

Your bedroom should be more than just a place to sleep; it should be a sanctuary that reflects your inner calm. Embroidery is a quiet, meditative way to infuse that personal warmth into your space, turning simple textiles into meaningful pieces of art.
But perhaps you feel your stitches lack a certain polish, or you’re unsure how to move beyond a simple sampler. The secret isn’t in mastering hundreds of complex stitches. It’s in learning how to thoughtfully choose your materials, combine textures, and use simple techniques with intention.
Here, you won’t find fleeting trends. Instead, you’ll discover 30 ways to create a cozy, hygge-inspired bedroom through mindful stitching. Each idea is a gentle invitation to slow down, connect with your creativity, and make your space feel truly, deeply your own.
1. Celestial Appliqué for Serene Wall Art
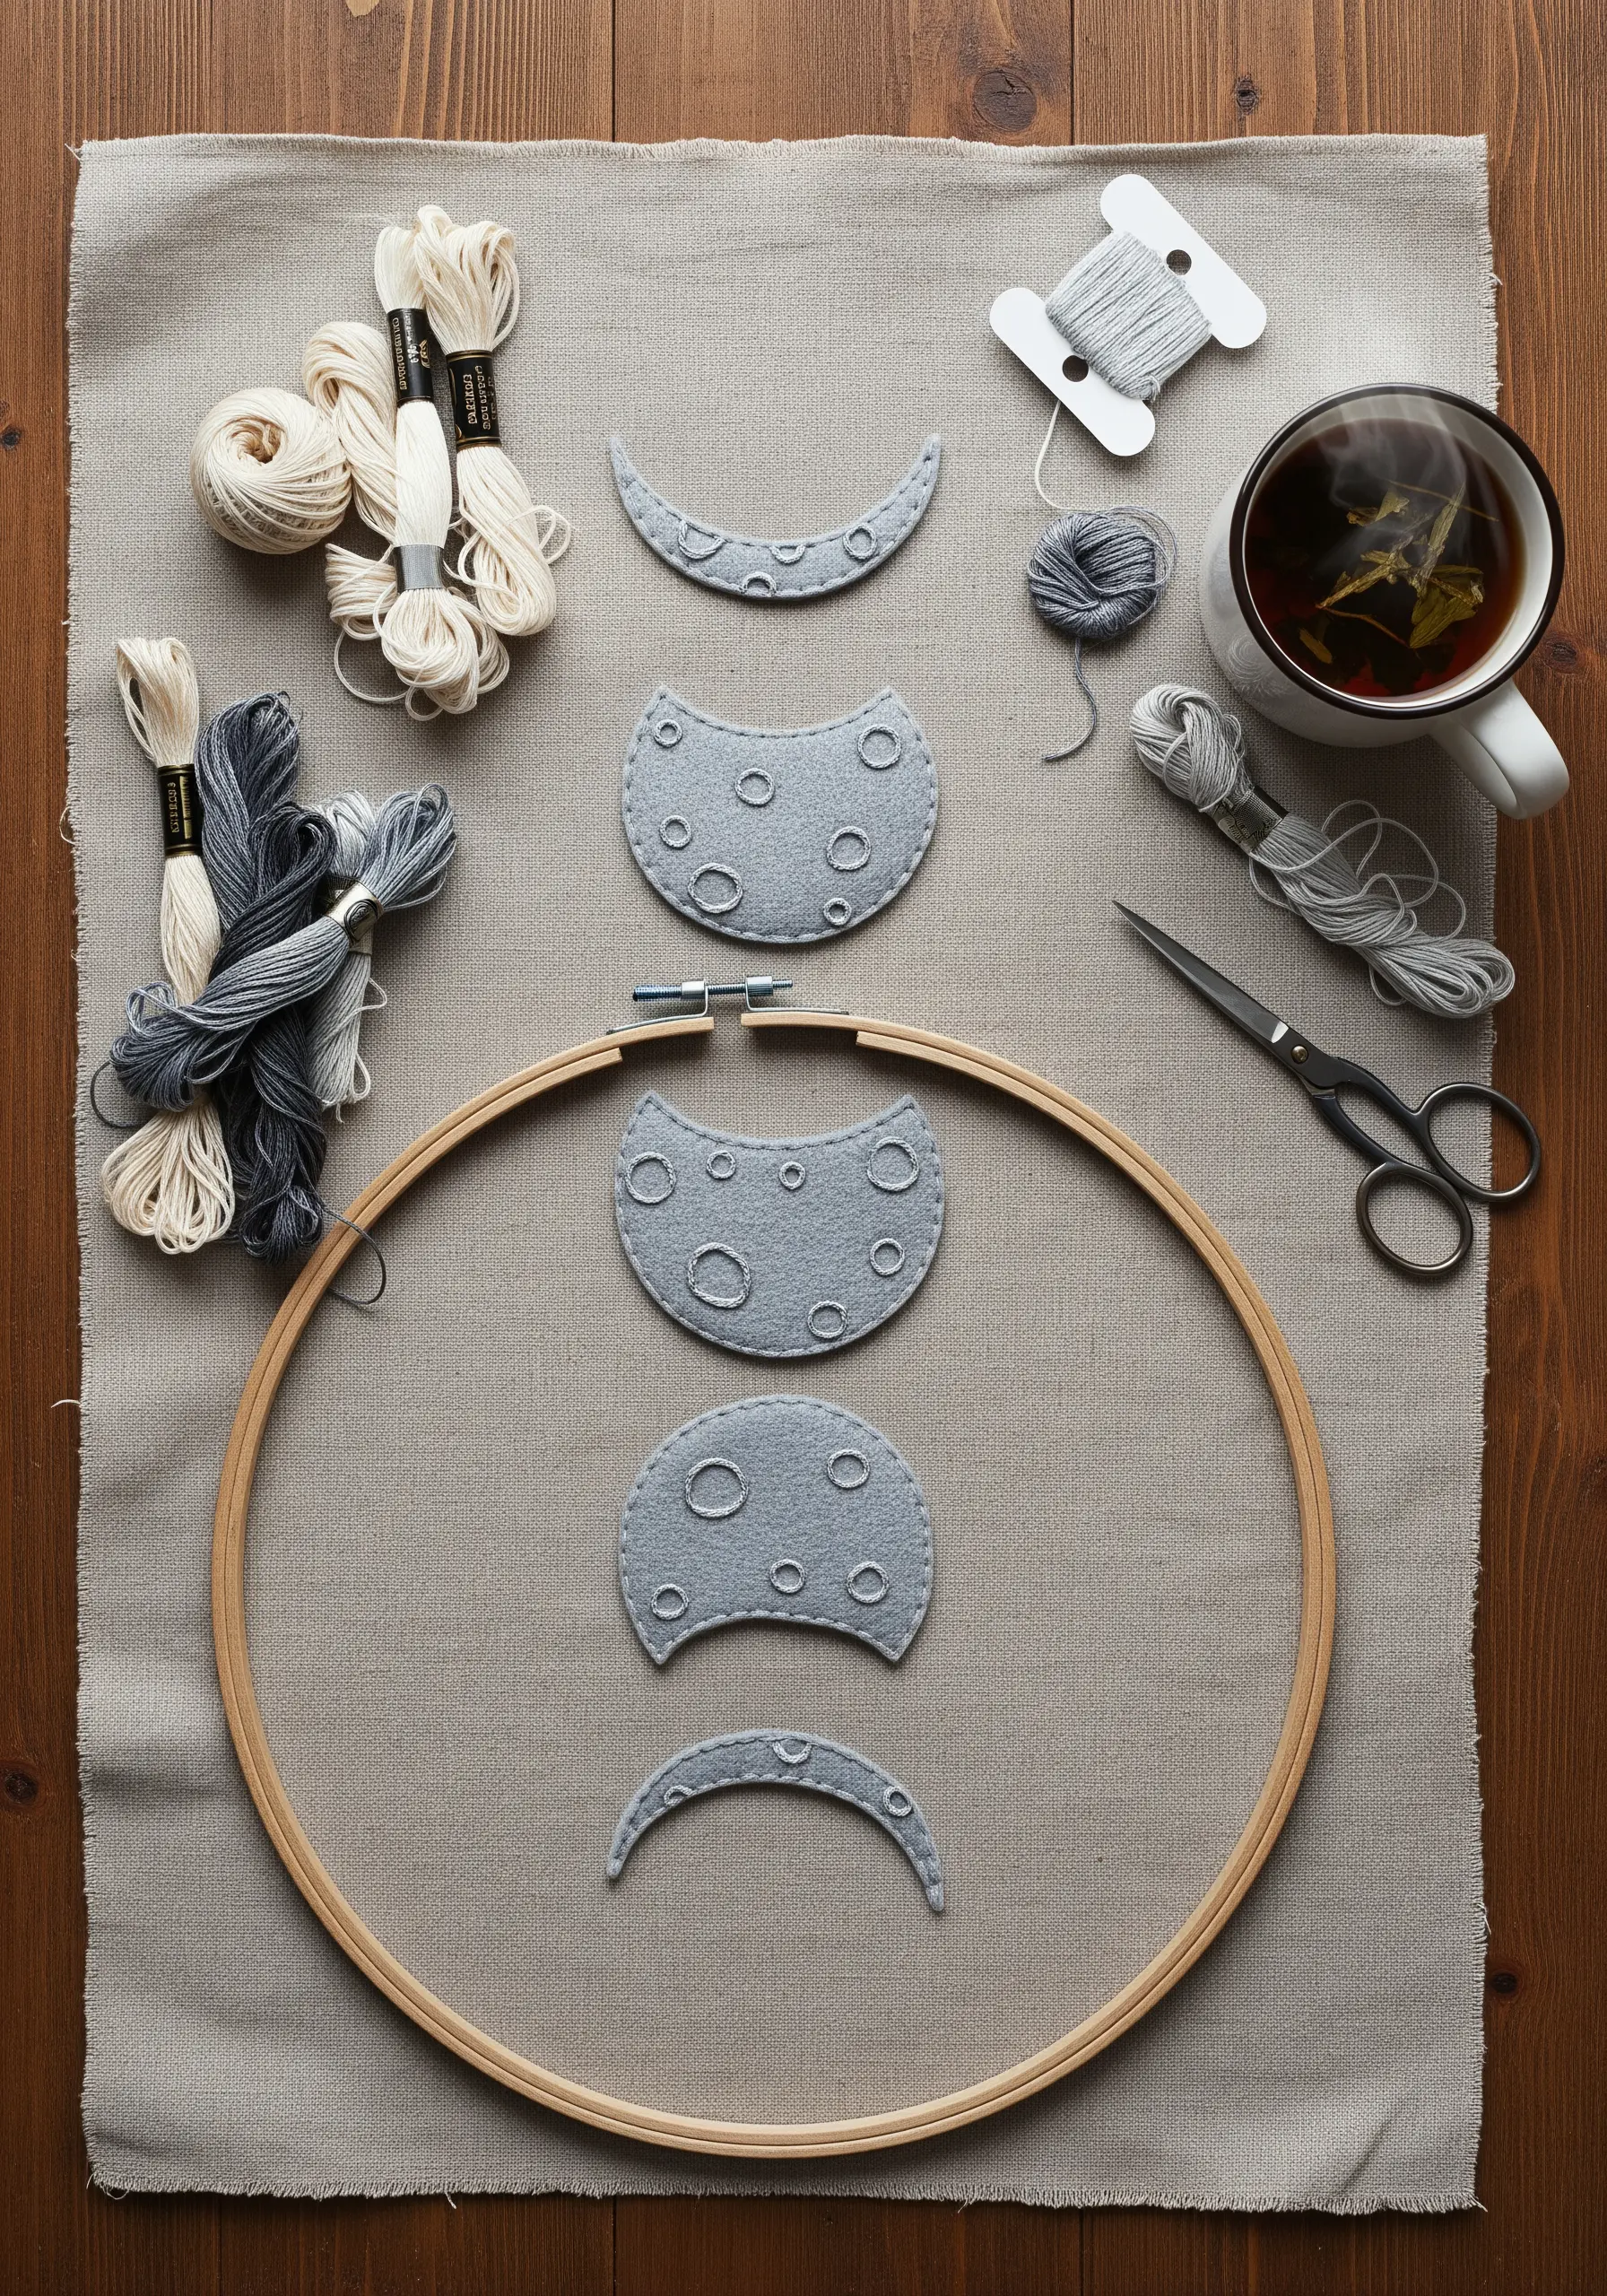
Create a calming lunar cycle by combining felt appliqué with minimal embroidery.
First, cut your moon phases from soft felt—its edges won’t fray, making it perfect for beginners.
Arrange the shapes on a neutral linen background, securing them with a few hidden stitches or a fine bead of fabric glue.
Instead of a dense satin stitch, outline the craters with simple seed stitches or single French knots using a contrasting grey thread.
This adds subtle texture without overwhelming the minimalist design, resulting in minimal celestial embroidery wall designs that feel both modern and handmade.
2. The Tactile Comfort of a Chunky Knit Throw
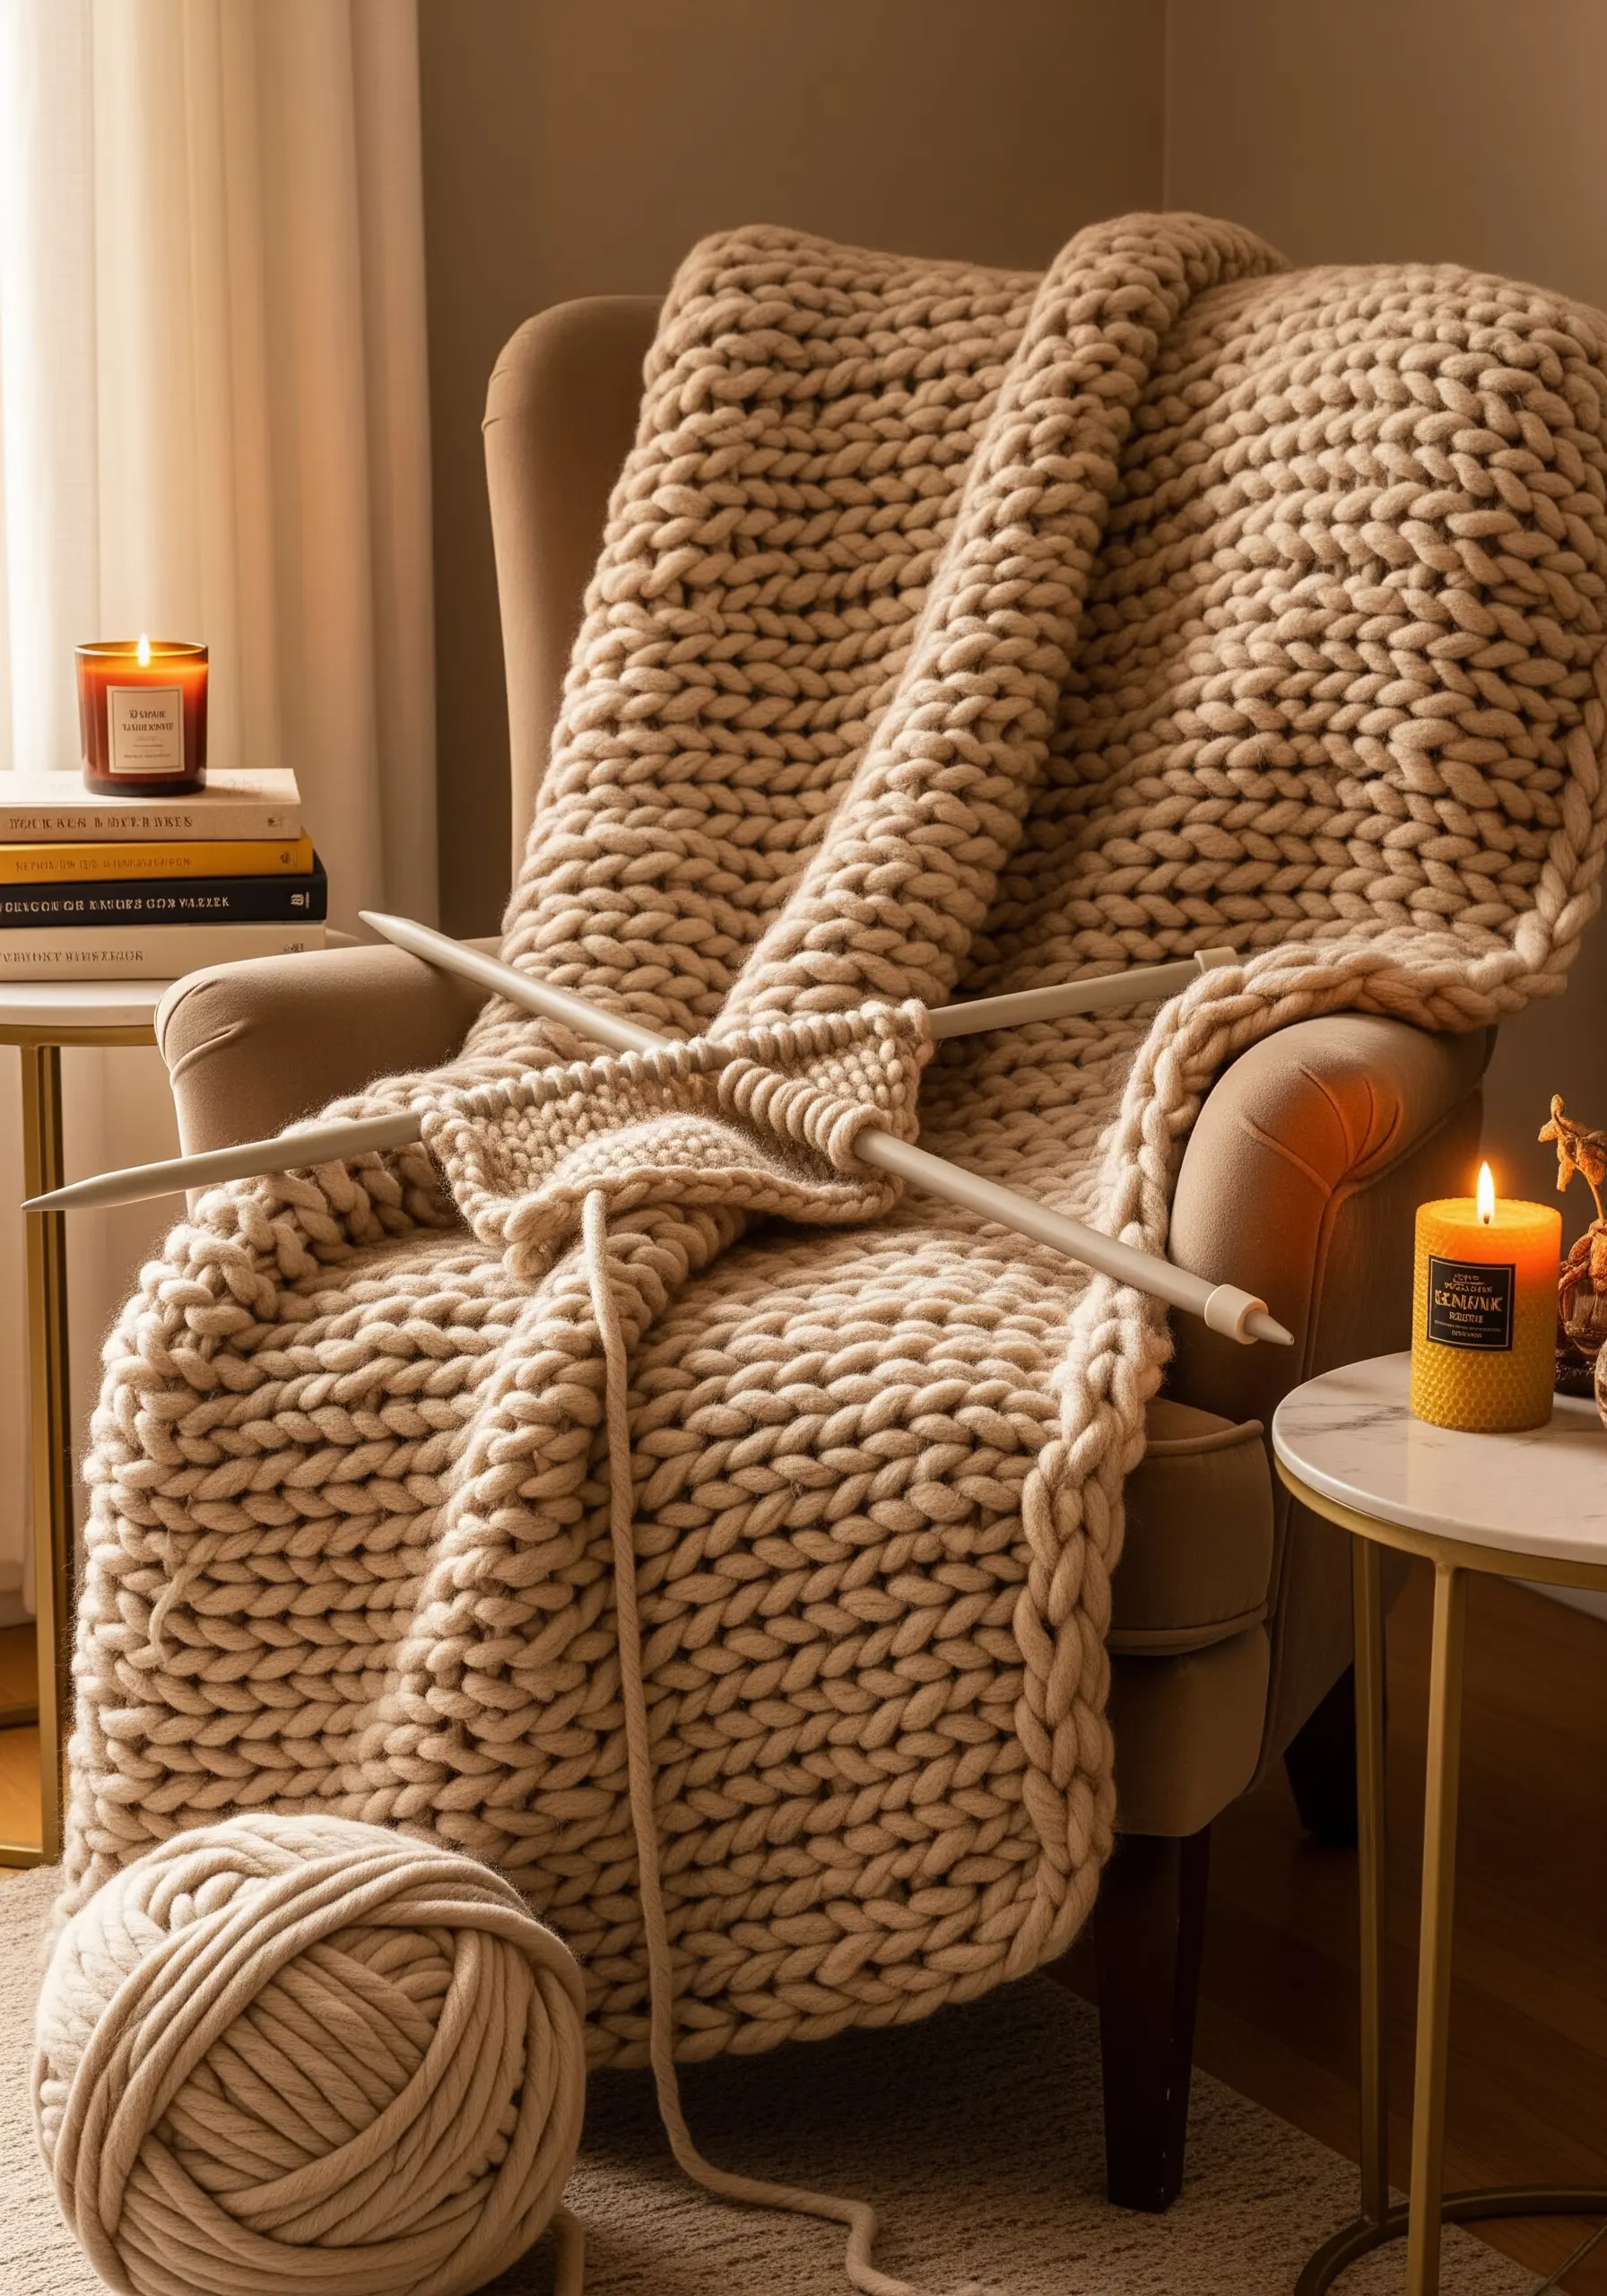
Complement your embroidered pieces with the grounding weight and texture of a chunky knit blanket.
While not traditional embroidery, working with oversized yarn offers a similar meditative rhythm and creates an instant sense of hygge.
Choose a natural wool or cotton roving in a neutral tone like oatmeal or dove grey to create a versatile anchor piece for your bedroom.
The oversized stitches provide a beautiful visual contrast to the fine detail of embroidery, making your entire textile collection feel more curated and dynamic.
3. A Botanical Tapestry Stitched with Lightness
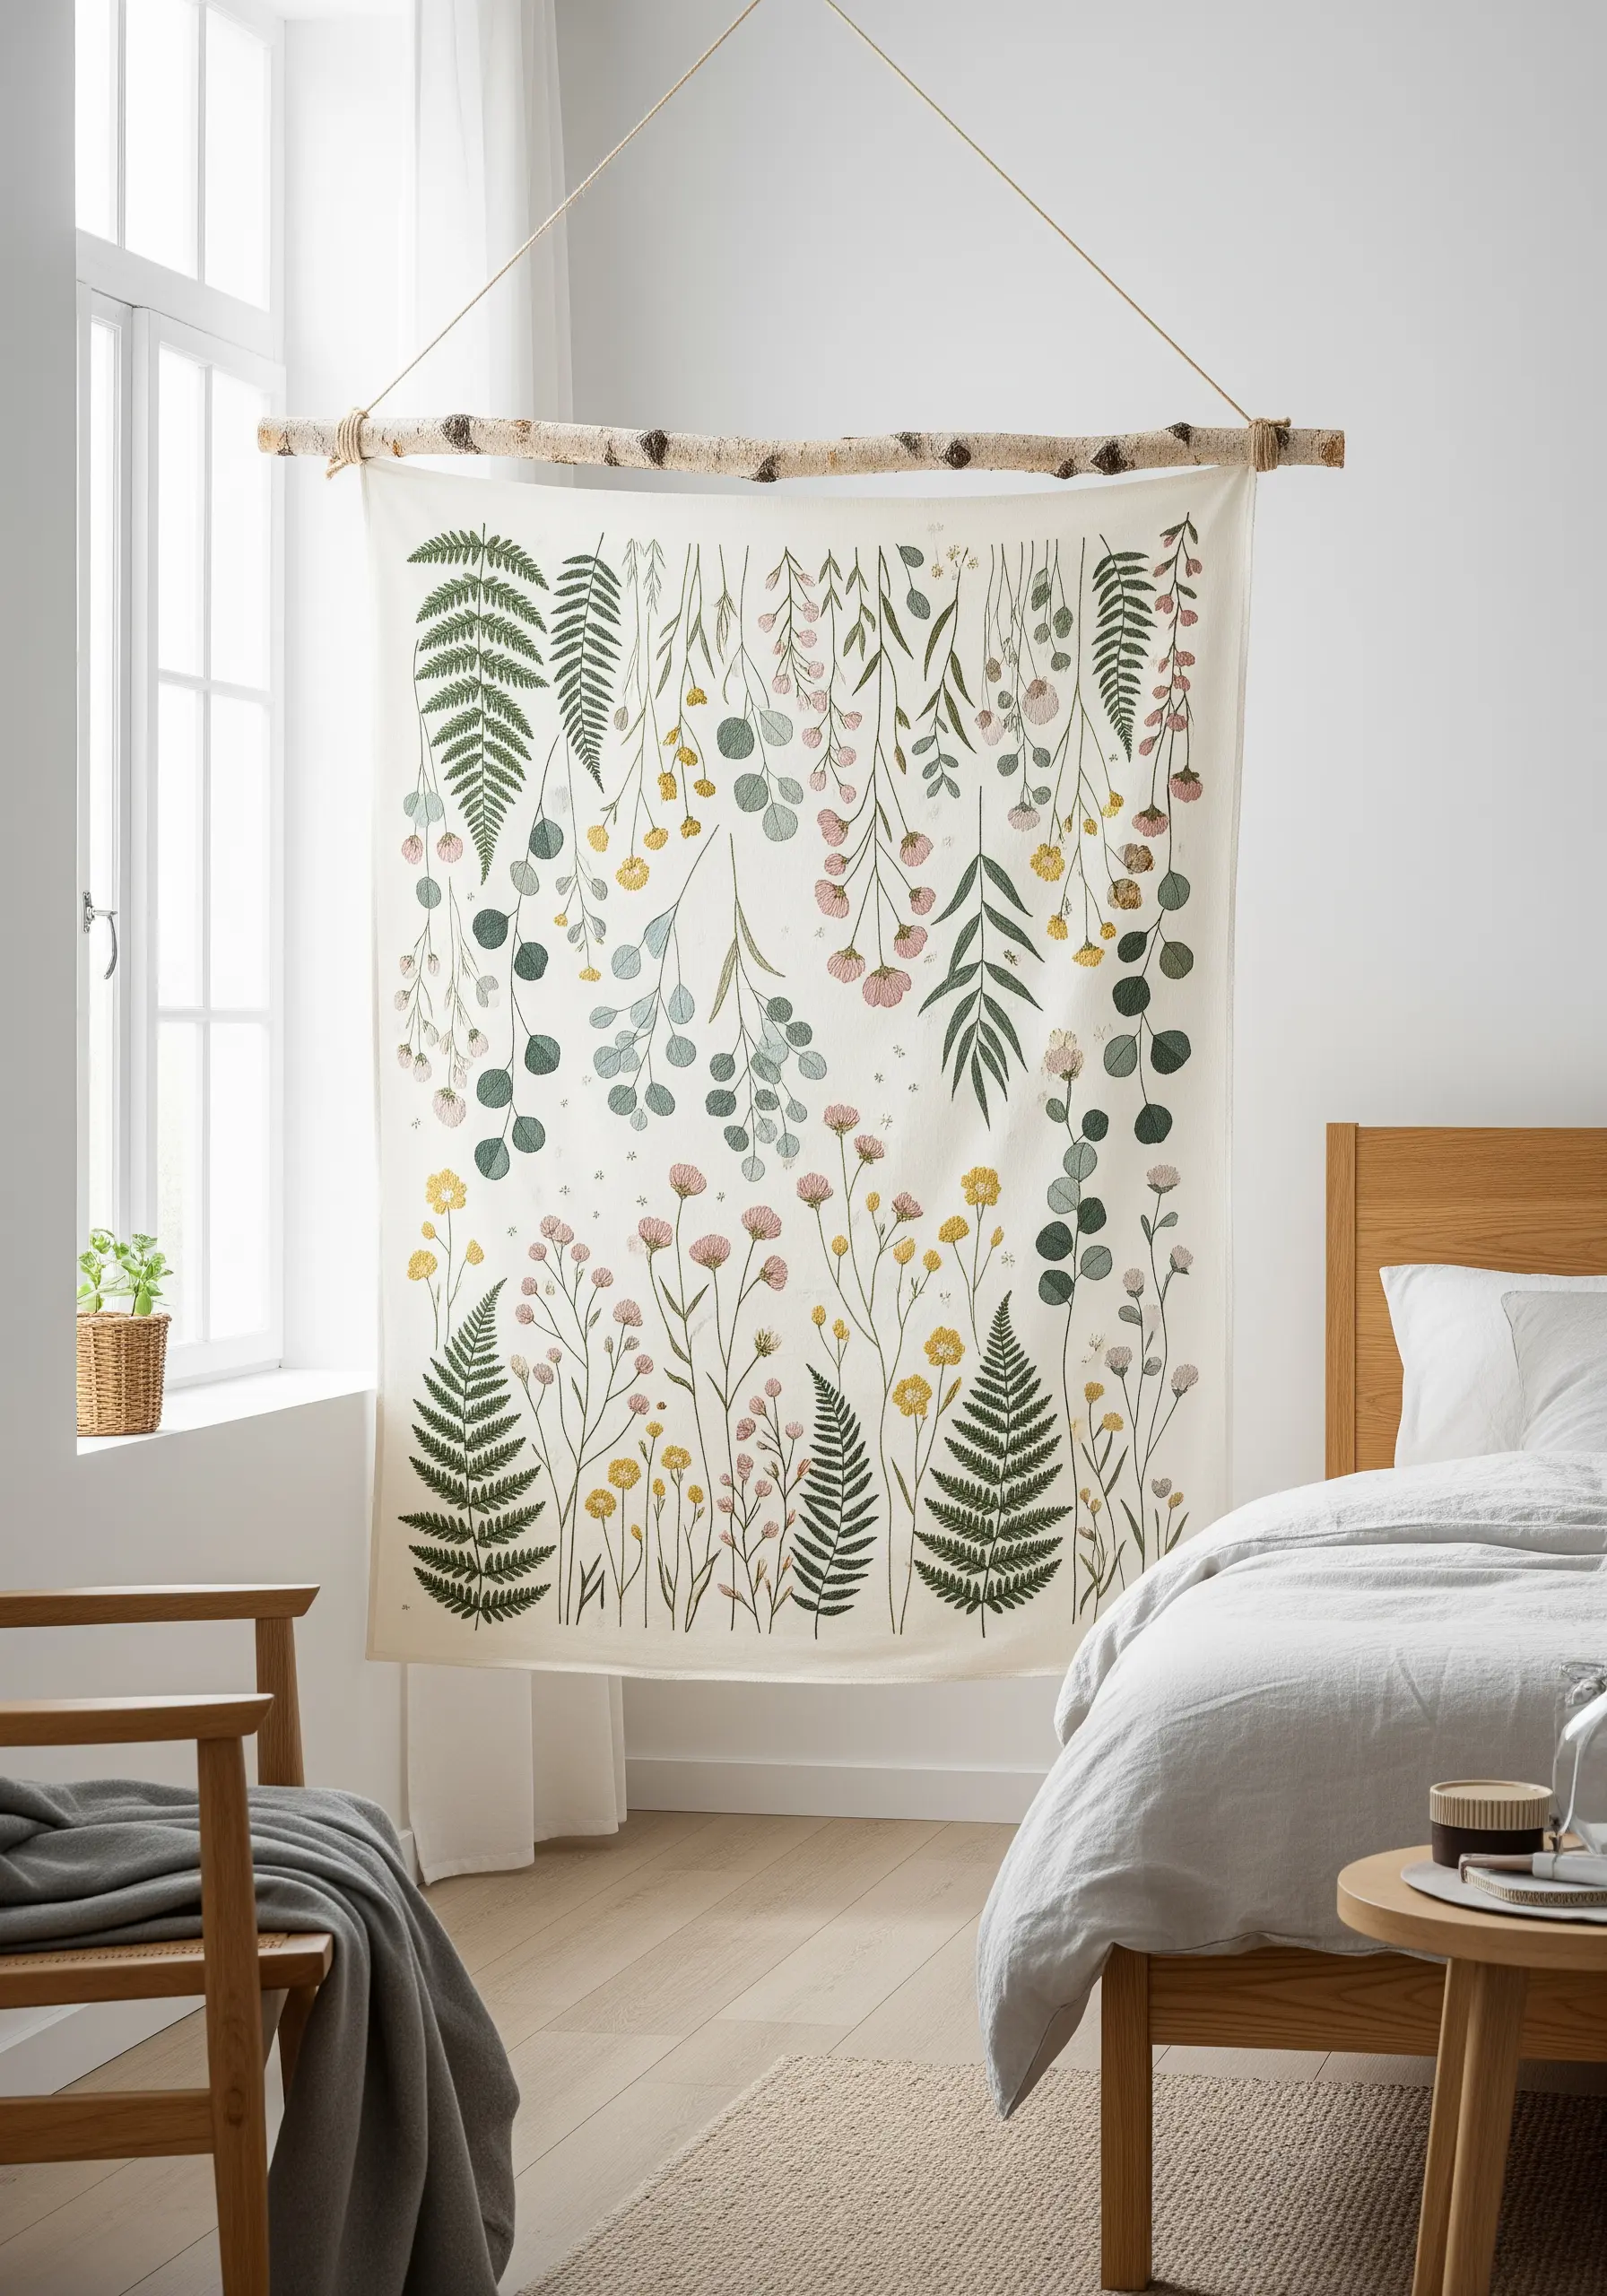
Transform a simple cotton panel into a breathtaking botanical wall hanging that feels airy and delicate.
The key to a large-scale design like this is balancing stitched elements with negative space; you don’t need to fill every inch.
Use a limited palette of soft, earthy tones and rely on simple line stitches like stem stitch for vines and lazy daisy for leaves.
This approach allows the natural drape of the fabric to remain, preventing the piece from becoming stiff or overworked.
To hang it, simply fold over the top edge and stitch a channel for a birch branch, enhancing the nature-inspired framed embroidery designs with an organic touch.
4. Sashiko-Inspired Mending for Mindful Details
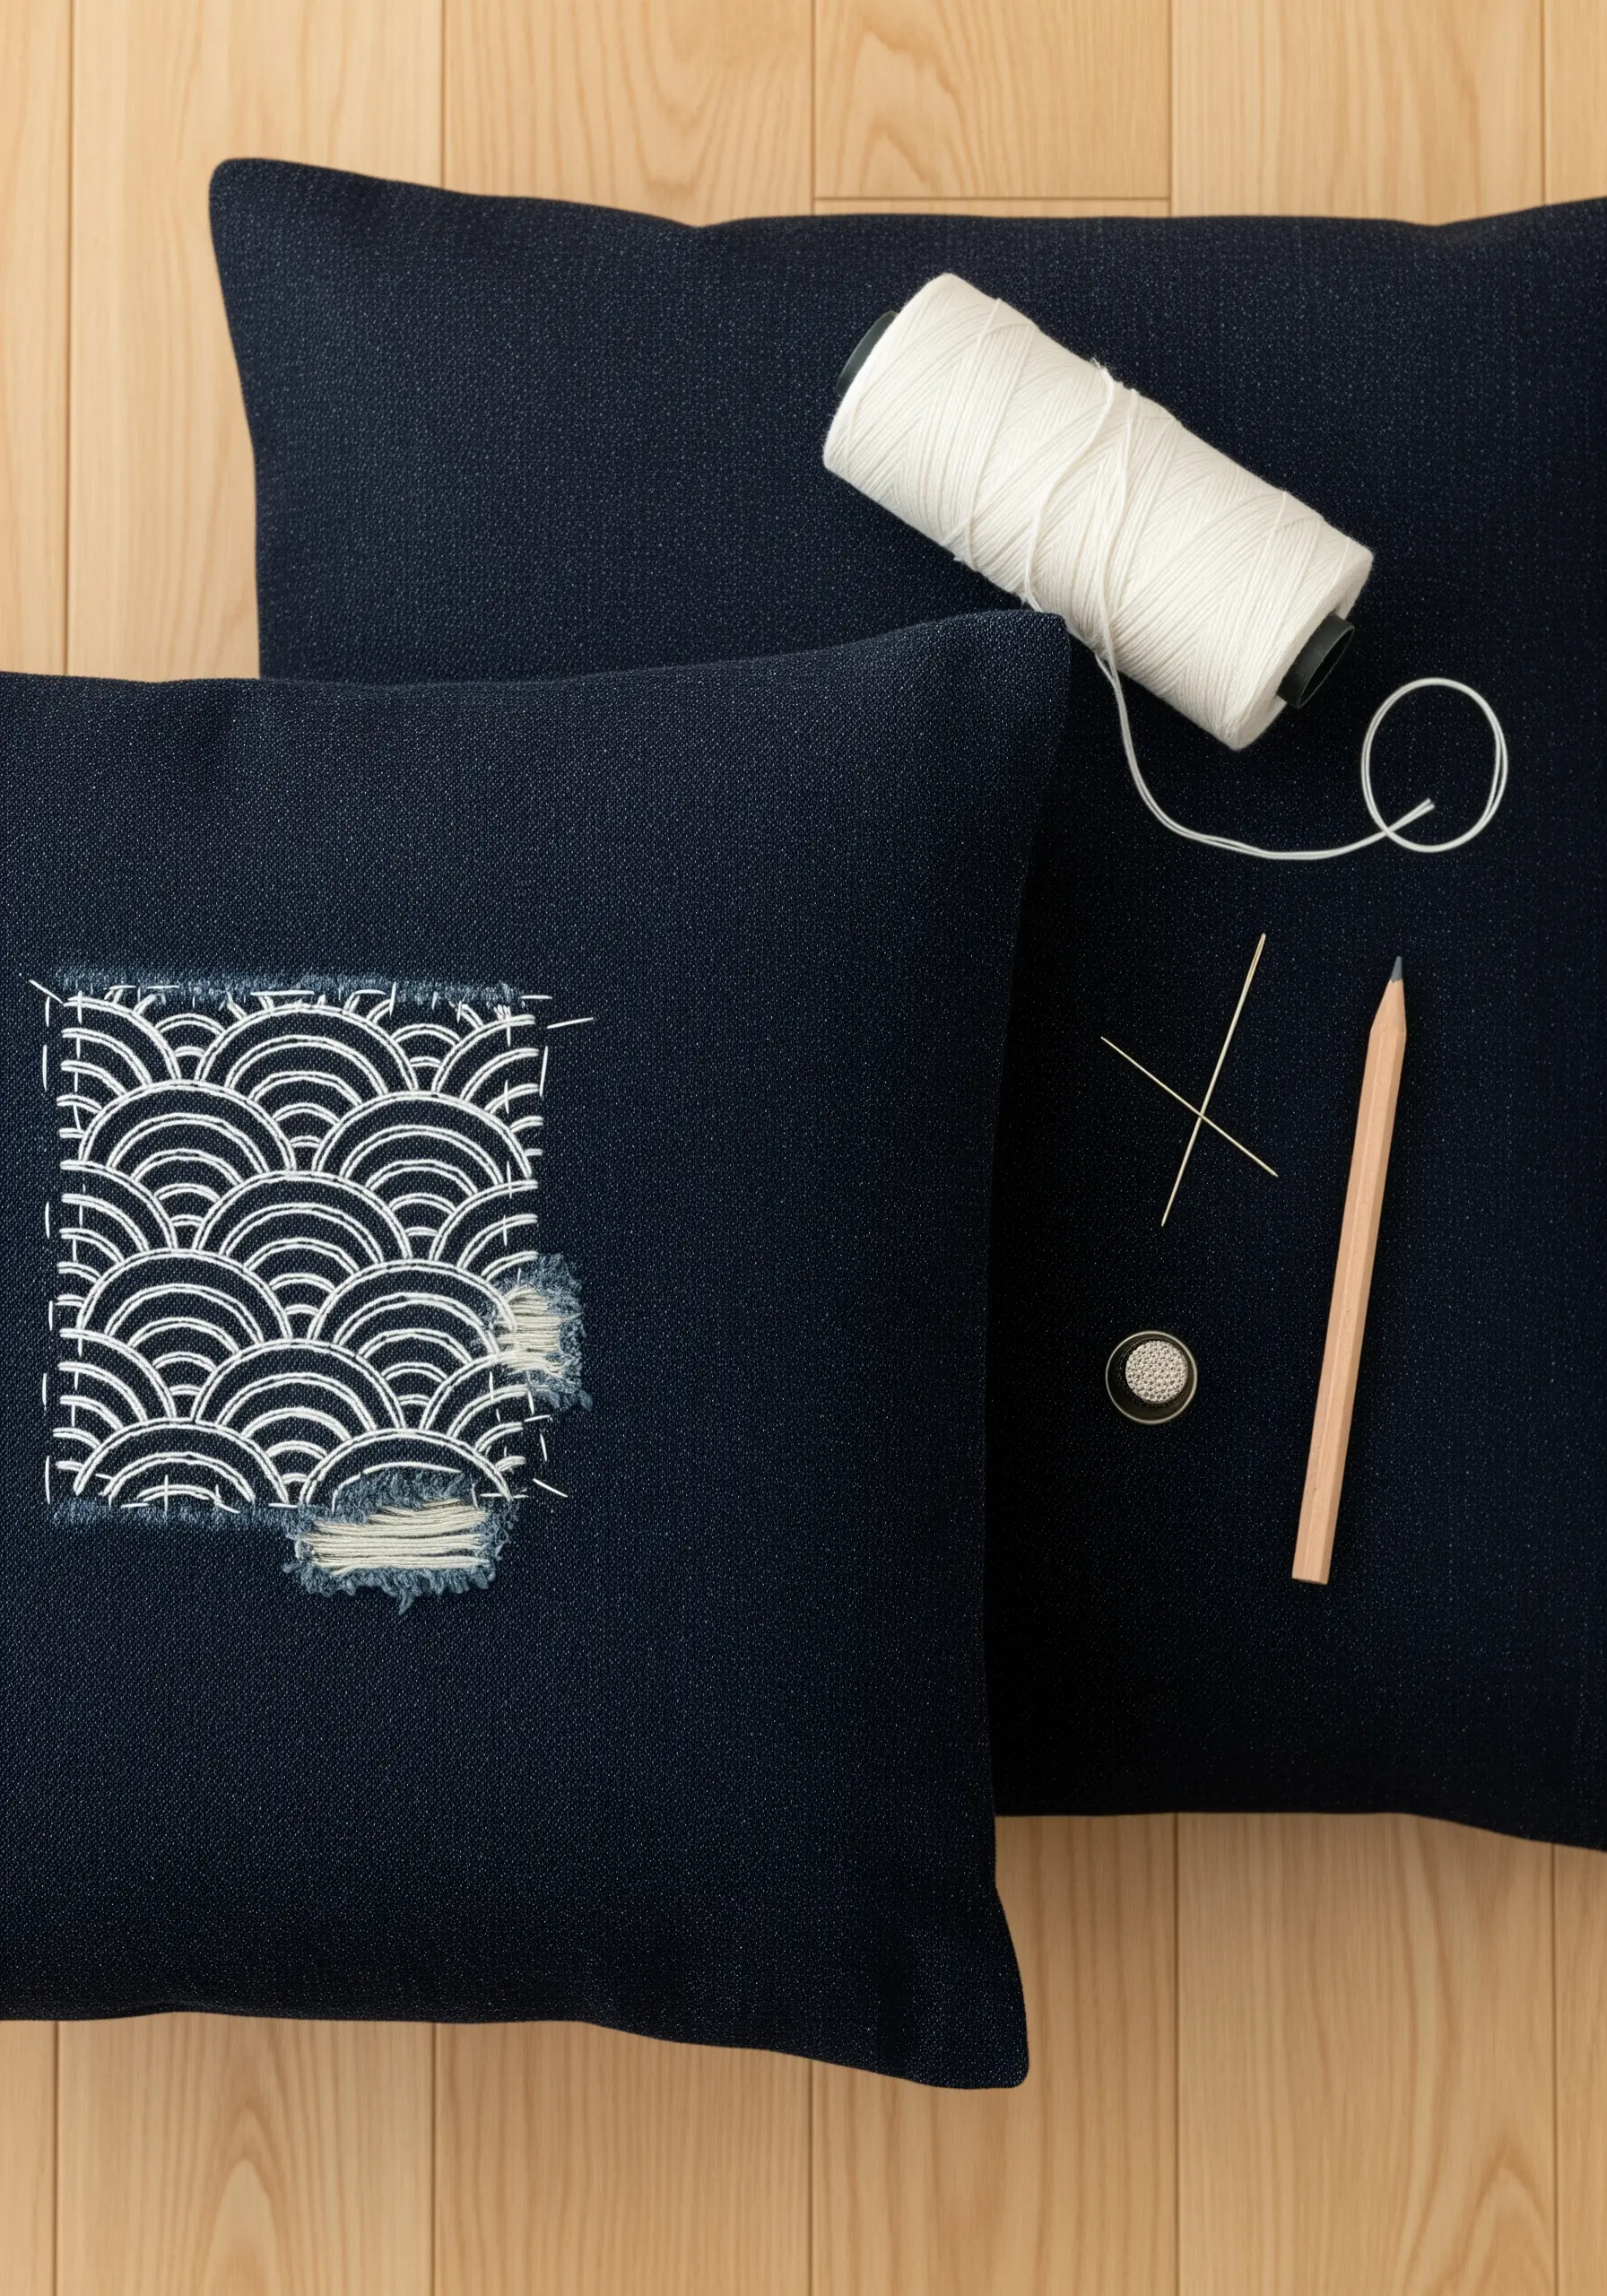
Elevate a plain cushion cover by adding a patch using the principles of Sashiko, the Japanese art of visible mending.
Select a contrasting fabric scrap with a simple geometric pattern, like the traditional ‘Seigaiha’ wave motif.
Instead of hiding your repair, frame the patch with intentionally spaced running stitches using a thick, smooth Sashiko thread.
The beauty lies in the rhythm and slight imperfections of your hand stitching, turning a simple mend into a thoughtful design element.
This technique embodies the hygge philosophy of finding beauty in simplicity and giving new life to cherished objects.
5. Illuminate Your Stitches with a Lampshade Design
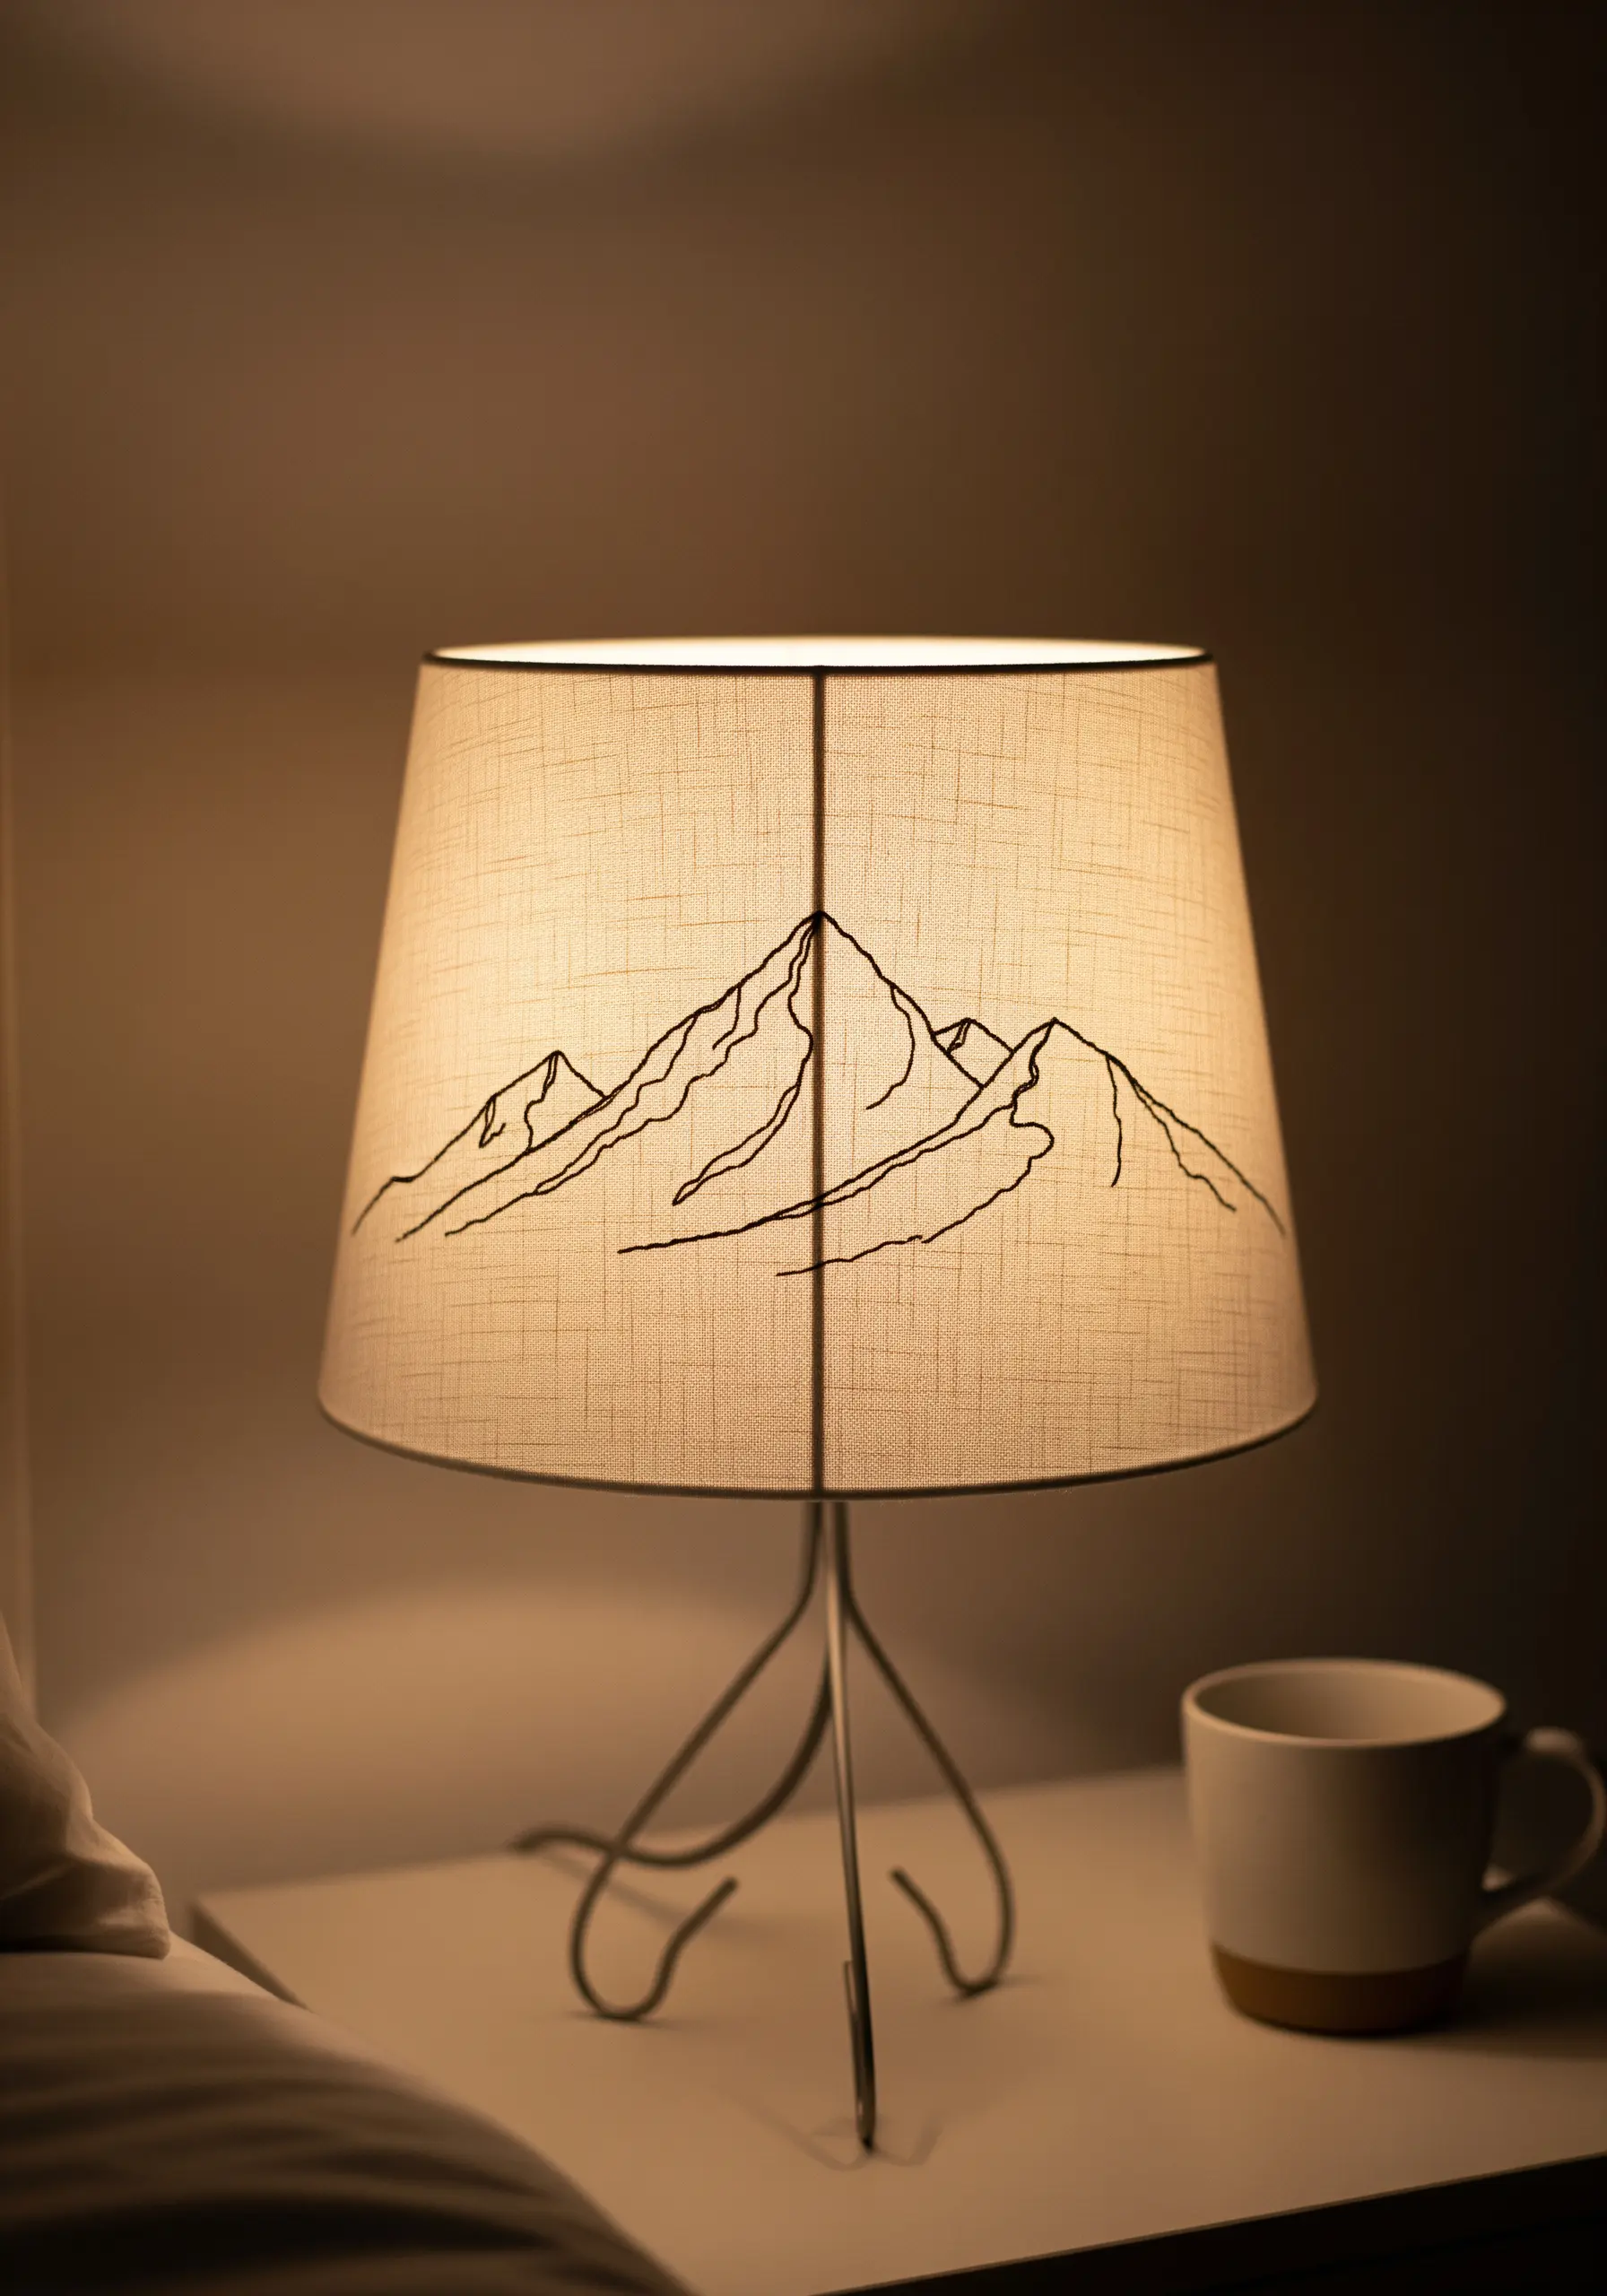
Embroidering on a lampshade transforms simple line art into a glowing focal point.
Choose a fabric lampshade with a smooth, even weave, and sketch your design lightly with a water-soluble pen.
A simple backstitch or stem stitch using just two or three strands of black floss will create a clean, graphic outline that truly pops when the light is on.
Work carefully to avoid puckering the fabric, using a sharp needle and keeping your tension even.
The result is a piece of functional art that adds a subtle, personalized layer of light and shadow to your bedside table, creating one of those tiny artistic home touches that make a big statement.
6. Radial Stitching on Felt Coasters
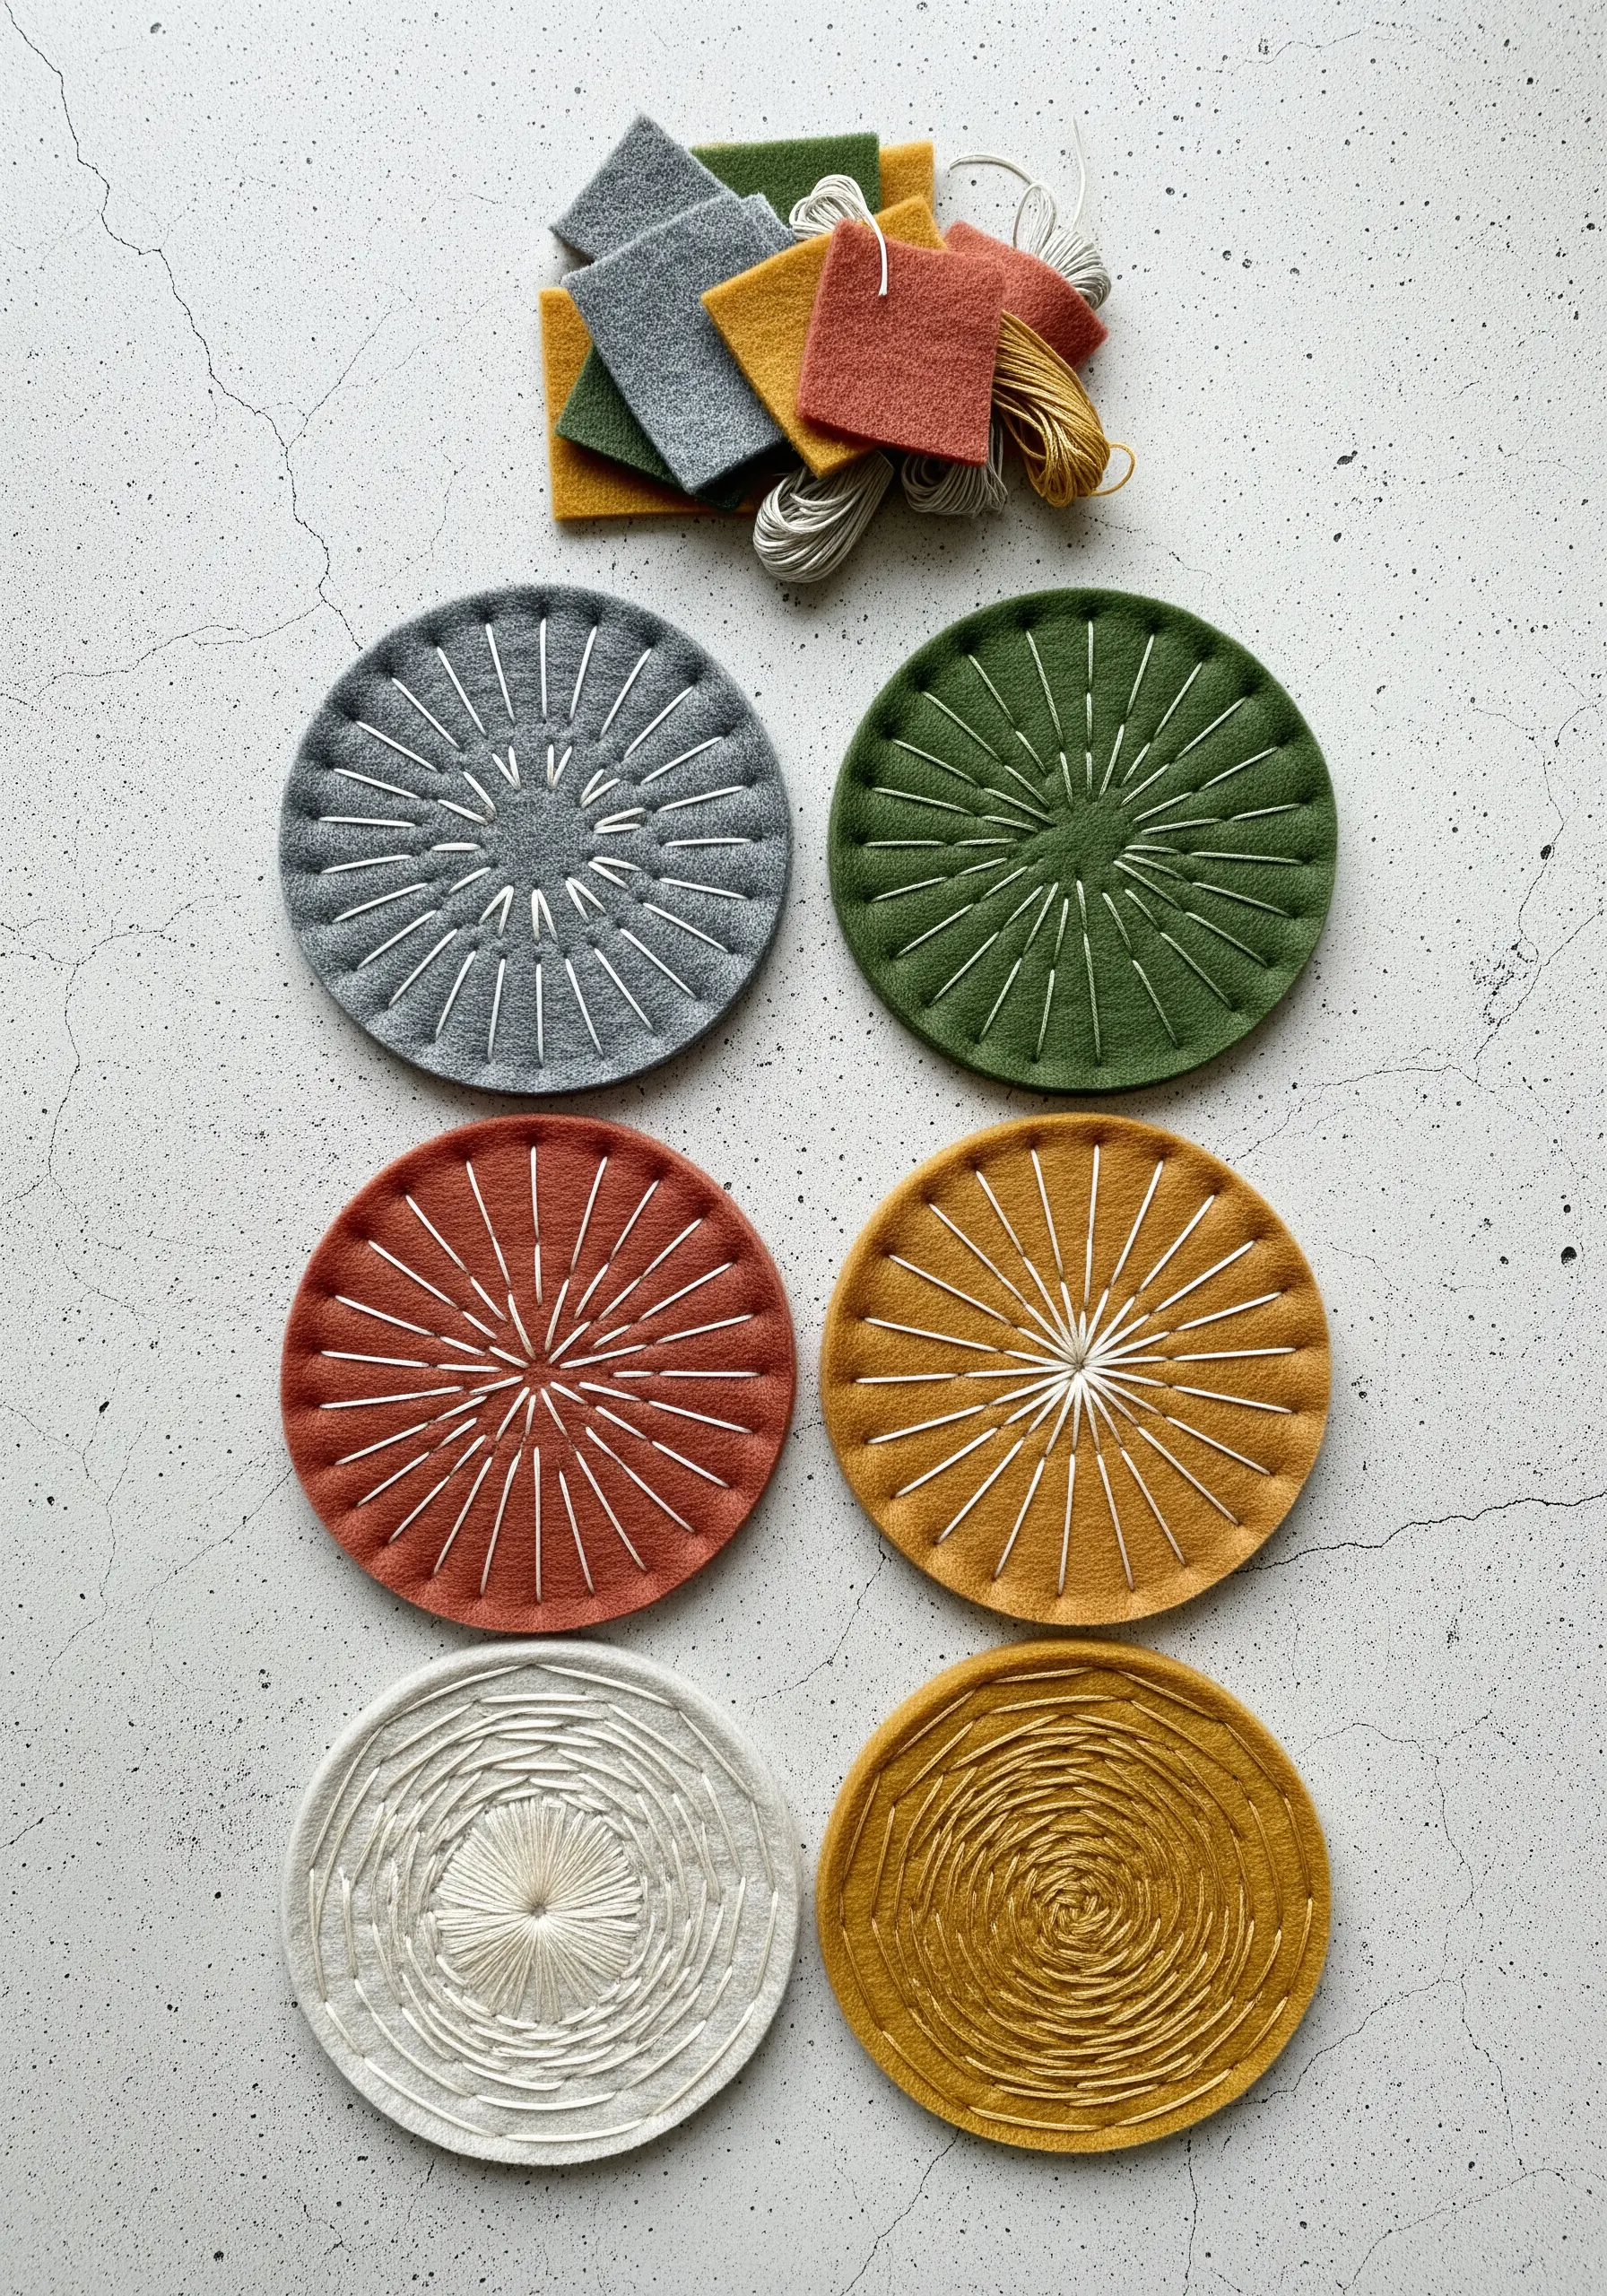
Craft a set of beautifully textured coasters using thick felt and simple radial stitches.
Felt is an ideal base as it’s stable, requires no hemming, and provides a soft matte contrast to the sheen of embroidery floss.
Use a disappearing ink pen to mark a central point and evenly spaced dots around the edge as a guide.
Experiment with straight stitches radiating from the center or concentric circles of running stitches to create stunning geometric patterns.
Using a thick thread, like a full six strands of floss or even perle cotton, will give your stitches definition and a satisfying texture.
7. The Meditative Pace of Hand-Stitched Quilting
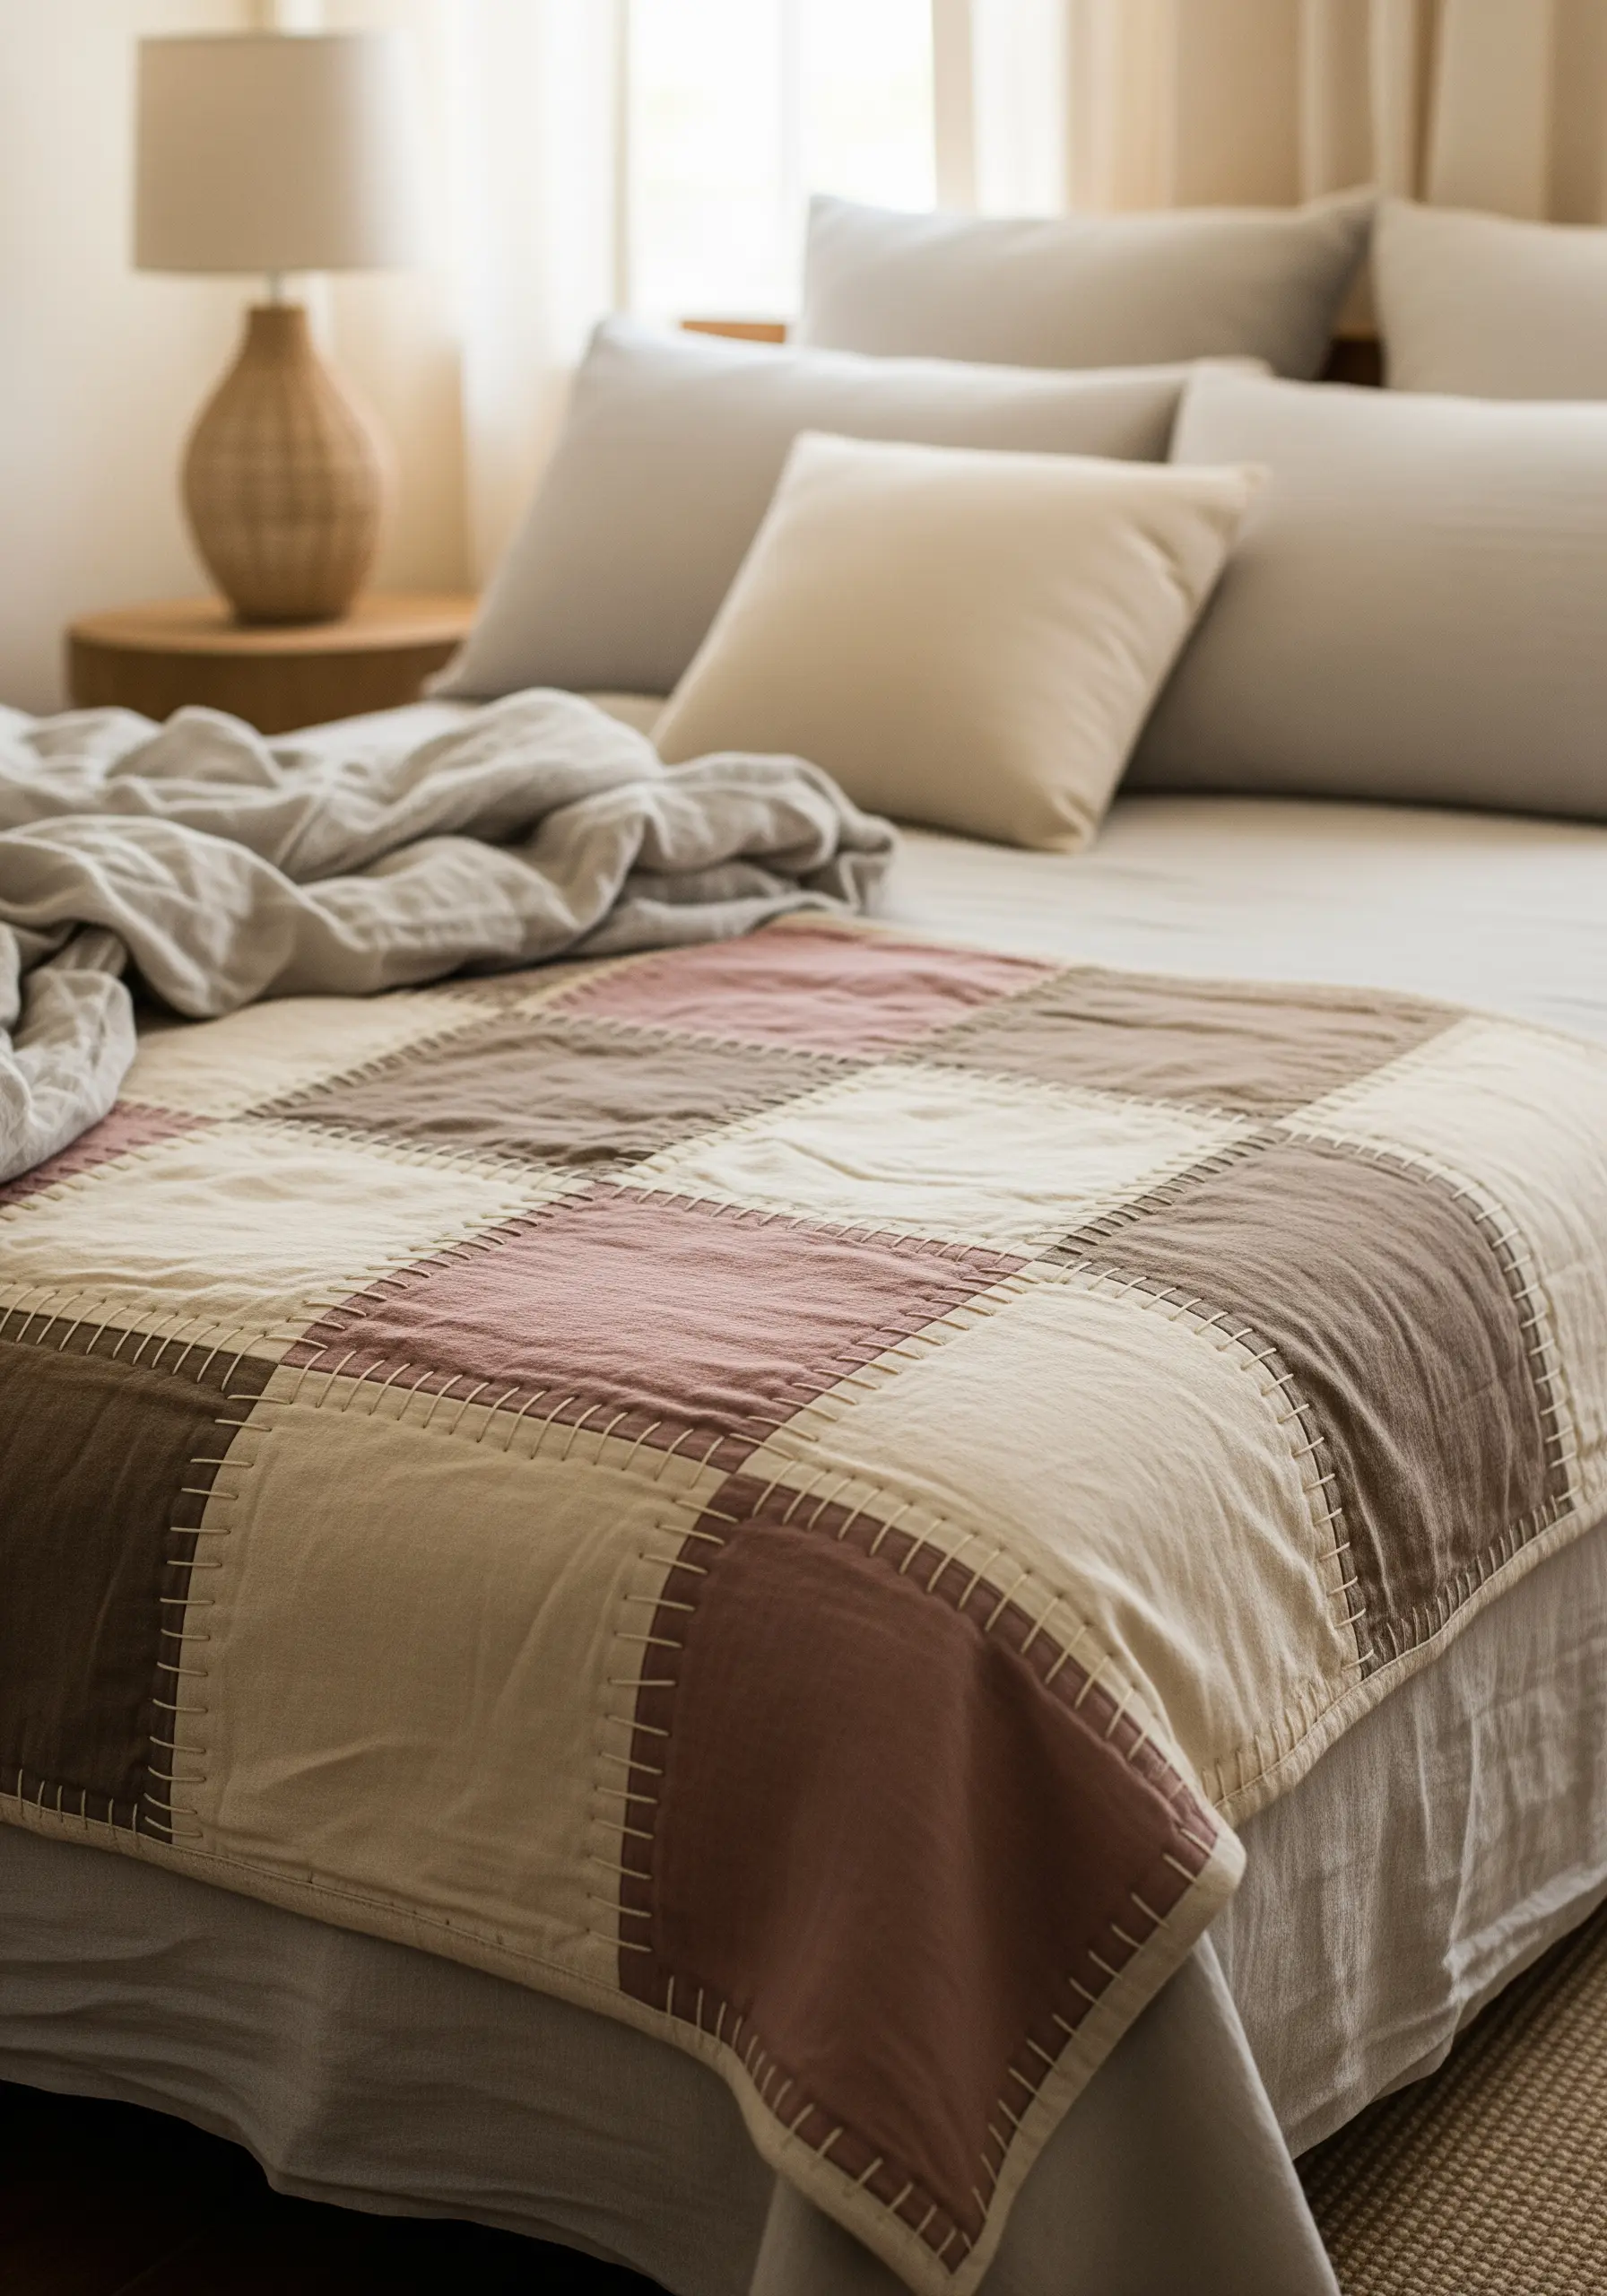
Embrace a slower, more intentional form of quilting by using large, visible stitches to join your fabric patches.
This technique, often called ‘big stitch’ quilting, uses thicker thread like perle cotton to create a bold, textural line that becomes a design element in itself.
Choose a soft, muted palette of linen or cotton fabrics for a calm, earthy aesthetic.
The focus isn’t on perfect, tiny stitches, but on the rhythmic process and the cozy, handmade quality it lends to the finished quilt, making it one of those relaxing handmade DIY gifts that everyone will cherish.
8. Delicate Vine Embroidery for a Personal Bookmark
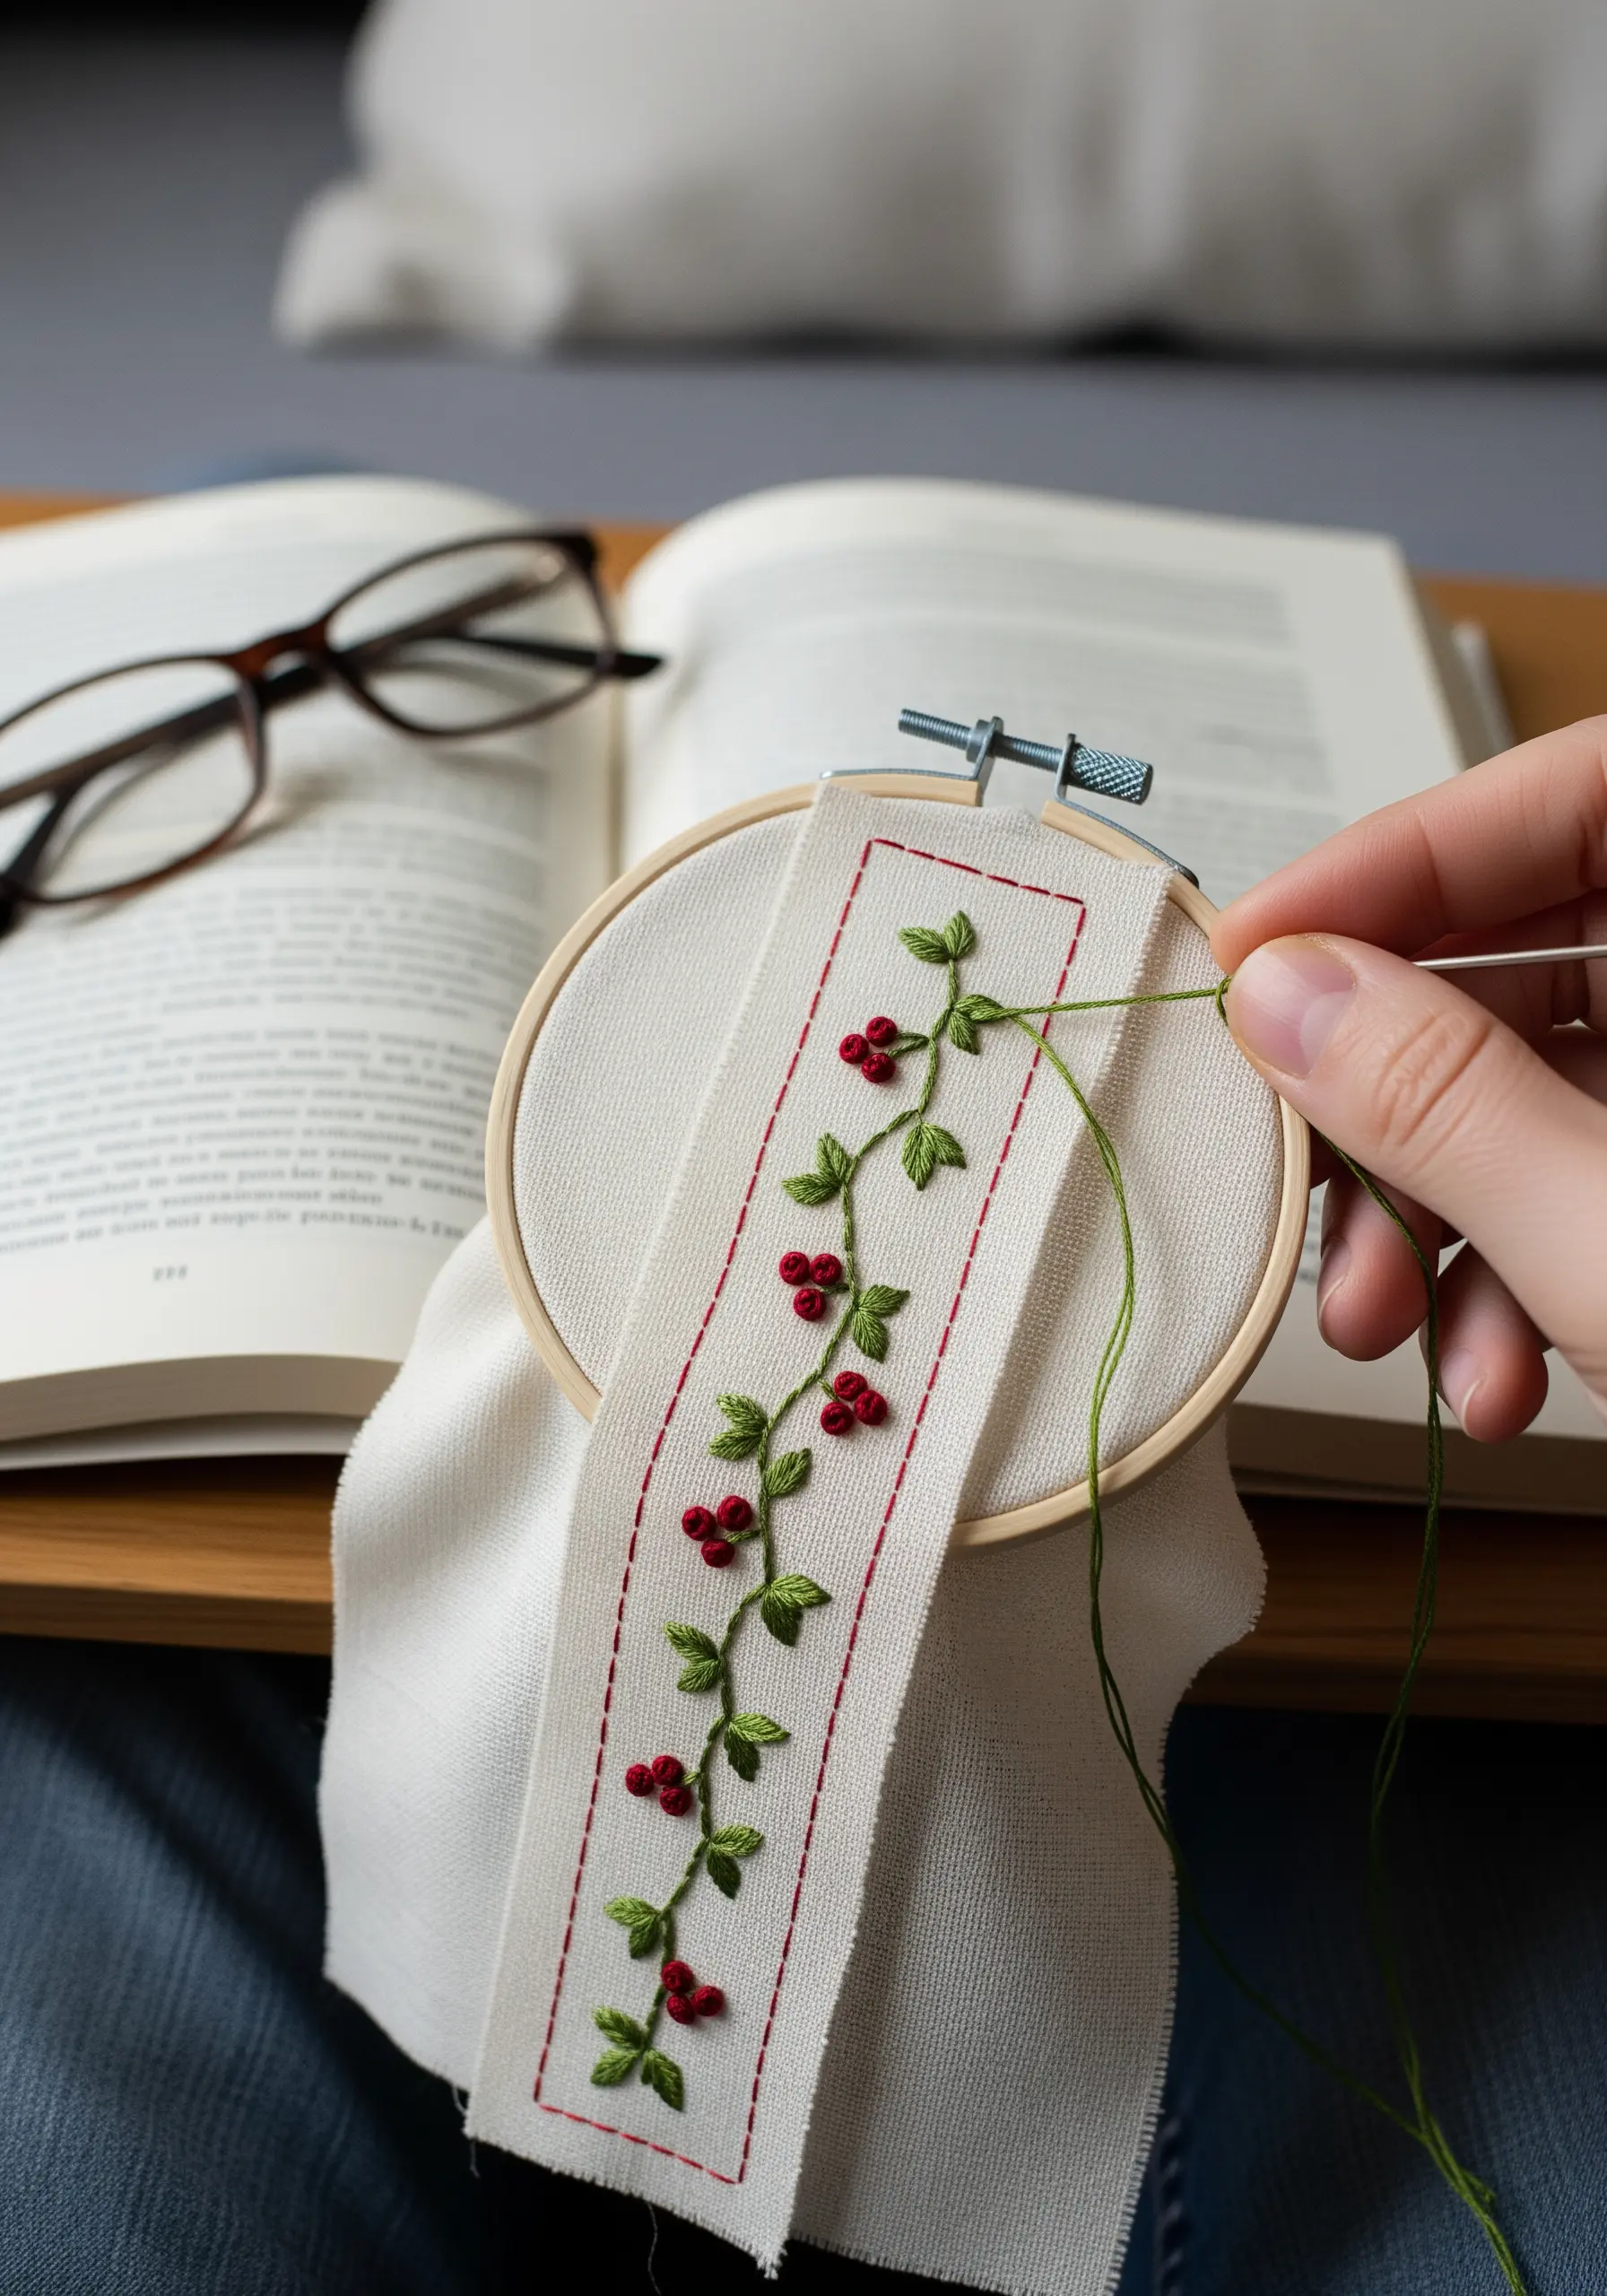
Create a beautiful, functional piece of art by embroidering a delicate botanical vine on a handmade bookmark.
Working on a small scale requires precision, so opt for a fine, tightly woven fabric like cotton or linen.
Use just one or two strands of floss for the stem stitch vines and lazy daisy leaves to keep the details crisp and elegant.
Tiny French knots or seed stitches in a contrasting color make perfect berries, adding a pop of dimension.
Finish the edges with a simple running stitch border to create a polished and thoughtful gift for yourself or a fellow reader.
9. Elevate Fabric Baskets with a Decorative Edge
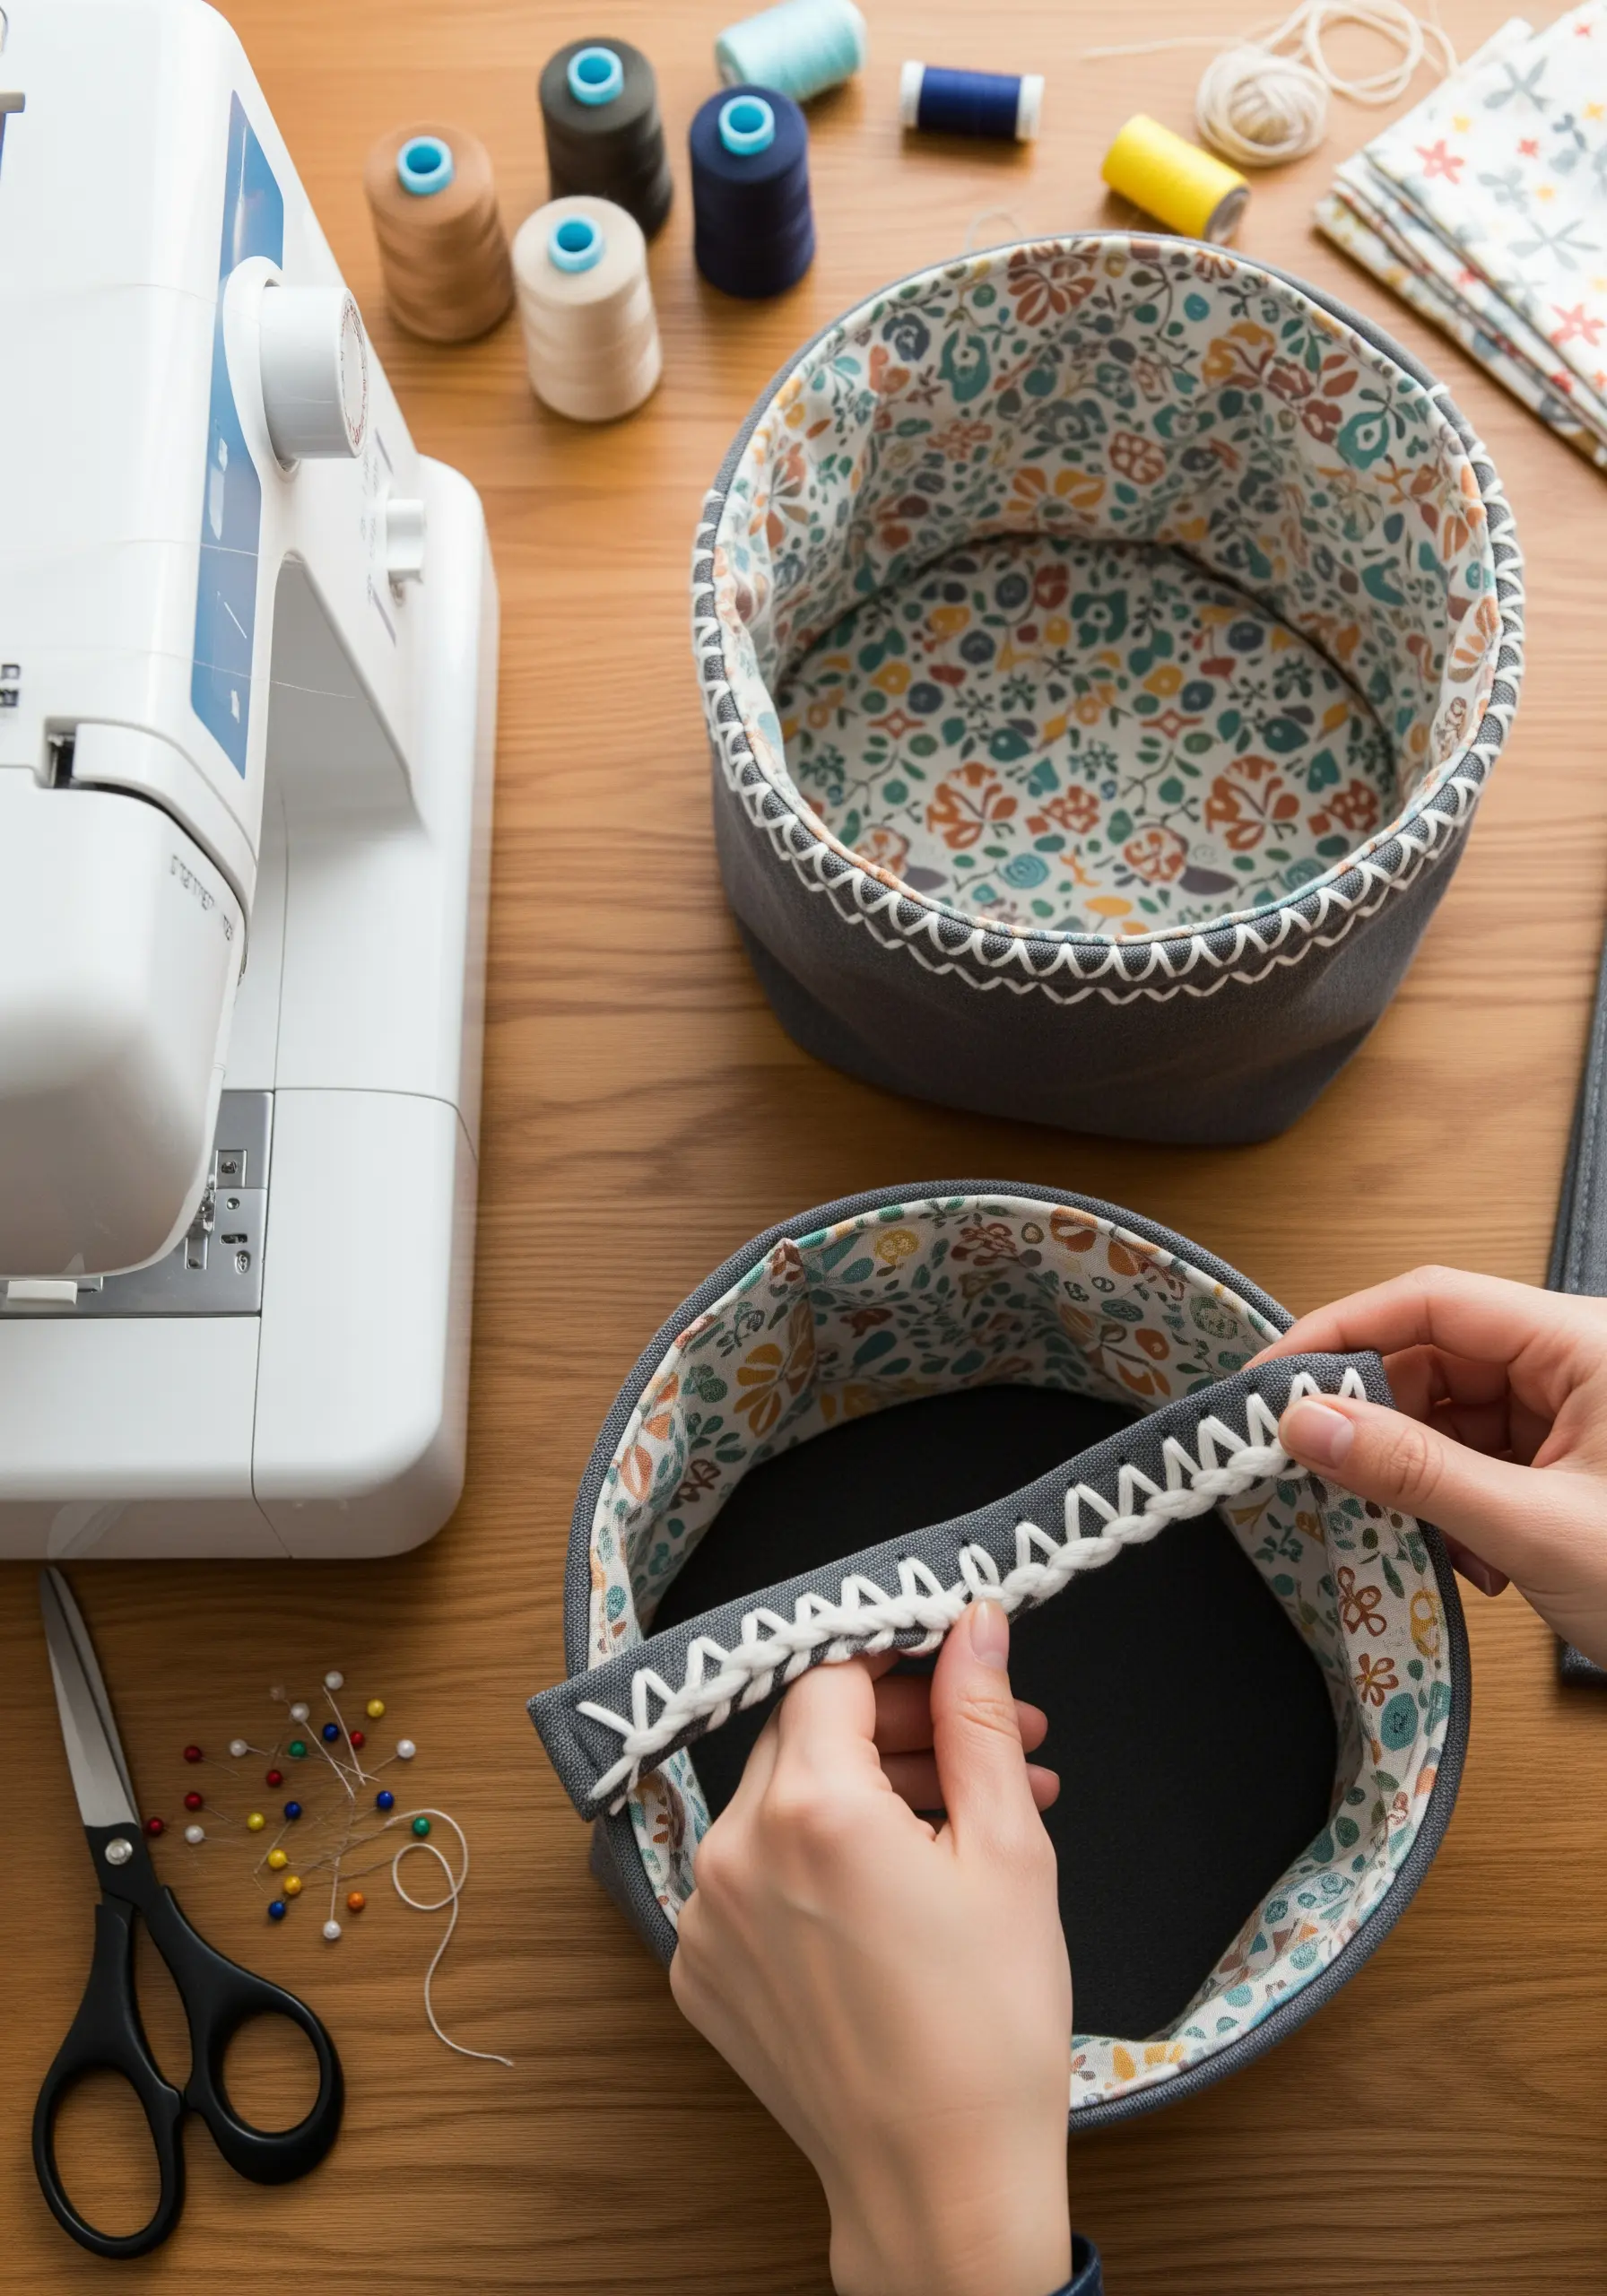
Transform simple, functional fabric storage baskets into bespoke decor items with a single finishing stitch.
After sewing your basket, use a thick, contrasting thread like perle cotton or yarn to add a decorative blanket stitch around the top rim.
This not only adds a beautiful handmade detail but also reinforces the edge, helping the basket hold its shape.
Ensure your stitches are evenly spaced for a polished, professional look. It’s a simple addition that makes small DIY home accents that look expensive but are easy to make.
10. Minimalist Script for Elegant Pillowcases
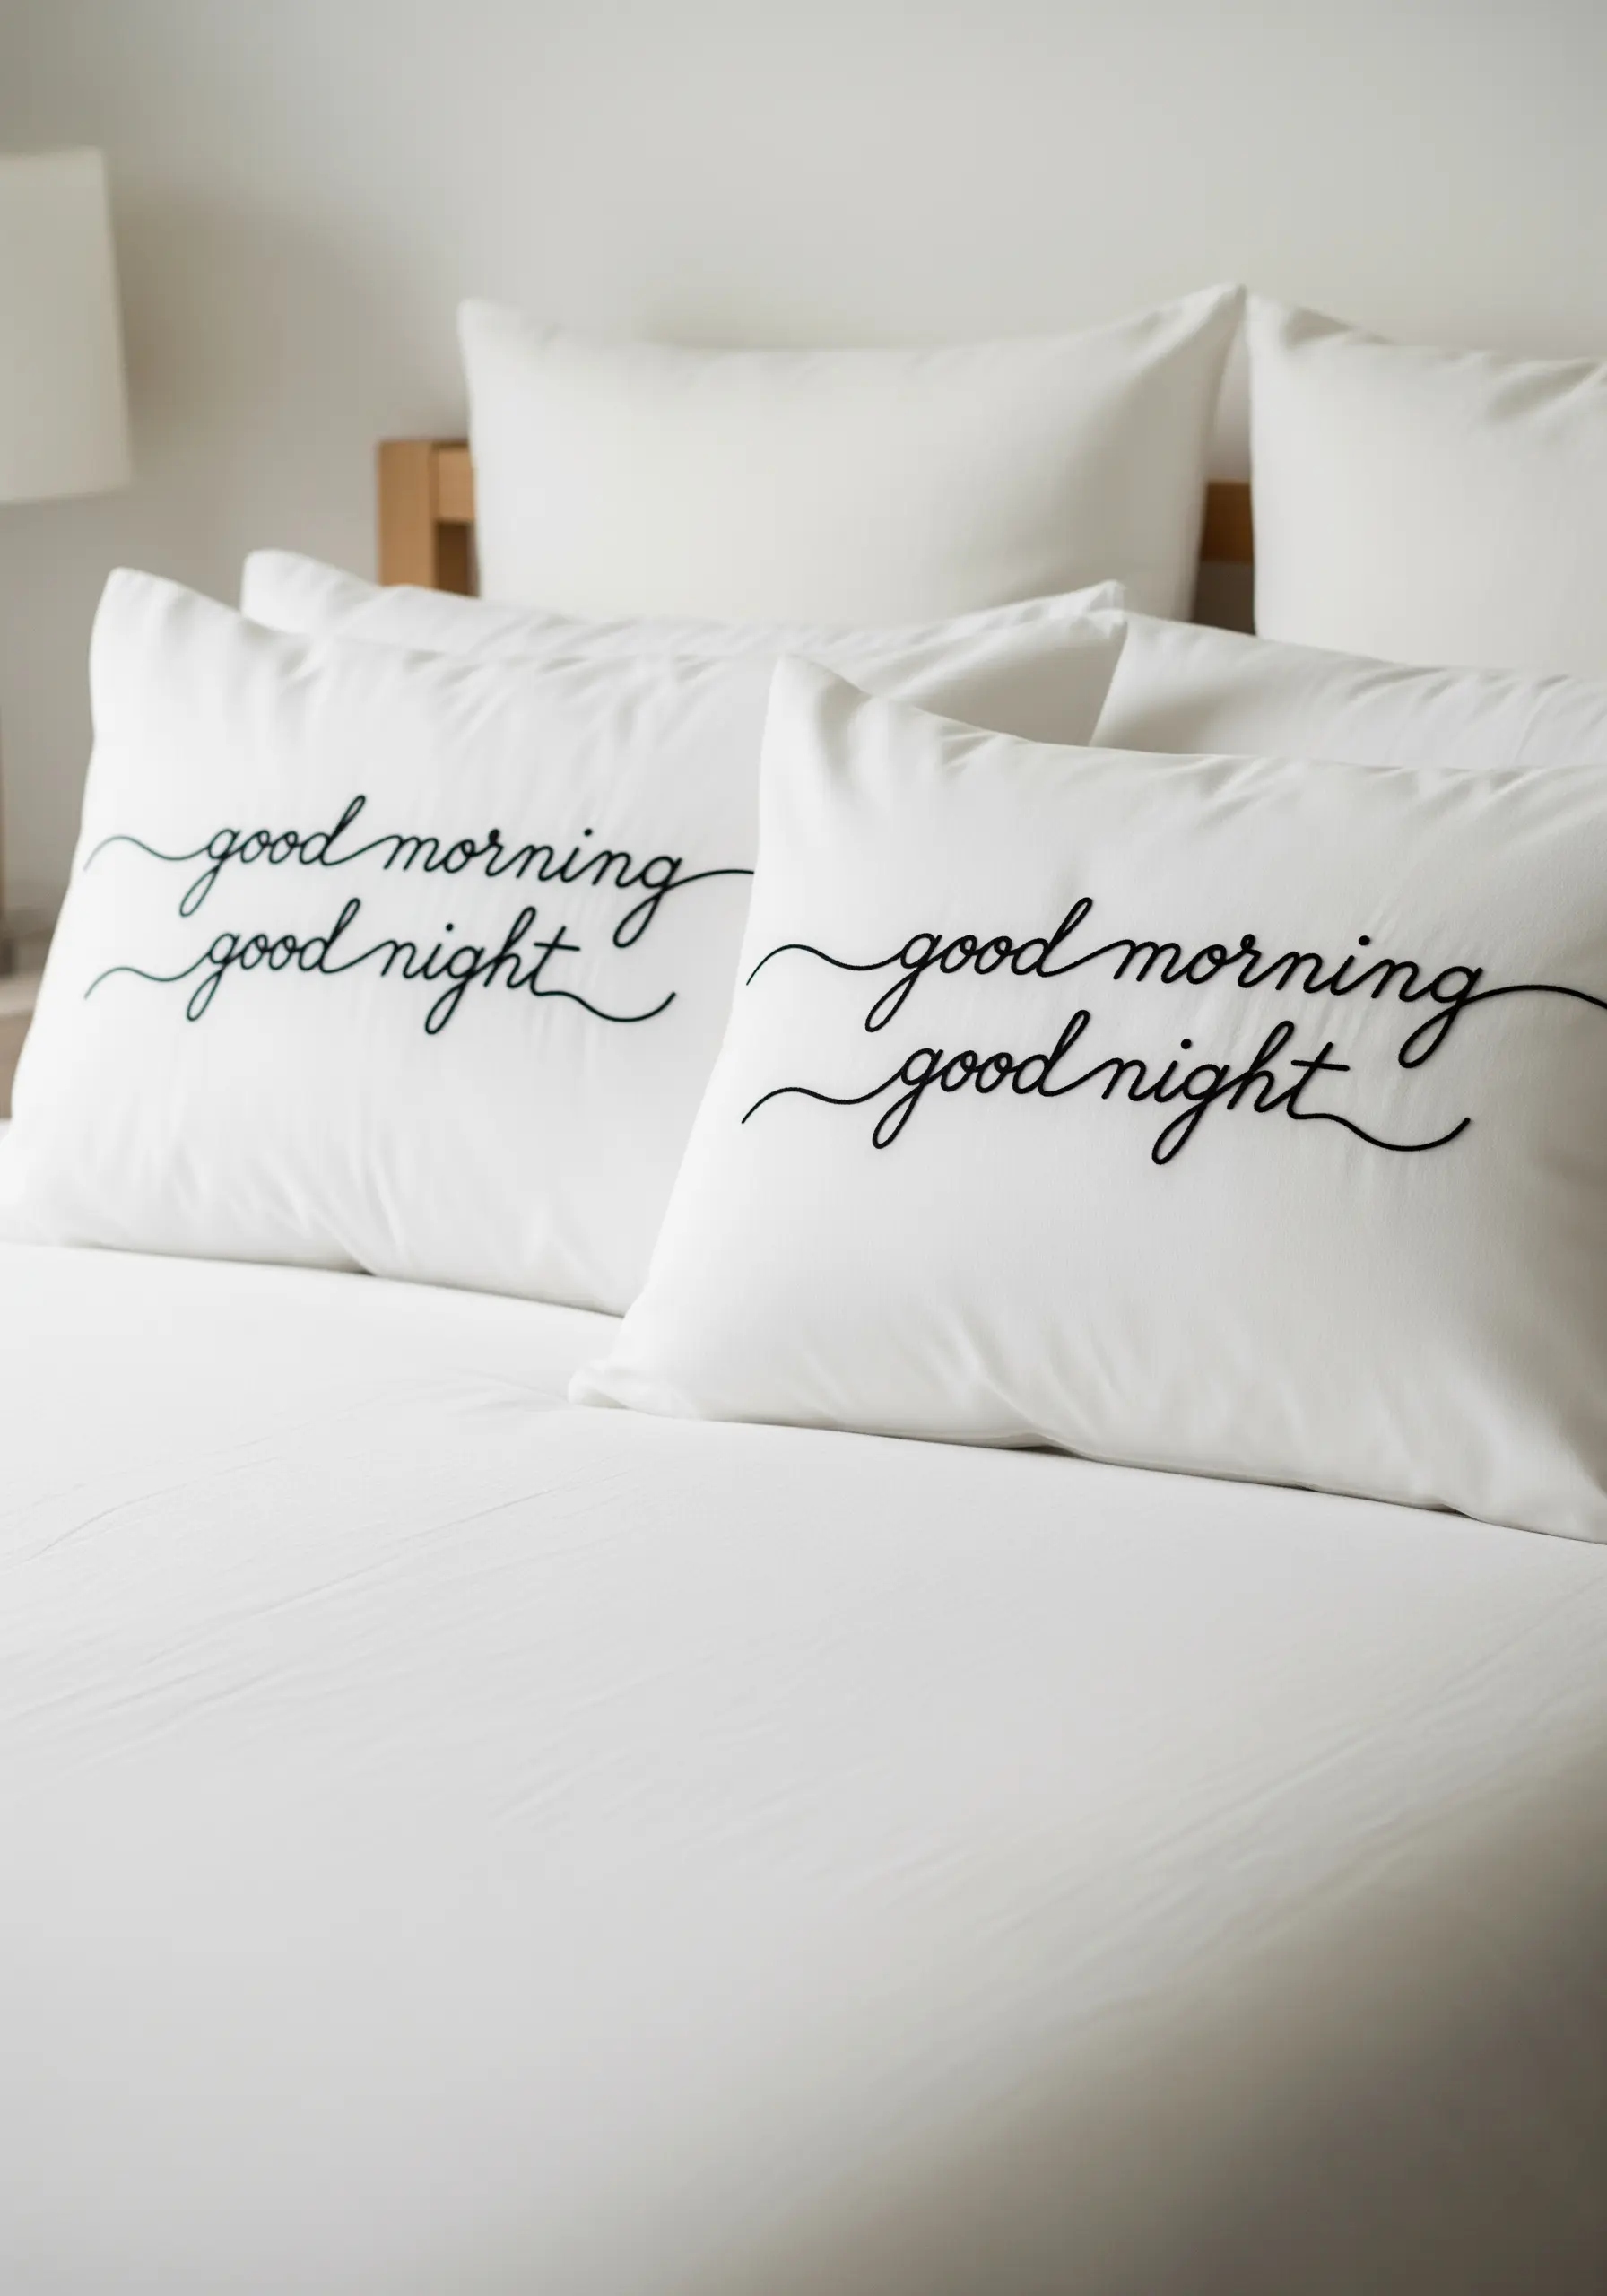
Add a touch of serene elegance to your bedding with clean, cursive lettering.
For script that flows beautifully, a whipped backstitch is your best technique. First, create a standard backstitch outline of your letters.
Then, without piercing the fabric, whip a second thread under and over each backstitch, completely covering the ‘steps’ and creating a perfectly smooth, raised line.
Using a high-contrast thread, like black on crisp white cotton, gives the design a graphic, modern feel that is both calming and chic. It’s one of the best modern thread art for minimalist bedrooms.
11. Sculptural Yarn Art for a Statement Headboard
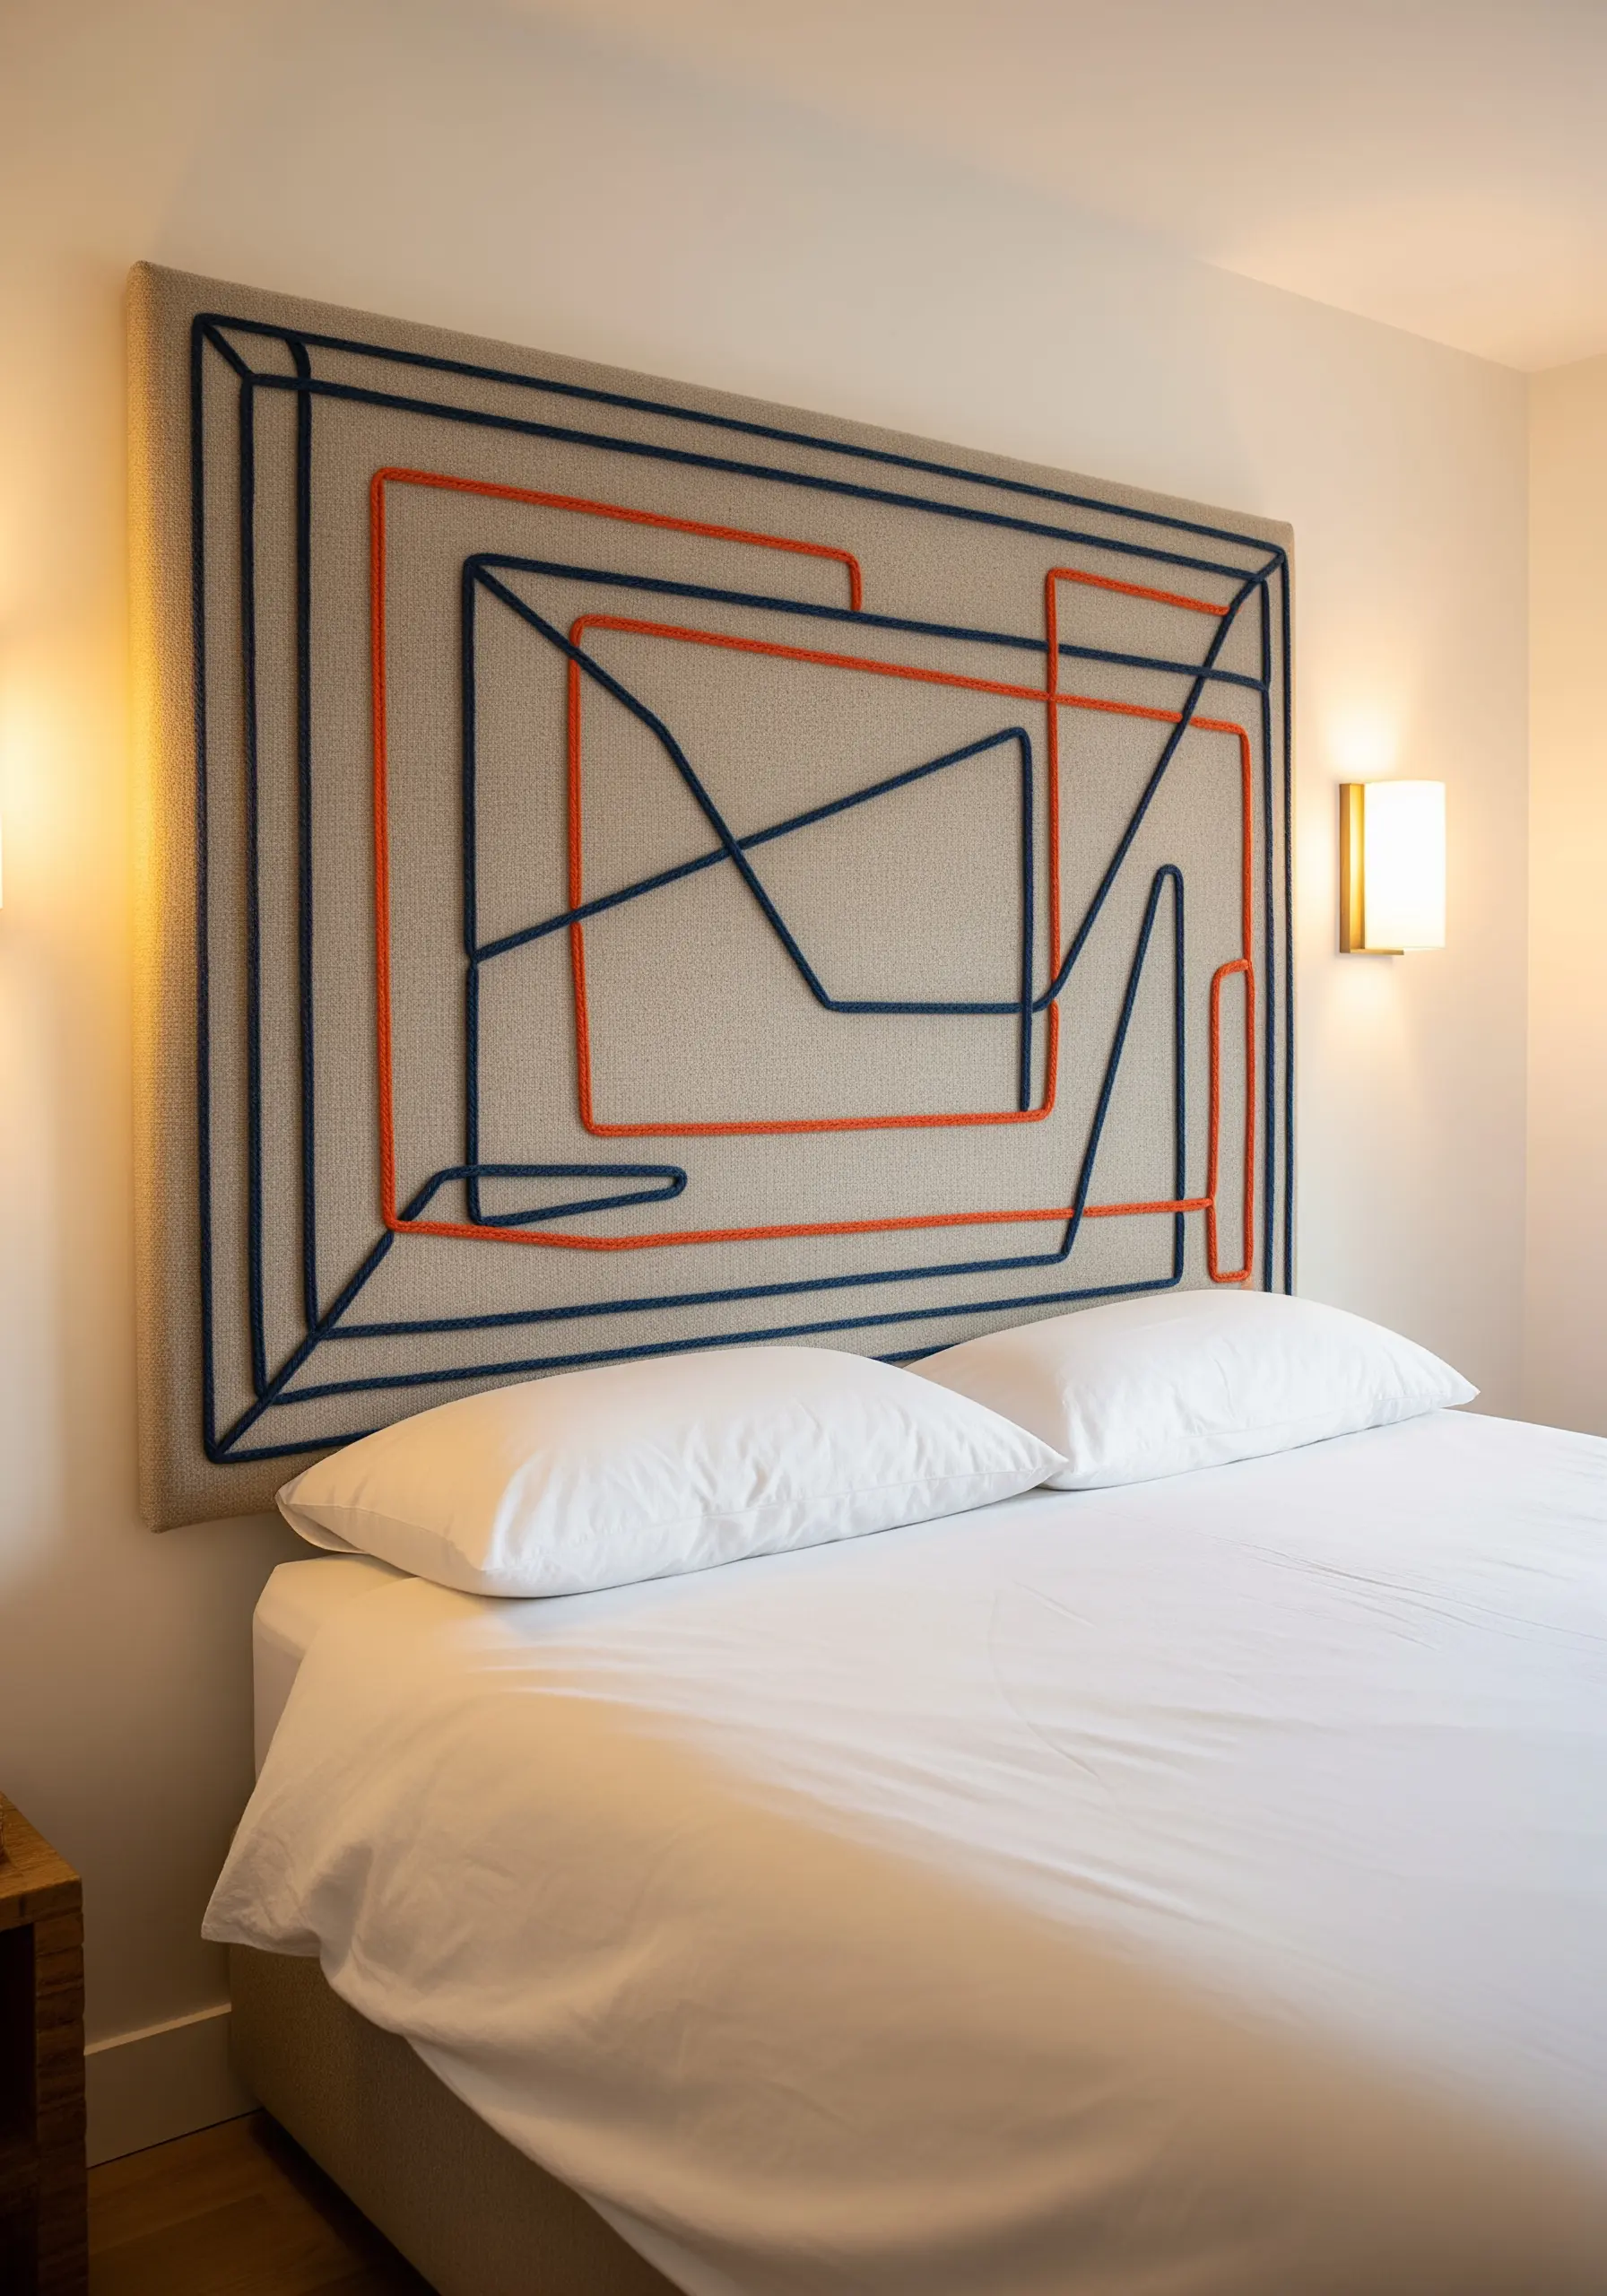
Create a dramatic, modern headboard using thick yarn to draw bold, abstract lines.
This technique, called couching, involves laying a thick cord or yarn on the surface of your fabric and securing it with small, perpendicular stitches of a thinner, matching thread.
Stretch a neutral, textured fabric like linen or tweed over a large canvas or wooden frame.
Plan your abstract design with a water-soluble marker, then couch the yarn along the lines. This creates incredible texture and dimension, turning your bed into a true art piece.
12. Personalize Printed Fabric with a Simple Monogram
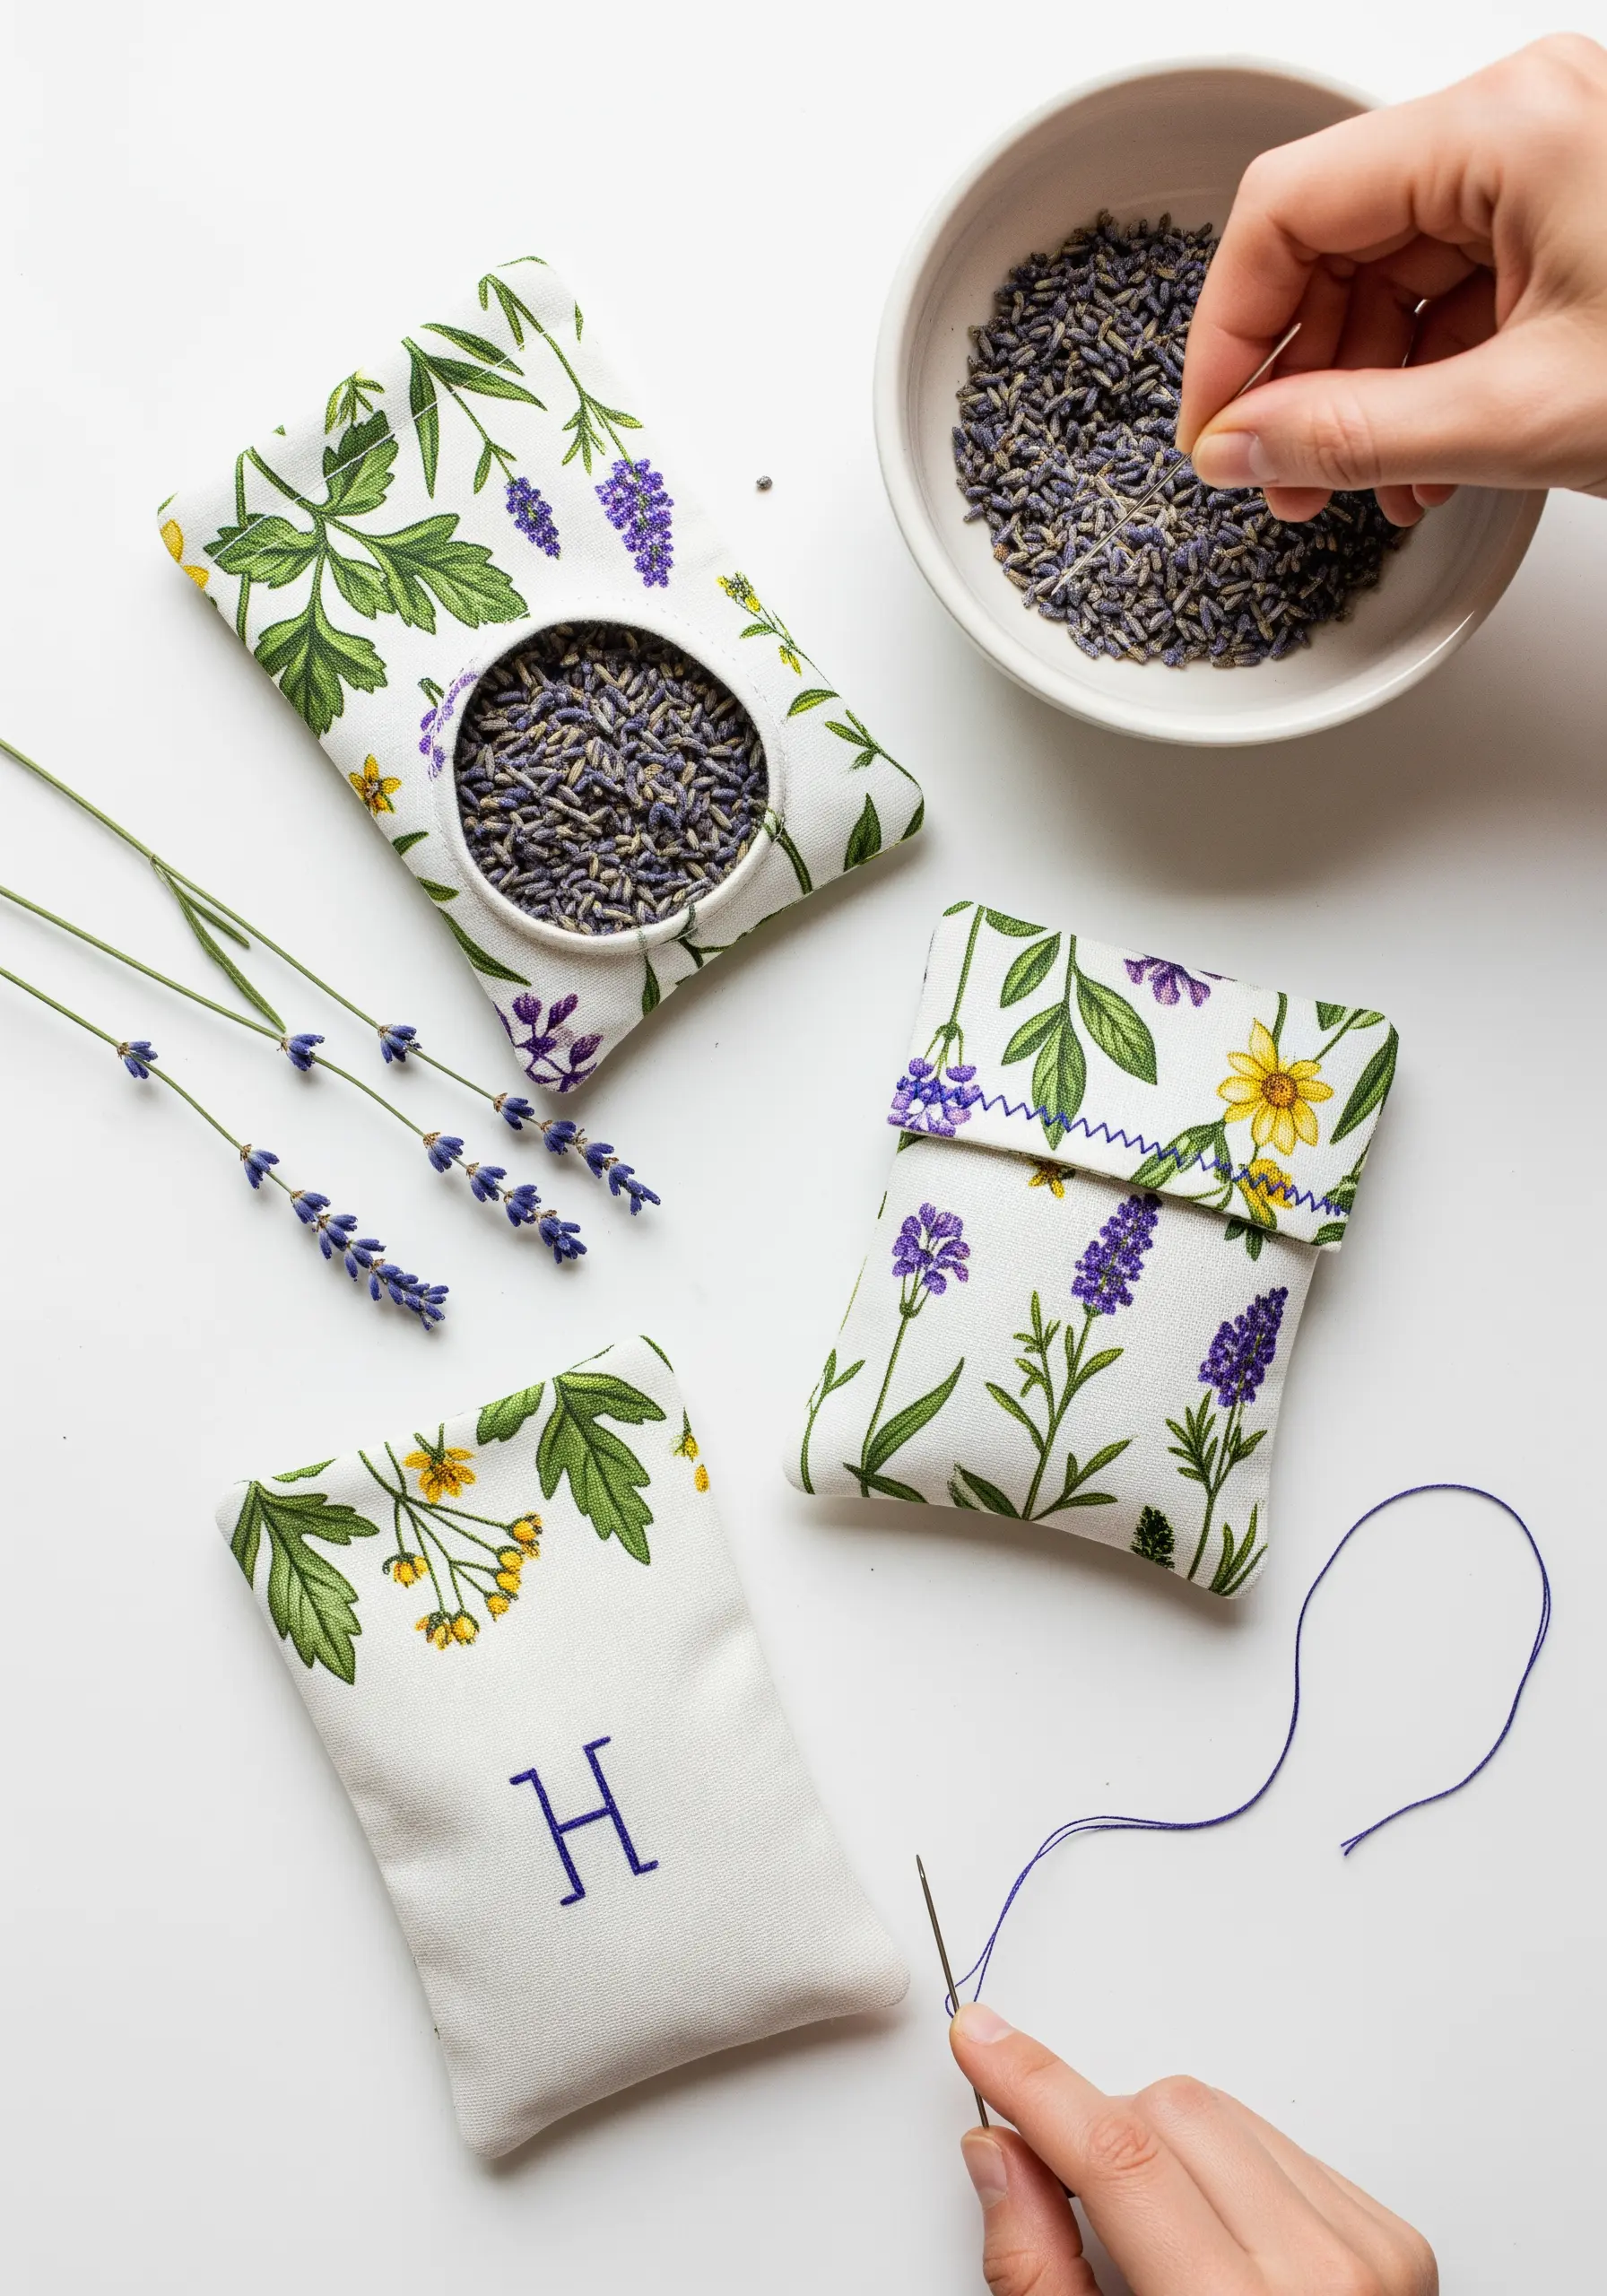
Give pre-printed fabric pouches a personal, handmade touch with the addition of an embroidered monogram.
For these calming lavender sachets, a simple satin-stitched initial elevates the botanical print beautifully.
To ensure your satin stitch is smooth and even, outline the letter with a split stitch first. This raised edge acts as a guide, helping you keep your stitches neat and contained.
Choose a thread color that complements the existing pattern for a cohesive and sophisticated finish, perfect for tiny embroidery projects that make thoughtful DIY gifts fast.
13. Appliqué a Narrative on Textured Fabric
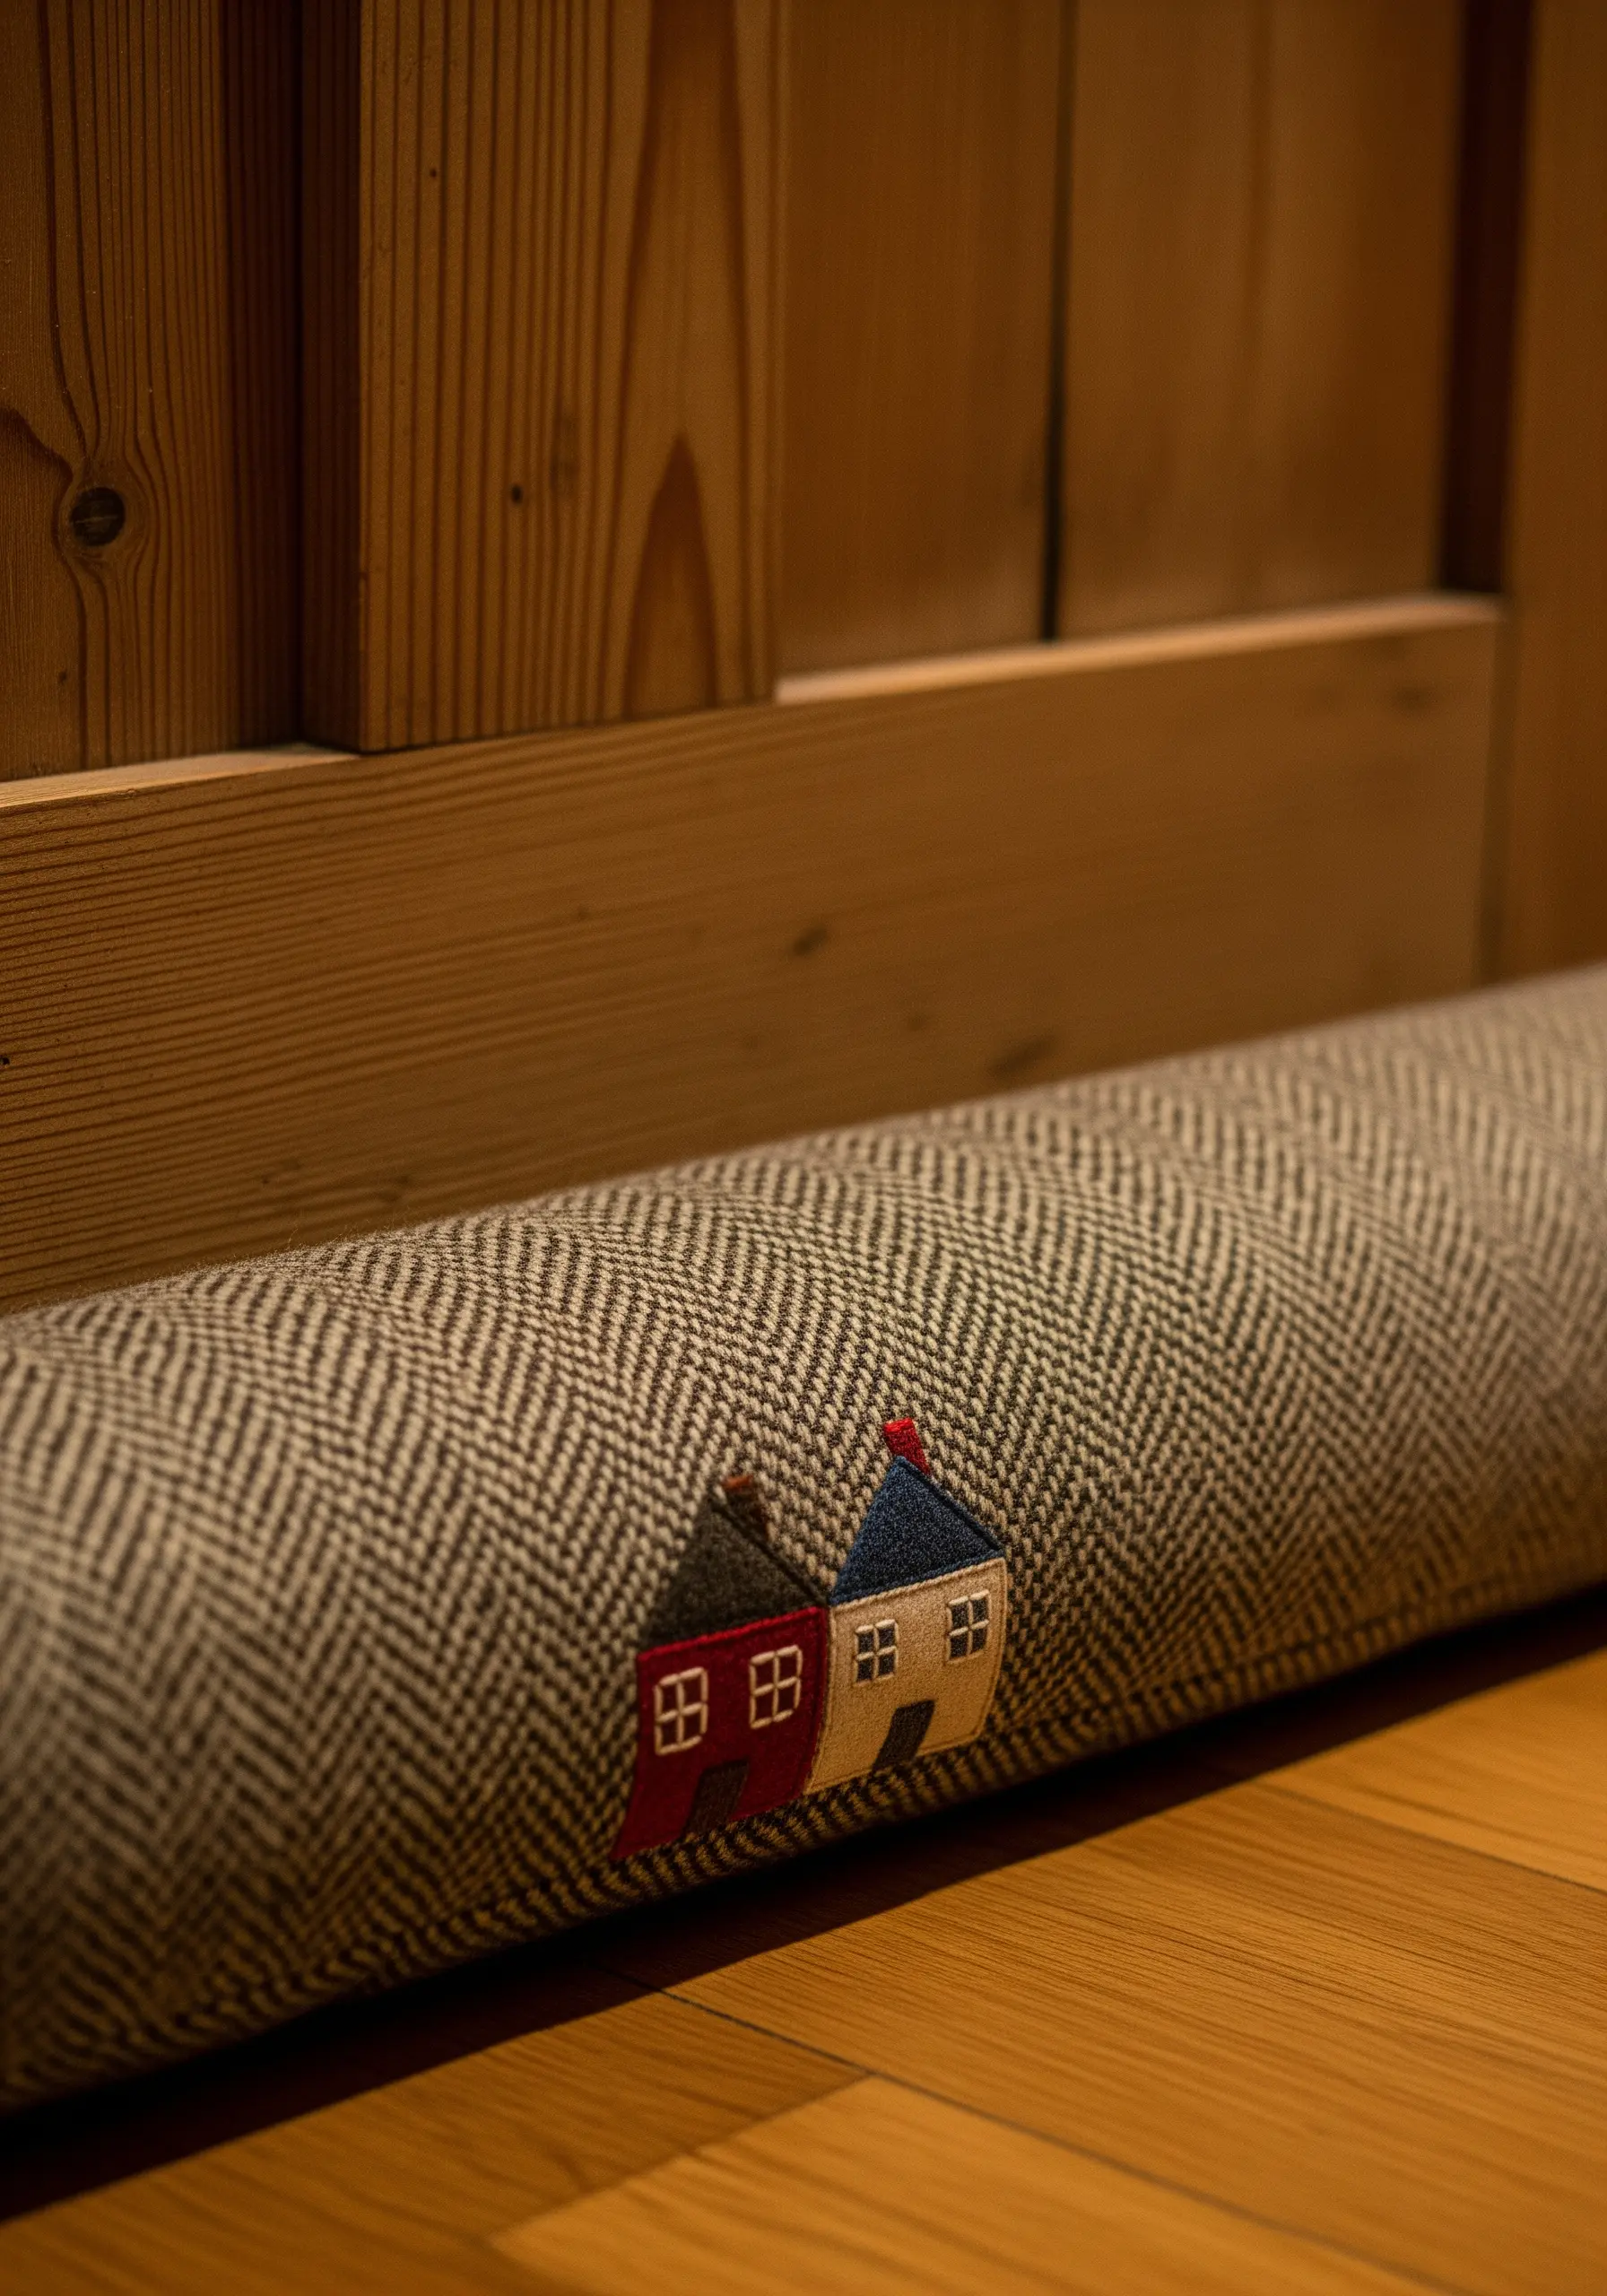
Tell a cozy story with tiny appliqué houses on a functional draft excluder.
The key to this charming project is the contrast in textures. Use smooth cotton scraps for the houses against a robust, heavily textured base like herringbone tweed.
Secure the tiny shapes with a simple running stitch or a neat blanket stitch around the edges.
Add miniature details like windows with just a few straight stitches in a contrasting color. It’s a playful way to infuse personality into a practical household item.
14. Hand-Stitched Felt Garland for a Dreamy Touch
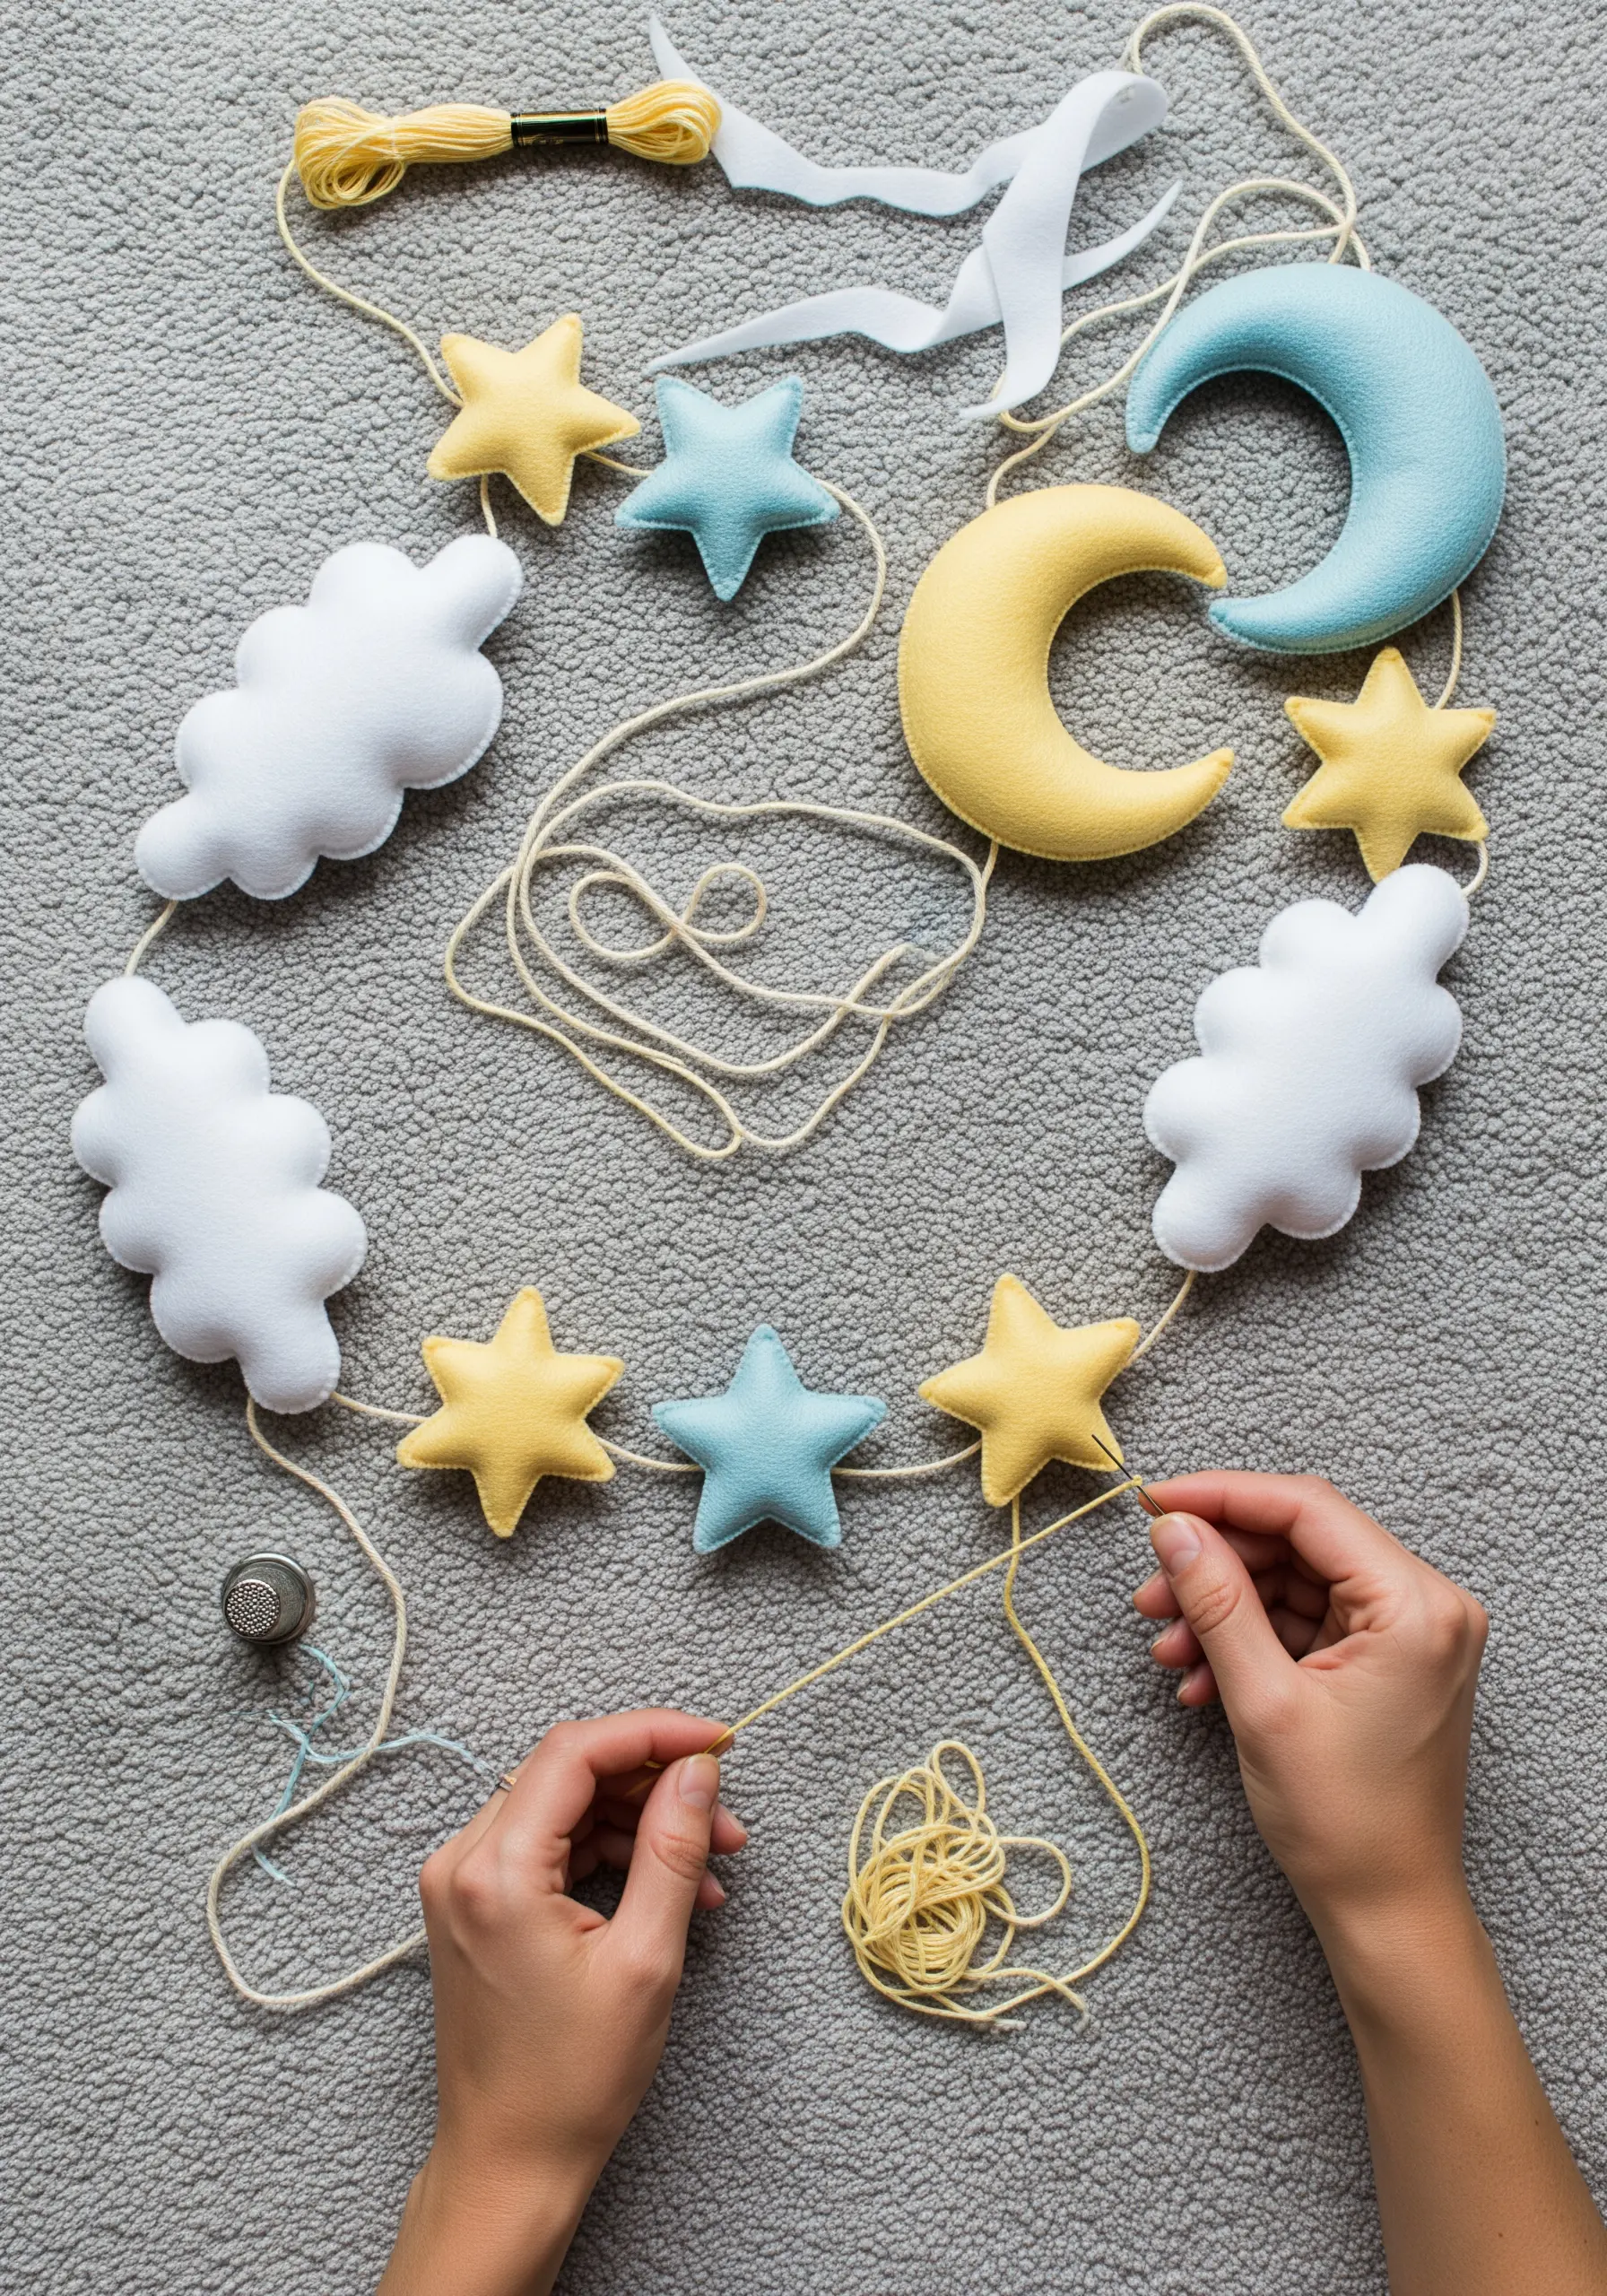
Create a soft, whimsical garland using simple felt shapes and a single, versatile stitch.
Cut out your clouds, moons, and stars from pastel-colored felt. Because felt doesn’t fray, you don’t need to worry about complex seam allowances.
Lightly stuff each shape with a bit of poly-fil and stitch the edges together with a neat blanket stitch. This stitch is both decorative and functional, creating a clean, finished edge.
String your finished shapes onto a piece of embroidery floss or thin twine for a gentle, dreamy accent in a nursery or above a bed.
15. Create a Polished Botanical Laundry Bag
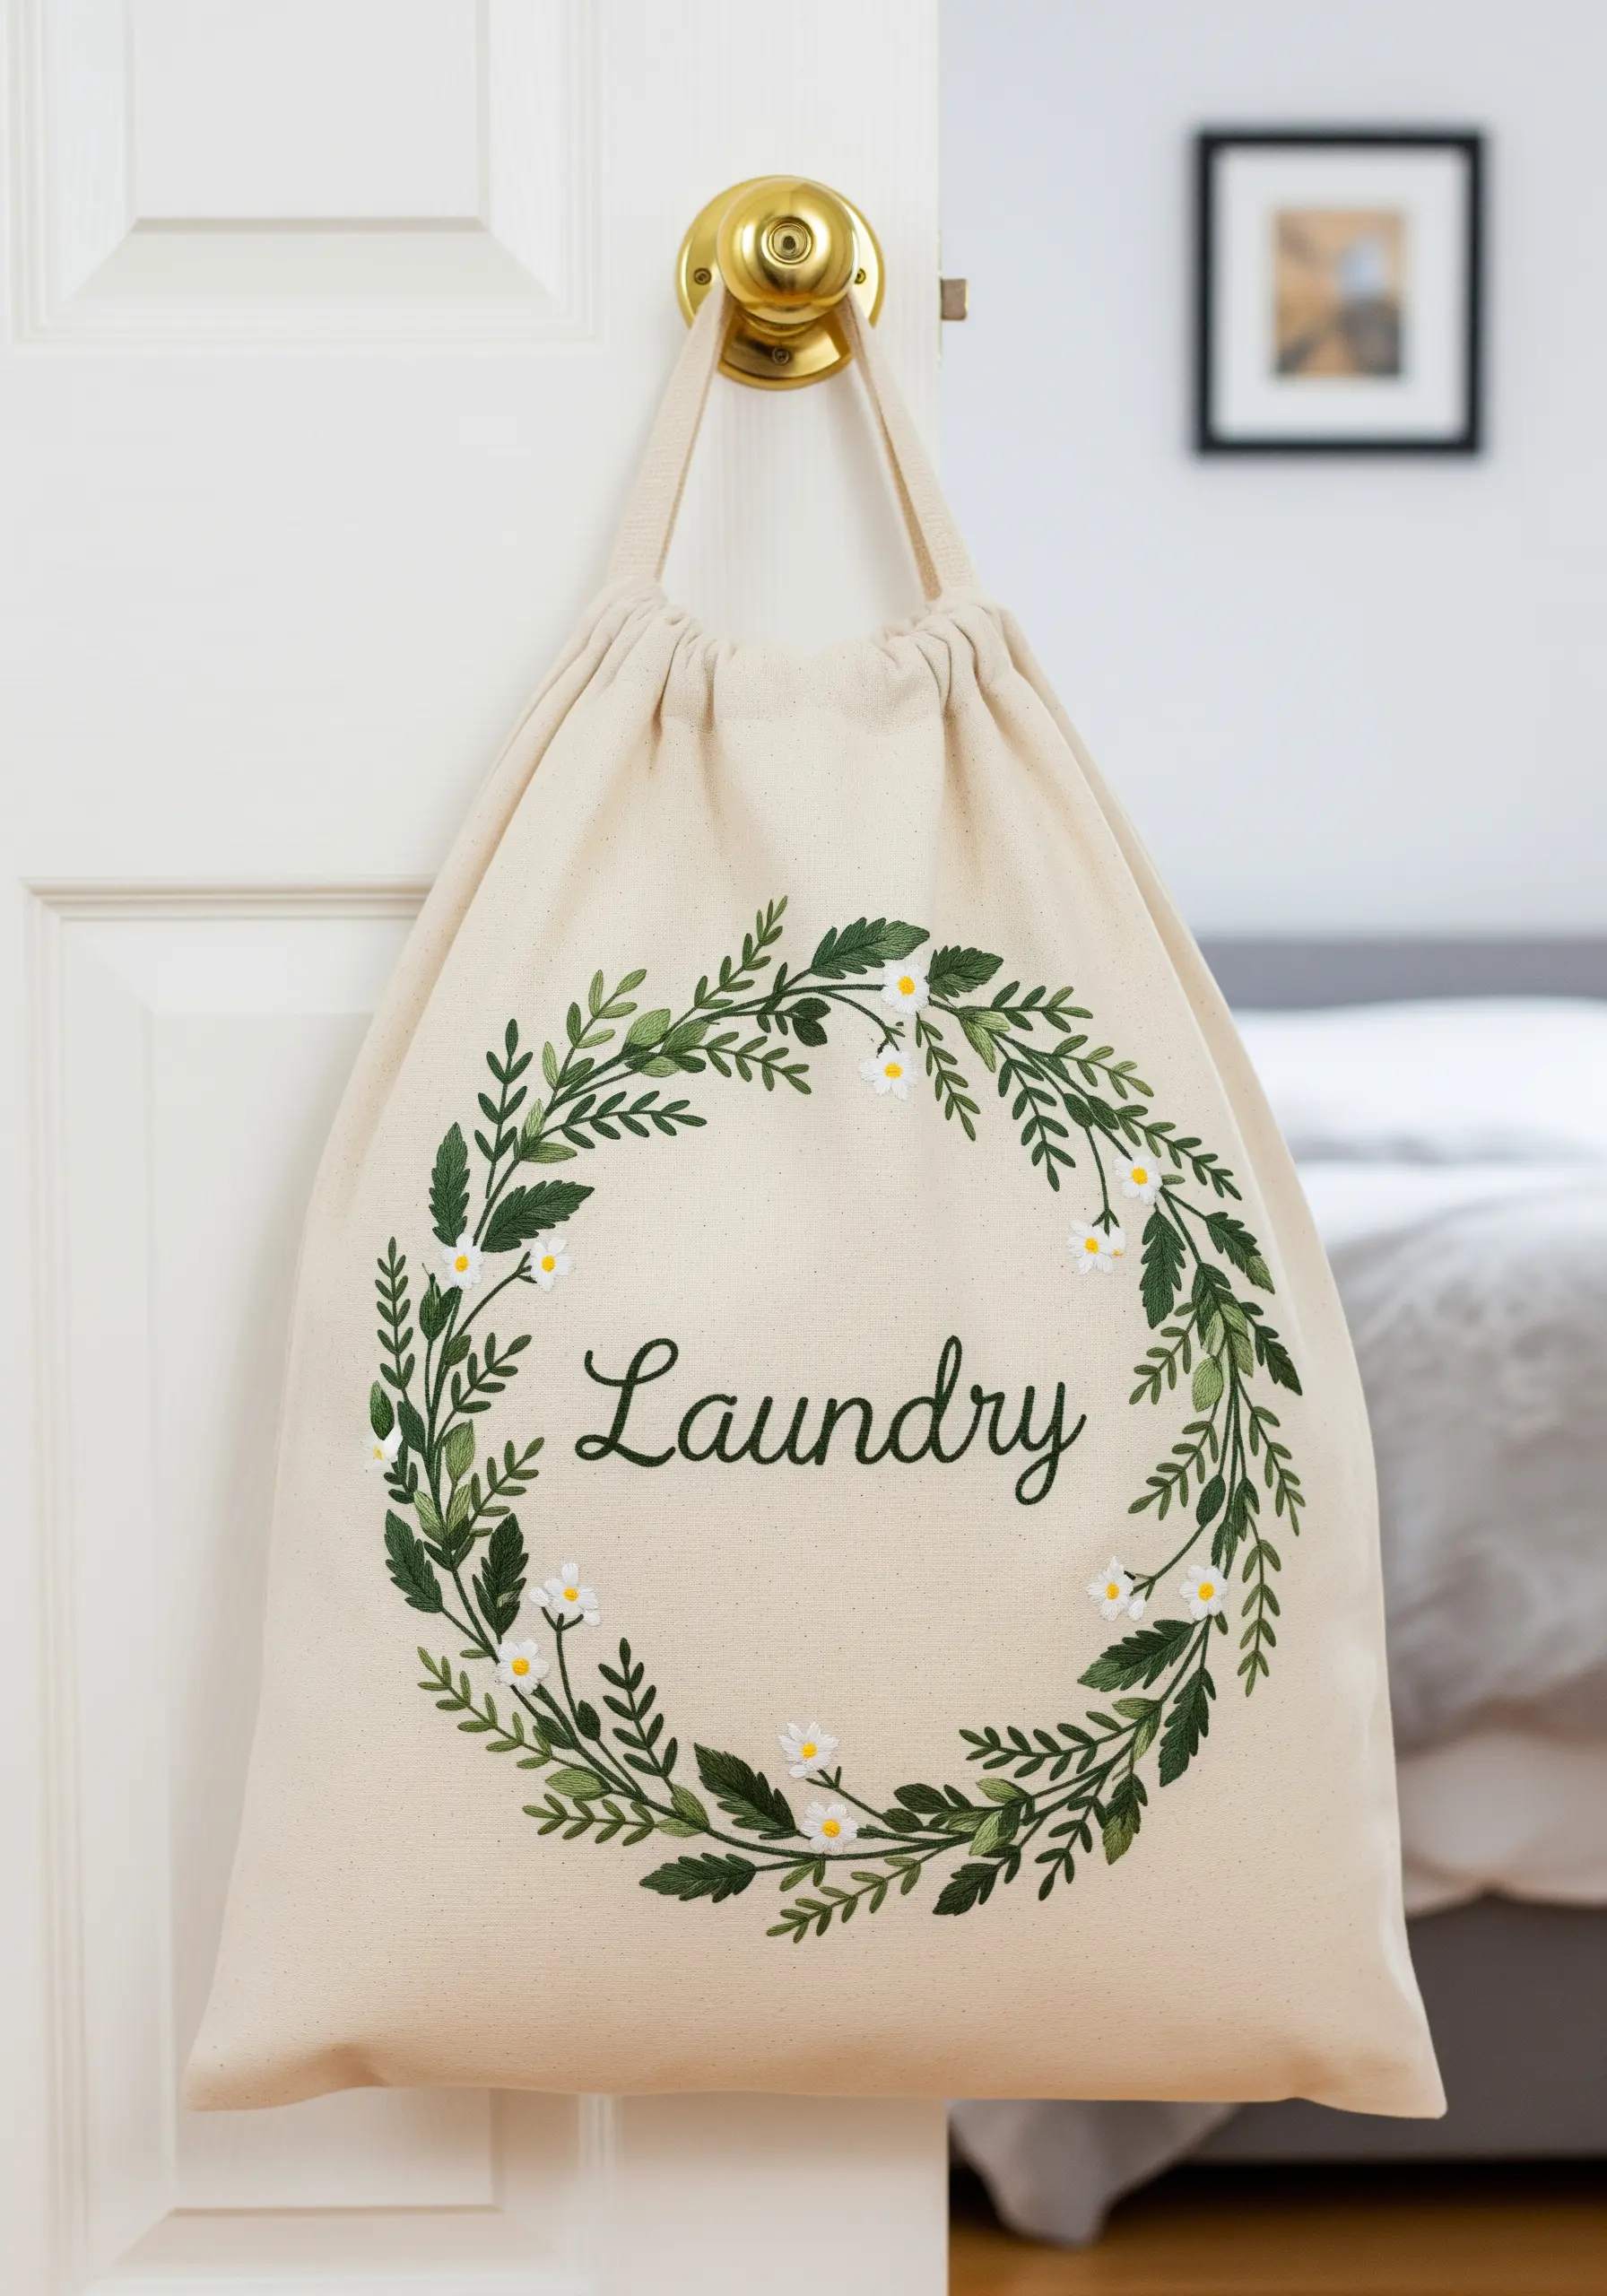
Elevate a plain canvas laundry bag with a beautifully balanced botanical wreath.
To achieve this polished look, combine two key stitches: satin stitch for the leaves and a clean stem stitch for the lettering and vines.
For smooth, plump leaves, work your satin stitches on a slight diagonal across the shape. This helps the threads lie flat and catch the light beautifully.
For the lettering, a consistent stem stitch creates a rope-like texture that is both legible and elegant, making even a laundry bag feel like a piece of handmade embroidery ideas for an elegant, artsy look.
16. Embroidering on Sheer Curtains for an Ethereal Effect
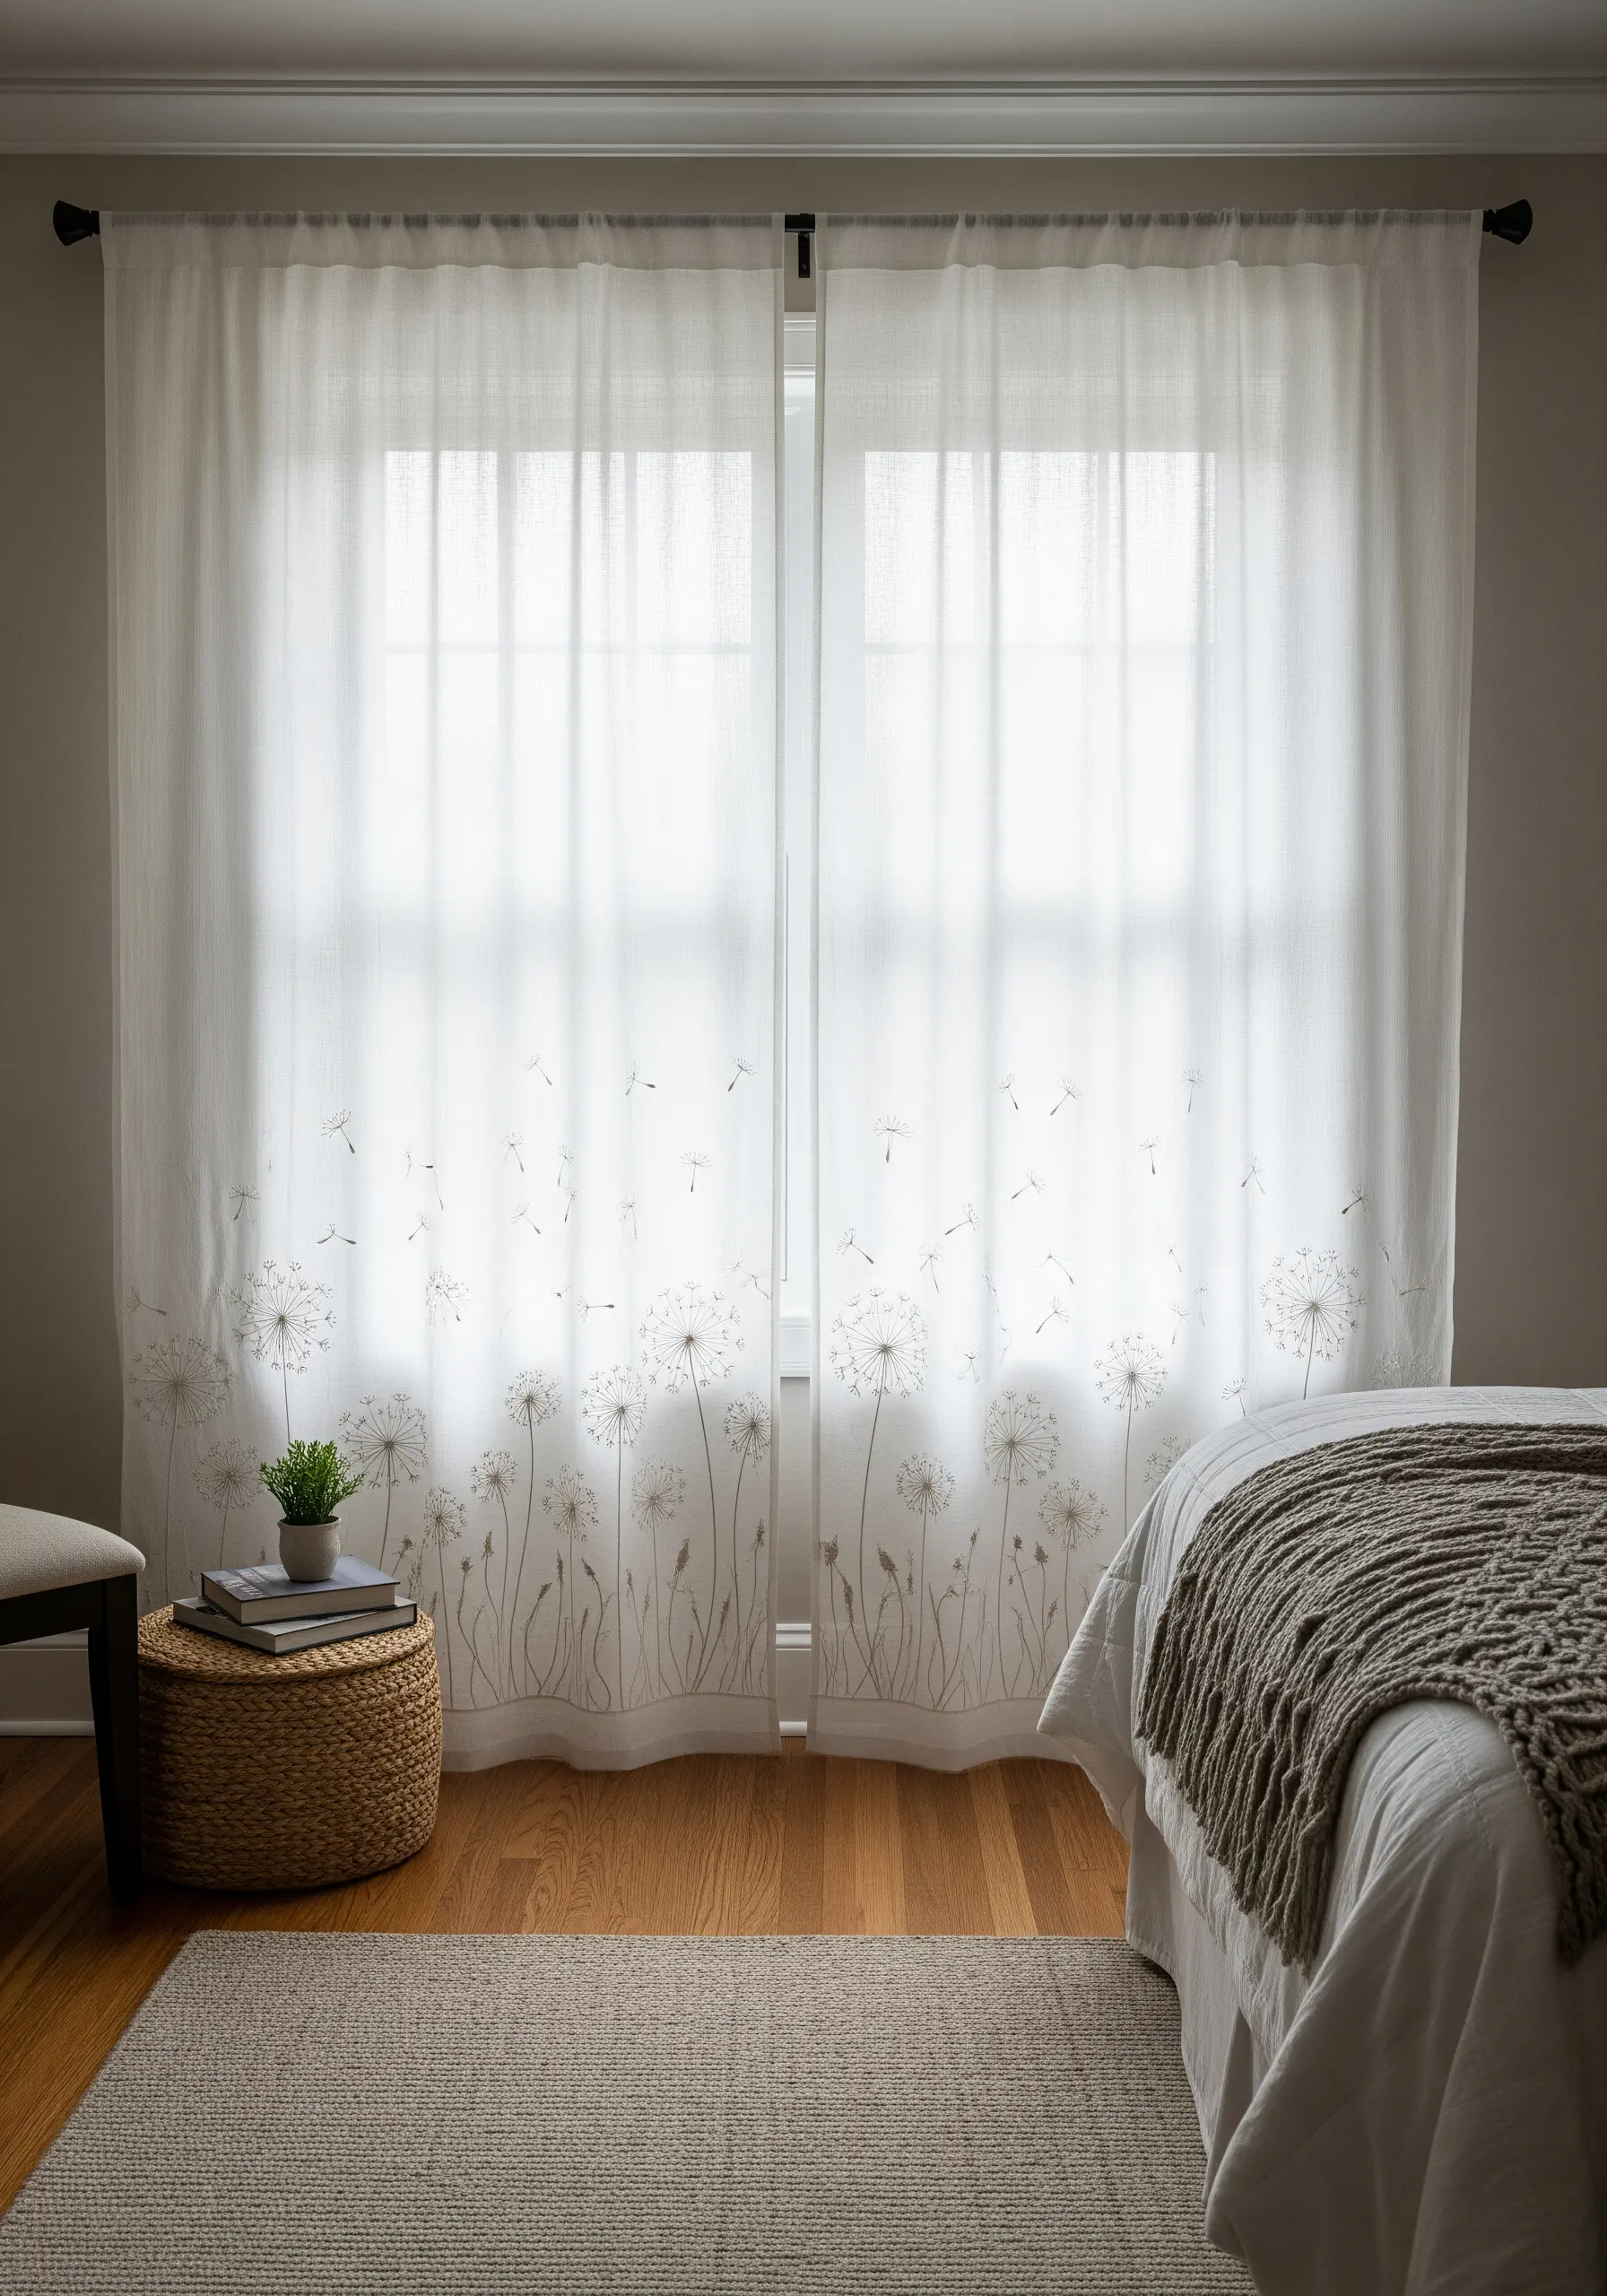
Add a touch of breezy magic to your bedroom by embroidering delicate dandelions on sheer linen curtains.
The trick to stitching on lightweight fabric is to use a temporary stabilizer. Adhere a wash-away or tear-away stabilizer to the back of your design area before you begin.
This provides the necessary support to prevent puckering and distortion as you stitch.
Use a fine thread and simple straight stitches for the dandelion seeds, allowing them to appear as if they’re floating in the light. Once you dissolve or remove the stabilizer, only your ethereal design remains.
17. Modern Typography with Cross-Stitch
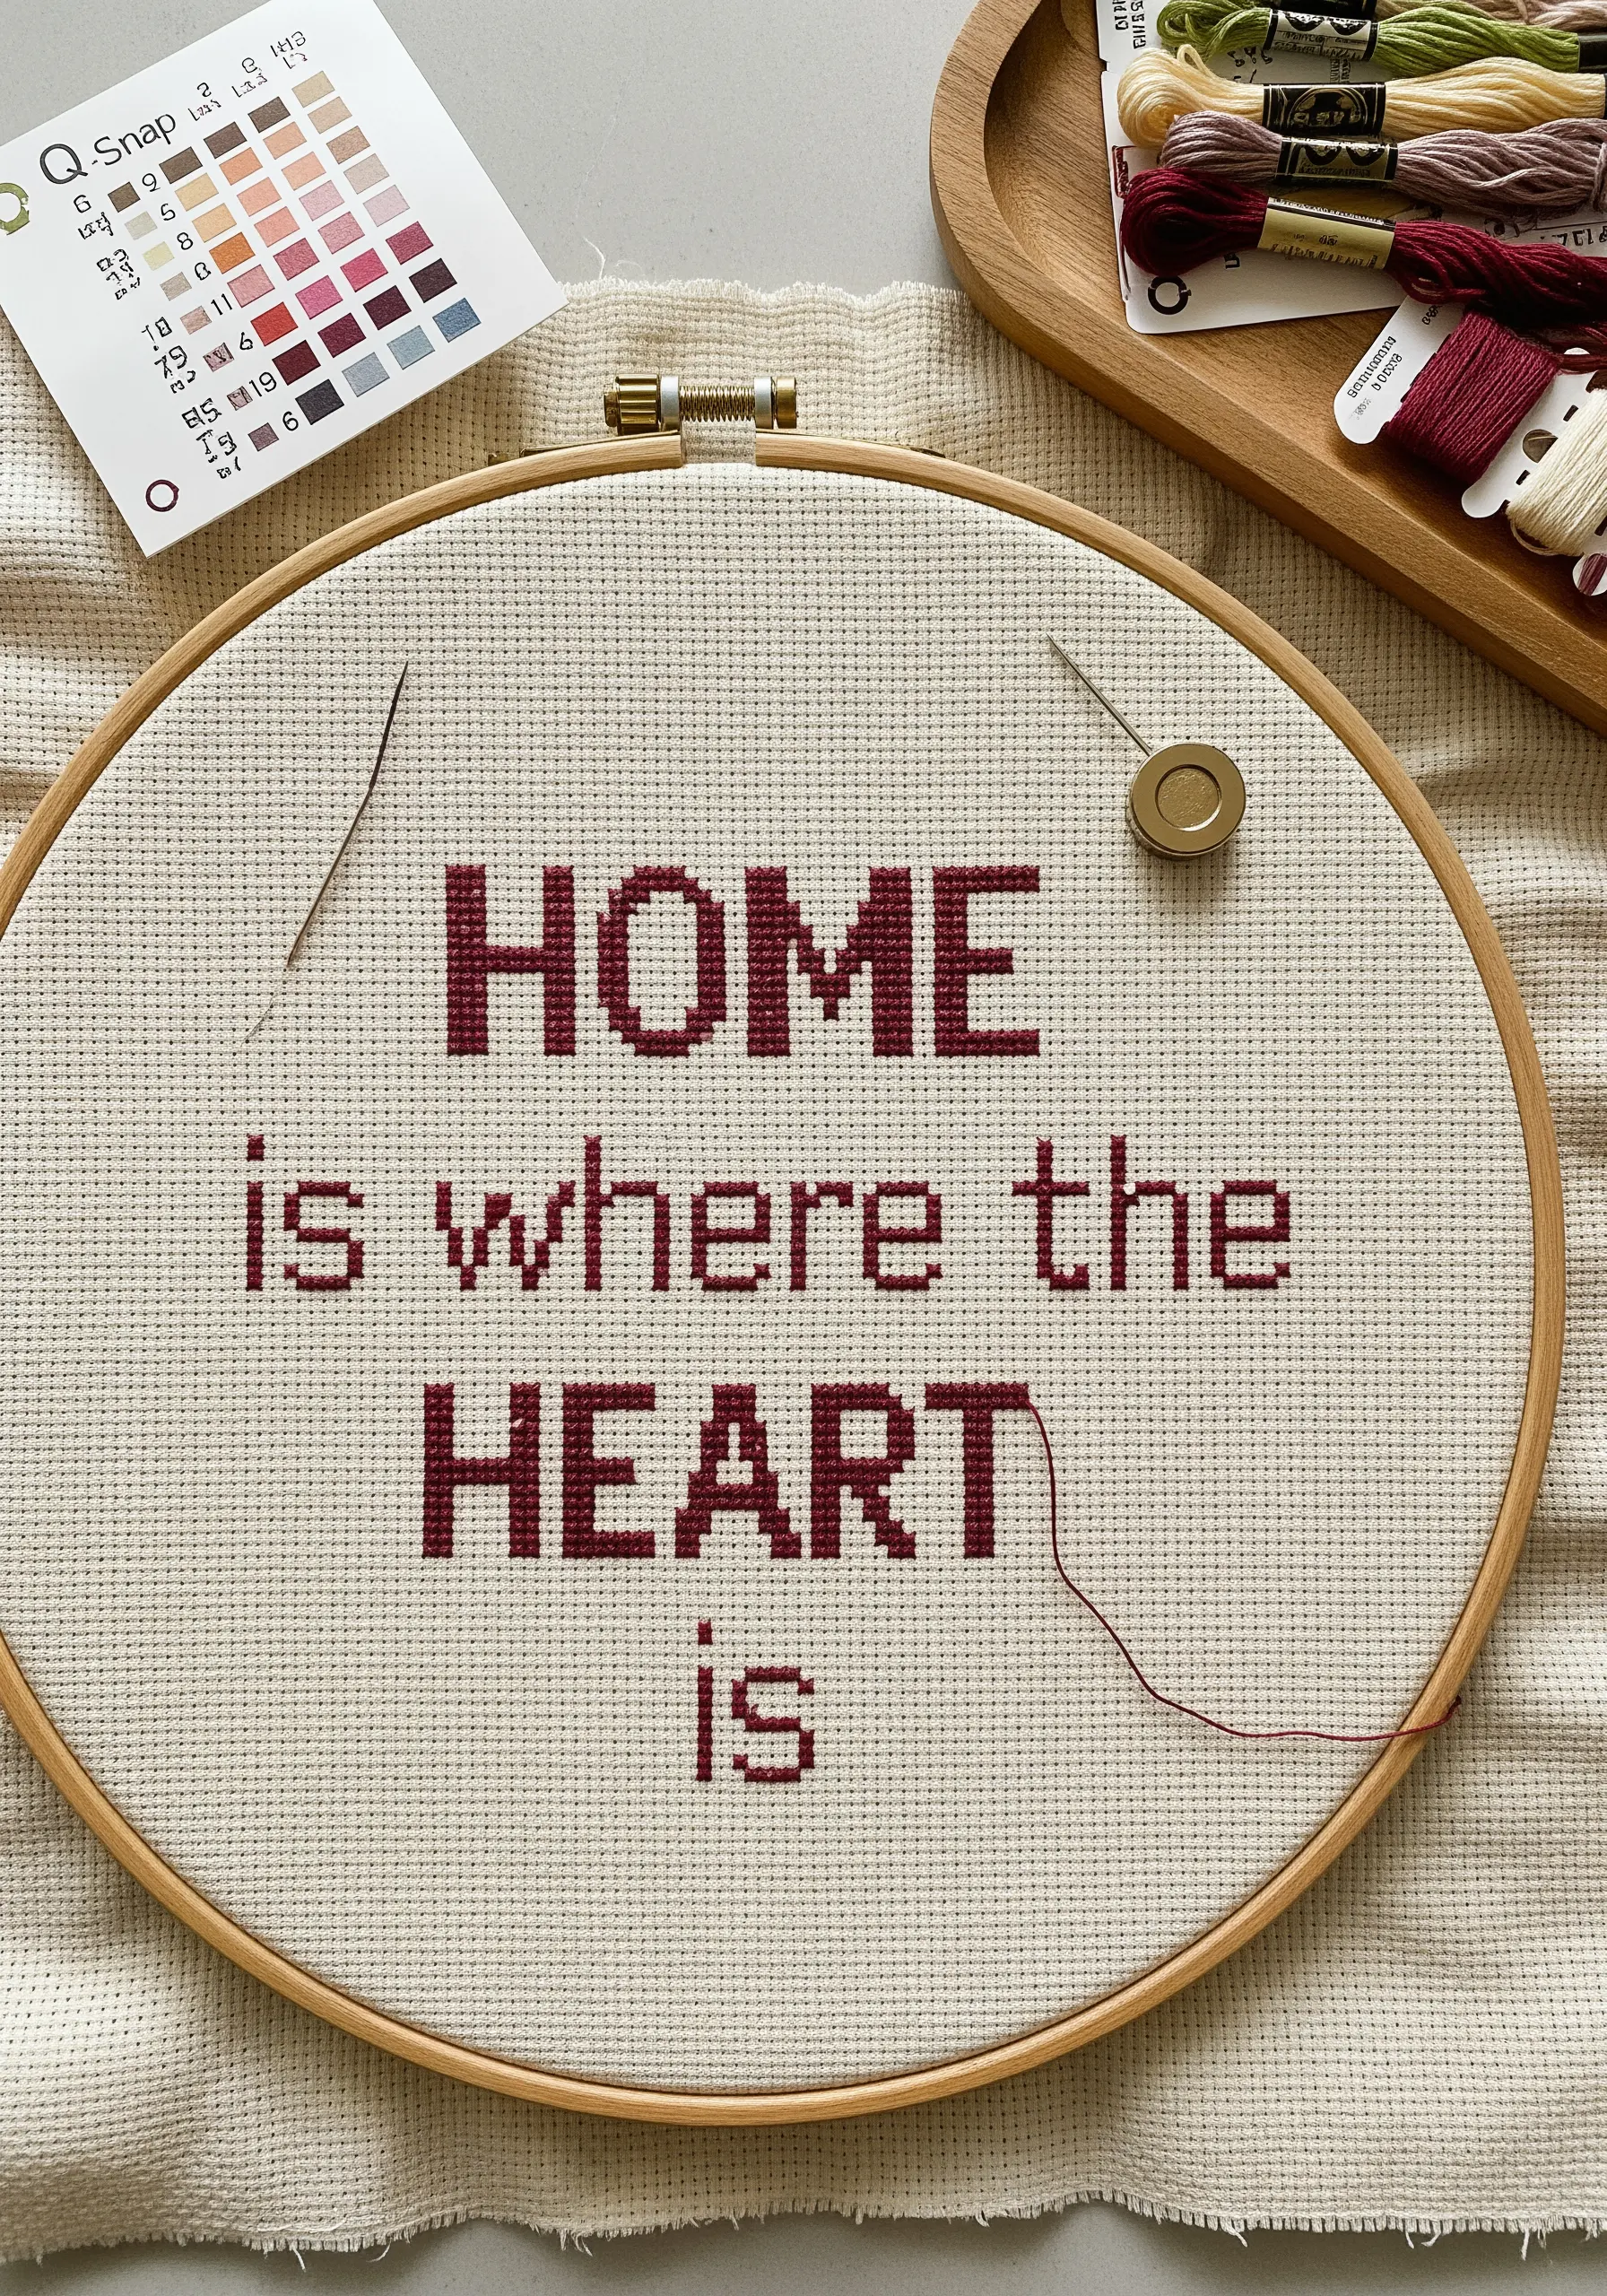
Give cross-stitch a modern update by focusing on bold typography and a restrained color palette.
Choose a contemporary block or pixel-style font for your quote, which translates perfectly to the grid-based nature of Aida cloth.
Working with a deep, monochromatic palette—like this rich burgundy—creates a graphic impact that feels more like modern print design than traditional needlework.
The clean lines and inherent rhythm of cross-stitch make it a wonderfully meditative way to create thread-based typography ideas for bold, modern quotes.
18. Turn Functional Stitches into a Design Feature
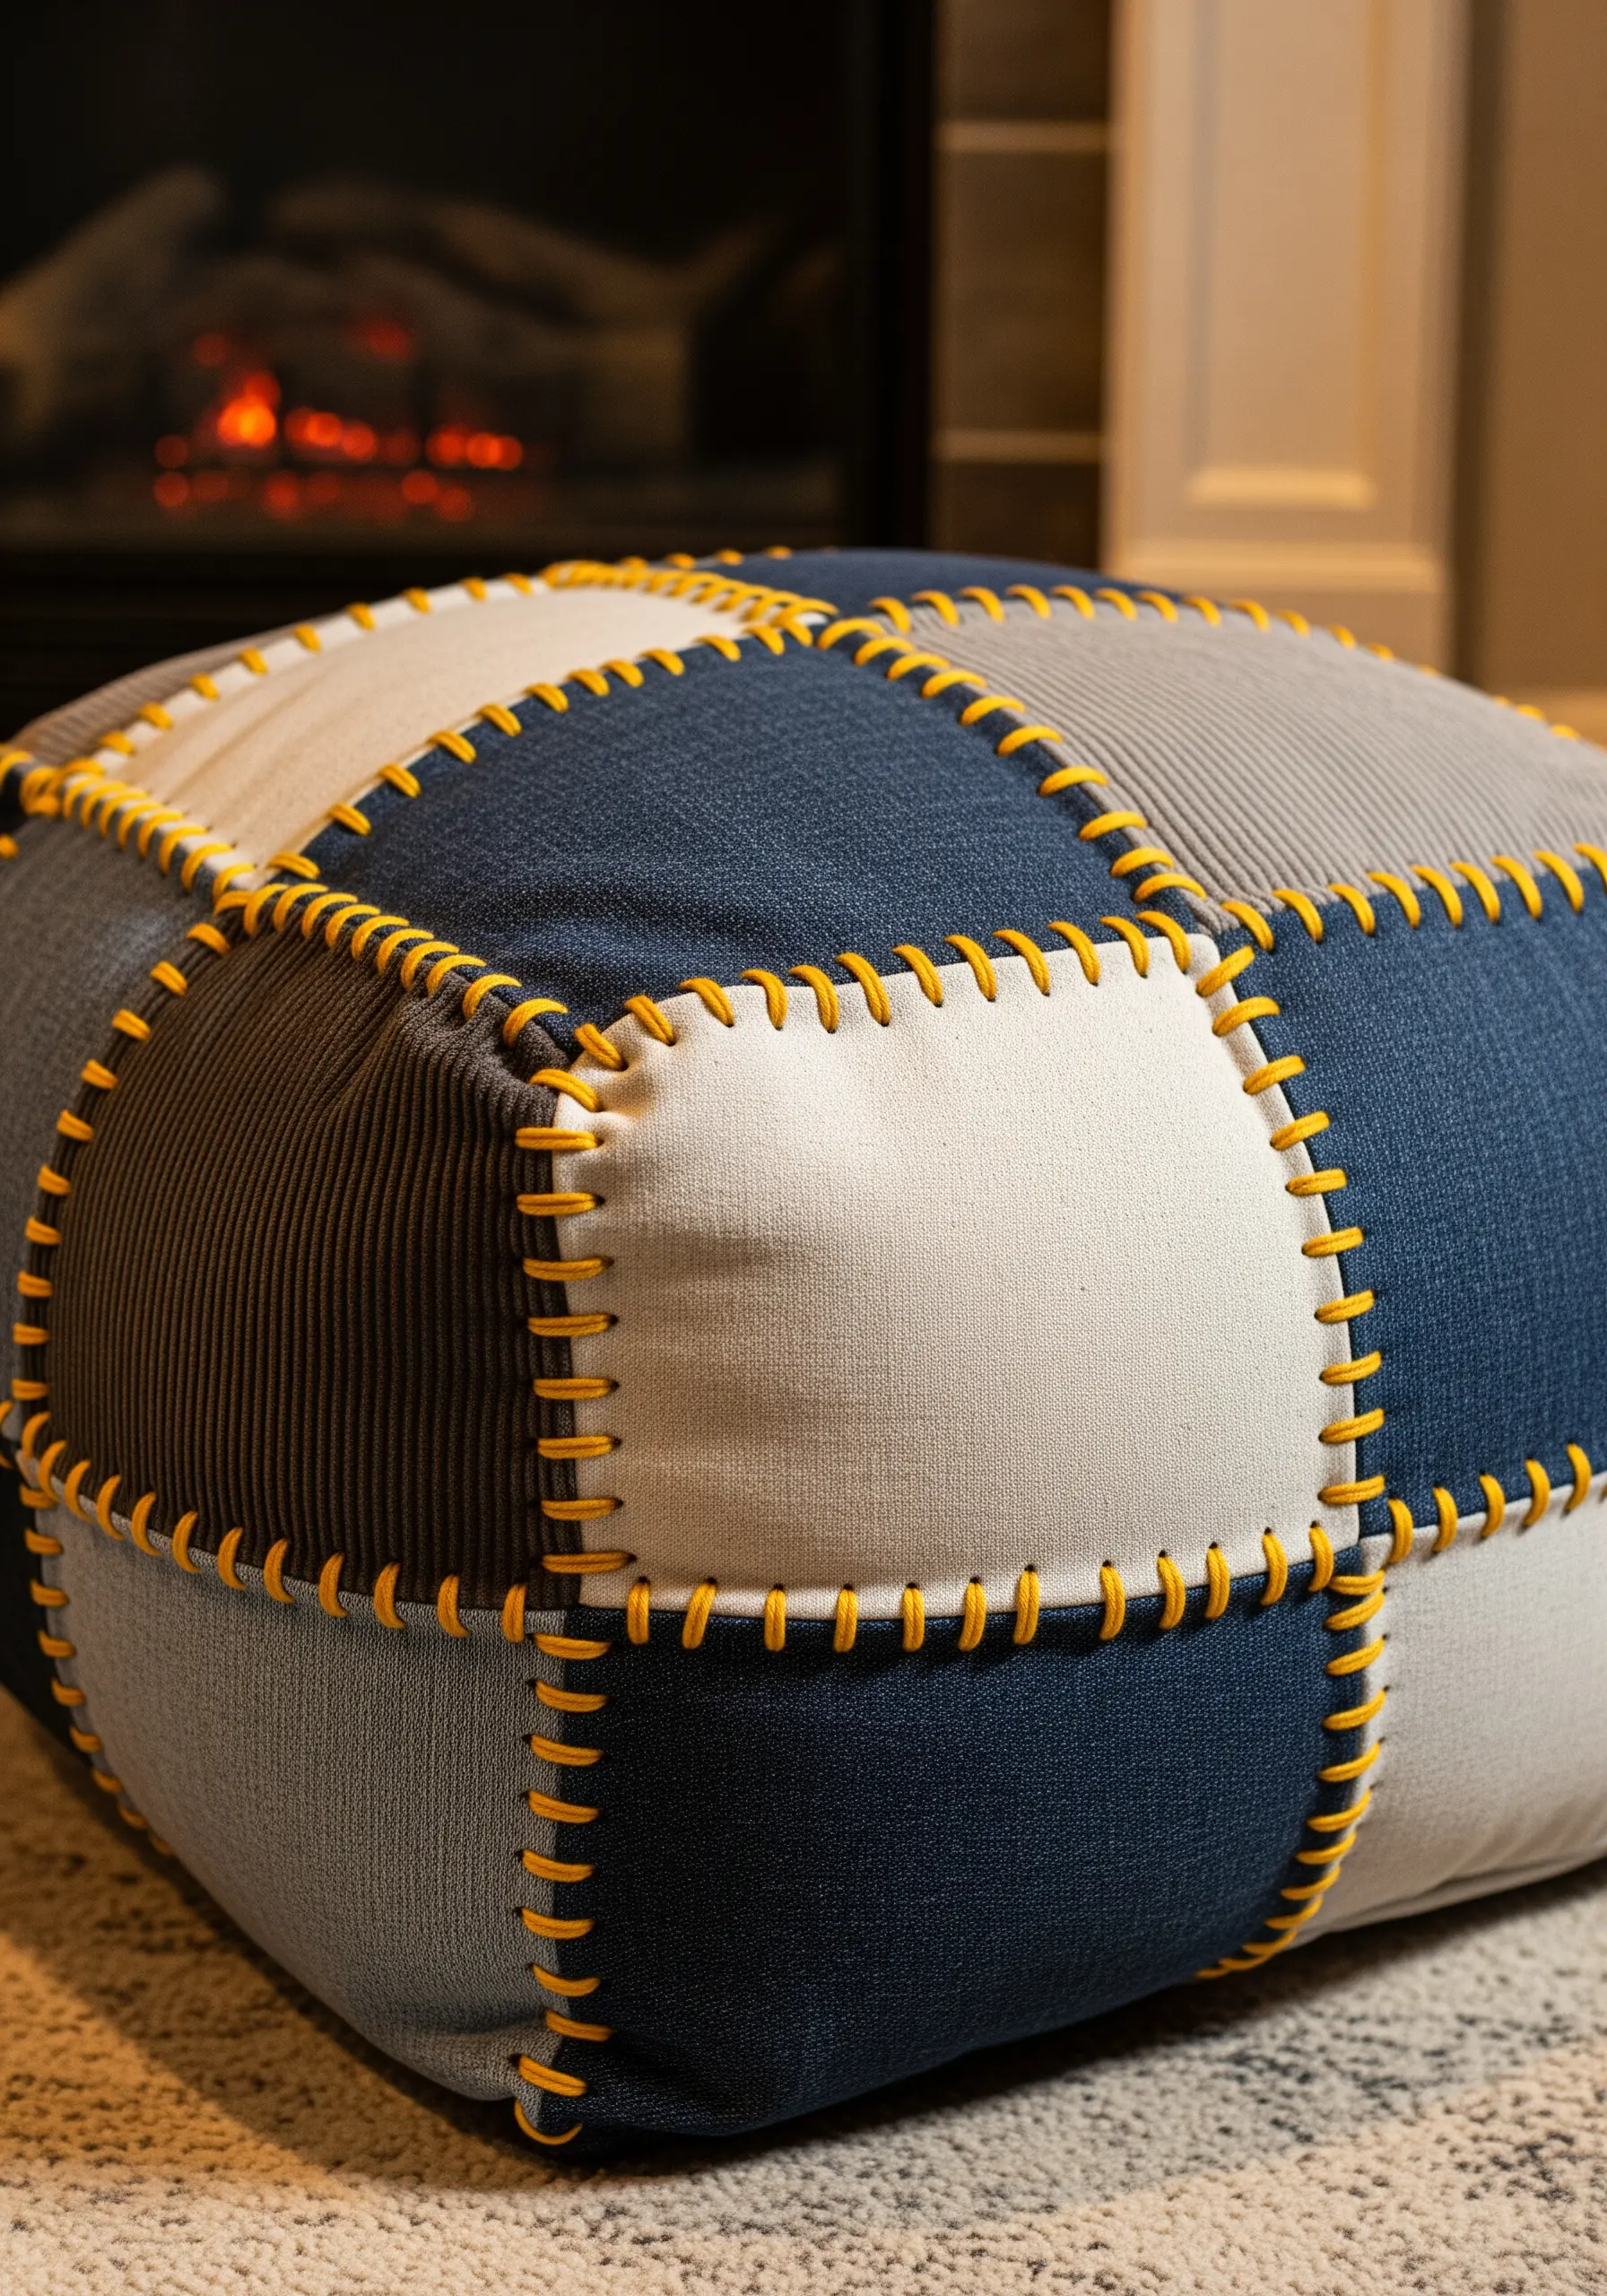
Construct a durable and stylish floor pouf by highlighting, rather than hiding, your construction stitches.
Use a variety of textured fabrics like denim, corduroy, and canvas for a rich, tactile patchwork effect.
Instead of a standard seam, join the squares with a bold, contrasting blanket stitch using a thick, vibrant yarn.
This not only ensures a strong construction but also turns the seams into the primary decorative element, celebrating the craft and structure of the piece.
19. Luxurious Details with Metallic Thread
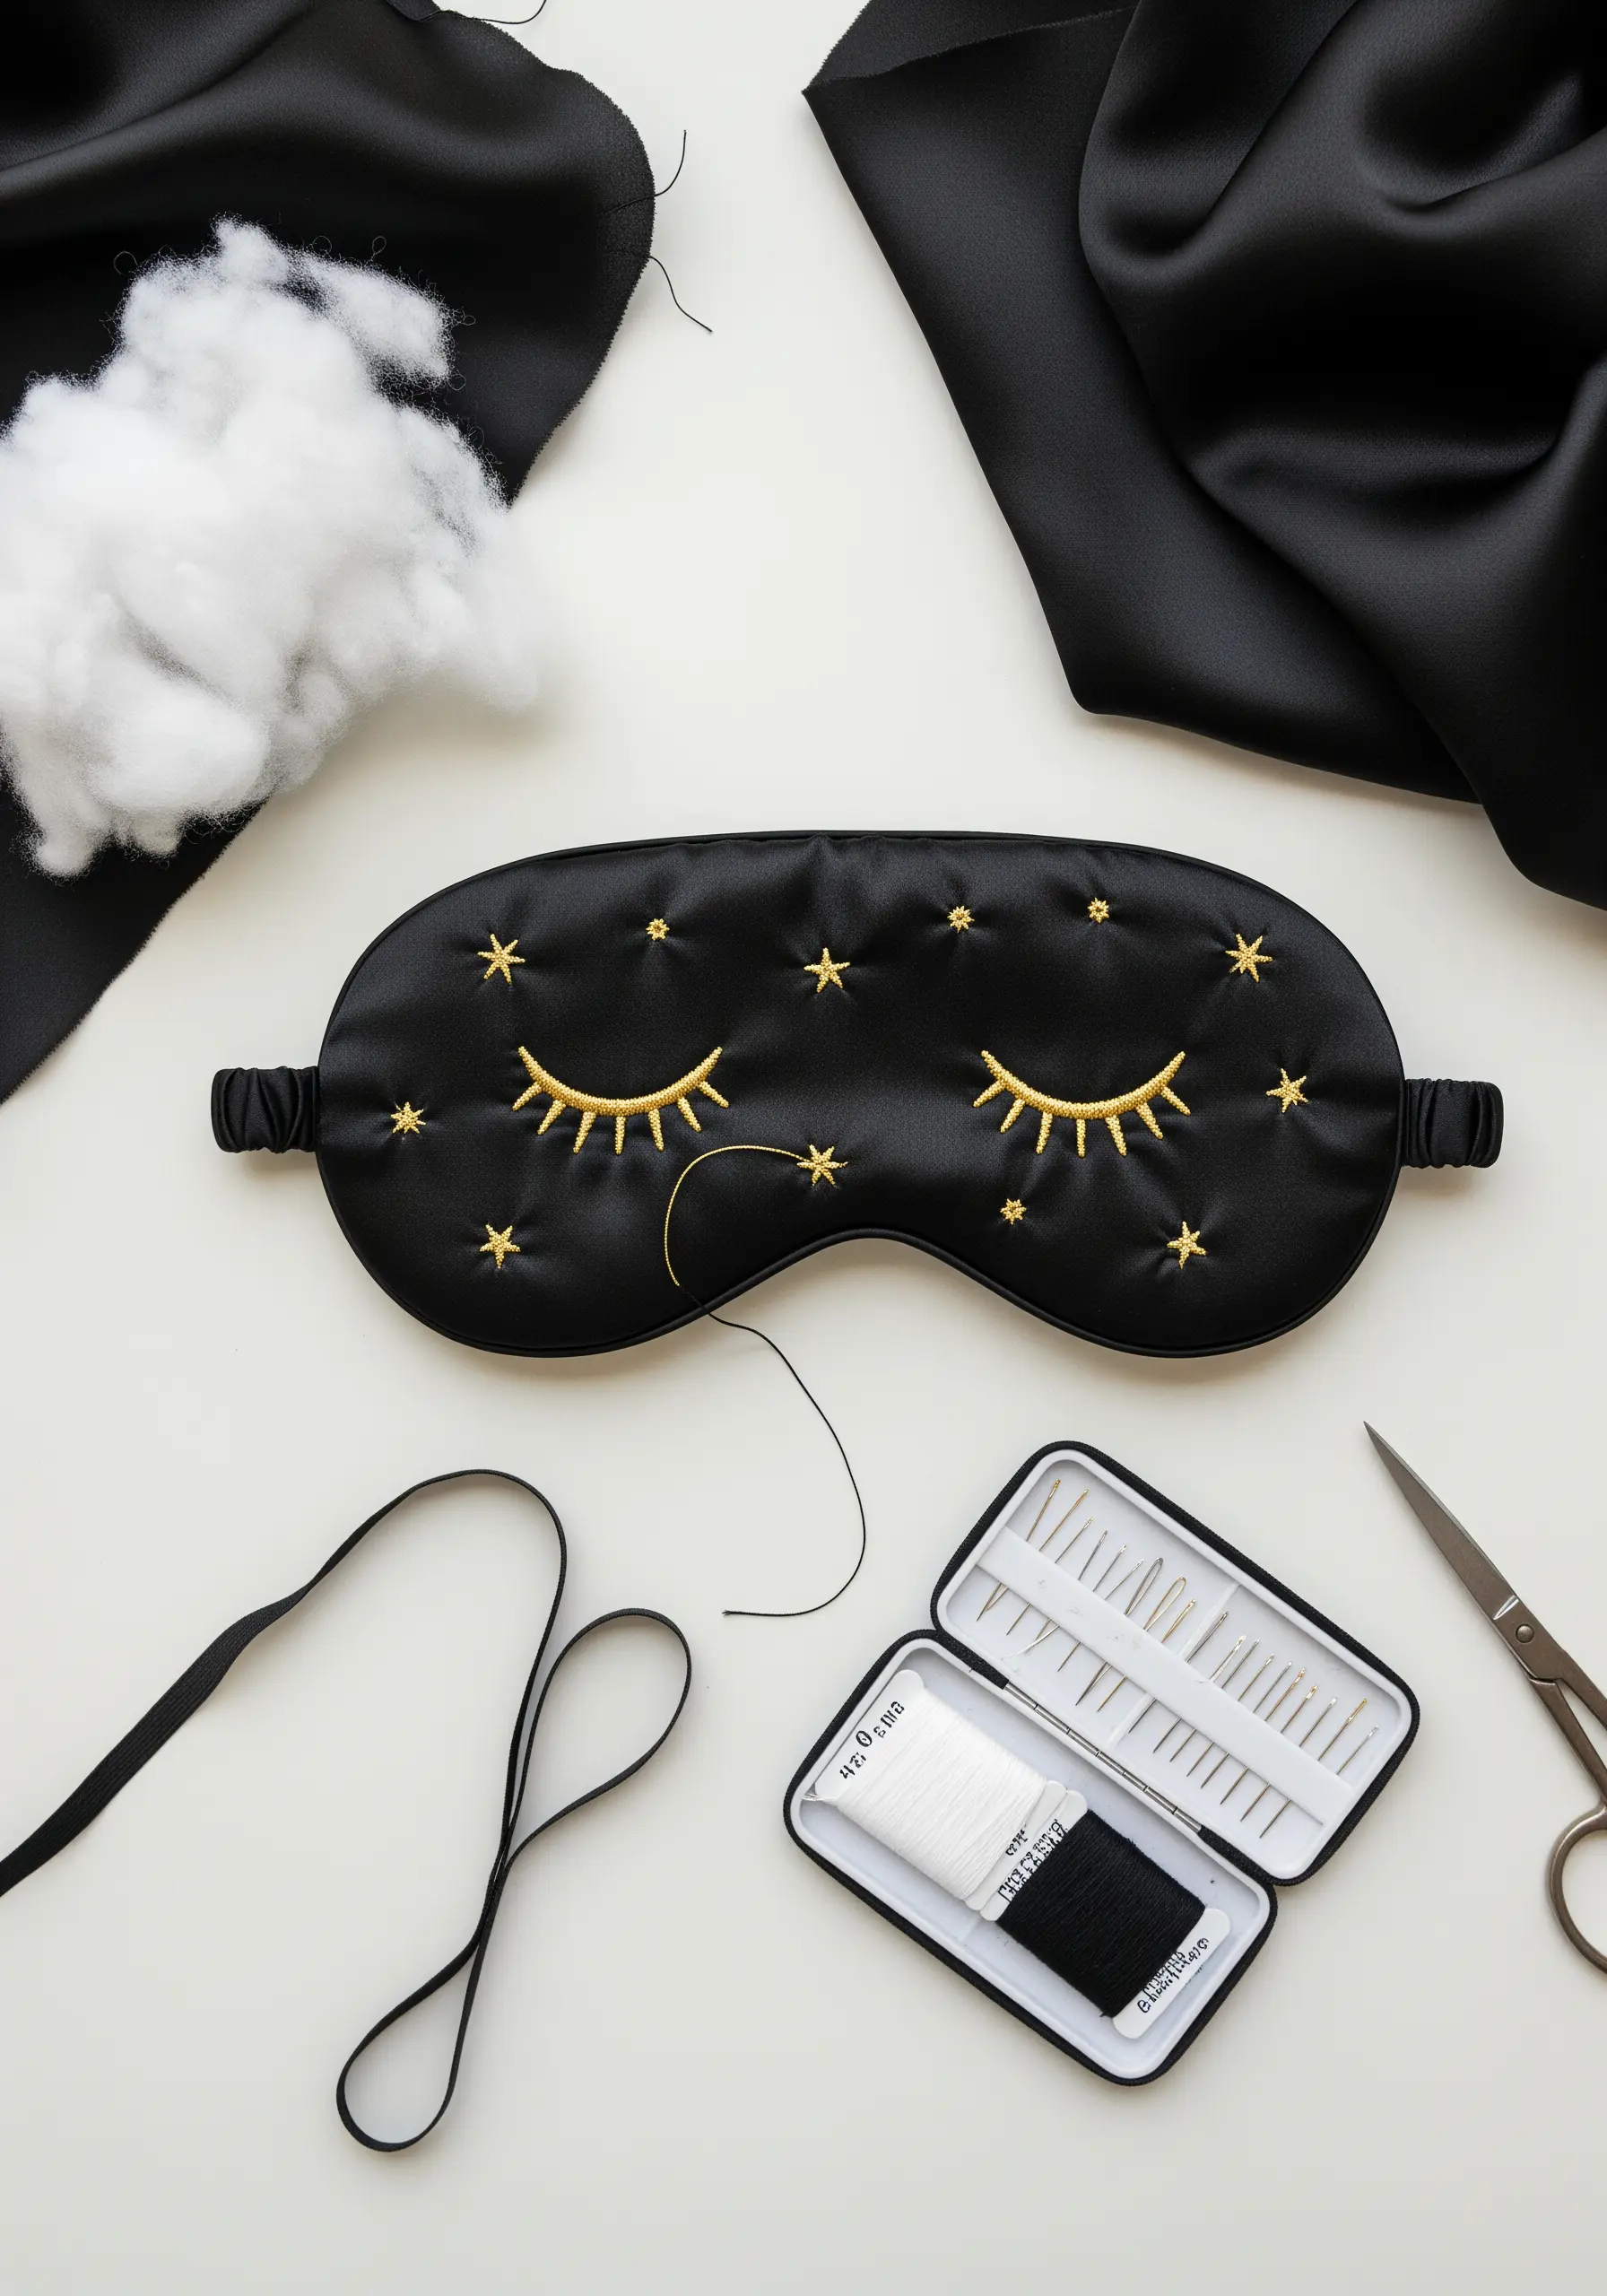
Add a touch of celestial glamour to a simple silk eye mask using metallic gold thread.
Working with metallic floss can be tricky, as it tends to unravel and snag. The secret is to use a shorter length of thread than you normally would—no more than 12 inches.
You can also use a thread conditioner, like beeswax, to help tame it.
A simple satin stitch for the eyelashes and scattered star stitches create a dreamy, high-contrast design that feels incredibly luxurious against the smooth black silk.
20. A Functional Wall Organizer with Simple Stitches
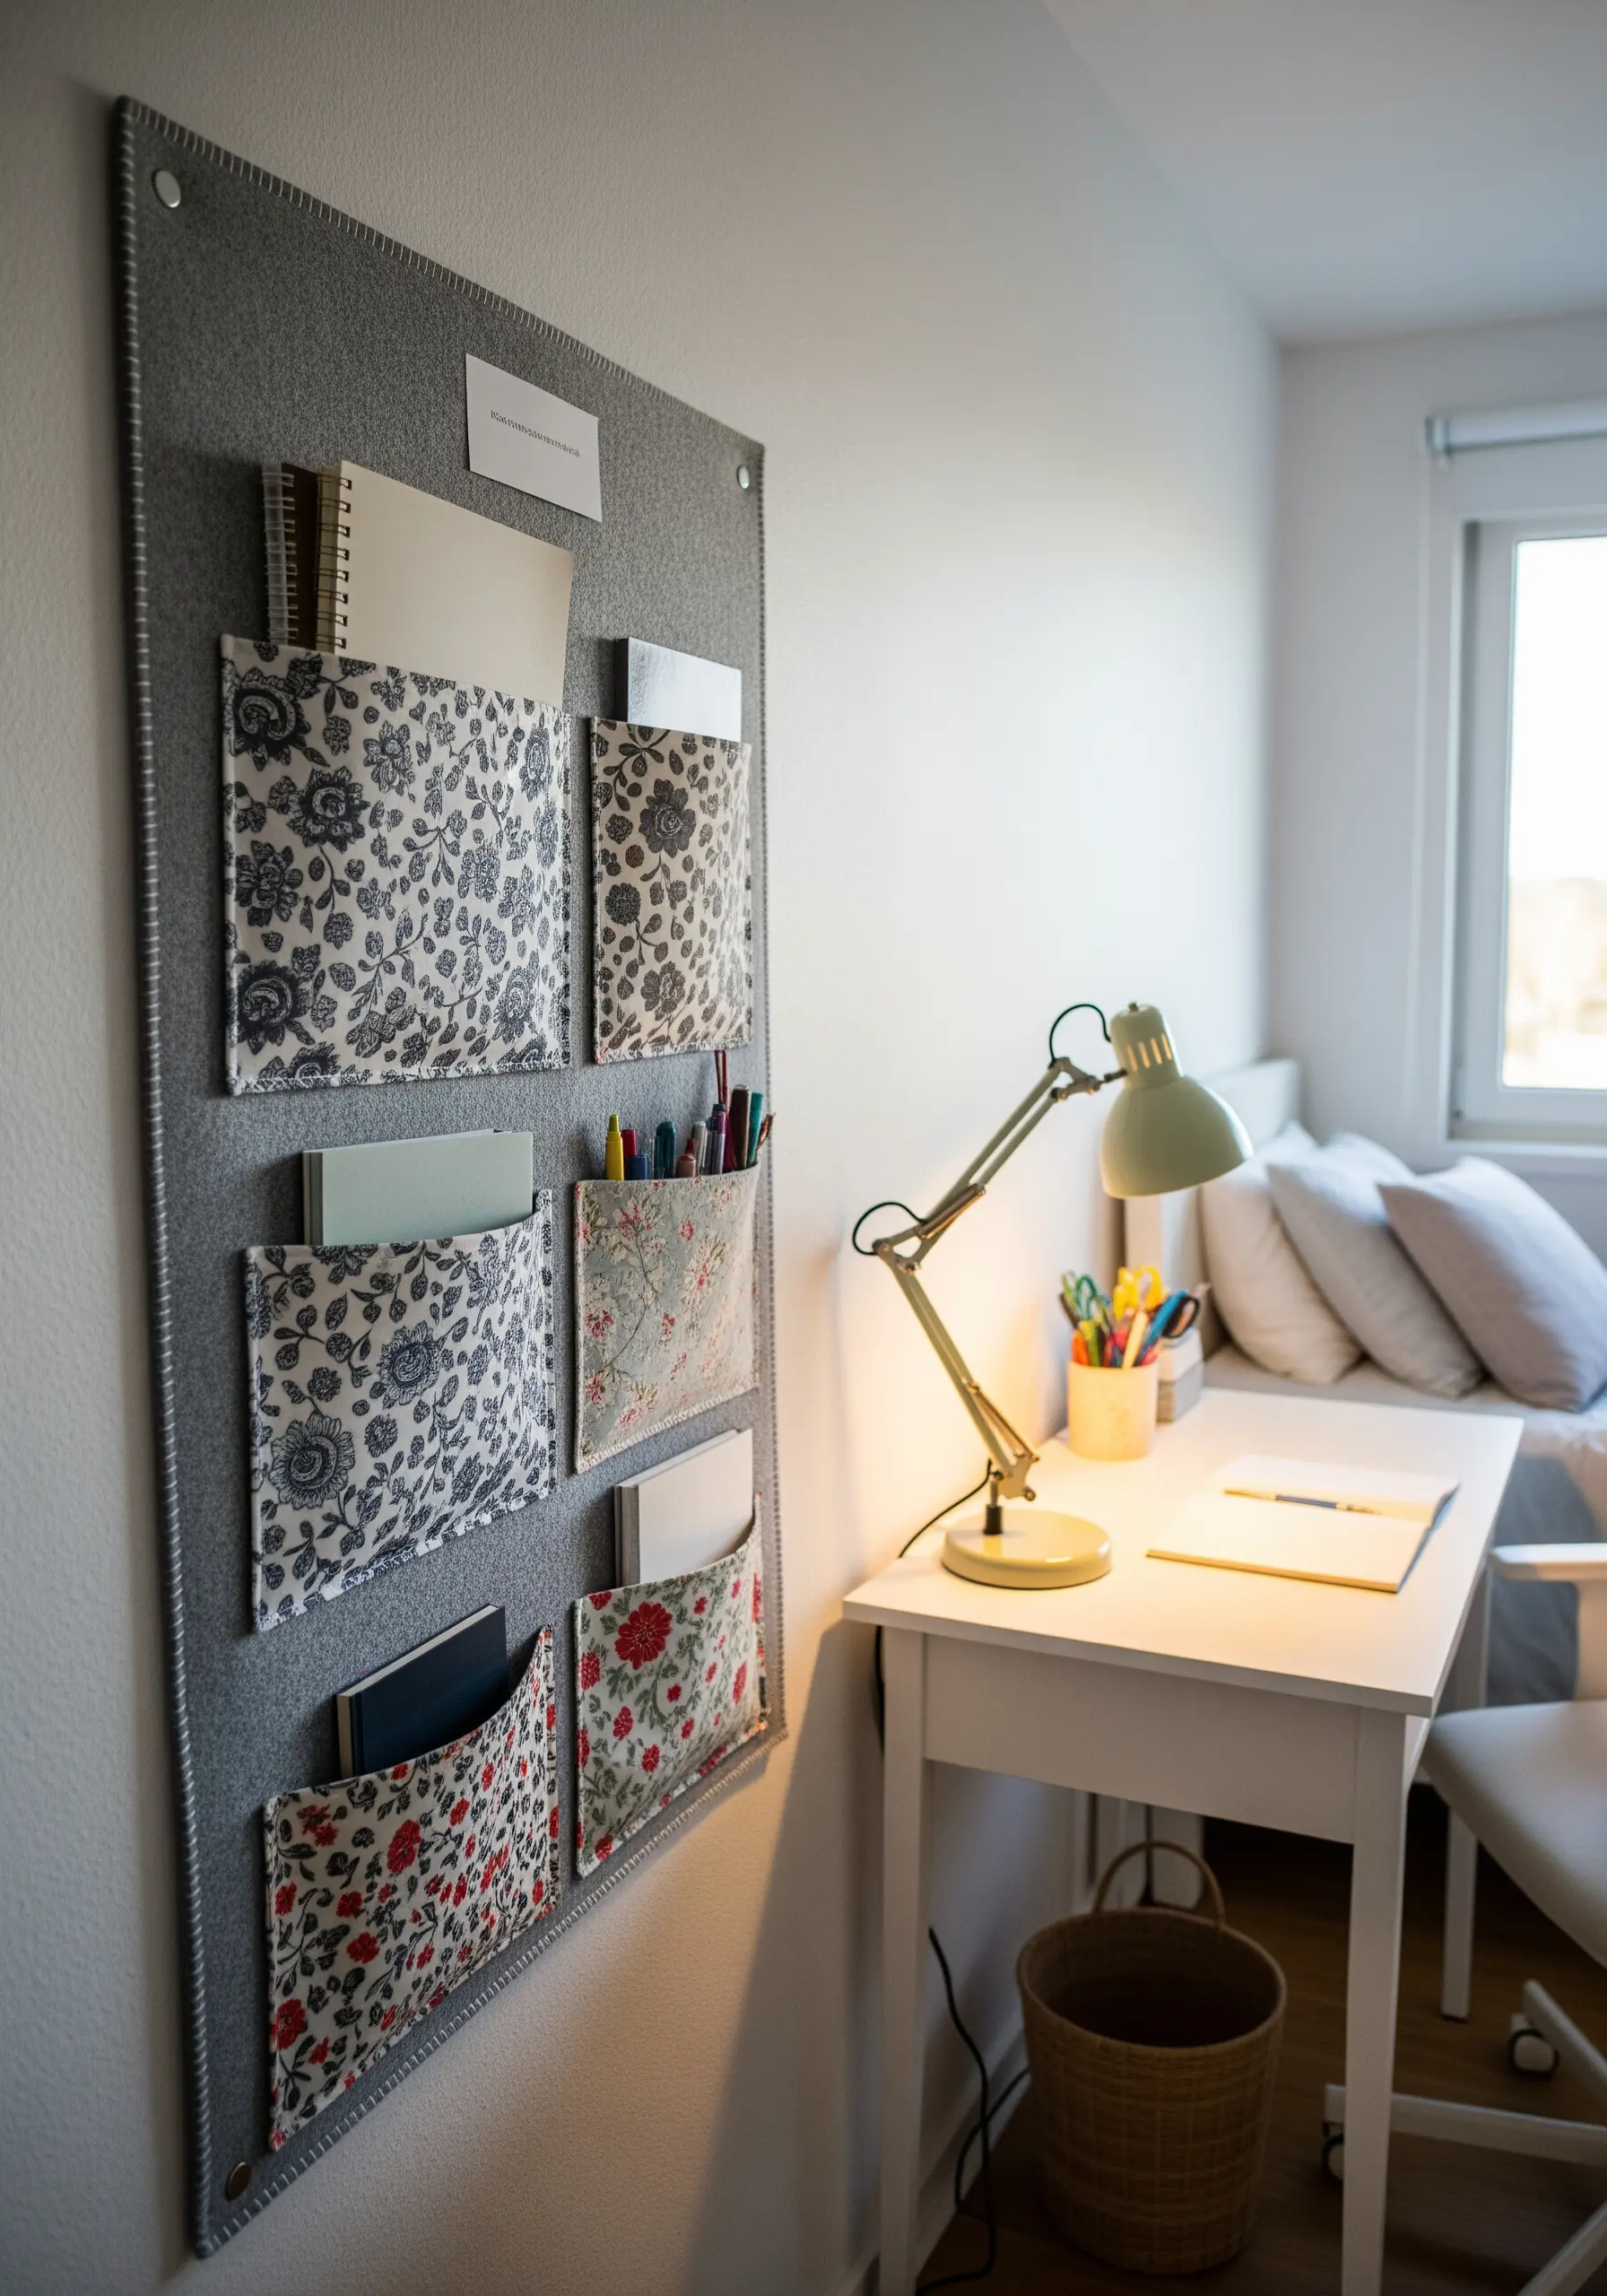
Combine utility and beauty by creating a wall organizer where the stitching is part of the clean, simple aesthetic.
Use a sturdy felt panel as your base and create pockets from your favorite fabric scraps.
A simple, visible running stitch in a contrasting thread is all you need to attach the pockets.
This approach is not only quick and easy but also adds a charming, handmade detail that aligns perfectly with a cozy, hygge-inspired space.
It proves that even the most practical items can be elevated with thoughtful, simple craftsmanship. This is one of those sleek and subtle stitches to upgrade your home office or bedroom.
21. Transform a Flaw with Decorative Darning
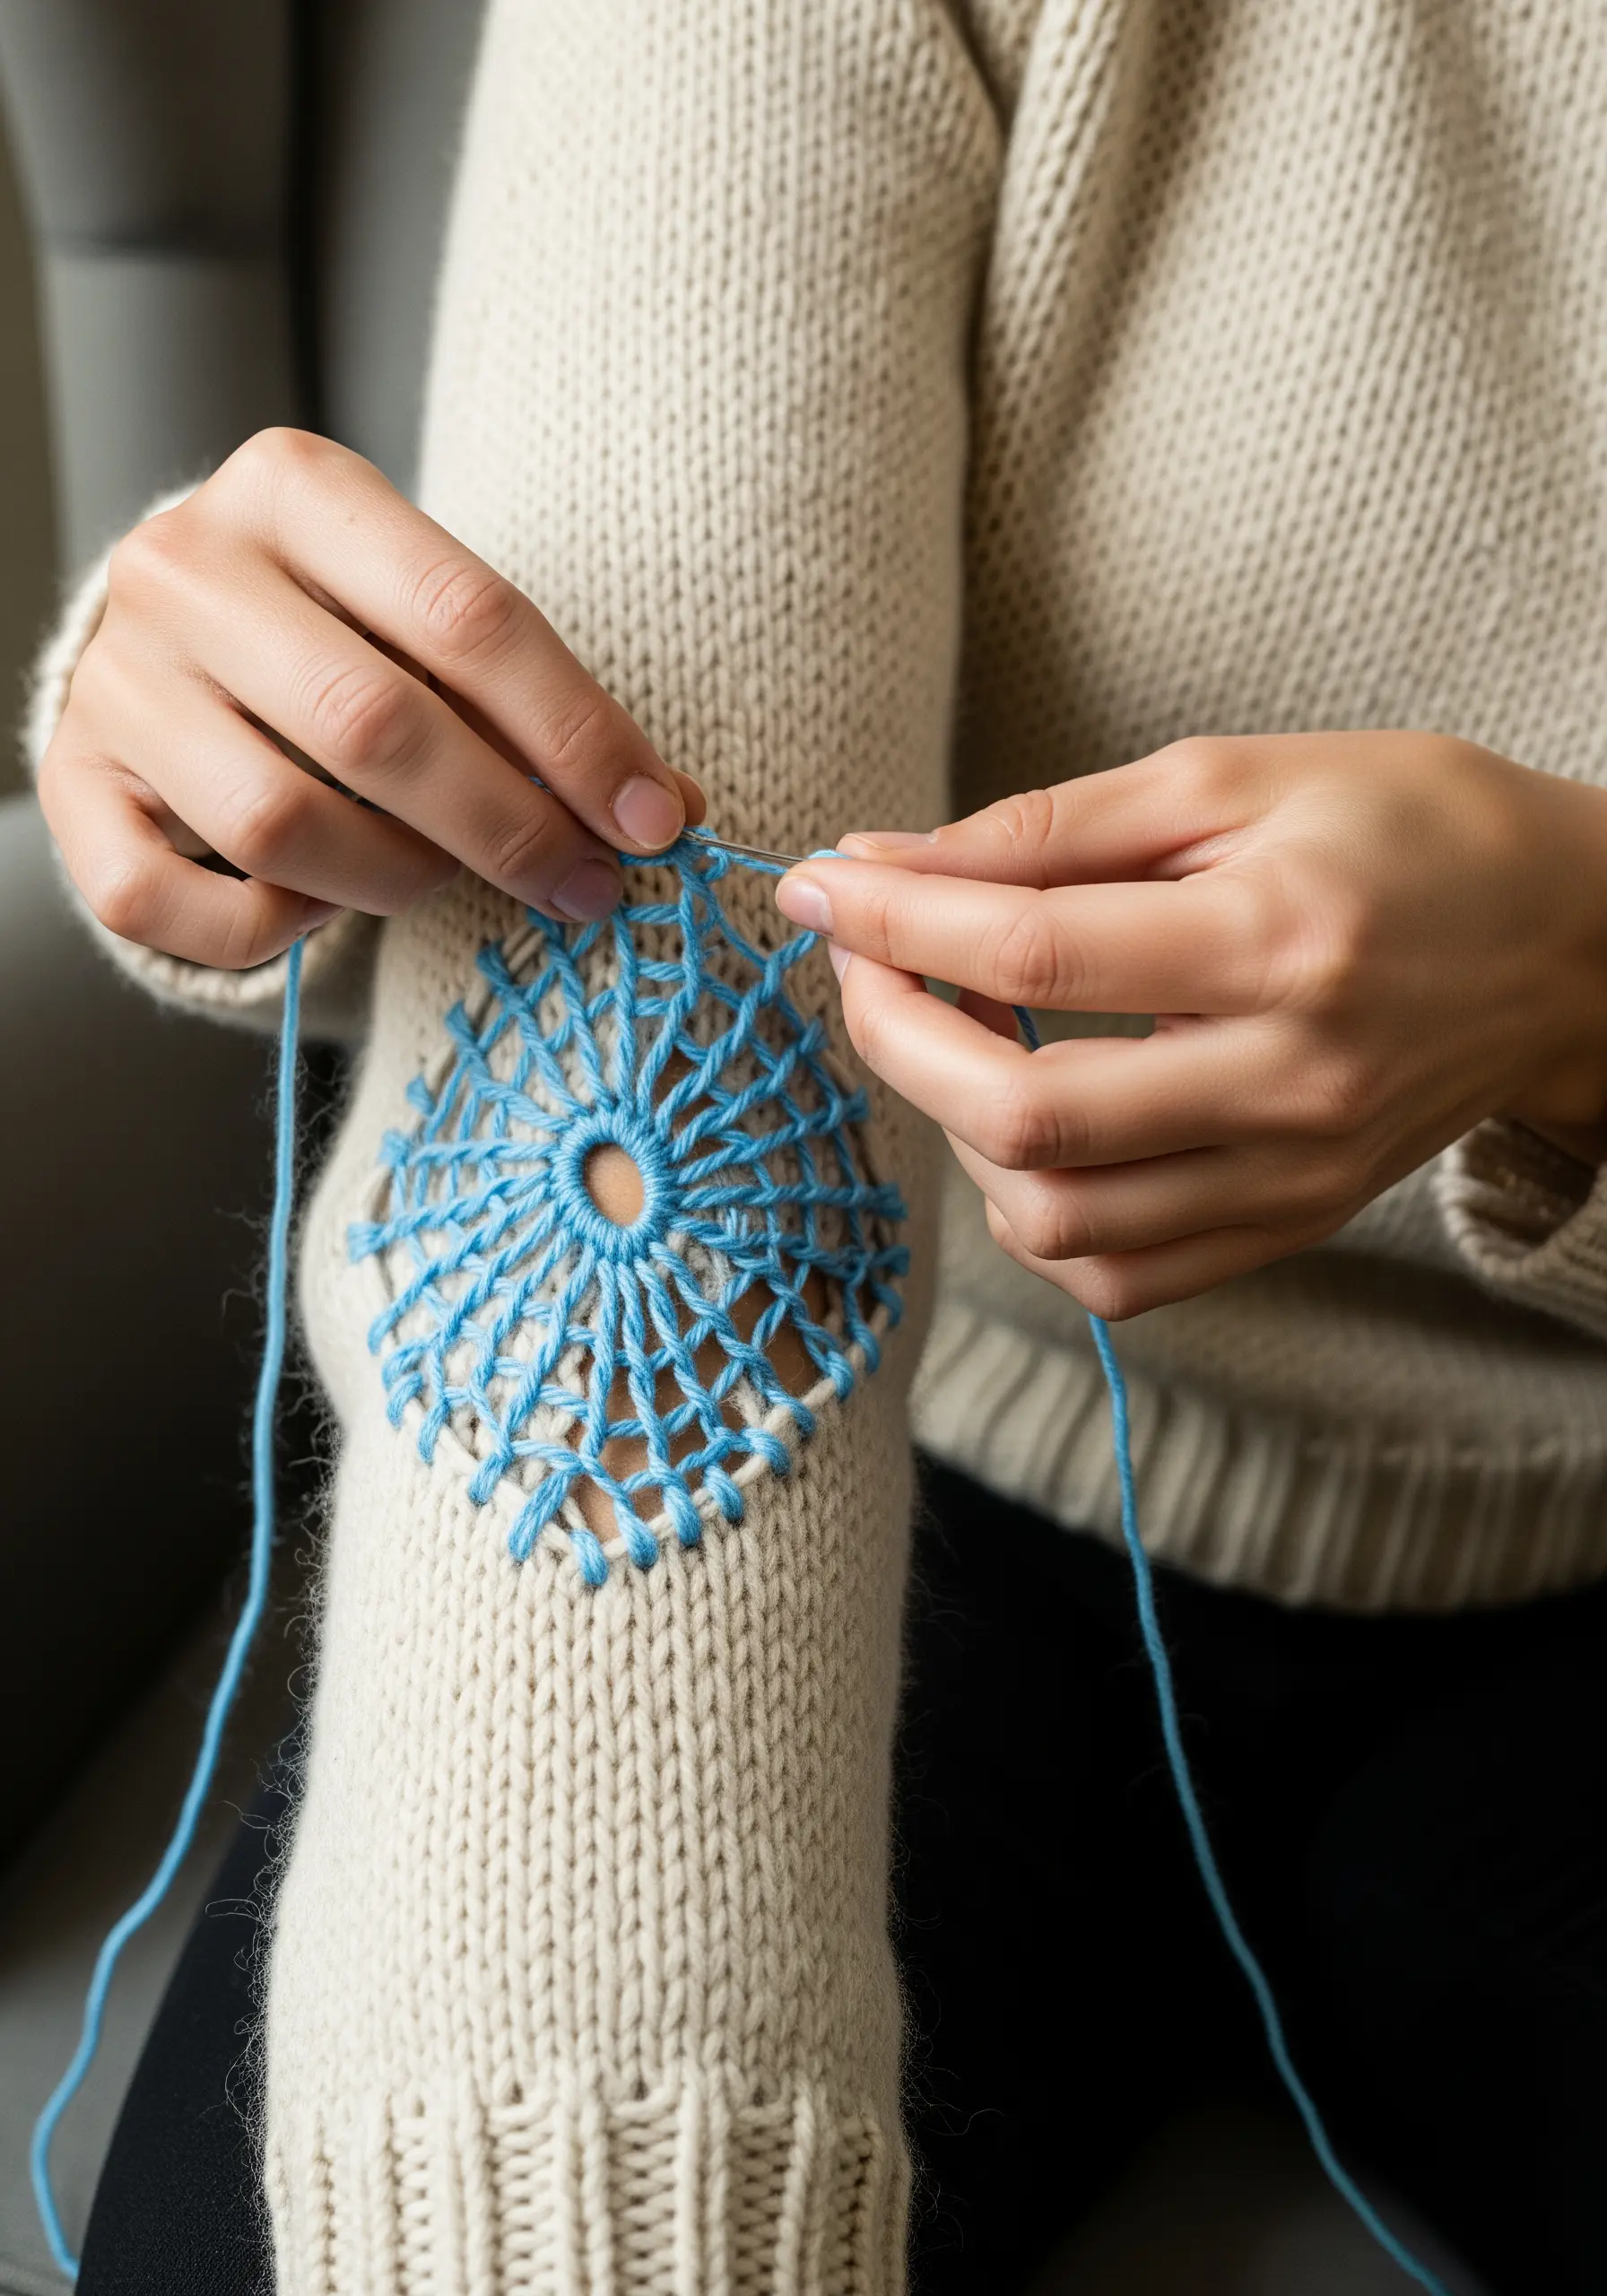
Breathe new life into a favorite sweater by transforming a hole into a beautiful, web-like darned patch.
This visible mending technique turns a repair into a statement. First, create a grid of running stitches over the hole, forming a warp.
Then, weave your thread over and under these warp threads to create a woven patch that is both strong and decorative.
Using a bright, contrasting color celebrates the act of mending and adds a unique, personal story to your garment.
22. Sculptural Color with Coiled Rope Bowls
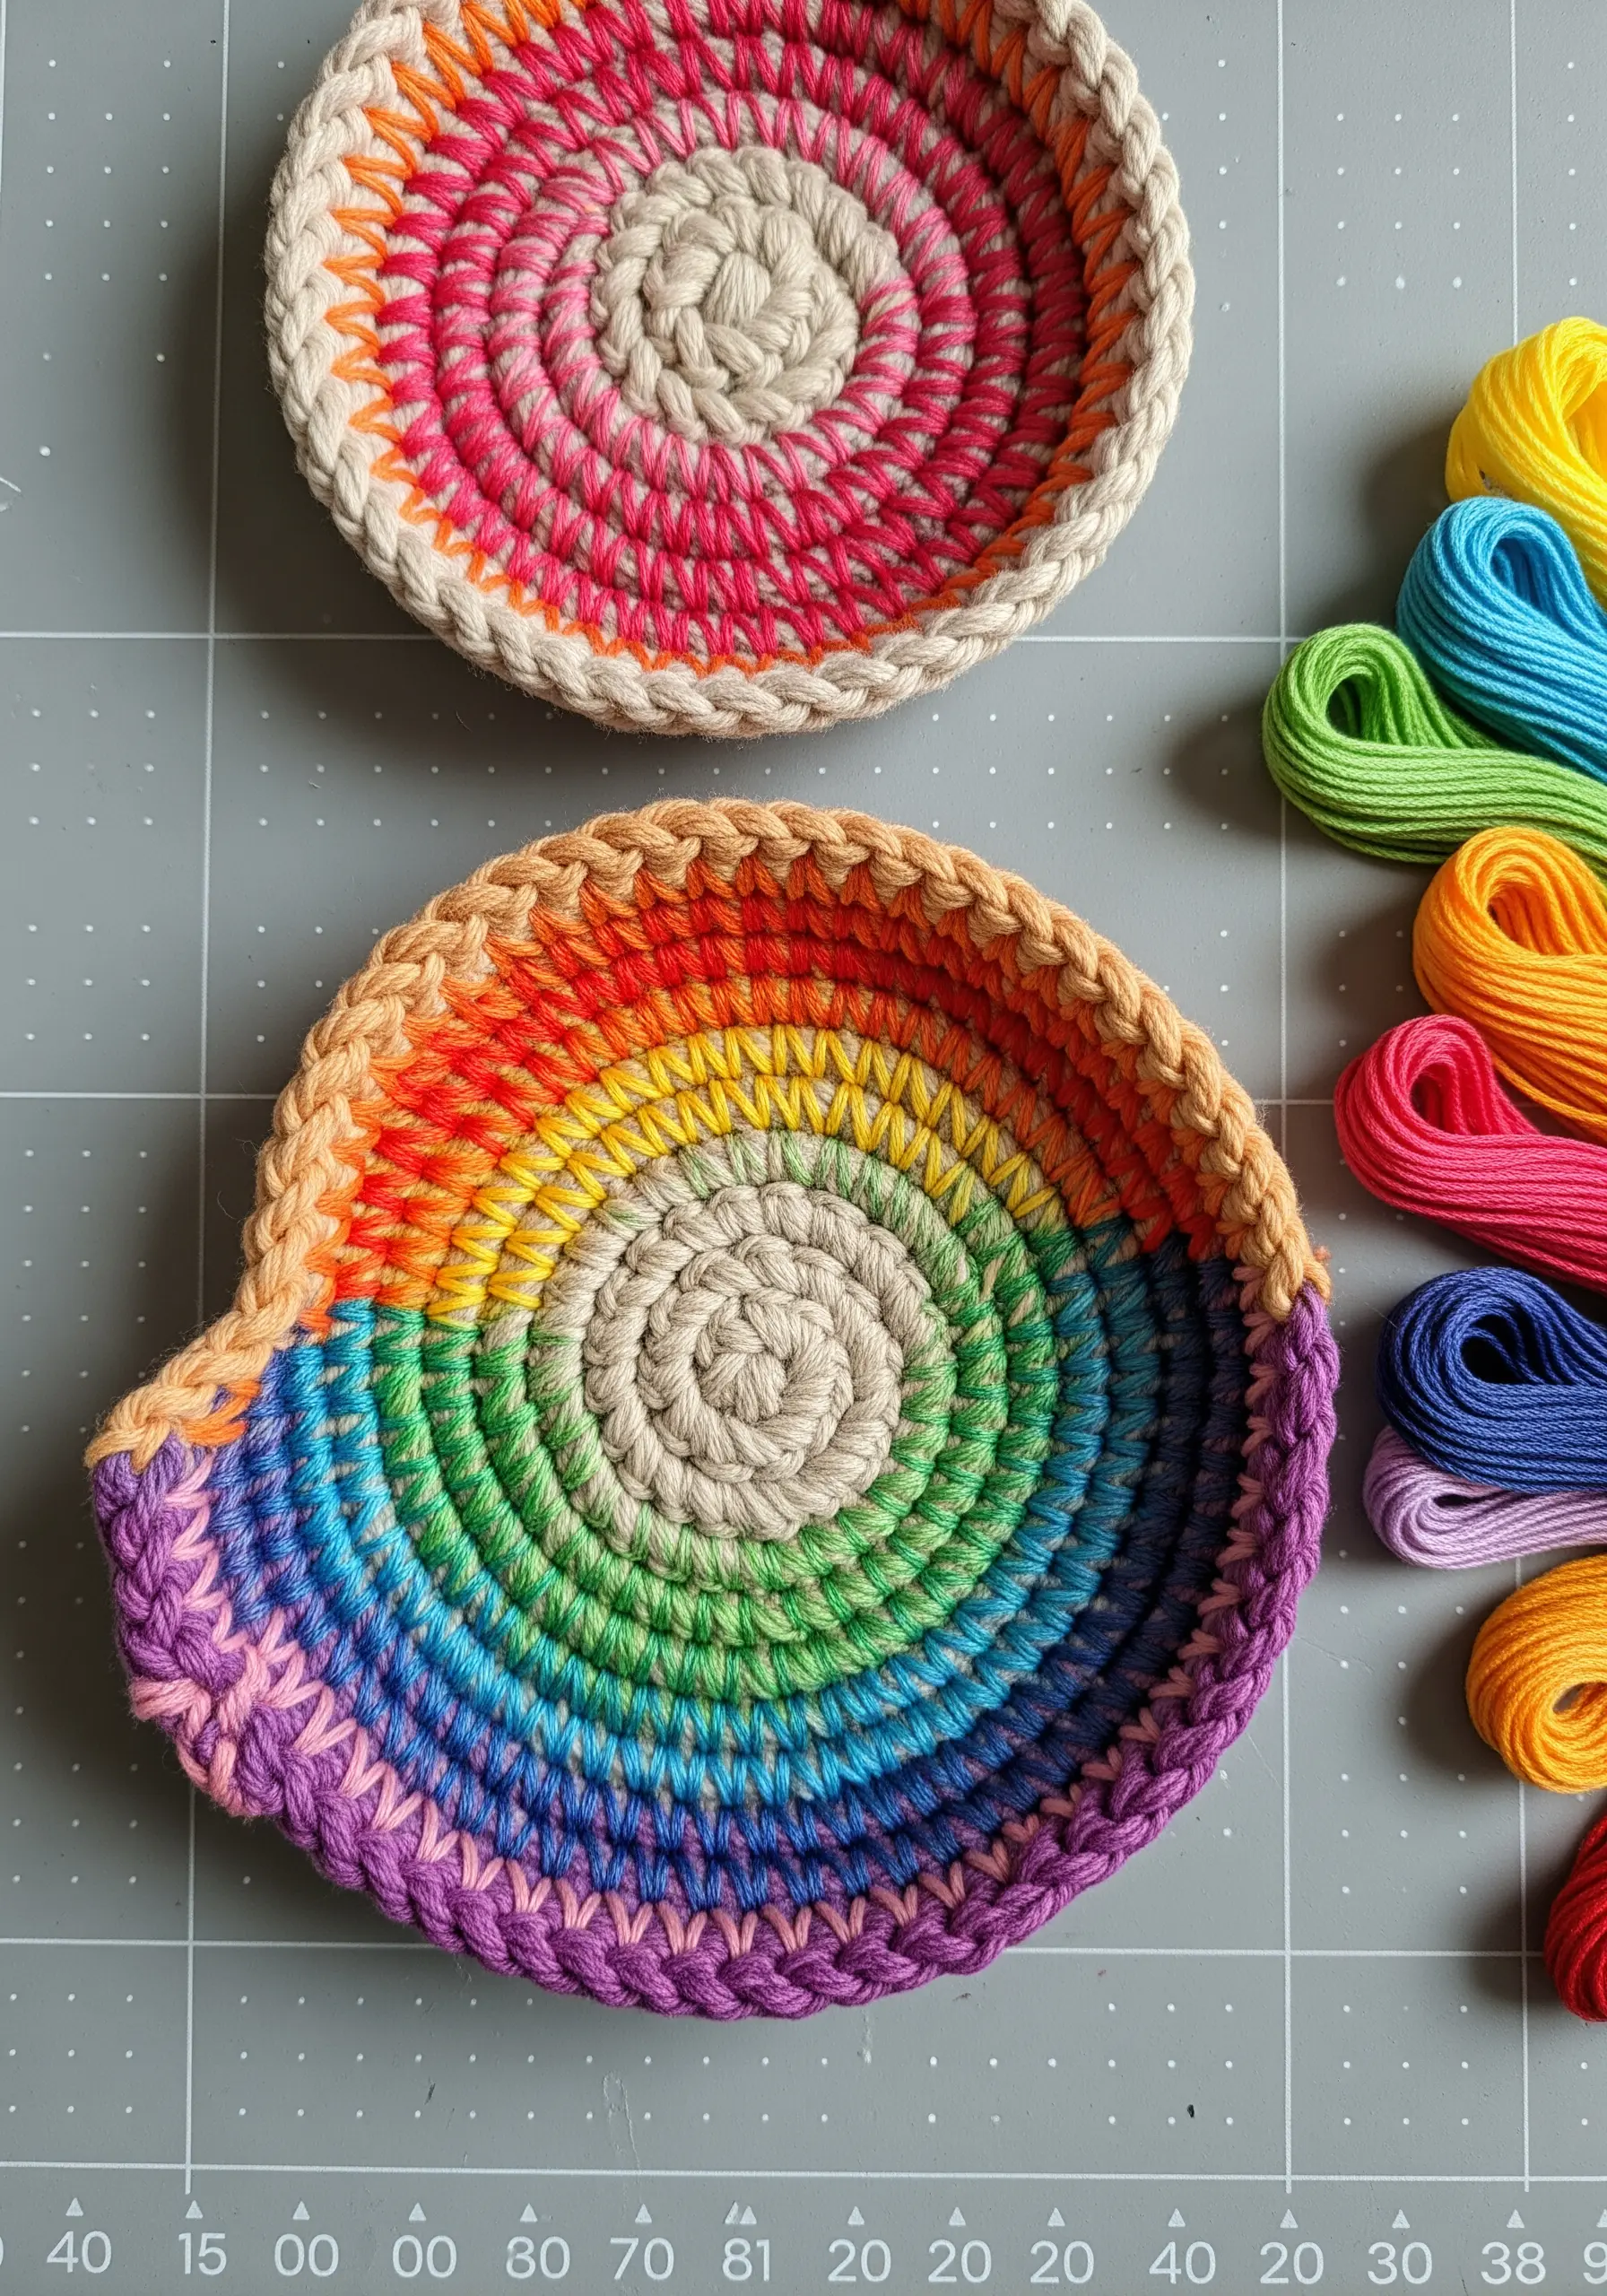
Create vibrant, sturdy trinket dishes by coiling rope and wrapping it with colorful embroidery floss.
Start by coiling the end of a thick cotton rope, then begin tightly wrapping it with floss, stitching it to the previous coil every few wraps to secure the shape.
The magic happens when you plan your color changes. Create bold stripes, subtle gradients, or modern color blocks by switching your floss as you work.
This technique turns thread from a decorative accent into the primary structural and visual element, resulting in beautiful and artistic objects you can make from leftover craft supplies.
23. Embroider Drawer Knobs for a Subtle Upgrade
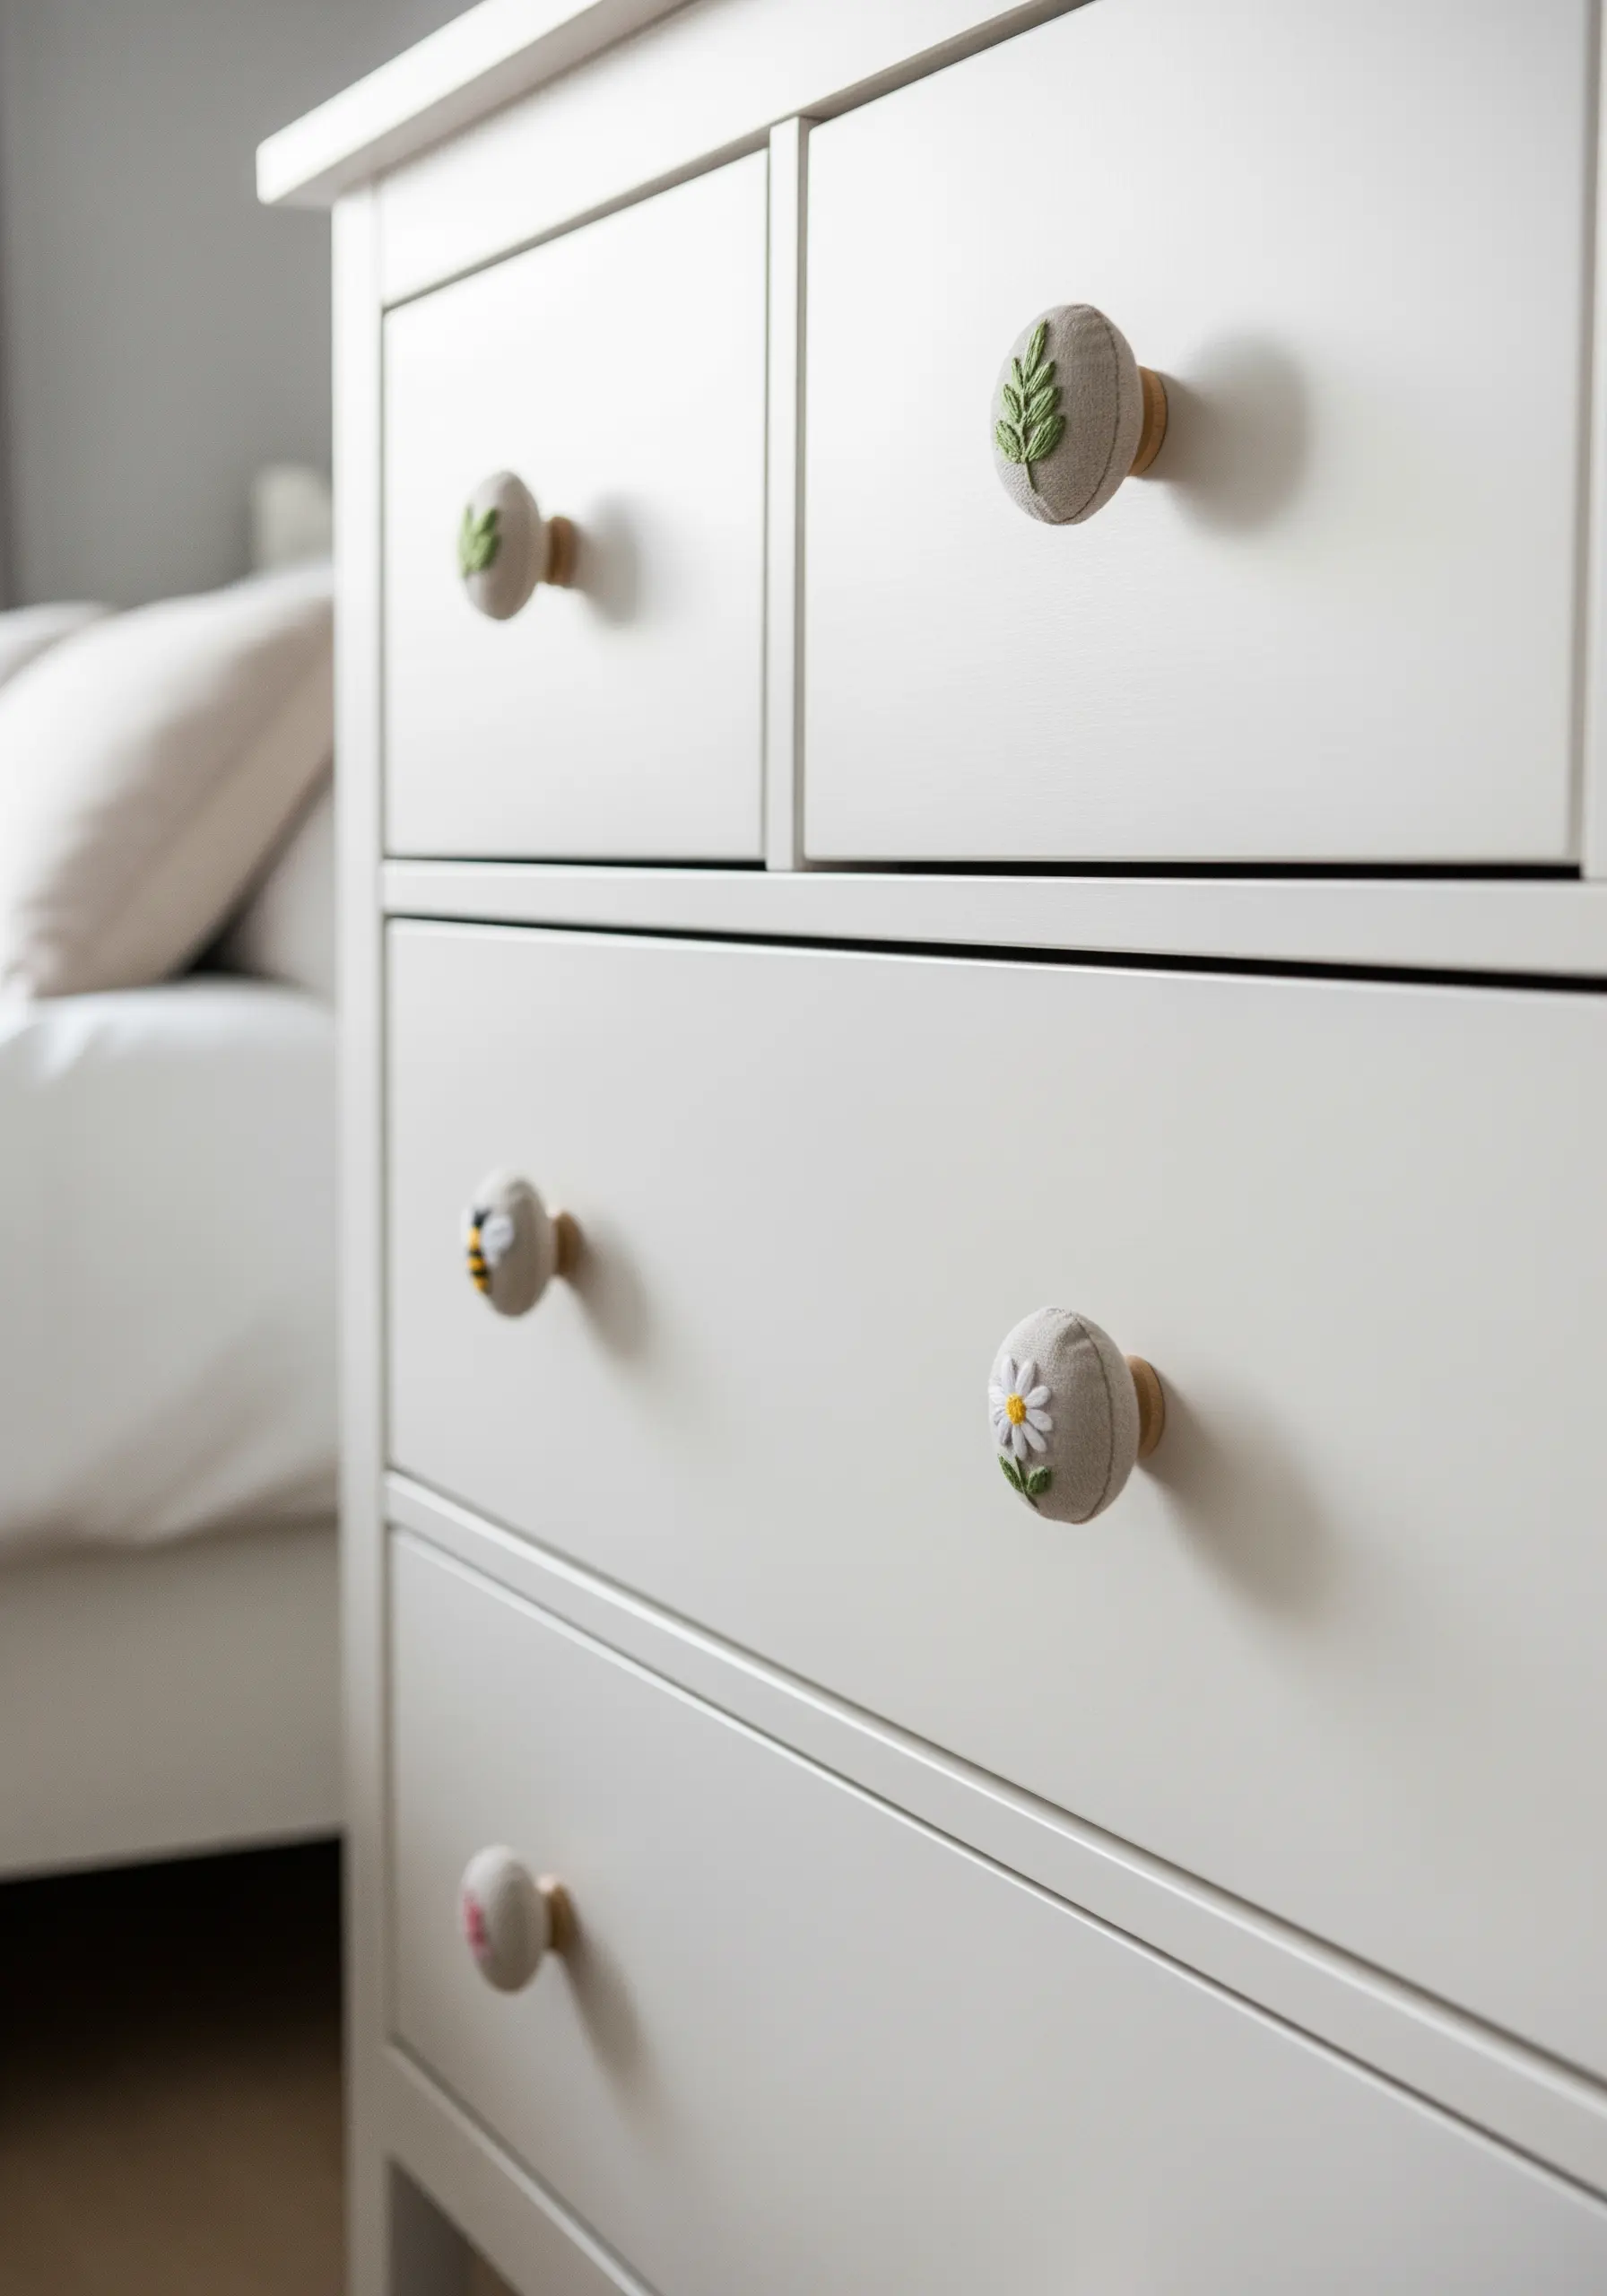
Give a plain dresser a charming, custom makeover by covering the knobs with tiny embroidered motifs.
Stretch a small piece of neutral linen in a mini hoop and stitch your designs—a simple leaf, a daisy, or a tiny bee.
Use just one or two strands of floss to keep the details sharp and clear.
Once stitched, cut the fabric into a circle larger than the knob, wrap it around, and secure it tightly on the back with glue or a running stitch. This is a perfect way to add tiny embroidery details that make big impact on room vibes.
24. Achieve High-End Polish with Machine Embroidery
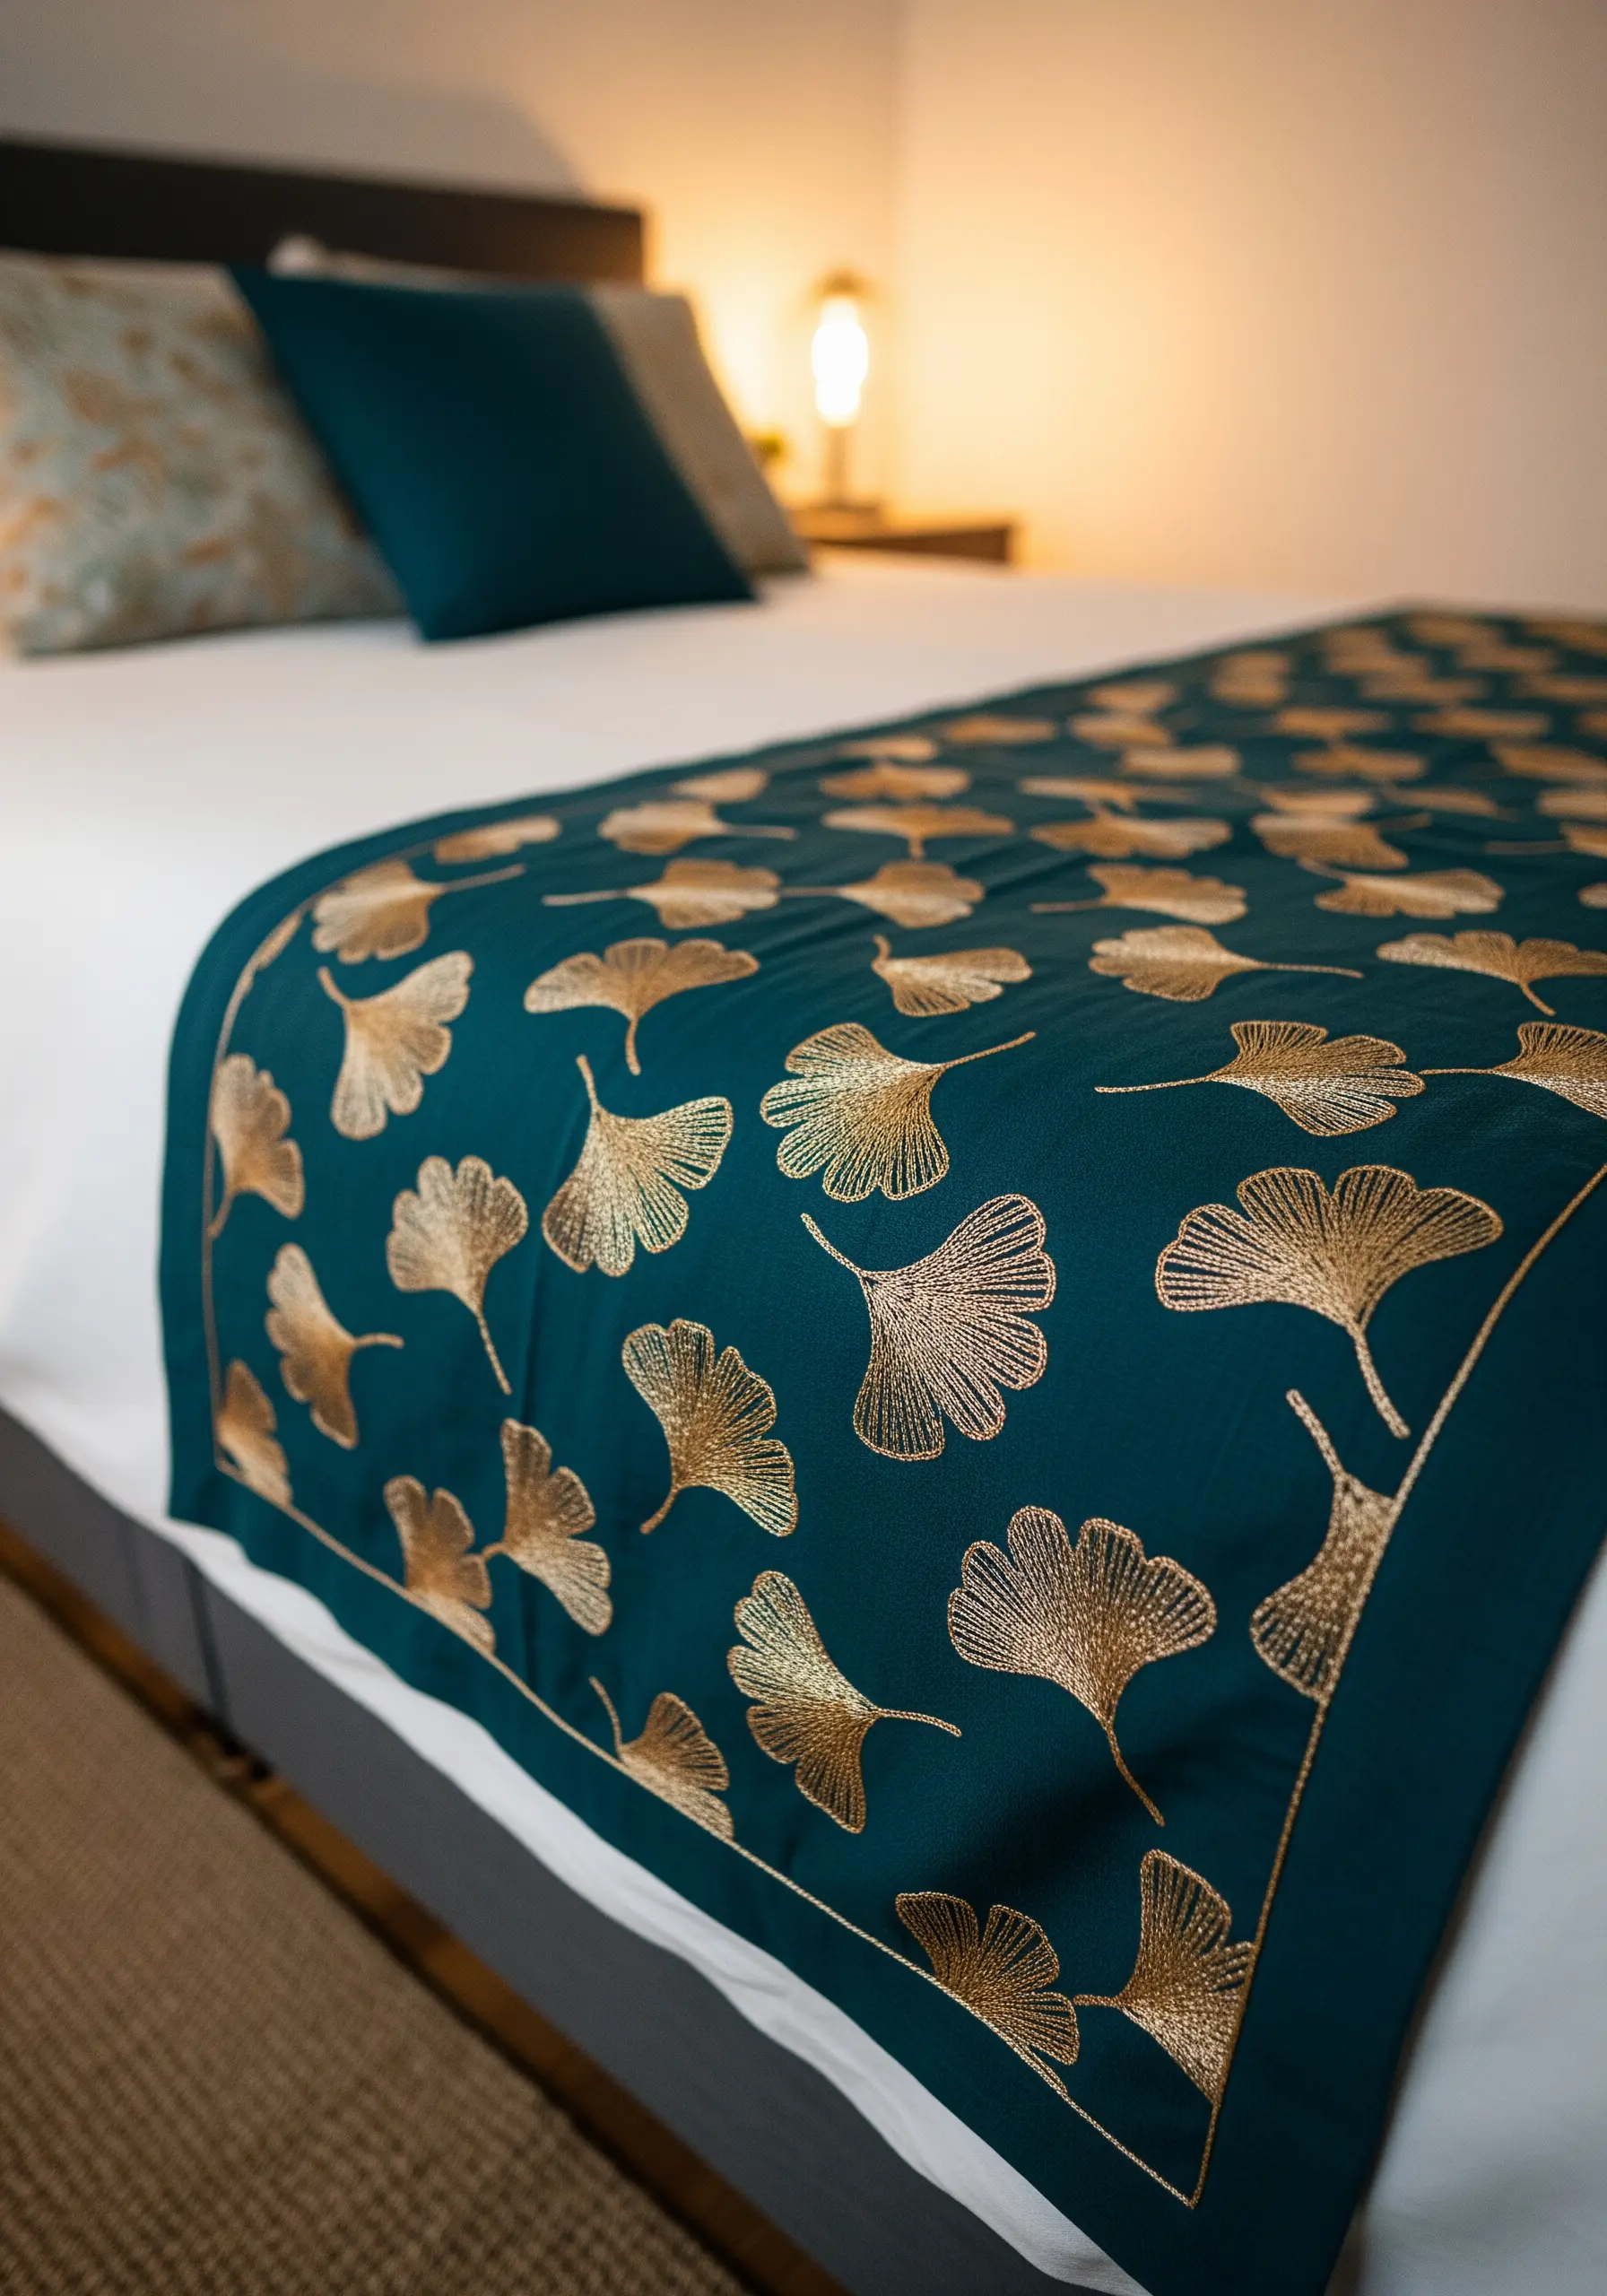
Create a luxurious bed runner with the precision and elegance of machine embroidery.
For a sophisticated look, choose a timeless, repeating motif like these ginkgo leaves and a high-contrast color scheme like gold on deep teal.
A sewing machine with embroidery capabilities can execute complex, dense patterns like this flawlessly, ensuring every leaf is identical.
The satin stitch fill catches the light beautifully, giving the metallic thread a liquid-gold appearance that adds a layer of opulence to your bedding.
25. Paint with Yarn Using a Punch Needle
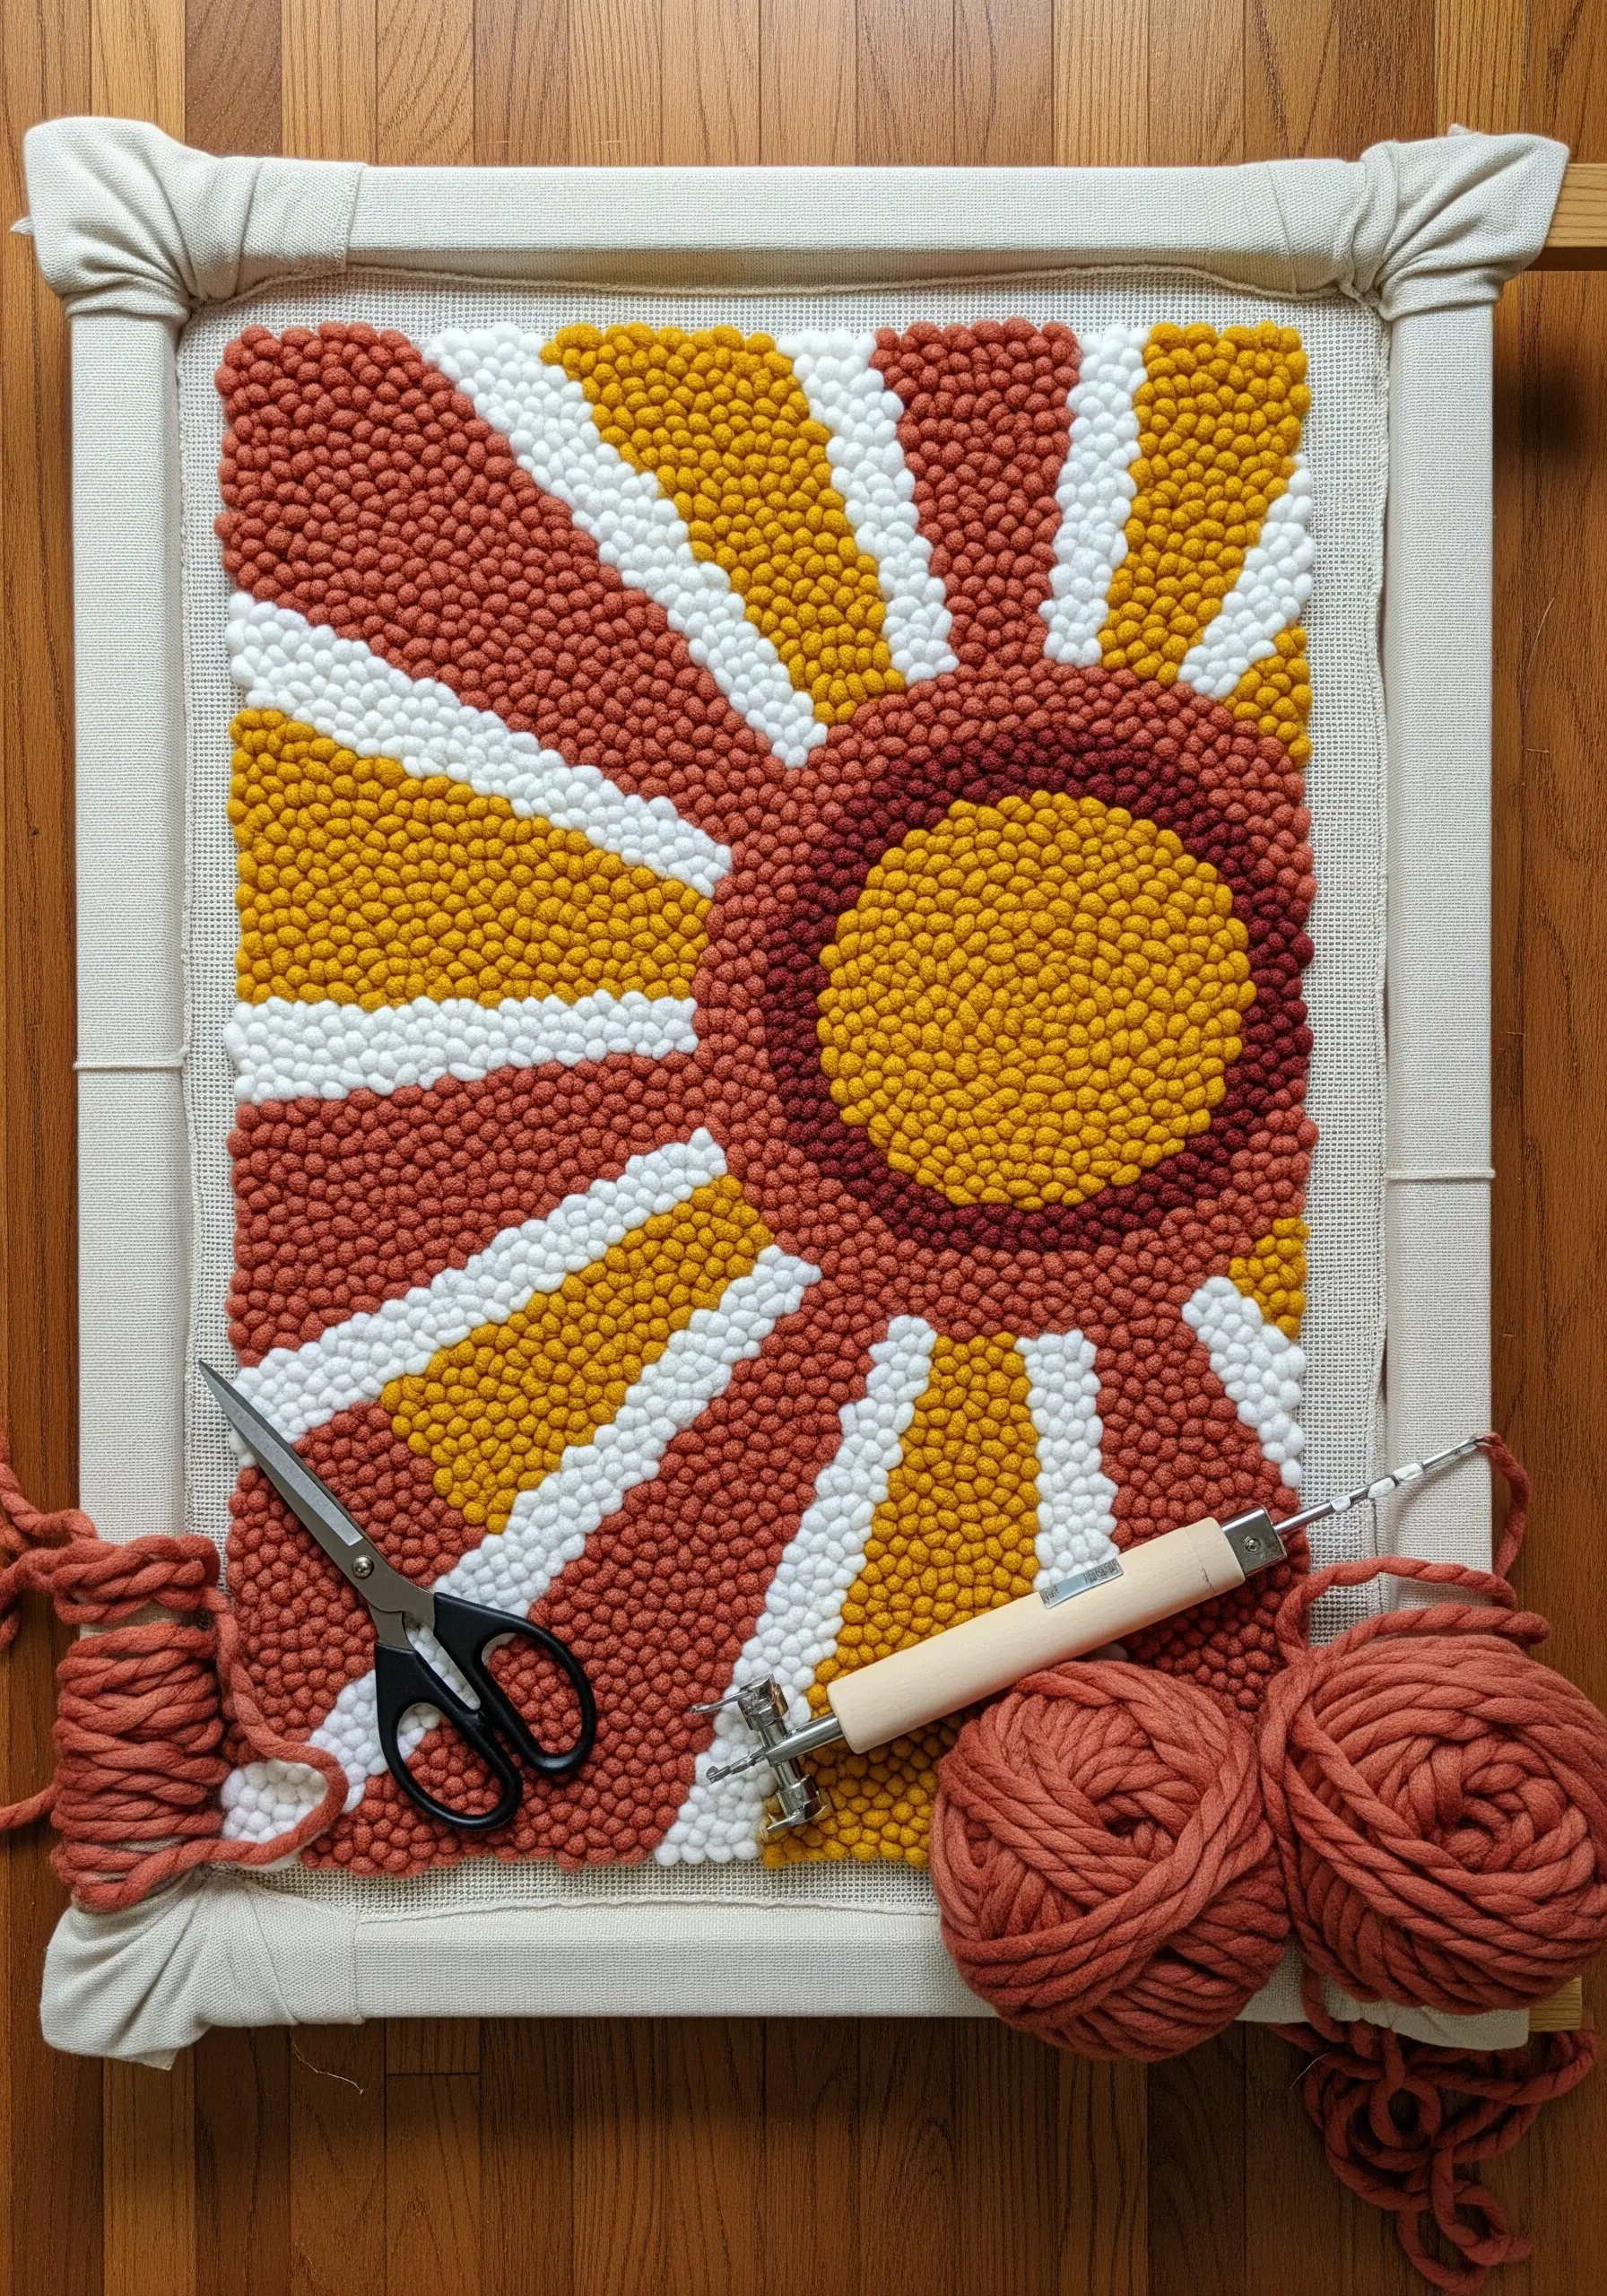
Explore the satisfying art of punch needle to create a highly textured, graphic piece of wall art.
Punch needle works by creating loops of yarn on a foundation cloth, allowing you to ‘paint’ with texture and color.
Stretch monk’s cloth tightly on a frame and work from the back to create neat, even loops on the front.
This technique is perfect for bold, color-blocked designs like this retro sunburst. The dense loops of yarn create a plush, satisfying texture that invites touch and adds warmth to any wall.
26. Combine Appliqué and Stitching for Depth
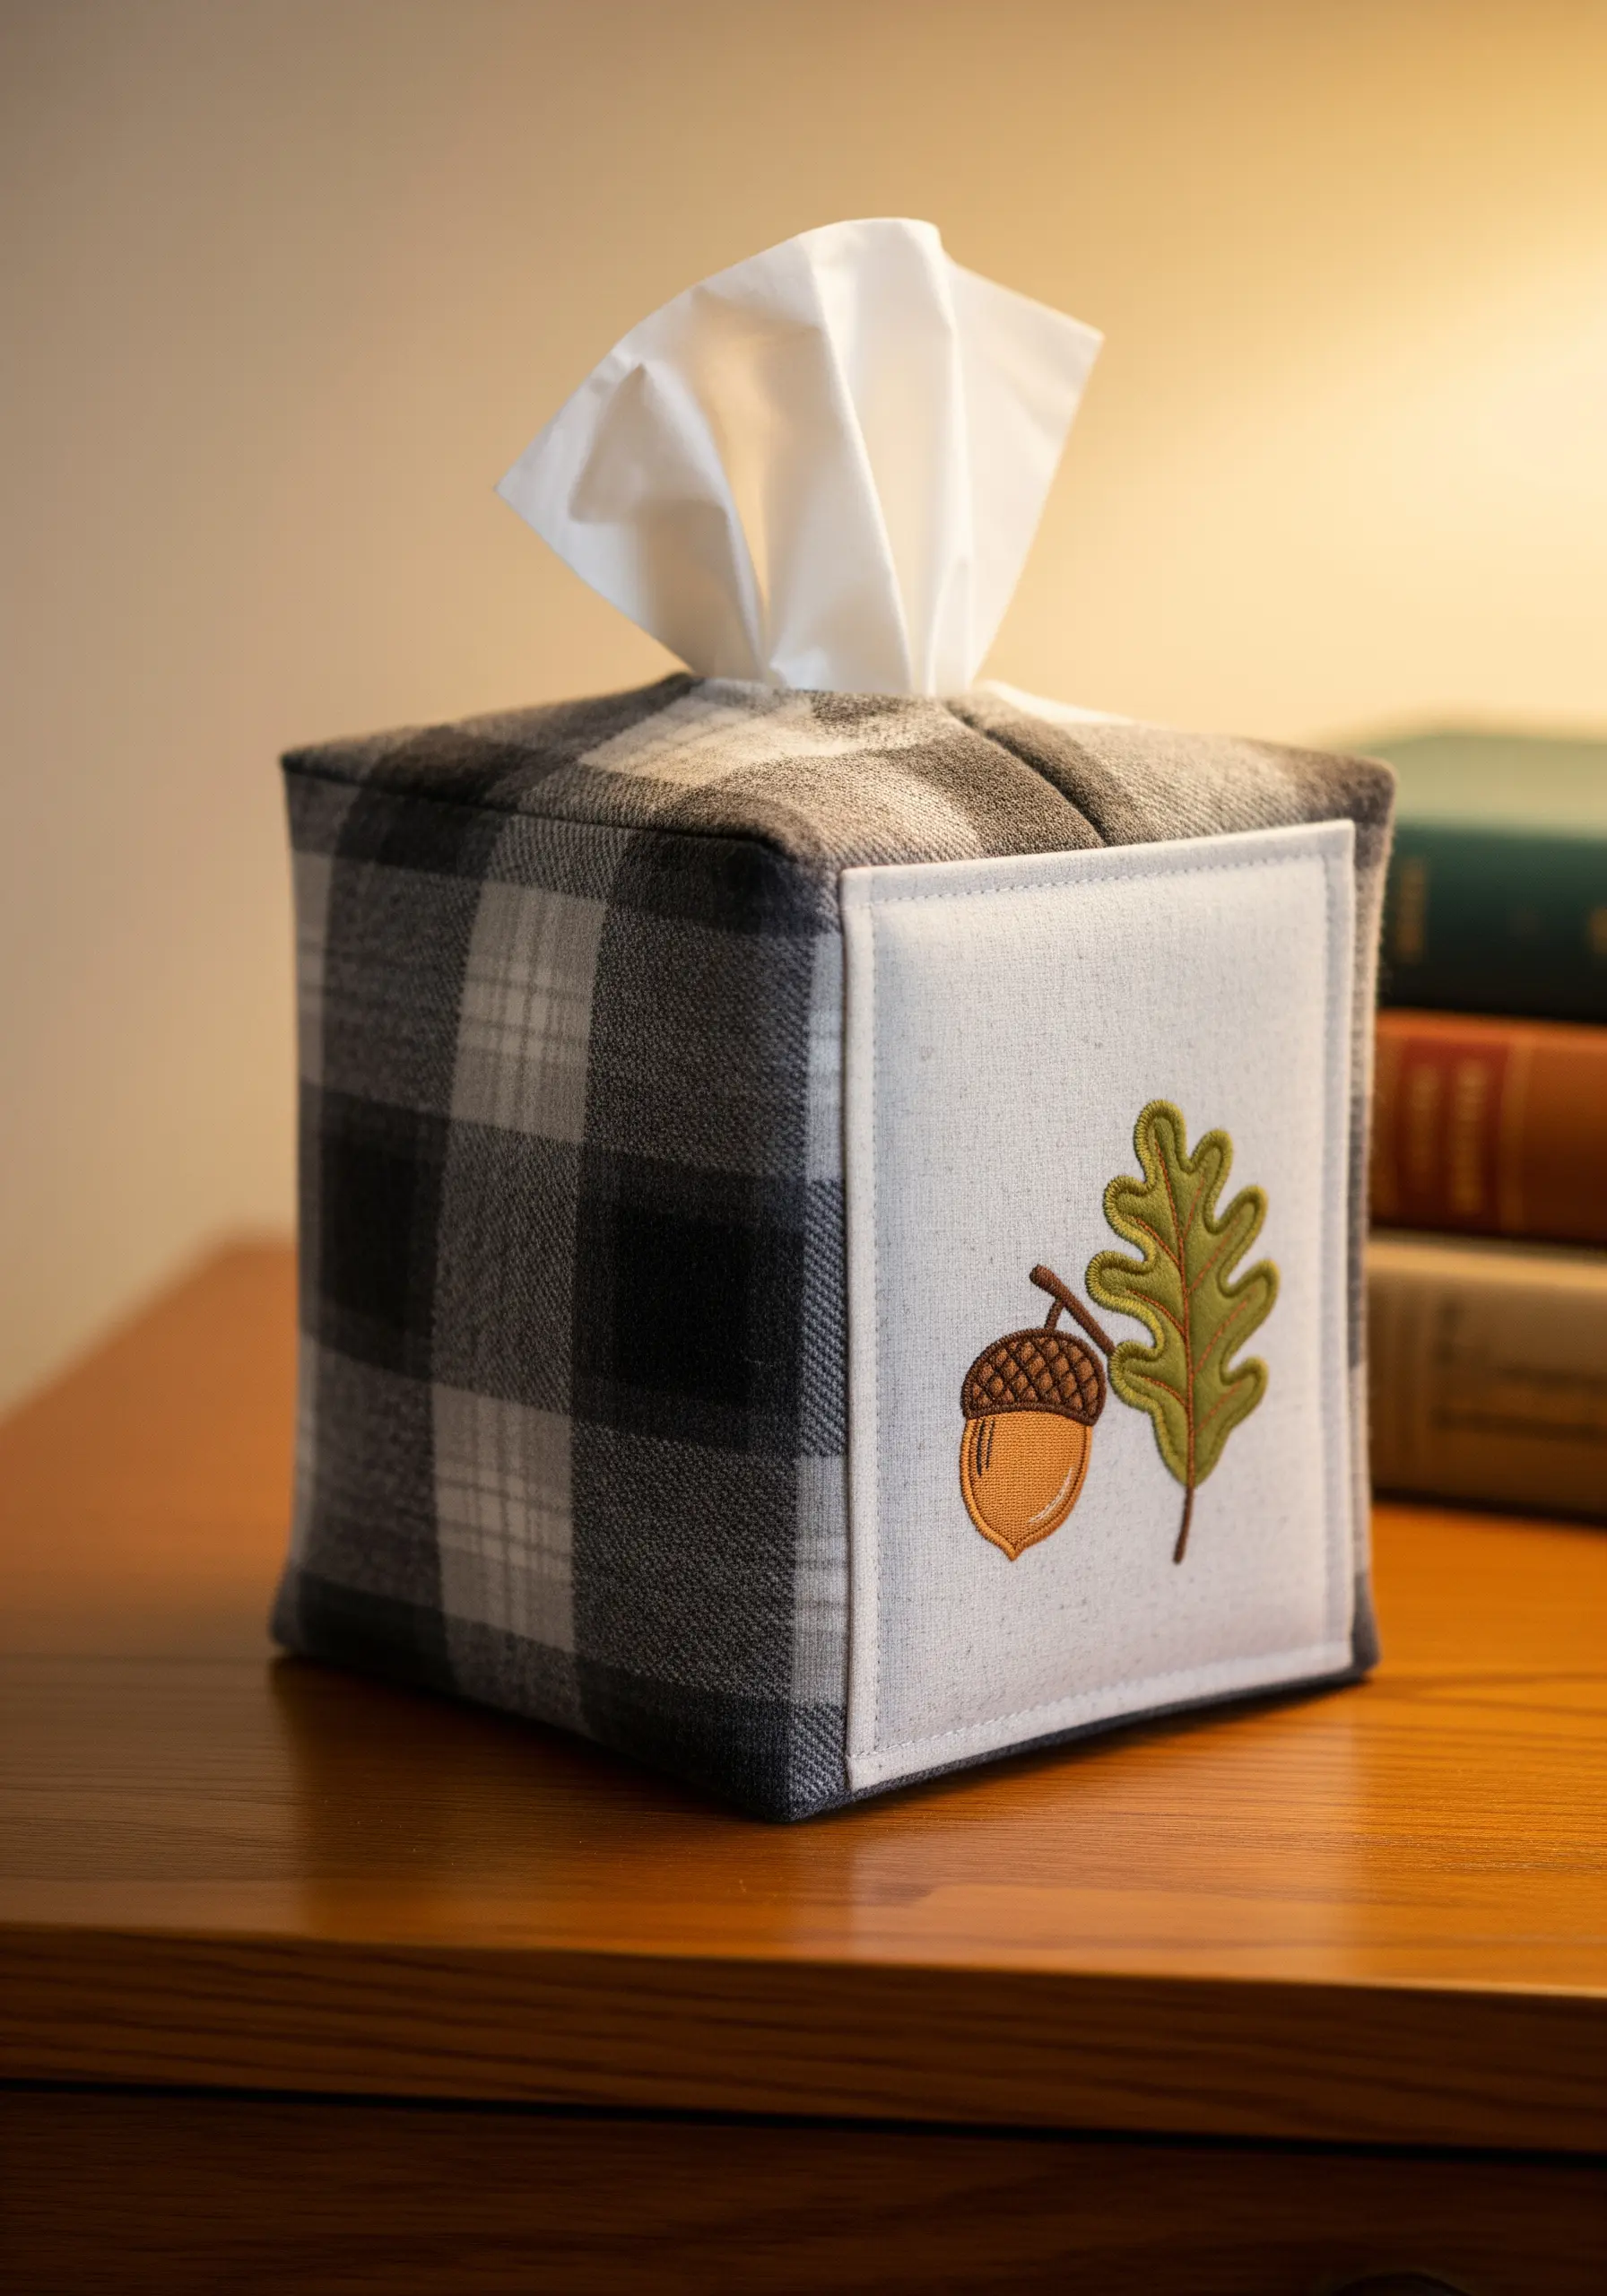
Design a charming tissue box cover by combining the strengths of appliqué and surface embroidery.
Use appliqué for the larger color blocks, like the leaf and the acorn cap. This is much faster than filling large areas with satin stitch.
Then, come back with embroidery to add the finer details—a satin stitch outline around the edges for a clean finish, and straight stitches for the acorn’s texture and the leaf’s veins.
This mixed-media approach creates a clean, dimensional, and highly polished look.
27. Curate a Gallery Wall of Embroidered Hoops
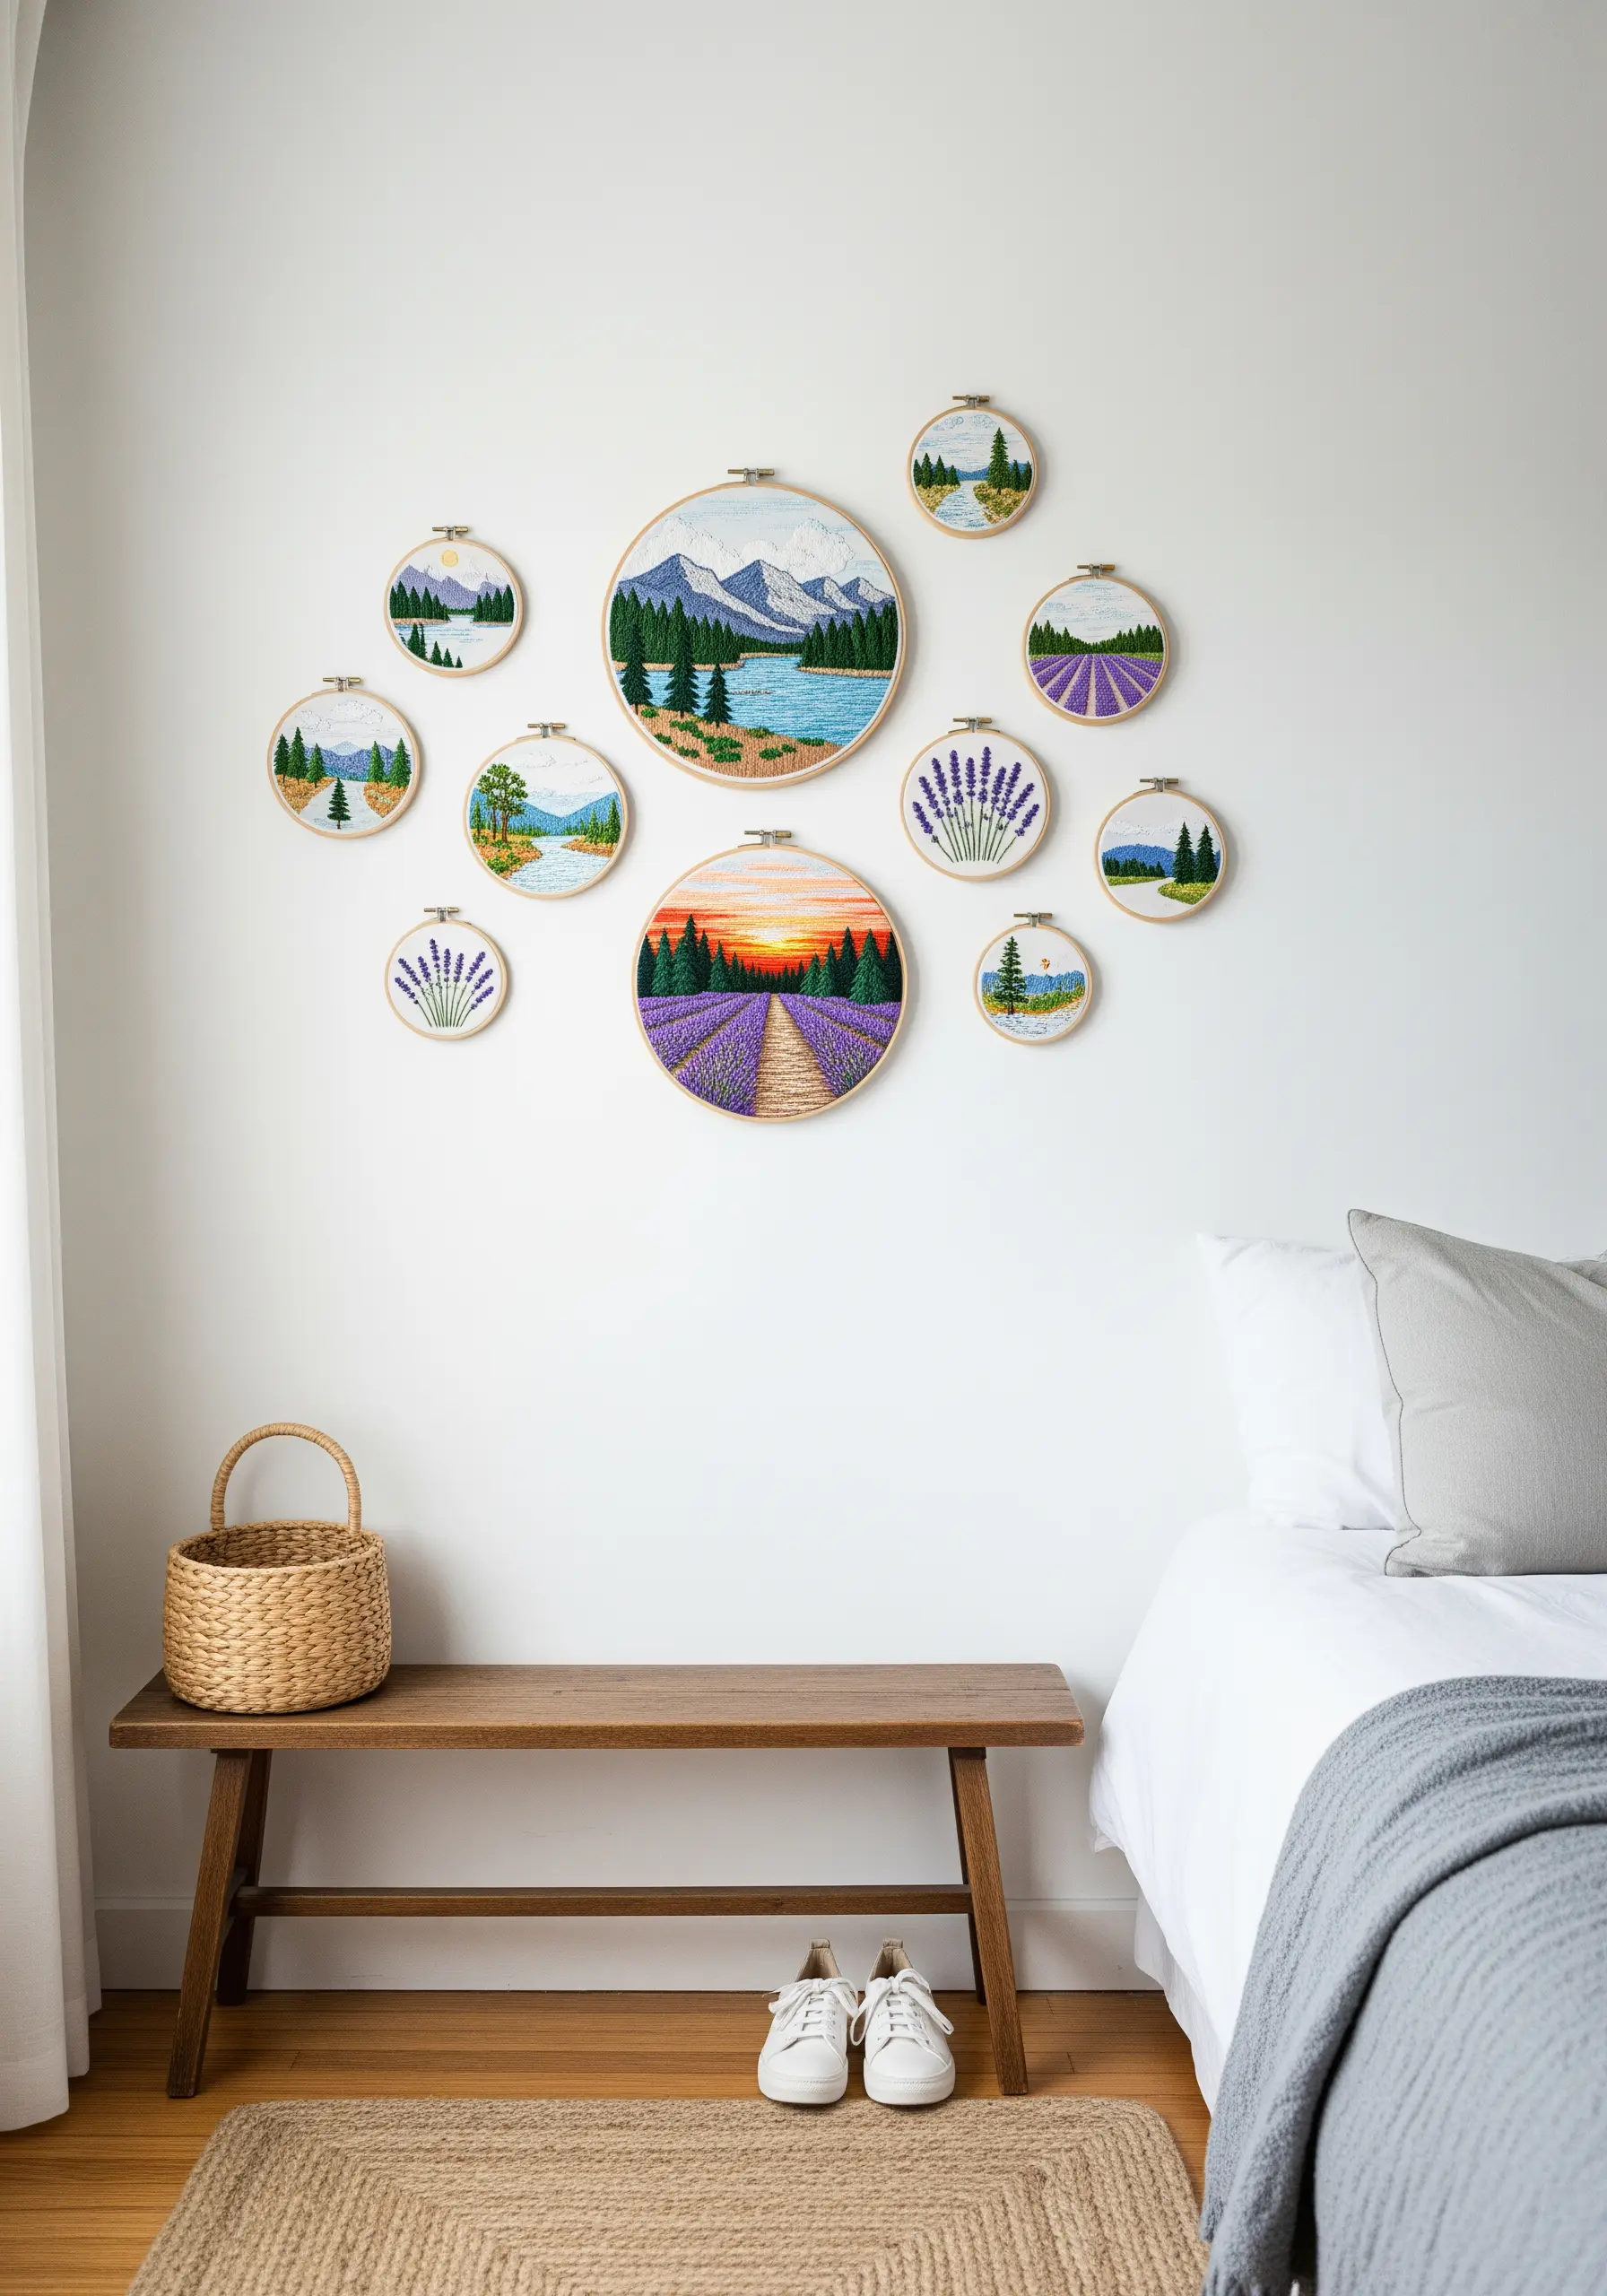
Turn a collection of small embroideries into a significant art installation by creating a gallery wall.
The key to a cohesive look is a unifying theme or color palette. Here, serene landscapes and lavender fields connect each piece.
Vary the size of your hoops to create visual interest and a dynamic layout.
Plan your arrangement on the floor before hanging to ensure a balanced composition. This approach allows you to build a stunning, personal art piece over time, one small hoop at a time, creating hooped wall collage layouts that turn simple stitches into gallery-style decor.
28. Couch Chunky Yarn for a Cozy Statement
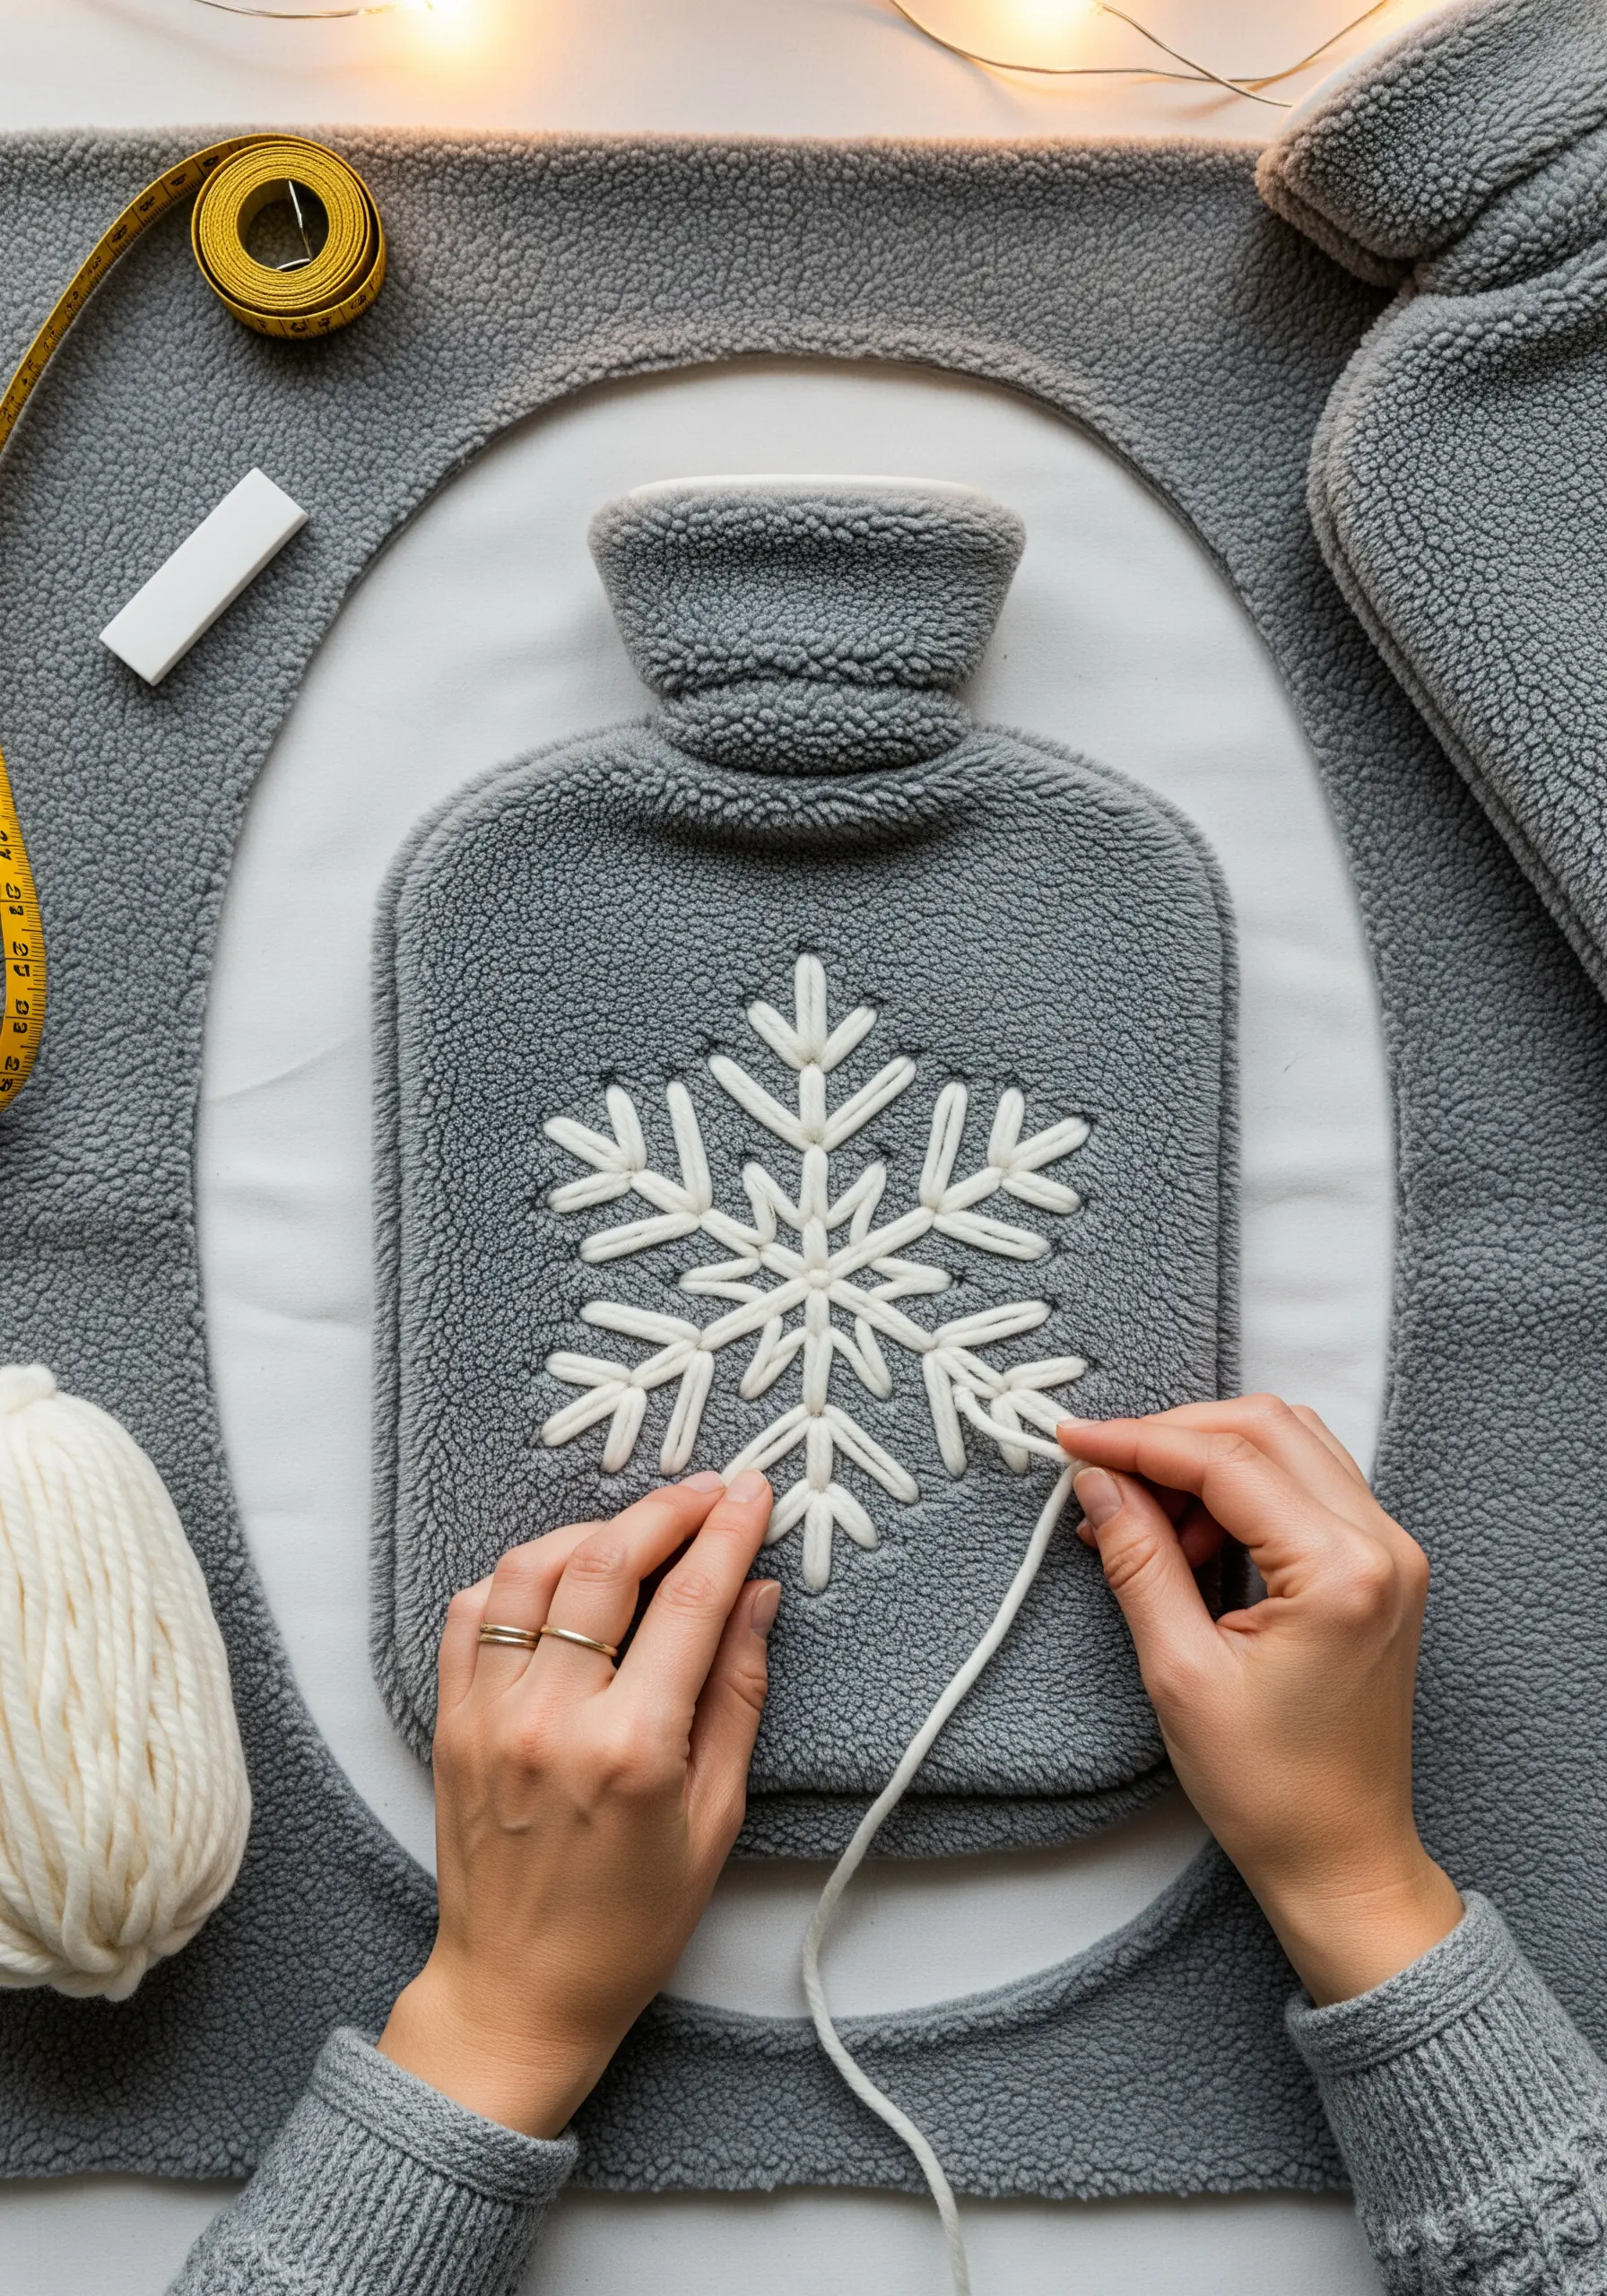
Add instant texture and warmth to a fleece hot water bottle cover using chunky yarn.
Instead of trying to stitch with the thick yarn itself, use the couching technique. Lay the yarn on your fabric in the desired shape—like this bold snowflake—and tack it down with a thinner, matching embroidery floss.
The small, perpendicular stitches will be almost invisible against the texture of the yarn and fleece.
This is a fast and effective way to add a bold, sculptural design element that enhances the cozy function of the object.
29. Weave a Lampshade for Diffused, Textured Light
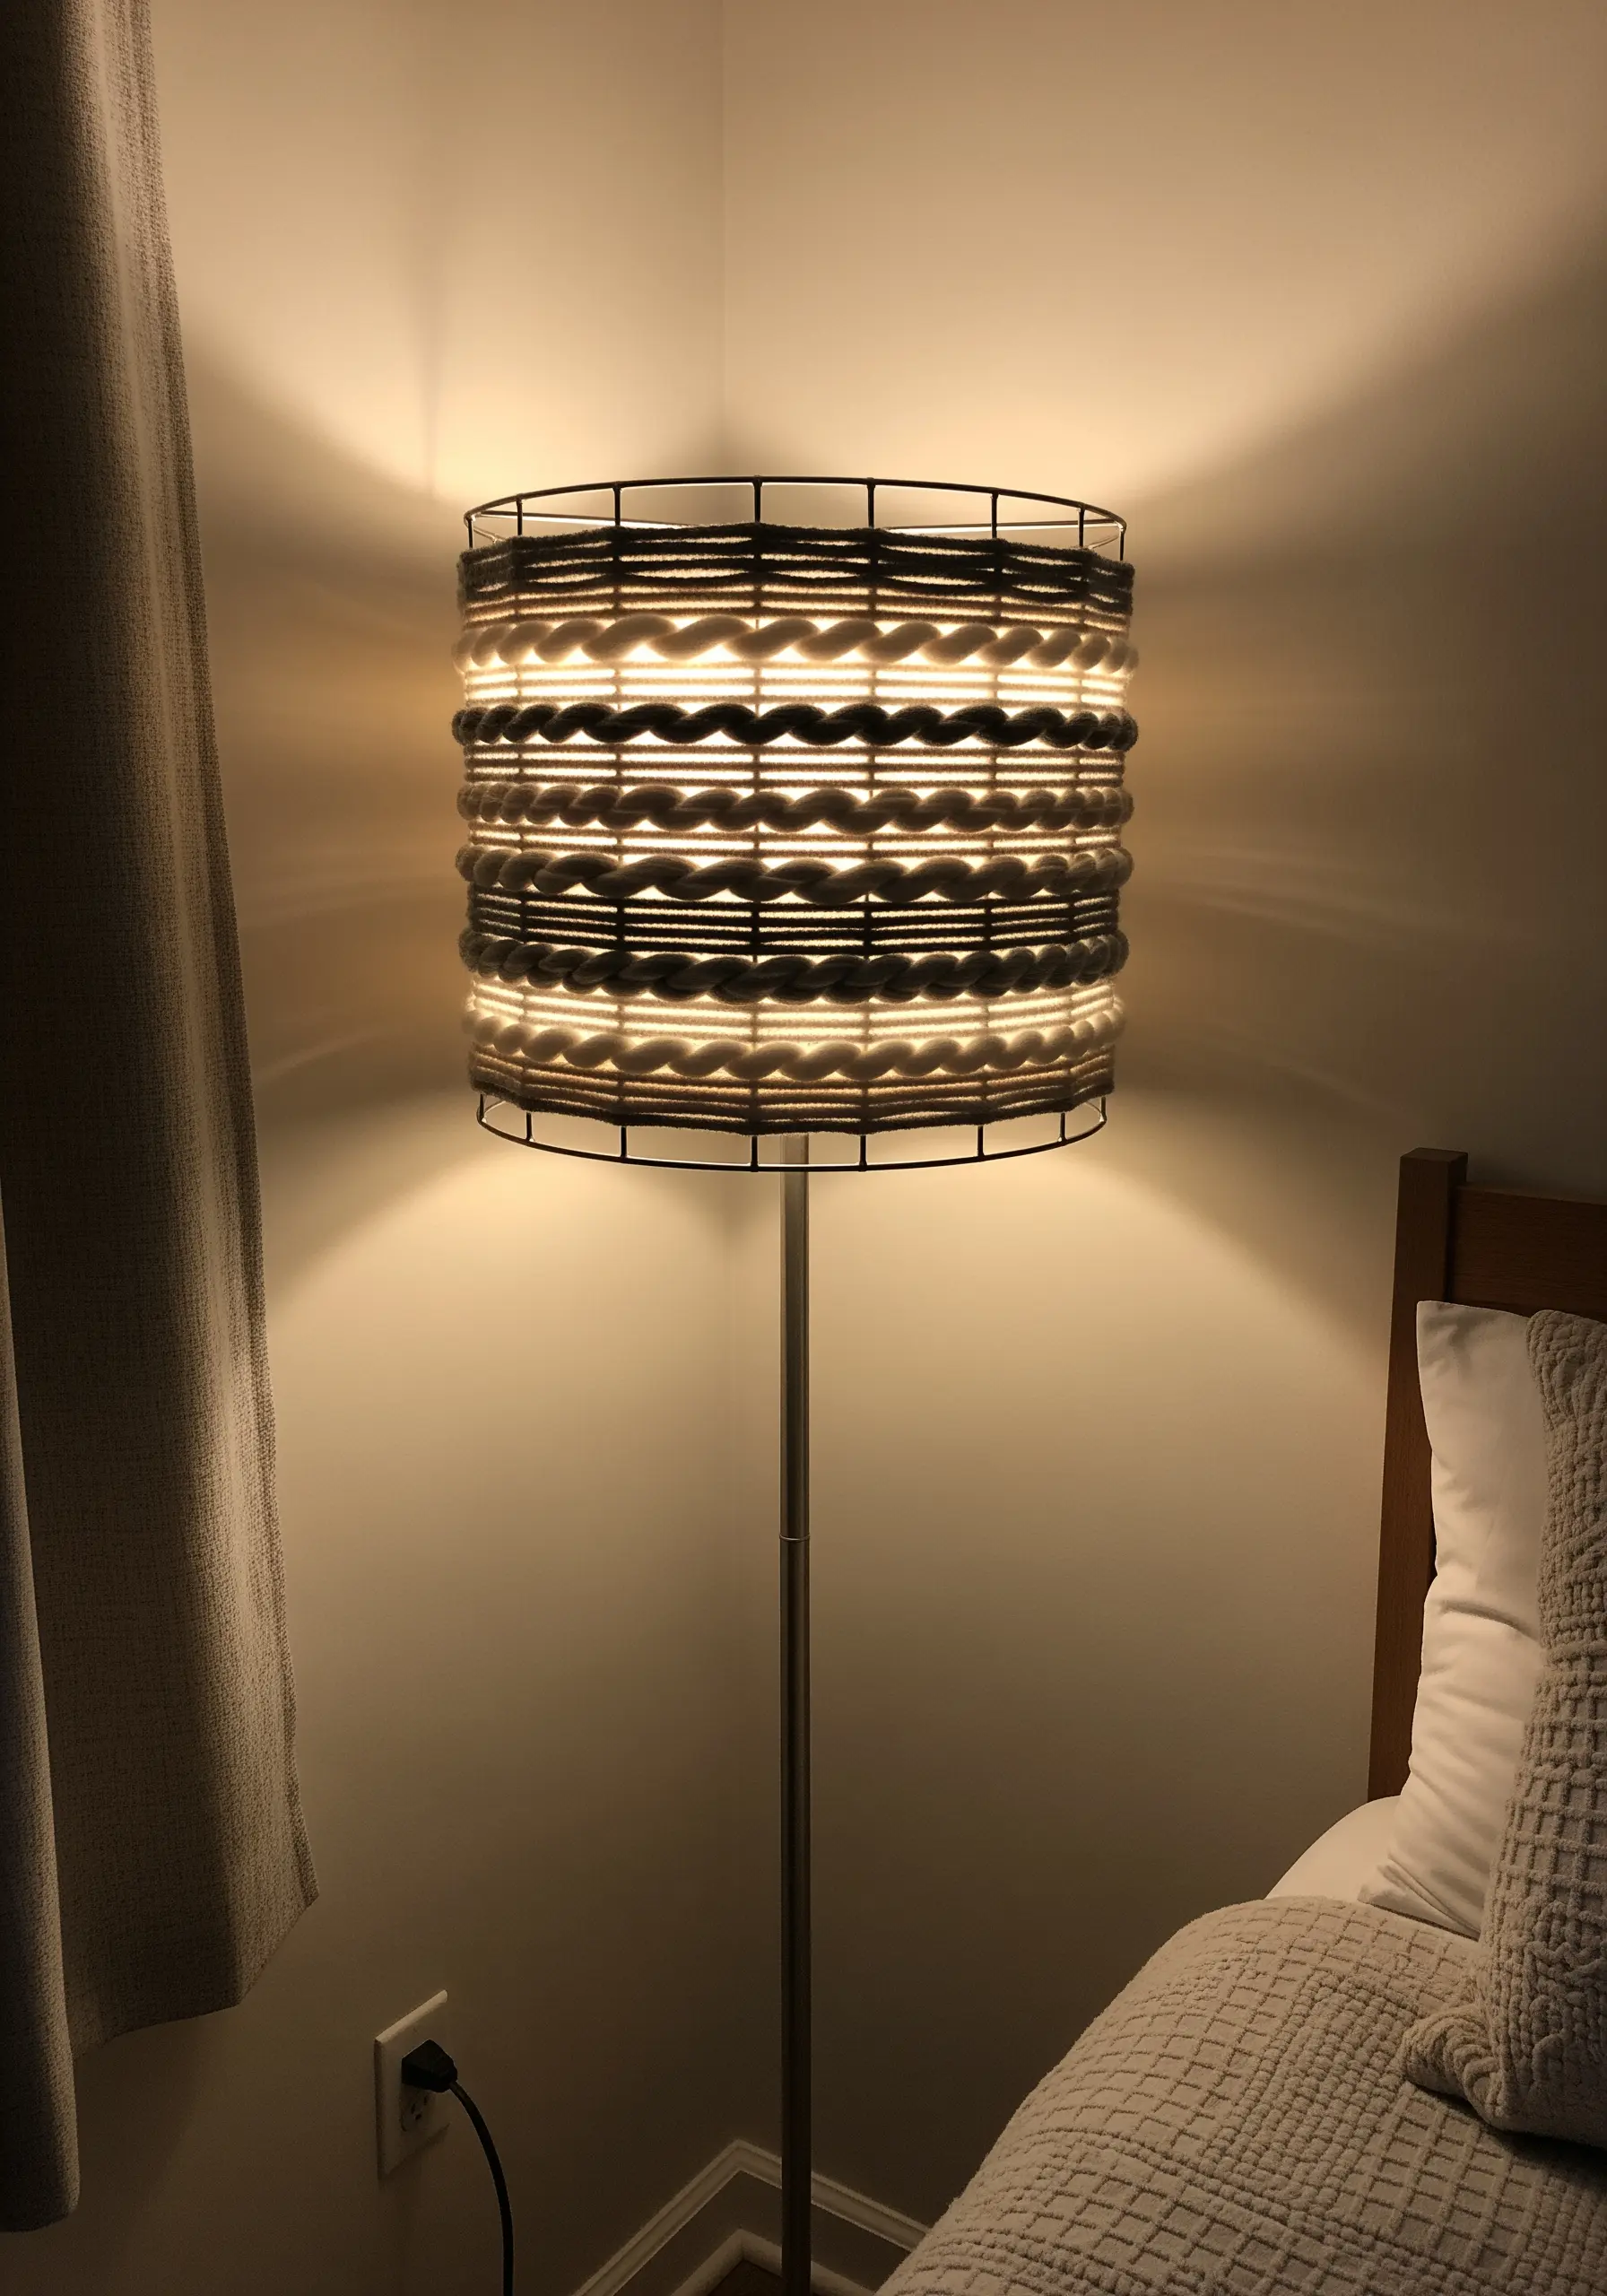
Update a boring lampshade frame by weaving it with different yarns and textures.
Start by wrapping the vertical struts of a wire lampshade frame to create your warp threads.
Then, simply weave different types of yarn—thick, thin, smooth, and bumpy—horizontally through the warp threads.
Experiment with different weaving patterns and color combinations to create a unique piece. The woven texture will cast beautiful, soft patterns of light and shadow, adding a layer of hygge to your room’s ambiance.
30. Craft Felt and Macrame Curtain Tie-Backs
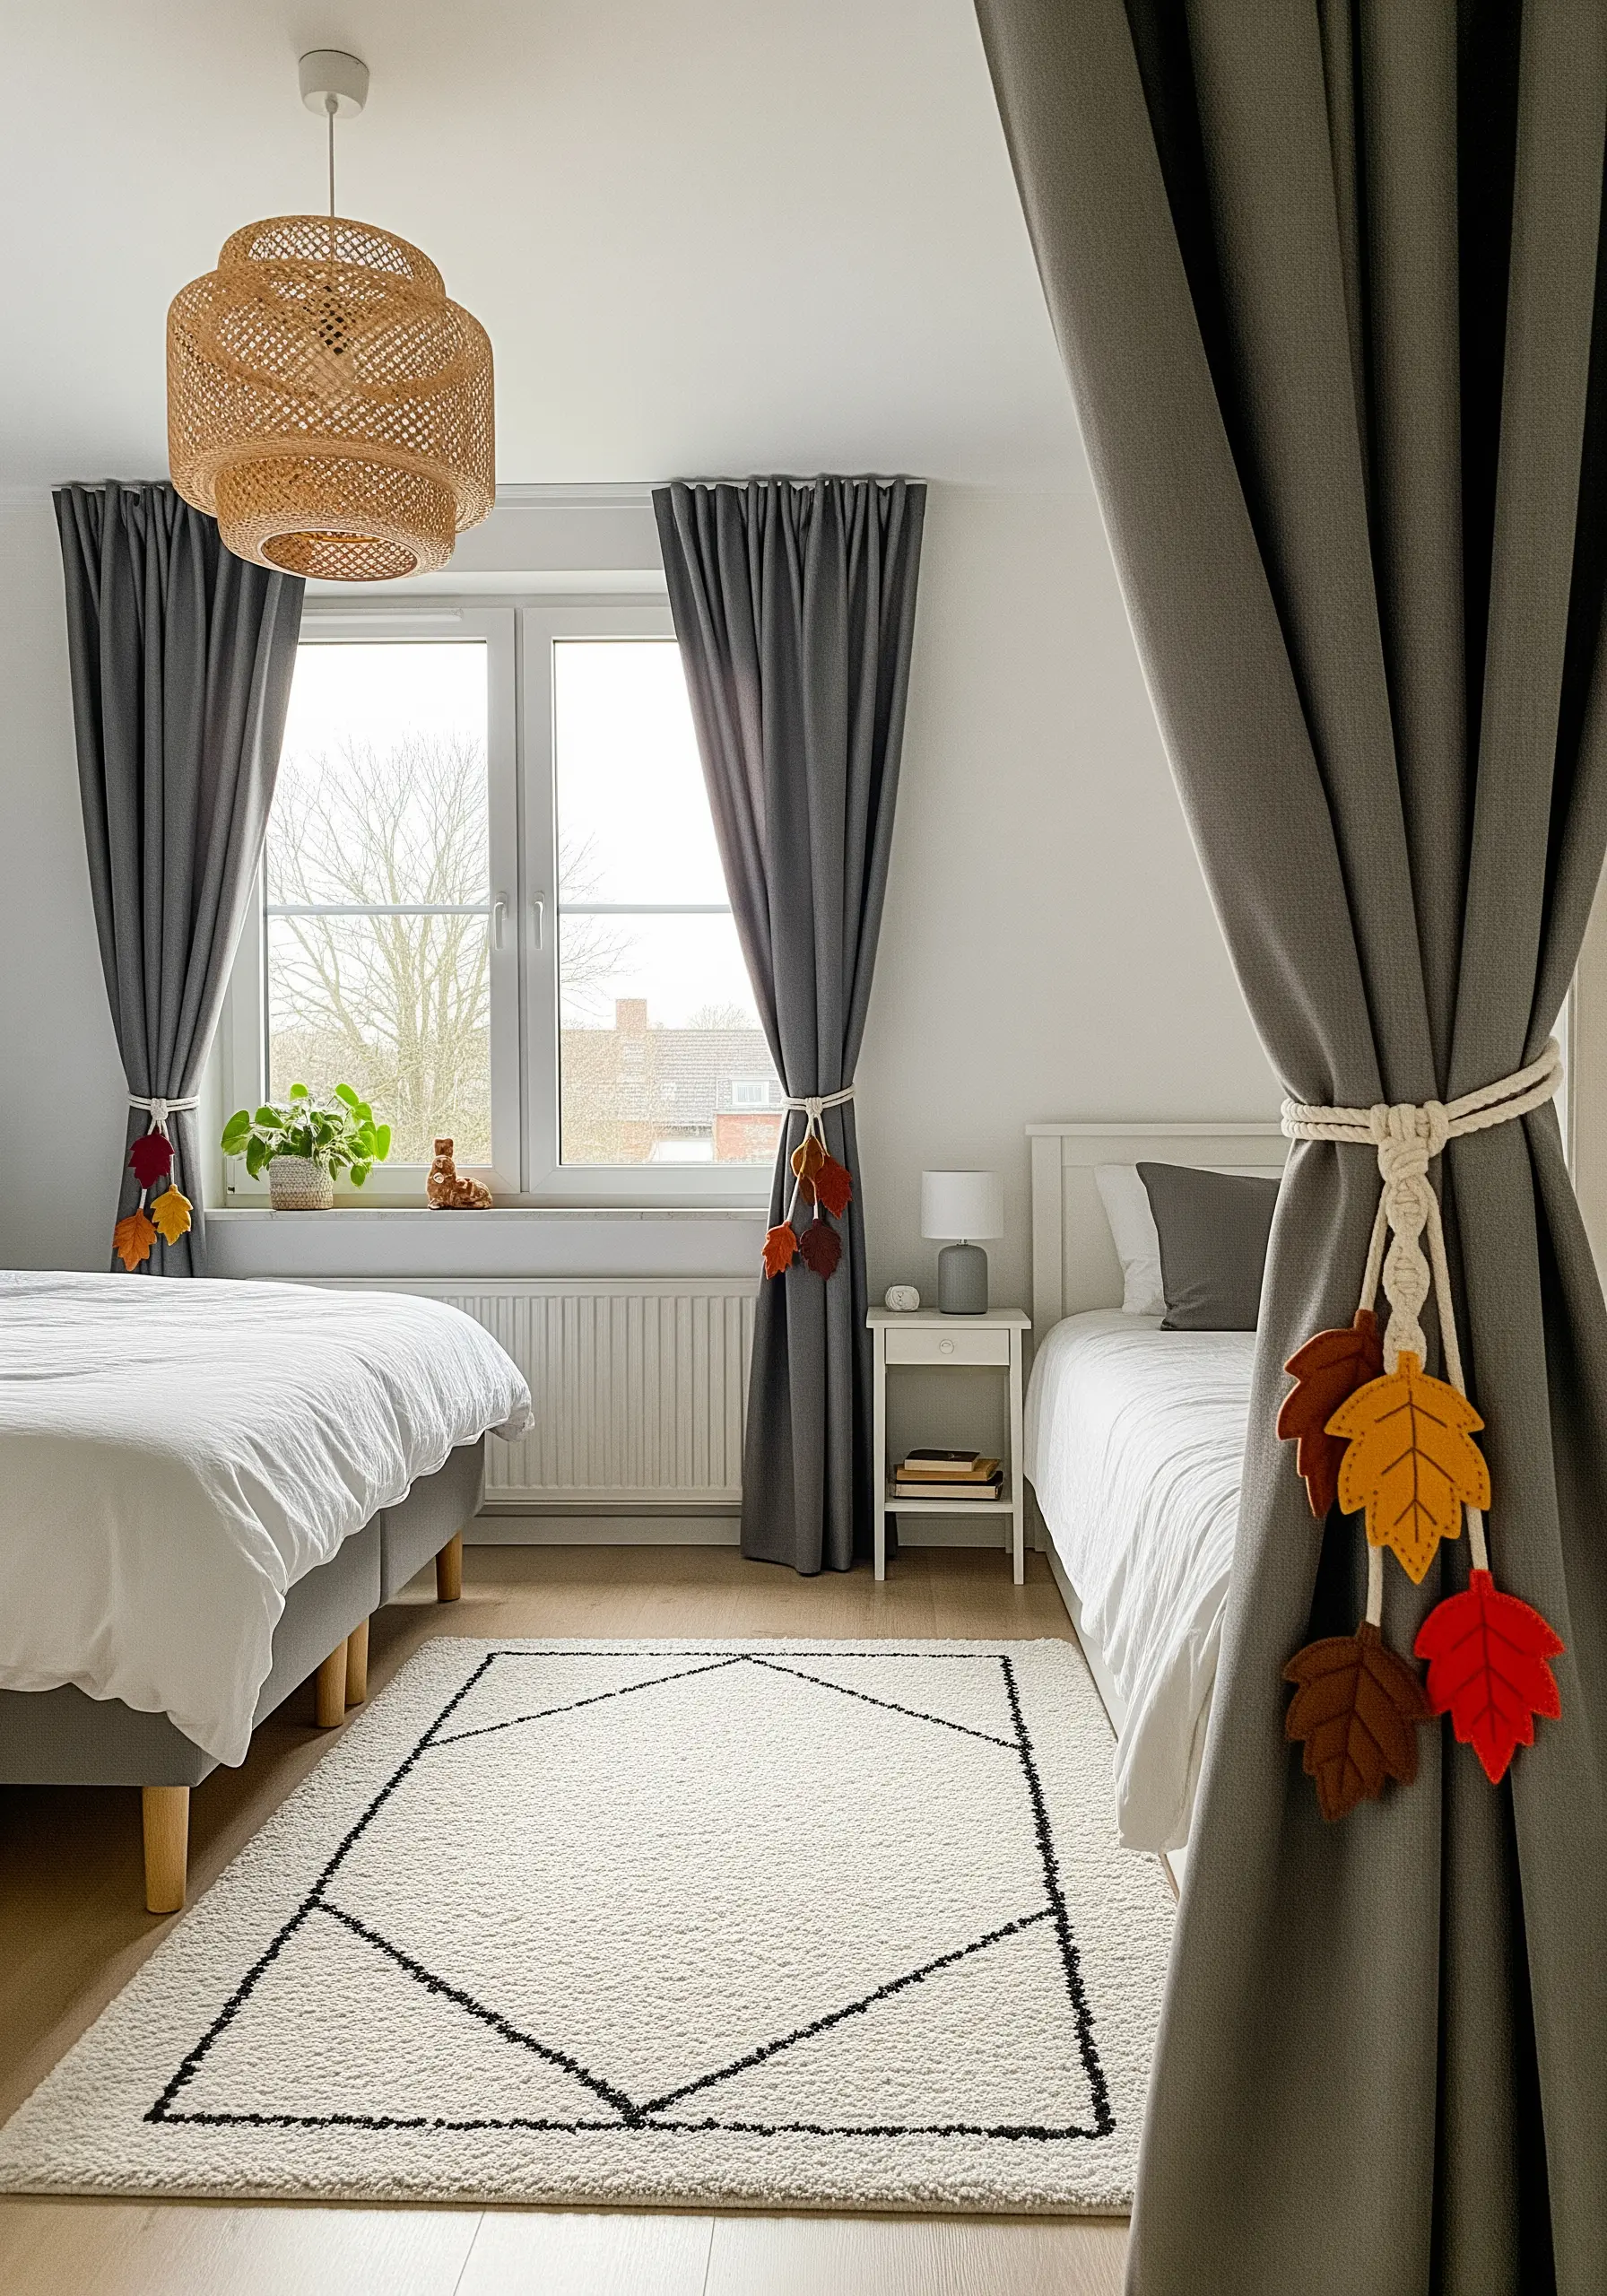
Combine simple macrame knots with soft felt leaves for beautiful, nature-inspired curtain tie-backs.
Use a thick, natural cotton rope and a few basic knots, like the square knot, to create the main tie.
Cut leaf shapes from autumnal-colored felt and add simple vein details with a single line of backstitch down the center.
Attach the leaves to the ends of the rope for a finishing touch that is both decorative and functional, bringing a subtle, organic element to your window treatments.


