Sometimes the desire isn’t for more color or more complex patterns, but for a quiet, intentional quality in your work. You want your stitches to feel less like a hobby and more like a deliberate, thoughtful mark on the fabric of your home.
The secret to achieving that polished, cozy aesthetic isn’t about mastering hundreds of stitches. It’s about understanding nuance—how a thicker thread changes the weight of a line, how a tone-on-tone palette prioritizes texture, or how a single, perfectly executed stitch can say more than a thousand rushed ones.
These ideas are an invitation to explore that subtlety. They are small adjustments in technique and material that will help you create neutral decor that feels deeply personal, impeccably crafted, and beautifully calm.
1. Master the Graphic Couching Stitch

To achieve this clean, linear effect on a ginkgo leaf or similar botanical motif, shift your technique from a simple satin stitch to couching.
First, lay down your main thread—a thicker pearl cotton works beautifully for this—along the pattern line.
Then, use a second, finer thread (a single strand of embroidery floss in a matching color) to tack down the main thread at regular, tight intervals.
This method gives you perfectly sharp, raised lines that satin stitch can’t replicate on curves, creating a design that feels both sculptural and delicate.
It’s the ideal technique for linen-tone embroidery cushion covers that need a modern, graphic punch.
2. Weave Abstract Landscapes with Yarn

Move beyond the hoop and create large-scale texture by treating your canvas like a loom.
Instead of floss, work with chunky yarn, wool roving, and other thick fibers to build abstract, sculptural shapes.
Use oversized, blunt-tipped tapestry needles to weave fibers directly through a heavy-duty fabric base like burlap or monk’s cloth.
Focus on creating tactile zones: dense loops next to smooth woven sections, or thick French knots clustered together to mimic natural formations.
These stunning fiber art installations introduce a bold, organic warmth that traditional embroidery can’t achieve on its own.
3. Elevate Simplicity with Rhythmic Seed Stitch

Transform a simple lumbar pillow with a meditative, all-over pattern created from one of the most basic stitches: the seed stitch.
Instead of a complex motif, you’ll create a subtle, tactile grid of tiny straight stitches placed at alternating angles.
Use a thread that is slightly thicker than standard floss, like a pearl cotton No. 8, to give each stitch a visible presence without overwhelming the fabric.
The key to a polished look is consistency in stitch length and spacing, resulting in a piece that invites touch and adds quiet sophistication to your bedding.
It’s a perfect starting point for beige and blush embroidery pillow ideas that rely on texture over color.
4. Curate a Cohesive Hoop Art Gallery Wall
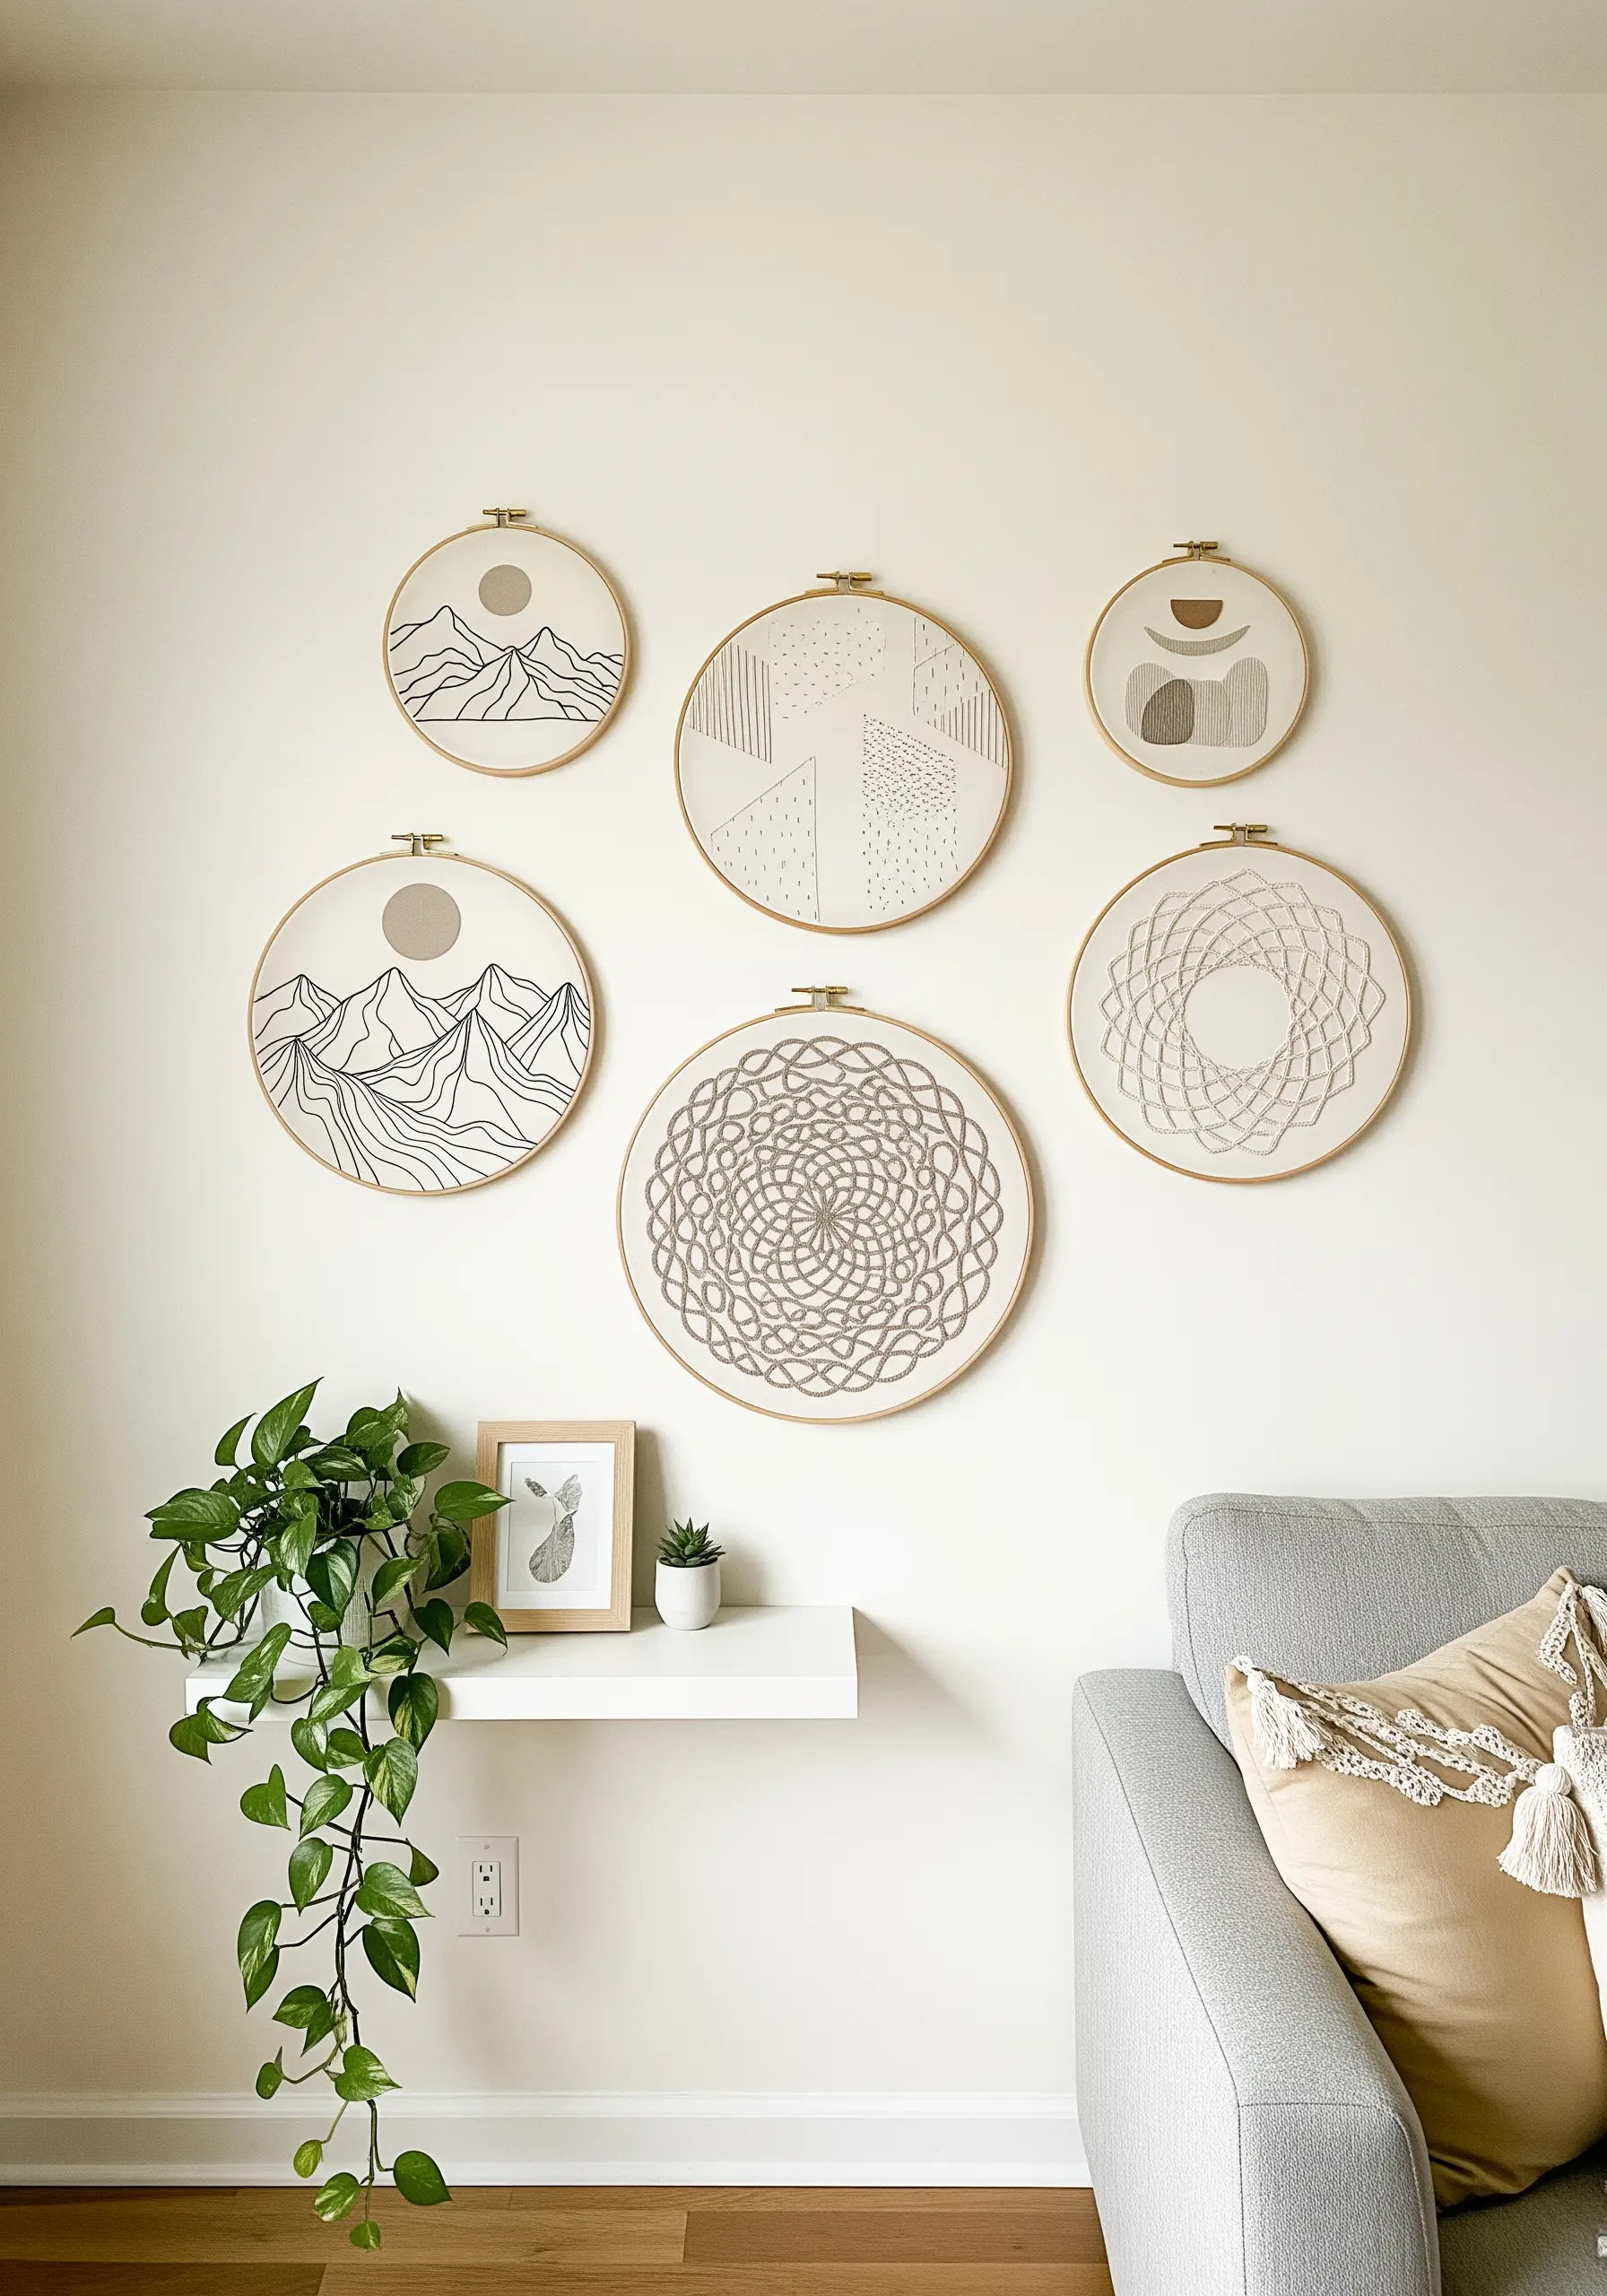
To make a collection of hoops feel like intentional art, unify them with a strict color palette and a balance of design styles.
Choose two or three neutral thread colors—like charcoal, beige, and tan—and use them across all your pieces.
Vary the complexity within this palette: pair a dense, geometric pattern with a sparse line-art landscape, or a simple abstract shape with a detailed mandala.
This creates visual rhythm and ensures the collection feels curated, not random.
Displaying them together transforms minimal DIY embroidery projects you’ll actually want to hang into a sophisticated statement piece.
5. Add Sculptural Borders with Chunky Braids

Introduce a bold, textural element to blankets or large cushions by couching a pre-made chunky braid along the edge.
Instead of trying to stitch with bulky yarn, create or purchase a thick, soft braid and attach it to the surface of your textile.
Use a sturdy, matching thread to make small, anchoring stitches that sink invisibly into the braid’s crevices, securing it firmly to the base fabric.
This technique adds a dramatic, handcrafted frame to your work, offering a high-impact finish that feels both cozy and luxurious.
It’s a wonderful way to experiment with cozy mixed-fiber projects without needing specialized tools.
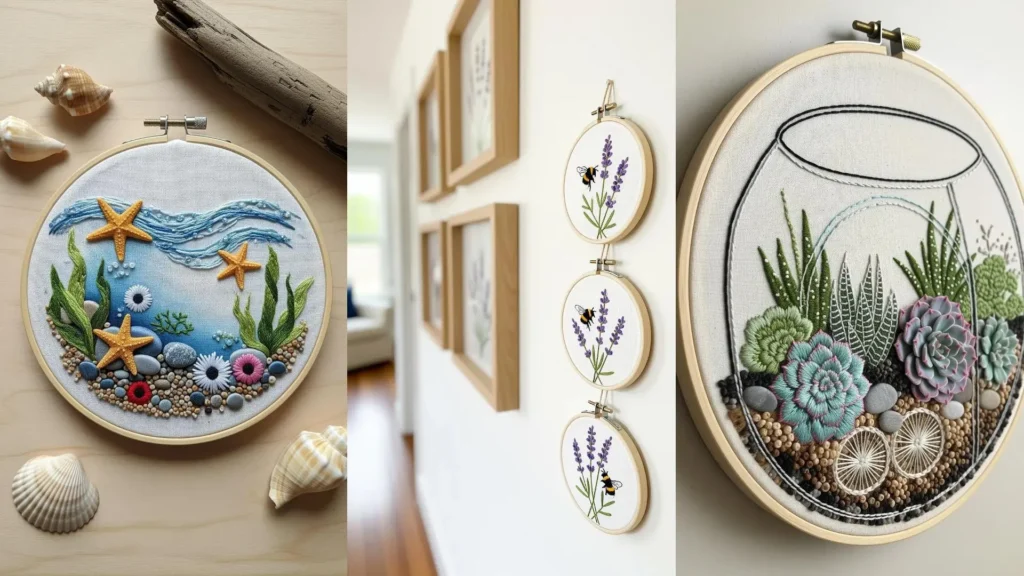
6. Refine Your Linens with Tone-on-Tone Botanicals

Achieve an understated, elegant finish on table runners and napkins by using a thread color that is only one or two shades different from your fabric.
This monochrome approach emphasizes texture over color, allowing the subtle sheen of the thread and the form of the stitches to become the main focus.
For delicate branches and leaves, use just one or two strands of floss and rely on open, airy stitches like the fly stitch or feather stitch.
The result is a design that feels integrated into the fabric rather than sitting on top of it, perfect for sophisticated line-art garden motifs that transform table runners.
7. Create Realistic Texture with Directional Stitching
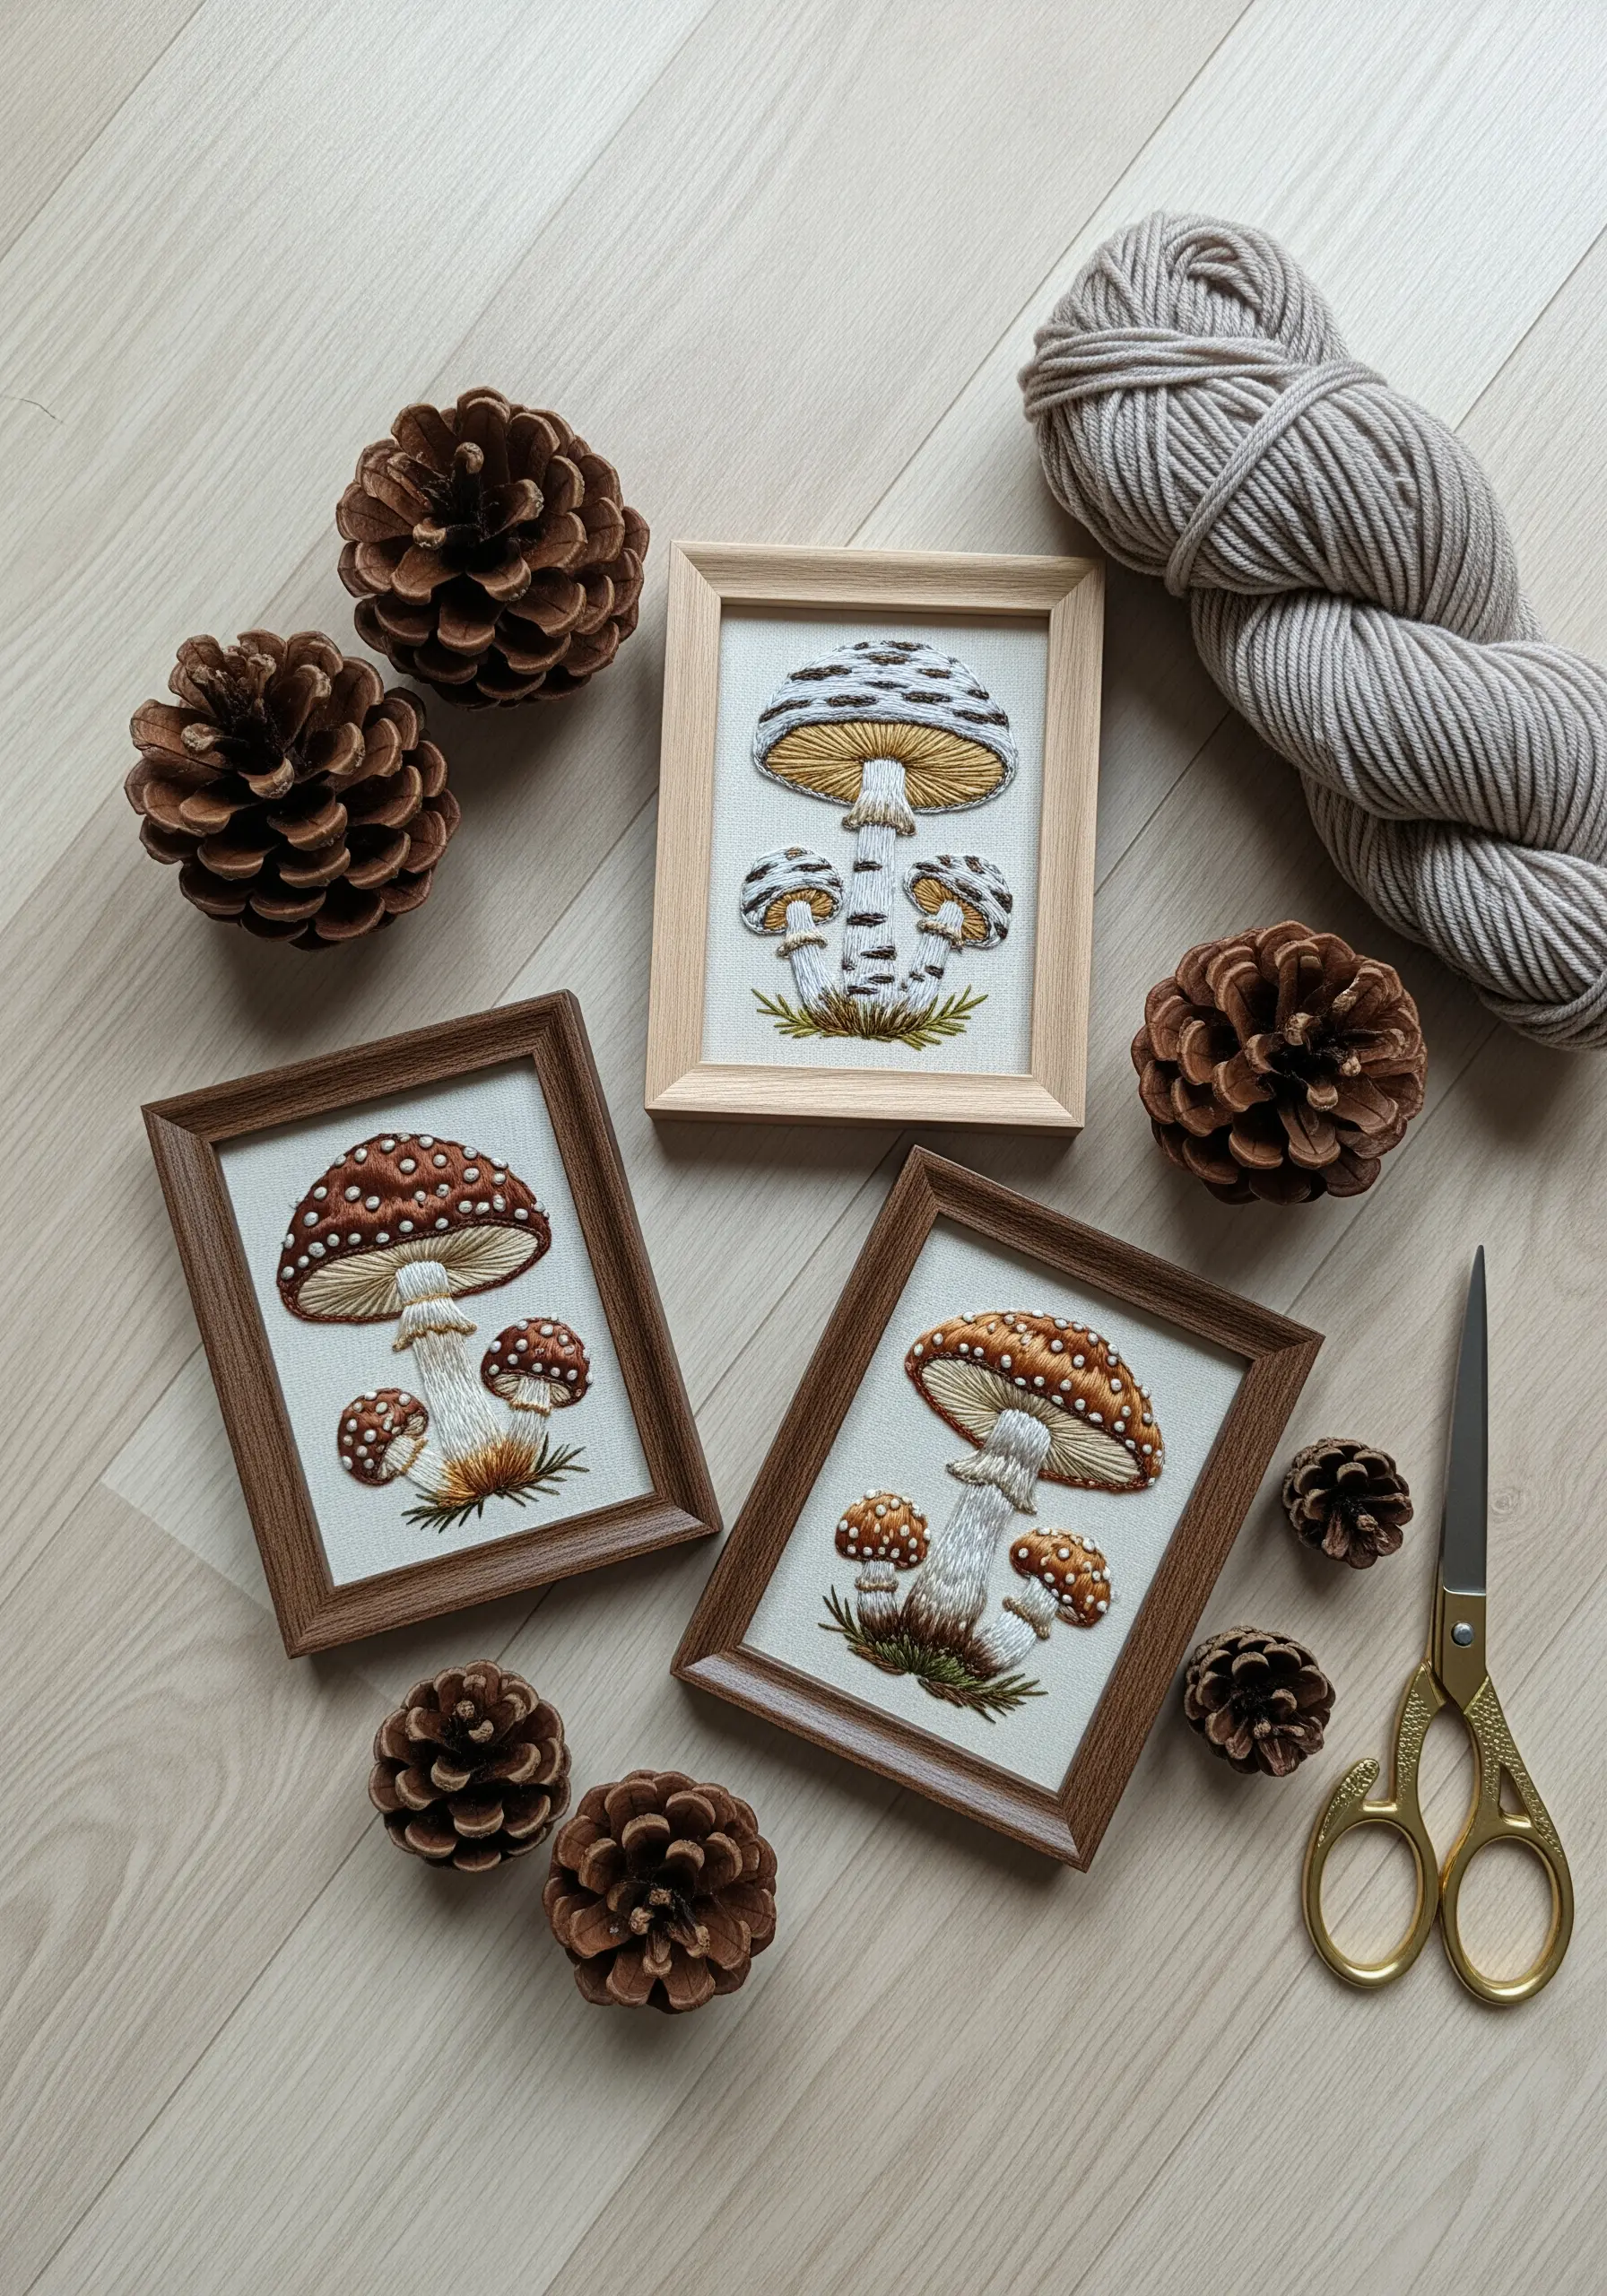
To bring botanical illustrations like mushrooms to life, pay close attention to the direction of your stitches.
Use long-and-short stitch for the mushroom cap, angling your stitches to follow its natural curve and create a smooth, rounded appearance.
For the stem, switch to vertical satin stitches to mimic its fibrous texture.
Finally, add dimension with clusters of French knots for the spots, using a slightly lighter thread to make them pop.
This deliberate use of stitch direction is the key to creating realistic mushroom and forest floor embroidery projects that feel dimensional and lifelike.
8. Ground Your Decor with a Modern Cross-Stitch Border

Add a clean, graphic touch to towels or throws with a simple, repeating cross-stitch border.
The key to perfect uniformity on plush or uneven fabrics is using a waste canvas or a water-soluble stabilizer printed with a grid.
Secure the stabilizer to your fabric, stitch your pattern directly through it, and then dissolve or pull away the guide to reveal perfectly spaced stitches.
Using a high-contrast thread, like black on cream, transforms a traditional stitch into a bold, modern accent.
These are the kinds of tiny embroidered accents that make your home look designer-crafted.
9. Map Out a Celestial Sampler
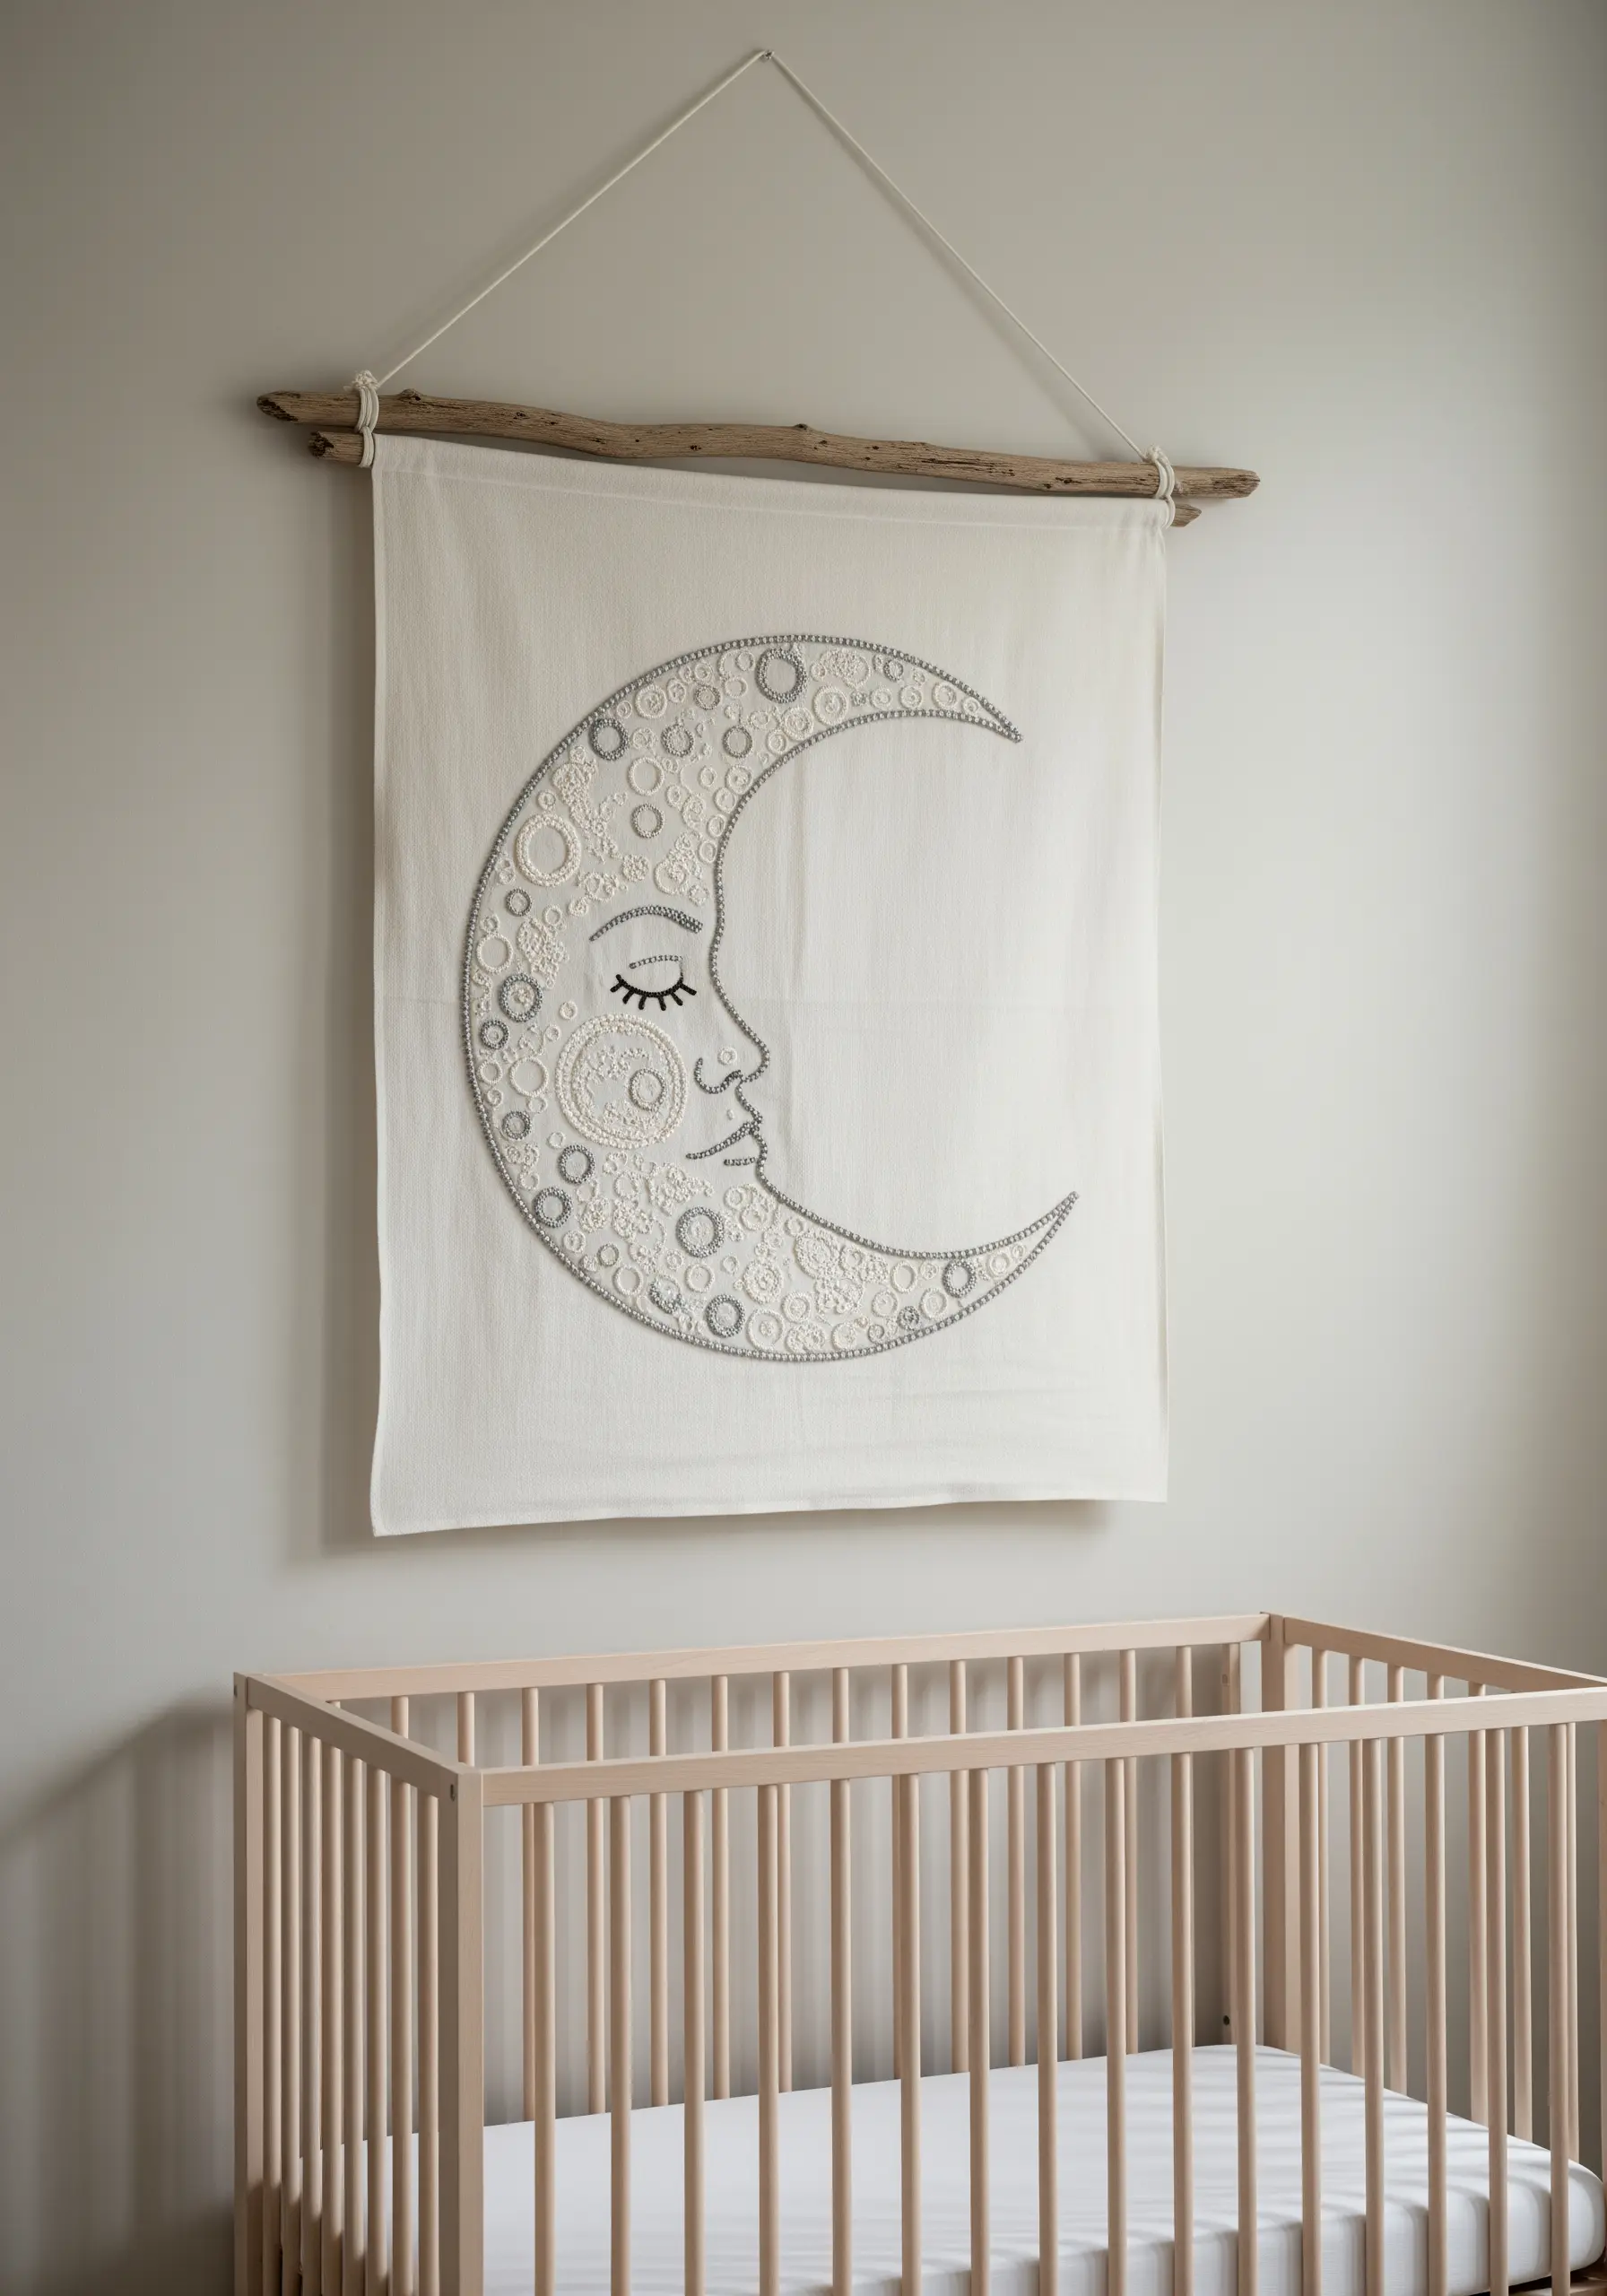
Turn a single large motif, like a crescent moon, into a canvas for textural exploration.
Divide the shape into smaller, organic sections and assign a different filling stitch to each one: tightly packed French knots, swirling seed stitches, radial satin stitches, or delicate chain stitch outlines.
By keeping the entire piece in a single color family (like shades of grey and silver), the focus remains on the rich tapestry of textures.
This approach transforms a simple shape into a captivating piece of fiber art, perfect for minimal sky and moon designs in a nursery or bedroom.
10. Add Dimension with Padded Satin Stitch Monograms

For monograms that look truly luxurious and professional, give them a raised, three-dimensional profile with padding.
First, outline your letters with a split stitch. Then, fill the inside of the letters with a loose layer of seed stitches or straight stitches—this is your padding.
Finally, work your satin stitch horizontally over the entire shape, covering the padding completely.
This underlying layer lifts the satin stitch, creating a subtle shadow and a satisfyingly plump finish that feels expensive and refined.
It’s a classic technique for adding elegance to mini monogram embroidery frames or high-quality linens.
11. Paint a Forest Scene with Vertical Stitches

Create a sense of depth and perspective in a landscape using only vertical straight stitches.
For trees in the foreground, use darker, thicker threads and slightly longer, denser stitches. For trees in the background, switch to lighter, finer threads and shorter, sparser stitches.
This subtle variation in thread weight and density tricks the eye into seeing distance.
Let the stitches be slightly imperfect and overlapping to mimic the organic texture of bark, turning a simple cushion into a serene work of art for nature-calm stitching projects.
12. Embroider on Unexpected Surfaces Like Lampshades

Bring a handmade touch to functional objects by embroidering directly onto a lampshade.
Choose a simple, open geometric or linear pattern that won’t block too much light.
Because you can’t use a hoop, you’ll need a sharp needle, a thimble to protect your fingers, and patience.
Mark your design lightly with a water-soluble pen and use basic stitches like backstitch or chain stitch that are easy to control from both sides of the stiff fabric.
These unexpected stitched details that make plain walls pop add a layer of custom, subtle artistry to your lighting.
13. Embrace the Delicacy of Single-Line Botanicals
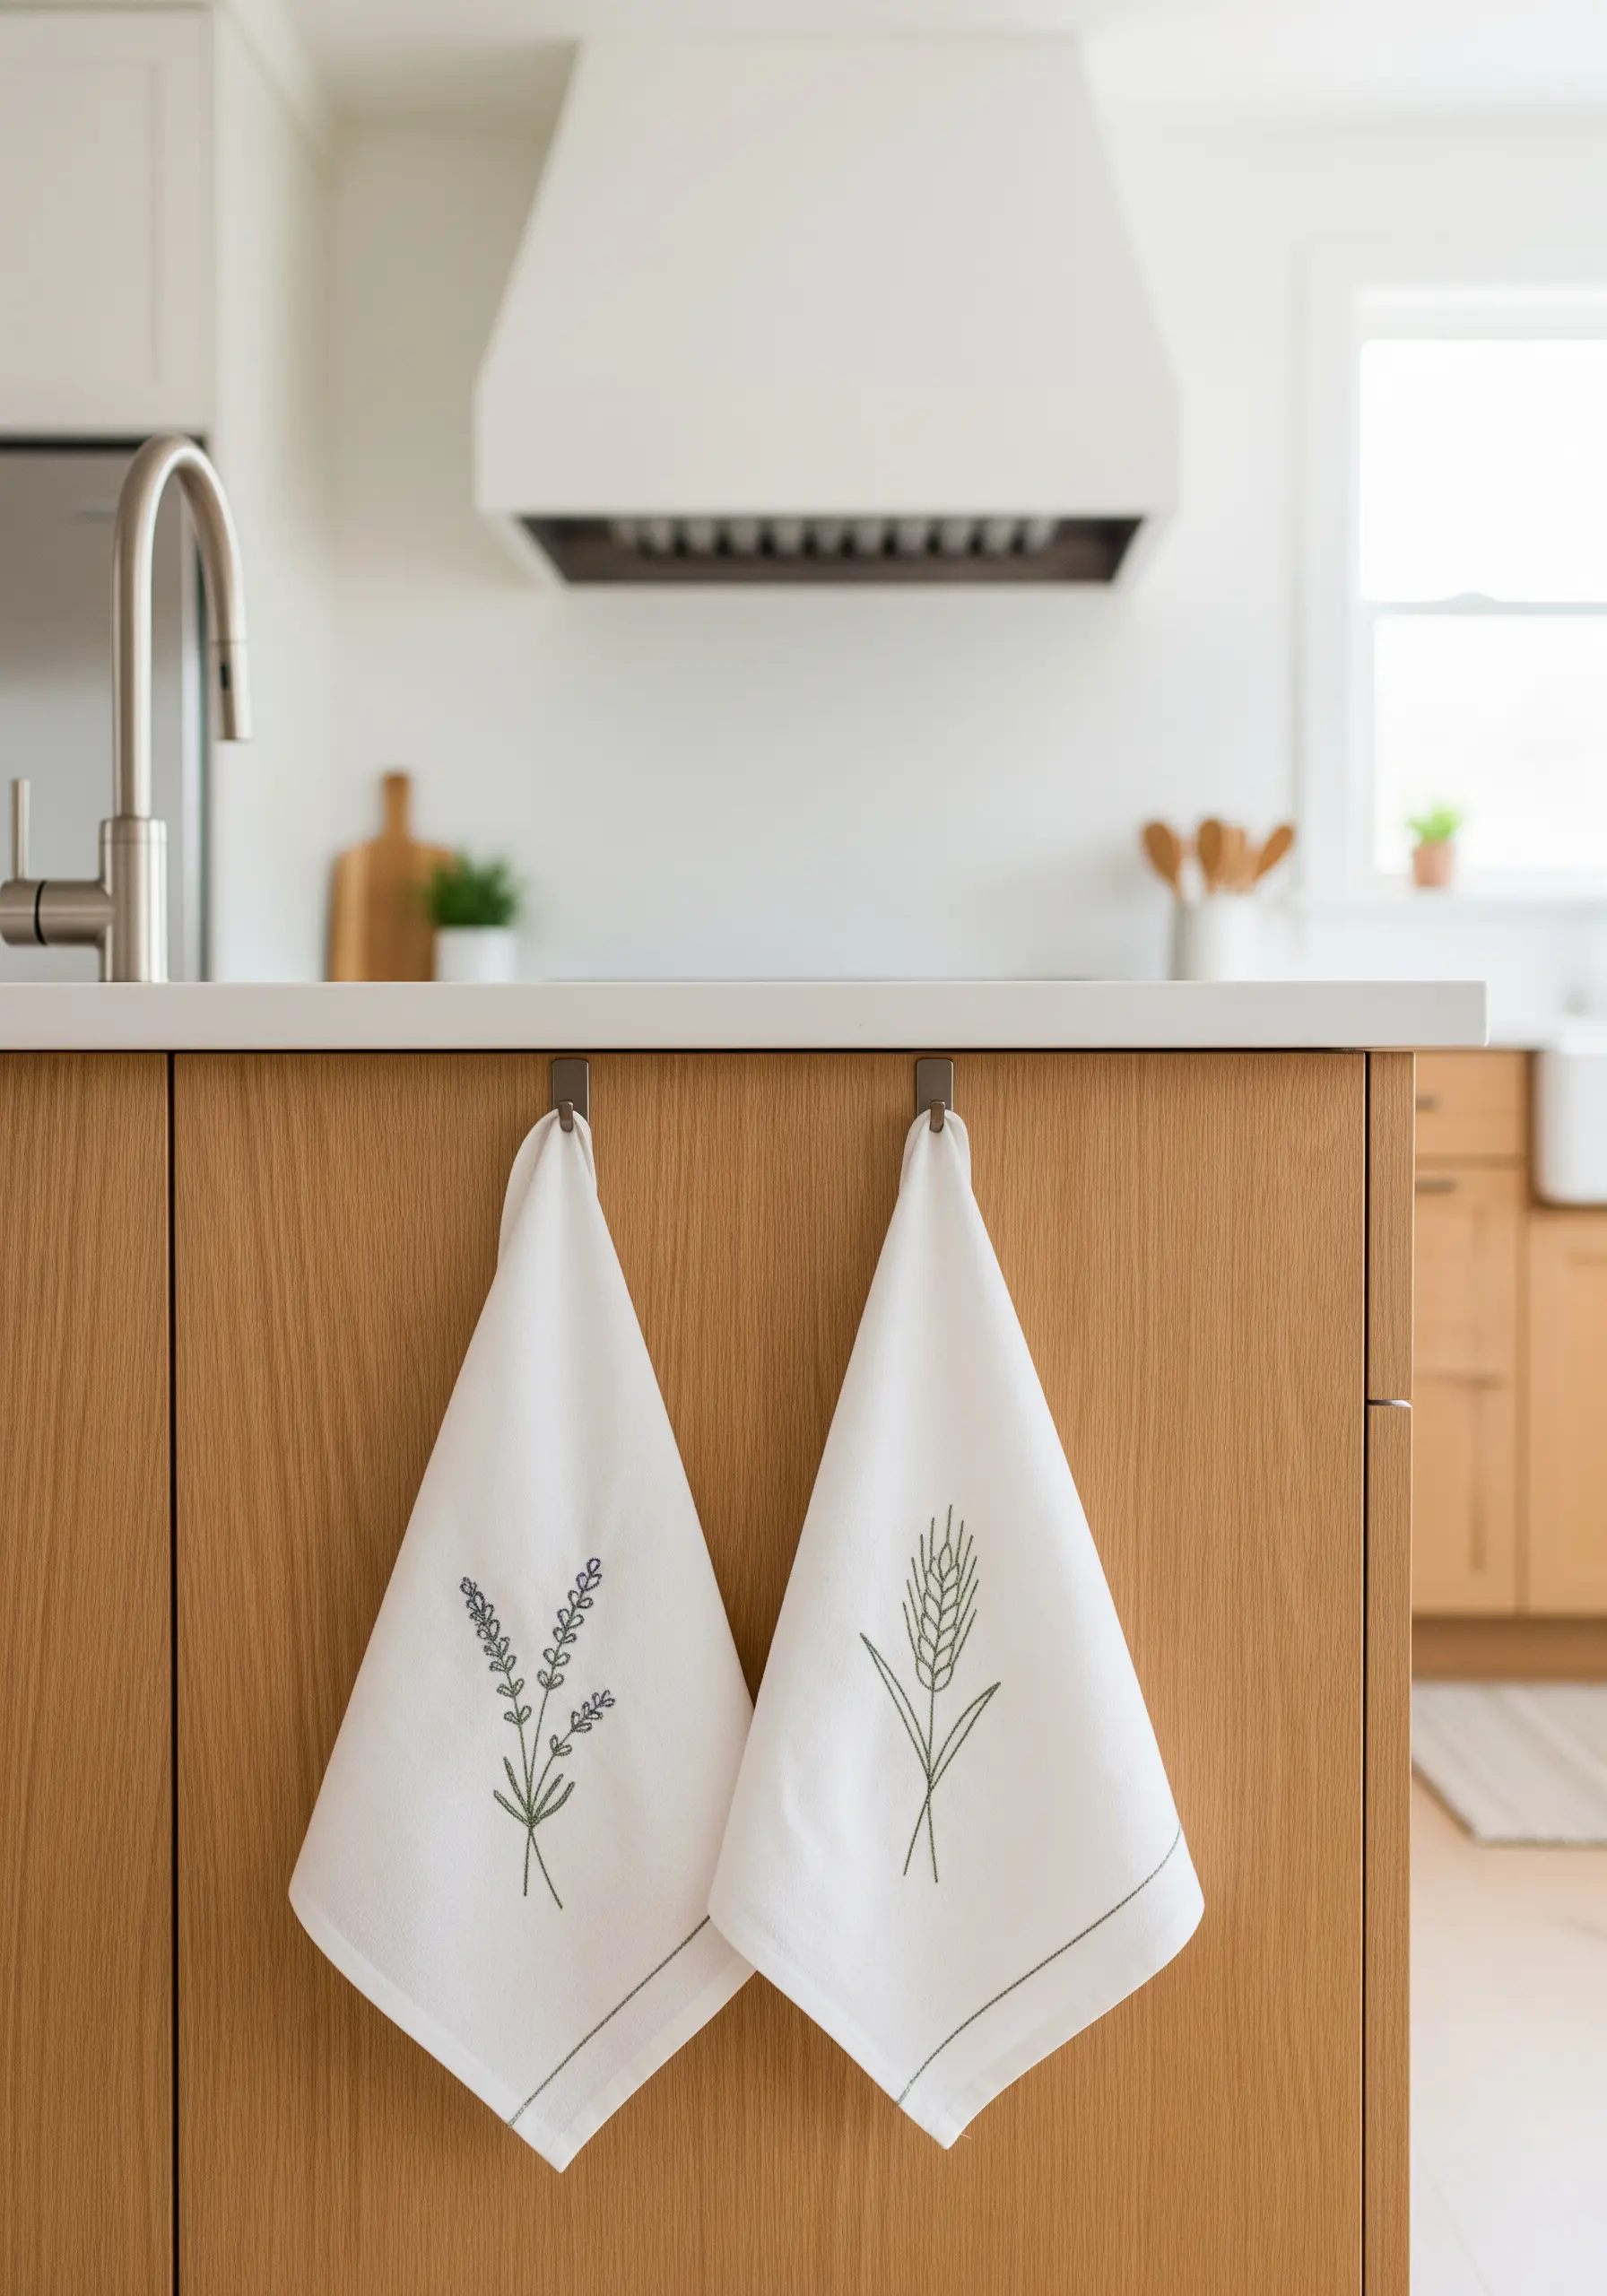
On functional items like kitchen towels, less is often more. A simple, fine-line botanical drawing gains immense elegance when translated into thread.
Use only two strands of floss and stick to a clean outline stitch like backstitch or stem stitch.
This ensures the design remains crisp and won’t snag or pull with use and washing.
The beauty of this approach lies in its restraint, transforming an everyday object with a mark of quiet craftsmanship.
It’s an accessible way to create your own botanical line art embroidery patterns on any fabric surface.
14. Combine Punch Needle and Embroidery for a Tactile Collage

Create a composition rich in contrasting textures by combining the flat planes of fabric appliqué with the high loops of punch needle and the fine detail of embroidery.
Start by stitching down abstract shapes of felt or linen onto your base fabric.
Then, use a punch needle to fill some areas with dense, plush loops, creating a satisfyingly fuzzy texture.
Finally, add delicate details or outlines with traditional stitches like the woven wheel or French knots.
These high-texture fabric collage embroidery projects are a playground for your senses.
15. Personalize Terrycloth with Tone-on-Tone Stitching
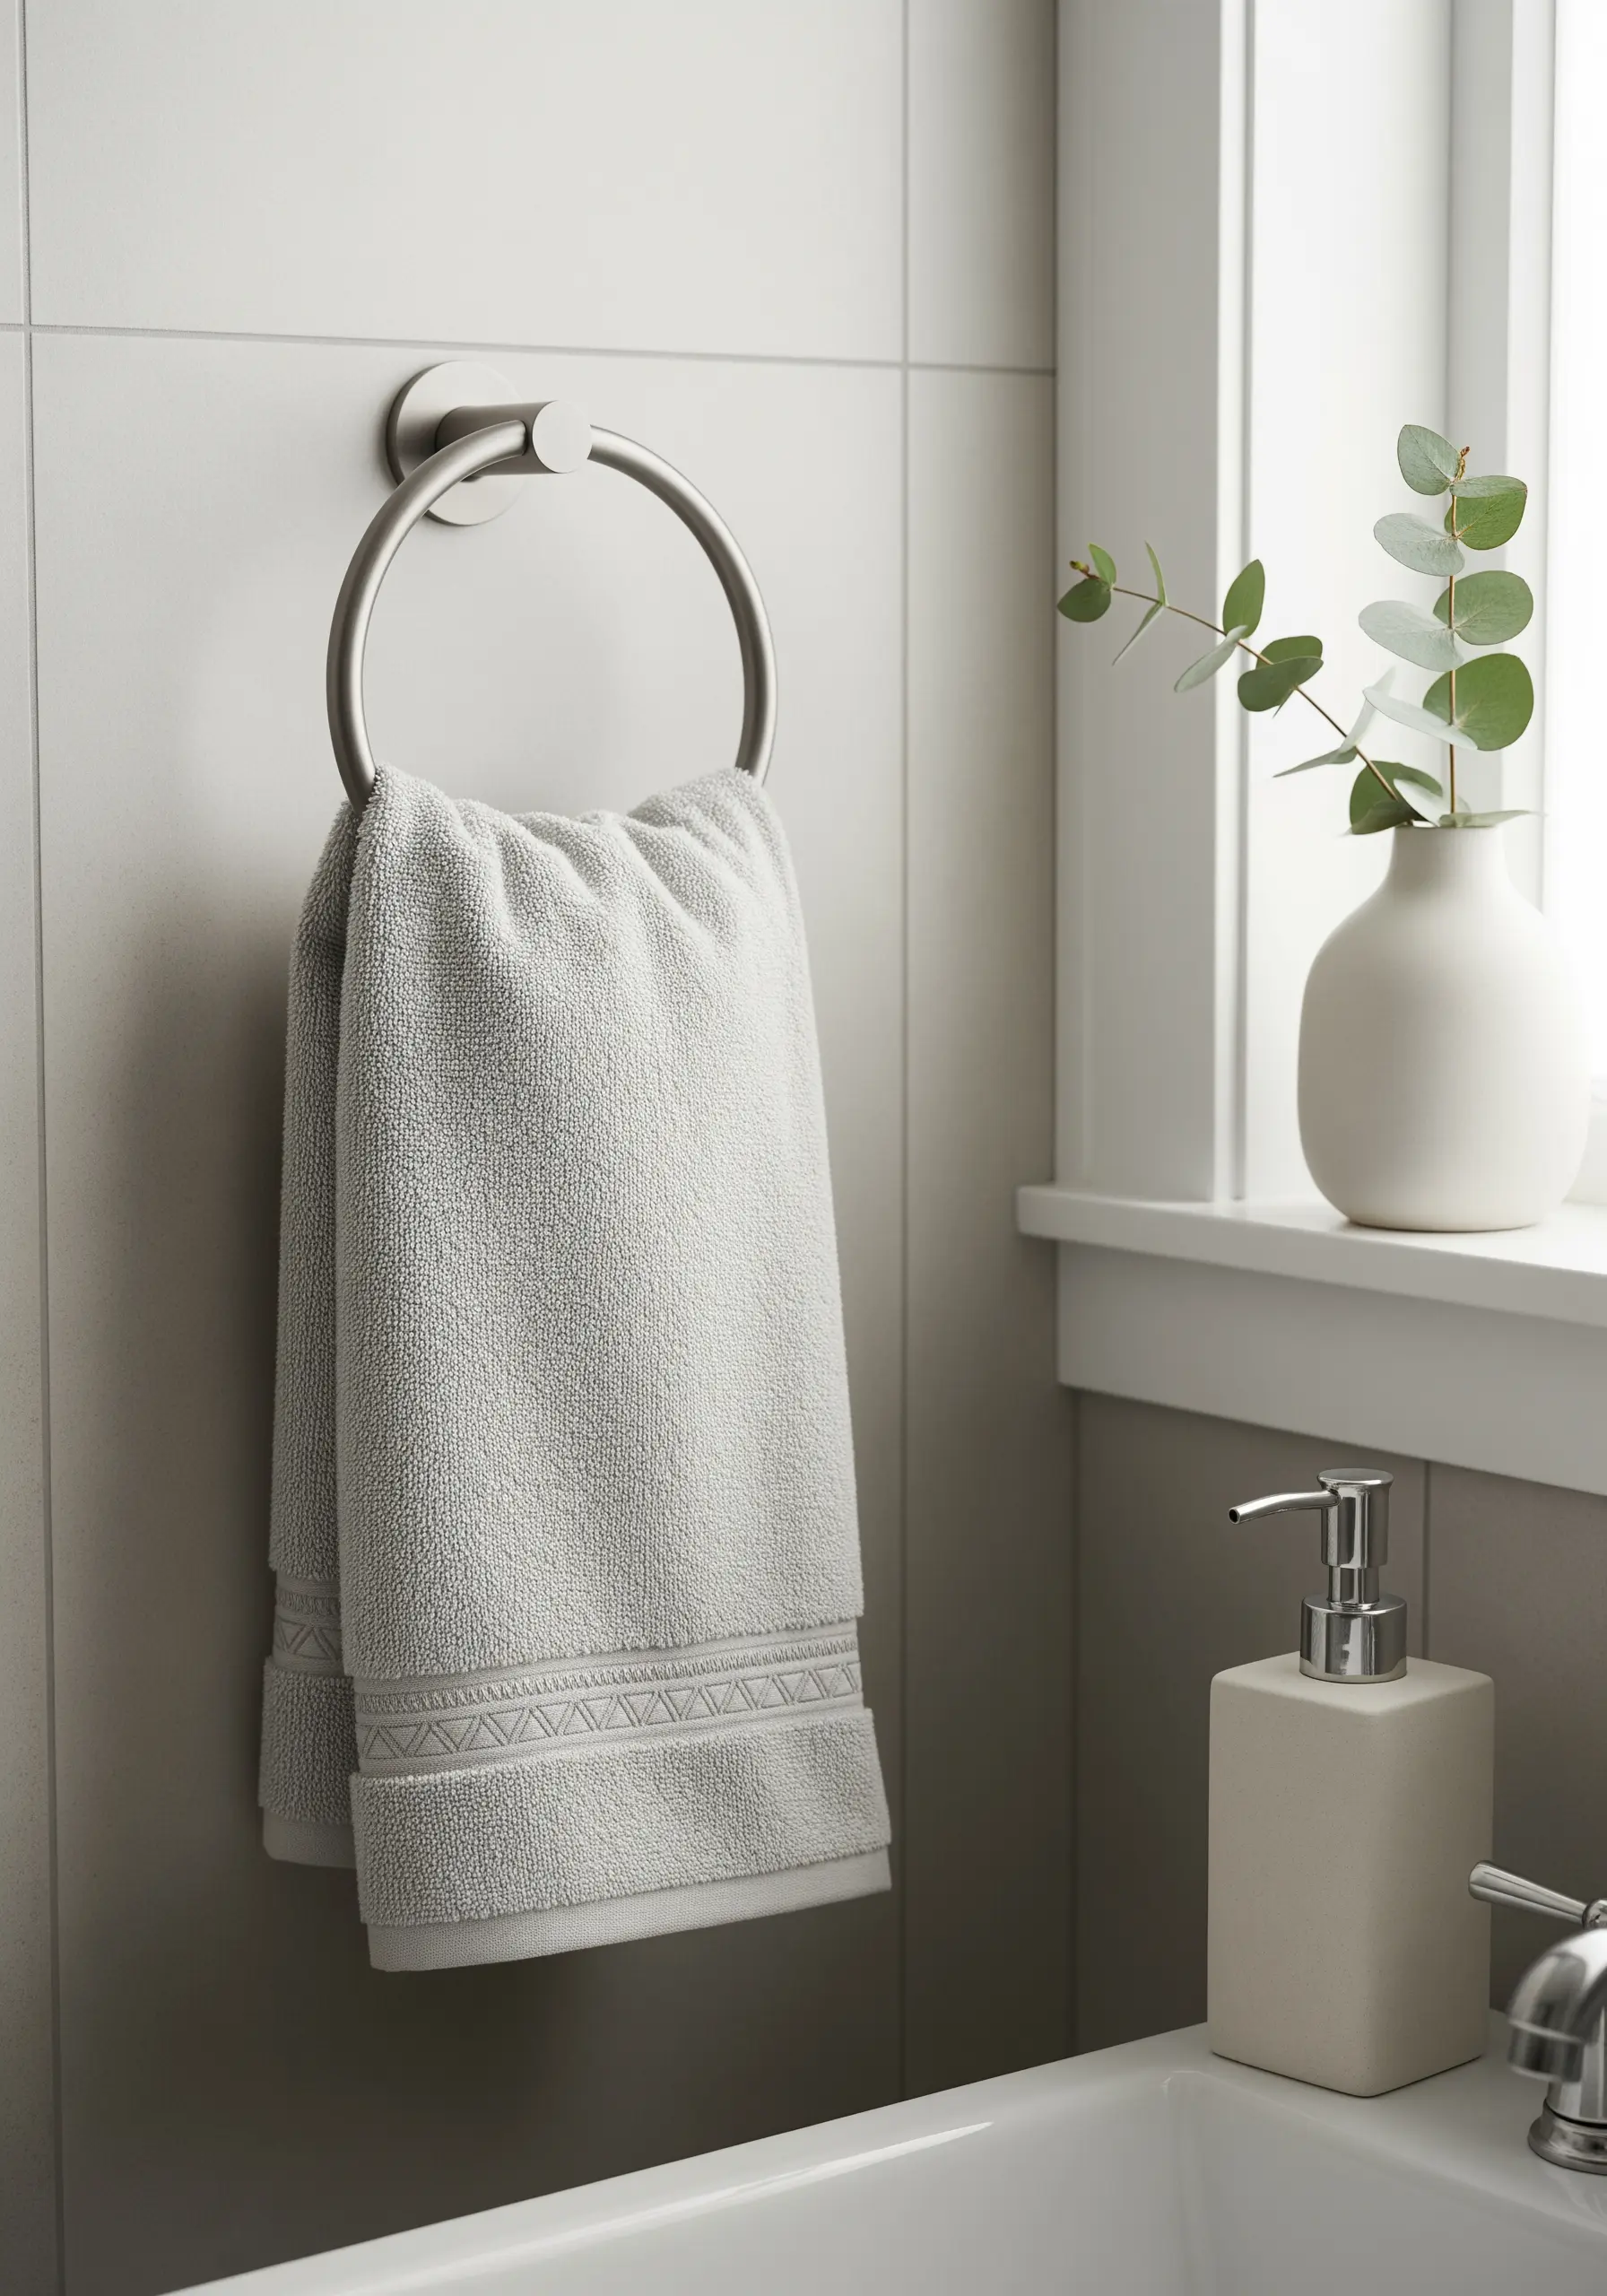
Embroidering on a high-pile fabric like a terrycloth towel requires a specific technique to prevent your stitches from disappearing into the loops.
First, apply a water-soluble topper over the area you plan to stitch. This creates a smooth surface for your needle and thread.
Choose a simple design, like a monogram or a geometric border, and use a thread that is just a shade darker or lighter than the towel.
This tone-on-tone approach adds a subtle, luxurious detail that looks like it belongs in a high-end hotel, making it one of the easiest small embroidery patterns to customize your home decor.
16. Add Sculptural Lines to Upholstery with Couching
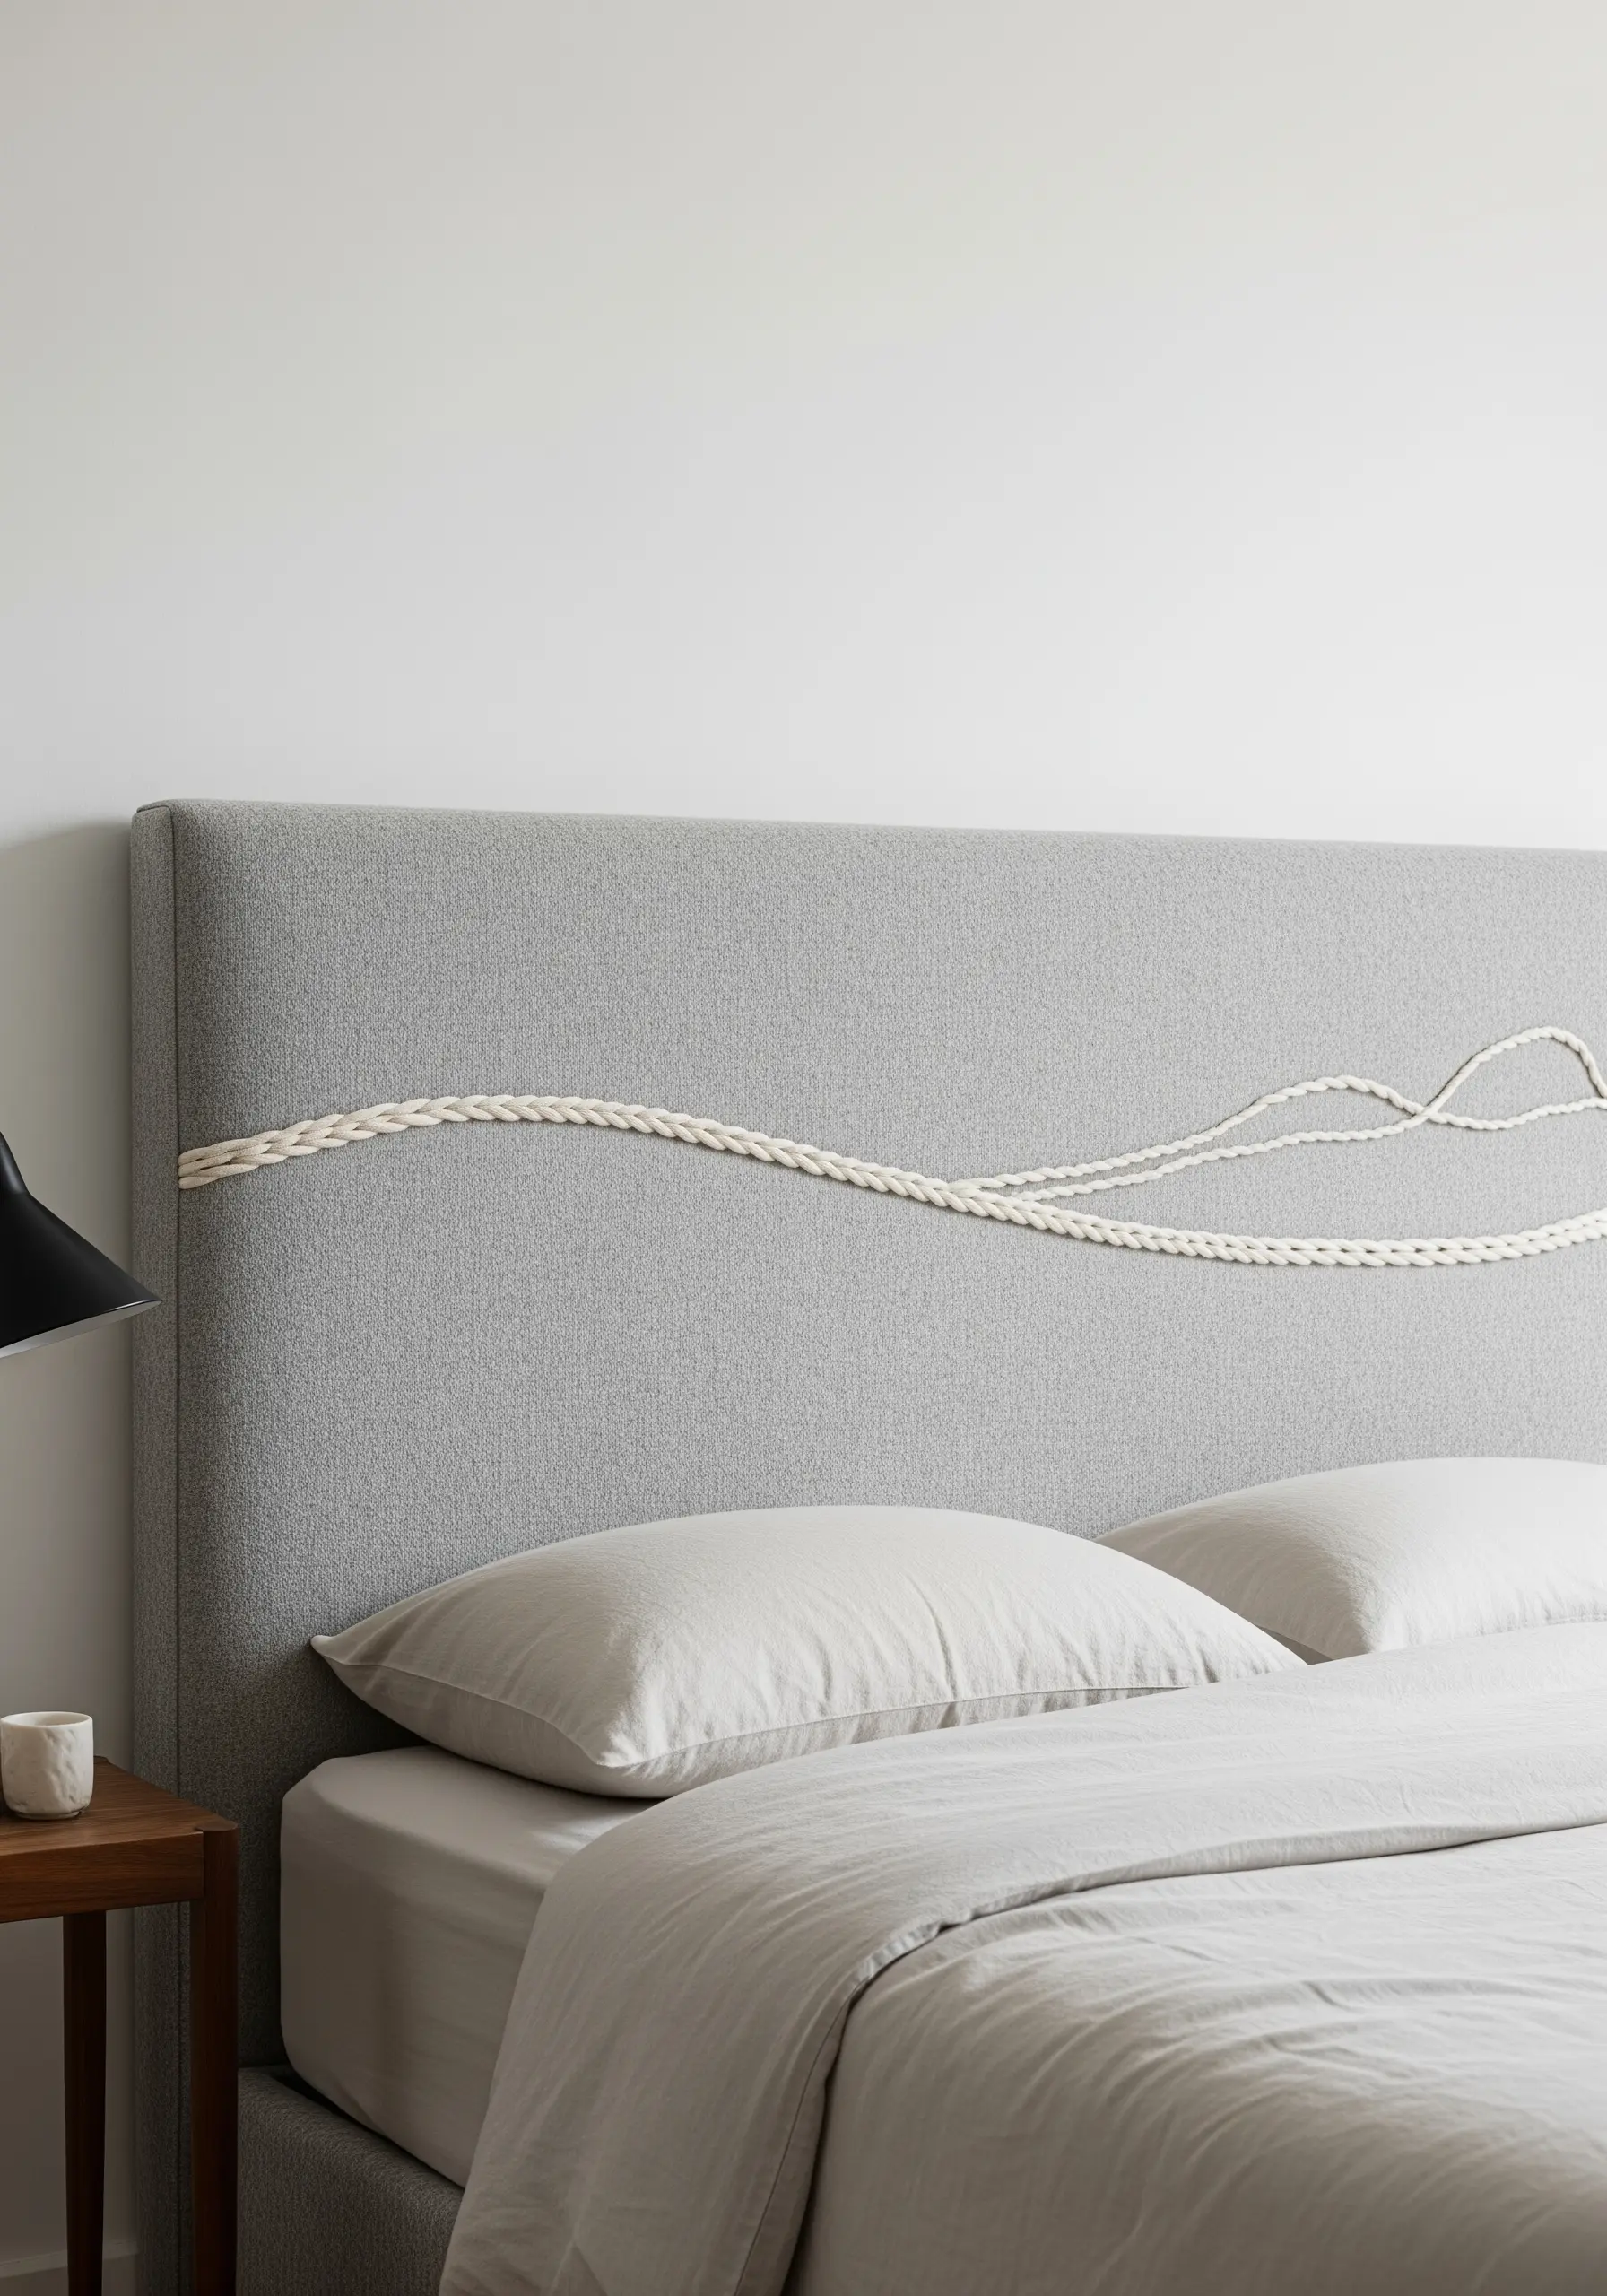
Elevate a simple fabric headboard or chair back by adding a bold, sculptural line with couched rope or thick cord.
Plan a simple, flowing abstract design and lightly trace it onto the upholstery fabric.
Lay your cord along the line and, using a strong, matching thread and a curved upholstery needle, stitch it down with small, evenly spaced anchoring stitches.
This technique is surprisingly straightforward and transforms a plain piece of furniture into a custom statement.
It is one of the most effective embroidery accent furniture ideas for creating a high-end, bespoke look.
17. Stitch Airy Foliage with Fishbone Stitch

When embroidering delicate botanicals like ferns, avoid heavy, dense stitches that can make them look clunky.
Instead, use the fishbone stitch. This stitch creates a central spine and angled sides in one fluid motion, perfectly mimicking the natural structure of a leaf or fern frond.
It leaves small gaps between the threads, creating a lighter, more realistic texture than a solid satin stitch.
This is a foundational technique for mastering any hand-embroidery leaf patterns and achieving a naturalistic look.
18. Create Dimensional Mandalas with Varied Fibers
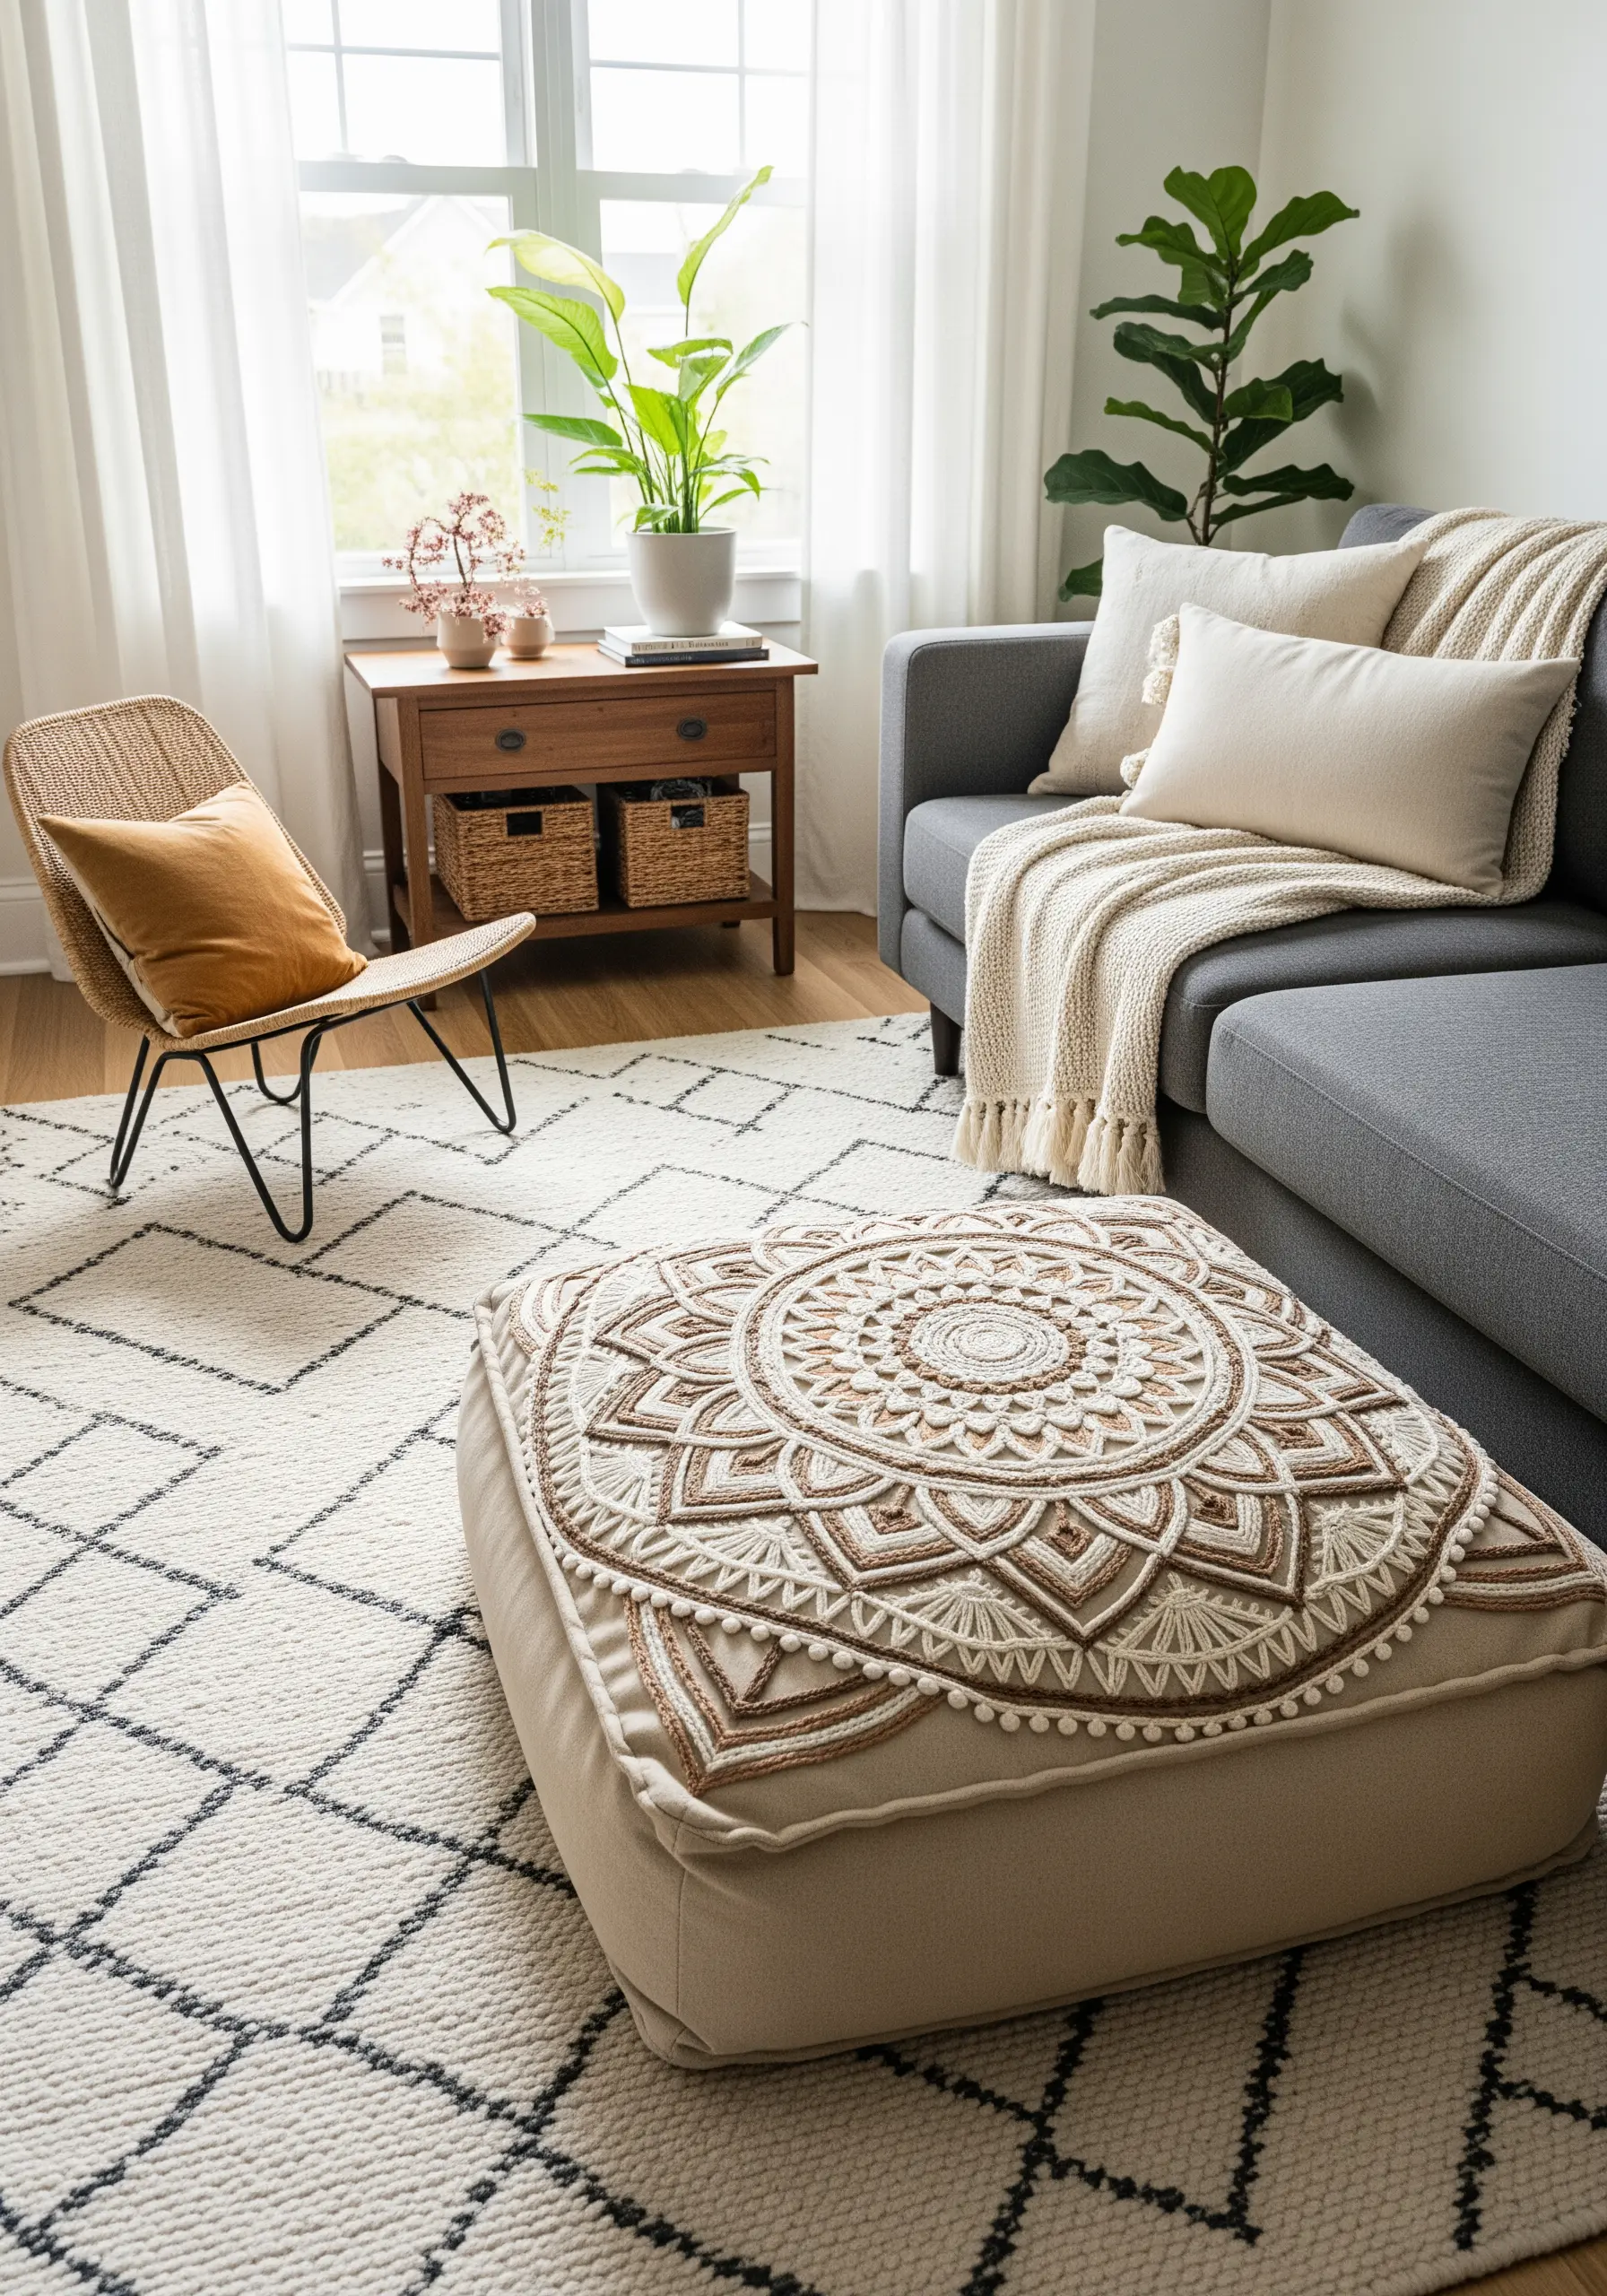
For a large-scale project like a mandala on a floor cushion, creating visual interest is all about varying your thread’s texture and thickness.
Use a chunky yarn or pearl cotton for the main structural outlines to make them bold and prominent.
Fill in the smaller, detailed sections with standard six-strand embroidery floss, using stitches like French knots or satin stitch for contrast.
This mix of fibers creates a rich, tactile surface that invites closer inspection and adds significant depth to the design.
It’s the perfect technique for large, embroidered mandala wall art designs that need to make an impact.
19. Achieve Crisp Lines with a Simple Backstitch

When stitching a graphic, sun-like motif on a textured fabric like canvas, clarity is everything.
A simple backstitch is your most reliable tool for creating clean, unbroken lines. Focus on keeping your stitch length consistent for a smooth, professional result.
Using a single, warm color like gold or ochre against a neutral background allows the simple power of the shape to shine without distraction.
This minimalist approach proves that even the most basic stitches can create impactful decor, making it perfect for minimal DIY embroidery pieces perfect for a gallery wall.
20. Add Effortless Depth with Variegated Thread

Give your botanical embroidery a painterly, dimensional quality without constantly changing colors by using a single variegated thread.
A variegated floss contains multiple shades of the same color along its length, creating subtle, natural-looking highlights and shadows as you stitch.
This is particularly effective for dense designs like ferns, where the random color shifts mimic how light hits different parts of a plant.
It’s a simple switch that helps you master one of the key ways to embroider realistic shadows under leaves for depth, adding complexity with ease.
21. Form Dimensional Letters with Wrapped Cording

Create soft, sculptural lettering on felt banners or pillows by using a technique that combines cording and thread wrapping.
First, cut your letters from a thick cord or yarn. Lay them on the felt and secure them with a few temporary stitches or fabric glue.
Then, using a matching color of embroidery floss, meticulously wrap the entire surface of the cord, using your needle to pass the thread under and over until it’s completely covered.
This technique creates a soft, raised text effect that is beautifully tactile and adds a gentle, handcrafted touch to personalized embroidery ideas.