

You have the threads, the fabric, and the desire to create something beautiful for your home. But how do you move beyond a simple hoop on the wall and make your embroidery feel truly integrated, intentional, and part of your living space?
The answer lies in seeing the furniture around you not as finished objects, but as blank canvases. A simple IKEA stool, a plain cushion cover, or even a cabinet door holds the potential to become a personal work of art—a surface waiting for the texture and story that only your stitches can provide.
This is where your craft becomes design. It’s about choosing the right stitch to create a specific texture, the right thread weight to make a motif pop, and the right placement to transform an everyday item into something that feels uniquely yours. Let’s explore how a few thoughtful stitches can completely redefine the furniture you live with every day.
1. Create Textural Depth on KALLAX Storage Bins

Transform simple fabric bins into a botanical art piece by layering different stitches to create dimension.
Use a chunky French knot for flower centers, a delicate detached chain stitch for petals, and a whipped backstitch for sturdy stems that stand out.
Vary the number of strands in your floss—use all six for bold foreground flowers and just two for finer background details.
This technique of modulating thread weight and stitch style turns a flat surface into a dynamic, tactile landscape that invites a closer look.
2. Add Graphic Punch Needle Blocks to a POÄNG Chair

Achieve this bold, contemporary look on a chair cushion using punch needle embroidery with thick yarn.
Create clean, geometric shapes by working within taped-off sections on your monk’s cloth foundation.
Ensure all your loops are punched in the same direction for a uniform, carpet-like texture that looks incredibly professional.
This method offers a faster way to cover large areas with color and texture than traditional embroidery, resulting in a durable and highly graphic finish.
3. Adorn a HEMNES Dresser with Delicate Vine Appliqués

For a subtle, painterly effect on a wooden dresser, create embroidered vine appliqués.
Stitch delicate branches using a fine stem stitch on a sheer, sturdy fabric like organza, leaving a generous border.
Once complete, trim the organza very close to the stitches and affix it to the drawer fronts with a clear, flexible craft adhesive.
This approach gives the illusion of embroidery directly on wood, adding a touch of organic elegance without altering the furniture permanently.
4. Craft a Radiant Sunburst on an IVAR Cabinet

Turn plain cabinet doors into a statement piece with a geometric sunburst design.
Cover the door panels with a tightly woven fabric like teal linen. Mark a central point and evenly spaced dots around the perimeter.
Use a thick, metallic cord or braided floss, stitching long straight lines from the center to the edge to create the rays.
A central decorative button or a cluster of French knots provides a polished focal point, turning a simple storage unit into a piece of functional art.
5. Line a BILLY Bookcase with an Embroidered Backdrop

Elevate a simple bookcase by transforming the back panel into a custom embroidered surface.
Remove the thin backer board and cover it with evenweave fabric or Aida cloth, pulling it taut and securing it with staples or glue.
Work a repeating cross-stitch or blackwork pattern for a clean, graphic effect that adds depth and personality behind your books and objects.
This unexpected detail turns a standard shelf into a bespoke piece of furniture.
6. Stitch Functional Liners for a RÅSKOG Cart

Add a soft, custom touch to a utility cart with simple, removable fabric liners.
Choose a durable fabric like cotton canvas that can withstand use. Embroider a repeating motif using a simple backstitch or stem stitch with three to four strands of floss.
The key is simplicity and repetition—a clean, minimal pattern feels intentional and modern, elevating the cart’s function with quiet style.
Fold the top edge over to create a clean cuff that hangs neatly over the side.
7. Upholster a BEKVÄM Stool with a Playful Pattern

Turn a basic step stool into a cheerful accent by upholstering the top with your own embroidered fabric.
Before you begin stitching, choose a heavy-duty fabric like cotton duck that can handle wear.
Use satin stitch to fill in your motifs, which creates a durable and smooth surface. For bees or other insects, add fine backstitched details for legs and antennae after filling the main shapes.
Stretch the finished embroidery over a layer of foam and secure it tightly underneath with a staple gun for a professional finish.
8. Add Extreme Texture with a Couching Technique

While this appears to be arm knitting, you can achieve a similar high-texture, color-blocked effect using couching.
Lay down thick wool roving or chunky yarn onto a sturdy felt base in your desired pattern.
Then, use a strong matching or contrasting thread to tack the roving down at regular intervals. This technique allows you to control the placement of these oversized fibers precisely.
It’s a fantastic way to introduce sculptural fiber art to your furniture without needing any knitting skills.
9. Unify a Daybed with a Cohesive Geometric Motif

Create a sophisticated, designer look by repeating a single color and geometric theme across multiple pillows.
Choose a bold thread color, like this classic navy blue, to stand out against a neutral background fabric.
Use a whipped backstitch or a chain stitch to create consistently thick, graphic lines that emphasize the pattern’s structure.
This disciplined approach—limiting color and repeating motifs—is what makes the collection feel intentional and high-end, perfect for a minimalist space.
10. Create Custom Botanical Fabric for Upholstery

Instead of searching for the perfect printed fabric, embroider your own to upholster a simple stool.
Select a durable base fabric like cotton twill or canvas. Trace a repeating leaf pattern, like these monstera leaves, across the surface.
Use long-and-short stitch with two or three shades of green per leaf to create subtle, realistic color blending and depth.
This method transforms a basic piece of furniture into a unique statement piece featuring your own botanical artwork.
11. Design a Serene, Large-Scale Headboard

Make your bed the centerpiece of the room with a large-scale embroidered headboard.
Create a simple slipcover for a basic headboard from a neutral, textured fabric like linen-cotton blend.
To tackle a large design like this tree, use a projector to trace the outline onto the fabric before you begin stitching. This ensures perfect proportions.
Combine simple stitches: stem stitch for the trunk and branches, and detached chain stitches (lazy daisies) for the leaves. The result is an impressive piece of art that remains soft and serene.
12. Organize with Minimalist Embroidered Icons
Elevate fabric storage bins with clean, modern embroidered labels that function as minimalist art.
Use a tear-away stabilizer on the inside of the bin to prevent the fabric from puckering and ensure your lines are crisp.
Choose a high-contrast thread, like black on gray, and use a simple backstitch to create sharp, geometric icons.
This is a sophisticated and minimal approach to organization that feels both personal and impeccably designed.
13. Curate a Sofa with Mixed-Texture Pillows

Create a visually interesting sofa display by combining pillows with distinctly different embroidery techniques.
Pair a pillow with chunky couched yarn next to one with dense French knot clusters for a bobble effect. Add another with clean, geometric line work using a simple split stitch.
The key to making this eclectic mix feel cohesive is a shared color palette. The consistent tones unify the varied textures, creating a rich, layered look.
14. Craft 3D Lettering with Couched Yarn

For bold, dimensional lettering on a pillow, move beyond thread and use yarn.
This raised, script-like effect is achieved by couching a thick, soft yarn onto the fabric surface.
Simply lay the yarn in the shape of your letters and use a matching or contrasting embroidery floss to tack it down with small, evenly spaced stitches.
This technique is much faster than satin-stitching a large area and results in a wonderfully tactile, almost sculptural, finish.
15. Add High-Relief Texture to EKET Drawer Fronts

Give plain cabinet doors a dramatic, tactile makeover with full-coverage texture.
This effect is best achieved with punch needle using thick wool yarn, which creates a dense, looped surface.
Work your geometric pattern on a foundation cloth that is cut slightly larger than the drawer front. Once finished, trim the piece and adhere it securely to the surface with a strong spray adhesive or fabric glue.
This method completely transforms the furniture, adding warmth, color, and sophisticated texture.
16. Add a Removable Folk-Art Accent Band

Instantly infuse personality into a neutral armchair with a brightly embroidered, removable band.
This is a perfect project for practicing traditional folk-art motifs, which often feature bold, symmetrical florals.
Use a vibrant palette of floss and fill your shapes with dense, smooth satin stitch. Outline each element with a contrasting color using a stem or split stitch to make the design pop.
As it’s not permanently attached, you can switch it out seasonally or move it to other pieces of furniture.
17. Create a Graphic Chevron Cushion with Satin Stitch
Emulate the look of bold, graphic fabric by creating it yourself with embroidery.
For a crisp chevron pattern on a bench cushion, use wide, dense satin stitch blocks worked in a heavy-weight thread or fine yarn.
To ensure perfectly straight edges between the black and white sections, use masking tape as a guide for your needle, stitching right along the edge of the tape.
This meticulous approach results in a clean, high-contrast geometric pattern that is both striking and durable.
18. Stitch Minimalist Typography for Wall Decor

For elegant, modern lettering that feels both handmade and refined, focus on the stitch and the spacing.
Use a simple split stitch for the main letters; it creates a smoother, more solid line than a standard backstitch.
To achieve the outline effect, stitch two parallel rows of split stitch very close to one another, letting the negative space define the shape of the letter.
This technique turns a simple inspirational quote into a piece of clean, graphic art.
19. Give Fruit Motifs Dimension with Padding
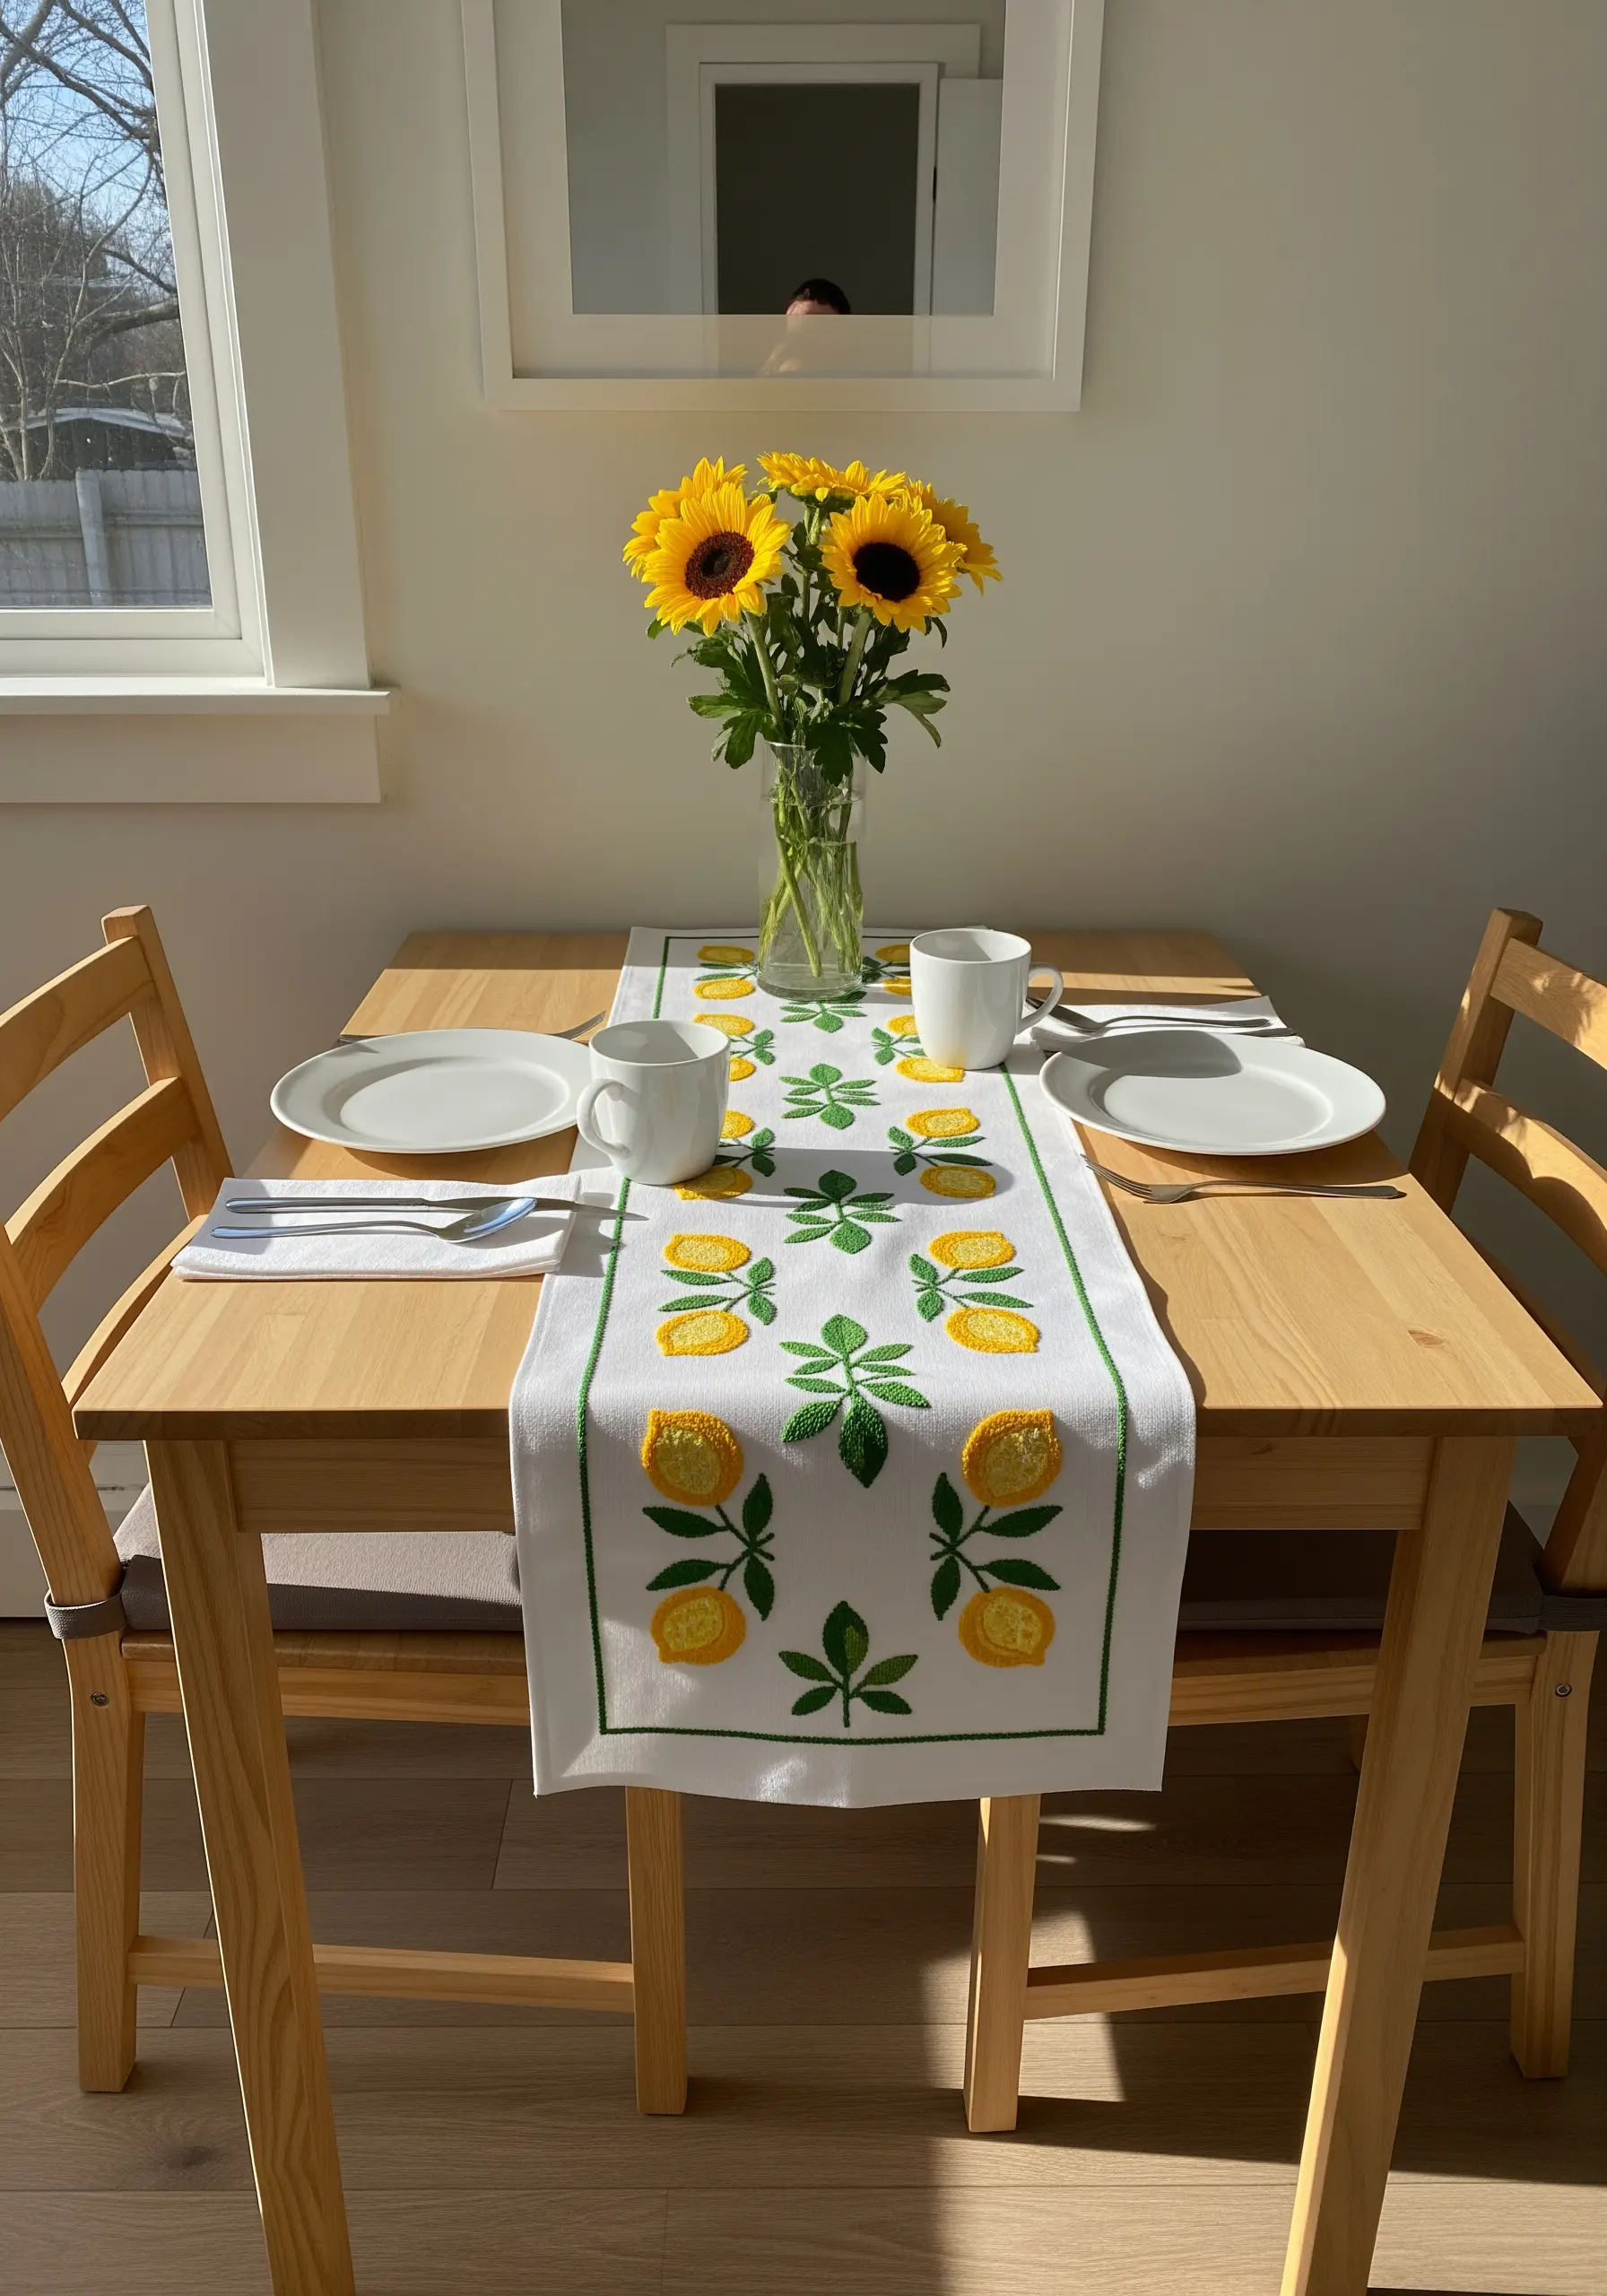
Make your embroidered fruit look plump and realistic by using a padding technique before you stitch.
Before you begin the final satin stitch, create a base layer of small, straight stitches or seed stitches within the outline of the lemon.
Then, work your final vertical satin stitches over this padded foundation. This underlayer lifts the top stitches, creating a subtle 3D effect that catches the light beautifully.
It’s a classic technique that adds a touch of refinement to otherwise simple designs.
20. Achieve Painterly Blending with Long-and-Short Stitch
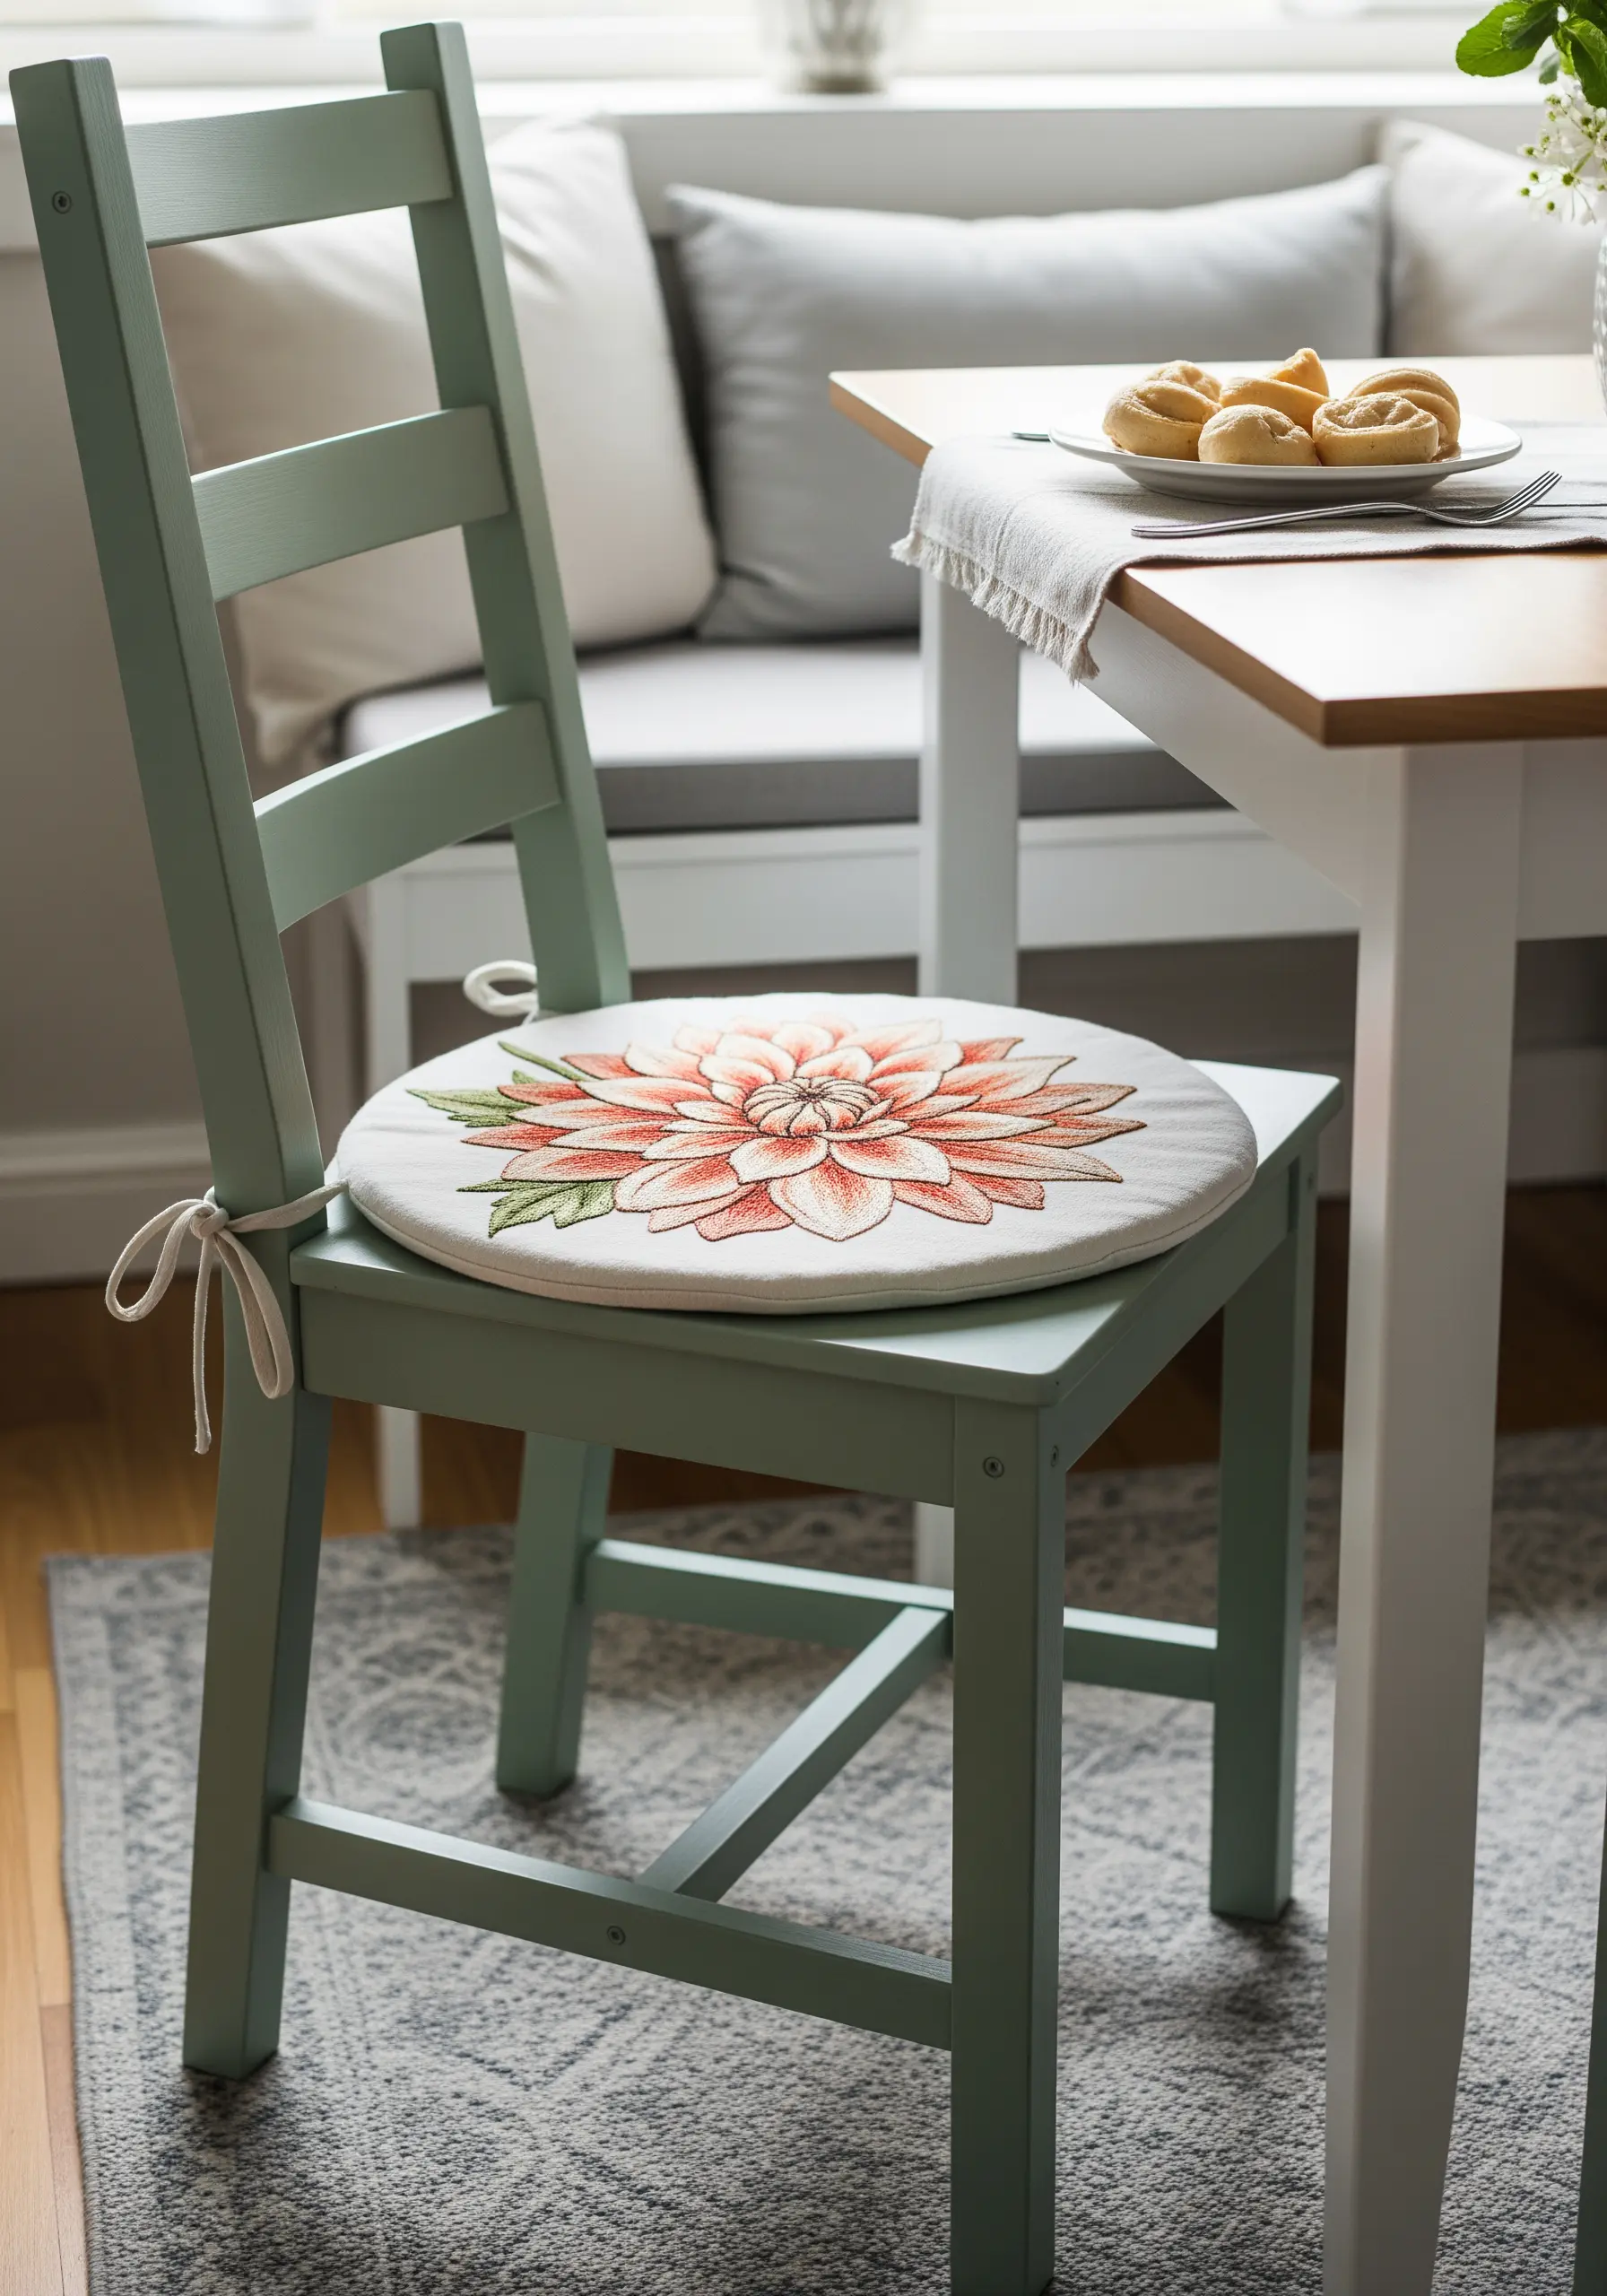
Create soft, realistic floral gradients on a seat cushion using the long-and-short stitch.
This stitch is essentially a ‘thread painting’ technique. It allows you to blend different shades together seamlessly, avoiding the harsh lines of color-blocking.
Work in rings from the outside of the petal inward, interlocking stitches of each new color with the row before it.
The result is a beautifully shaded flower that looks more like a watercolor painting than needlework.
21. Chart the Stars on a Nightstand Drawer

Customize a MALM drawer front by turning it into a celestial map.
Adhere a piece of dark fabric, like black linen or fine-wale corduroy, to the drawer front.
Use a single strand of metallic silver or bright white floss to stitch constellation patterns with a simple backstitch. For the stars themselves, use tiny seed stitches or single French knots.
This is a sophisticated and personal way to add a touch of cosmic wonder to your bedroom decor.
22. Create an Abstract ‘Colorwash’ Ottoman Top

Transform a plain ottoman by creating a rich, abstract textile surface.
This effect is achieved by filling the entire fabric area with dense, parallel rows of straight stitch, also known as Roumanian couching or Bokhara stitch.
Use multiple strands of variegated floss or frequently change colors to create a fluid, blended look that resembles a woven tapestry or a watercolor painting.
It’s a meditative process that turns a simple piece of furniture into a vibrant work of art with stunning color shifts.
23. Curate an Embroidery Gallery Wall

Design a cohesive gallery wall by treating your embroidery hoops as individual art pieces.
To create harmony, select a unified color palette and use the same background fabric across most pieces.
Alternate between detailed florals, abstract textural works, and simple typographic designs. Combine hoops of different sizes with a few rectangular frames for added visual interest.
Using shallow picture ledges allows you to rearrange your collection easily, creating a dynamic display of botanical line art and other motifs.
24. Embroider a Lampshade with a Hidden Glow

Add a magical, interactive element to a bedside lamp by stitching with glow-in-the-dark thread.
Choose a simple motif, like these fireflies, and stitch it directly onto a plain fabric lampshade. Use a fine needle to avoid making large holes.
The thread will absorb light when the lamp is on. When you turn it off, your embroidery will emit a soft, surprising glow.
This simple technique turns a functional object into one of the most charming tiny embroidery ideas for a bedroom.
25. Tell a Story with Appliqué Bunk Bed Curtains

Transform a KURA bed into a woodland hideaway with narrative curtain panels.
Combine felt appliqué for the larger shapes—like the fox, owl, and mushroom caps—with decorative embroidery stitches for the details.
Attach the felt pieces with a neat blanket stitch around the edges, which adds another layer of texture and charm.
Use stem stitch for tree branches and simple satin stitch for smaller elements, creating a durable and playful scene for a child’s space.
26. Add a Meditative Mandala to a Tray Table

Elevate a simple tray table by creating a removable, embroidered insert.
For an intricate mandala design, a high-contrast palette like white on black is incredibly effective.
Use a whipped backstitch or a chain stitch to create the smooth, solid lines. The key is stitch consistency, which reinforces the pattern’s soothing, symmetrical nature.
This project turns a functional item into a focus for mindfulness, both in its creation and its final display, making it one of the most satisfying floral mandala embroidery ideas.
27. Plant an Embroidered Garden on a Mirror Frame

Add an unexpected touch of softness and color to a plain mirror by embellishing it with a floral appliqué.
First, embroider a dense wildflower scene along the edge of a strip of sturdy felt or canvas.
Use a variety of stitches—satin stitch for petals, French knots for flower centers, and stem stitch for greenery—to create rich texture.
Carefully trim the finished piece and affix it to the bottom of the mirror frame with a strong, clear adhesive for a charming, three-dimensional effect.
28. Introduce Color and Texture with Yarn Wrapping

For a no-sew textile update, transform a metal floor lamp by wrapping it in yarn.
This is an easy and effective way to add a handmade touch to an industrial-style piece. Use variegated yarn for effortless color changes, or create your own stripes with different solid colors.
Start at one end, securing the yarn with a dab of hot glue, then wrap tightly and evenly, pushing the coils together as you go to ensure no metal shows through.
Secure the other end with another dot of glue for a clean finish.
29. Embroider Directly onto a Wooden Crate

Take your embroidery off the fabric and onto an unexpected surface like a wooden crate.
Start by drawing your letters on the wood with a pencil. Then, using a small drill bit (1/16″ or smaller), carefully drill holes along your penciled lines, spaced about a quarter-inch apart.
Thread a blunt tapestry needle with thick yarn and use a simple backstitch, going in and out of the pre-drilled holes.
This technique creates a bold, graphic statement and beautifully merges hard and soft materials.
30. Achieve a Bouclé Finish with Punch Needle

Create a sophisticated, highly tactile cushion top using the loop side of a punch needle project.
Working with a punch needle and wool yarn on monk’s cloth will produce a dense, looped texture that mimics expensive bouclé or sherpa fabric.
To embed a simple motif, like this seashell, adjust your punch needle to a shorter loop height for just that section. This creates a subtle, recessed design defined by a change in texture rather than color.
31. Stitch on Sheer Curtains for an Ethereal Effect
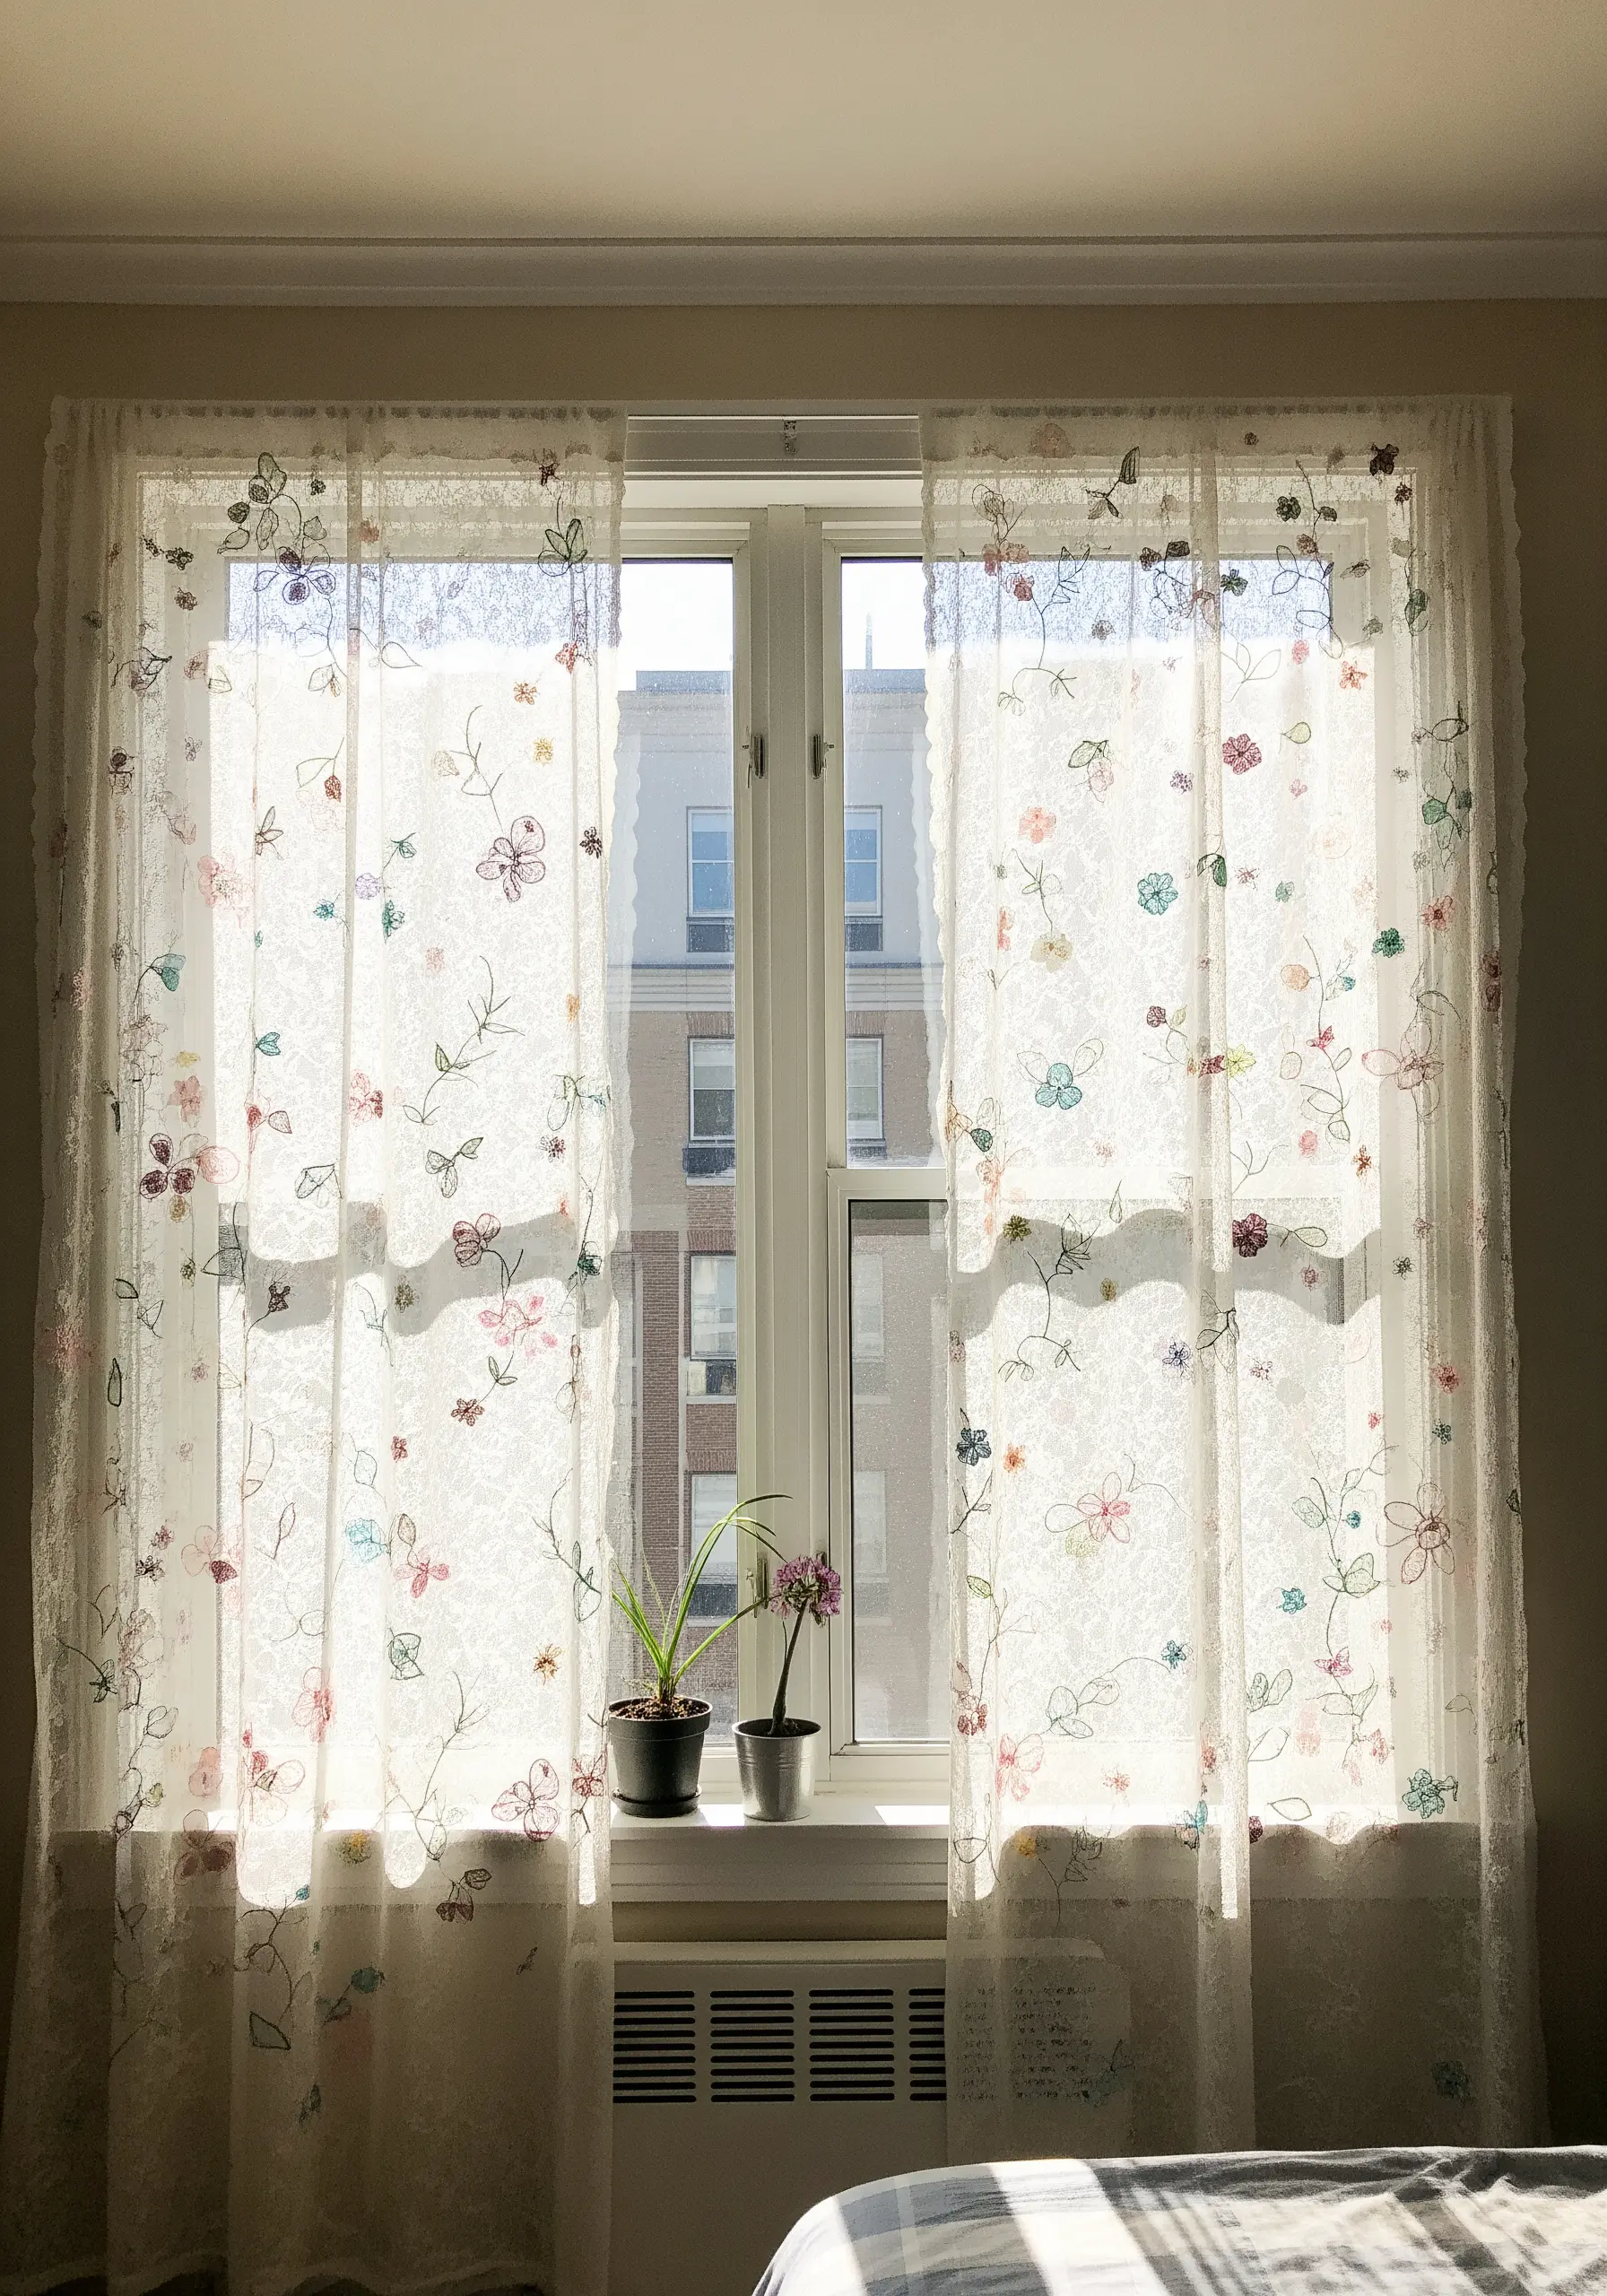
Embroidering on sheer or lace curtains adds a delicate, custom layer of detail that plays beautifully with light.
The essential tool for this is a water-soluble stabilizer. Hoop the stabilizer and the curtain fabric together; this provides the necessary support to prevent puckering and tearing.
Use lightweight stitches, like lazy daisies and single straight stitches, with only two strands of floss. Keep the motifs small and scattered to maintain the fabric’s airy drape, transforming them into delicate art.
32. Organize Your Workspace with a Pegboard Gallery

Turn a SKÅDIS pegboard into a flexible and inspiring gallery for your embroidery work.
Create a series of small stitch samplers or motifs on coordinating fabric. Display them in small, lightweight frames or mini hoops that can be hung directly from the pegboard hooks.
This modular approach allows you to showcase your skills, test new patterns, and keep your creative inspiration visible and organized.
It’s a perfect way to make your workspace beautiful and functional with stunning framed pieces.
33. Craft Polished and Functional Embroidered Coasters

Turn your small geometric embroideries into useful, everyday objects.
After stitching your design on a sturdy fabric like canvas, mount it onto a round cork base using a strong craft adhesive.
For a durable and decorative edge, finish the coaster with a blanket stitch. Use a sharp needle and a thick, contrasting perle cotton to wrap the stitch evenly around the edge, neatly joining the fabric to the cork.
This professional finishing touch makes your work not just beautiful, but also practical.


