You know the intimate magic of pulling thread through fabric, watching a design bloom from your hands. But what happens when you swap your linen for paper? The conversation changes. Your stitches find a new voice—crisper, bolder, and more graphic.
Handmade paper isn’t a replacement for fabric; it’s a new partner in your creative process. It offers a firm, stable foundation that makes every single stitch stand out in sharp relief. The slight pull of the thread, the clean perforation of the needle—it all becomes part of the art. This isn’t about learning a new craft, but expanding the boundaries of the one you already love.
Here, you’ll discover how to turn that partnership between thread and paper into stunning wall art. These ideas are more than just inspiration; they are invitations to see your skills in a new light, creating pieces that feel both handmade and gallery-ready. You have the needle. You have the thread. Let’s give them a new story to tell.
1. Celestial Spirals on Textured Paper
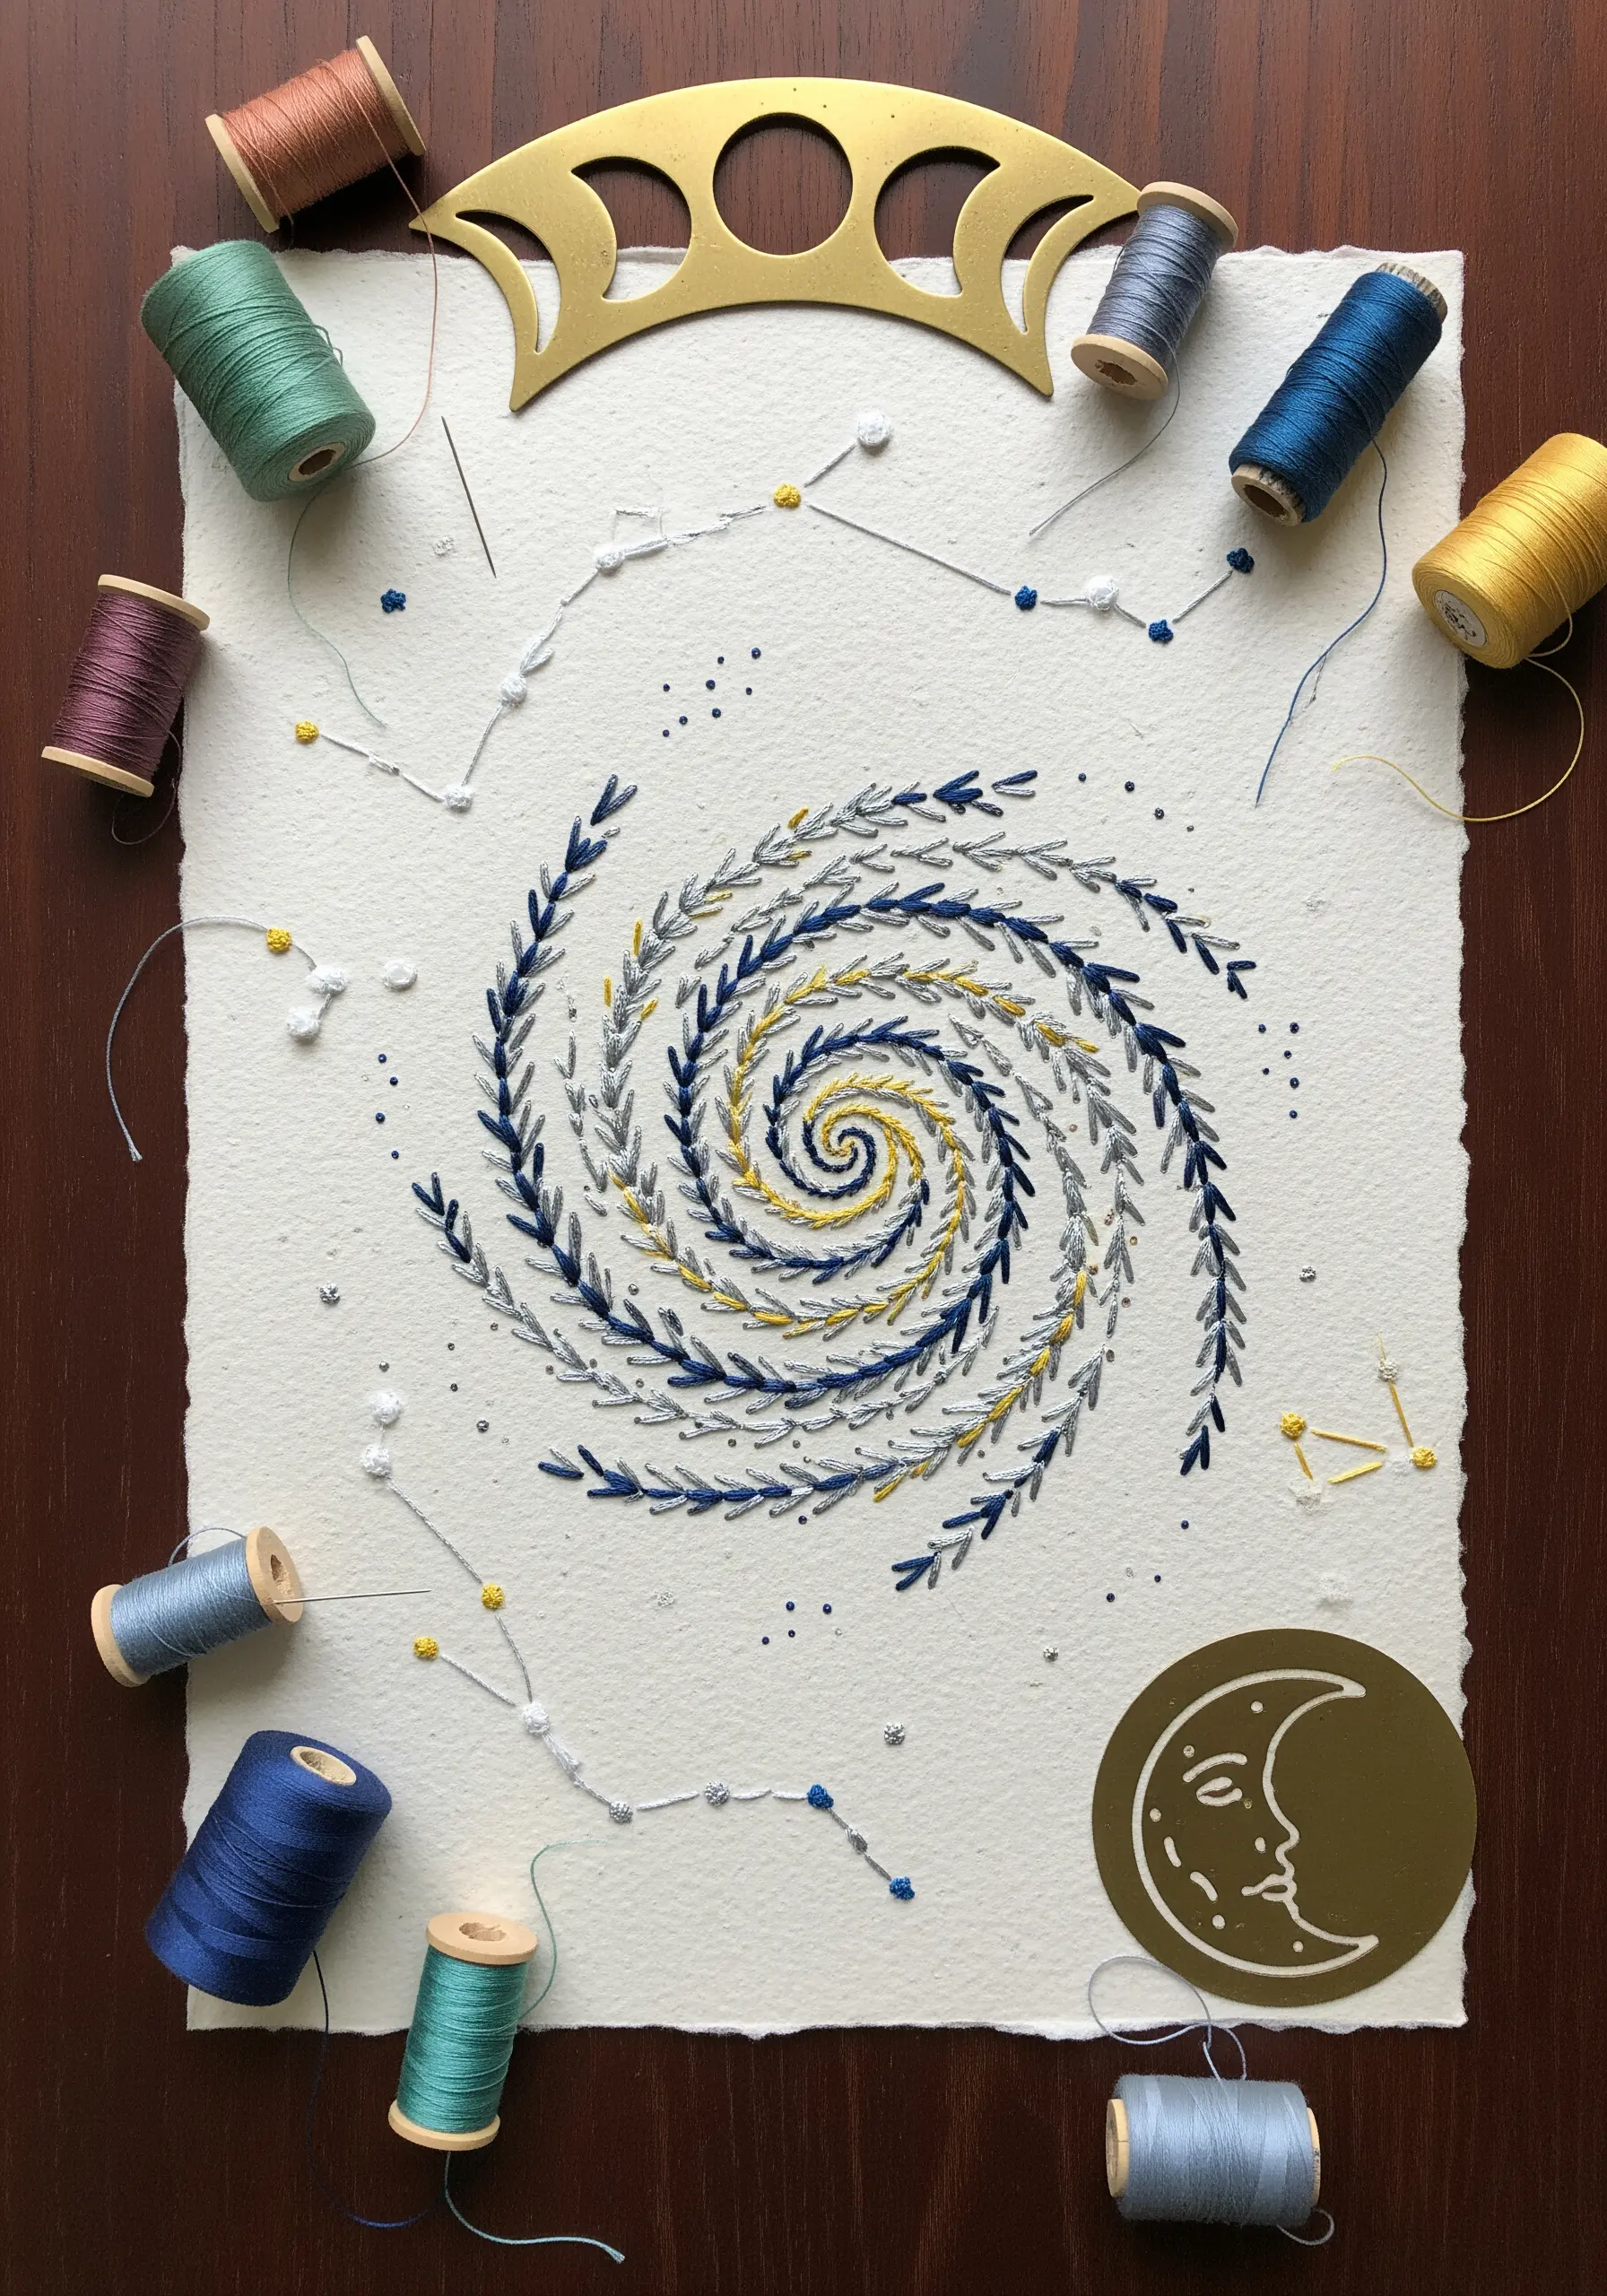
Stitching on paper requires a gentle approach—pre-pierce your pattern with a fine needle to prevent tearing and guide your thread smoothly.
Use this technique to create intricate cosmic designs, where the matte, fibrous texture of the paper provides a stunning contrast to high-sheen metallic floss.
For flowing curves like a galaxy spiral, use a split backstitch; its connected nature creates an unbroken line that mimics a single, elegant brushstroke.
Render constellations with tiny French knots for stars and single straight stitches for the connecting lines, achieving a delicate, graphic look that lets the paper breathe.
2. Minimalist Botanical Outlines
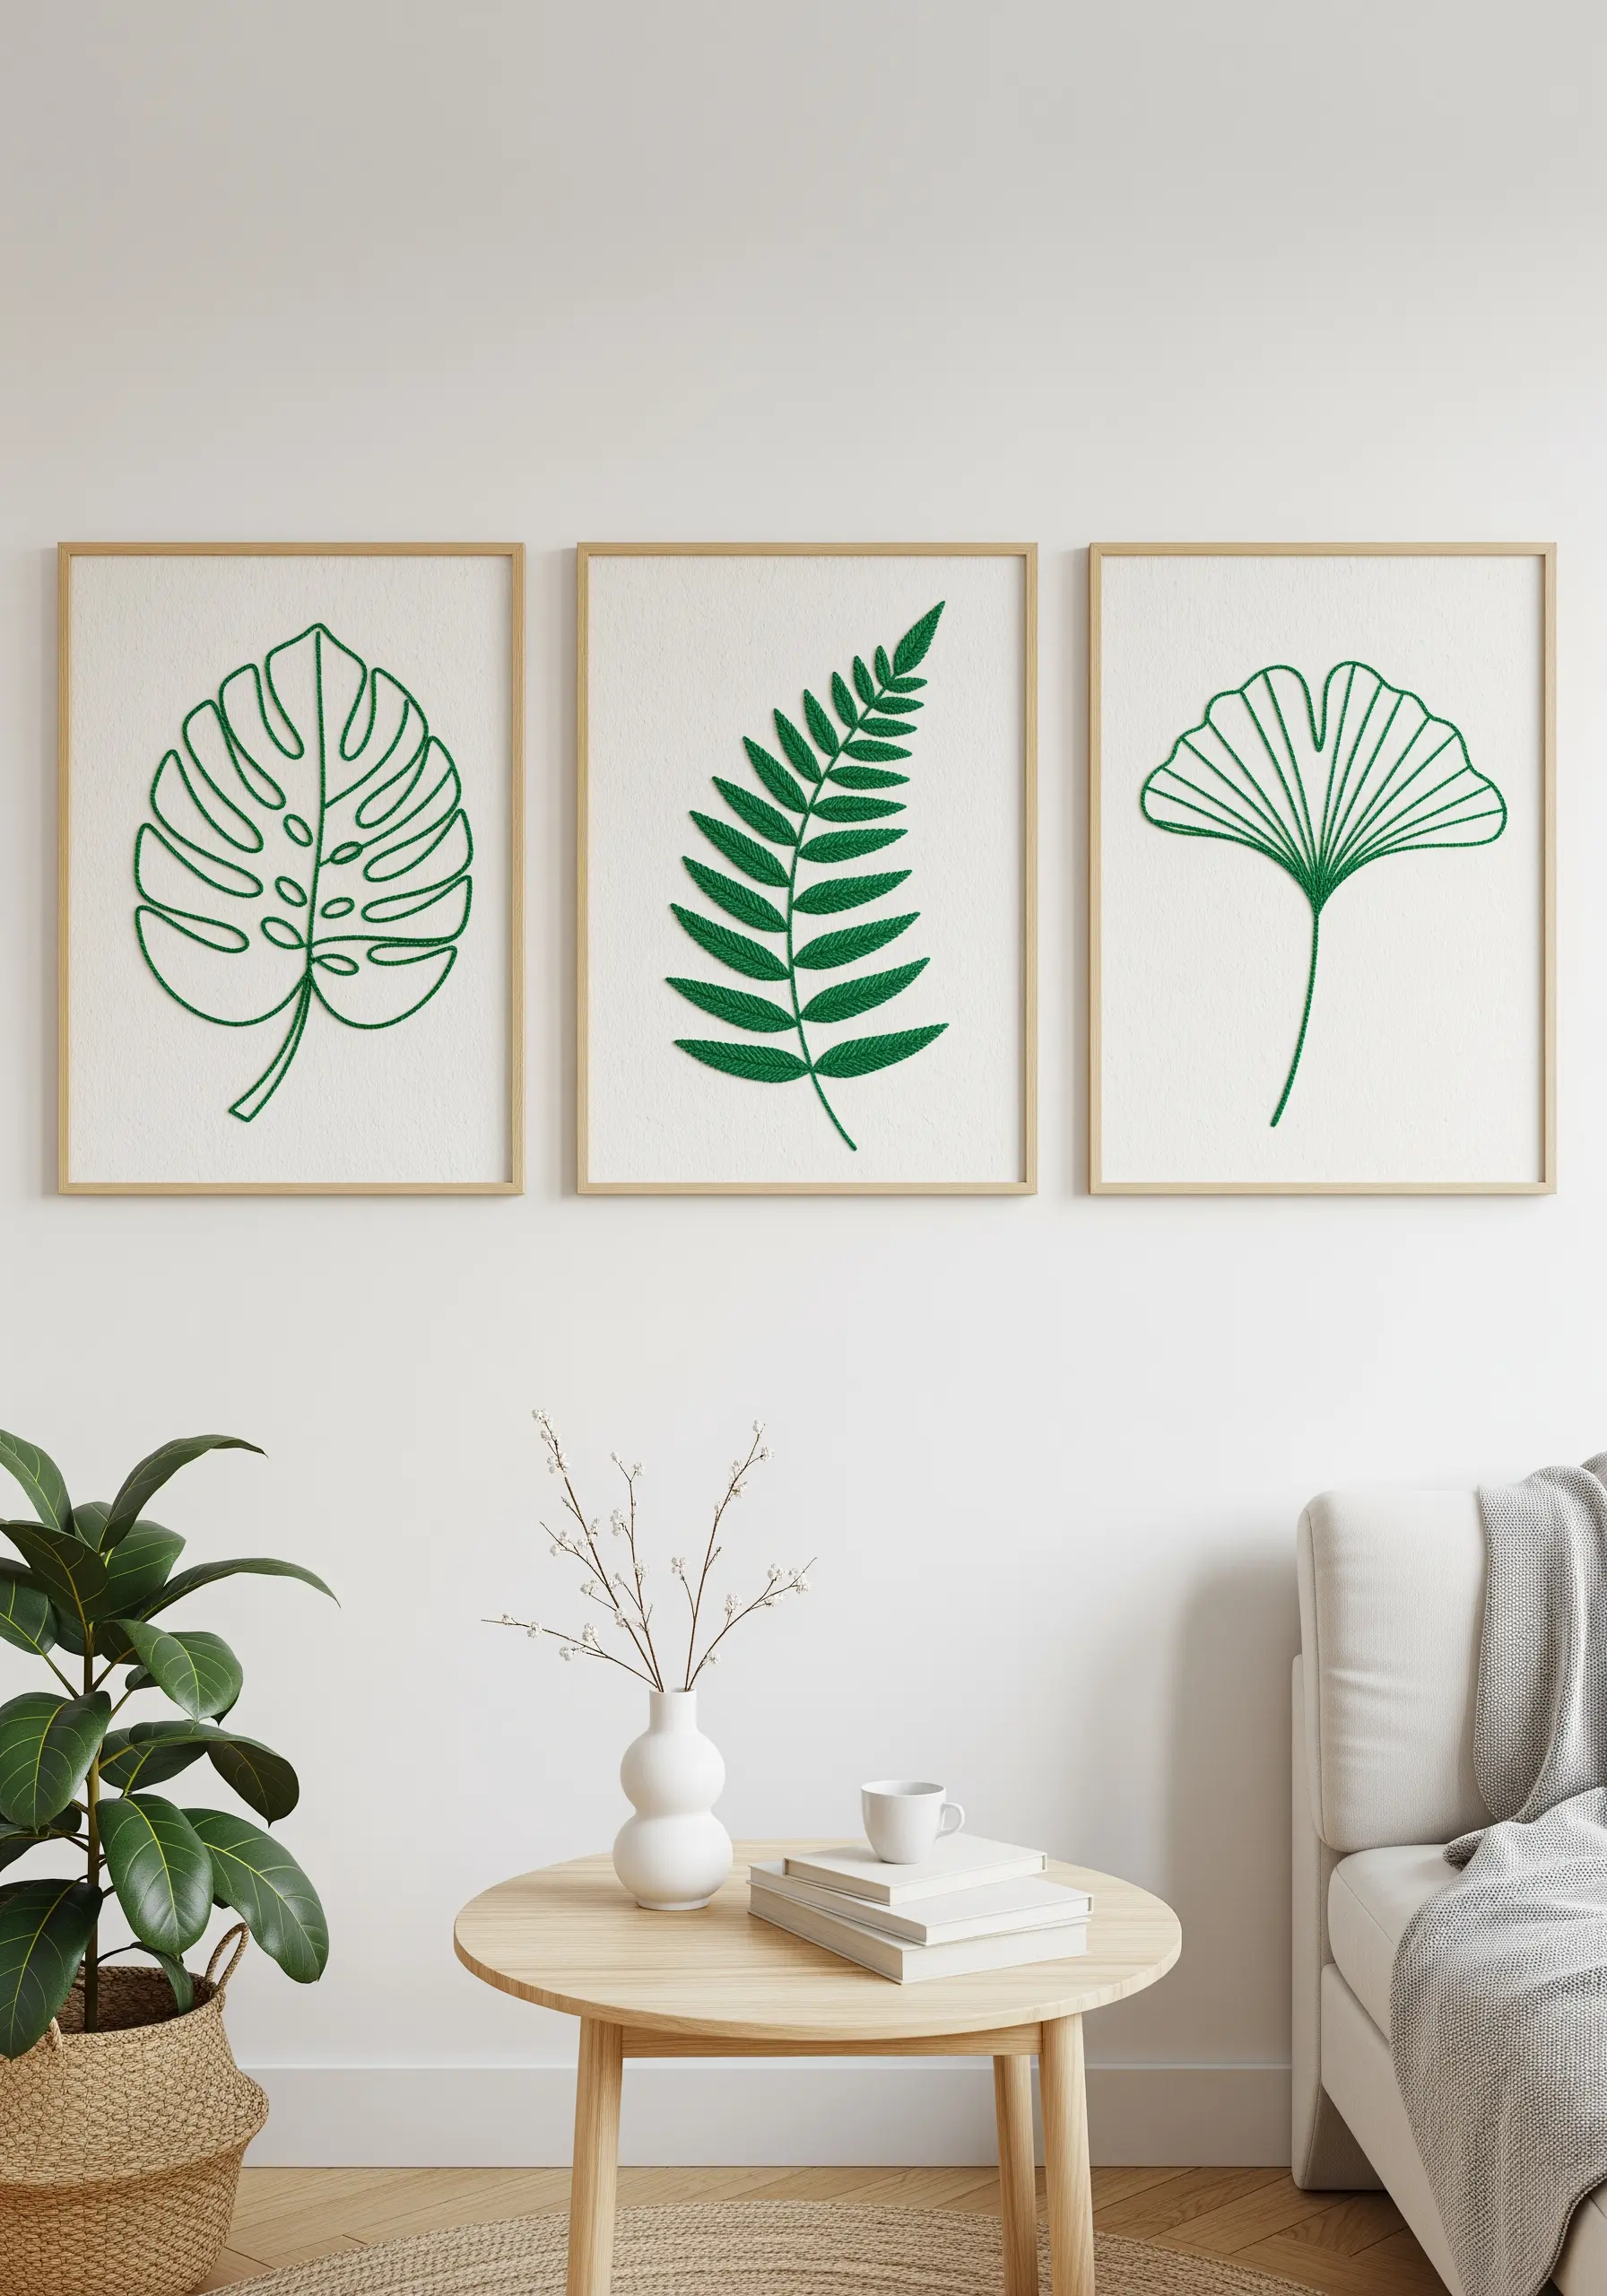
To achieve these clean, bold botanical lines, use a whipped backstitch on heavy paper or cardstock.
This stitch wraps the initial backstitch, eliminating gaps and creating a solid, rope-like line with a beautiful, subtle relief.
For a strong graphic impact, use all six strands of your embroidery floss and choose a vibrant, monochromatic color palette.
The composition’s power lies in its use of negative space; by keeping the motifs simple and isolated, you create a sophisticated, modern and clean aesthetic perfect for a triptych display.
3. Layered Paper Landscapes with Thread Accents
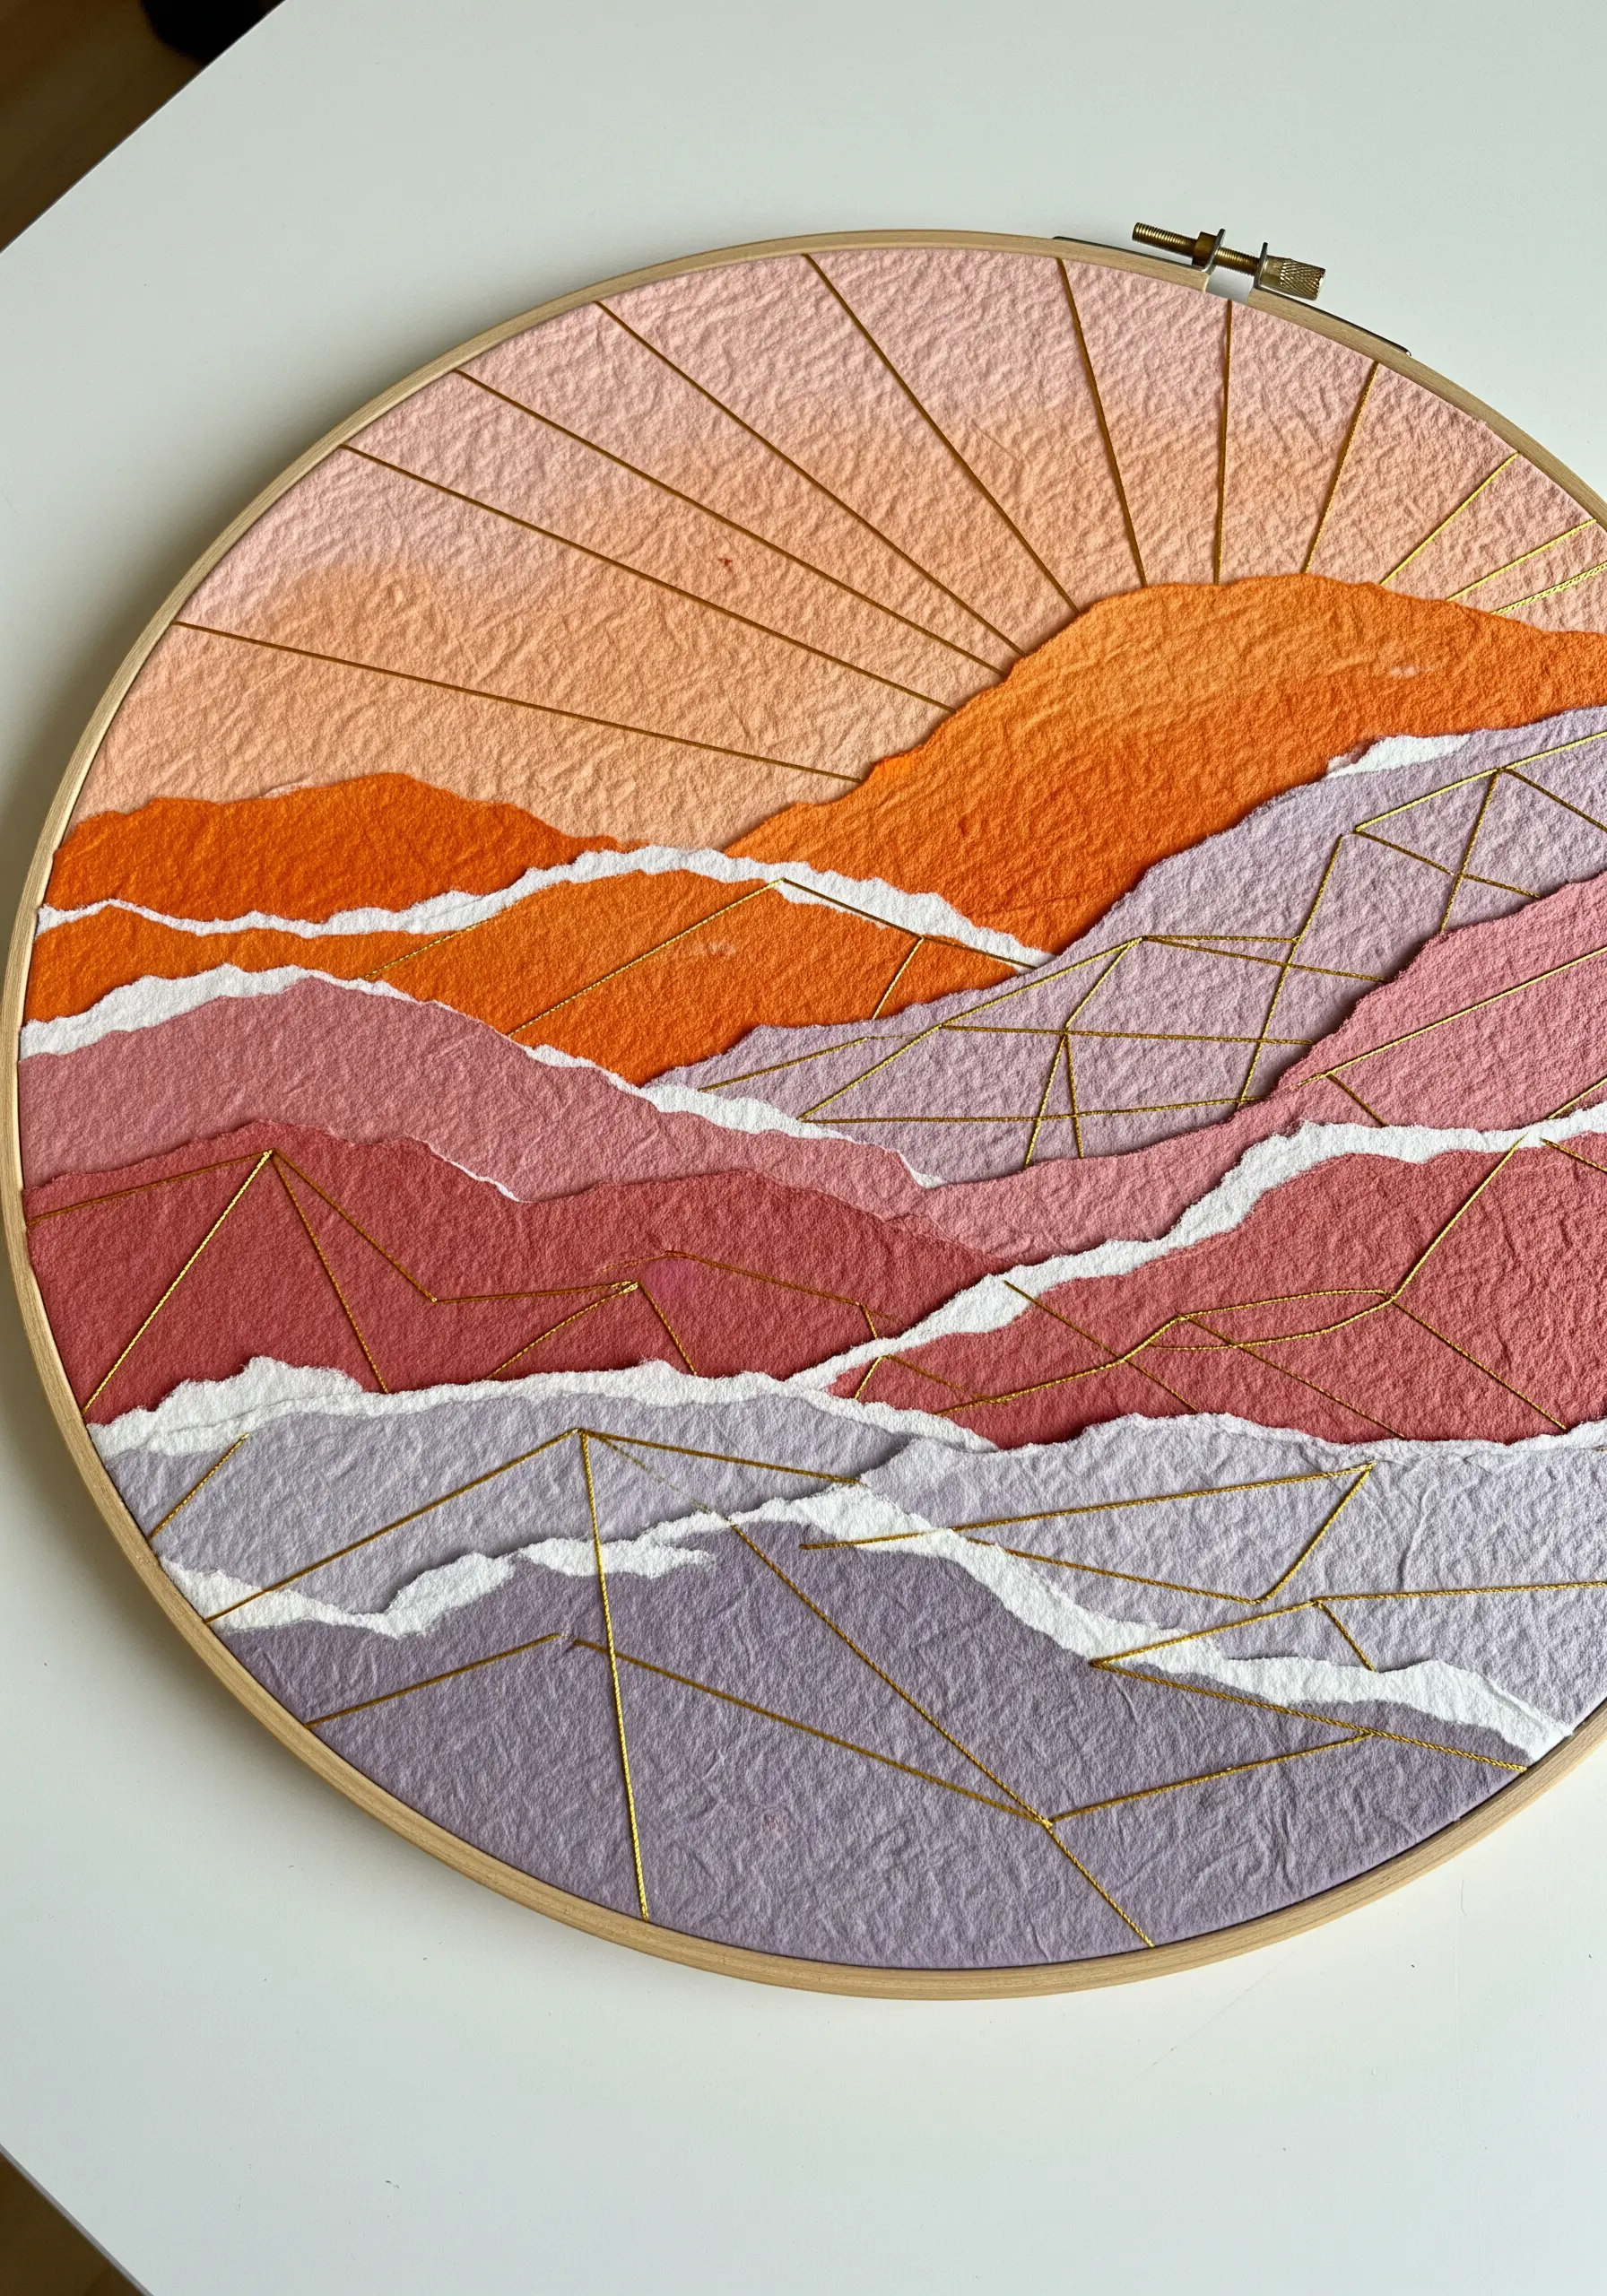
Build breathtaking depth by tearing and layering colored handmade paper to form an abstract mountain range inside a hoop.
The raw, torn edges provide an organic texture that contrasts beautifully with the clean lines of thread.
Instead of filling the shapes, use a single strand of gold metallic thread to add sharp, geometric lines that unify the paper layers.
These stitched accents act as structural elements, guiding the eye through the composition and adding a touch of contemporary polish to the rustic paper forms.
4. Sculptural Yarn Couching on Paper
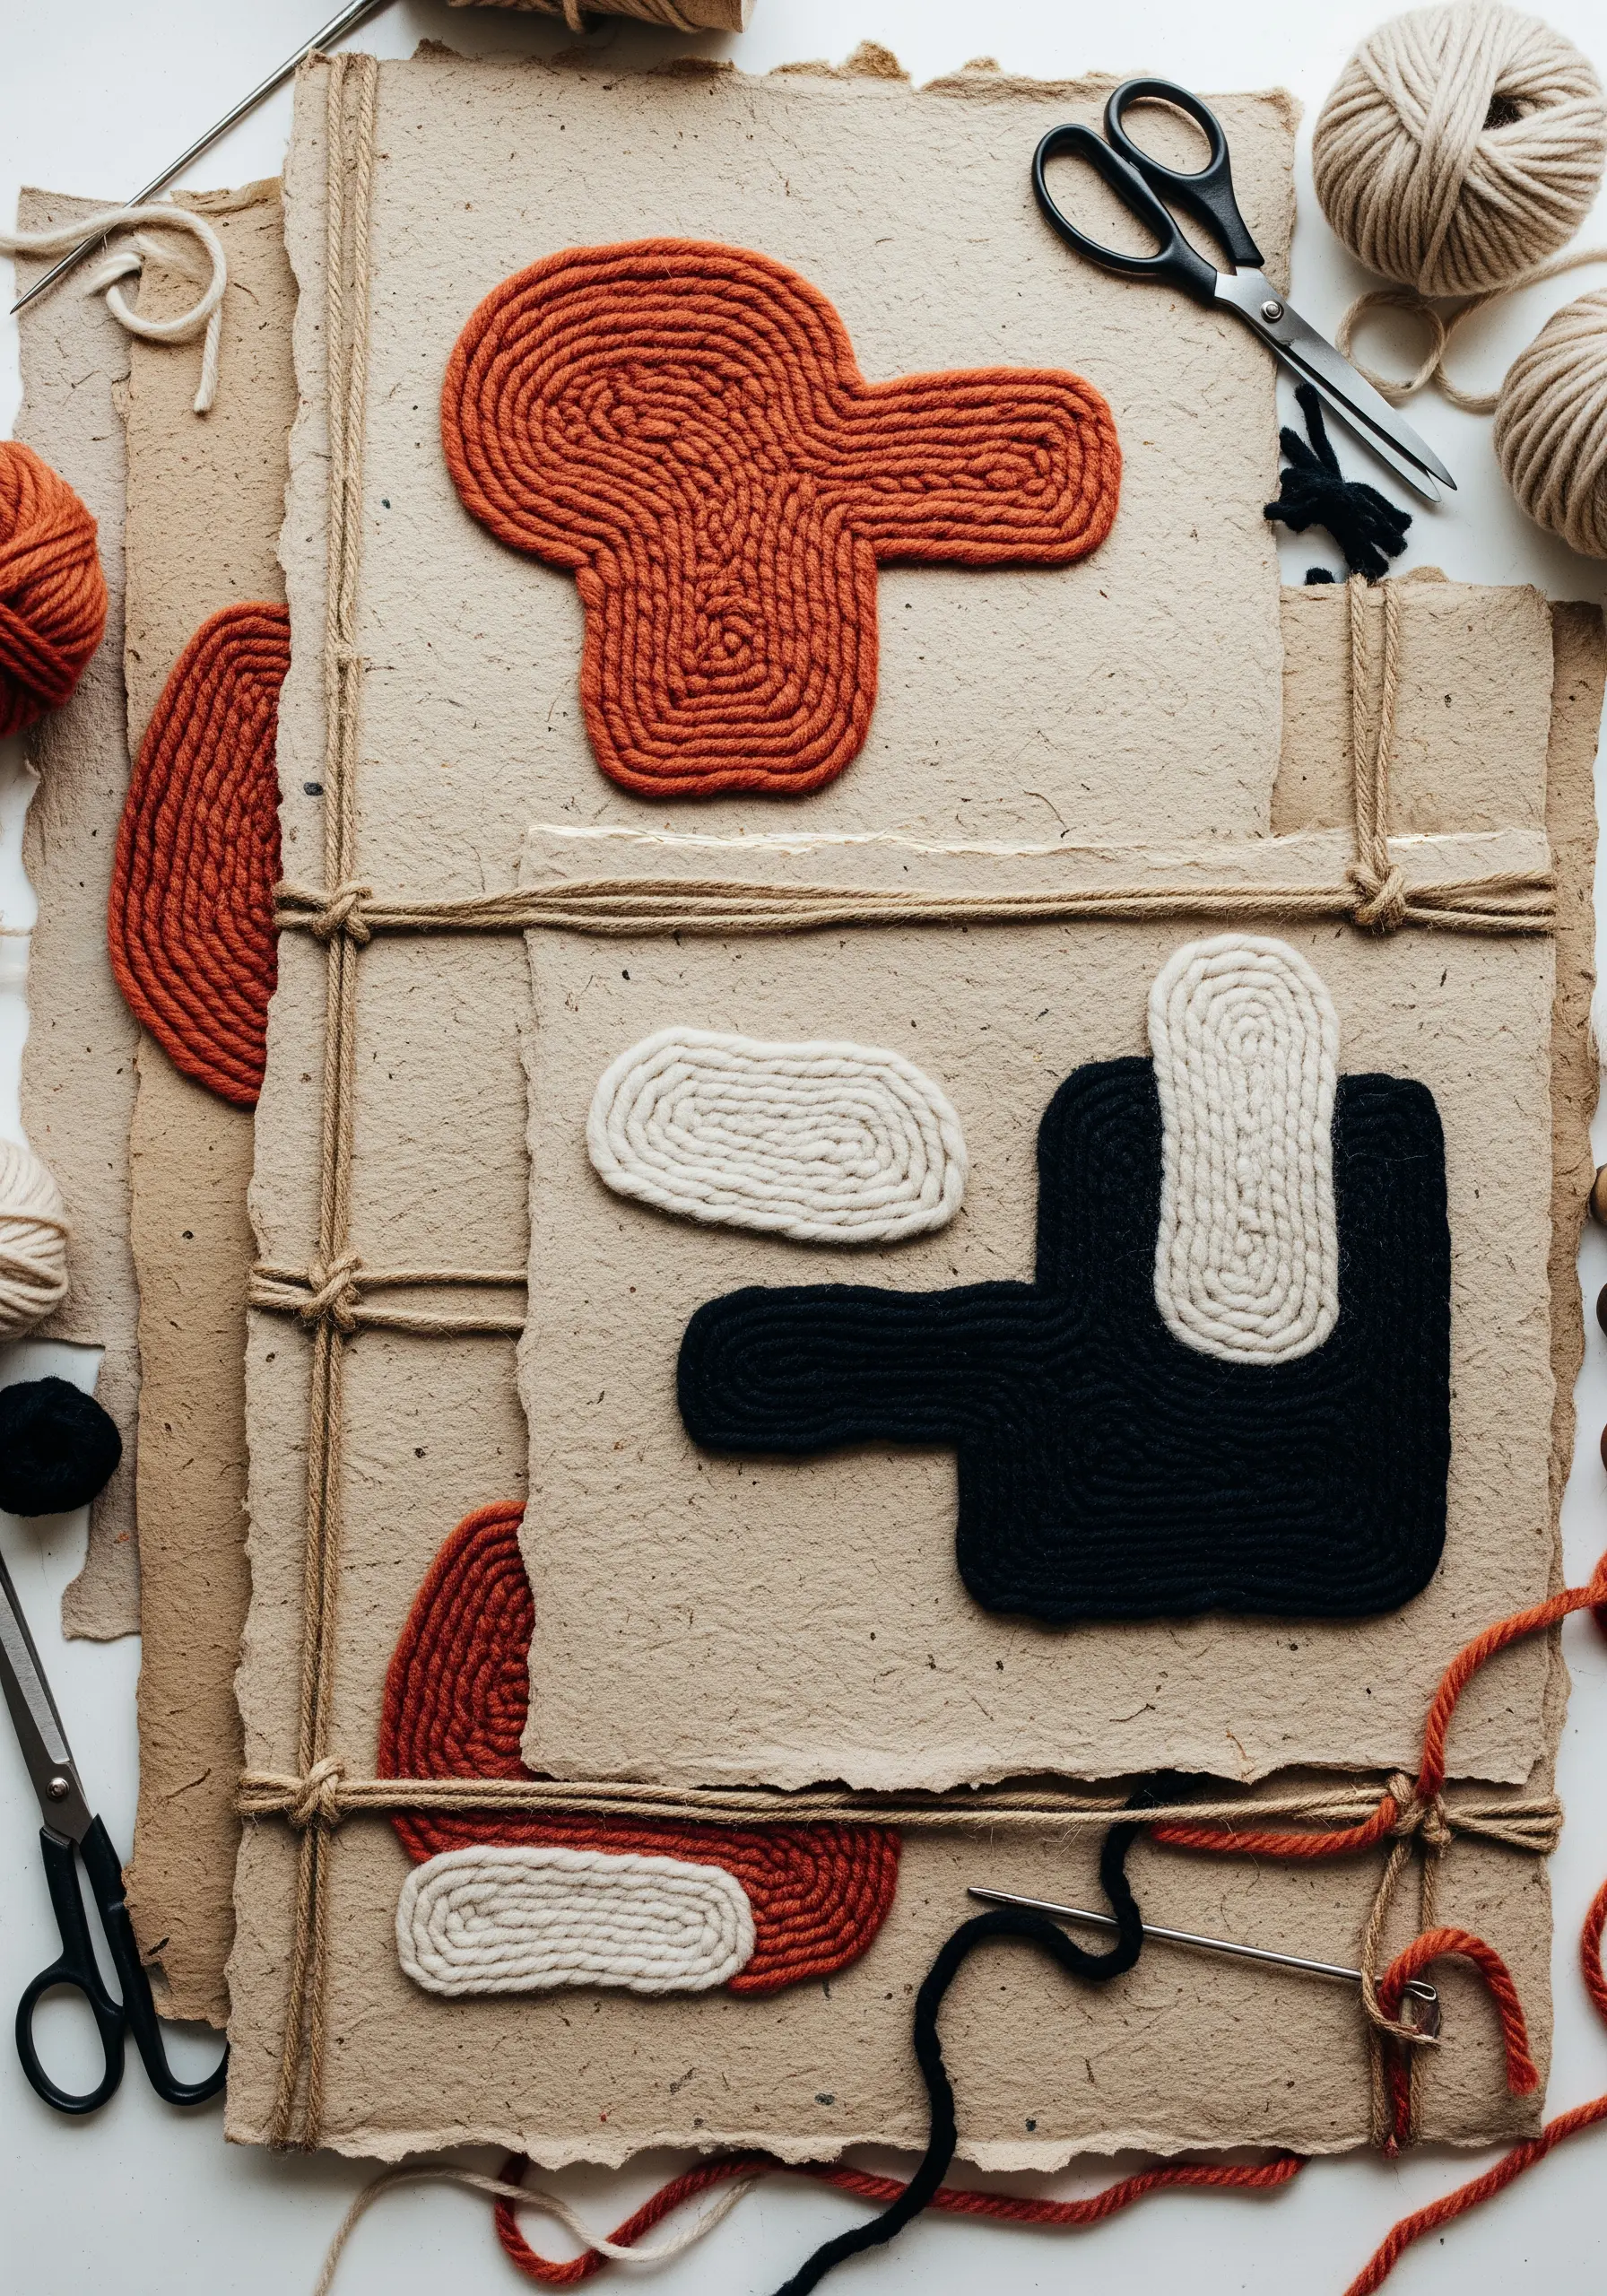
Couching is your key to adding bold, dimensional forms to paper that would be impossible with traditional stitching.
Simply lay thick yarn or cotton cord onto the paper surface in your desired shape, then use a thinner, discreet thread to tack it down with small, evenly spaced stitches.
This method allows you to create dramatic, raised motifs with incredible sculptural texture, turning simple lines into tactile art.
Experiment with contrasting colors for your tacking thread to turn a functional stitch into a design element.
5. Thread Painting with Botanical Embellishments
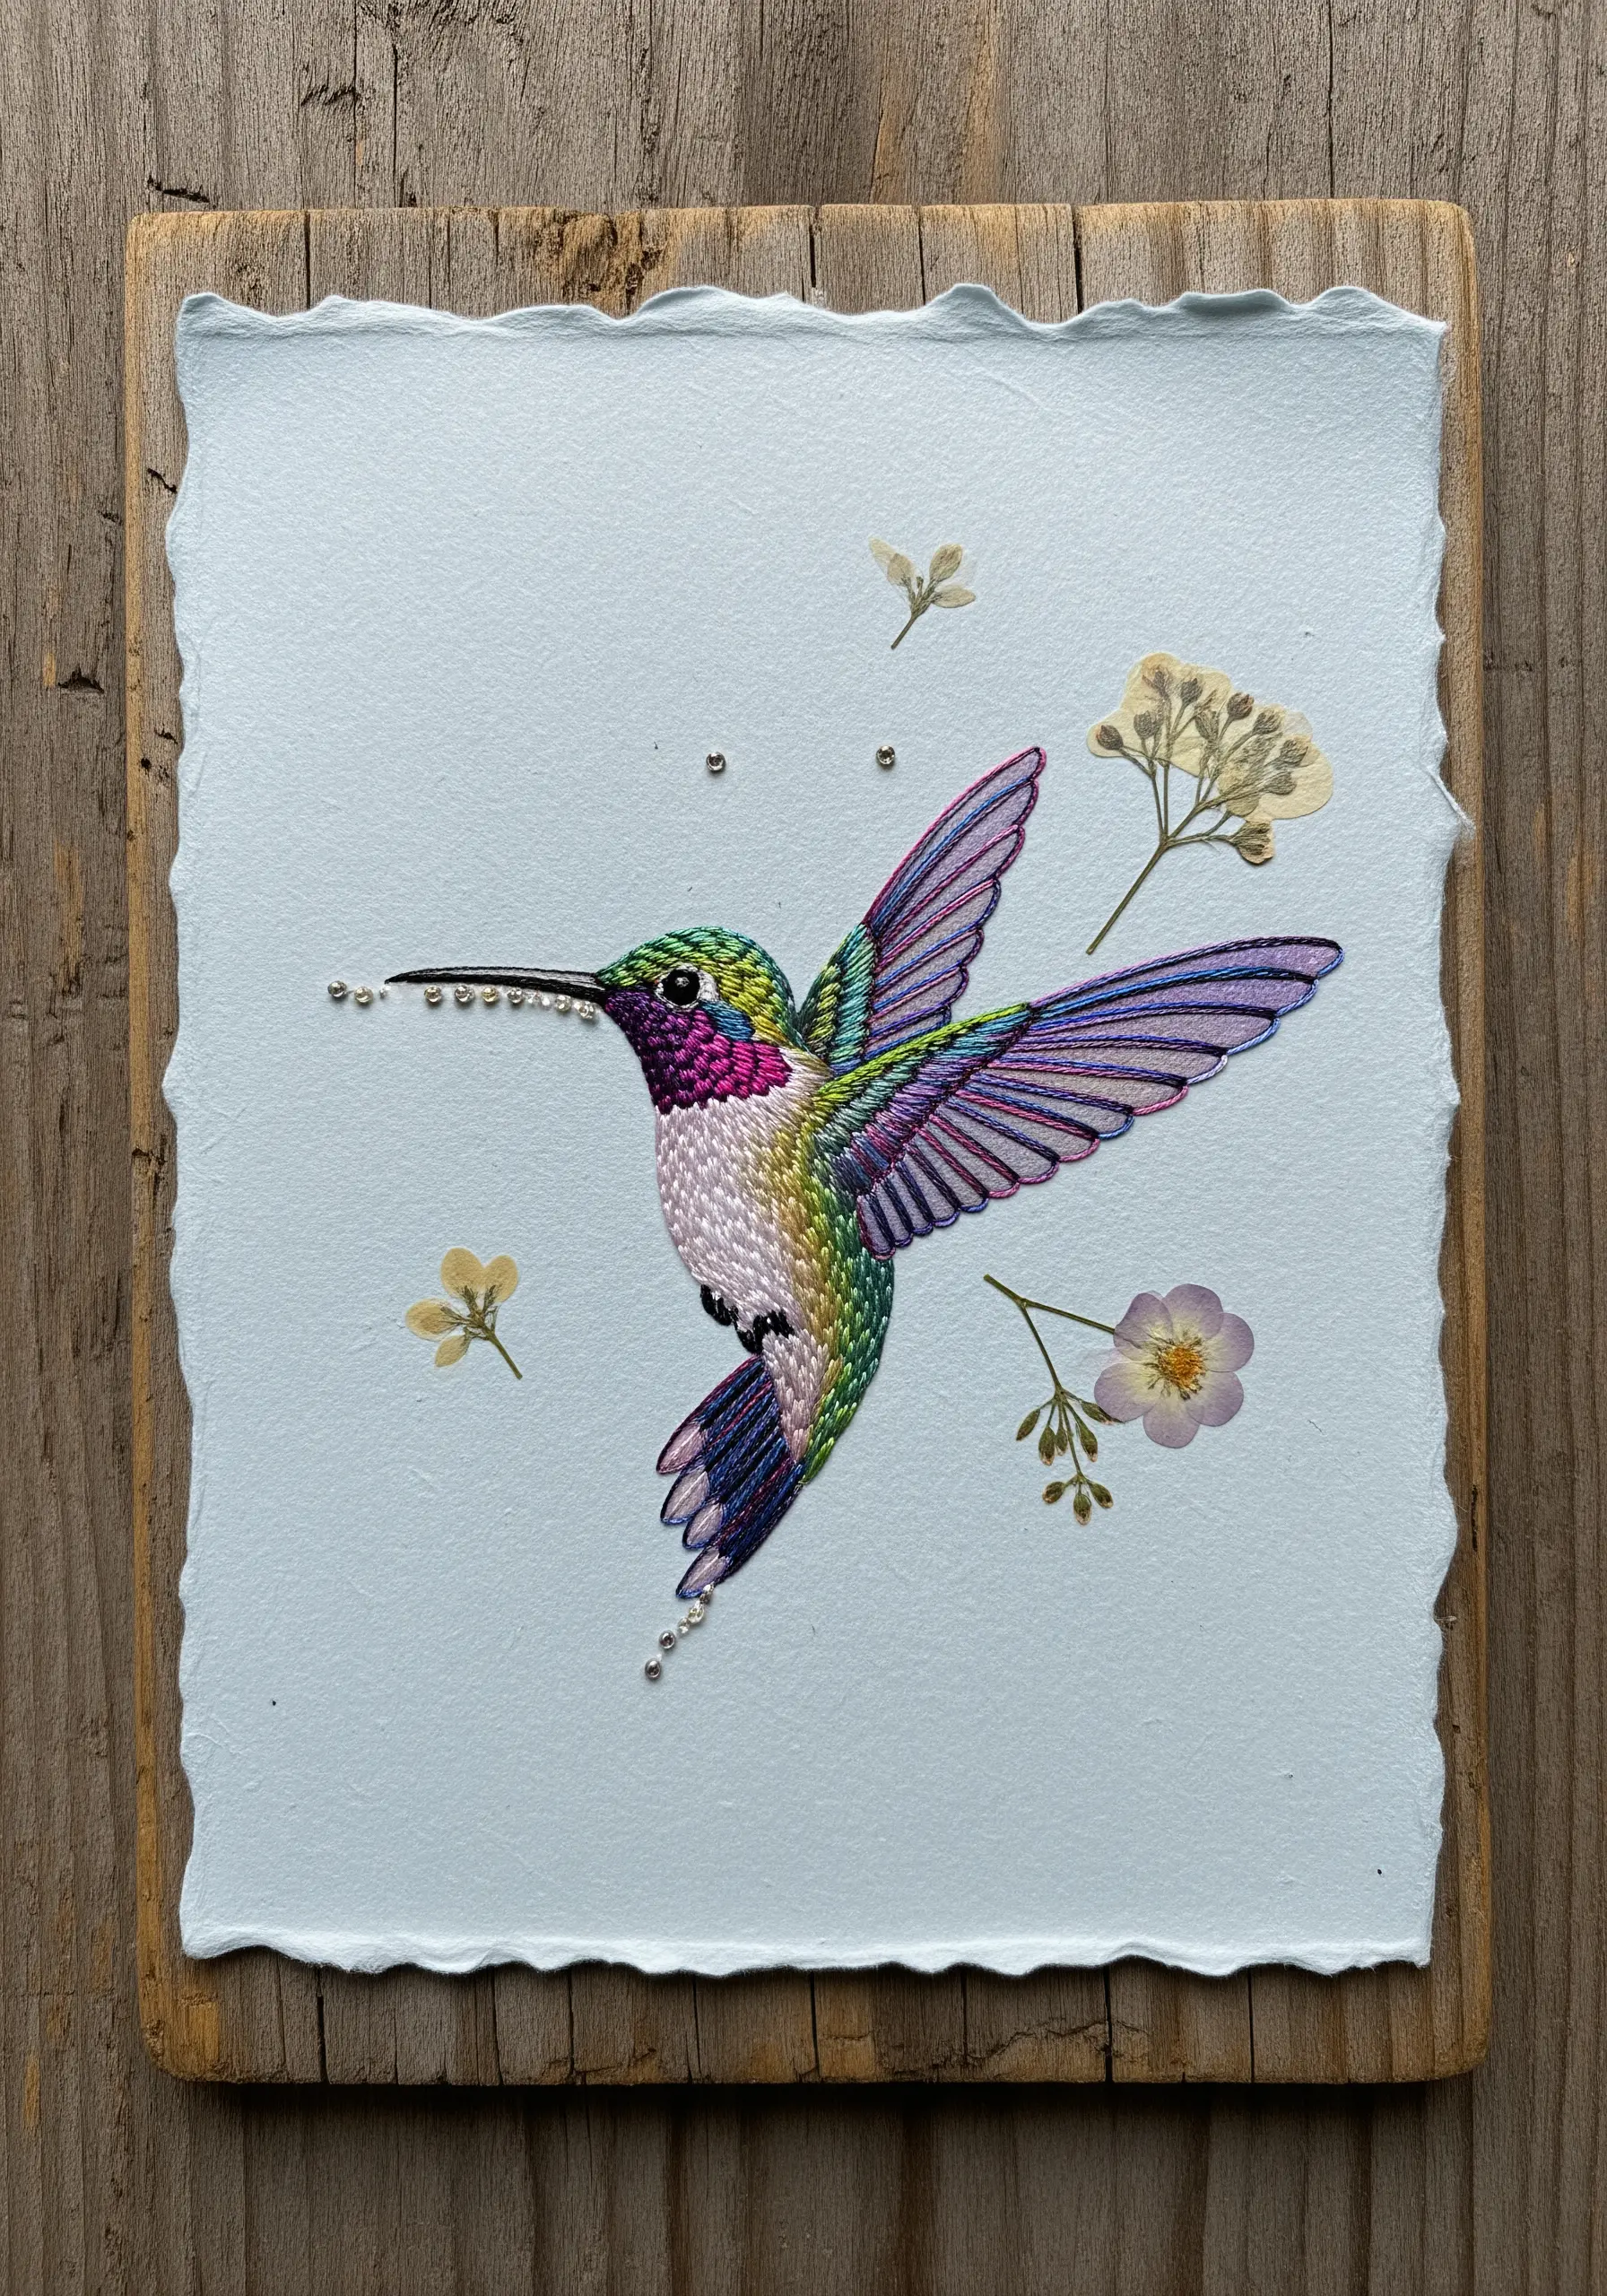
Combine the precision of thread painting with the fragile beauty of nature by incorporating delicate pressed flowers.
First, complete your embroidered motif on thick, high-quality paper, using single-strand long-and-short stitch to blend colors seamlessly.
Once your stitching is finished, carefully arrange small pressed botanicals around your design.
Adhere them with a tiny, precise dot of acid-free craft glue, creating a mixed-media piece that feels both hyperrealistic and wonderfully magical.
6. Geometric Precision with High-Contrast Thread
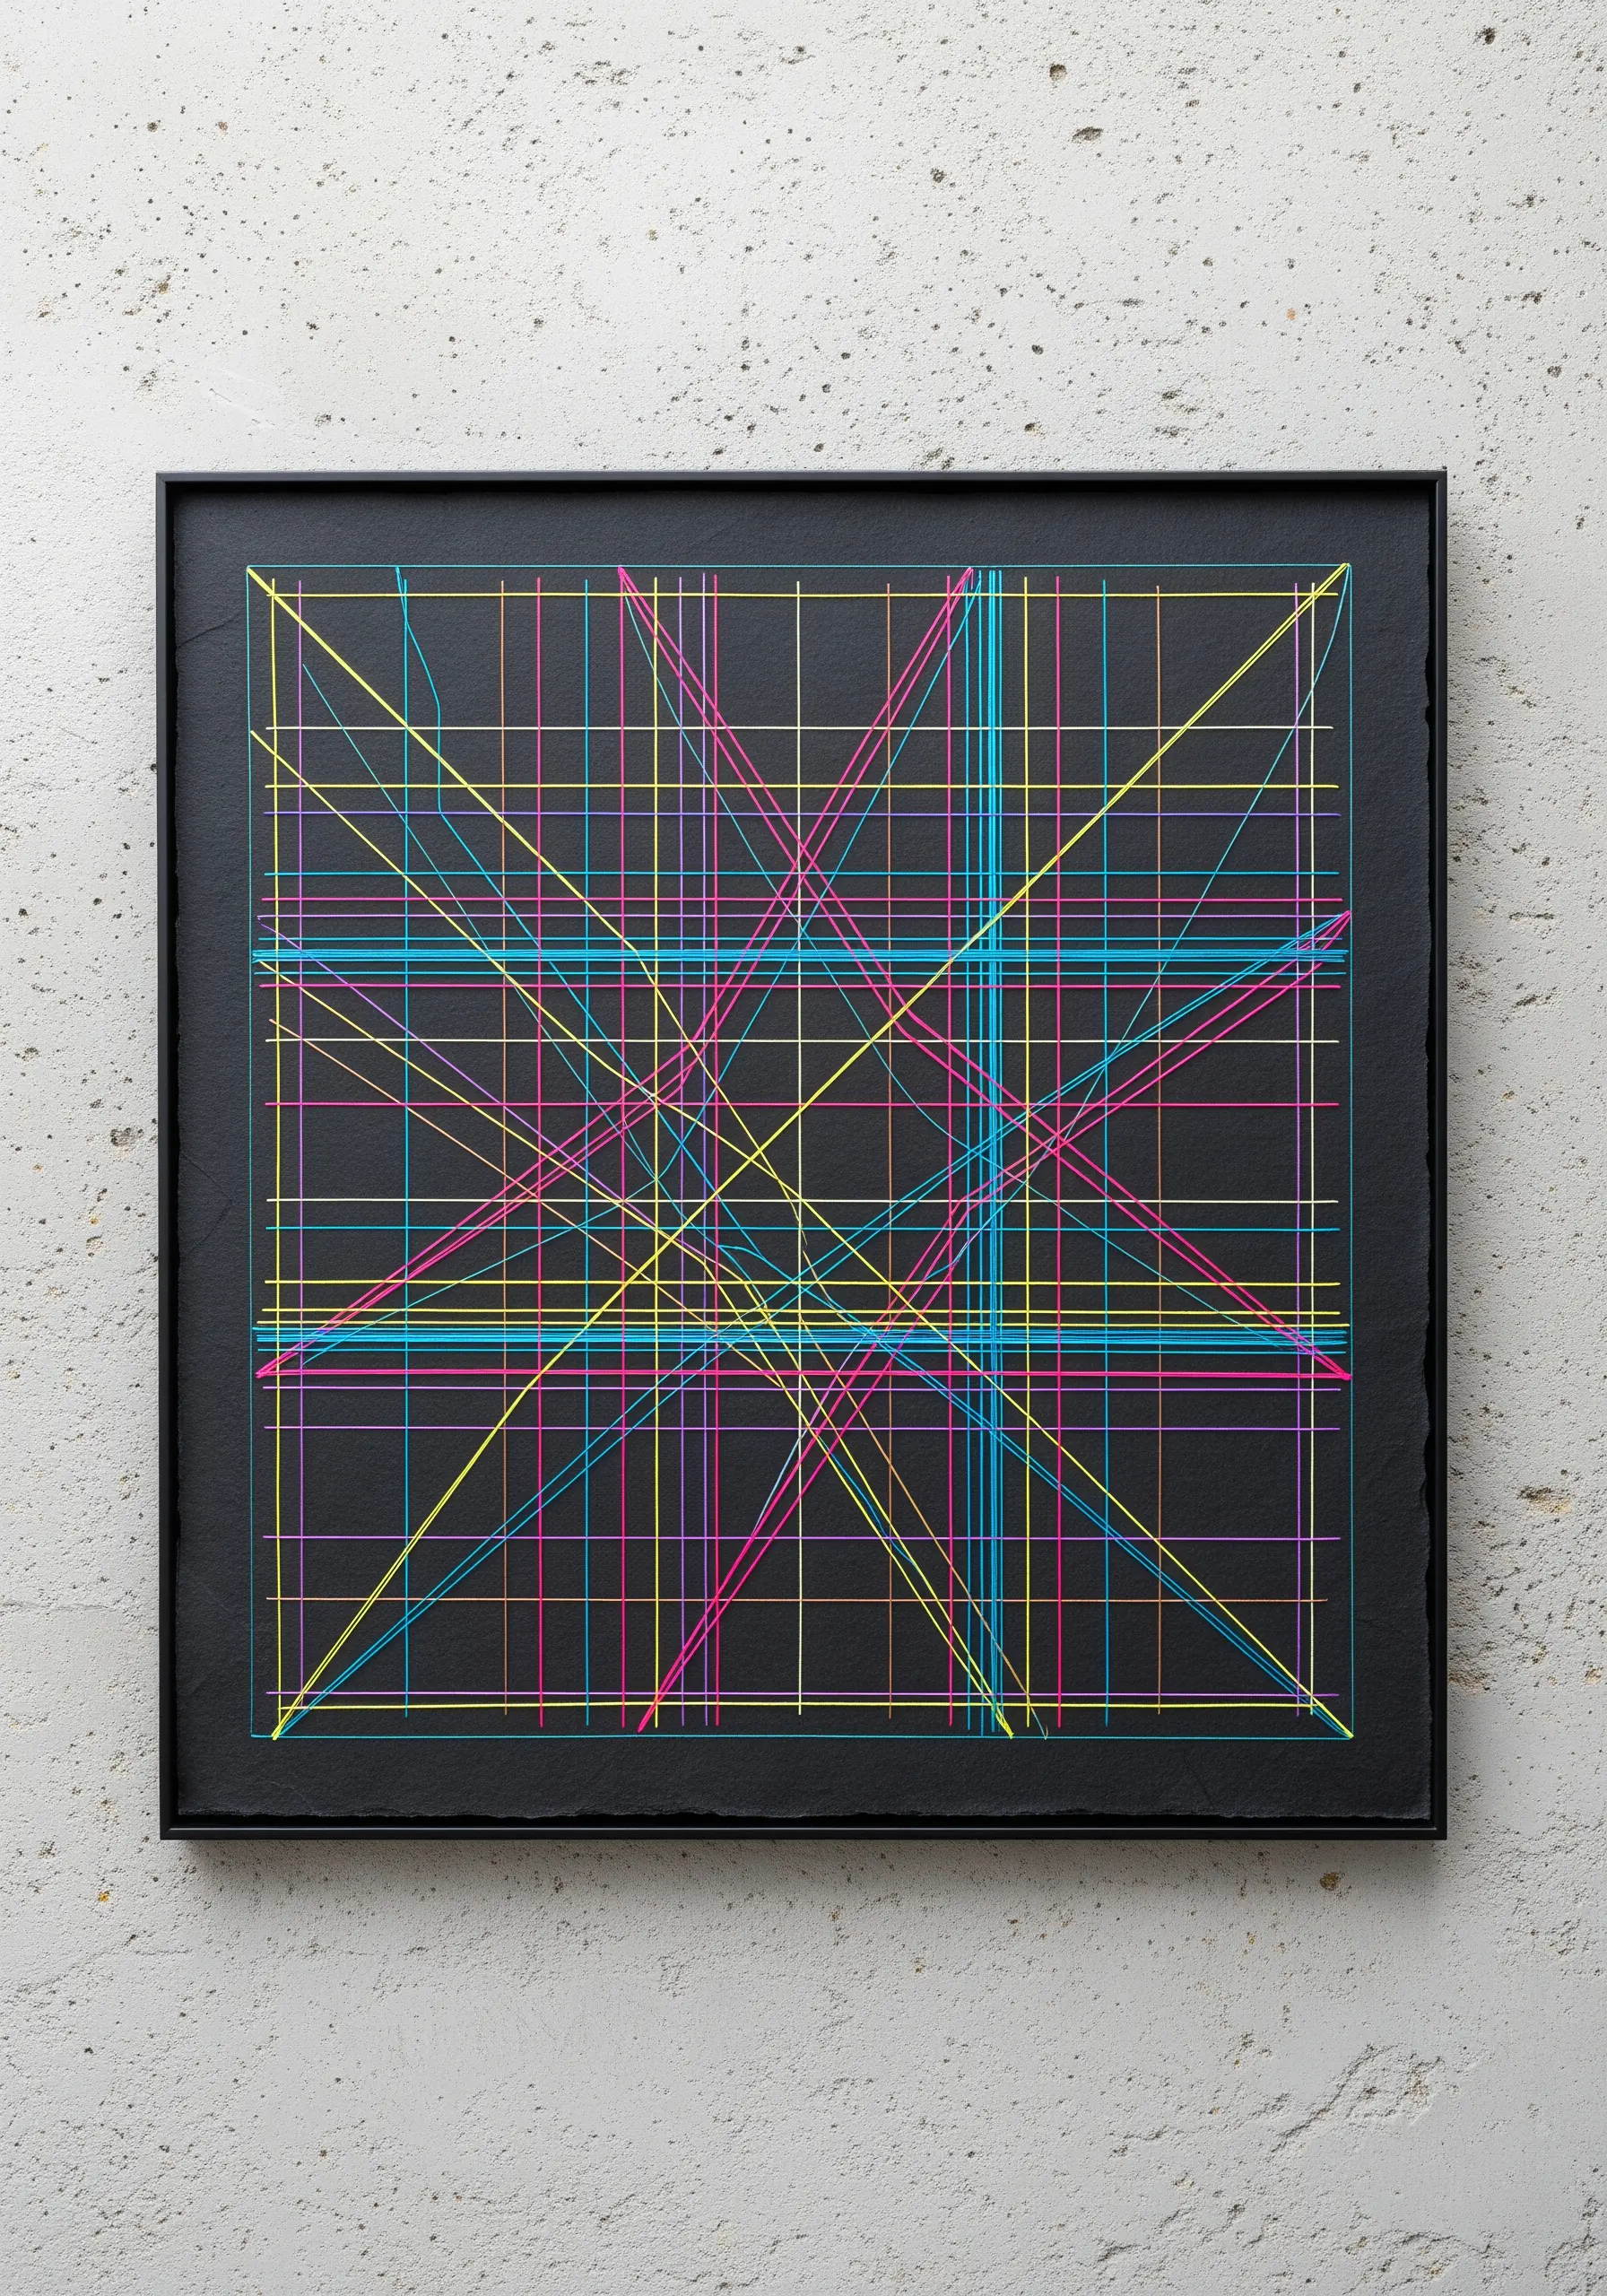
Create striking geometric art by leveraging the power of high contrast and perfect lines.
Choose a deep black, matte paper as your canvas to make vibrant floss colors appear almost electric.
For flawlessly straight stitches, use a ruler and a pin to mark and pre-pierce every entry and exit point before you even thread your needle.
This preparation ensures your lines are taut and precise, transforming simple thread into a crisp, architectural design.
7. Layered Mandalas with Metallic Foil
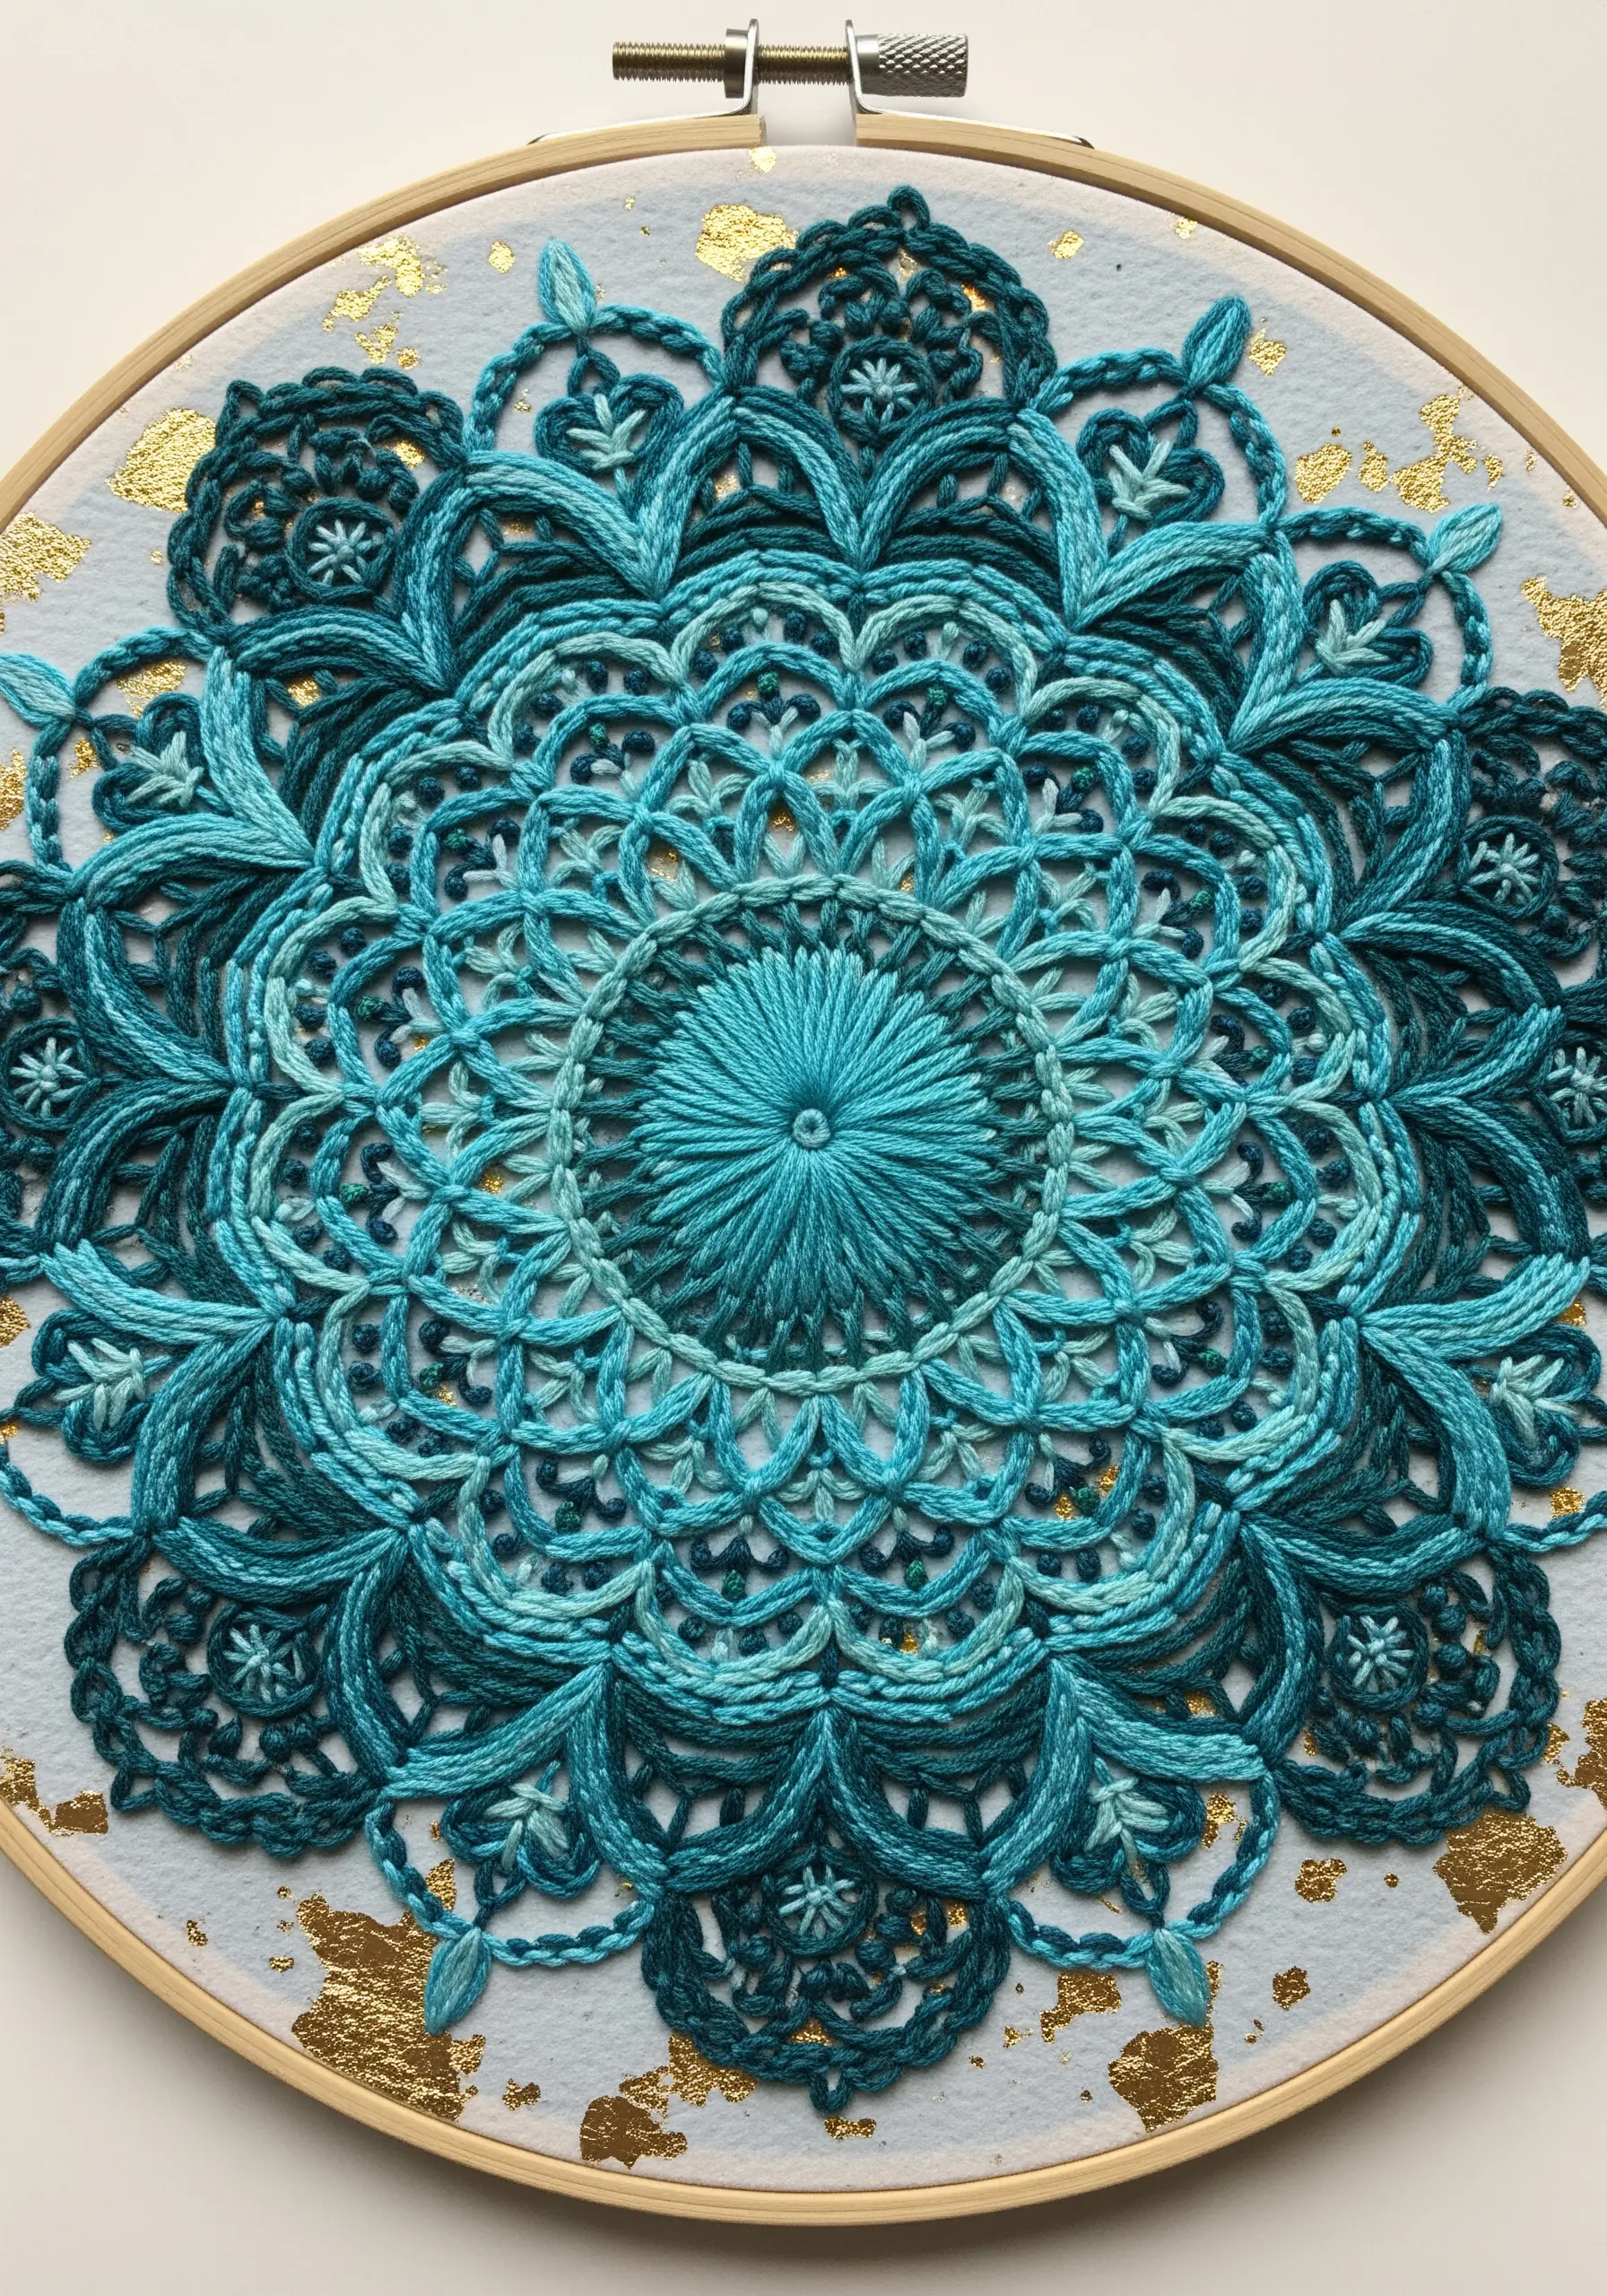
Build intricate mandalas by layering different stitches. Use woven wheel stitches for circular motifs, cast-on stitches for raised petals, and whipped backstitch for clean outlines.
Before you begin stitching, elevate the paper itself by applying gold leaf flakes with a gilding adhesive and a soft brush.
Let the foil application be slightly imperfect and organic, allowing it to peek through your stitches.
This technique adds a layer of unexpected shimmer and luxury, creating a rich interplay between thread, texture, and light.
8. Mixed-Media Seascapes
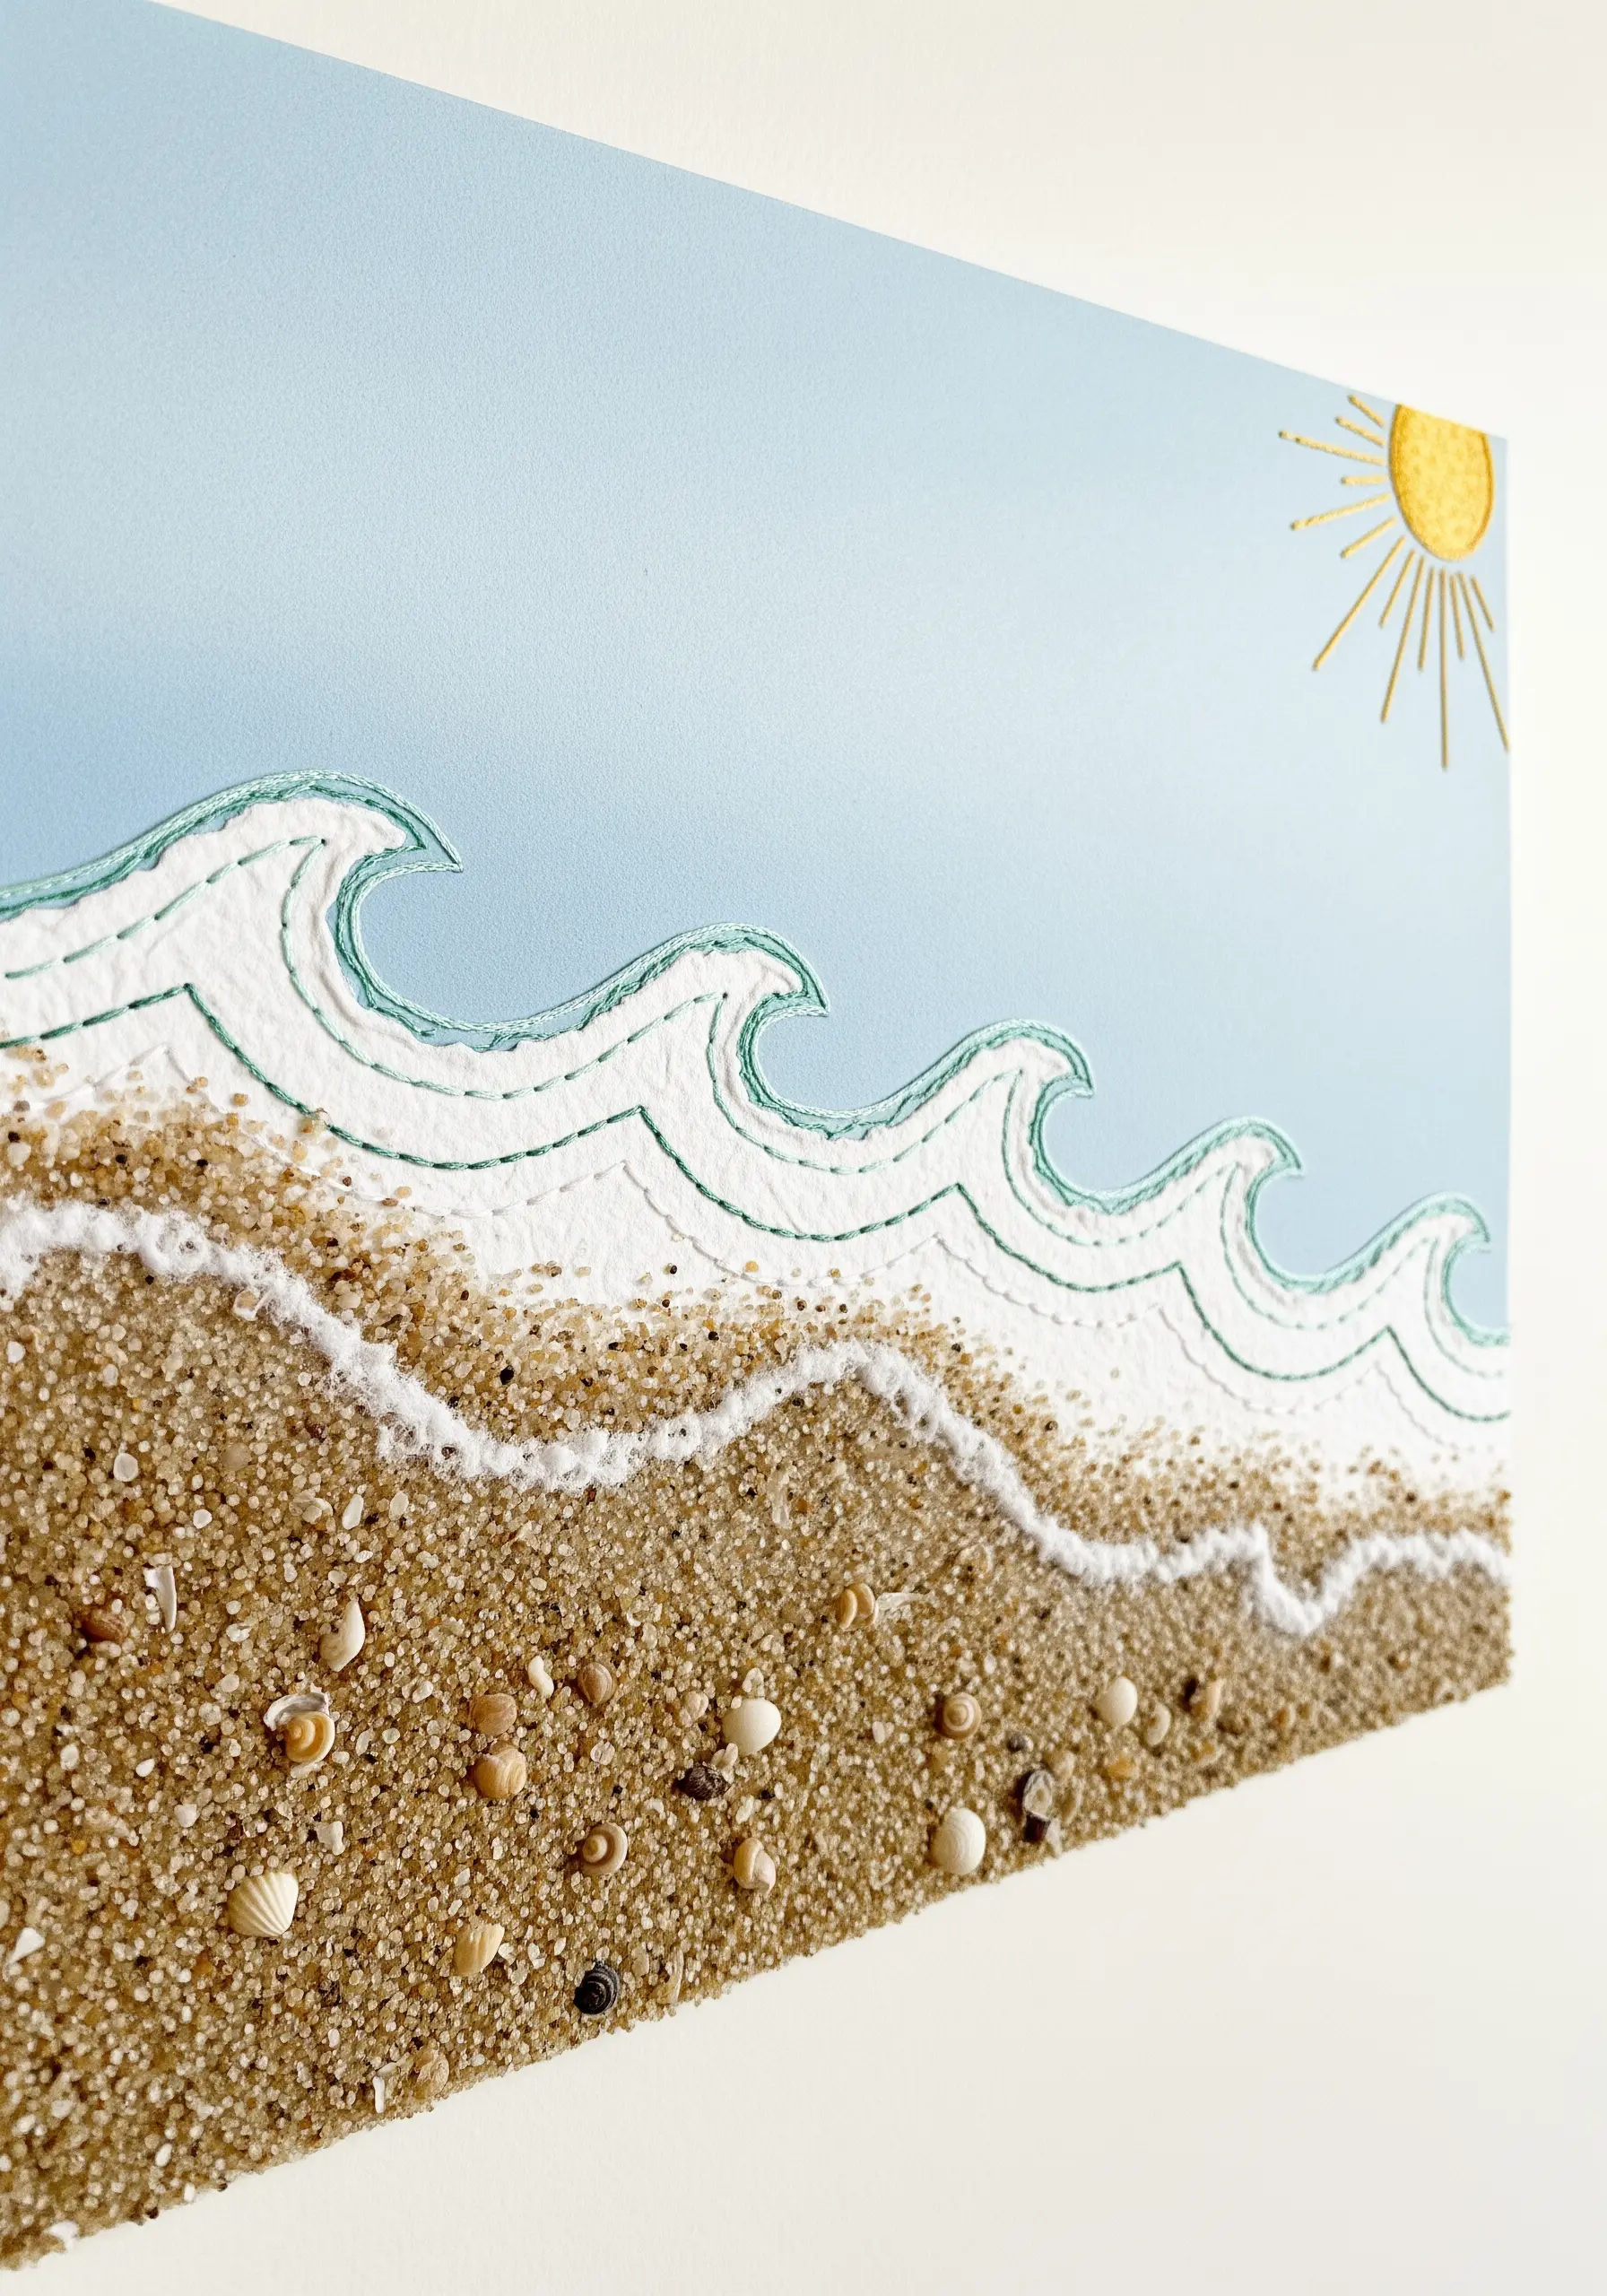
Go beyond thread to create a truly tactile beach scene that engages more than just the eyes.
First, stitch your waves and sky onto a sturdy paper-covered canvas or heavy cardstock.
Once the embroidery is complete, mask off your stitched areas and apply a generous layer of clear, strong craft glue to the ‘shoreline’ section.
Sprinkle fine sand and tiny shells over the adhesive, let it dry completely, and then shake off the excess. The result is a piece with captivating, sensory depth.
9. A Study in Seasonal Textures
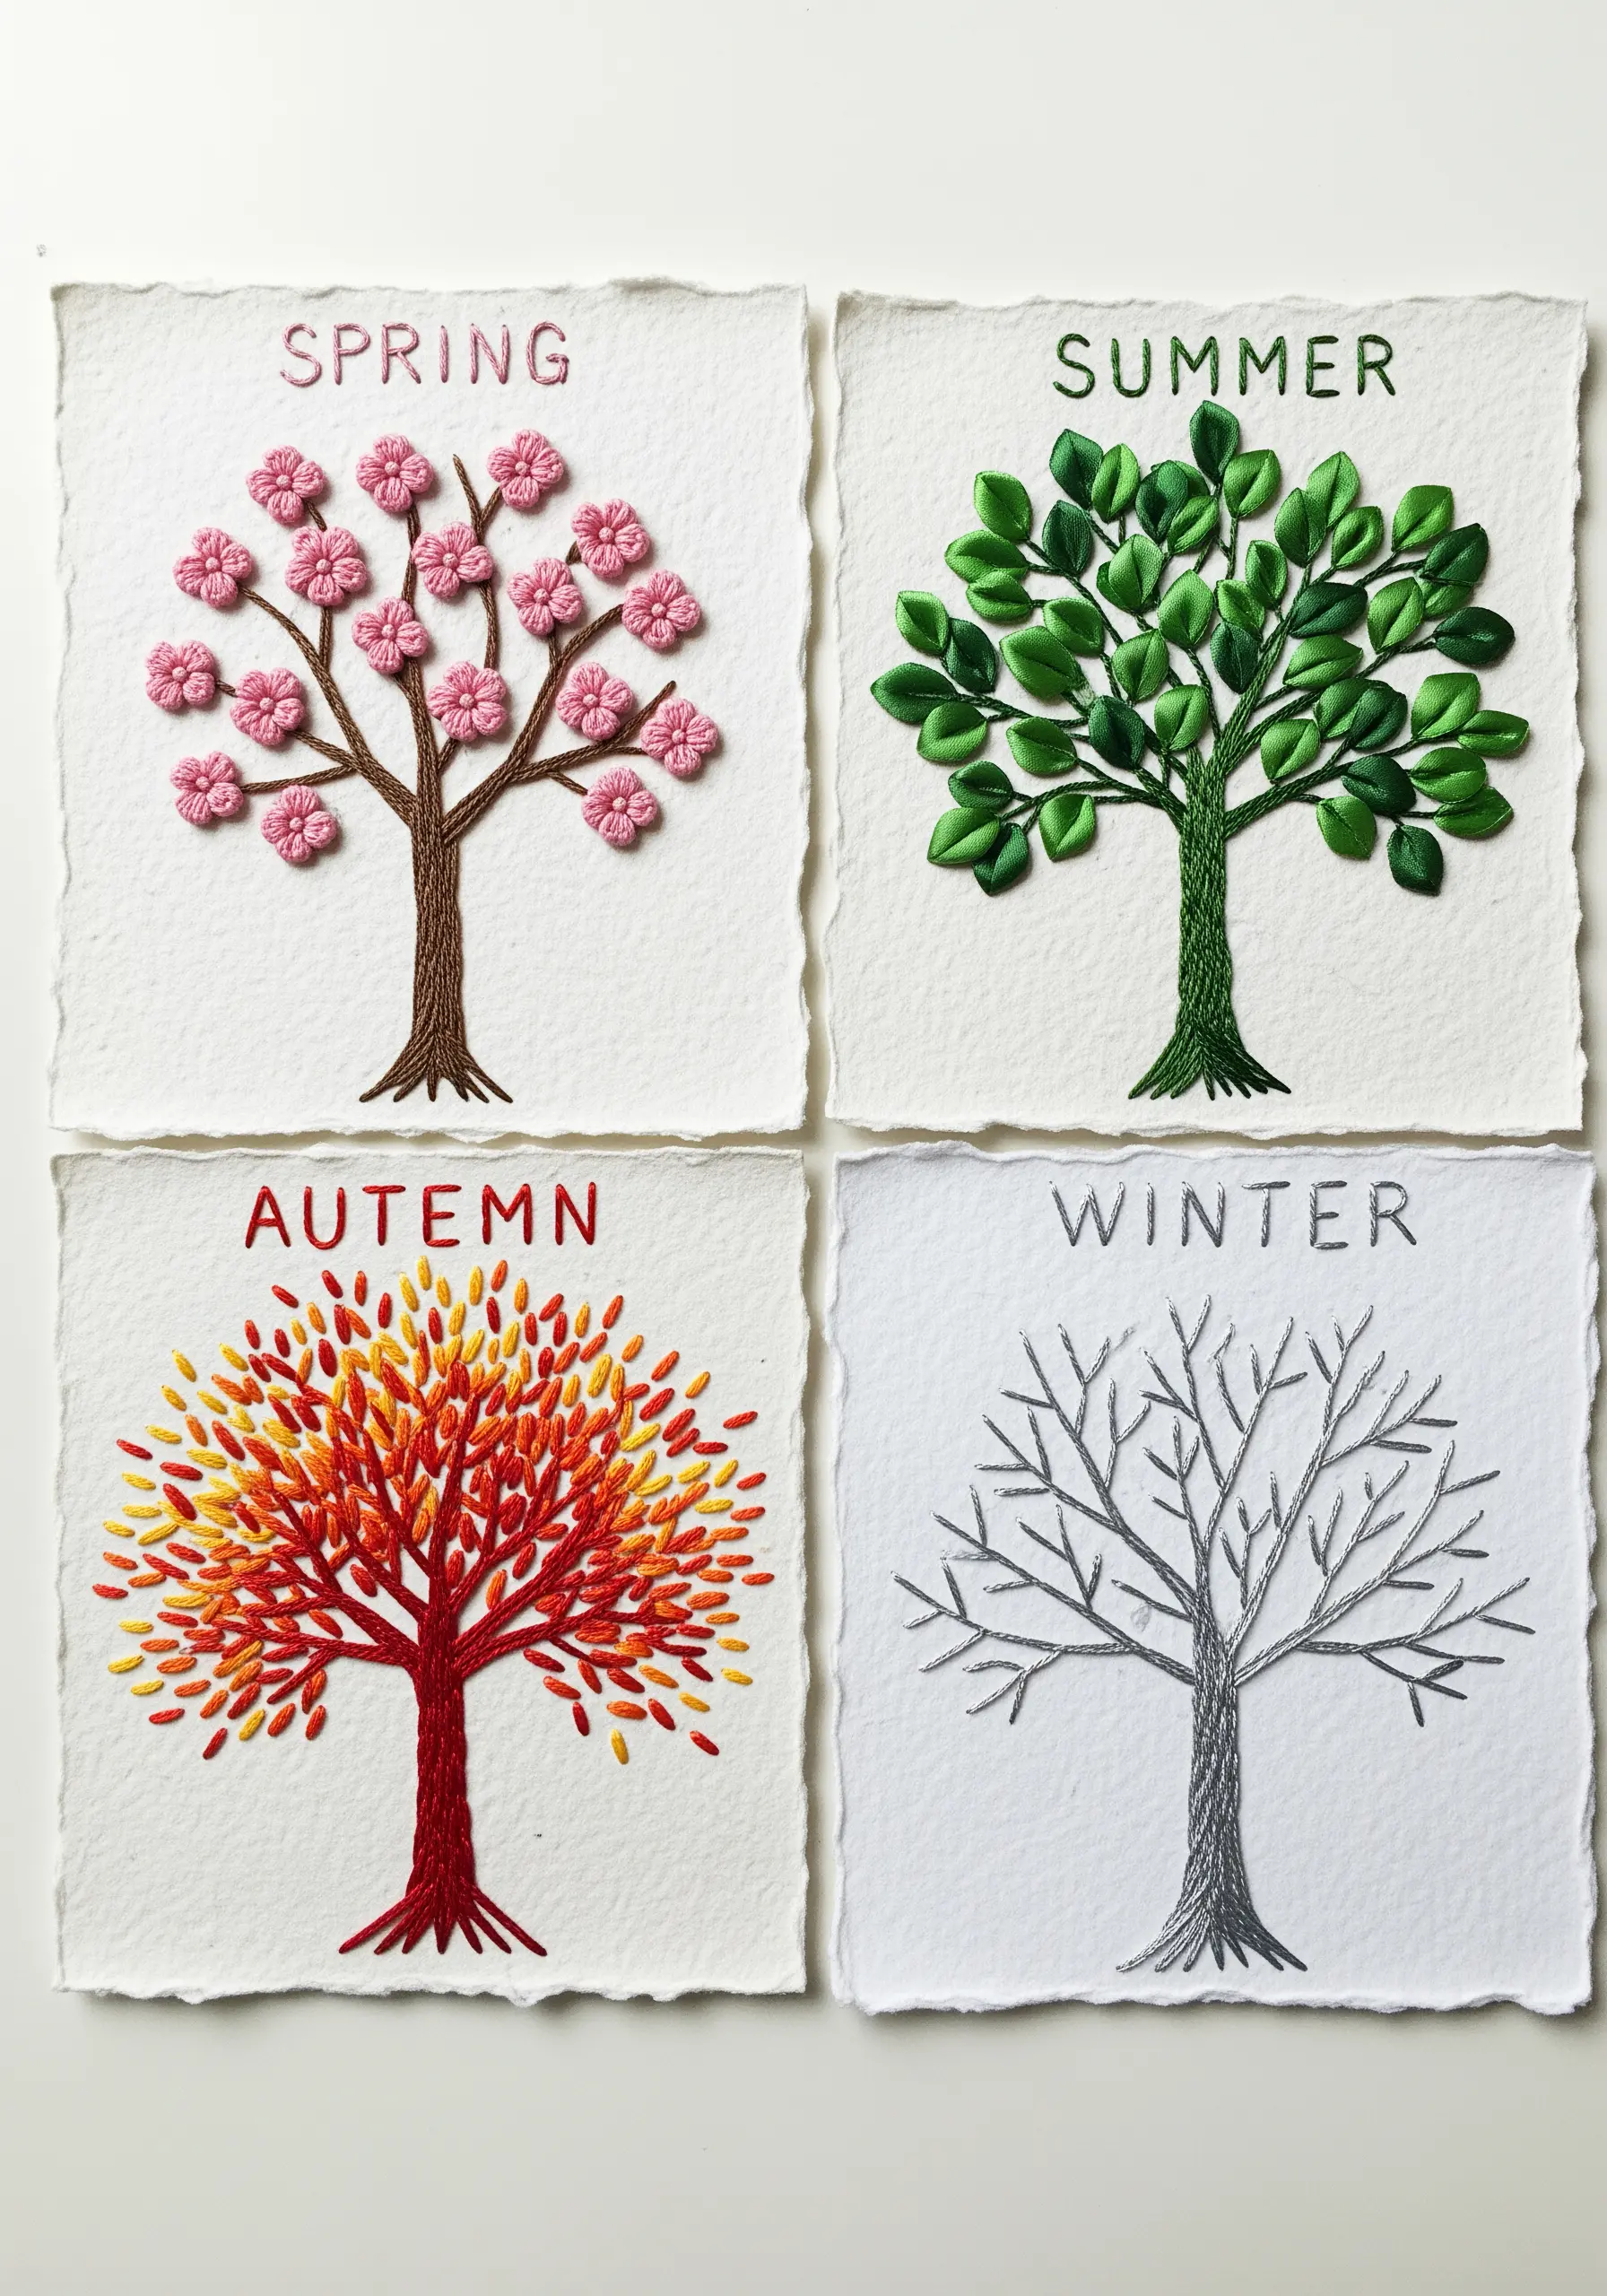
Use a single motif, like a tree, to explore how stitch choice can powerfully evoke a feeling or define a season.
For spring, use bullion knots to form plump blossoms. Create lush summer foliage with detached chain stitches (lazy daisies) or fishbone stitch.
Capture autumn’s brilliance with a dense flurry of single straight stitches in oranges, reds, and yellows.
For the starkness of winter, rely on the simple elegance of split stitch to outline bare branches. This turns your work into a narrative of texture.
10. Wrapped Yarn Wall Hangings
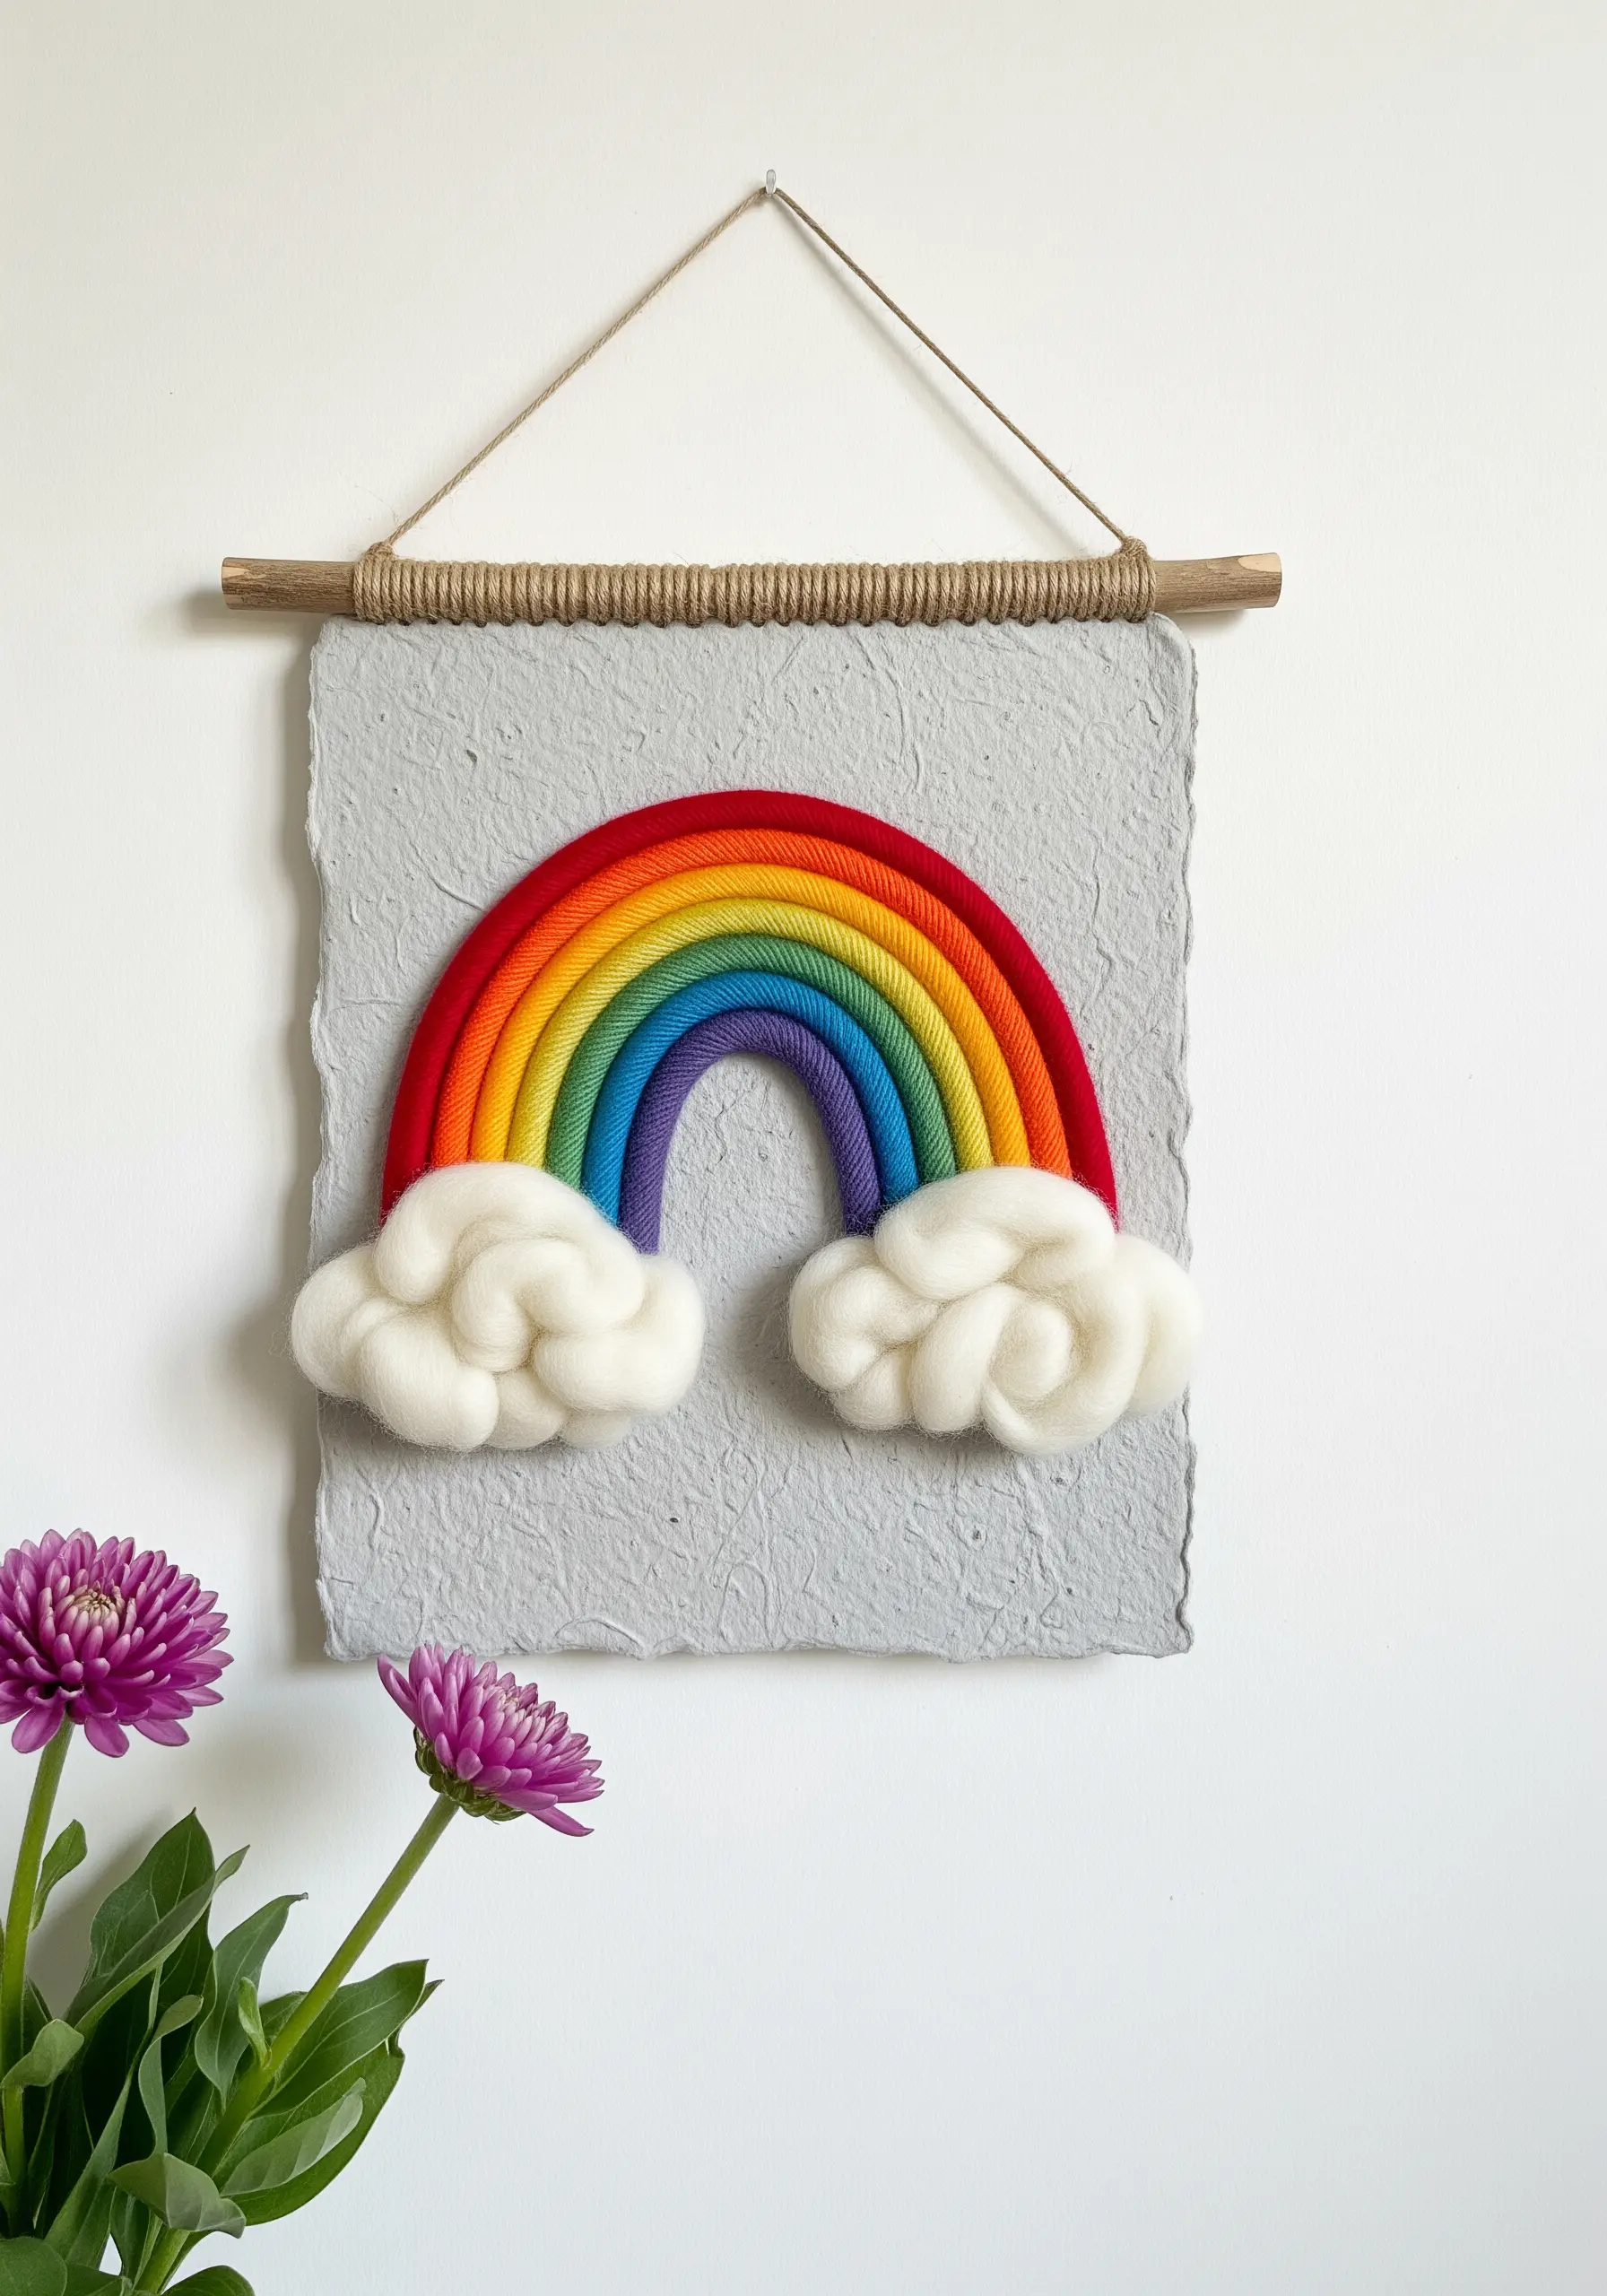
Explore a different kind of fiber art technique by wrapping yarn around a shaped base instead of stitching with it.
Form thick cotton rope into rainbow arcs, then tightly wrap each one with a different color of yarn, securing the ends discreetly with a dab of fabric glue.
For the clouds, use soft wool roving, teasing it into a fluffy shape and attaching it to the paper background with a few hidden stitches or strong adhesive.
This method creates bold, graphic pieces with wonderful softness and dimension.
11. Anatomical Thread Painting on Paper
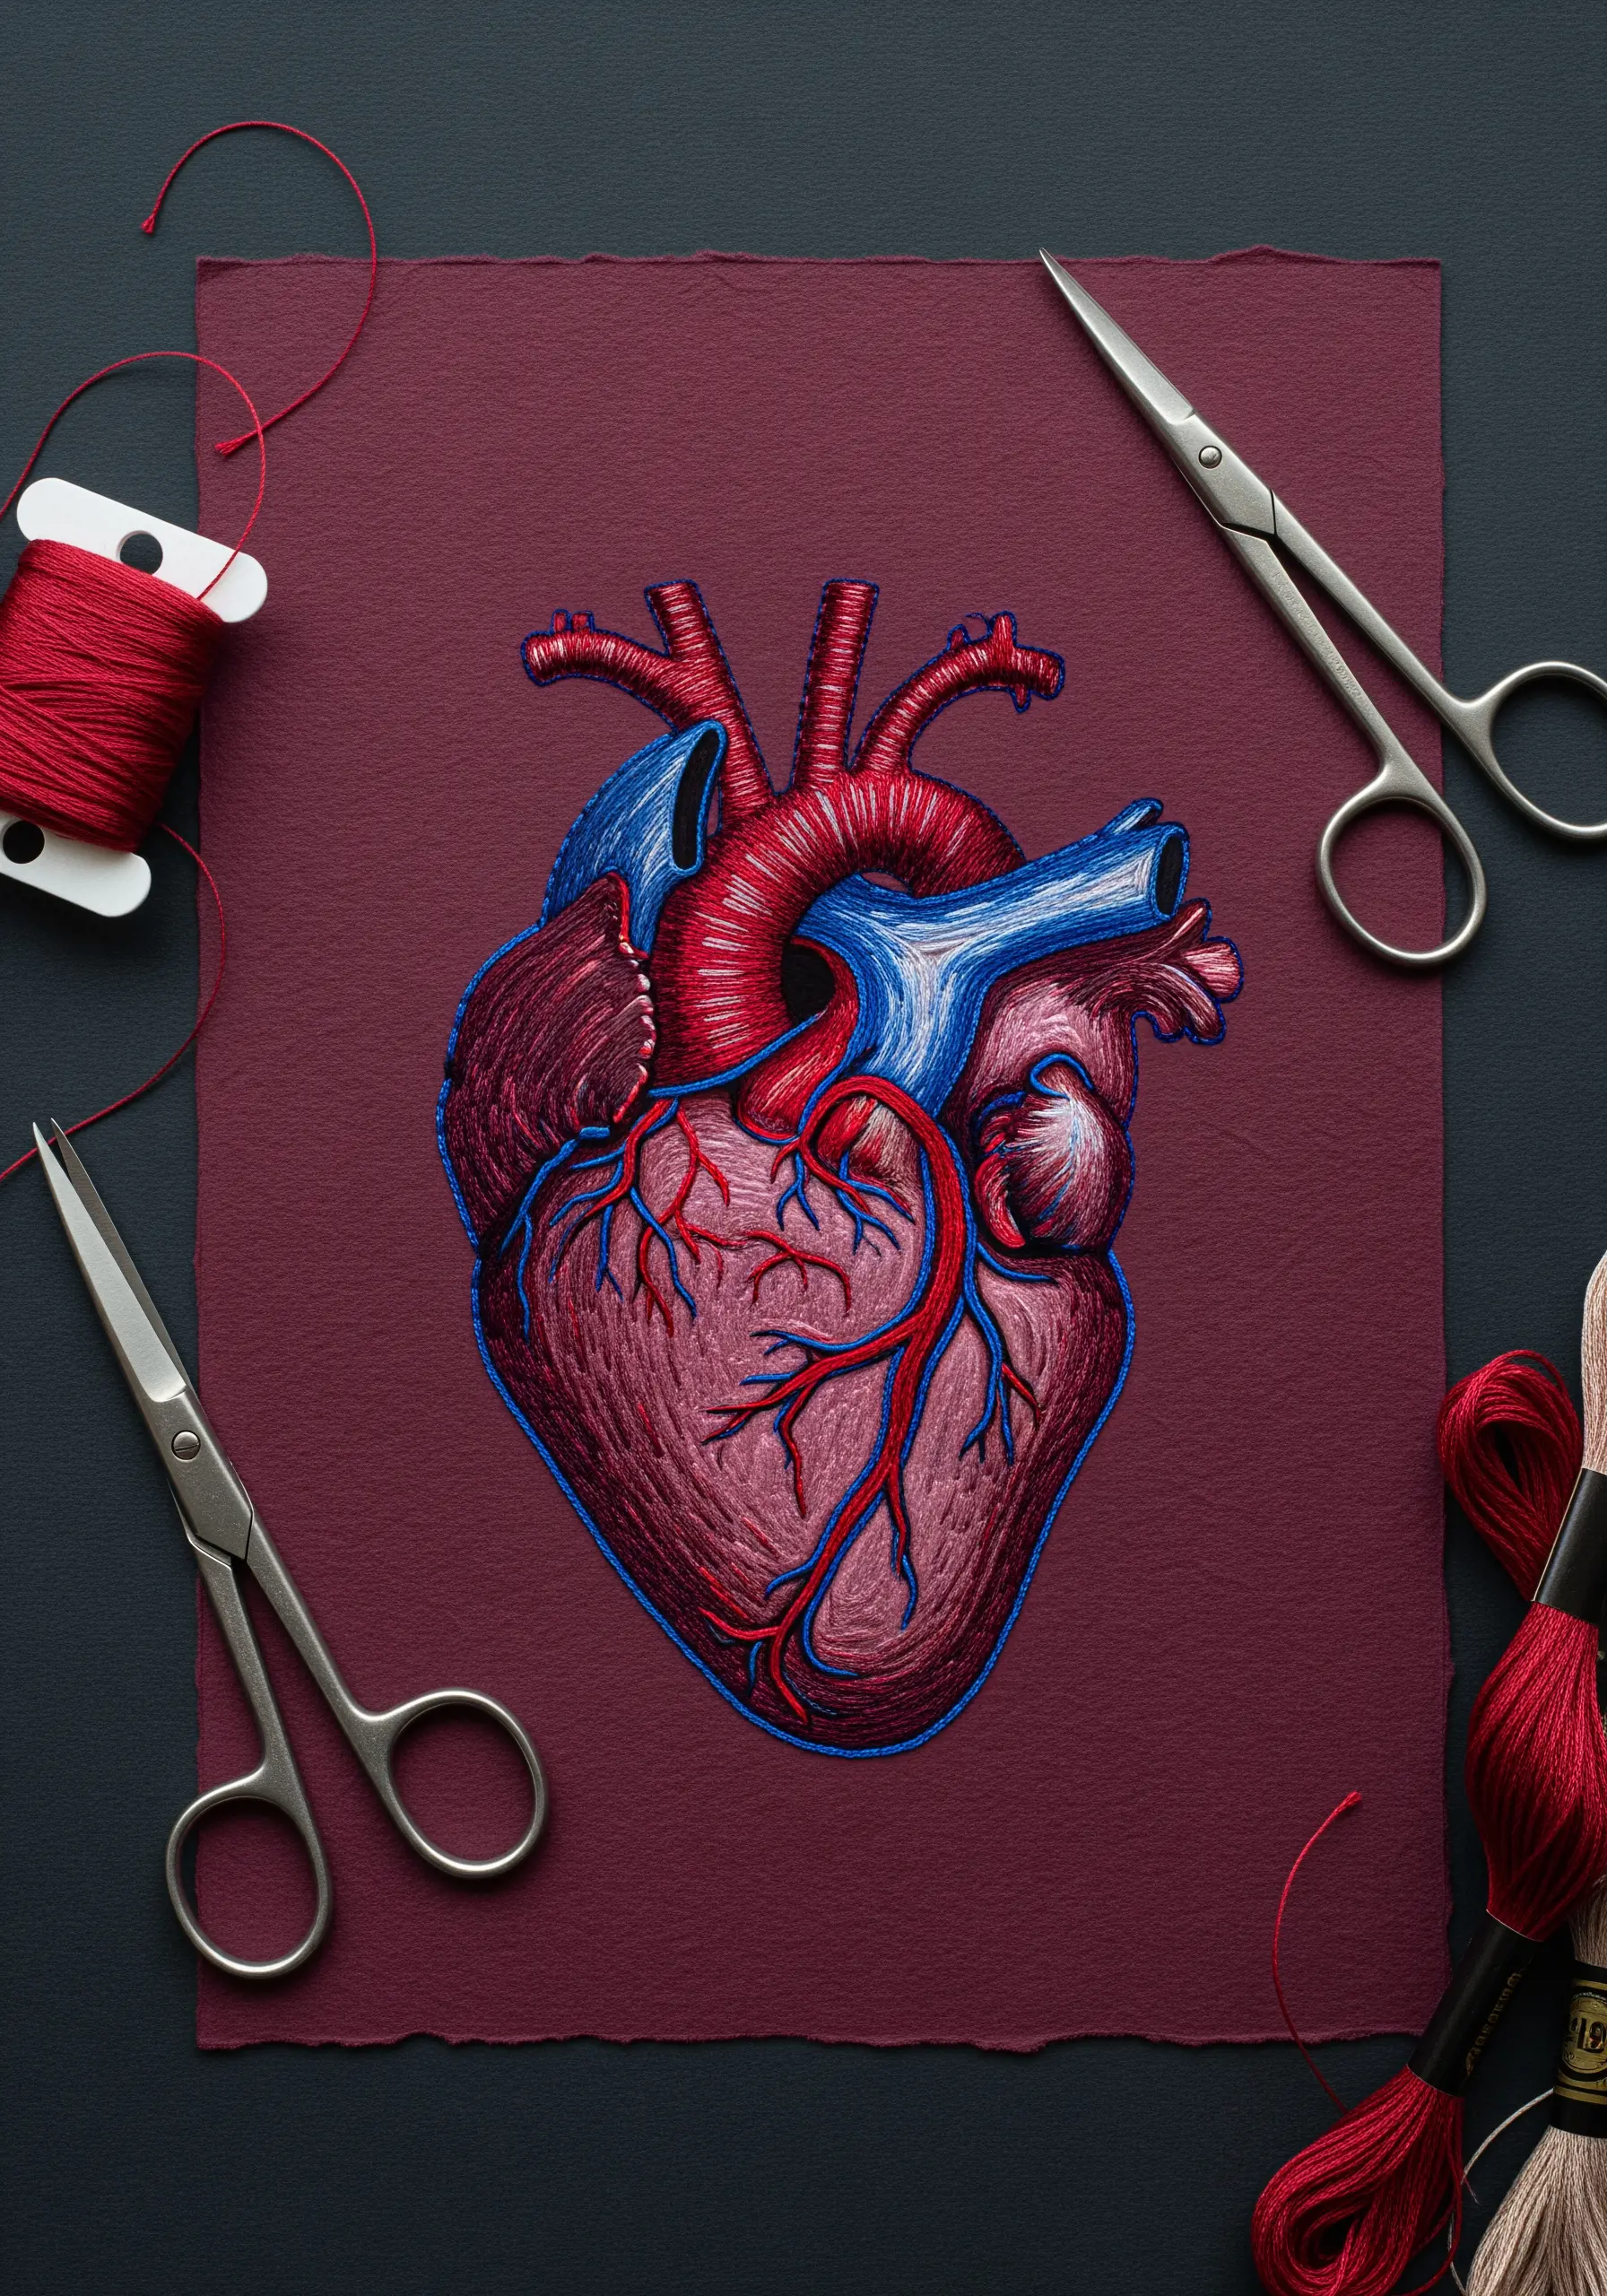
Achieve detailed, painterly effects on paper by paying close attention to your stitch direction.
Use split stitch and single-strand satin stitch, angling your stitches to follow the natural contours and muscle fibers of an anatomical illustration.
This directional work is what creates the illusion of form, light, and shadow, making the subject feel three-dimensional.
Stitching on a richly colored, matte paper provides a sophisticated background that makes your thread colors appear deeper and more saturated.
12. Negative Space Embroidery
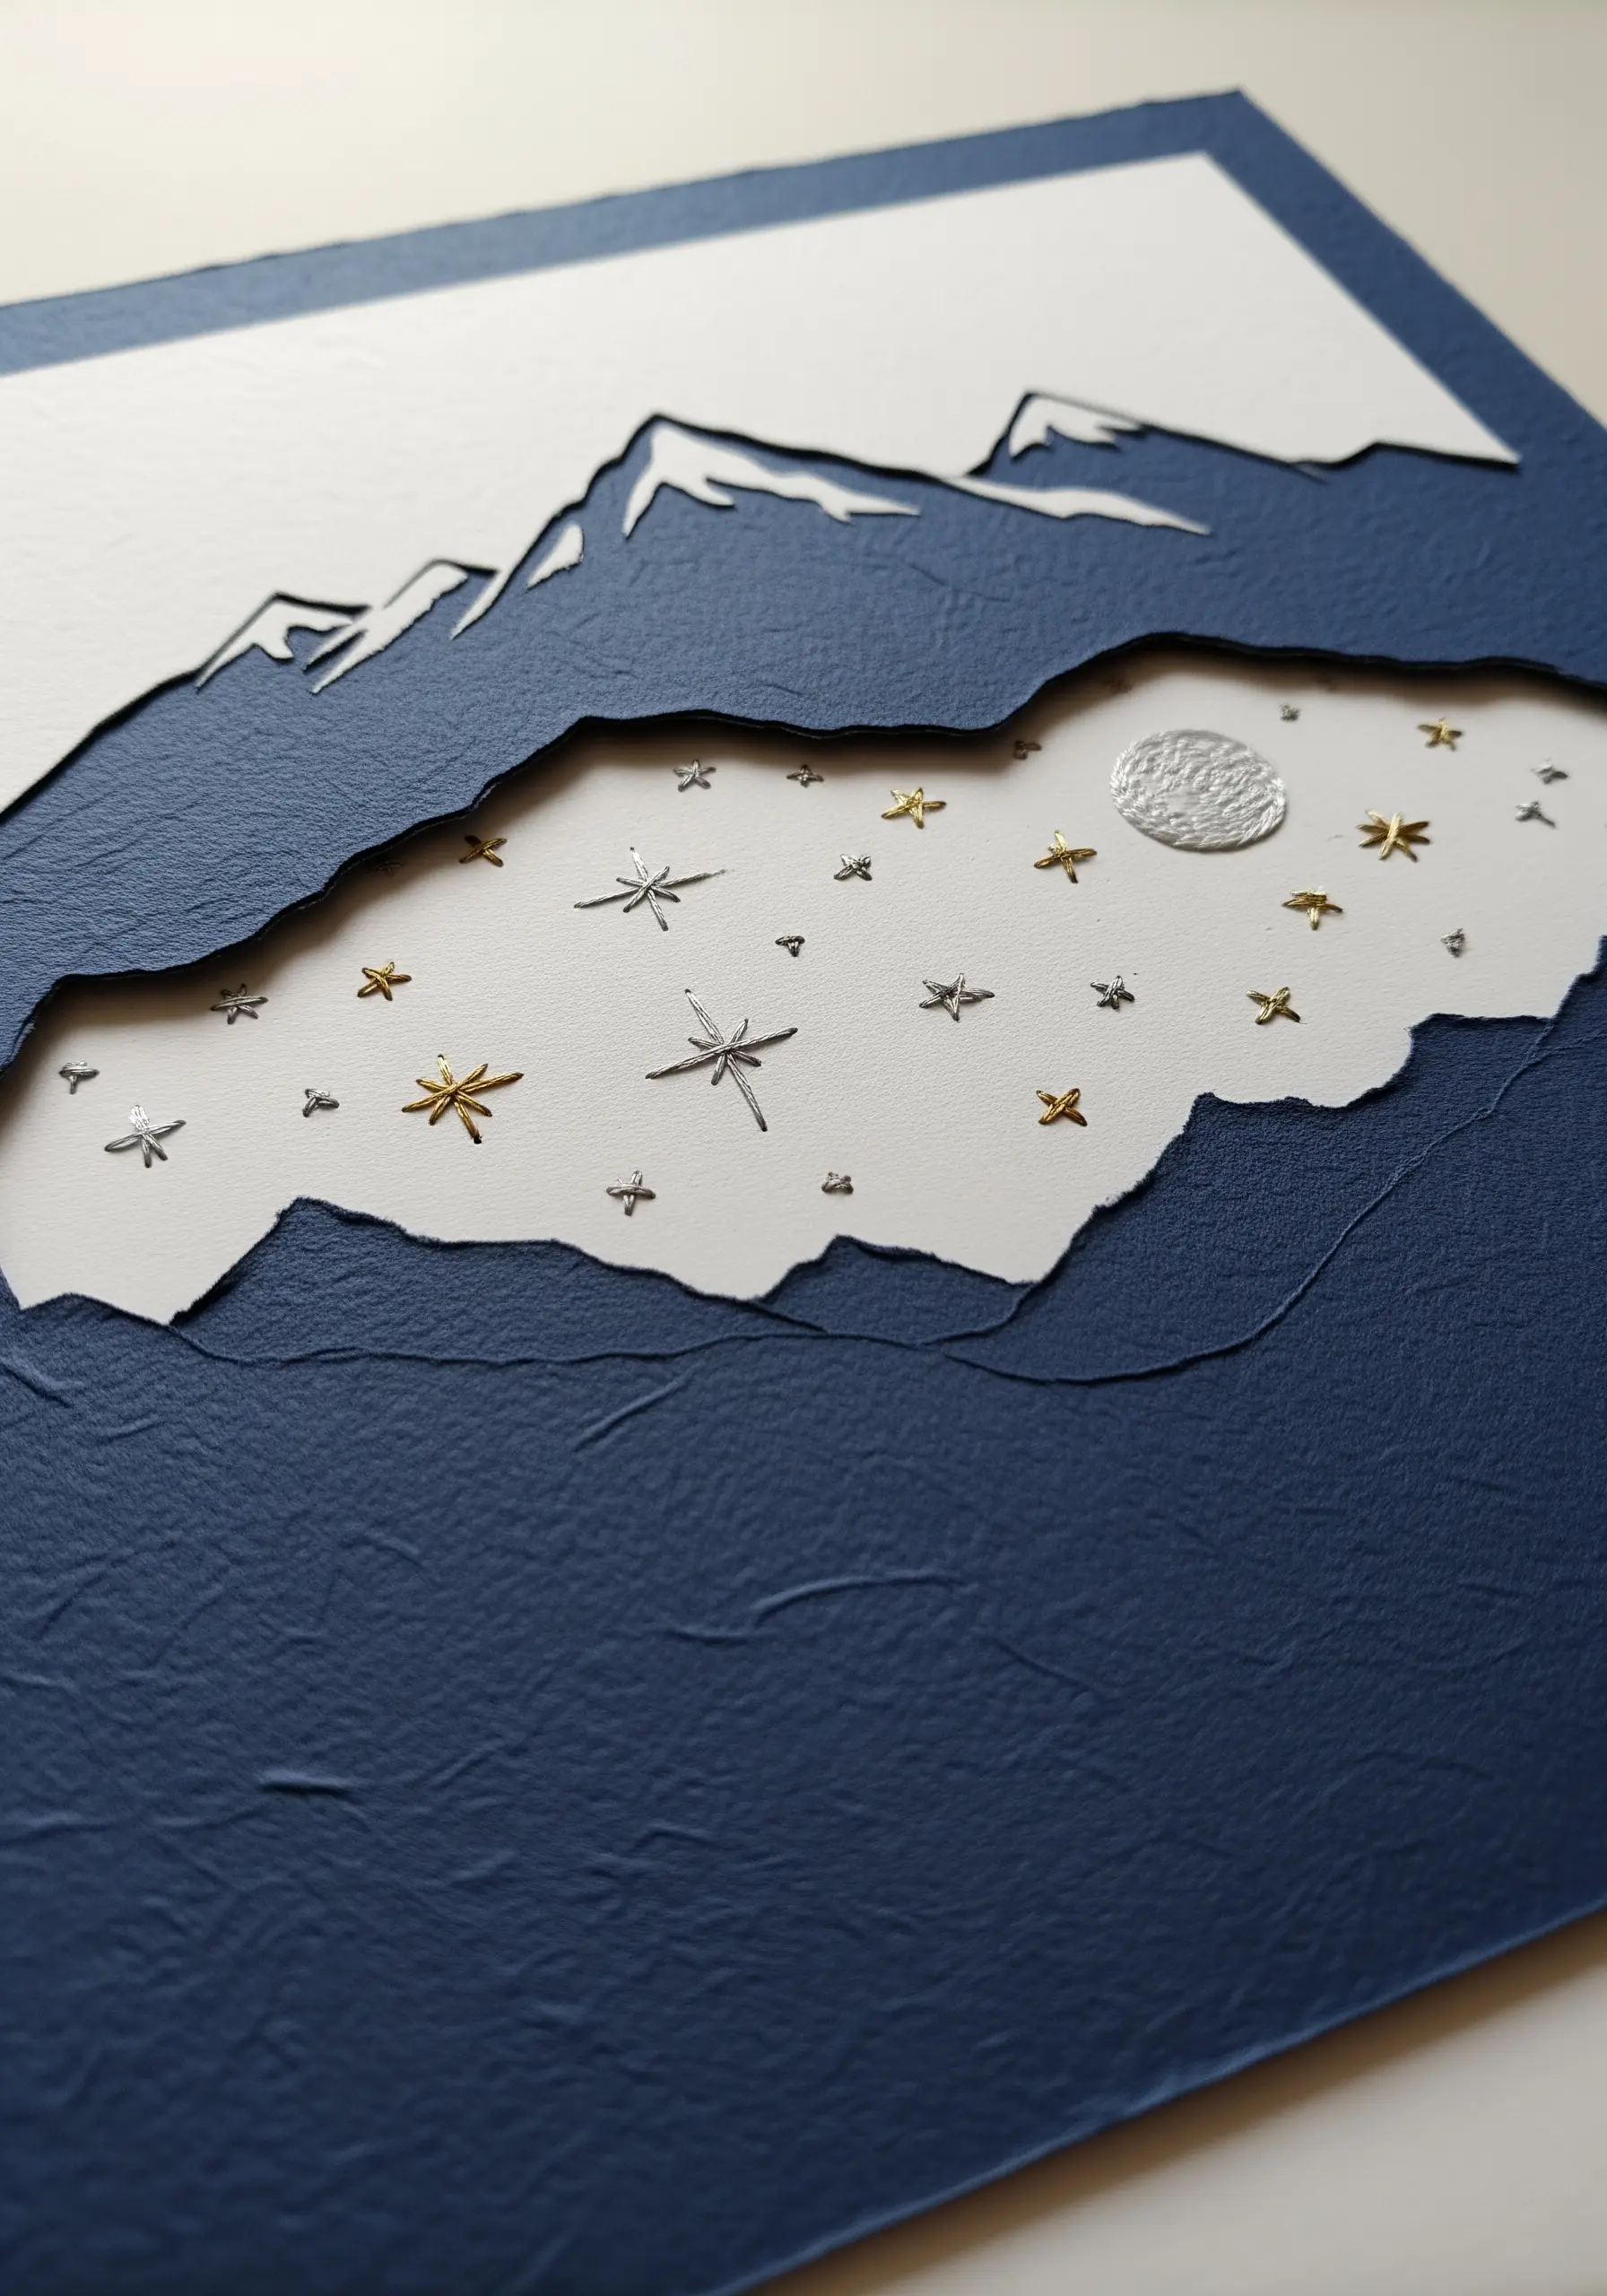
Let the paper do the heavy lifting in your composition by embracing negative space as a design element.
Instead of stitching a landscape, carefully cut it out from a top sheet of paper to reveal a contrasting background sheet underneath.
Reserve your embroidery for the smallest, most impactful details—like stitching a delicate moon and tiny metallic stars in the newly revealed ‘sky’.
This technique creates stunning depth through negative space, making your stitches feel precious and deliberate.
13. Deconstructed Typography
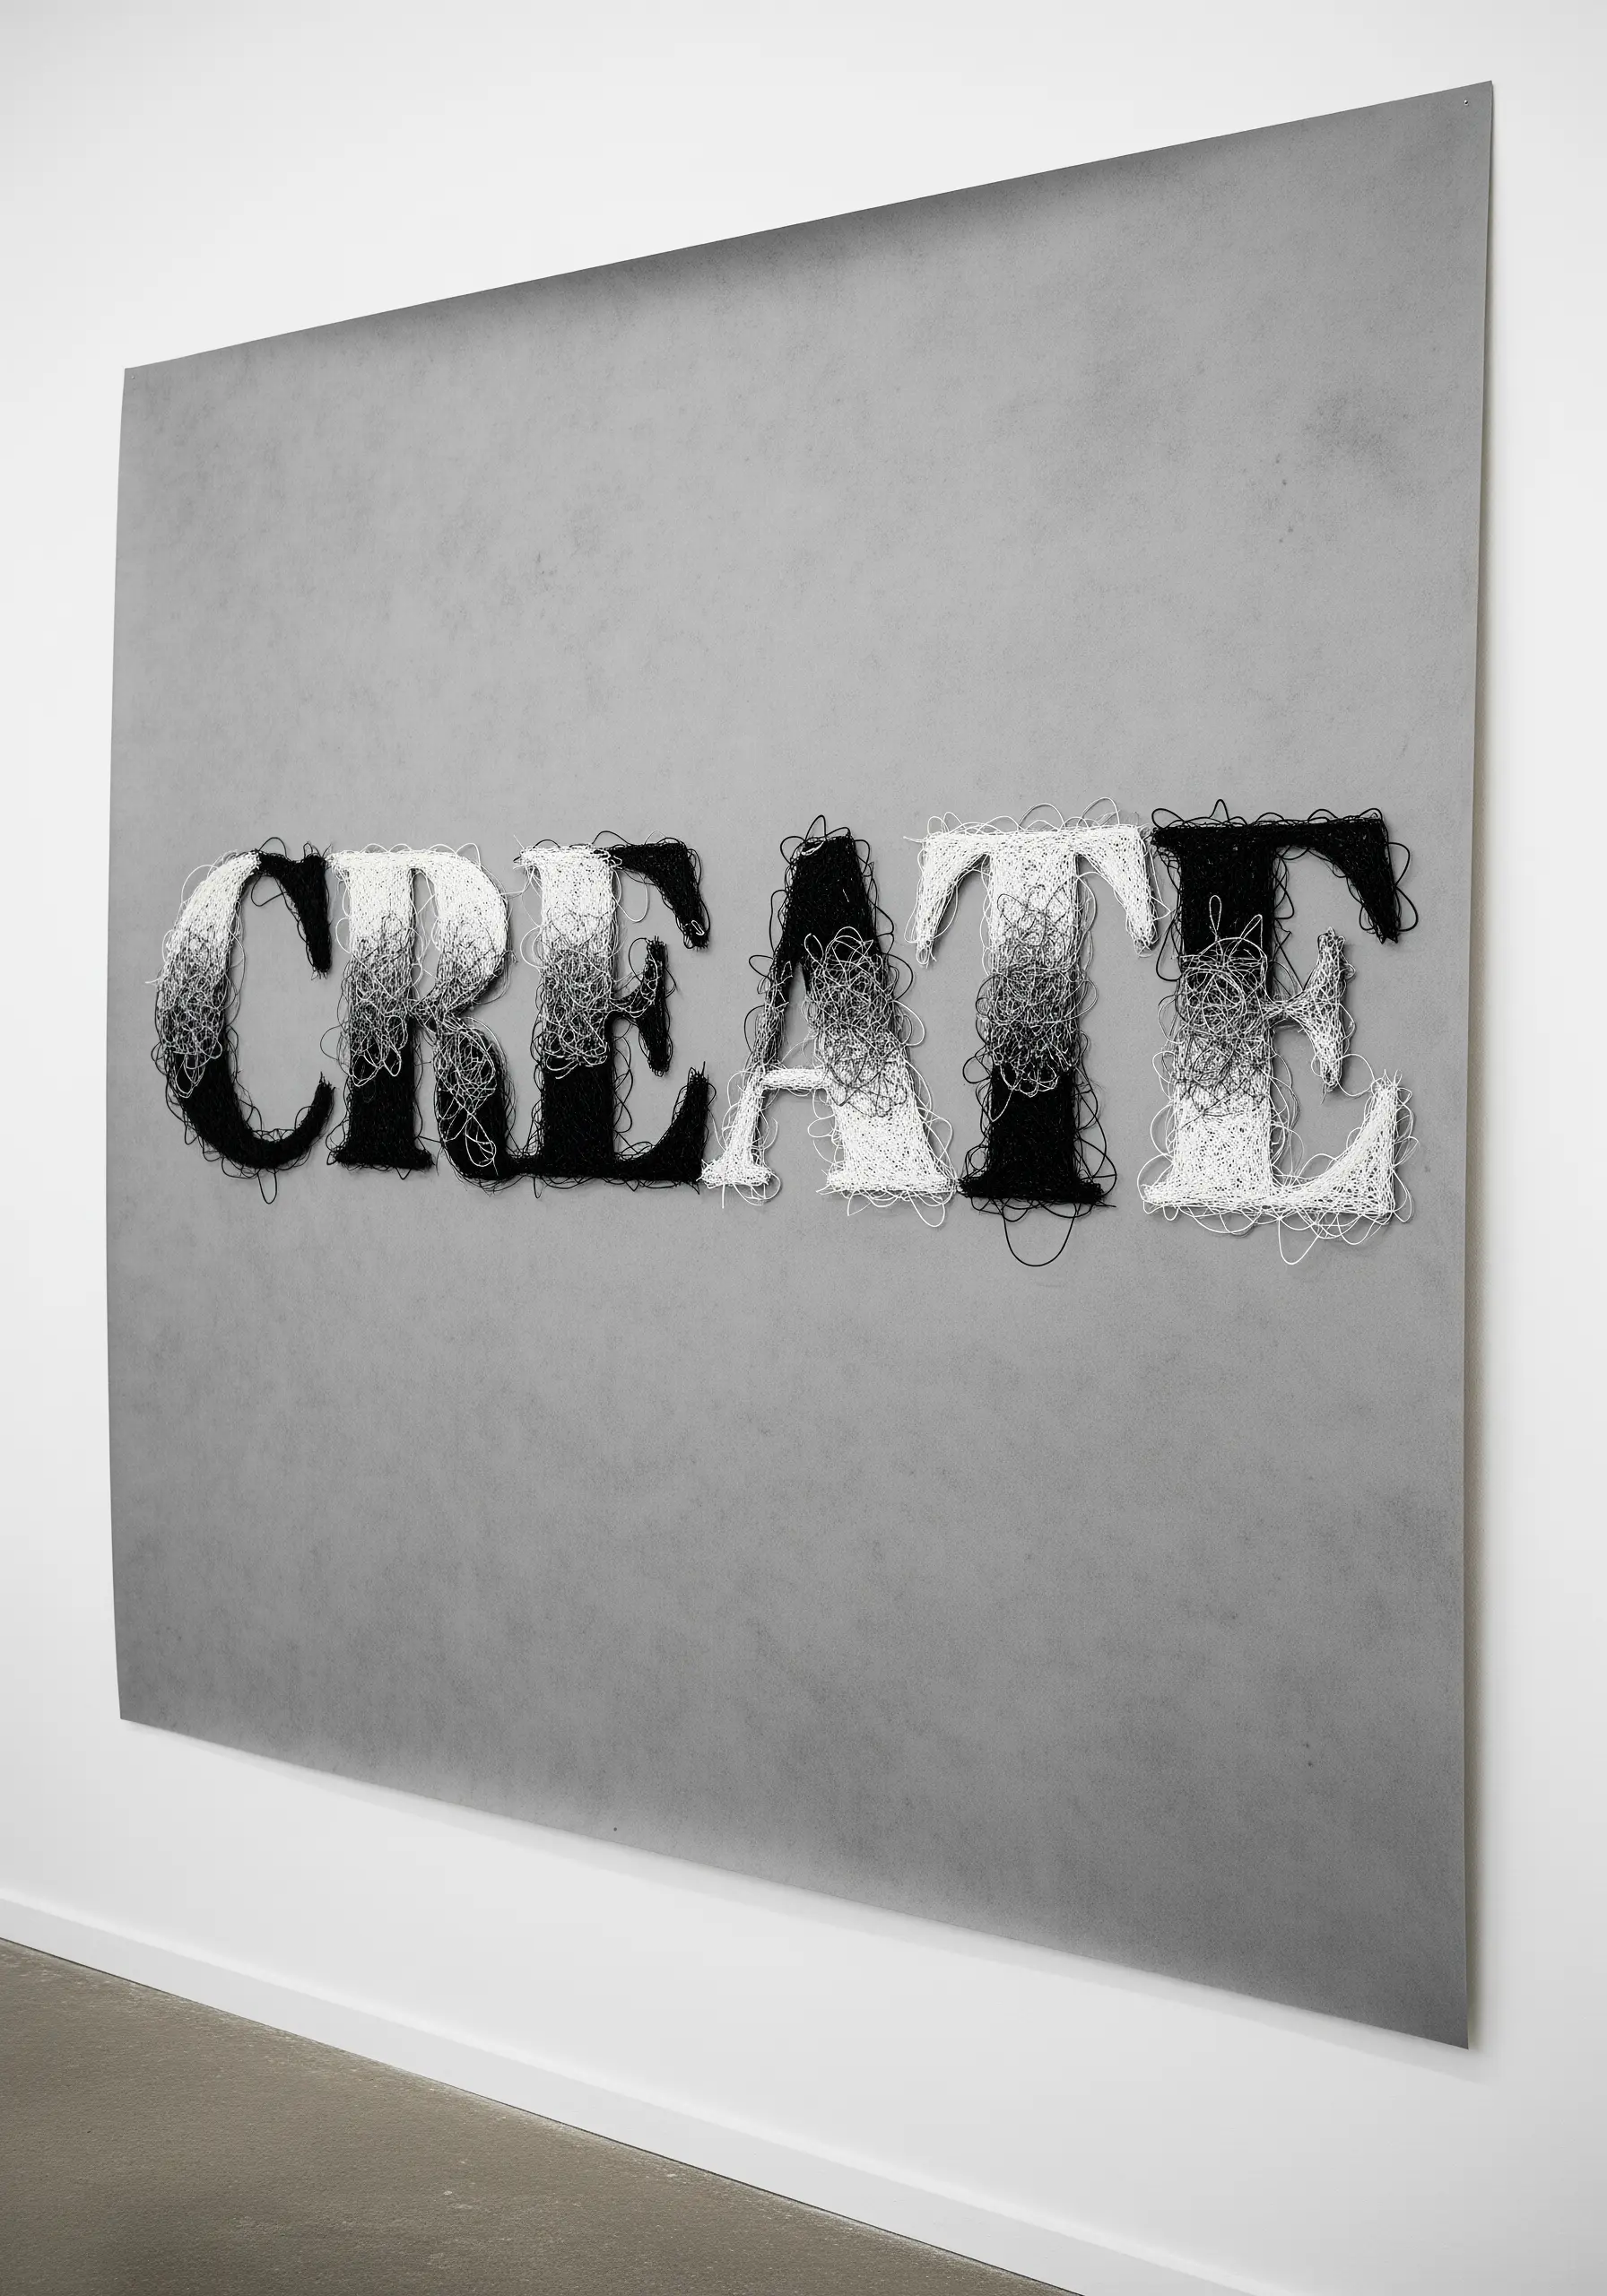
Give typography an emotional, energetic quality by breaking free from neat, uniform stitches.
First, establish the letterforms with a clean backstitch outline. Then, fill the shapes with a chaotic web of long, overlapping straight stitches, allowing the thread to loop, cross, and tangle.
This ‘scribble fill’ technique creates a powerful contrast between structure and chaos, turning a simple word into a piece with raw, expressive effect.
14. Watercolor and Thread Fusion
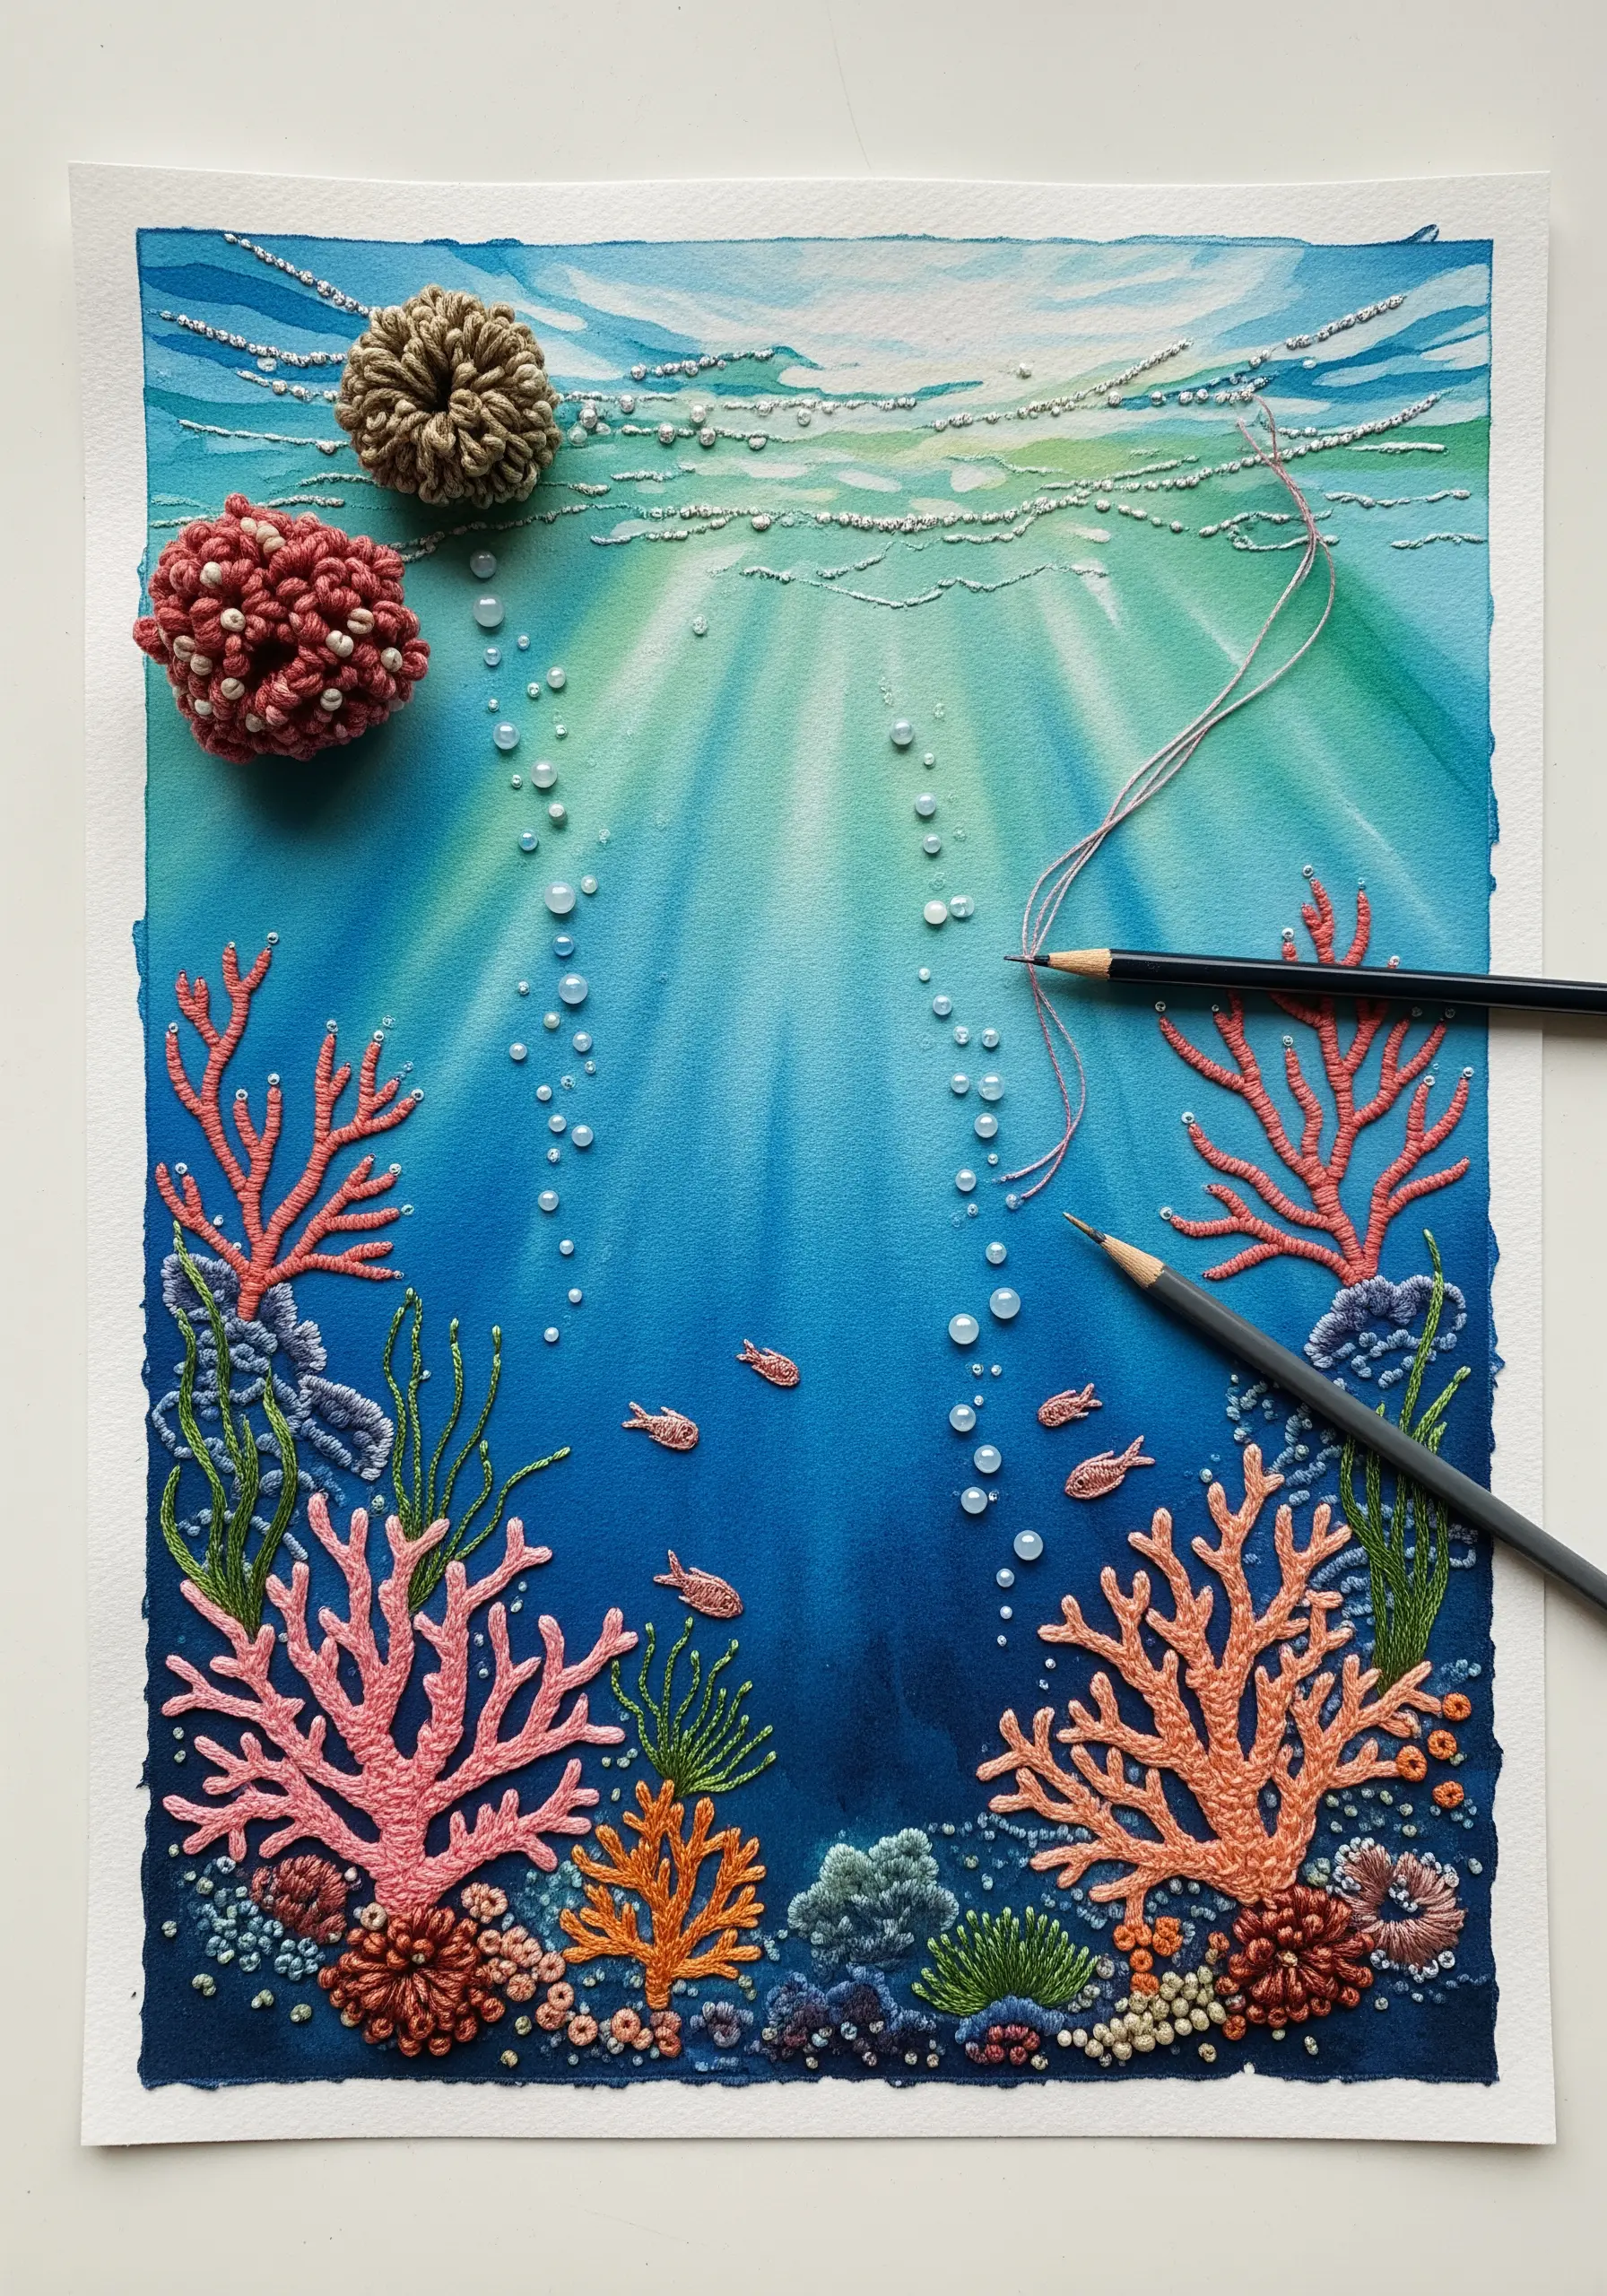
Create an atmospheric base for your embroidery by starting with a watercolor wash on thick, high-grade paper.
The softness of watercolor provides a dreamy, ethereal quality that perfectly complements the sharp texture of thread.
Lay down your background colors, letting them blend and dry completely before you begin to stitch.
Then, add your details: French knot bubbles, stem stitch coral, and woven picot fish. The painted background adds depth and context, making your embroidered elements pop.
15. Raised Metallic Insect Studies
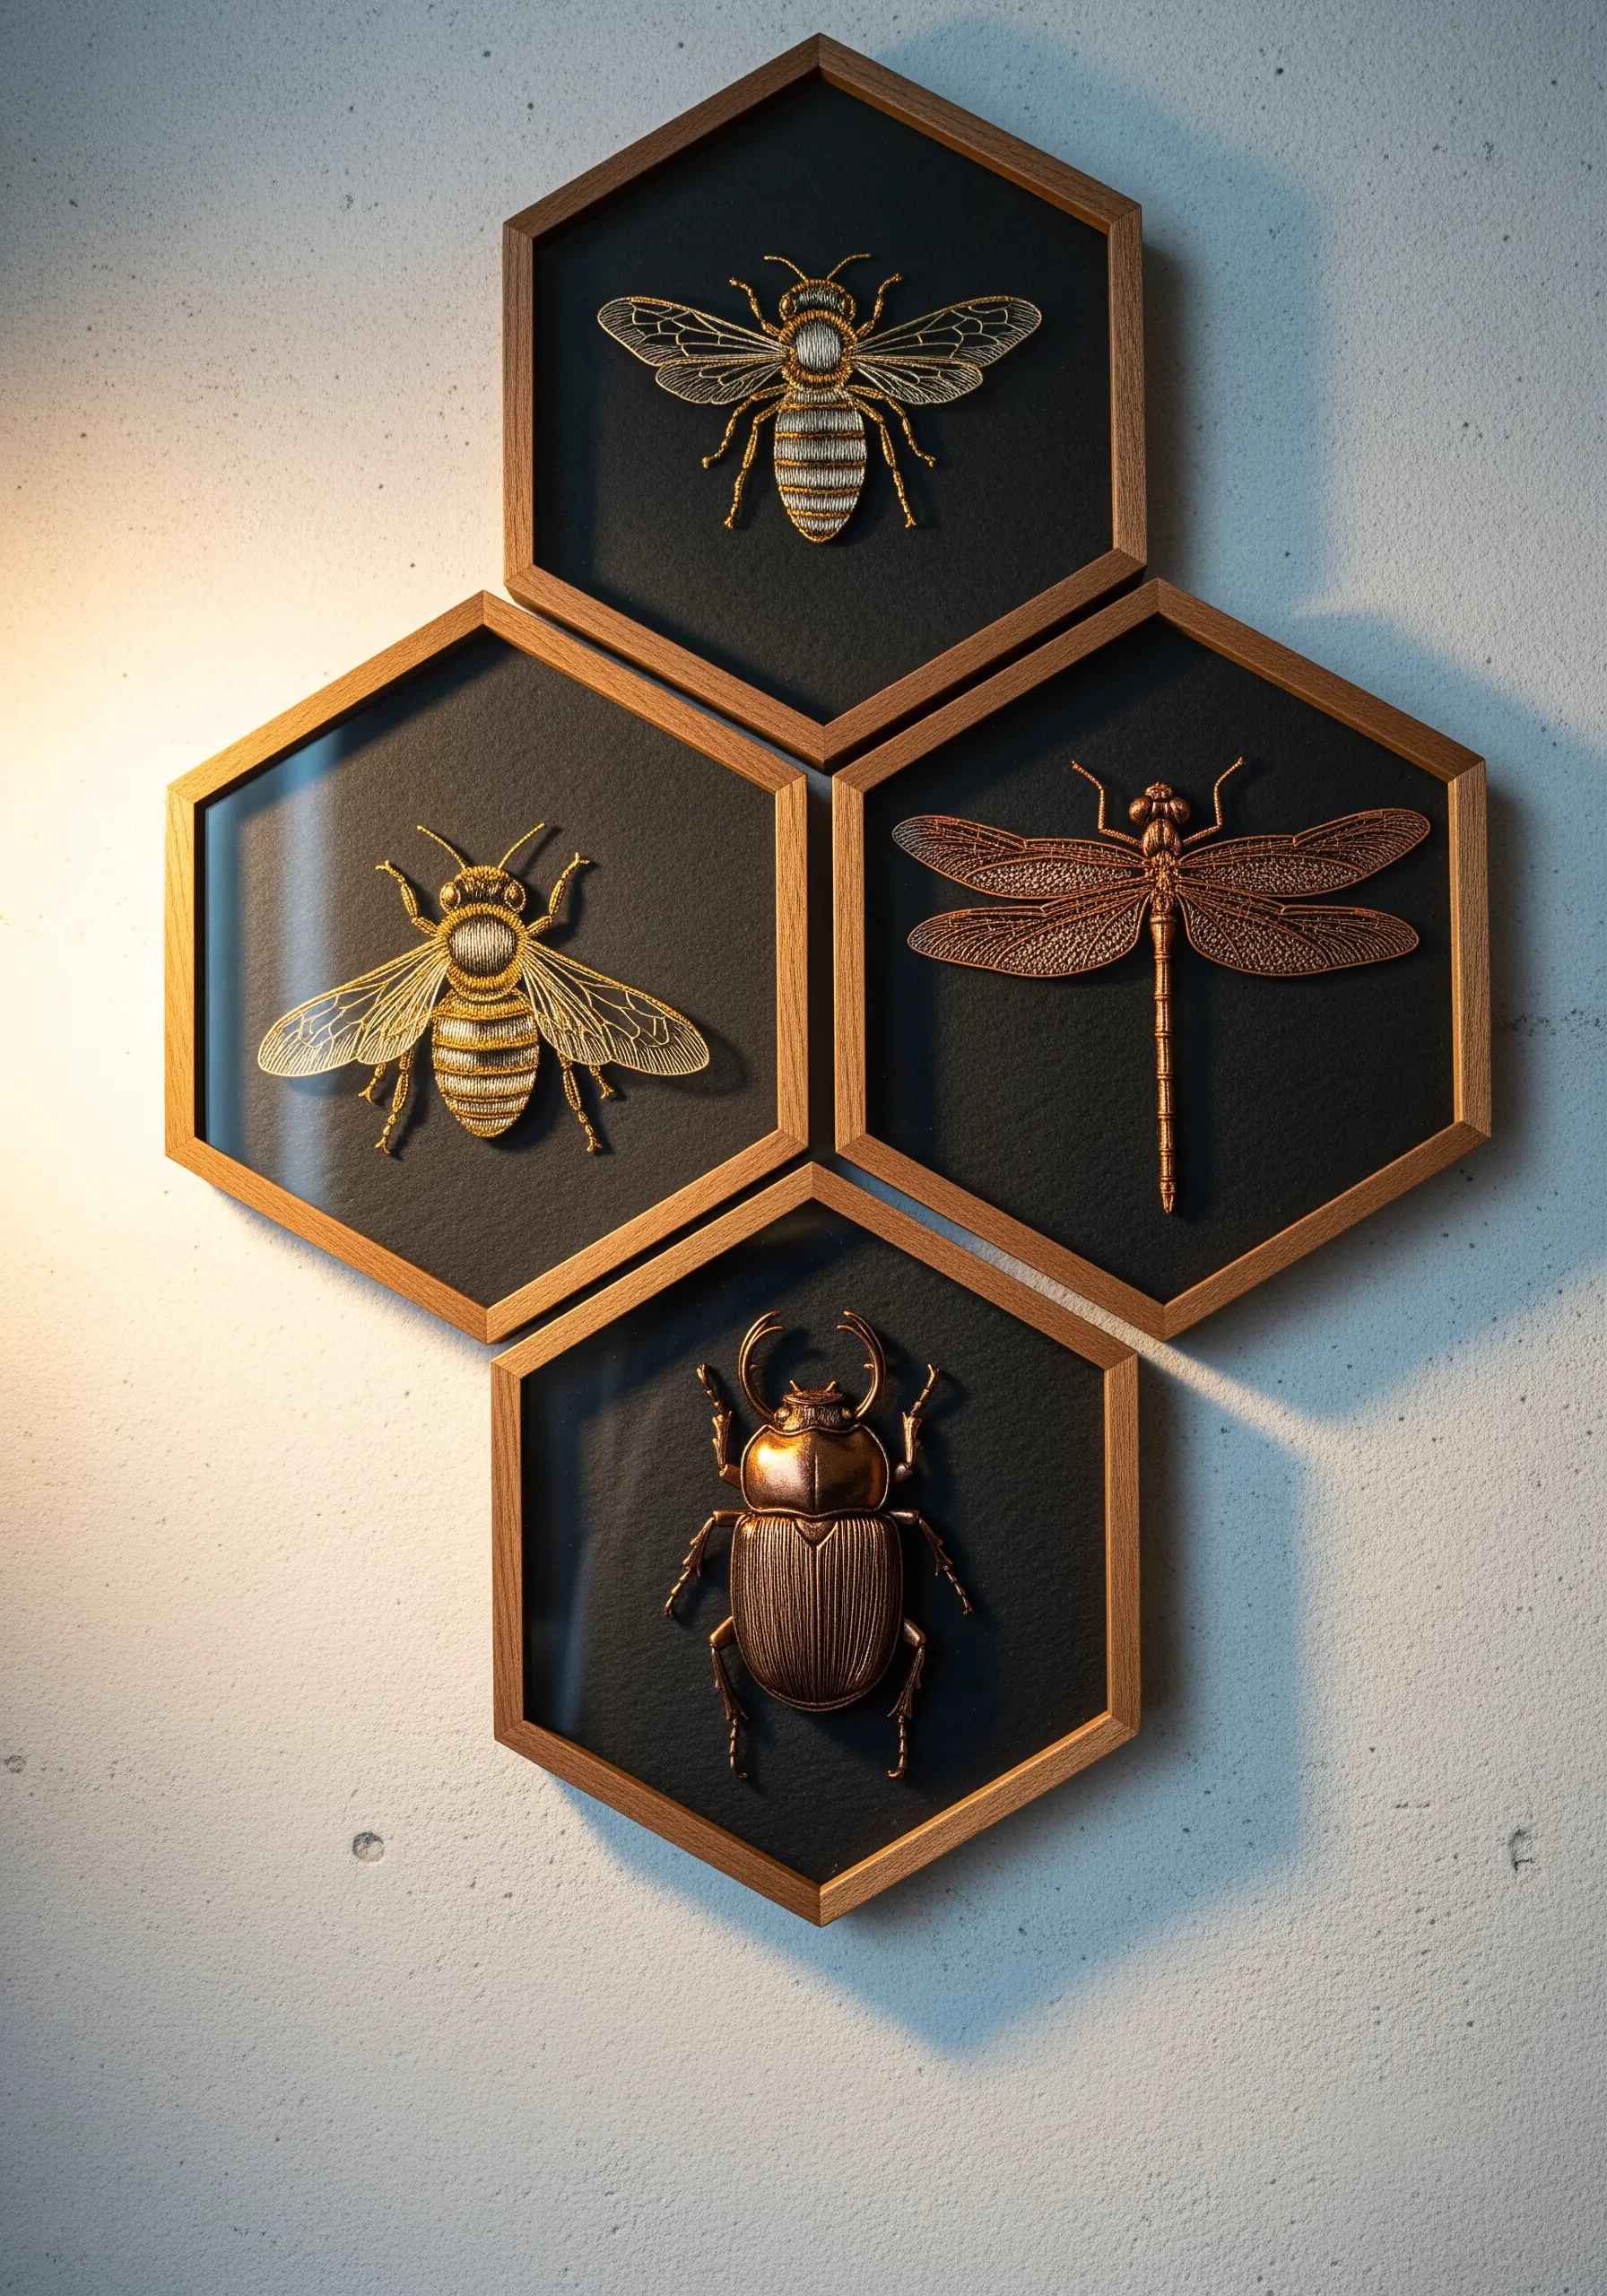
Explore the world of stumpwork to create stunning, three-dimensional specimens.
Shape fine-gauge wire into the form of wings and bodies, then wrap these frames tightly with metallic thread using buttonhole stitch or weaving techniques.
These individual embroidered elements are created separately ‘off’ the background.
Once complete, mount them onto a dark, textured paper within a shadow box frame. This gives your work a sculptural, museum-quality presence.
16. Graphic Cityscapes with Cross Stitch
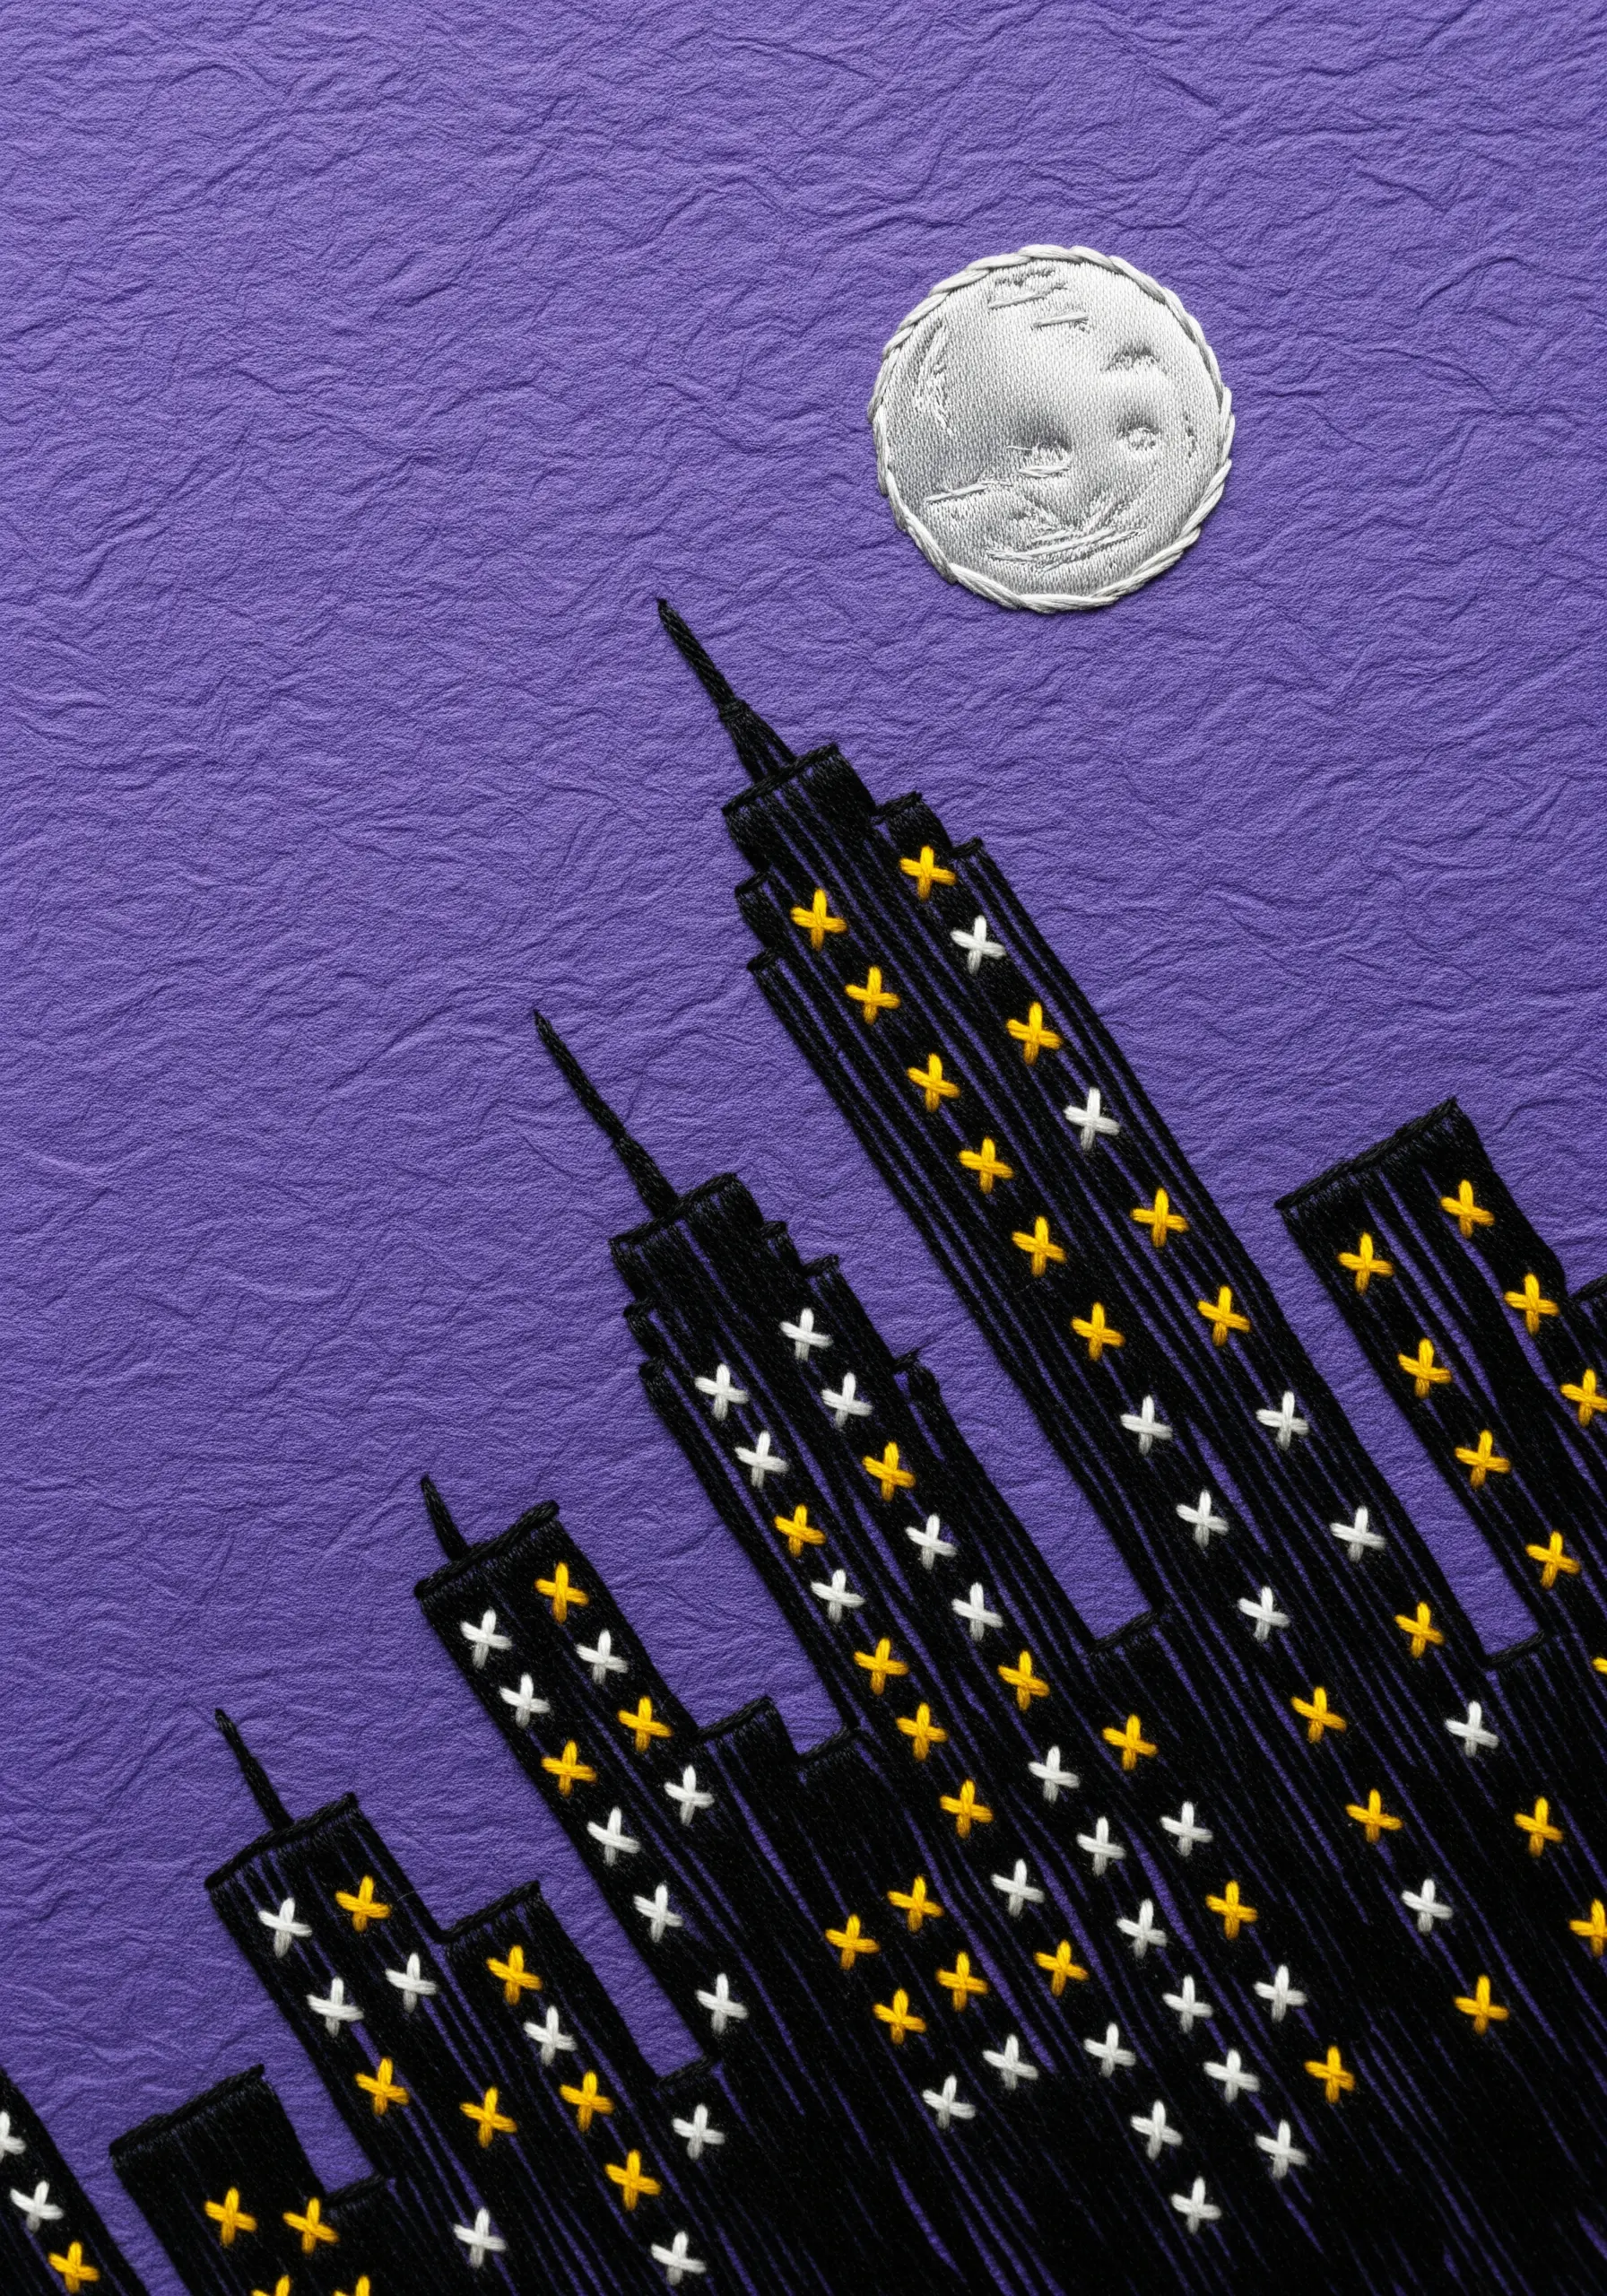
Combine bold fills with delicate details for a striking architectural piece.
Use a dense satin stitch for the solid building silhouettes, ensuring your stitches are smooth and even.
Then, switch to a different texture for the windows. Simple cross stitches in a bright, contrasting color create a gridded, pixelated effect that suggests light and activity.
This juxtaposition of smooth and textured stitches creates a clean, modern aesthetic with a wonderfully graphic feel.
17. Folk Art Inspired Color Blocking
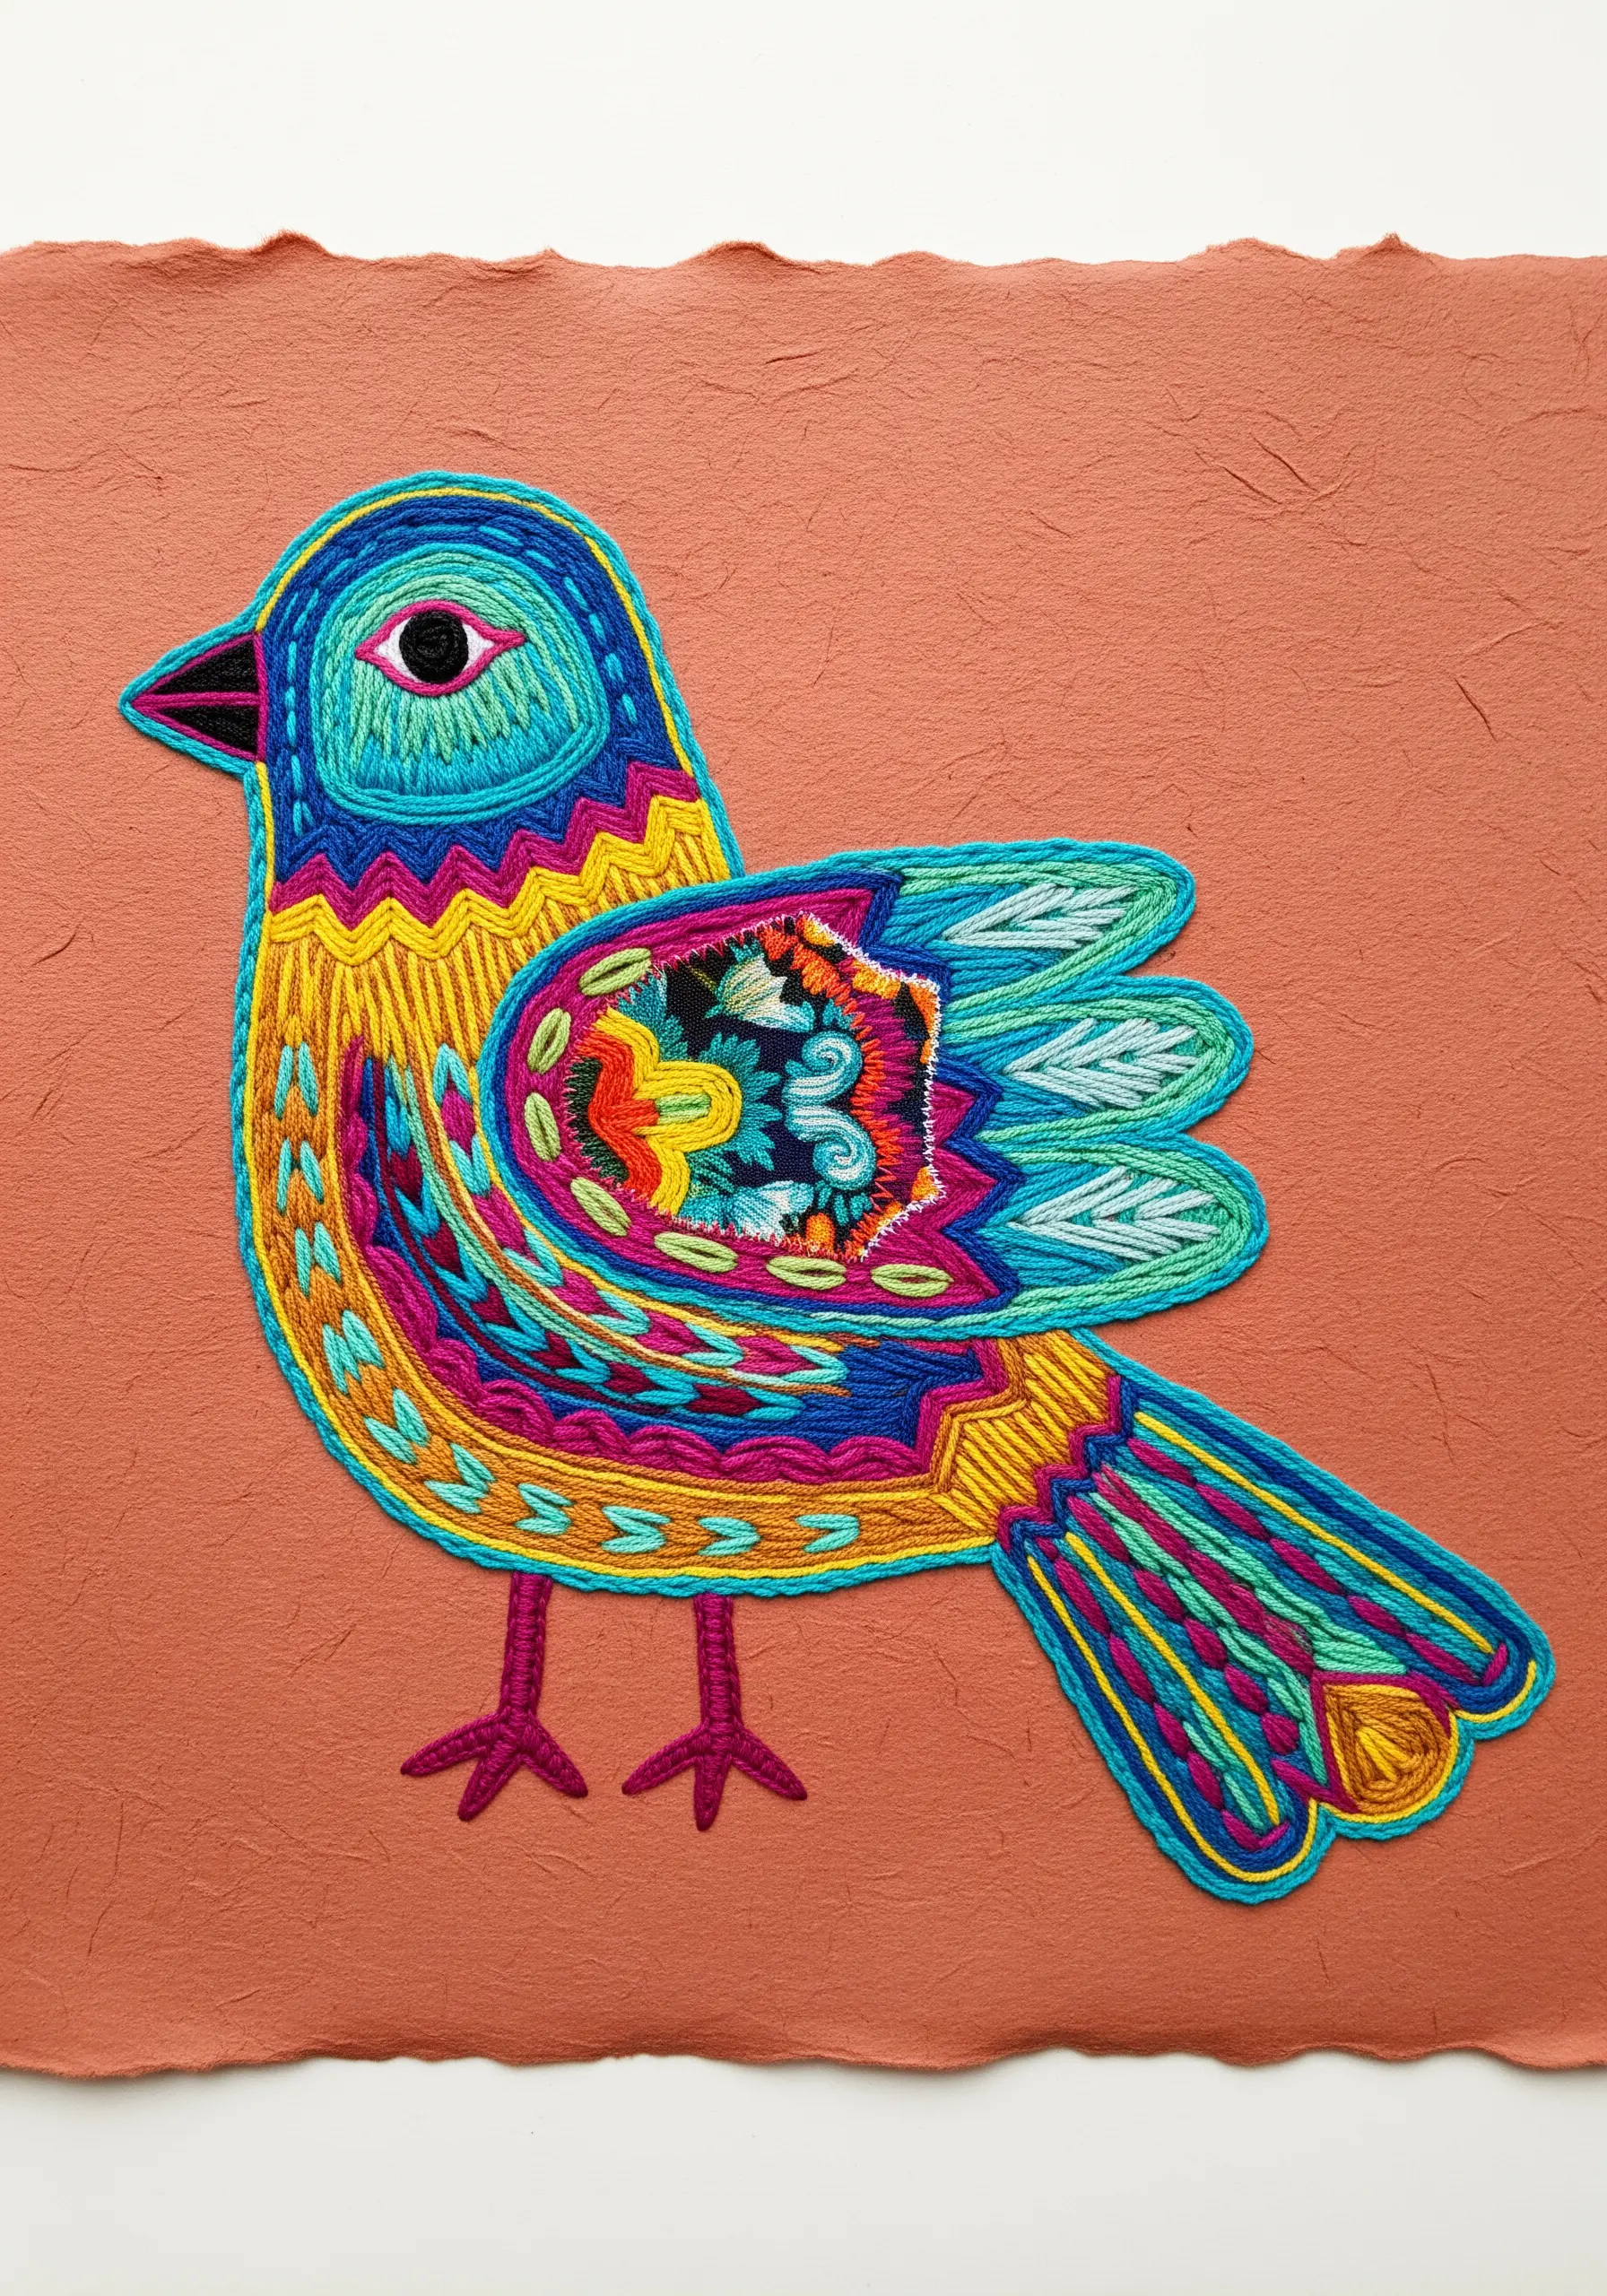
Capture the spirit of folk art with a dense, textural filling technique that gives your work a vibrant, graphic look.
First, outline each color section with a clean backstitch. Then, fill these areas with concentric, tightly packed rows of stem stitch or split stitch.
This method builds up color and texture beautifully, mimicking the look of traditional yarn painting.
Don’t be afraid to place bold, saturated colors directly next to each other for maximum visual impact.
18. Cascading Florals on a Paper Scroll
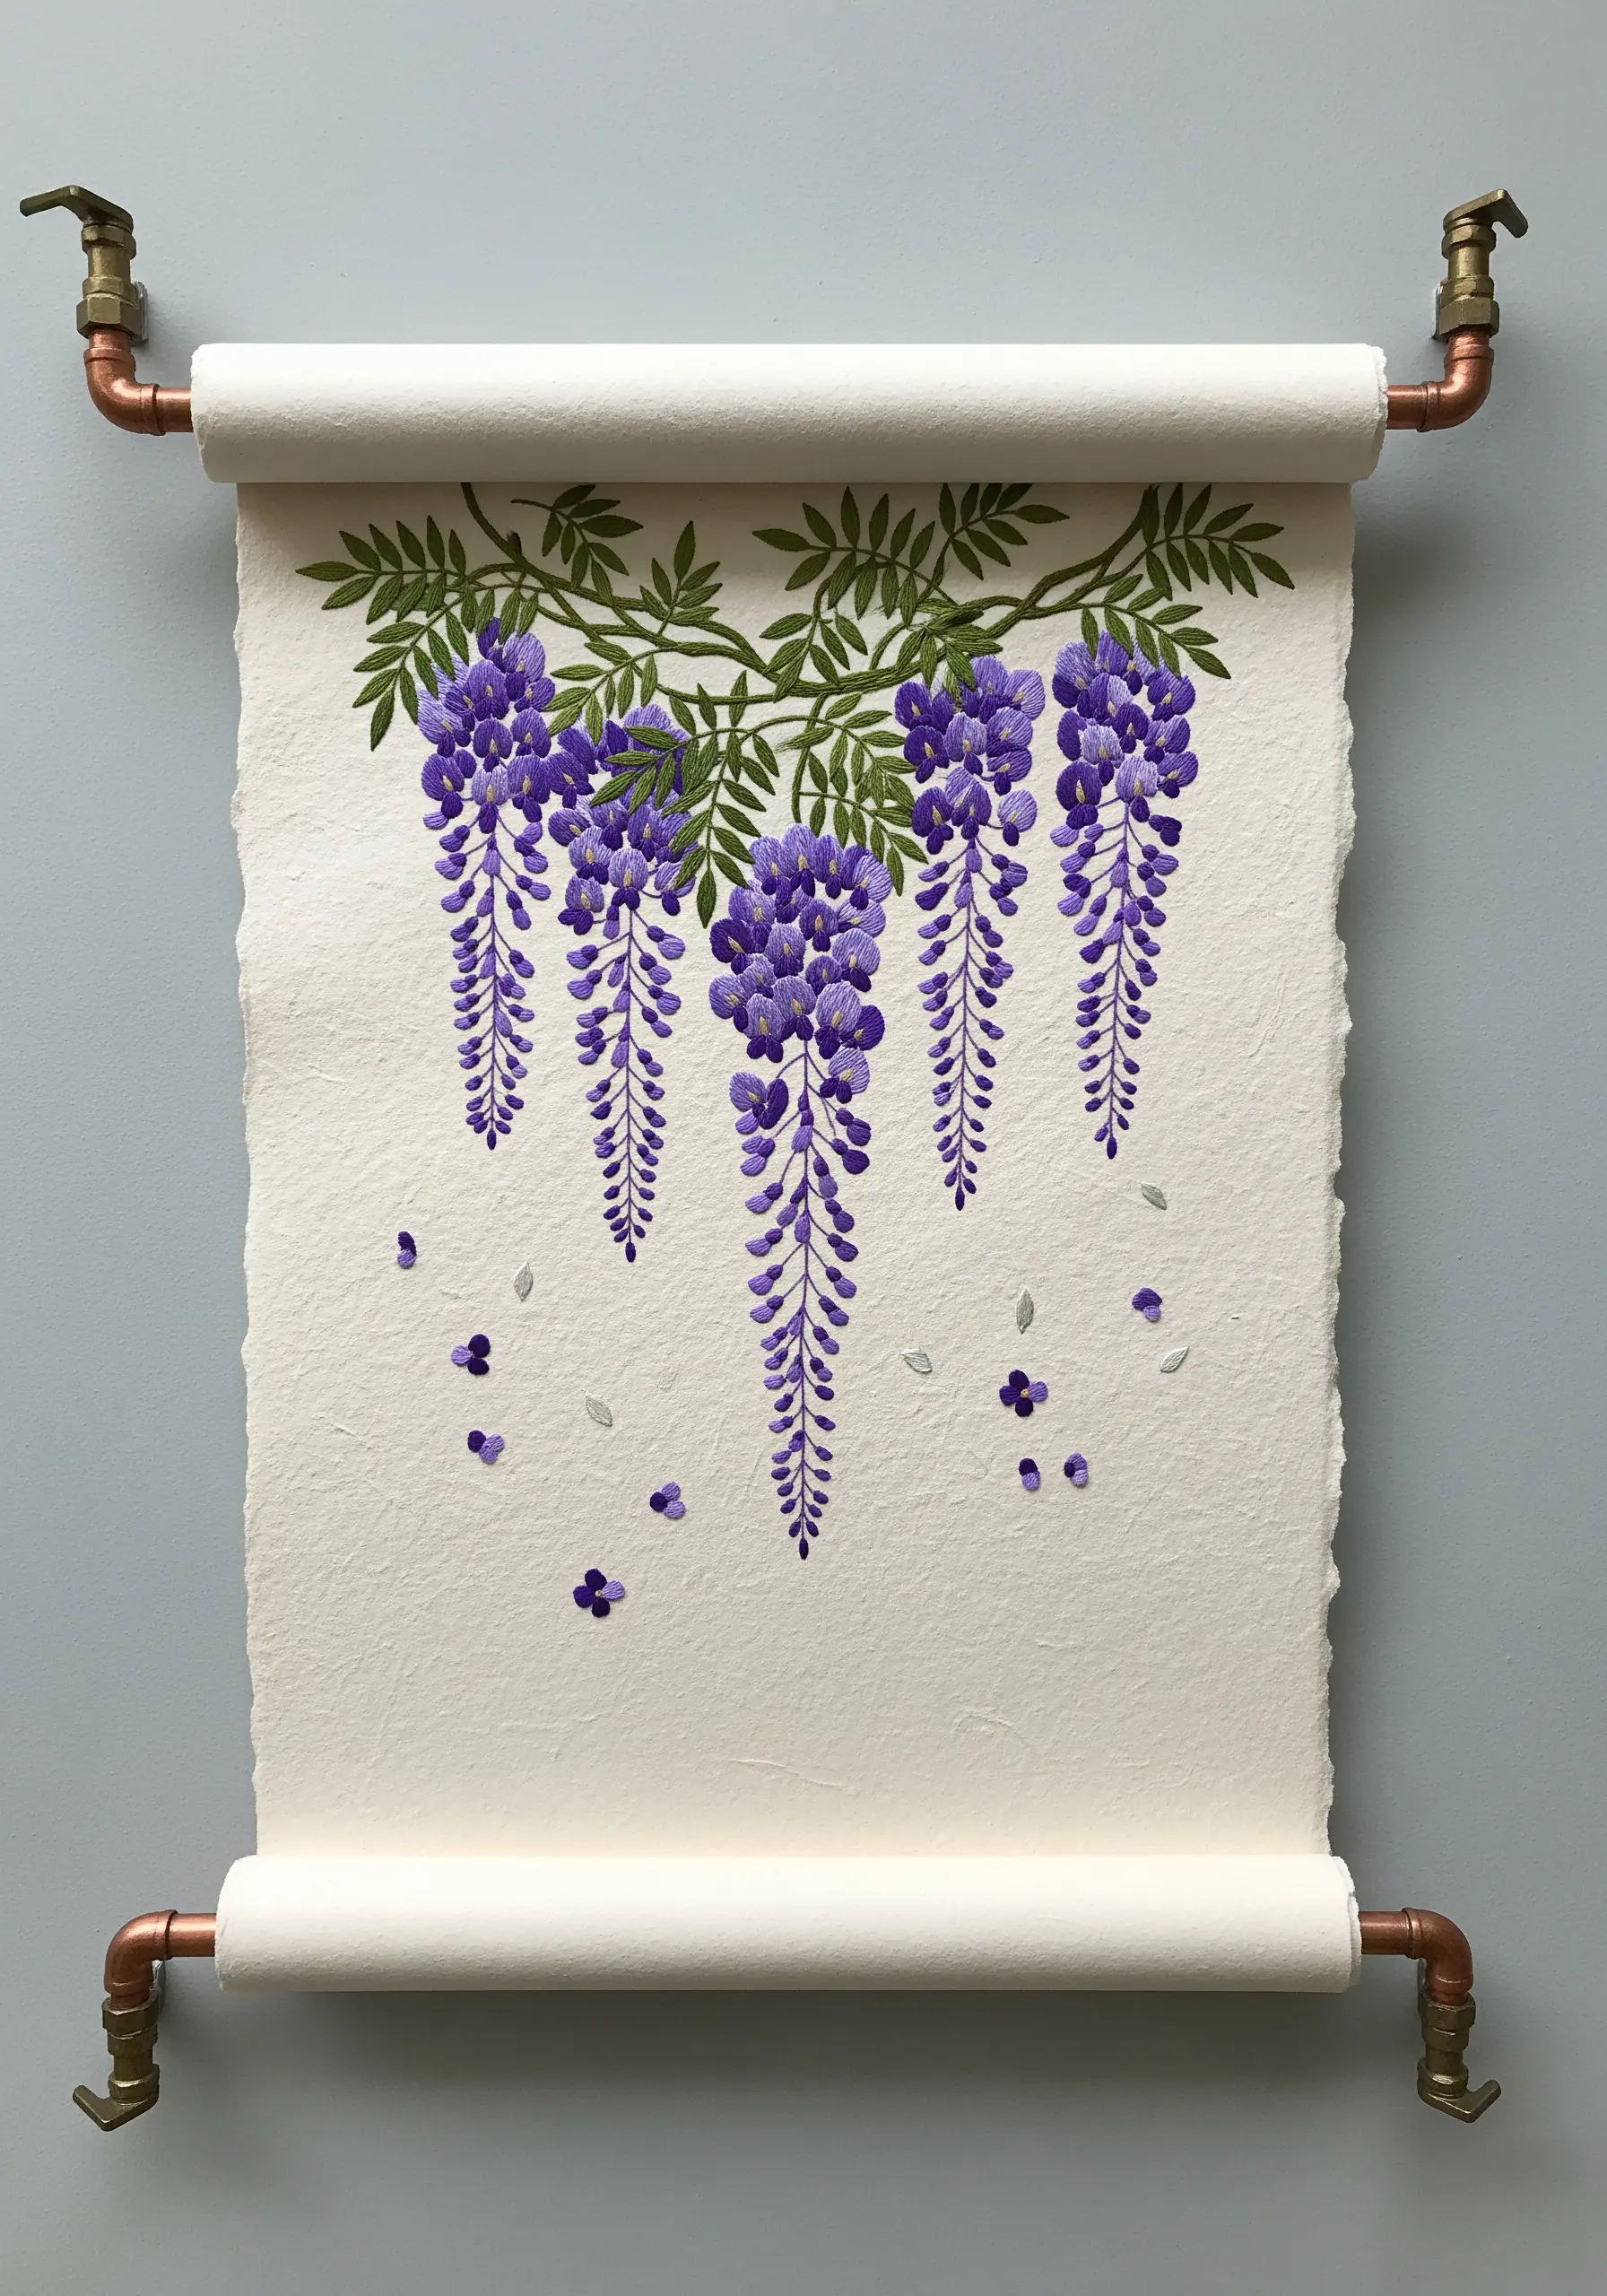
Rethink your presentation by working on a long piece of handmade paper and mounting it as a wall scroll.
For delicate, cascading blossoms like wisteria, use a mix of French knots and detached chain stitches (lazy daisies) in several shades of the same color to create depth.
Use a fine split stitch for the connecting vines and branches.
Attaching wooden dowels or copper pipes to the top and bottom transforms your embroidery from a flat image into an elegant, sculptural wall hanging.
19. Stitching Soundwaves
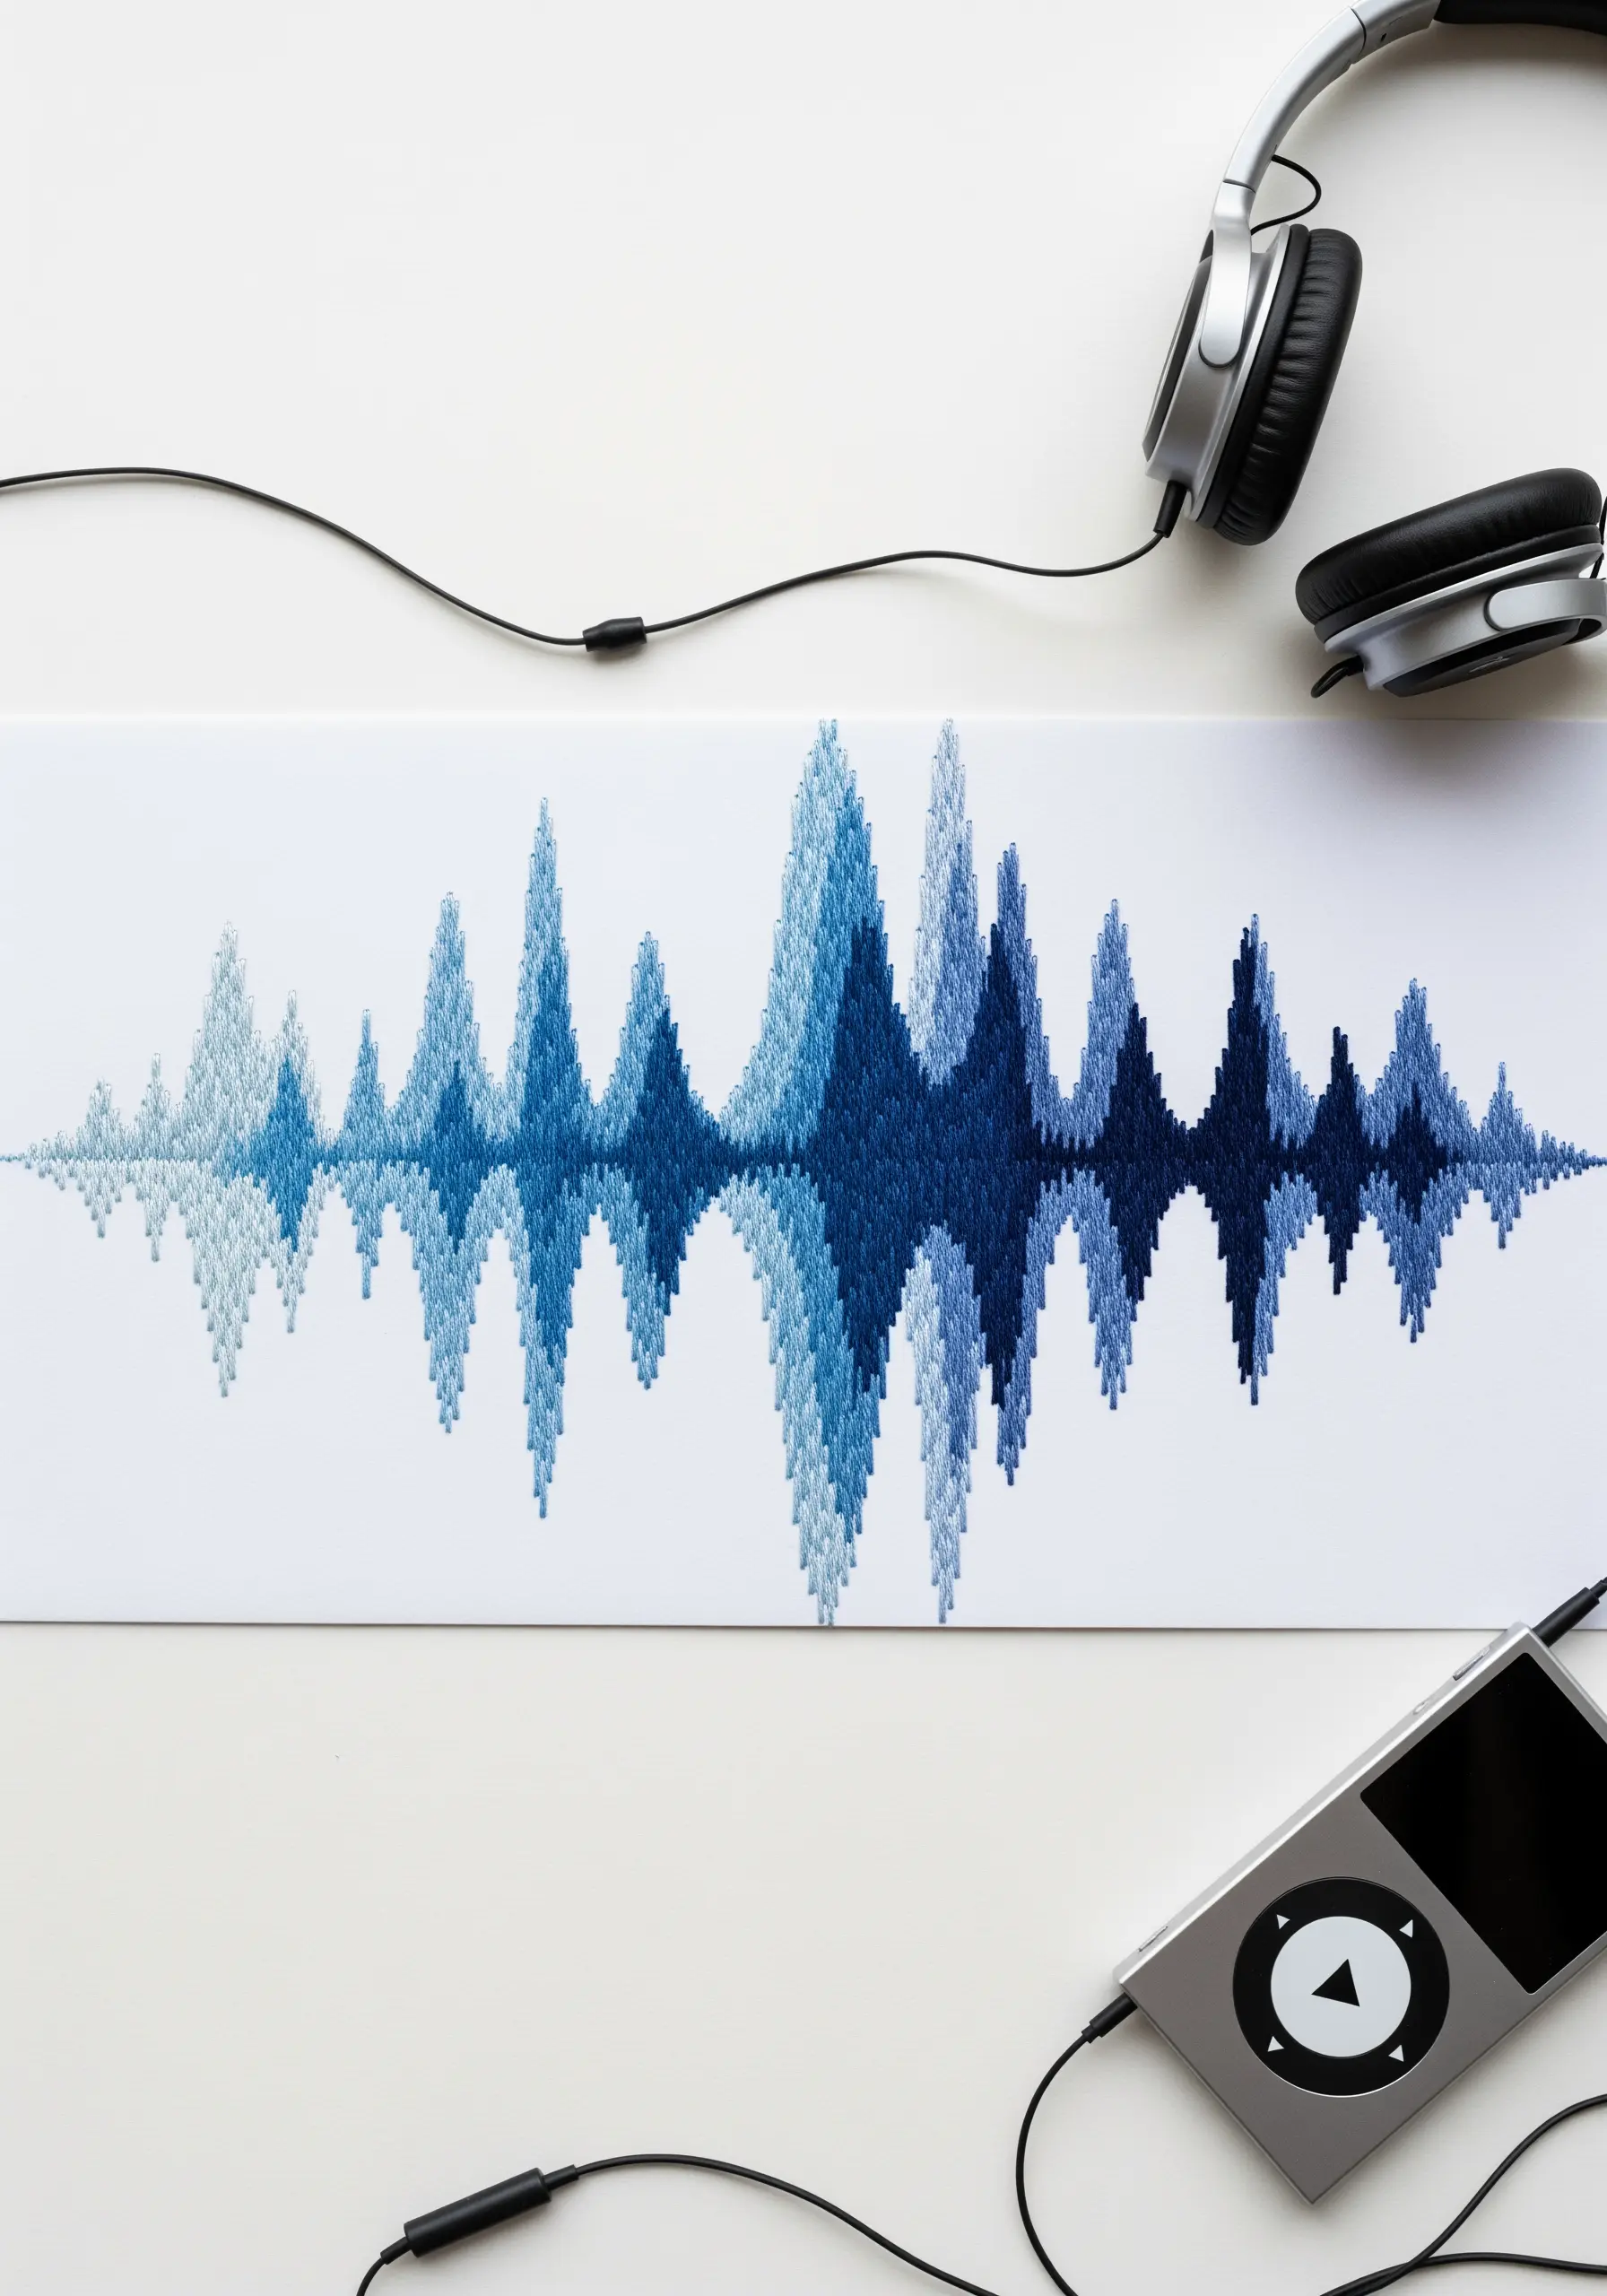
Turn sound into a visual, tangible piece of art. Record a meaningful clip—a snippet of a song, a loved one’s voice—and use an app to generate its soundwave image.
Transfer this unique pattern to your paper and fill it with vertical satin stitches.
Vary the height of each stitch to perfectly match the peaks and valleys of the soundwave.
Using a gradient of blues or another favorite color palette adds a beautiful sense of rhythm and flow, making the invisible visible.
20. Three-Dimensional String Art
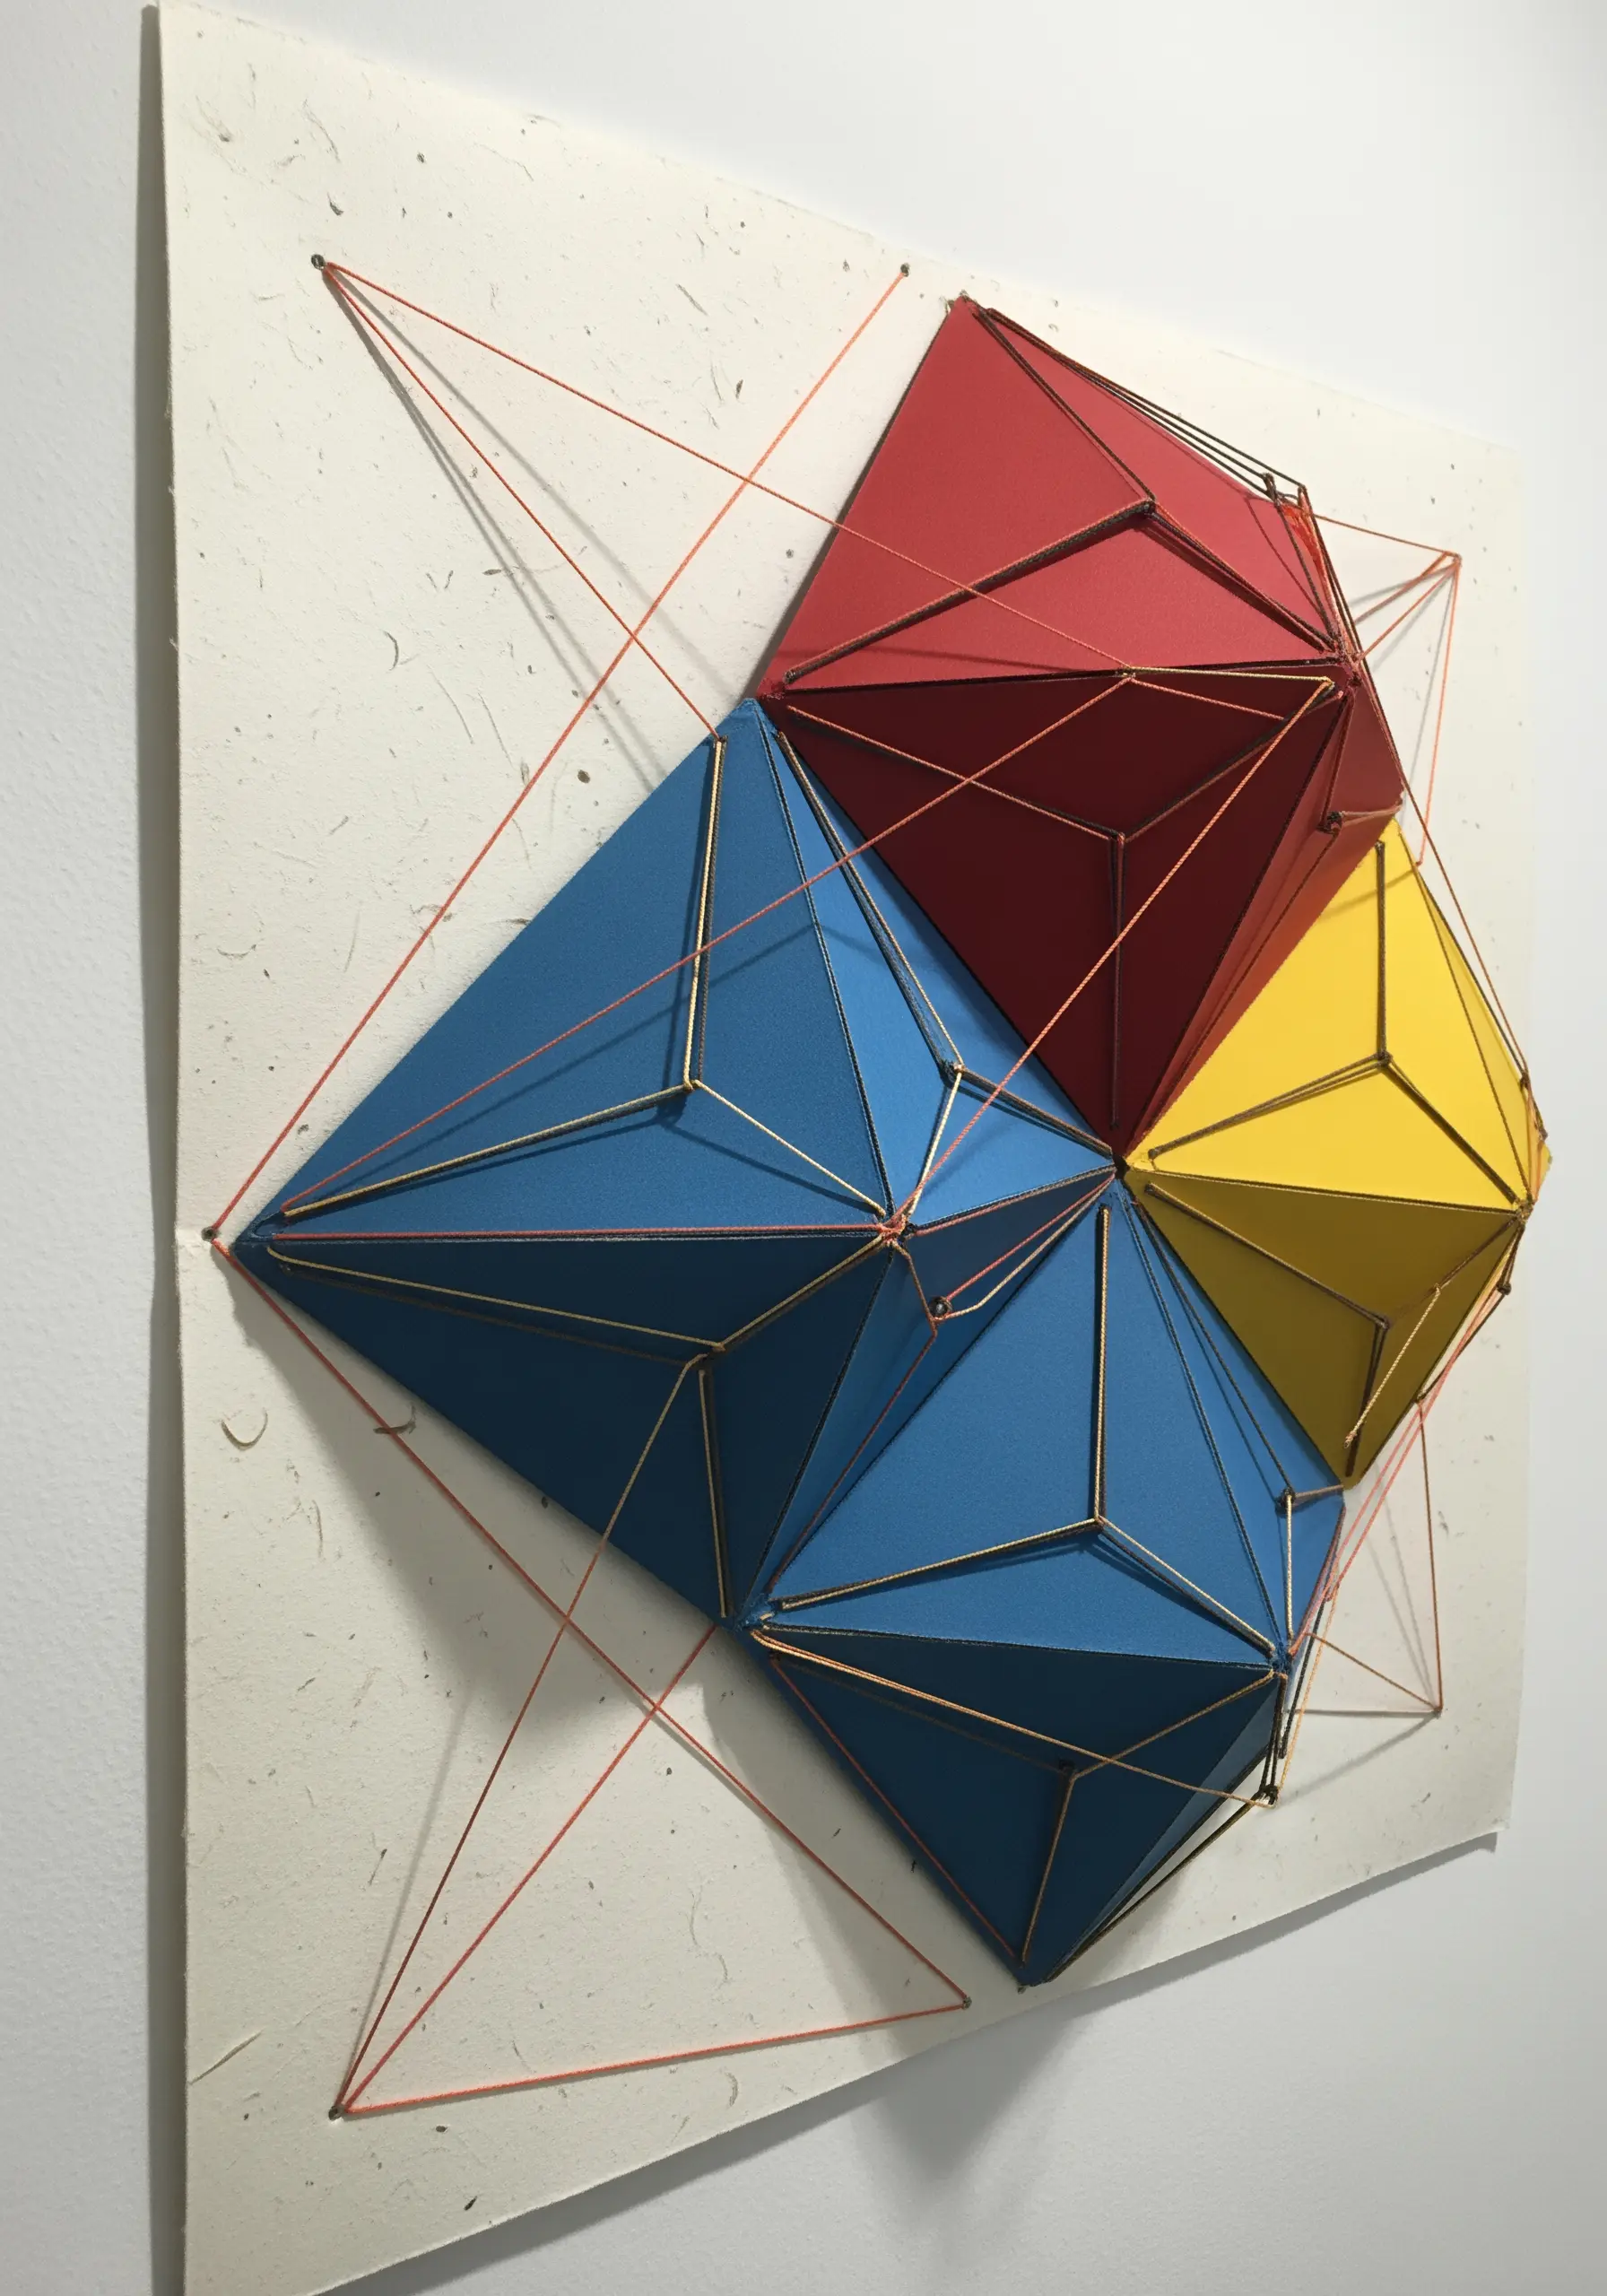
Elevate your work from two dimensions to three by combining paper sculpture with thread.
Construct polyhedral shapes from colored cardstock, then use a needle to pierce holes along their edges.
Use a strong, fine cord to stretch between these points, creating new lines and geometric planes that connect the paper forms.
This architectural approach borrows from string art traditions to create stunning 3D art where thread provides both decoration and structure.
21. Minimalist Kitchen Illustrations
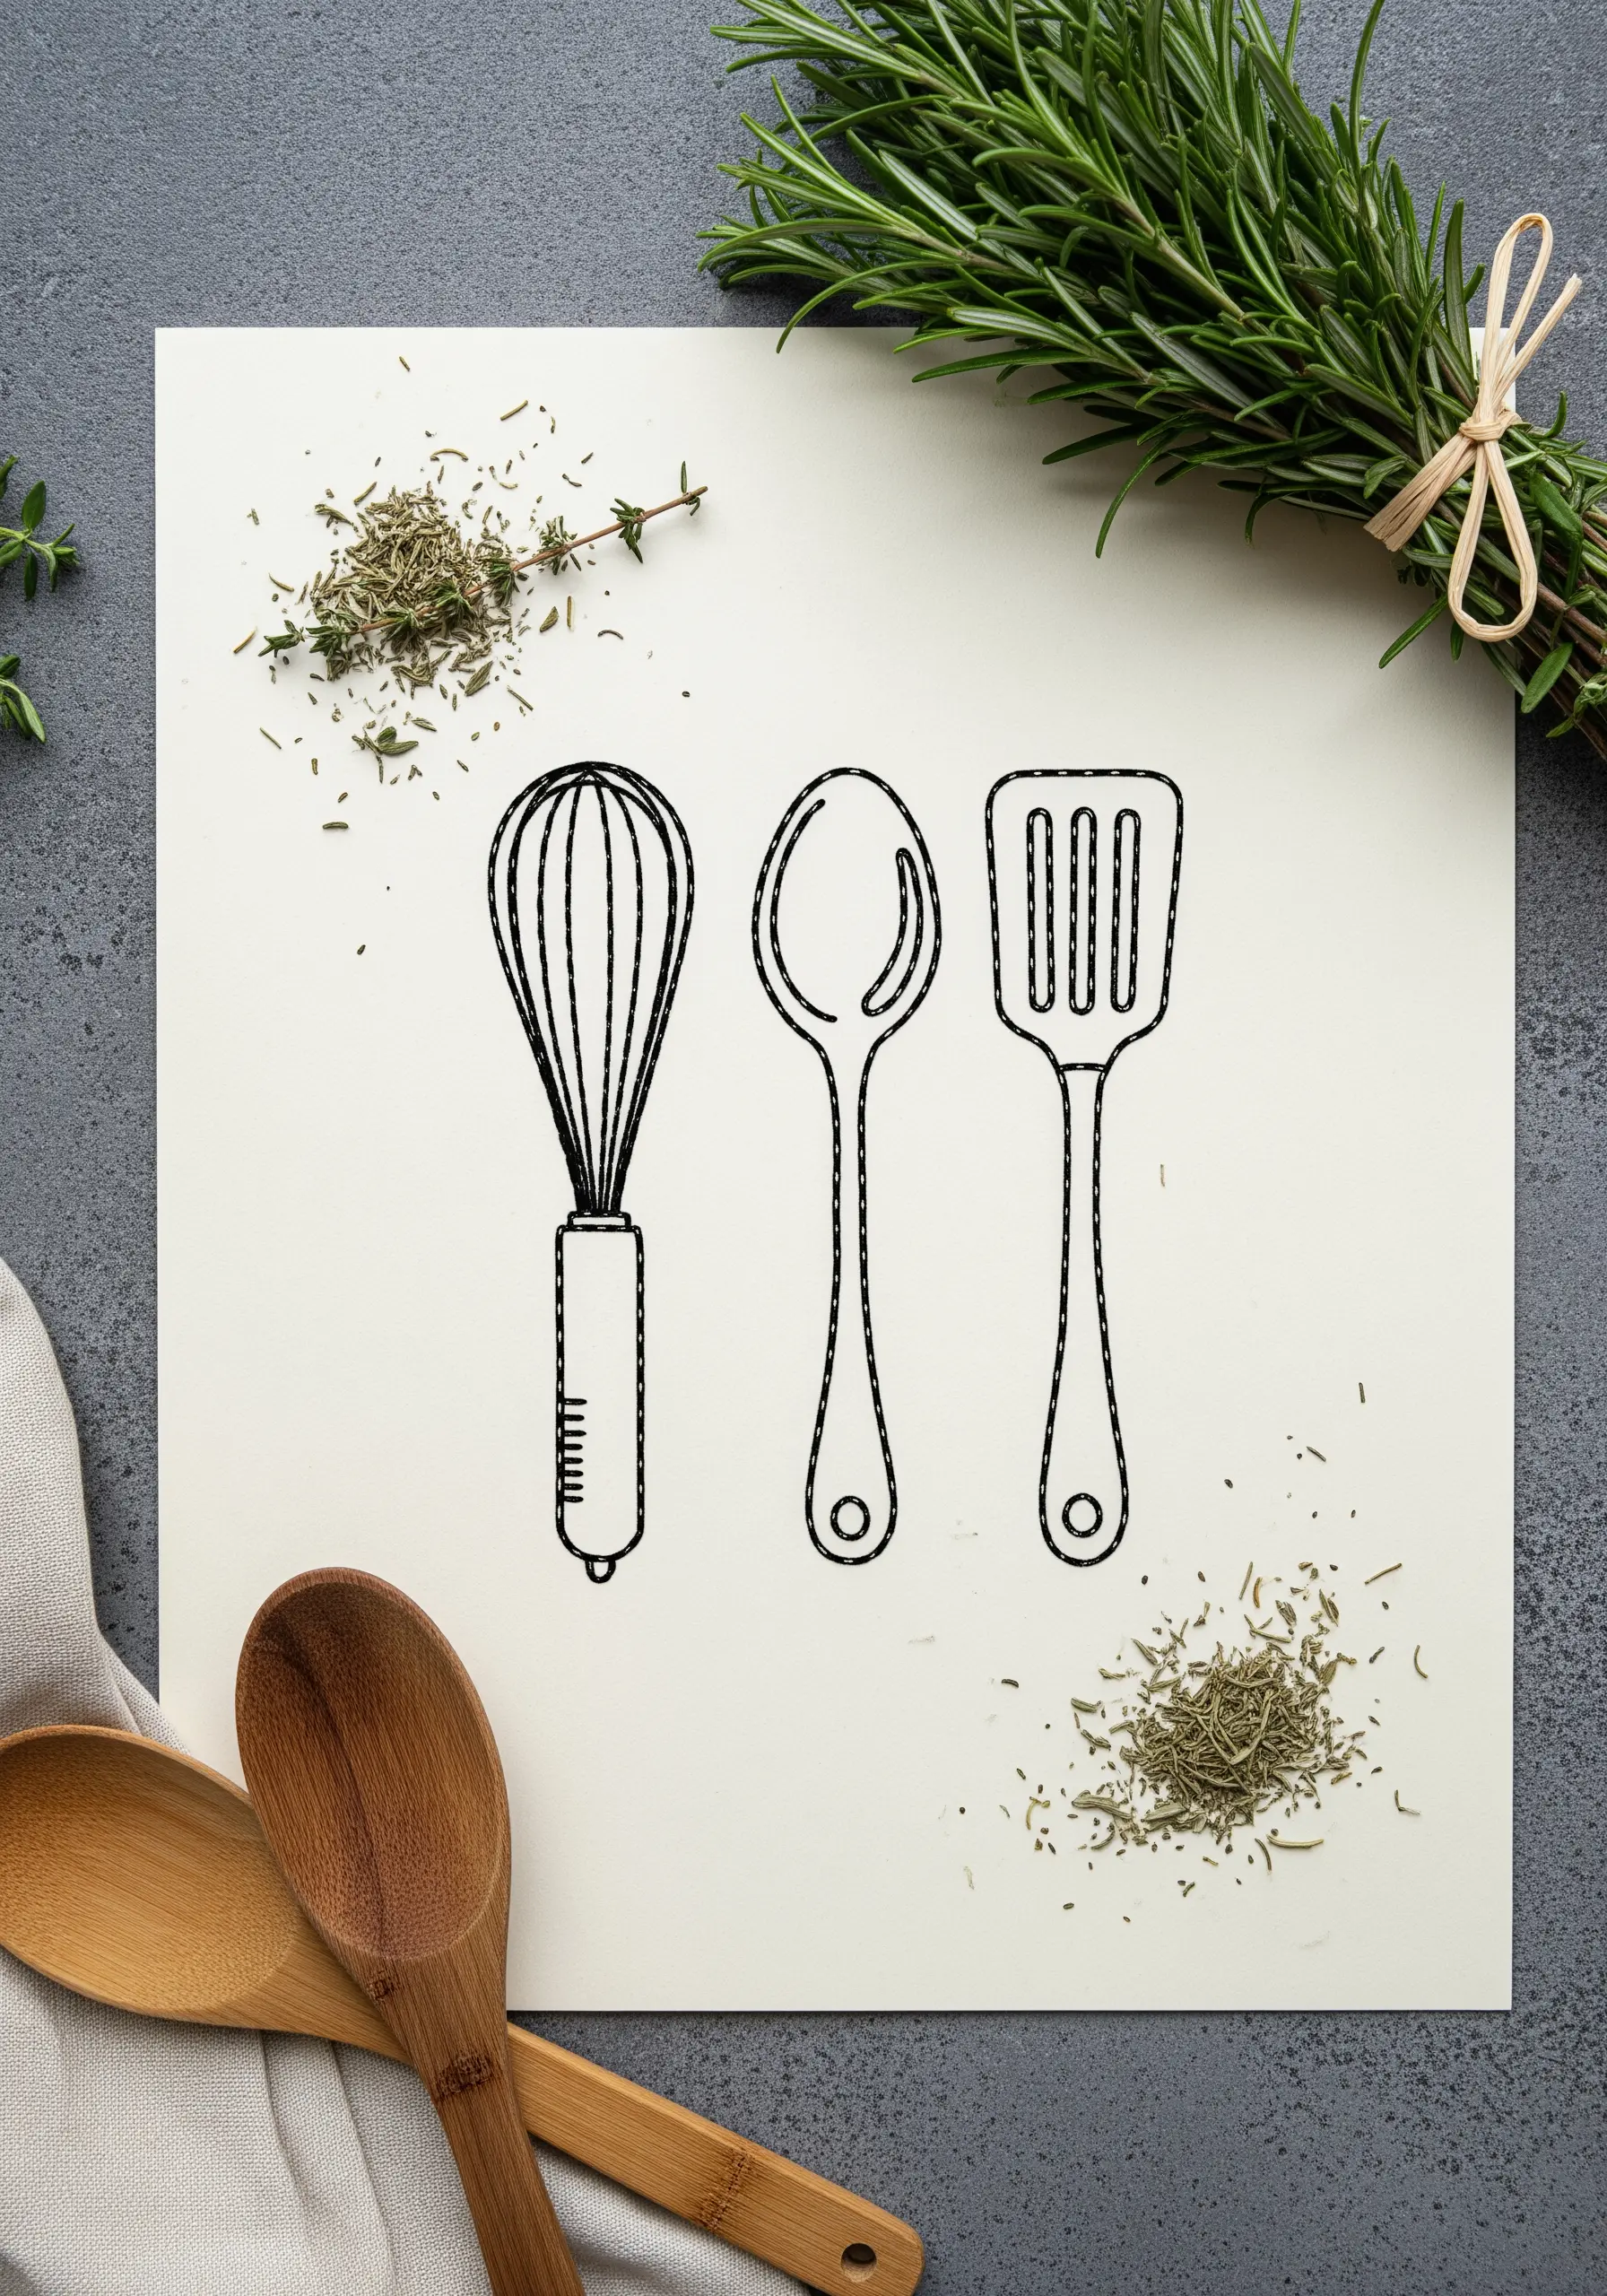
You don’t need complex stitches to create elegant art; sometimes, a simple line is all it takes.
Use a basic backstitch with three strands of black floss to create a clean, consistent line that has the feel of a pen-and-ink drawing.
Choosing a high-quality, off-white paper as your canvas enhances this minimalist, graphic quality.
This approach is perfect for celebrating the simple beauty of everyday objects and creating chic, themed art for your home.
22. Celestial Maps with Glow-in-the-Dark Thread
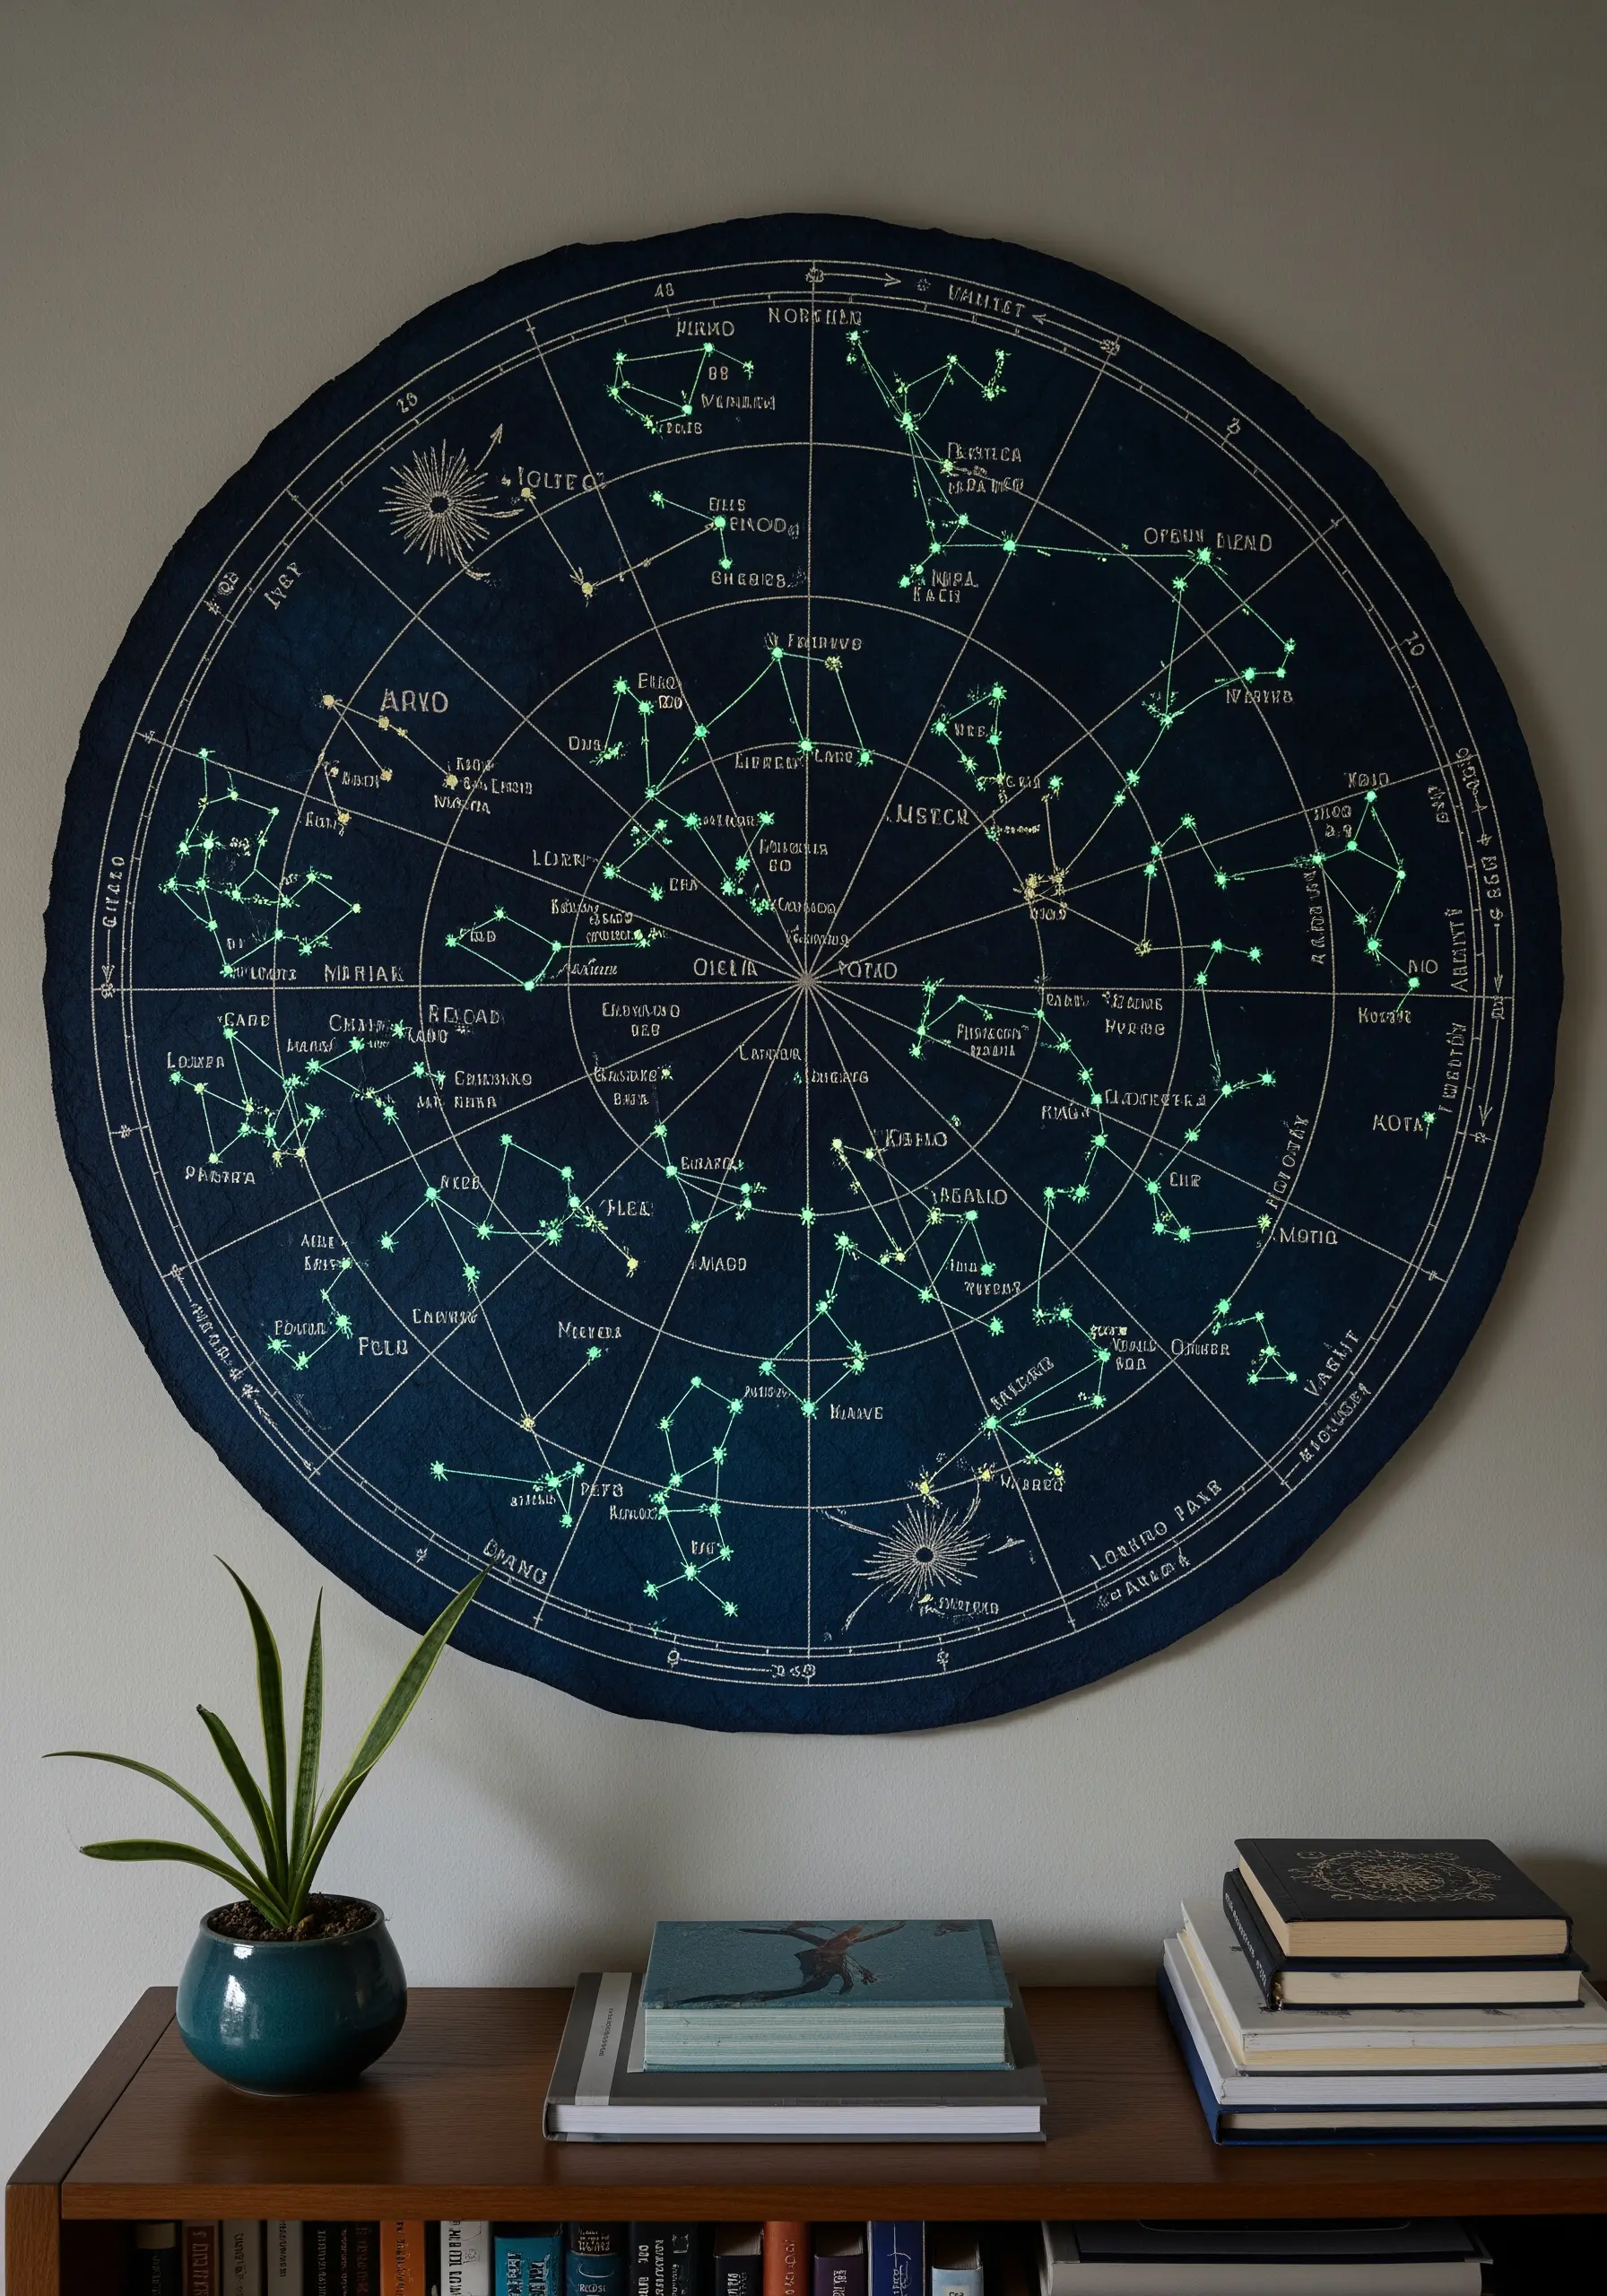
Create a piece of art with a hidden secret by stitching a constellation map with glow-in-the-dark floss.
By day, it’s a sophisticated chart on dark blue paper. By night, it transforms.
Use simple backstitch for the constellation lines and French knots or small star stitches for the stars themselves, reserving the special thread for the stellar points.
Just expose the finished piece to a bright light to ‘charge’ the thread, then turn off the lights to reveal its magical glow.