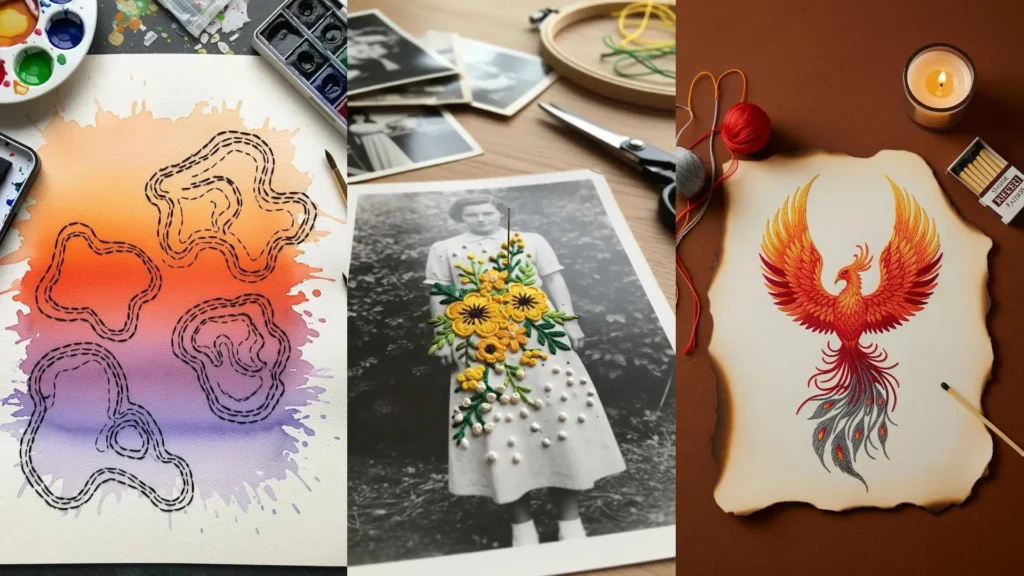
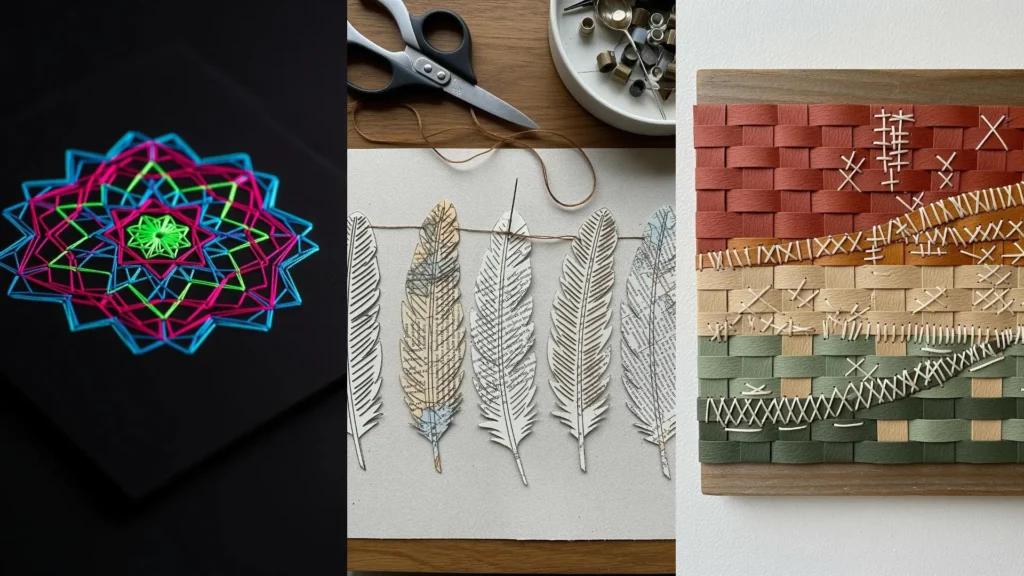
You have the stitches down. You know your floss from your fabric, and your hoops are filled with beautiful work. But perhaps you’re feeling that quiet desire for something more—a way to make your embroidery not just skillful, but truly resonant and unique.
This is where mixed media comes in, not as a complication, but as an invitation. It’s about looking beyond the thread to see the artistic potential in materials you already have: a piece of paper, a forgotten photograph, a scrap of linen. By combining these textures, you can add layers of story and sophistication to your work.
These projects are designed to show you that an ‘expensive’ look comes from thoughtful technique and creative confidence, not costly supplies. Let’s explore how a simple fold, a splash of paint, or a carefully placed paper cutout can transform your stitching into art that feels deeply and personally expressive.
1. Botanical Illusions with Stitched Vellum & Gold Leaf
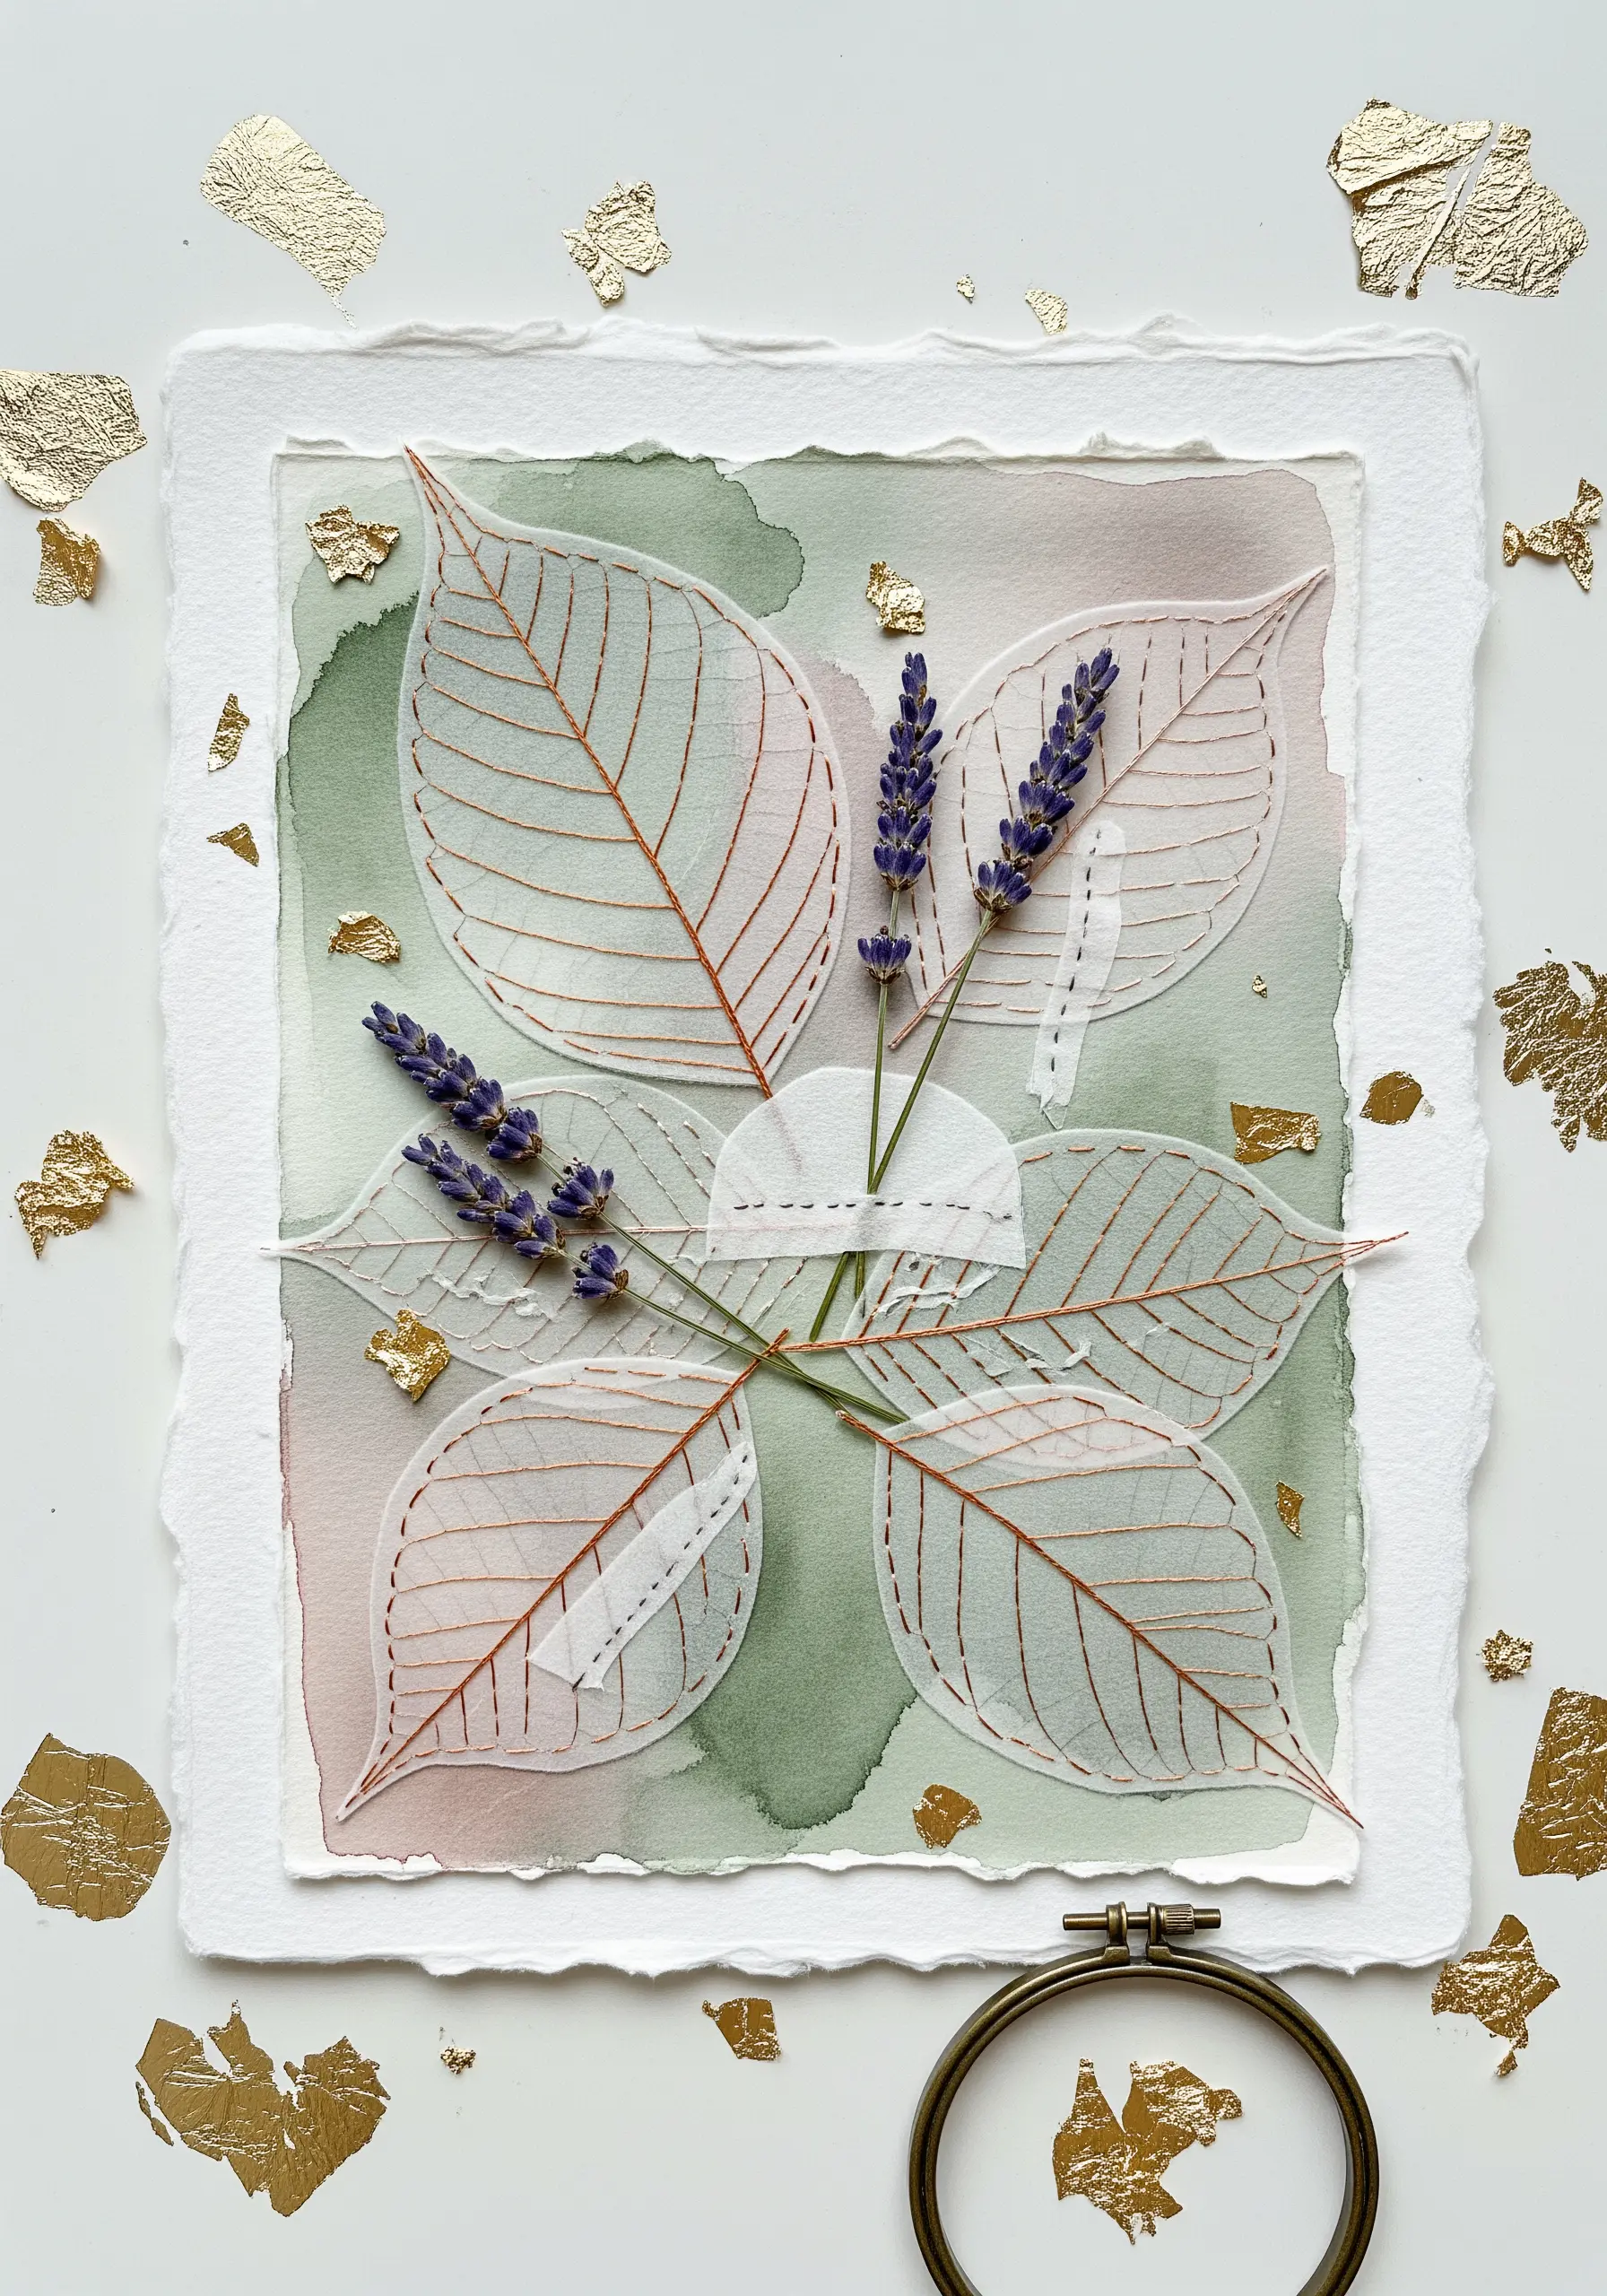
Begin by applying a soft watercolor wash to a piece of heavy, textured paper and allow it to dry completely.
Next, use a single strand of thread to stitch delicate leaf vein patterns onto semi-translucent vellum or fine organza.
Carefully cut out your stitched leaves and arrange them over the painted background, securing them with a tiny dab of archival glue to create a floating, ghost-like effect.
Incorporate a physical element by securing a sprig of dried lavender or another botanical element with a few hidden couching stitches.
Finish by applying scattered flakes of imitation gold leaf; the metallic shimmer adds a touch of luxury that contrasts beautifully with the organic materials.
2. Celestial Embellishments for Journal Covers
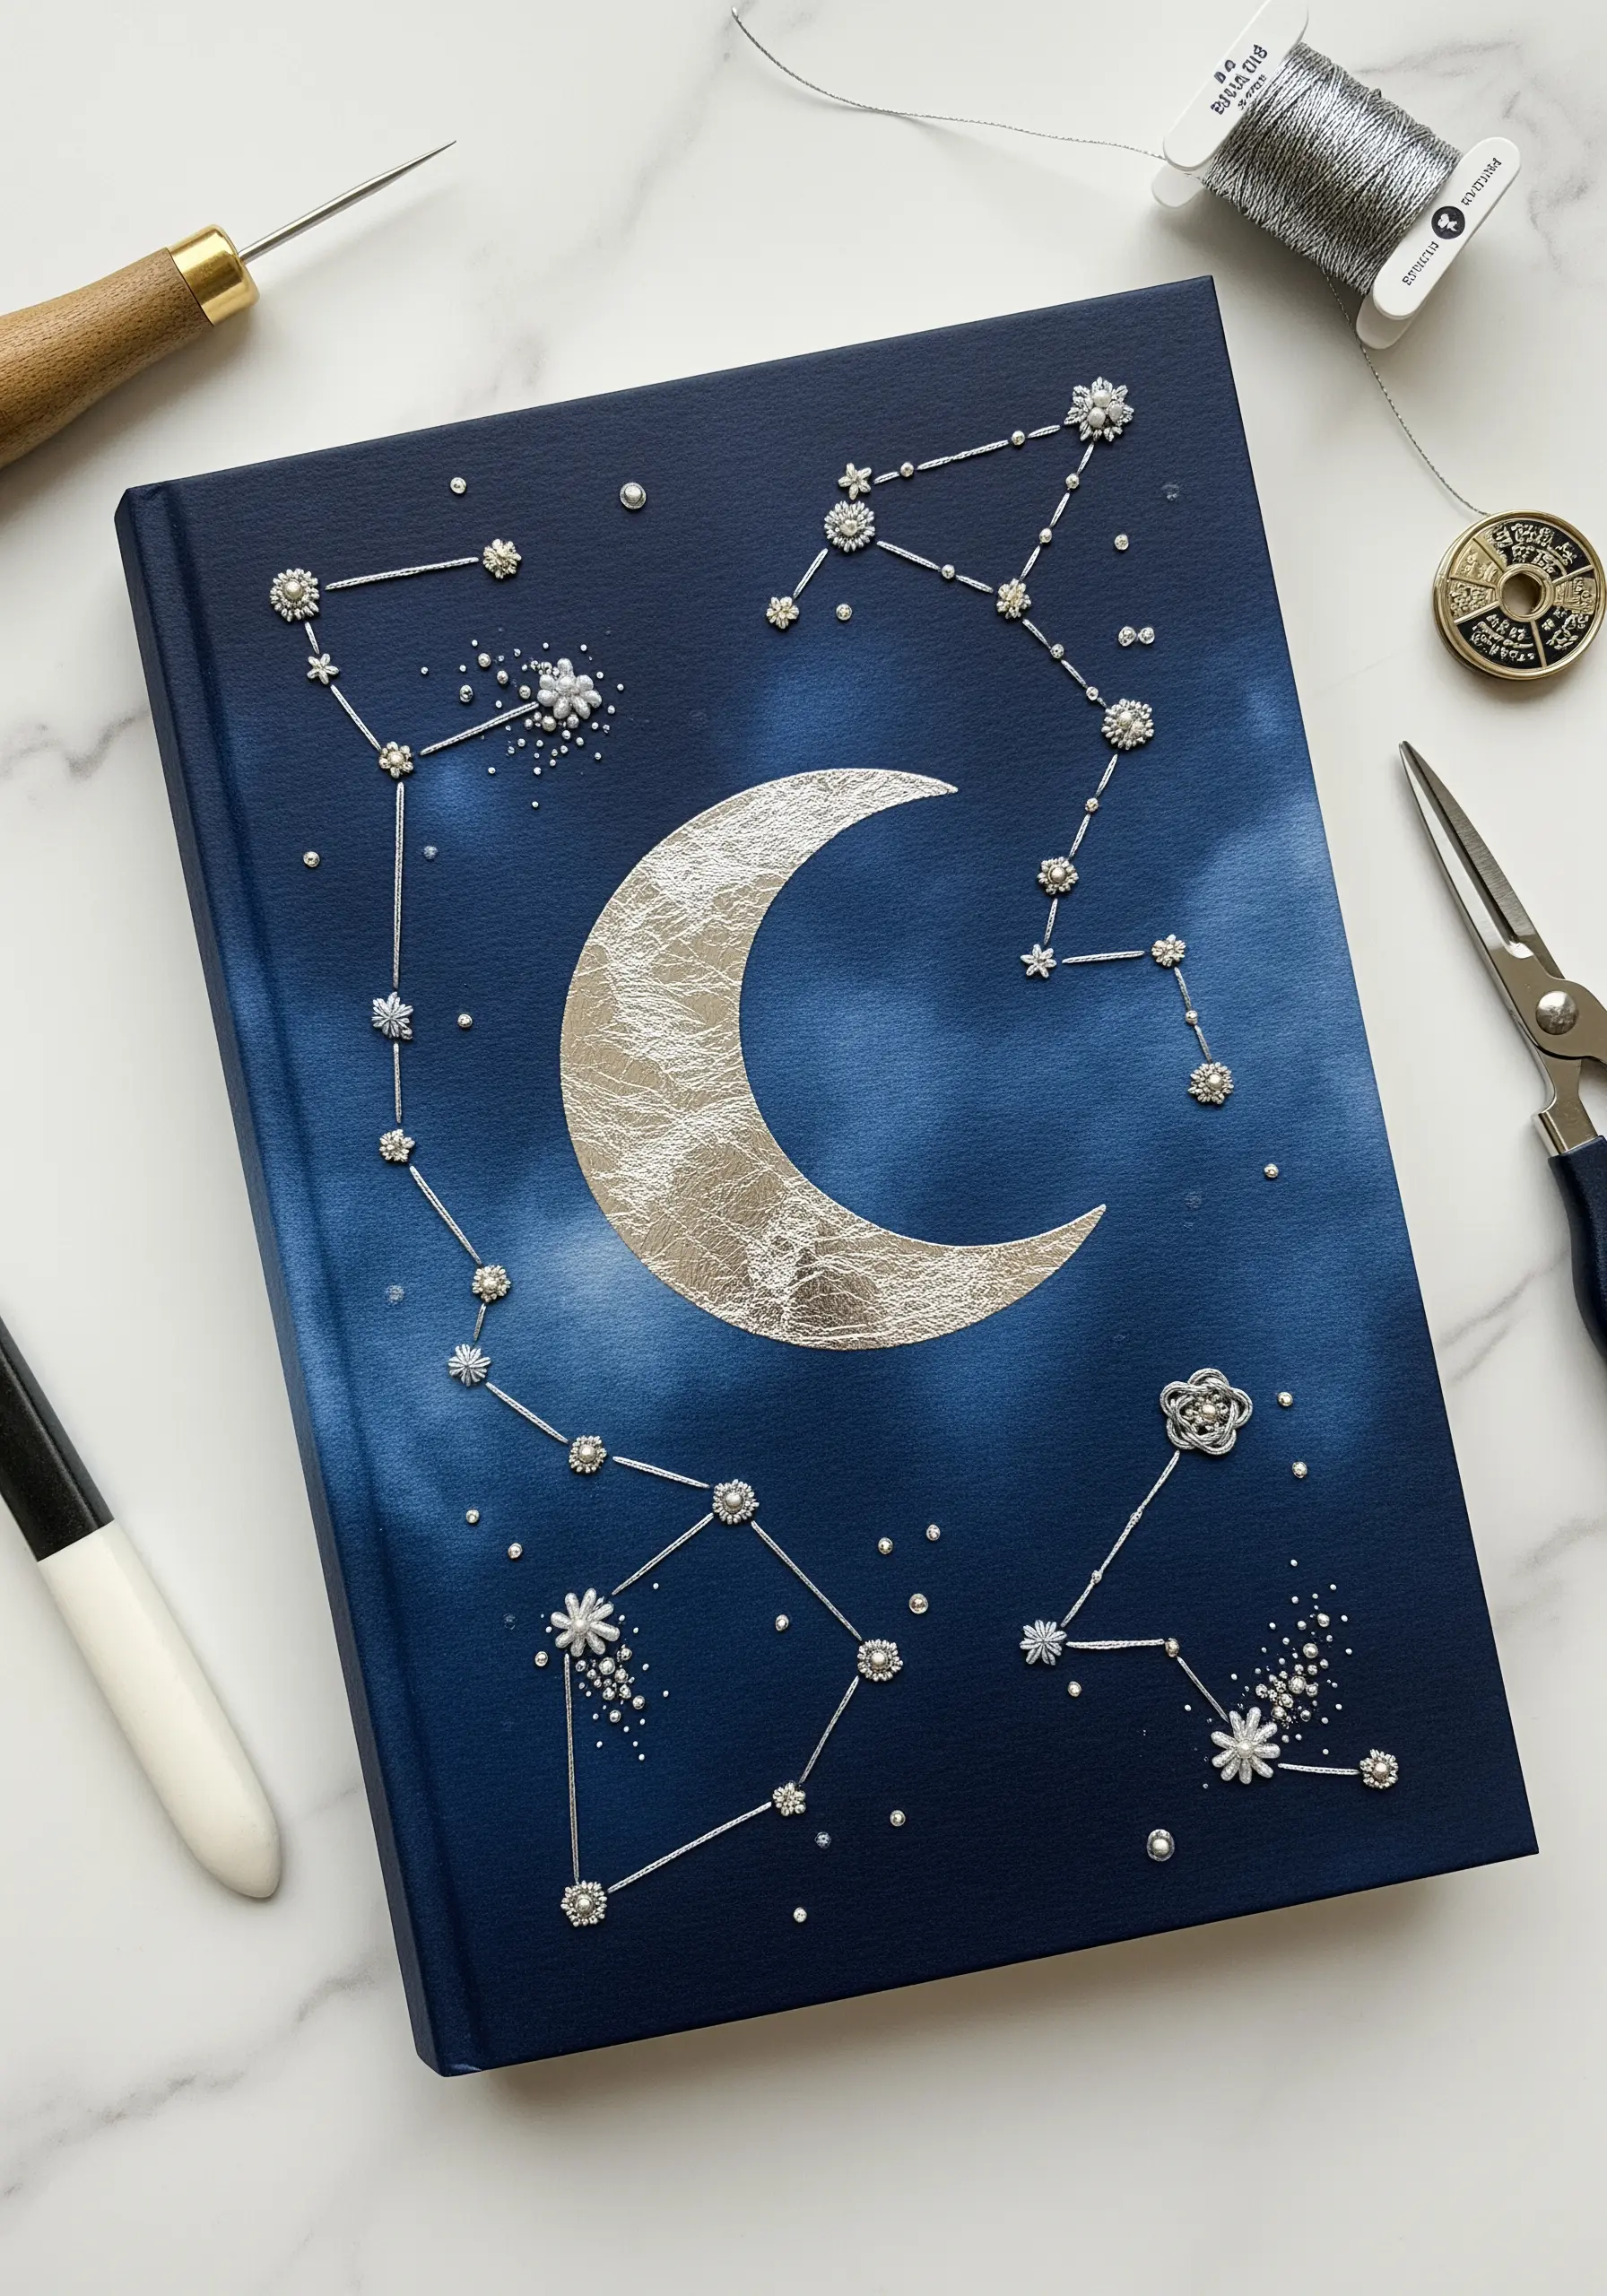
Transform a plain, cloth-bound journal by first plotting out a constellation map on its cover.
Use a bookbinding awl or a thick needle to gently pierce holes at each star’s location and at the start and end of each connecting line.
With a fine metallic thread, use simple straight stitches to connect the holes, forming the constellations.
For the stars themselves, create variation by stitching small star stitches, French knots, or sewing on tiny seed beads or metallic sequins.
Apply silver leaf over a crescent moon shape using gilding adhesive for a brilliant, non-tarnishable finish that provides a stunning focal point.
3. Layered Textile & Paper Landscapes
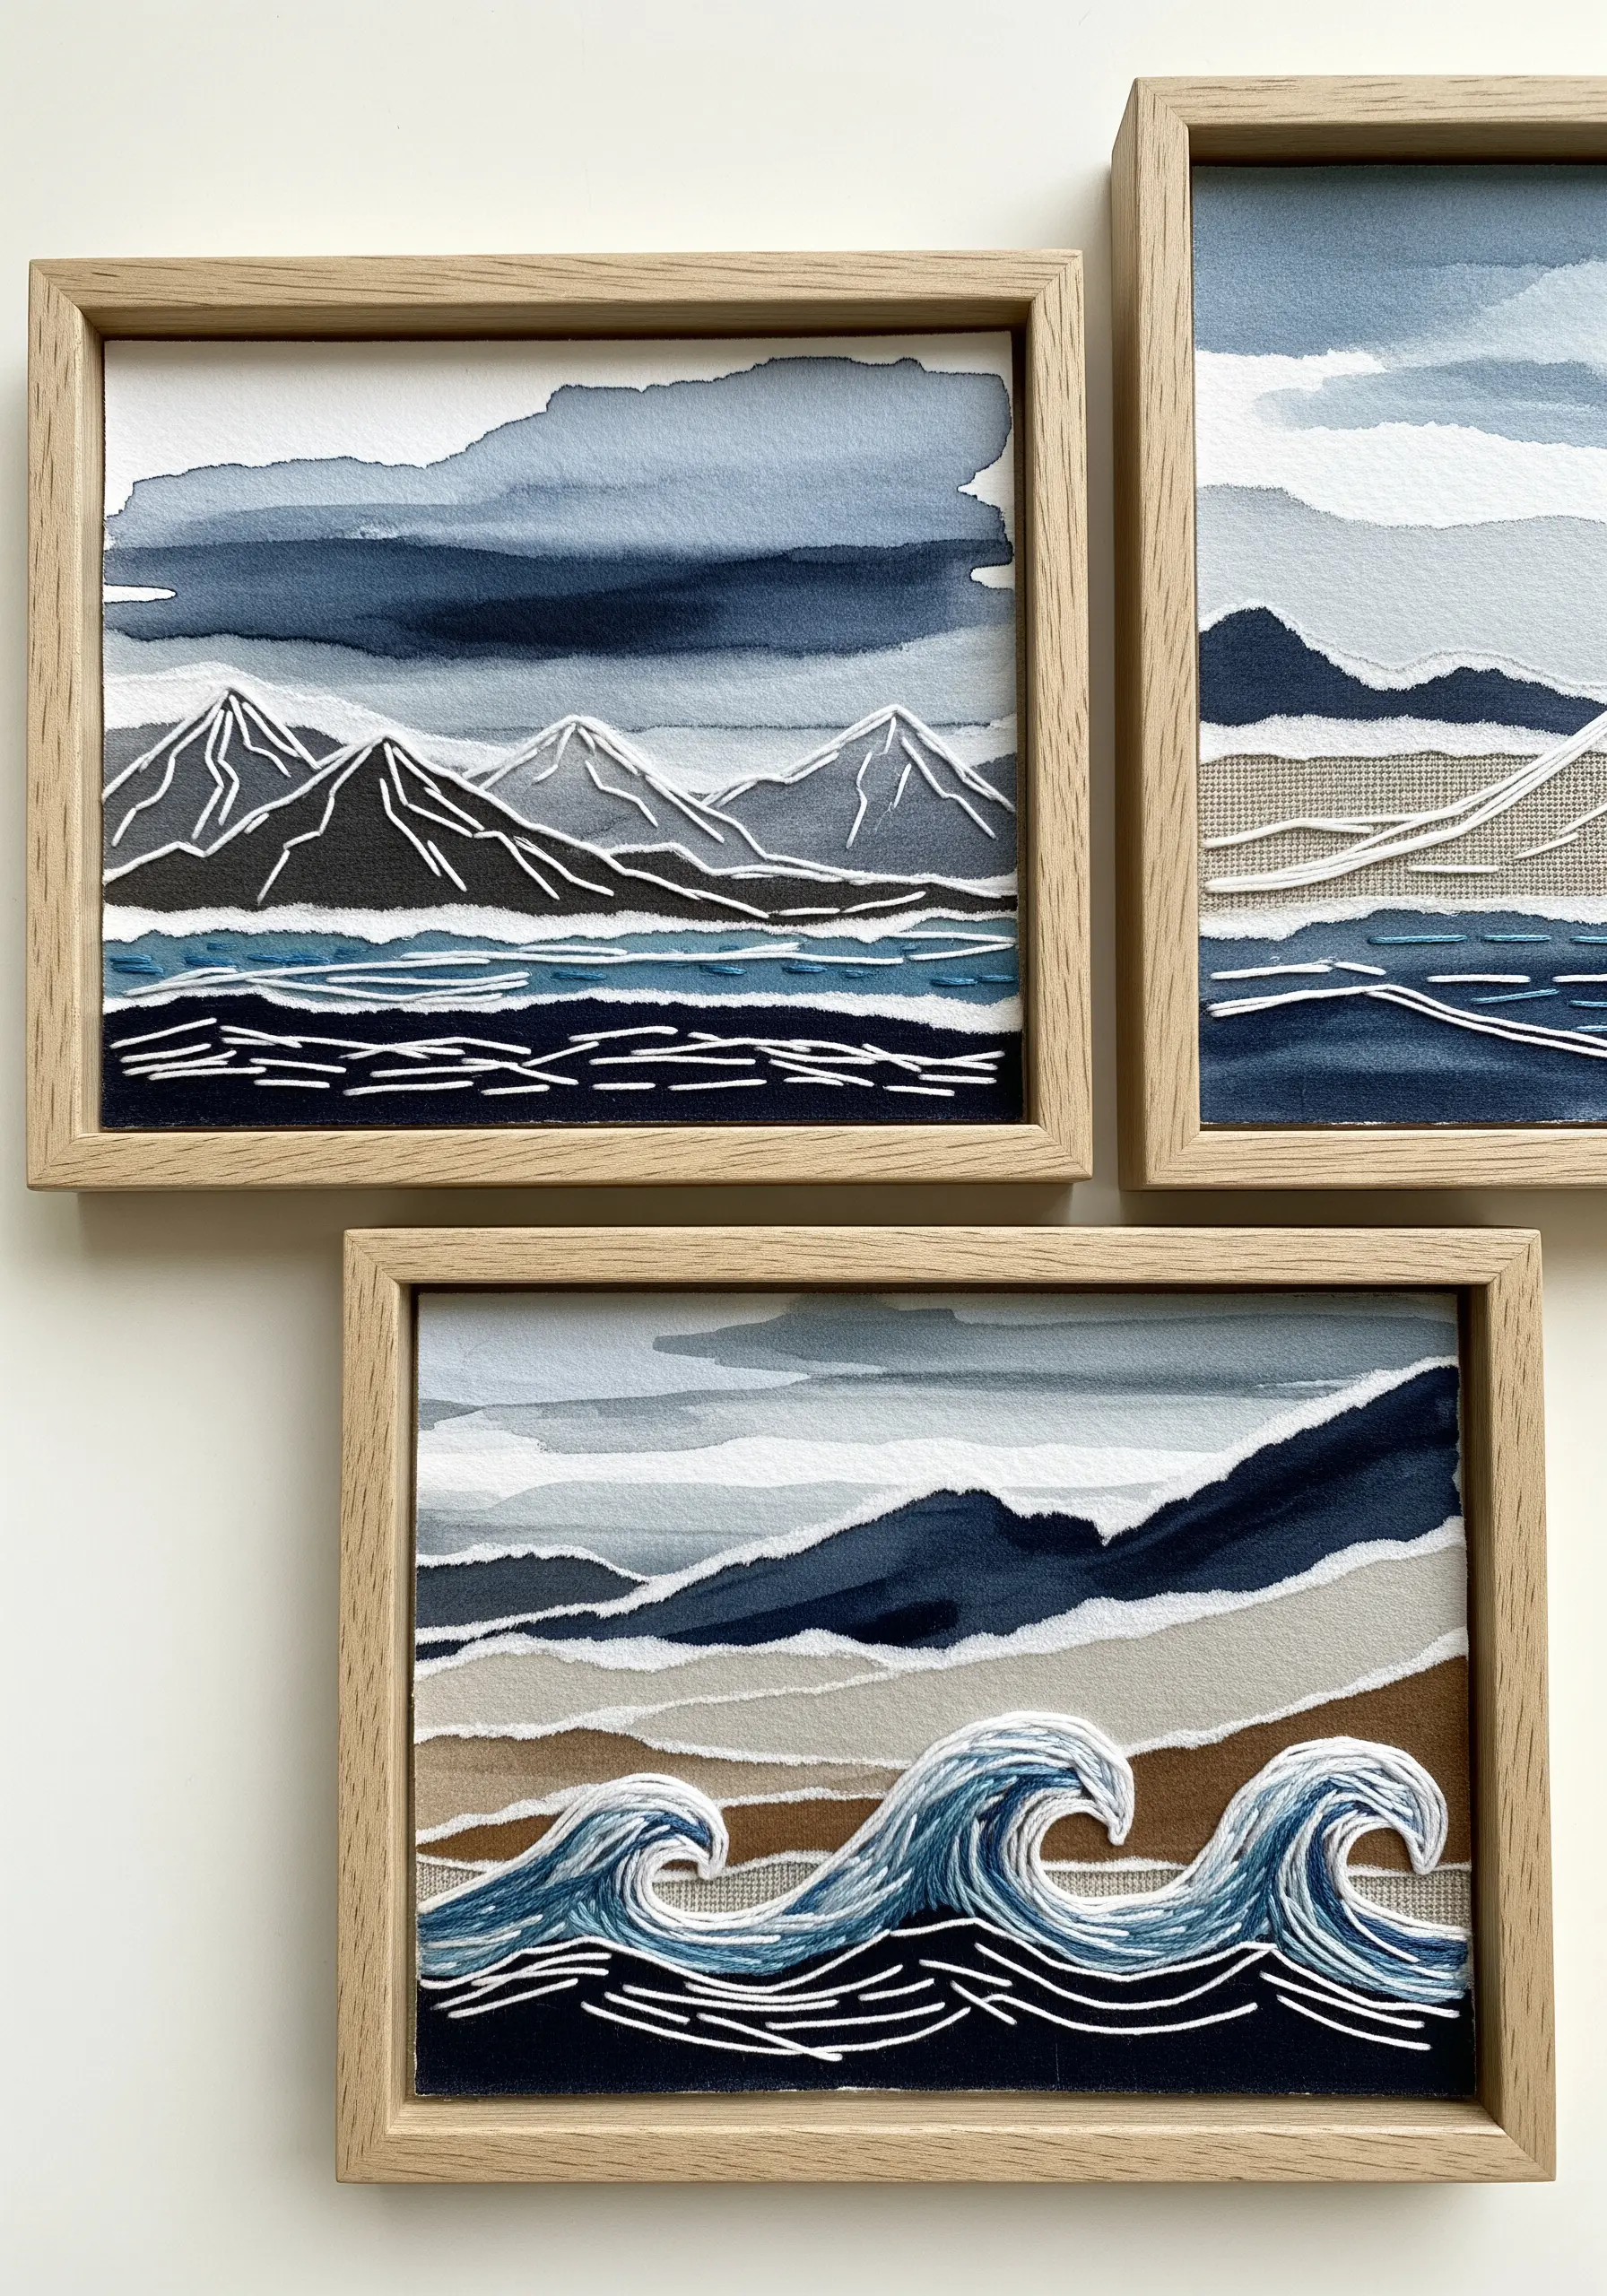
Build your landscape by tearing and layering strips of textured paper and fabric scraps like linen, raw canvas, or even denim.
Arrange these pieces to suggest mountains, water, and sky, securing them with a thin layer of fabric-safe glue.
Instead of drawing or painting fine details, use embroidery floss to “draw” with thread.
Use a crisp backstitch or running stitch in a high-contrast color—like white on dark blue—to define mountain ridges or create graphic waves.
The combination of rough, torn edges and clean stitch lines creates a sophisticated composition that is rich in texture.
4. Geometric Cardstock with Metallic Thread Outlines
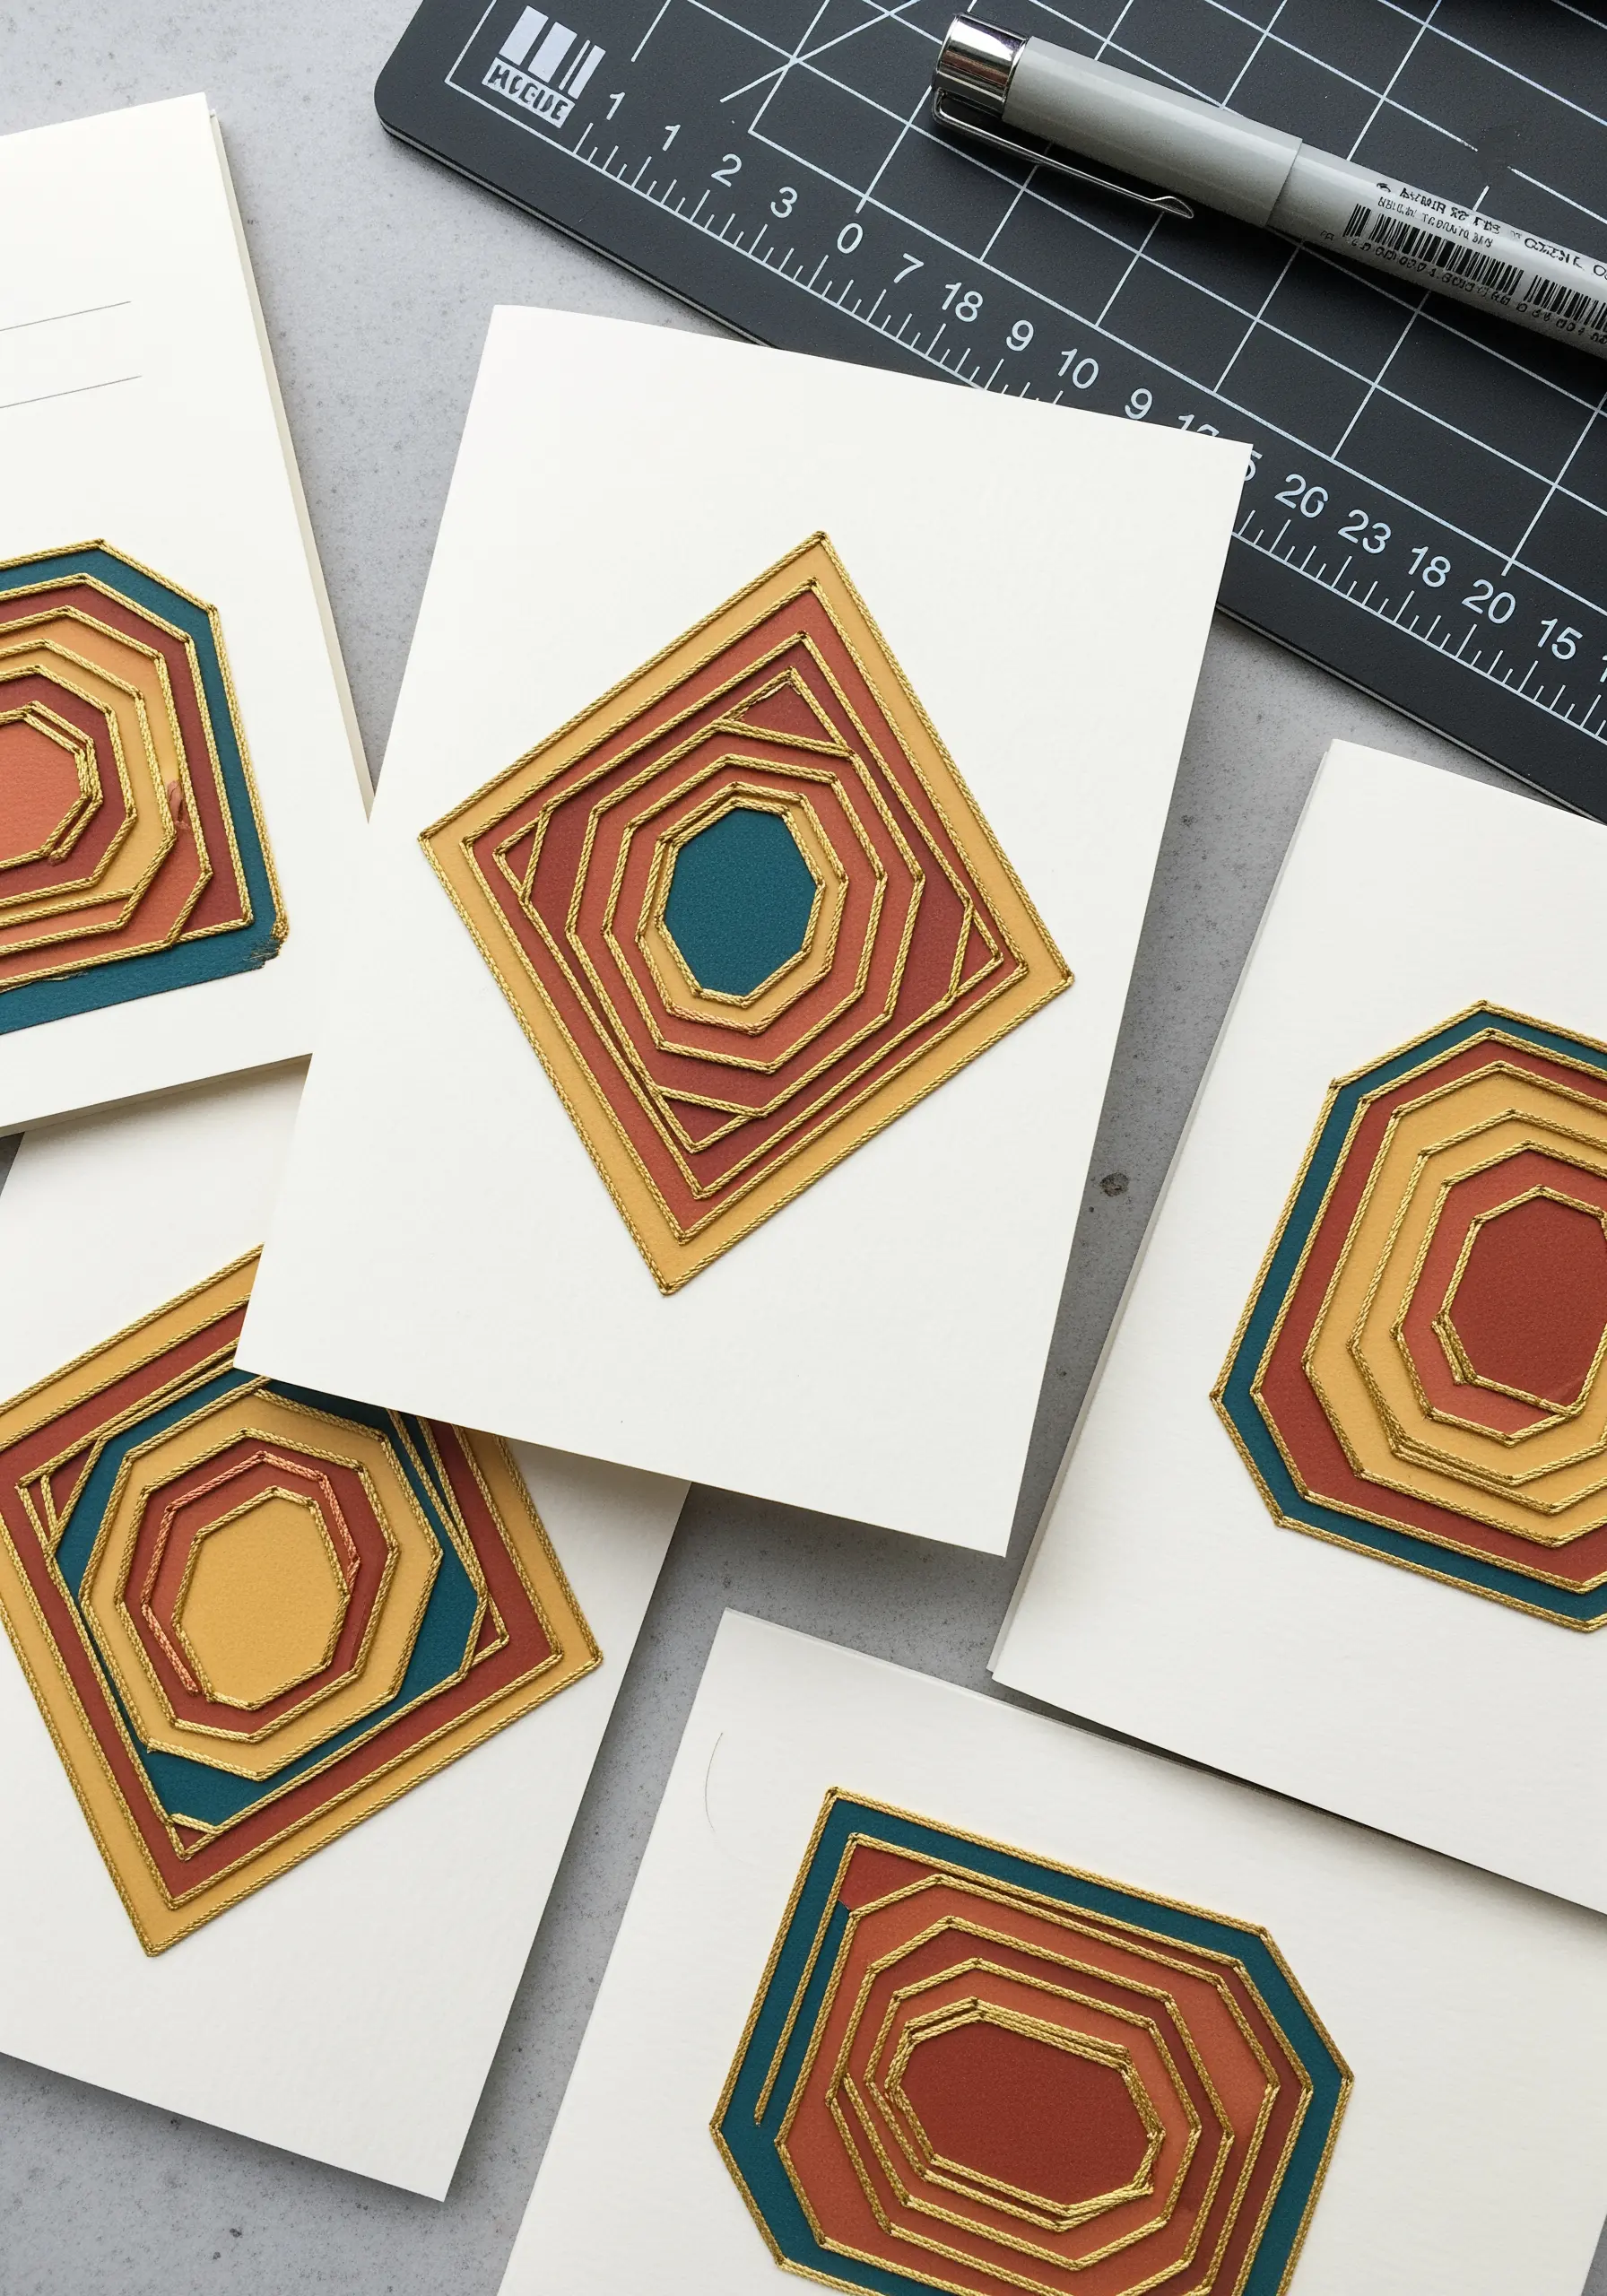
Create architectural depth by cutting and layering geometric shapes from colored cardstock.
Before assembling the layers, use a pin to pre-pierce stitching holes evenly around the edge of each paper shape.
Use a fine metallic thread—gold or copper works beautifully—to stitch a sharp backstitch or couching stitch around each layer.
The metallic thread catches the light, defining the geometry and making the colors feel more vibrant while adding a touch of elegance.
This simple technique elevates basic papercraft into a luxurious, tactile design suitable for greeting cards or framed art.
5. Abstract Stitching on Memory Collage
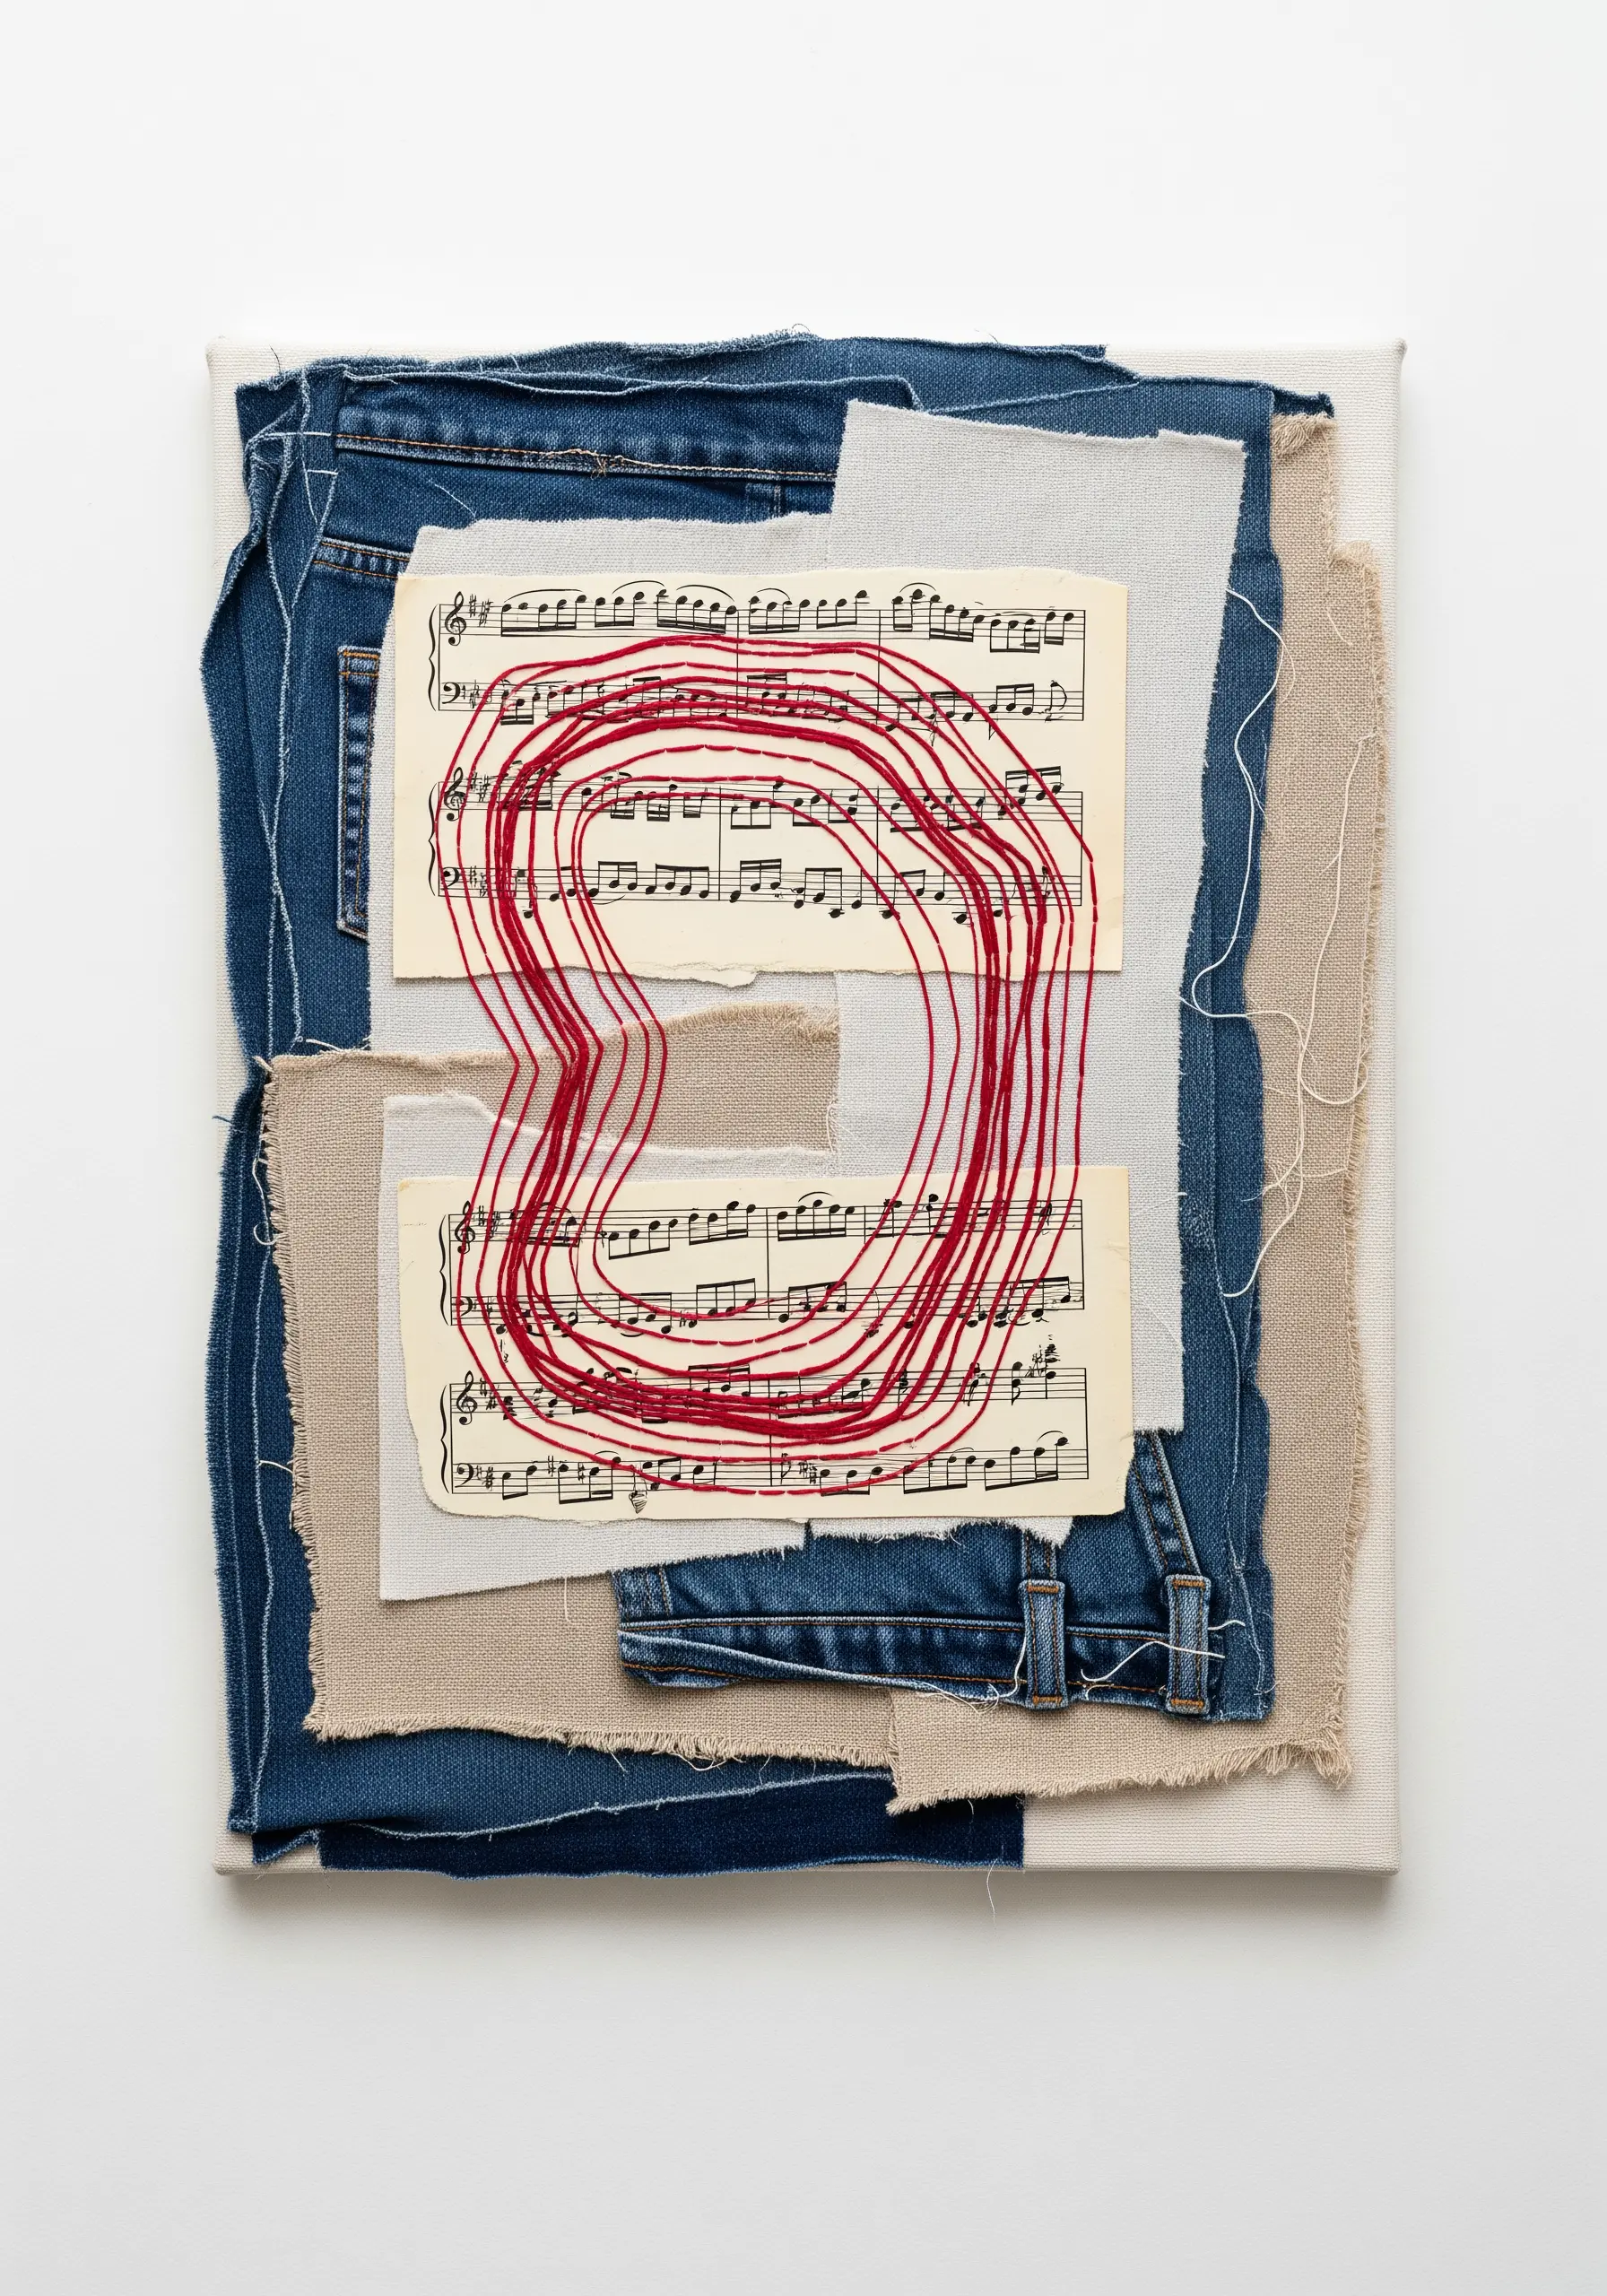
Begin by creating a collage base on a stretched canvas using materials that hold personal meaning, such as old denim, sheet music, letters, or linen scraps.
Secure the layers with archival glue or a few anchoring stitches, embracing the frayed edges and varied textures.
Choose a single, bold color of thread—like a vibrant red on a neutral background—to create a focal point.
Stitch an abstract, organic shape over the collage using long, expressive running stitches or couching.
This free-form stitching acts as a unifying element that ties the disparate materials together into a cohesive piece of modern art.
6. Three-Dimensional Paper & Thread Entomology
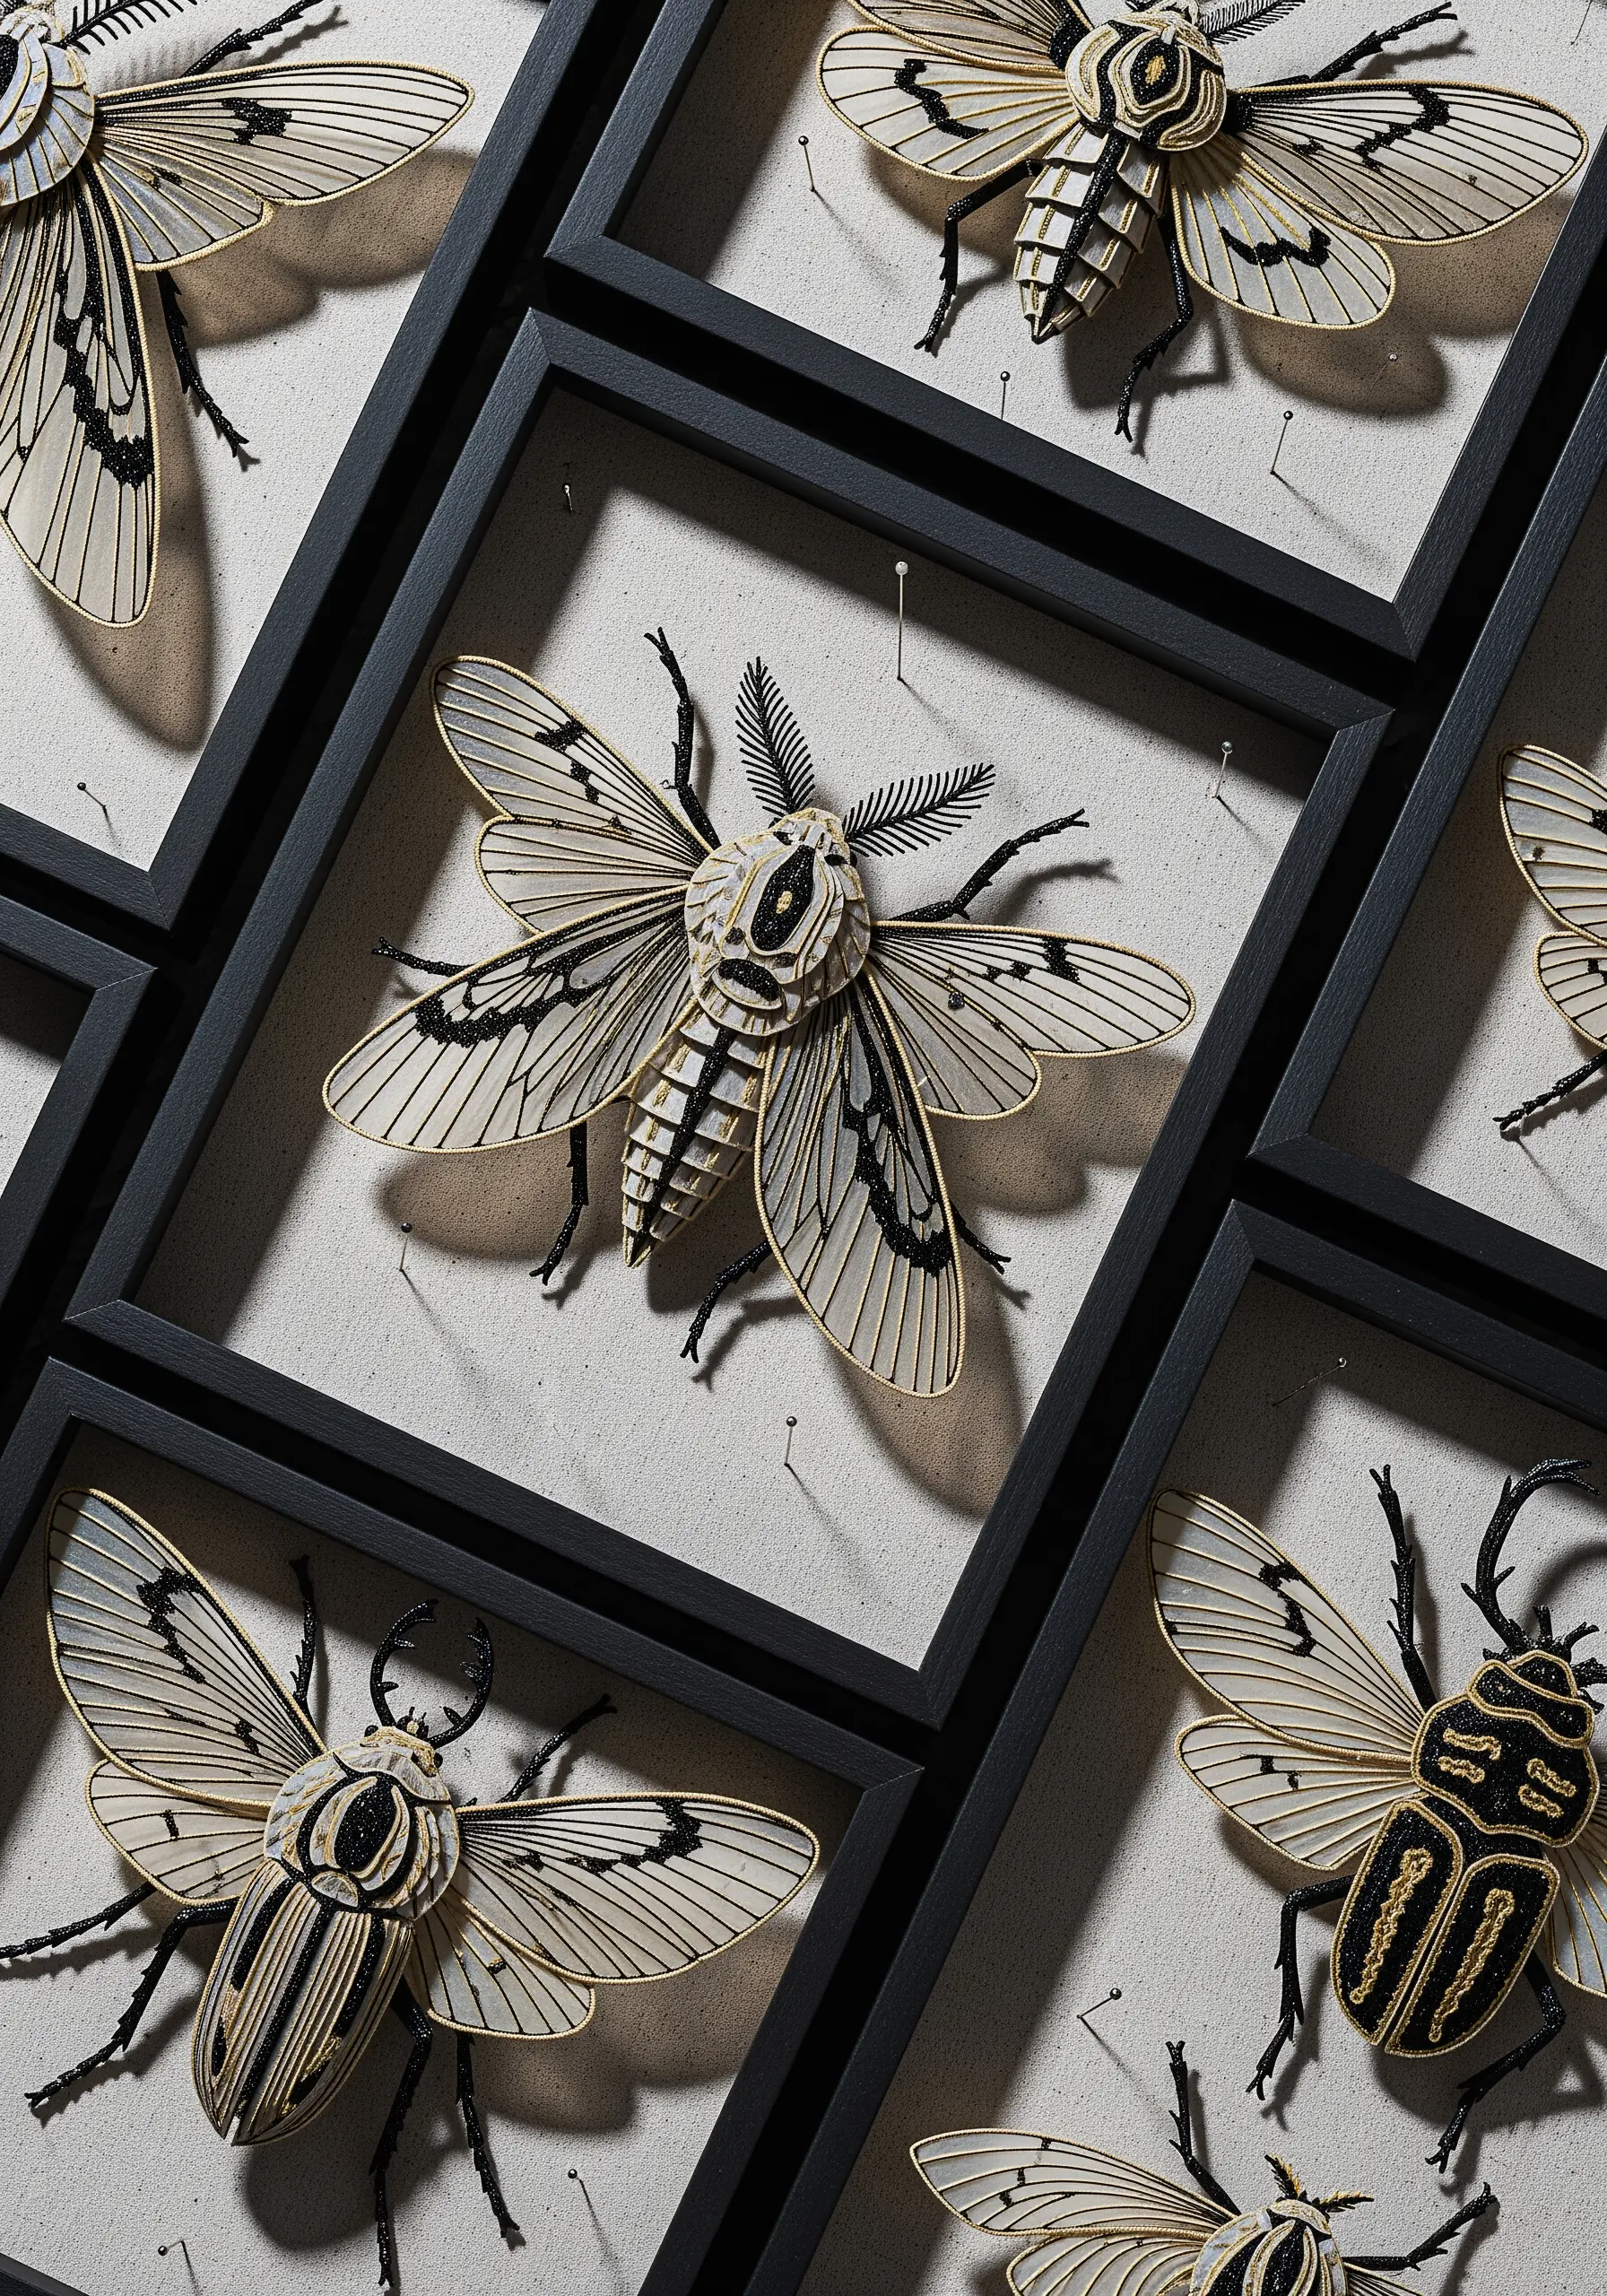
Construct your insects from layered, heavy cardstock to create a dimensional body, legs, and wings.
Before assembling the pieces, stitch details directly onto each paper component.
Use black thread and a backstitch to create sharp, delicate outlines on the wings.
Add texture to the body with gold thread, using small satin stitches or dense French knots to mimic natural patterns.
This combination of paper sculpture and precise stitching results in intricate, lifelike specimens that look complex but are surprisingly simple to execute.
7. Stitched Centers for Crepe Paper Florals
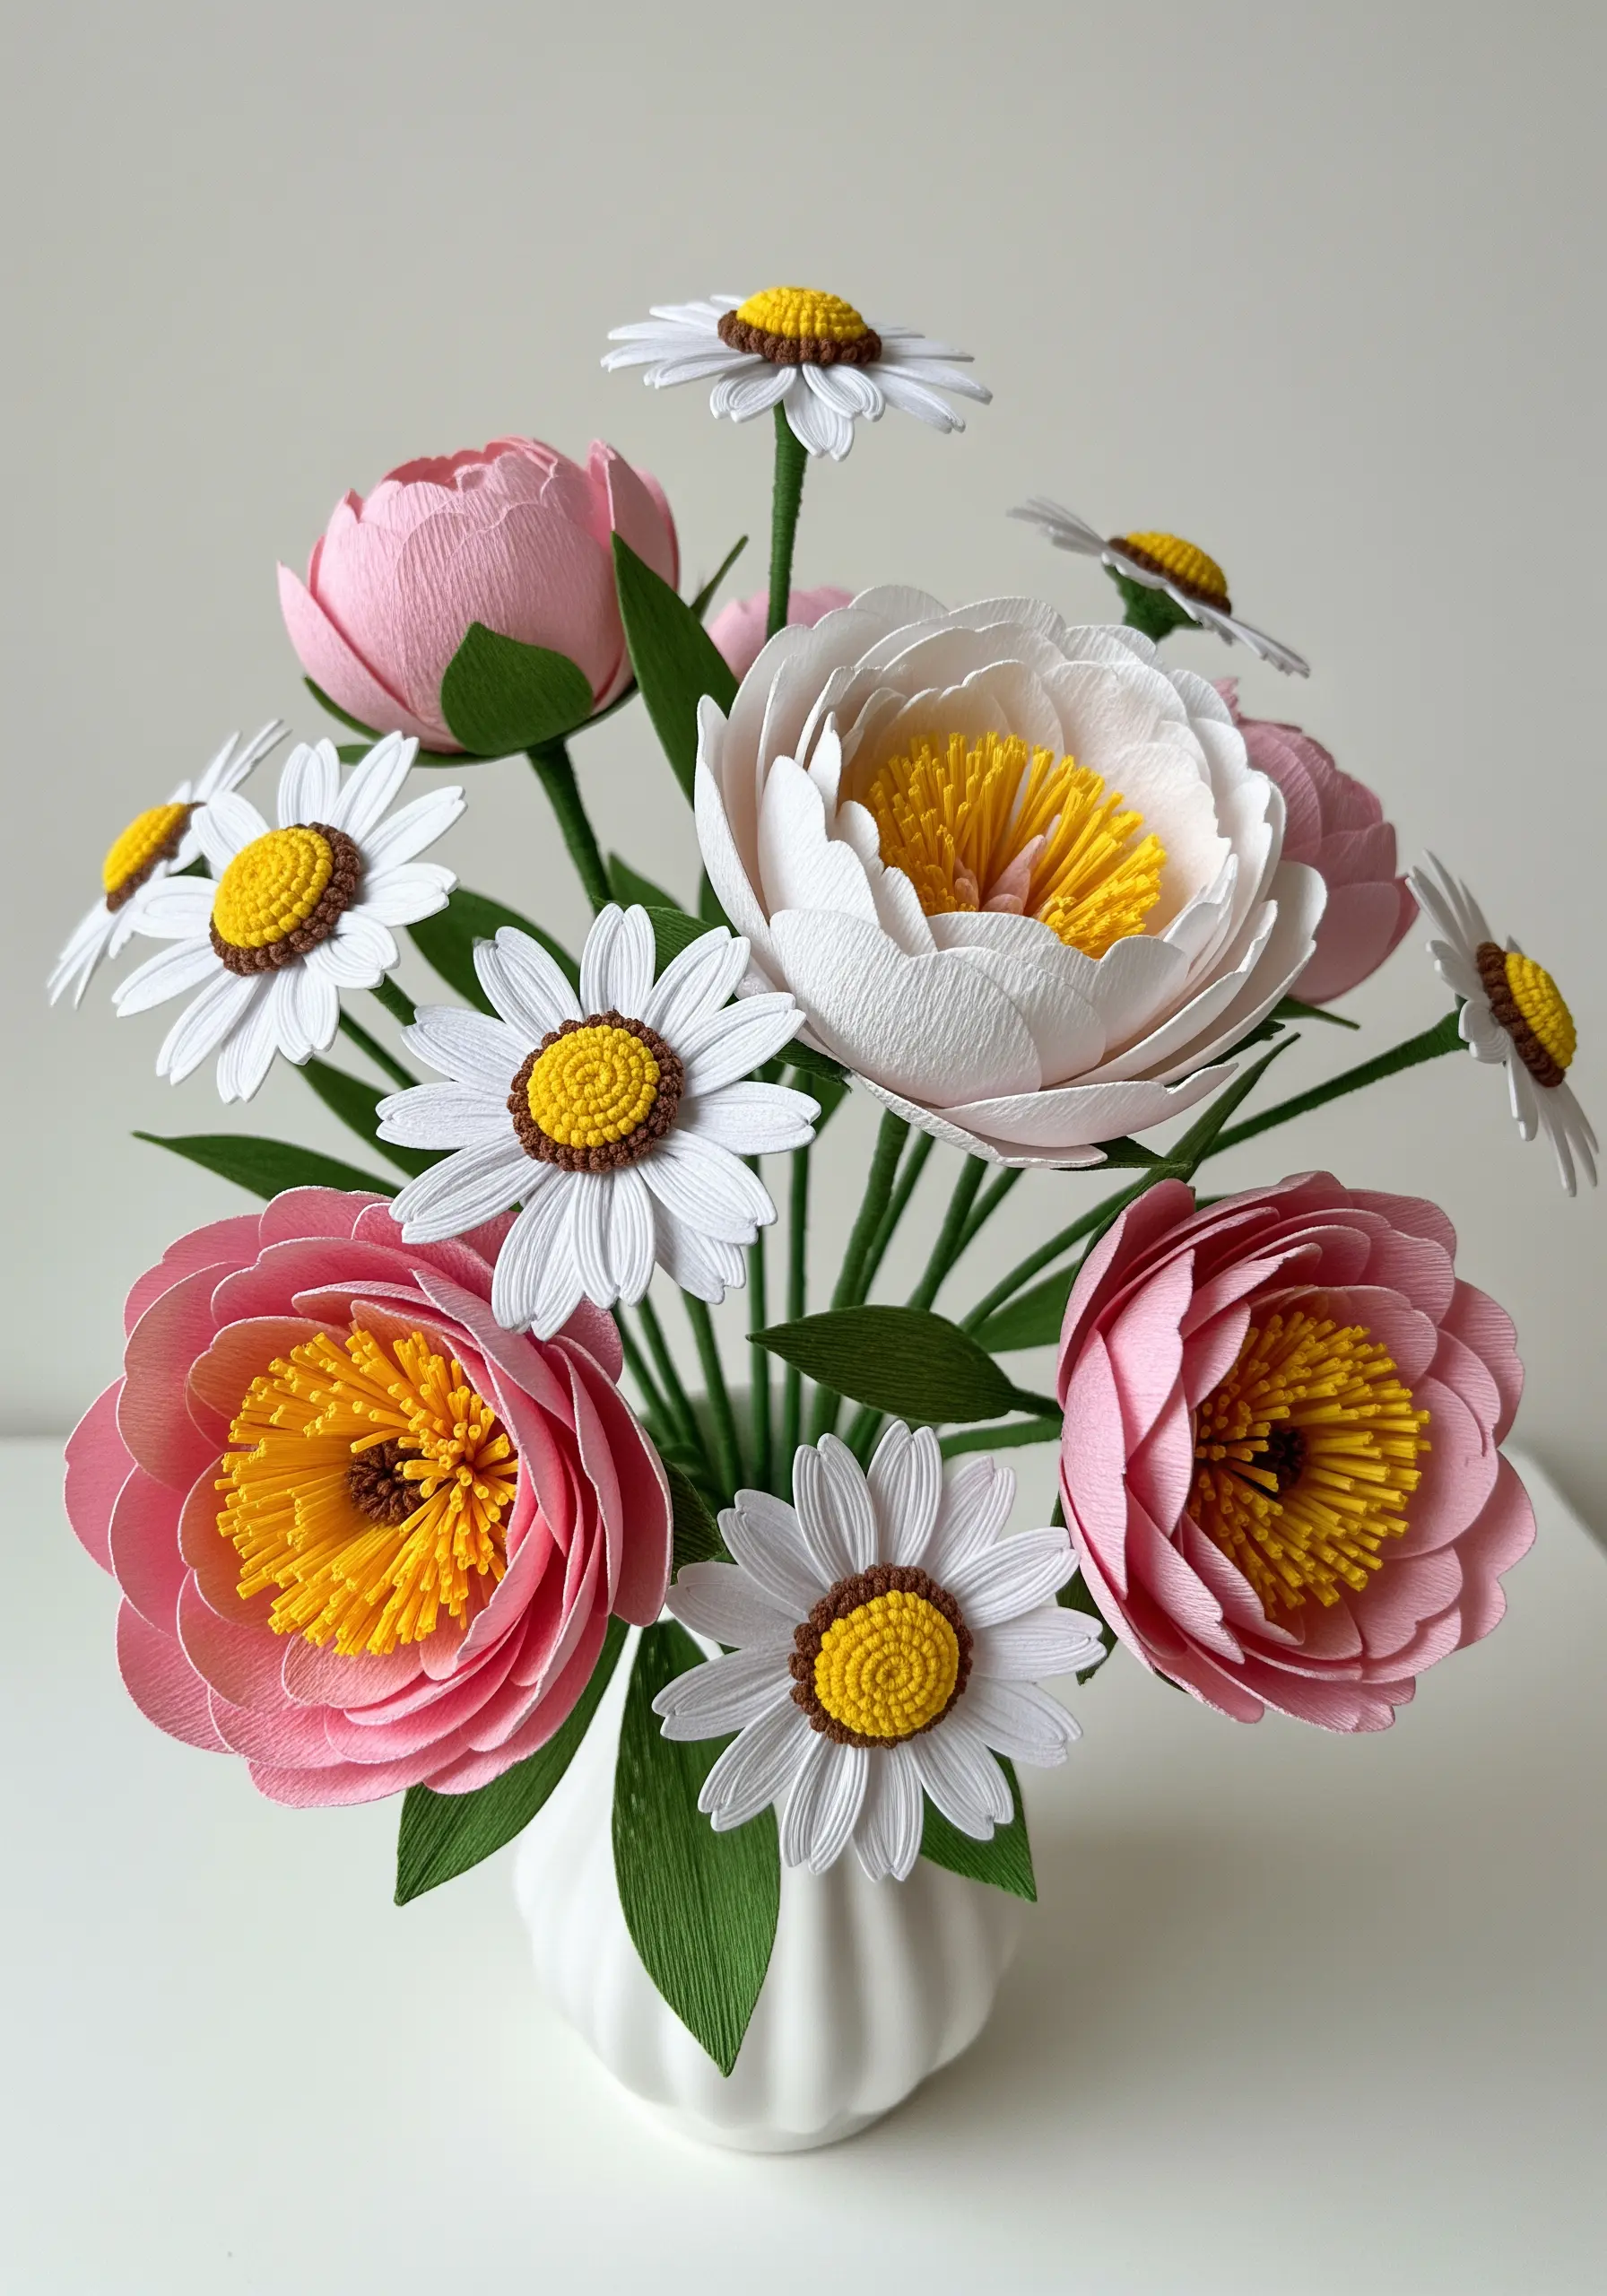
Add a surprising touch of realism to handmade crepe paper flowers by replacing the paper stamen with an embroidered center.
On a small circle of felt, create a dense cluster of French knots using yellow and brown embroidery floss to mimic the texture of pollen.
For a shaggier look, like on a daisy, you can use turkey work and trim the loops short.
Once complete, simply glue the stitched felt circle into the center of your assembled crepe paper peony, daisy, or poppy.
The soft, tactile quality of the thread provides a realistic texture that paper alone cannot replicate.
8. Architectural Paper Collage with a Stitched Illusion
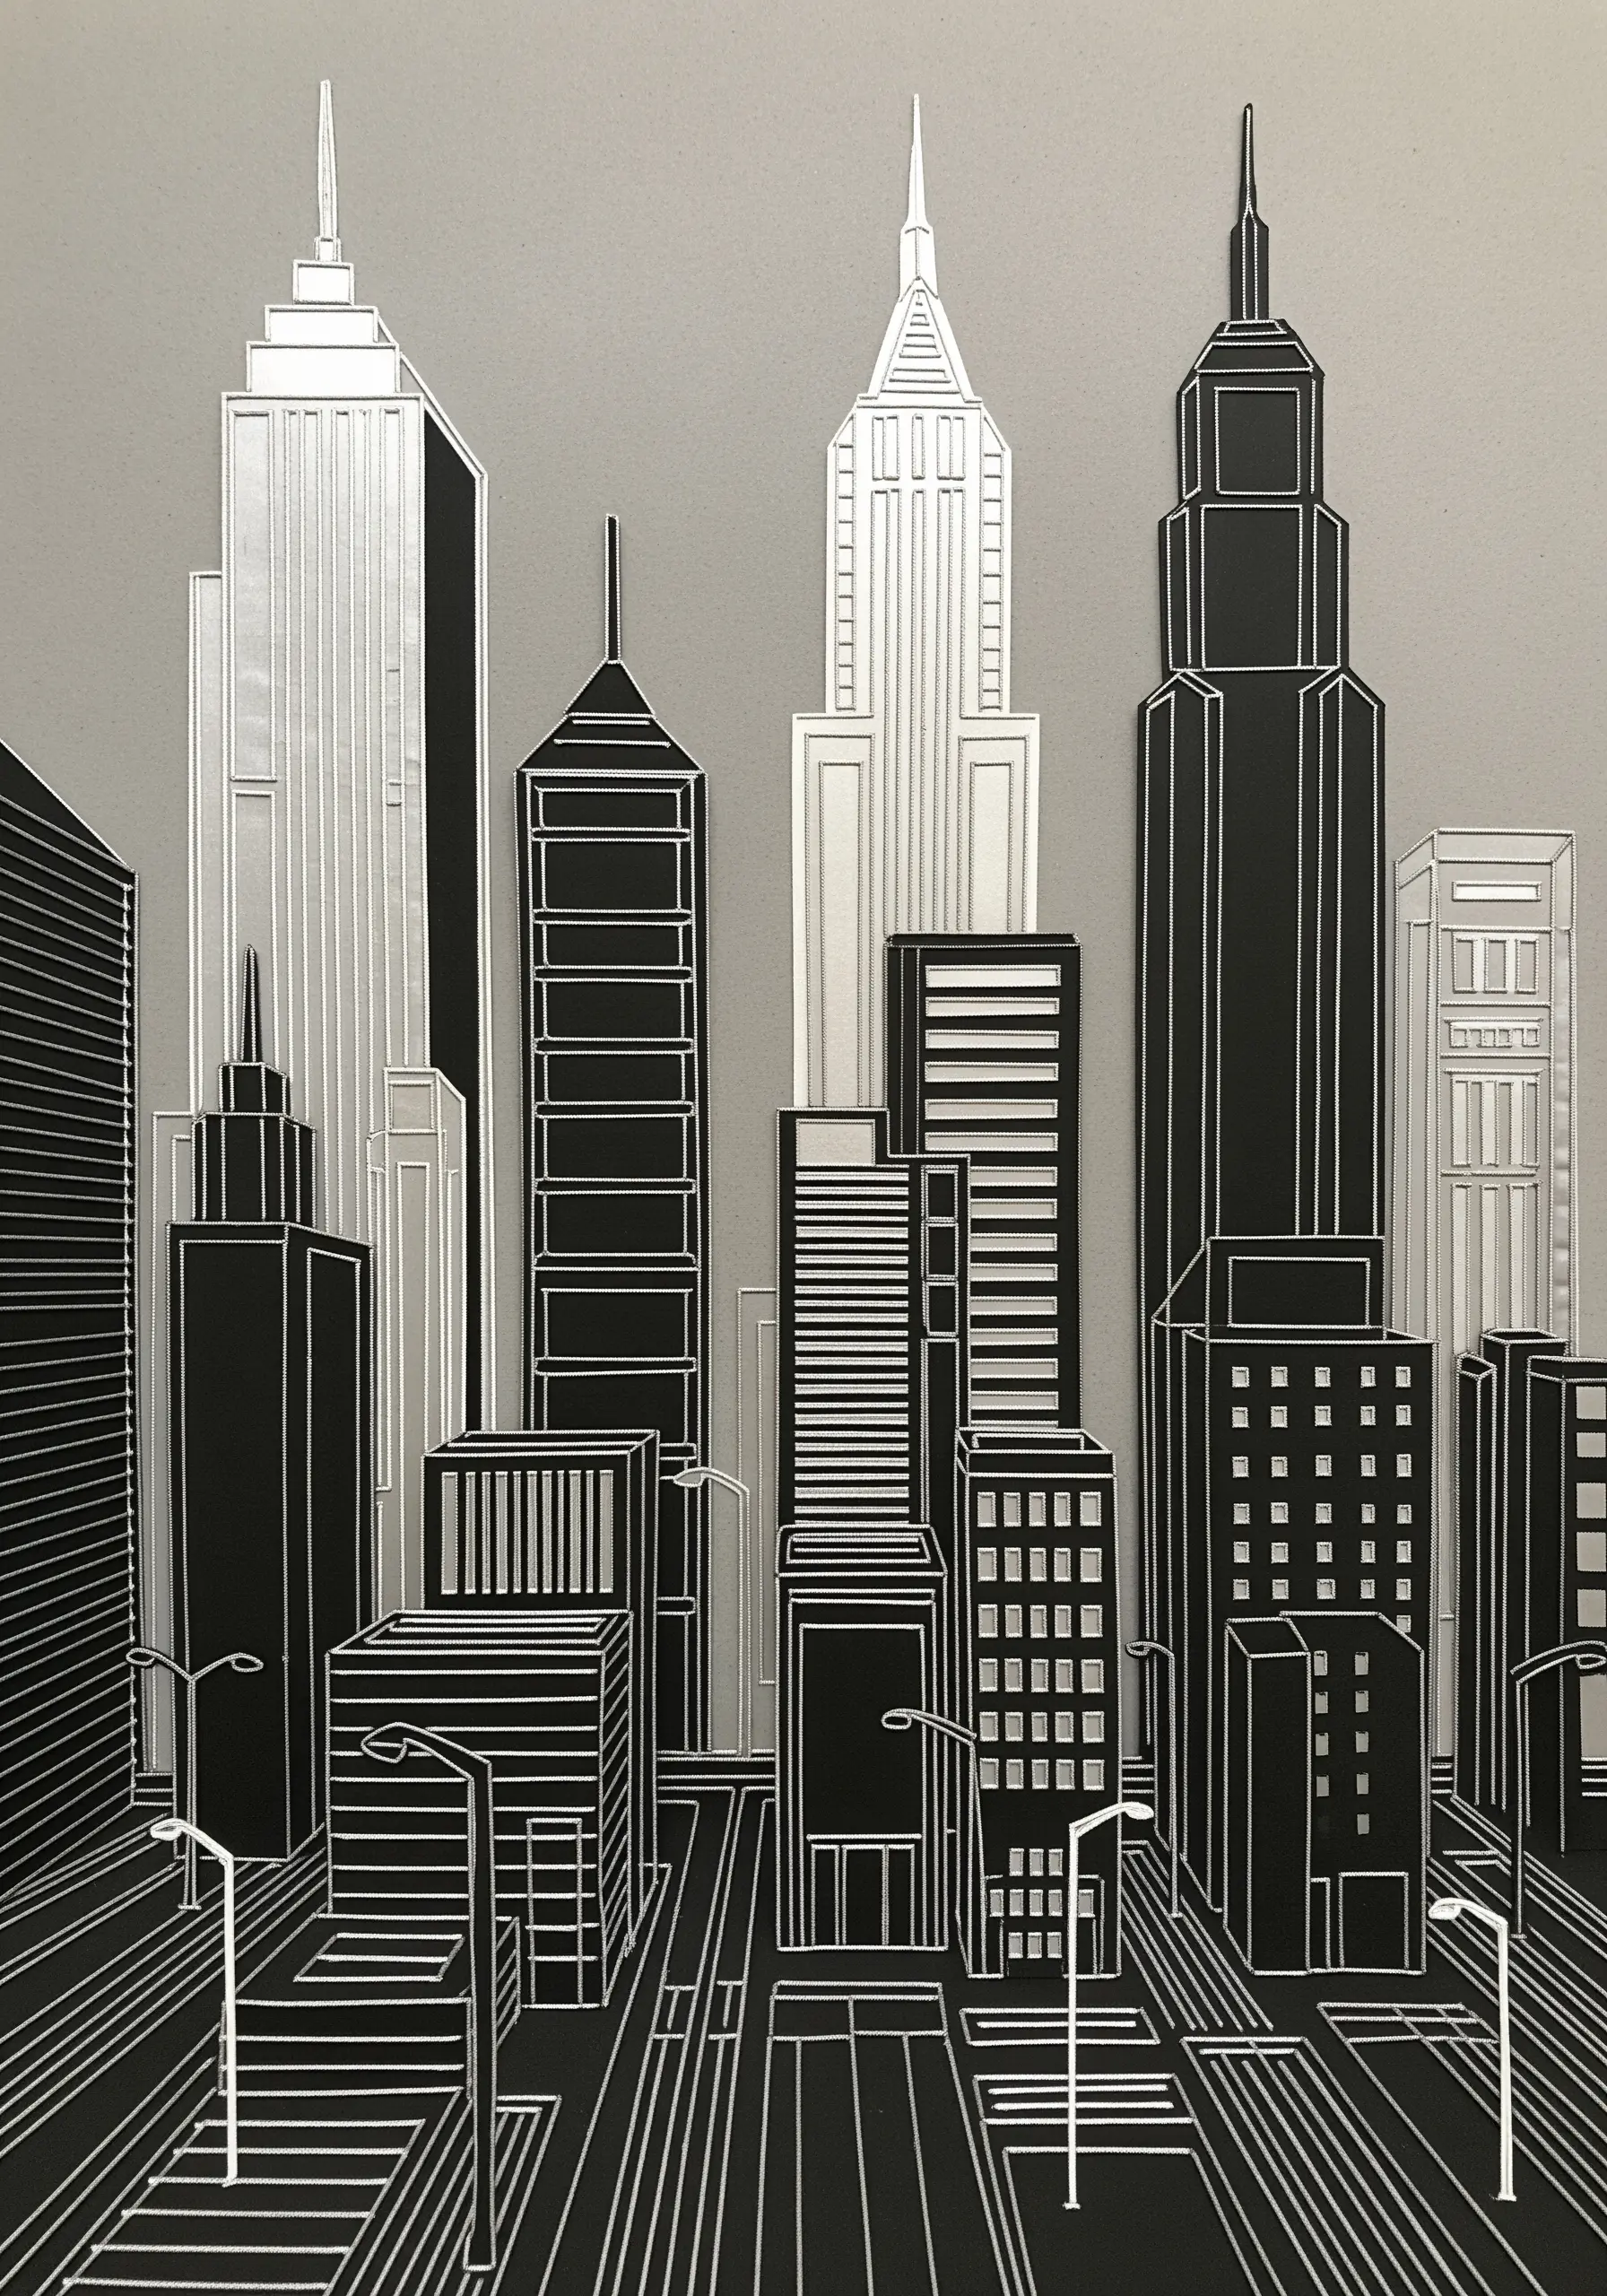
You can achieve the graphic precision of embroidery by using carefully cut strips of paper instead of thread.
Layer different shades of matte and metallic paper—black, grey, silver—to build a cityscape with a strong sense of architectural depth.
The technique is inspired by the clean linework of blackwork or architectural sketches.
The high contrast and sharp edges mimic the effect of stitched outlines, resulting in a crisp, modern aesthetic without a single stitch.
9. Selective Color Stitching on Monochrome Photos
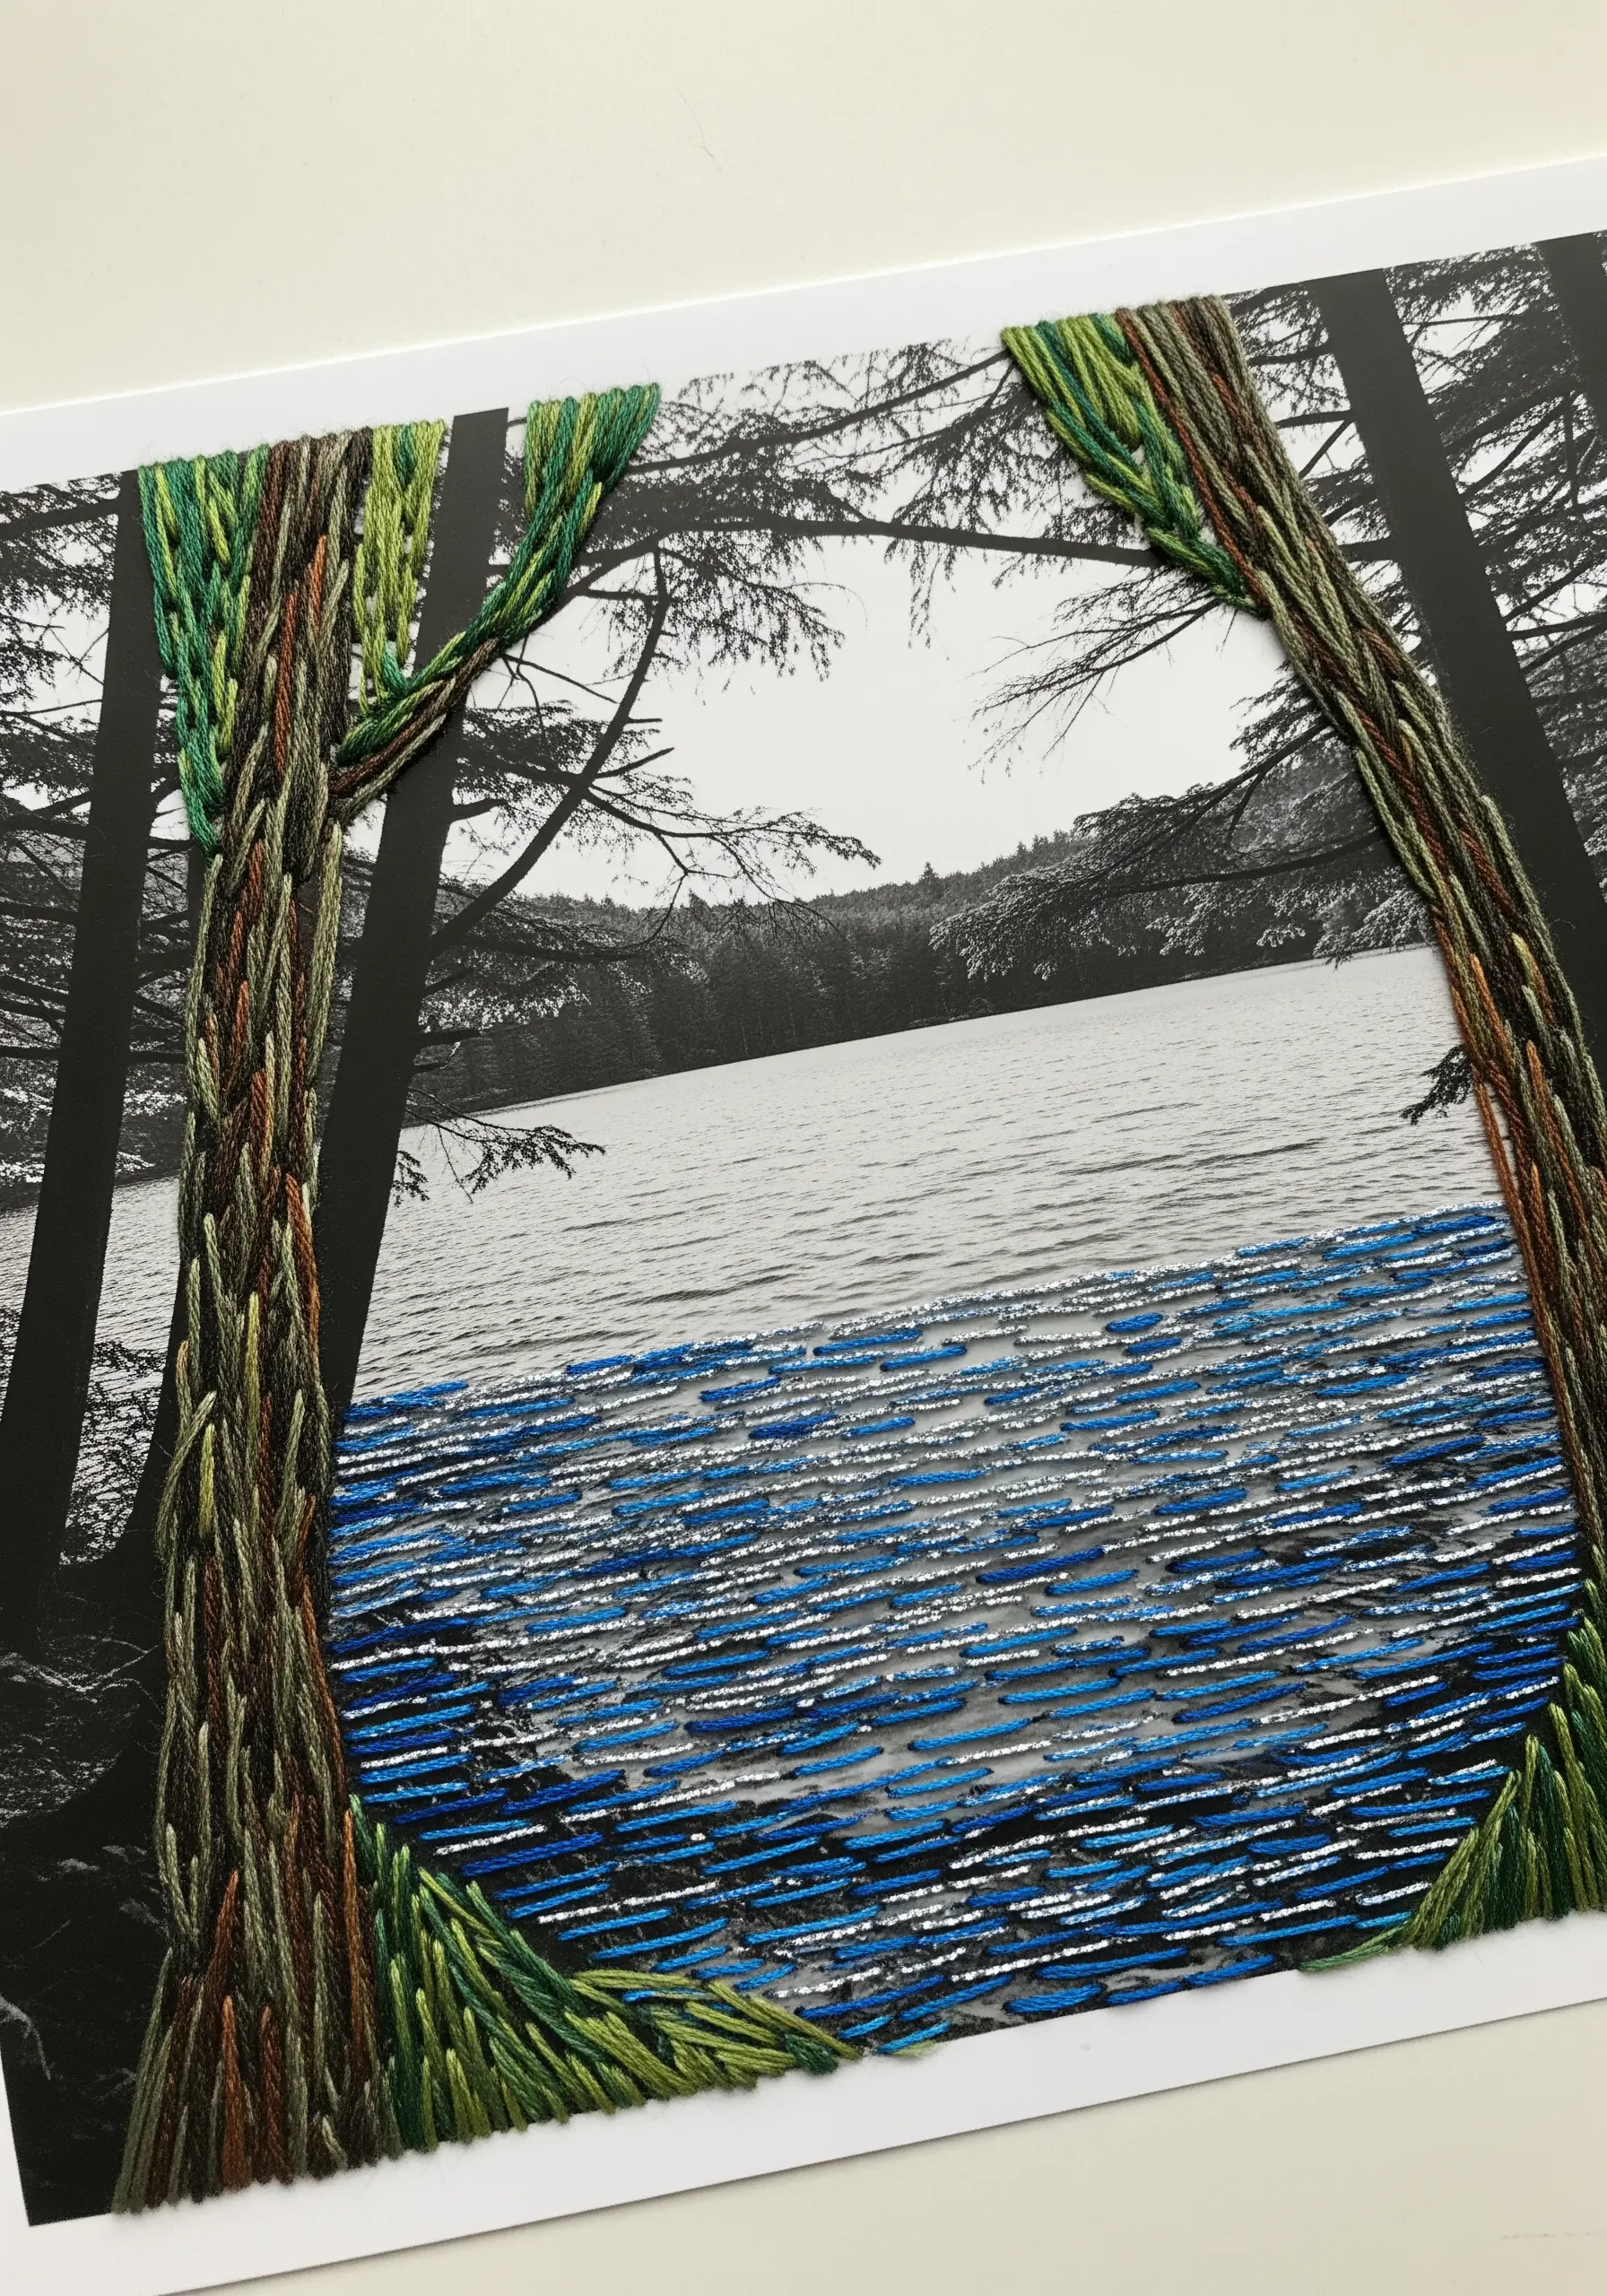
Choose a favorite landscape photograph and print it in black and white on thick, matte photo paper, which holds up well to piercing.
Select specific elements within the image to bring to life with color and texture through stitching.
Use variegated green and brown floss to wrap tree trunks with long satin stitches, creating a bark-like texture.
Fill in a lake or river with horizontal seed stitches in multiple shades of blue and silver to suggest the movement of water.
This technique of adding selective, textural color transforms a flat photograph into a dynamic, mixed-media piece.
10. Watercolor & Thread Bookmarks
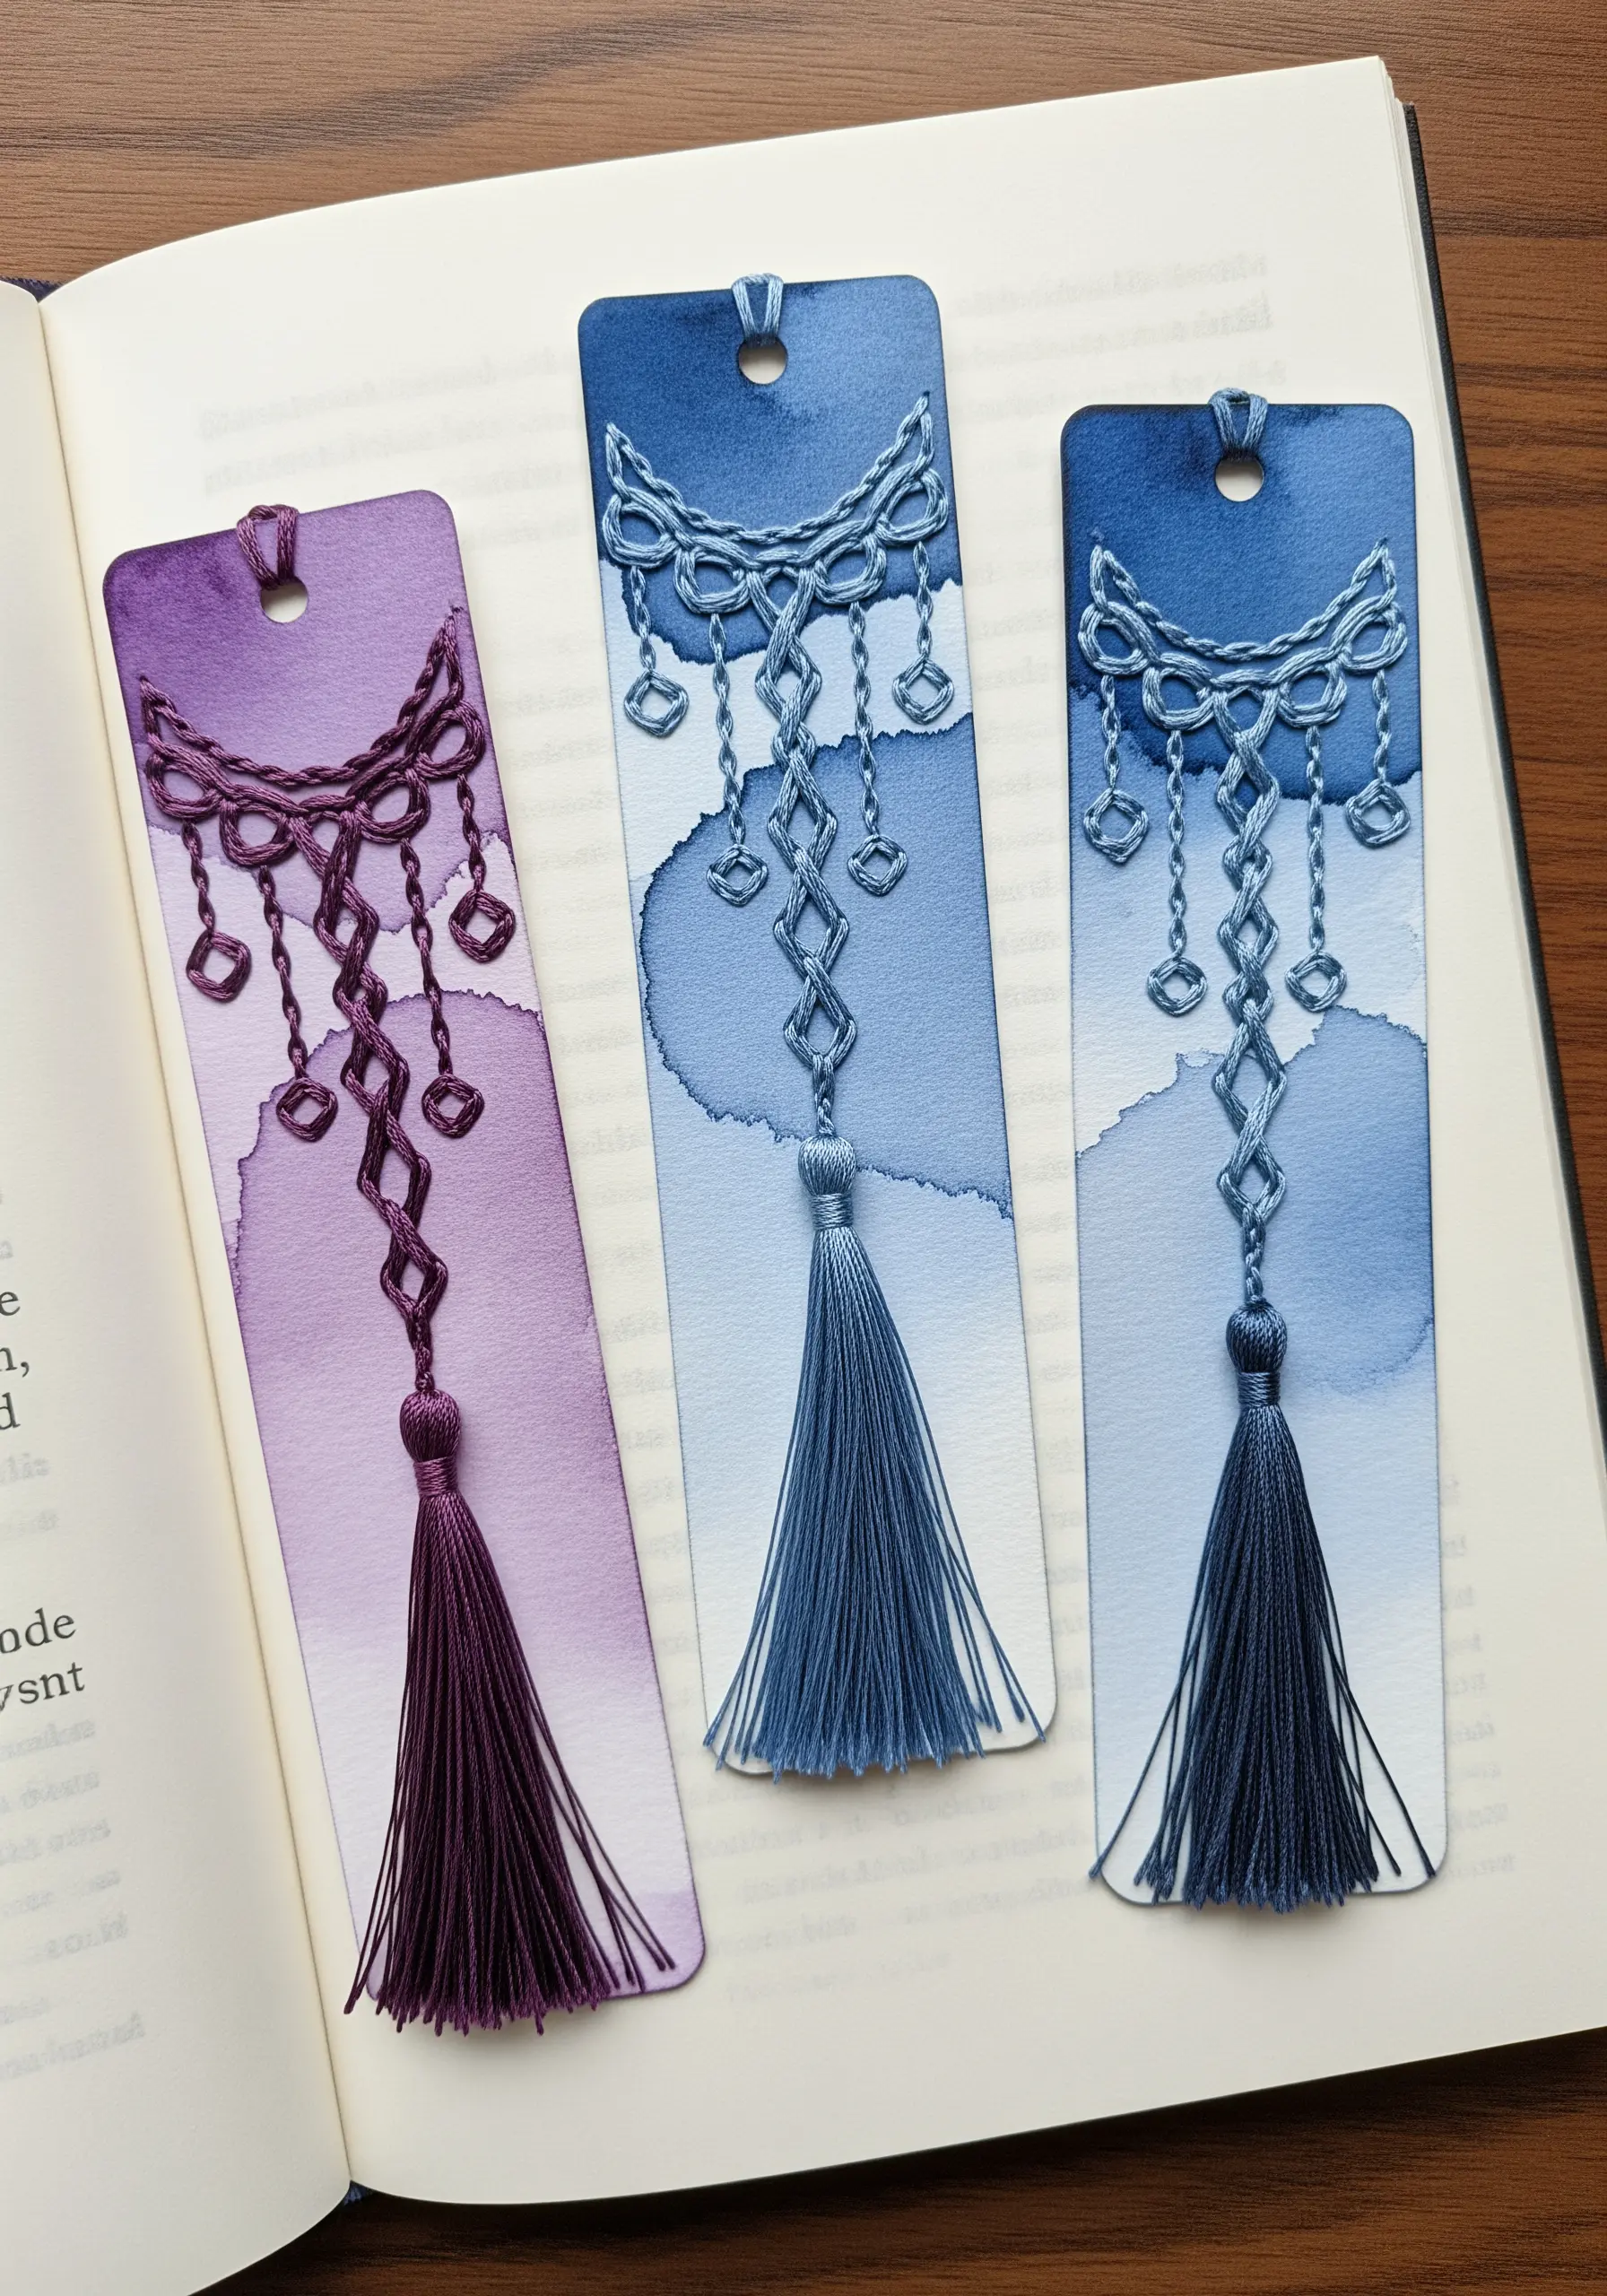
On a strip of heavy watercolor paper, create a soft, blended wash of one or two colors and let it dry completely.
Before you begin stitching, use a needle to pre-pierce the holes of your design to prevent the paper from tearing or buckling.
Stitch a simple geometric pattern or a delicate motif using a thread color that complements the watercolor background.
The sharp, defined lines of the thread create a beautiful contrast against the fluid, organic nature of the paint.
Finish by punching a hole and adding a matching tassel to elevate the bookmark into a polished, thoughtful gift.
11. Pierced Paper Constellation Art
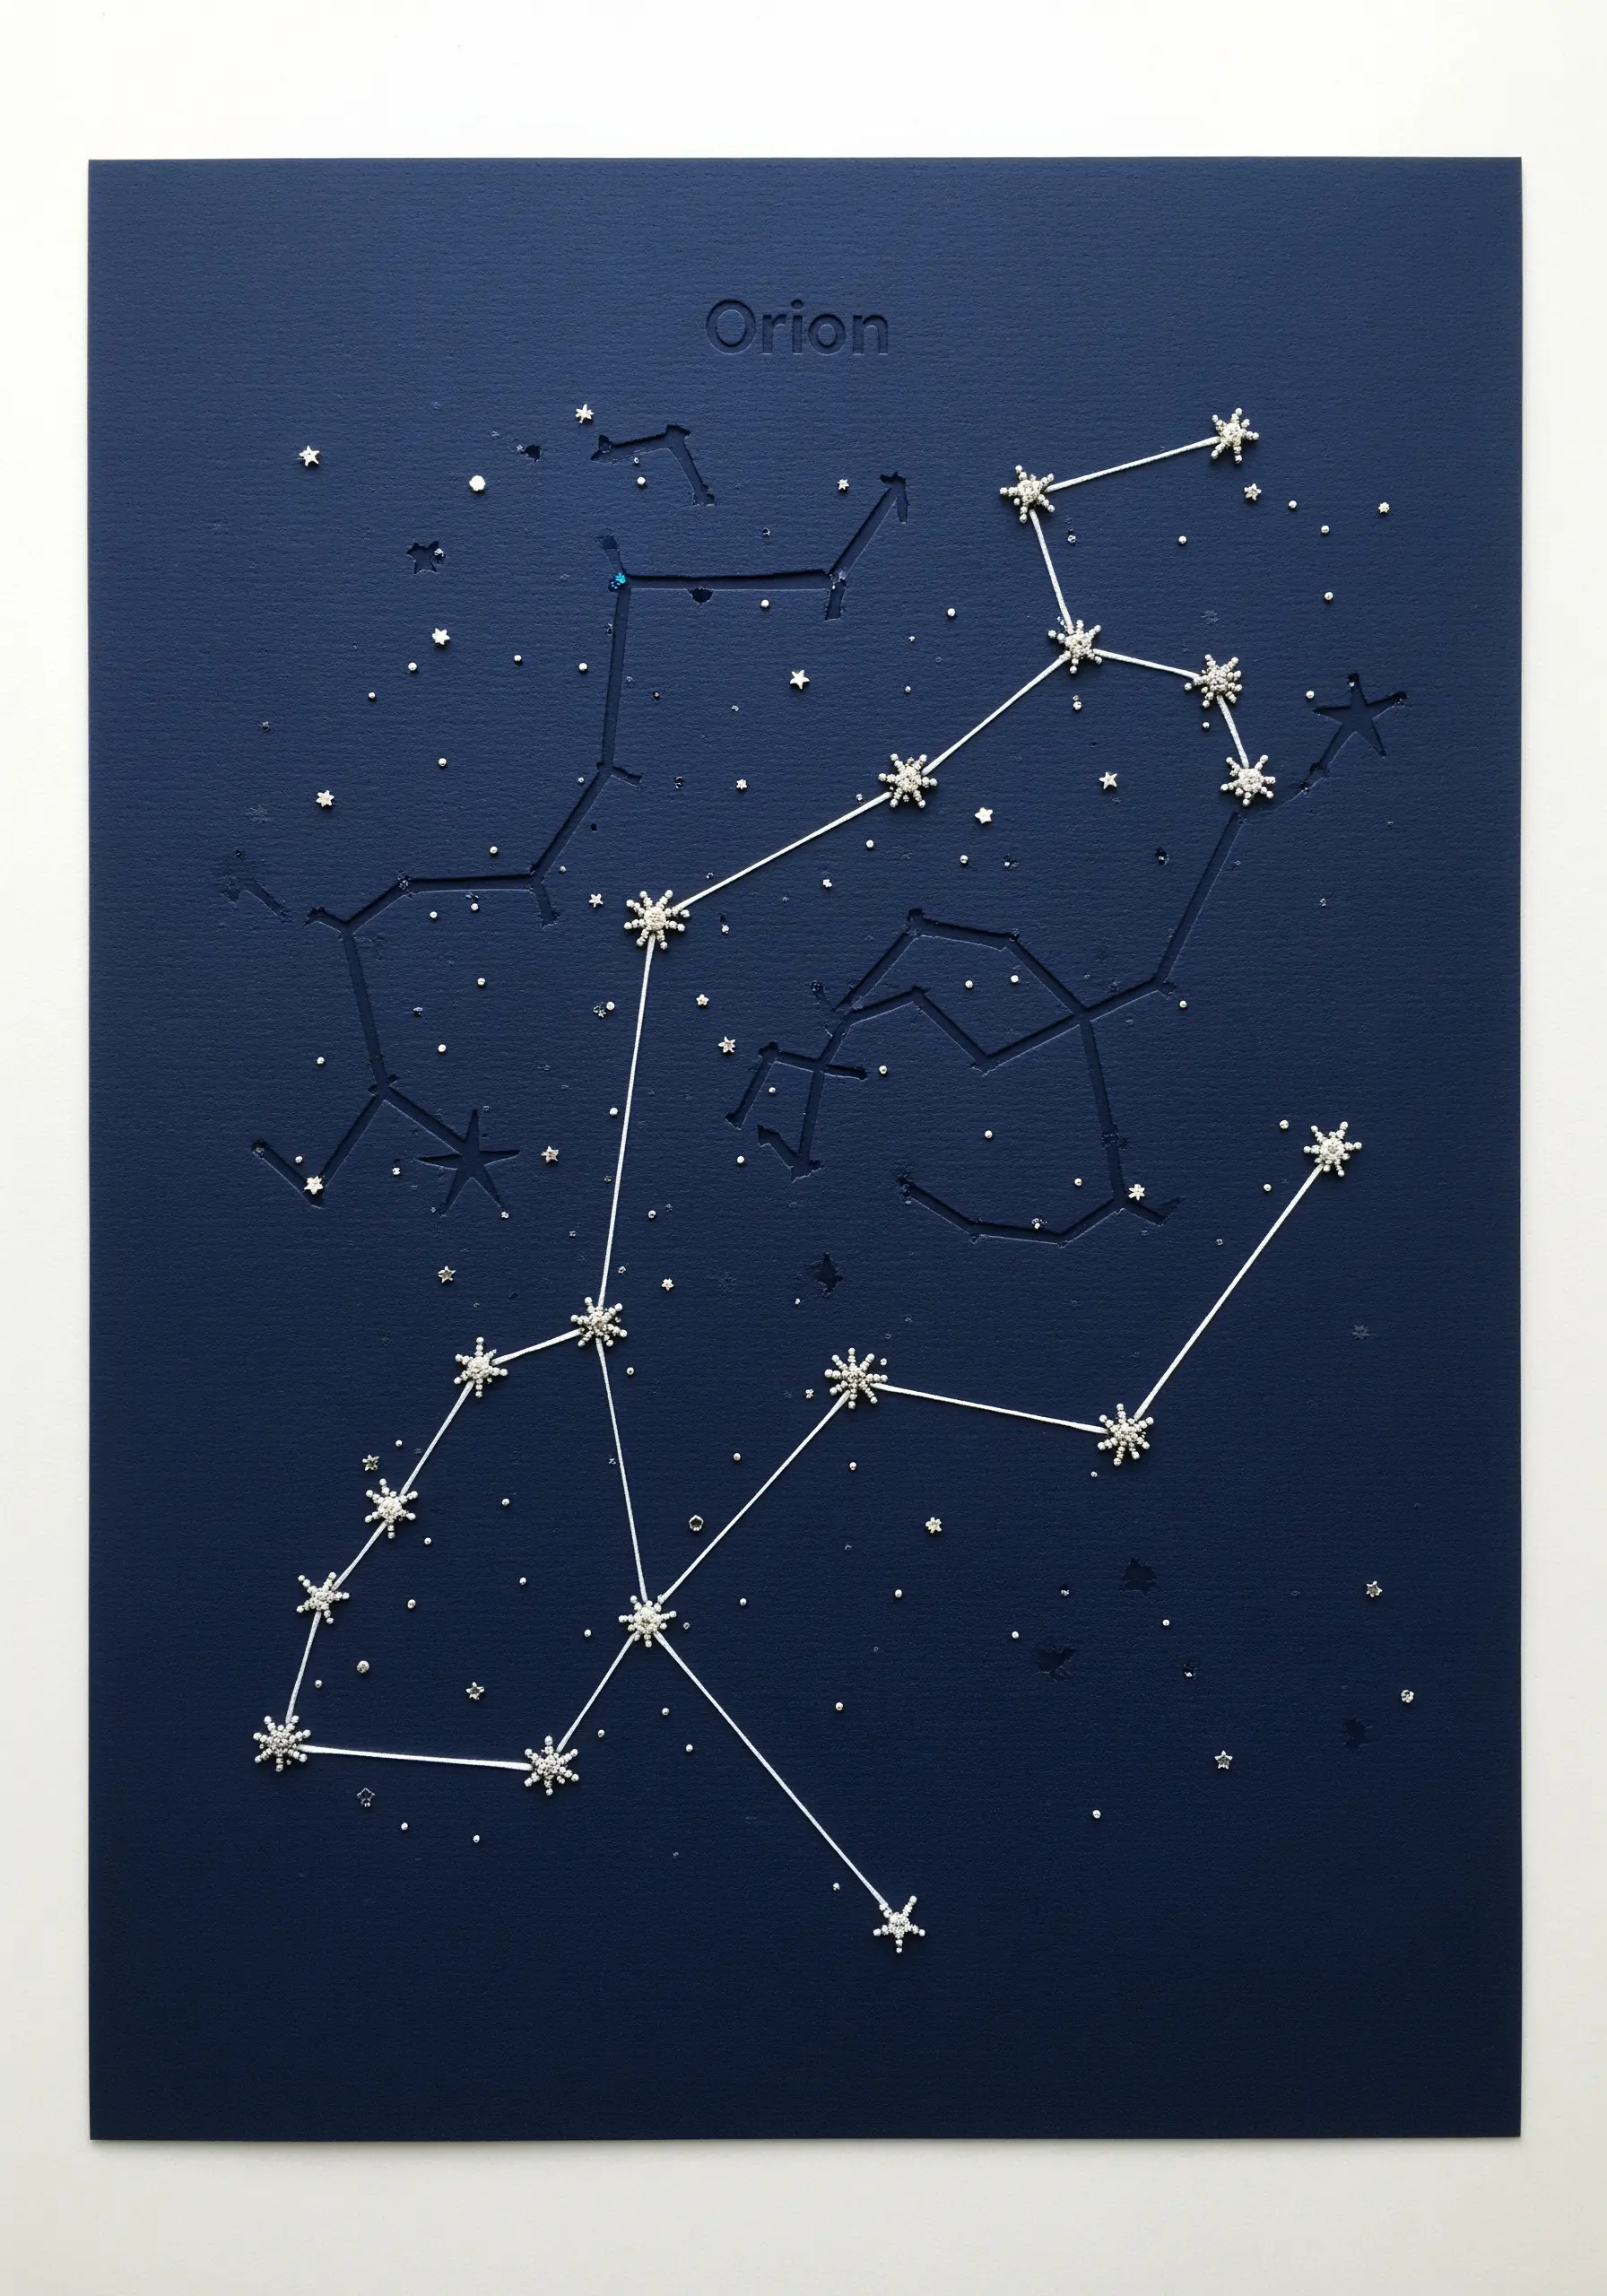
Create an ethereal map of the night sky by focusing on light and shadow rather than dense stitching.
On a piece of heavy, dark blue or black cardstock, use a small hole punch or the tip of a craft knife to pierce out tiny stars.
Use a fine, silver metallic thread and a simple straight stitch to connect only the major stars of your chosen constellation.
The minimalist combination of pierced light points and clean stitched lines results in a delicate artwork that feels both graphic and celestial.
12. Mandala Appliqué on a Textural Collage
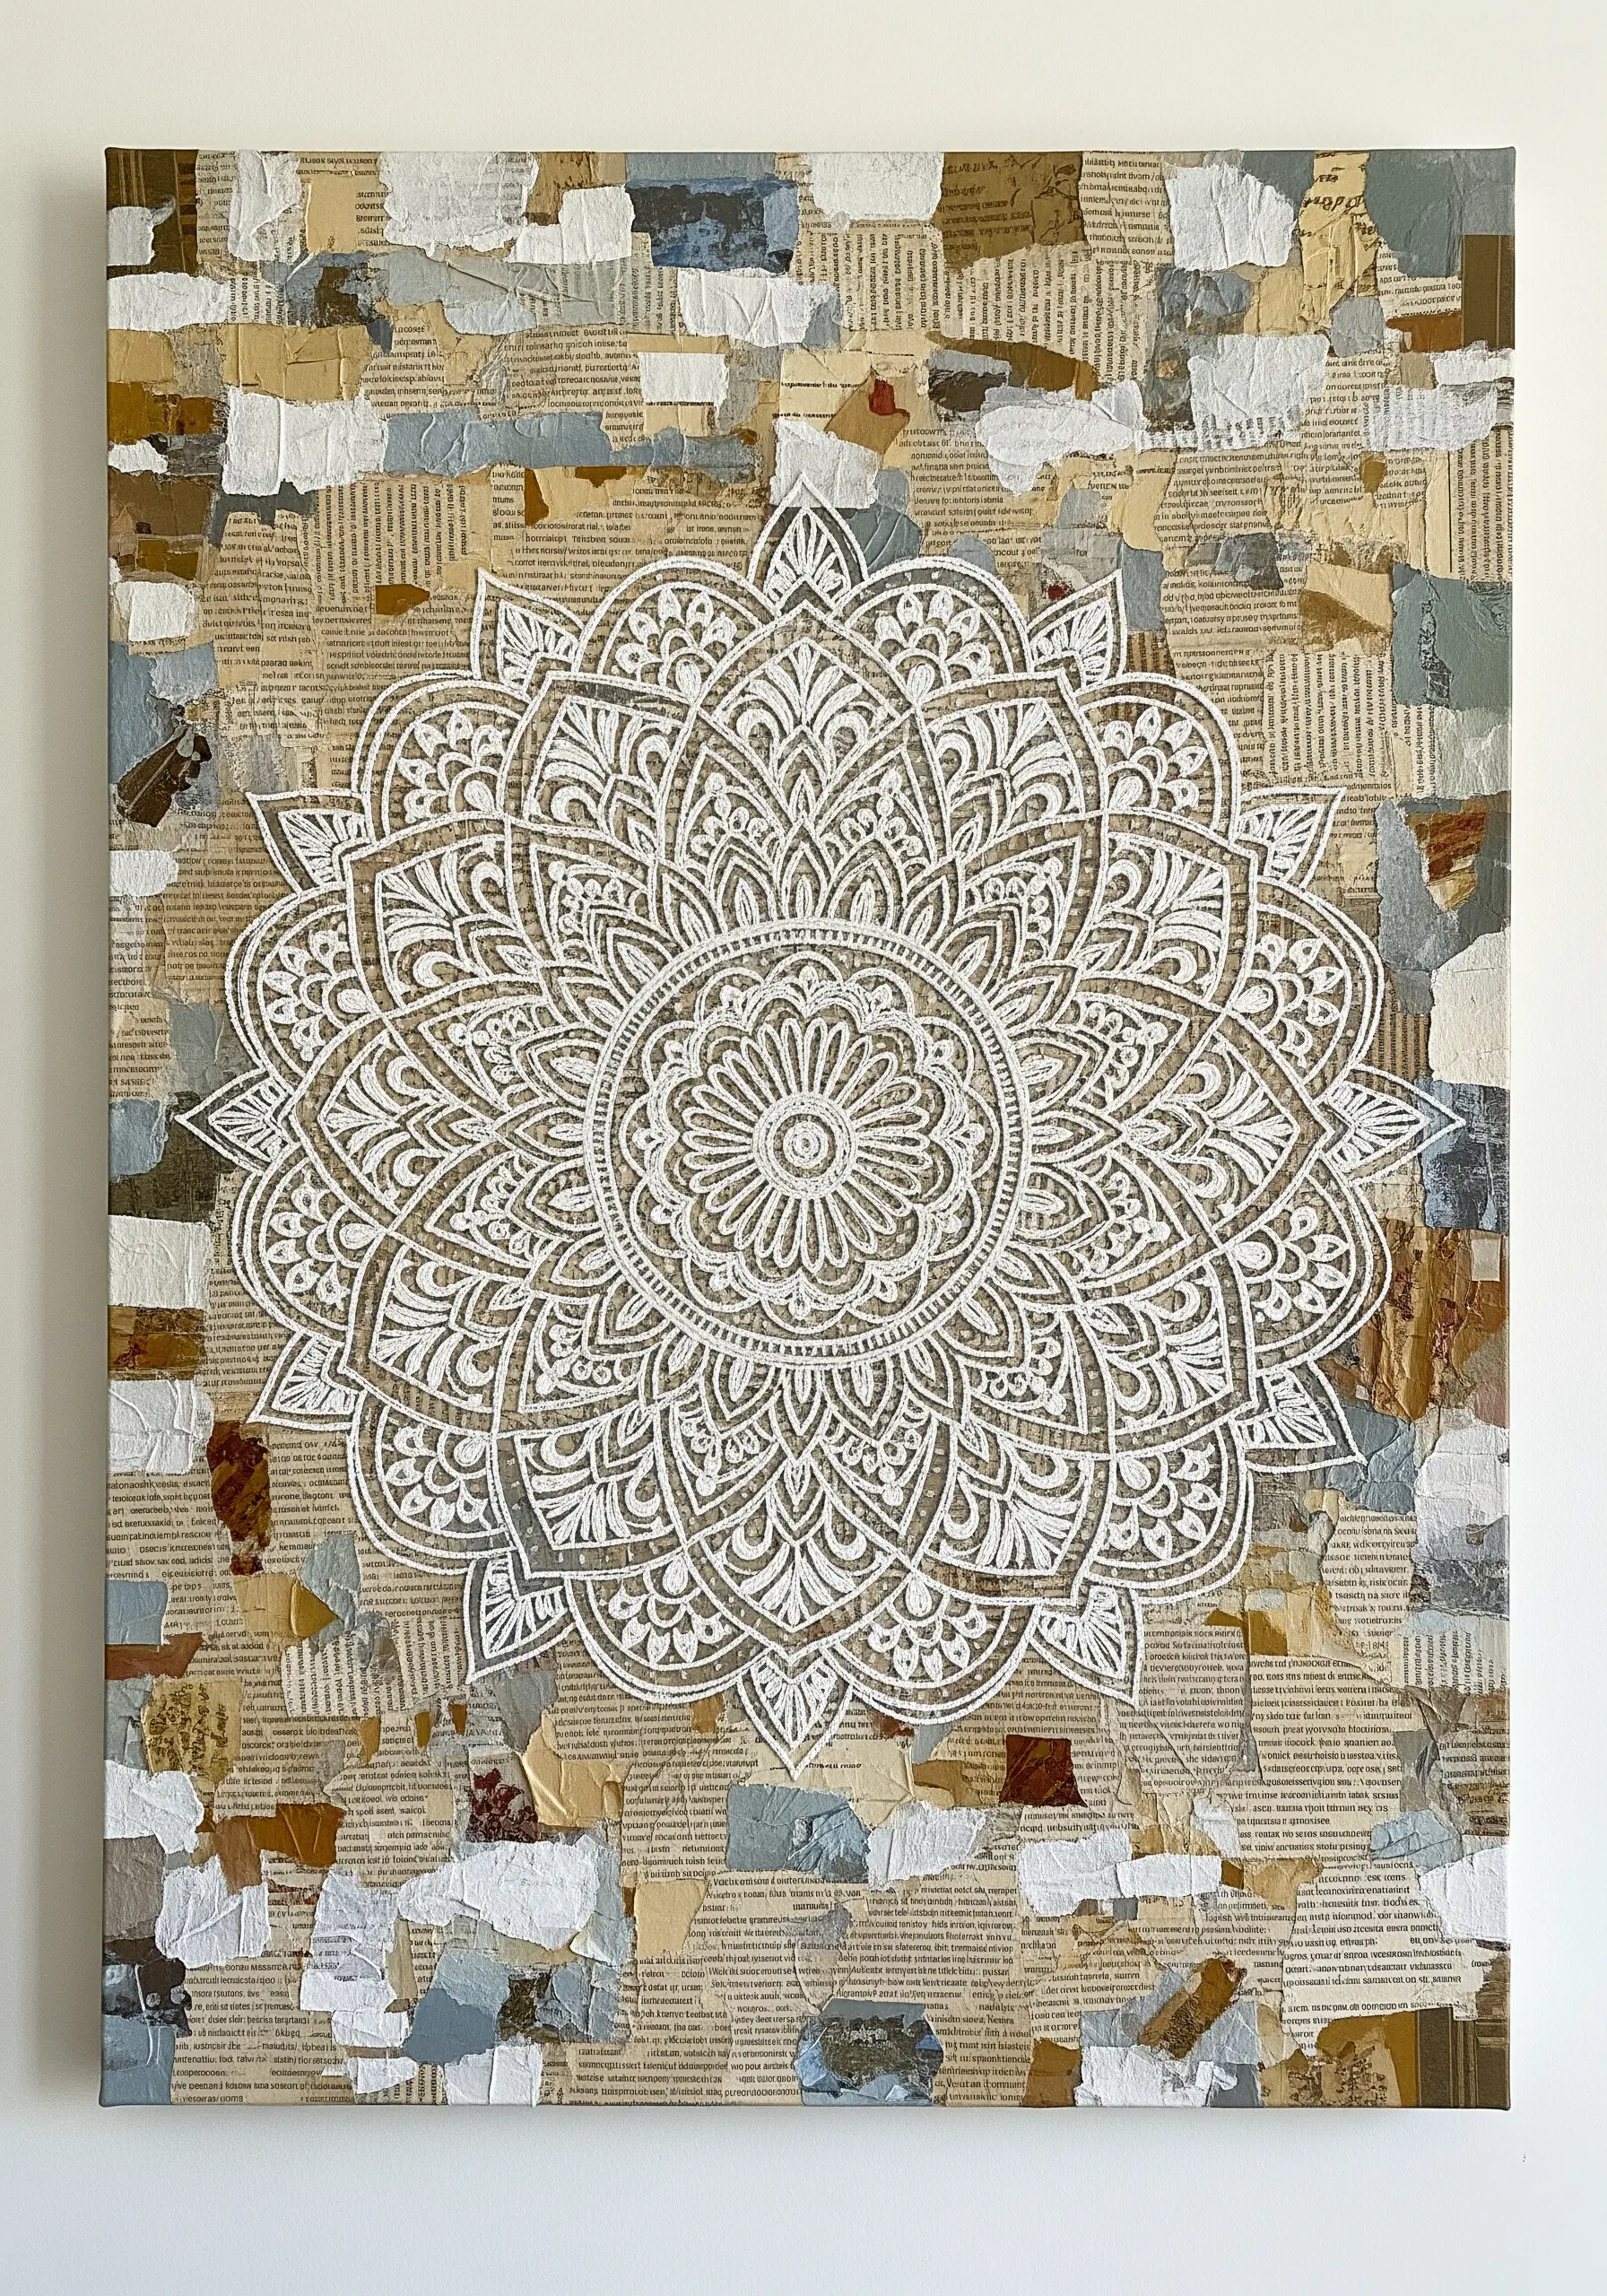
Build a rich, tactile background on a canvas by collaging torn book pages, painted paper scraps, and textured gesso.
Use a muted, cohesive color palette to ensure the background remains harmonious and doesn’t overpower the focal point.
Once the base is dry, apply an intricately cut paper or fabric mandala to the center using a clear craft glue.
The key to this piece is the contrast: the rustic, layered background makes the clean, symmetrical lines of the mandala stand out dramatically.
You can add a few nearly invisible couching stitches around the mandala’s edge to fully integrate it into the canvas.
13. Sculptural Paper Waves with Stitched Foam
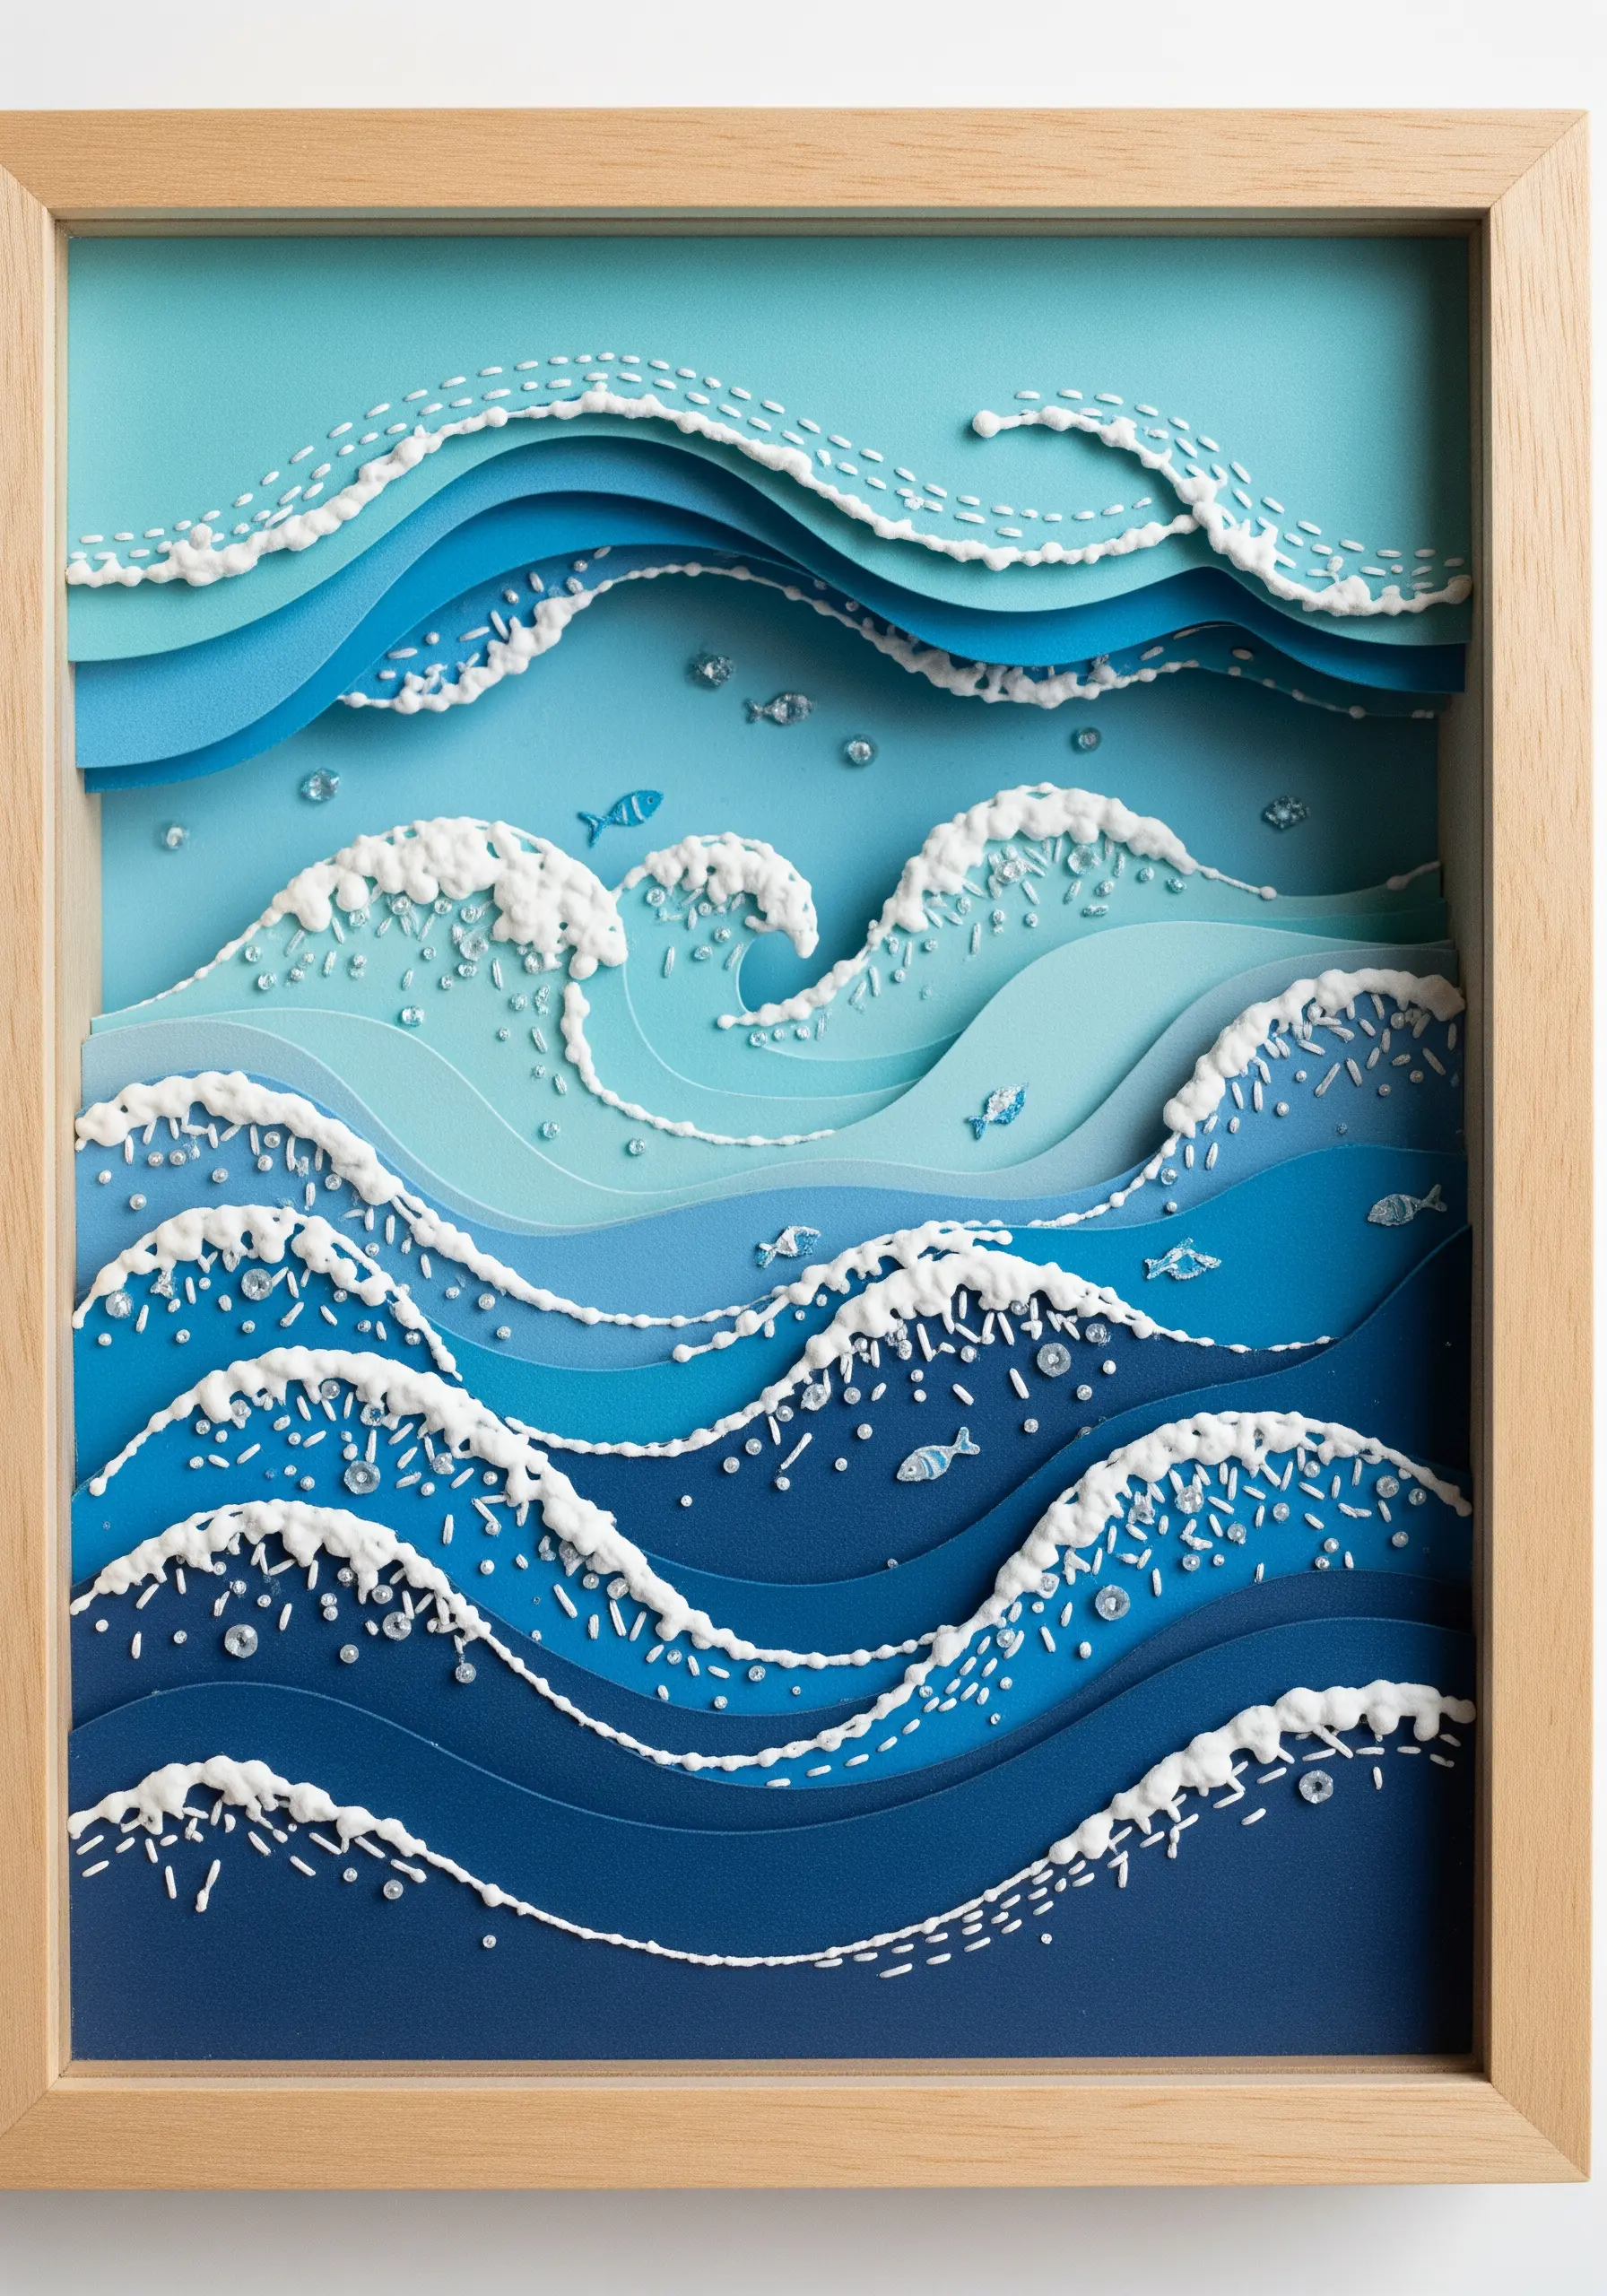
Build a dimensional sea scene inside a shadowbox frame by layering wavy-cut cardstock in graduating shades of blue.
Insert small foam spacers between the paper layers to enhance the 3D effect and create realistic depth.
To create the look of seafoam, use a thick white cotton thread or soft yarn to stitch dense clusters of French knots along the crest of each paper wave.
Add a few scattered running stitches to suggest sea spray. The soft, raised stitches perfectly mimic the texture of foam, adding a tactile realism that paper alone cannot achieve.
14. Miniature Stitched Gift Embellishments
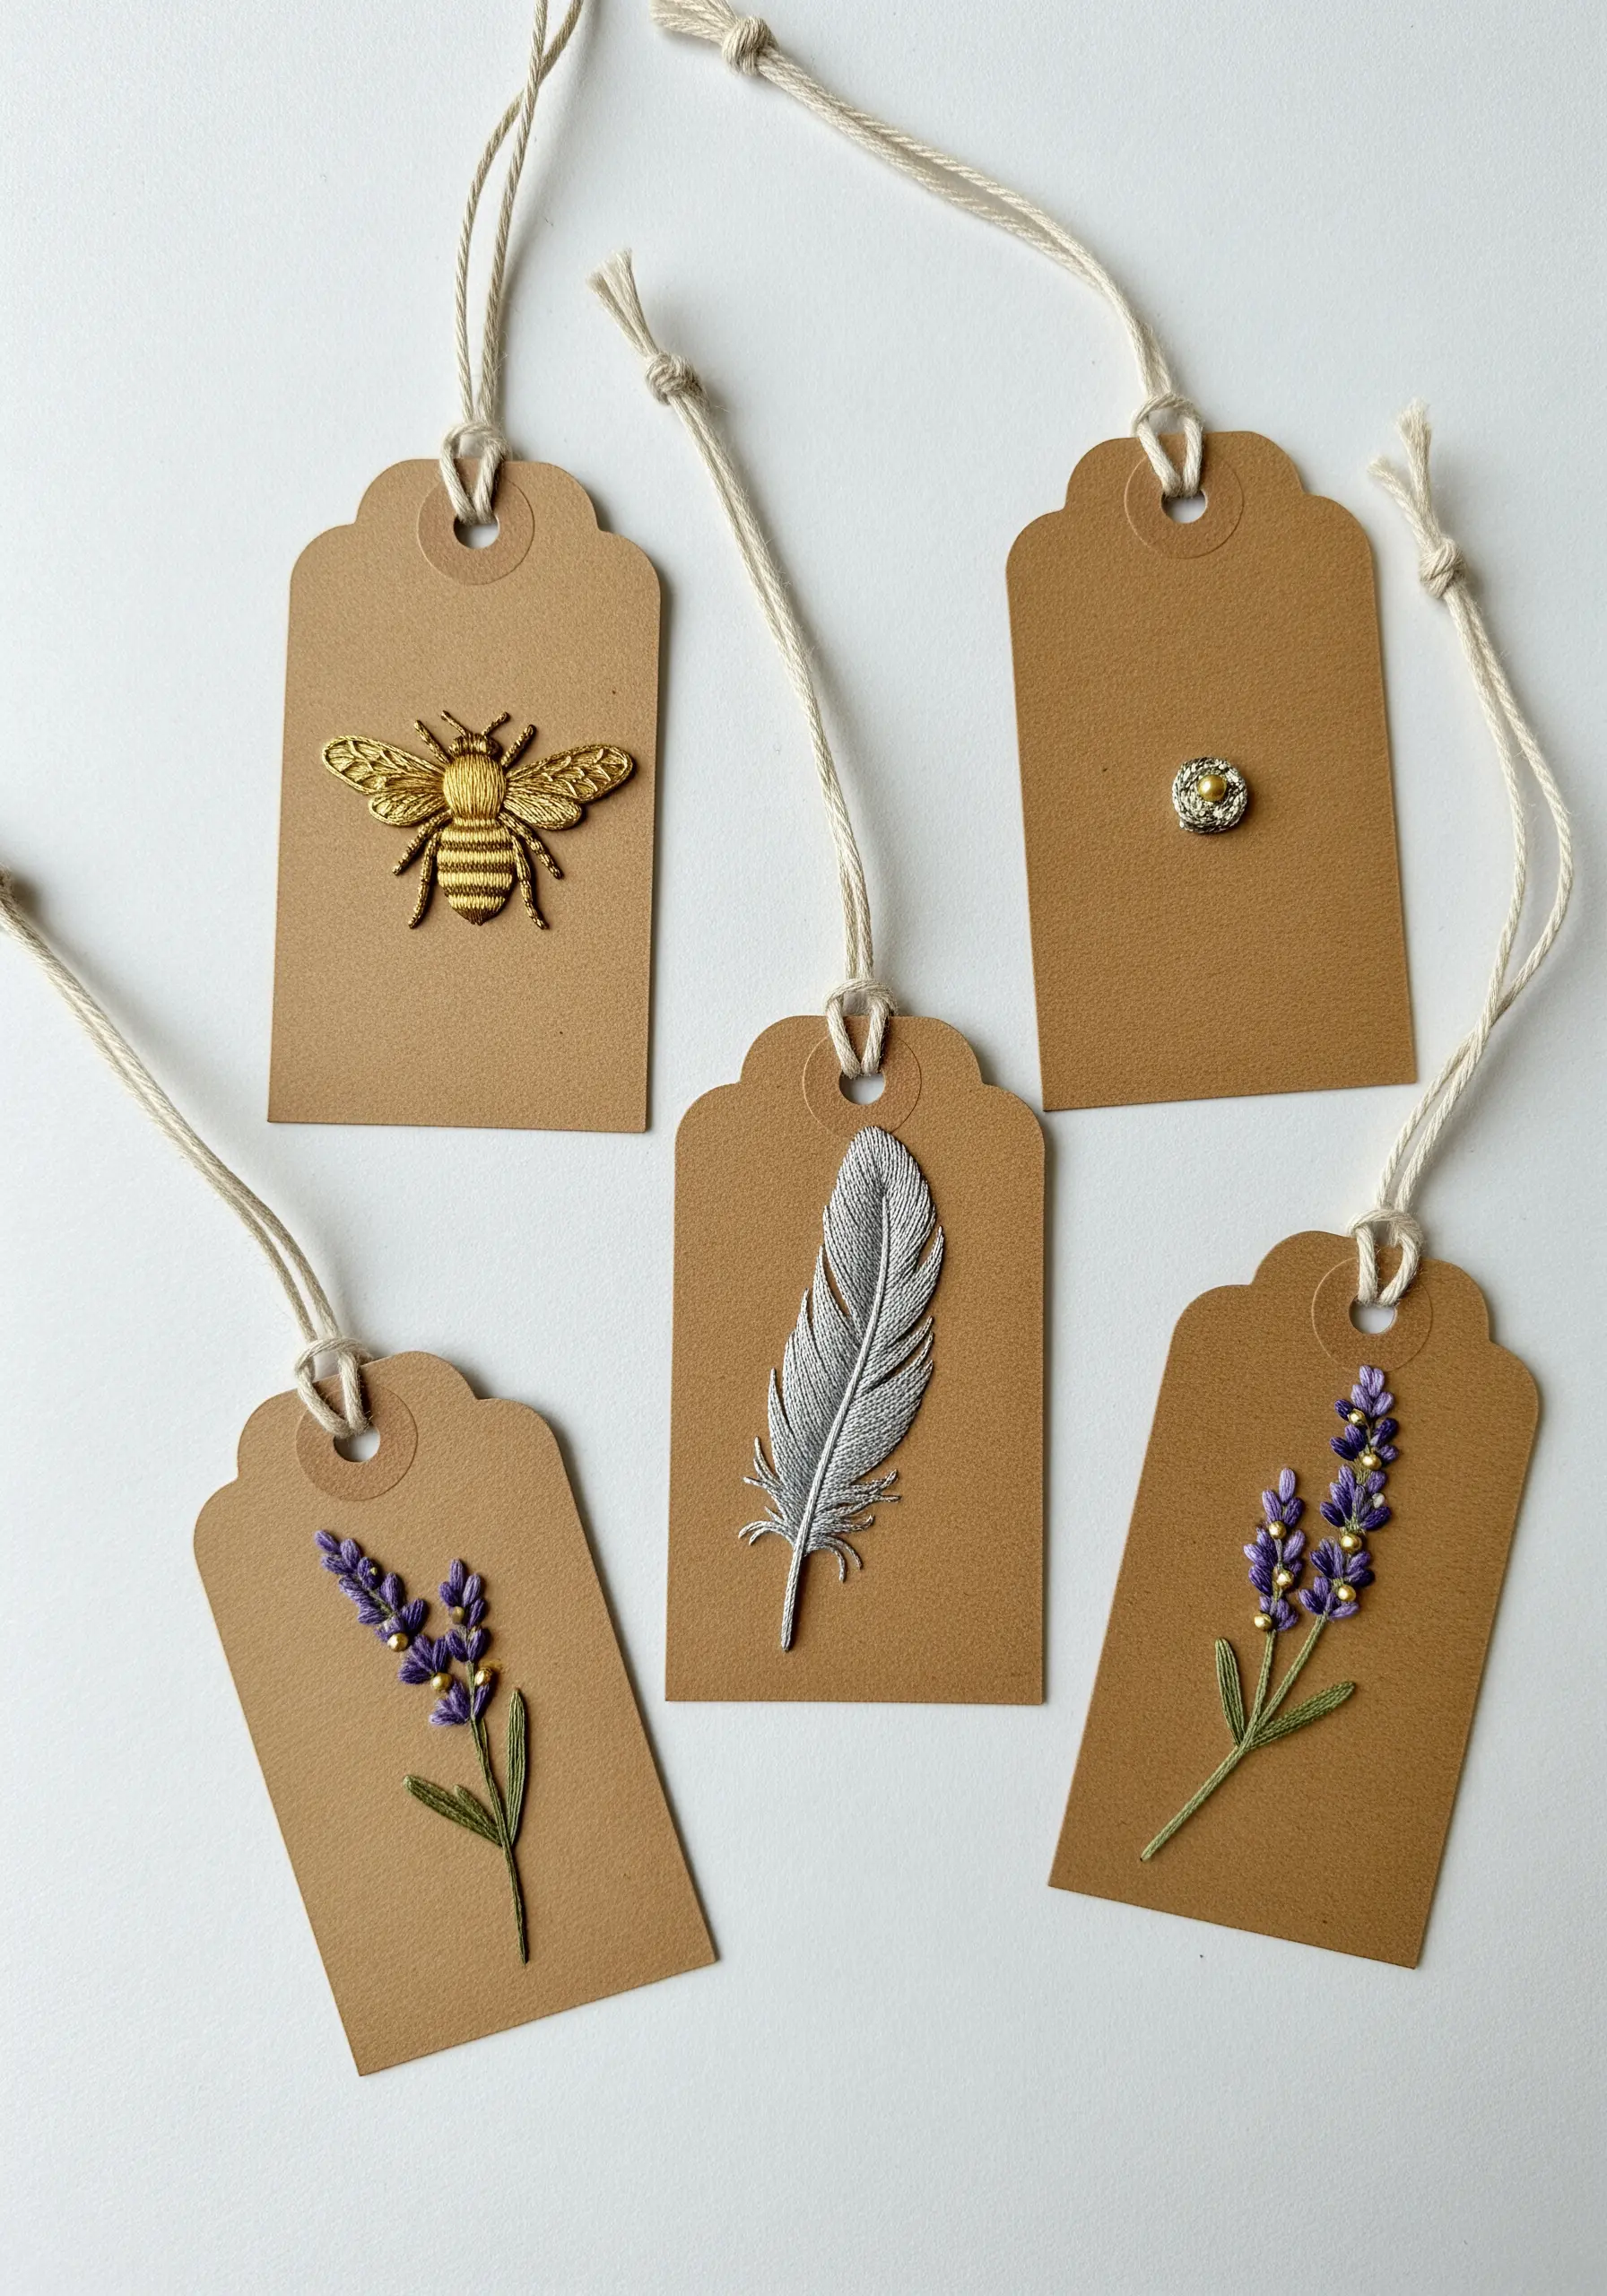
Elevate simple kraft paper tags by adding a single, beautifully executed micro-motif.
Choose simple designs that can be completed in just a few minutes, like a sprig of lavender, a metallic feather, or a tiny bee.
Use techniques that add dimension, such as a padded satin stitch for the bee’s body or long-and-short stitch for the feather.
For the lavender, a combination of straight stitches for the stem and French knots for the blossoms is highly effective.
These tiny embroidery projects turn gift wrapping into a memorable part of the present itself.
15. Decorative Stitching on a Woven Paper Base
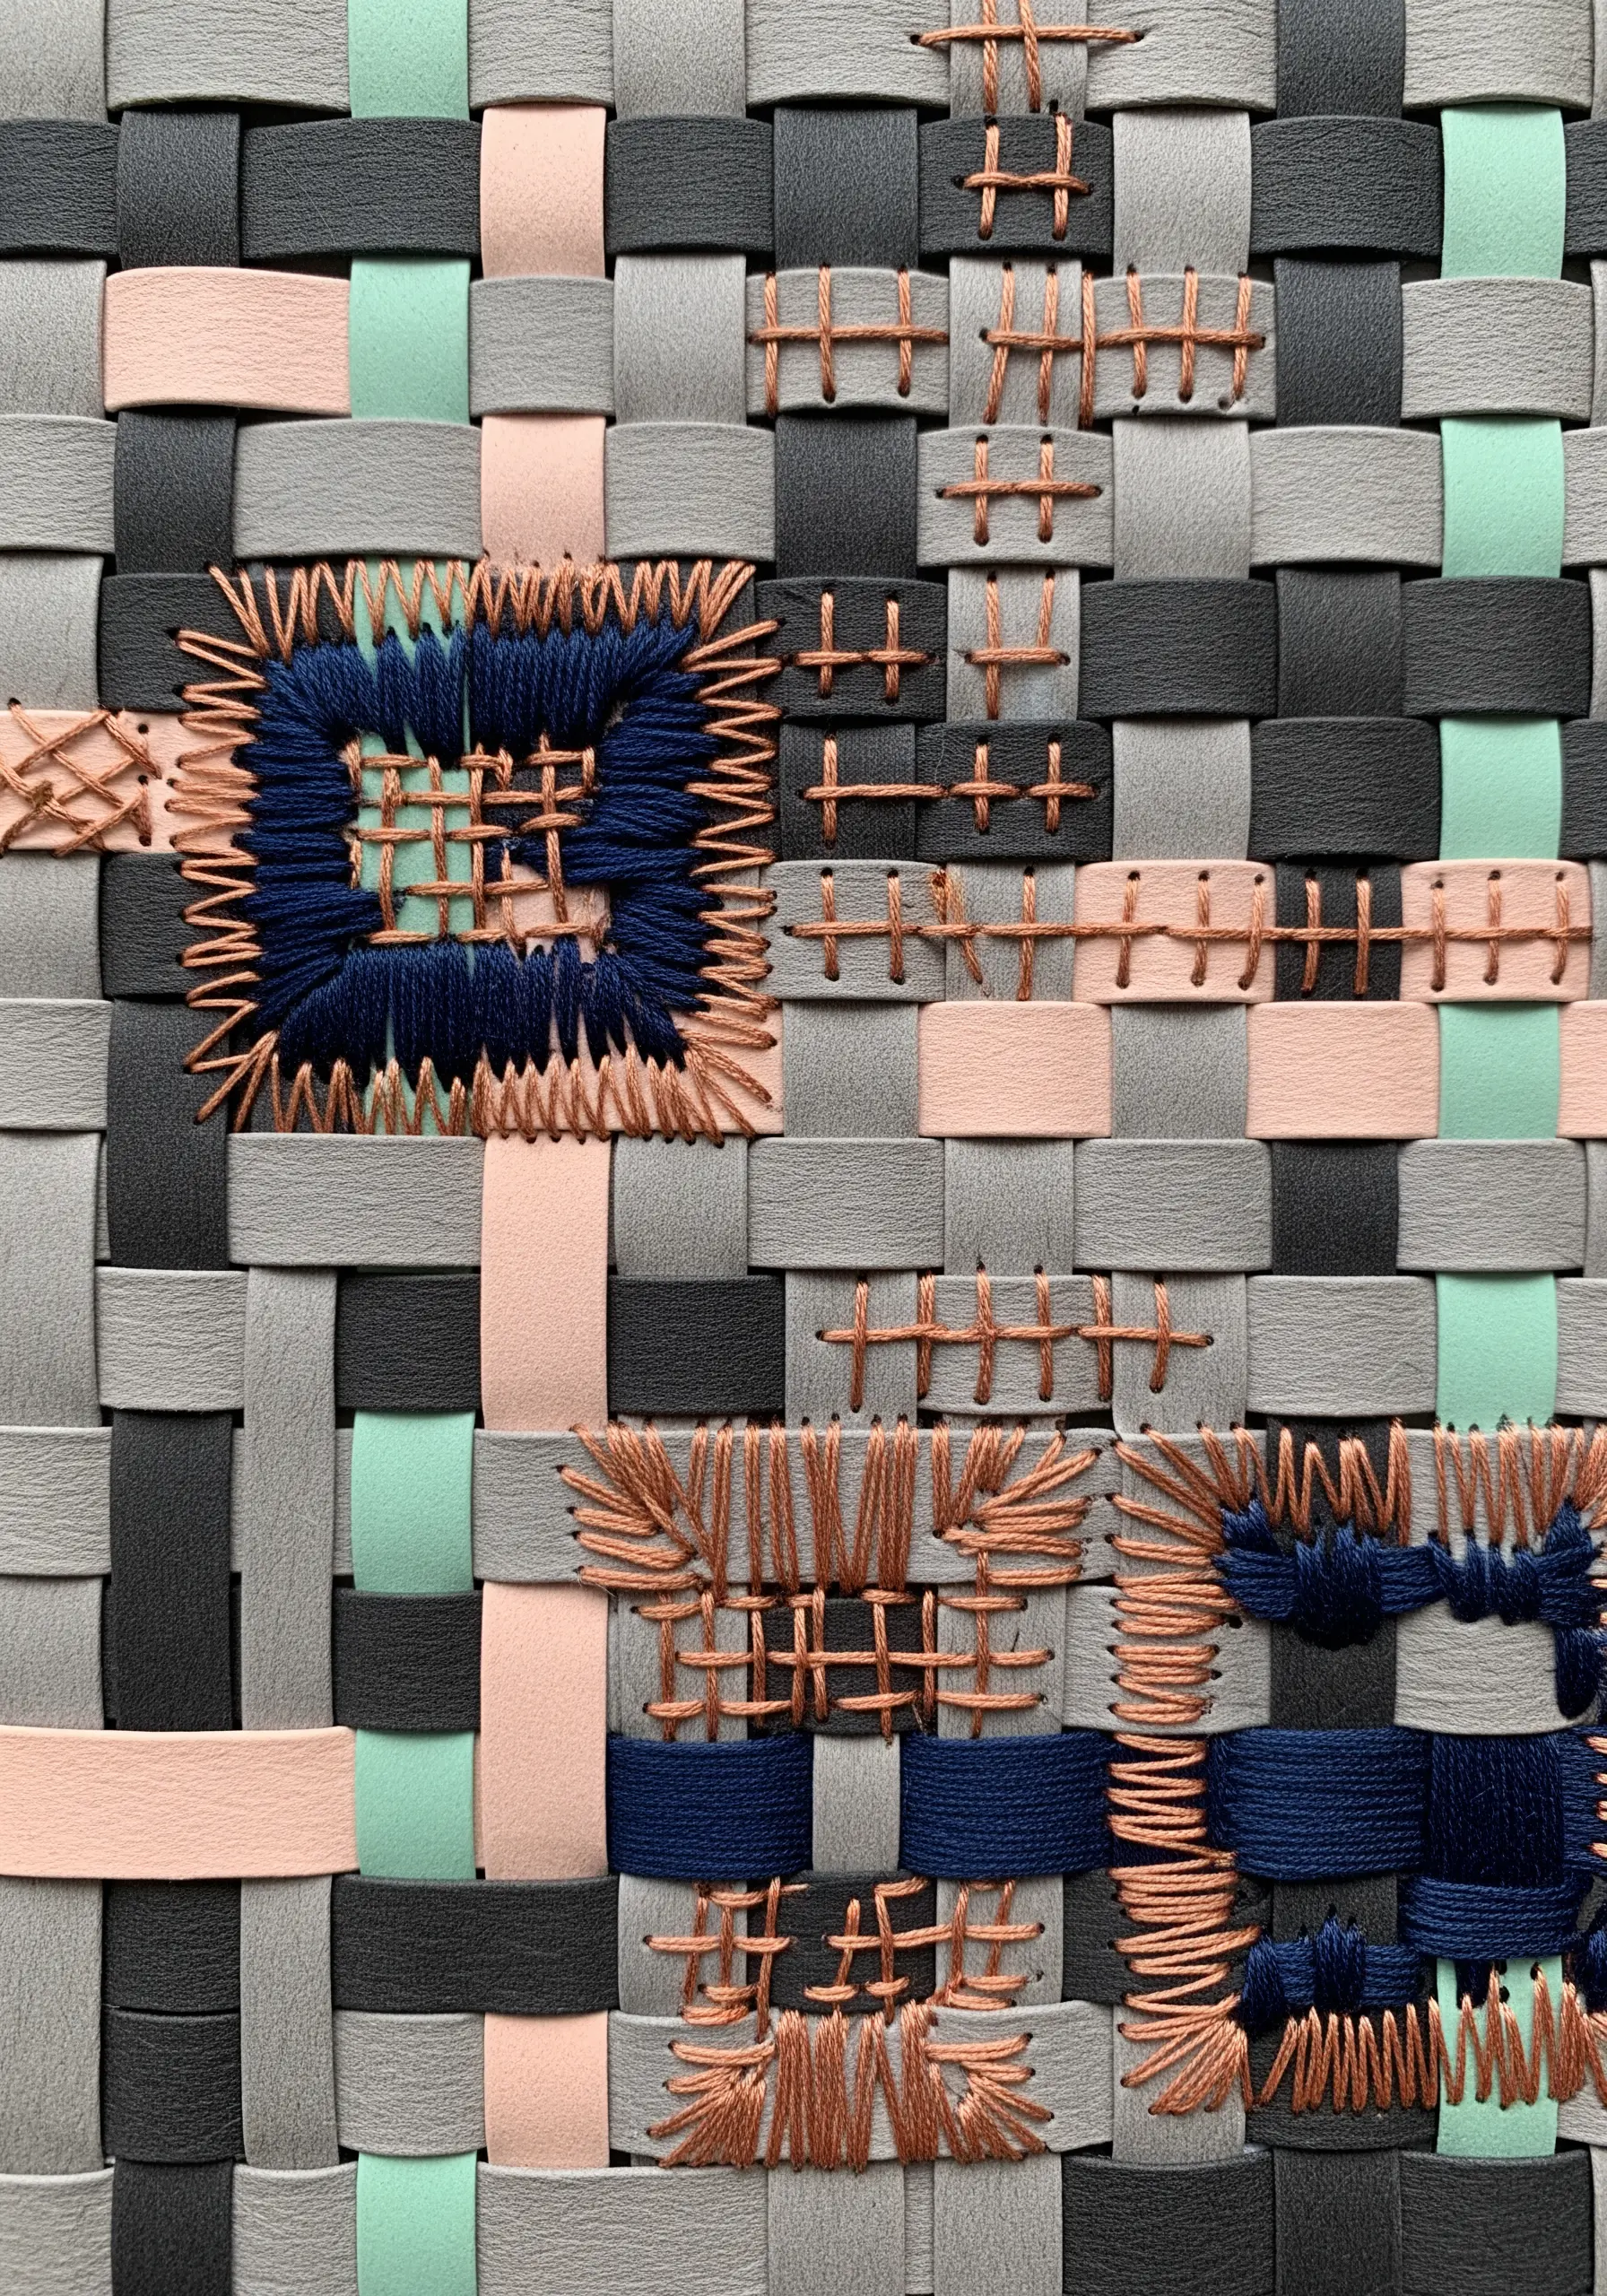
Create a unique textile-like canvas by weaving strips of colored cardstock together in a simple over-under pattern.
Treat this woven grid as your fabric, using it as a guide for geometric embroidery.
With a sharp needle and contrasting embroidery floss, add decorative accents like cross stitches, running stitches, or wrapped bars over the intersections.
This technique creates a fascinating interplay between the rigid structure of the woven paper and the soft, organic quality of the thread.
16. Art Deco Paper Fans with a Metallic Sheen
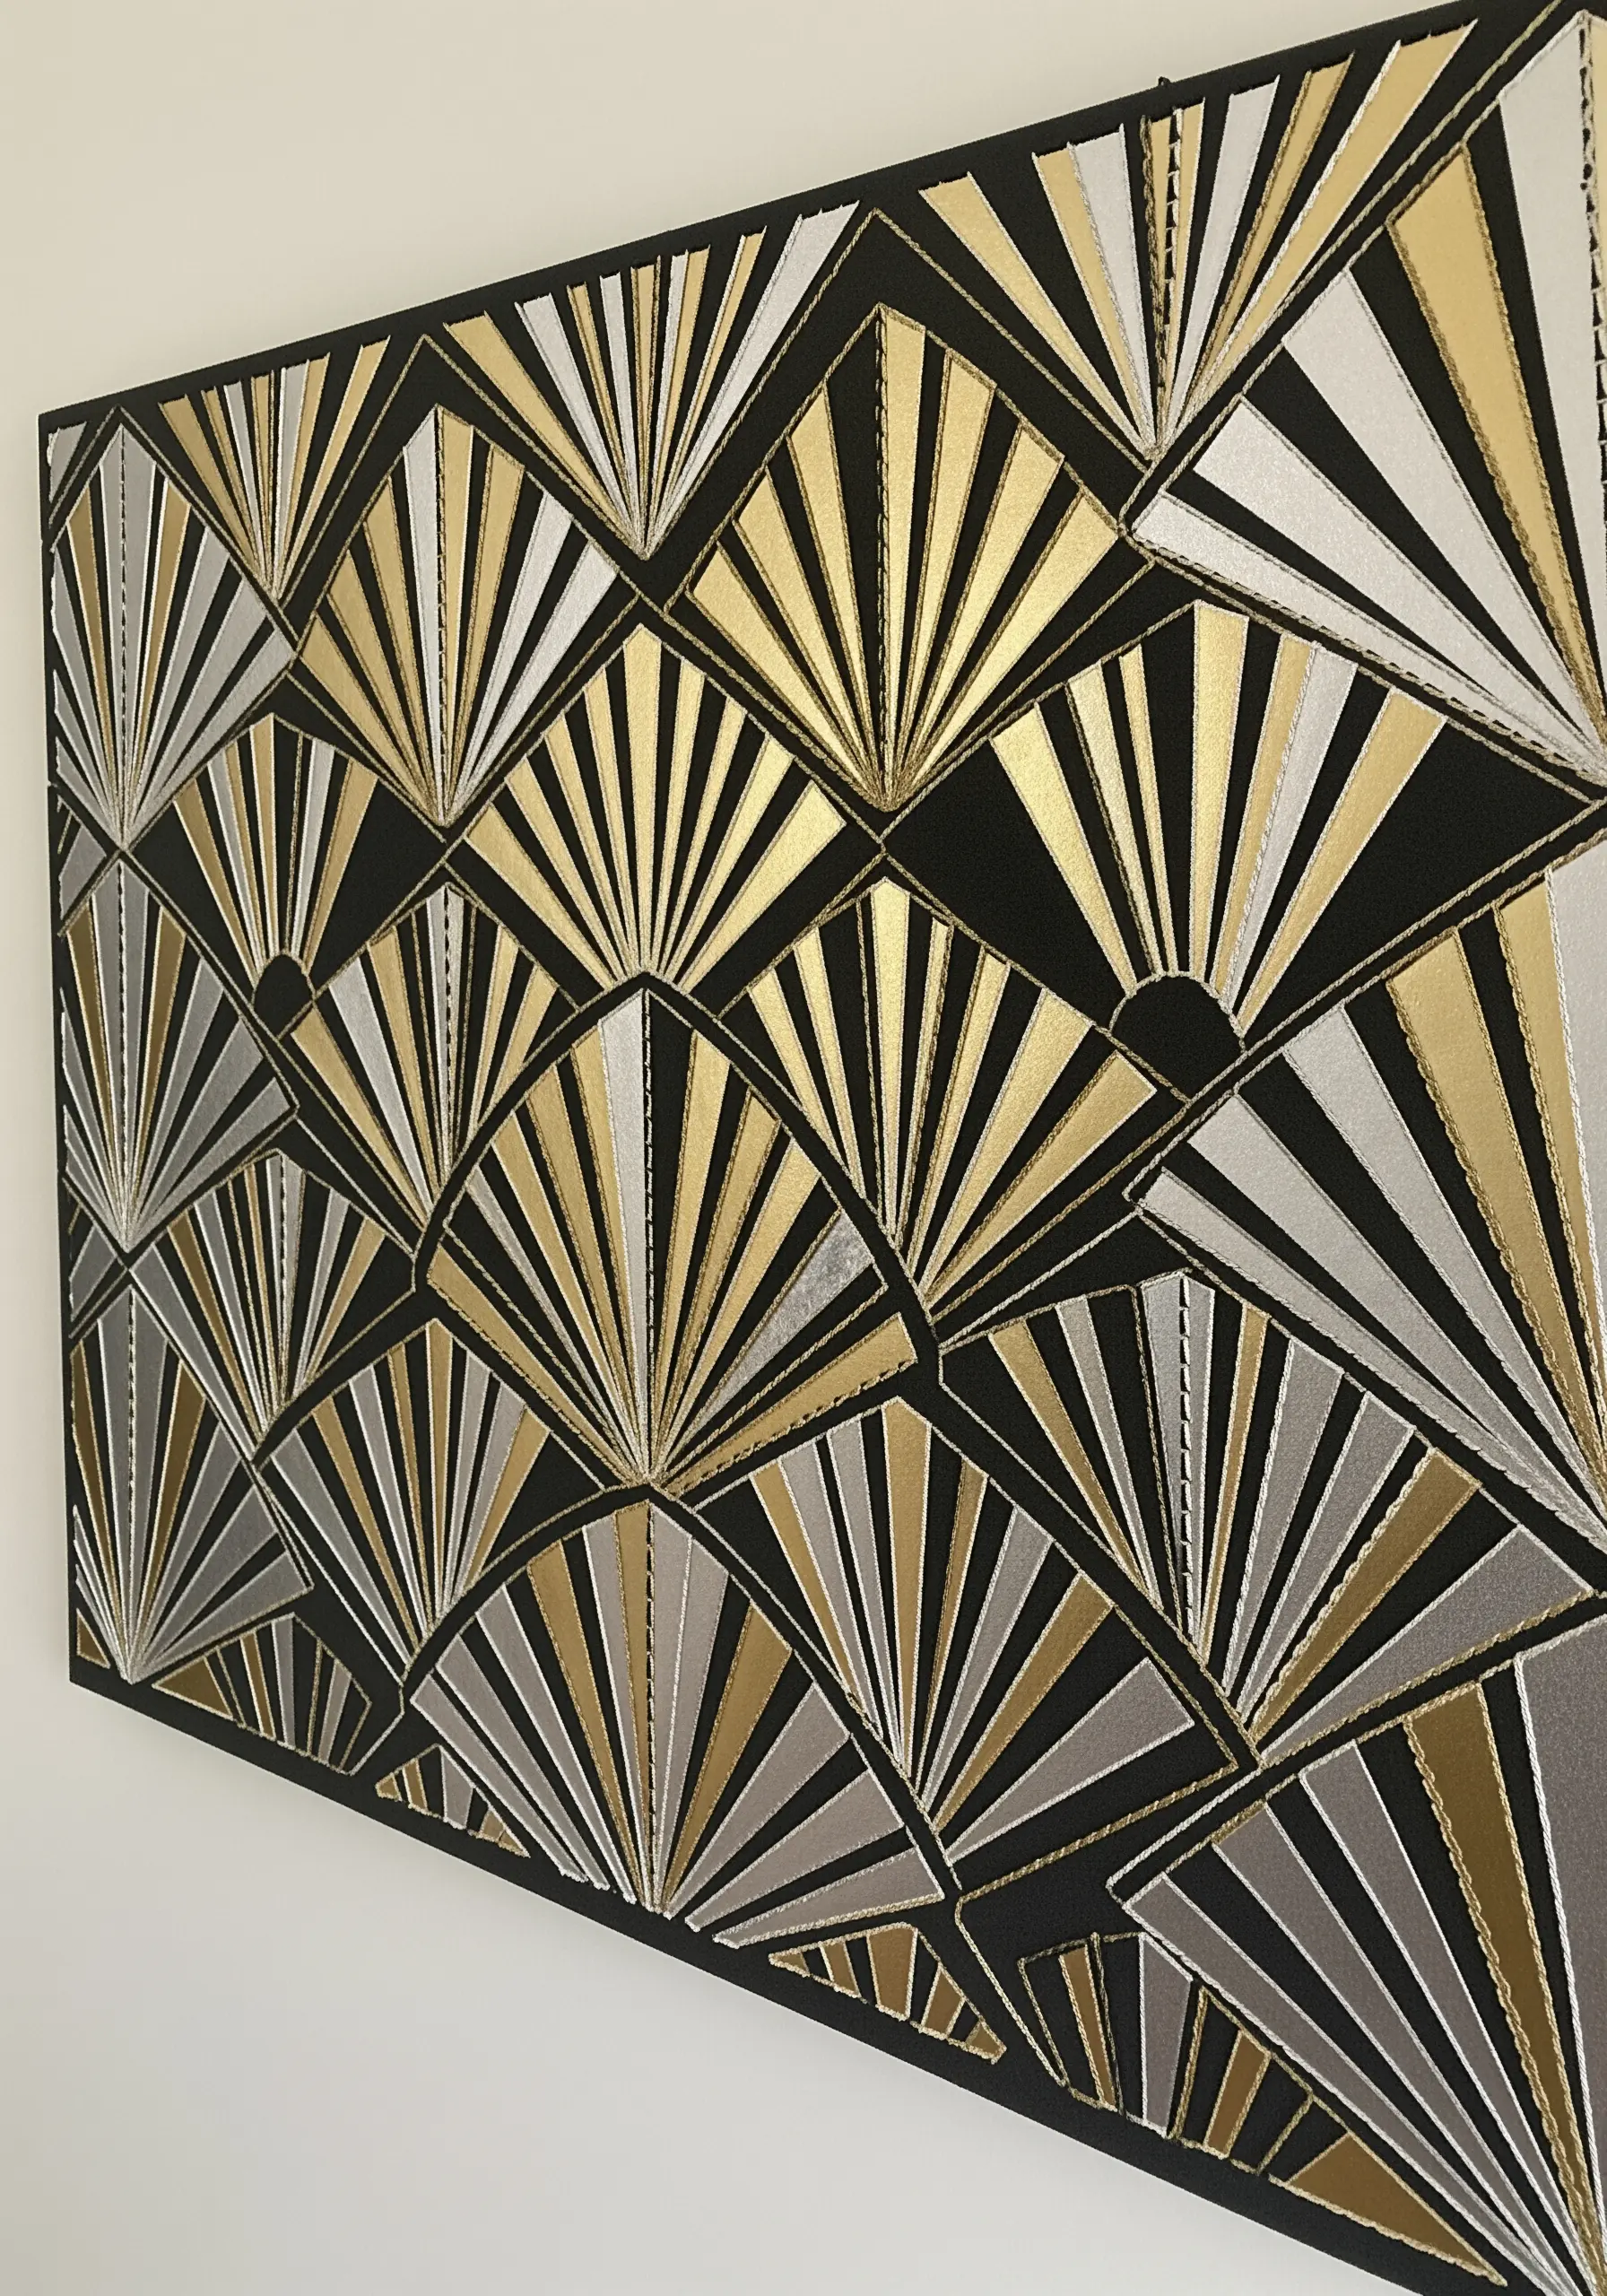
You can easily recreate the luxe, graphic look of satin-stitched Art Deco patterns using metallic paper.
Start with a black canvas or heavy cardstock as your base.
Cut fan shapes and fill them with precisely cut, radiating strips of gold and silver metallic paper.
The sharp lines and high-contrast metallic finish perfectly mimic the sheen and geometry of 1920s embroidery.
This method allows you to create large-scale, impactful pieces with a clean finish and a fraction of the time required for threadwork.
17. Stitched Veins on a Paper Leaf Garland
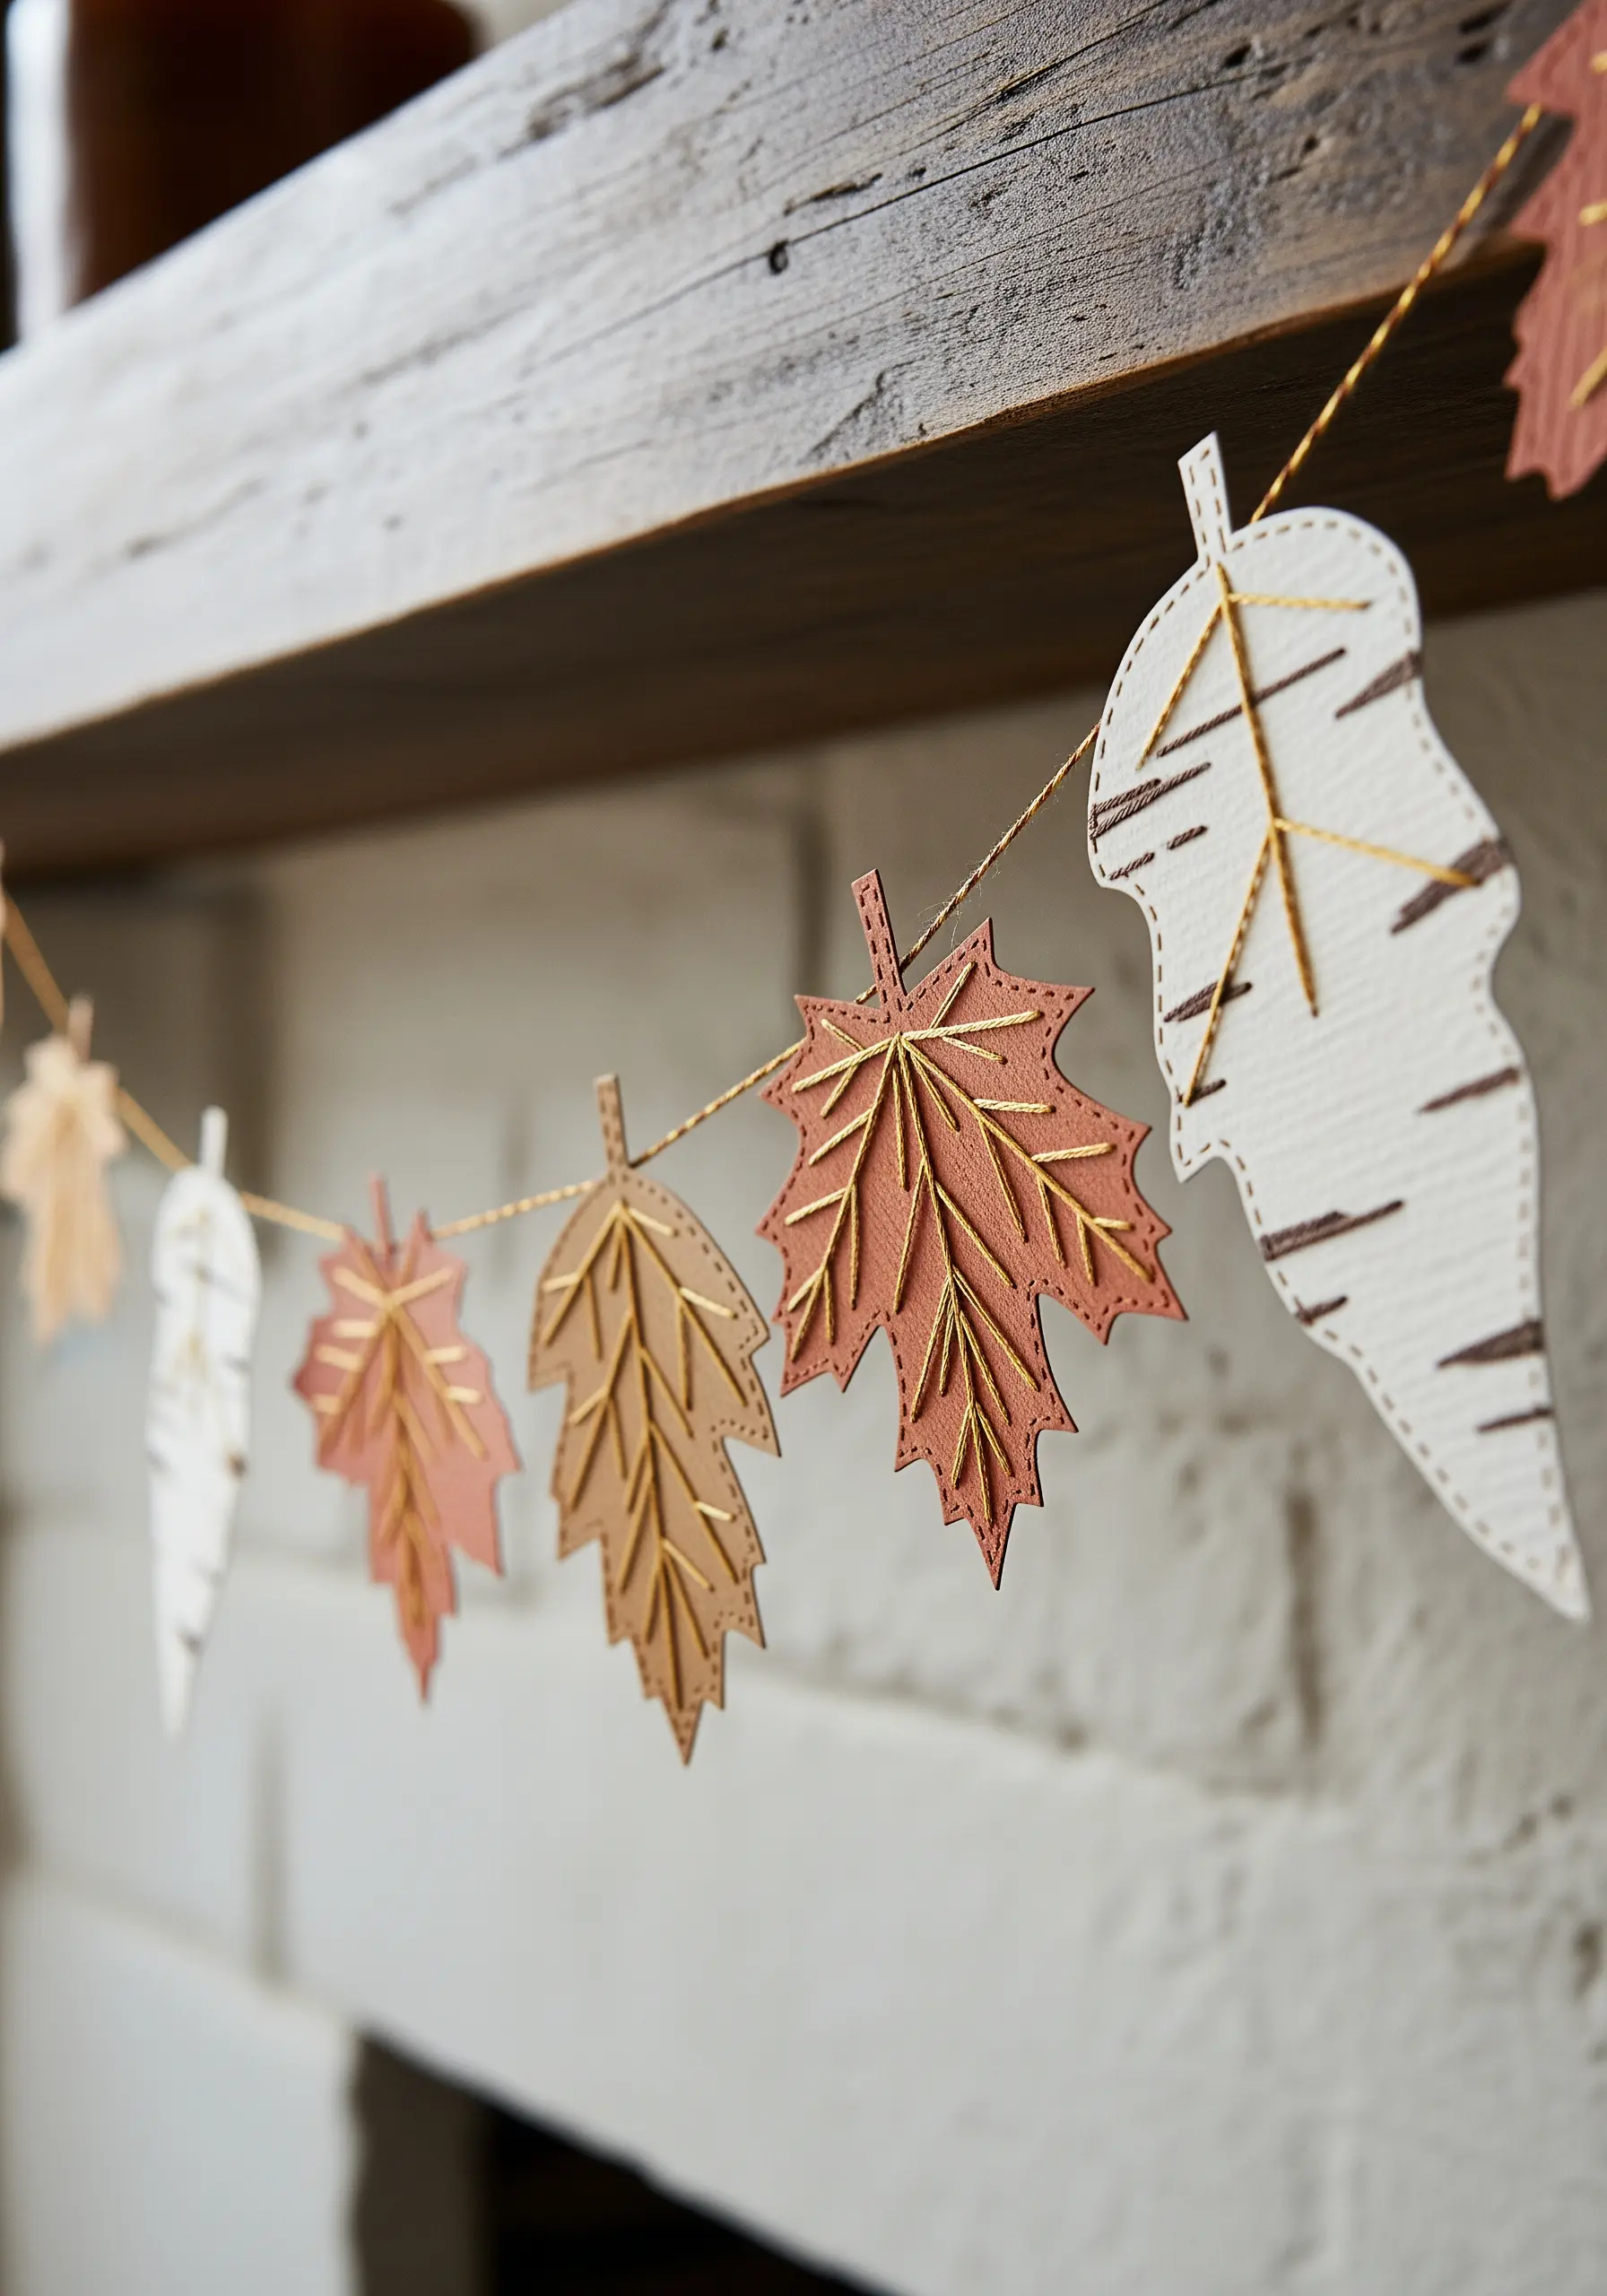
Give simple paper cutouts a sophisticated, handcrafted feel by adding stitched details.
Cut leaf shapes from textured cardstock in natural, autumnal colors.
Use a sewing machine with a standard needle—or stitch by hand—to add simple straight lines that mimic the veins of a leaf.
Using a contrasting metallic gold or copper thread adds a subtle shimmer that catches the light beautifully.
The stitching not only adds visual interest but also gives the paper more structure, preventing it from looking flat or flimsy when strung into a garland.
18. Translucent Paper Lantern with Backlit Stitching
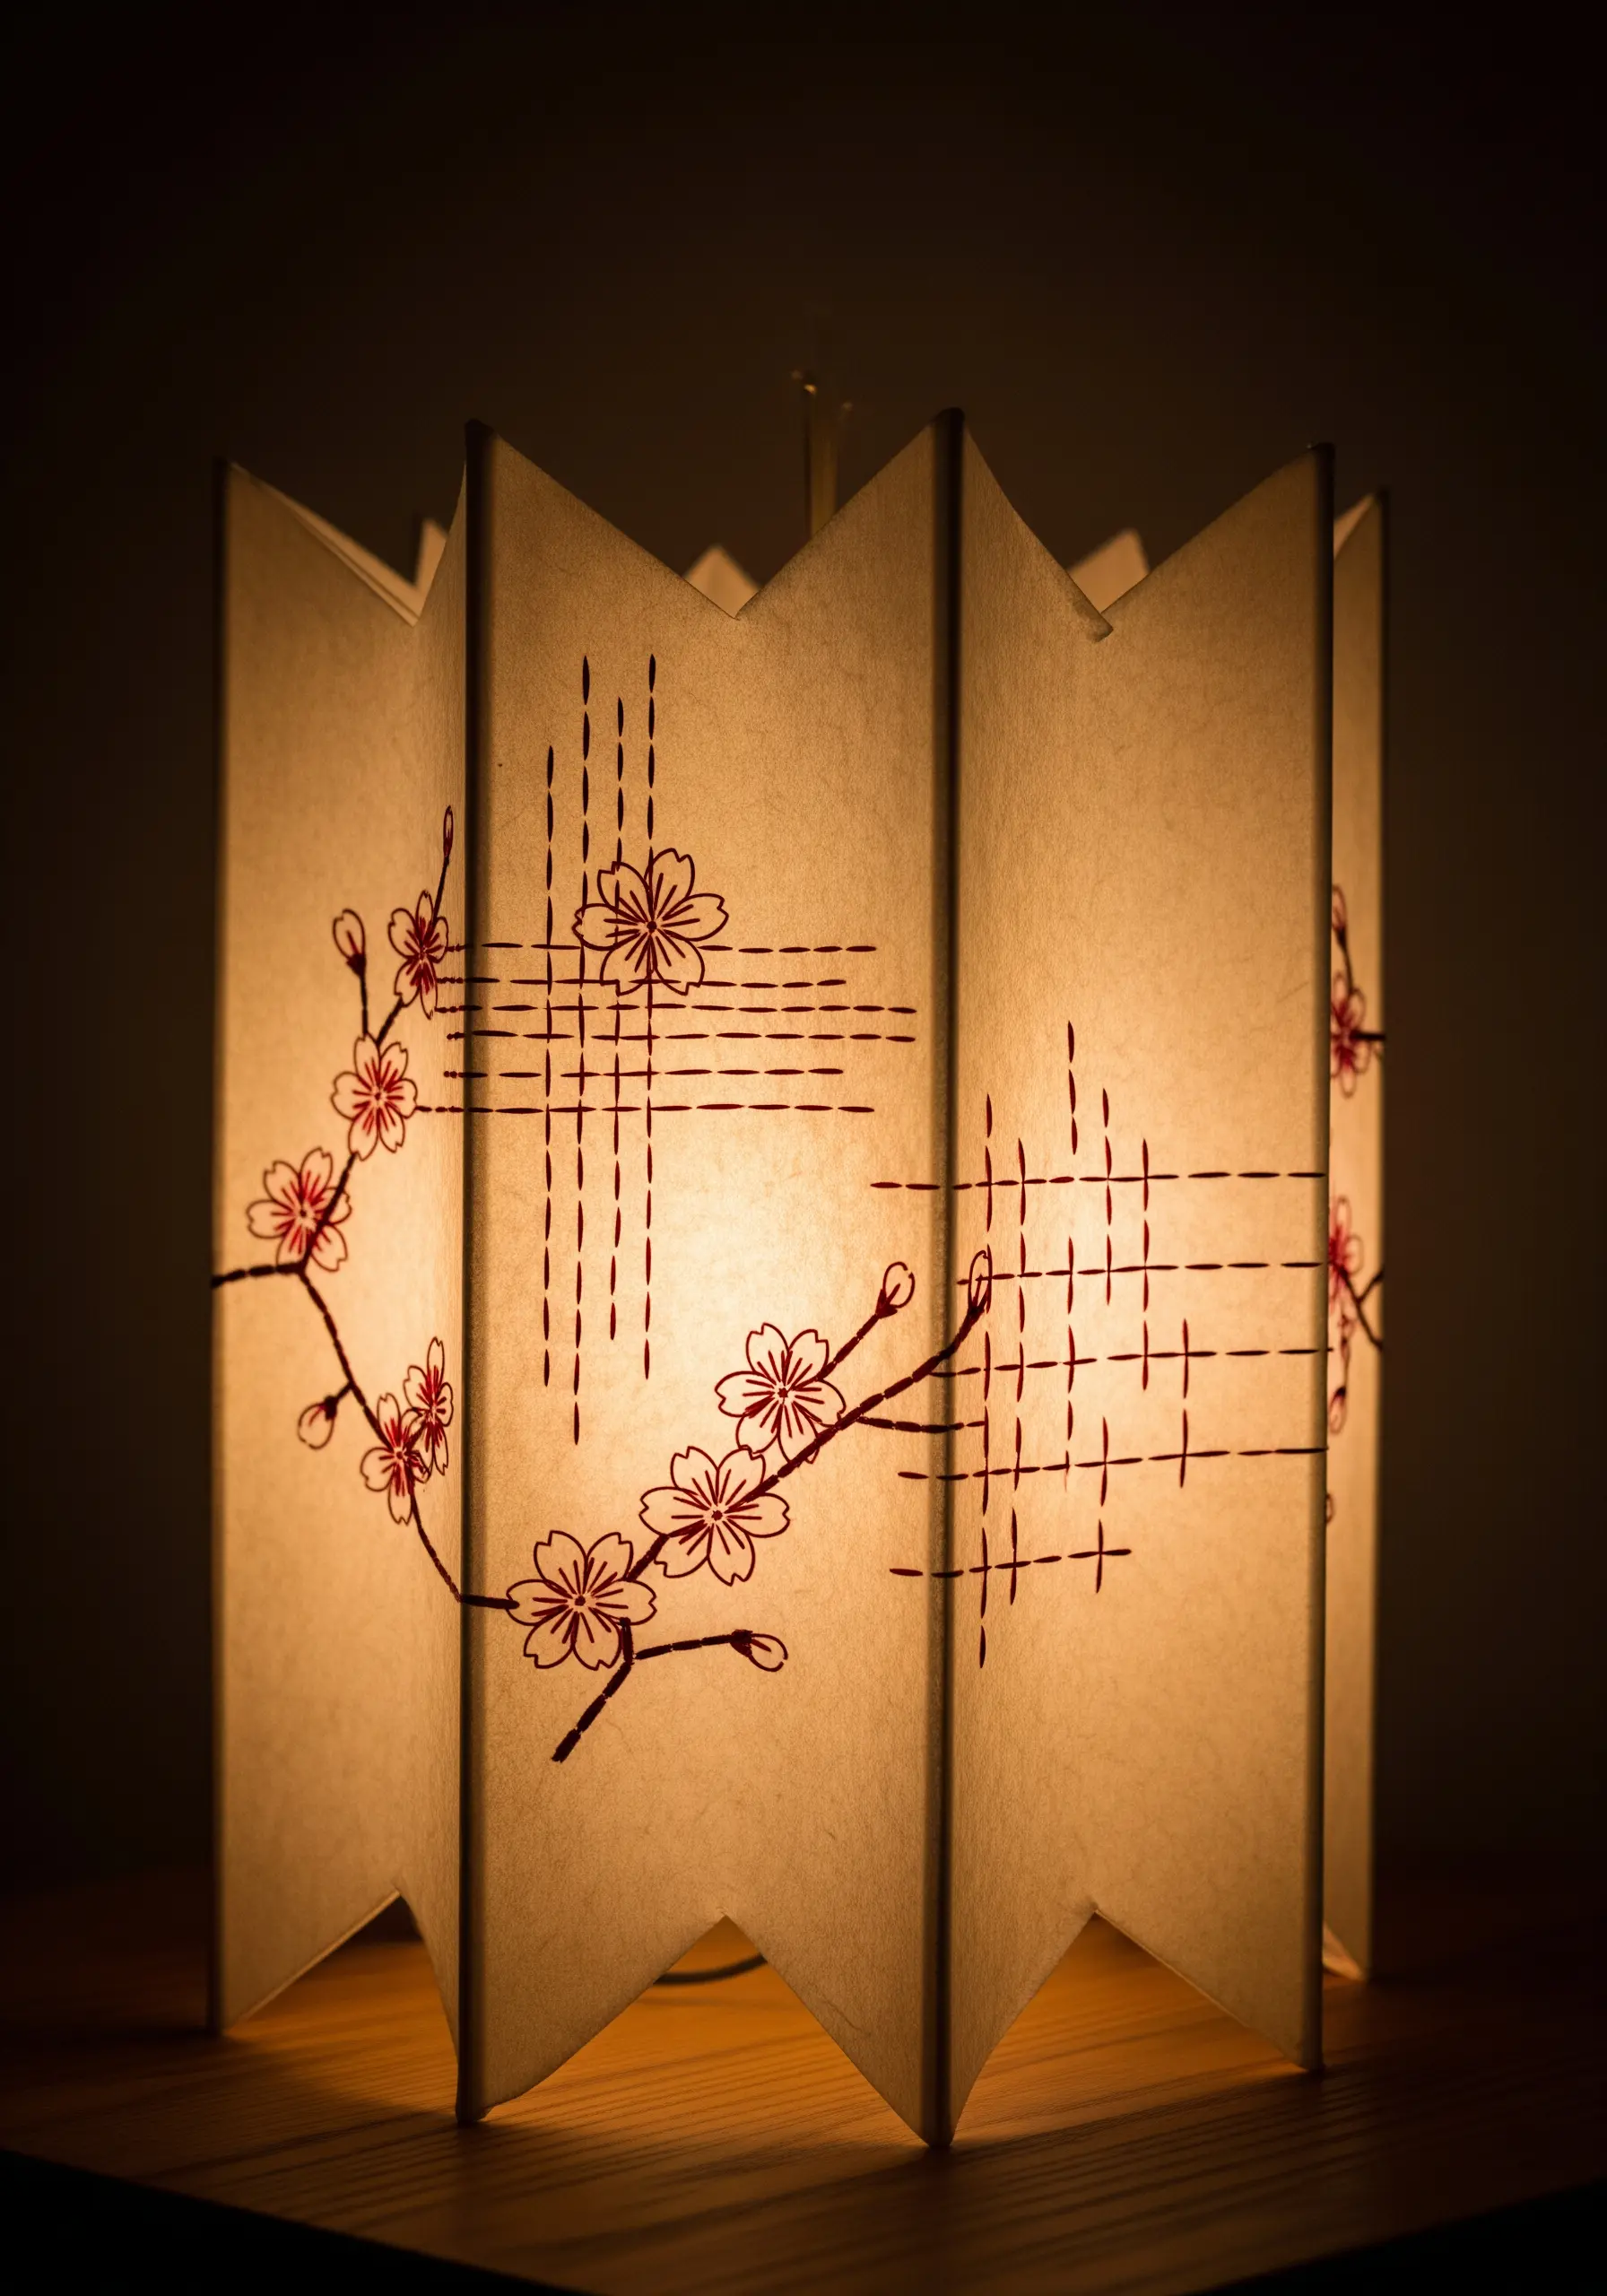
Select a sturdy, translucent paper like vellum or high-quality rice paper to construct a simple, folded lantern shade.
Before folding and assembling, lightly draw your design and embroider it using a simple backstitch for outlines and running stitches for fill.
When the lantern is lit from within, the light will shine through the pierced stitch holes, creating a beautiful constellation effect around your design.
This technique makes your threadwork a central part of the illumination, turning simple stitches into points of light.
19. Layered Paper Feathers with Unifying Stitches
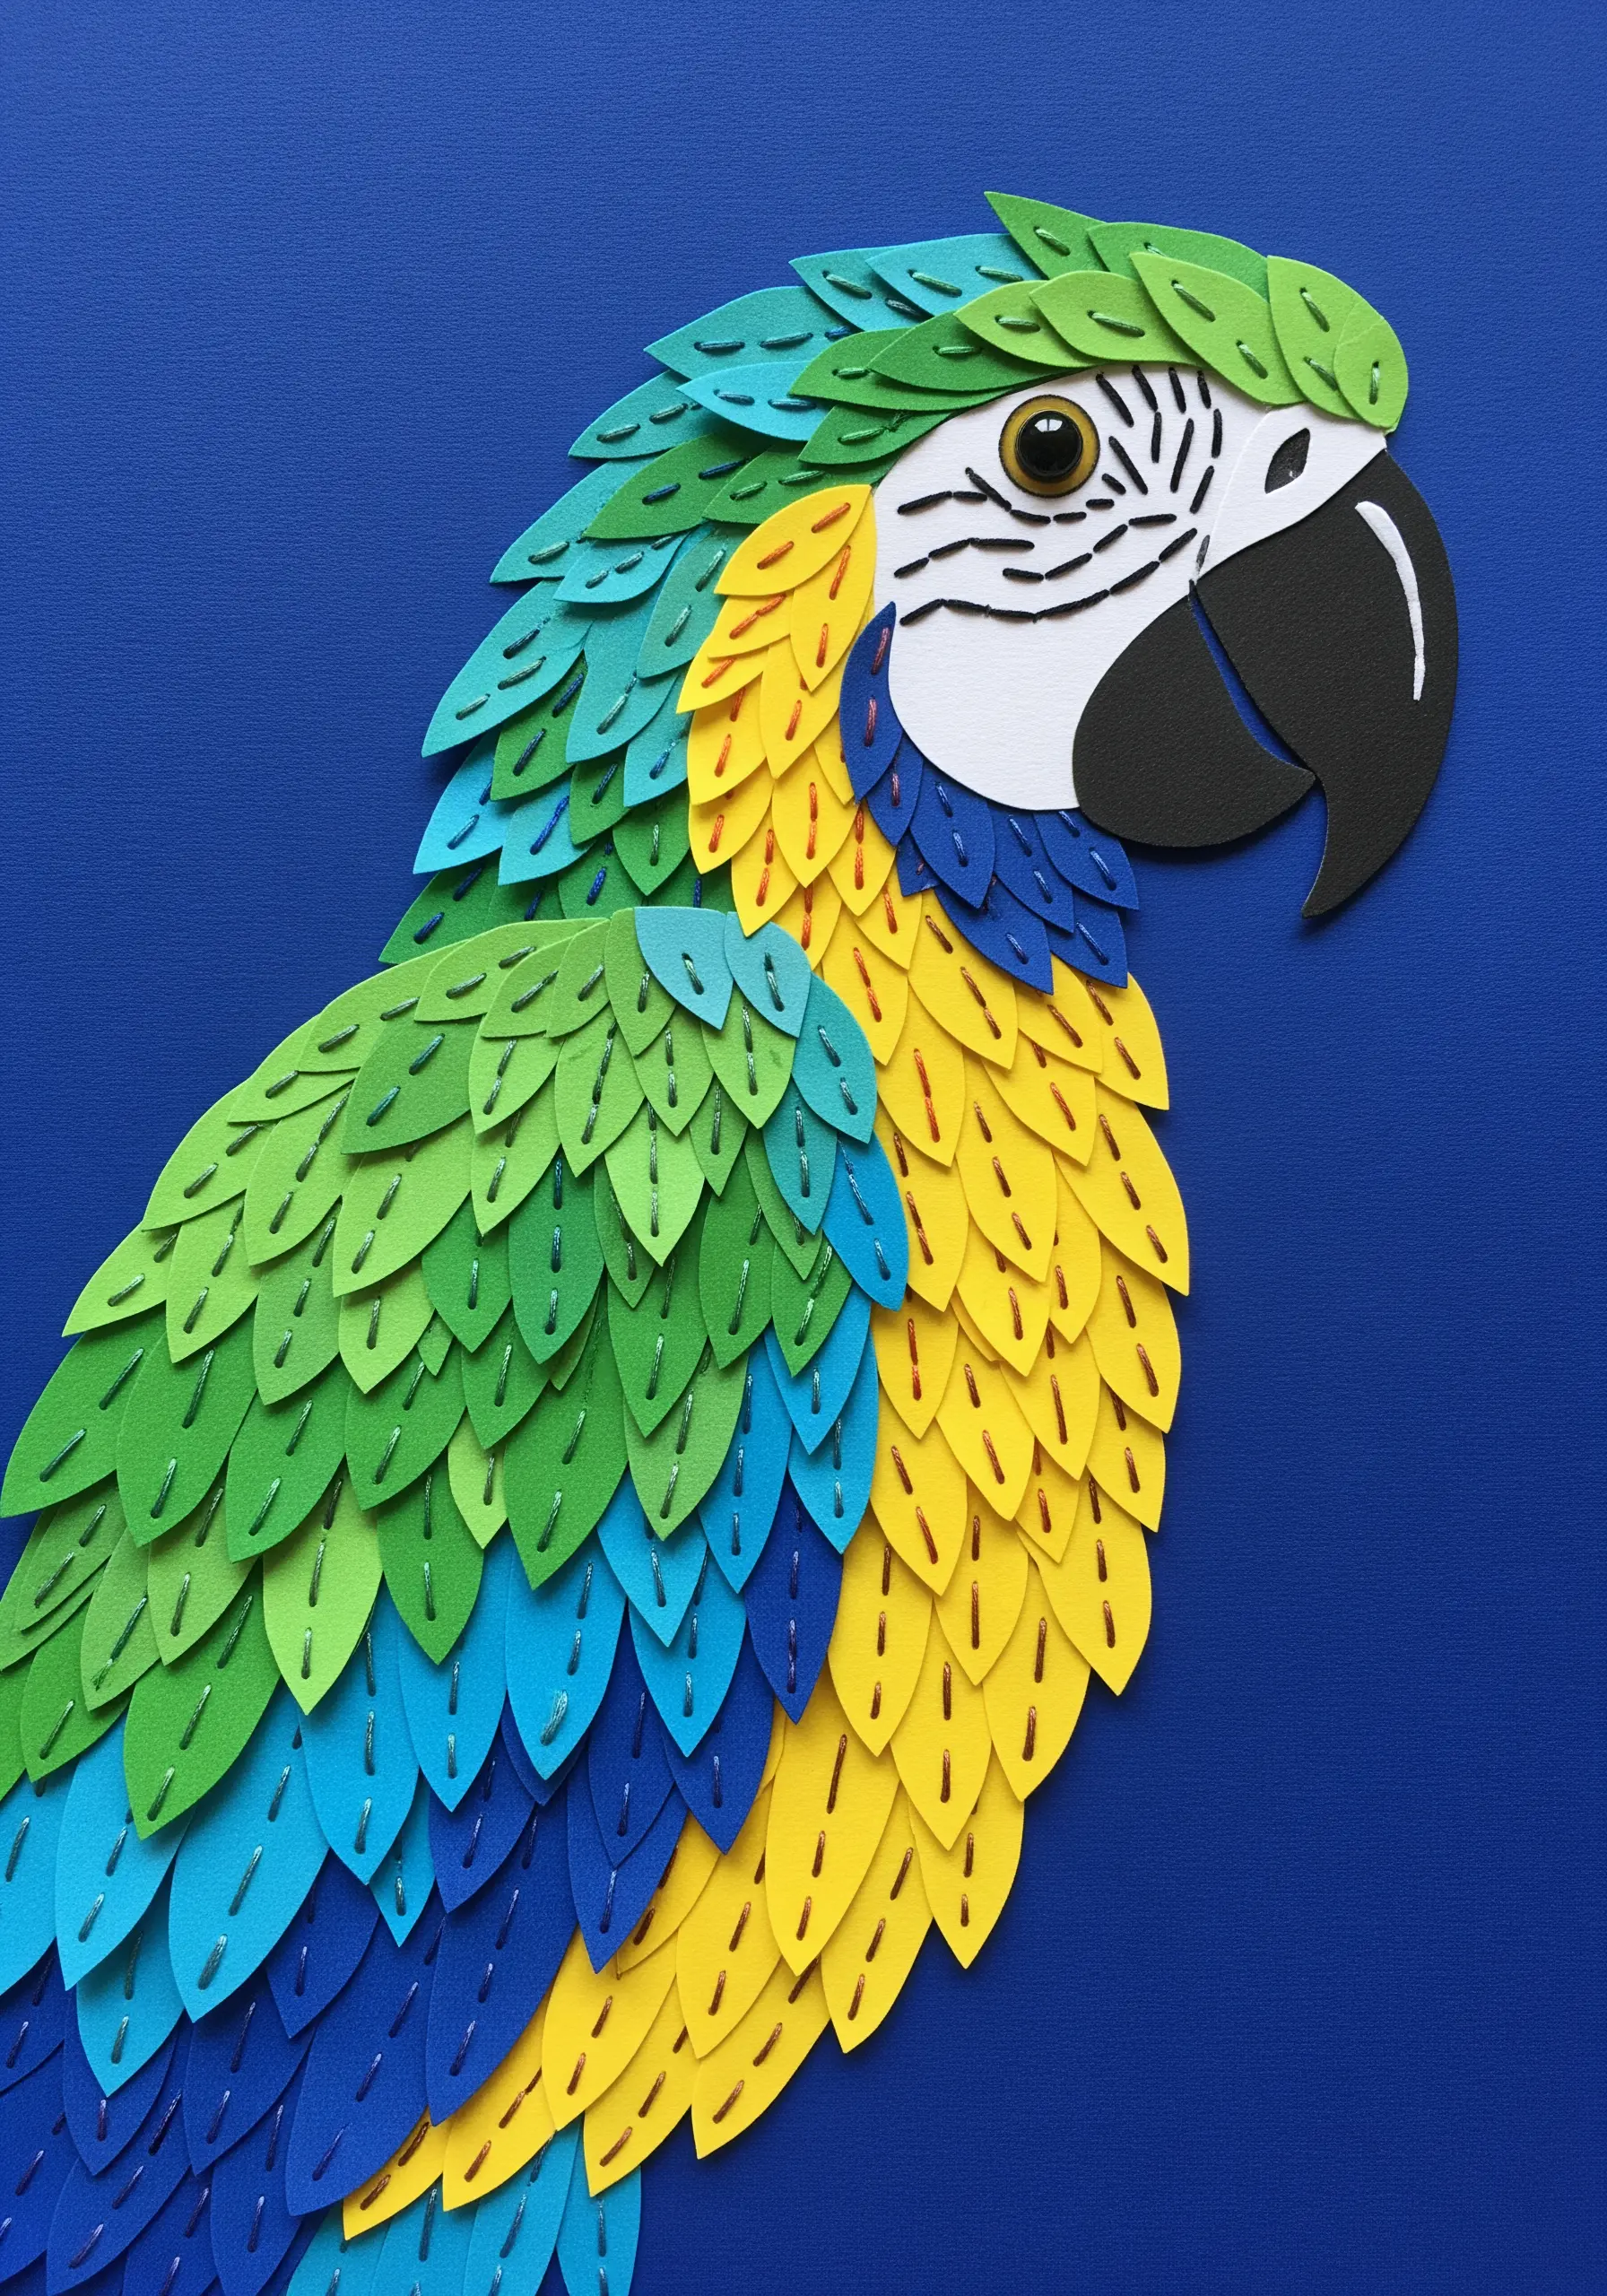
Create a vibrant animal or bird portrait by layering dozens of small, feather-shaped paper cutouts.
Use a gradient of colors within the same family—like various greens and blues—to create a realistic, dimensional effect.
To unify the piece and add a subtle layer of texture, add a single, simple stitch down the center of each paper feather before gluing it in place.
A simple running stitch or a small ‘V’ stitch in a complementary color is enough to connect the paper layers and give the final collage a cohesive, handcrafted finish.
20. Fabric-Covered Monogram with Corded Embellishments
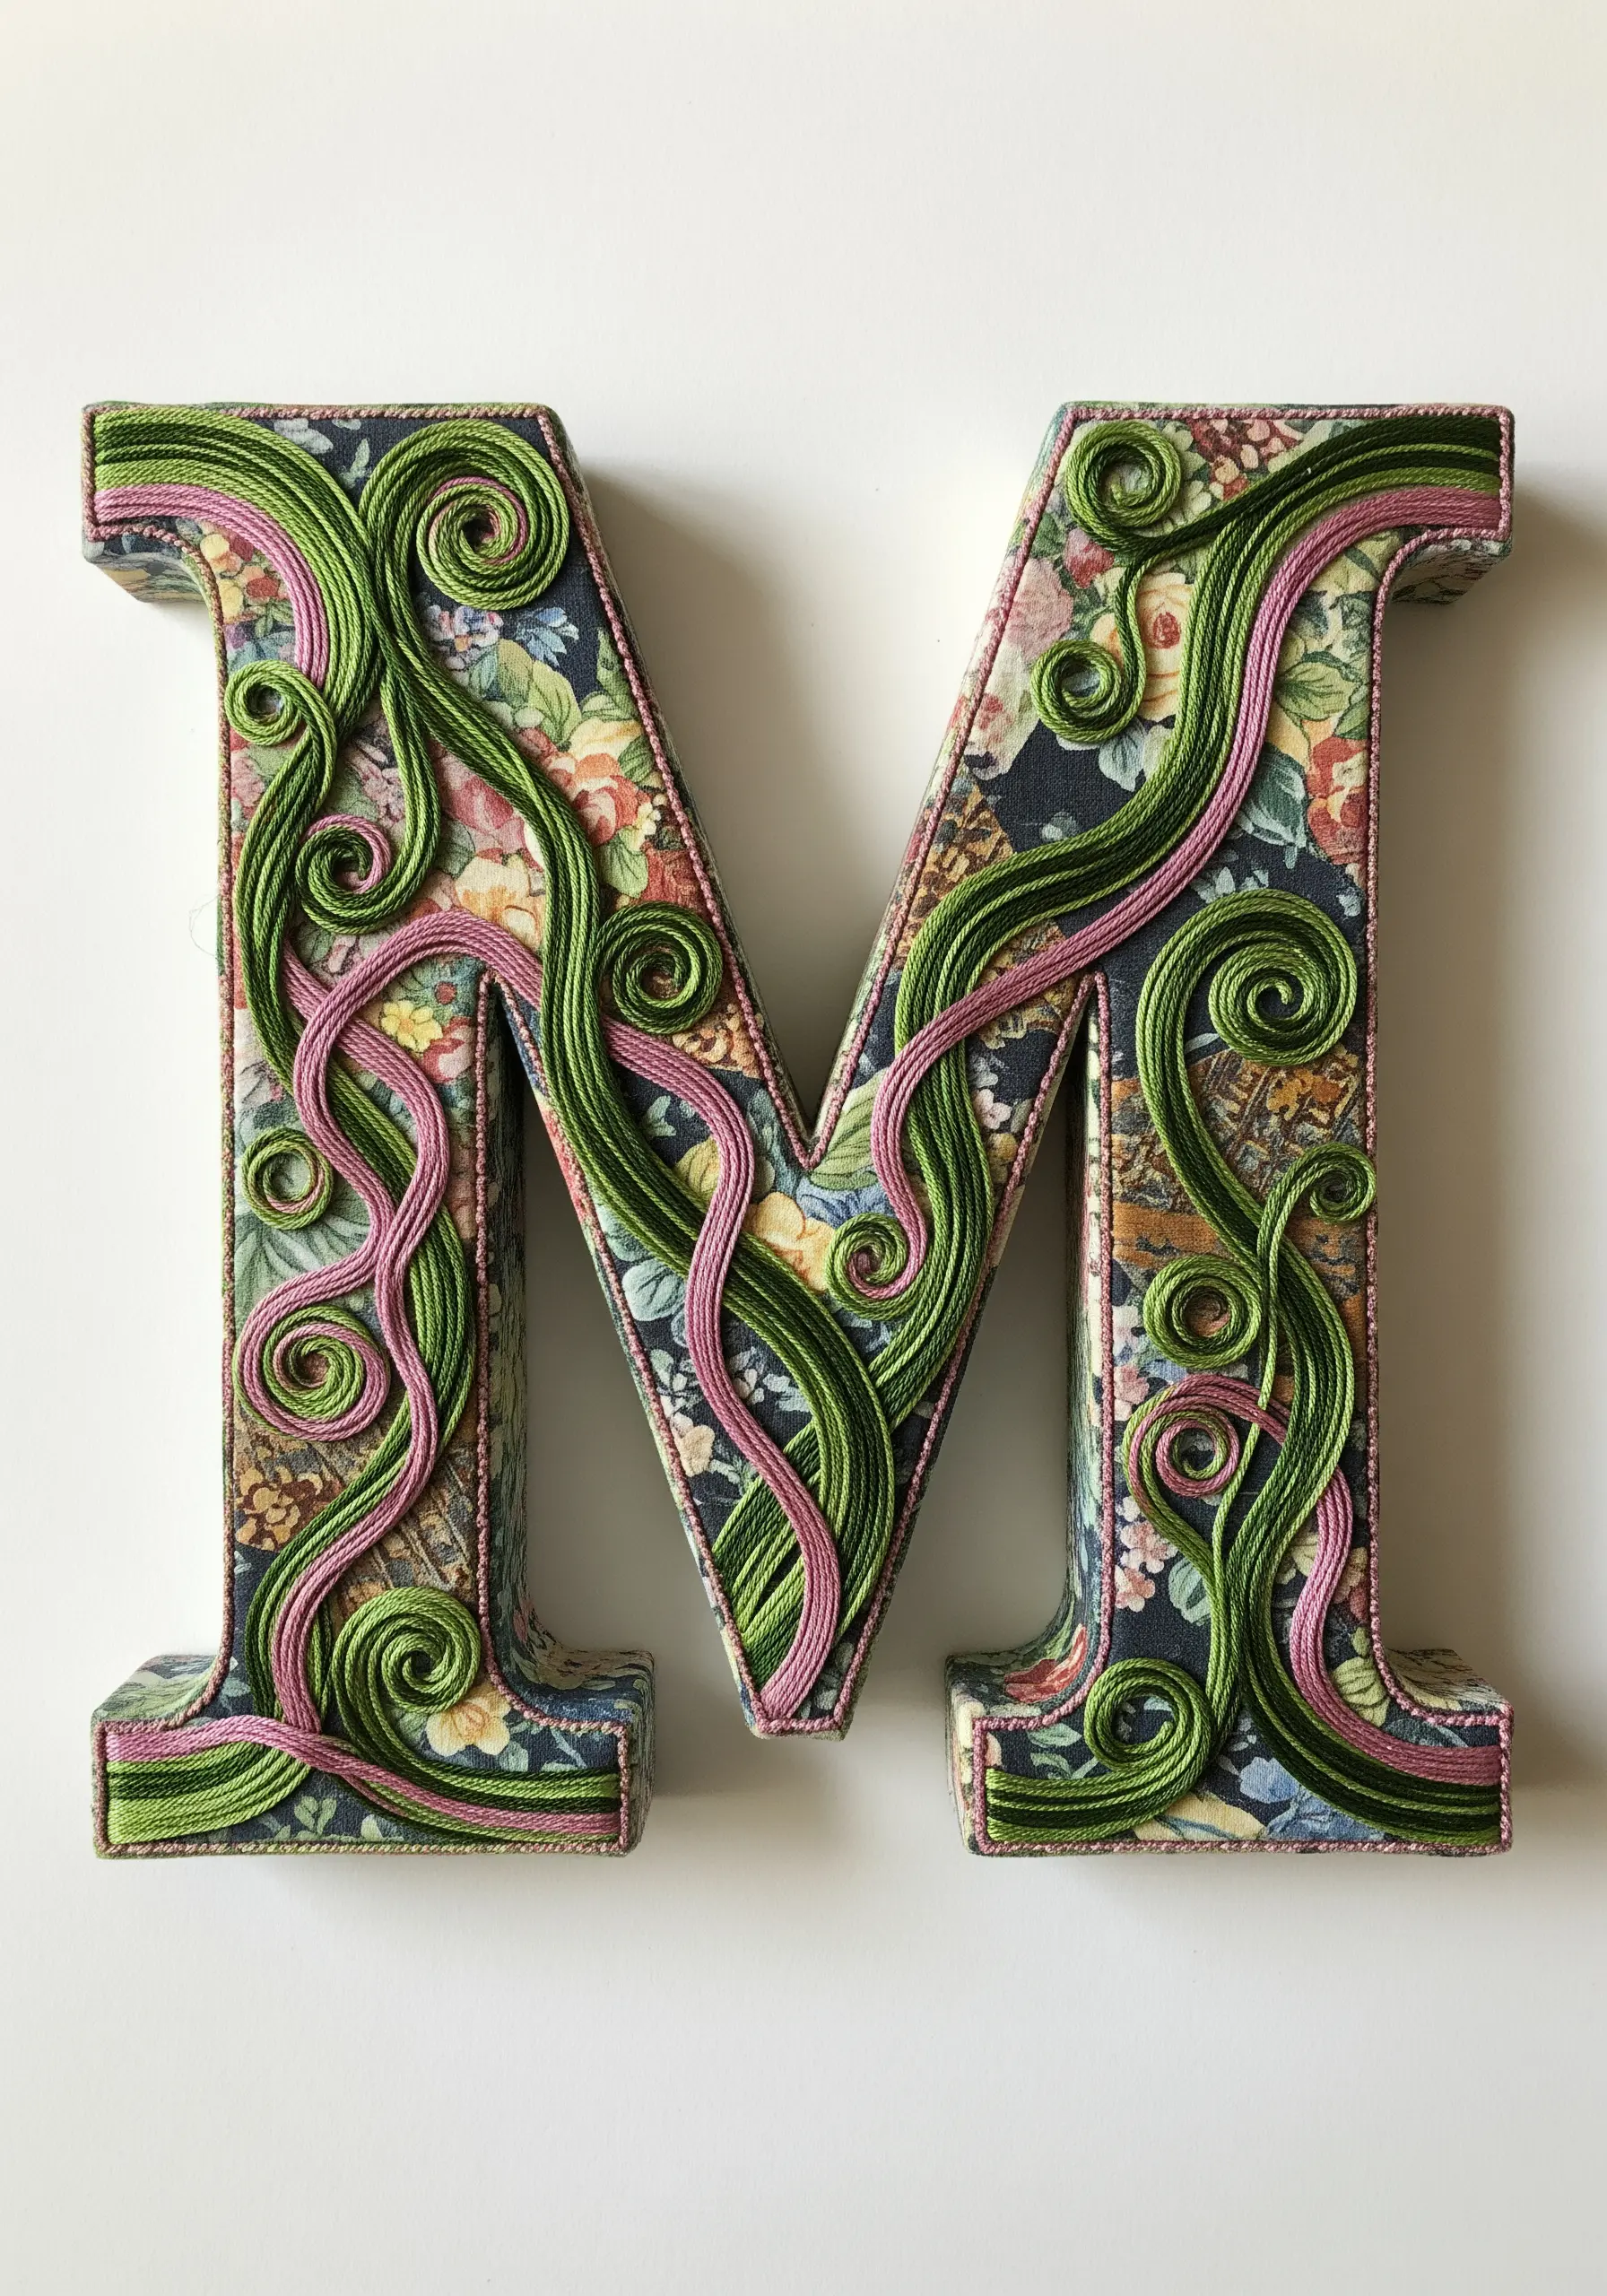
Begin by covering a papier-mâché or wooden letter with a patterned fabric using a decoupage medium.
Once dry, create raised, swirling patterns on top using a decorative cord or thick yarn, a technique inspired by stumpwork embroidery.
Couch the cord onto the fabric surface by making small, evenly spaced stitches over it with a matching or contrasting thread.
This adds a sculptural, three-dimensional quality that makes the monogram feel incredibly lush and detailed, contrasting beautifully with the flat floral background.
21. Sculptural Coral Reef with Mixed Fiber Textures
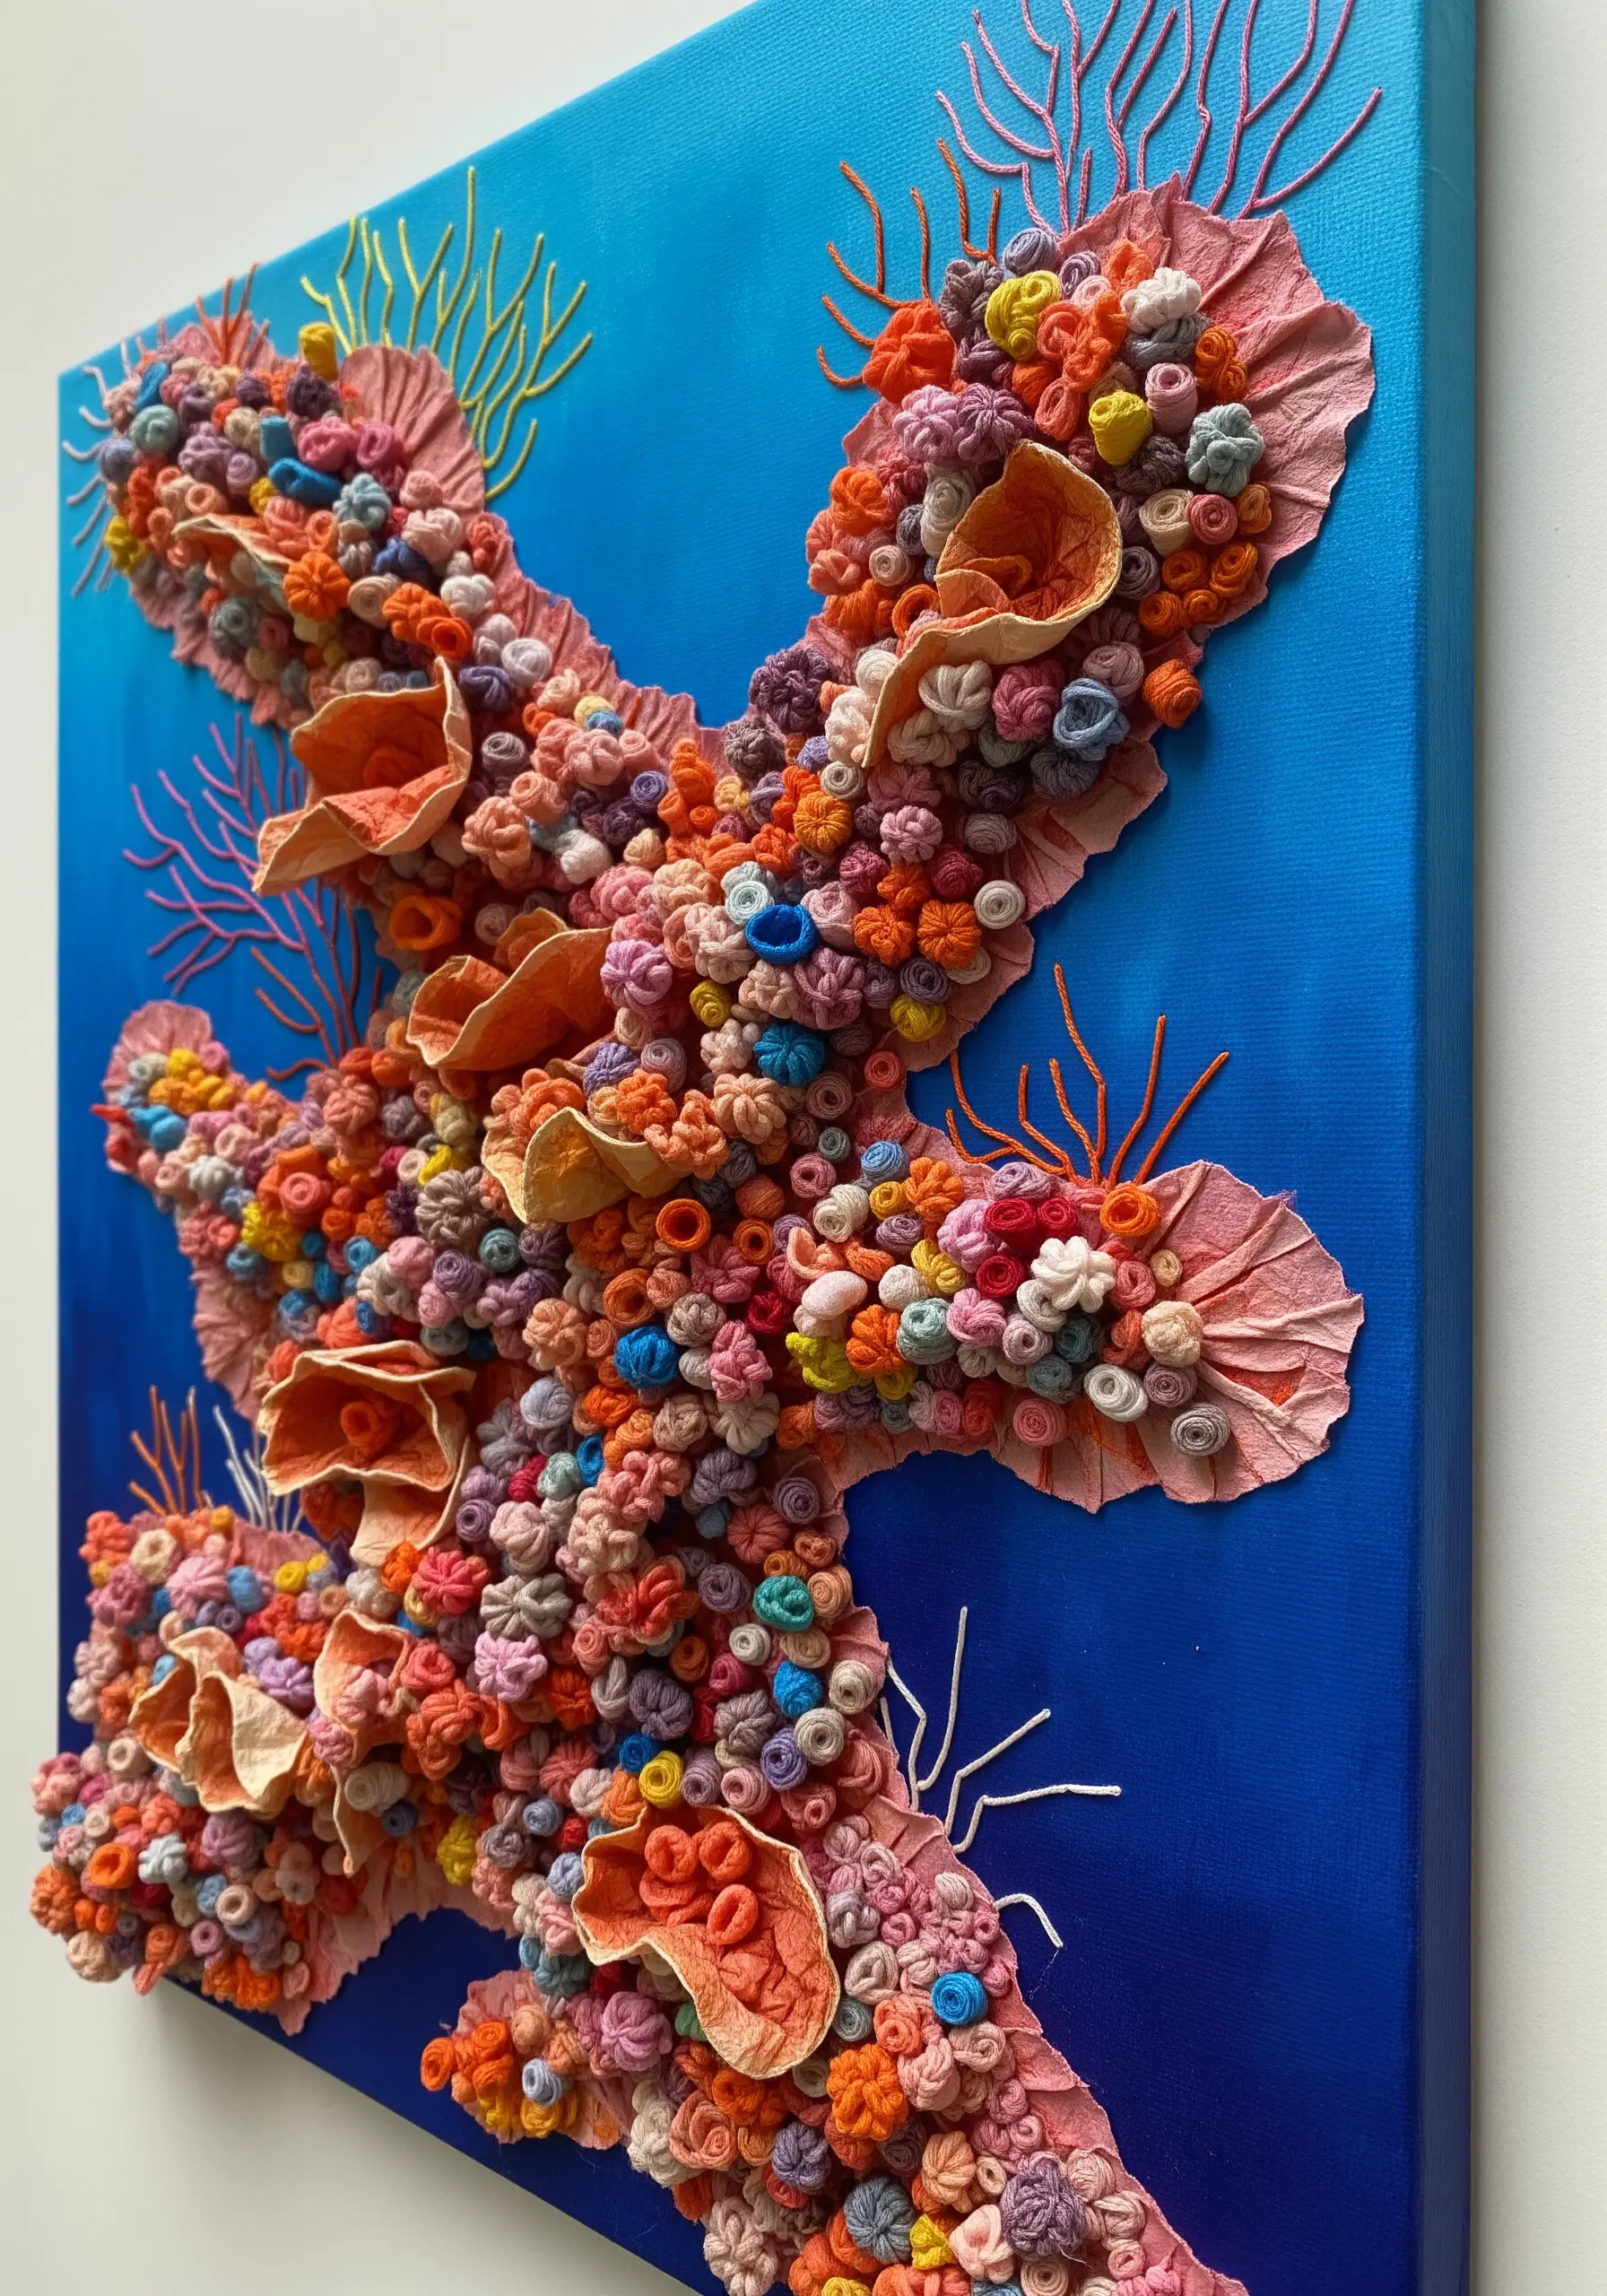
Build a vibrant, tactile coral reef on a painted canvas by combining various fiber art techniques.
Create dense clusters of French knots and bullion knots in bright colors to represent coral polyps.
Roll and stitch fabric scraps into tubular shapes for sea anemones. Shape larger coral forms from fabric stiffened with glue.
The key is to vary the height, texture, and color dramatically to create a dynamic, living surface.
Add a few simple straight stitches in the background to suggest sea grasses or tendrils.
22. Storybook Illustrations with Selective Stitching
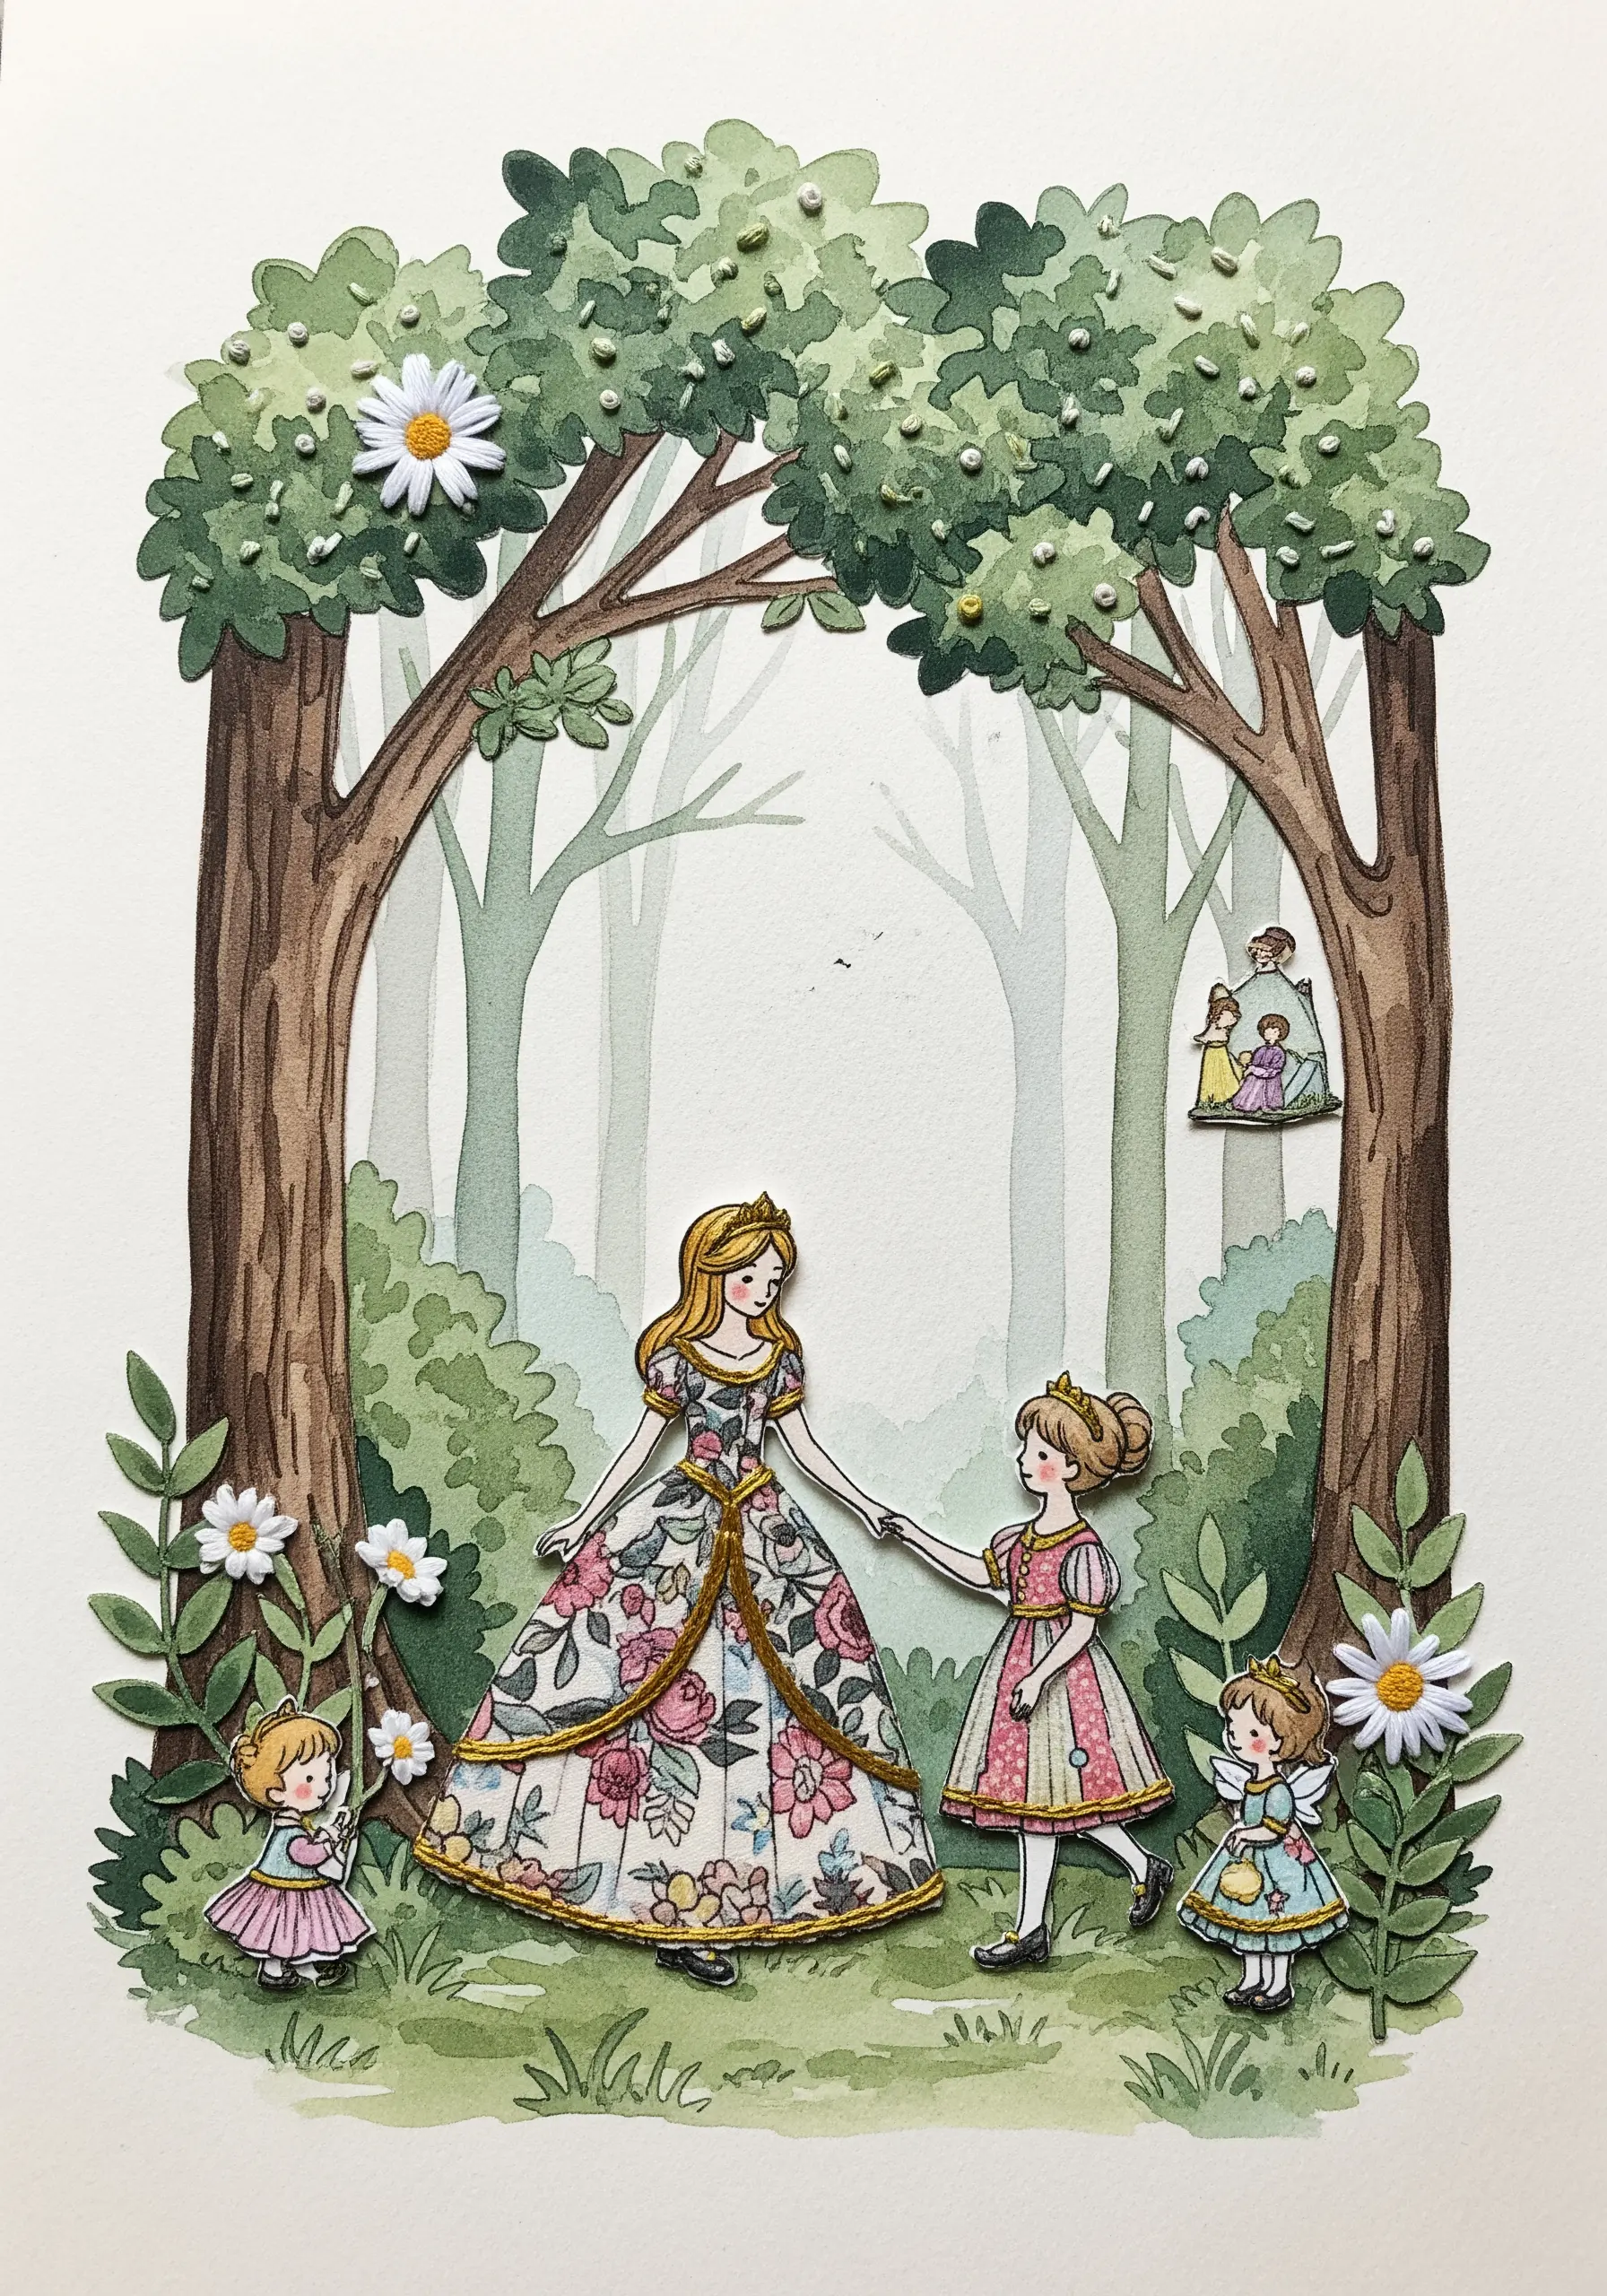
Begin with a watercolor illustration or a high-quality print as your base.
Create a sense of depth by adding layered paper cutouts for elements you want in the foreground, like trees or figures.
Finally, introduce tiny, almost hidden, embroidered details that reward close attention.
Use a few French knots for flowers in a character’s dress, a line of gold metallic thread to highlight a crown, or a single seed bead for a sparkling eye.
These subtle, thoughtful additions are what infuse a simple illustration with a touch of handcrafted magic.
23. Celestial Hoops with Quilled Paper & Thread
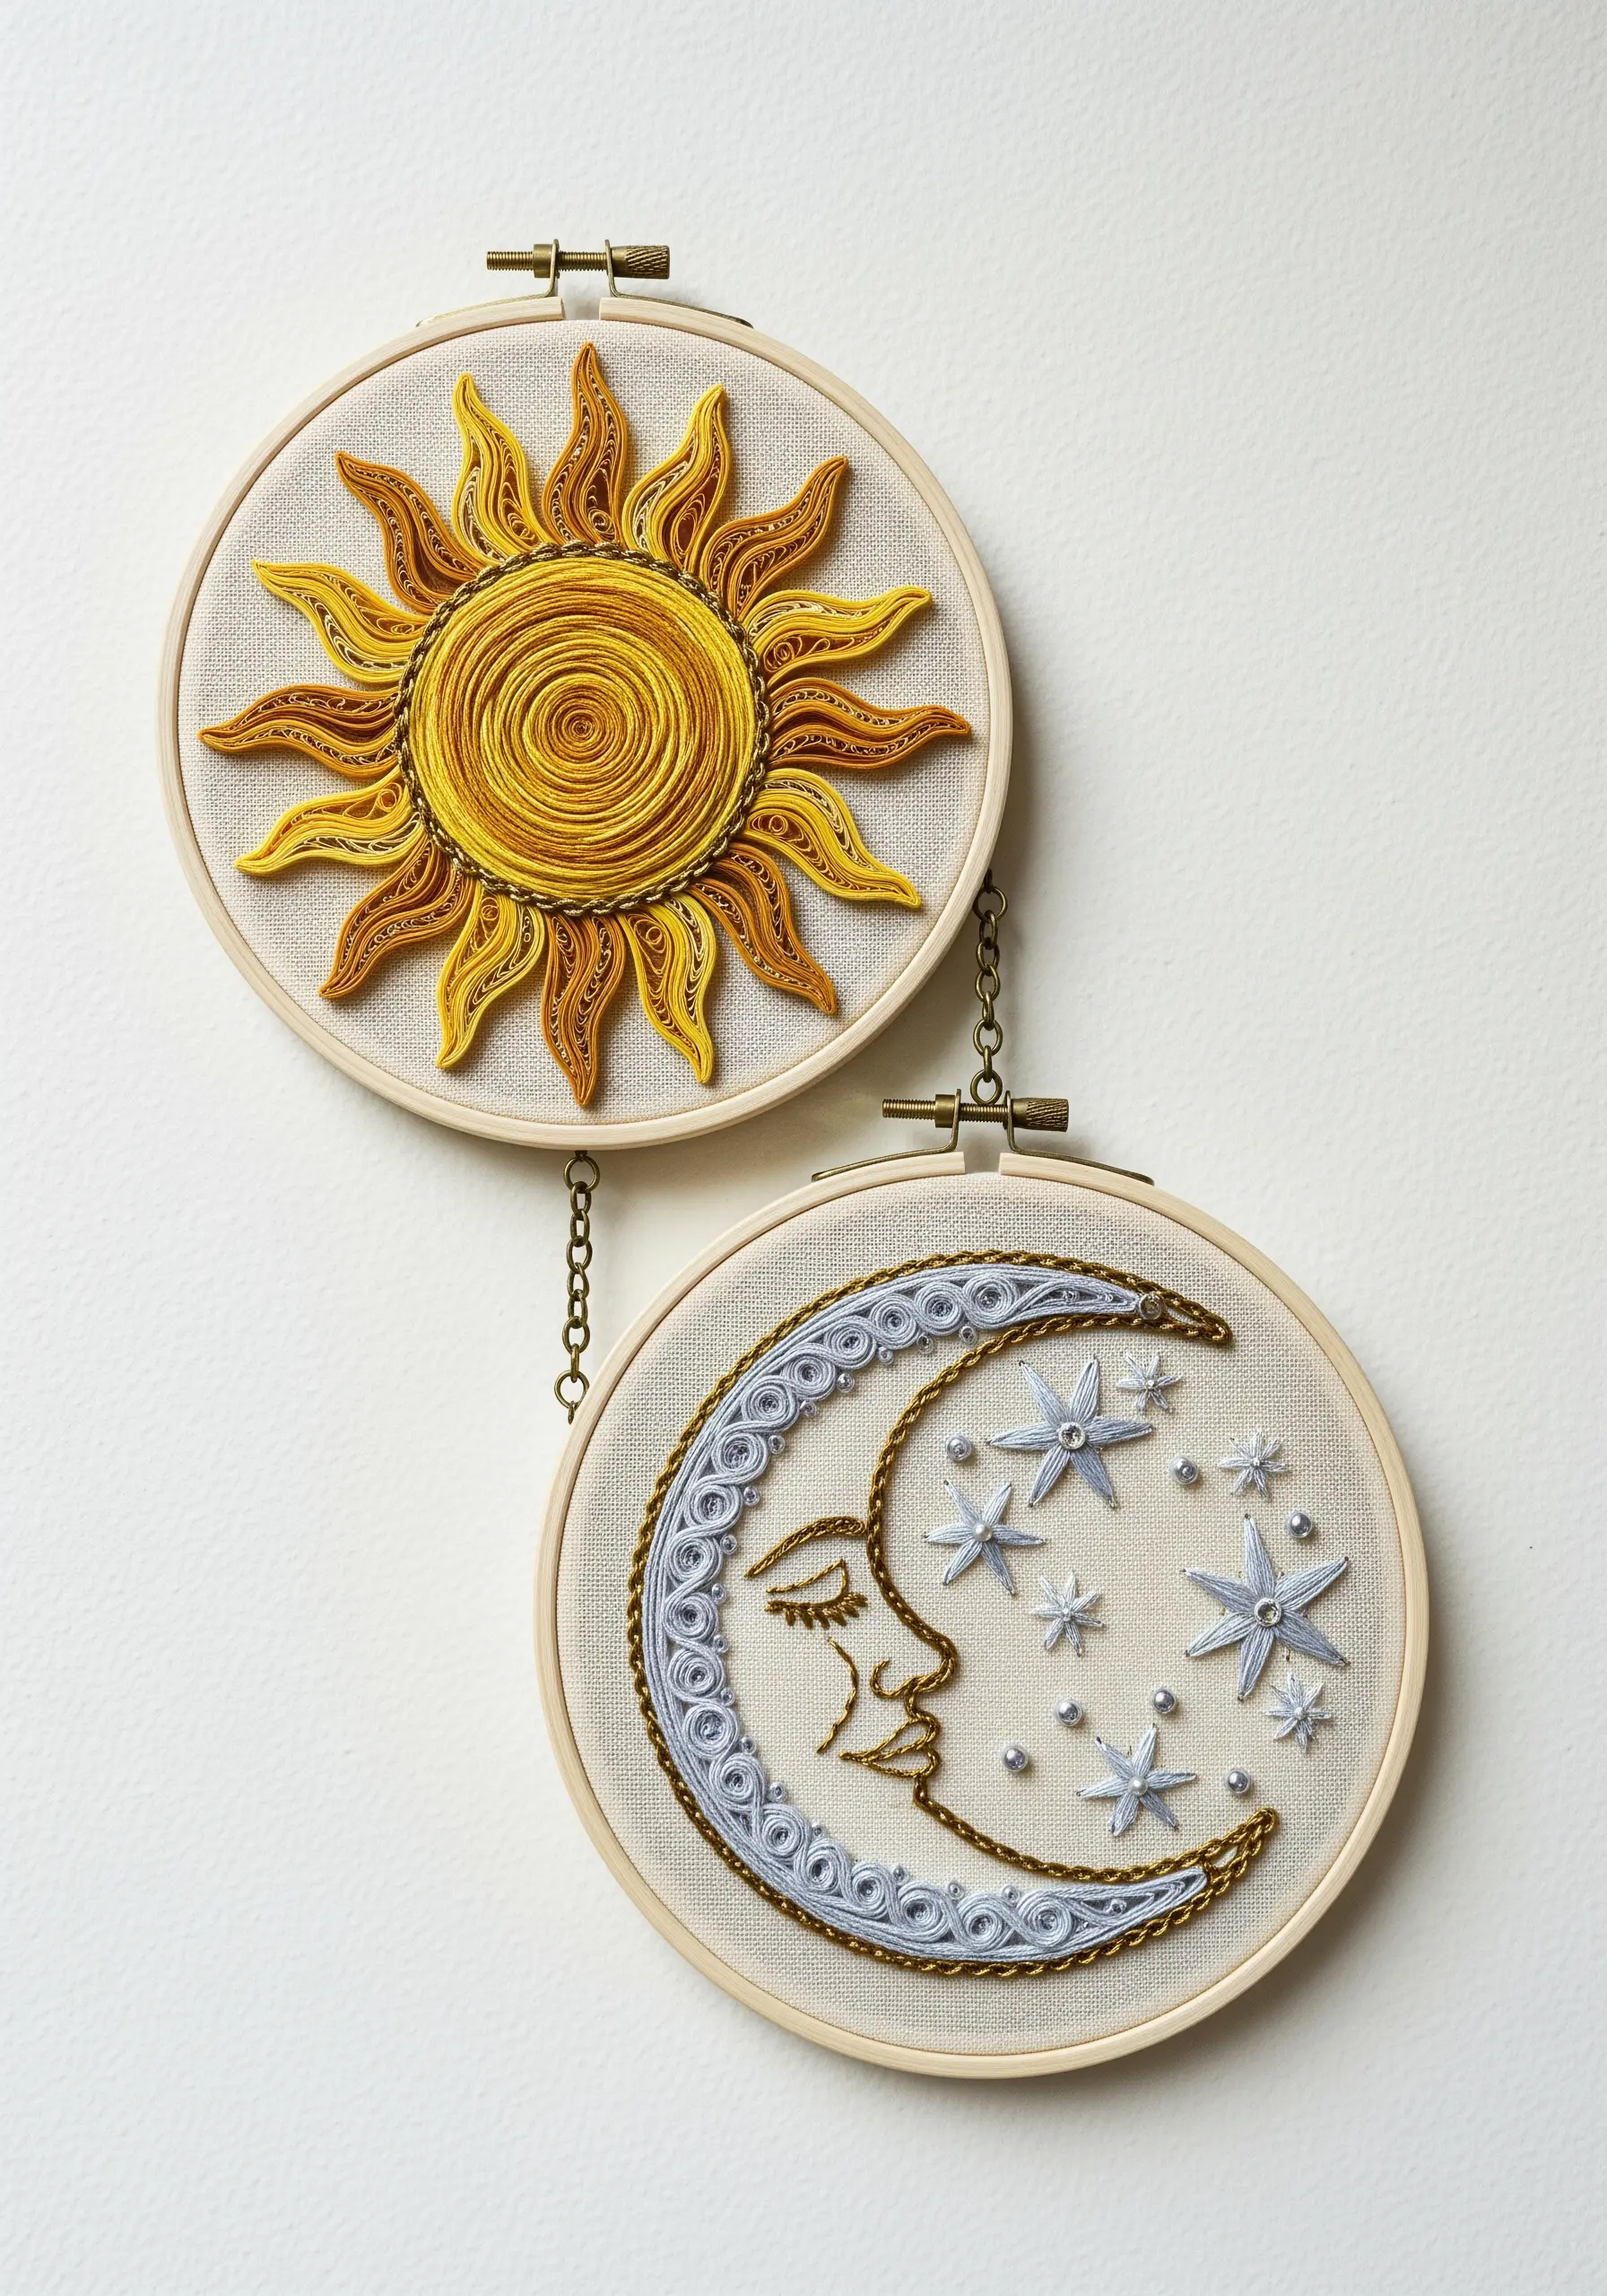
Combine the sculptural forms of paper quilling with the fine detail of traditional embroidery for a stunning 3D effect.
Stretch your fabric in a hoop and create the main celestial shapes—like the sun’s rays or the moon’s crescent—by gluing coiled and shaped strips of paper directly onto the fabric.
Once the glue is dry, use embroidery stitches to add the delicate details: a face stitched in backstitch, or stars made from metallic French knots and silver seed beads.
This blend of techniques creates a dynamic interplay between the bold, raised paper and the delicate, shimmering thread.