Look at that pile of fabric scraps—the offcuts from past projects, the pieces too small for a garment but too special to discard. Don’t see them as leftovers. See them as invitations. Each one is a small canvas, a low-pressure opportunity to try something new, to perfect a stitch, to play with color without the commitment of a large project.
This is your chance to move beyond just stitching a pattern and begin designing with thread. Think about how a change in stitch direction can mimic the texture of a citrus peel, or how combining felt and French knots can bring a tiny mushroom to life. These small adjustments are what elevate your work from a craft to an art form.
Let these ideas guide you. Use them to build your confidence, to experiment with metallic threads, or to finally master the long-and-short stitch. Your scrap pile is not a reminder of what’s finished; it’s the start of your next beautiful creation.
1. Botanical Realism with Gradient Shading
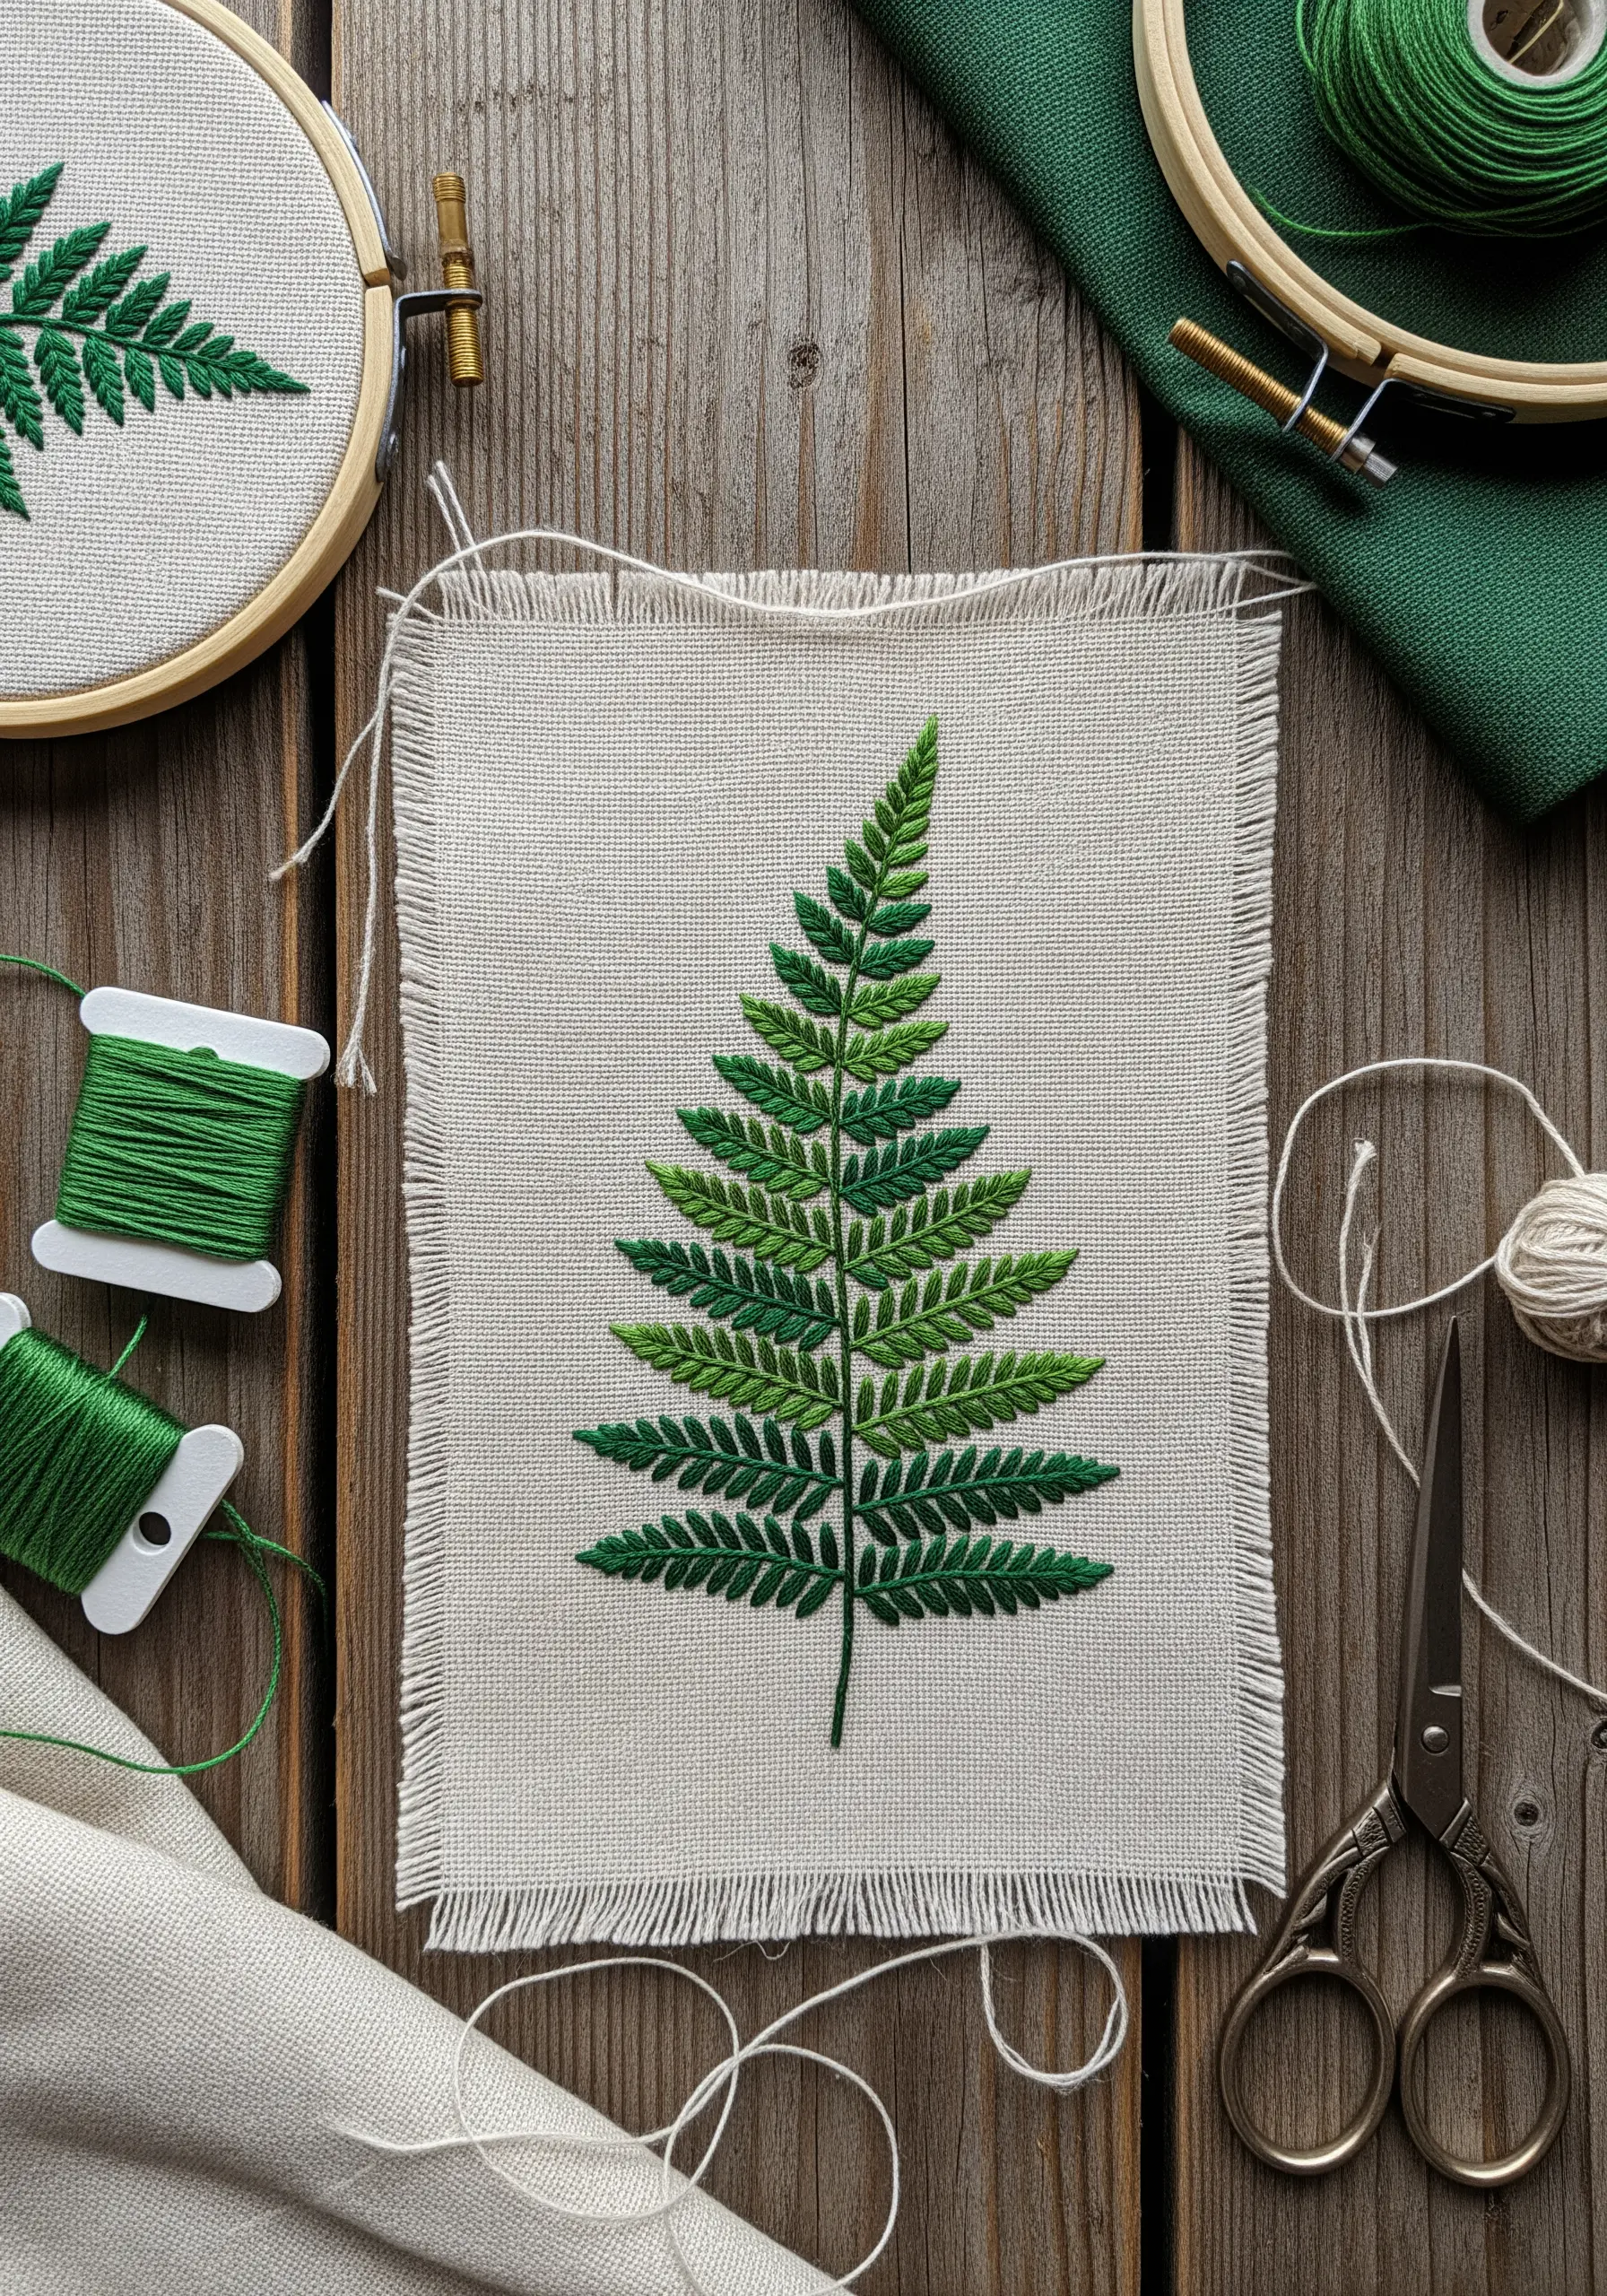
Give your botanicals a painterly quality by mastering subtle color transitions.
Use a single, clean line of split stitch for the central stem to provide a strong anchor for the design.
For the individual fern leaflets, work with two or three shades of green and fill them using satin stitch, directing your stitches outward from the stem.
Begin with your lightest green at the fern’s tip, gradually introducing darker threads as you work down each leaflet. This creates a natural shadow effect and prevents the design from looking flat.
This technique transforms a simple outline into a piece with convincing depth and dimension.
2. Graphic Impact on Denim with Satin Stitch
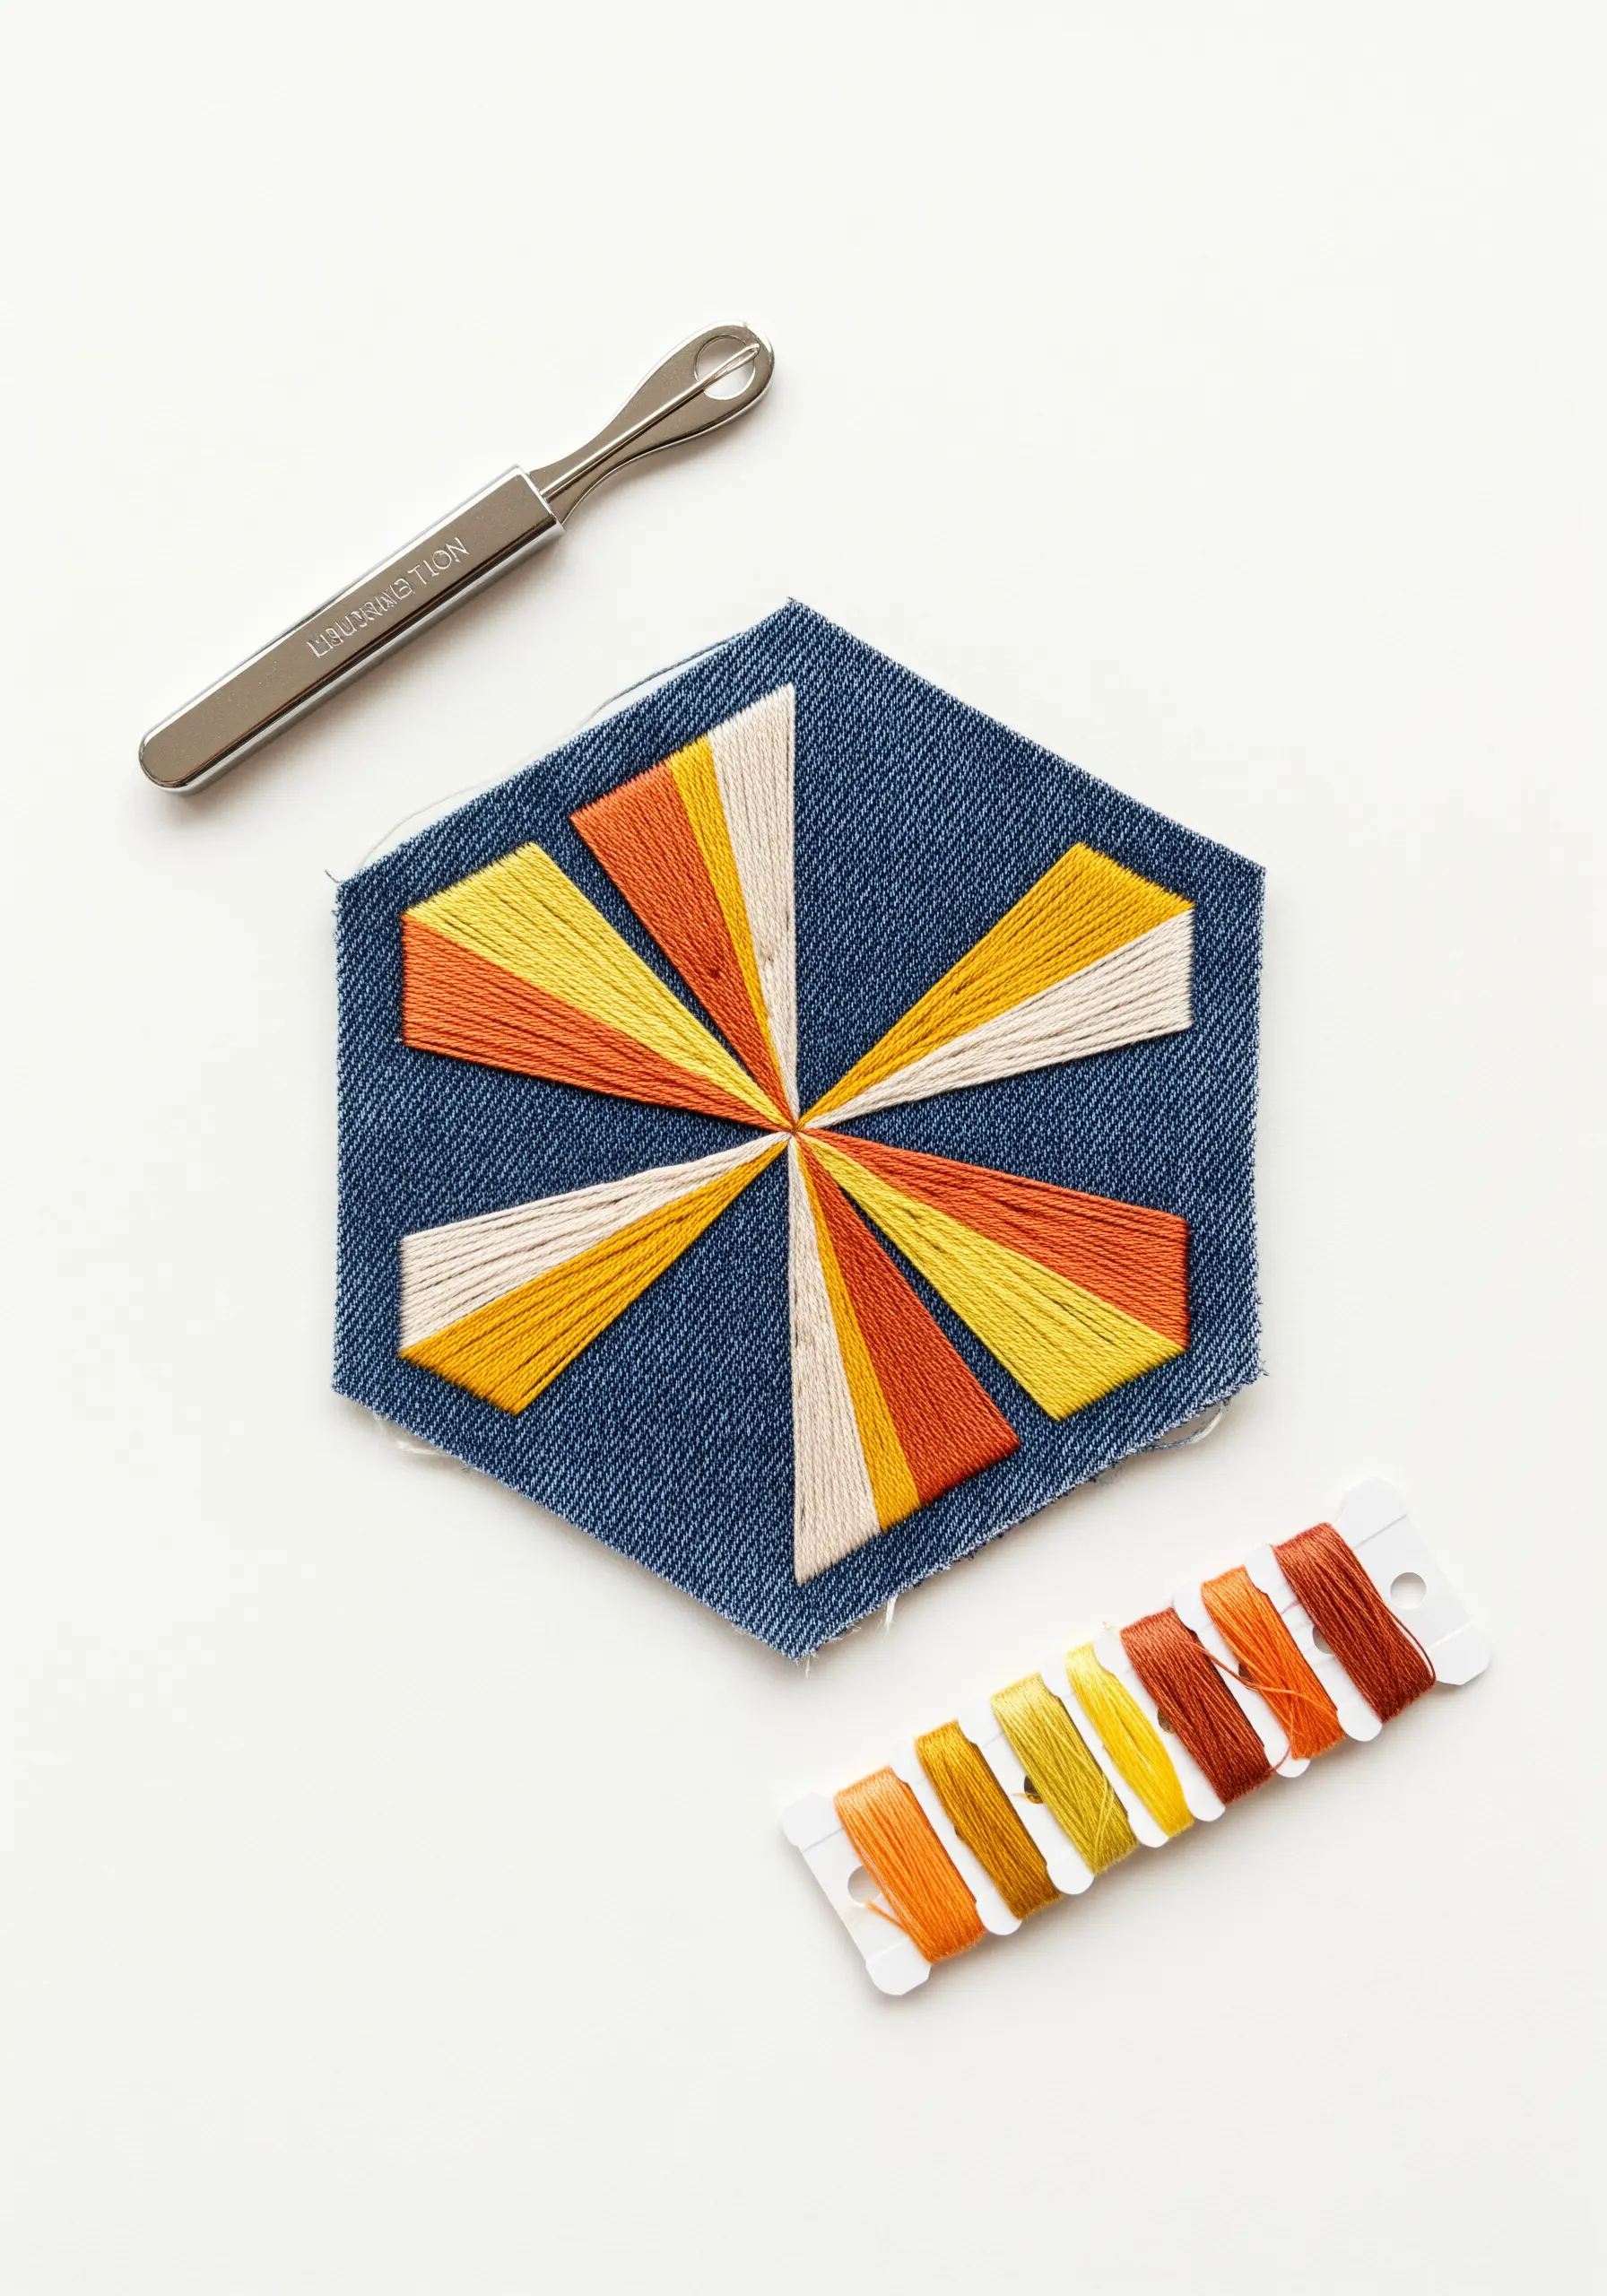
Transform a scrap of denim with the bold, clean lines of geometric satin stitch.
Use a full six strands of embroidery floss to create a dense, satisfying fill that contrasts beautifully with the rugged texture of the denim.
To achieve sharp, precise points, ensure your first stitch in each segment is perfectly placed at the apex.
Keep all subsequent stitches parallel and tightly packed together for a smooth, cohesive finish.
A high-contrast color palette, like these warm yellows and oranges against indigo, amplifies the design’s graphic power.
3. Dimensional Patches with Layered Appliqué
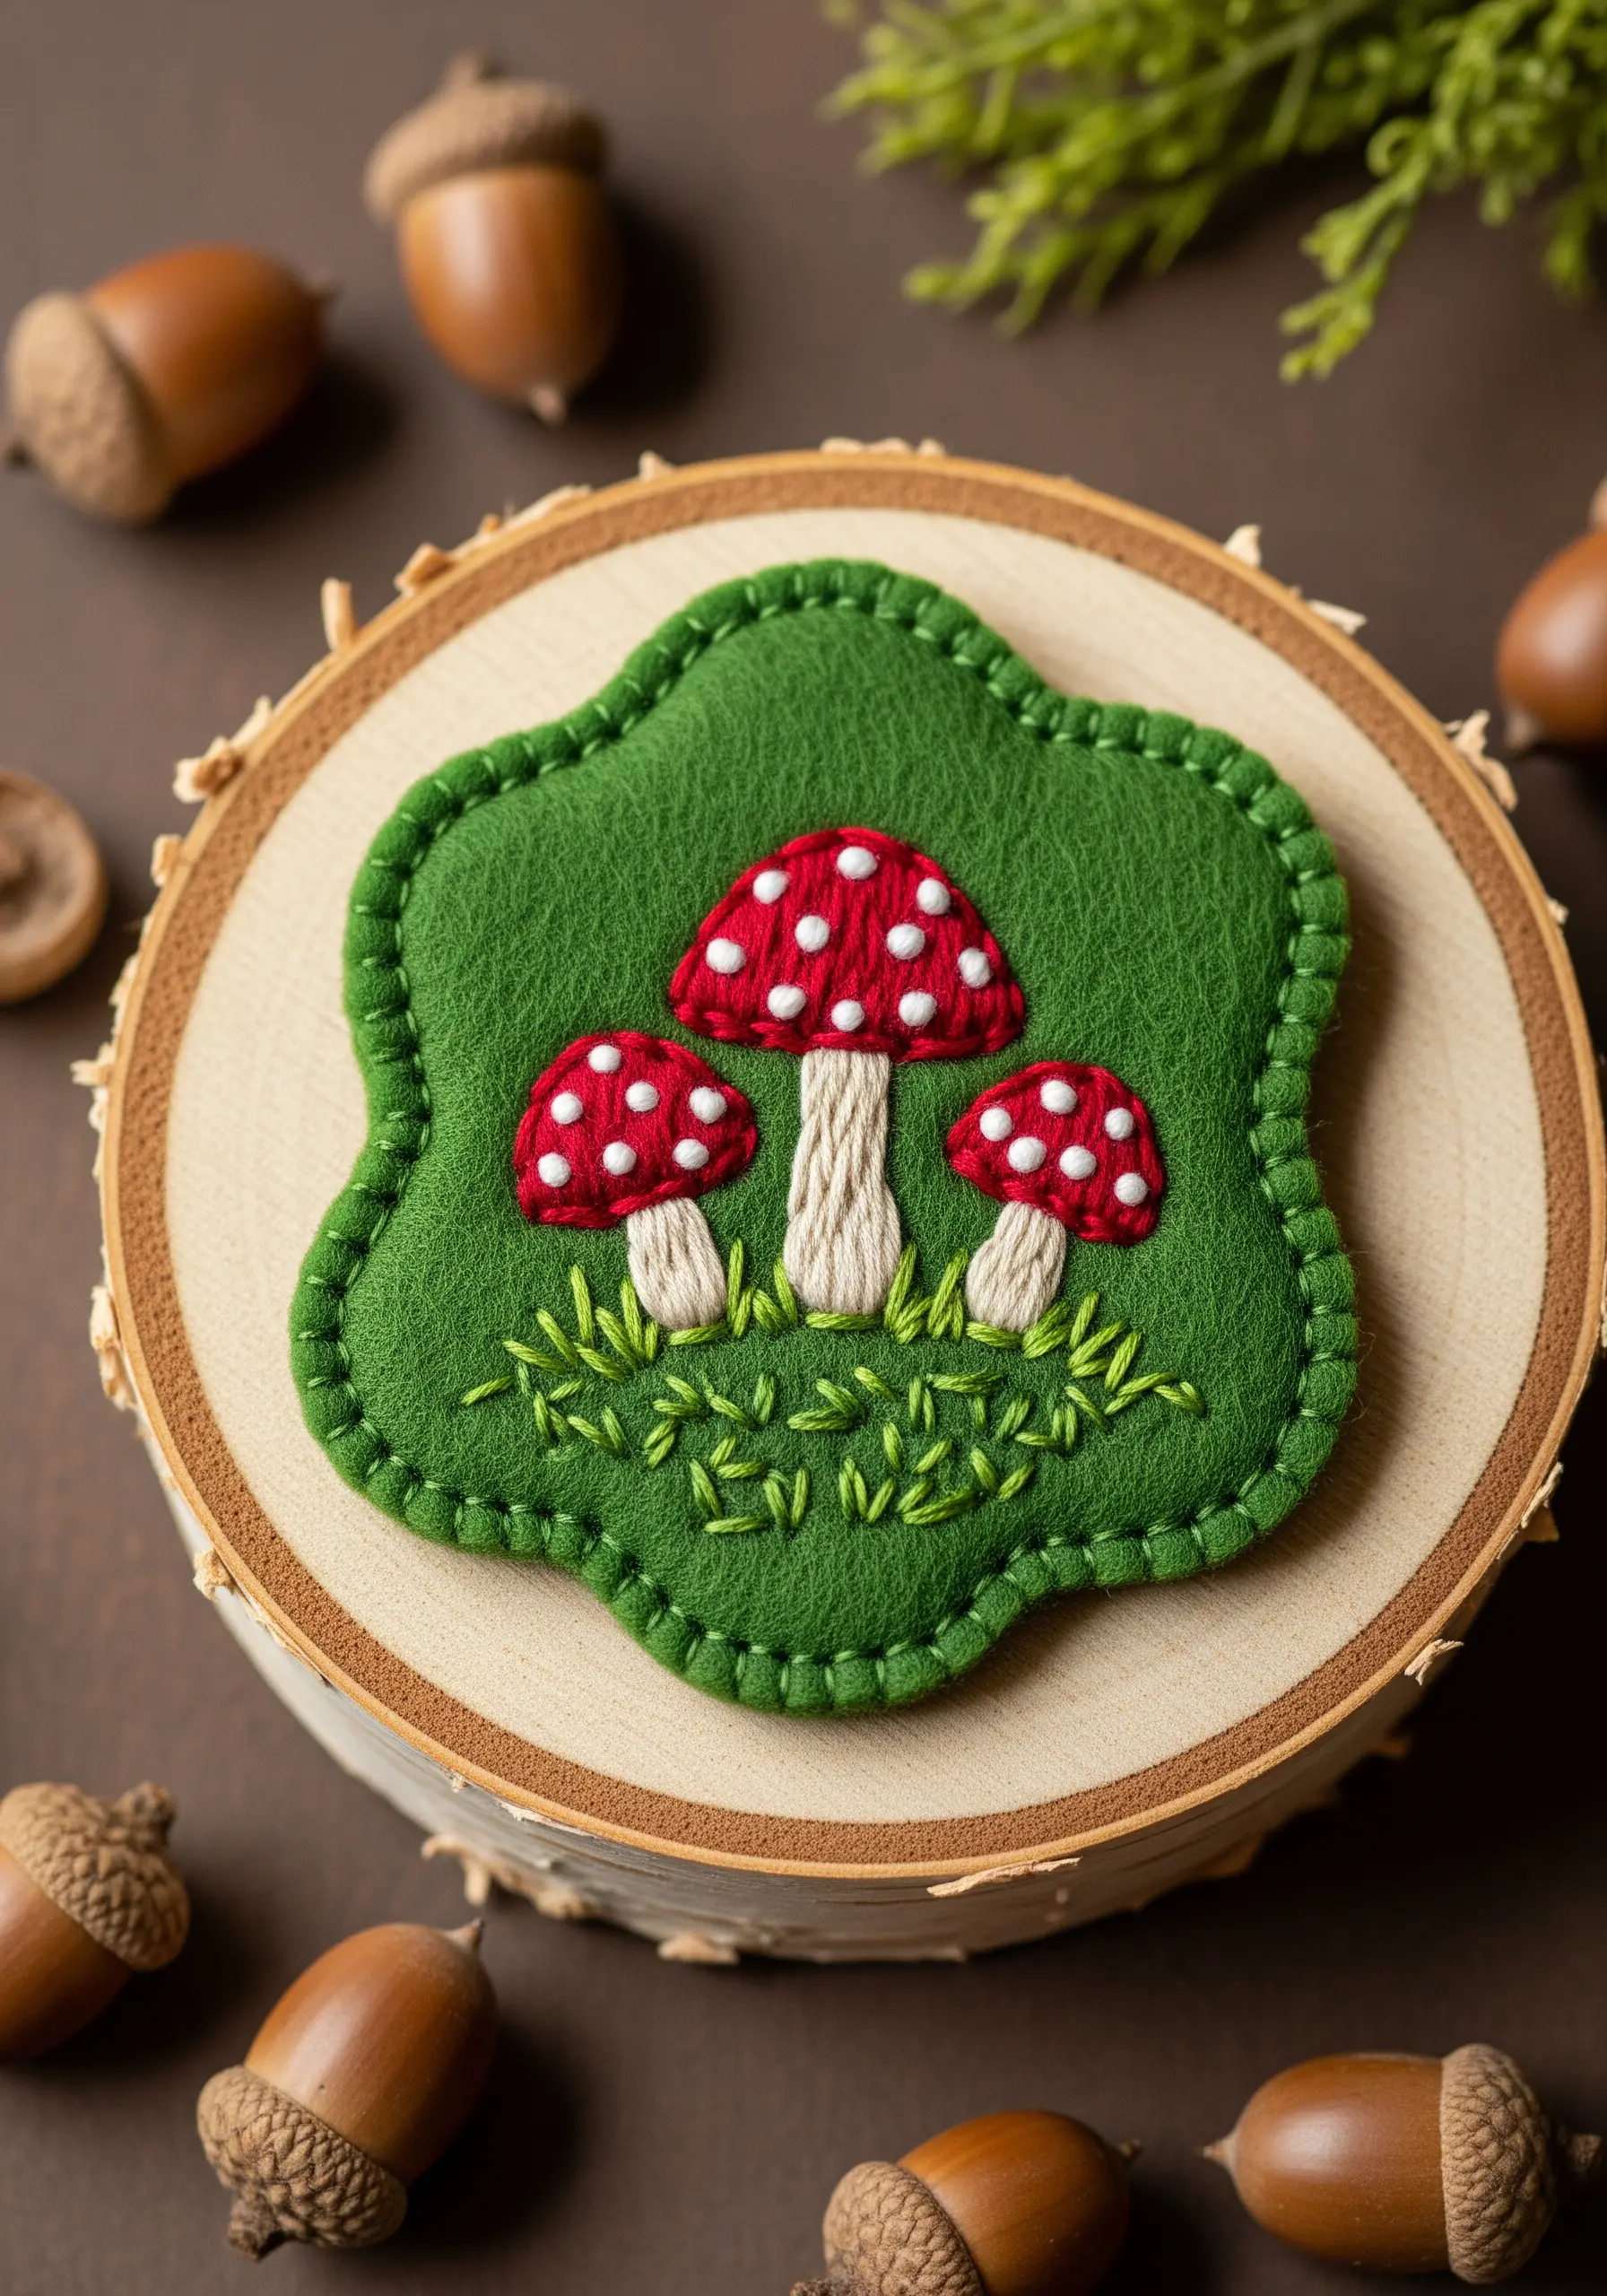
Create a charming, tactile patch by combining felt appliqué with textured embroidery.
Begin by cutting your primary shape from a piece of sturdy felt, which will serve as your canvas.
For the mushroom caps, use satin stitch, but add raised French knots for the spots to give them a playful, three-dimensional quality.
Define the edge and secure your work by framing the felt with a neat, consistent blanket stitch.
This layering technique is perfect for turning small fabric scraps into wearable art or decorative embellishments.
4. Abstract Forms with Thread Wrapping
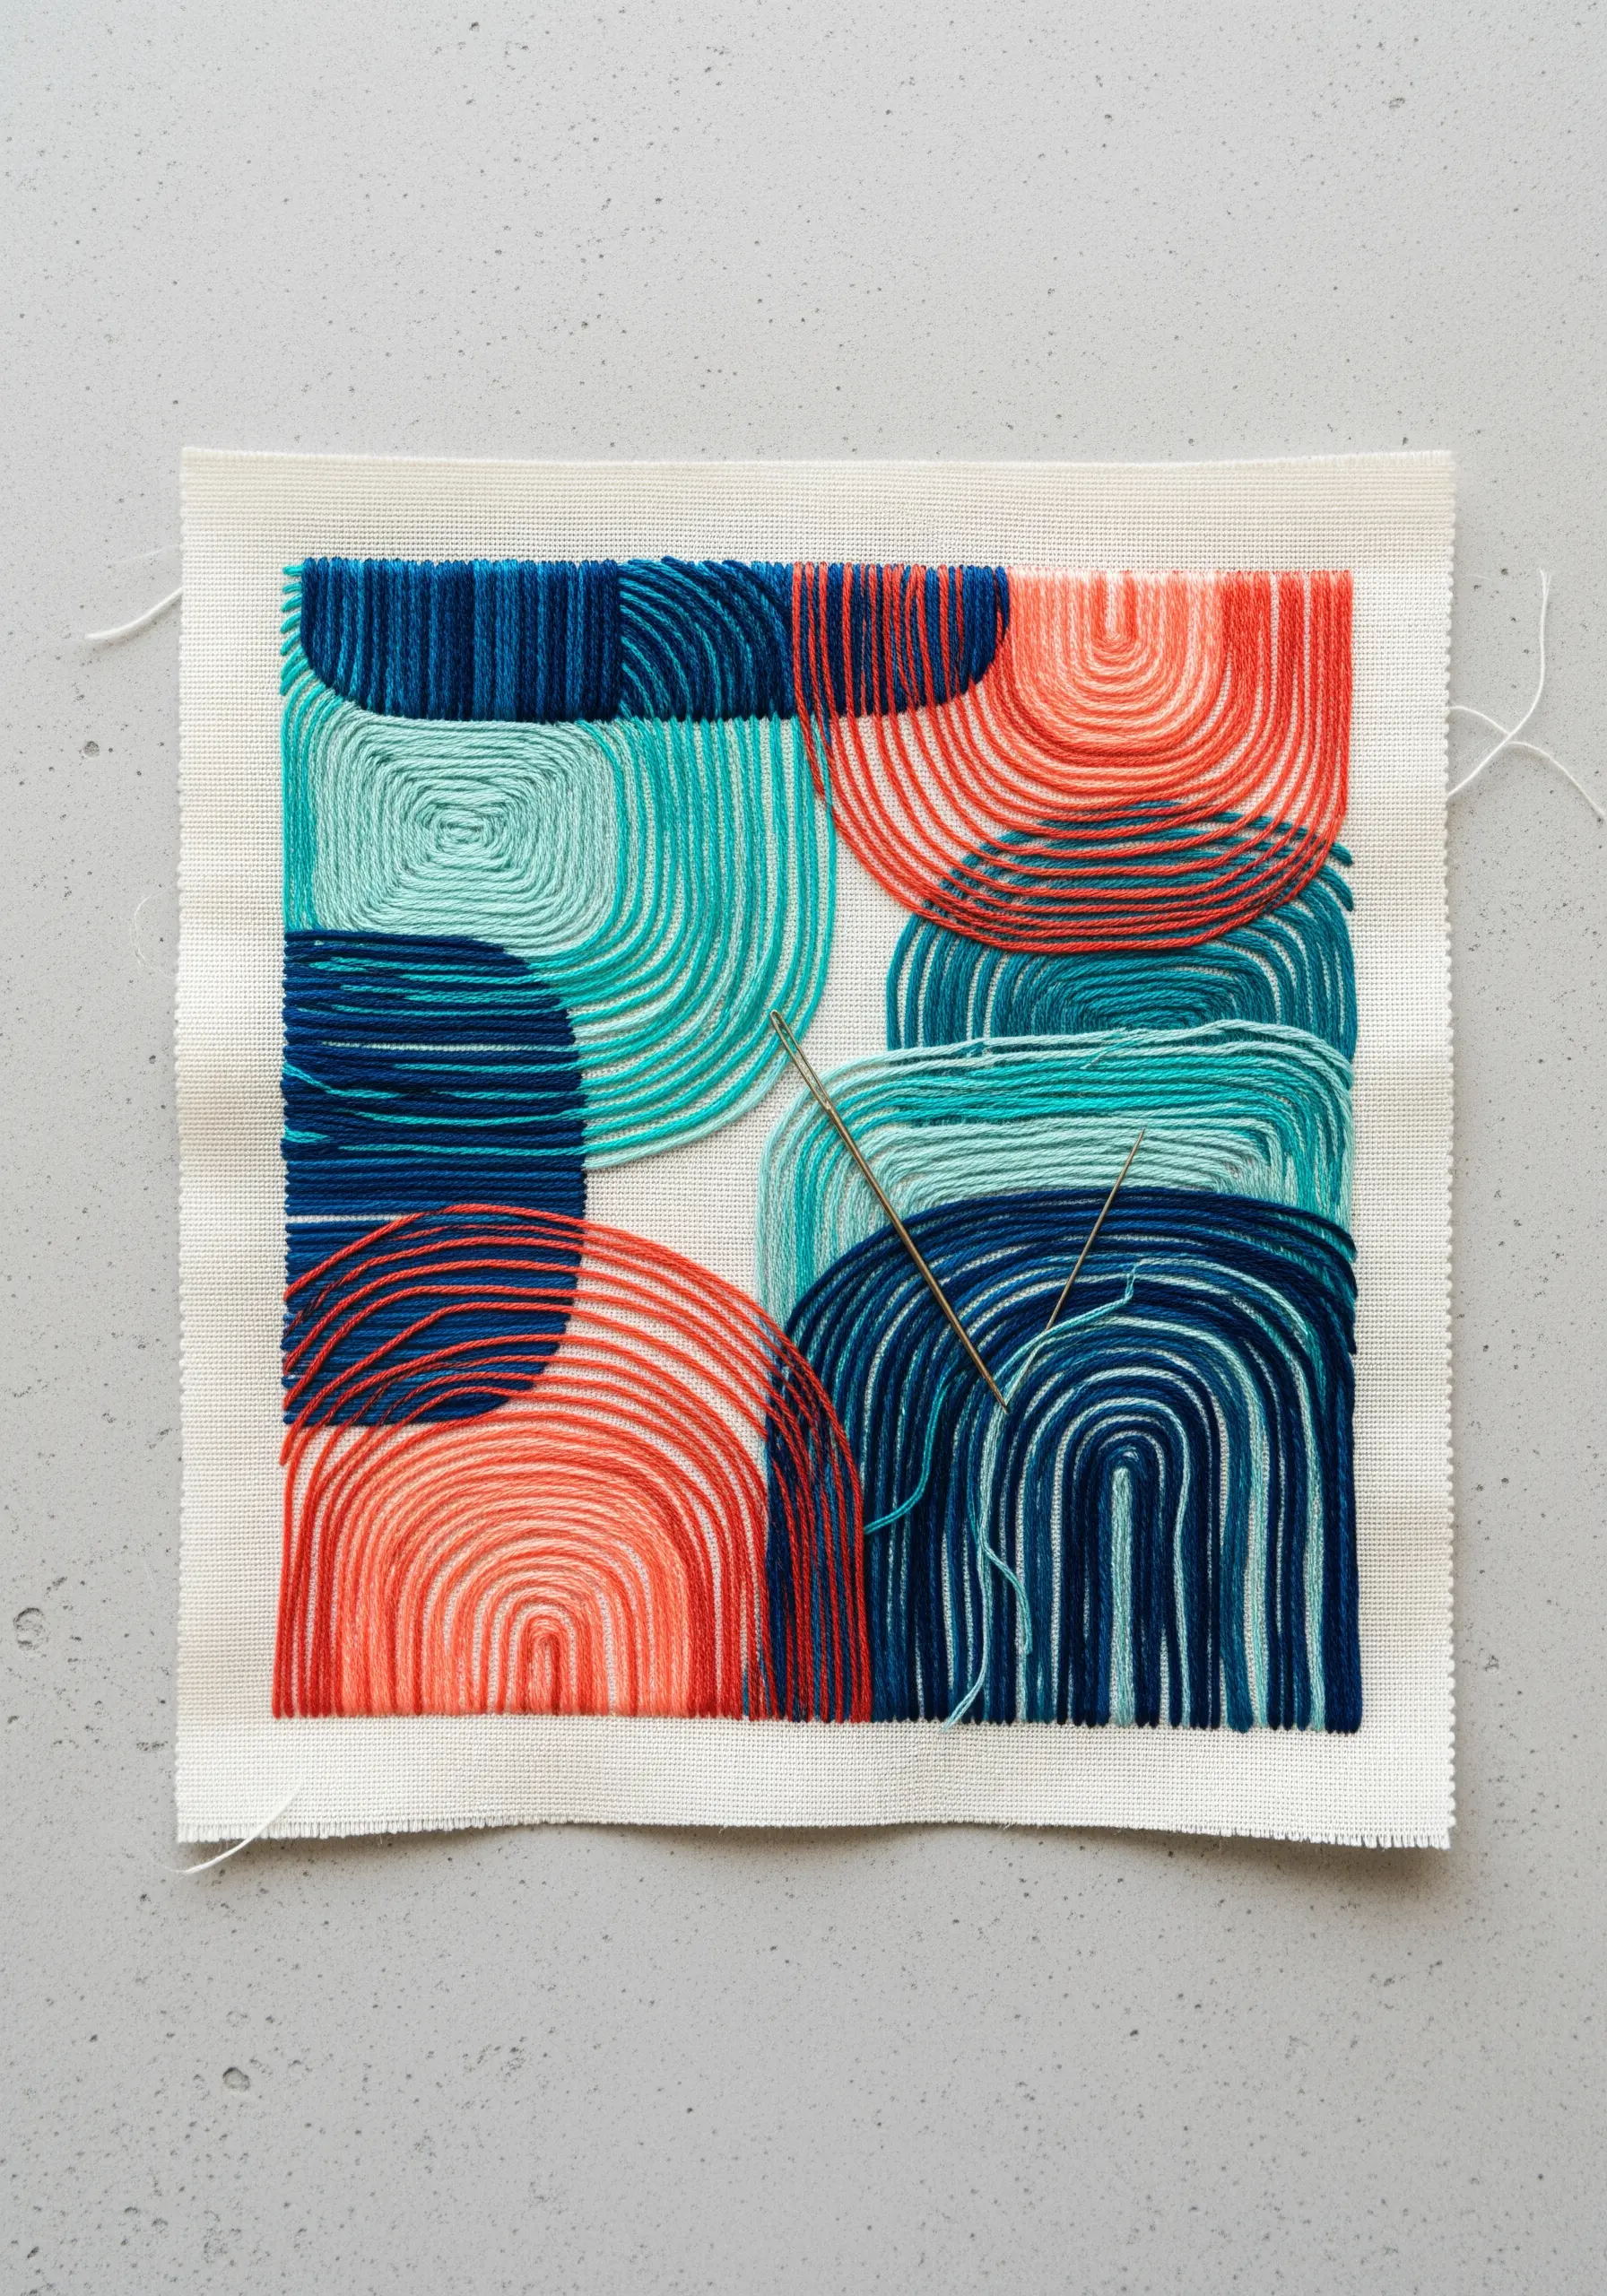
Explore bold, abstract compositions by wrapping thread directly onto your fabric scrap.
This technique is a faster alternative to traditional fill stitches and creates a unique, graphic texture.
Use thicker yarn or pearl cotton for the wrapped sections to build up color and form quickly.
You can also lay down thick threads and secure them with a thinner, contrasting thread—a technique called couching—to create clean outlines and dynamic curves.
This method allows you to play with color interaction and negative space in a freeform, expressive way.
5. Expressive Landscapes on Coarse Weaves
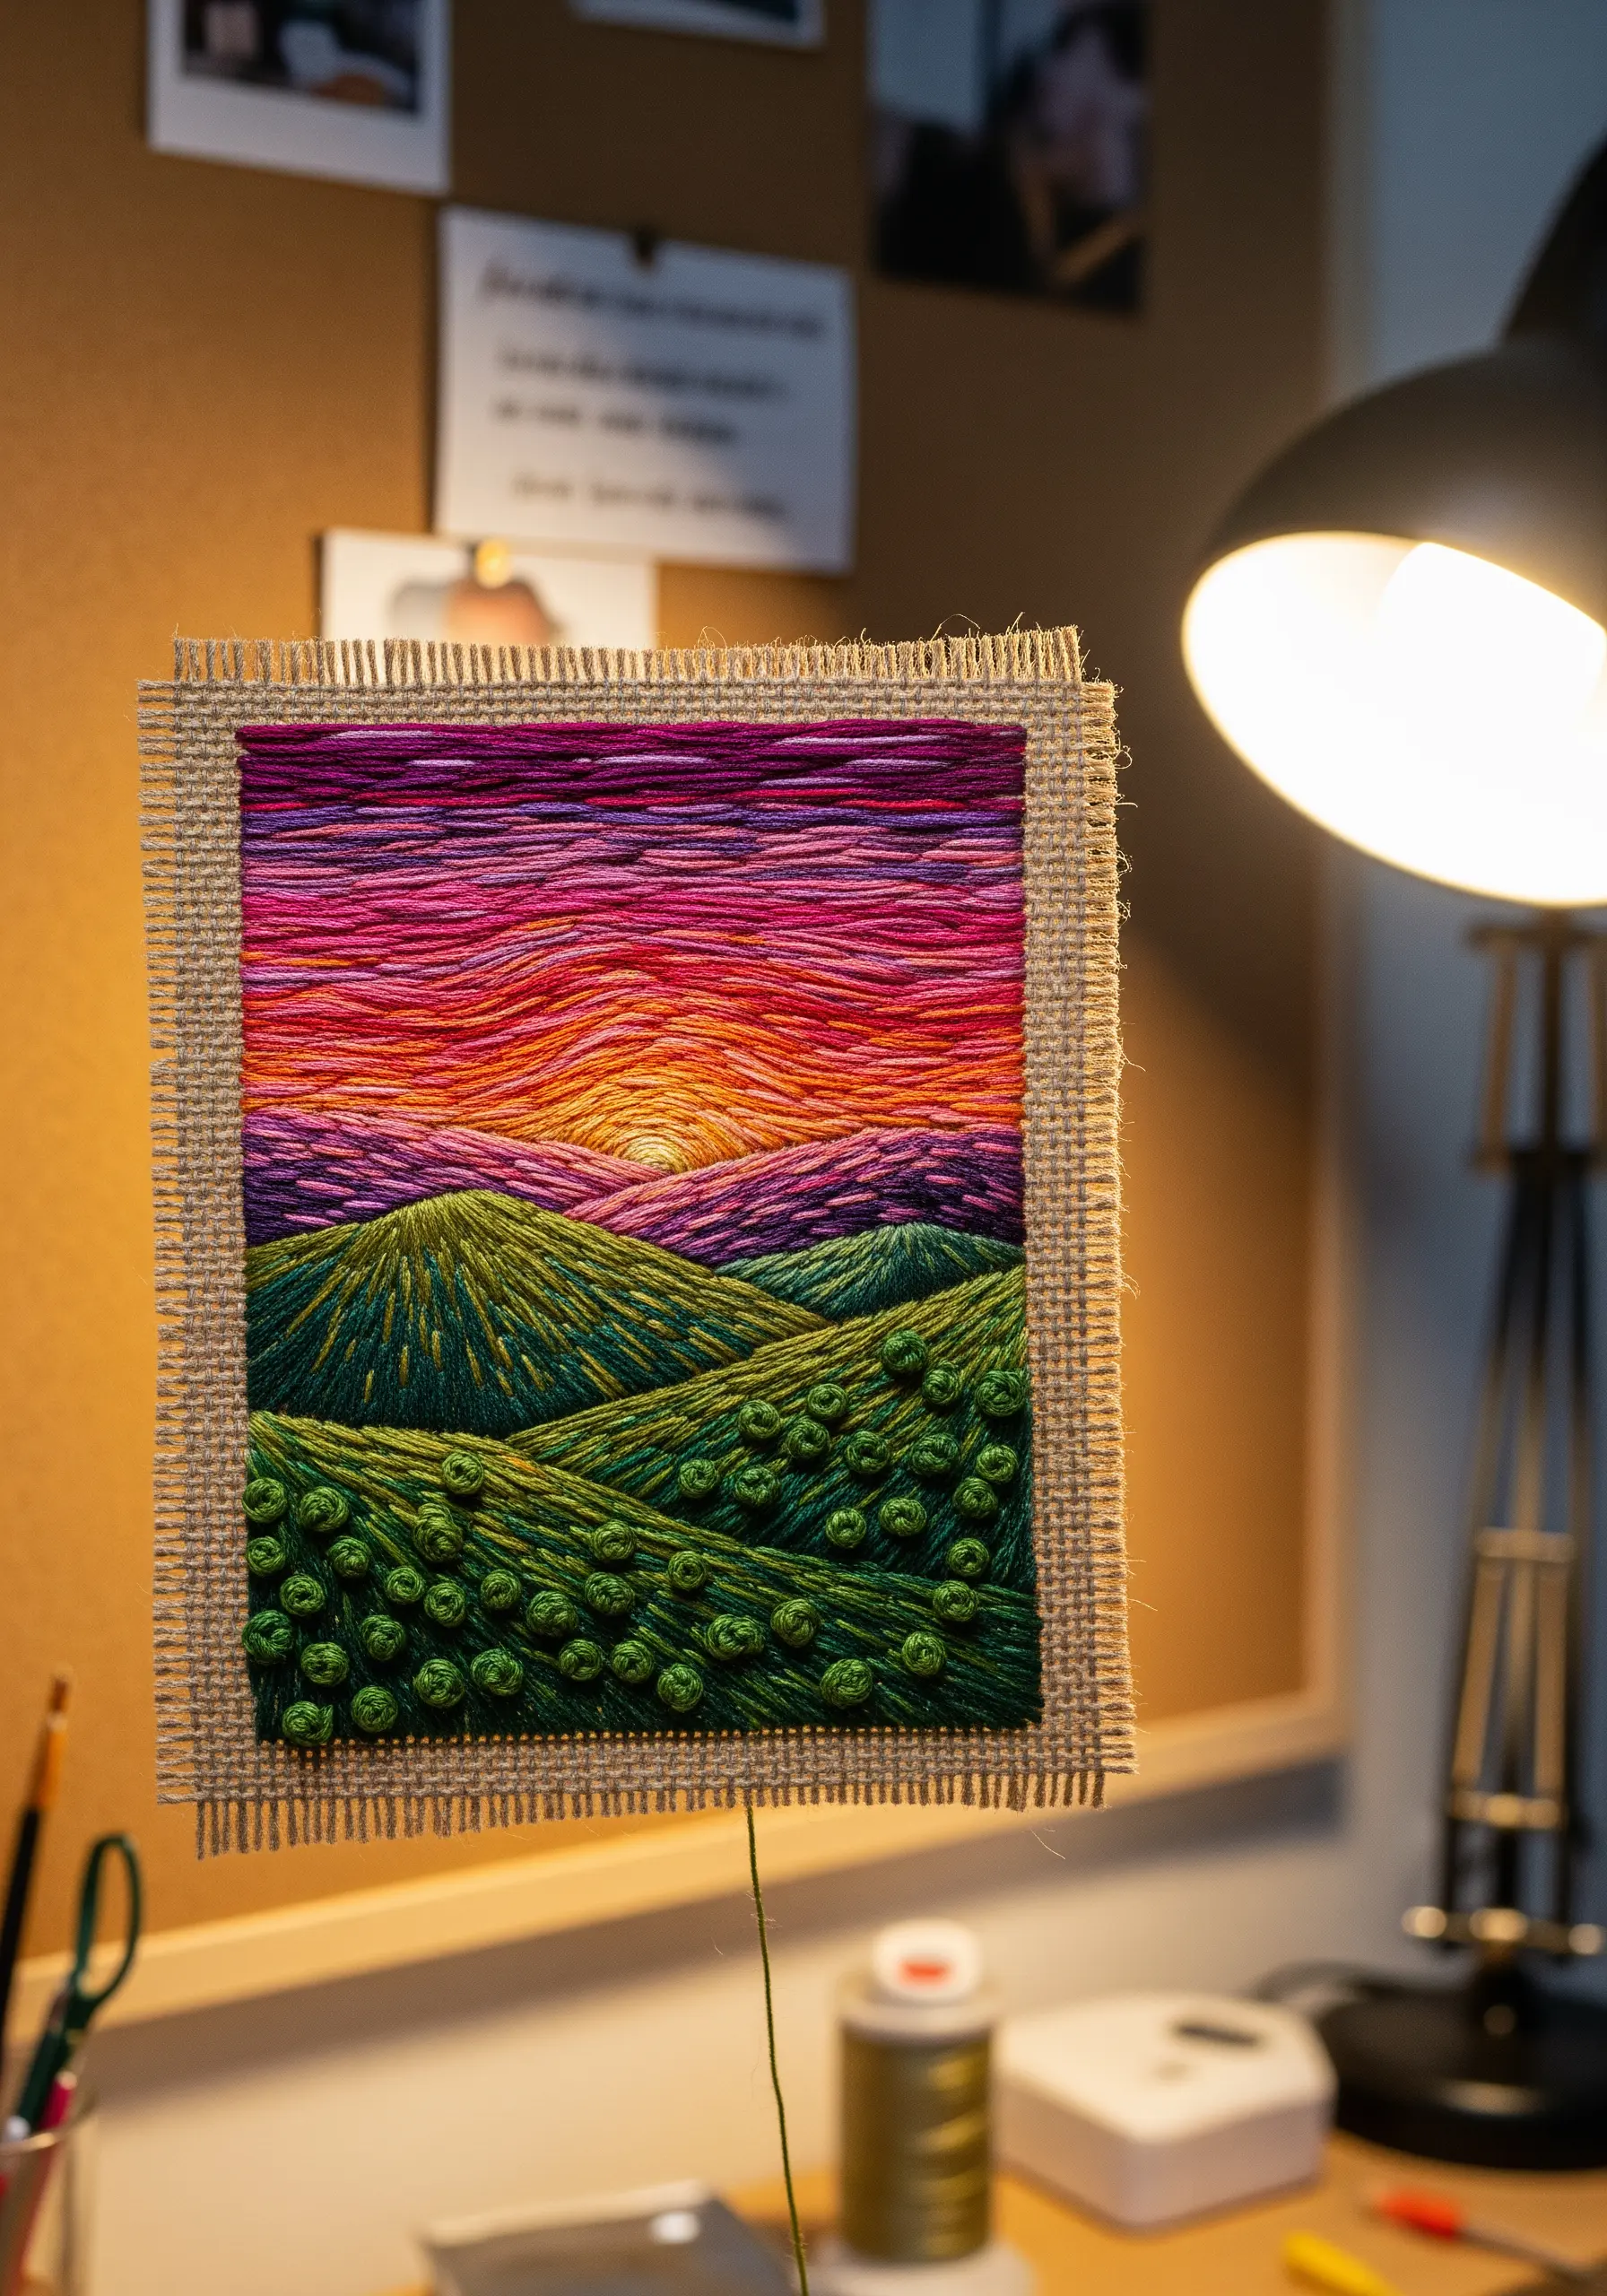
Don’t shy away from textured fabrics like burlap or hessian; use their rustic quality to enhance your design.
Employ long-and-short stitch to blend the colors of the sky, allowing the fabric’s natural texture to add a painterly effect.
For the foreground, create dense, tactile foliage using a combination of French knots and bullion knots of varying sizes.
This contrast between the smooth, blended sky and the highly textured hills creates a compelling sense of depth and perspective.
Use a full six strands of floss to ensure your stitches are bold enough to stand out against the coarse weave.
6. Celestial Elegance with Metallic Threads
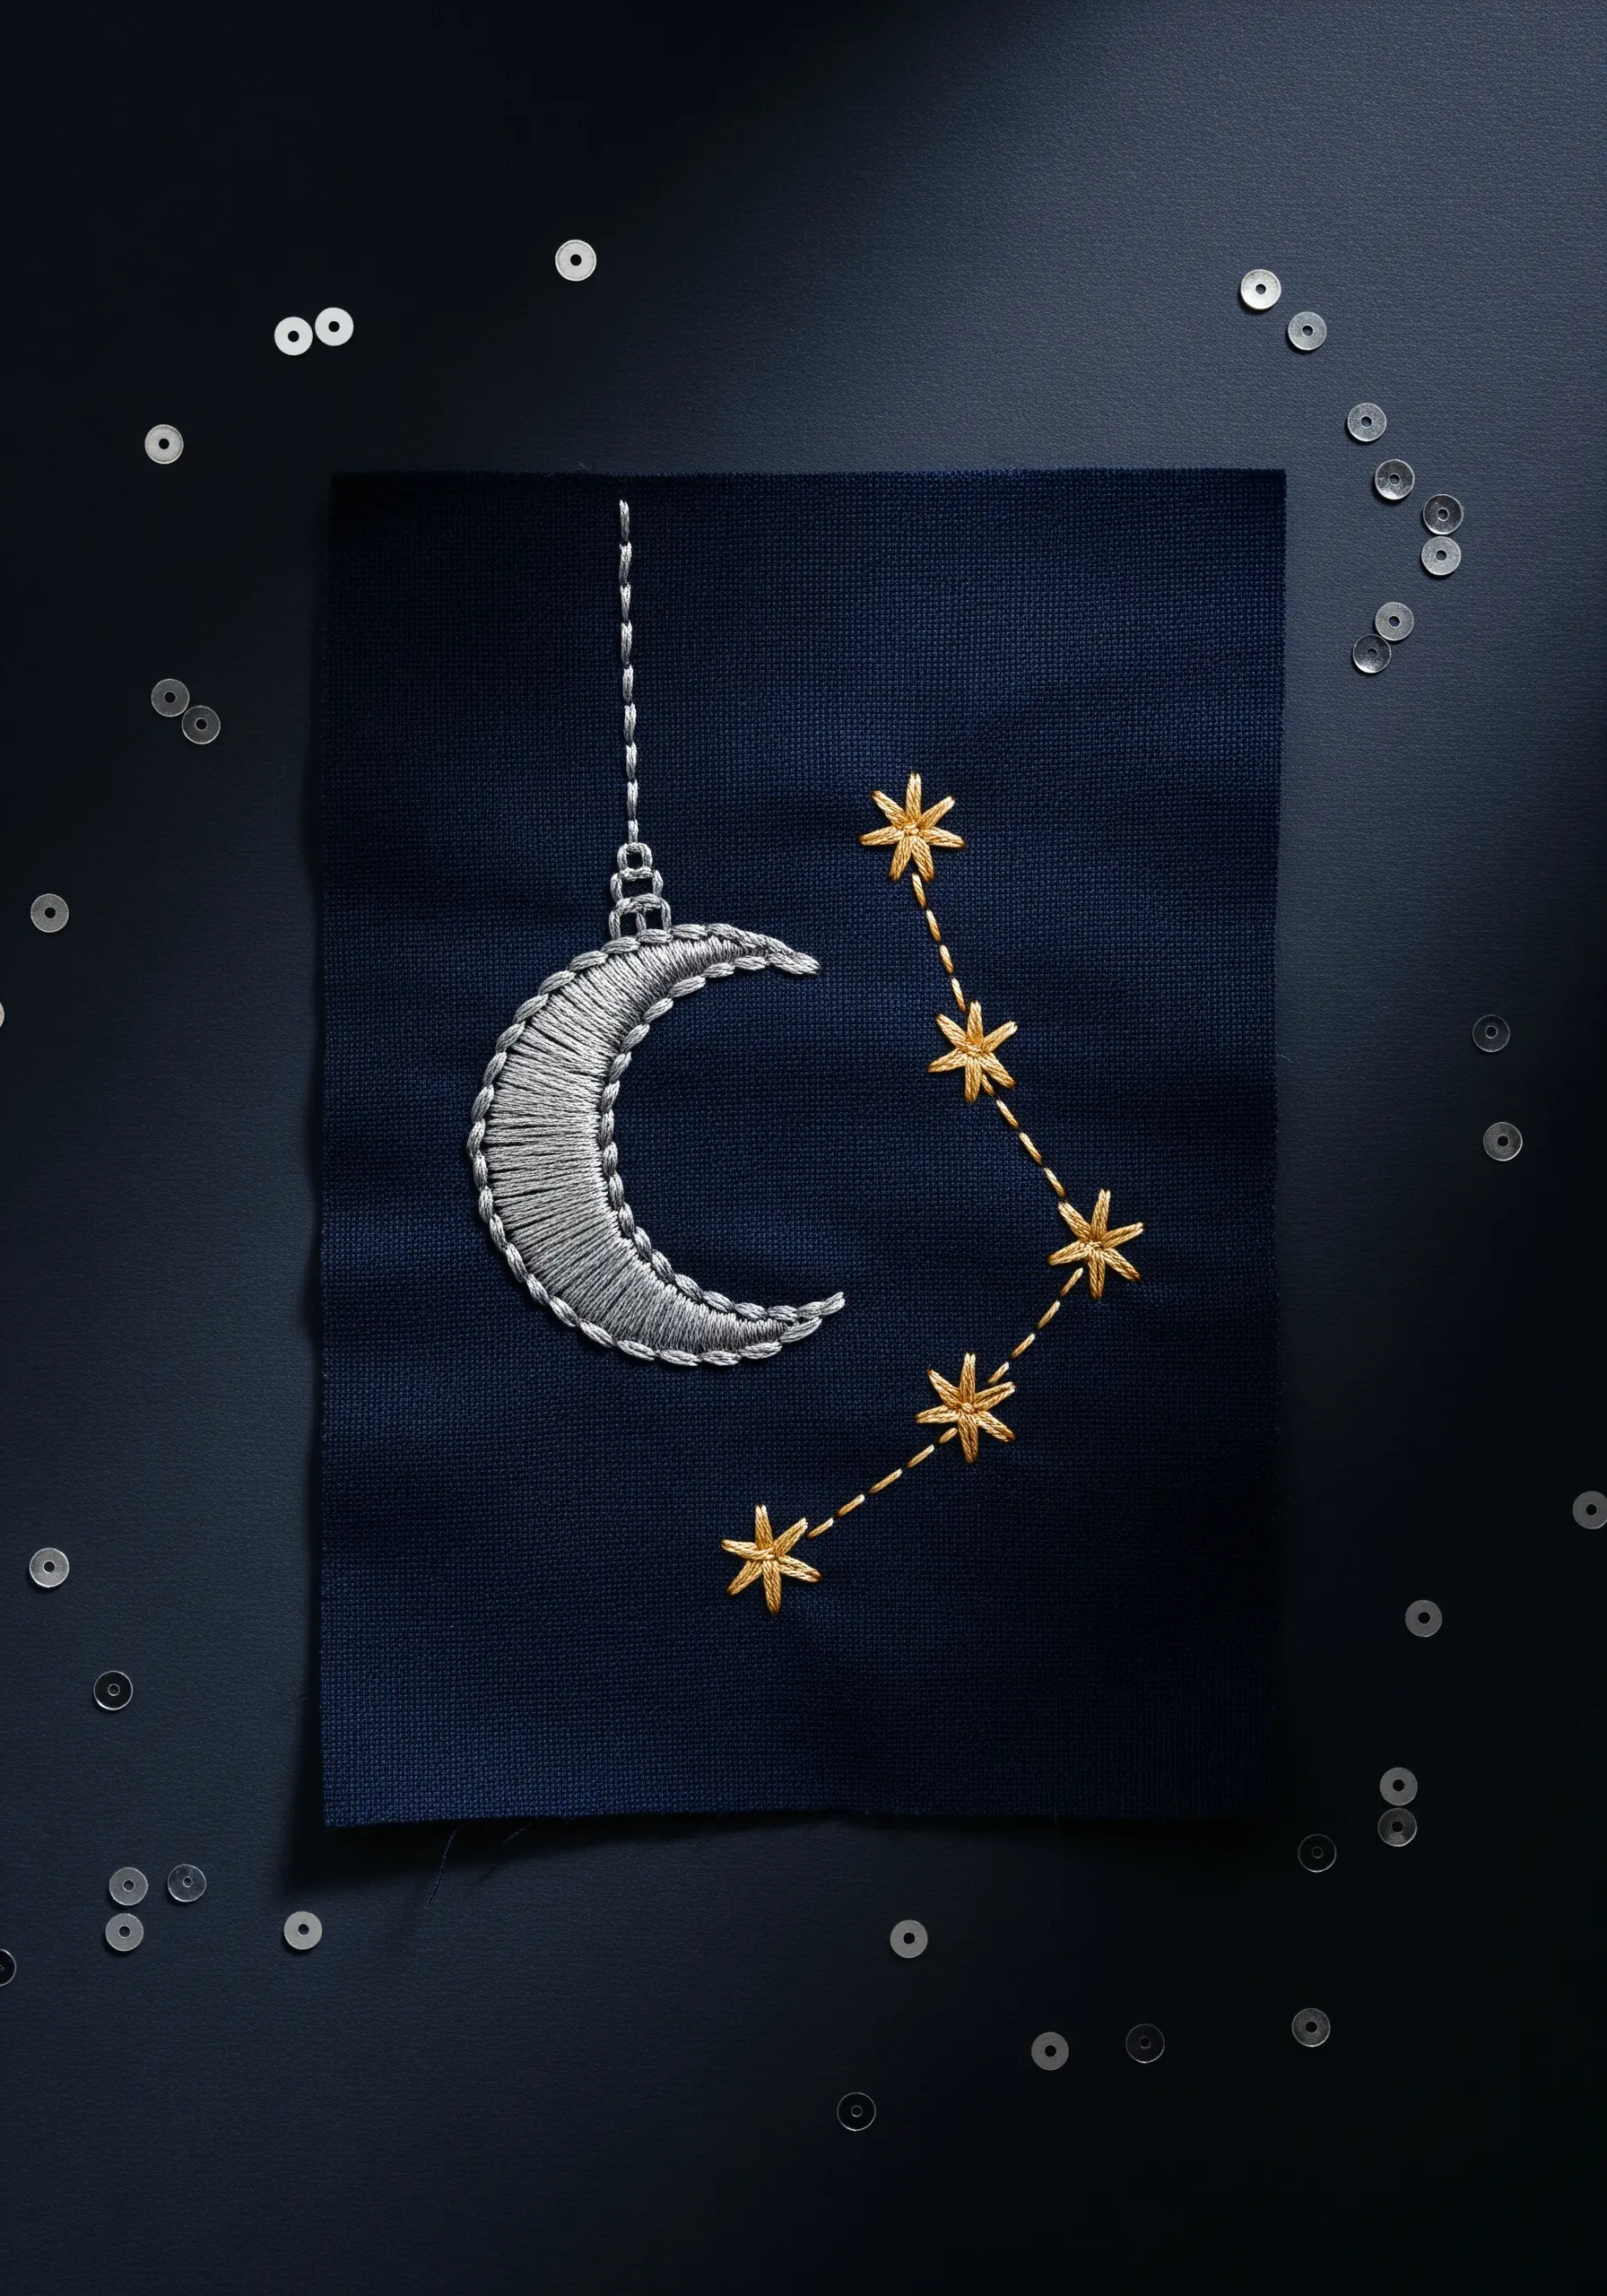
Transform a simple scrap of dark fabric into a sophisticated celestial scene using metallic threads.
For a raised, three-dimensional moon, use a padded satin stitch: create a base of small straight stitches, then cover them with smooth satin stitches in silver.
This underlayer pushes the final stitches up, creating a subtle, luxurious volume.
Stitch the constellation using a contrasting gold thread and simple star stitches to make it pop against the navy background.
Pro tip: use a thread conditioner and a needle with a larger eye to prevent metallic threads from fraying.
7. Capturing Iridescence with Thread Painting
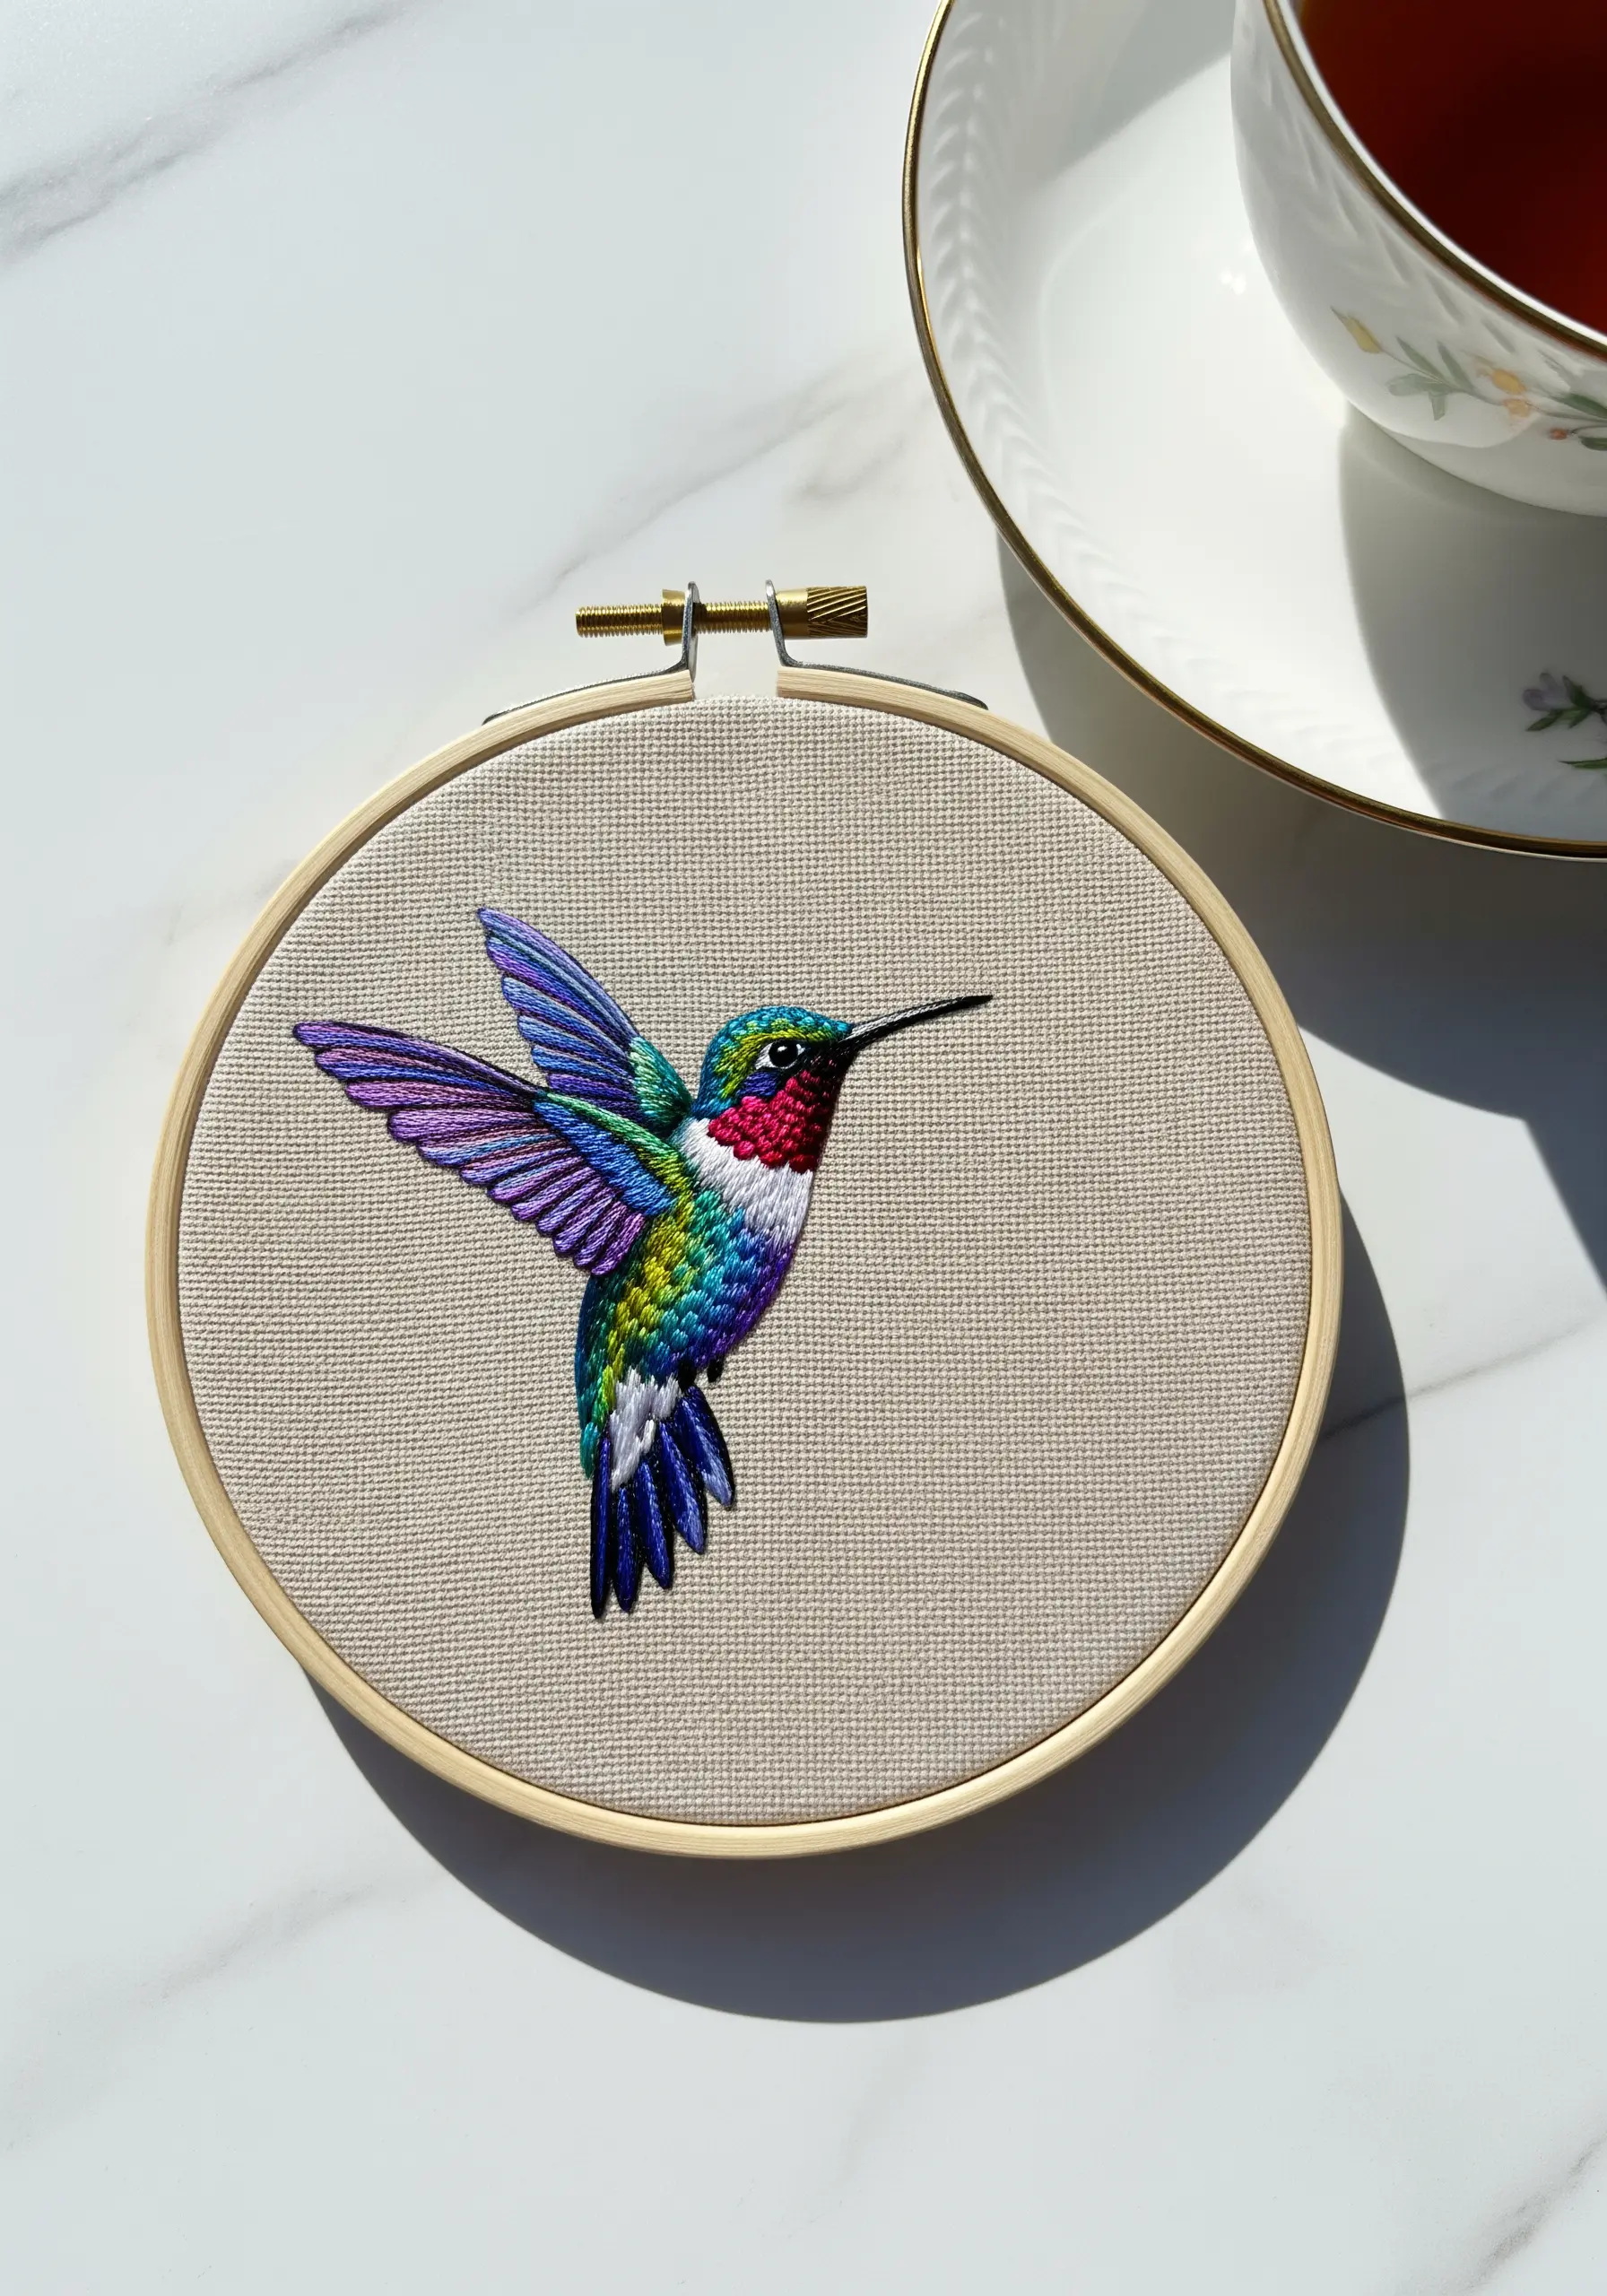
To mimic the shimmering feathers of a hummingbird, you need to think like a painter, blending colors directly on the fabric.
Work with a single strand of floss and use the long-and-short stitch technique for a seamless gradient.
Select several shades for each color area—like three purples and three teals—and interlock your stitches to create a smooth transition from one hue to the next.
Ensure your stitches follow the natural direction of the feathers to create a sense of movement and realism.
8. High-Texture Effects with the Turkey Stitch
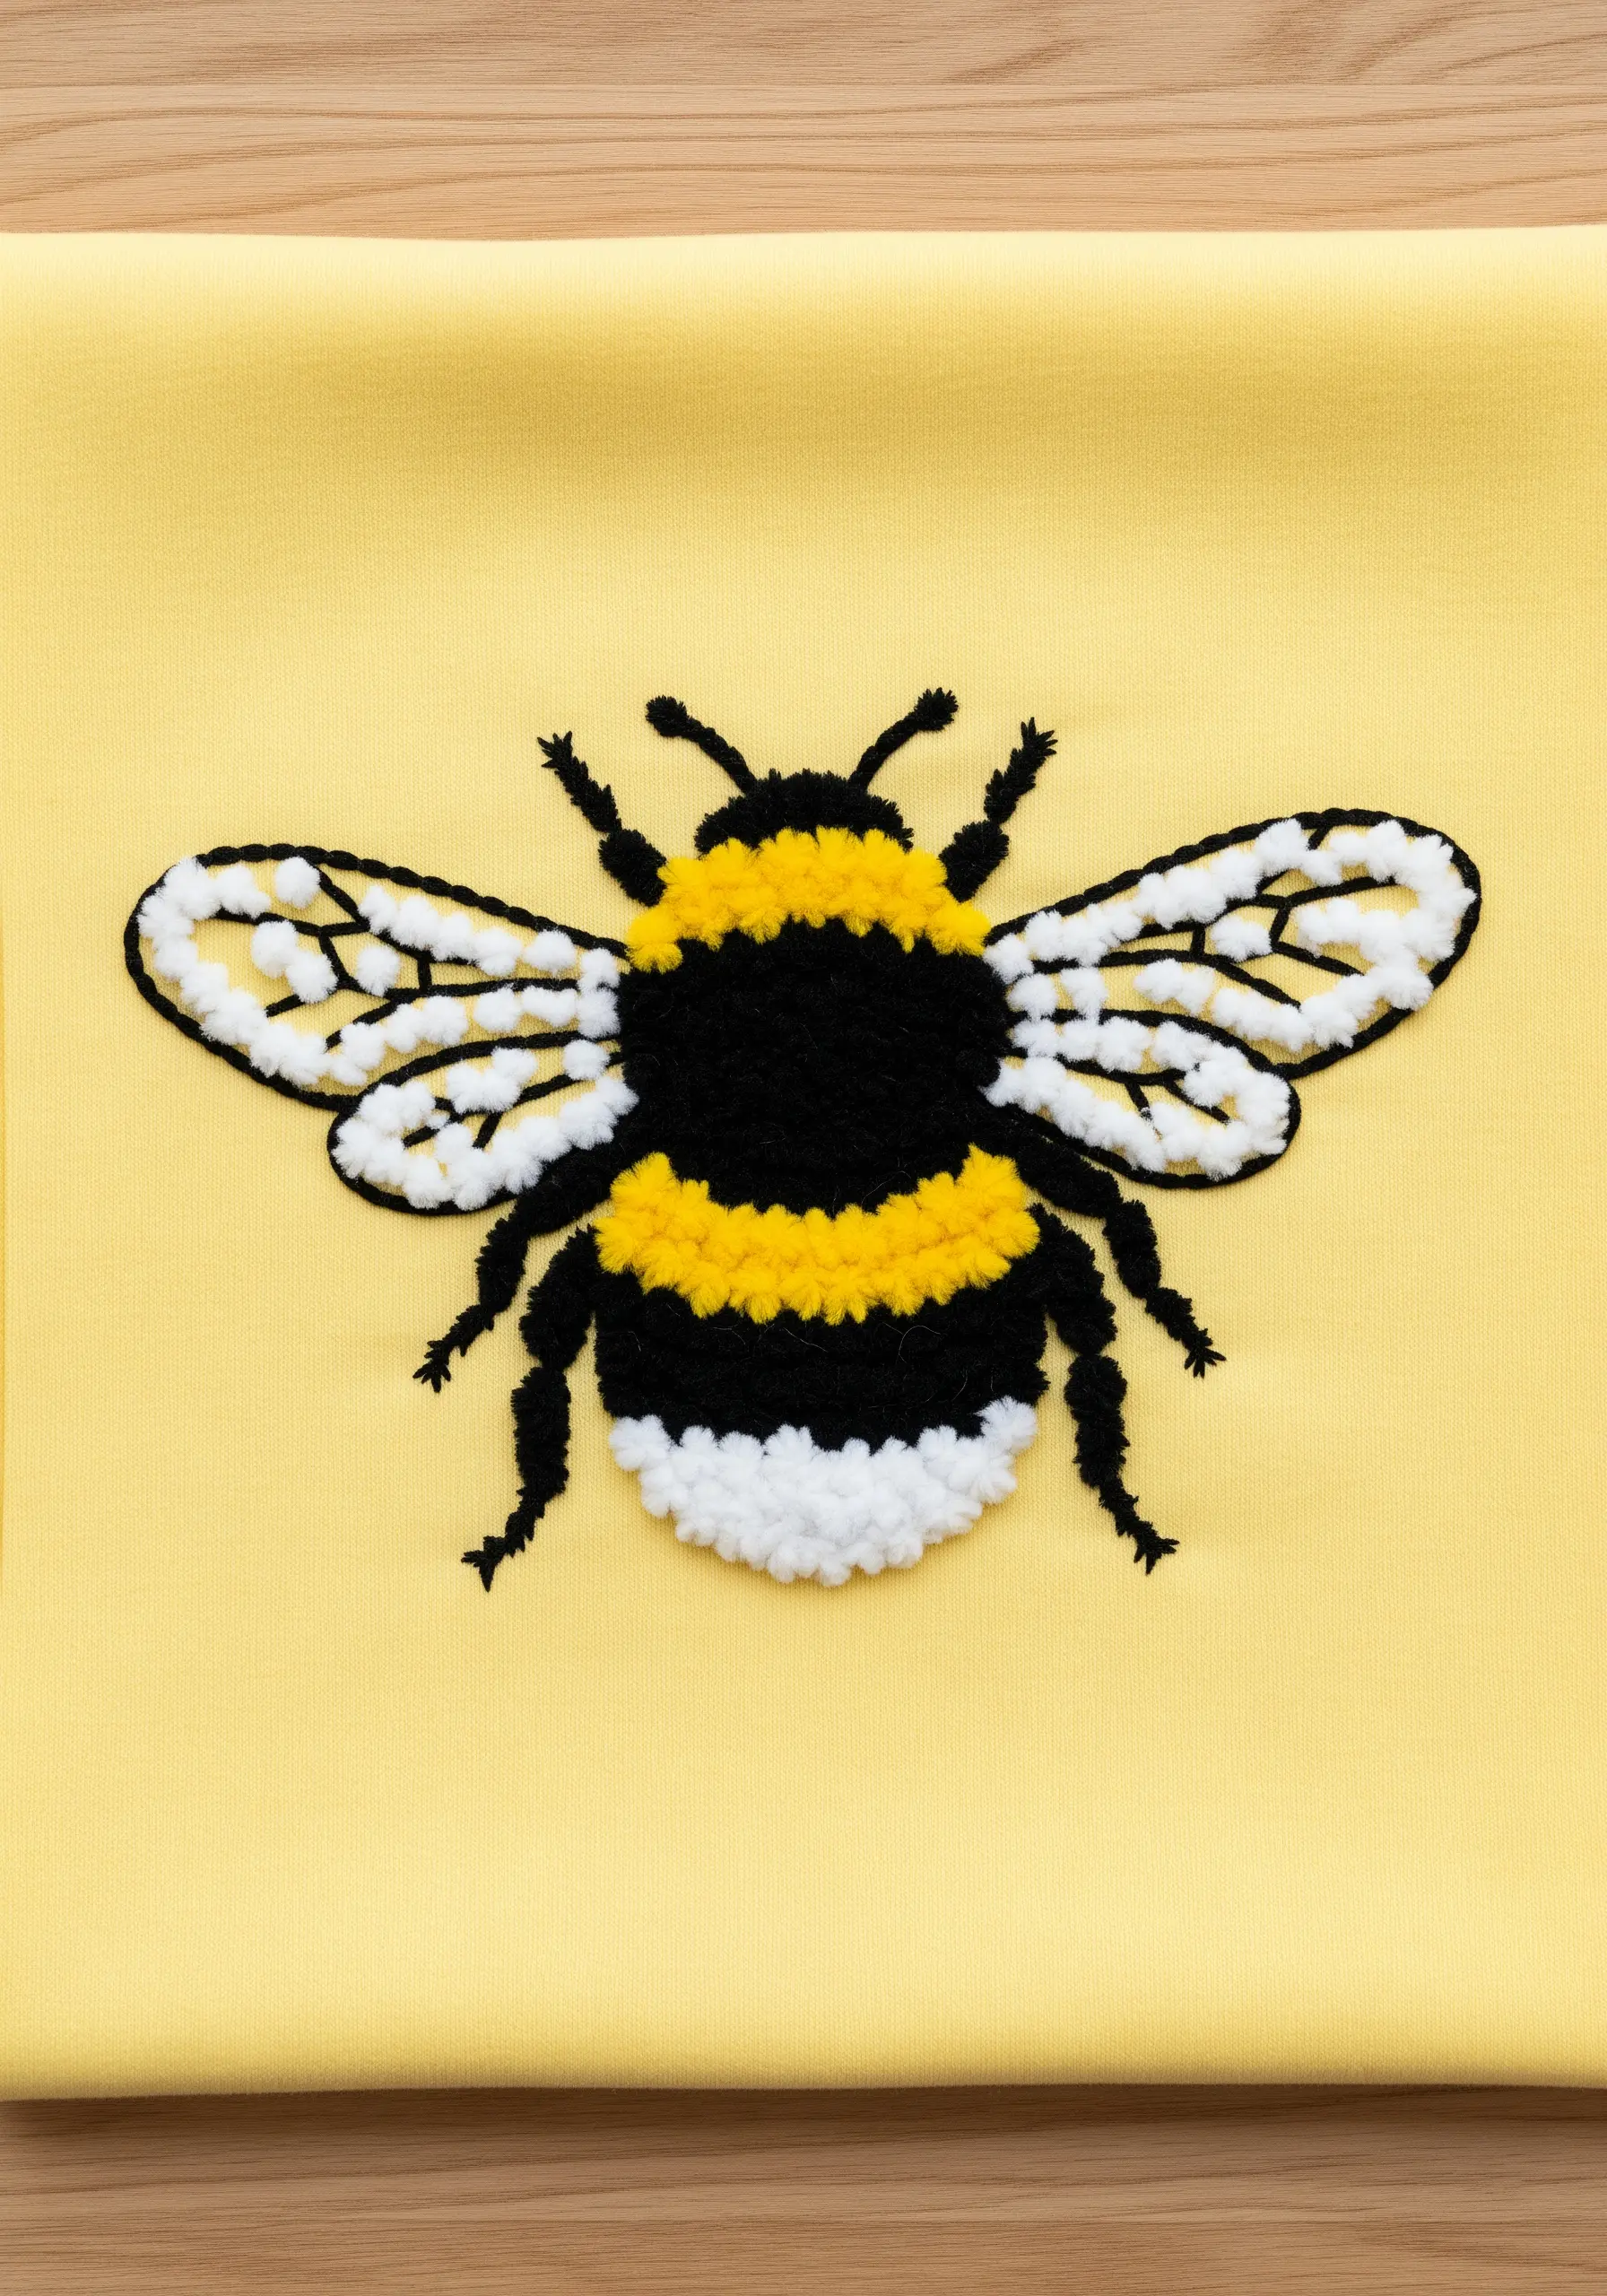
Create an irresistibly fluffy, three-dimensional texture with the Turkey work stitch, also known as the Ghiordes knot.
This stitch creates loops on the surface of your fabric, which you can then trim to your desired length for a soft, plush effect perfect for animal fur or textured fills.
Use it for the fuzzy parts of the bee’s body, then switch to a crisp backstitch for the legs and antennae.
This contrast between the soft, dense texture and the clean linework makes the entire motif stand out.
9. Minimalist Linework with Whipped Backstitch
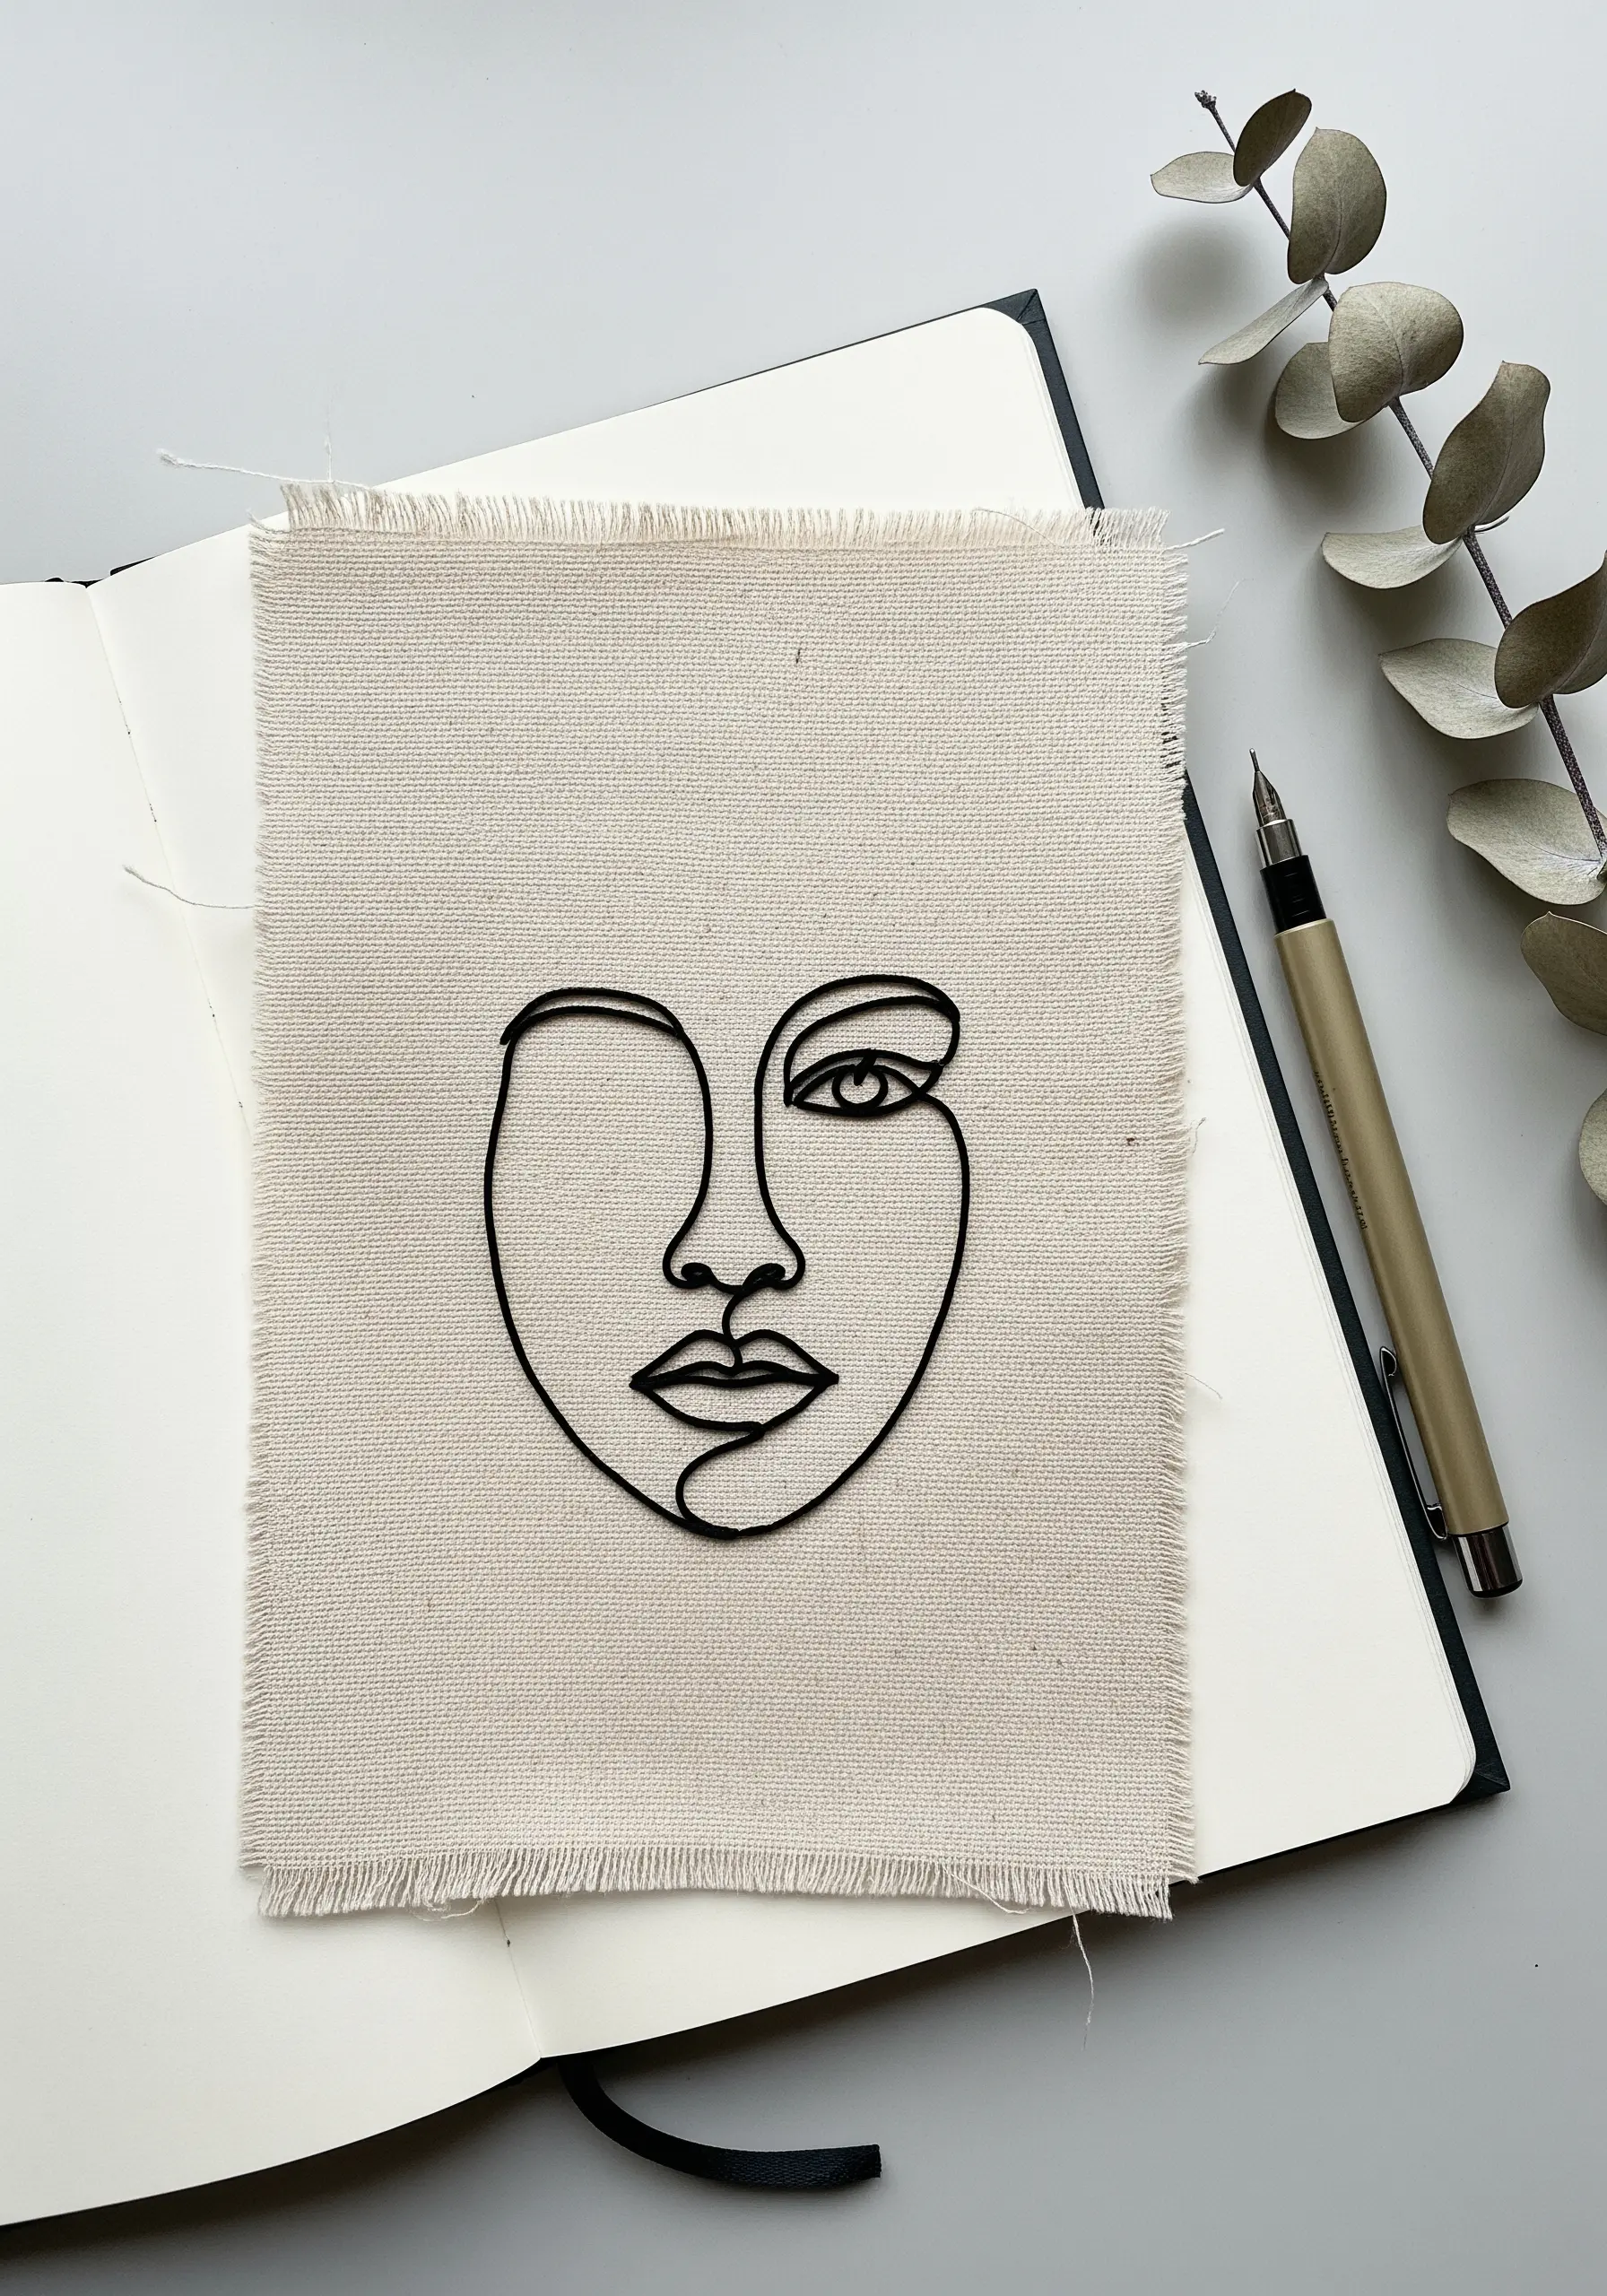
For clean, continuous lines that mimic a single stroke of an ink pen, elevate your backstitch by whipping it.
First, create your design using a standard backstitch.
Then, using the same thread, pass your needle under each backstitch without piercing the fabric. This wraps the existing stitches, eliminating the dotted look of a standard backstitch.
The result is a smooth, raised, and unbroken line, perfect for single-line face profiles and other minimalist artwork on linen or cotton scraps.
10. Realistic Citrus with Directional Stitching
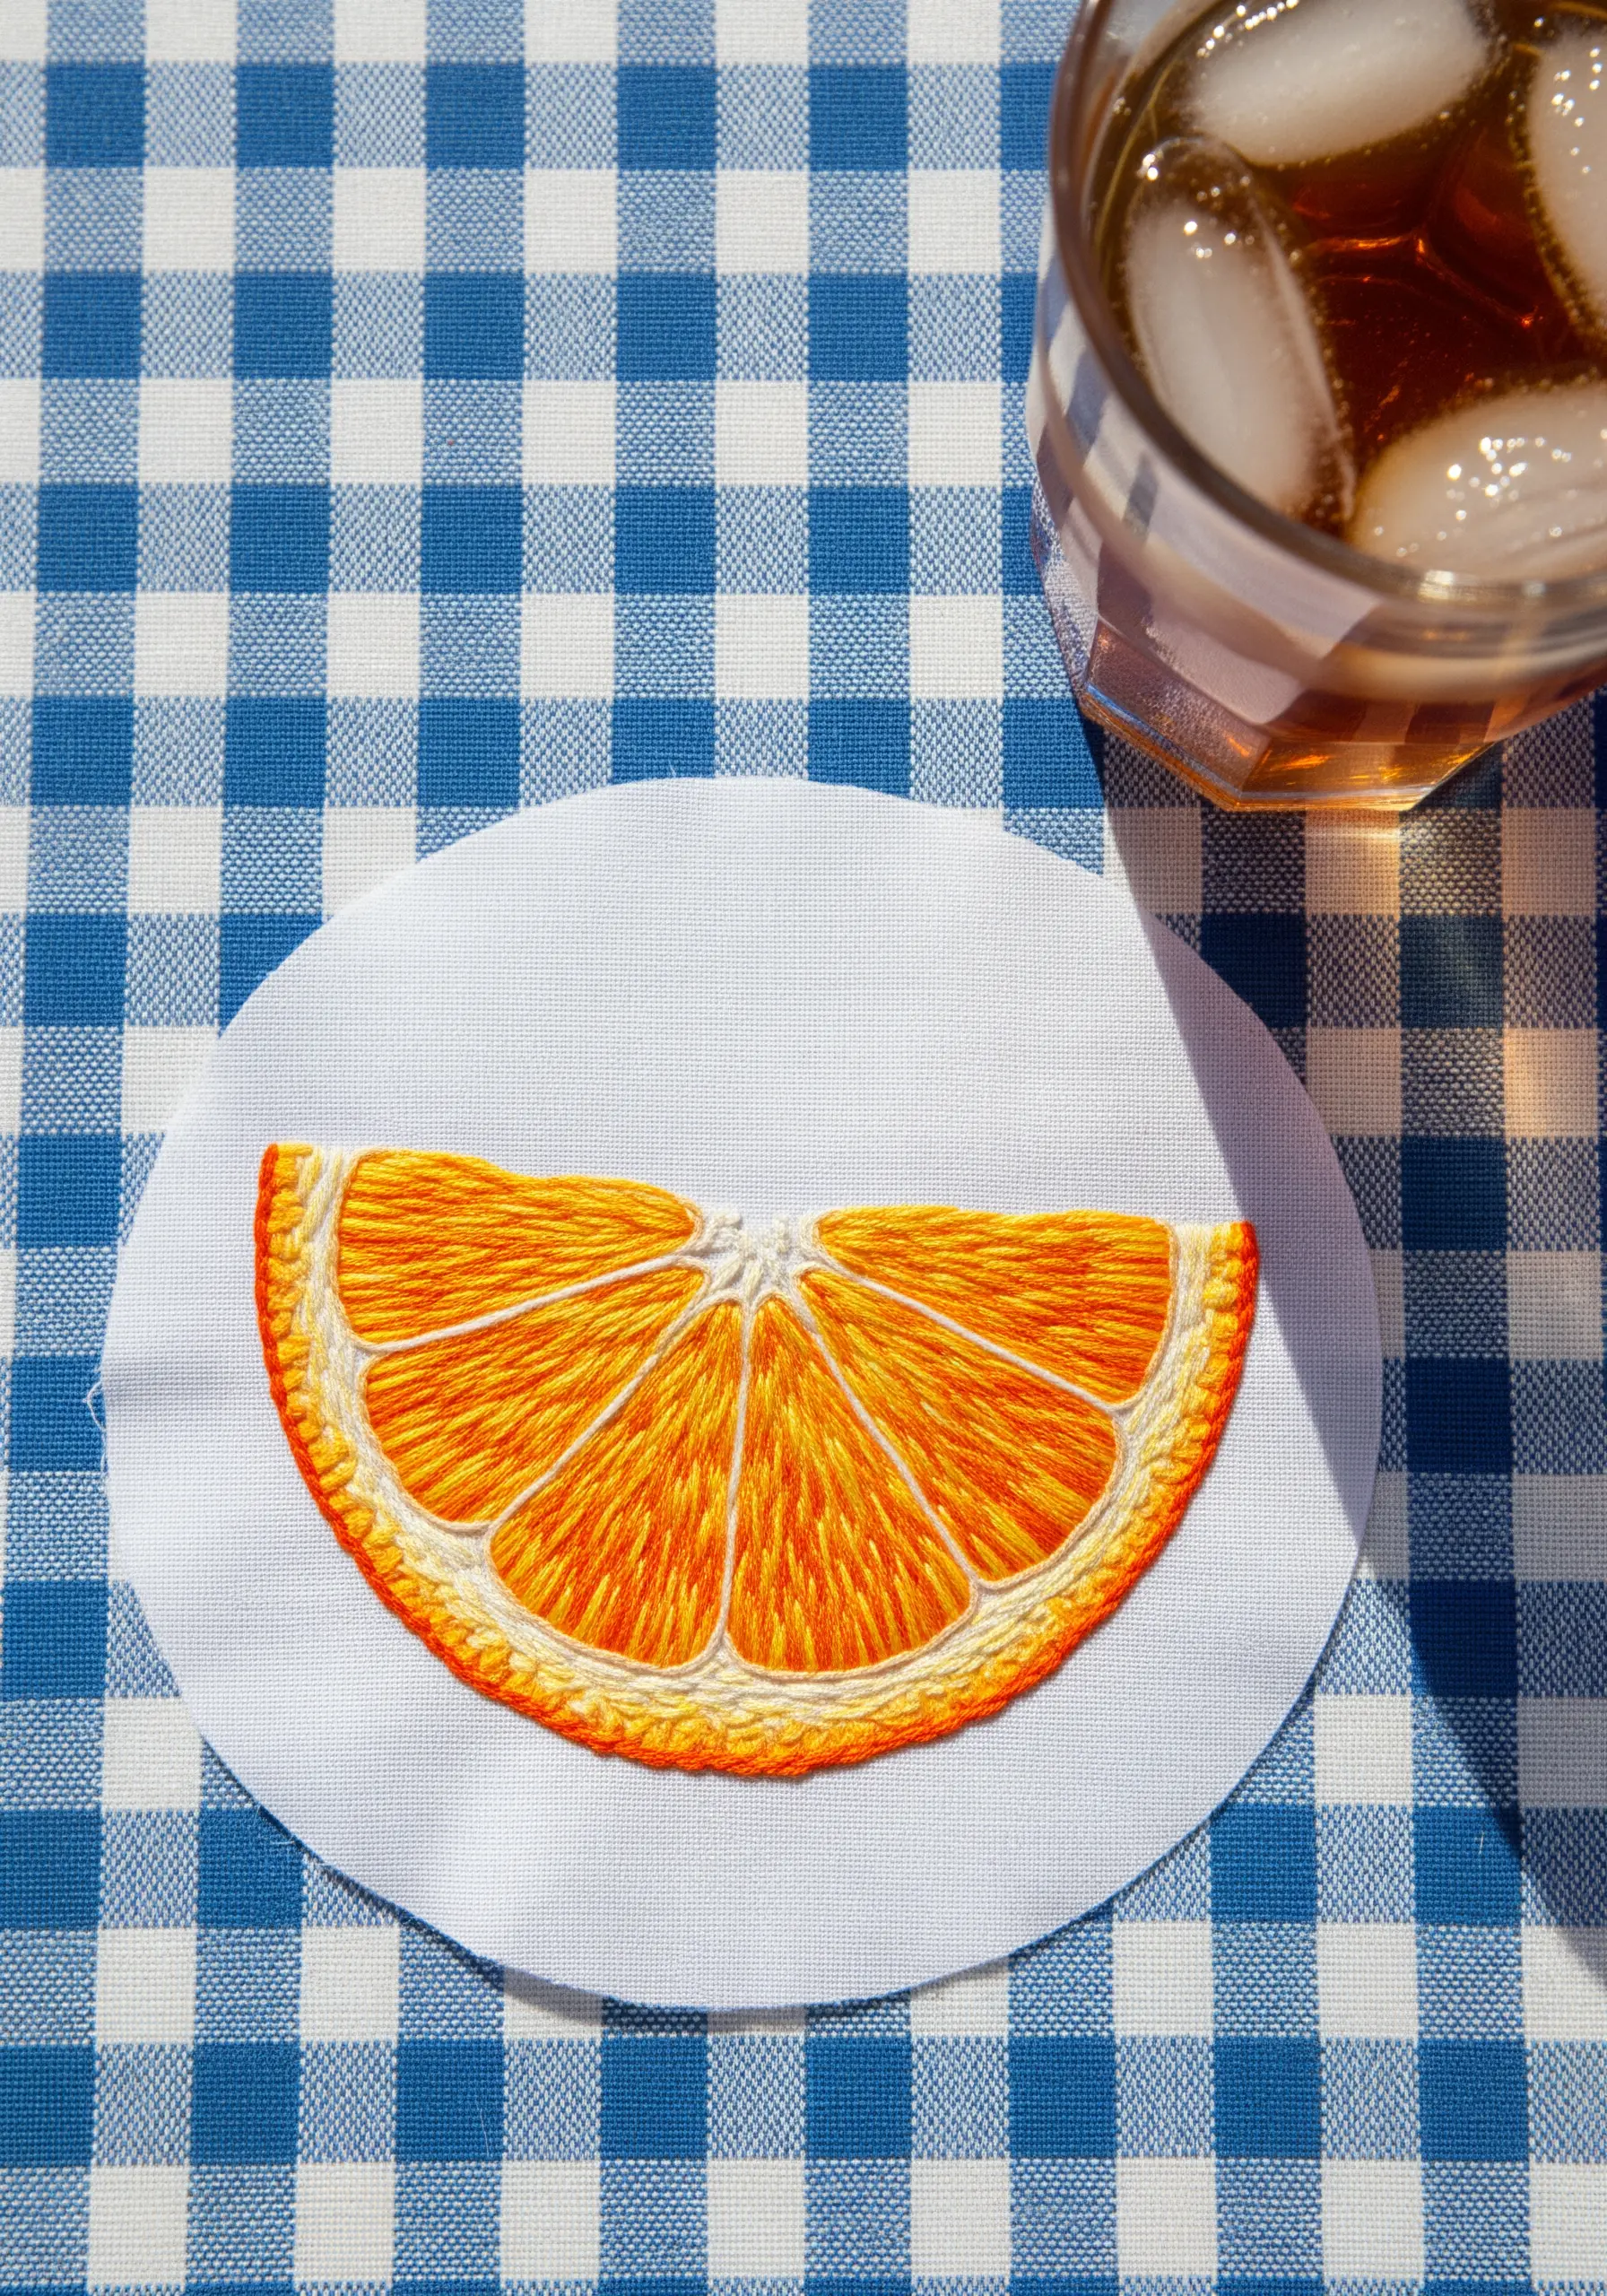
The key to embroidering a believable citrus slice lies entirely in the direction of your satin stitches.
For the individual segments, angle your stitches so they radiate from the center outwards, fanning slightly to mimic the fruit’s natural growth pattern.
Use a variegated floss or blend two to three shades of orange to create the subtle color variations that suggest juiciness and depth.
Frame the entire slice with a clean outline of split stitch to define the rind and give the piece a finished look.
11. Sculptural Waves with Mixed Textures
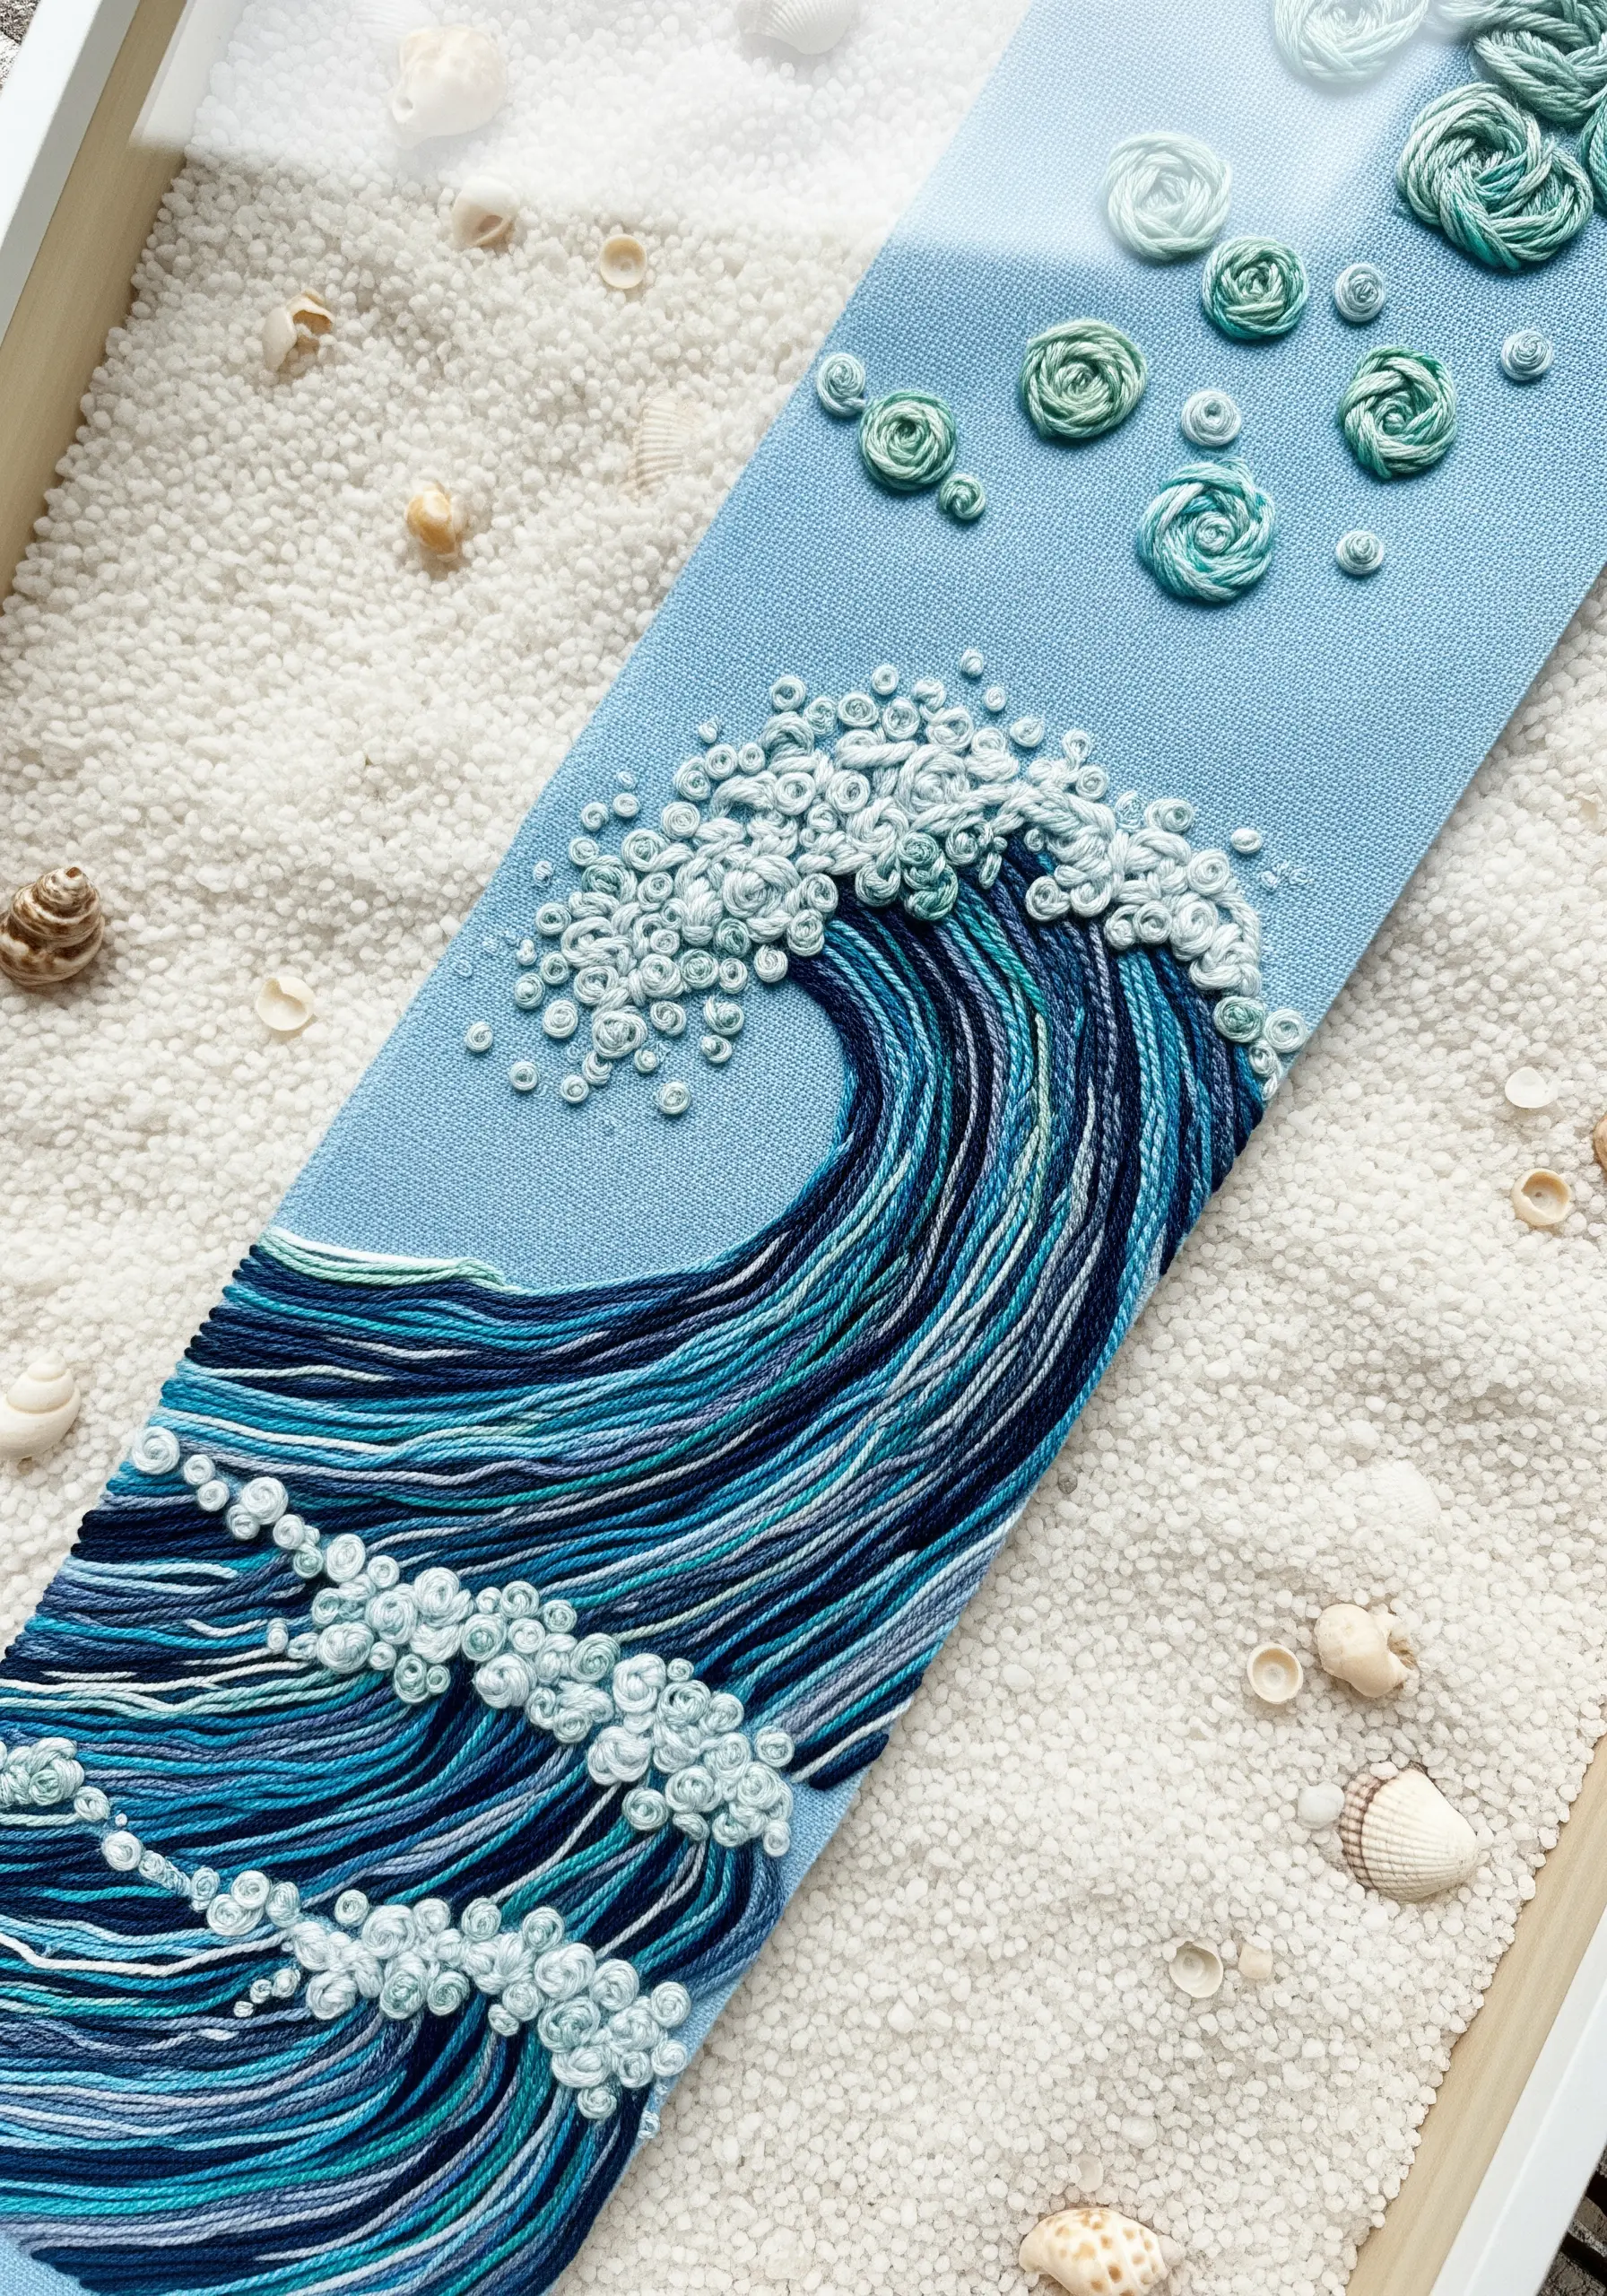
Capture the dynamic energy of the ocean by combining multiple stitches and thread weights in a single composition.
Use long, flowing straight stitches in various blues and teals to form the body of the wave, creating a sense of movement.
Create the crashing seafoam by clustering hundreds of French knots in white and pale blue at the crest of the wave.
Varying the size of your knots by changing the number of times you wrap the thread will add to the chaotic, natural feel of the spray. This creates a beautifully sculptural piece.
12. Modern Terrazzo with Satin Stitch Shapes
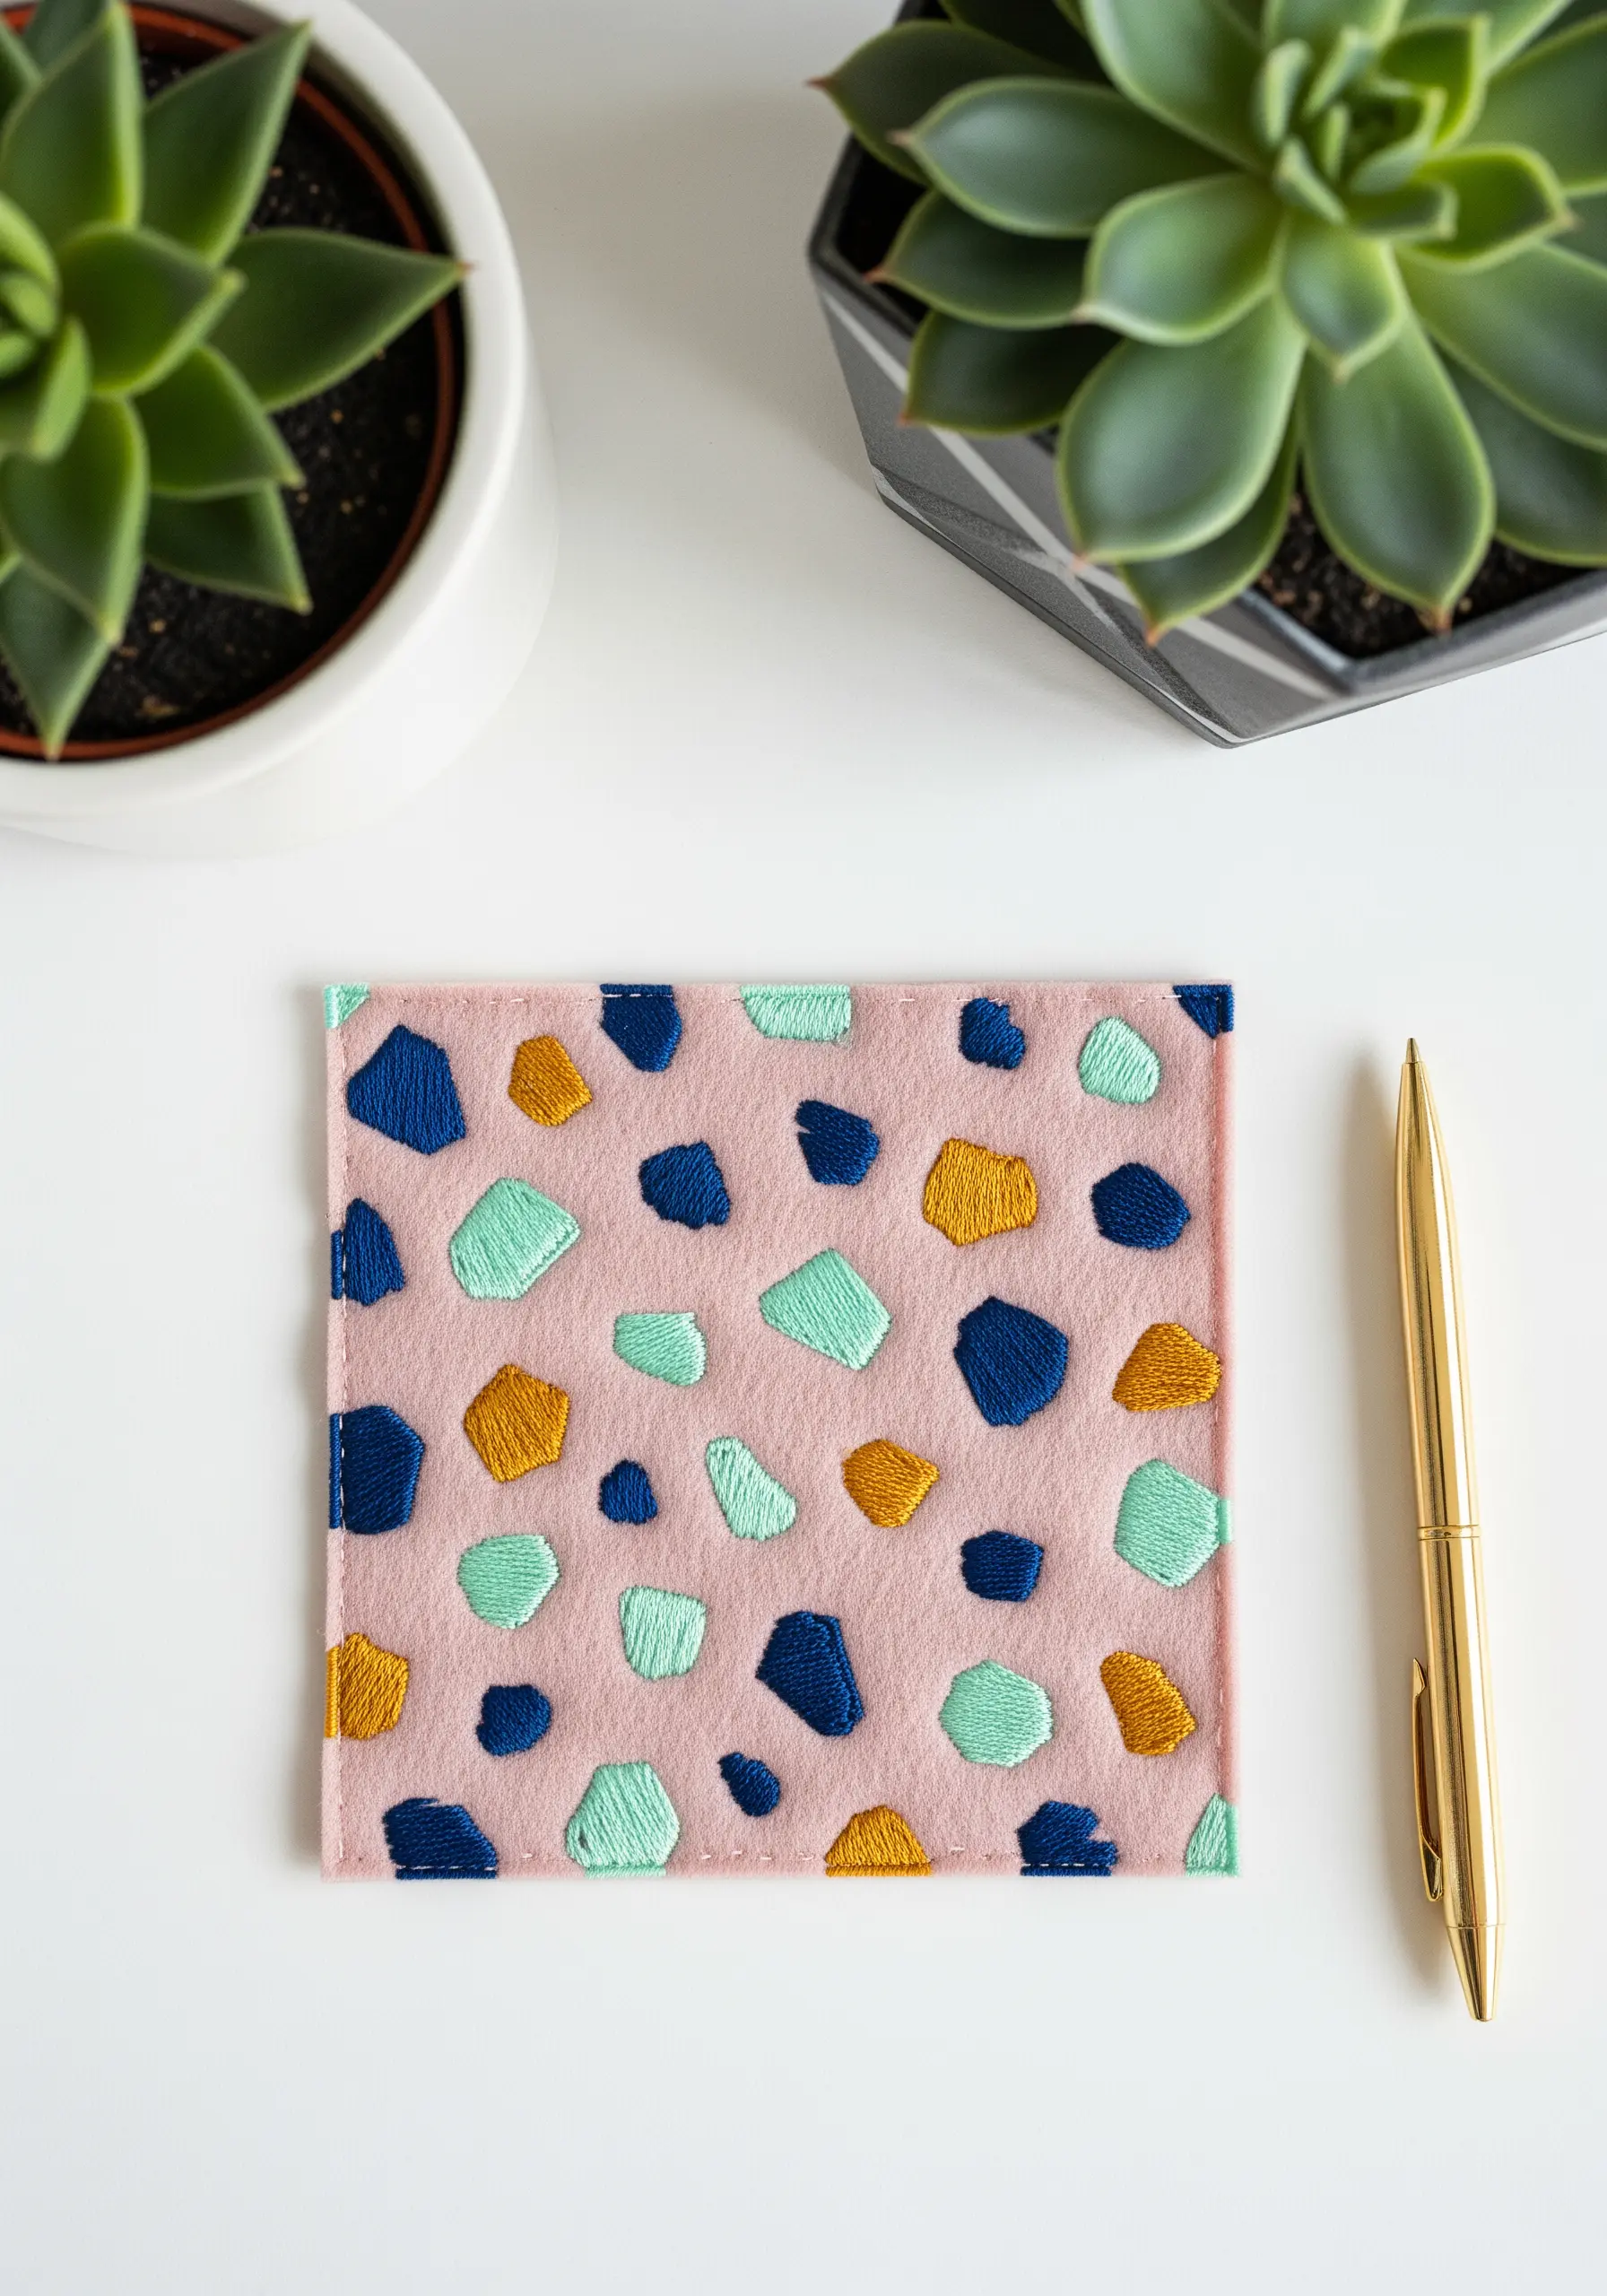
Turn a plain scrap of fabric into a chic, modern textile with a terrazzo-inspired pattern.
Lightly sketch irregular, pebble-like shapes across your fabric, varying their size and orientation.
Fill each shape with a dense satin stitch, but change the angle of your stitches for each new shape. This simple adjustment creates subtle shifts in how the light hits the thread, adding visual interest.
A curated, contemporary color palette is key to achieving a sophisticated, intentional look.
13. Delicate Wildflowers with Specific Stitches
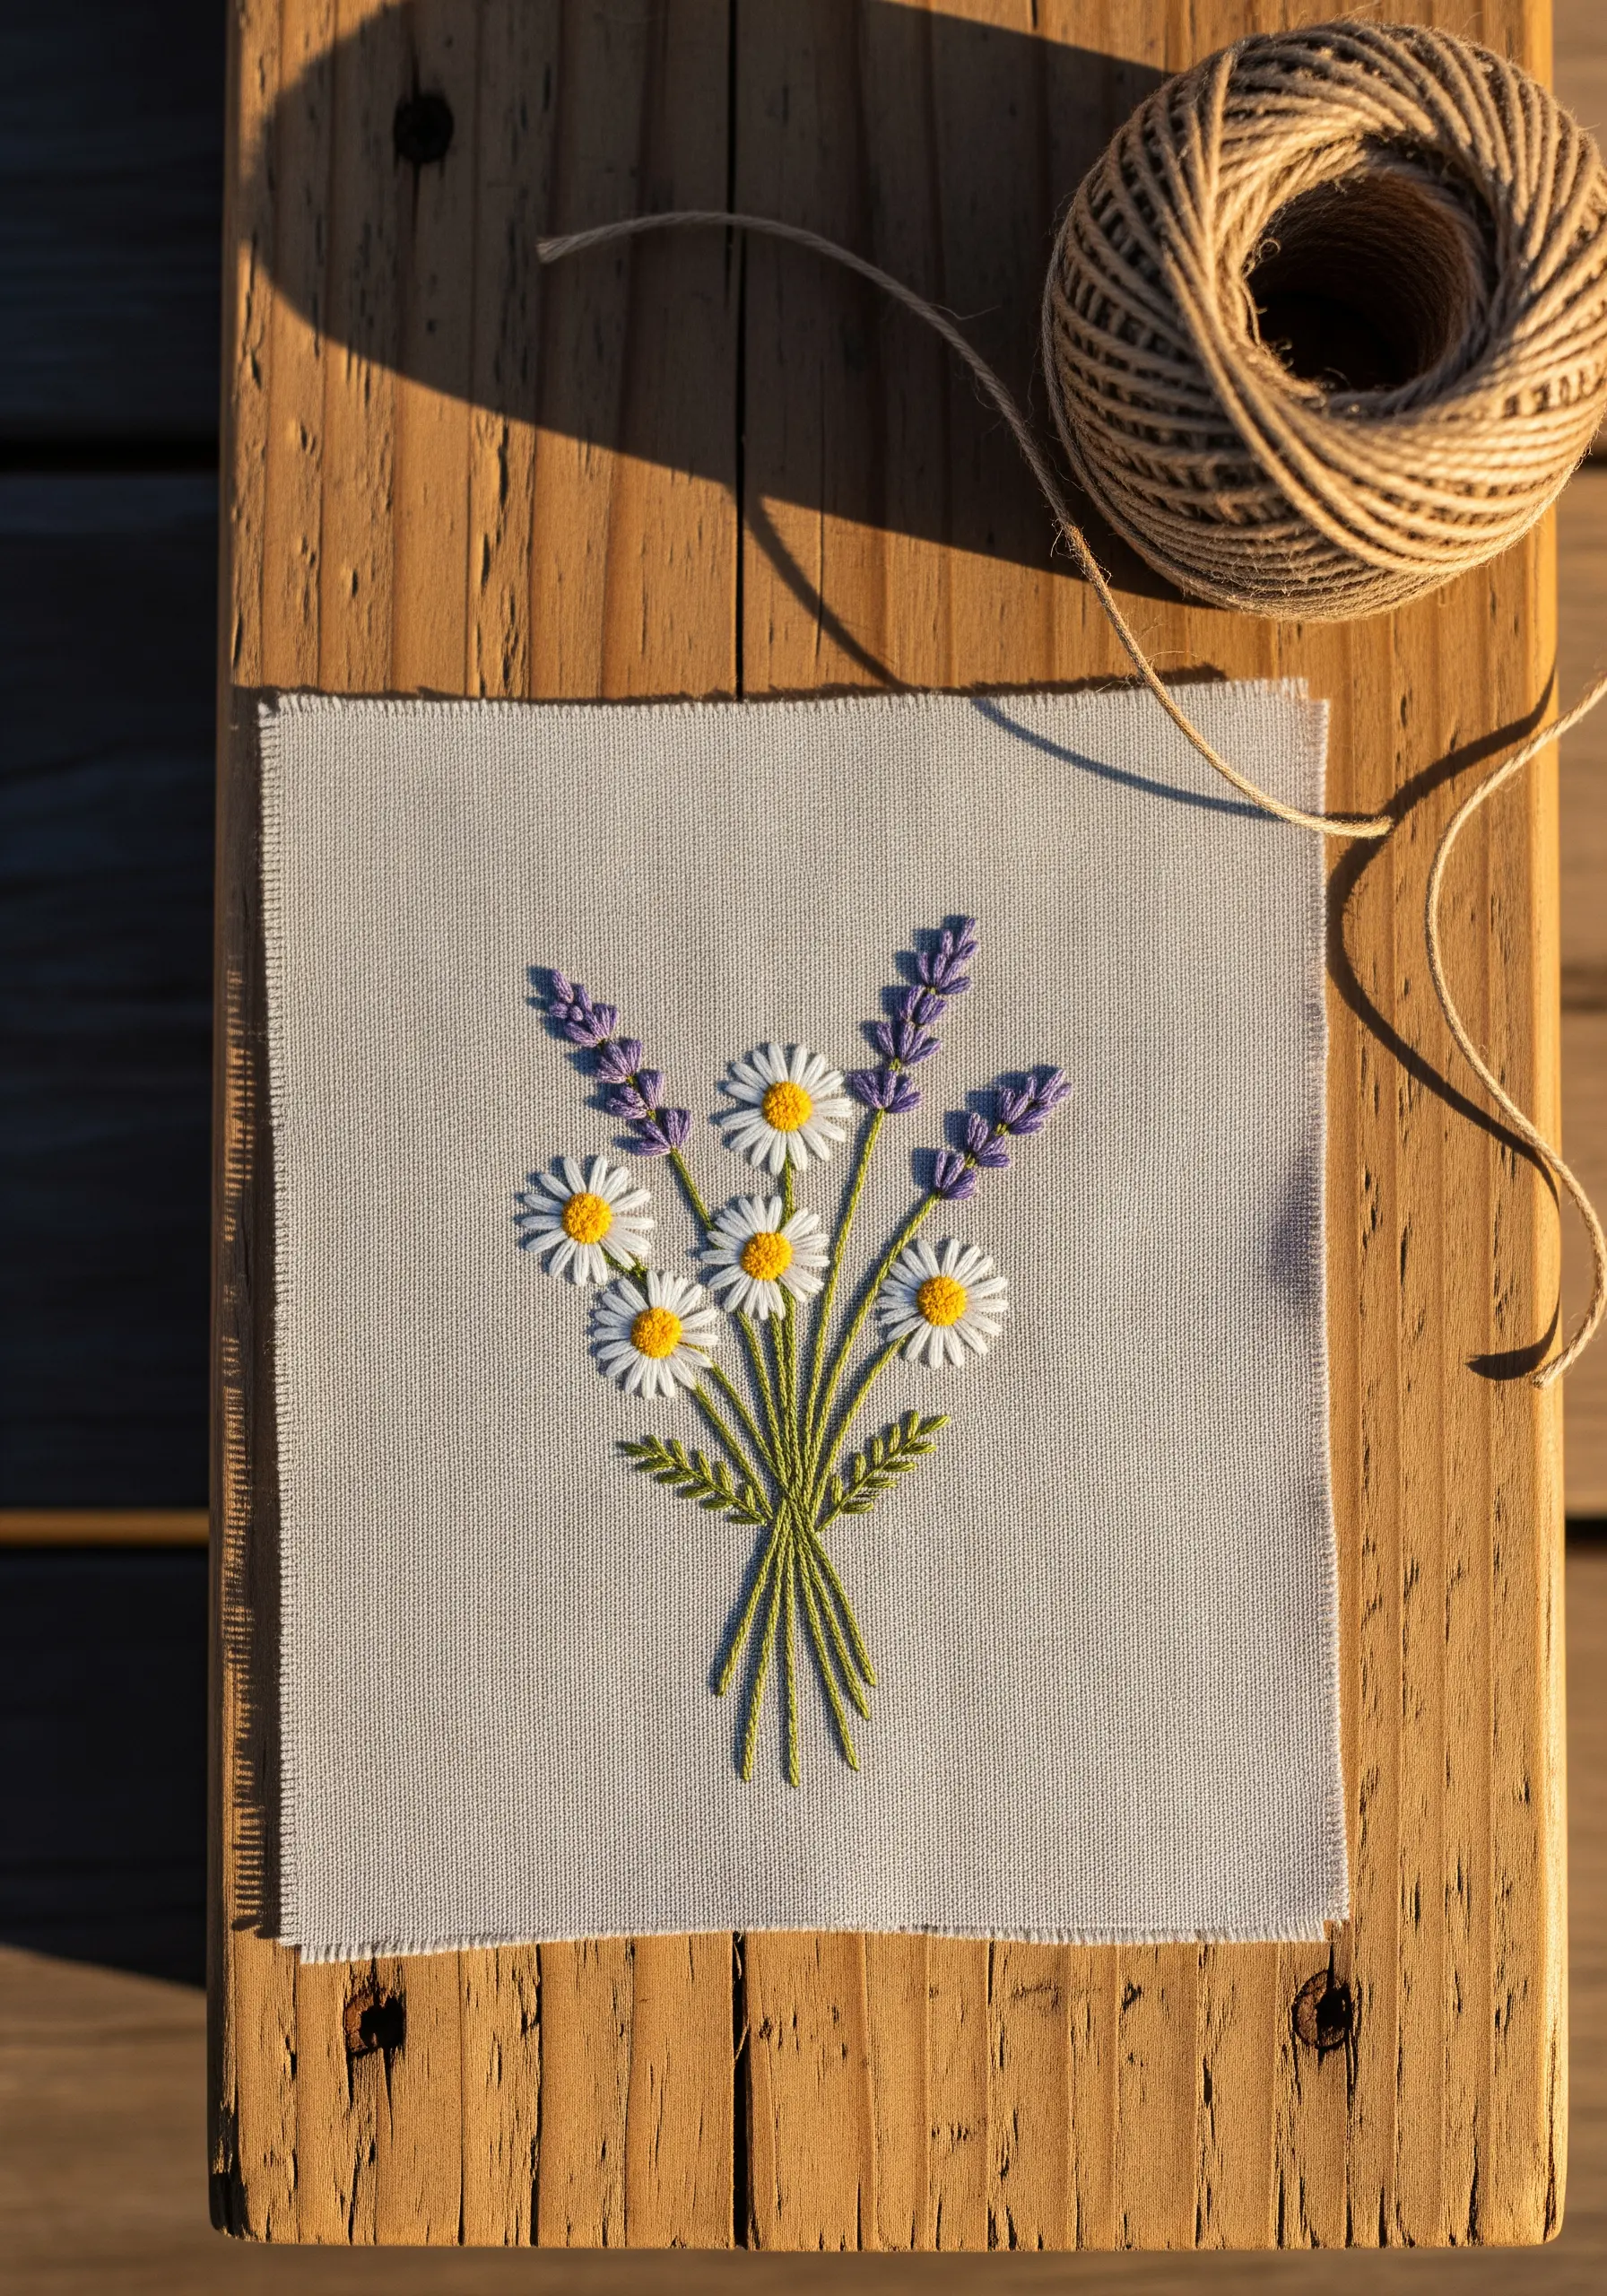
Give a simple bouquet a refined, illustrative quality by assigning a specific stitch to each type of flower.
Use lazy daisy stitches for the daisy petals to create their perfect teardrop shape, and fill the centers with a cluster of yellow French knots for texture.
For the lavender sprigs, bullion knots or small woven wheel stitches create the perfect dimensional form.
Connect everything with a clean stem stitch. This thoughtful approach makes each botanical element distinct and the entire composition more believable.
14. High-Contrast Mandalas on Dark Fabric
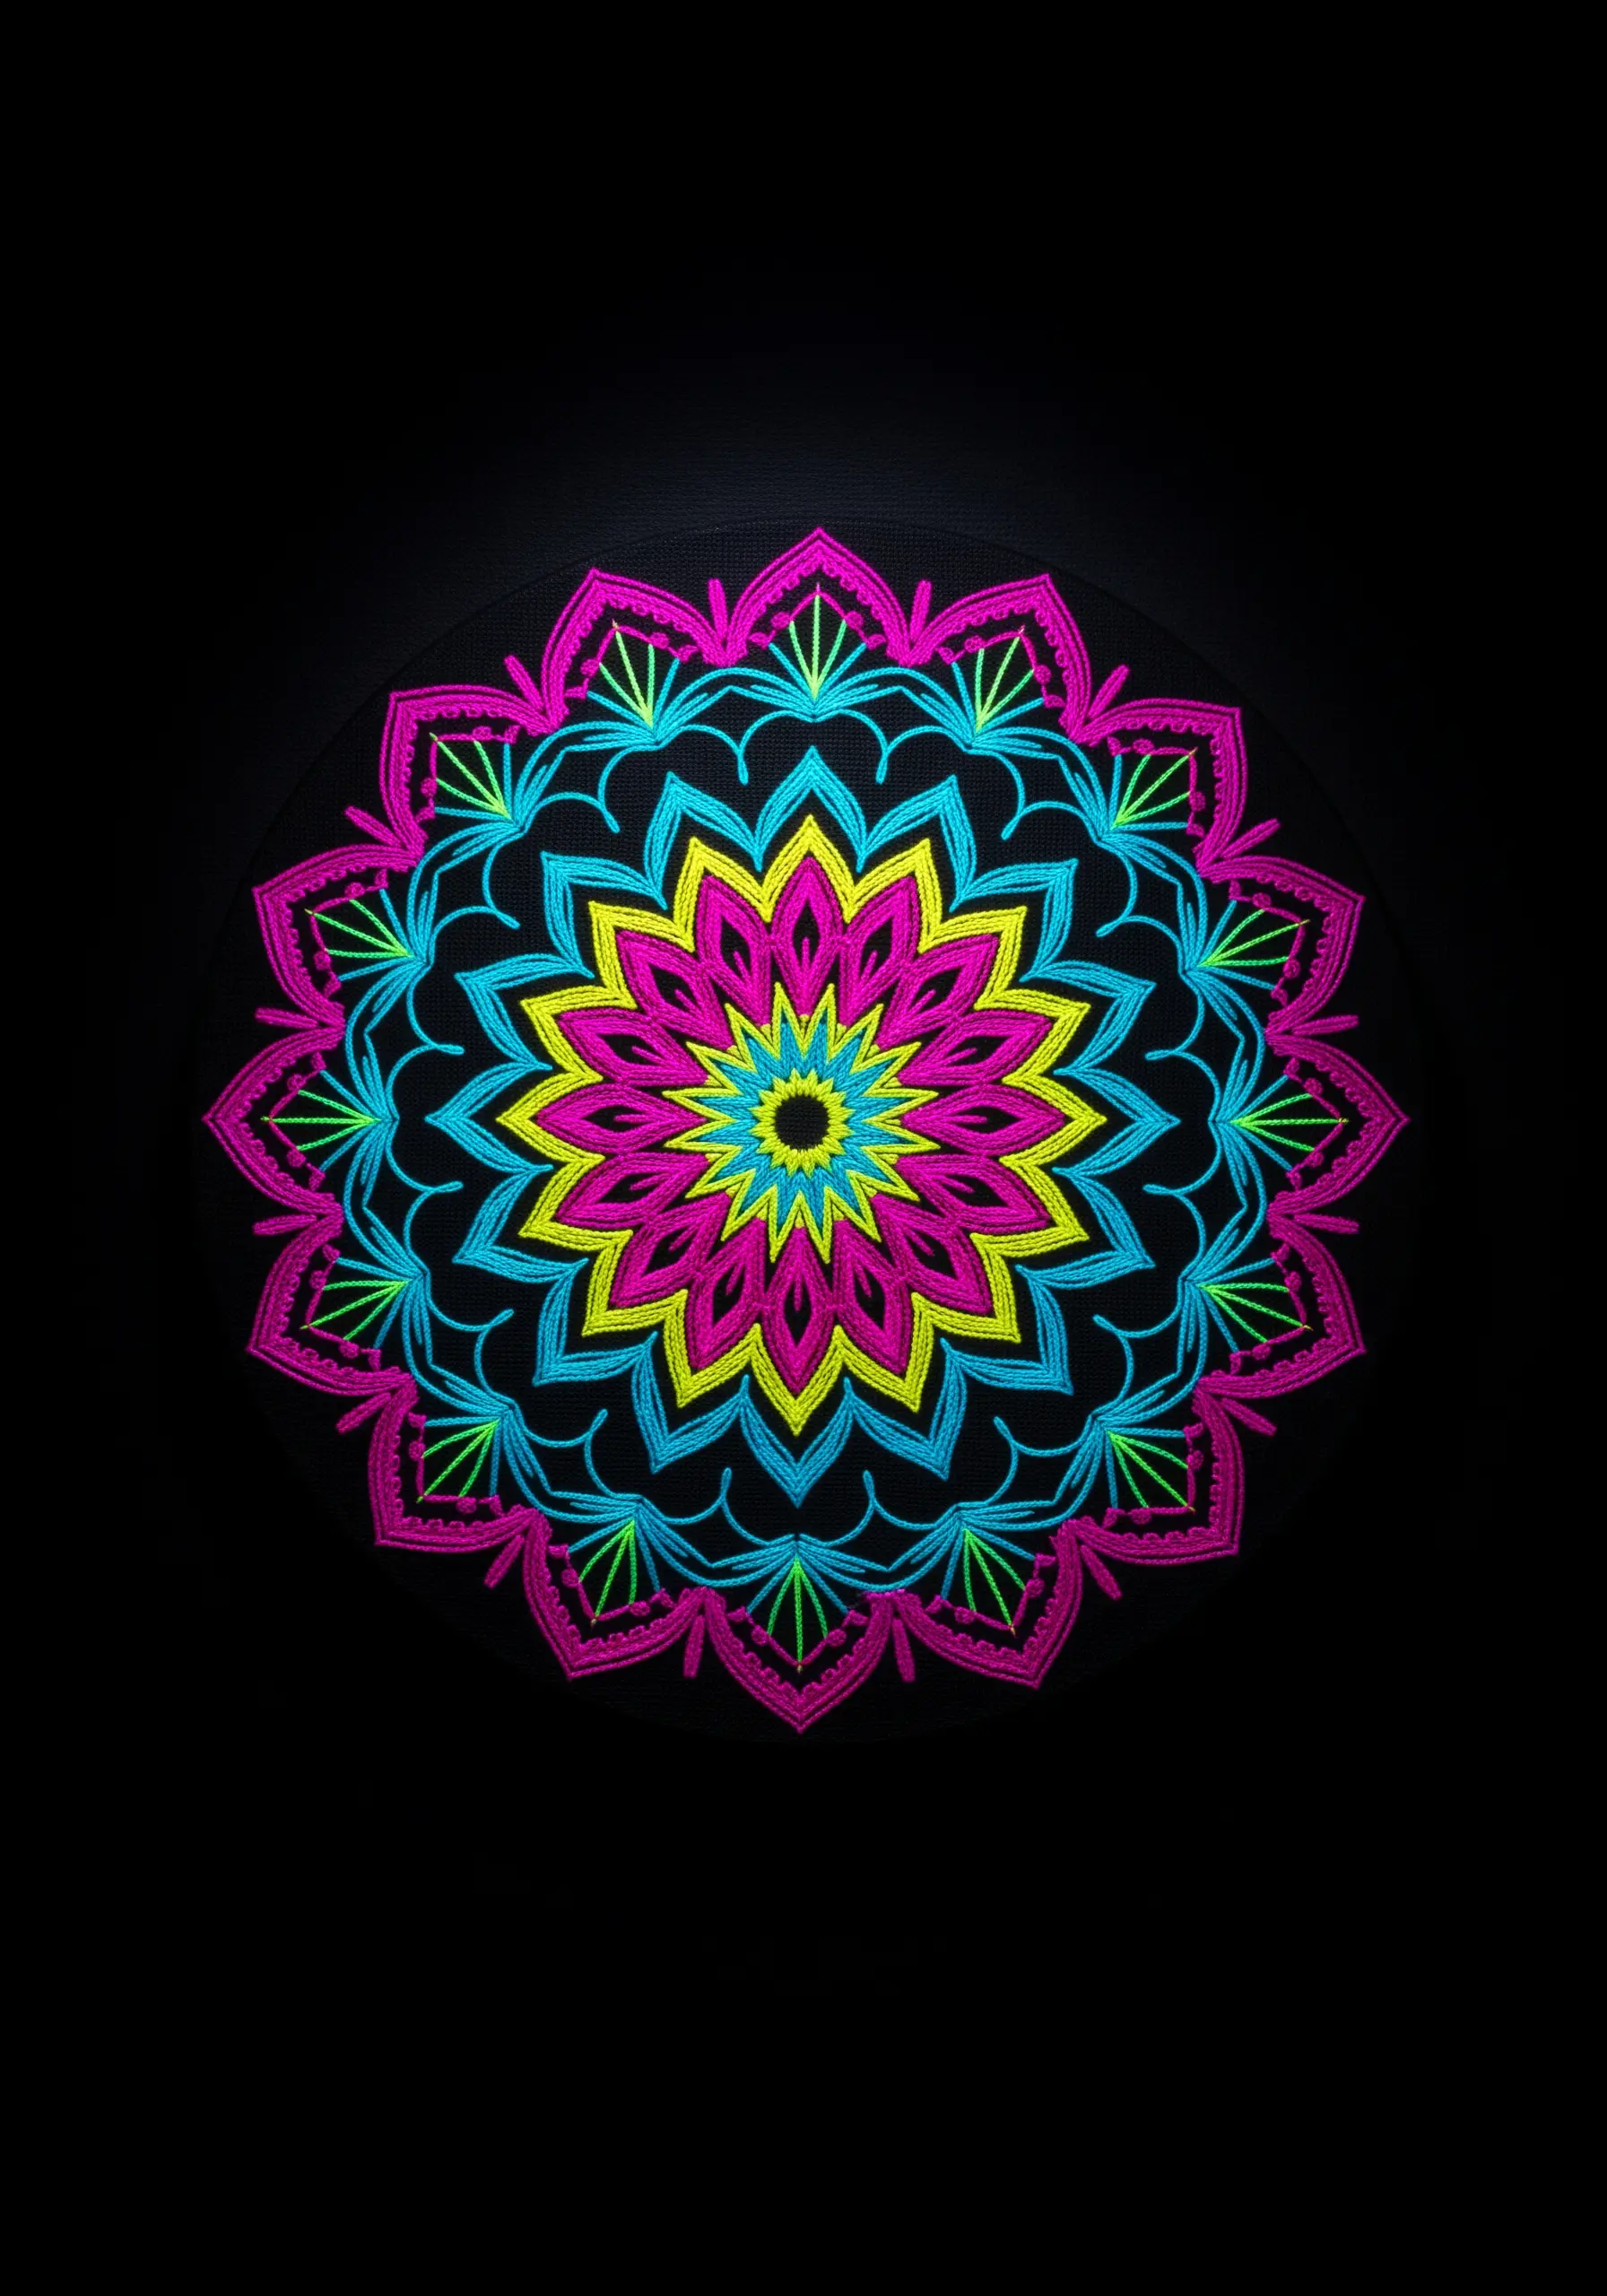
Make your stitches radiate with energy by using bold, neon threads on a black fabric background.
The deep, dark canvas makes fluorescent colors appear exceptionally vibrant and luminous.
To maintain the crisp, geometric precision of the mandala, use a simple backstitch or stem stitch for all the linework.
For any filled sections, a smooth, consistent satin stitch will provide a solid block of color that pops against the black.
Always use a stabilizer with dark, thin fabrics to prevent puckering and distortion from dense stitching.
15. Ornate Detail with Bead Embroidery
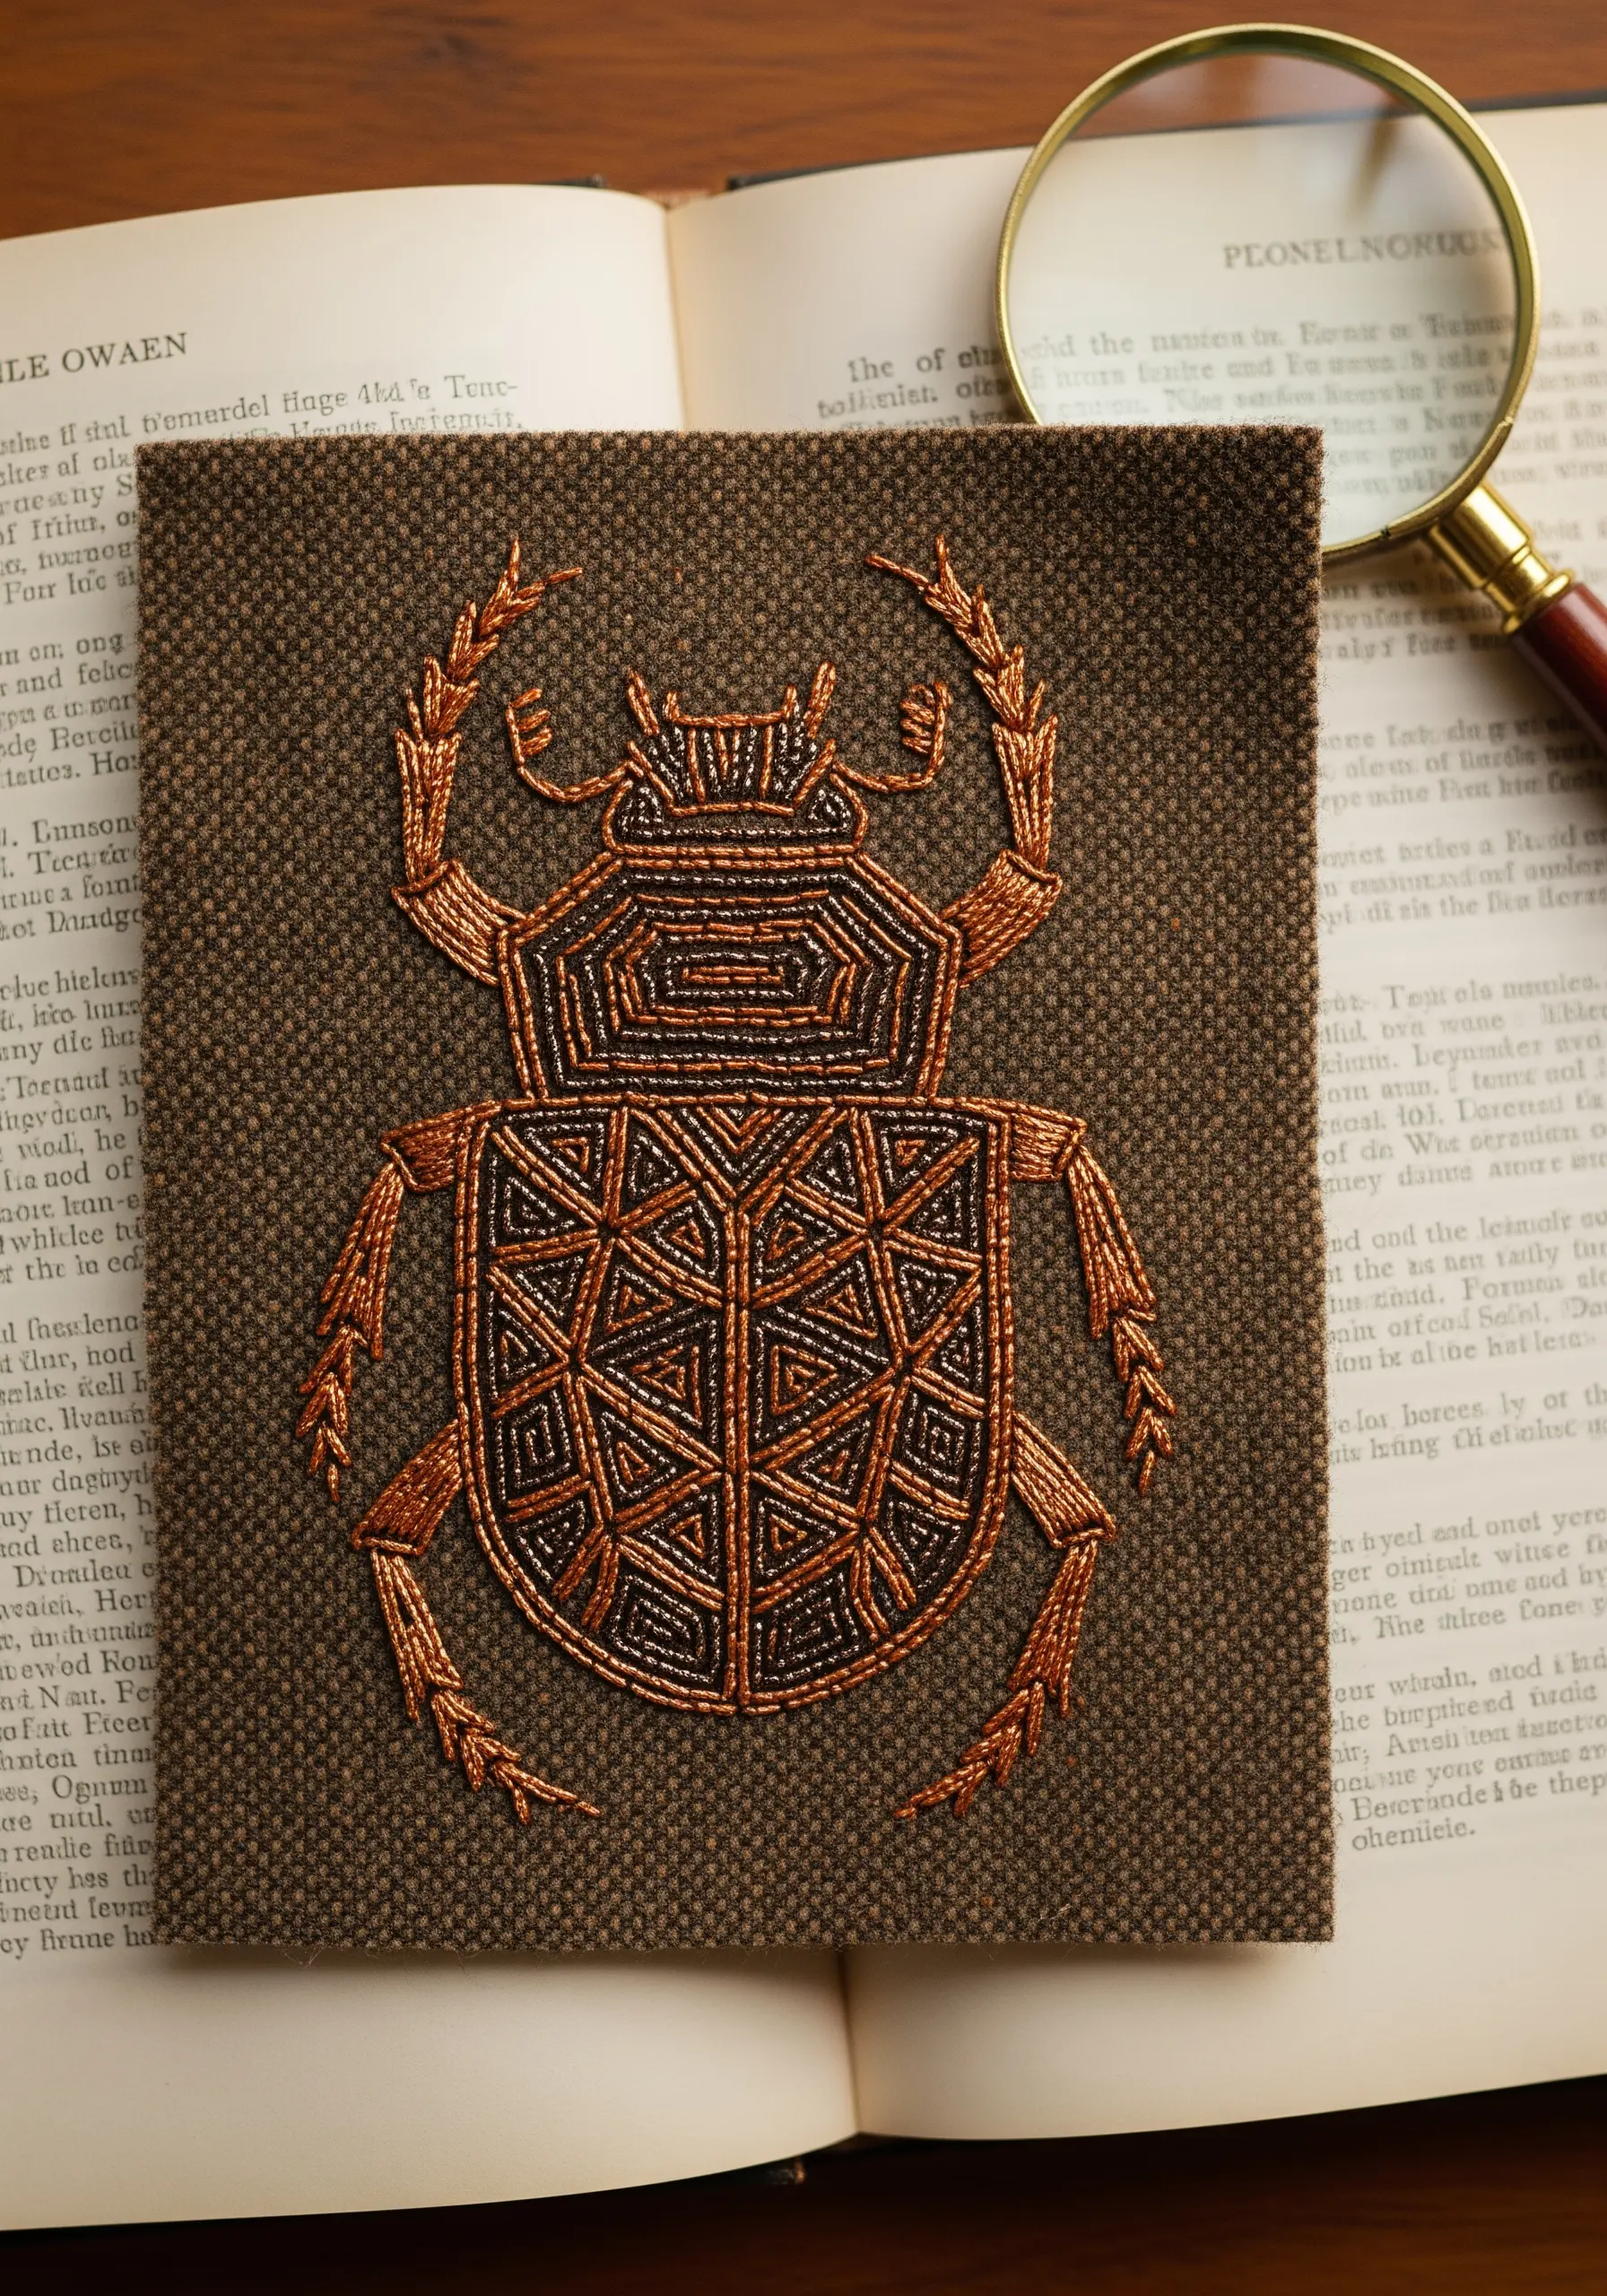
Introduce texture and a touch of luxury to your work by incorporating seed beads.
Begin by outlining the main shape of your design—in this case, a scarab beetle—using a metallic thread secured with a couching stitch.
Then, fill the interior sections with tiny seed beads. Use a beading backstitch: bring your needle up, thread a bead, and go back down a short distance away to create secure, uniform lines.
The interplay between the sheen of the metallic thread and the sparkle of the beads creates an opulent, artifact-like finish.
16. Heirloom Elegance with Fine Linework
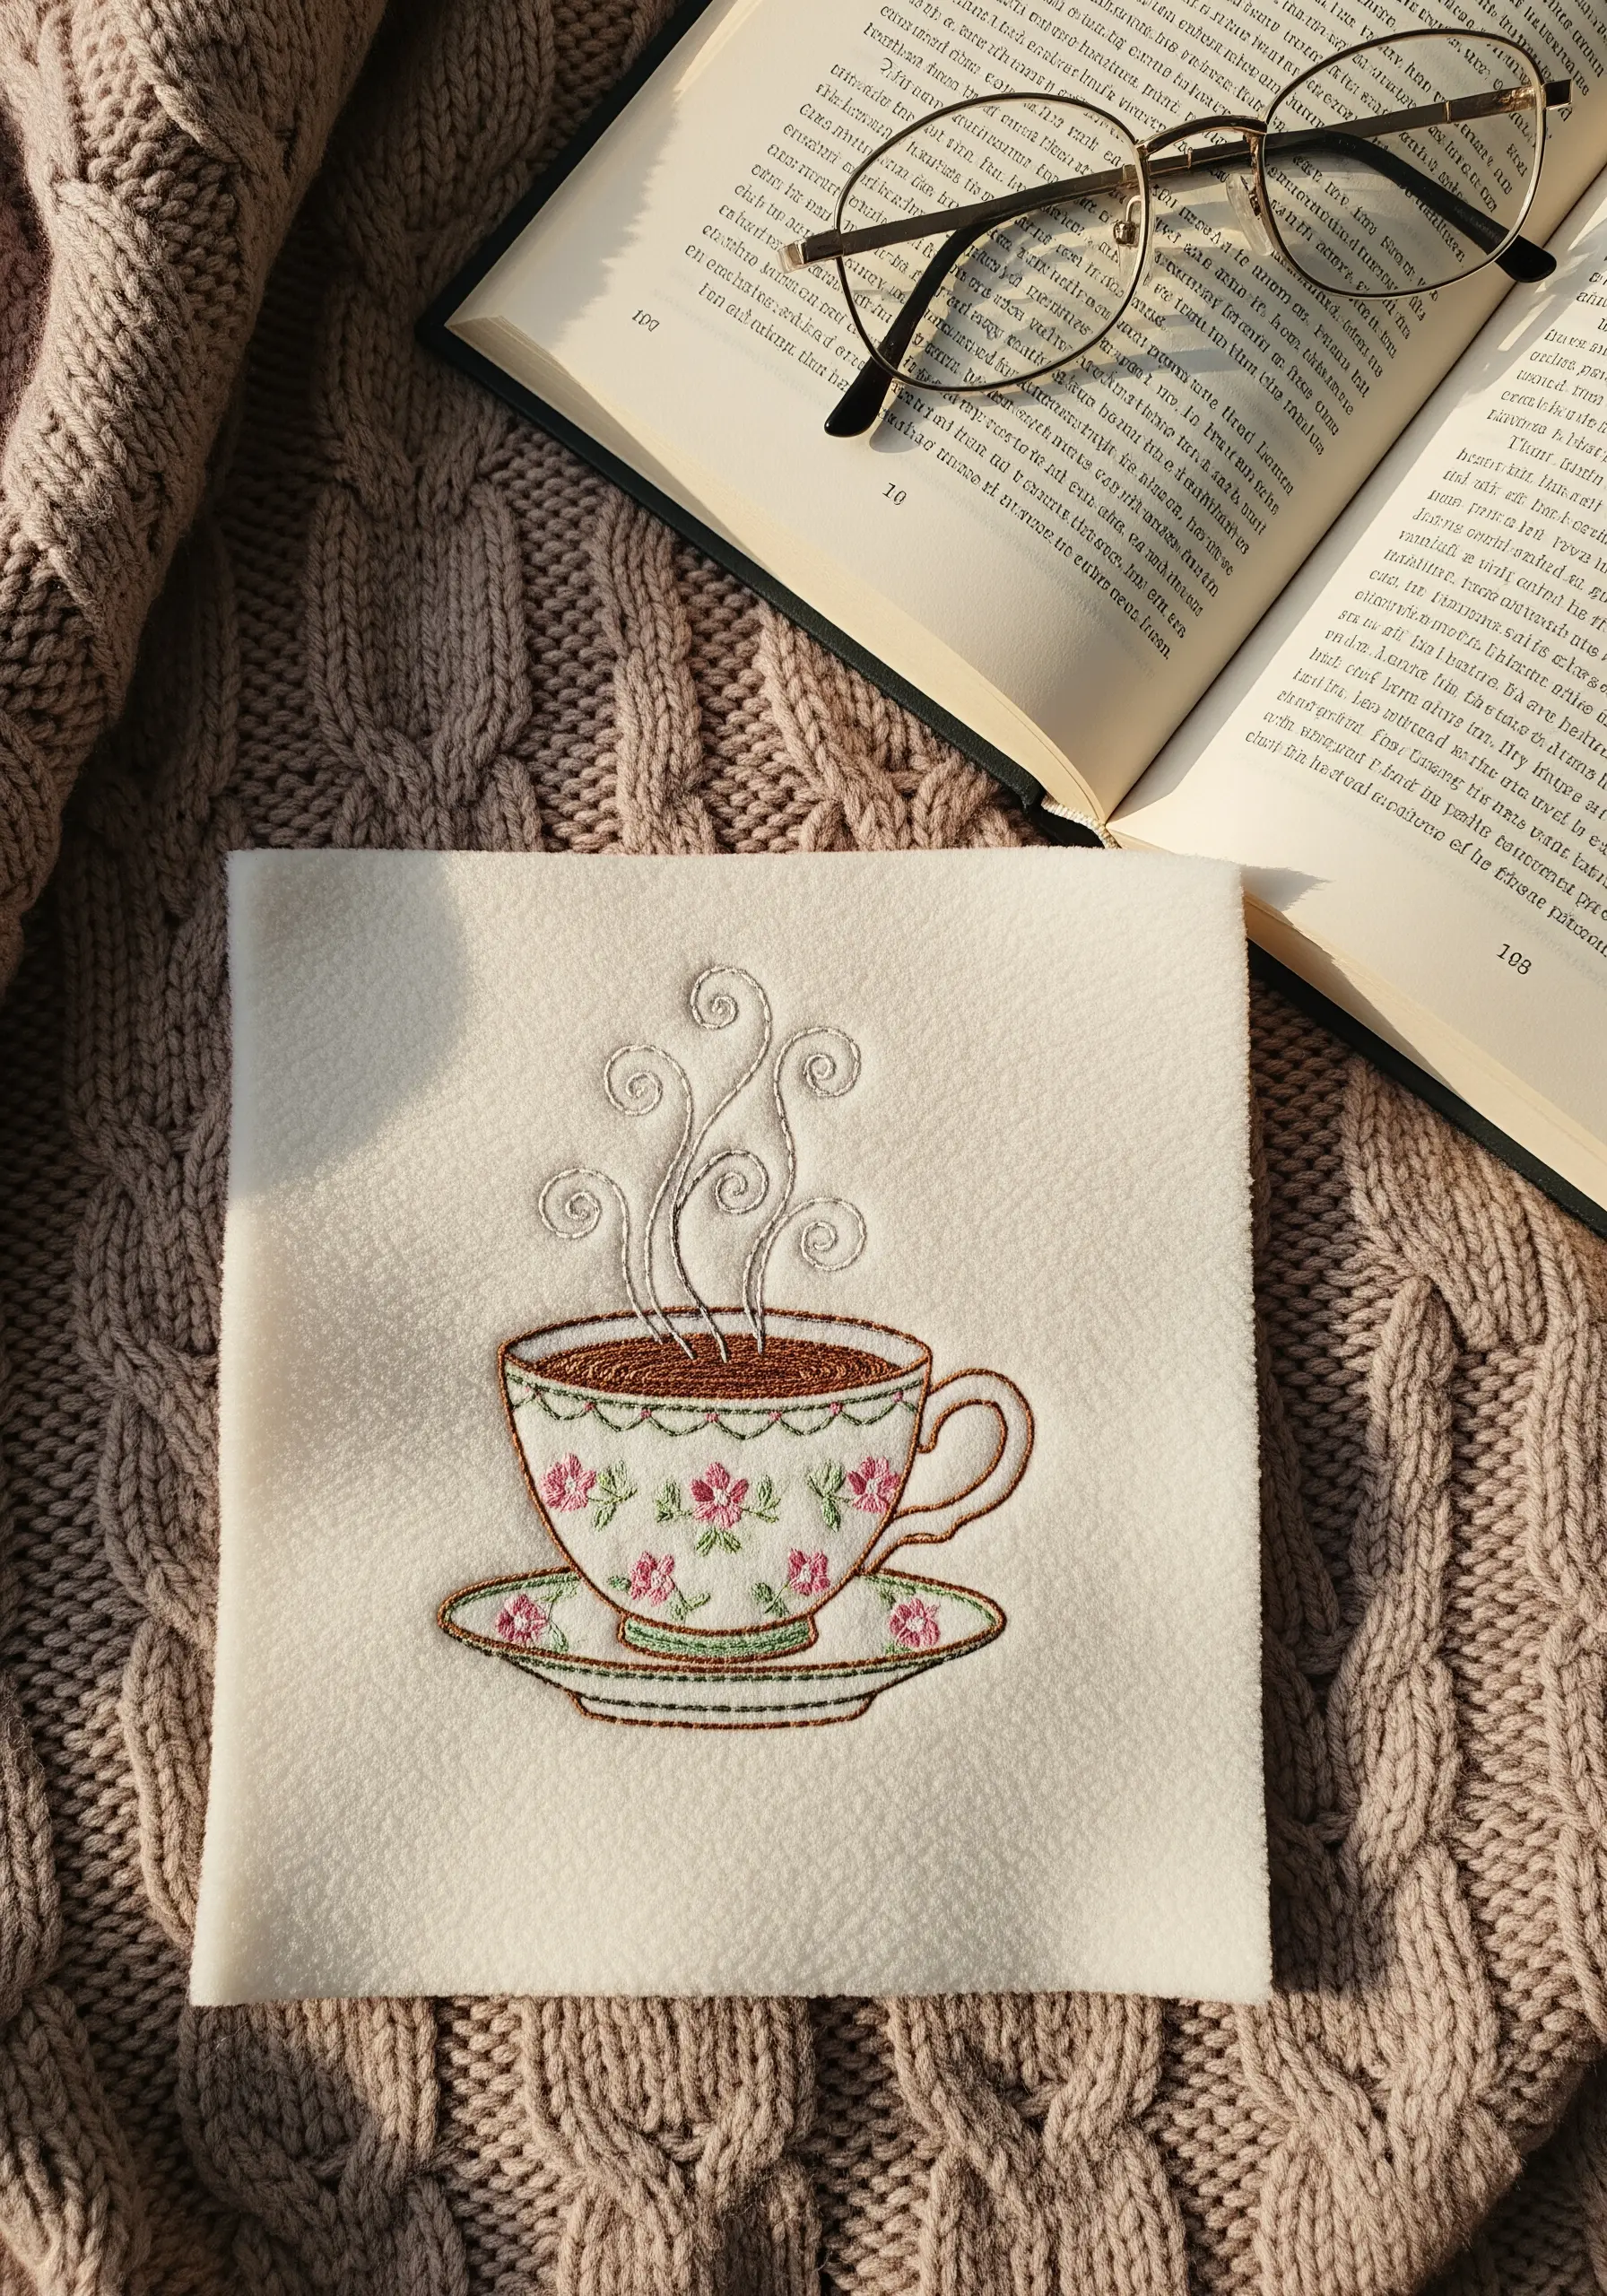
To capture the delicate quality of vintage porcelain, your stitch choice and thread weight are paramount.
Use only a single strand of floss for the entire design to keep the look light and refined.
For all outlines, including the cup’s shape and the steam swirls, opt for a split stitch. This creates a solid line that is finer and less segmented than a backstitch.
Use tiny lazy daisy stitches for the floral petals and minuscule French knots for the centers to complete the heirloom effect.
17. Abstract Galaxies with Needle Felting
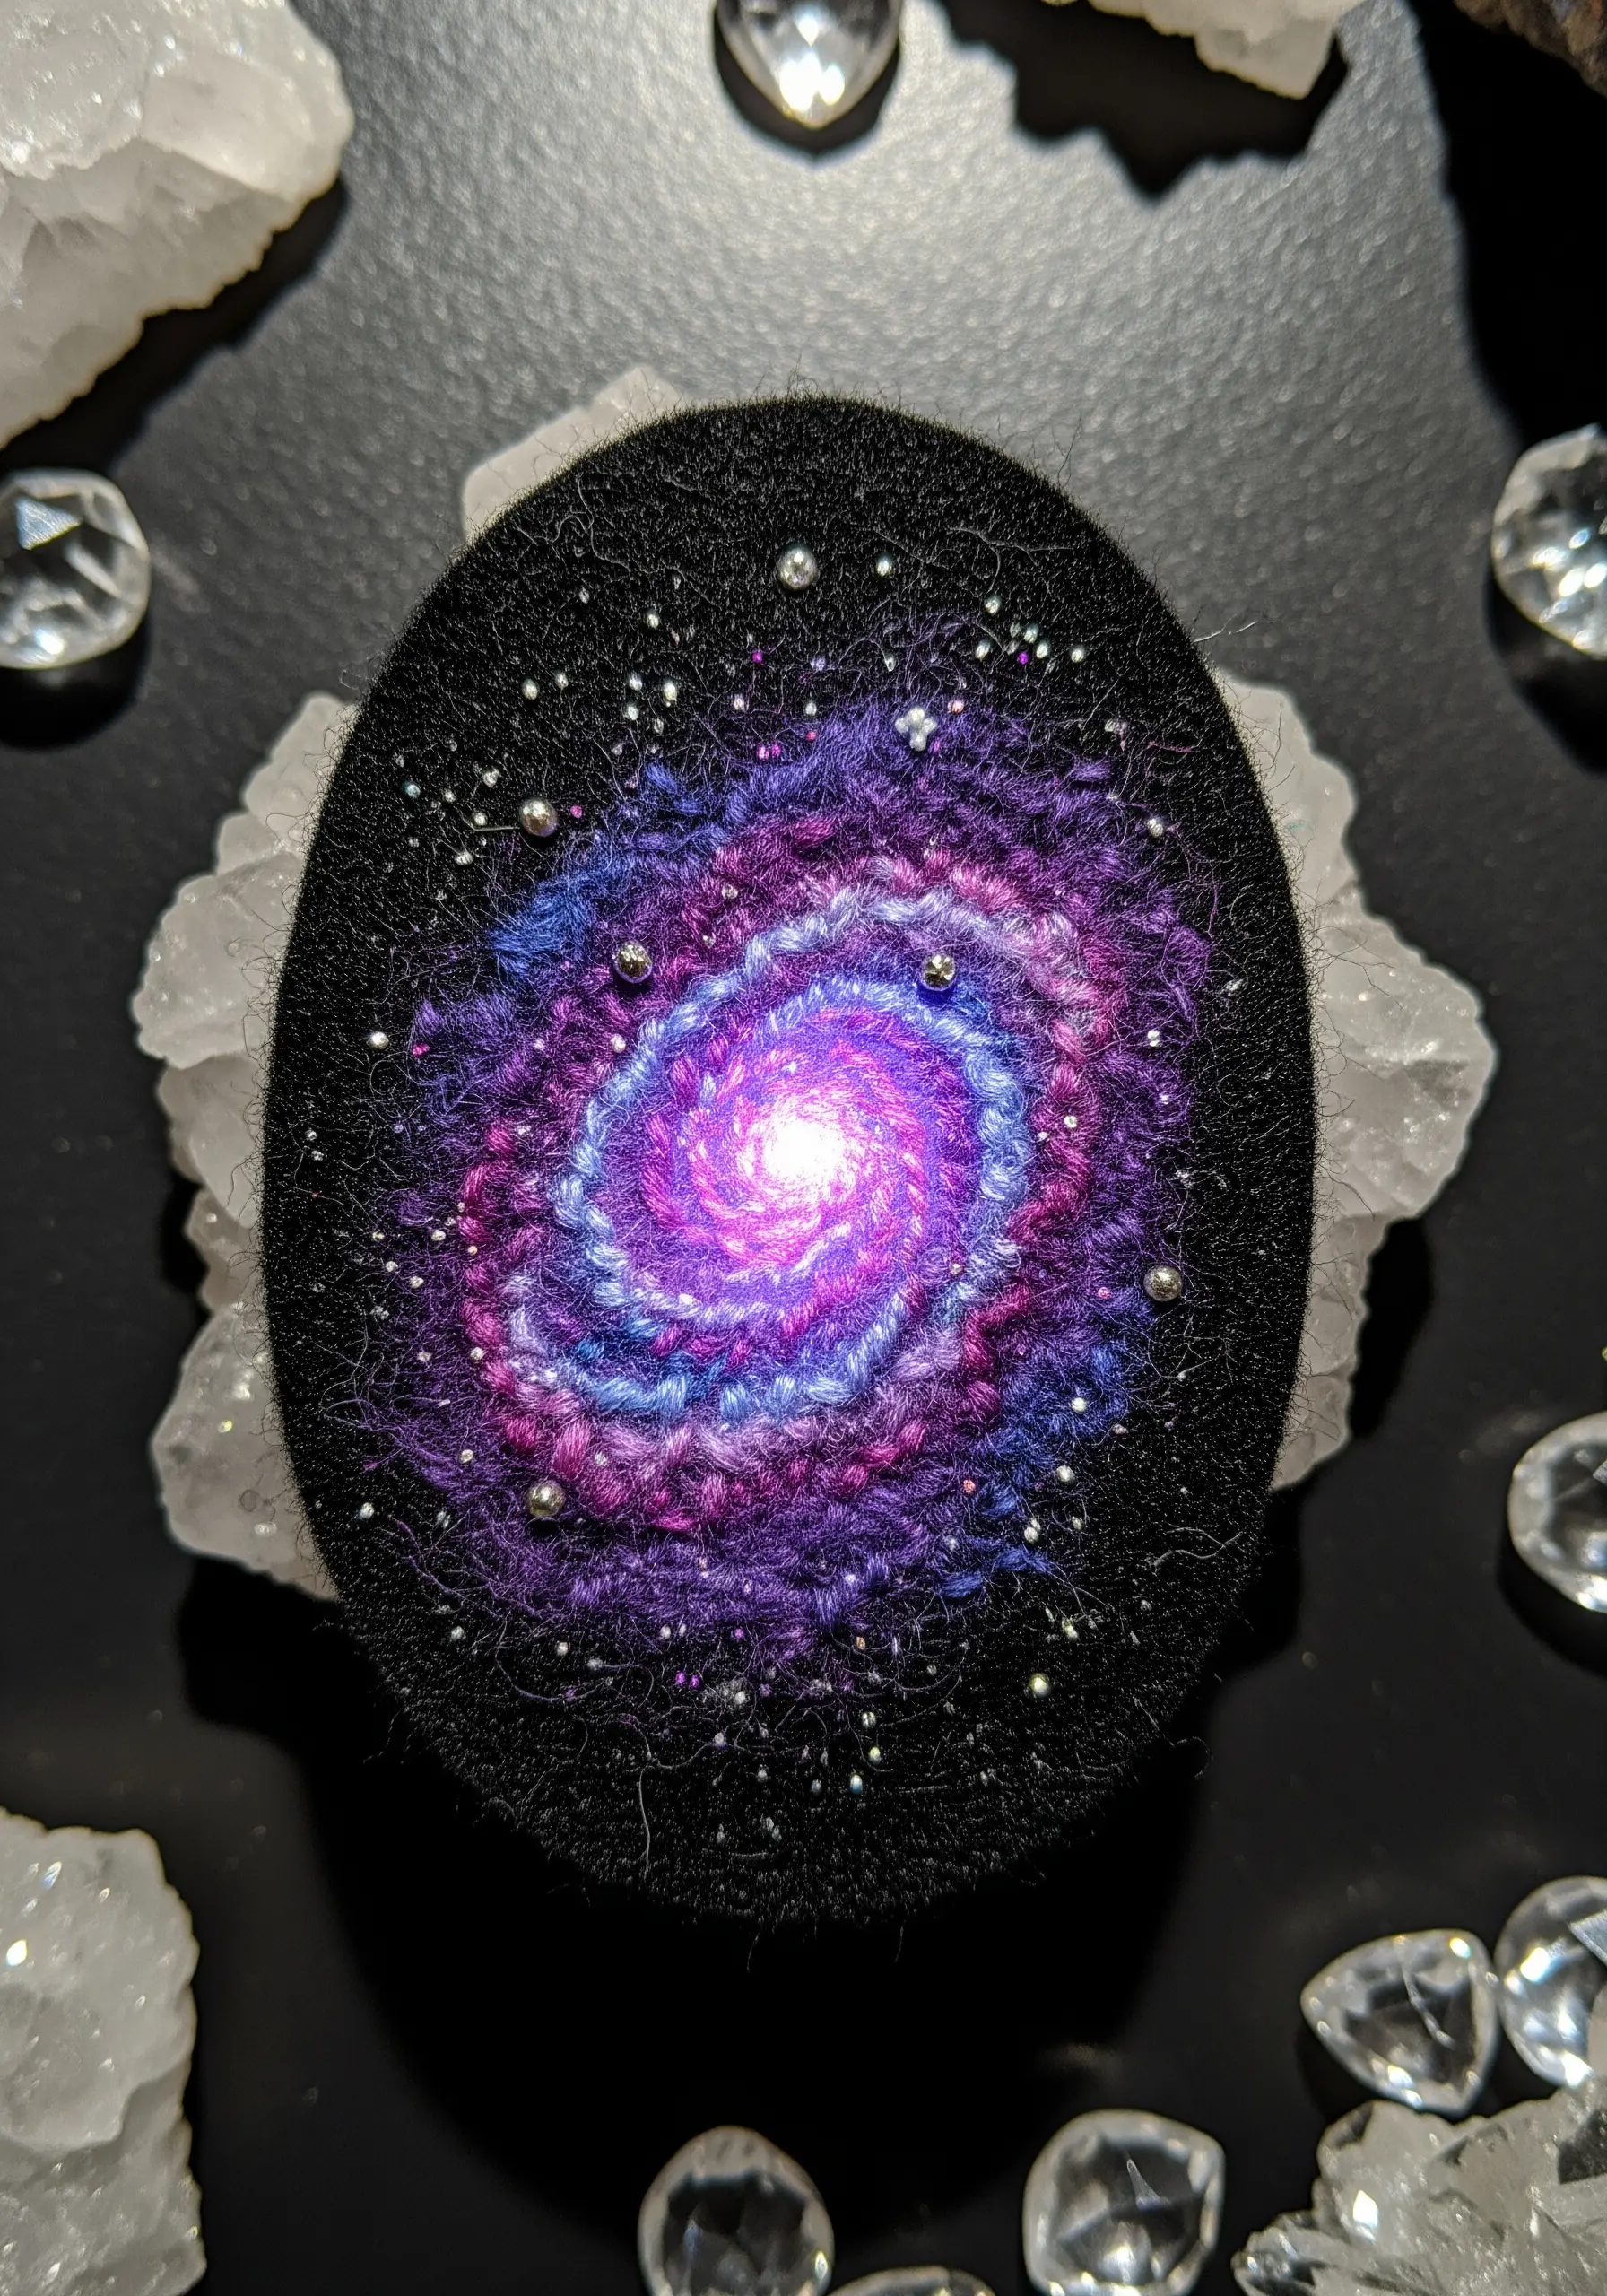
Create a breathtaking nebula by combining the soft texture of wool with the sparkle of thread and beads.
Start with a black felt scrap as your base. Use a felting needle to blend and fuse colorful wool roving directly onto the surface, creating the soft, ethereal clouds of a galaxy.
Once the felted background is complete, add starlight using white and metallic threads to stitch scattered French knots and straight stitches.
Finish by sewing on a few seed beads or small pearls for a final touch of cosmic sparkle. This mixed-media approach yields incredible depth.