

A simple tote bag is a blank canvas waiting for a story. Before you thread your needle, I want you to think beyond just adding a pretty picture. Consider this an opportunity to practice precision, to explore texture, and to place a single, intentional mark that transforms the entire object.
These small designs are more than just quick projects; they are exercises in technique. You’ll learn how the direction of a single satin stitch can create light and shadow, how varying the number of thread strands adds depth, and how a clean, minimalist outline can carry more weight than a dense, complex fill.
Let’s move past the idea of just decorating fabric. Instead, we’ll focus on elevating it. Each stitch you make is a deliberate choice, turning a functional bag into a small, personal work of art that feels both modern and masterfully made.
1. Render Citrus with Directional Satin Stitch
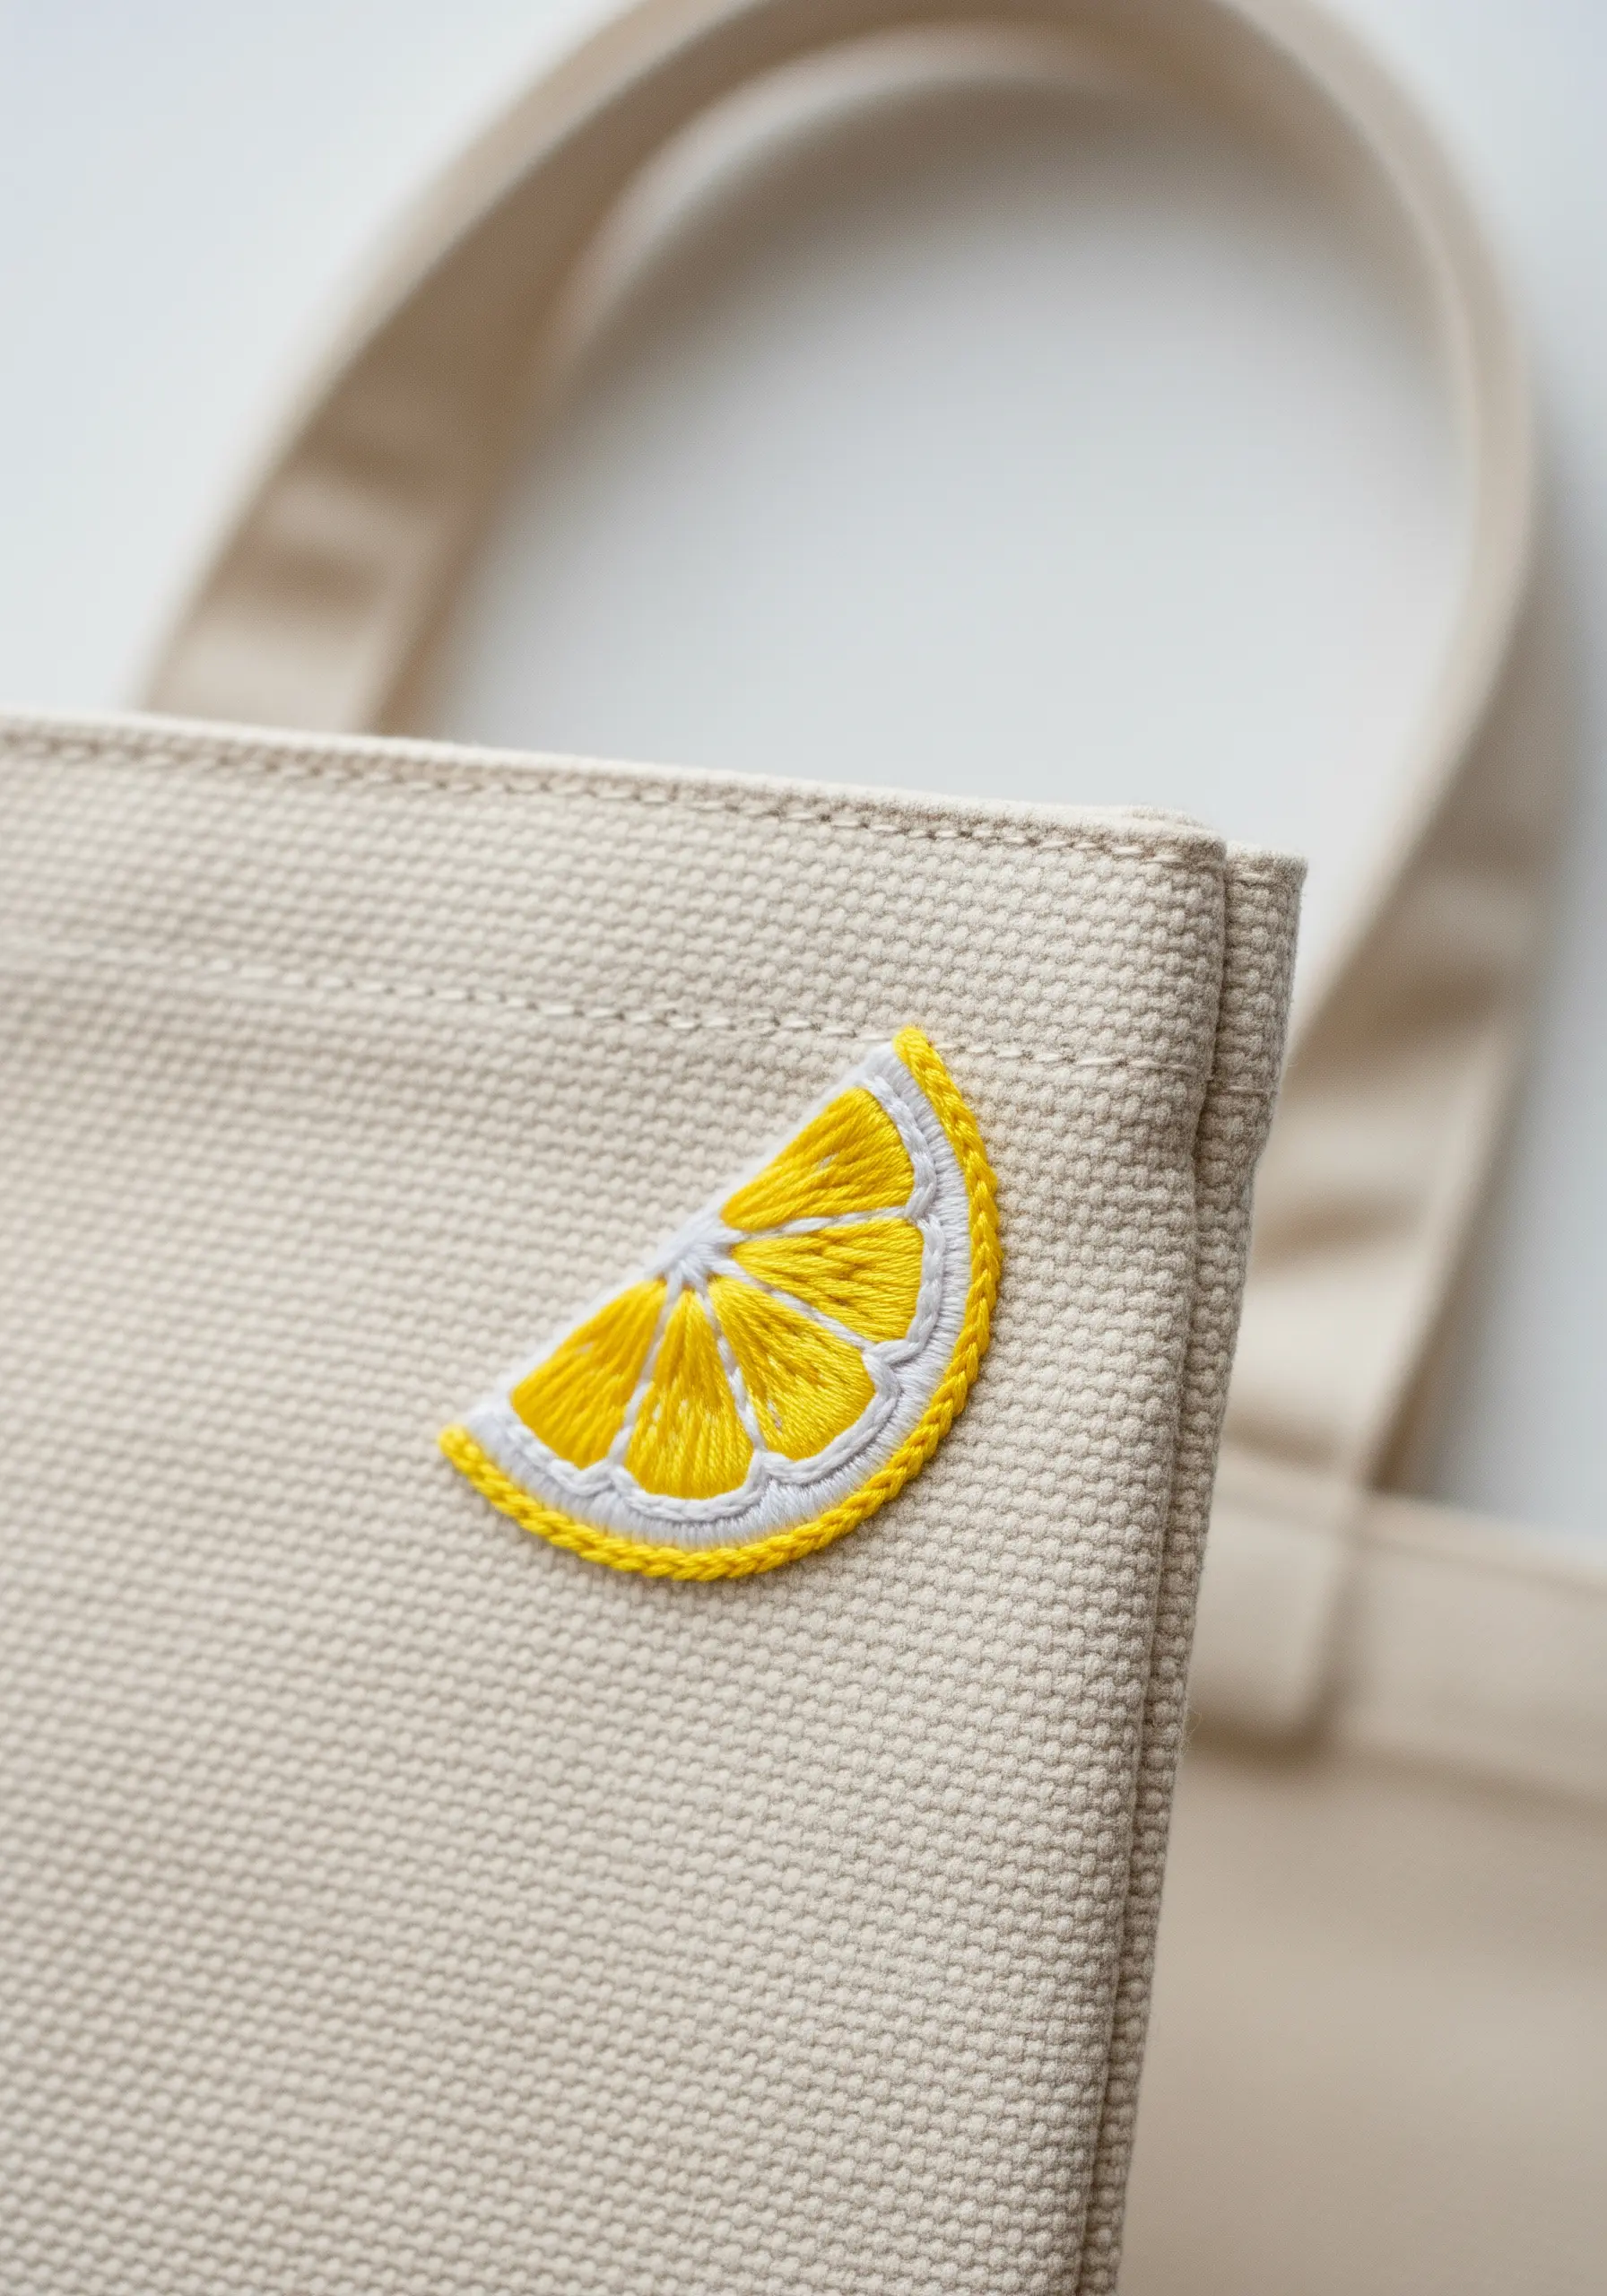
To give this lemon slice a realistic, juicy texture, focus entirely on the direction of your satin stitches.
For each segment, angle your stitches to radiate from the center point, just as they would in a real piece of fruit.
Use a crisp, slightly raised split stitch for the white pith outline—this creates a clean boundary and makes the yellow fill pop against the canvas.
This technique transforms a simple shape into something with depth and logic, training your eye to see how stitch direction equals form.
2. Capture Delicate Botanicals with Varied Textures
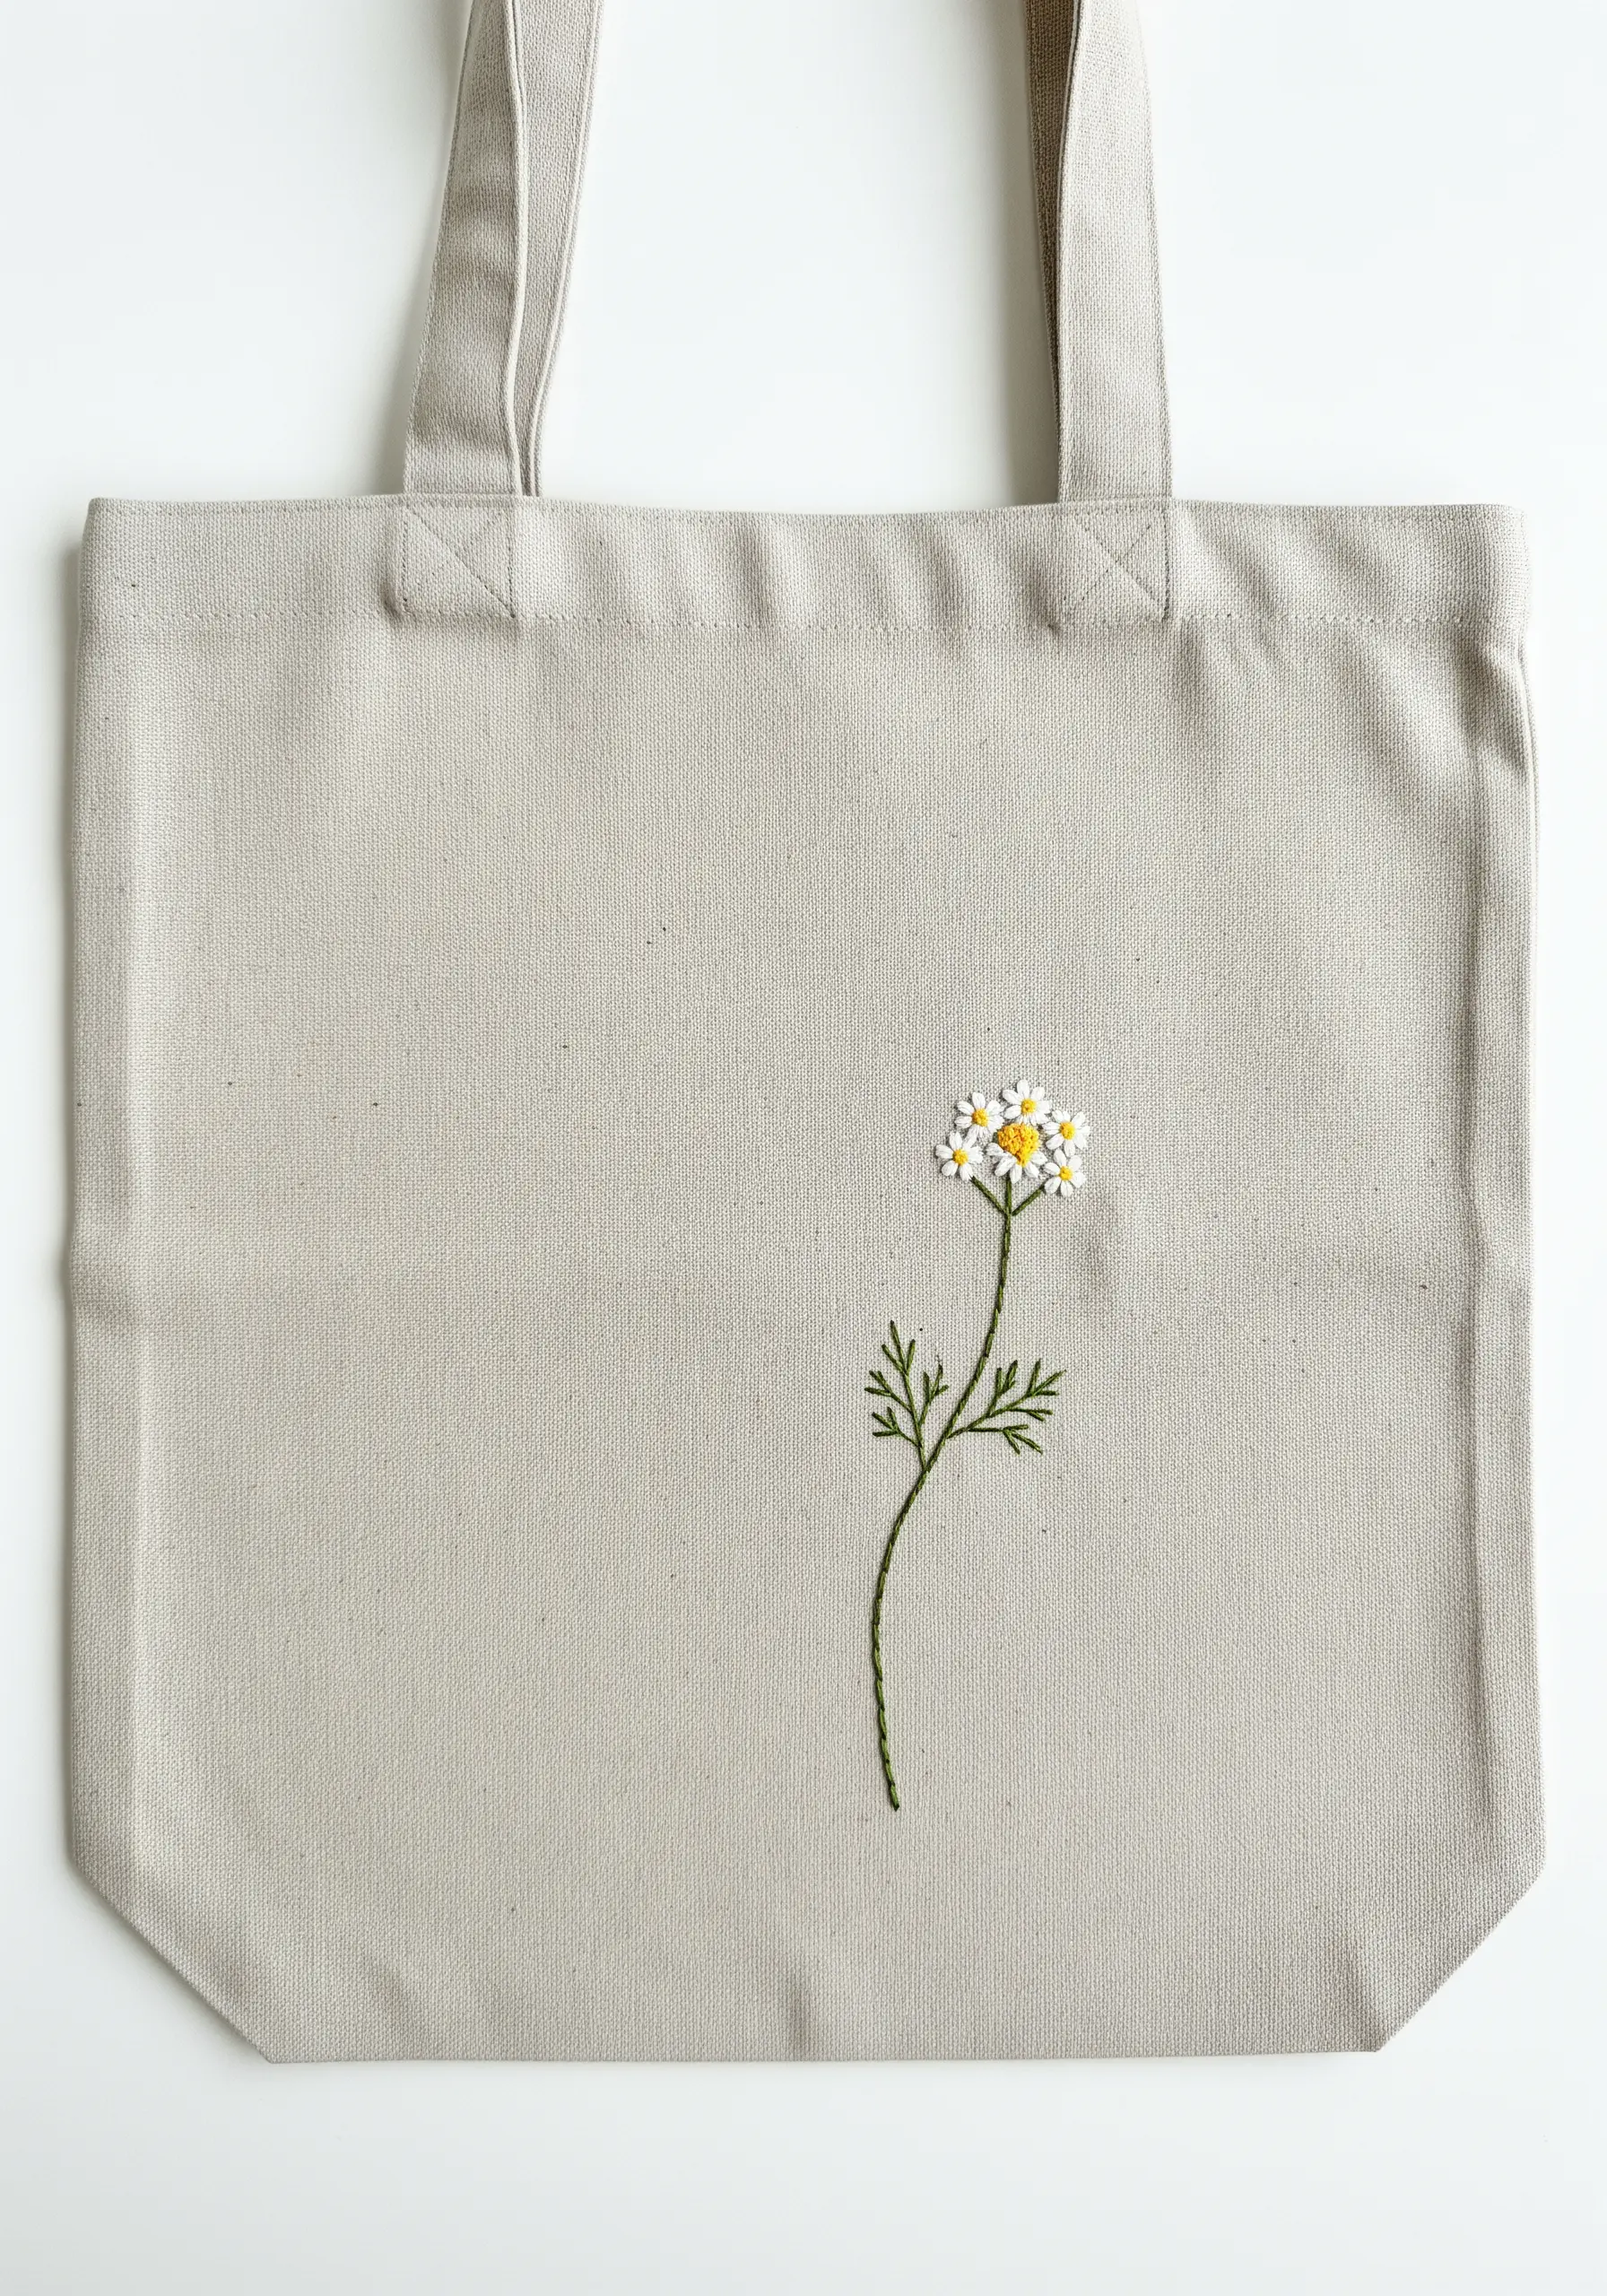
For a wildflower that feels alive, you need to create textural contrast between the stem, petals, and center.
Use a fine whipped backstitch or stem stitch for the stalk and leaves to give it a smooth, defined line that suggests strength.
For the petals, use a detached chain stitch (lazy daisy) or a simple satin stitch, keeping them light and distinct.
The center is where you add dimension: a cluster of tightly packed French knots in yellow and white creates a raised, pollen-dusted effect that draws the eye, making the entire flower feel more authentic.
These are great botanical stitch art ideas for transforming a plain bag.
3. Achieve Graphic Precision with Stabilizer
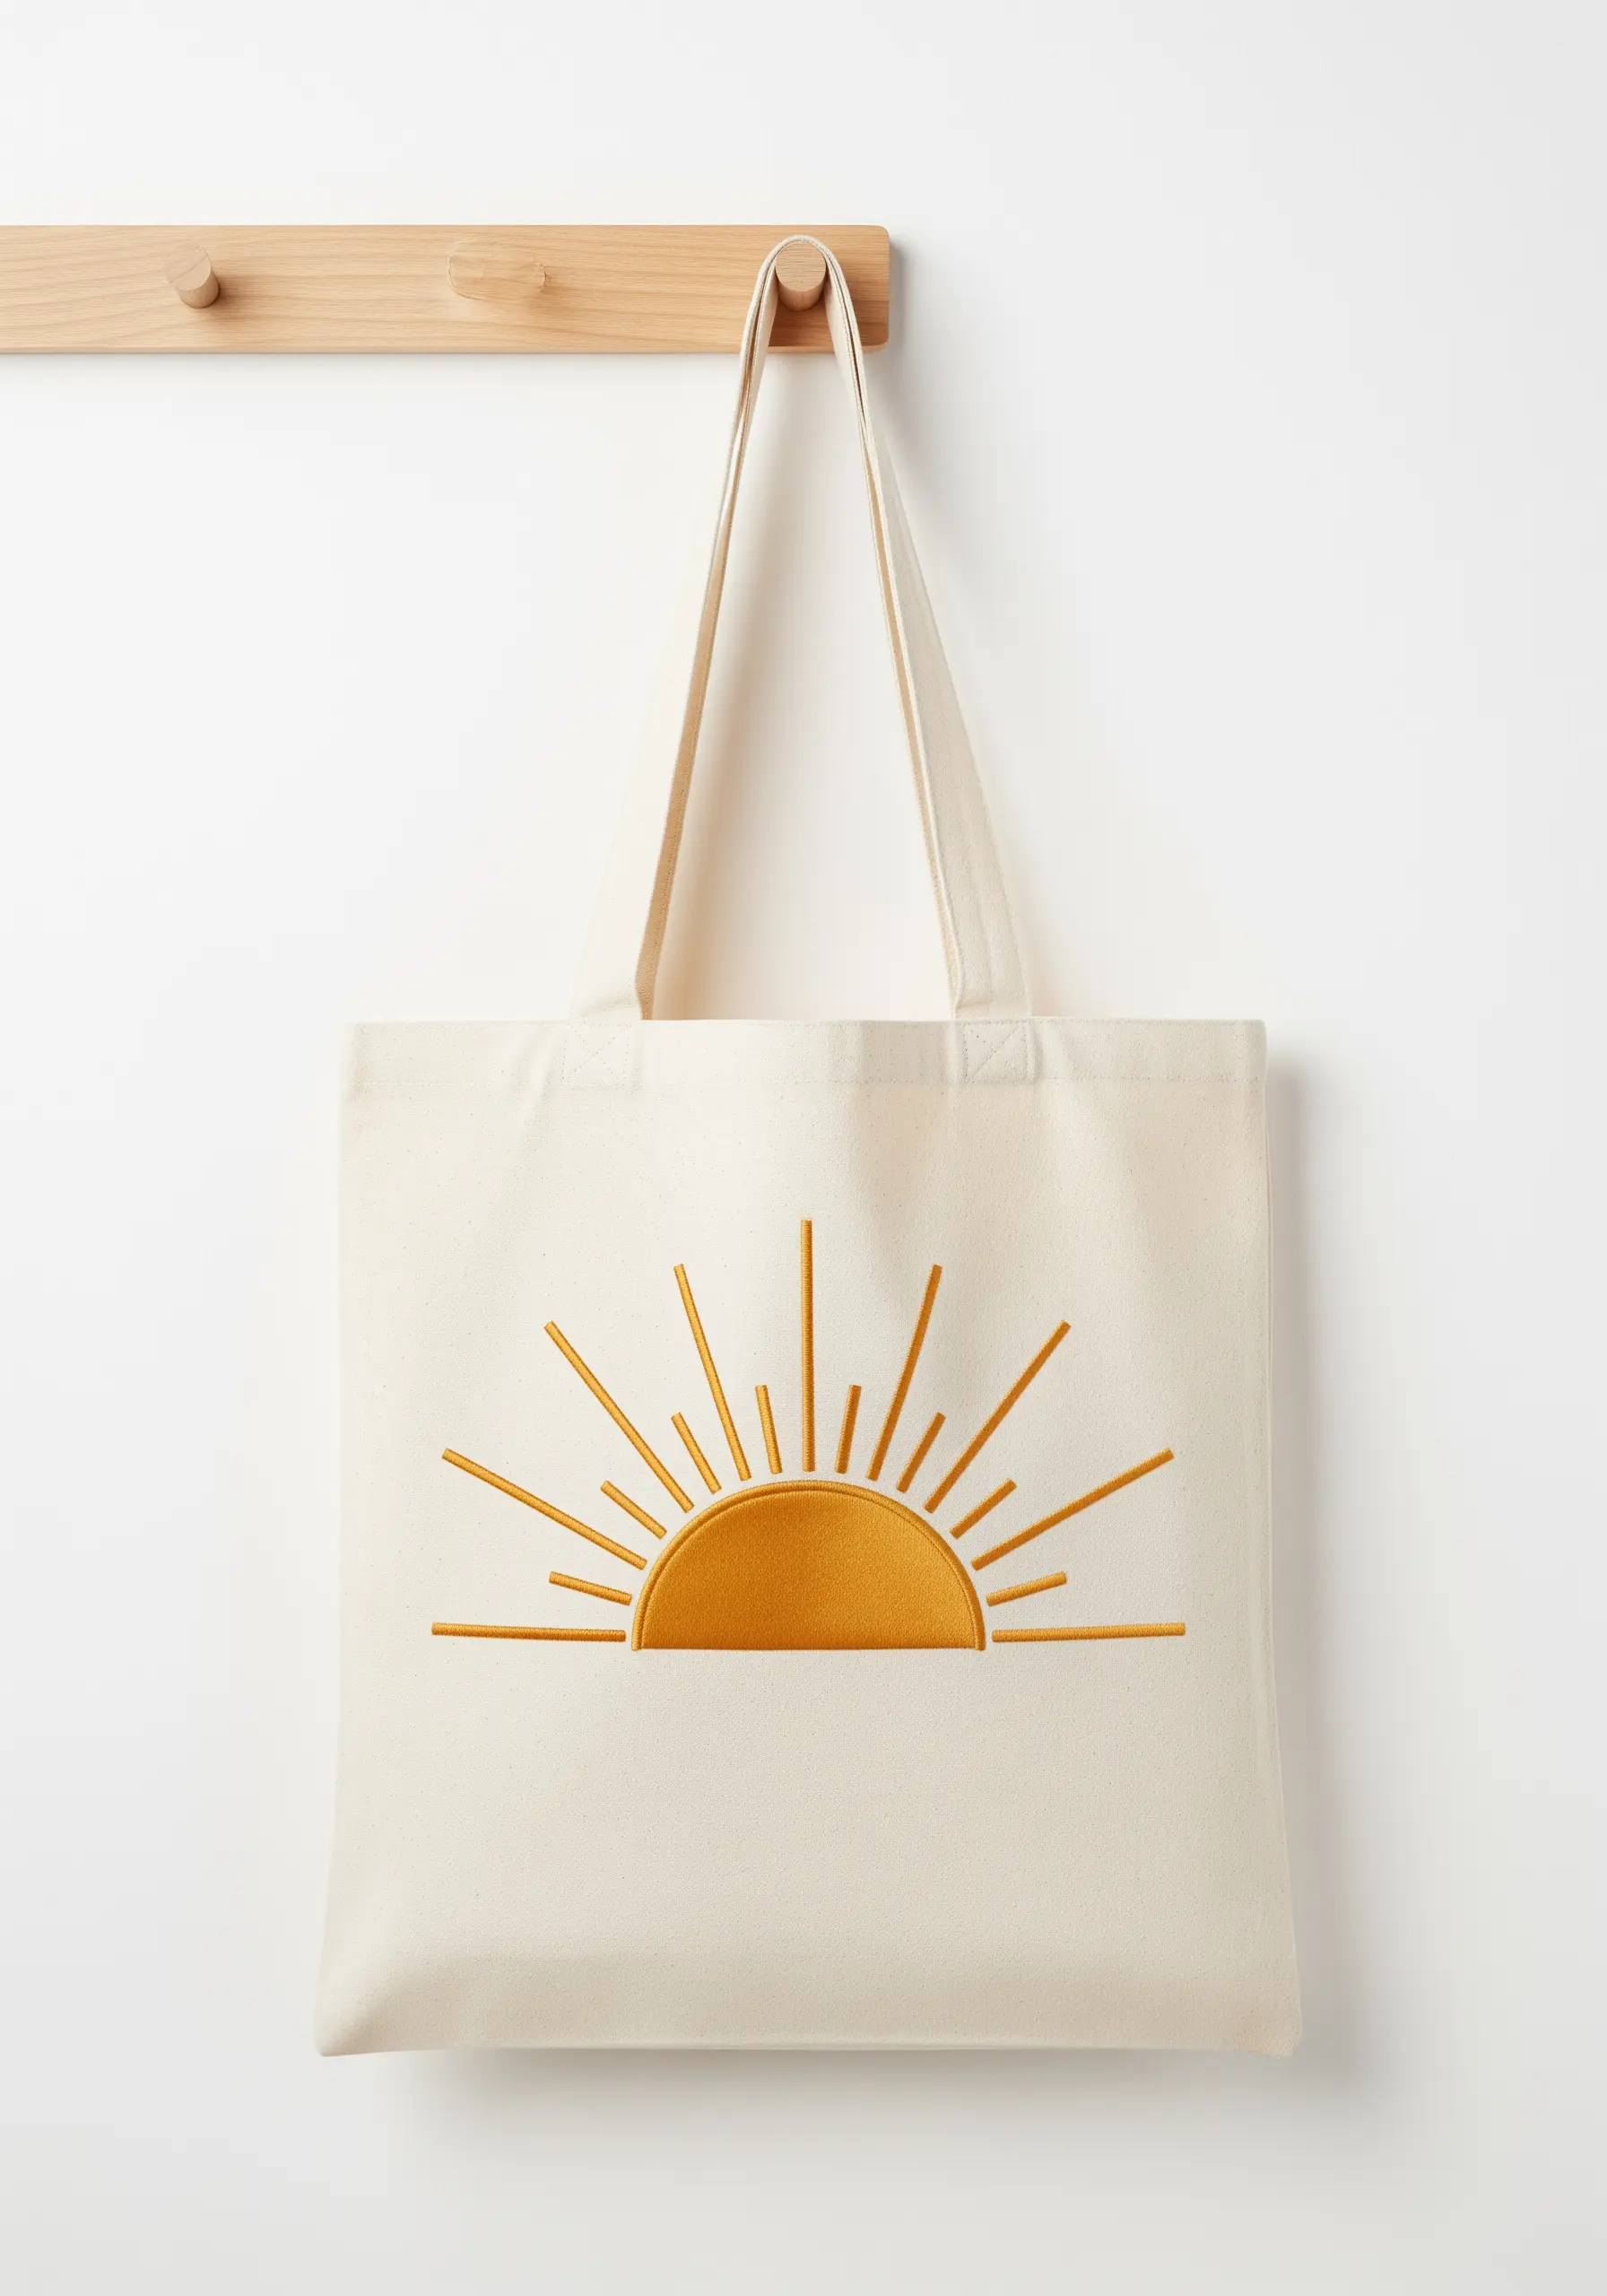
To achieve the clean, graphic lines of this sunburst, a tear-away stabilizer is your most important tool.
Iron it onto the inside of your tote bag before stitching; this prevents the heavy canvas from distorting your lines and keeps your satin stitch perfectly smooth.
For the rays, use a simple straight stitch, ensuring each one is taut and precisely placed.
The semi-circle requires a flawless satin stitch—work from one side to the other in parallel lines to create a solid, almost machine-embroidered finish.
4. Create Dimension with Padded Satin Stitch
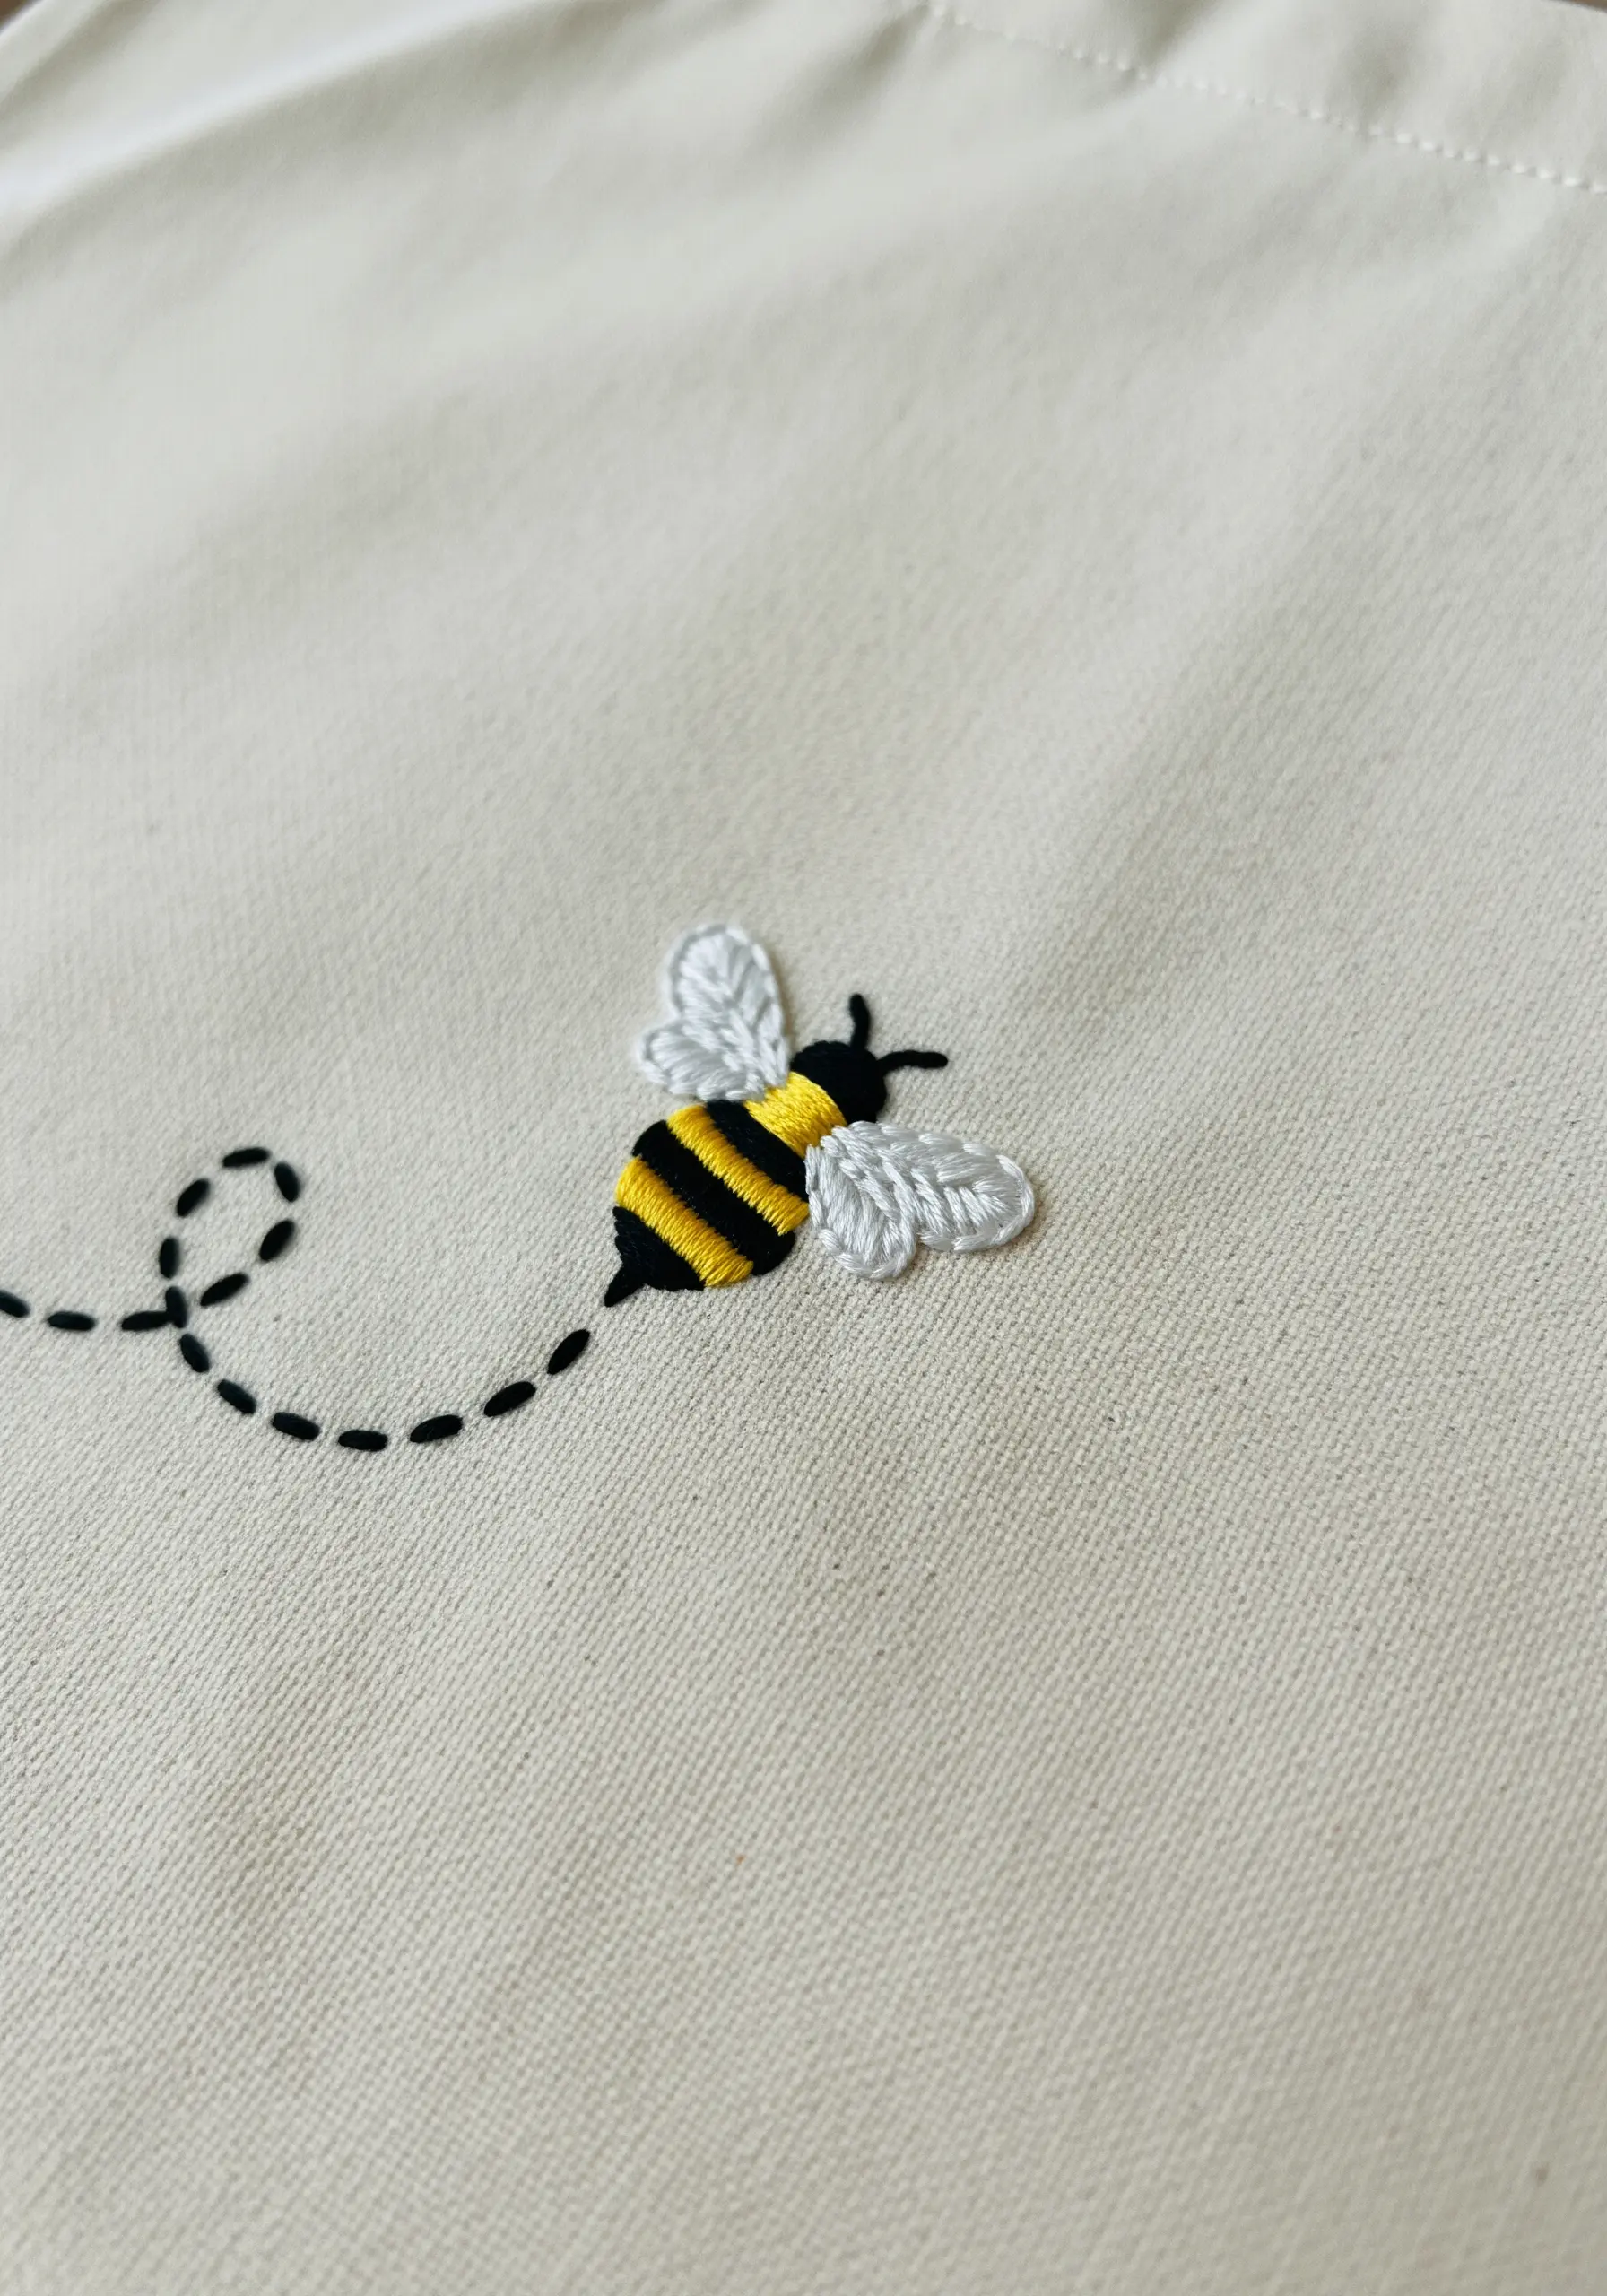
To make a small motif like this bee feel three-dimensional, use padding stitches underneath your final satin stitch.
First, fill the bee’s body with small, horizontal seed stitches. Then, cover this area with your final vertical satin stitches in black and yellow.
This simple preparation lifts the thread off the fabric, creating a subtle, rounded shape that catches the light.
For the wings, switch to a lighter thread count—perhaps just two strands—and use an open fill like a fly stitch to suggest transparency and delicacy.
5. Imply Transparency with Overlapping Shapes
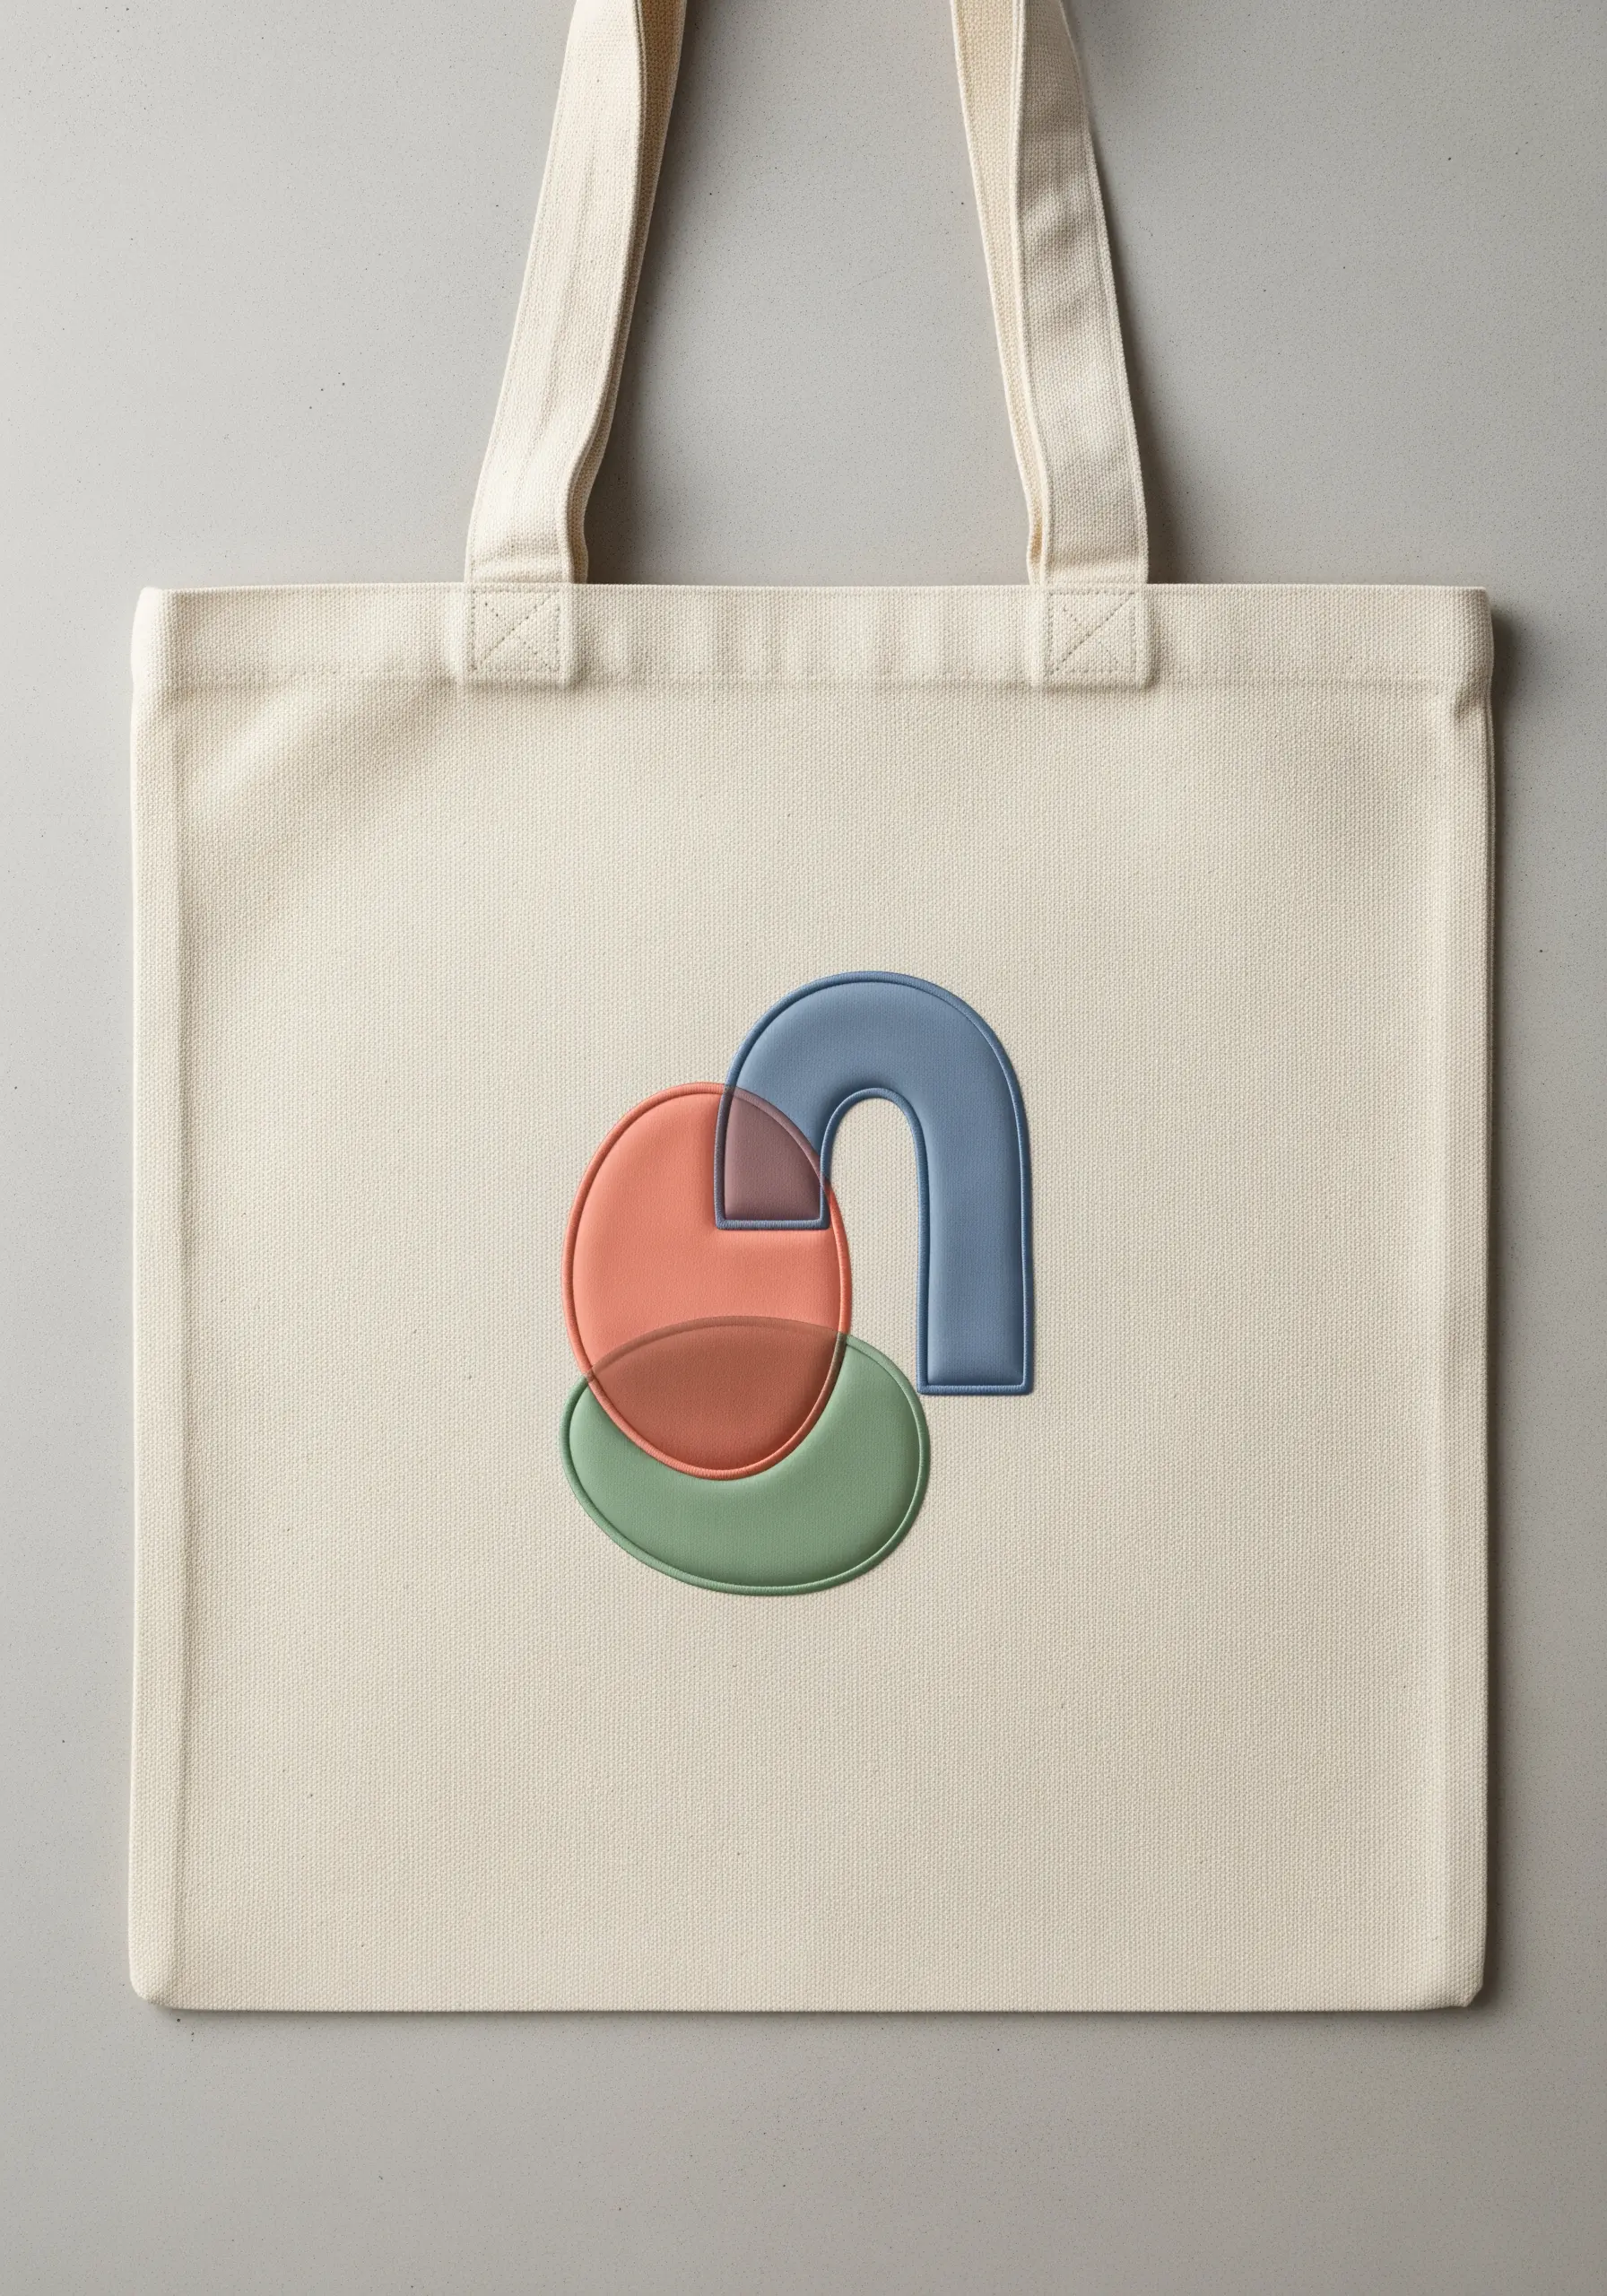
This design masterfully uses thread color to create the illusion of overlapping, transparent forms.
Where two shapes intersect, switch to a thread color that is a blend of the two primary colors—this is what sells the effect.
Each shape is filled with a dense, padded satin stitch, giving it a raised, almost embossed quality that contrasts beautifully with the flat canvas.
This approach to color theory is perfect for anyone interested in abstract geometric hoops and modern design.
6. Refine Monograms with a Guiding Outline
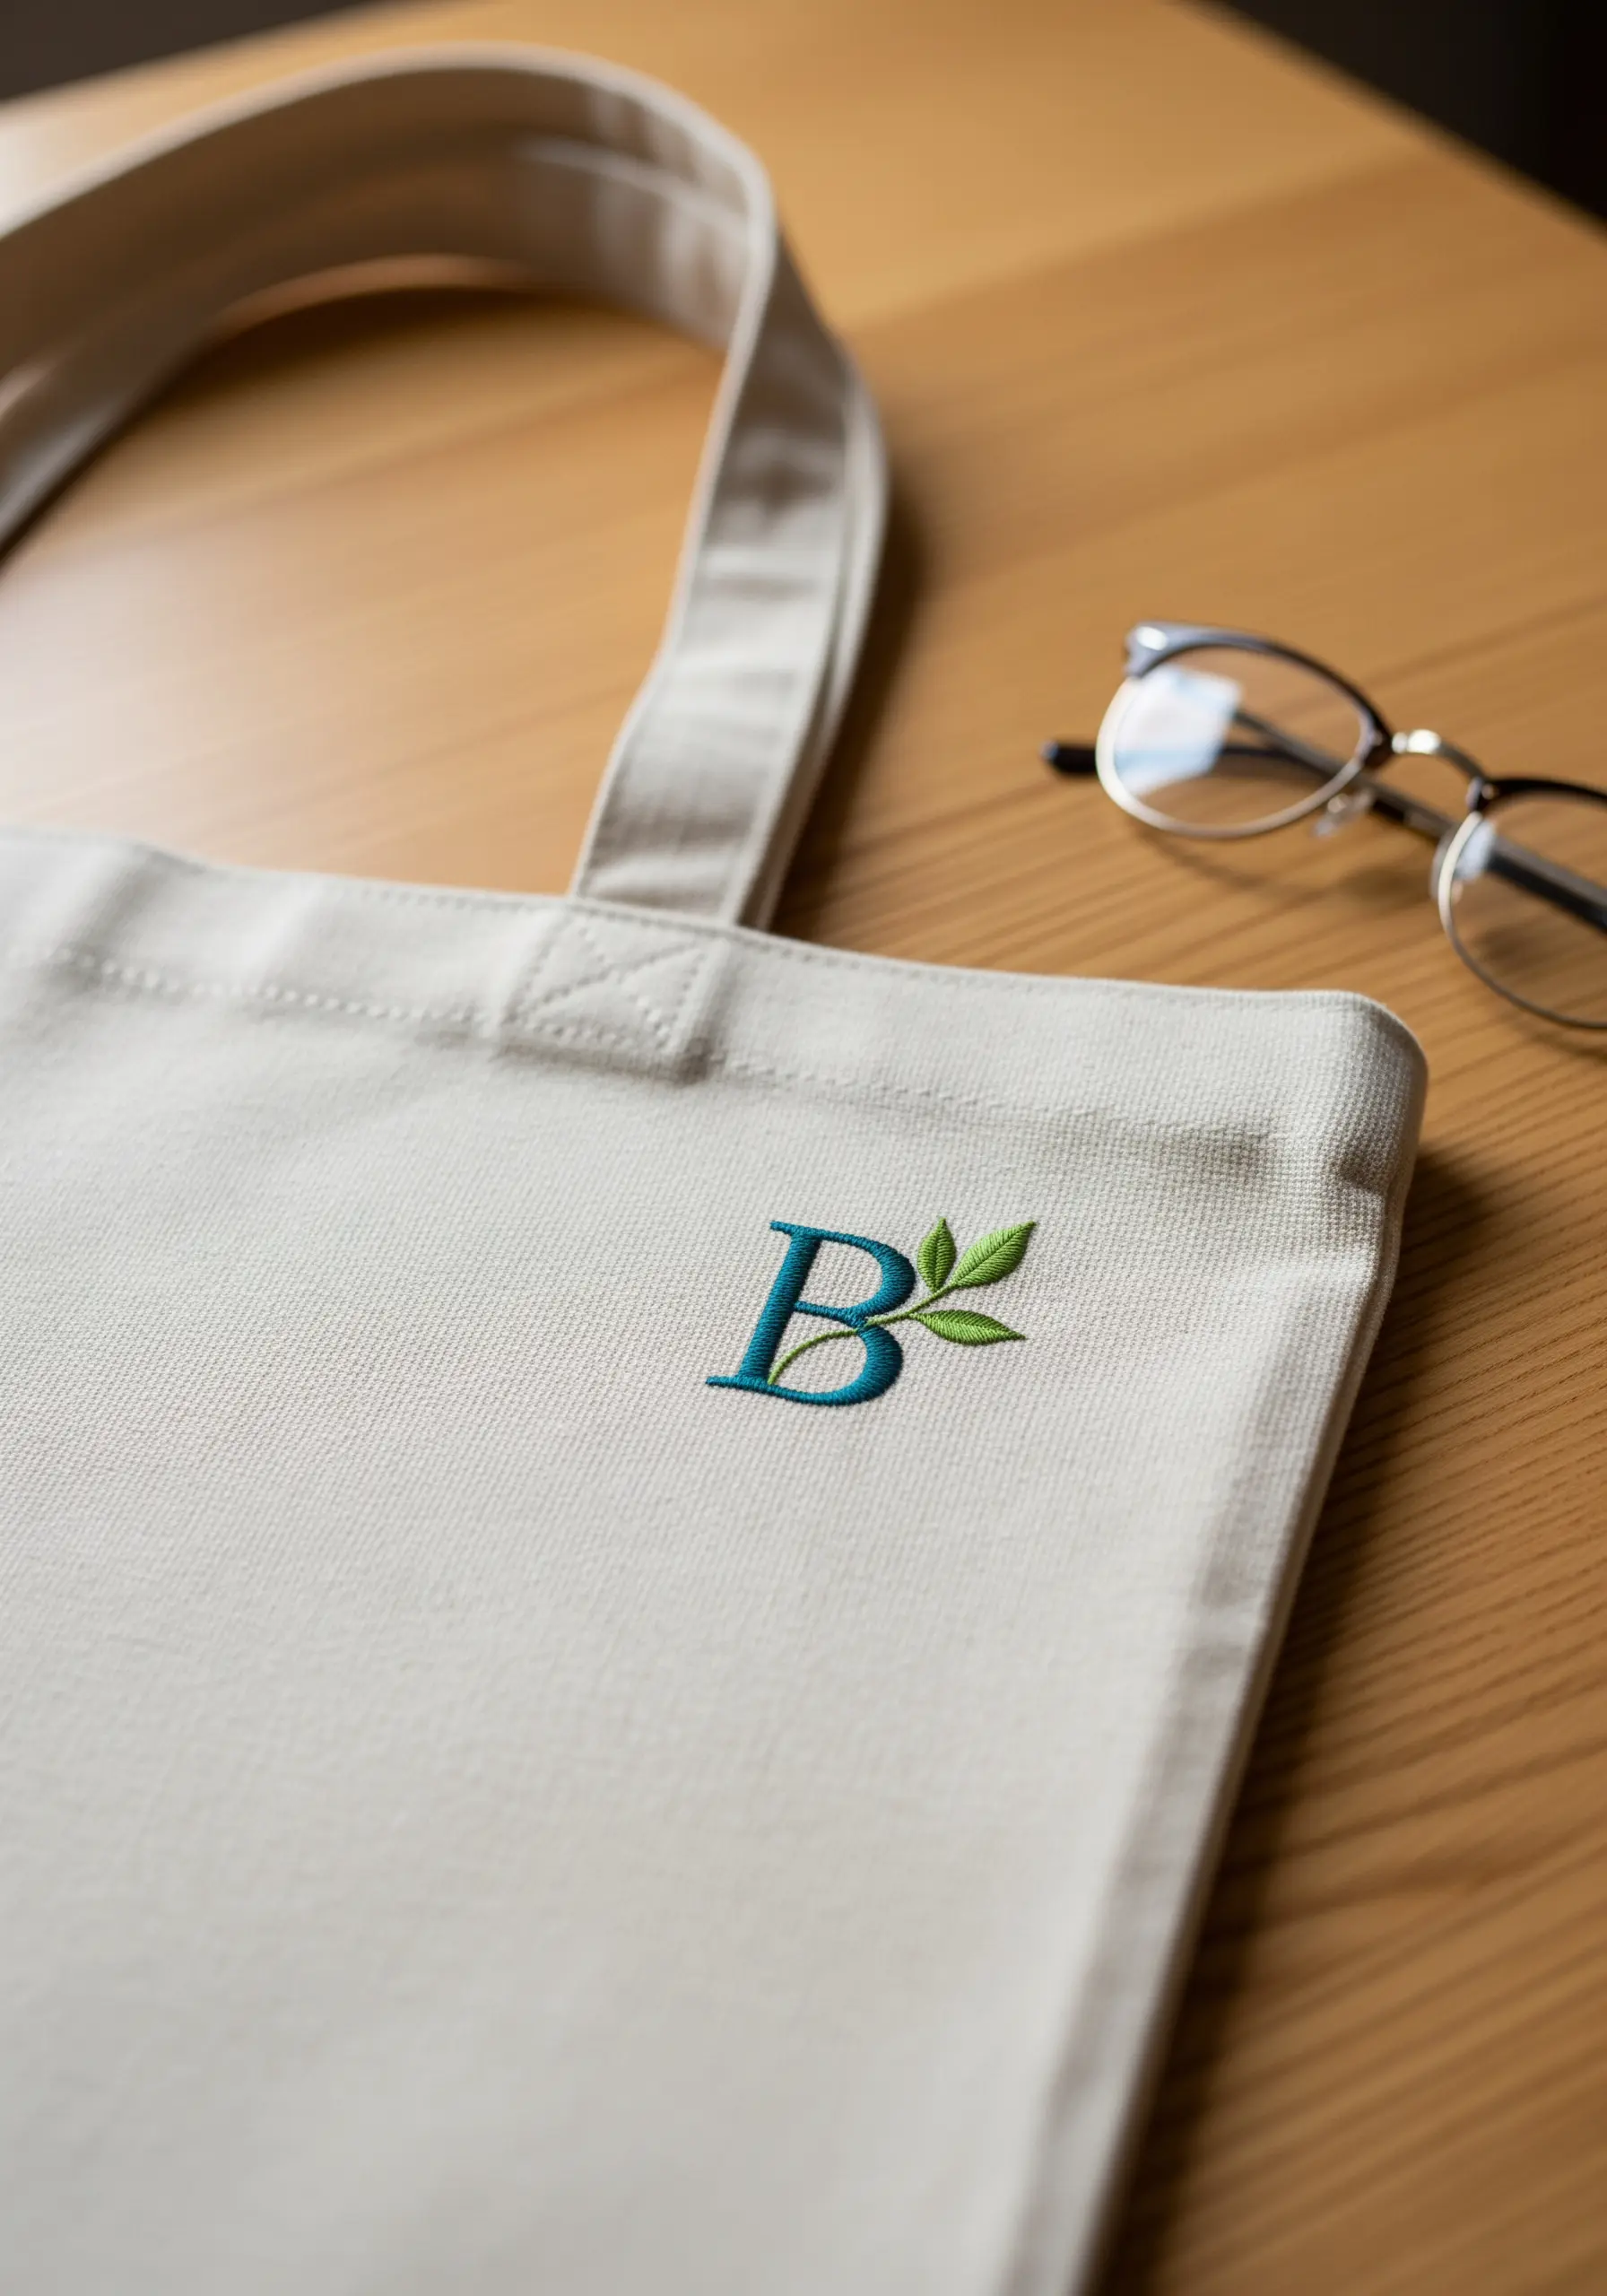
A perfect satin-stitched monogram requires a flawless foundation. Before you begin filling the letter, outline the entire shape with a precise split stitch.
This raised edge acts as a guide, helping you tuck the ends of your satin stitches for an exceptionally clean and sharp border.
For the botanical accent, use a contrasting stitch like a fishbone stitch for the leaves, which adds texture and a natural form against the smooth, solid letter.
This technique ensures your personalized initials look professional and intentional, not homemade.
7. Emphasize Form with High-Contrast Outlines
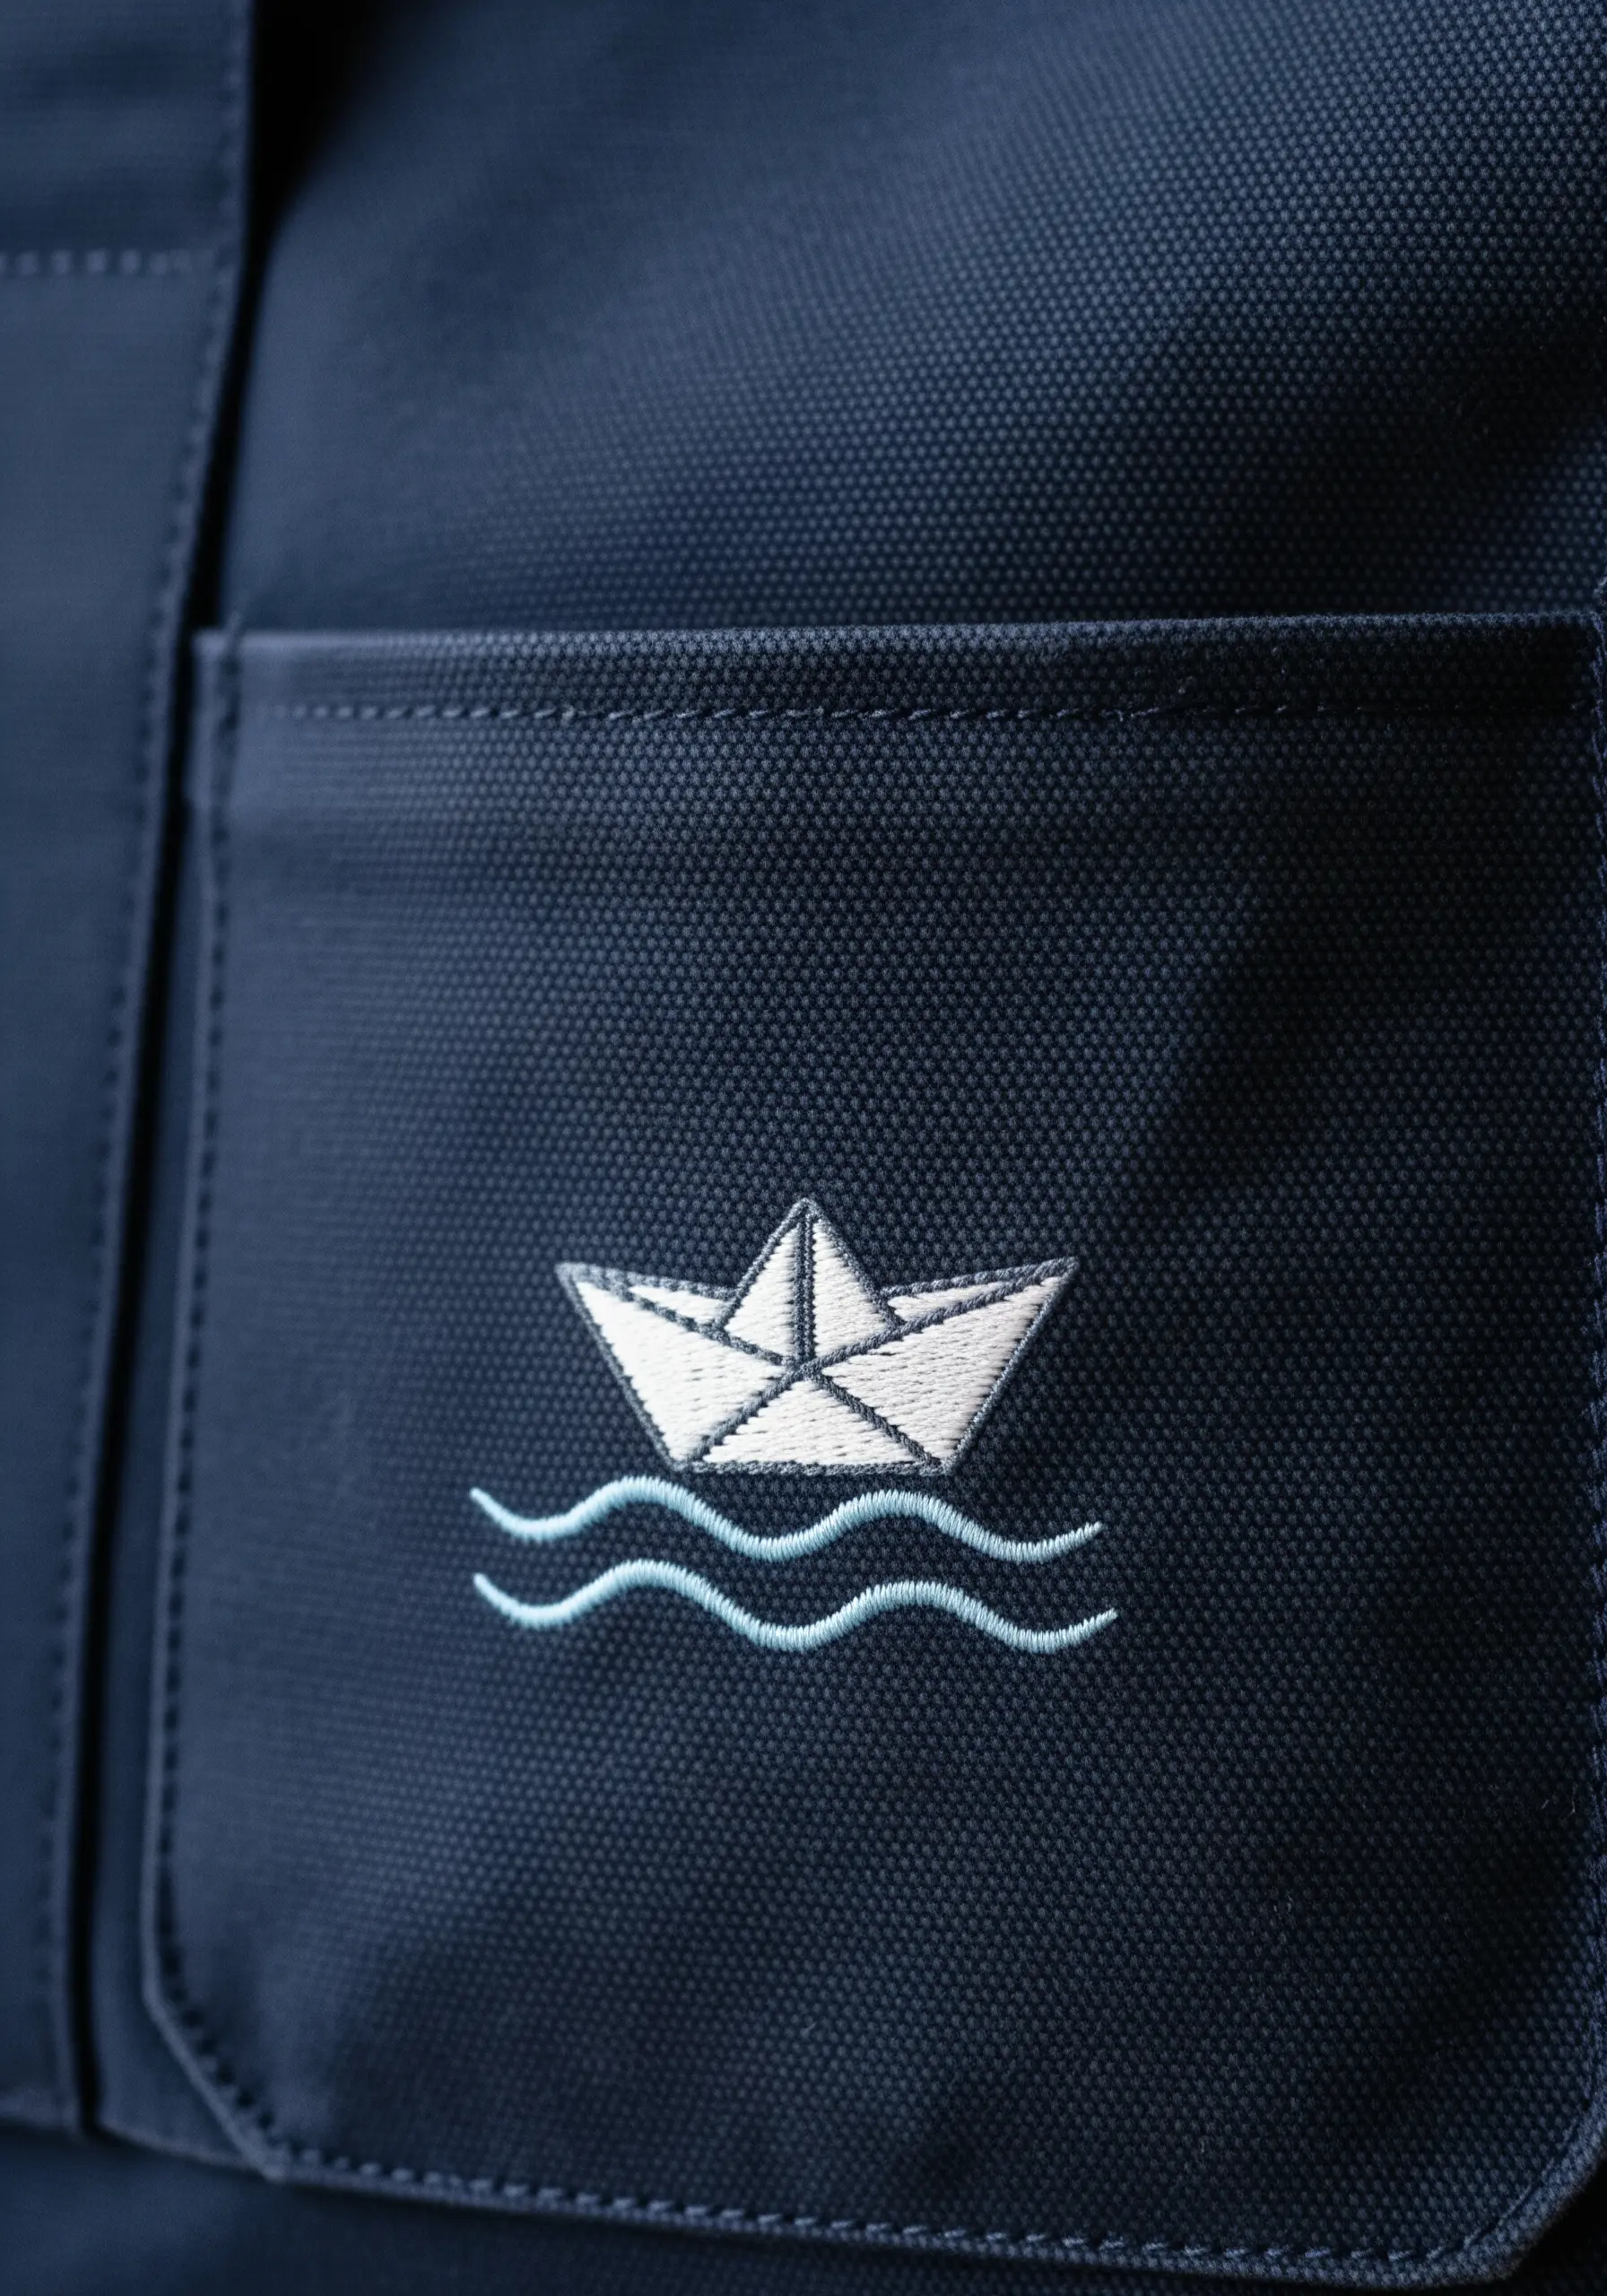
When stitching a light color on a dark fabric, clarity is everything. Every wobble and uneven stitch will show.
Choose a simple backstitch for this paper boat, focusing on keeping your stitch length perfectly consistent to create sharp, geometric folds.
Use a slightly lighter thread (a single strand of floss) for the interior fold lines than for the outer silhouette (two strands). This subtle shift in weight creates a sense of depth and perspective.
The waves, stitched in a lighter blue, should use a looser, more organic stitch like a stem or wave stitch to contrast with the boat’s rigidity.
8. Add Celestial Depth with Varied Knot Sizes
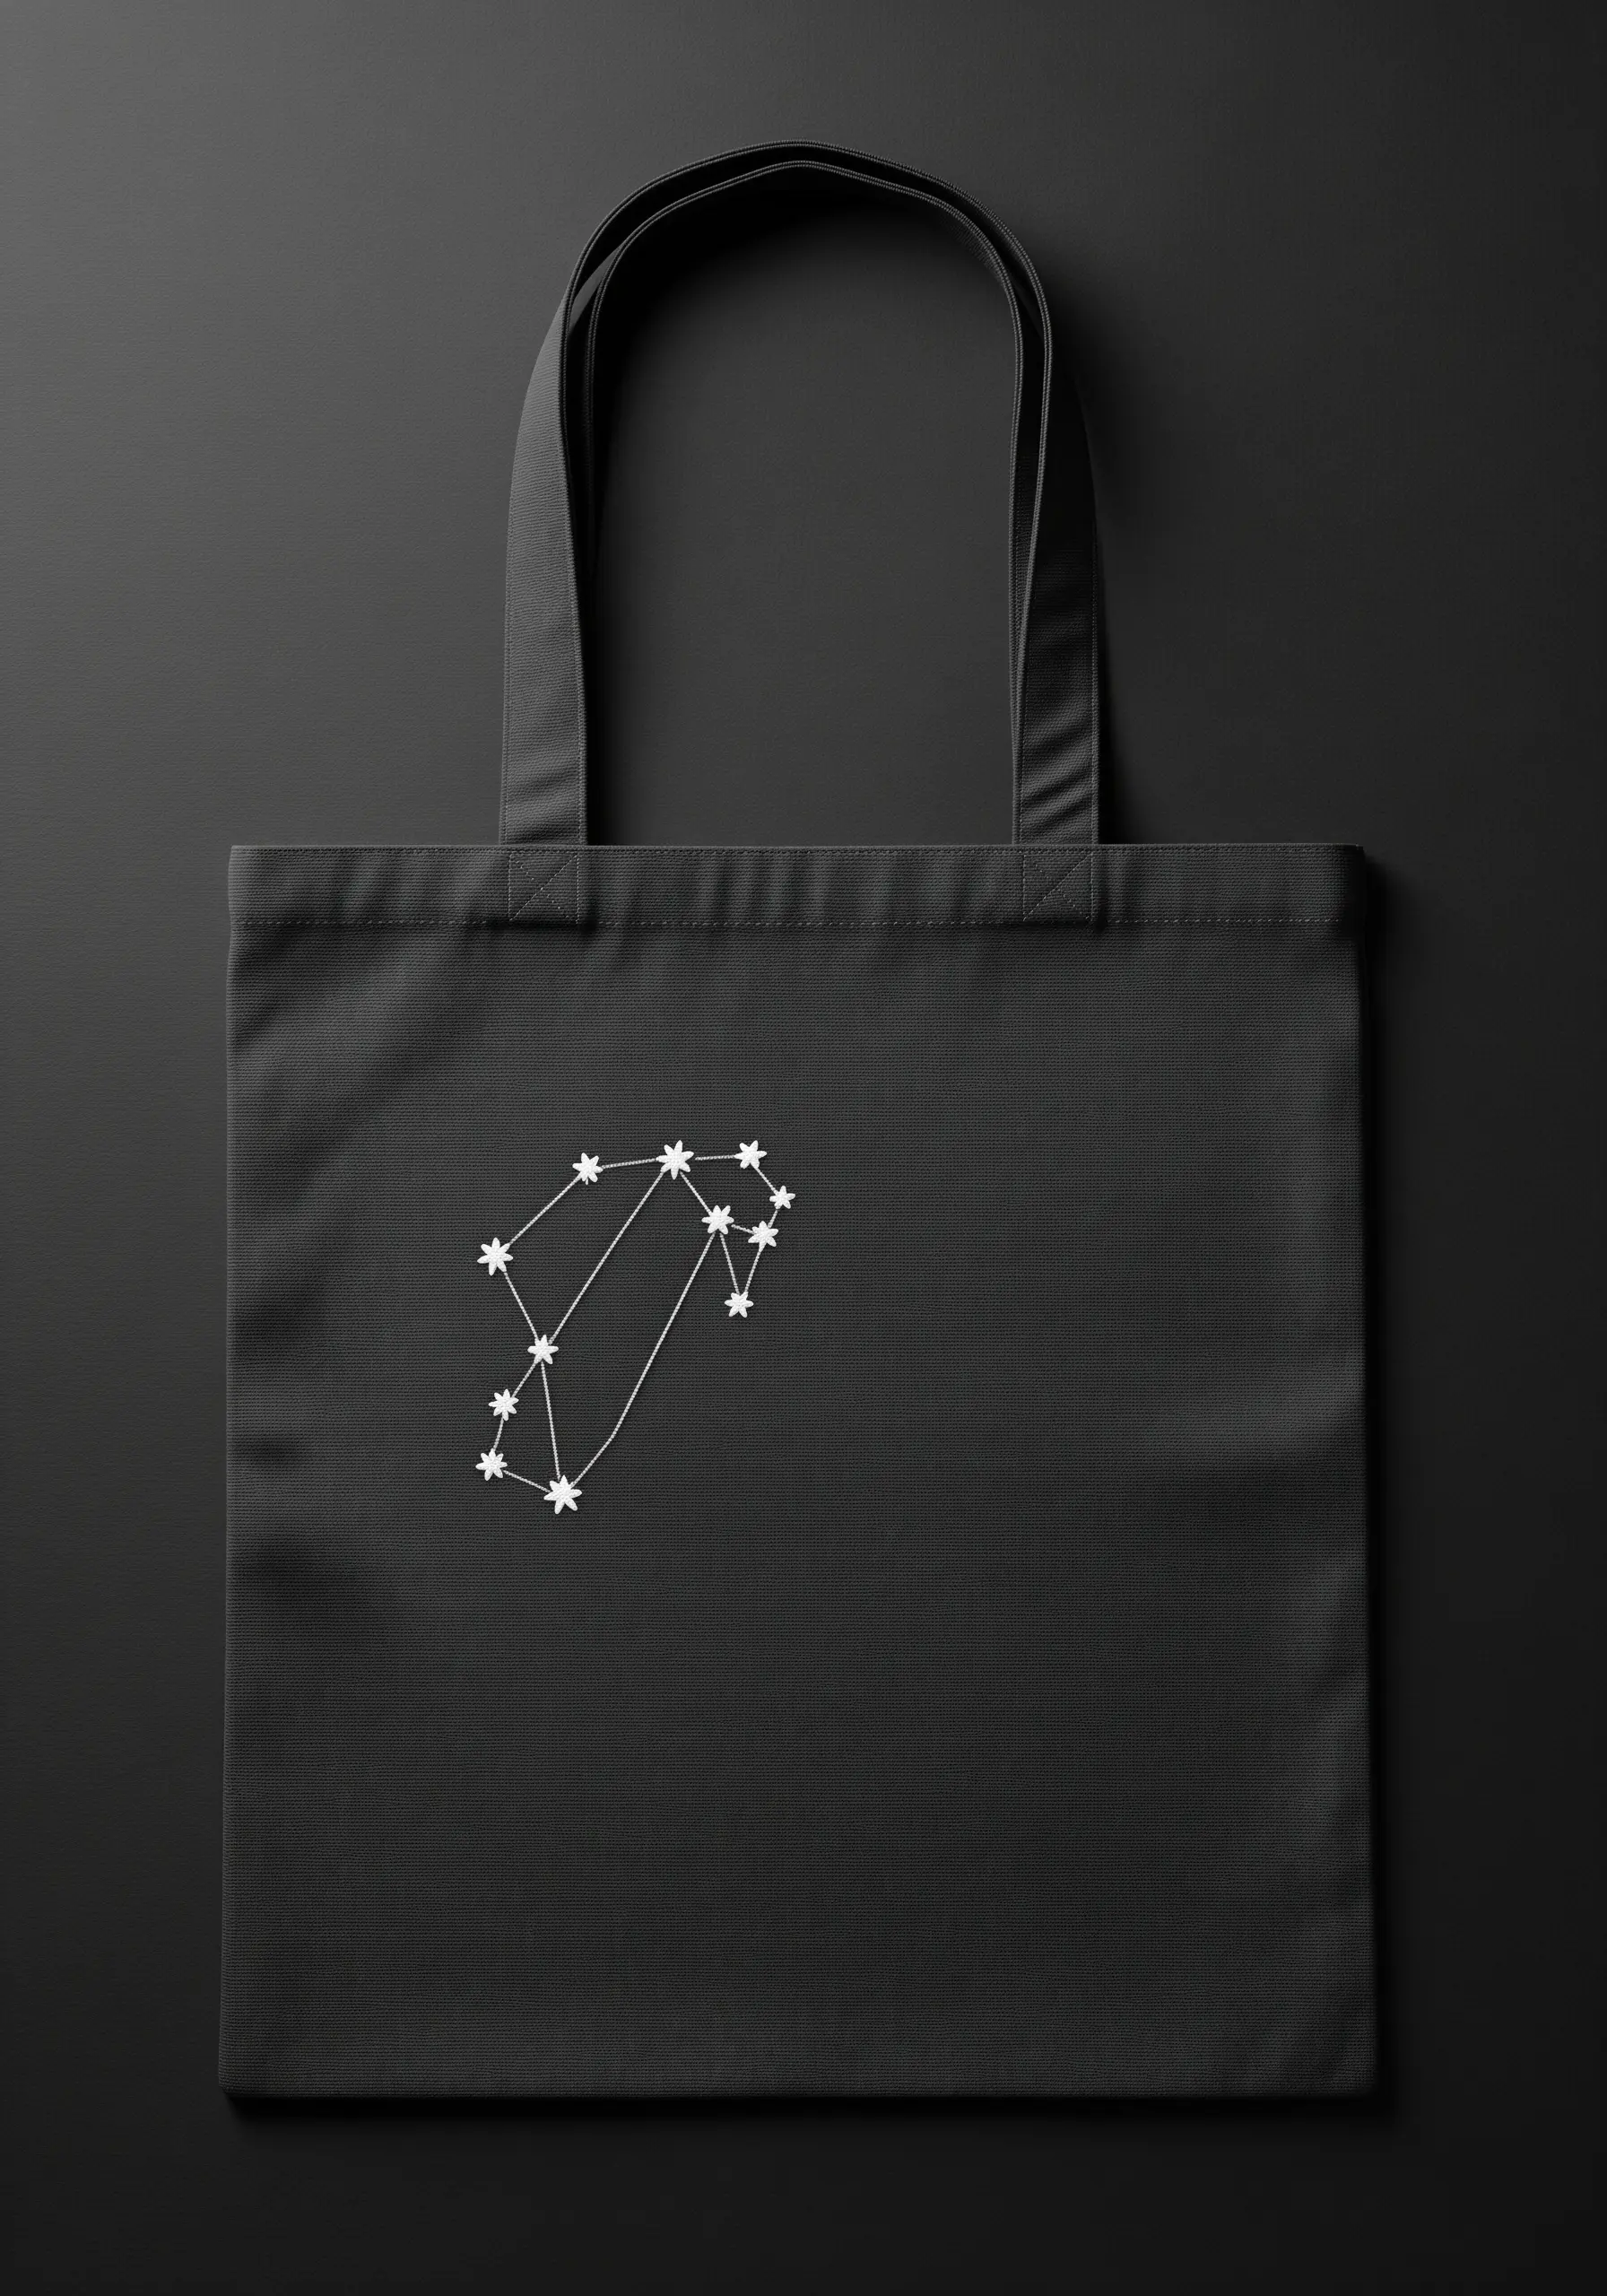
A constellation is a perfect exercise in minimalist storytelling. To make it feel like a twinkling night sky, avoid making every star identical.
Use French knots for the stars, but vary the size by changing both the number of thread strands (from one to three) and the number of times you wrap the thread around the needle (once or twice).
This creates a subtle variation in brightness and size, suggesting some stars are nearer or brighter than others.
Connect them with a simple, delicate backstitch using a single strand of thread to keep the focus on the star points.
9. Mimic Nature with Fishbone Stitch Leaves
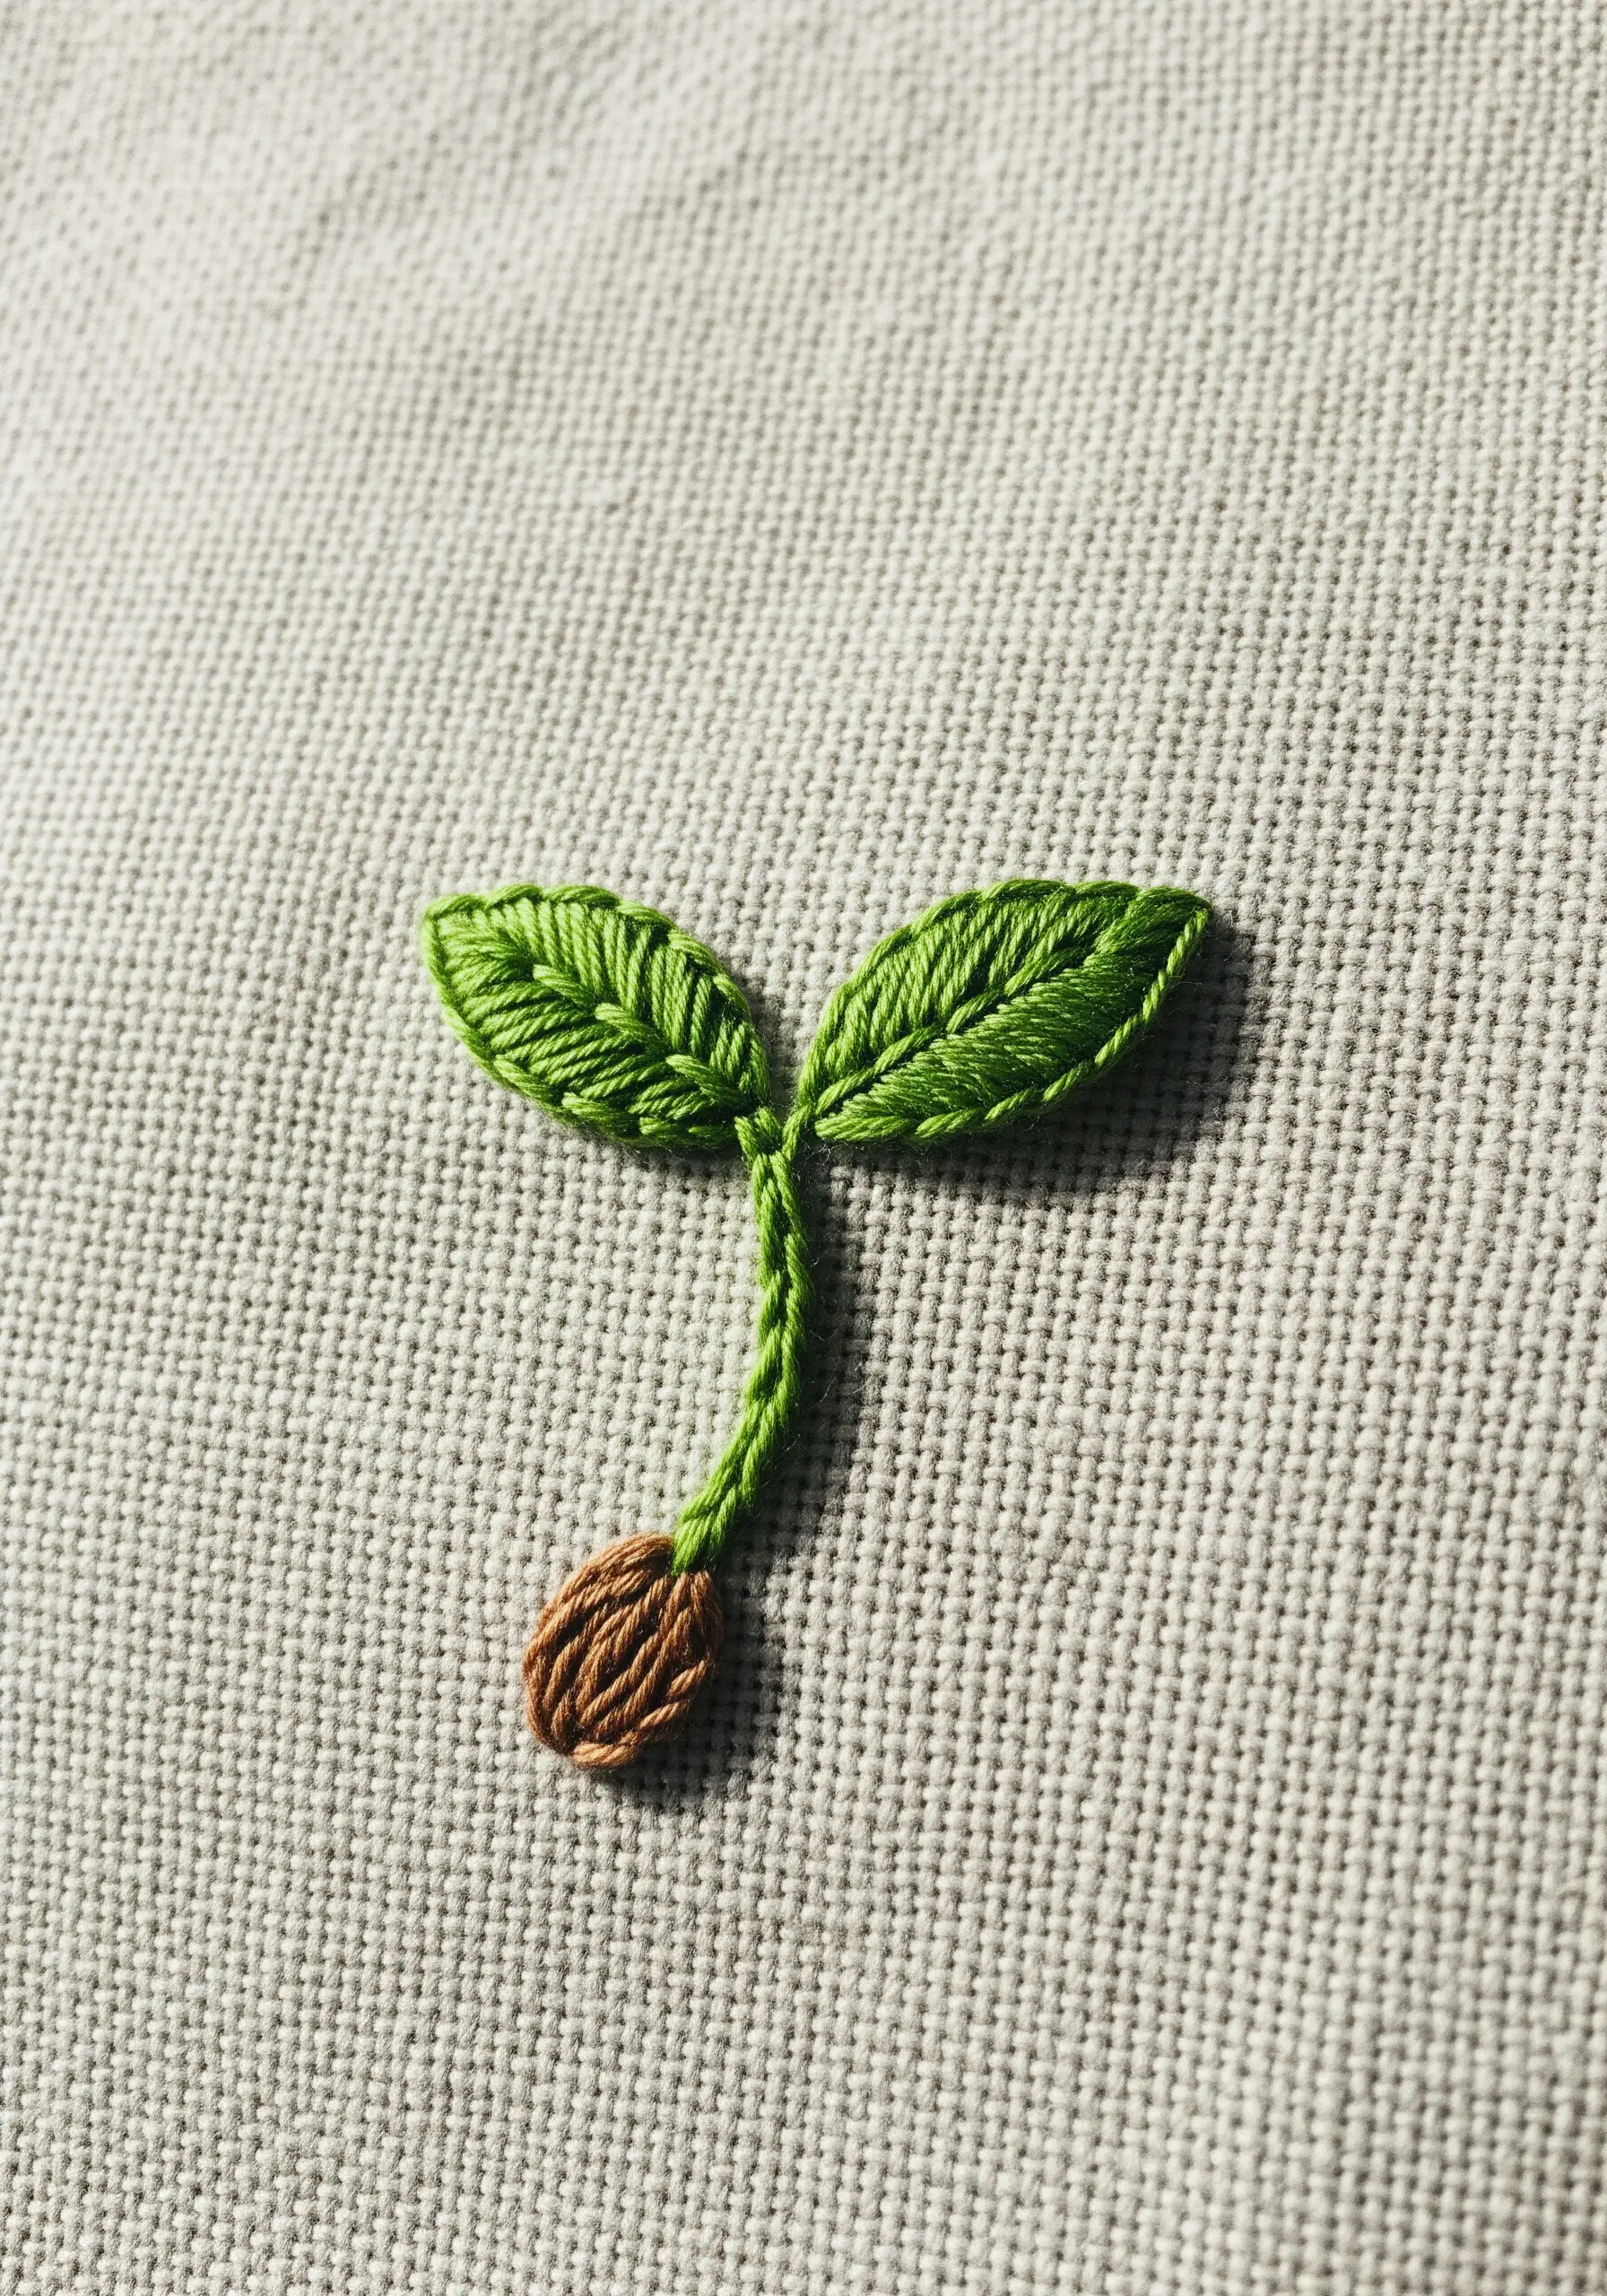
For small, symmetrical leaves, the fishbone stitch is technically and aesthetically superior to satin stitch.
This single stitch creates the leaf’s fill and its central vein simultaneously, resulting in a more organic and textured appearance.
Start at the tip and angle your alternating stitches down toward a central guideline. This naturally forms the raised line down the middle.
Pair the leaves with a simple stem stitch for the stalk and a cluster of French knots for the seed, creating a trio of distinct, nature-inspired textures.
10. Achieve a Glossy Finish with Strategic Highlights
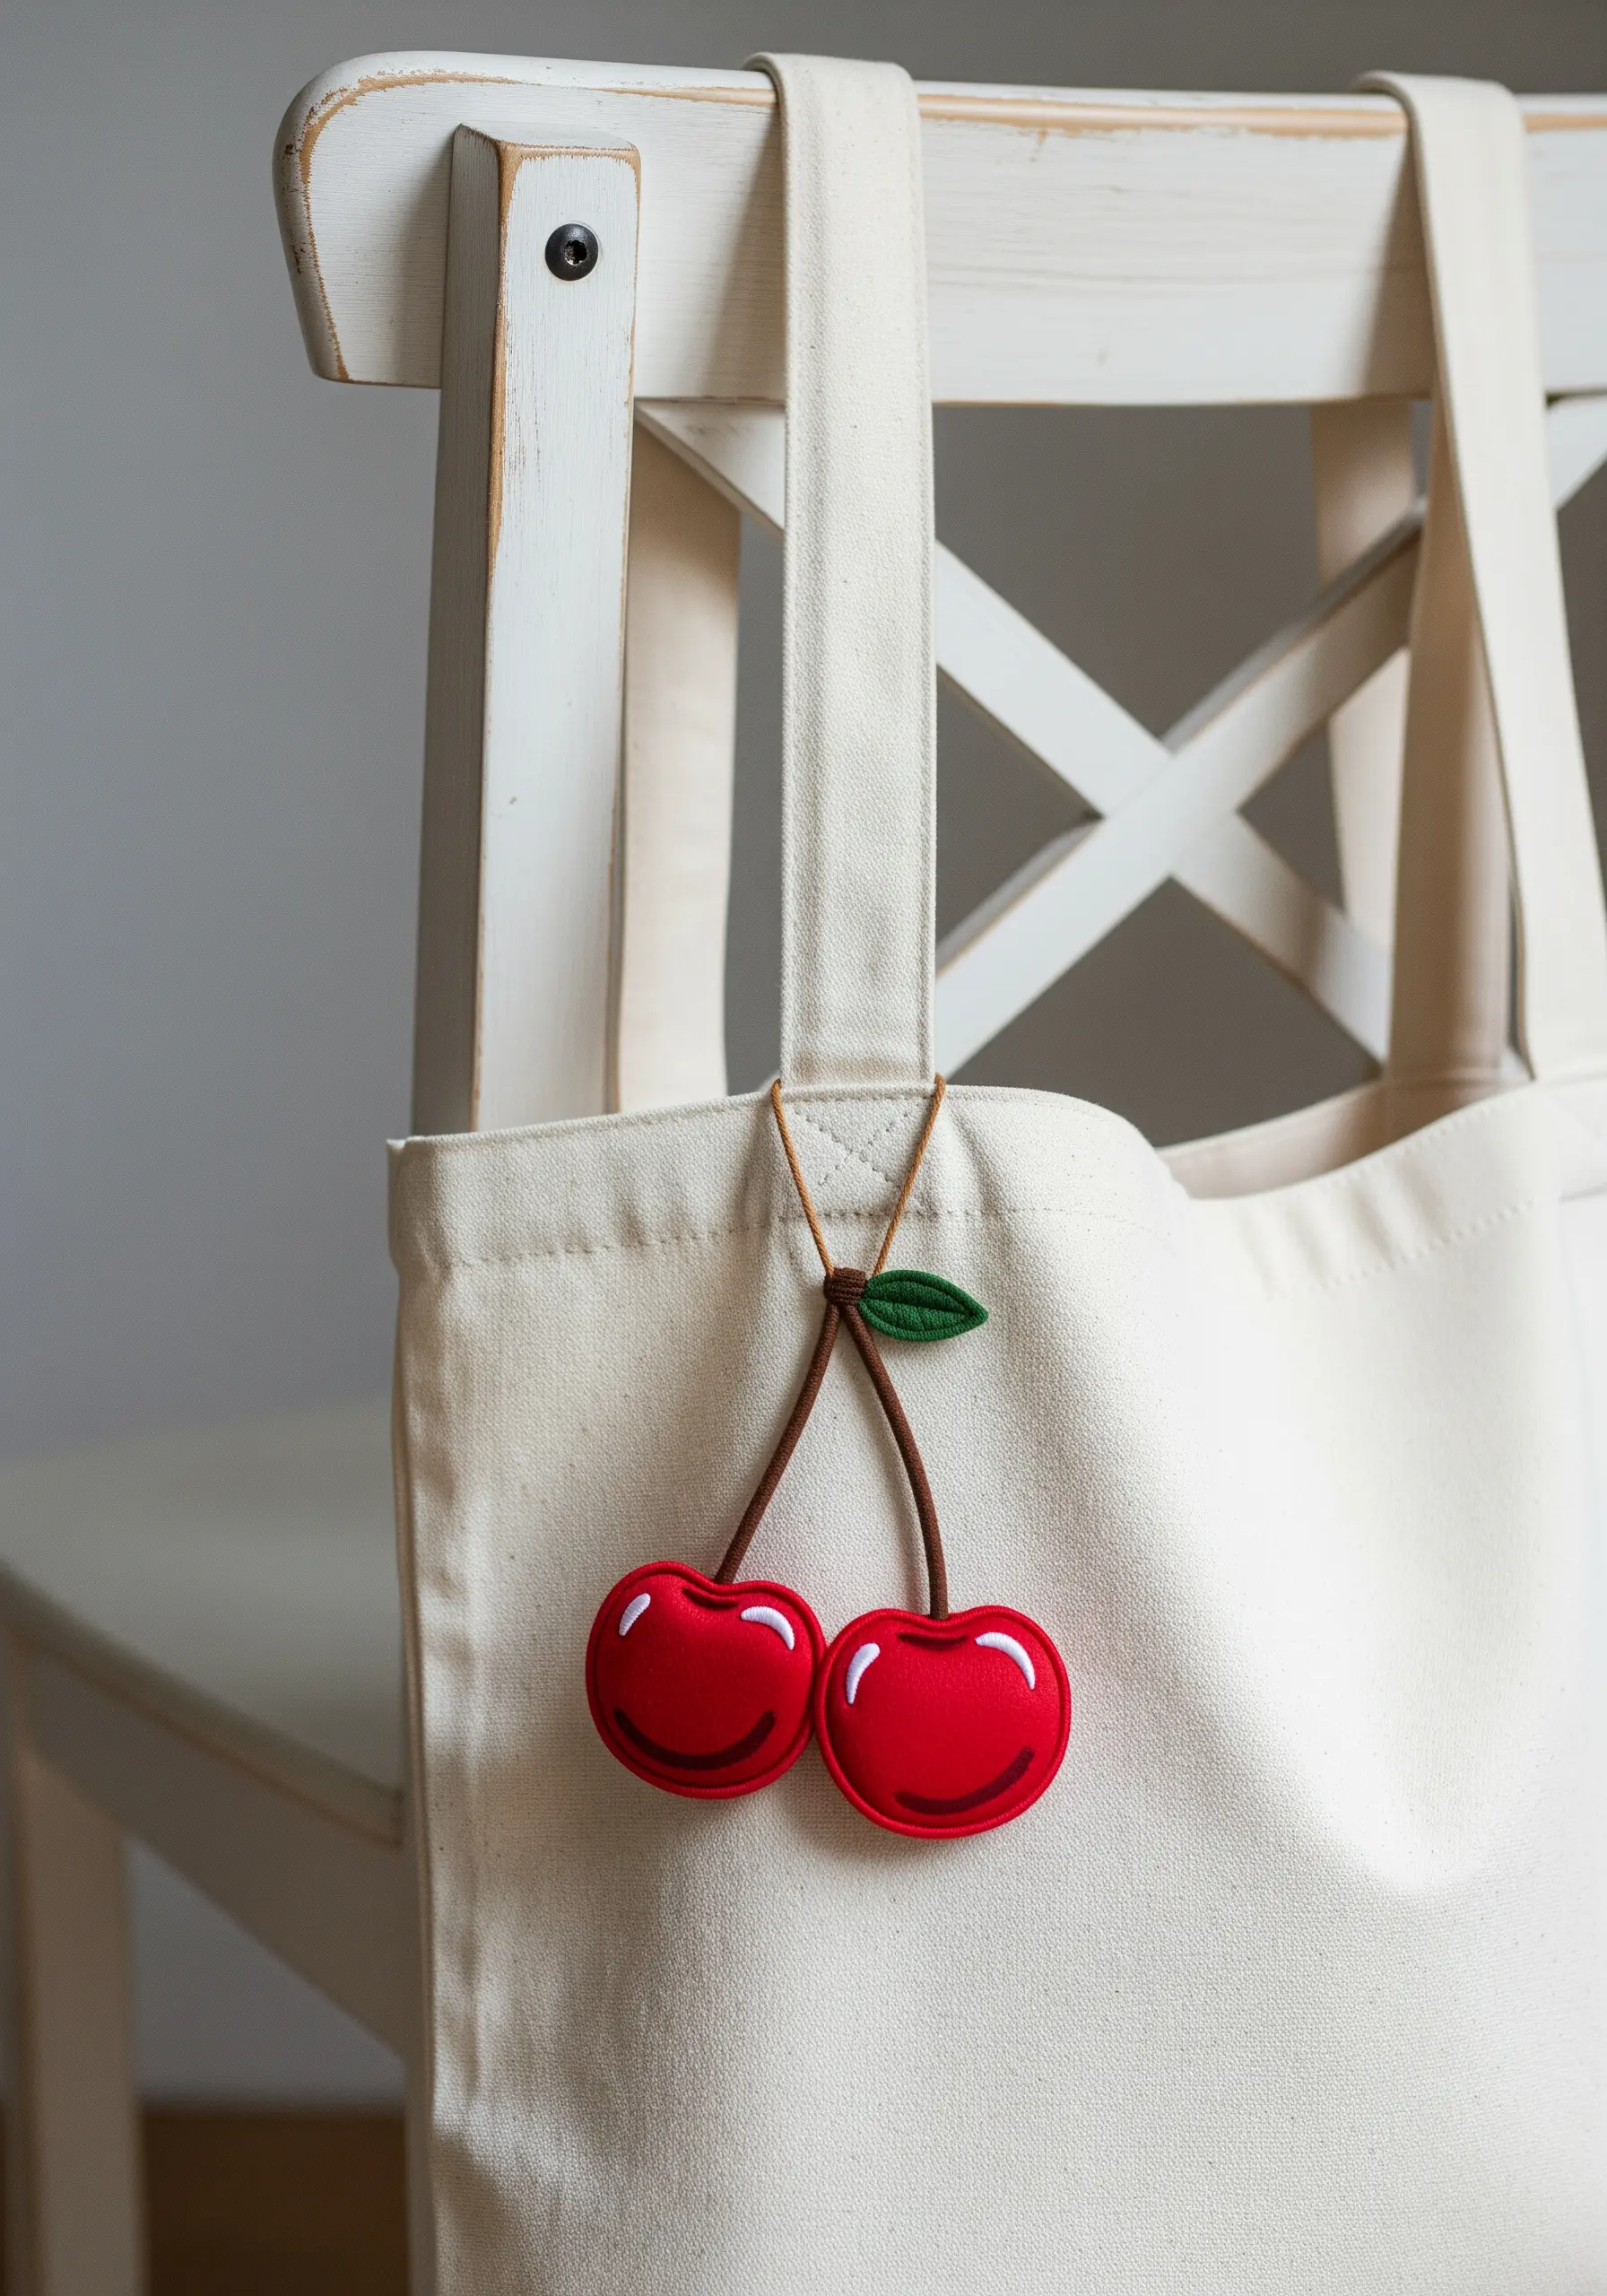
To give a satin-stitched motif a glossy, cartoon-like sheen, the key is a well-placed highlight.
Fill the entire cherry shape with a rich red satin stitch, ensuring your stitches are parallel and tight.
Then, come back with a single strand of white floss and add a small, curved satin stitch block on the upper curve of each cherry.
This tiny detail tricks the eye into seeing a reflective surface, instantly making the flat embroidery feel round and shiny.
11. Elevate Simplicity with a Muted Palette
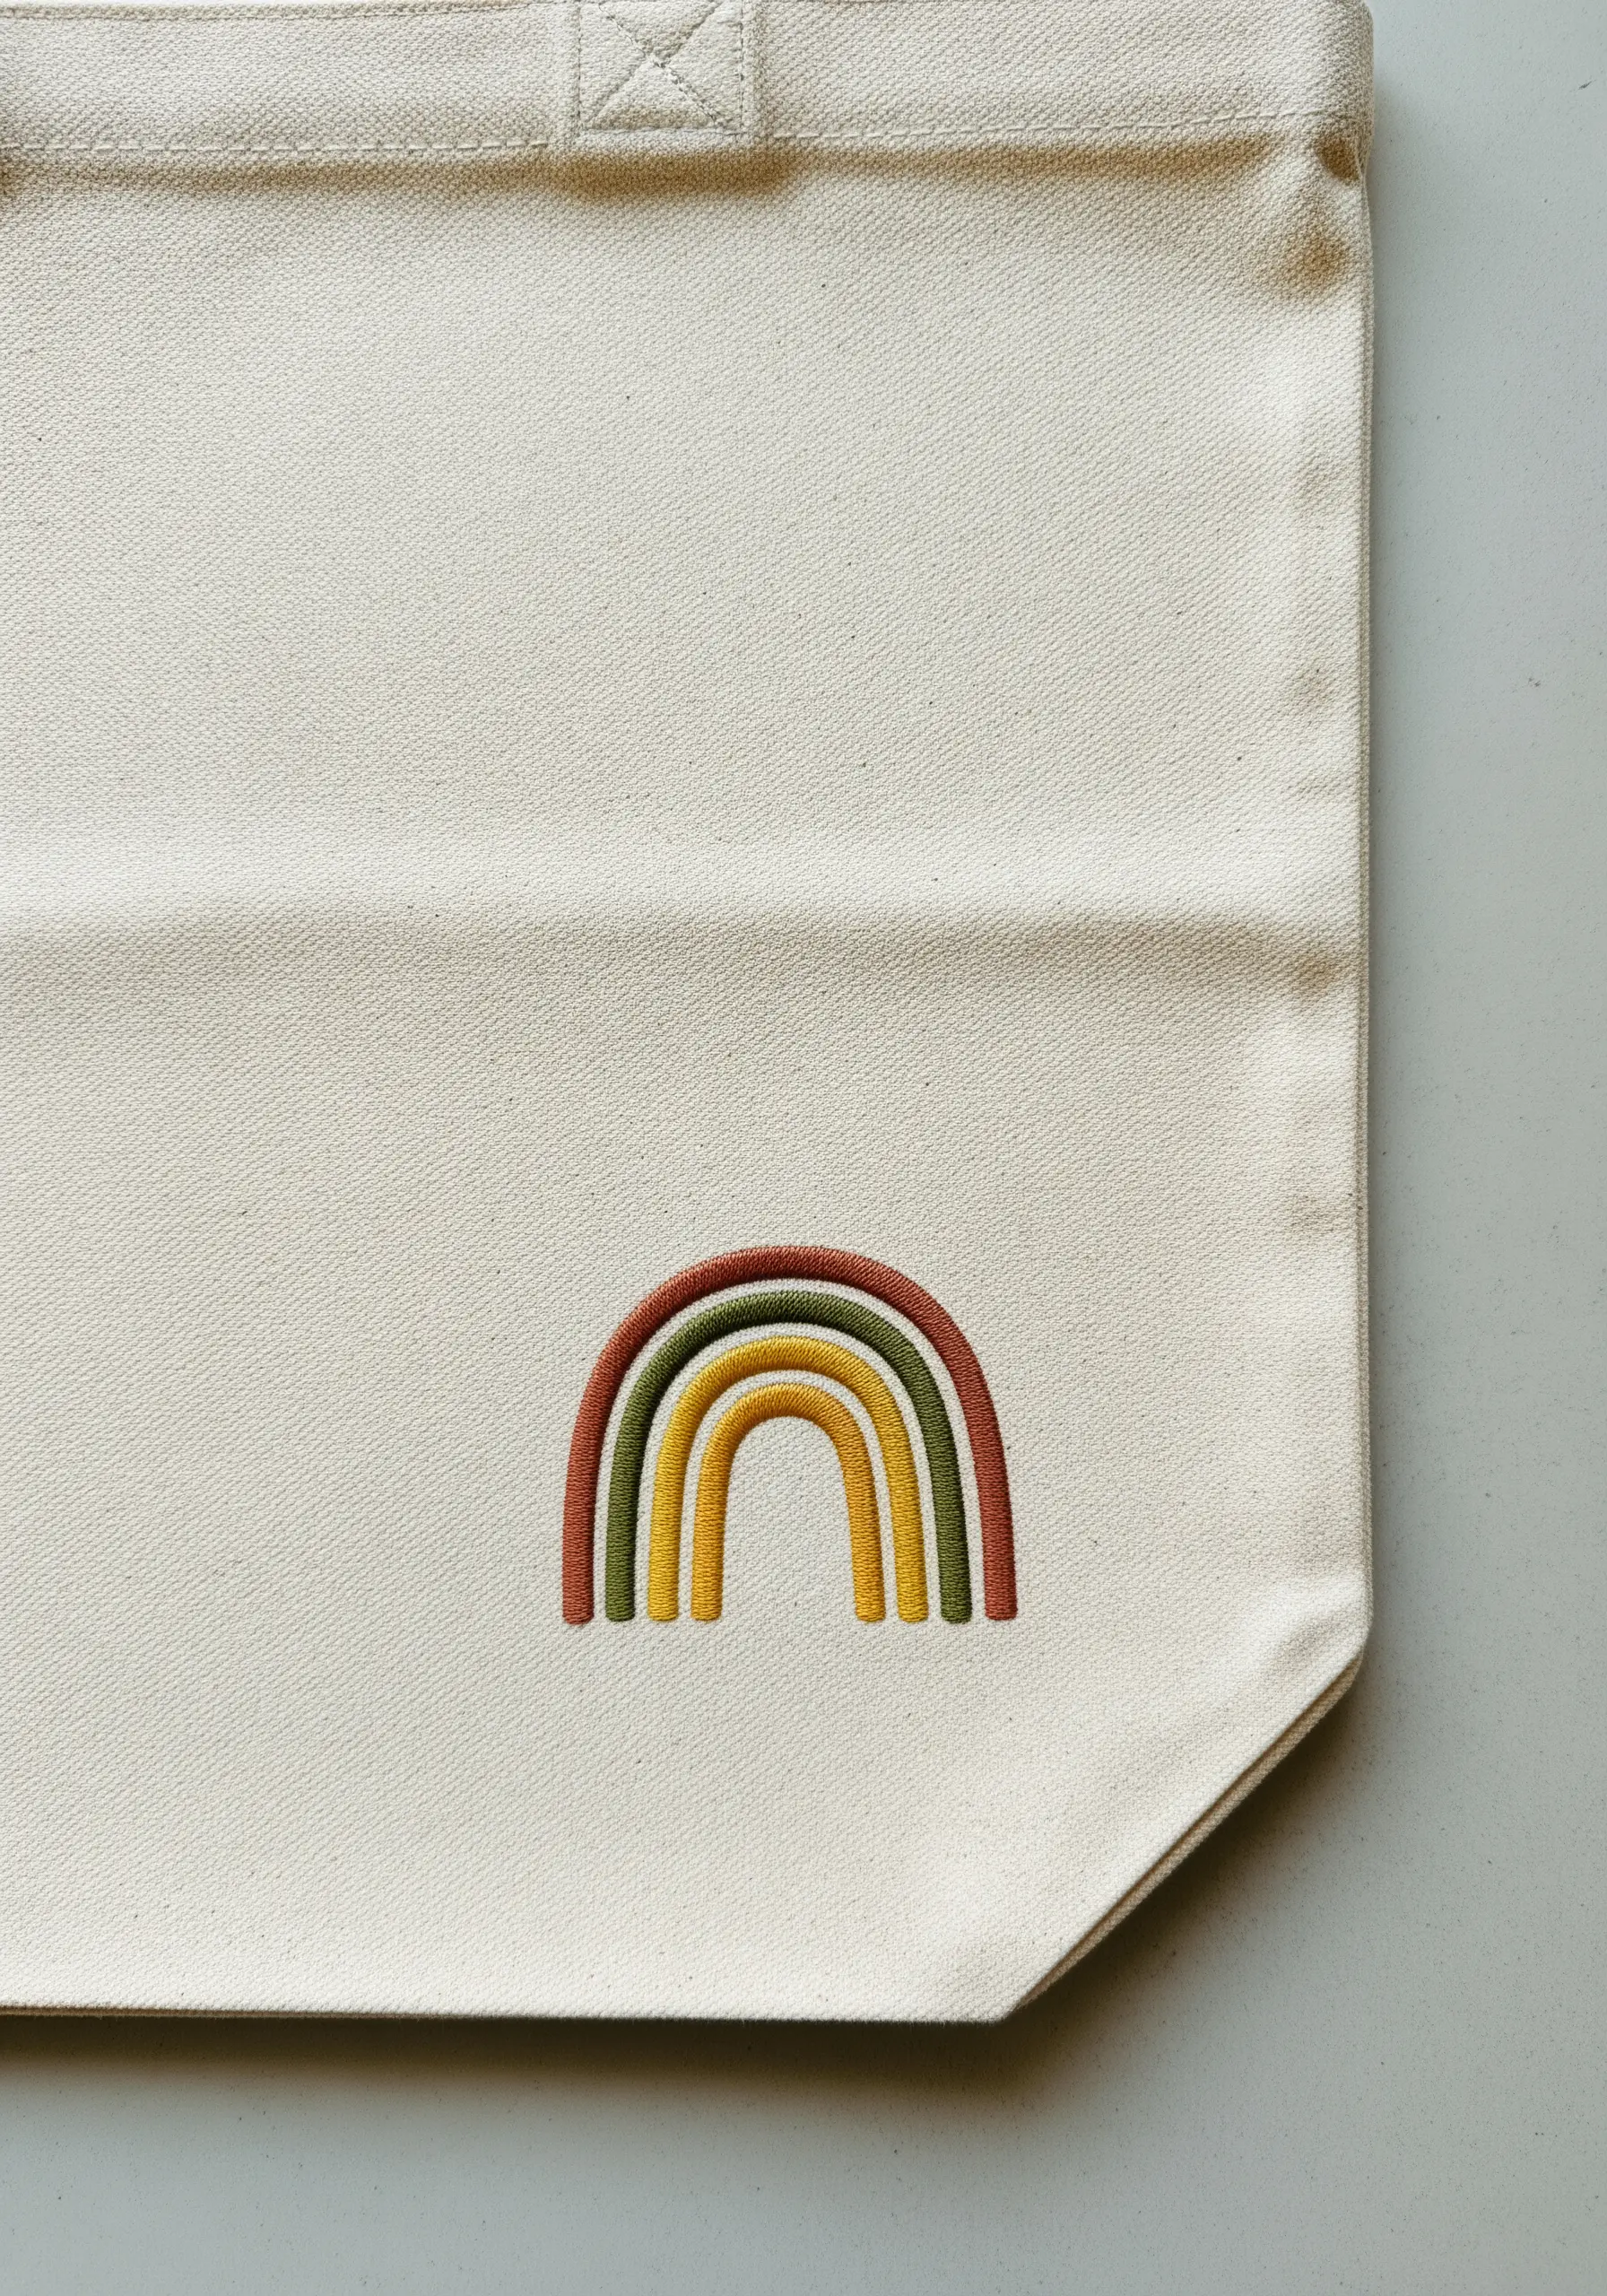
A rainbow motif can feel juvenile, but you can instantly modernize it by selecting a sophisticated, earthy color palette.
Instead of bright primary colors, choose muted tones like terracotta, ochre, olive green, and mustard. This grounds the design and gives it a calmer, more refined feel.
The technical challenge here is maintaining perfectly parallel satin stitches within each arc. Use a hoop to keep the canvas taut and stitch slowly to ensure each color band is uniform.
You can find more inspiration in earth-tone DIY embroidery designs.
12. Master Expressive Lines with a Single Stitch
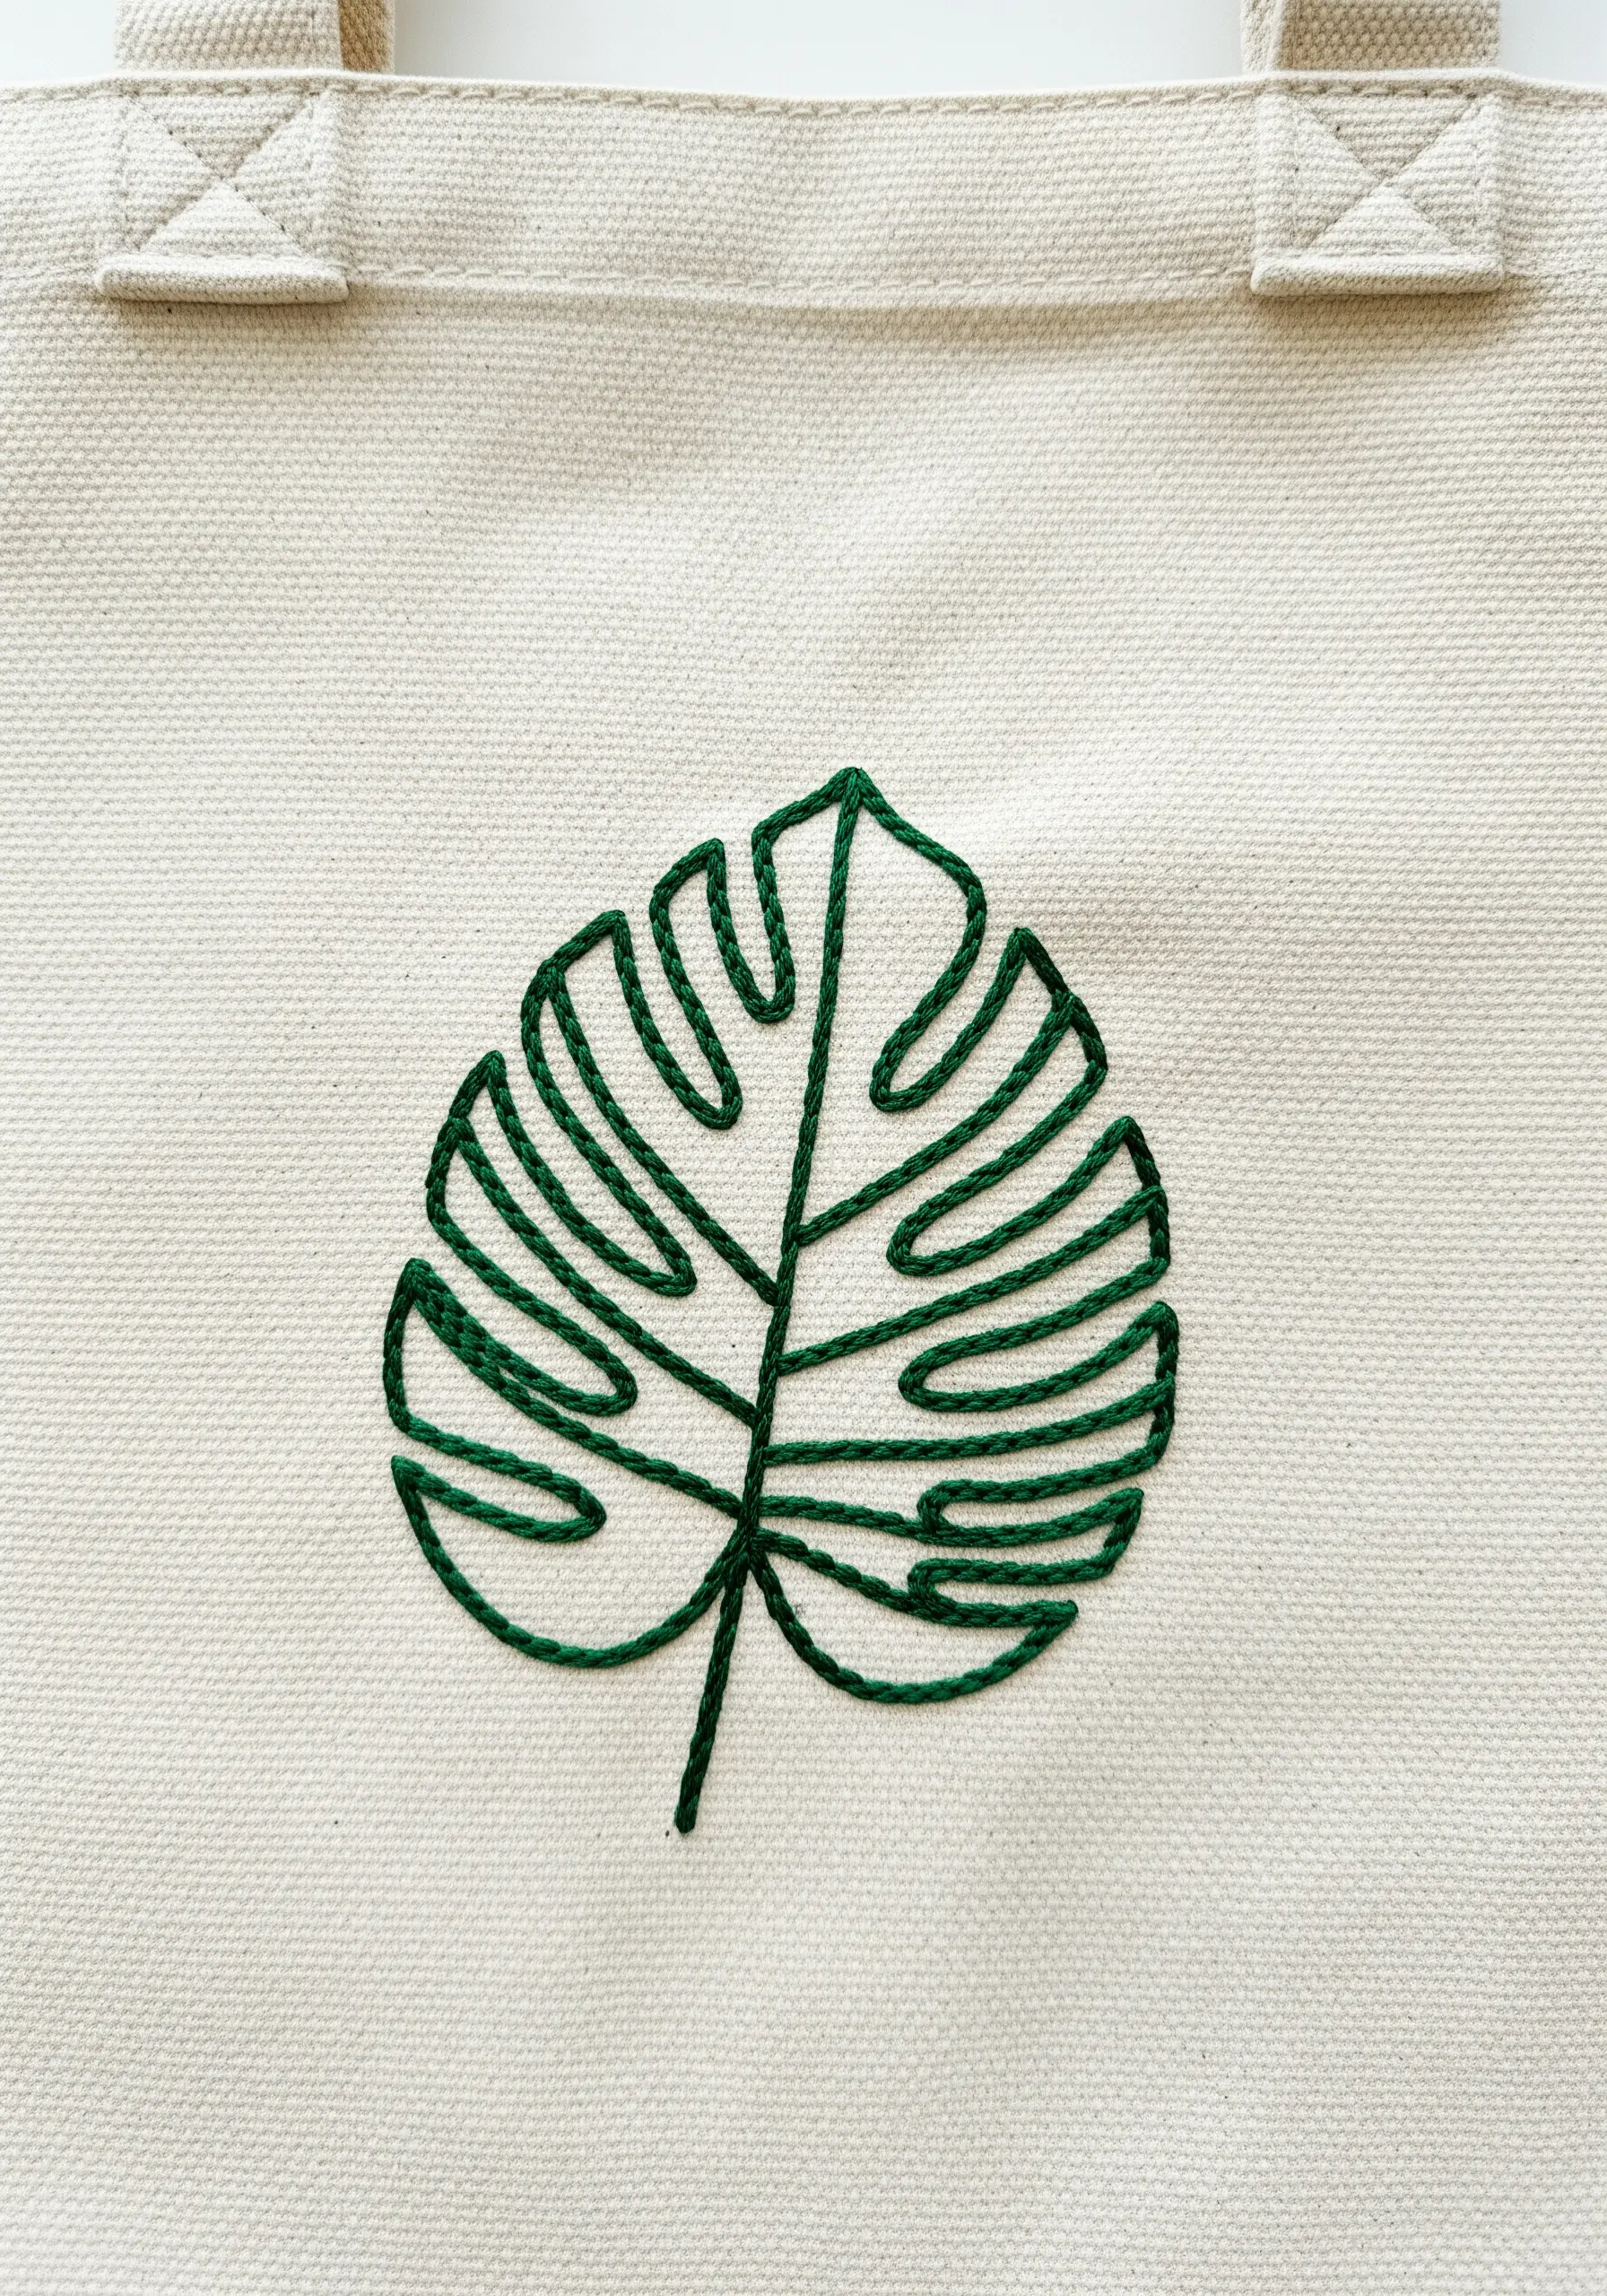
This monstera leaf proves that you don’t need complex fills to create a bold statement. The entire design relies on the quality of a single outline stitch.
A whipped backstitch is ideal here. First, create a standard backstitch outline. Then, weave a second thread through those stitches without piercing the fabric.
This technique creates a smooth, raised, and rope-like line that is far more substantial and professional-looking than a simple backstitch alone.
It’s a perfect way to add definition to your nature-inspired leaf clusters.
13. Convey Movement with Delicate Repetition
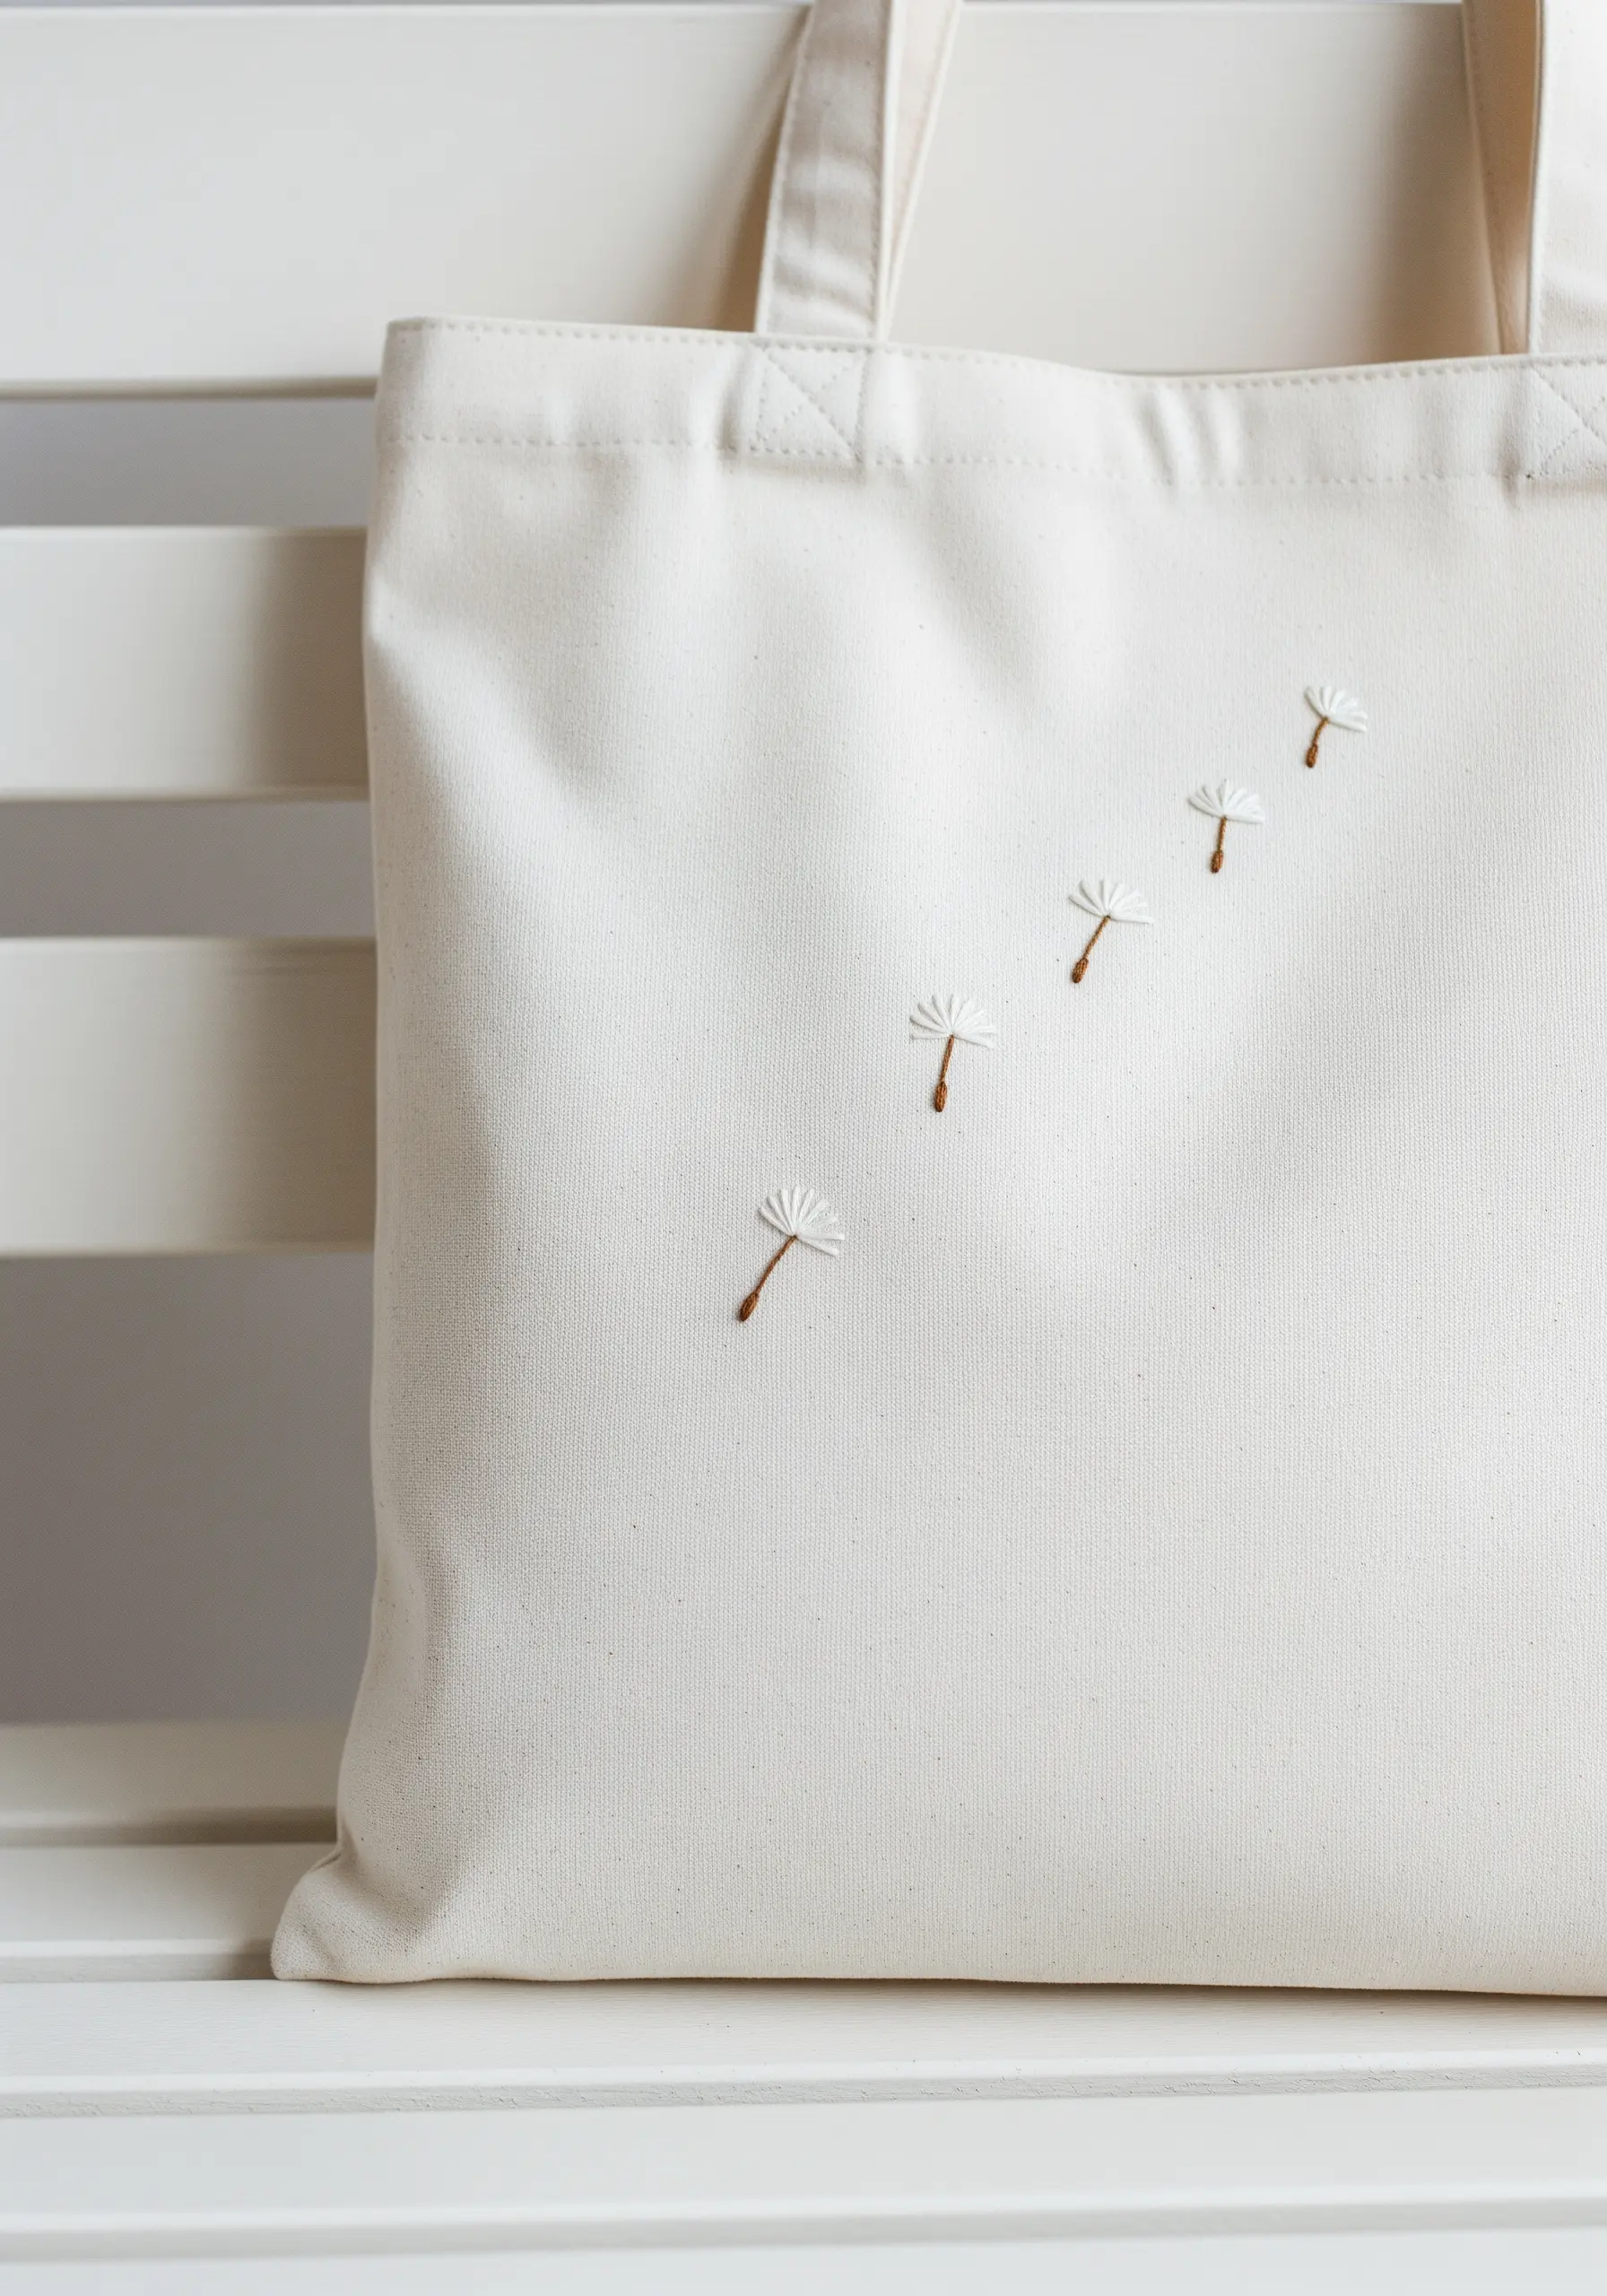
The beauty of this design is its sense of weightlessness and movement, achieved with the most delicate stitches.
For each seed, use a single strand of brown floss for the stem and a tiny satin stitch for the seed base.
The floating filaments are simple straight stitches made with a single strand of white thread. Fan them out from the stem, keeping them sparse and uneven for a natural, airy look.
Placing them in a diagonal line across the fabric creates a visual path, suggesting they are being carried by a gentle breeze. You can find more Dandelion and wildgrass stitch projects that capture this feeling.
14. Define a Focal Point with a Pop of Color
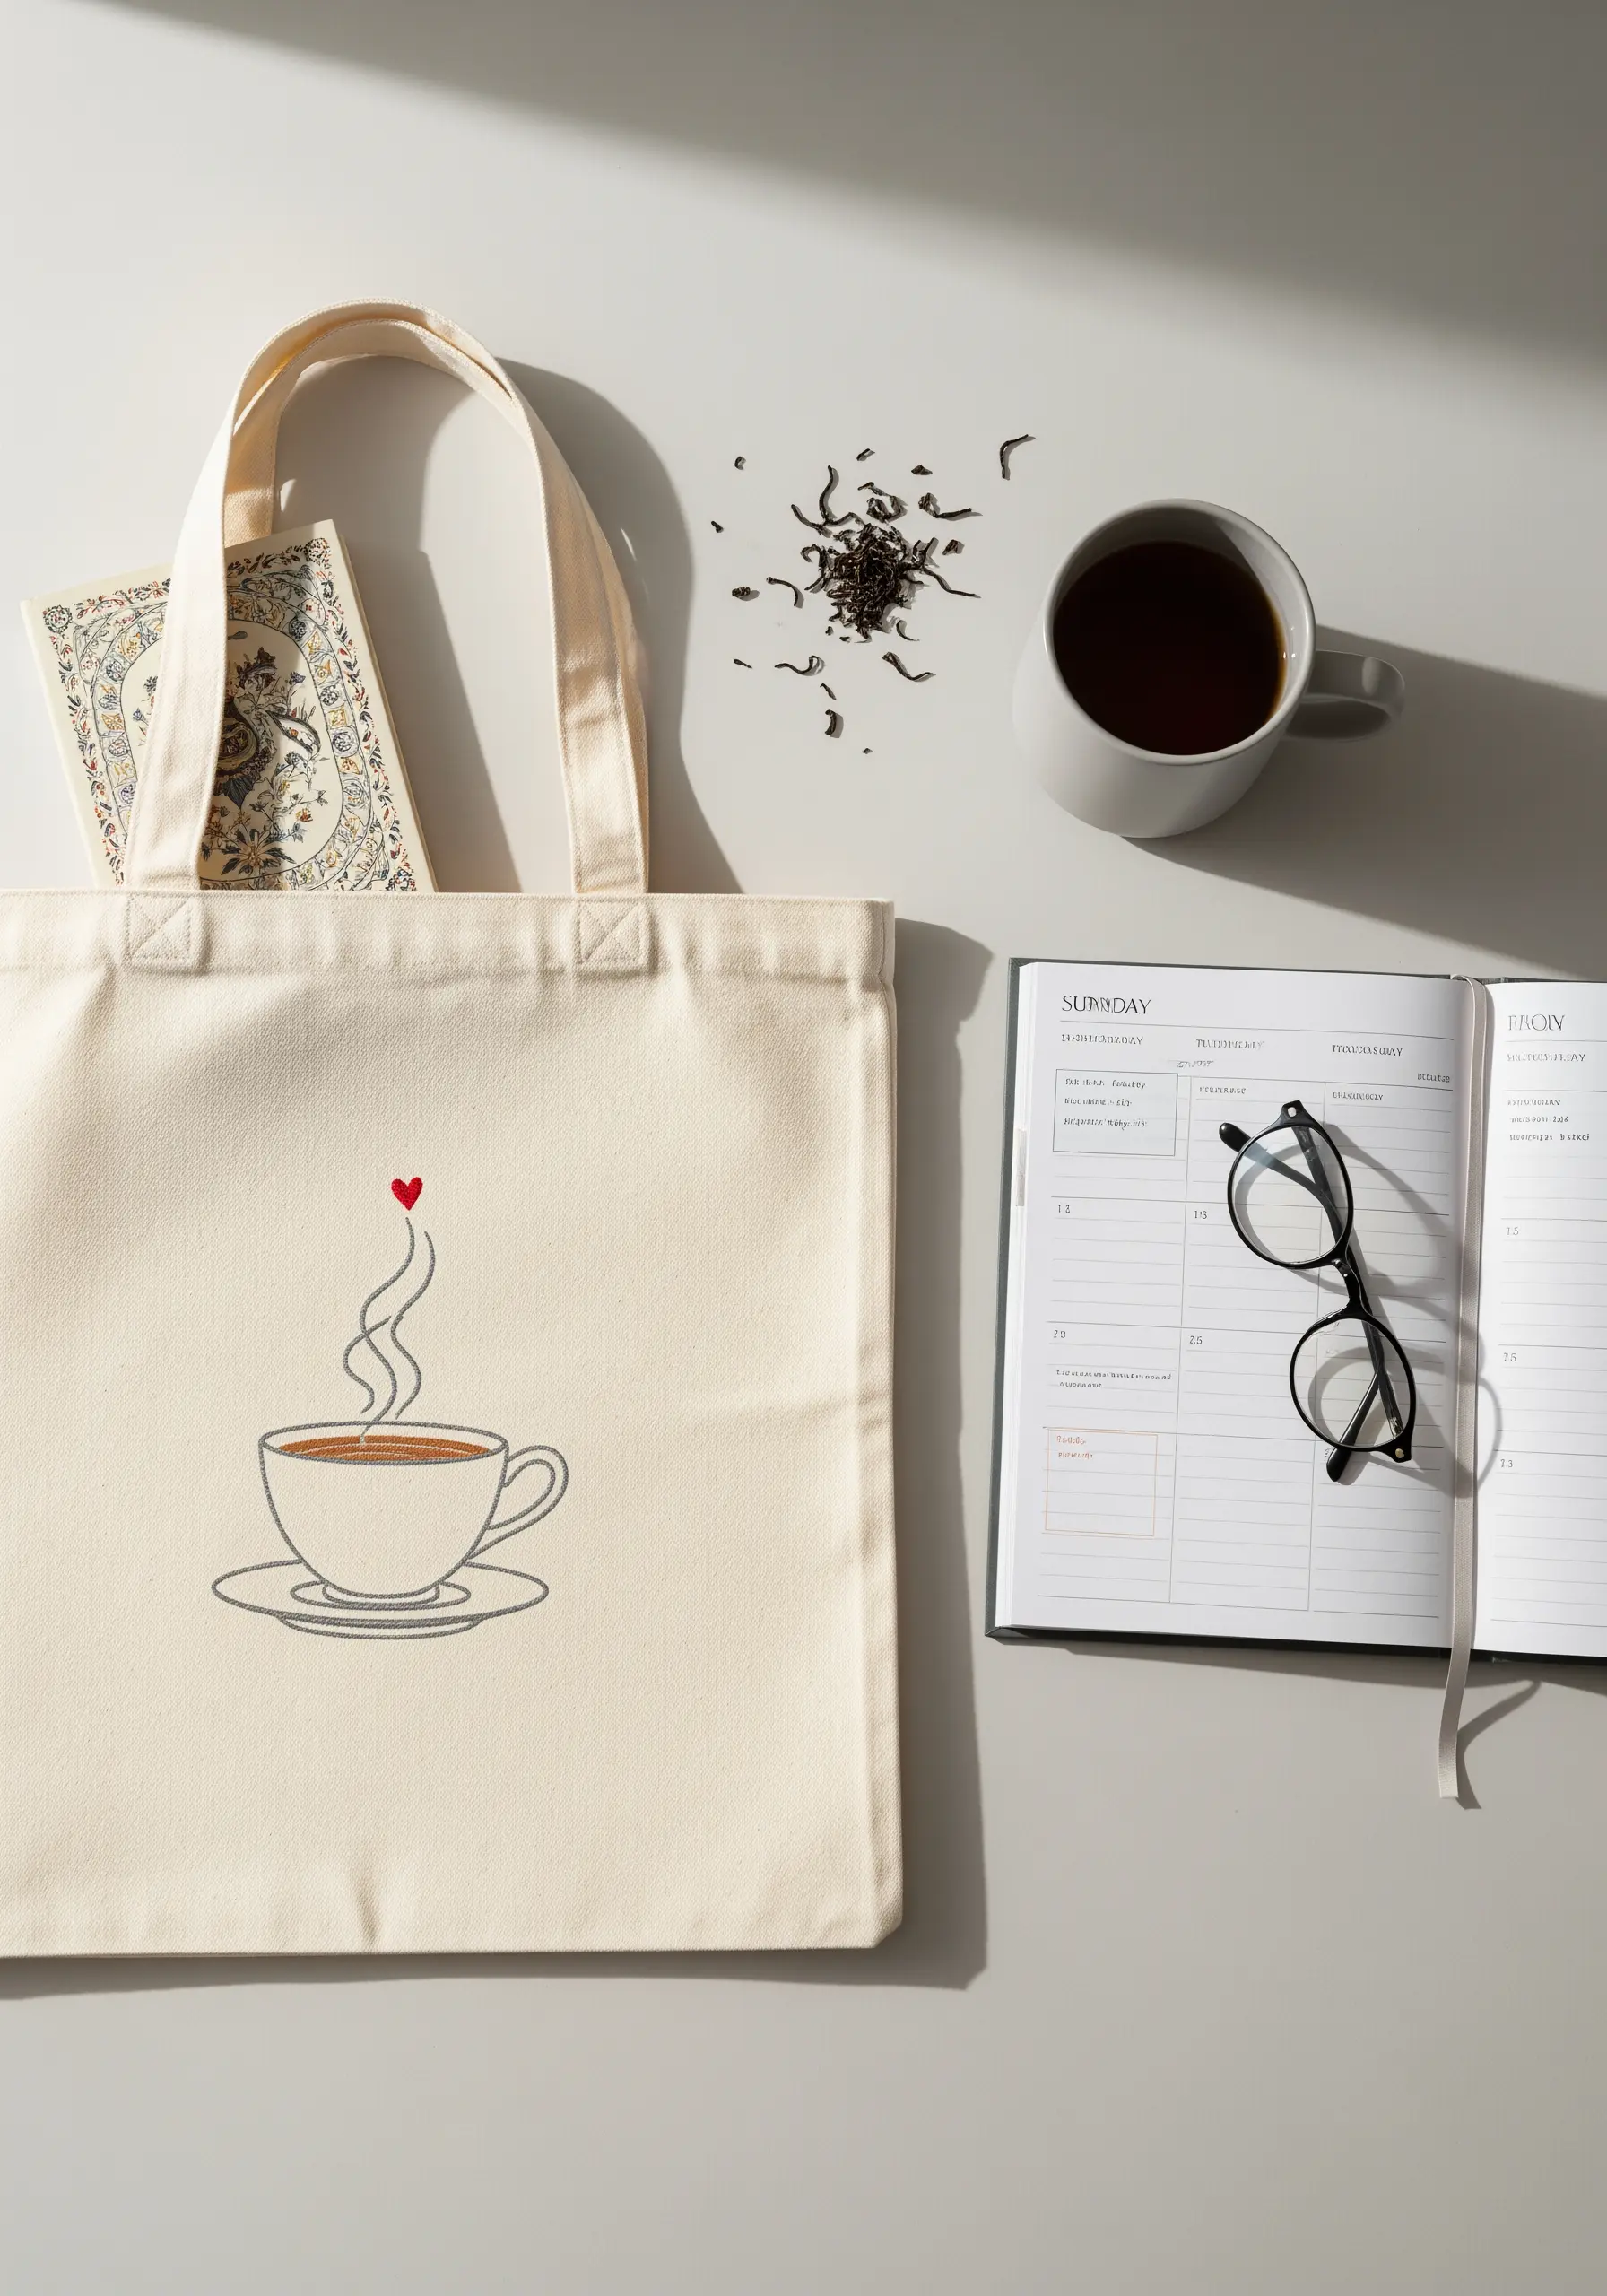
In a simple line-art design, a single drop of color can completely redirect the viewer’s focus and add emotional weight.
Here, the coffee cup is stitched in a neutral grey backstitch, making it a quiet, structural element.
The steam is rendered with a light, open stitch like a chain stitch or stem stitch, giving it a wispy quality.
By stitching the tiny heart in a bold, solid red satin stitch, you create an immediate focal point that imbues the entire piece with a feeling of warmth and love. Explore more tote bag embroidery designs for coffee lovers.
15. Create Depth with Line and Fill Contrast
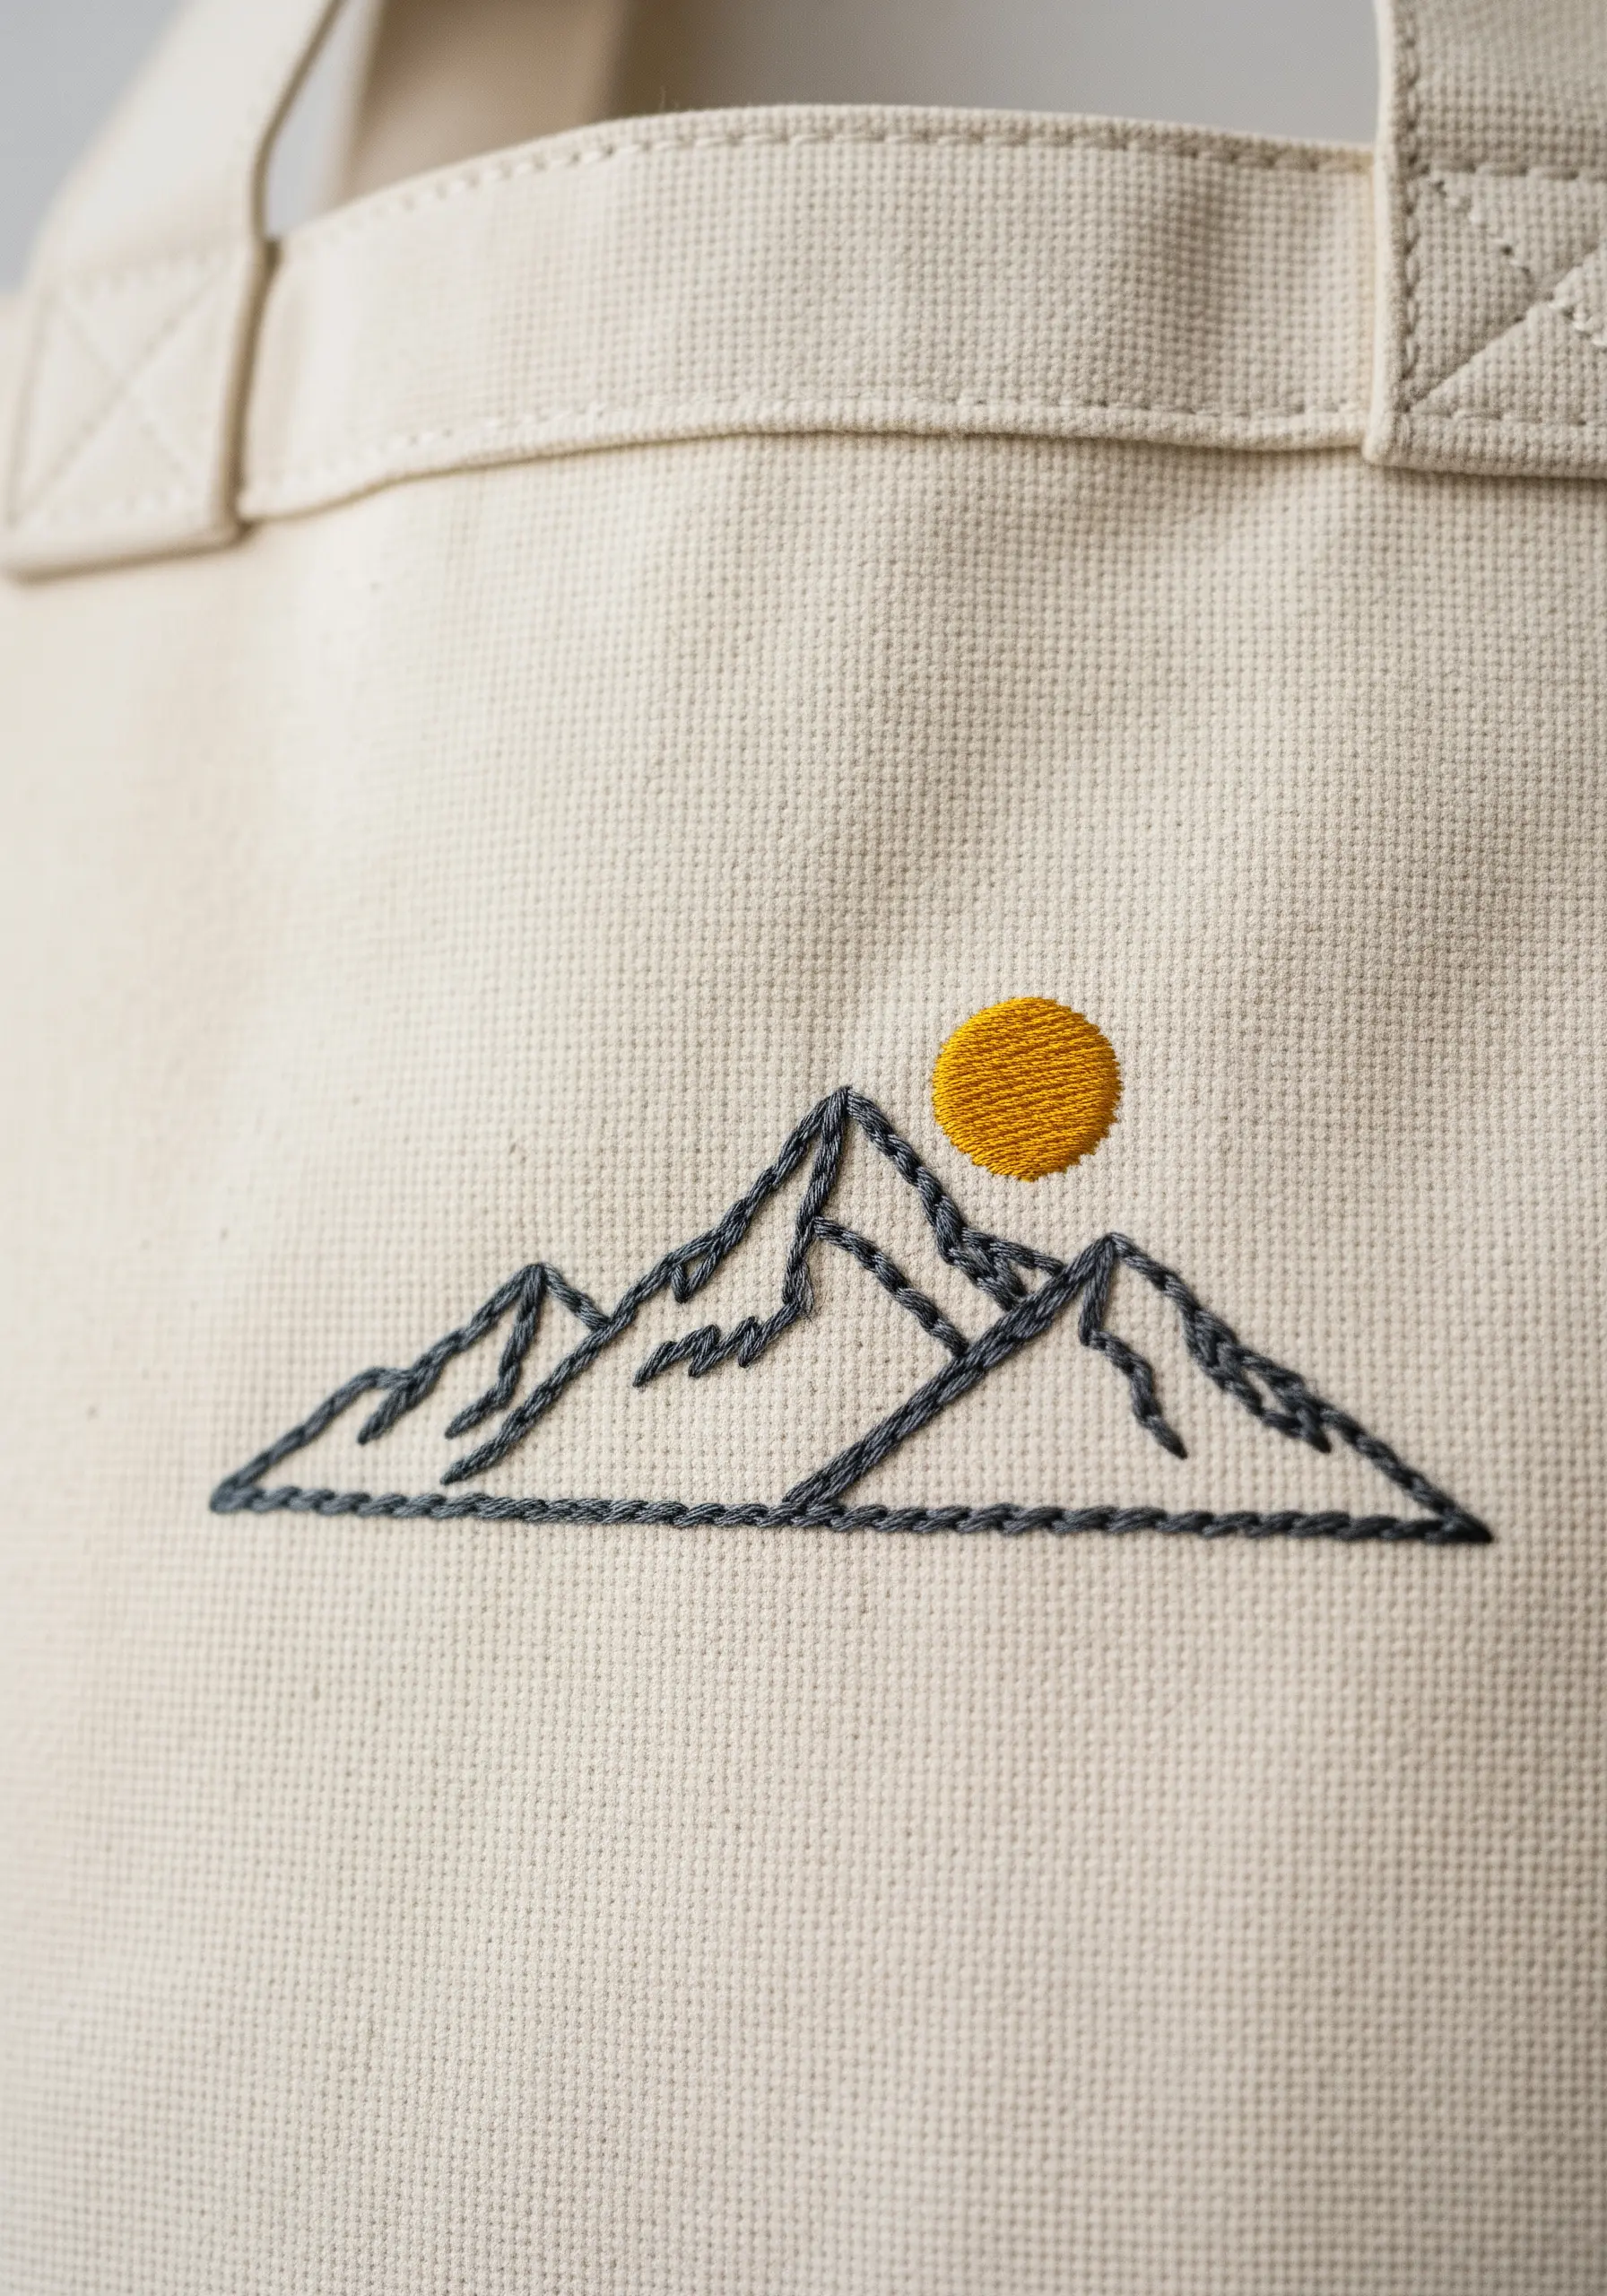
This minimalist mountain range effectively uses two contrasting techniques to create a sense of a layered landscape.
The mountains are defined by a crisp backstitch in a dark grey, focusing on sharp angles and clean lines to suggest rocky peaks.
The sun, in contrast, is a solid circle of densely packed satin stitch in a warm, golden yellow.
This juxtaposition of line versus solid fill instantly creates a foreground and background, making the sun feel like it’s positioned behind the mountain peaks.
16. Sculpt Petals with a Central Divide
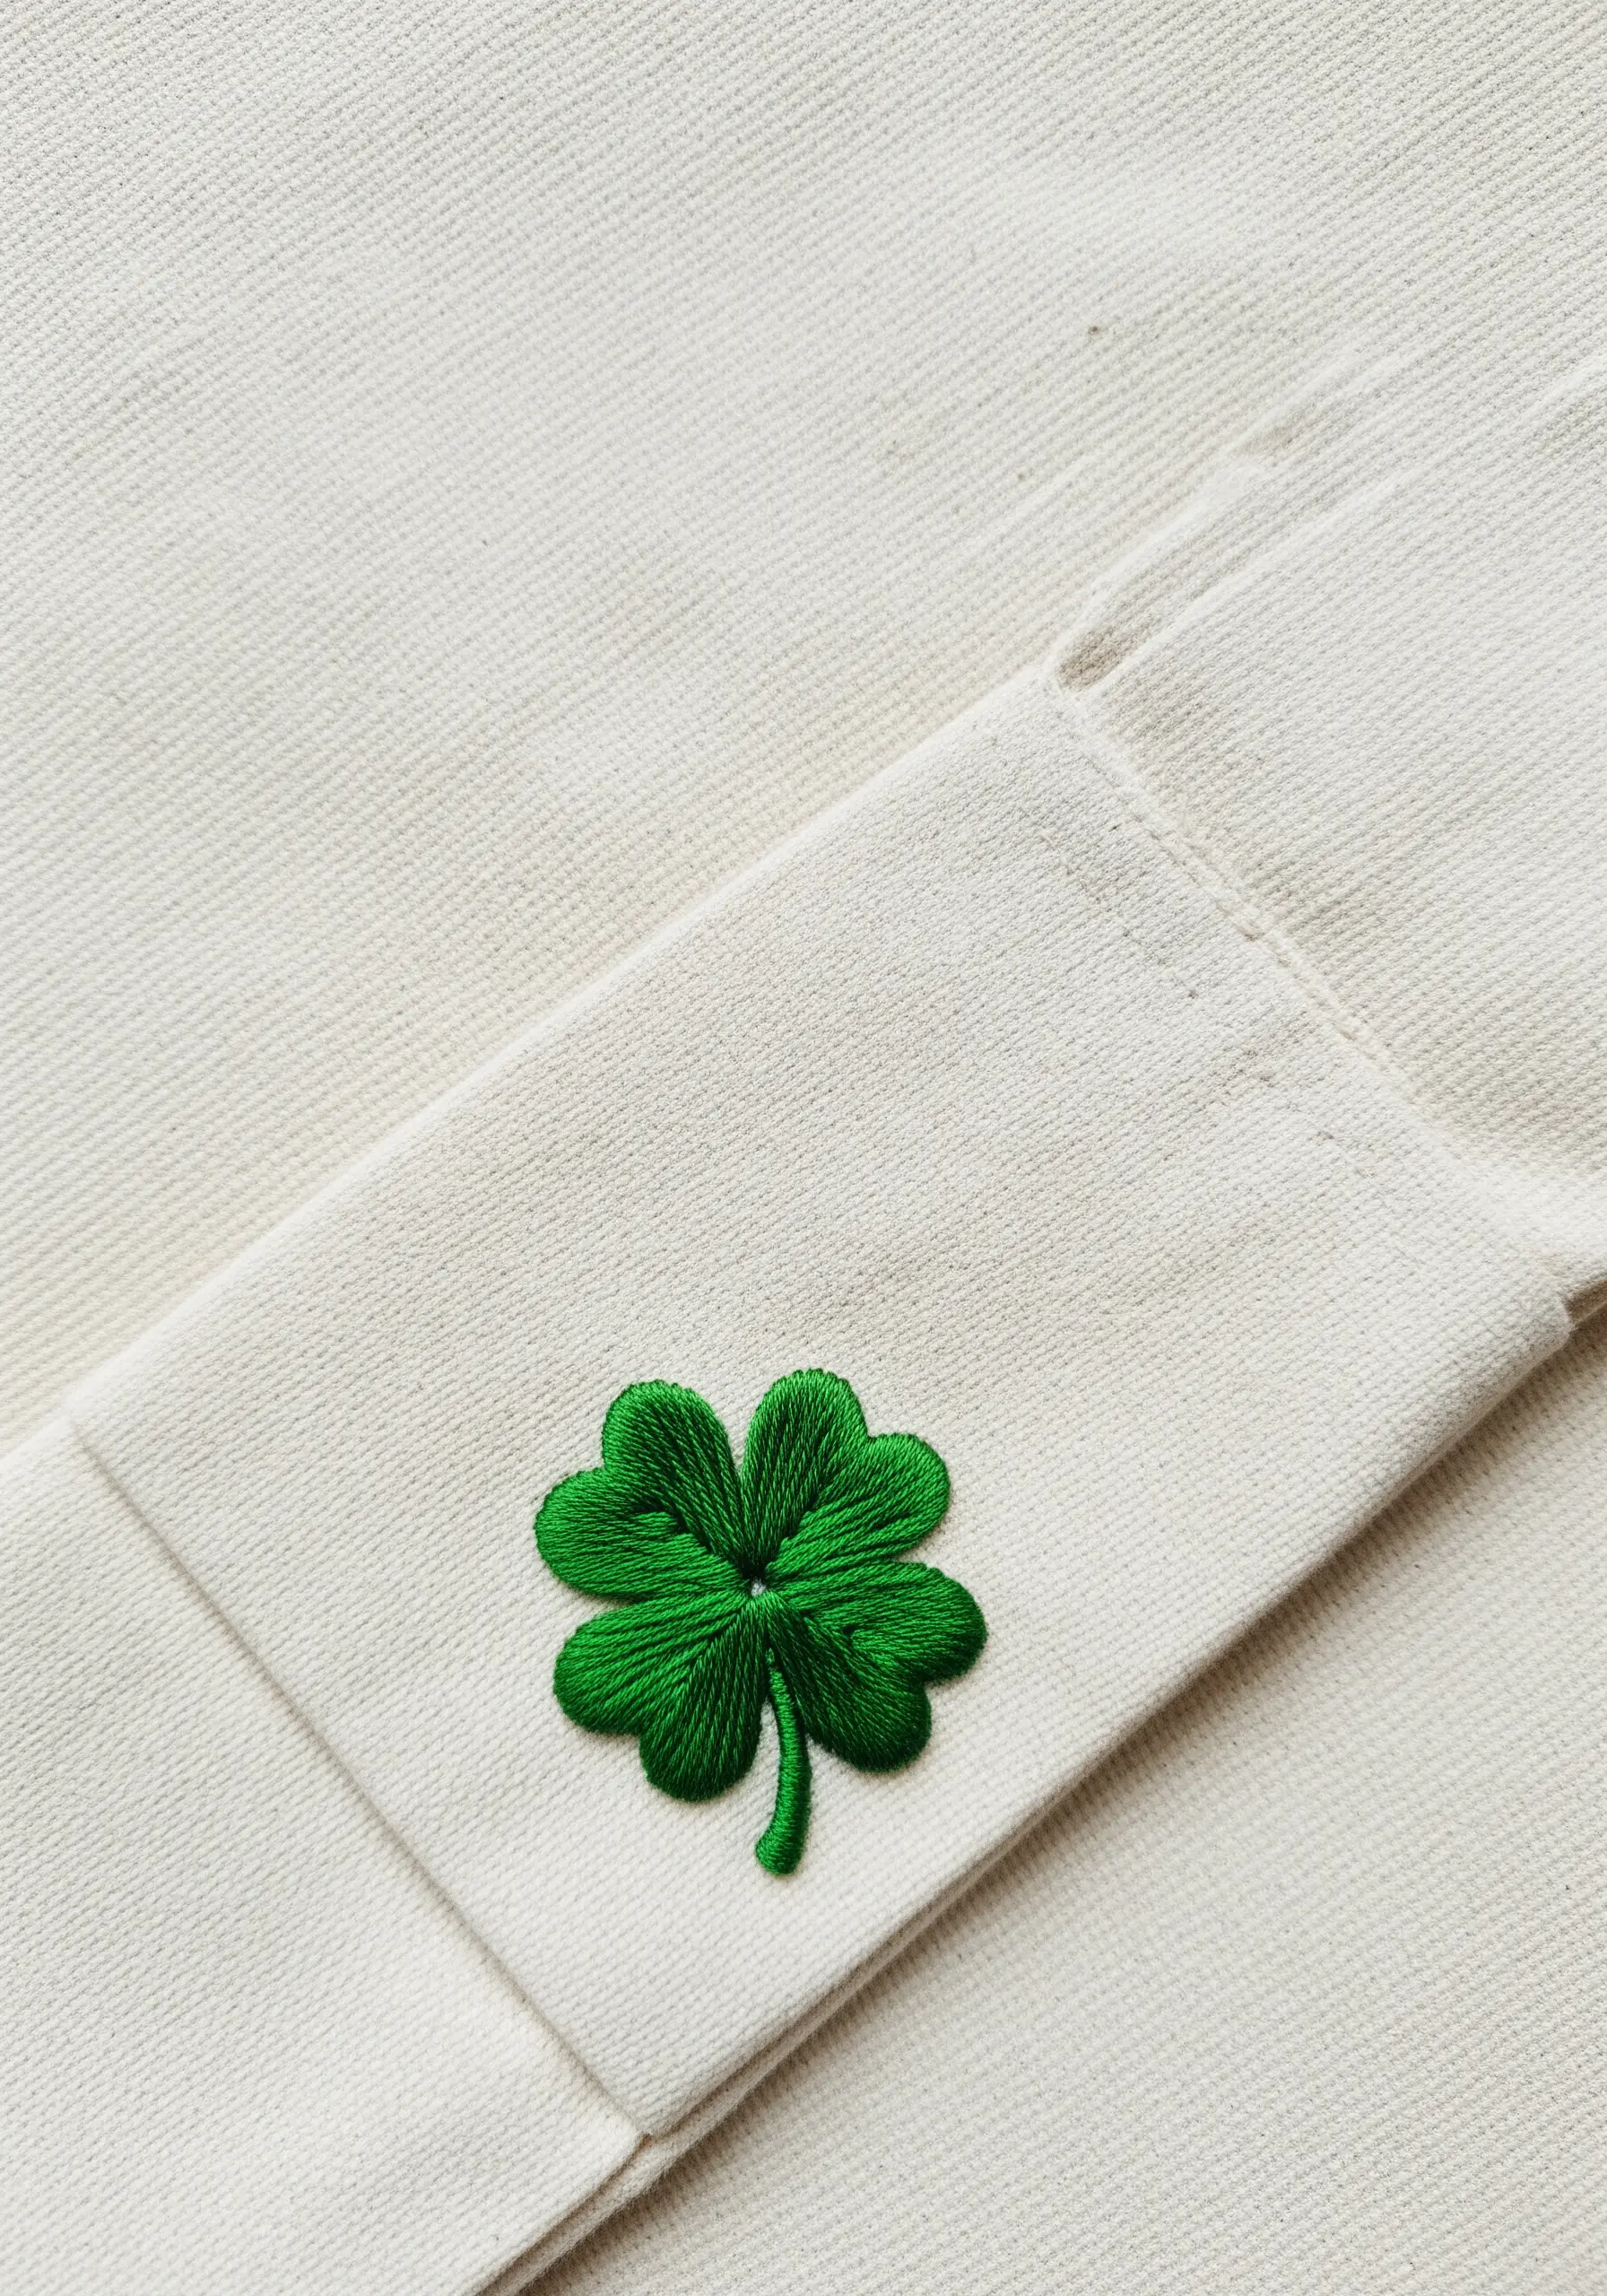
To prevent a solid shape like this clover from looking flat, you need to build sculptural detail directly into your satin stitch.
Instead of stitching straight across each heart-shaped leaf, treat each one as two separate halves.
Stitch from the outer edge inward toward the center line on both sides. This creates a subtle, indented line down the middle where the two sets of stitches meet.
This technique mimics the natural fold of a leaf or petal, adding realism and dimension without any extra outlining.
17. Blend Color to Animate Natural Elements
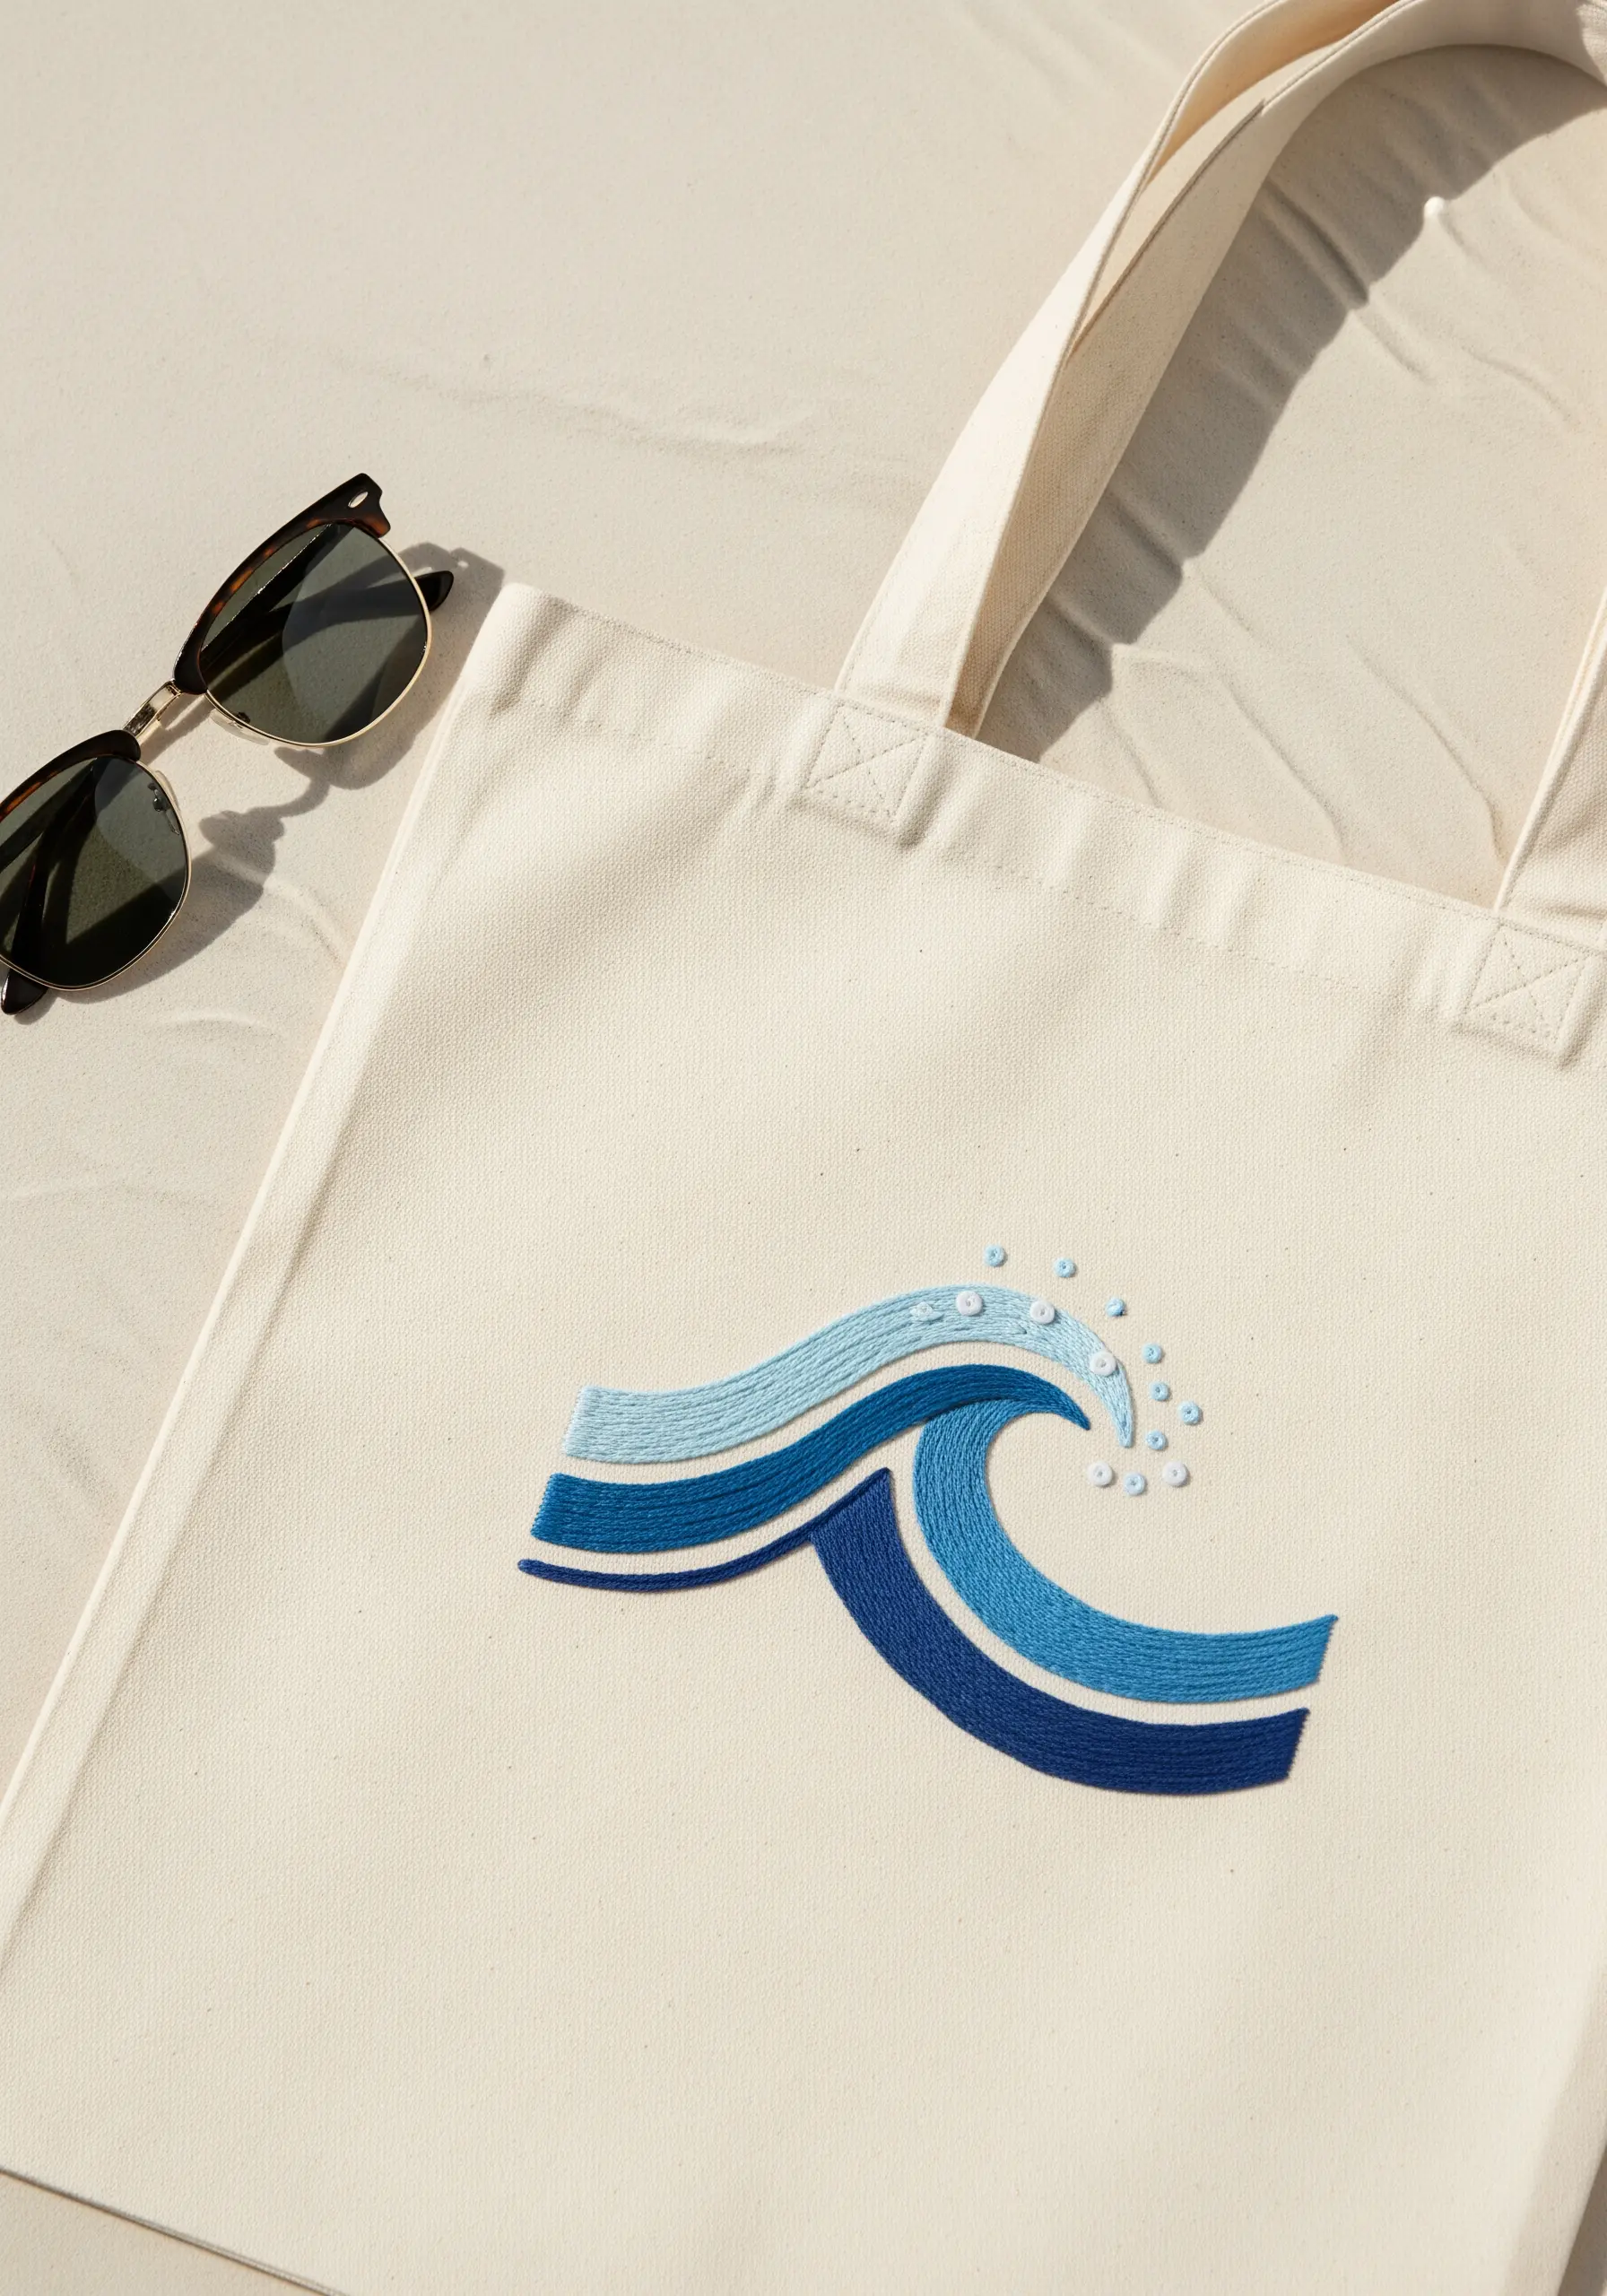
A wave is all about movement and blended color. To capture this, the long-and-short stitch is your best choice.
Start with the darkest blue at the bottom, creating a row of alternating long and short satin stitches.
In the next row up, bring your medium blue stitches up into the gaps of the first row, effectively blending the two shades seamlessly.
Finish with scattered French knots in white and light blue to represent sea spray, adding a final layer of texture and energy that makes the wave feel alive.


