Embroidering with children is less about perfect stitches and more about shared moments of creation. It’s a chance to transform a simple napkin or placemat into a canvas for their imagination, using threads as vibrant as their ideas.
Instead of focusing on complex patterns, let’s explore simple, impactful techniques that little hands can master. Think bold chain stitches that feel like drawing with yarn, or satisfying French knots that pop up like tiny treasures. Each stitch becomes a small victory, a colorful mark of their contribution.
These projects are designed for collaboration. You can set the foundation with a simple outline, and they can bring it to life with joyful, colorful fills. Together, you’ll create not just beautiful table linens, but cherished memories woven directly into the fabric of your home.
1. Tactile Rainbow with 3D Clouds
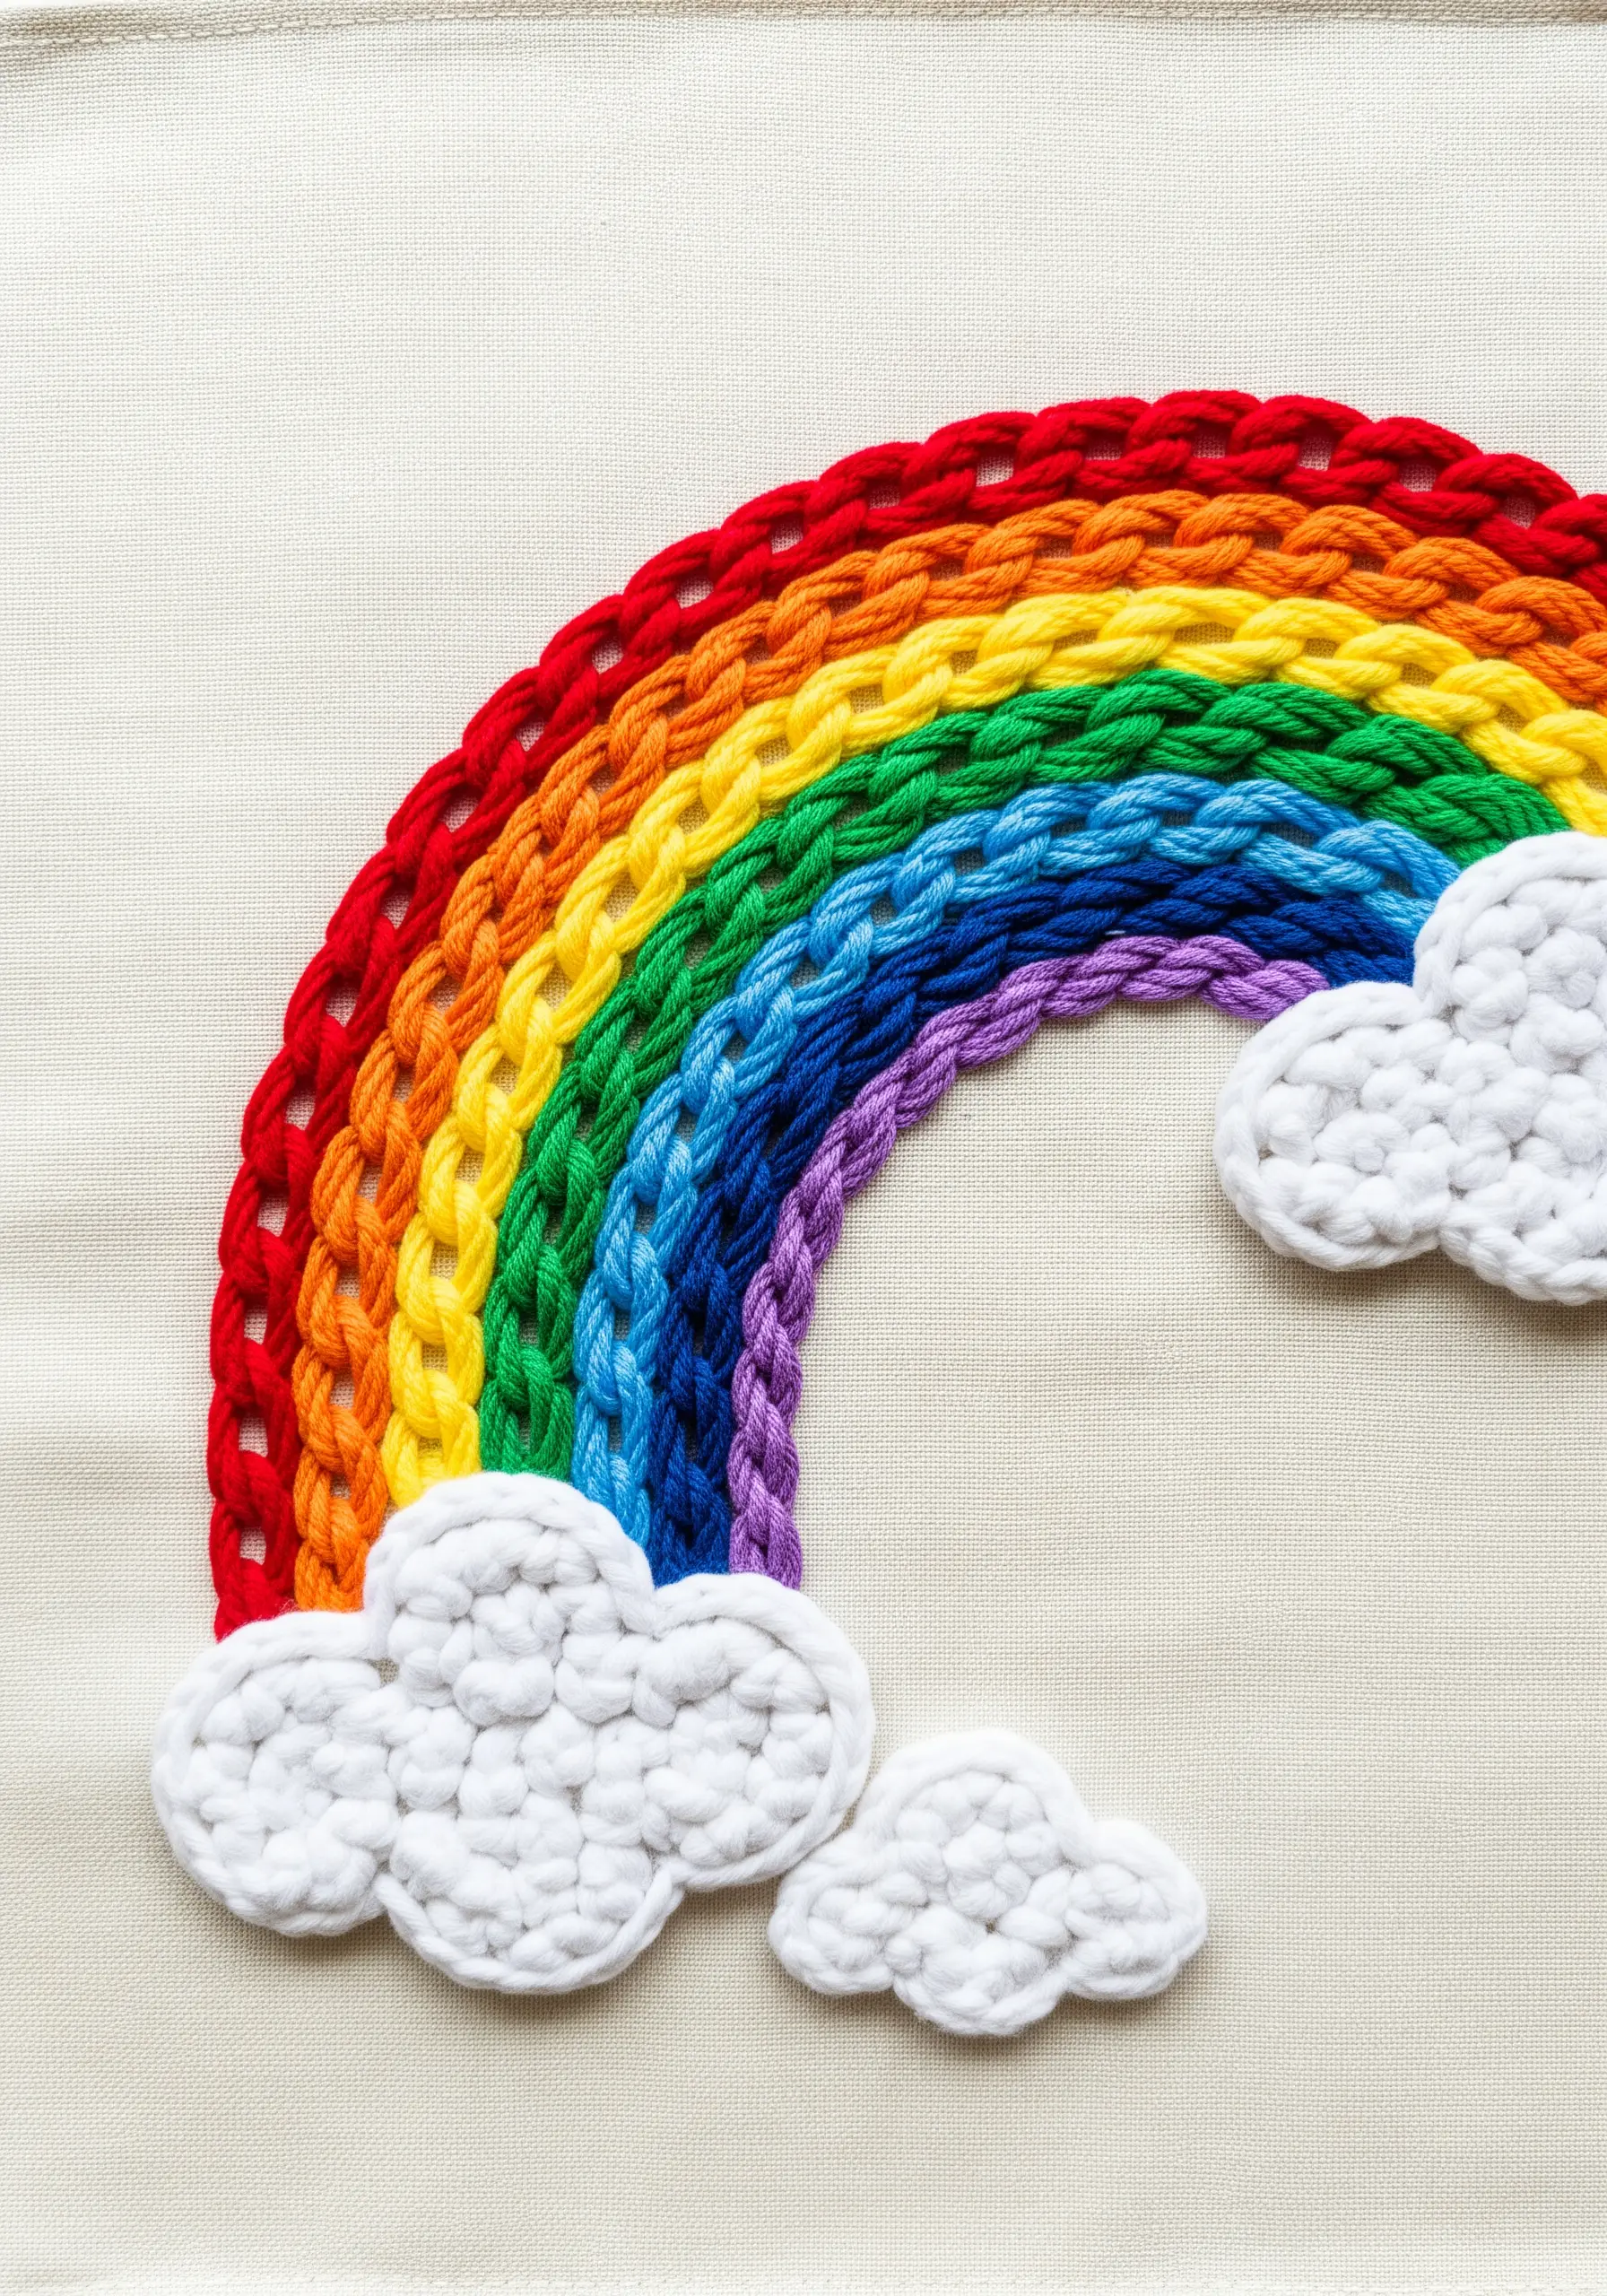
Create a rainbow with incredible texture by using a heavy chain stitch worked with all six strands of floss, or even a soft cotton yarn.
This stitch is easy for little hands to learn and creates a bold, braided line that stands out against the fabric.
For the clouds, teach kids to make chunky, dense French knots or colonial knots, clustering them together to build a fluffy, touchable shape.
The contrast between the smooth, braided rainbow and the bumpy clouds makes the entire piece more engaging and sensory.
2. Polished Balloon Bouquet
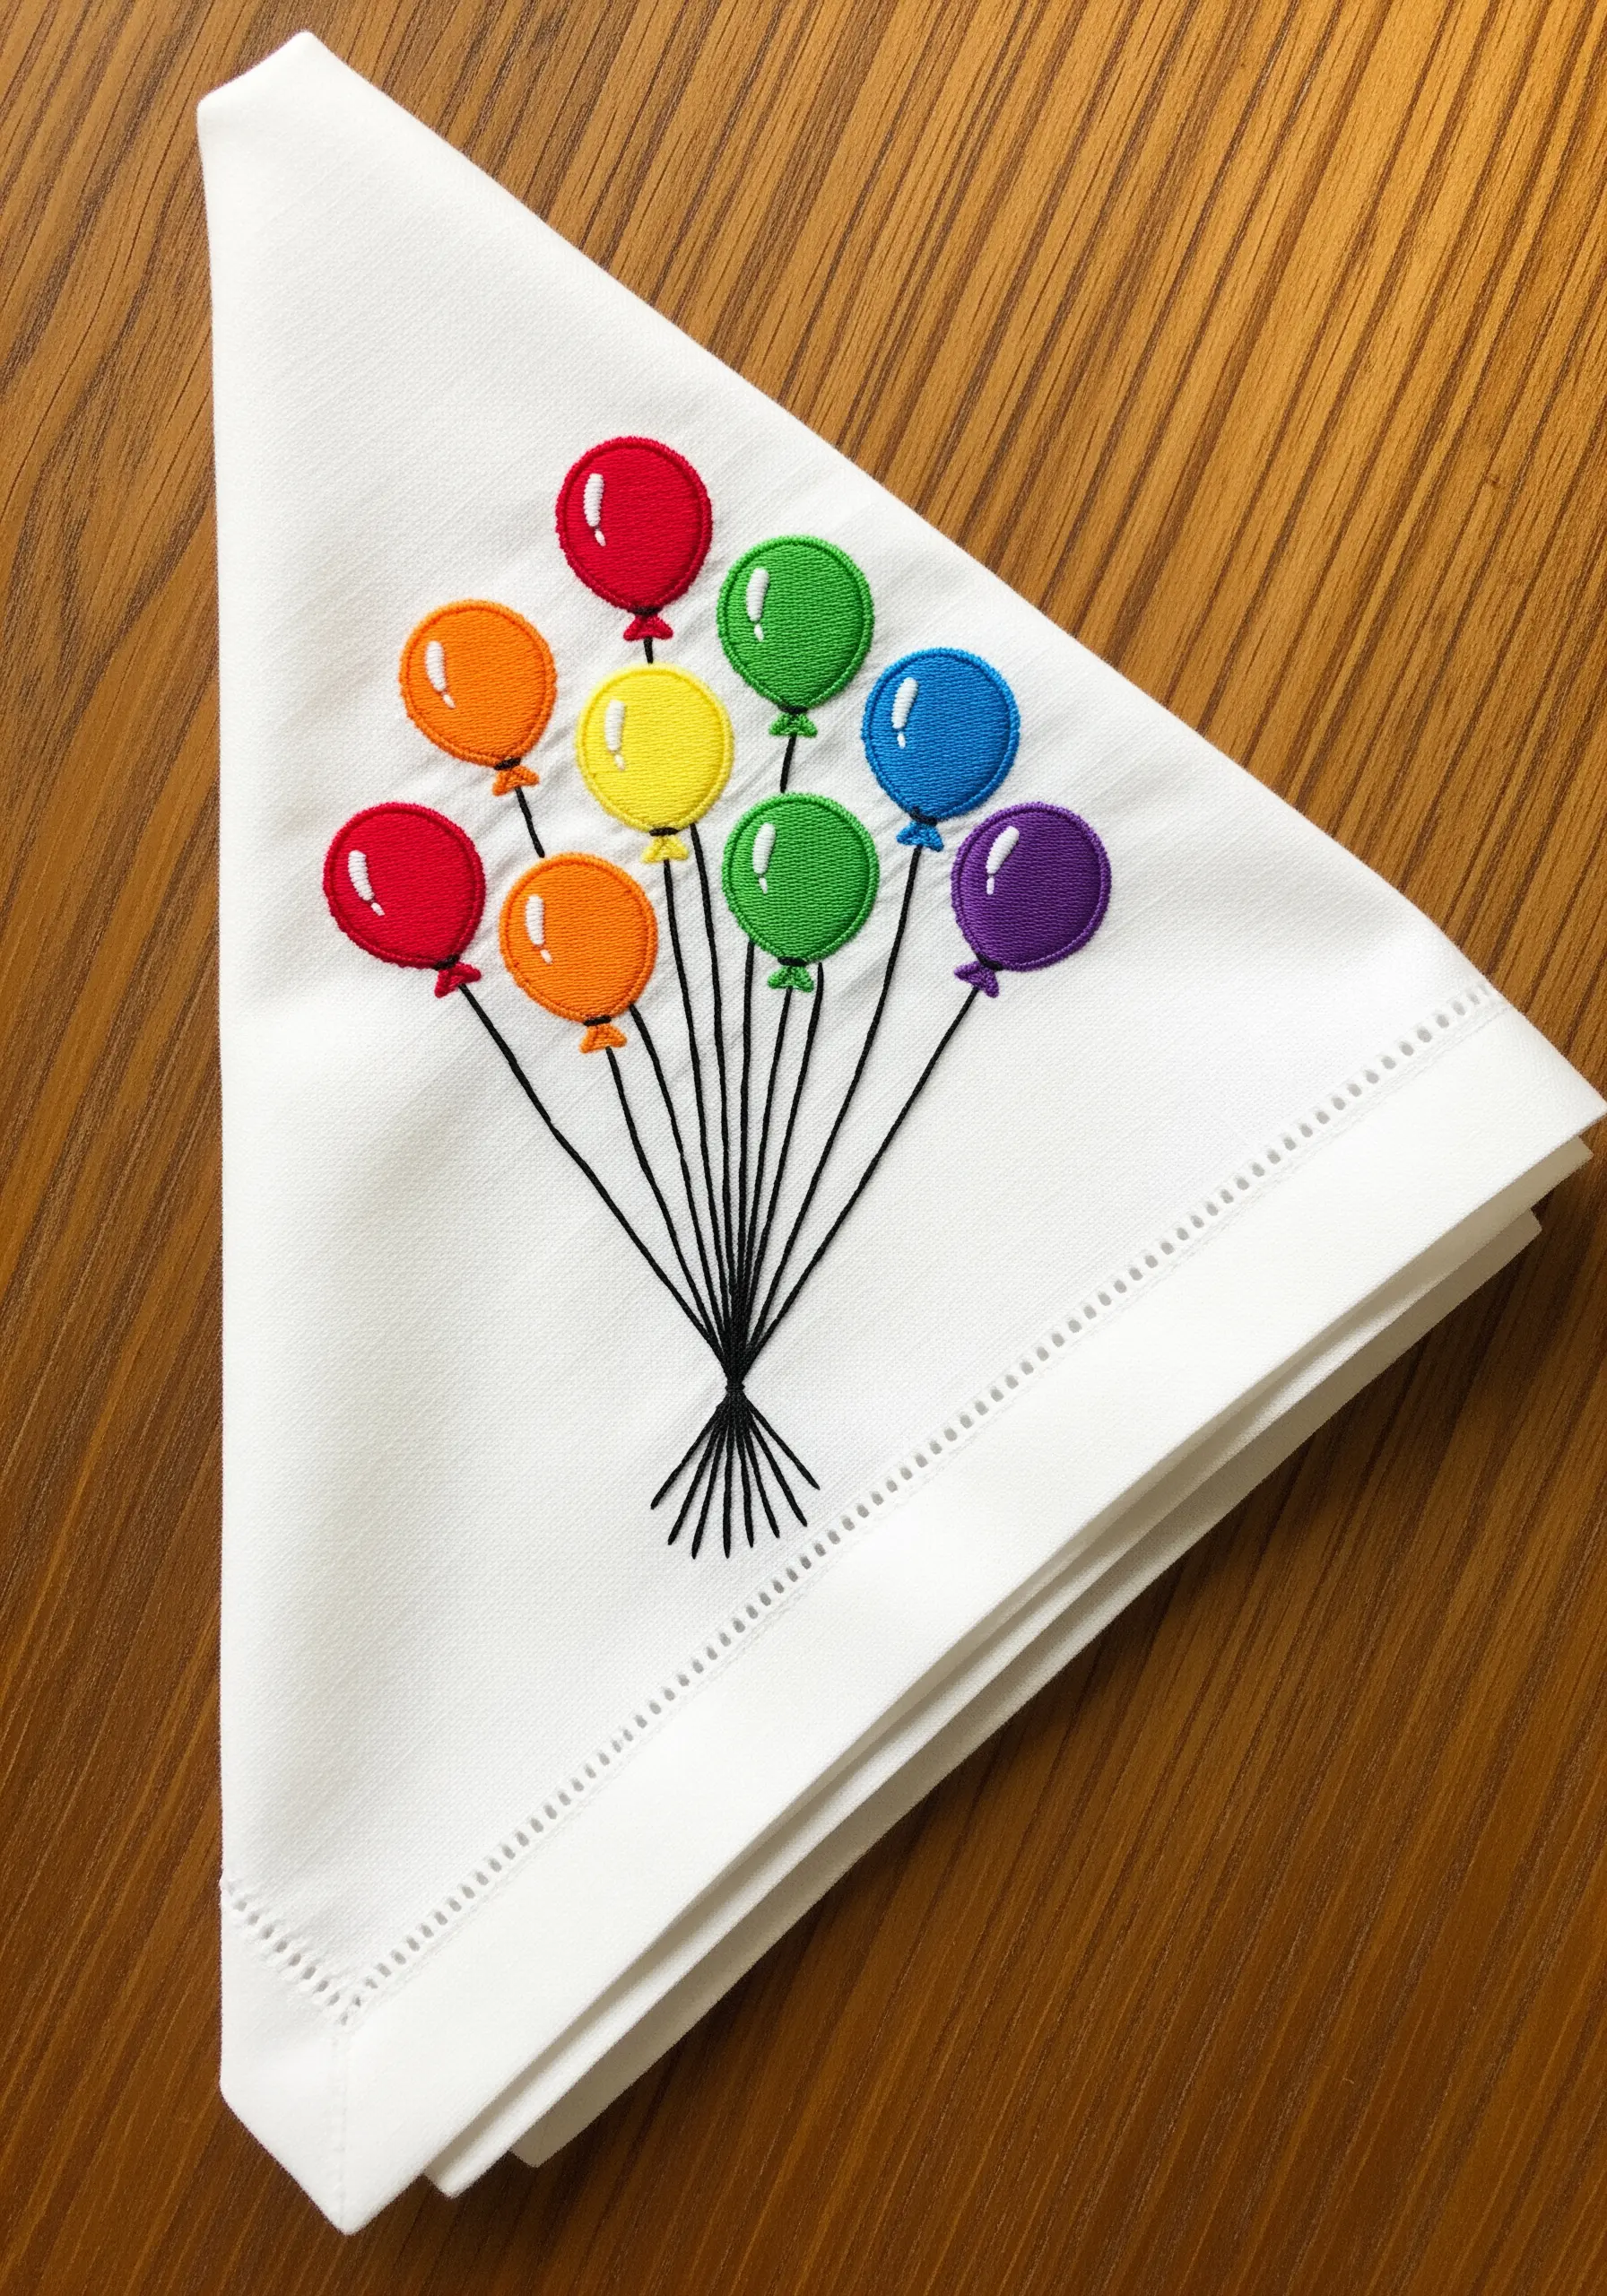
To achieve those perfectly smooth, shiny balloons, focus on executing a flawless satin stitch.
Work your stitches closely together without overlapping, ensuring they lay flat against the fabric for a high-sheen finish.
Have an adult stitch the balloon outlines with a tiny split stitch first; this creates a raised edge that makes it easier for kids to fill the shape neatly.
Use a single strand of black thread for the strings to create a delicate contrast against the bold, colorful balloons.
3. Playful Dinosaur Polka Dots
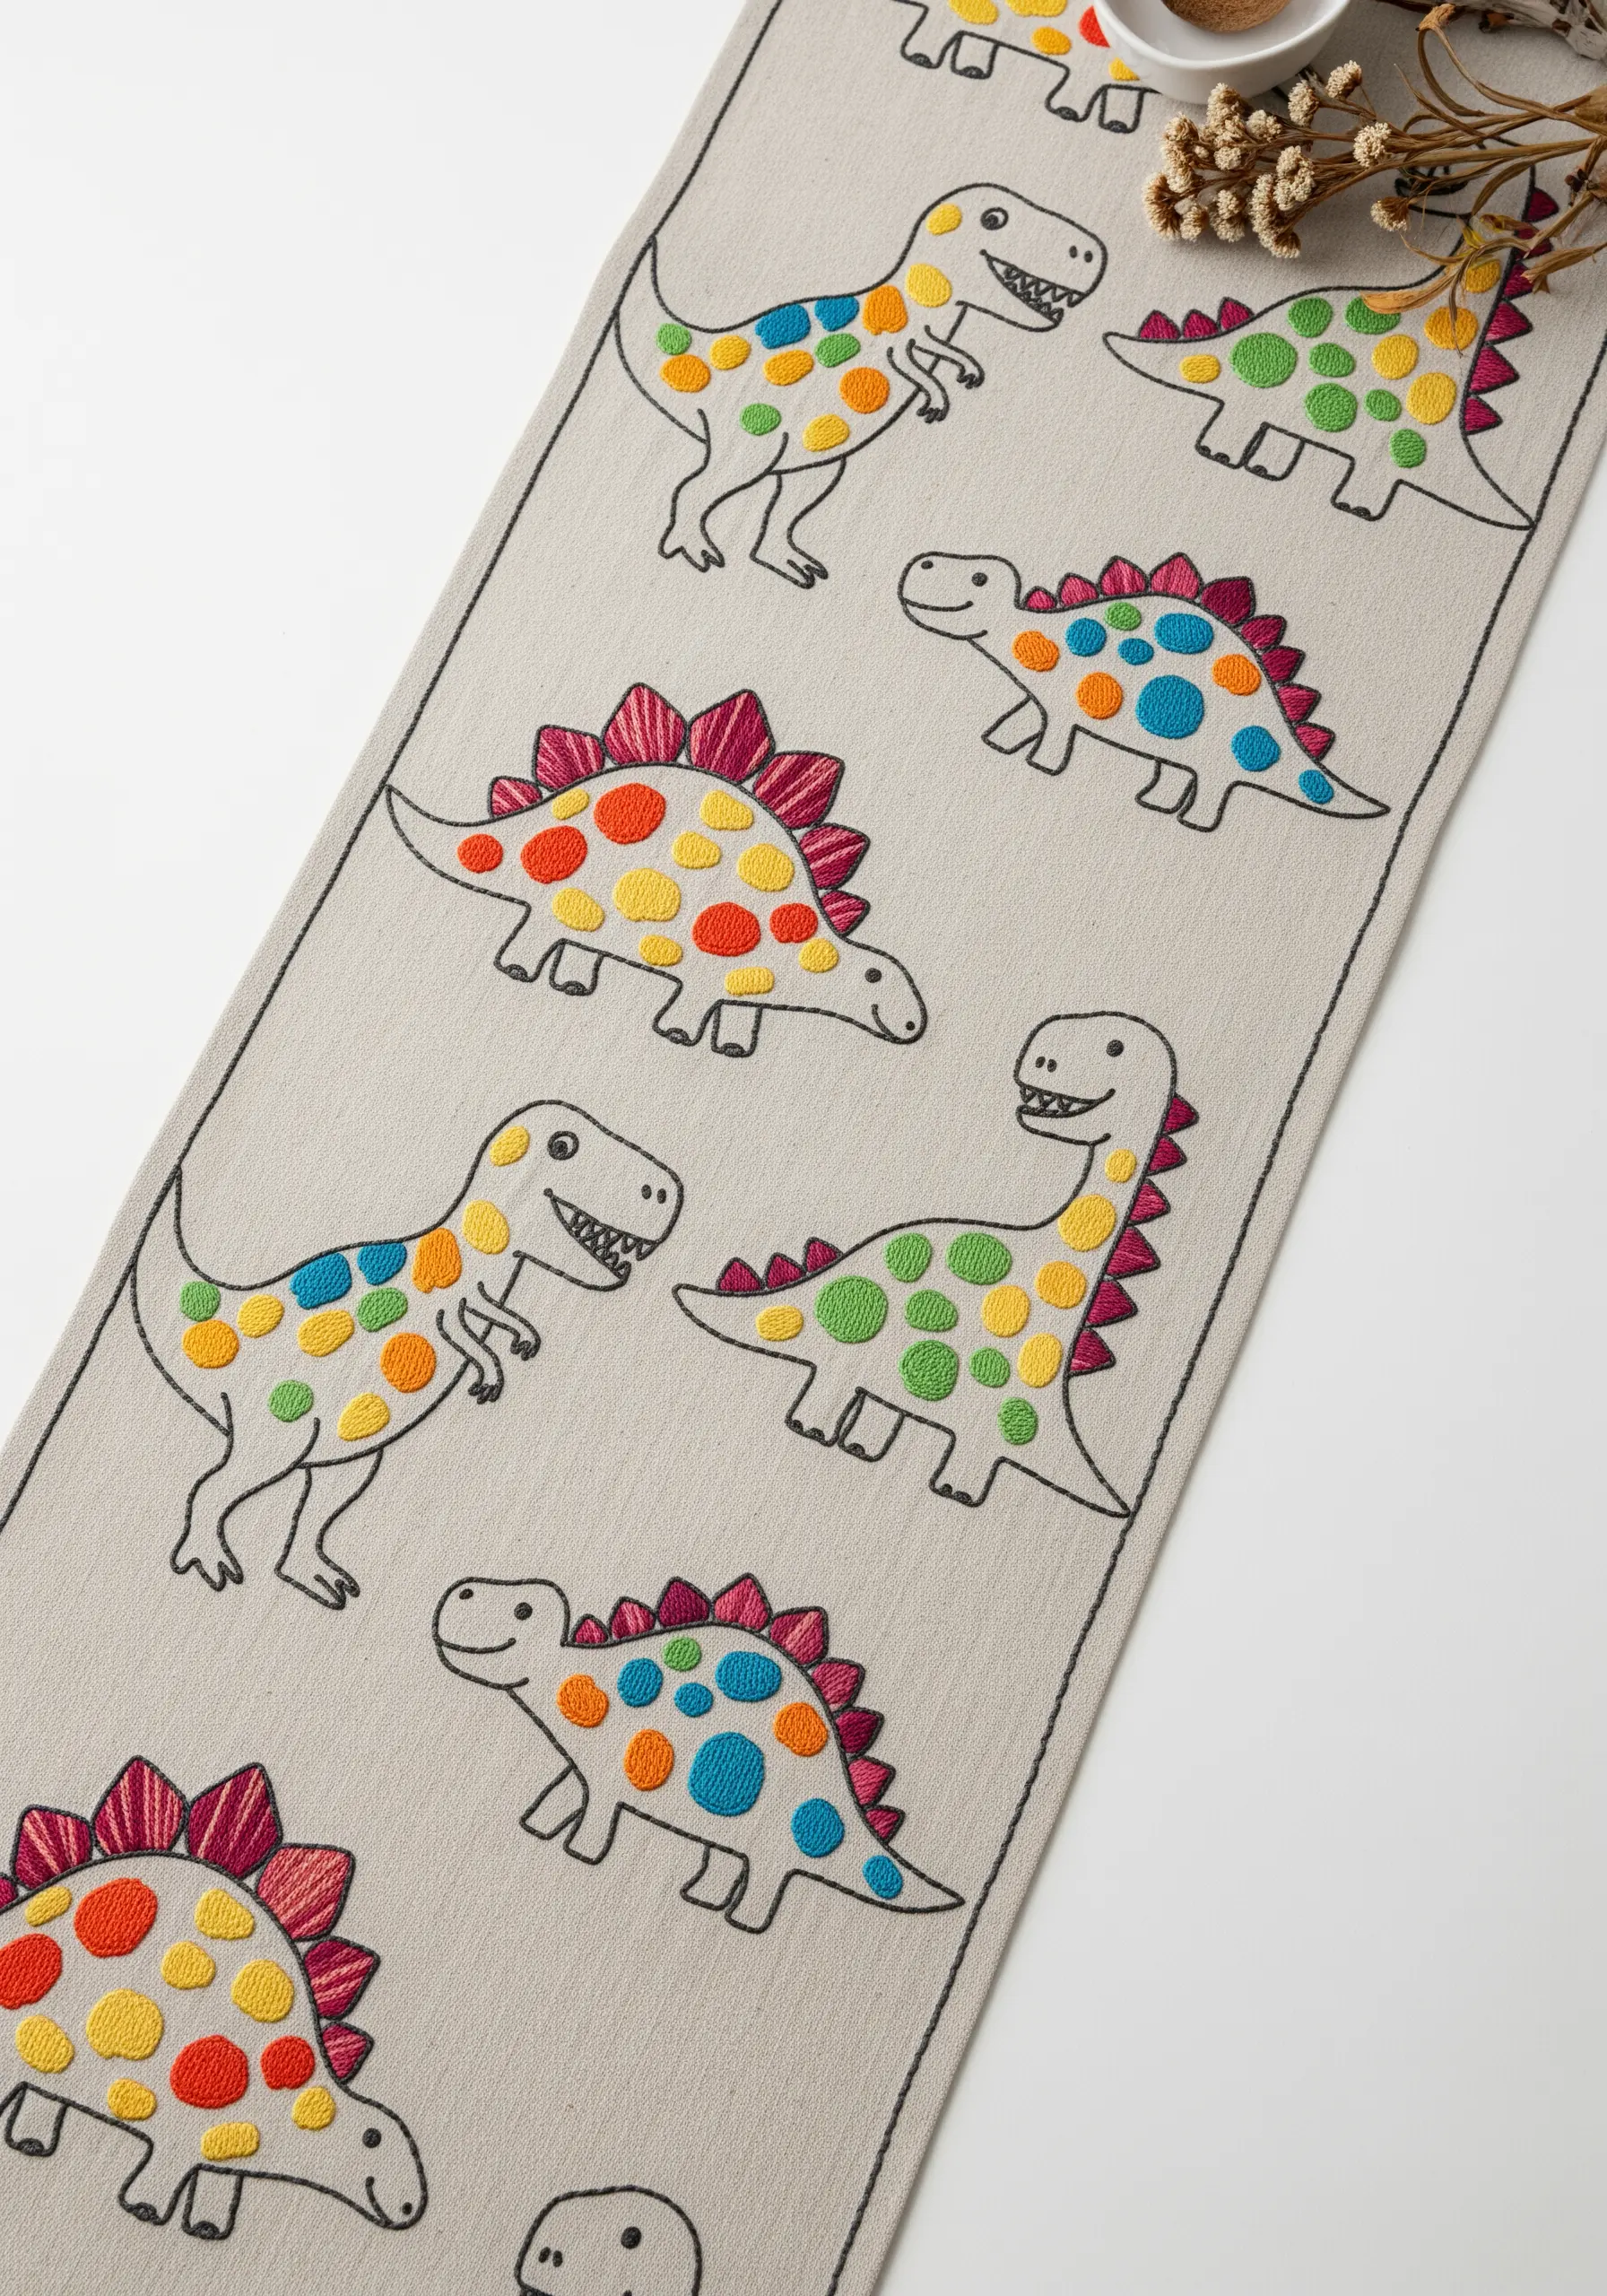
This is the perfect collaborative project. An adult can stitch the simple dinosaur outlines using a backstitch, setting up a canvas for kids to decorate.
Let your little helpers fill in the bodies with colorful polka dots using simple satin stitches.
This approach divides the labor and allows kids to contribute the most colorful part of the design, keeping them engaged.
Using a consistent number of strands for each dot—say, three strands—will give the pattern a cohesive, intentional look.
4. Celestial Satin Stitch Scatter
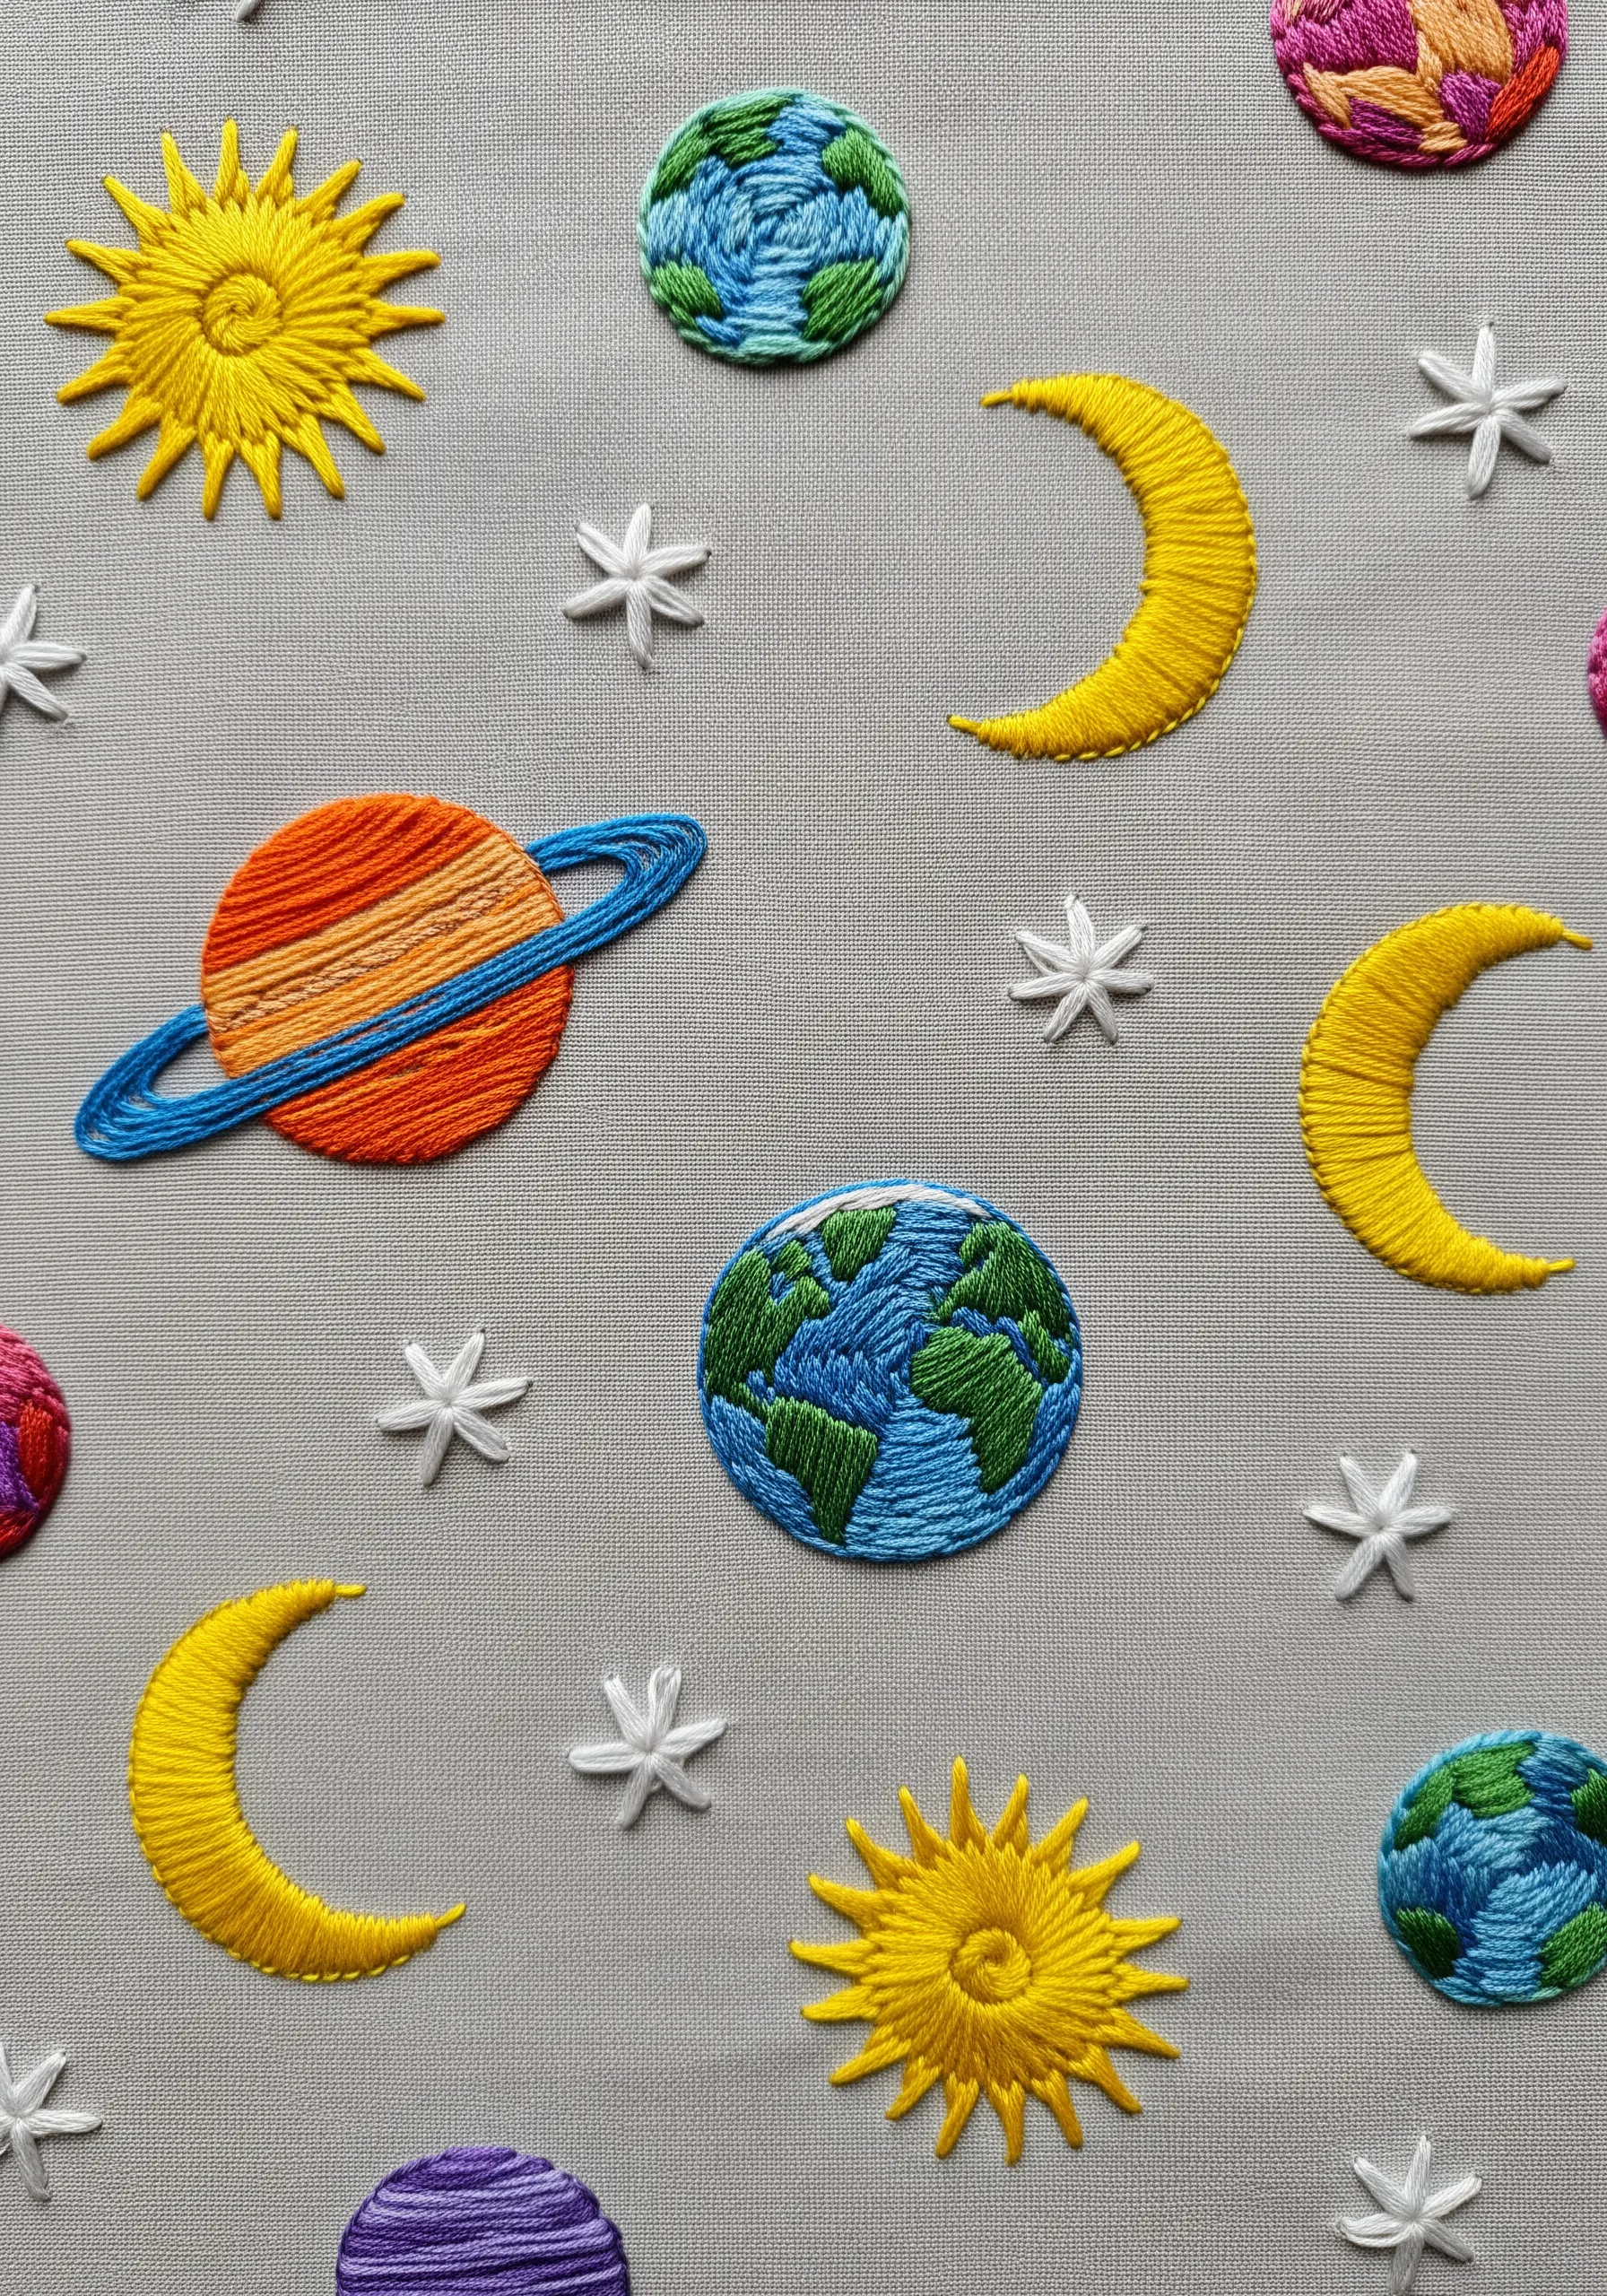
This cosmic pattern is an excellent way to practice directional satin stitch on your table linens.
For the planets, change the angle of your stitches to create the illusion of a spherical shape—for example, stitch horizontally across Saturn’s rings but vertically or diagonally on the planet itself.
The tiny stars are just simple straight stitches (or star stitches), making them an easy and fun task for kids to sprinkle across the fabric.
5. Vibrant Fruit Stitch Sampler
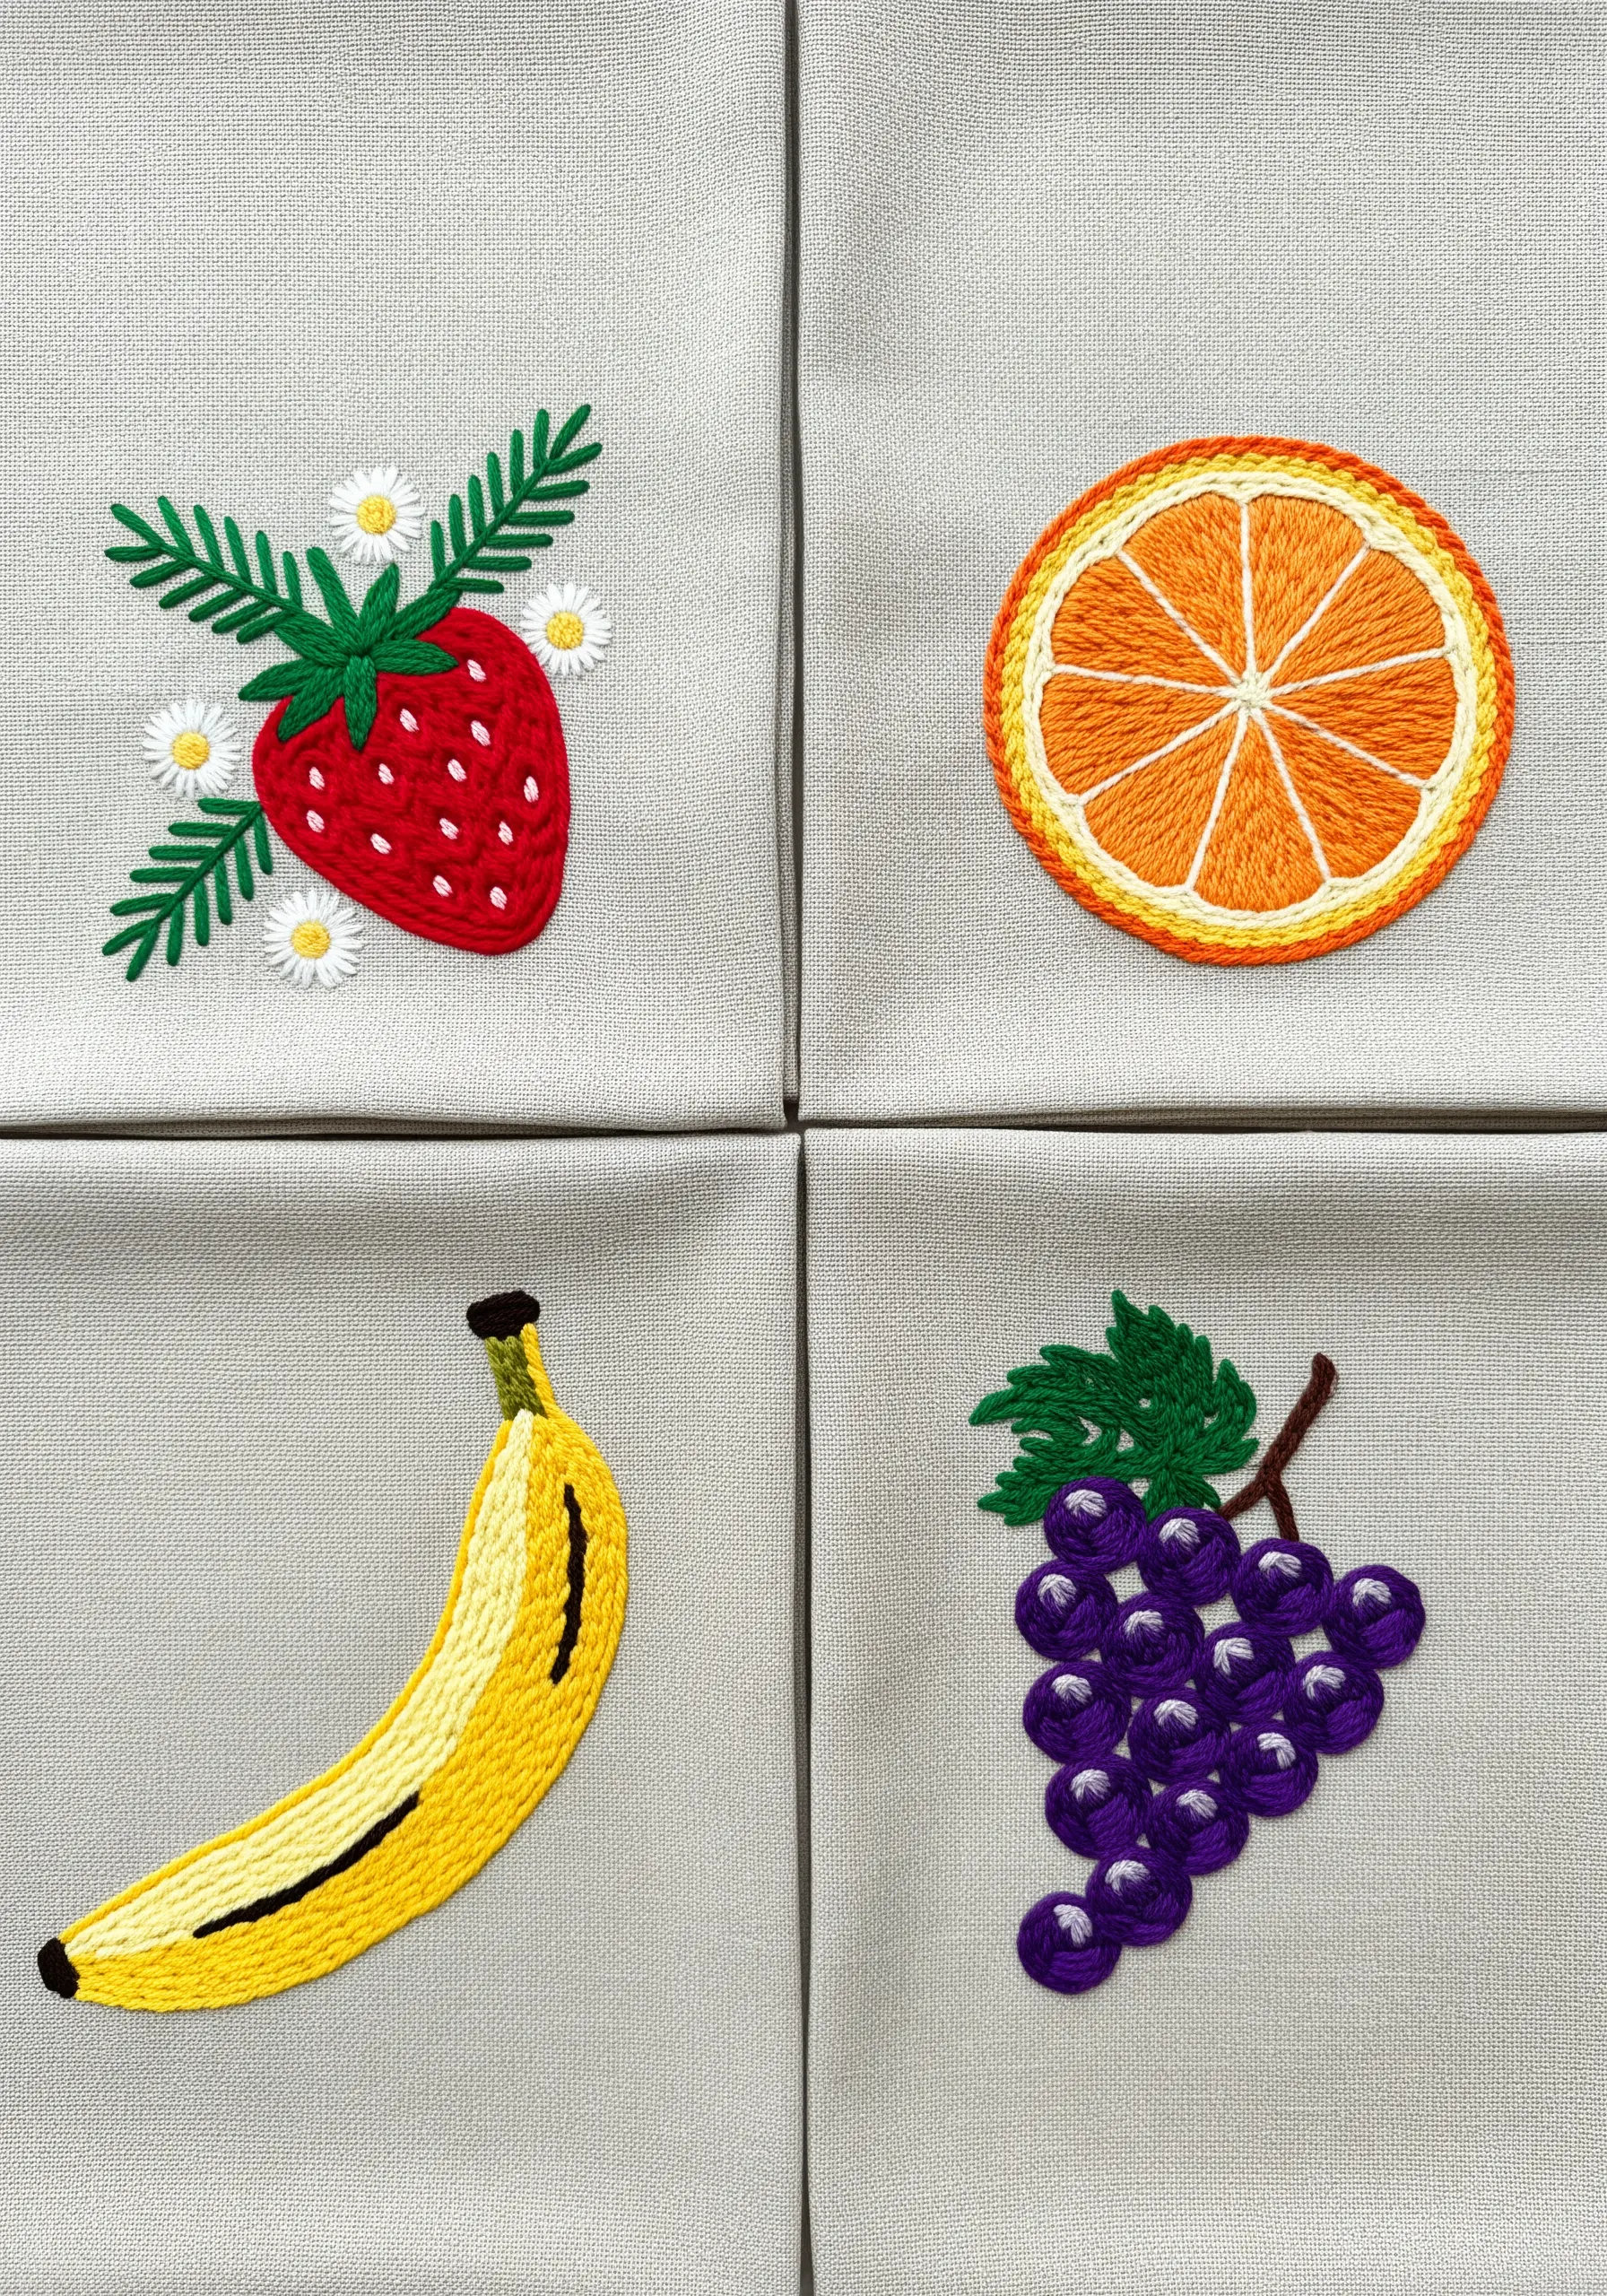
Turn a set of napkins into a fun stitch-learning exercise by dedicating each one to a different fruit.
Use a padded satin stitch for the strawberry to give it a plump feel, and add tiny white seed stitches for seeds.
Create the orange slices with a wagon wheel stitch, which is wonderfully simple for kids to wrap thread around.
The grapes are perfect for practicing French knots, clustering them together to form a bunch that has real dimension and texture.
6. The Continuous Rainbow Loop Border
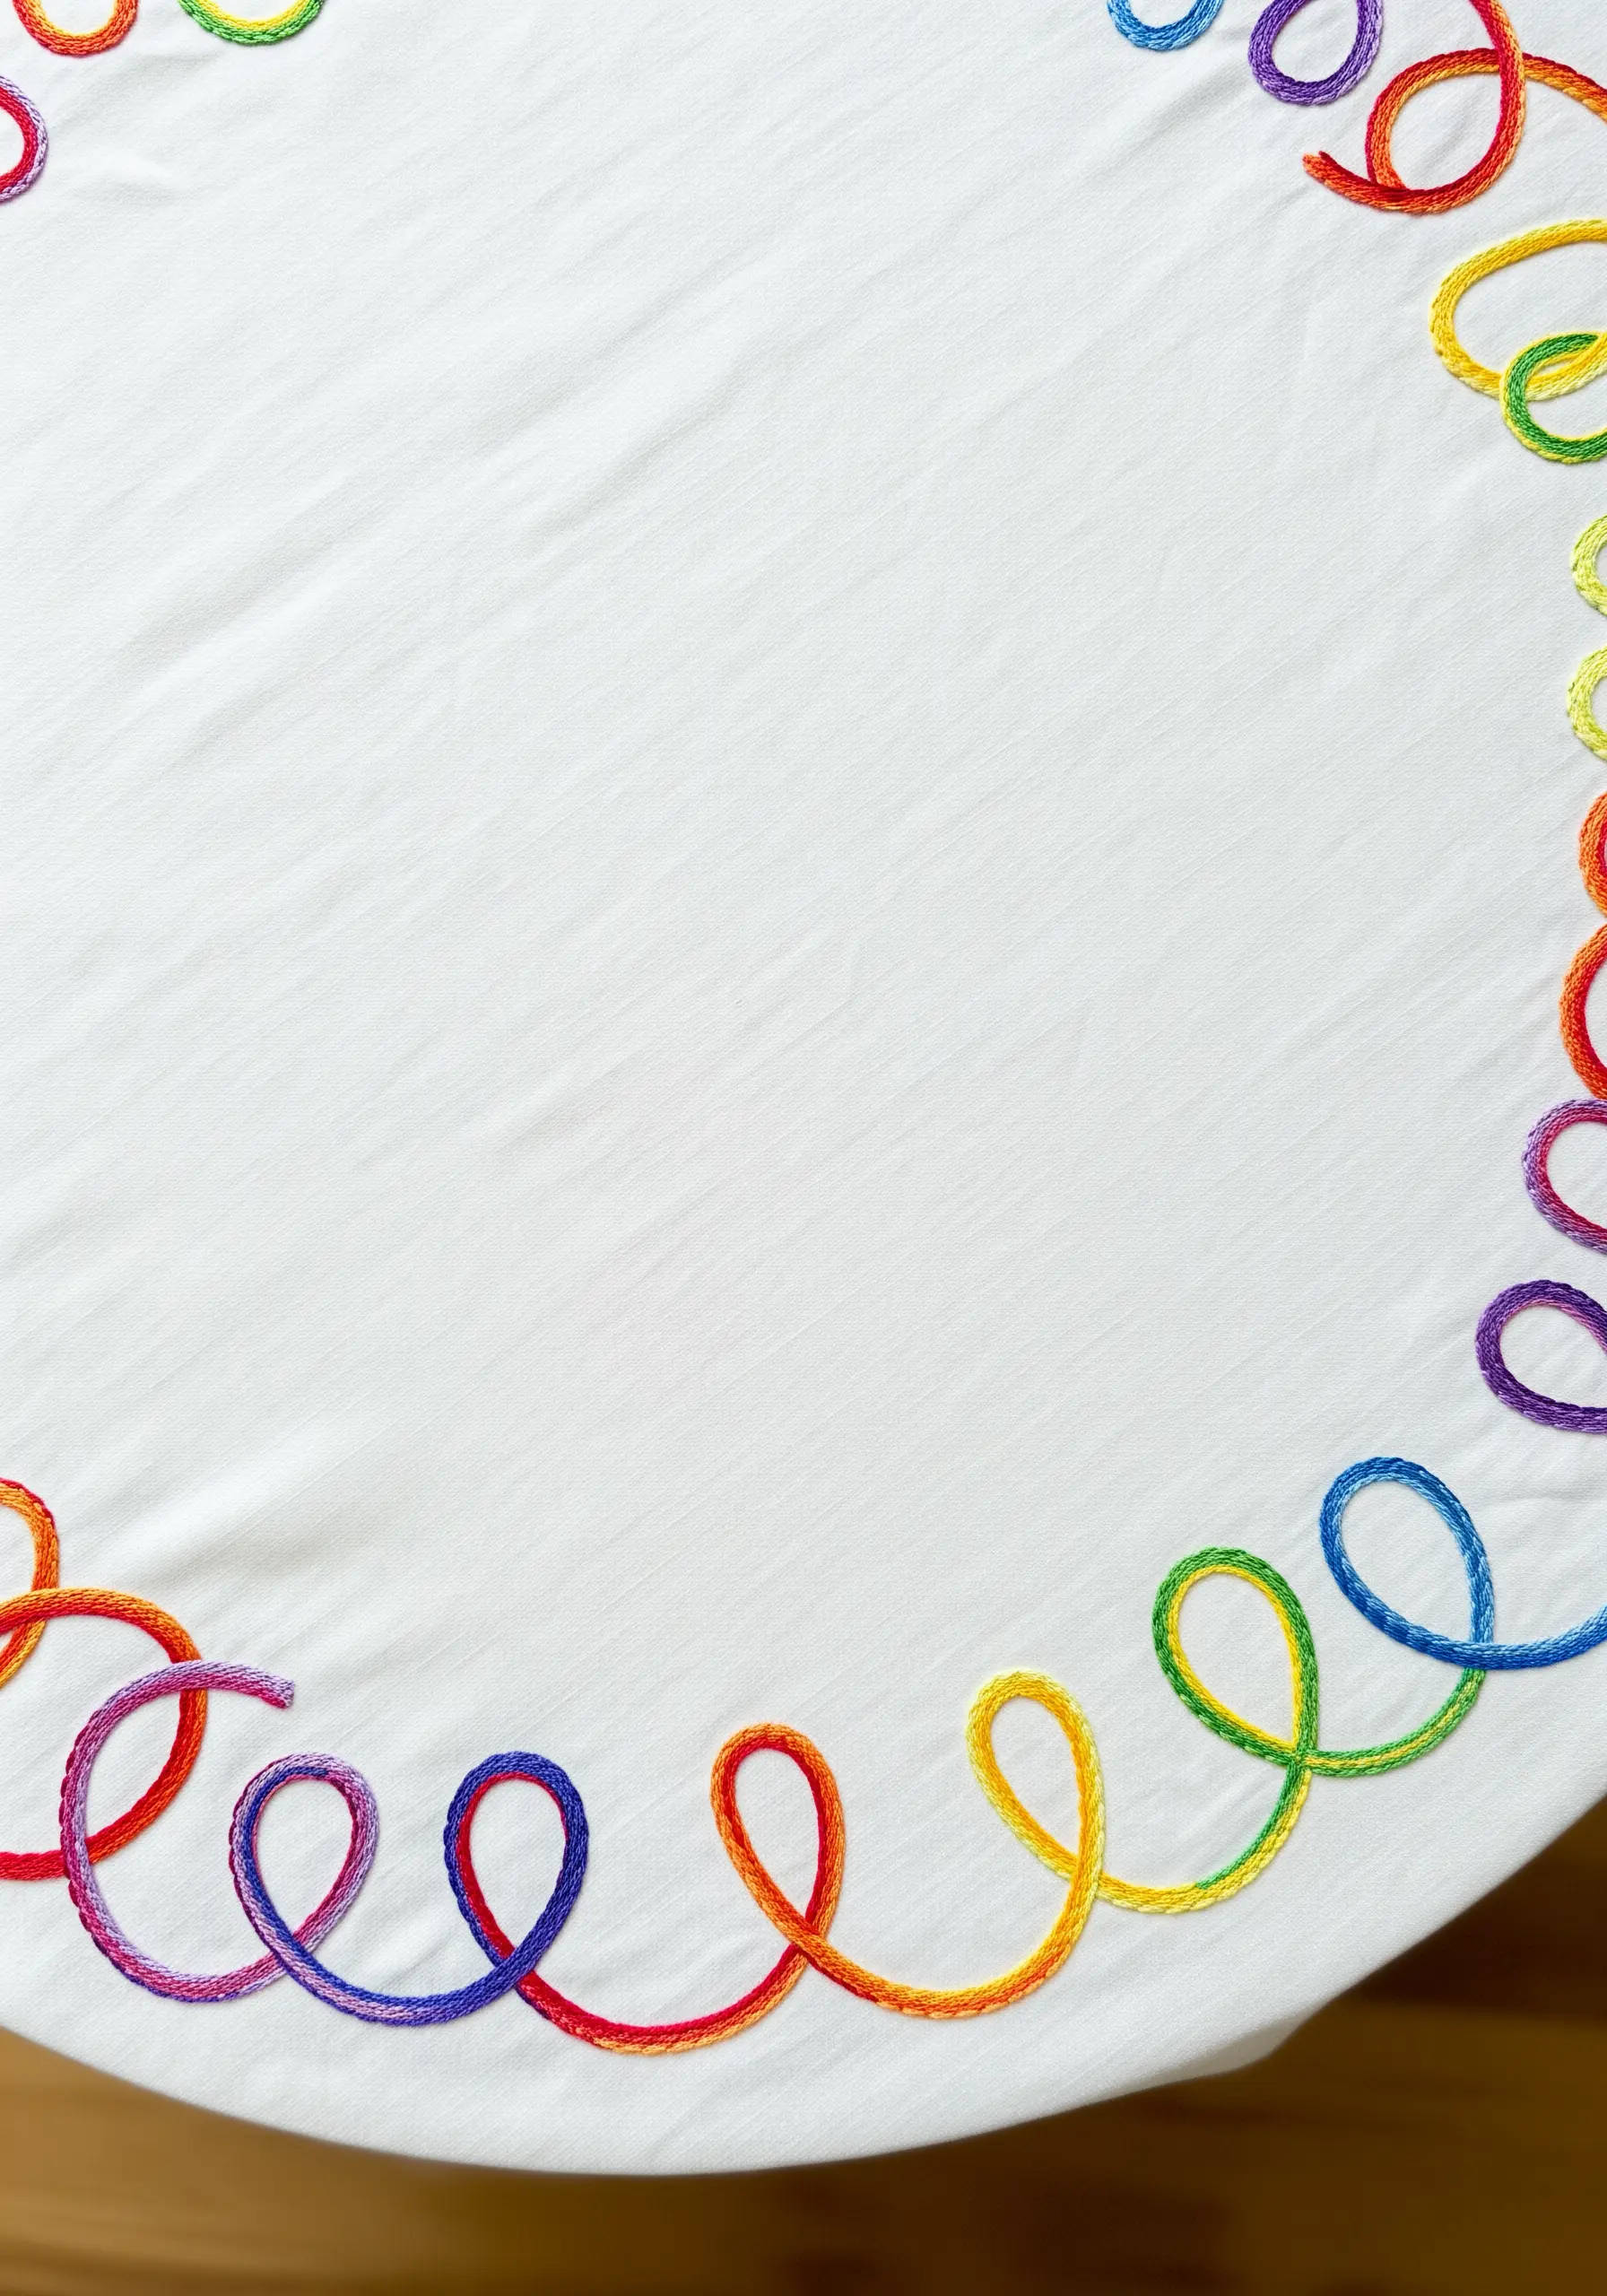
Create this dynamic, flowing border using a wide satin stitch or a couched stitch with thick yarn for an even faster result.
Mark the looping line lightly with a water-soluble pen to guide your stitching and ensure the curves are smooth and consistent.
This project is a fantastic exercise in maintaining even tension over long lines. Let the kids help decide the color order for the seamless rainbow gradient.
7. An Ascending School of Fish
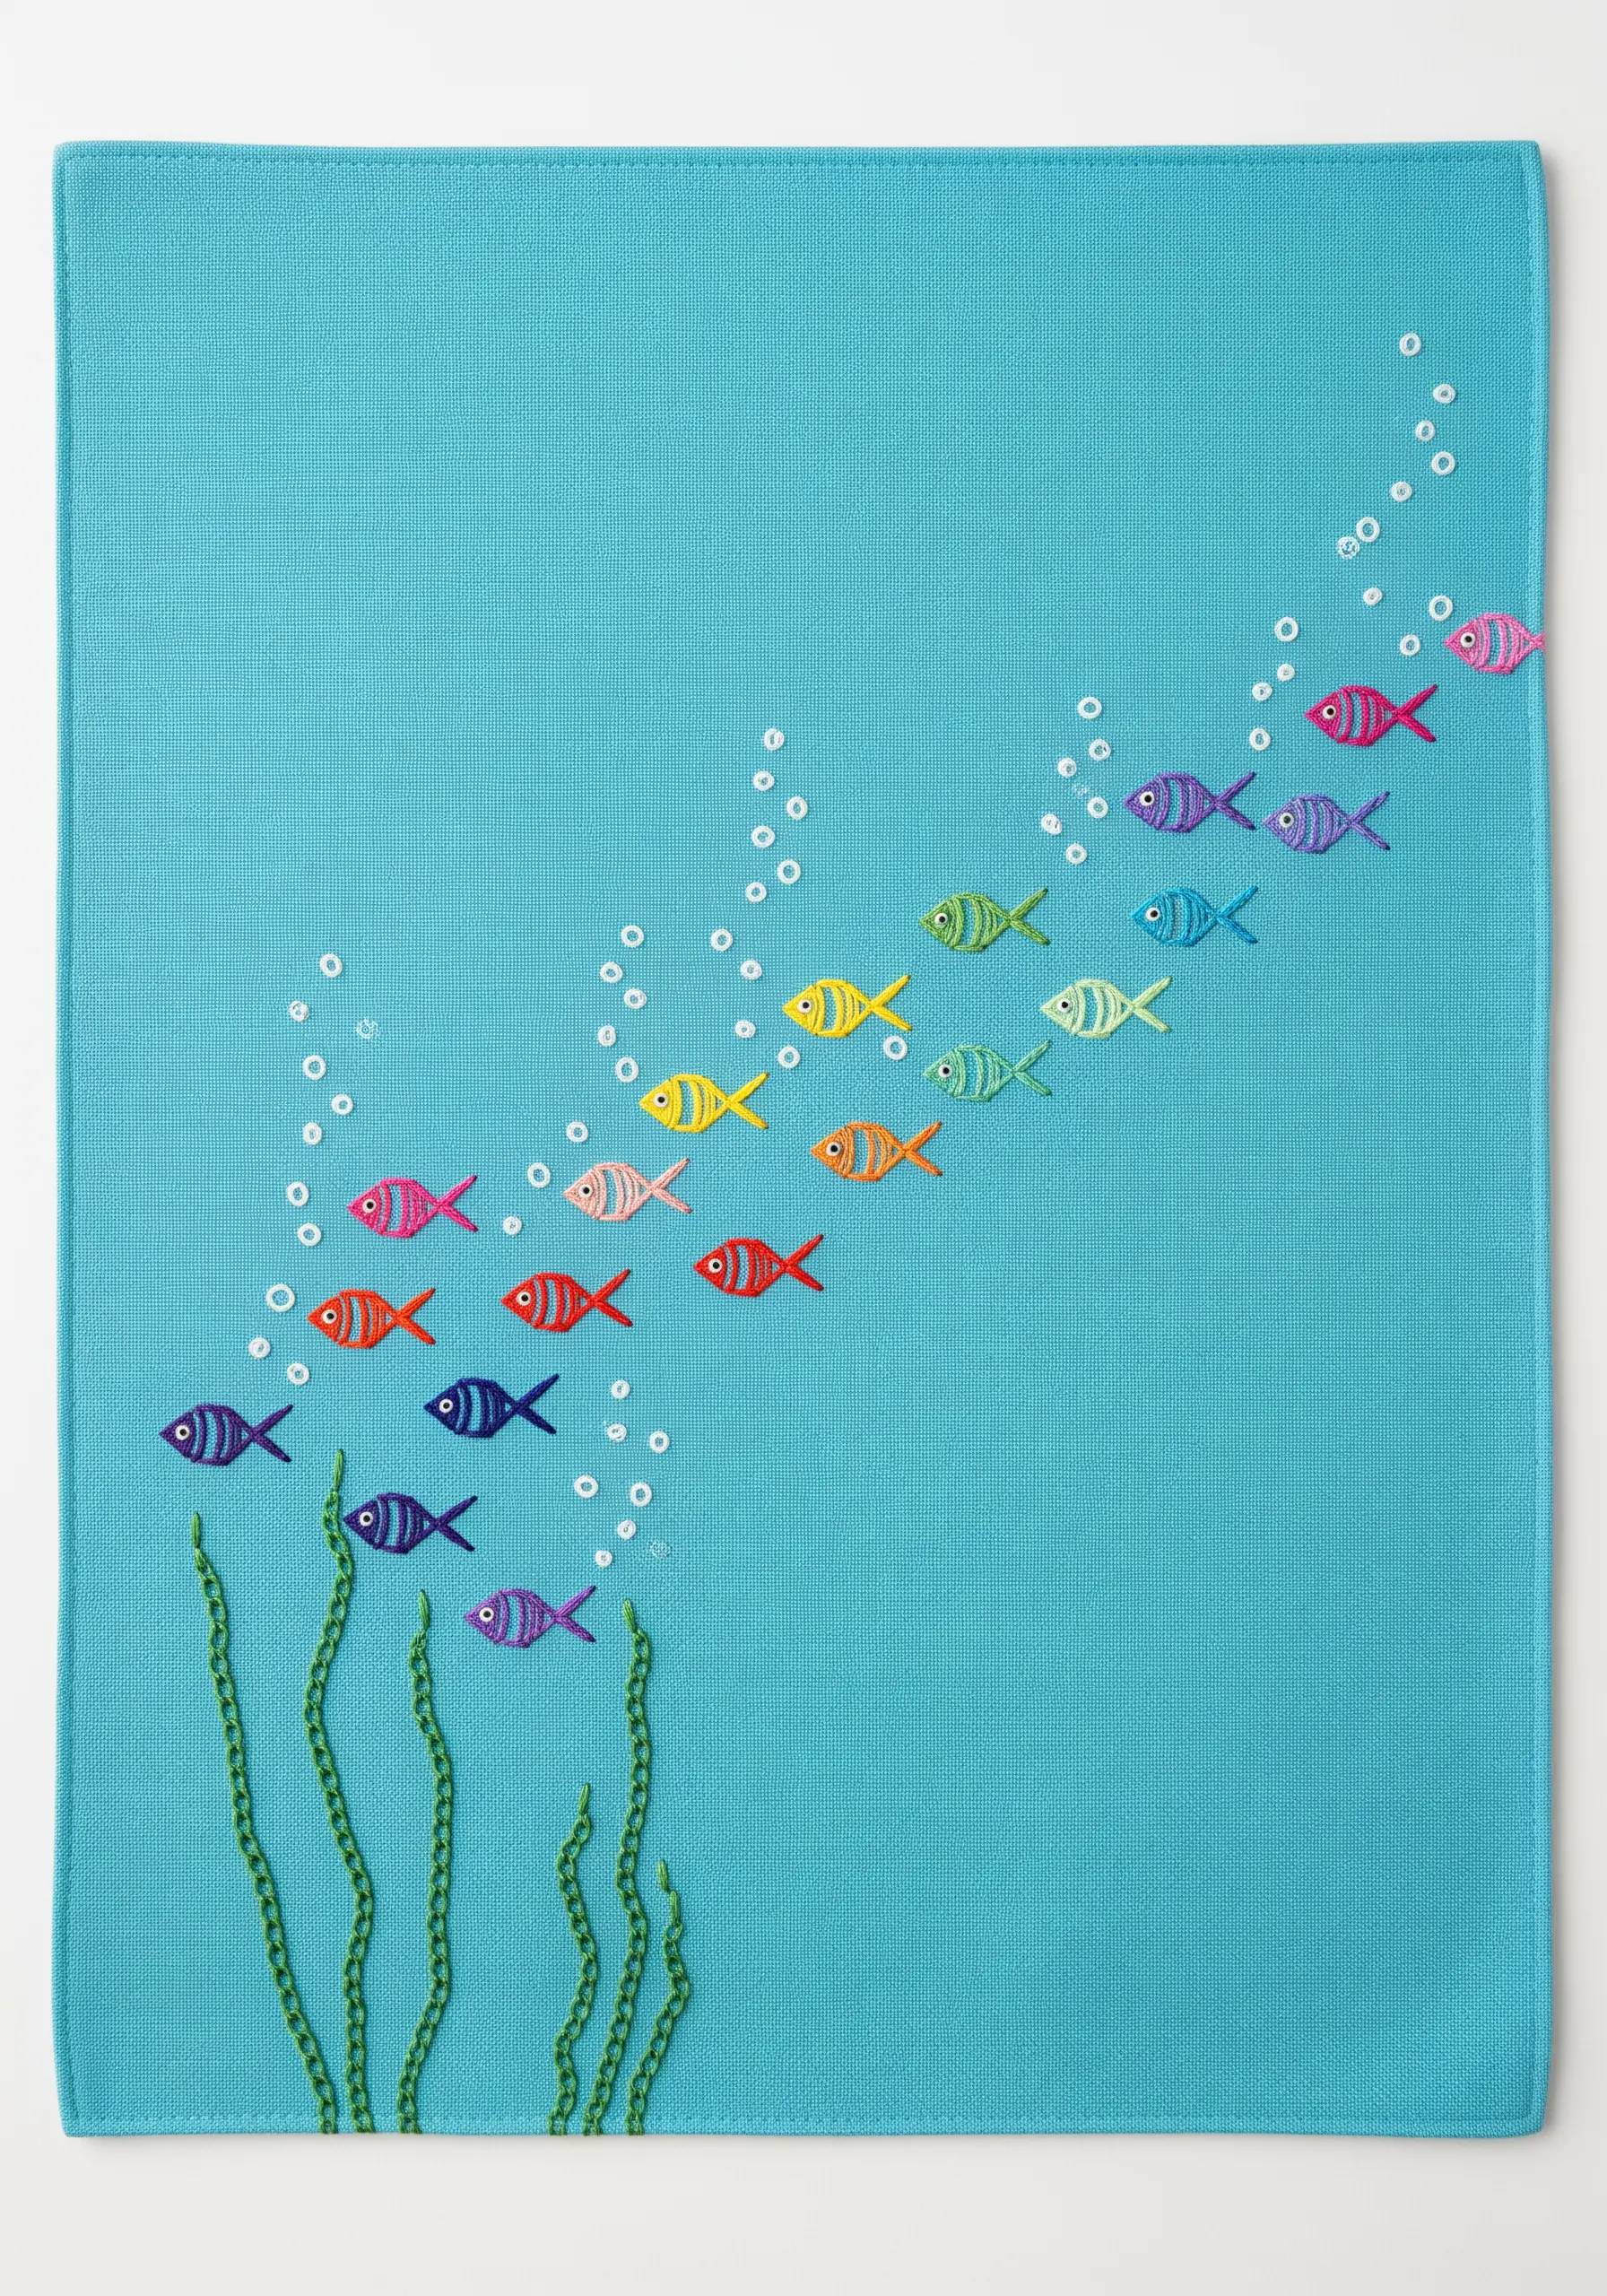
This design is a masterclass in using composition to create movement. The fish swim diagonally upwards, drawing the eye across the fabric.
Each fish can be made with just a few simple stitches: a single detached chain stitch for the tail and a fishbone stitch for the body.
The bubbles are tiny, scattered French knots or seed stitches—a perfect job for kids to add the finishing touches and bring the underwater scene to life.
8. Multi-Color Lazy Daisy Flowers
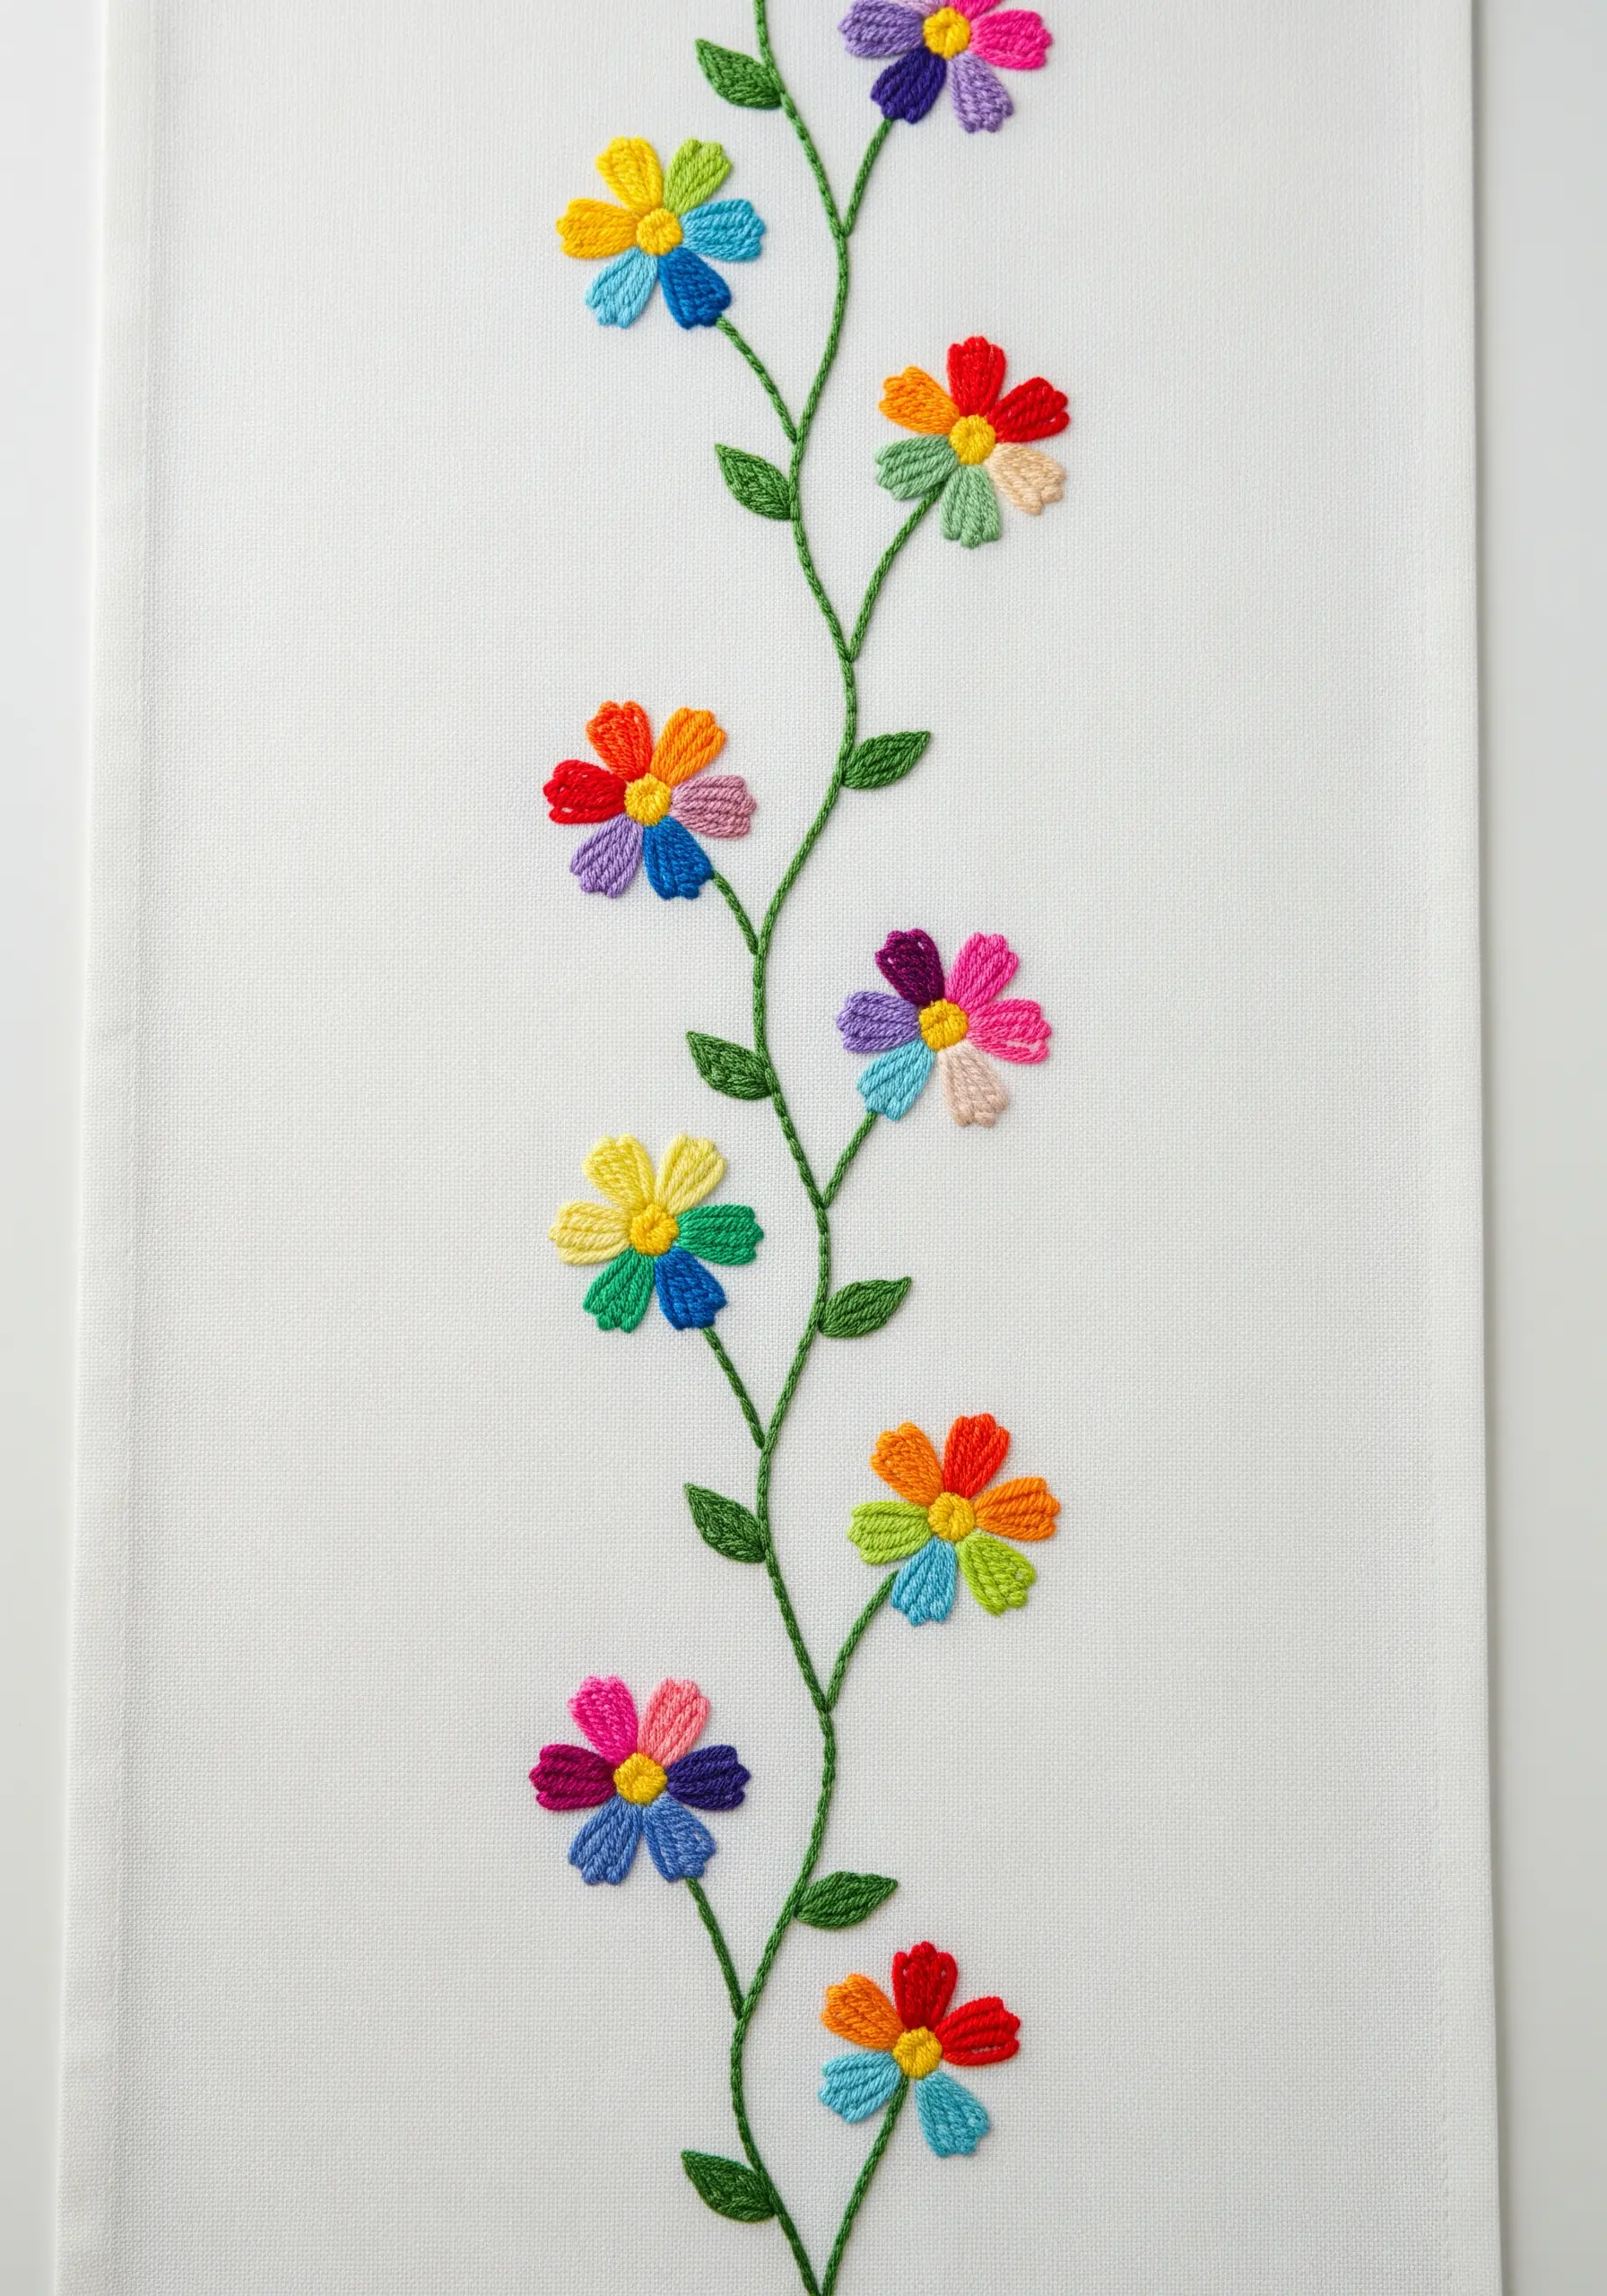
These cheerful flowers are built petal by petal using the lazy daisy stitch, making it easy for kids to contribute to the design.
Assign a color to each child and let them add one petal to each flower, working together to build a rainbow bloom.
Use a simple stem stitch for the winding green vine, which connects all the flowers into a cohesive and beautiful design for a table runner.
9. Spiraled Caterpillar Friend
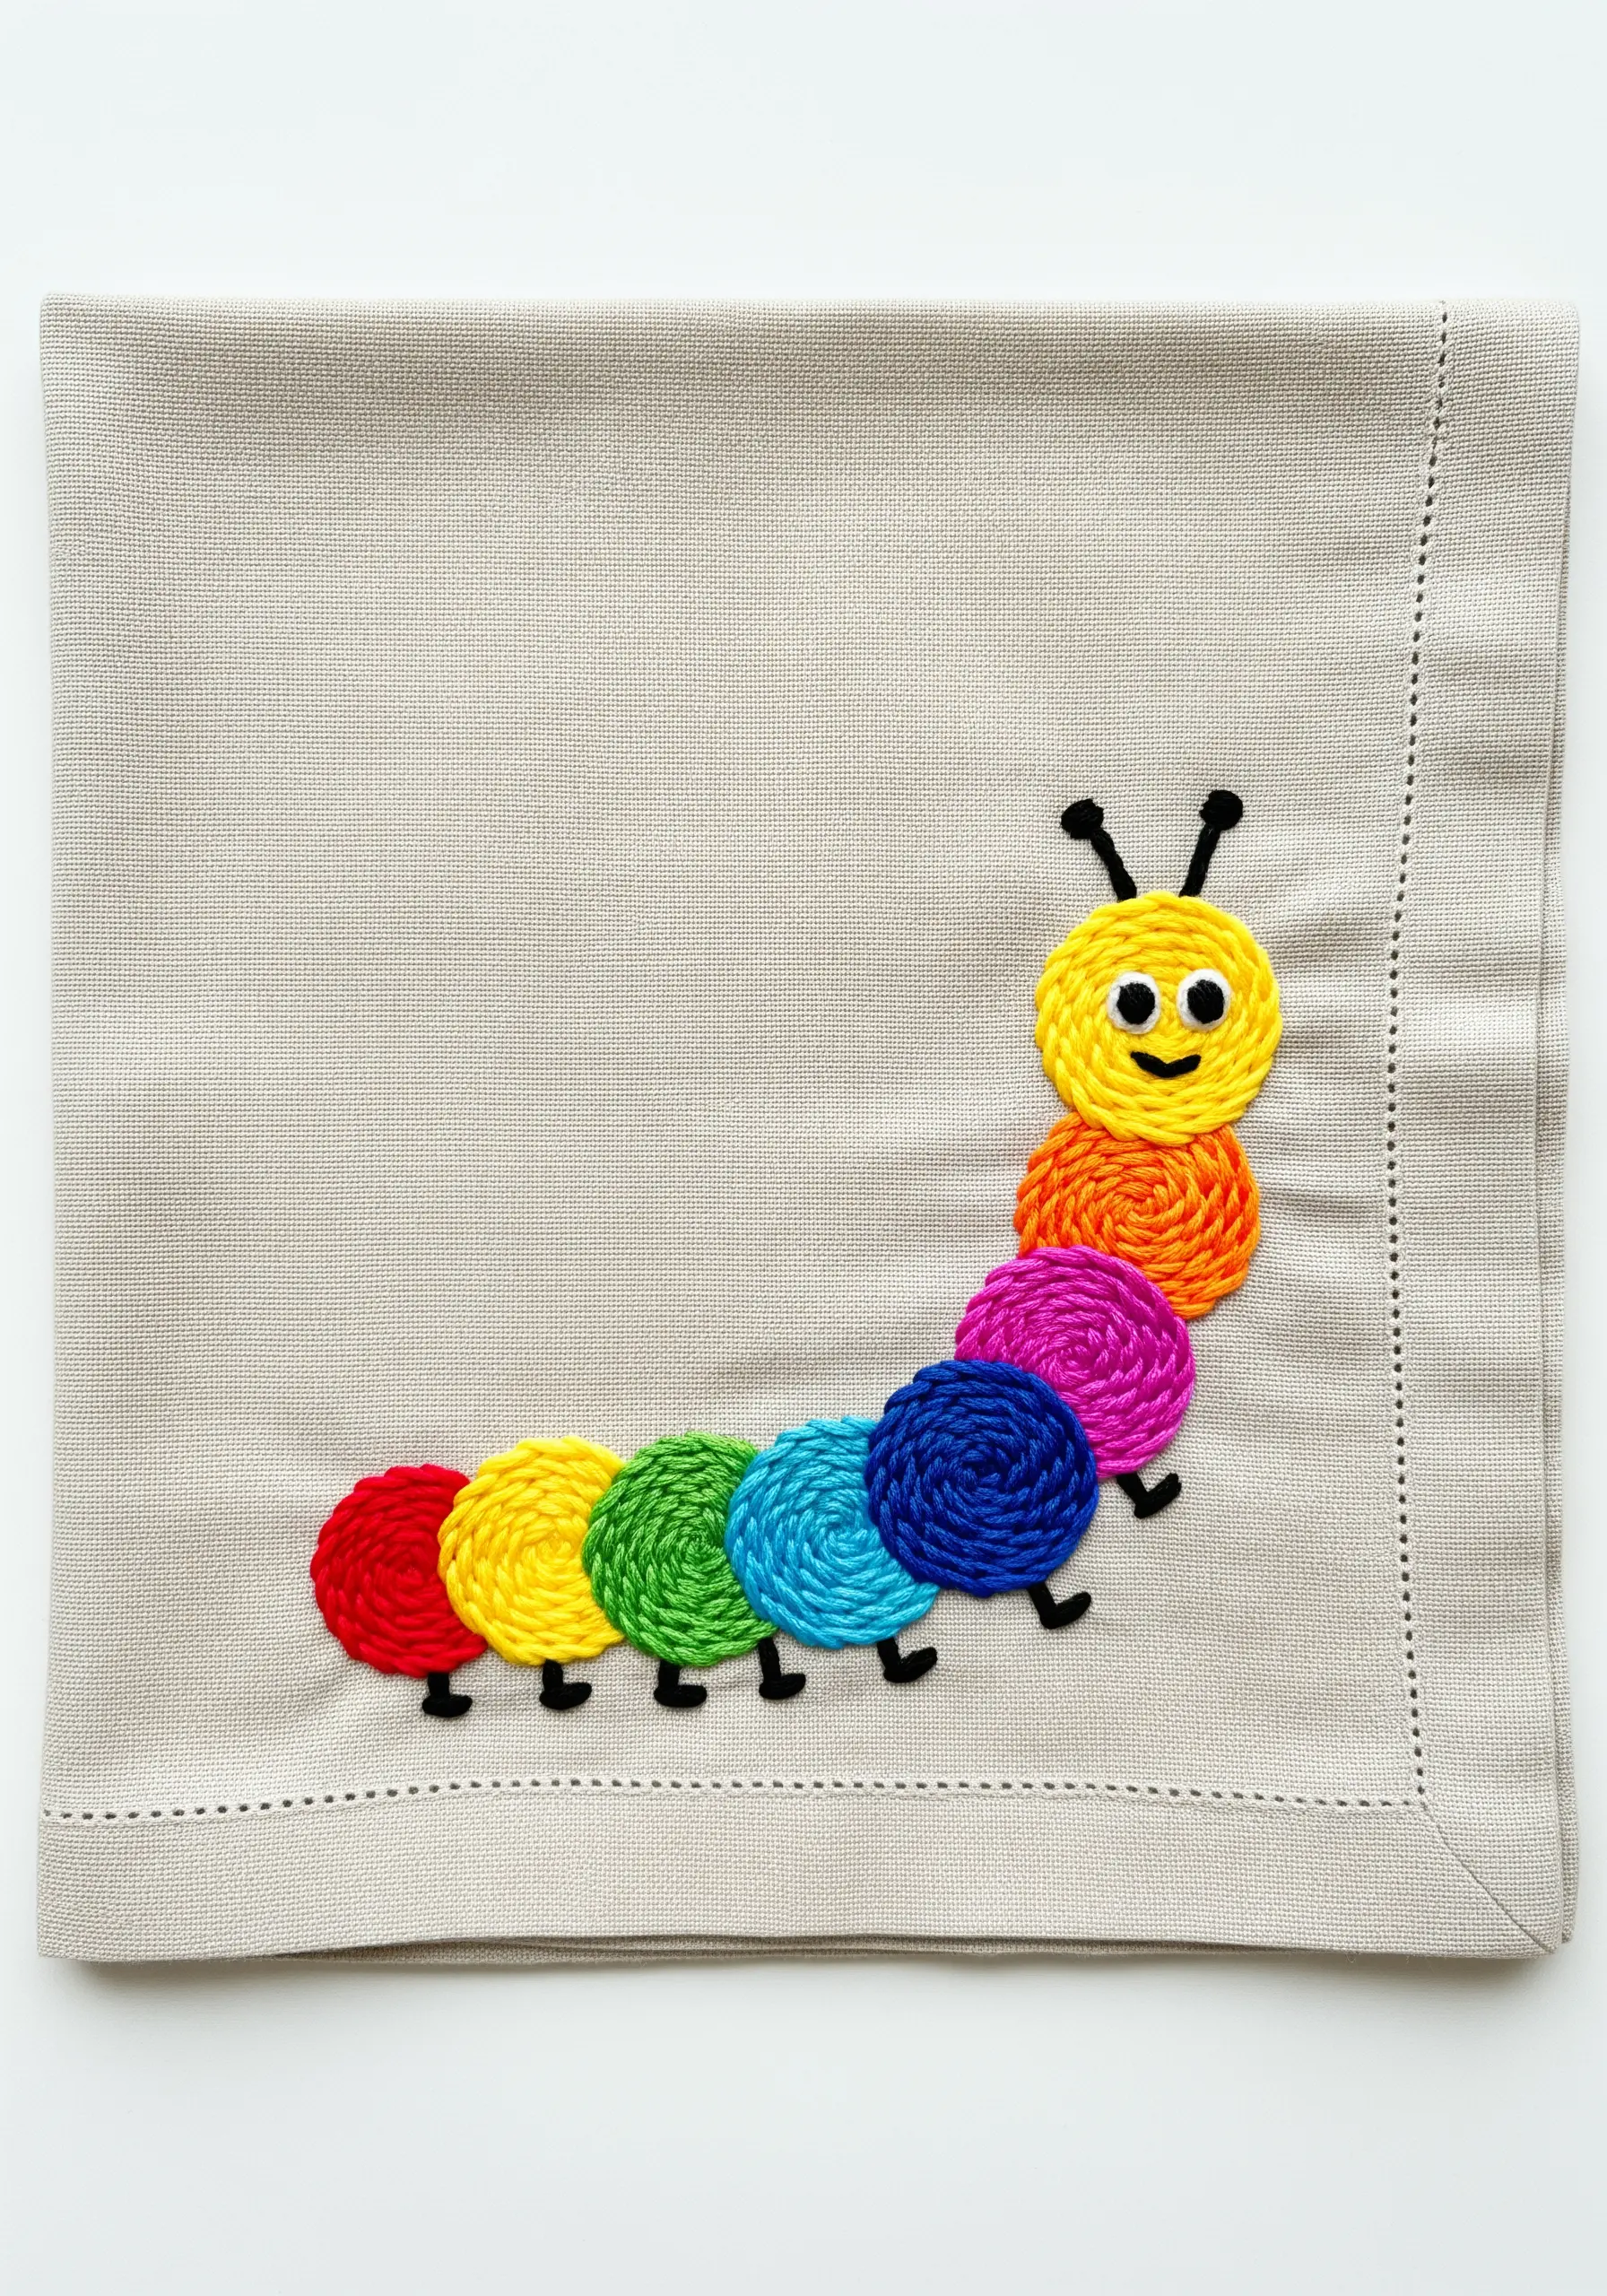
The delightful, textured body of this caterpillar is created by stitching in a spiral, rather than back and forth.
Outline each circle, then work a simple satin stitch or backstitch in a spiral from the outside in. This technique creates a dense, tactile finish that kids will love.
Let your child pick the color for each segment and have them add the simple straight-stitch legs and antennae as a final touch.
10. Radiant Shooting Star Trails
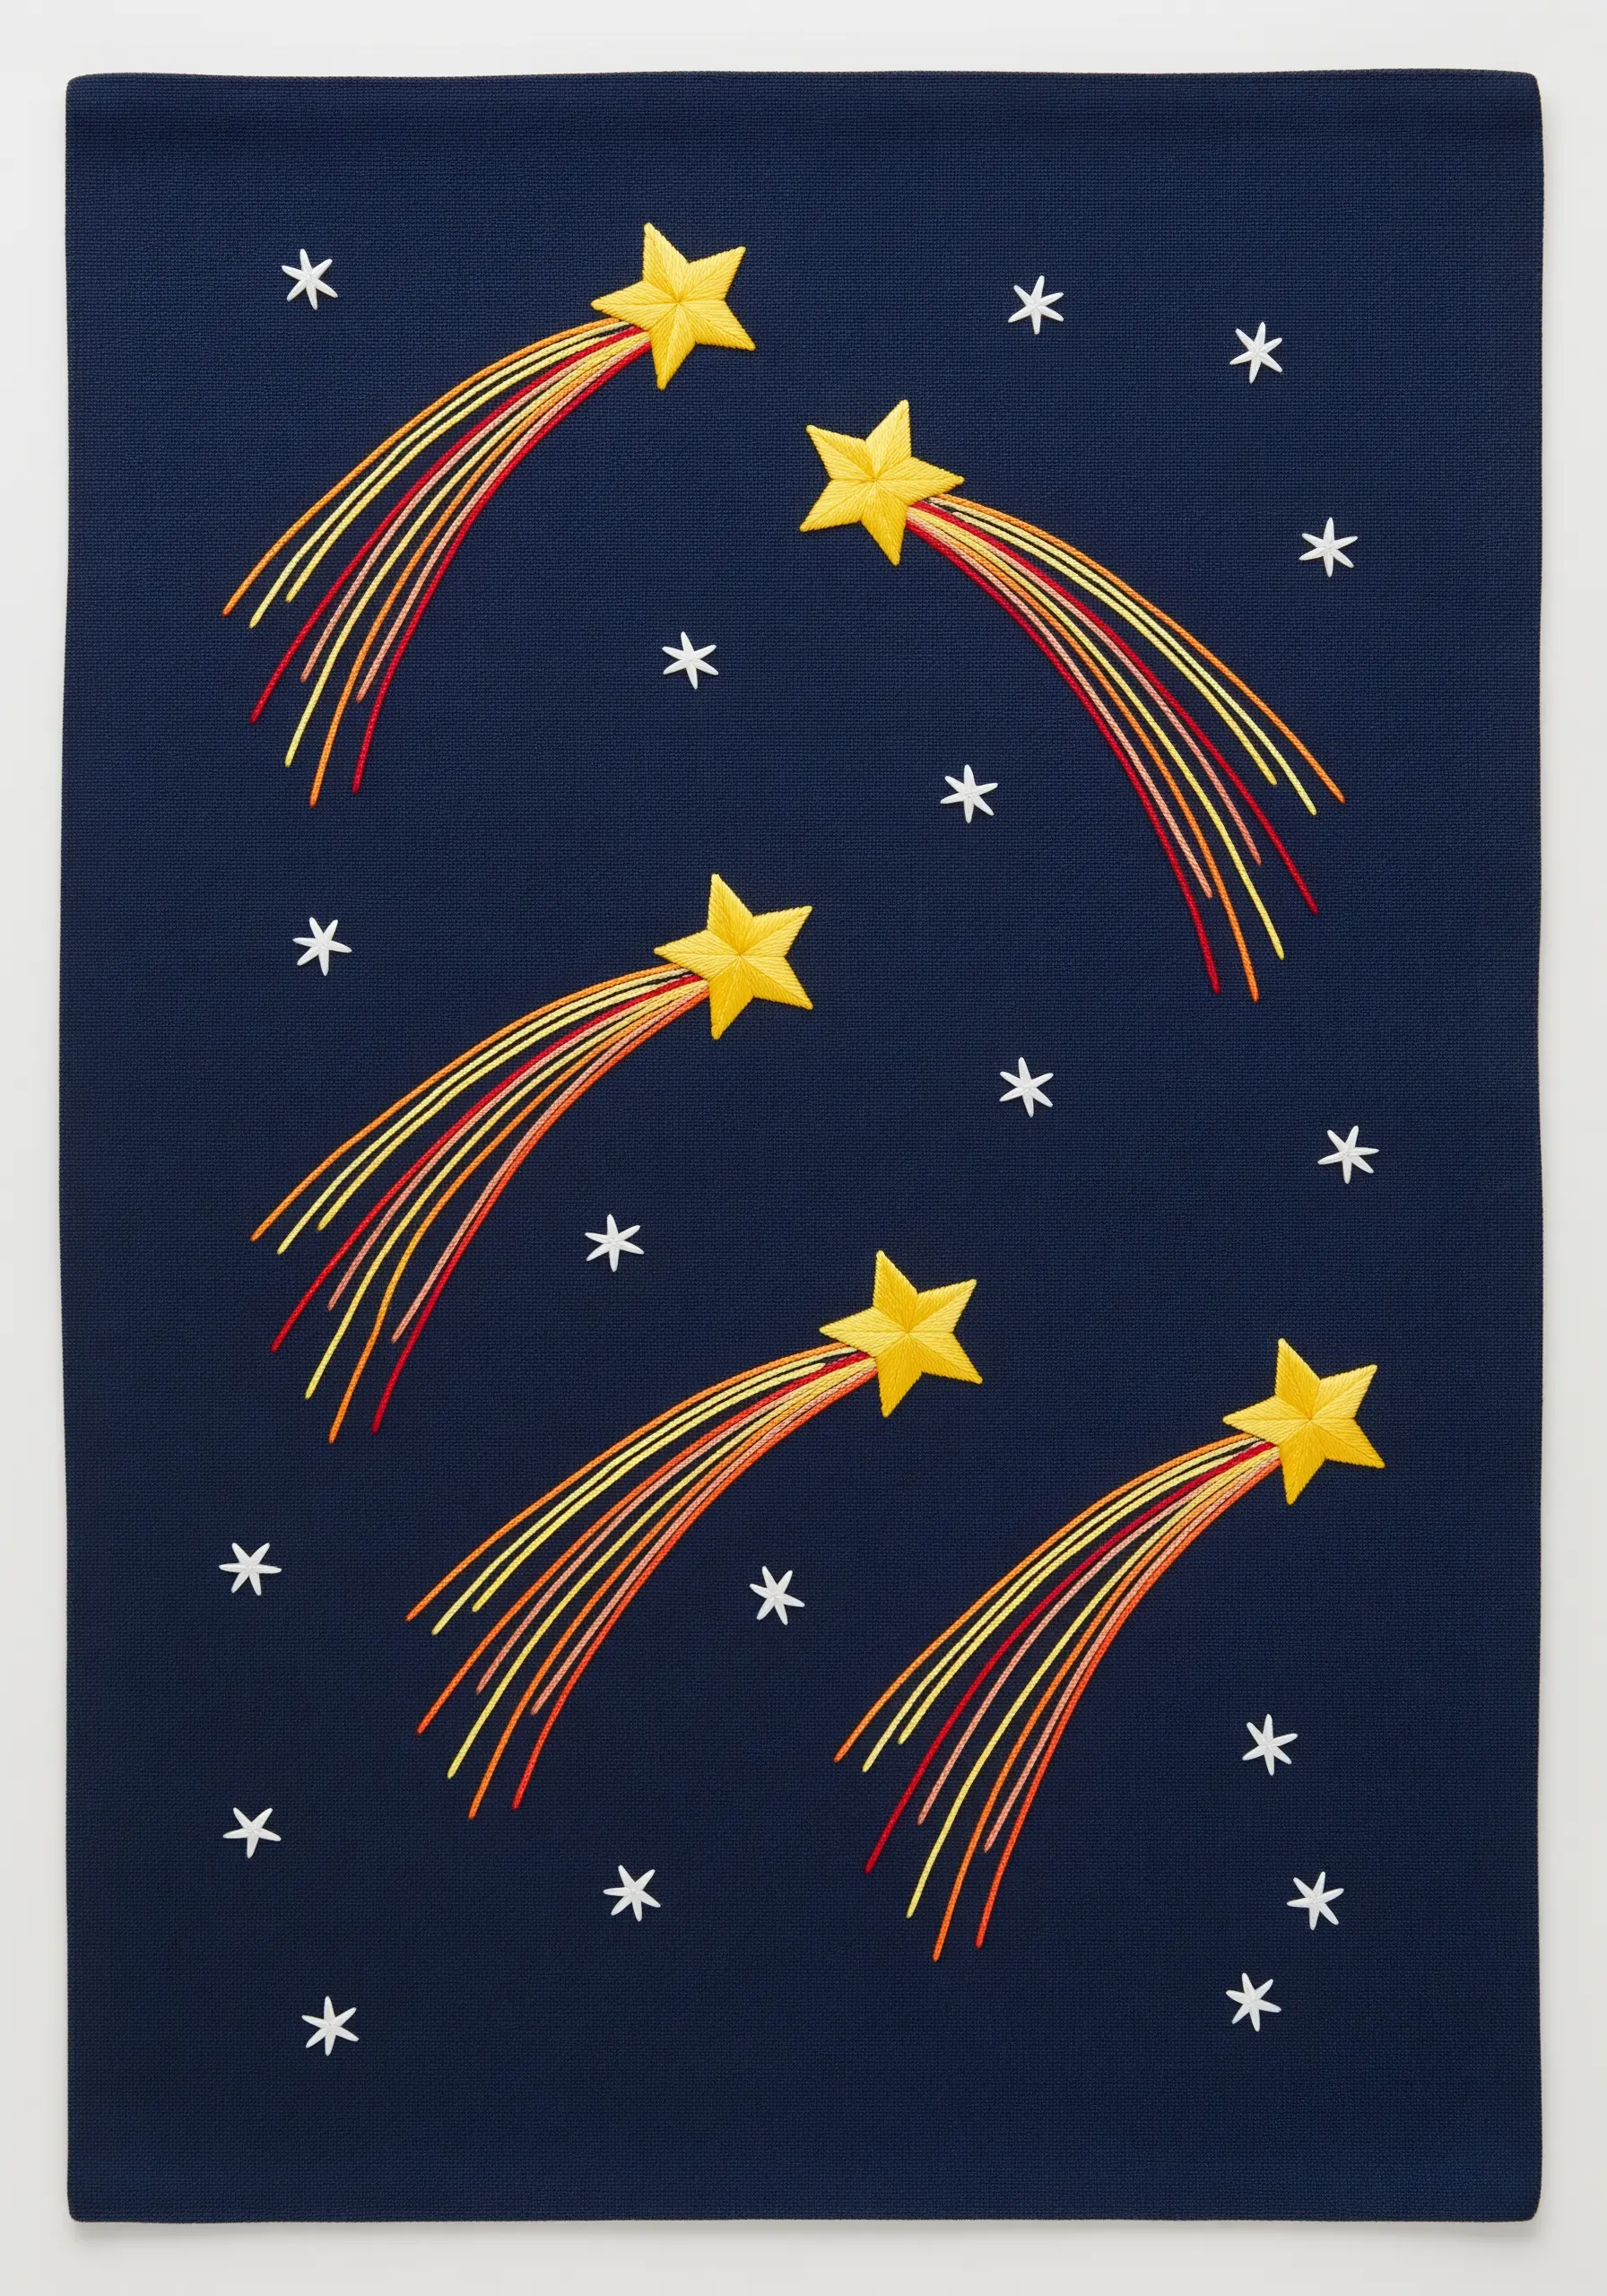
Combine two simple techniques for this dramatic effect. First, create the star using a padded satin stitch to make it pop off the dark fabric.
Then, add the tail using long, simple straight stitches in a gradient of yellow, orange, and red.
These long stitches are incredibly satisfying and easy for kids to complete, giving them a big role in creating these magical streaks of light.
11. A Modern Geometric Border
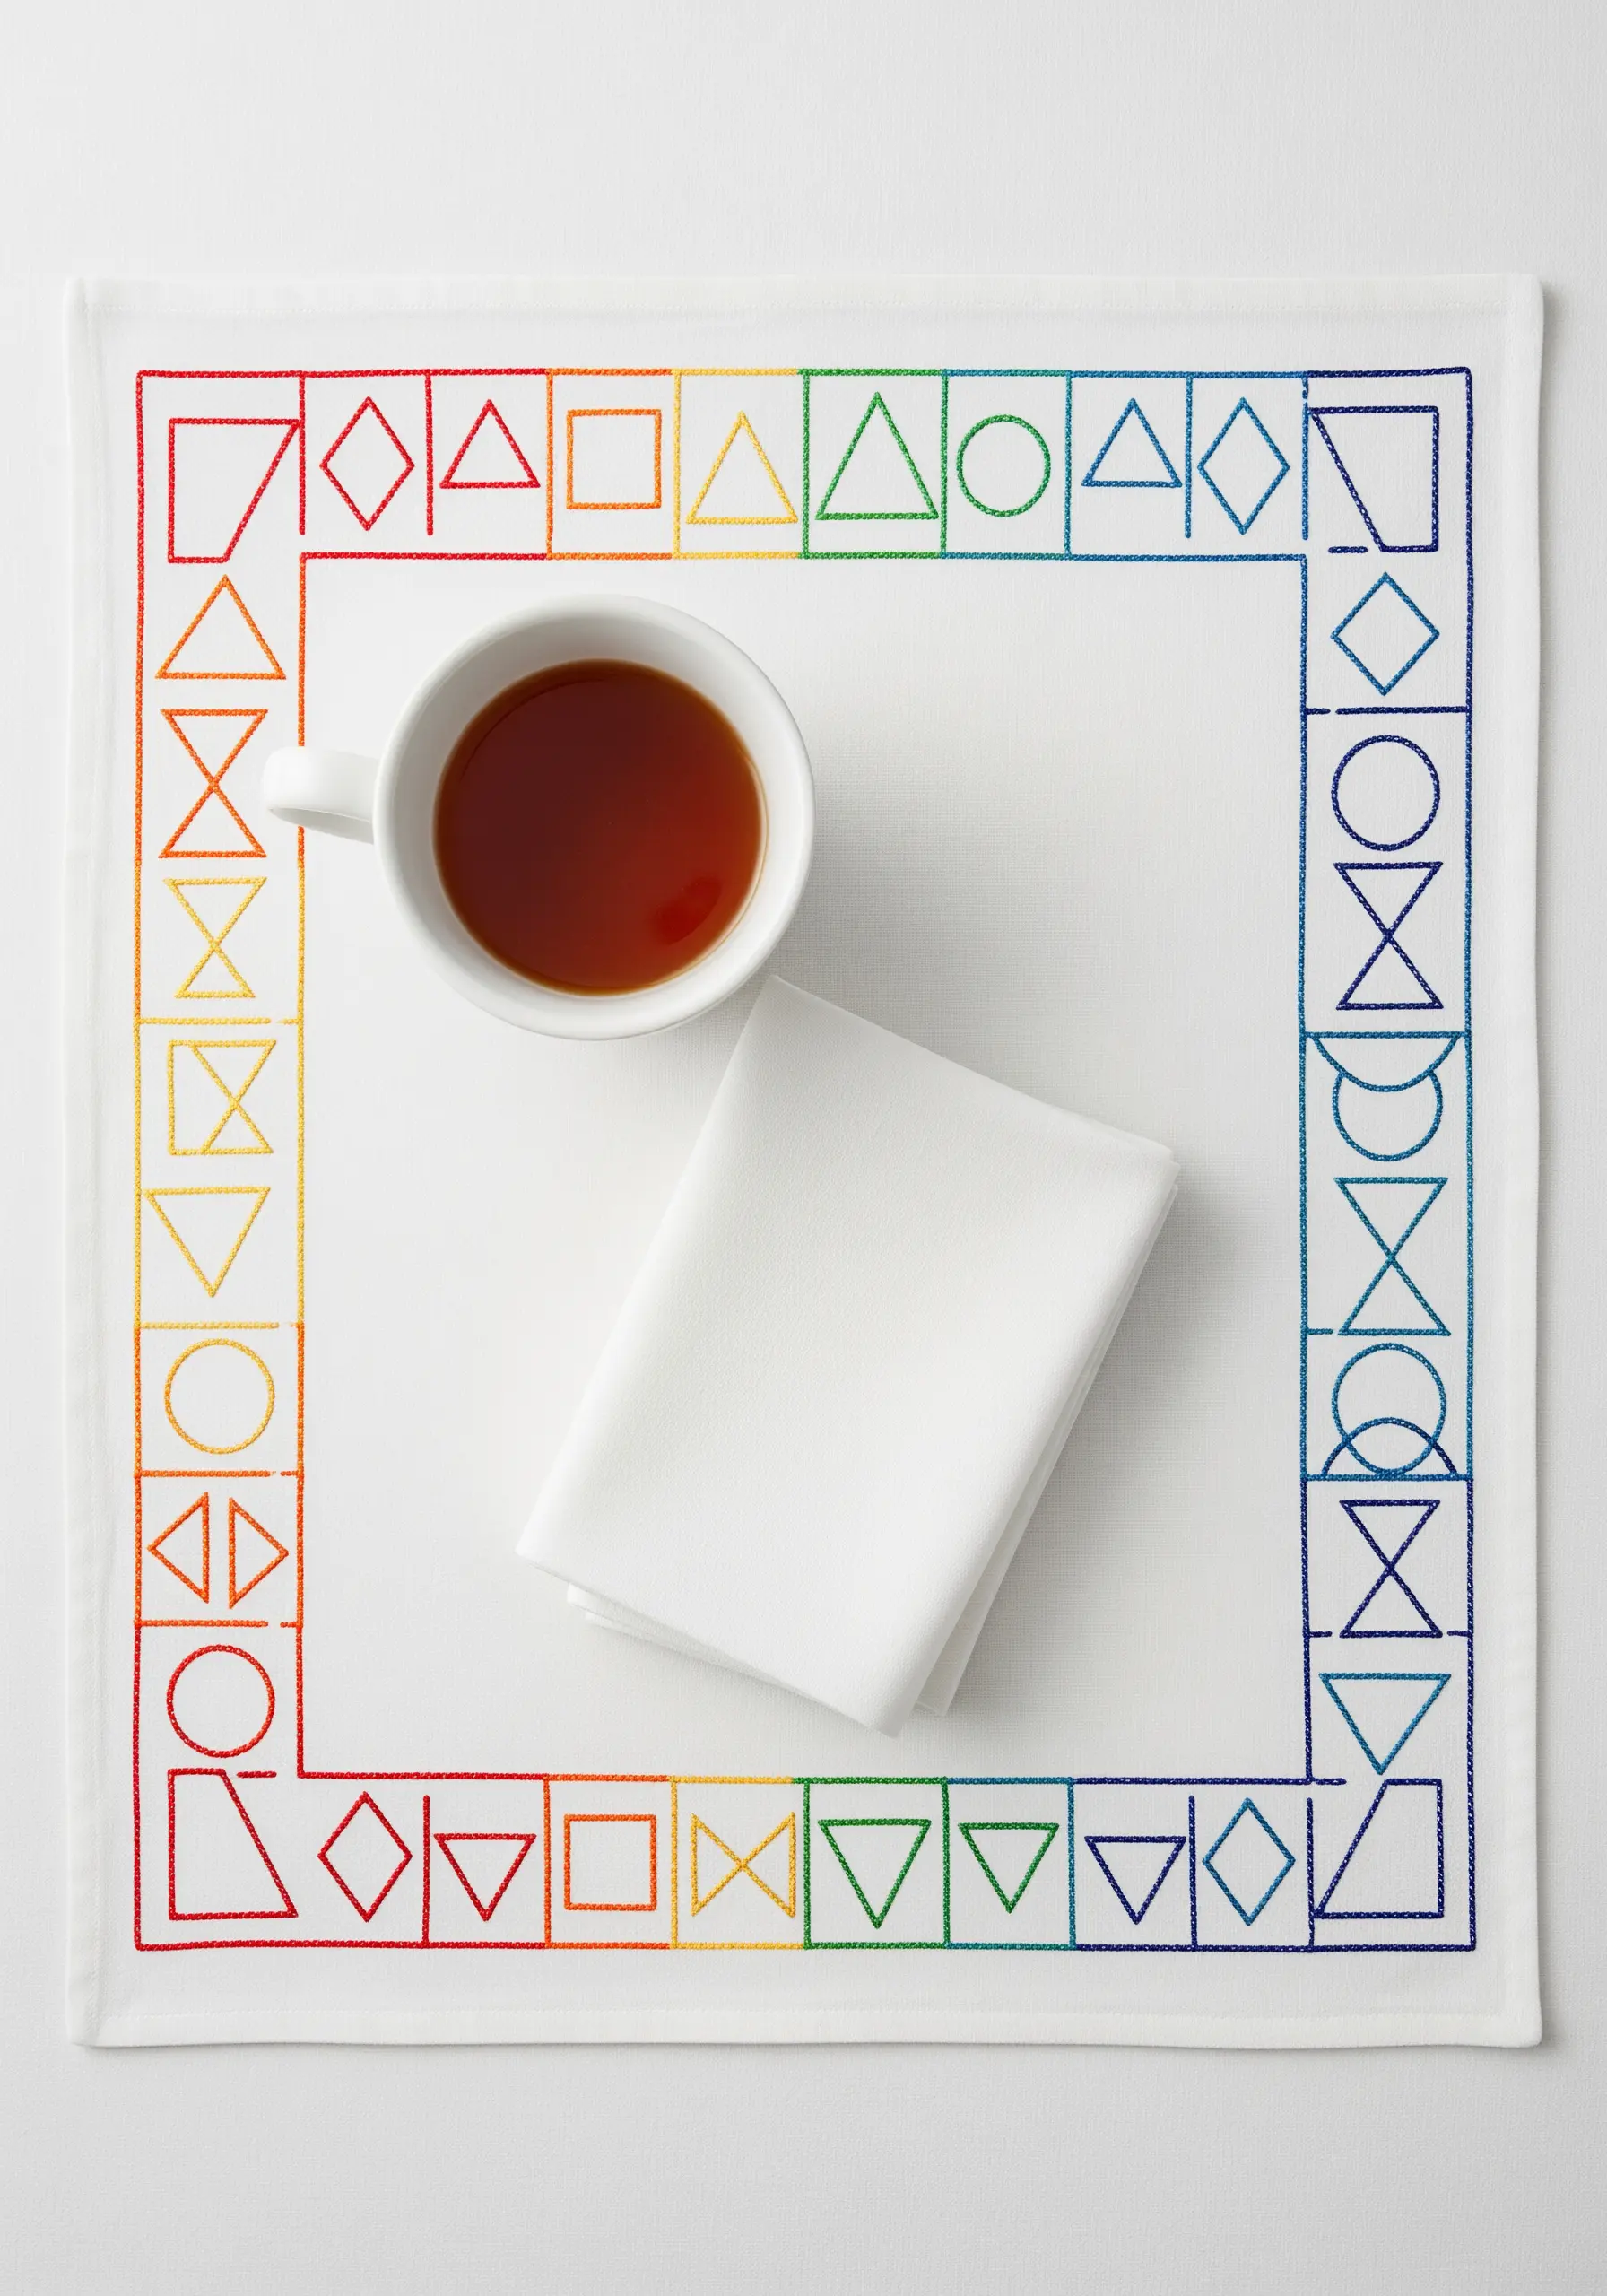
This placemat border is a fantastic project for practicing precision with backstitch or split stitch. The repeating shapes are meditative to stitch and look incredibly polished.
To make this a team effort, assign one or two shapes to each child and have them repeat it along the border in their chosen colors.
This helps them master a specific shape while contributing to a larger, unified geometric stitch pattern.
12. Symmetrical Butterfly Wings
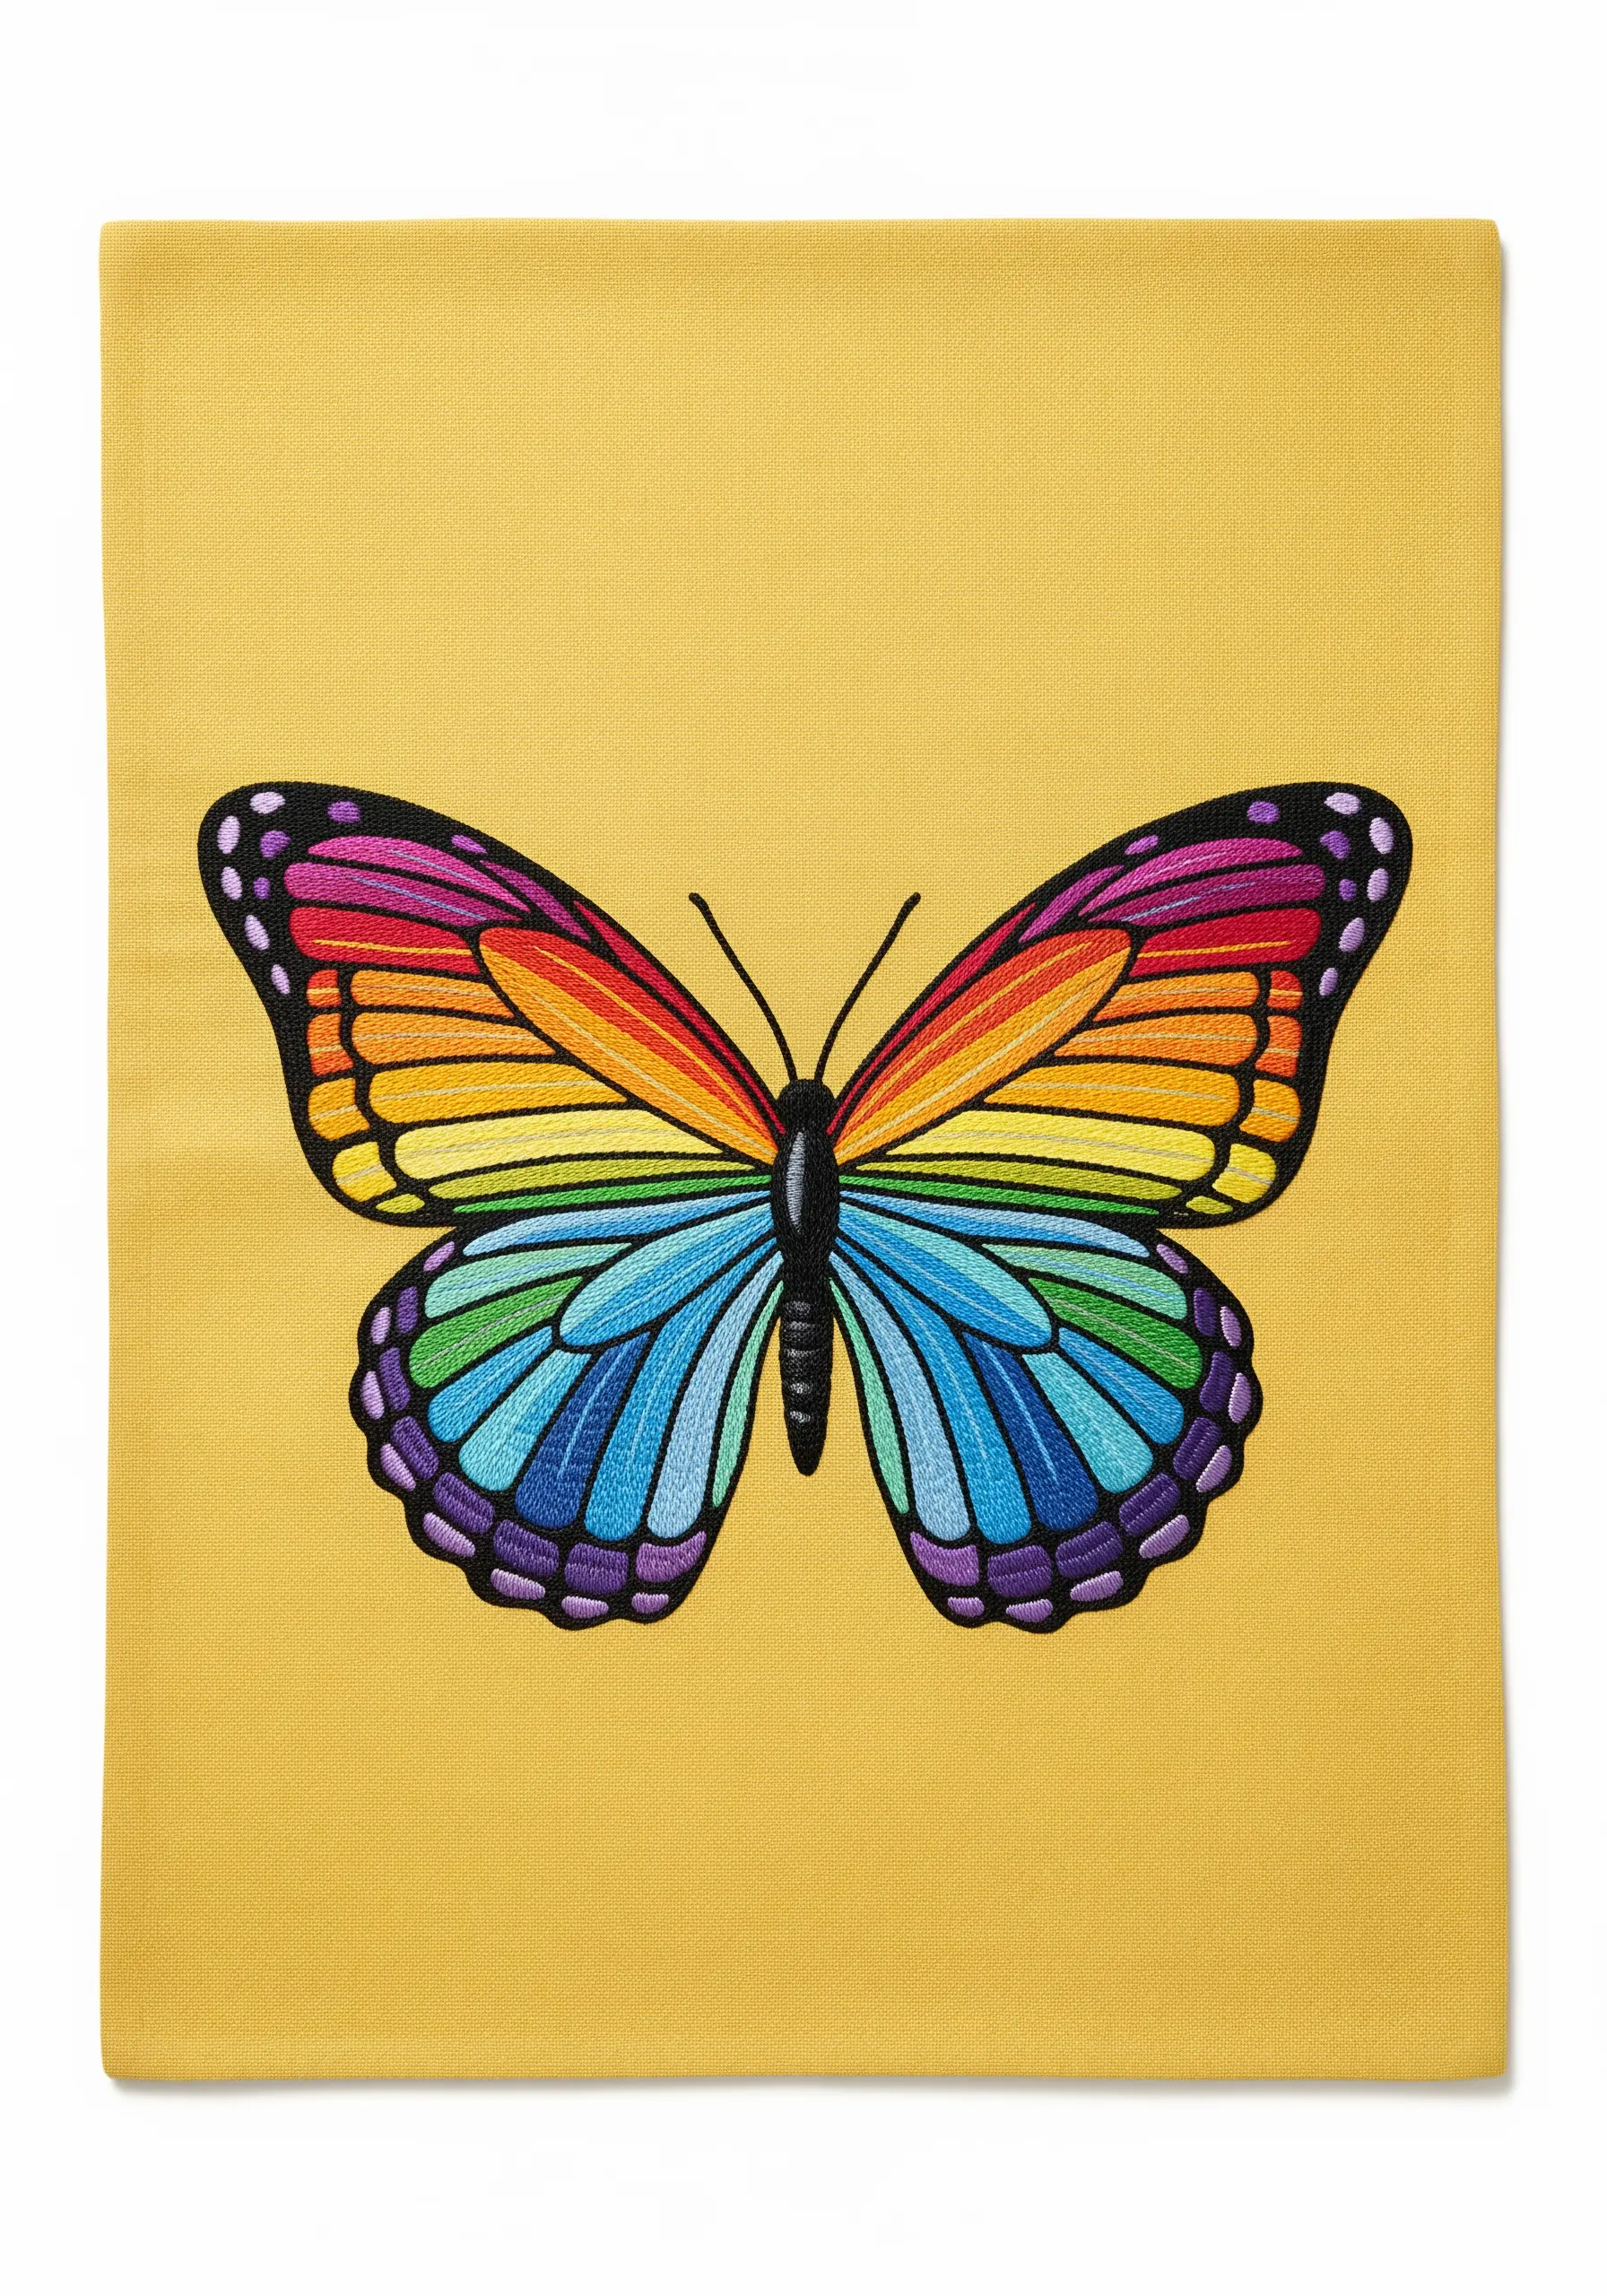
This butterfly is a perfect study in how stitch direction creates form. Fill each segment of the wings with satin stitches that follow the natural curve of the shape.
This simple adjustment makes the colors appear to shift in the light, adding depth and realism.
Before filling, have an adult outline each colored section with a black split stitch. This provides a clean, crisp border that makes the rainbow colors truly pop.
13. Scattered Rainbow Leaf Runner
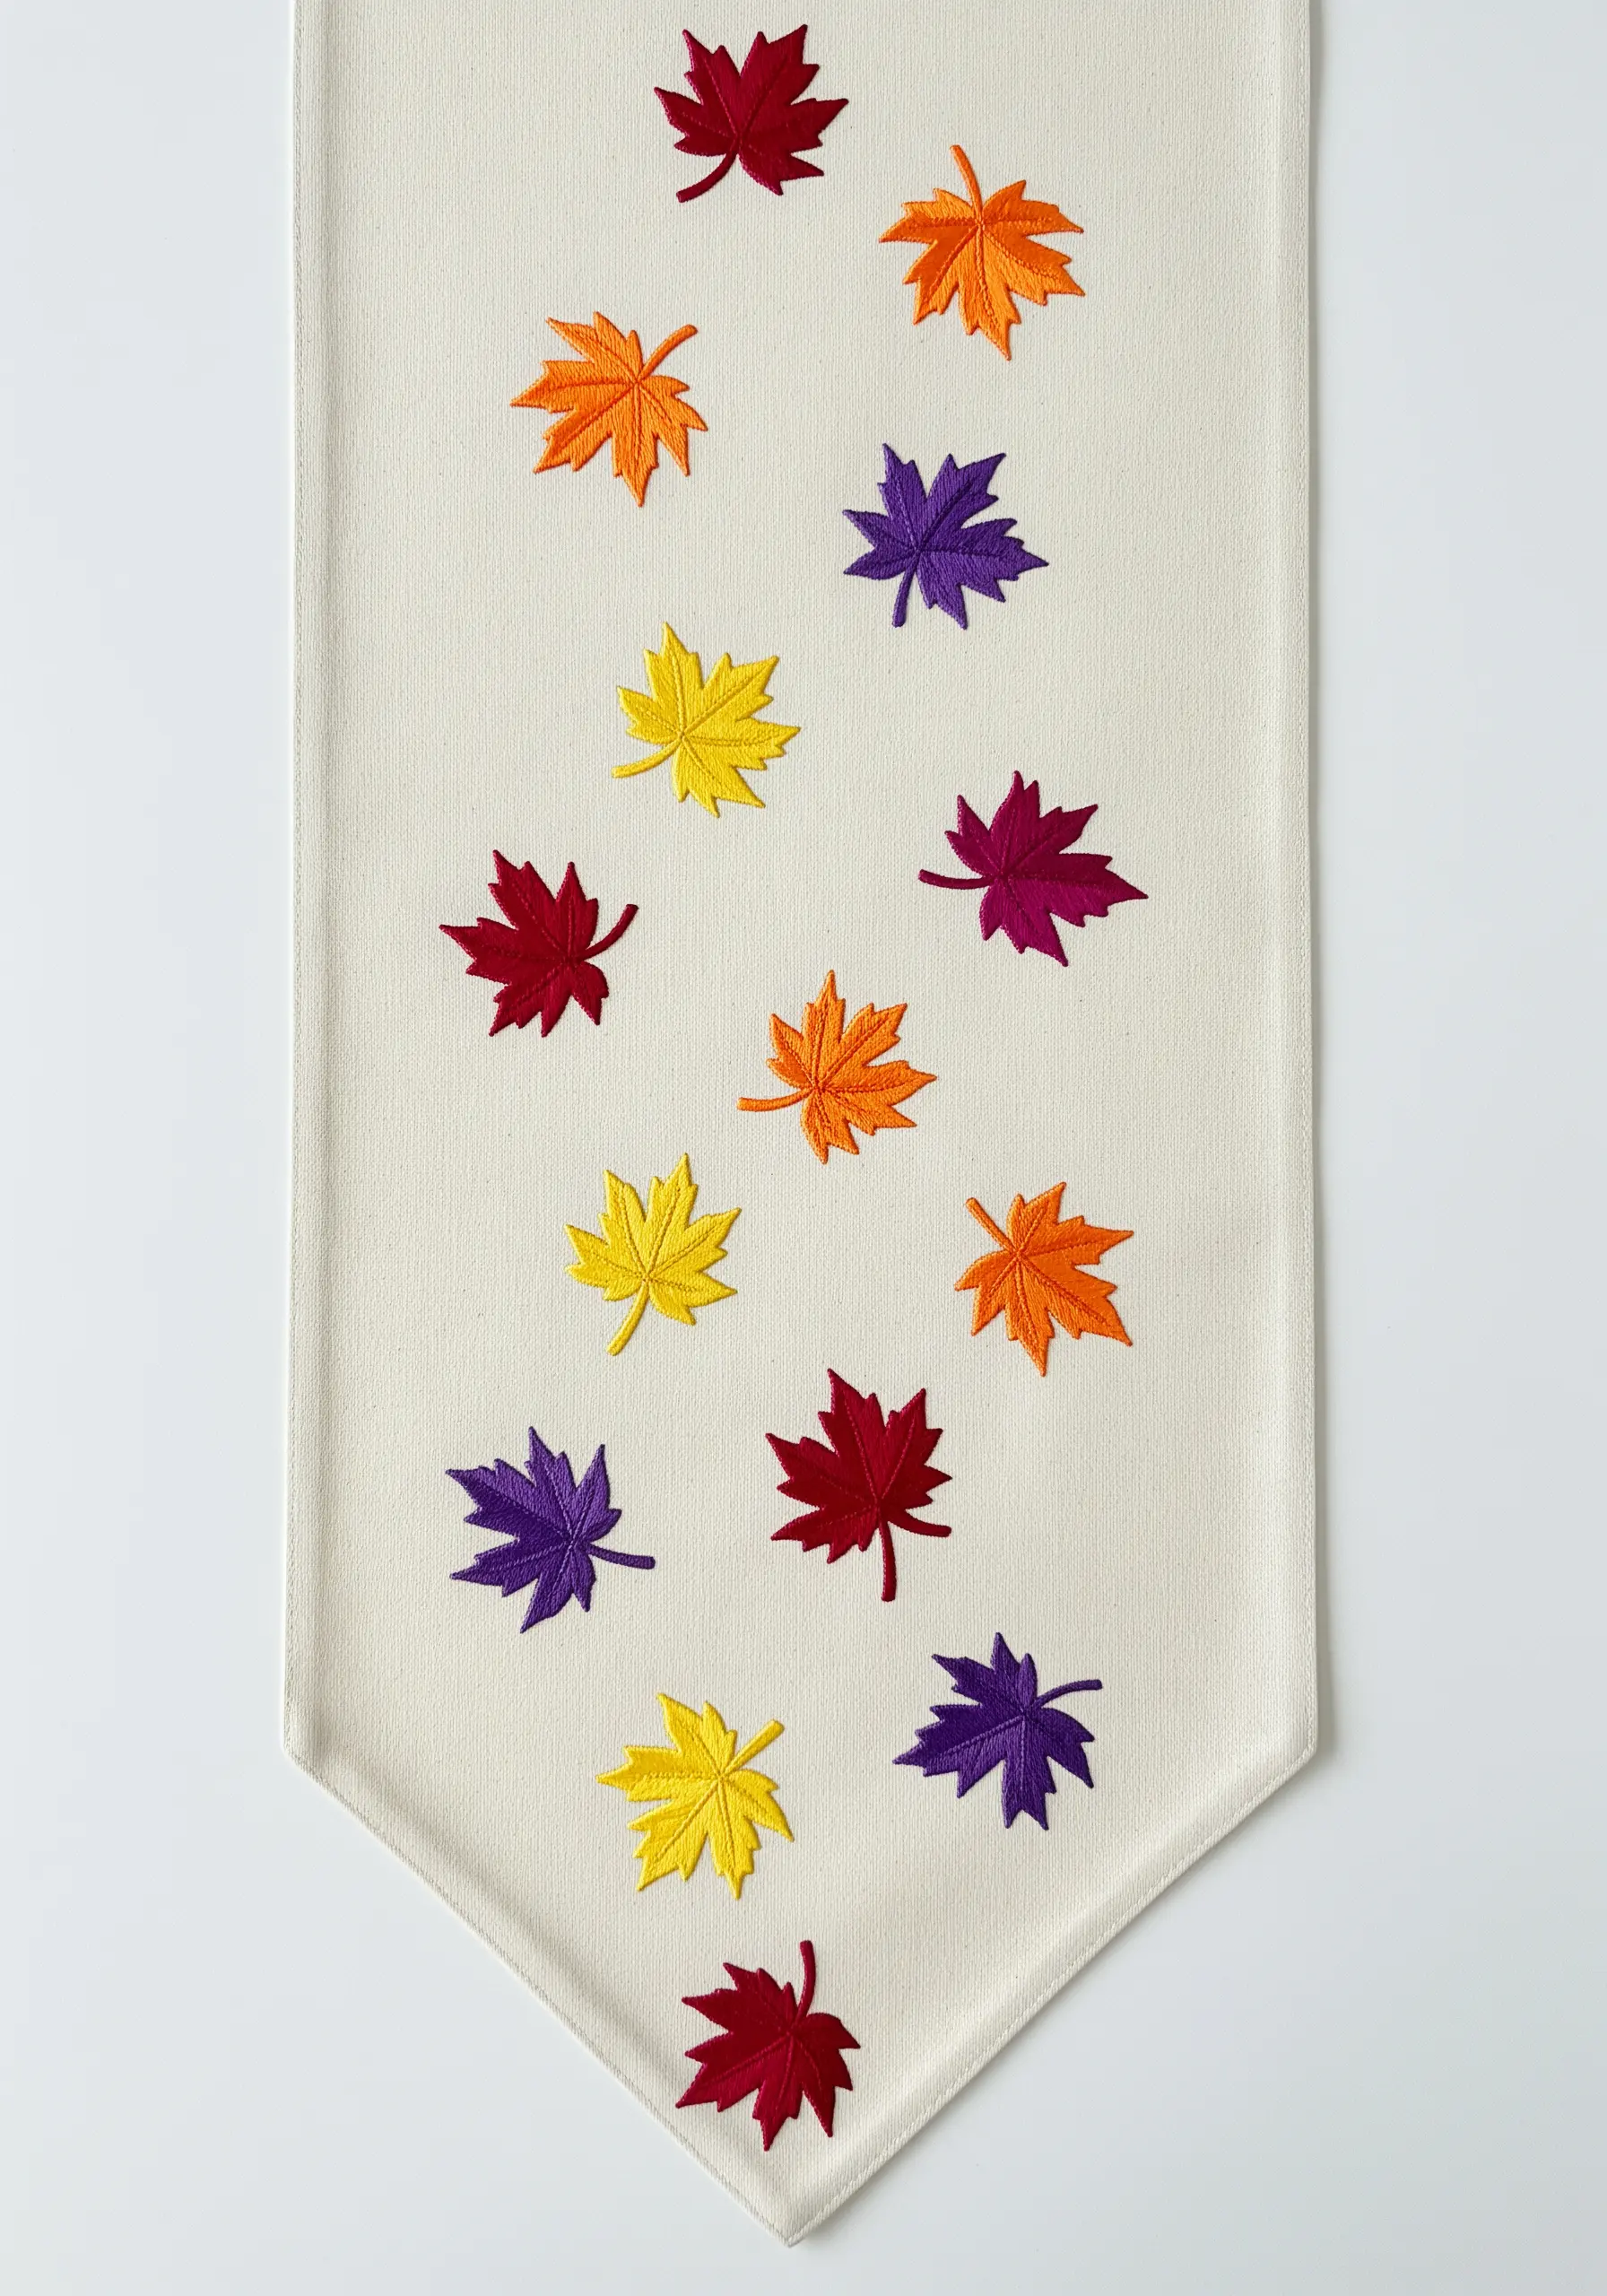
Embrace a relaxed, organic composition by scattering leaves across a table runner. This approach is forgiving and doesn’t require perfect placement.
Each leaf can be created with a fishbone stitch, which is intuitive to learn as it mimics the structure of a real leaf.
Kids can stitch individual leaves anywhere they choose, making this a low-pressure project that encourages their creative input.
These delicate leaf embroidery stitches are perfect for adding a touch of nature to any fabric.
14. A Fluffy Cloud and Colorful Rain
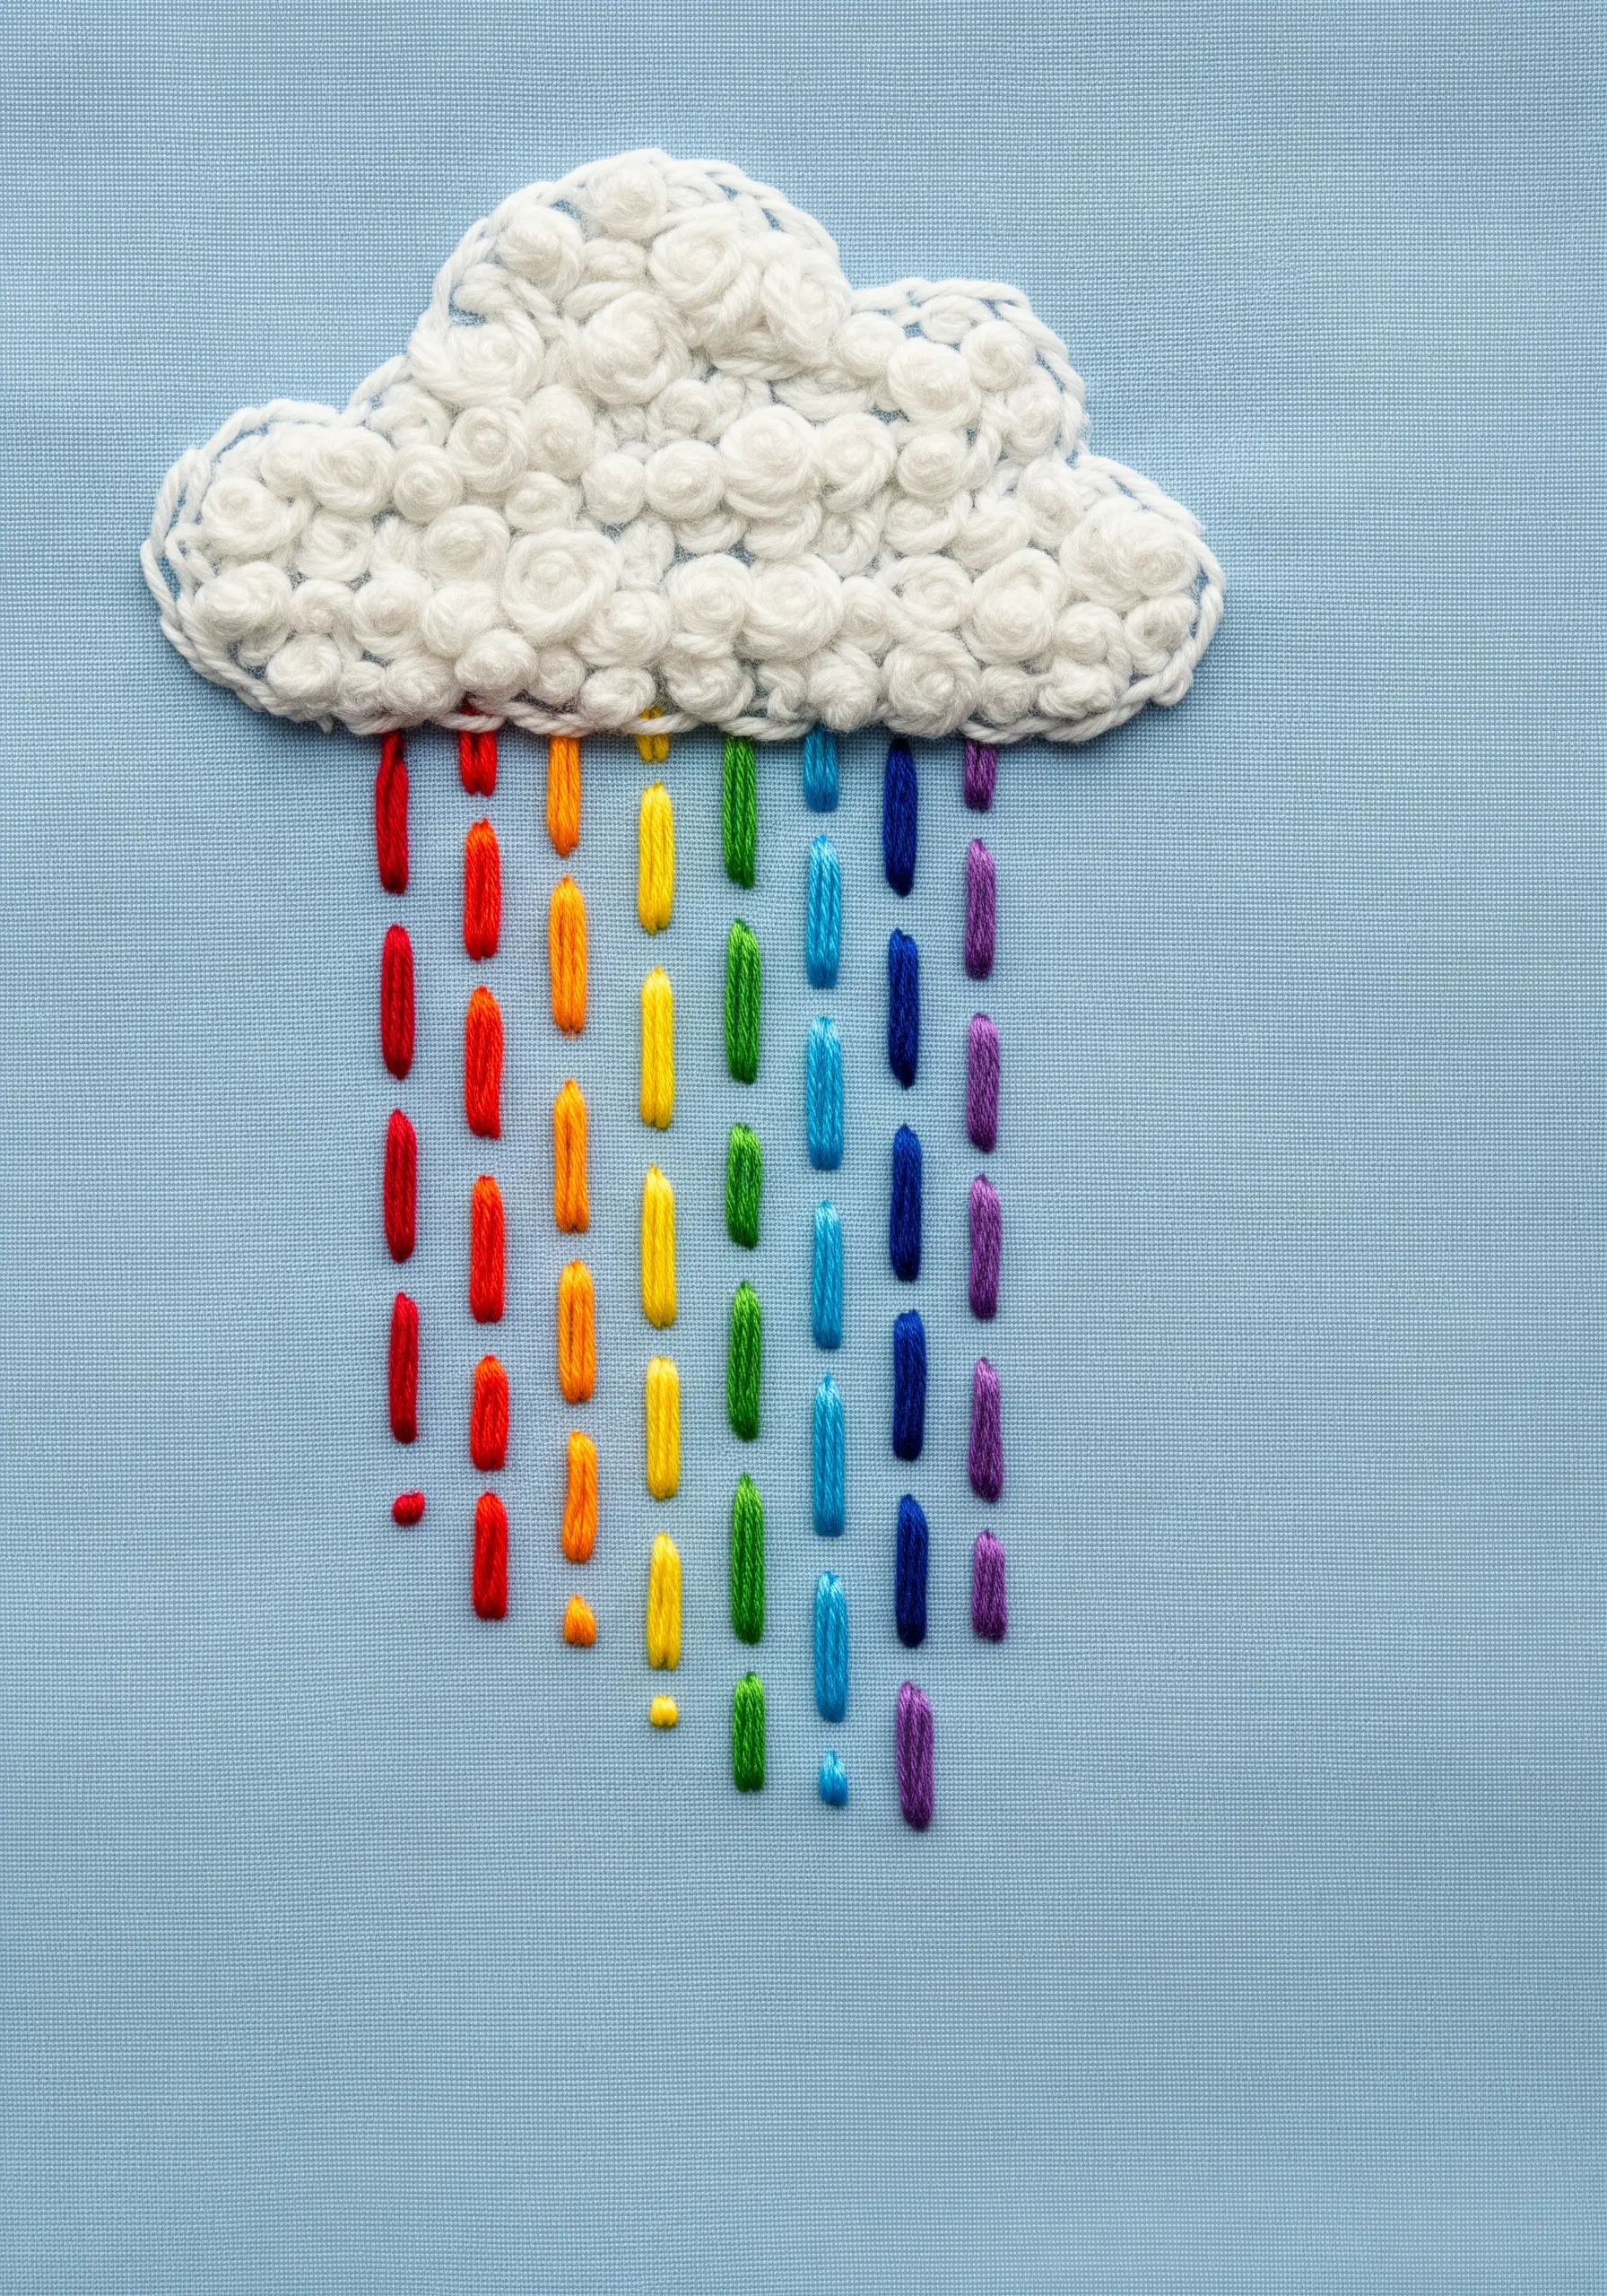
Create the cloud’s incredible texture by packing French knots or colonial knots tightly together. Using a thicker yarn or all six strands of floss will make the cloud look even fuller.
The raindrops are nothing more than simple, vertical straight stitches—or ‘satin dashes.’ This is a wonderful task for kids, as the slight variations in their stitch length and tension will only add to the charm of falling rain.
15. Ice Cream with Beaded Sprinkles
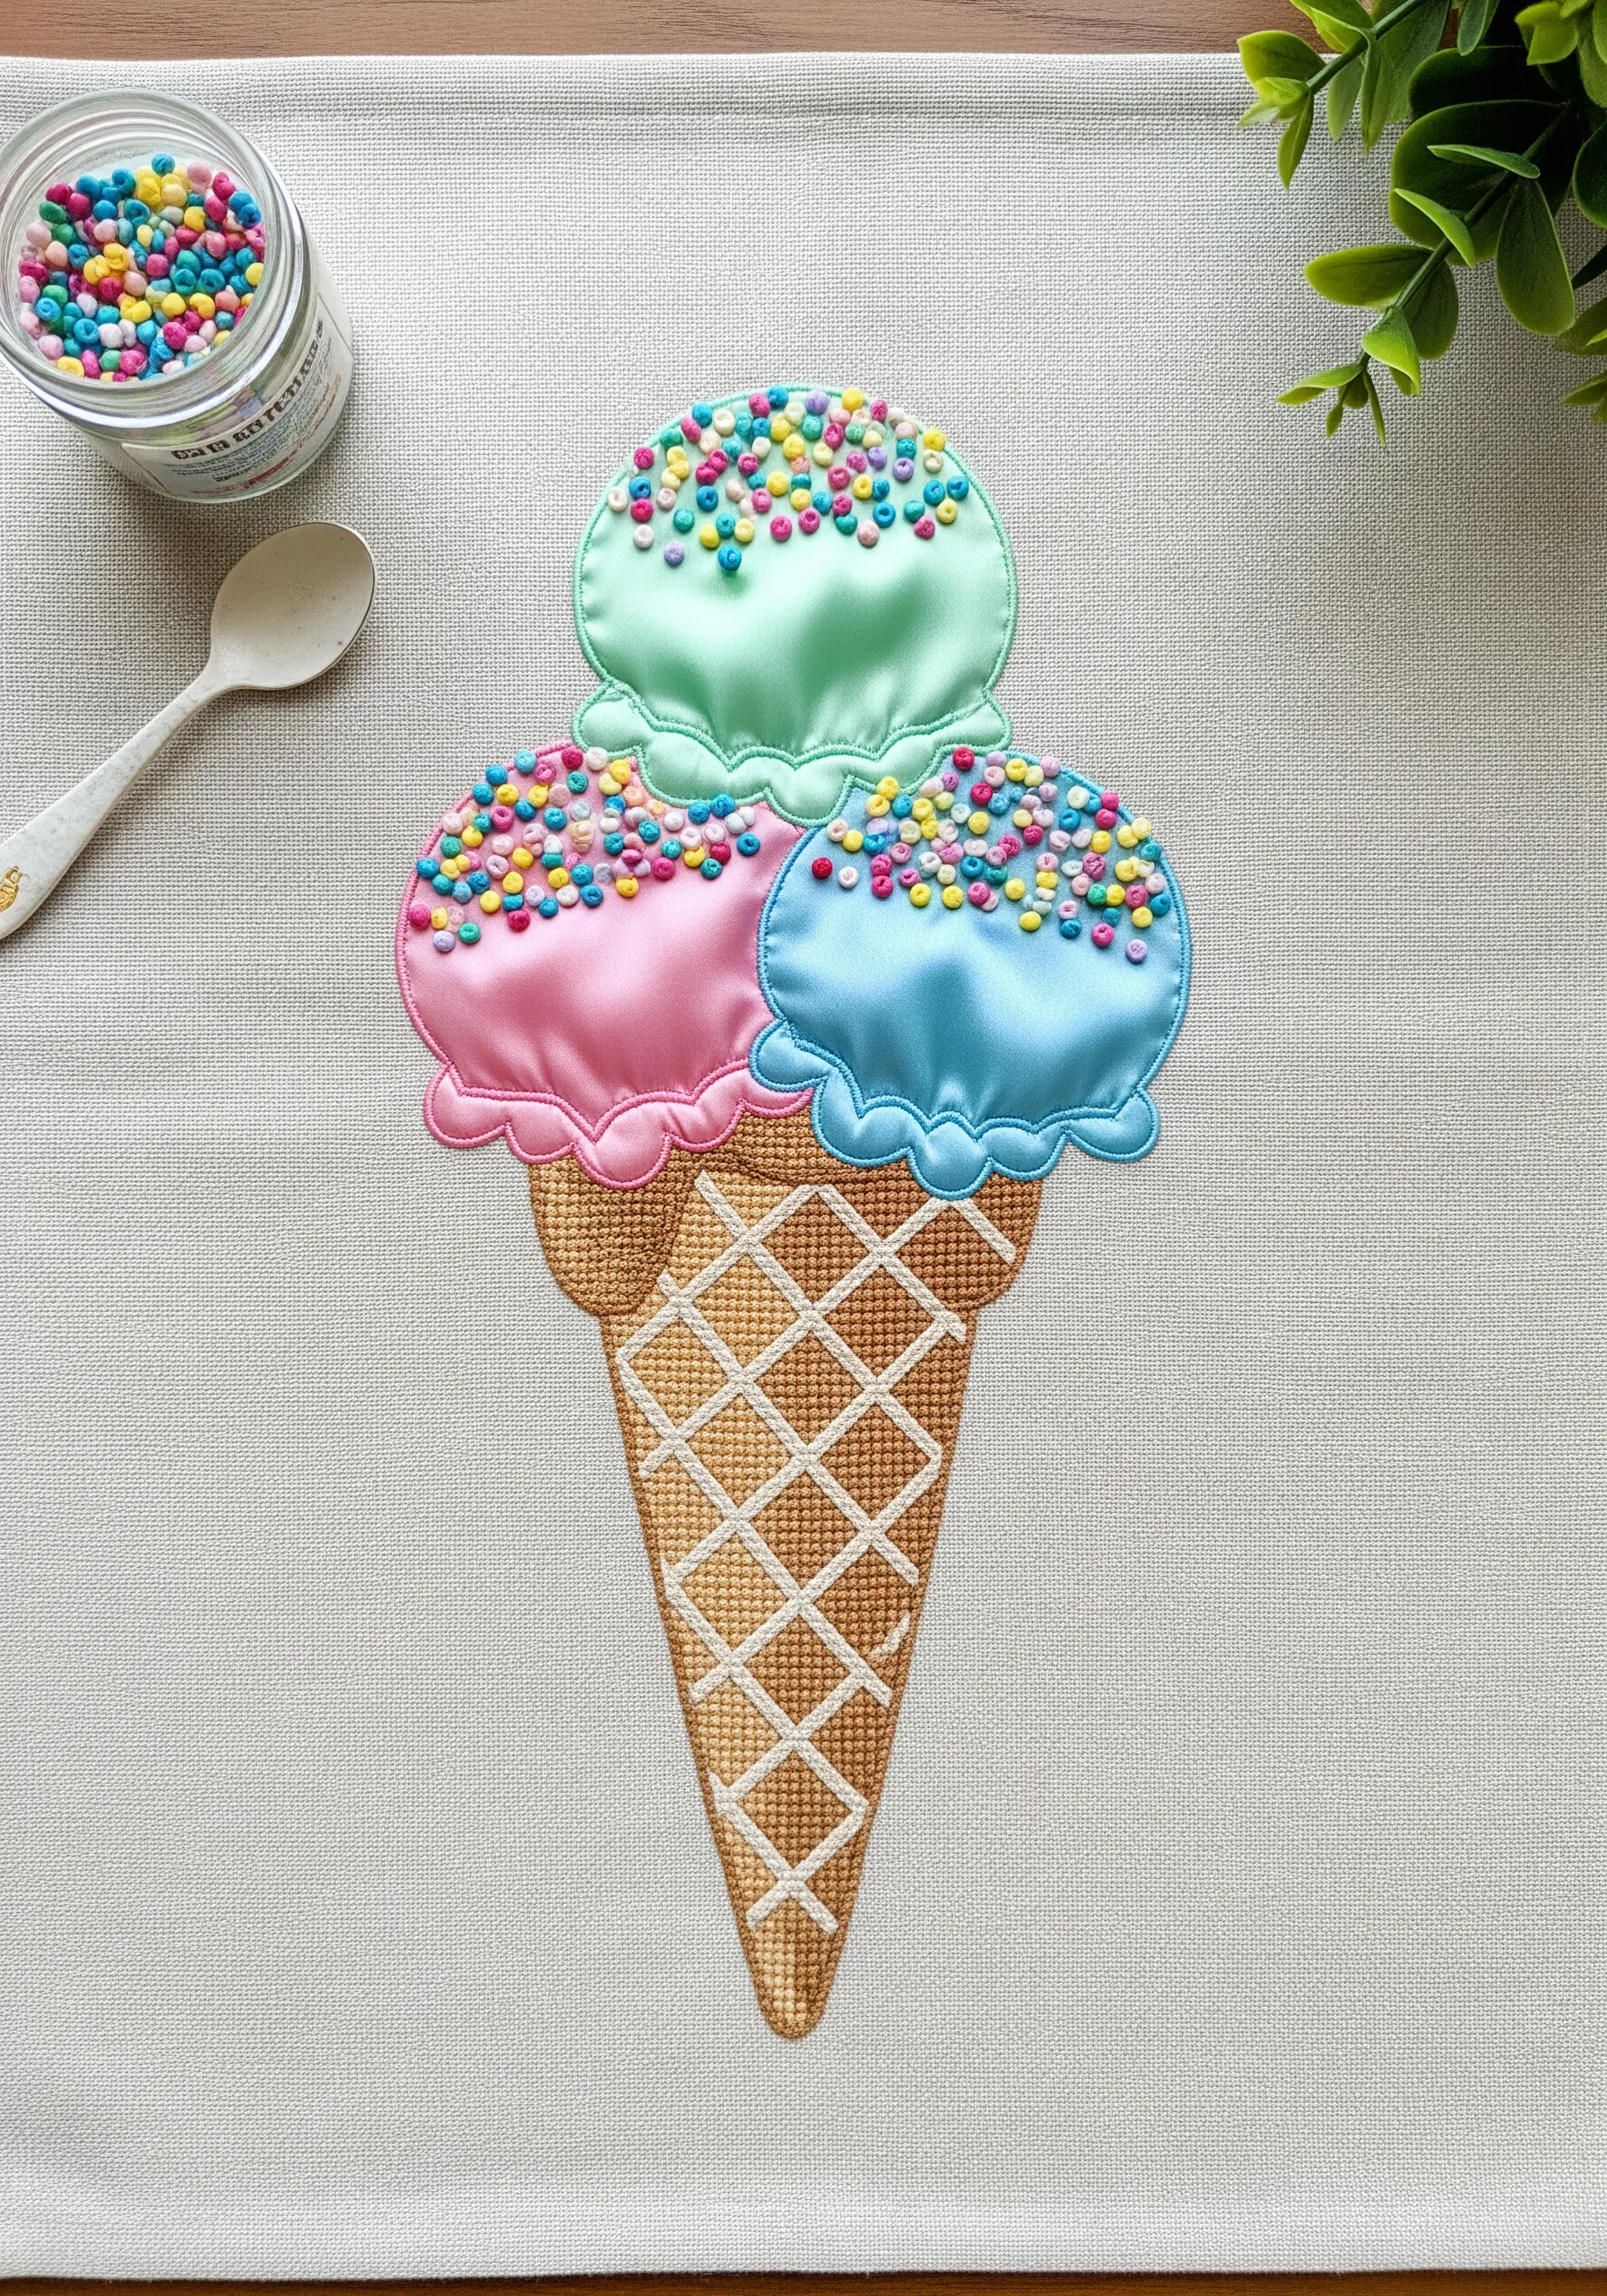
This design cleverly combines techniques to create a feast for the eyes. Use fabric appliqué for the ice cream scoops—it’s a fast and easy way to add large blocks of color.
Stitch the cone with a simple grid of backstitches to mimic a waffle pattern.
The best part for kids? Let them sew on tiny, colorful seed beads to act as sprinkles, adding a touch of sparkle and 3D texture.
16. Explosive Starburst Fireworks
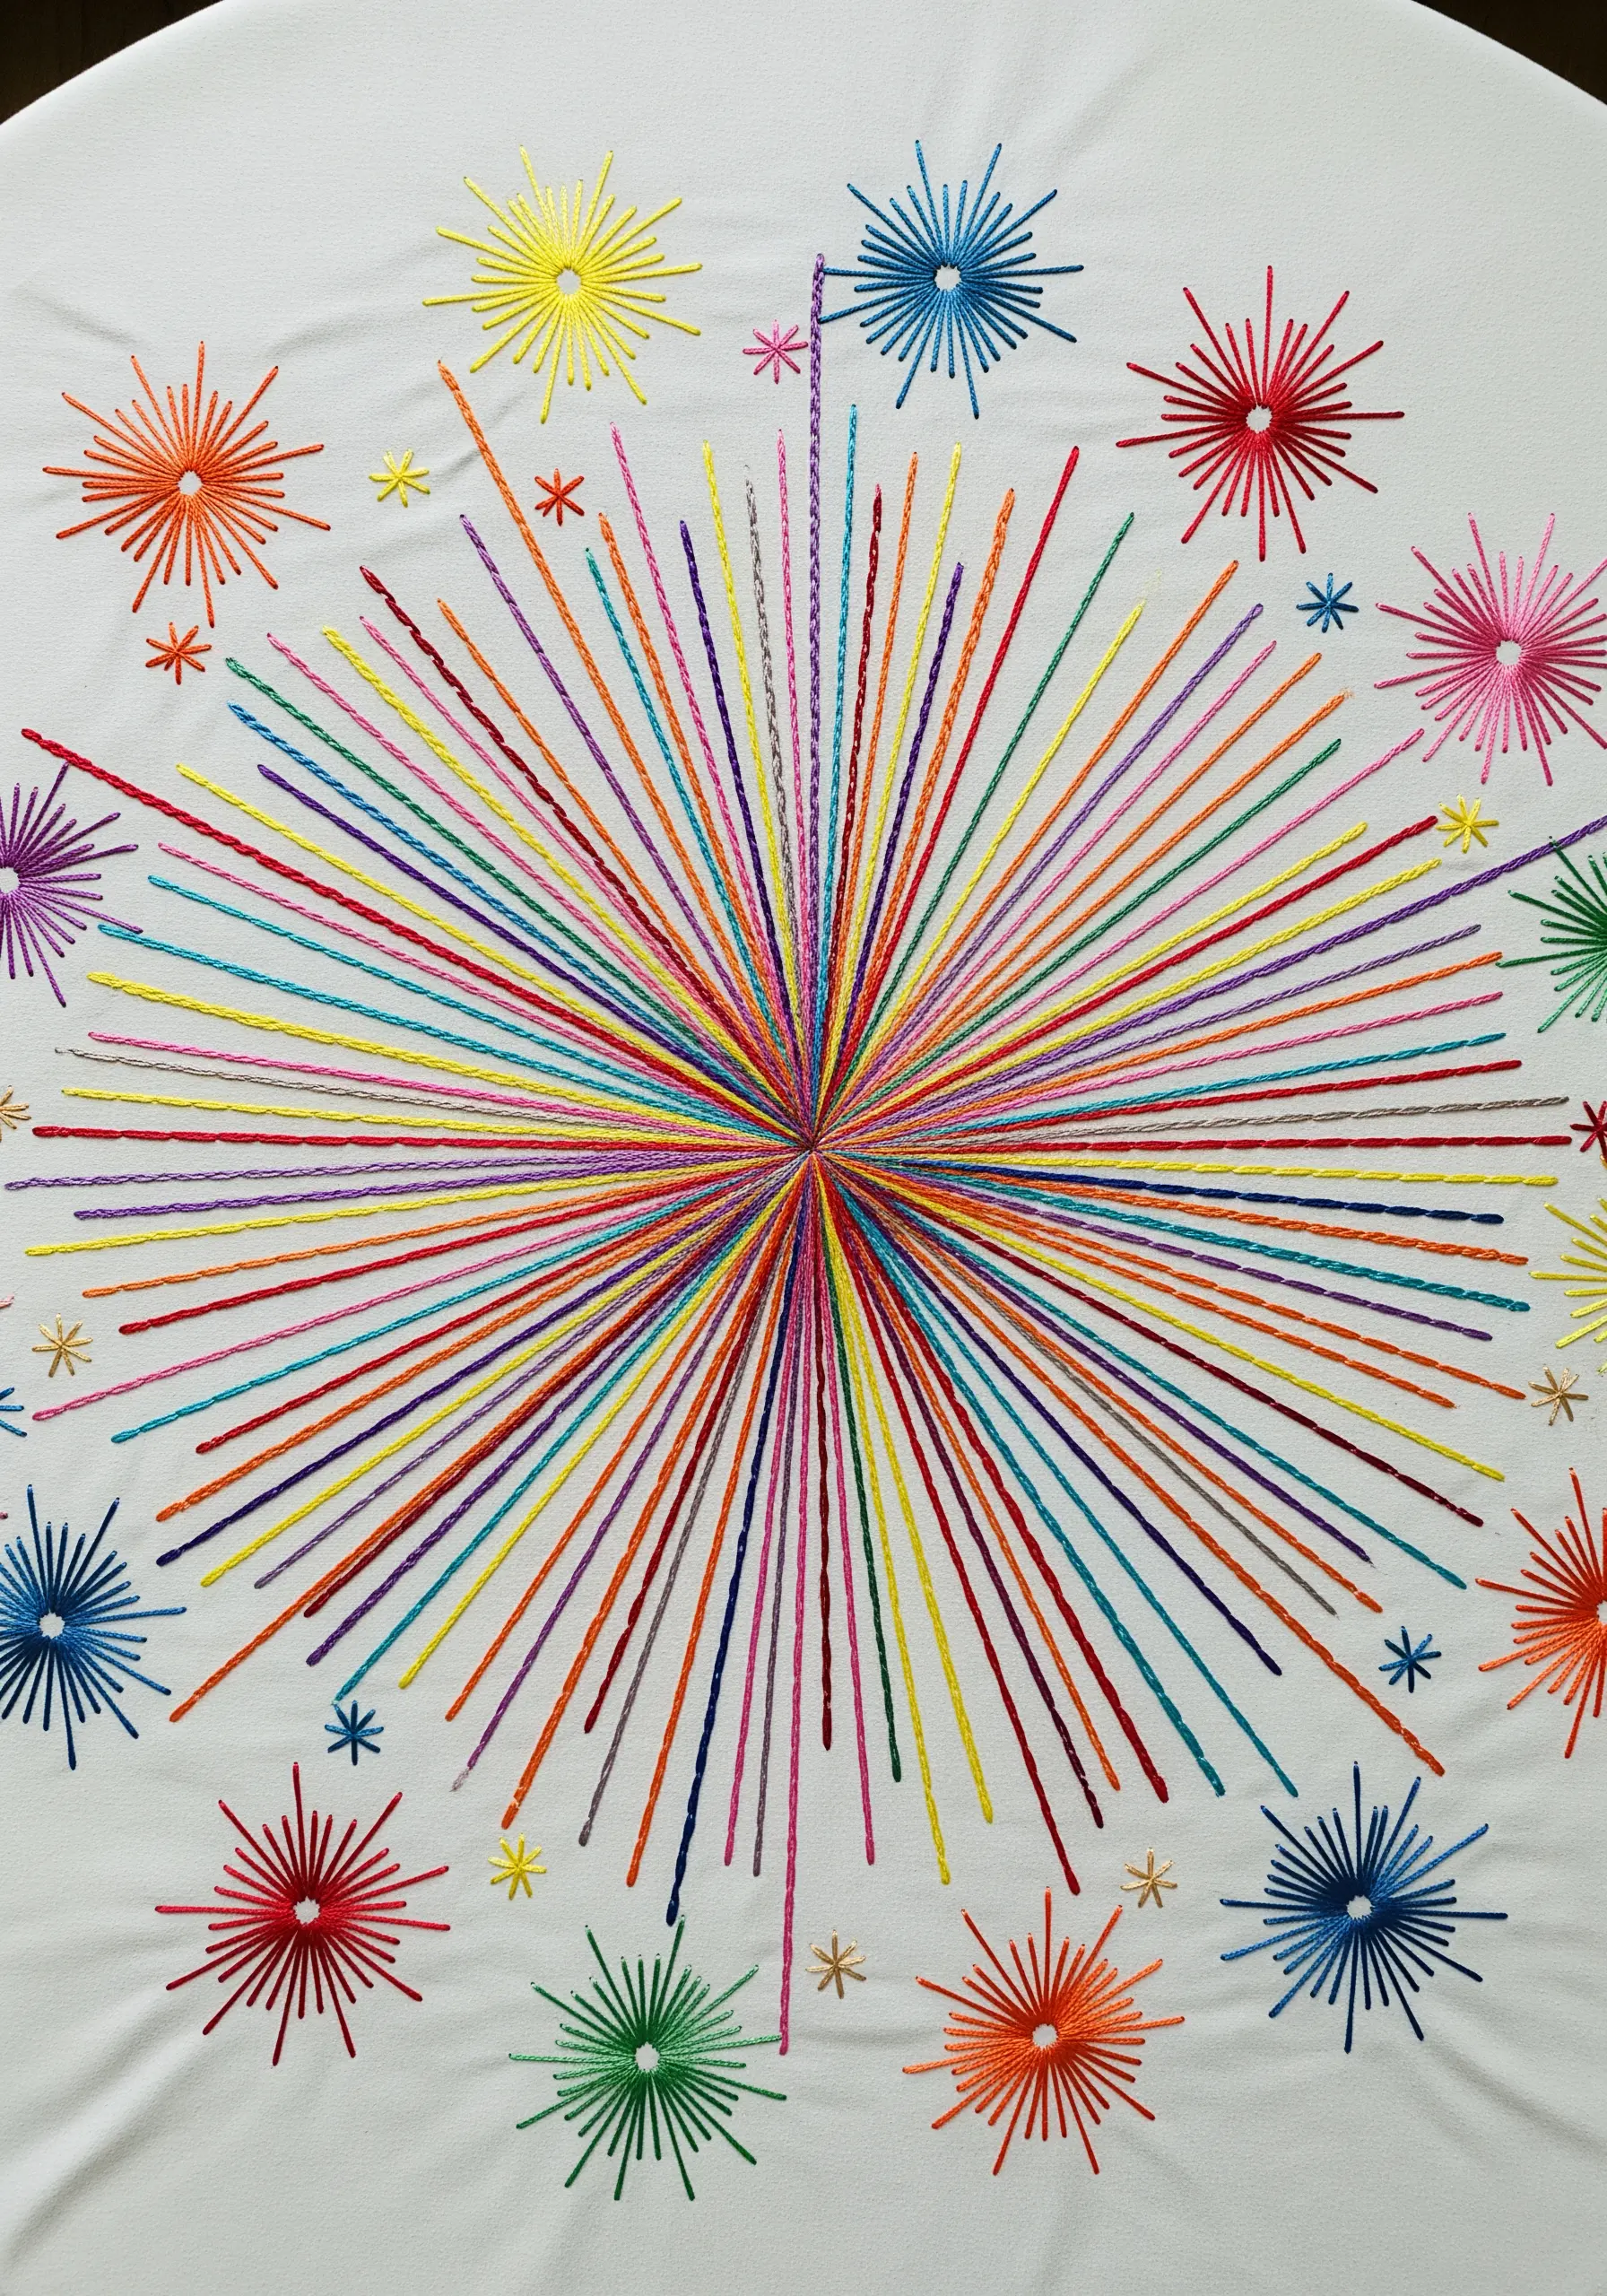
Achieve this stunning firework effect using only straight stitches. The secret is to radiate all the stitches from a single central point and vary their lengths and colors.
An adult can handle the large, central burst to ensure the lines are straight and evenly spaced.
Meanwhile, kids can stitch the smaller, surrounding starbursts, giving them a satisfying and impactful role in the design.
17. Minimalist Weather Icon Napkins
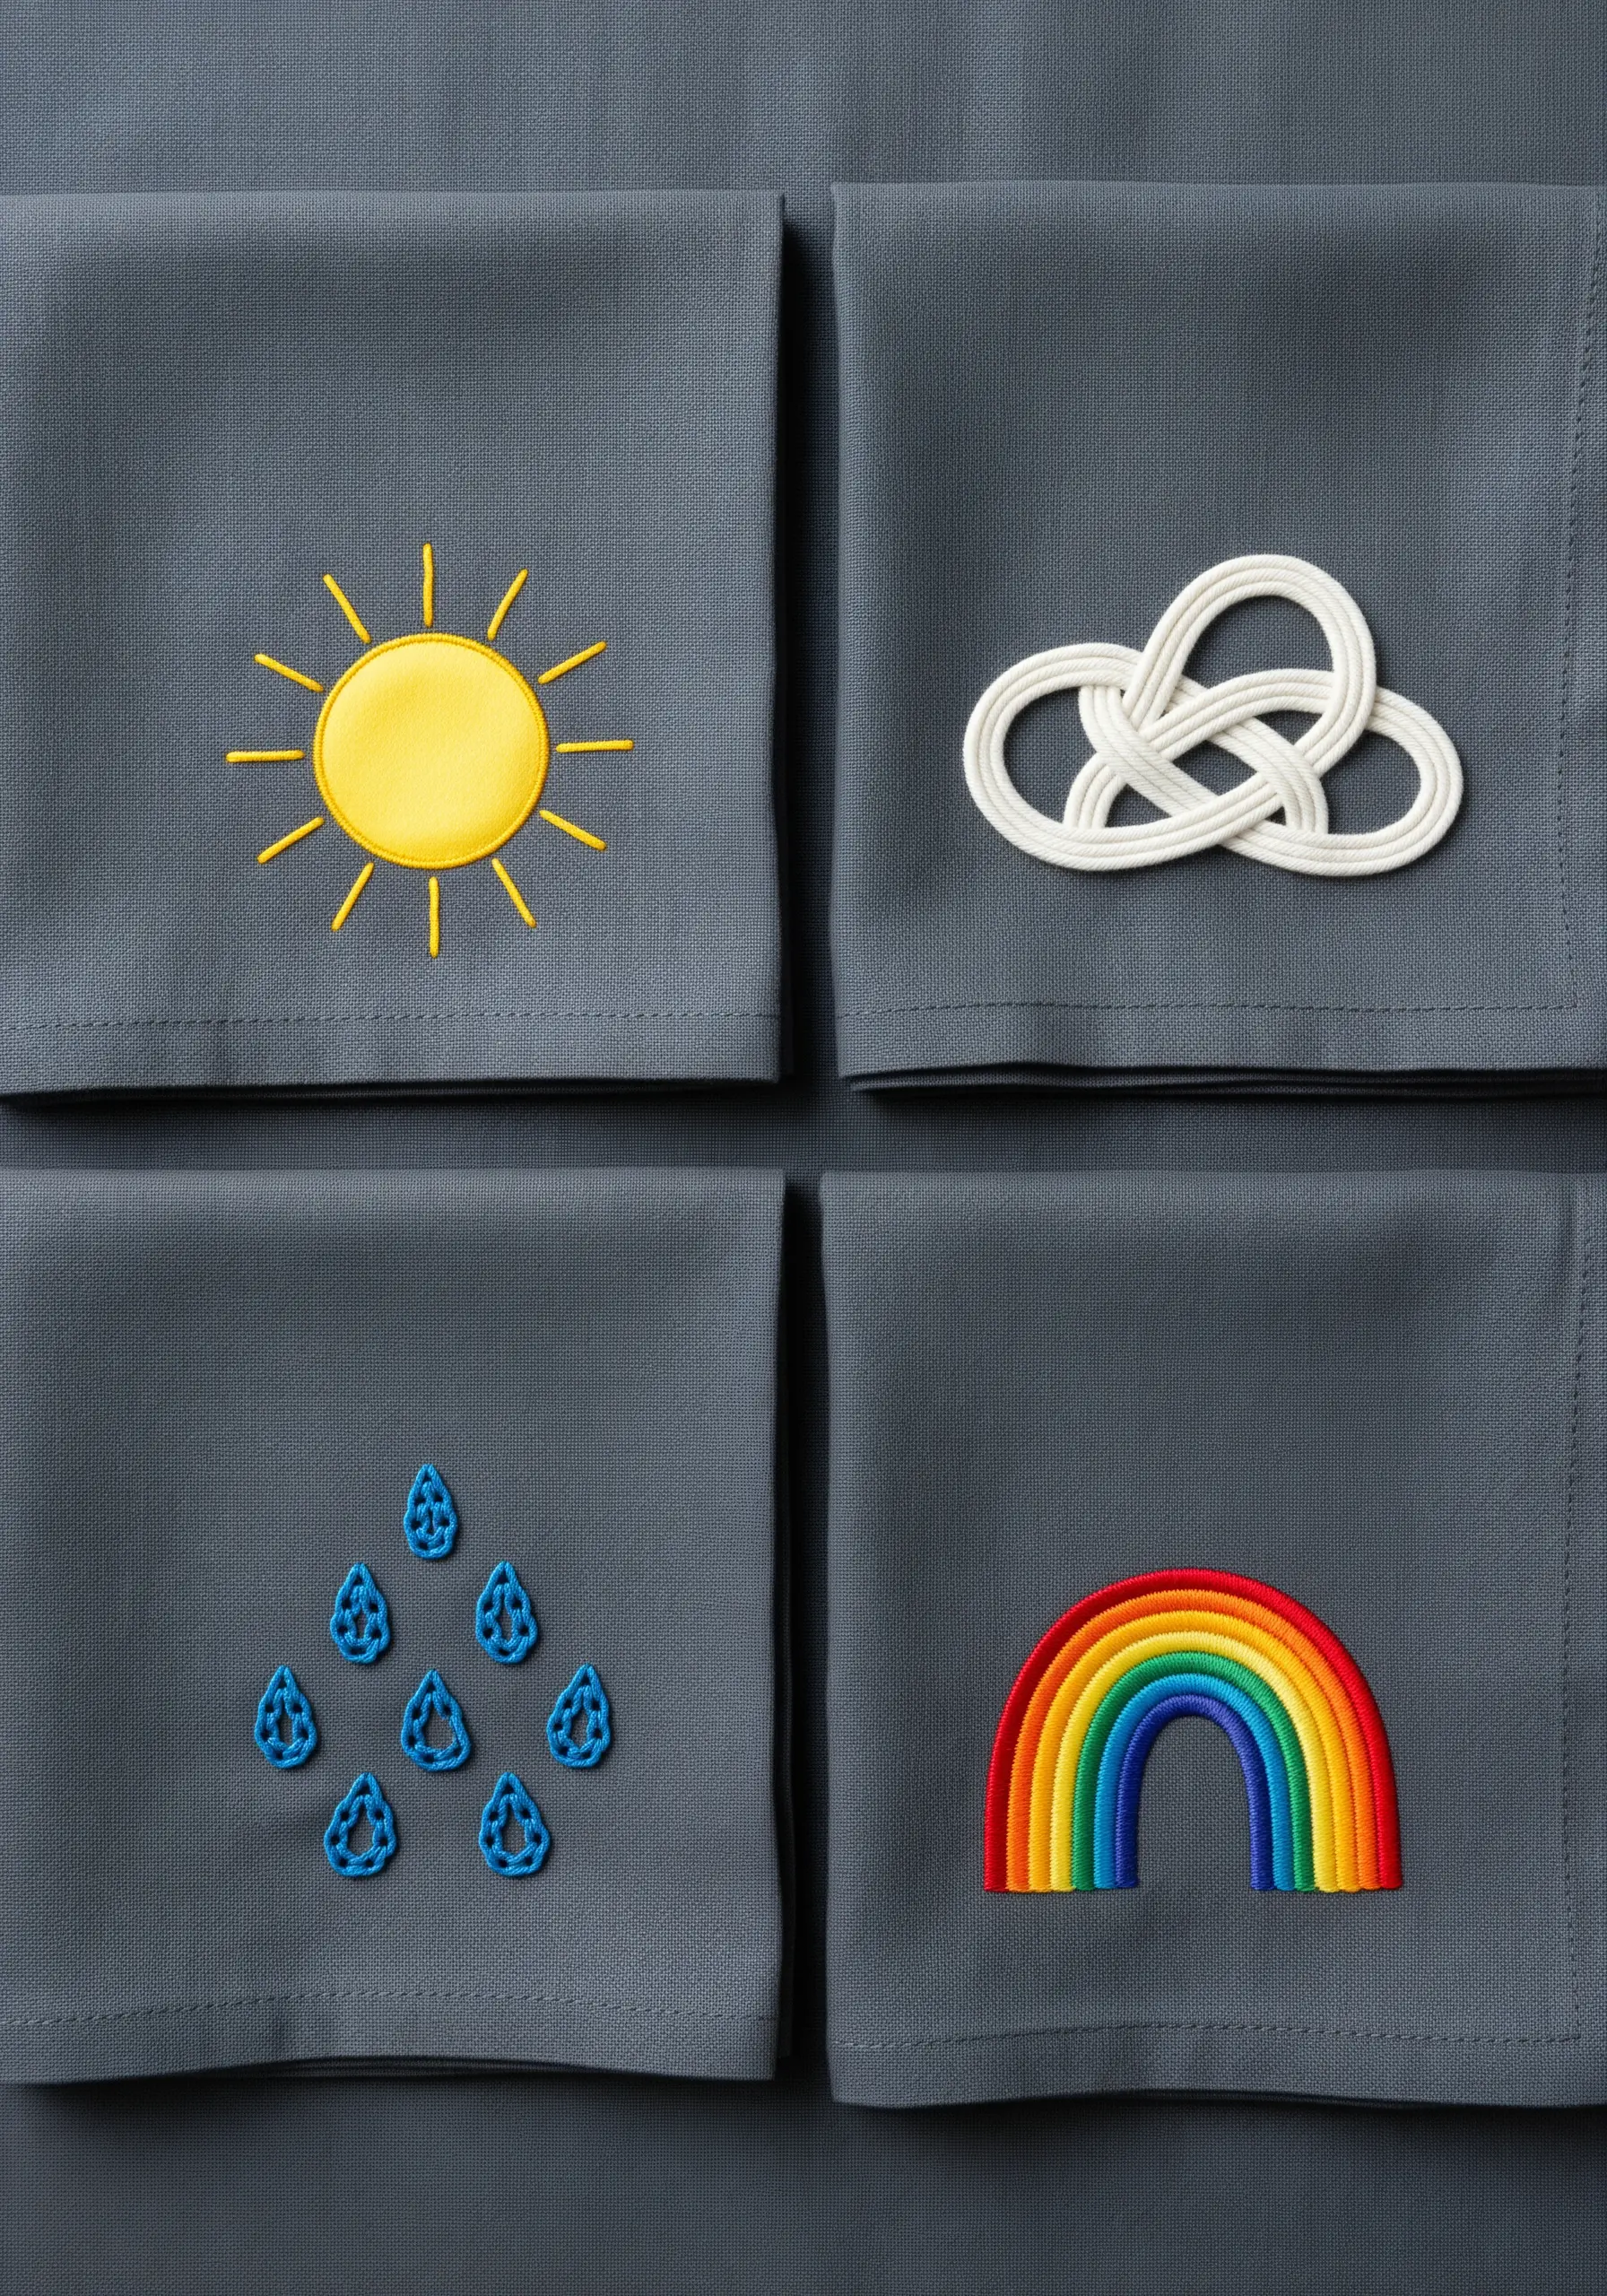
Transform a set of napkins with clean, modern weather icons. The key to making this set look cohesive and polished is to use a consistent stitch for all the shapes.
A simple backstitch or a slightly thicker split stitch works perfectly for creating crisp, readable lines.
The small, contained shapes make this an ideal project for beginners or kids who are ready to practice stitching smooth curves and sharp corners.
18. Personalized Gradient Lettering
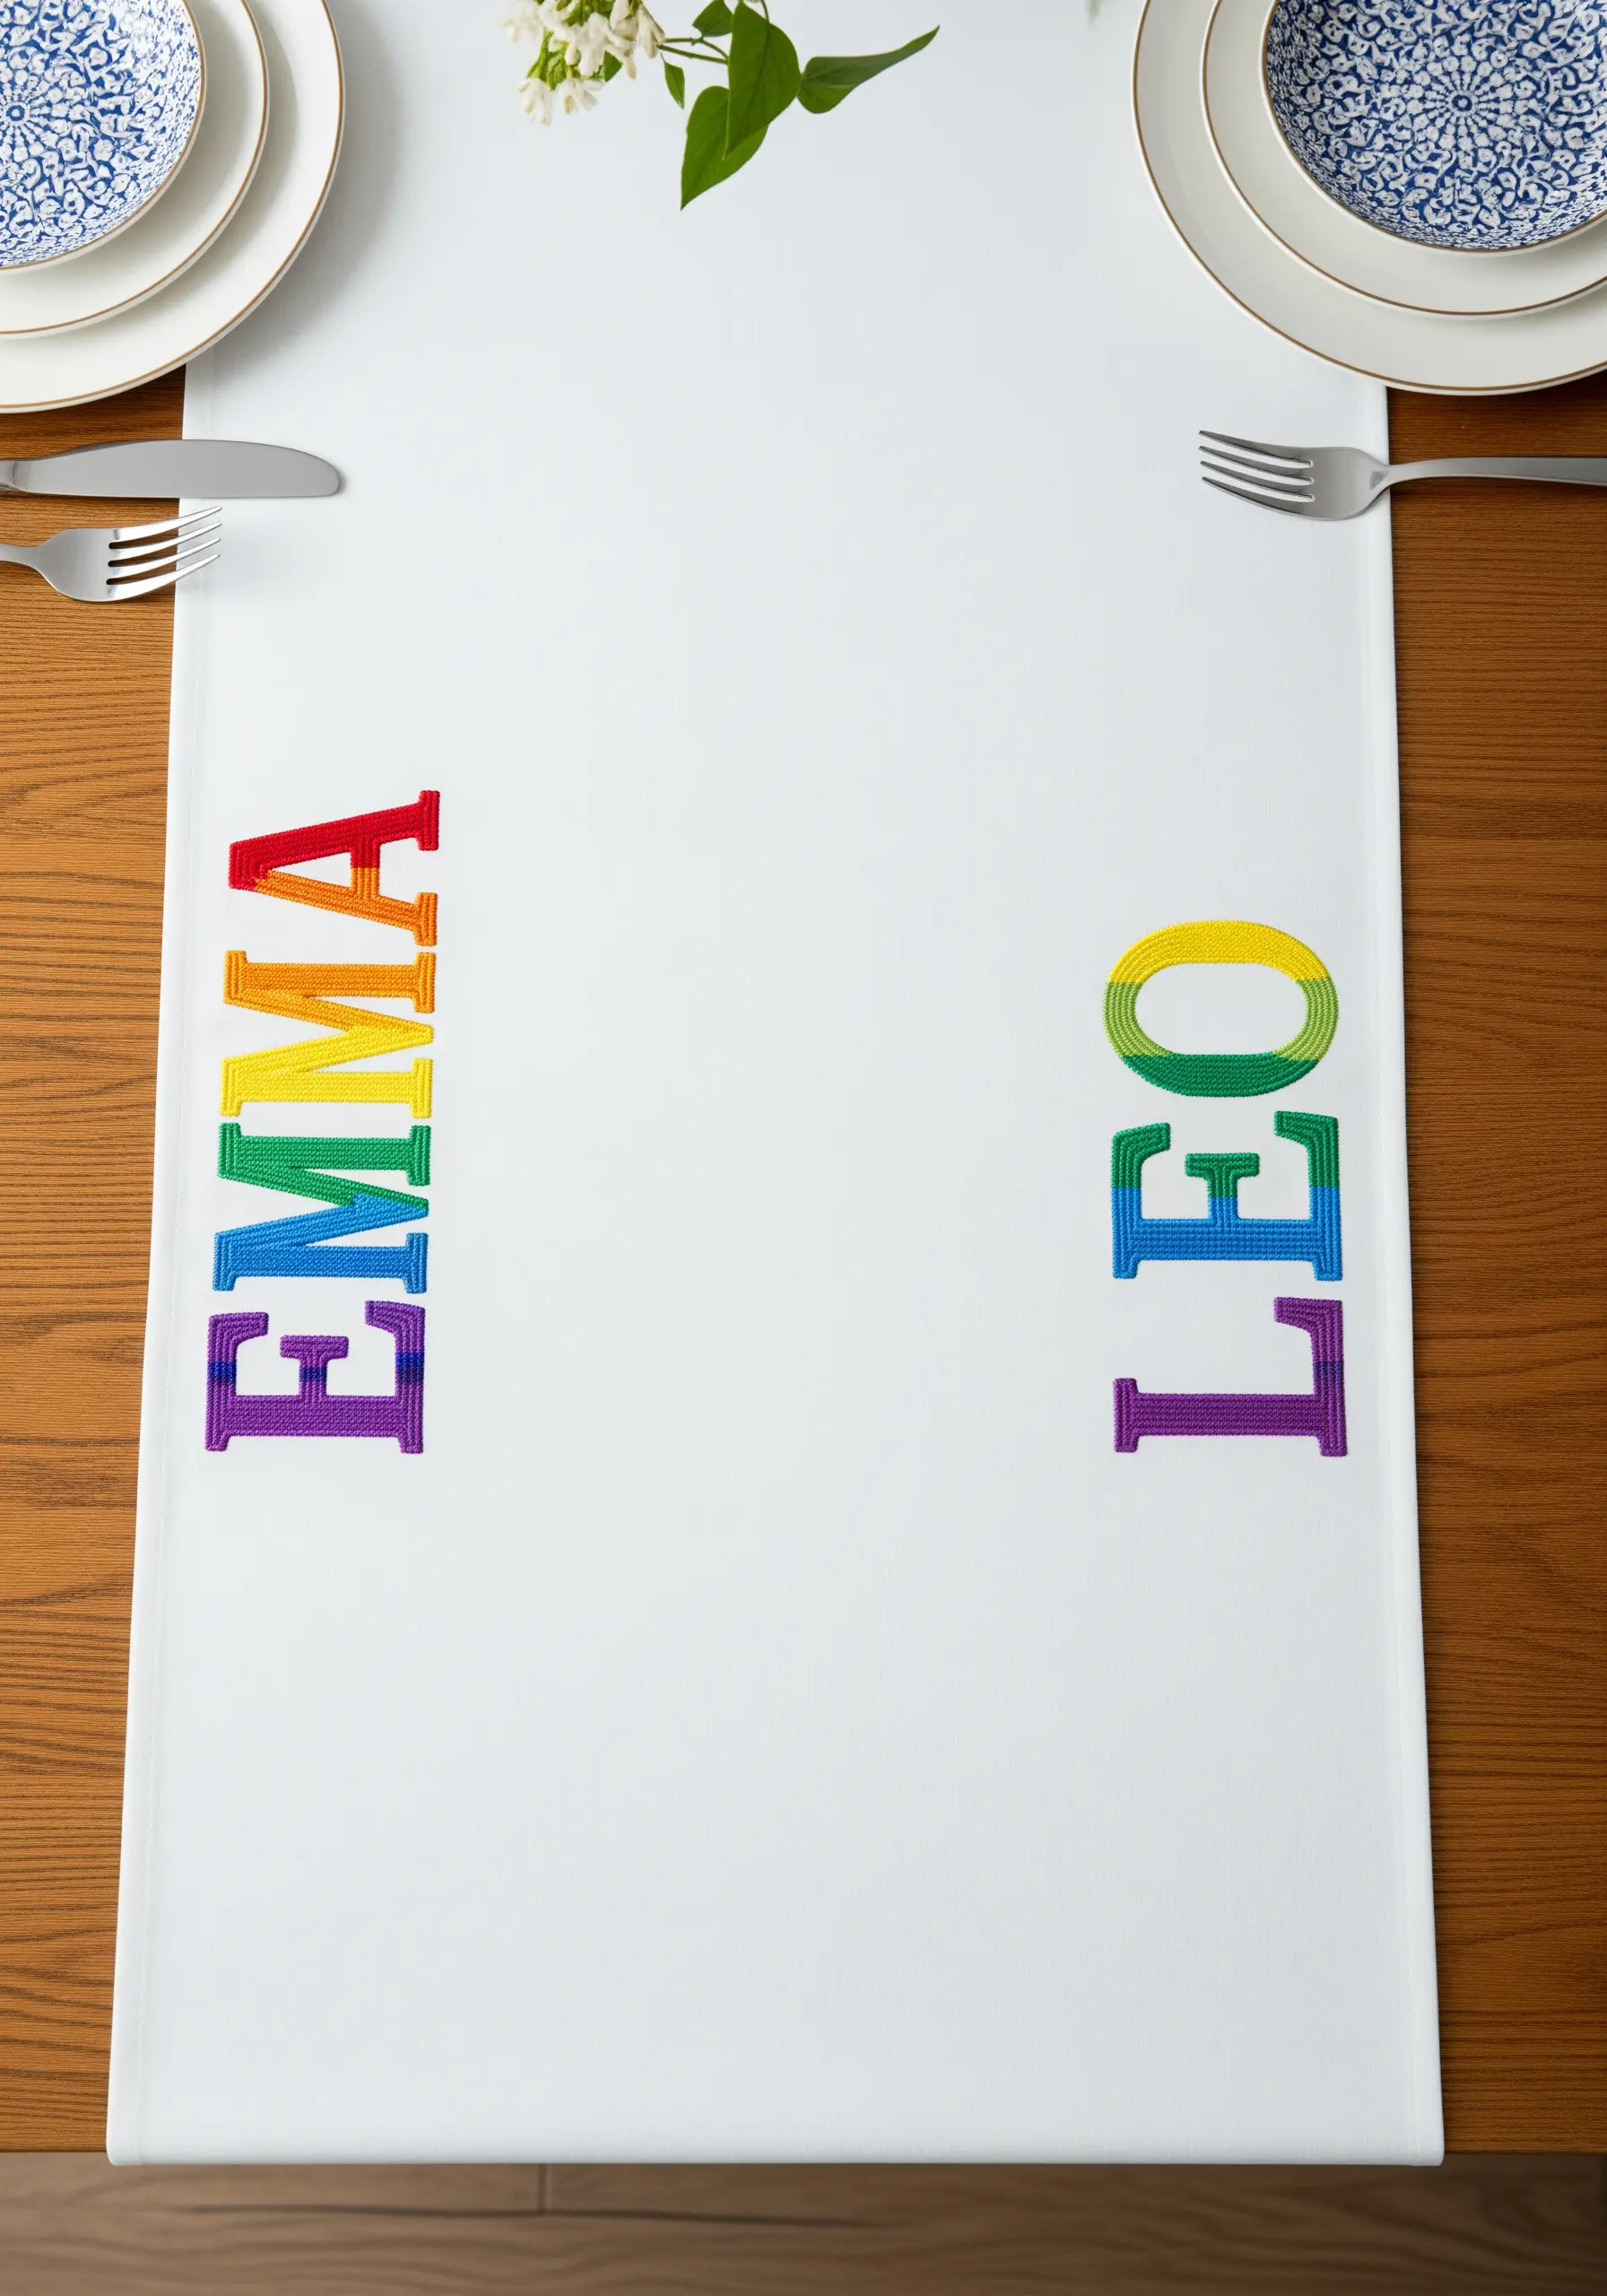
Personalize a table runner or placemats with names stitched in bold, block letters. Fill the letters with a vertical satin stitch for a smooth finish.
Instead of attempting a complex blend, create an easy gradient by dividing each letter into horizontal blocks of color.
Kids can take ownership of a letter or a color block, making this a wonderful way to create personalized name monogram place settings for the whole family.
19. A Neighborhood of Stitched Houses
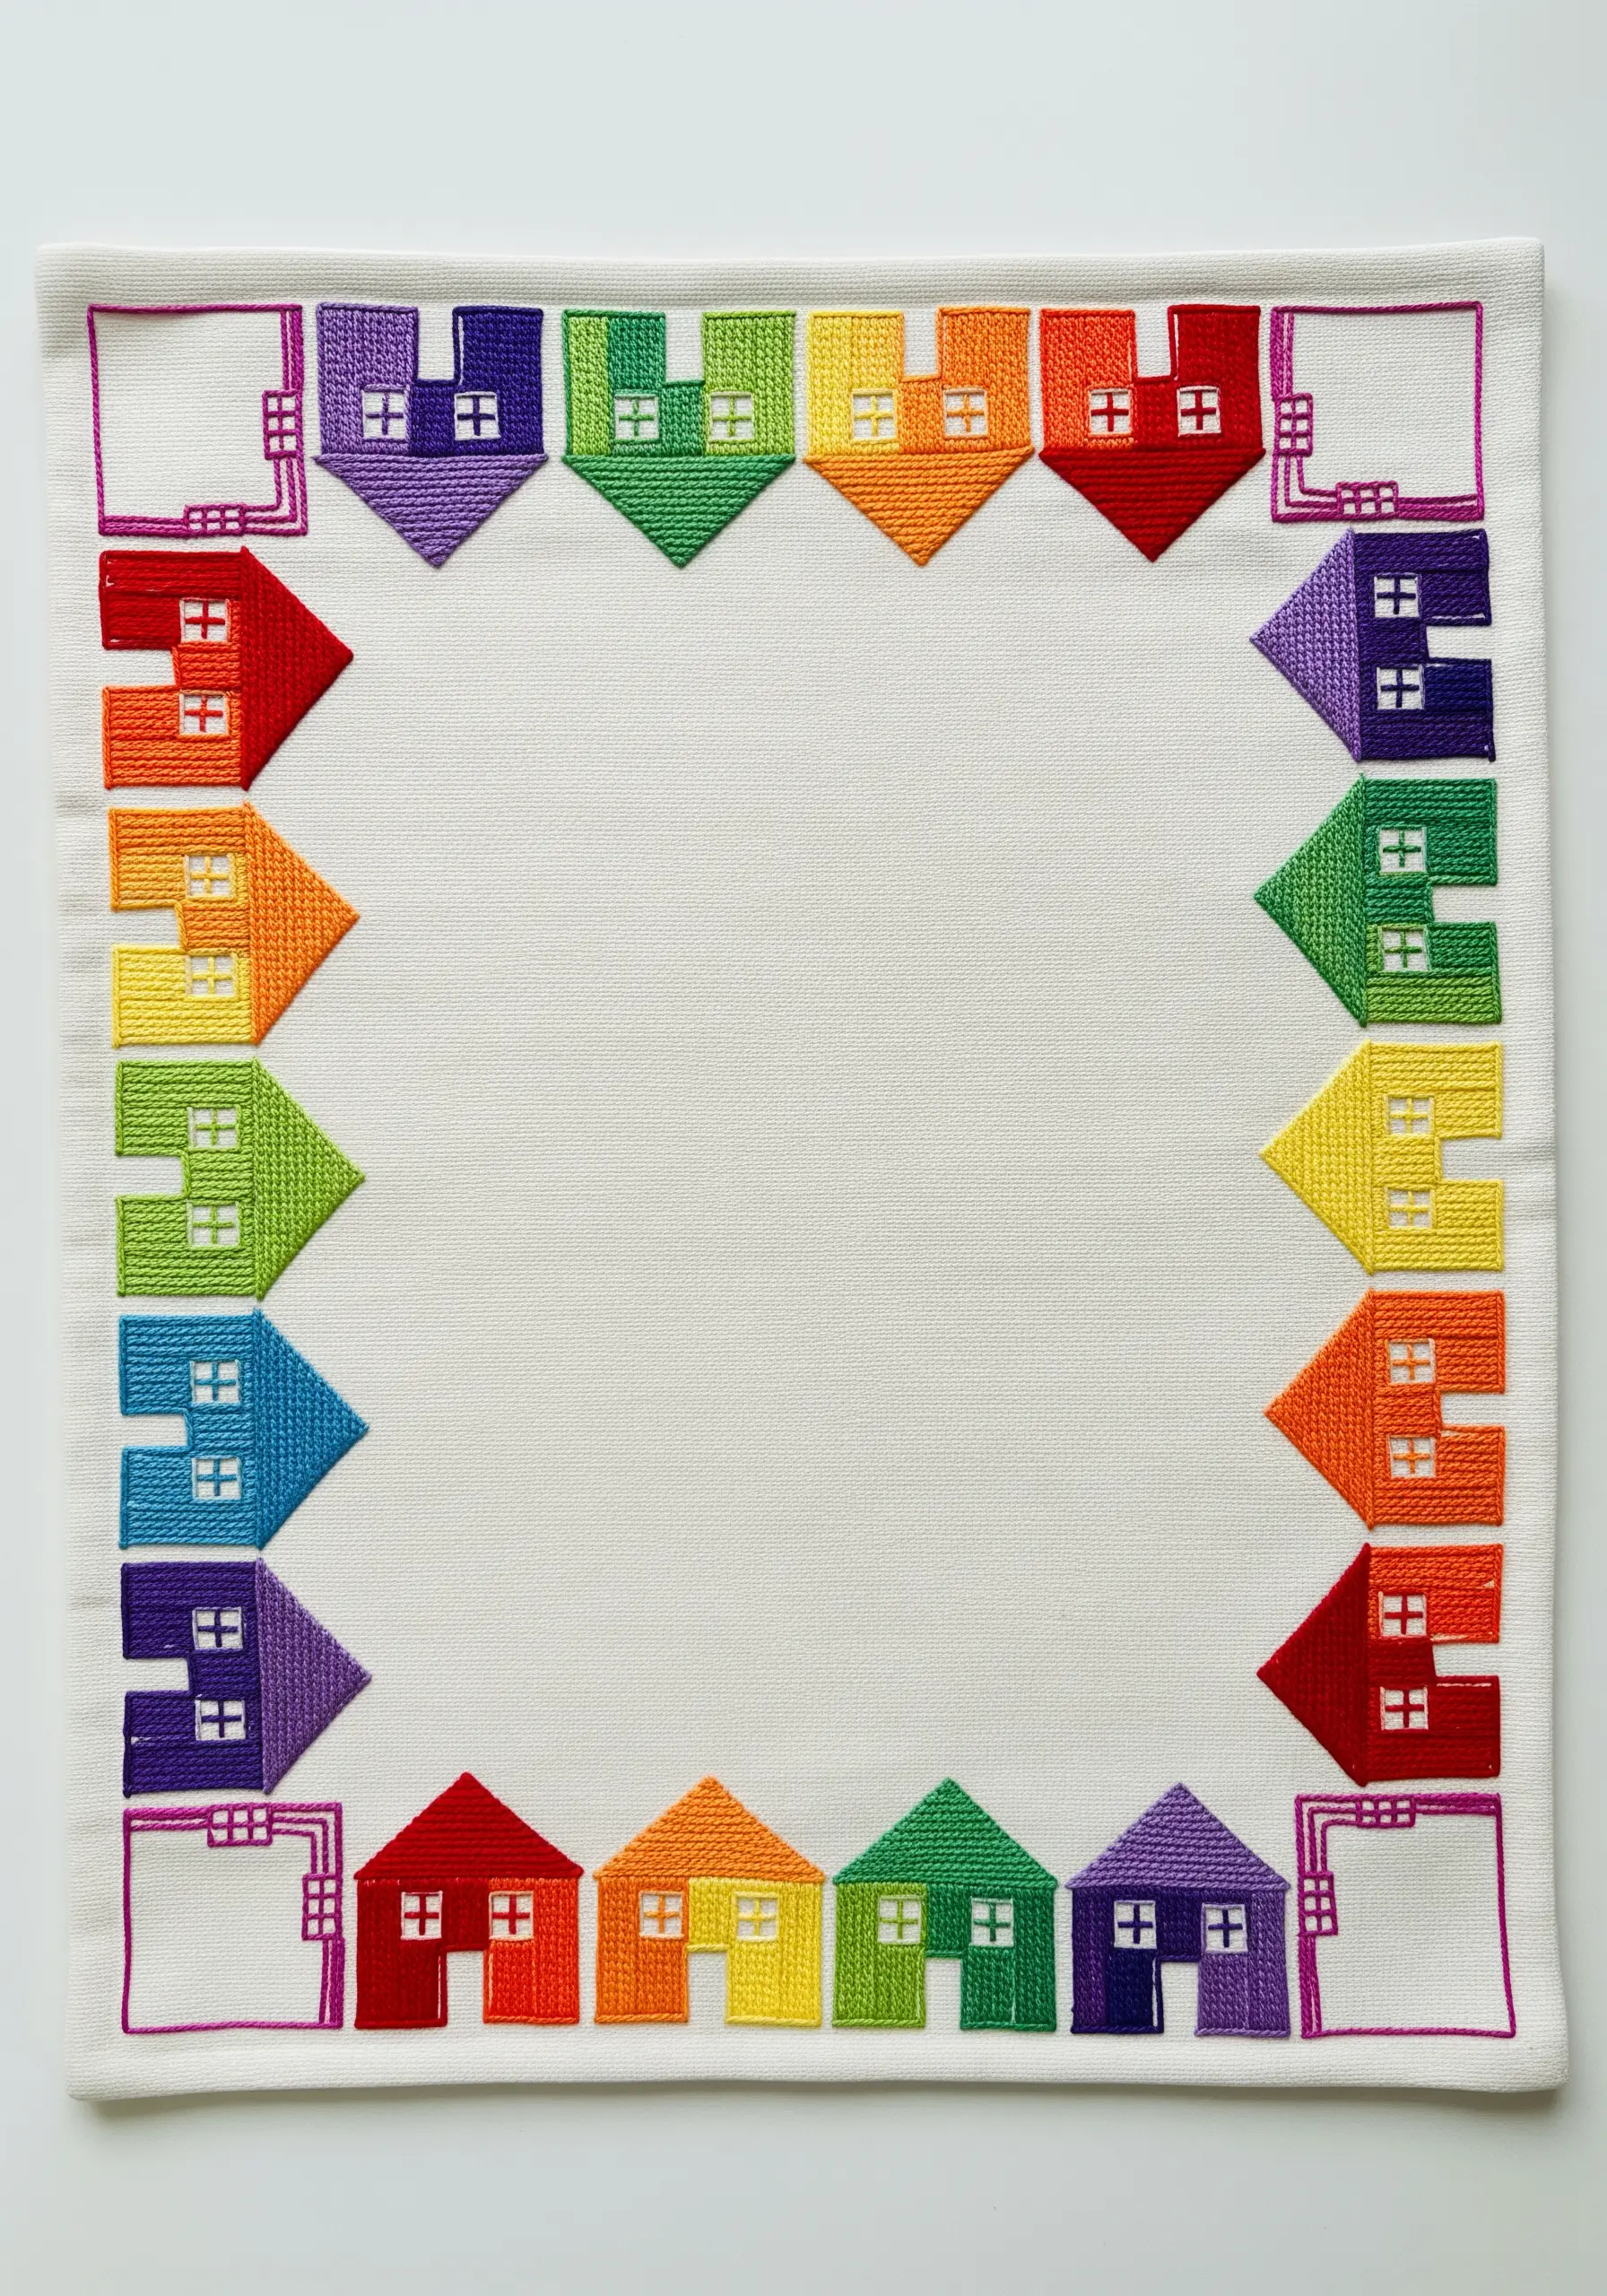
This charming border turns a simple placemat into a playful village scene. Each house is a small, manageable project filled with satin stitch.
This is a great opportunity for kids to practice filling a geometric shape and keeping their stitches neat and parallel.
Let each child choose the color for their own little house and then add the finishing details, like the window outlines, with a simple backstitch.
20. Layered Petal Color Blending
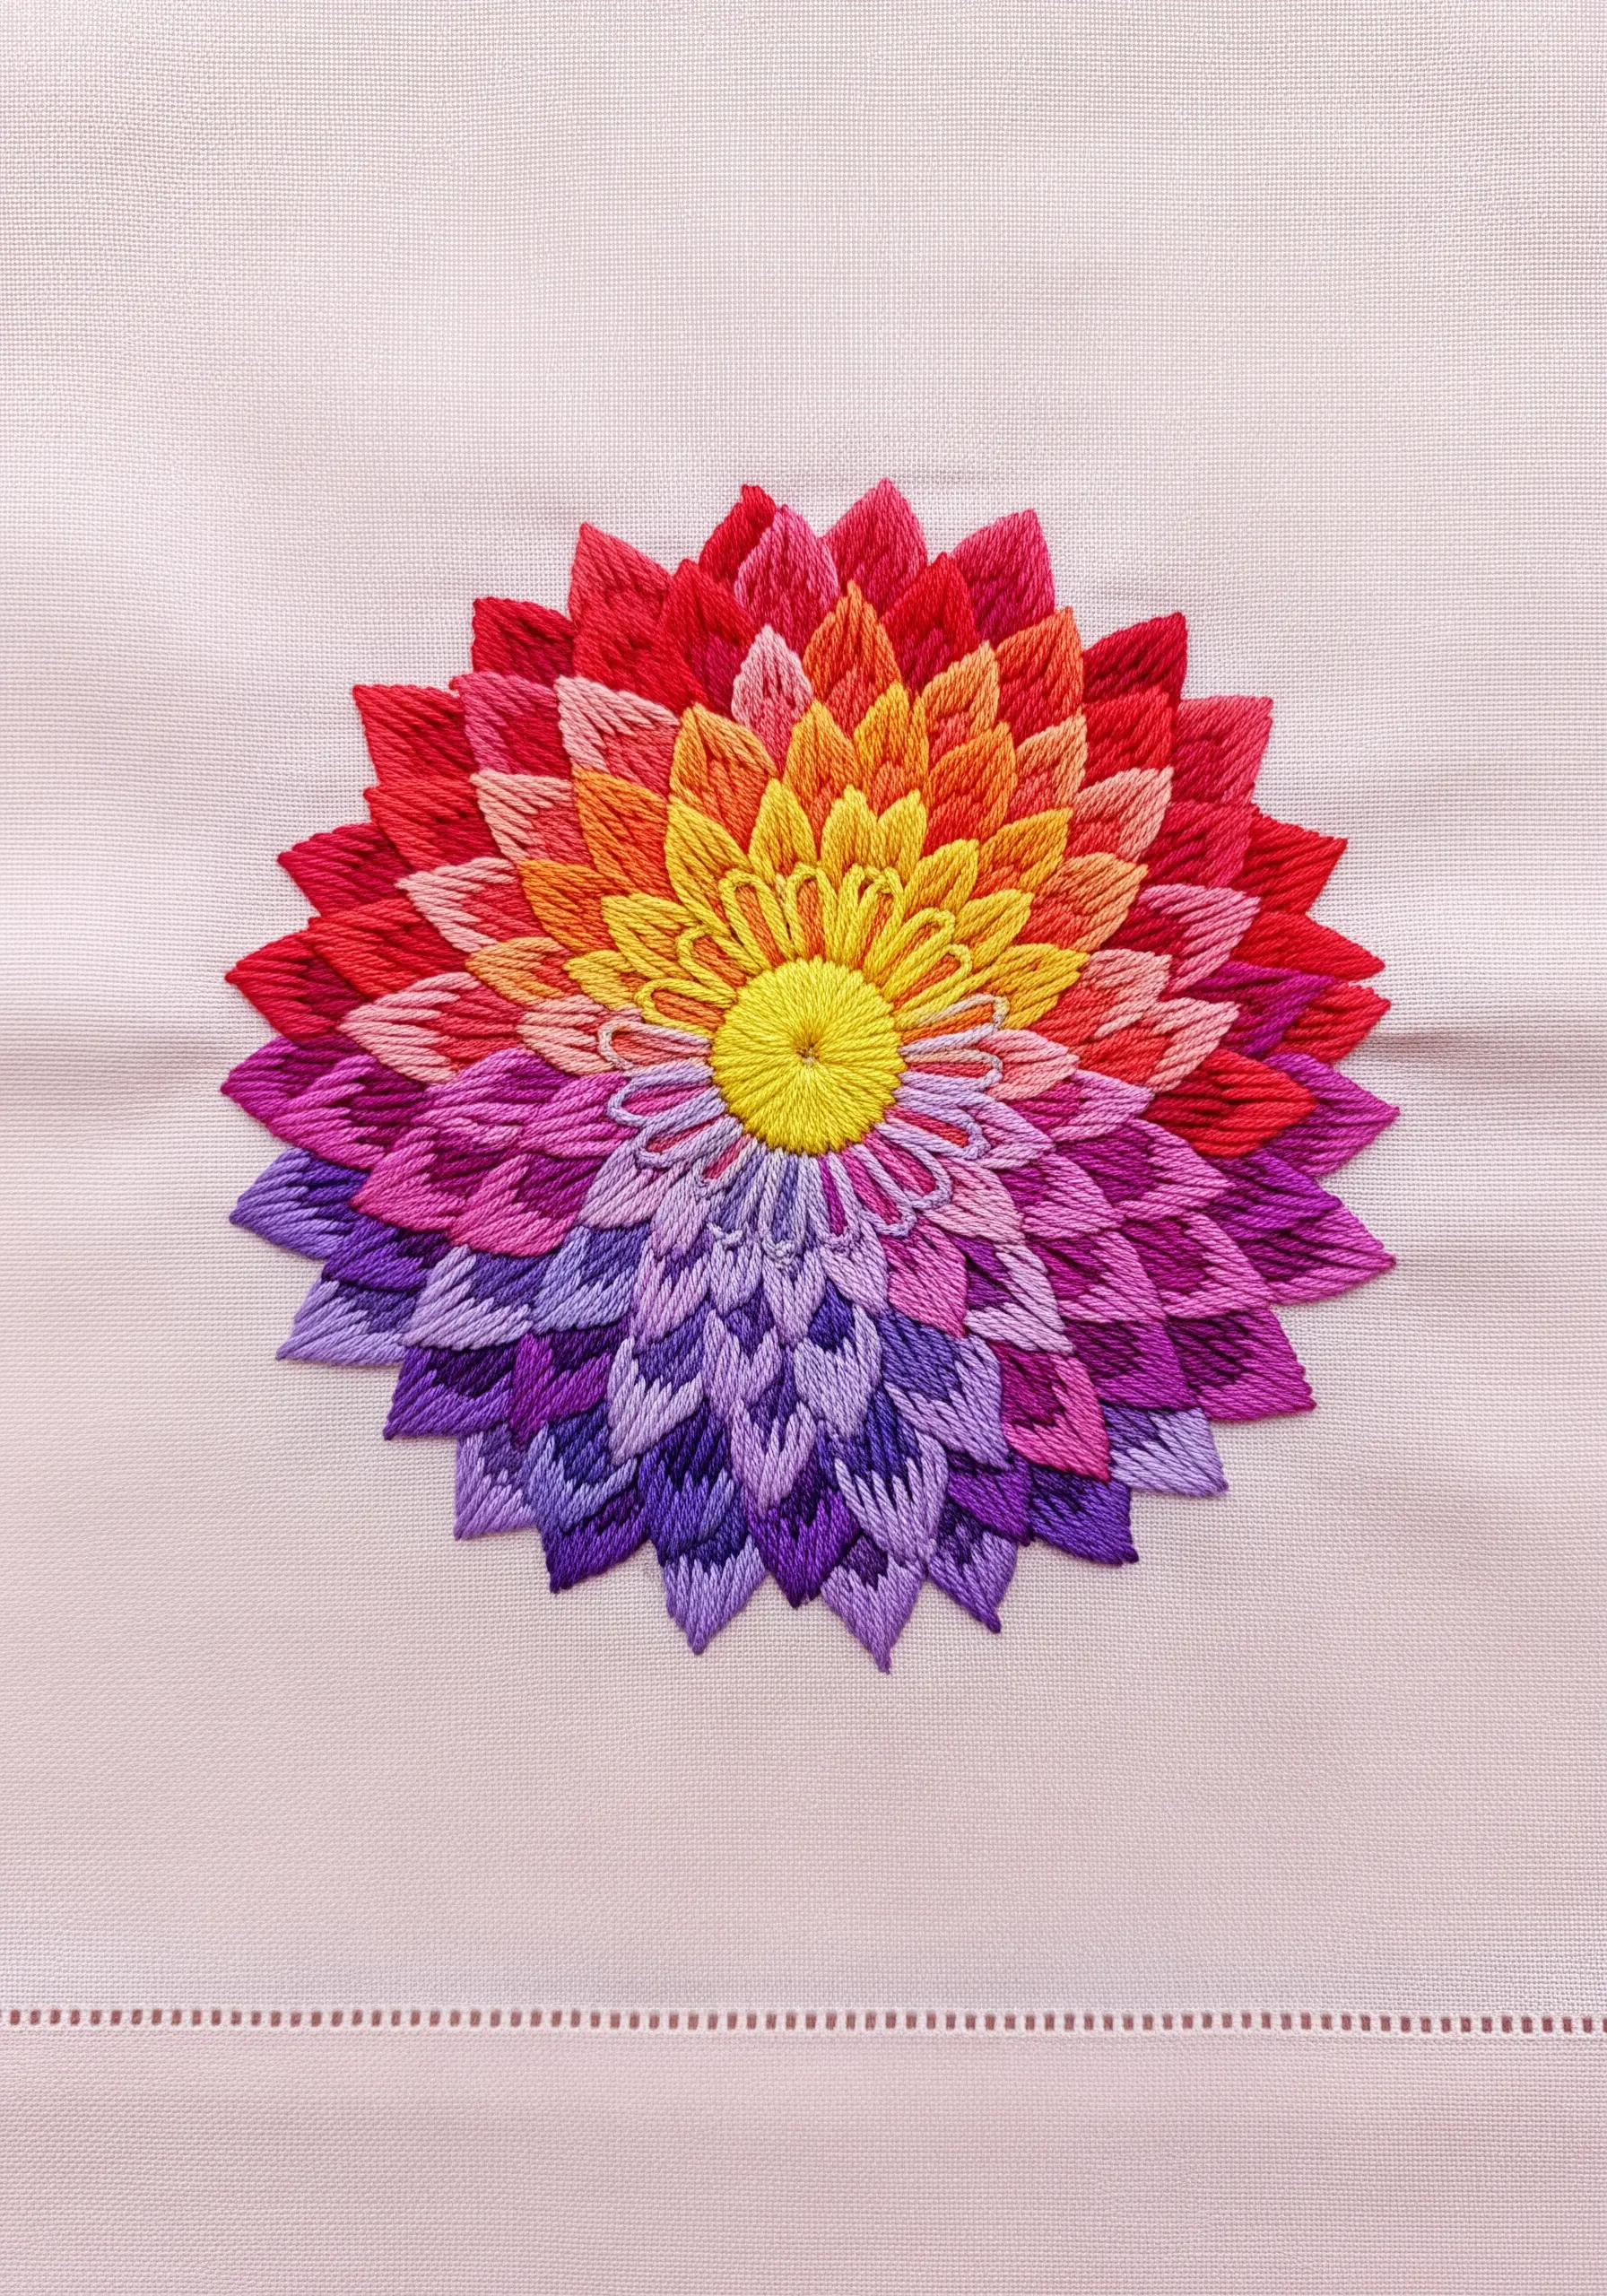
This intricate-looking flower is surprisingly simple to create. It’s made of layers of detached chain stitches (lazy daisies) or short, straight satin stitches.
Start stitching the outermost layer of petals first, then work your way in toward the center, slightly overlapping each new layer on top of the last.
This technique creates incredible depth and a seamless color blend. Kids can help with the larger, outer petals, which are the most forgiving.
It’s a beautiful way to create gorgeous floral embroidery ideas.
21. Spontaneous Confetti Tablecloth
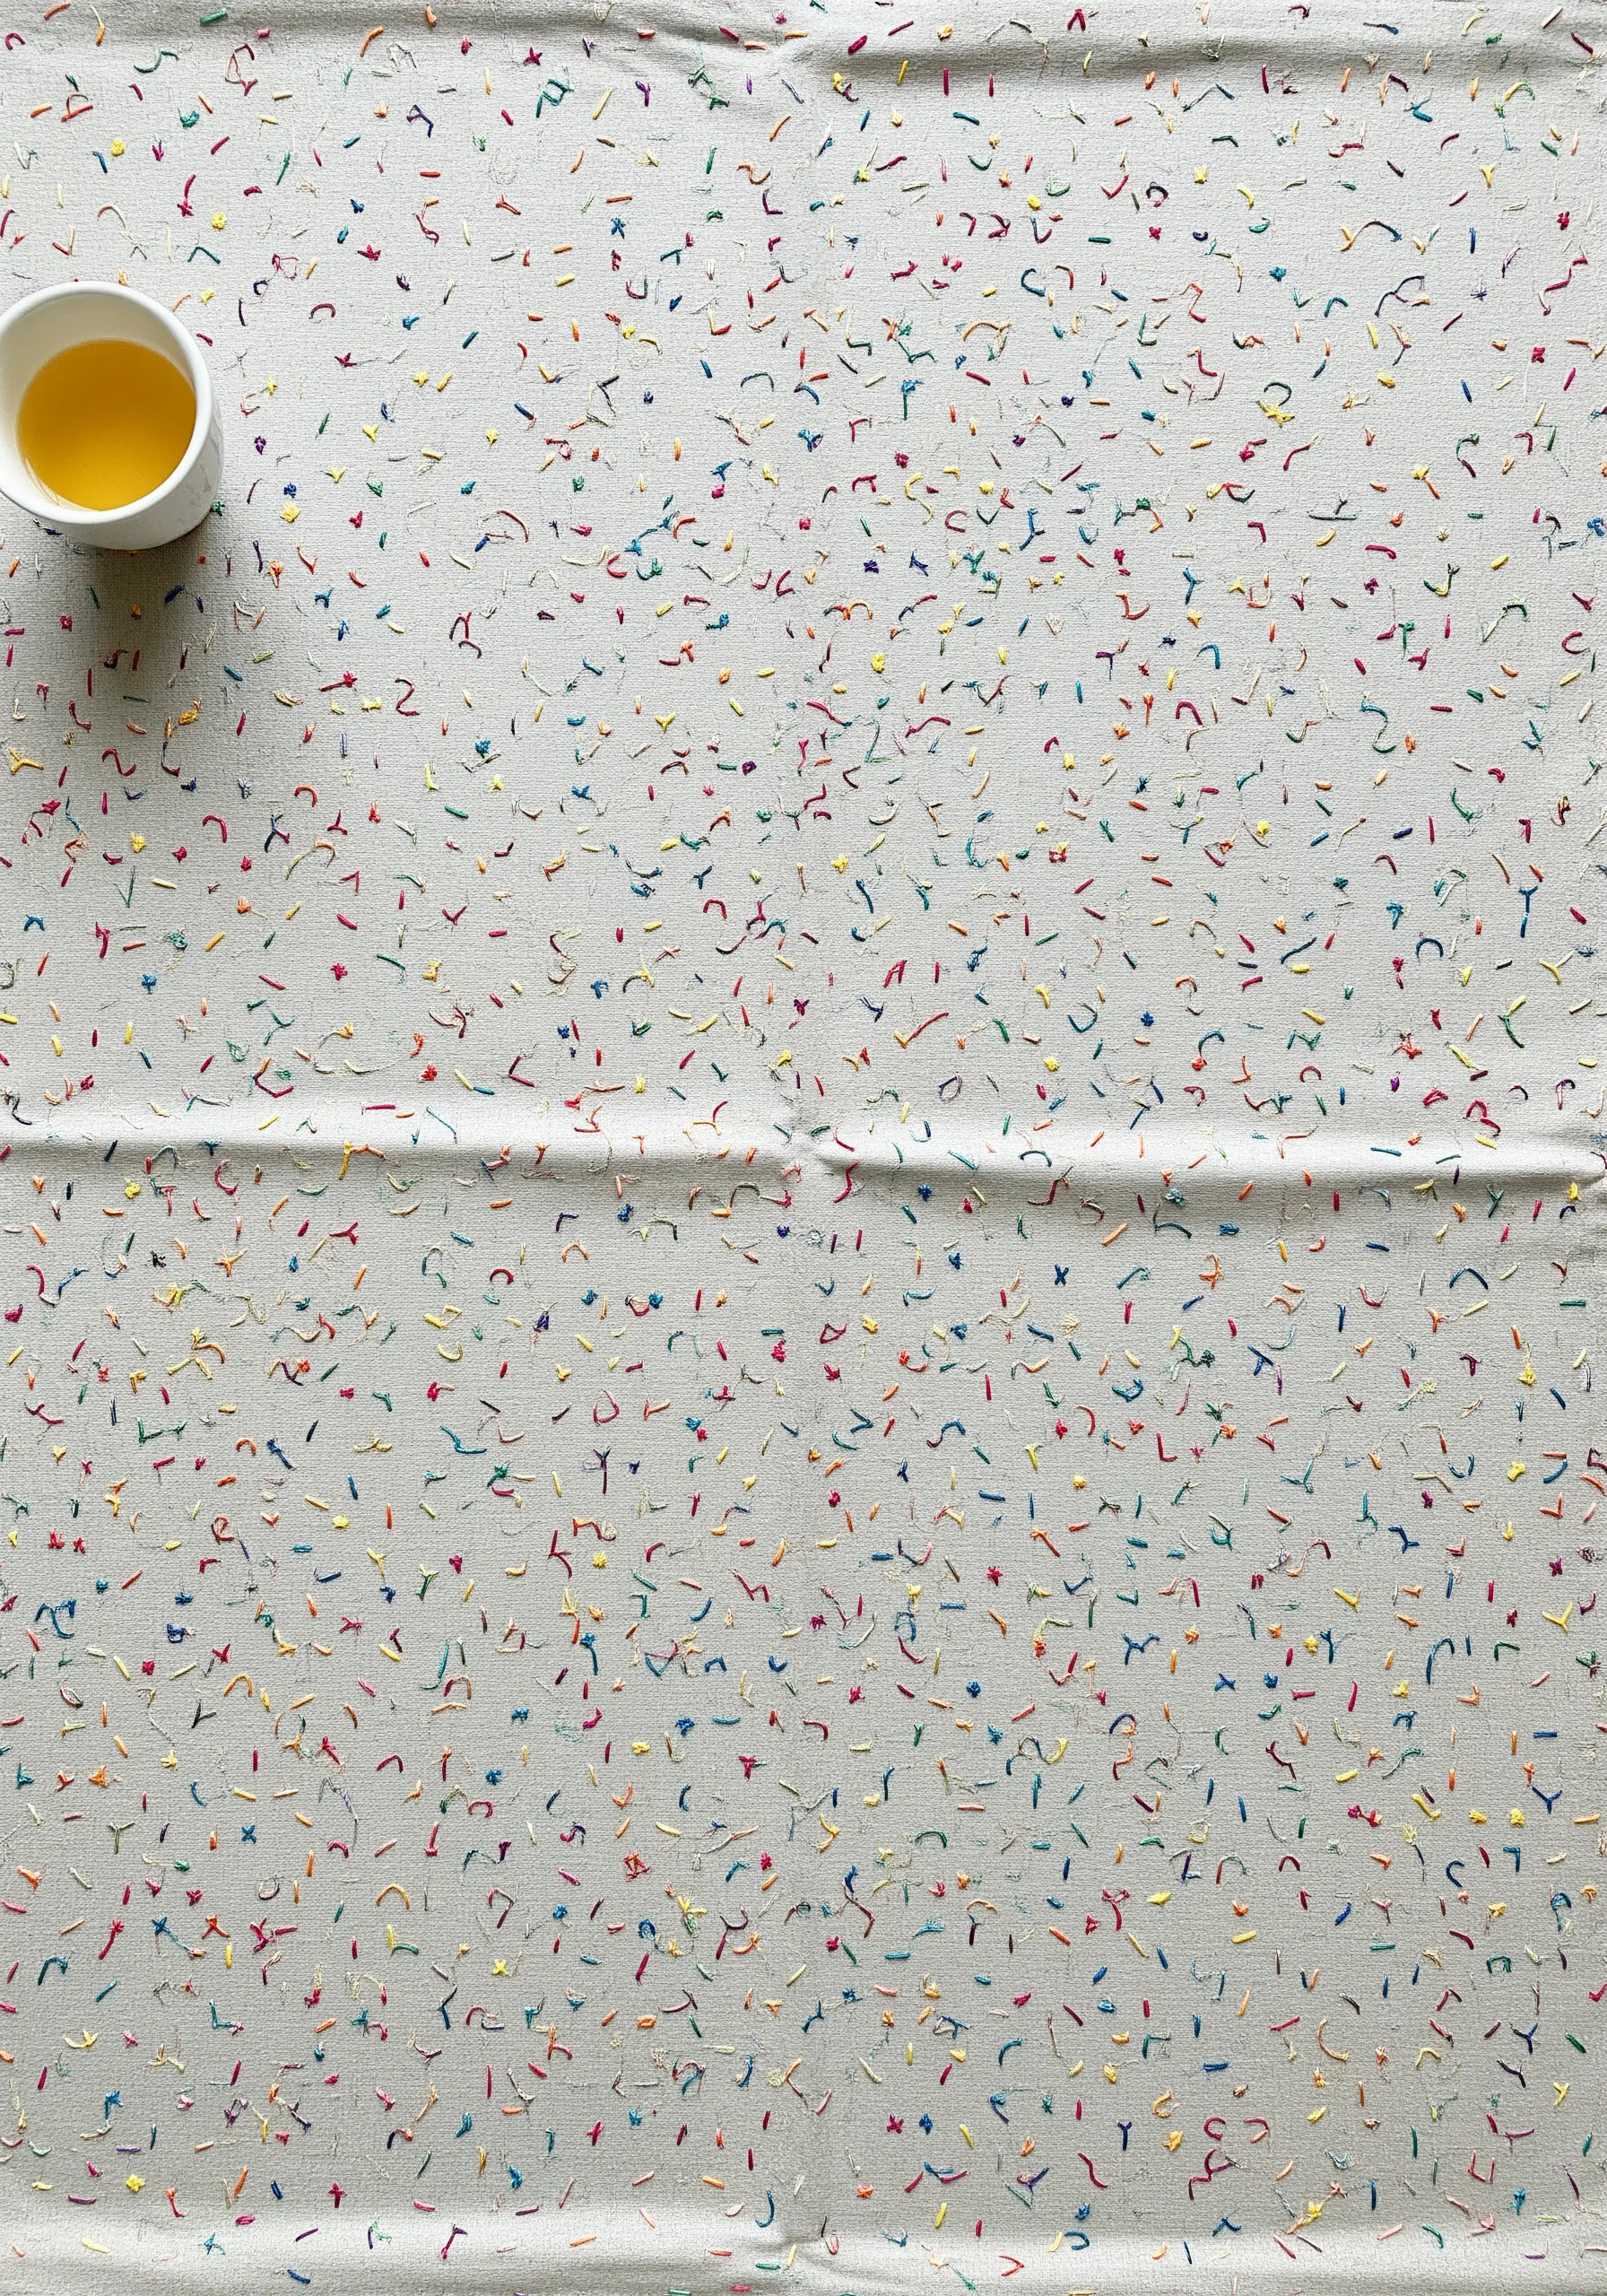
This is perhaps the most joyful and freeing embroidery project you can do with children. There are no rules—just pure color and fun.
Give your kids a hoop, a needle, and a rainbow of thread colors, and let them fill the fabric with tiny straight stitches, dashes, and crosses.
The random placement and mix of colors create a vibrant, celebratory confetti effect. It’s also the perfect way to use up all your leftover embroidery ideas that make fabric scraps of thread.