Sometimes the most beautiful embroidery isn’t about complex patterns, but about capturing the quiet elegance of something simple, like a sprig of mint from the garden. You already have the skills; what you might be looking for is a shift in perspective—a way to see the form, texture, and life in these everyday plants and translate it into thread.
This collection is designed to help you do just that. We’ll move beyond just tracing outlines and explore how to give a basil leaf its glossy dimension, how to make thyme blossoms feel delicate and airy, and how to use stitches to create shadow and light. It’s about making thoughtful choices in thread, stitch direction, and composition.
Think of each project not as a pattern to follow, but as an invitation to look closer. With a few refined techniques, you can transform a simple herb motif into a small work of art that feels both personal and polished, whether it’s on a kitchen towel, a favorite jacket, or framed on your wall.
1. Mastering the Textural Herb Wreath
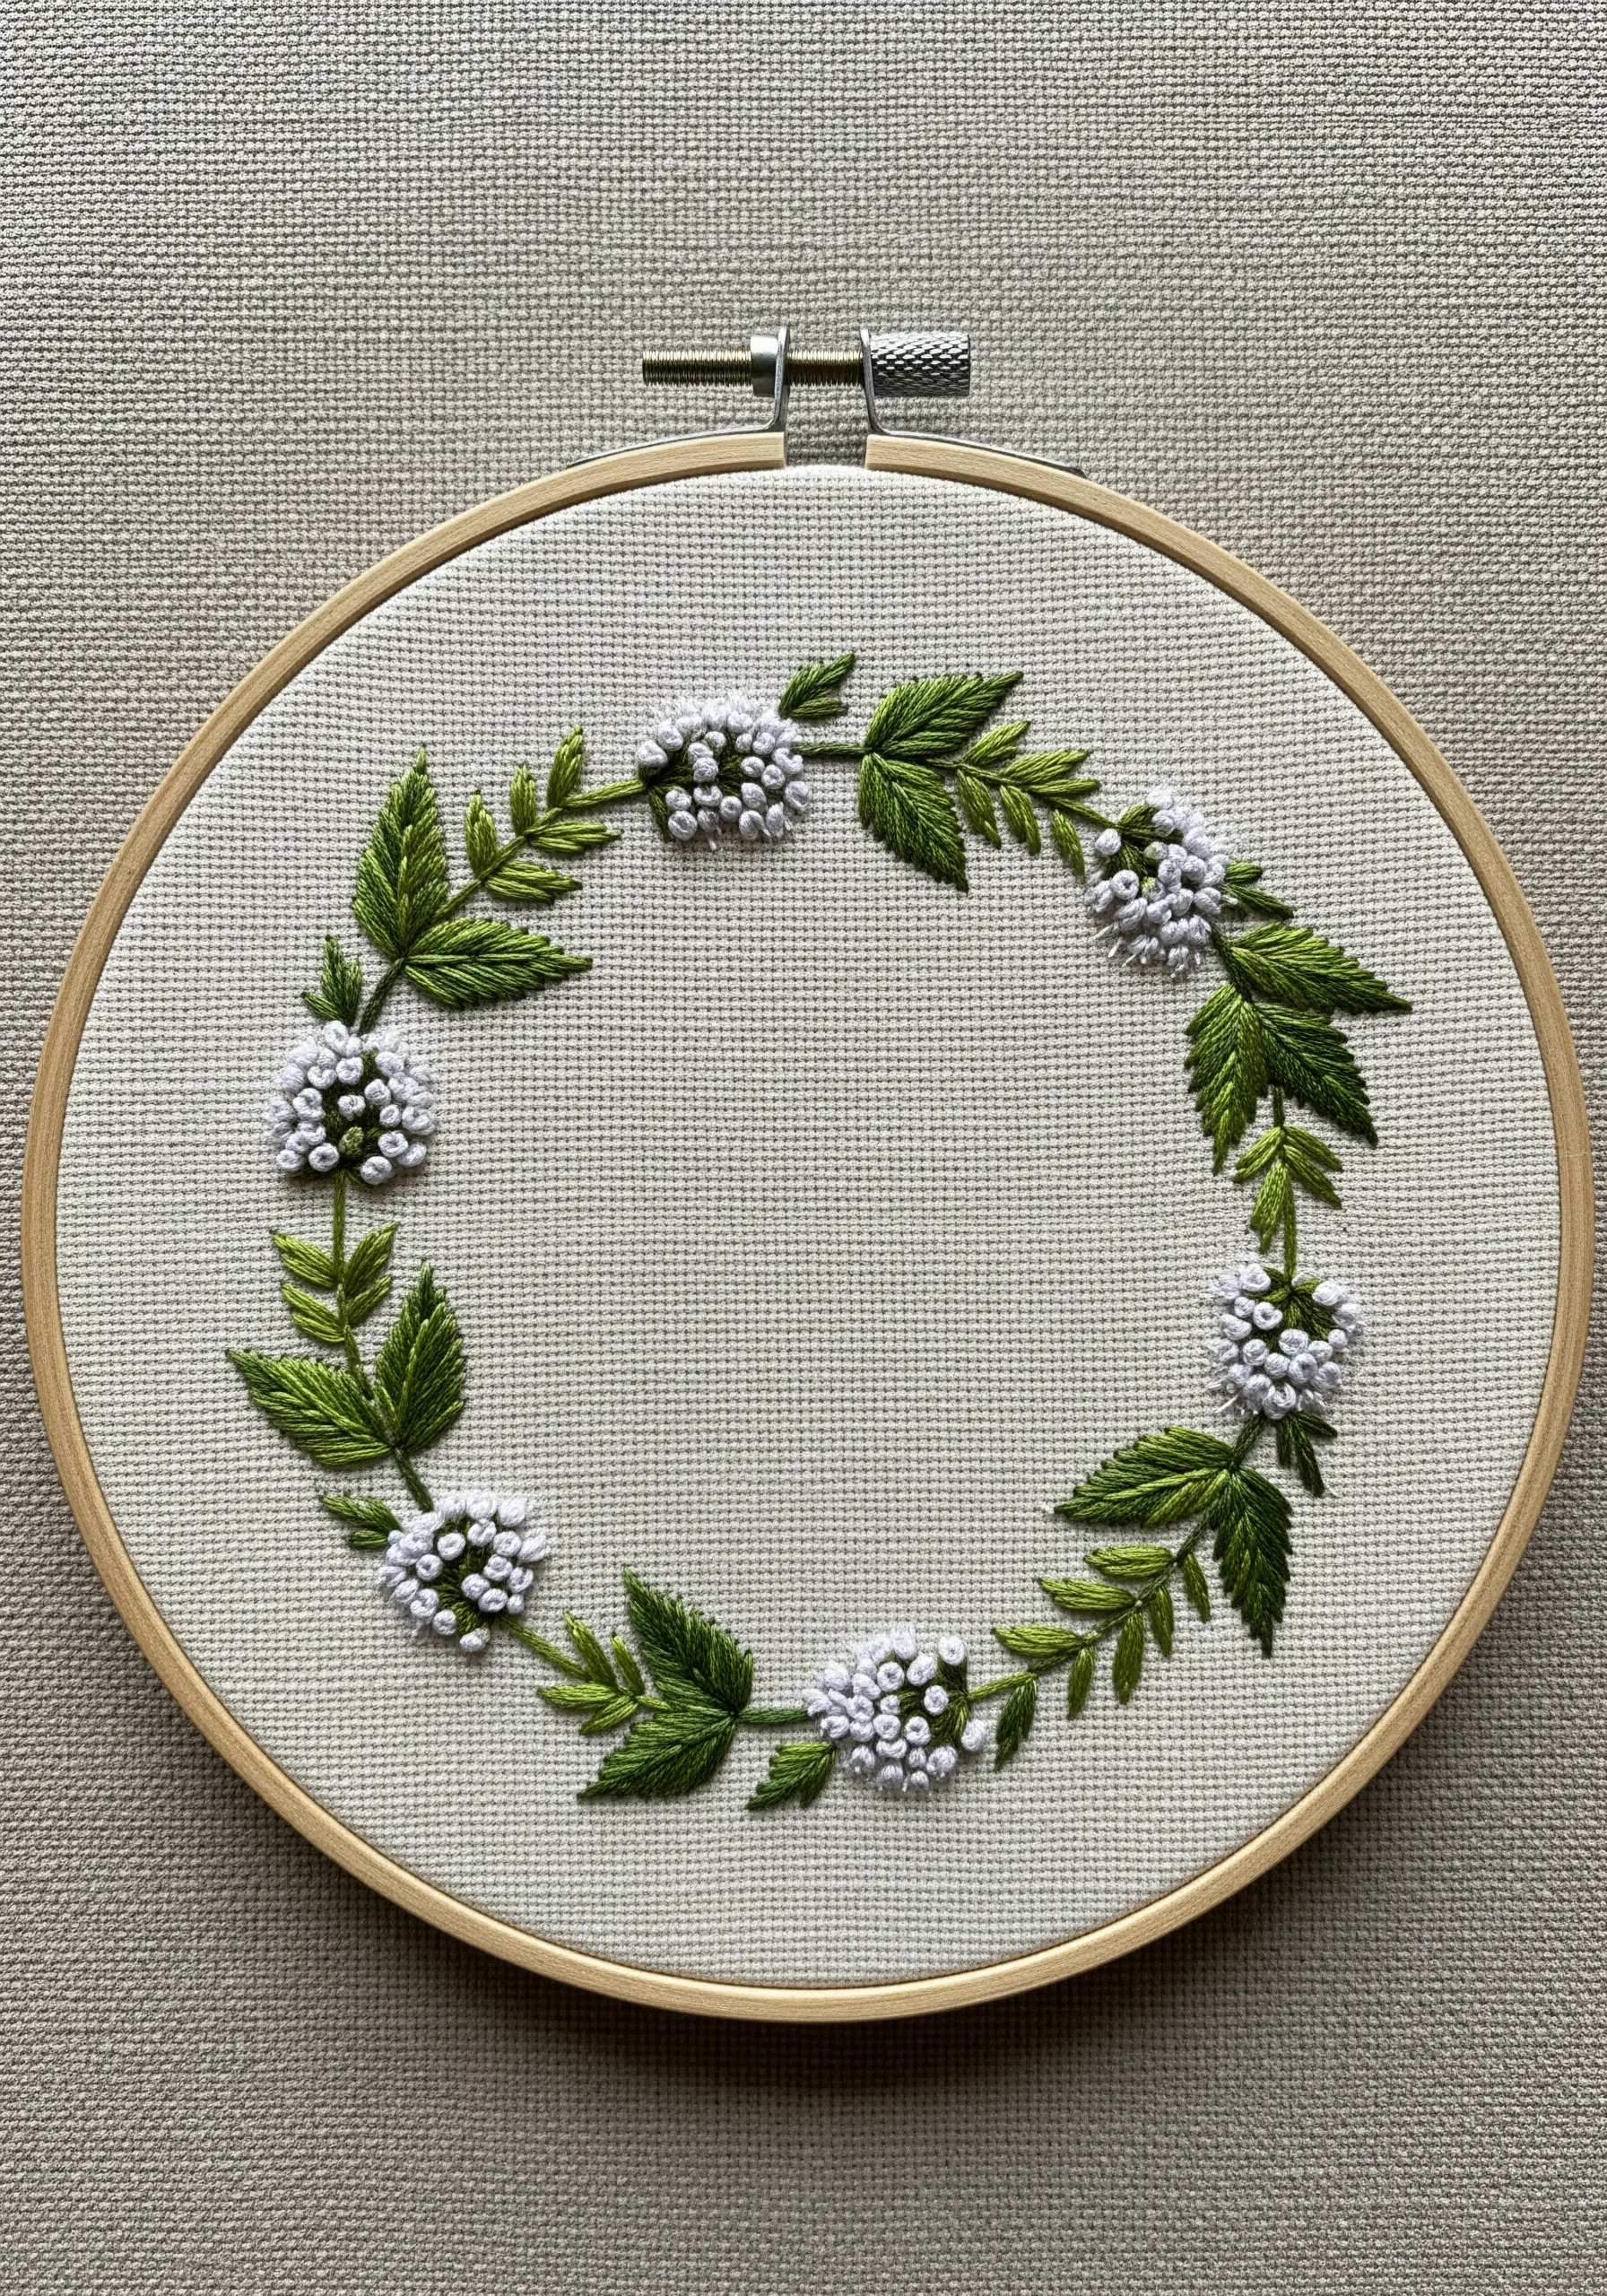
Create a dynamic mint wreath by focusing on varied textures for leaves and blossoms.
Use a fishbone stitch for the leaves, pulling the stitches taut at the center vein to create a subtle ridge that catches the light.
For the white blossom clusters, pack French knots tightly together using three strands of floss to give them a fluffy, dimensional quality that contrasts beautifully with the flatter leaves.
Alternate the direction of the leaves around the circle to create a sense of natural, unforced movement.
2. Achieving Glossy, Sculptural Basil Leaves
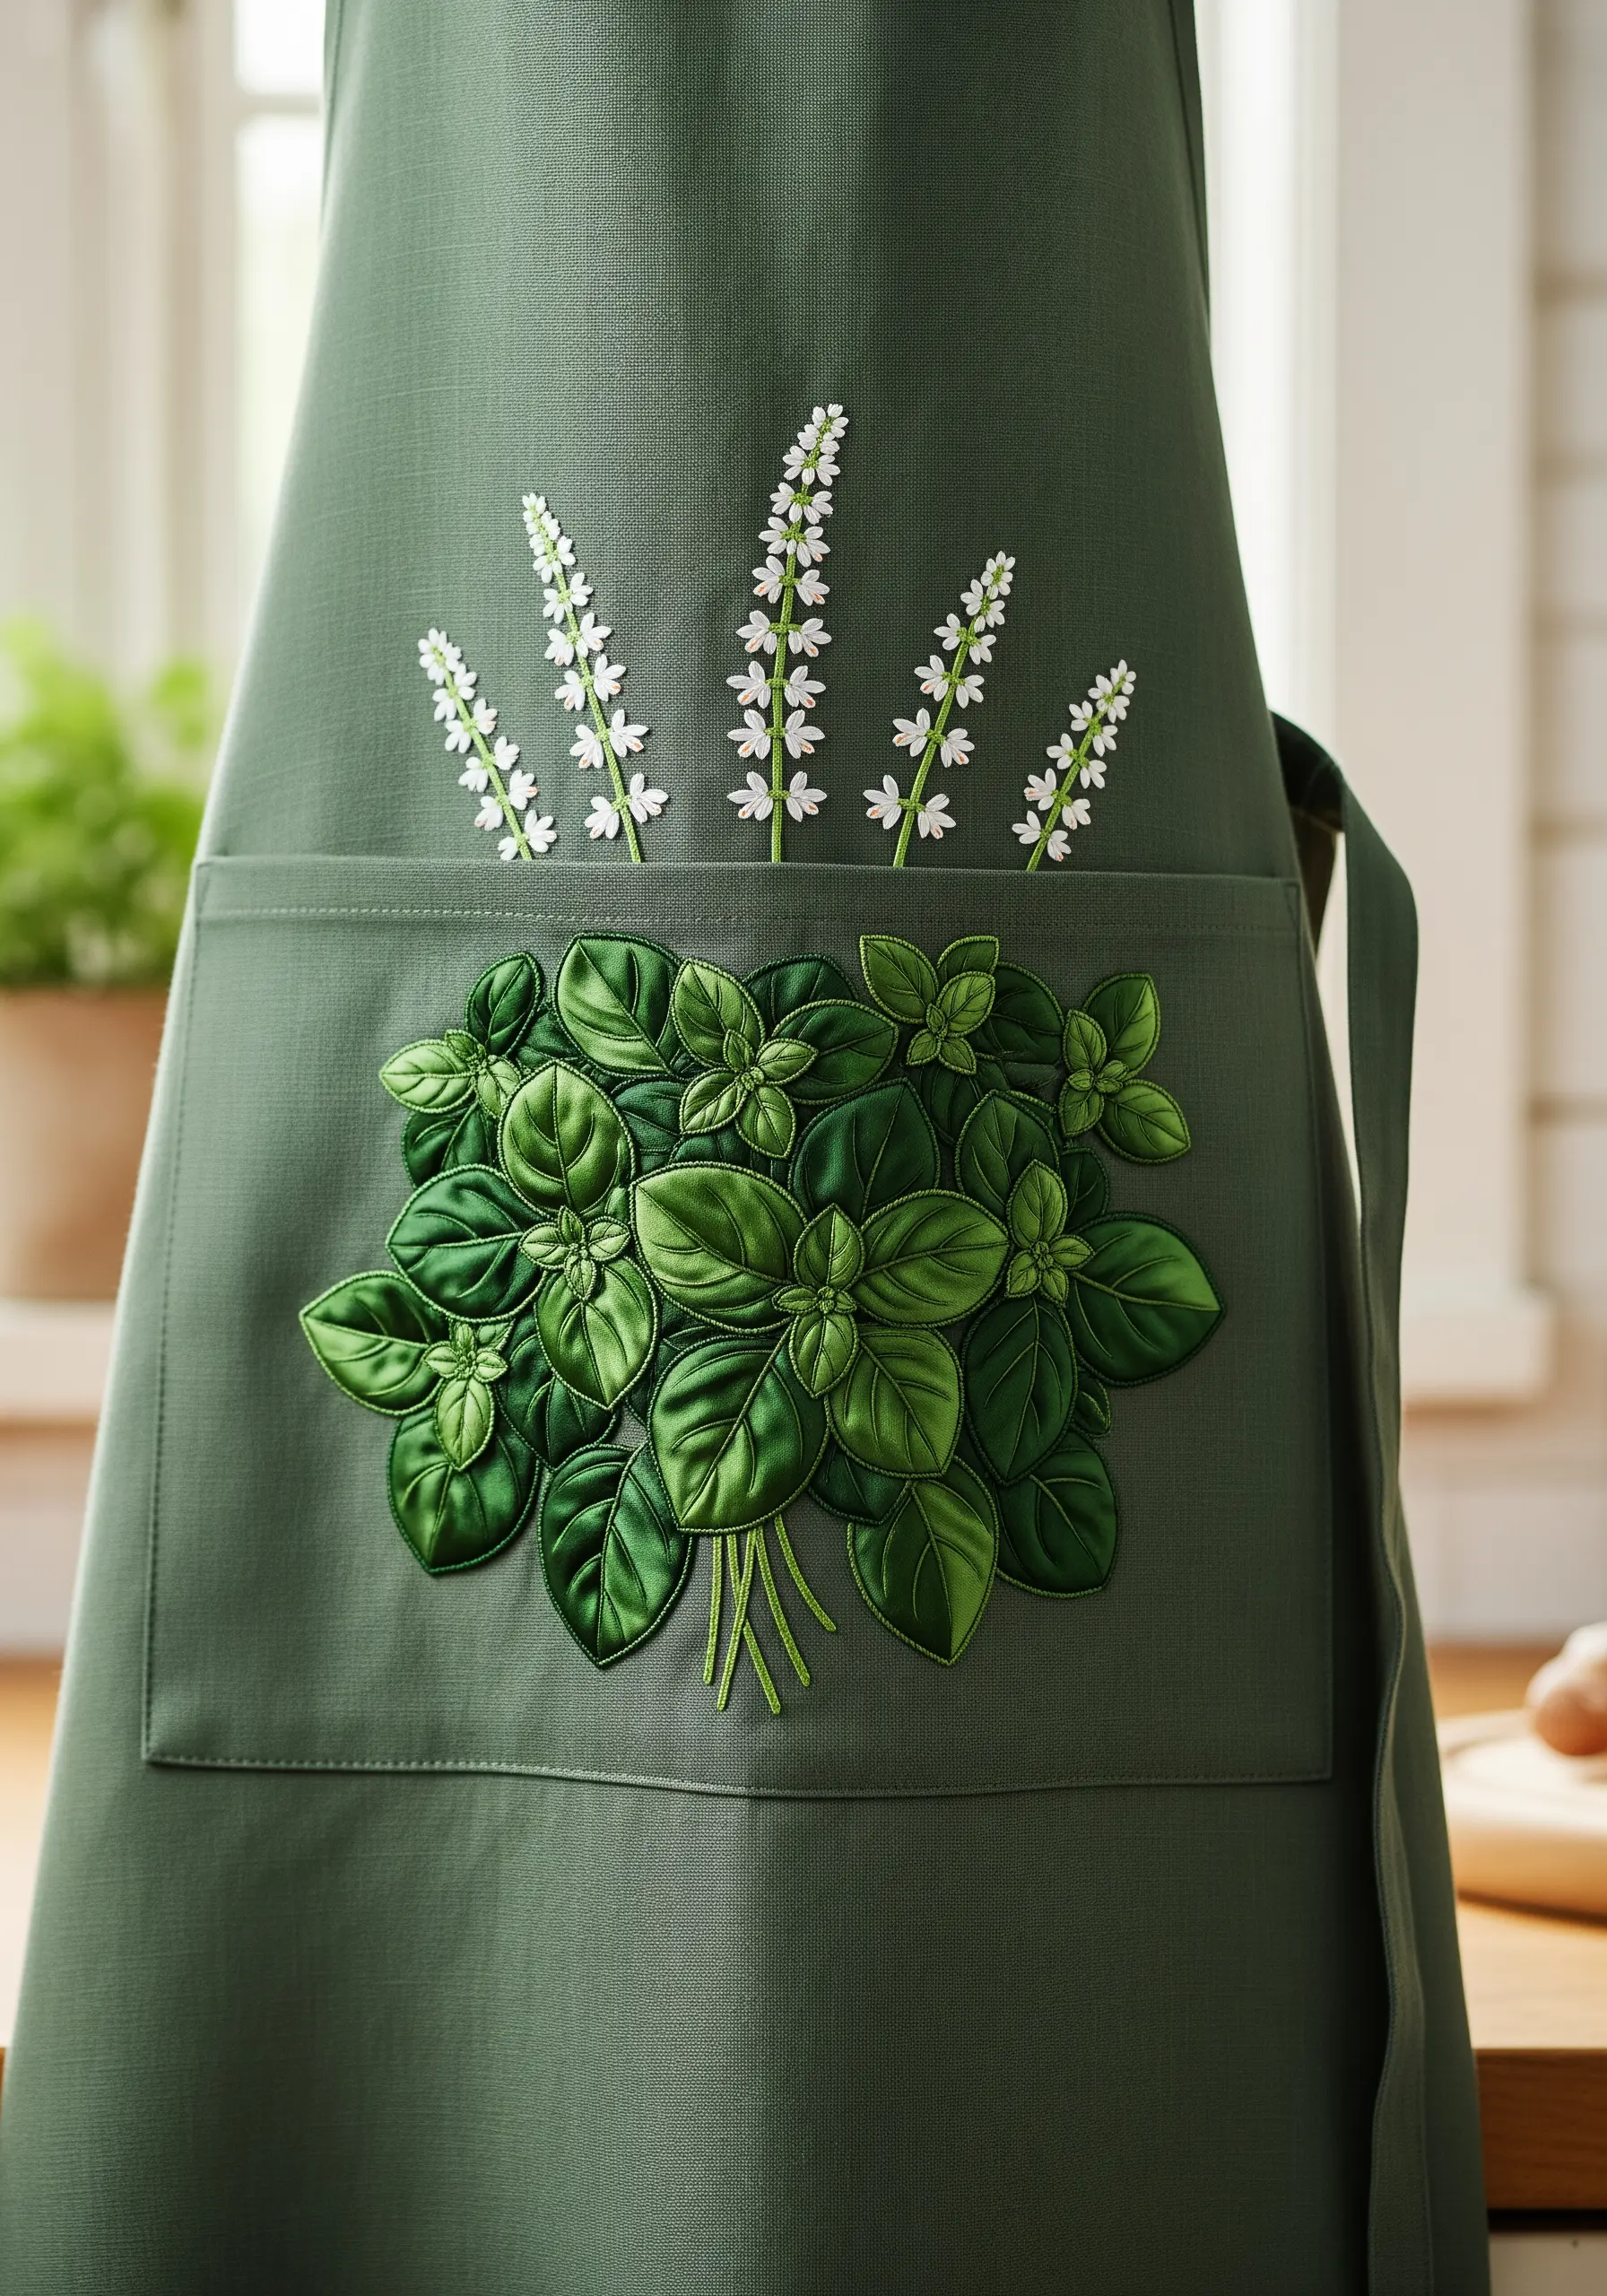
To give basil leaves that signature sheen and fullness on an apron, move beyond a simple satin stitch.
Use a padded satin stitch by first creating a base of small, underlying stitches within the leaf shape.
When you stitch over this padding, the final layer is raised, creating a three-dimensional effect that mimics the curve of a real leaf.
For the thread, choose a rayon or silk floss; its high luster reflects more light than standard cotton, enhancing the glossy, just-picked look.
3. Designing a Cascade of Delicate Thyme
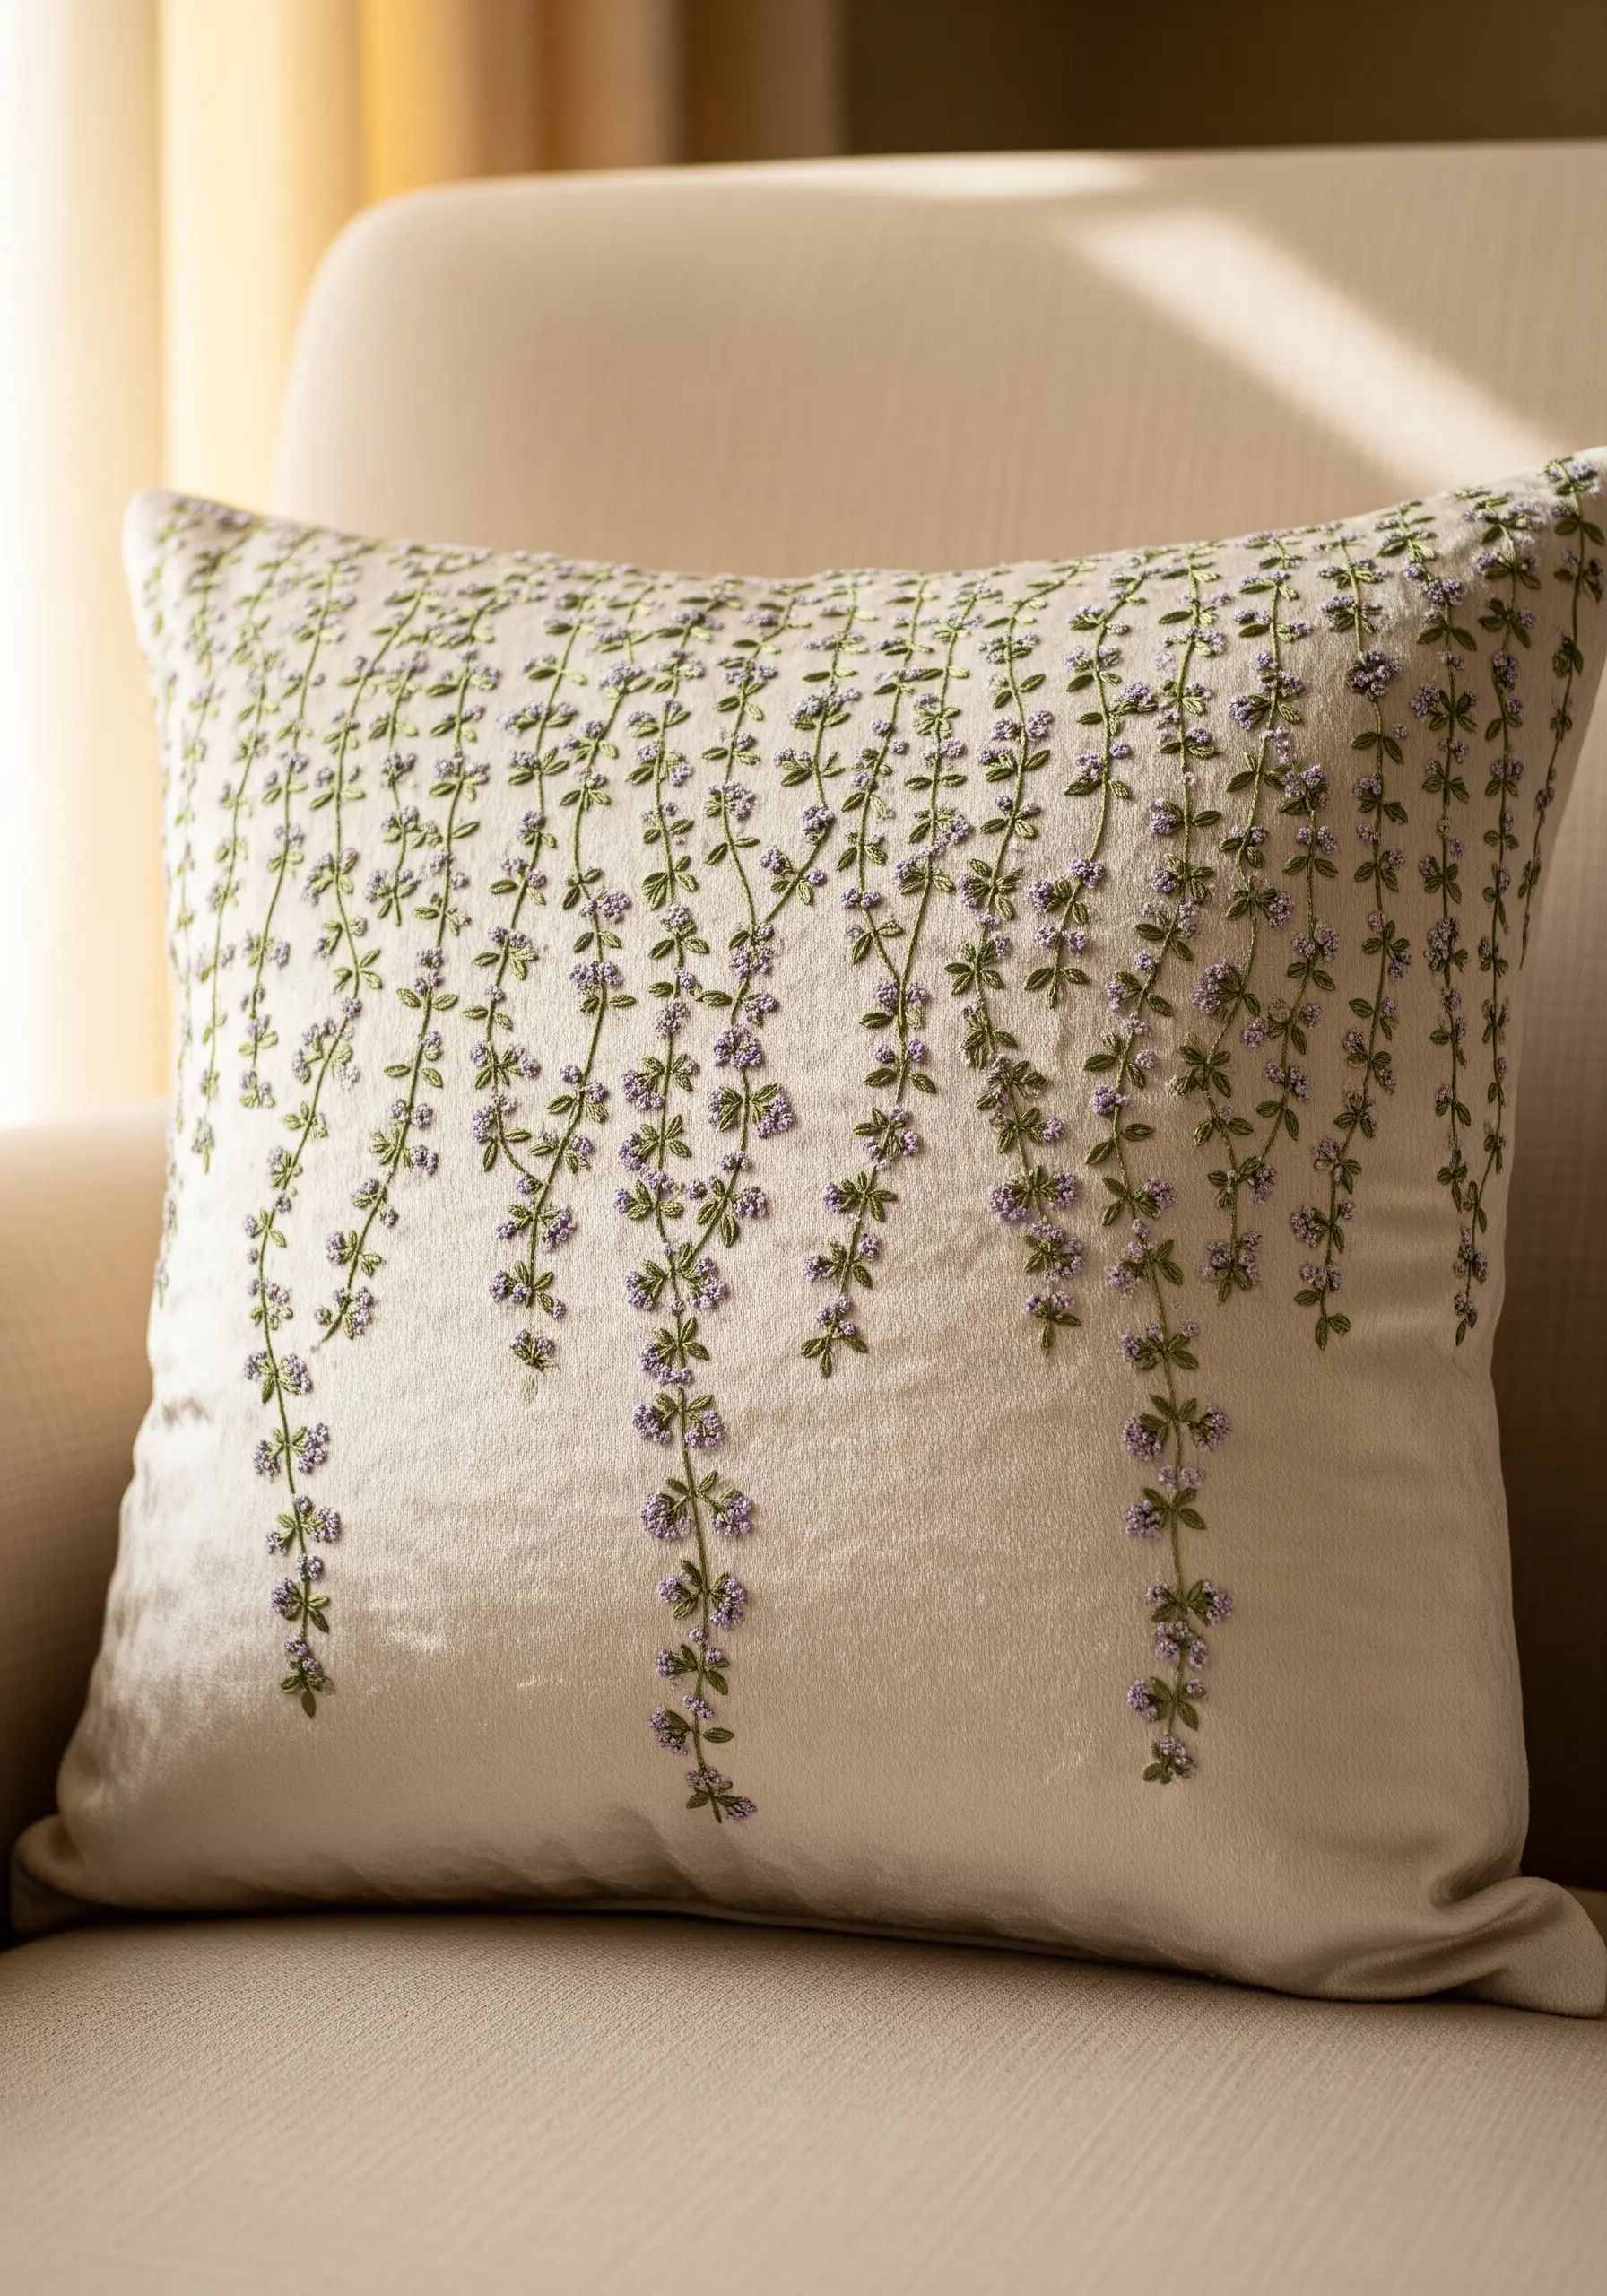
Capture the gentle droop of flowering thyme by creating a vertical, cascading pattern on a pillow cover.
Use a single strand of green thread for the stems, varying their lengths and curves with a simple stem stitch to avoid a uniform look.
Place tiny French knots or single lazy daisy stitches in soft lavender along the stems, clustering them more densely at the top and spacing them out toward the bottom.
This gradient effect creates a beautiful sense of movement, as if the blossoms are delicately trailing down the fabric.
4. Stitching a Botanical Illustration
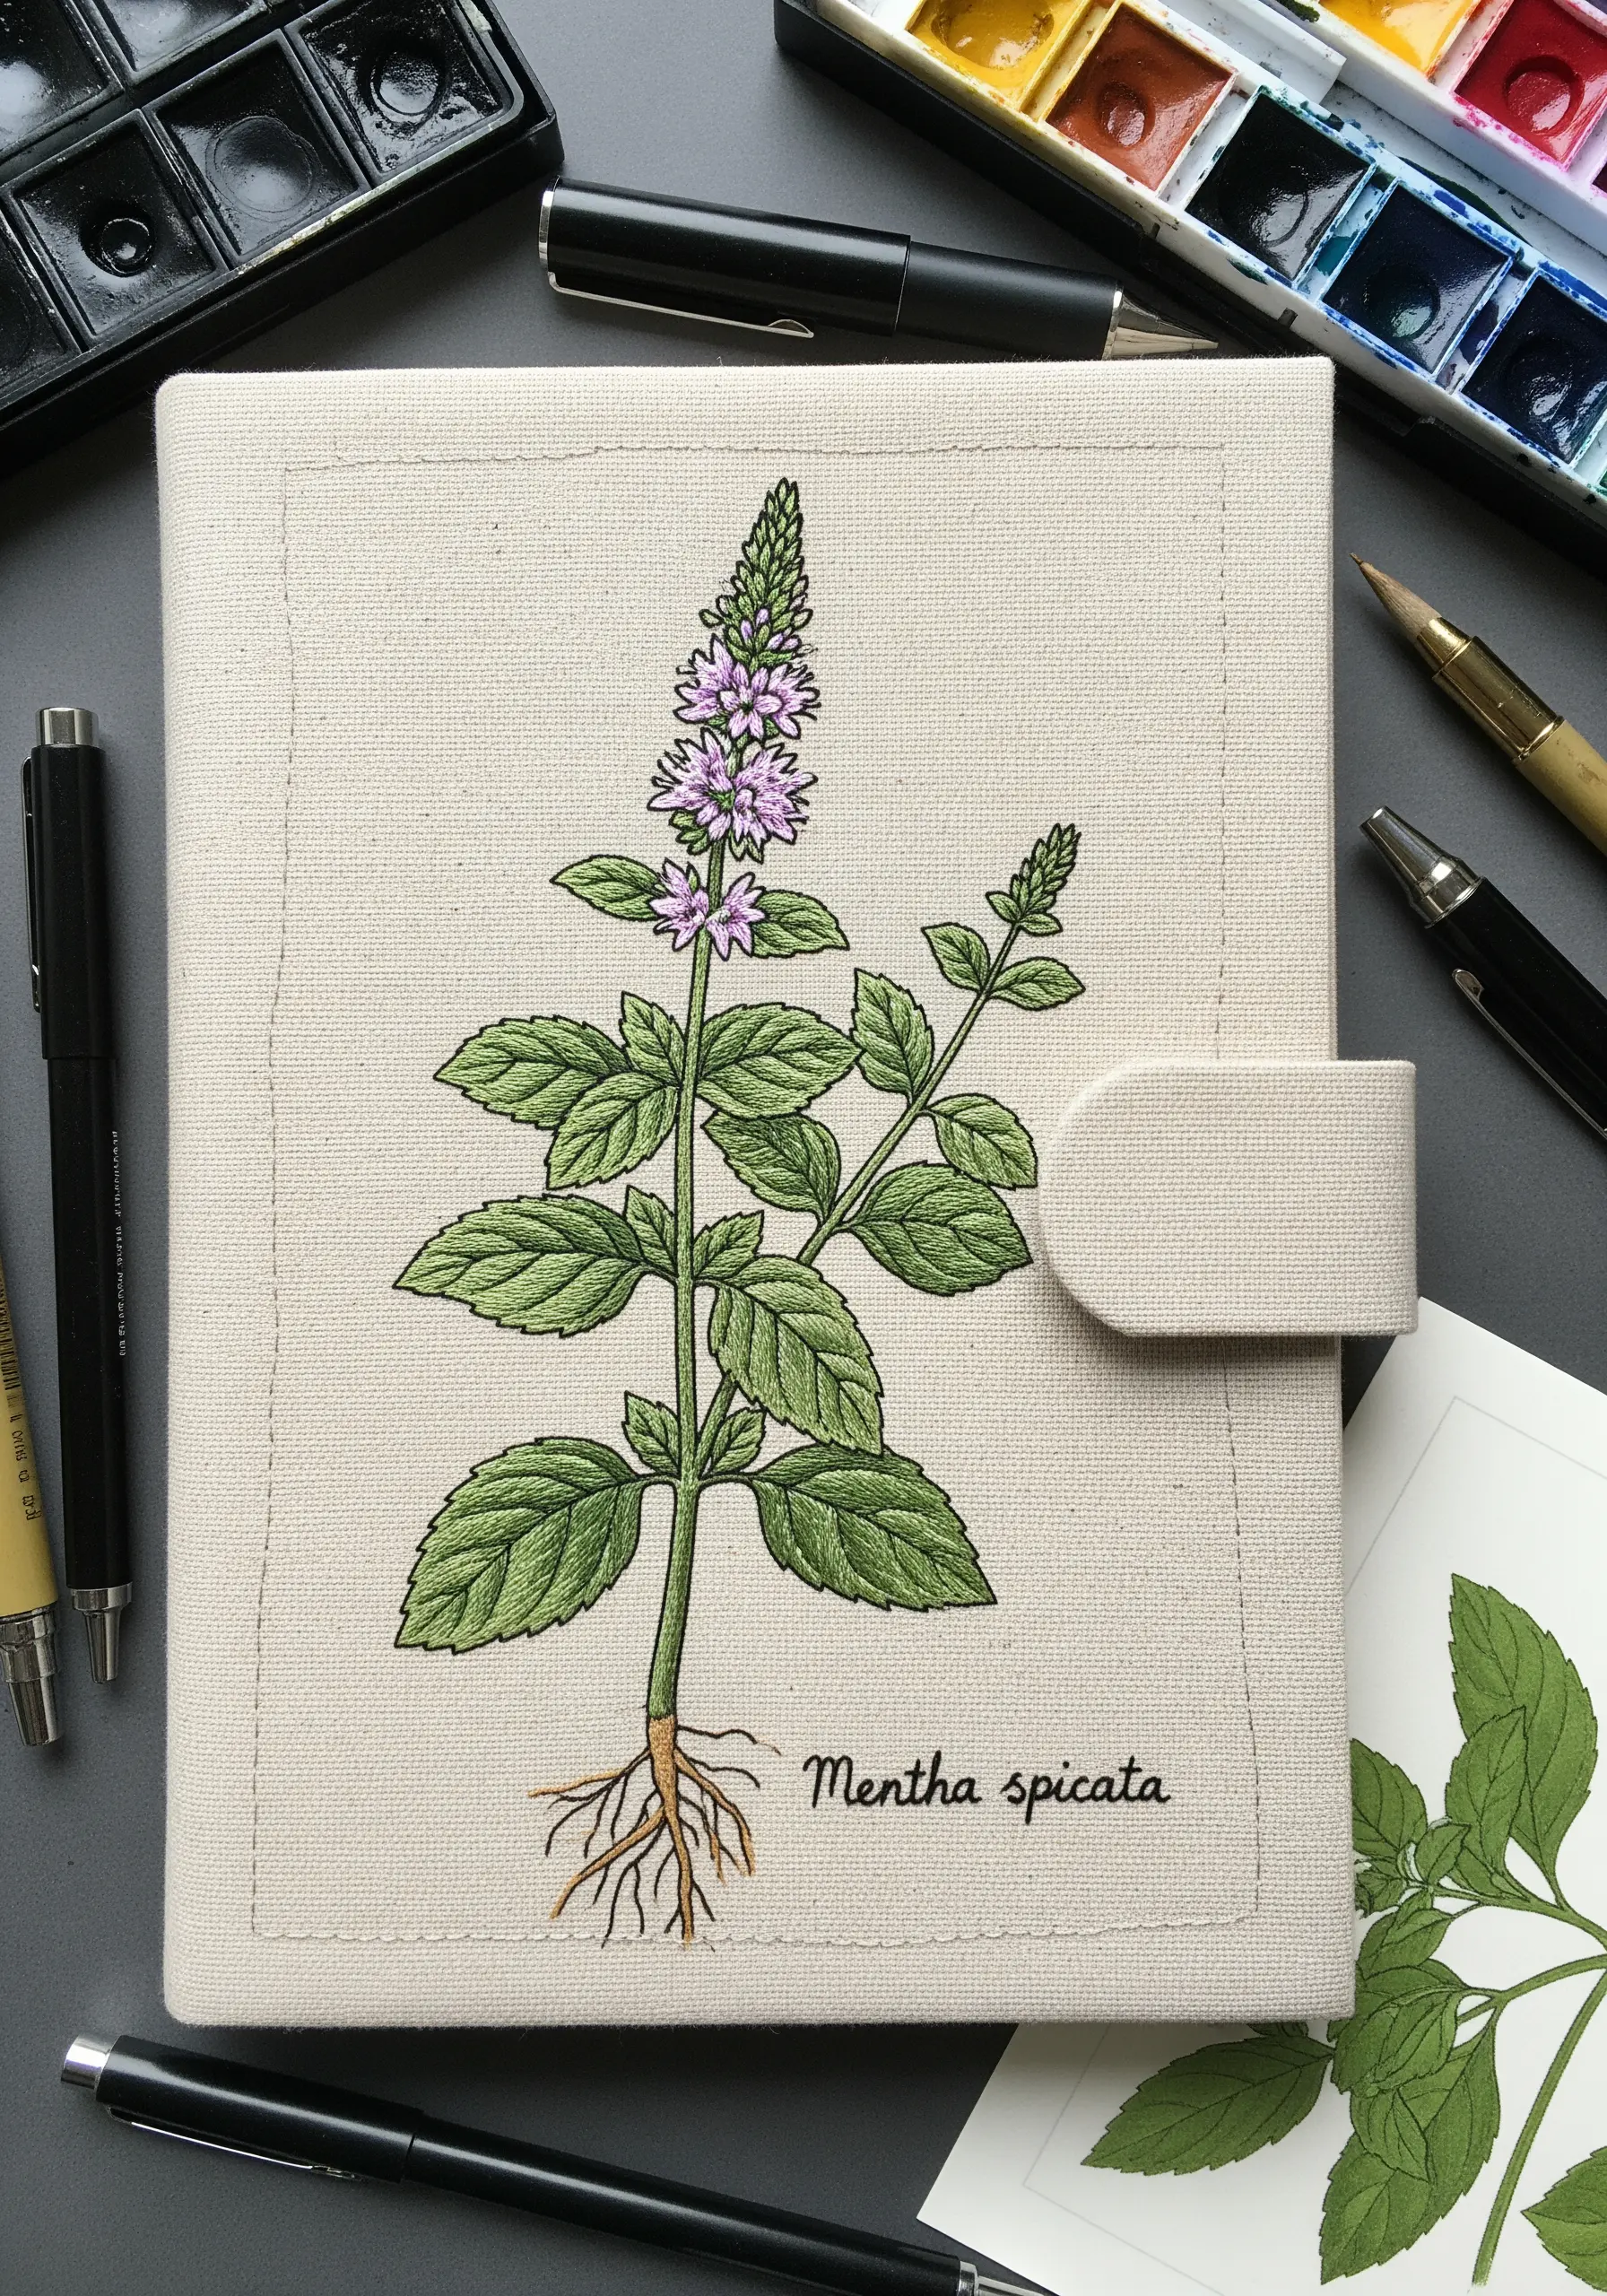
Recreate the precision of a scientific drawing on a journal cover by focusing on clean lines and subtle color fills.
Use a single strand of black or dark brown thread and a sharp needle to outline the entire mint plant with a meticulous split stitch; this creates a finer, more solid line than a standard backstitch.
Fill the leaves and blossoms with a light long-and-short stitch, using just two or three closely related shades to suggest shadow and form without overwhelming the delicate linework.
This technique preserves the crisp, illustrative quality of the design.
5. Composing Elegant Motifs for Table Linens
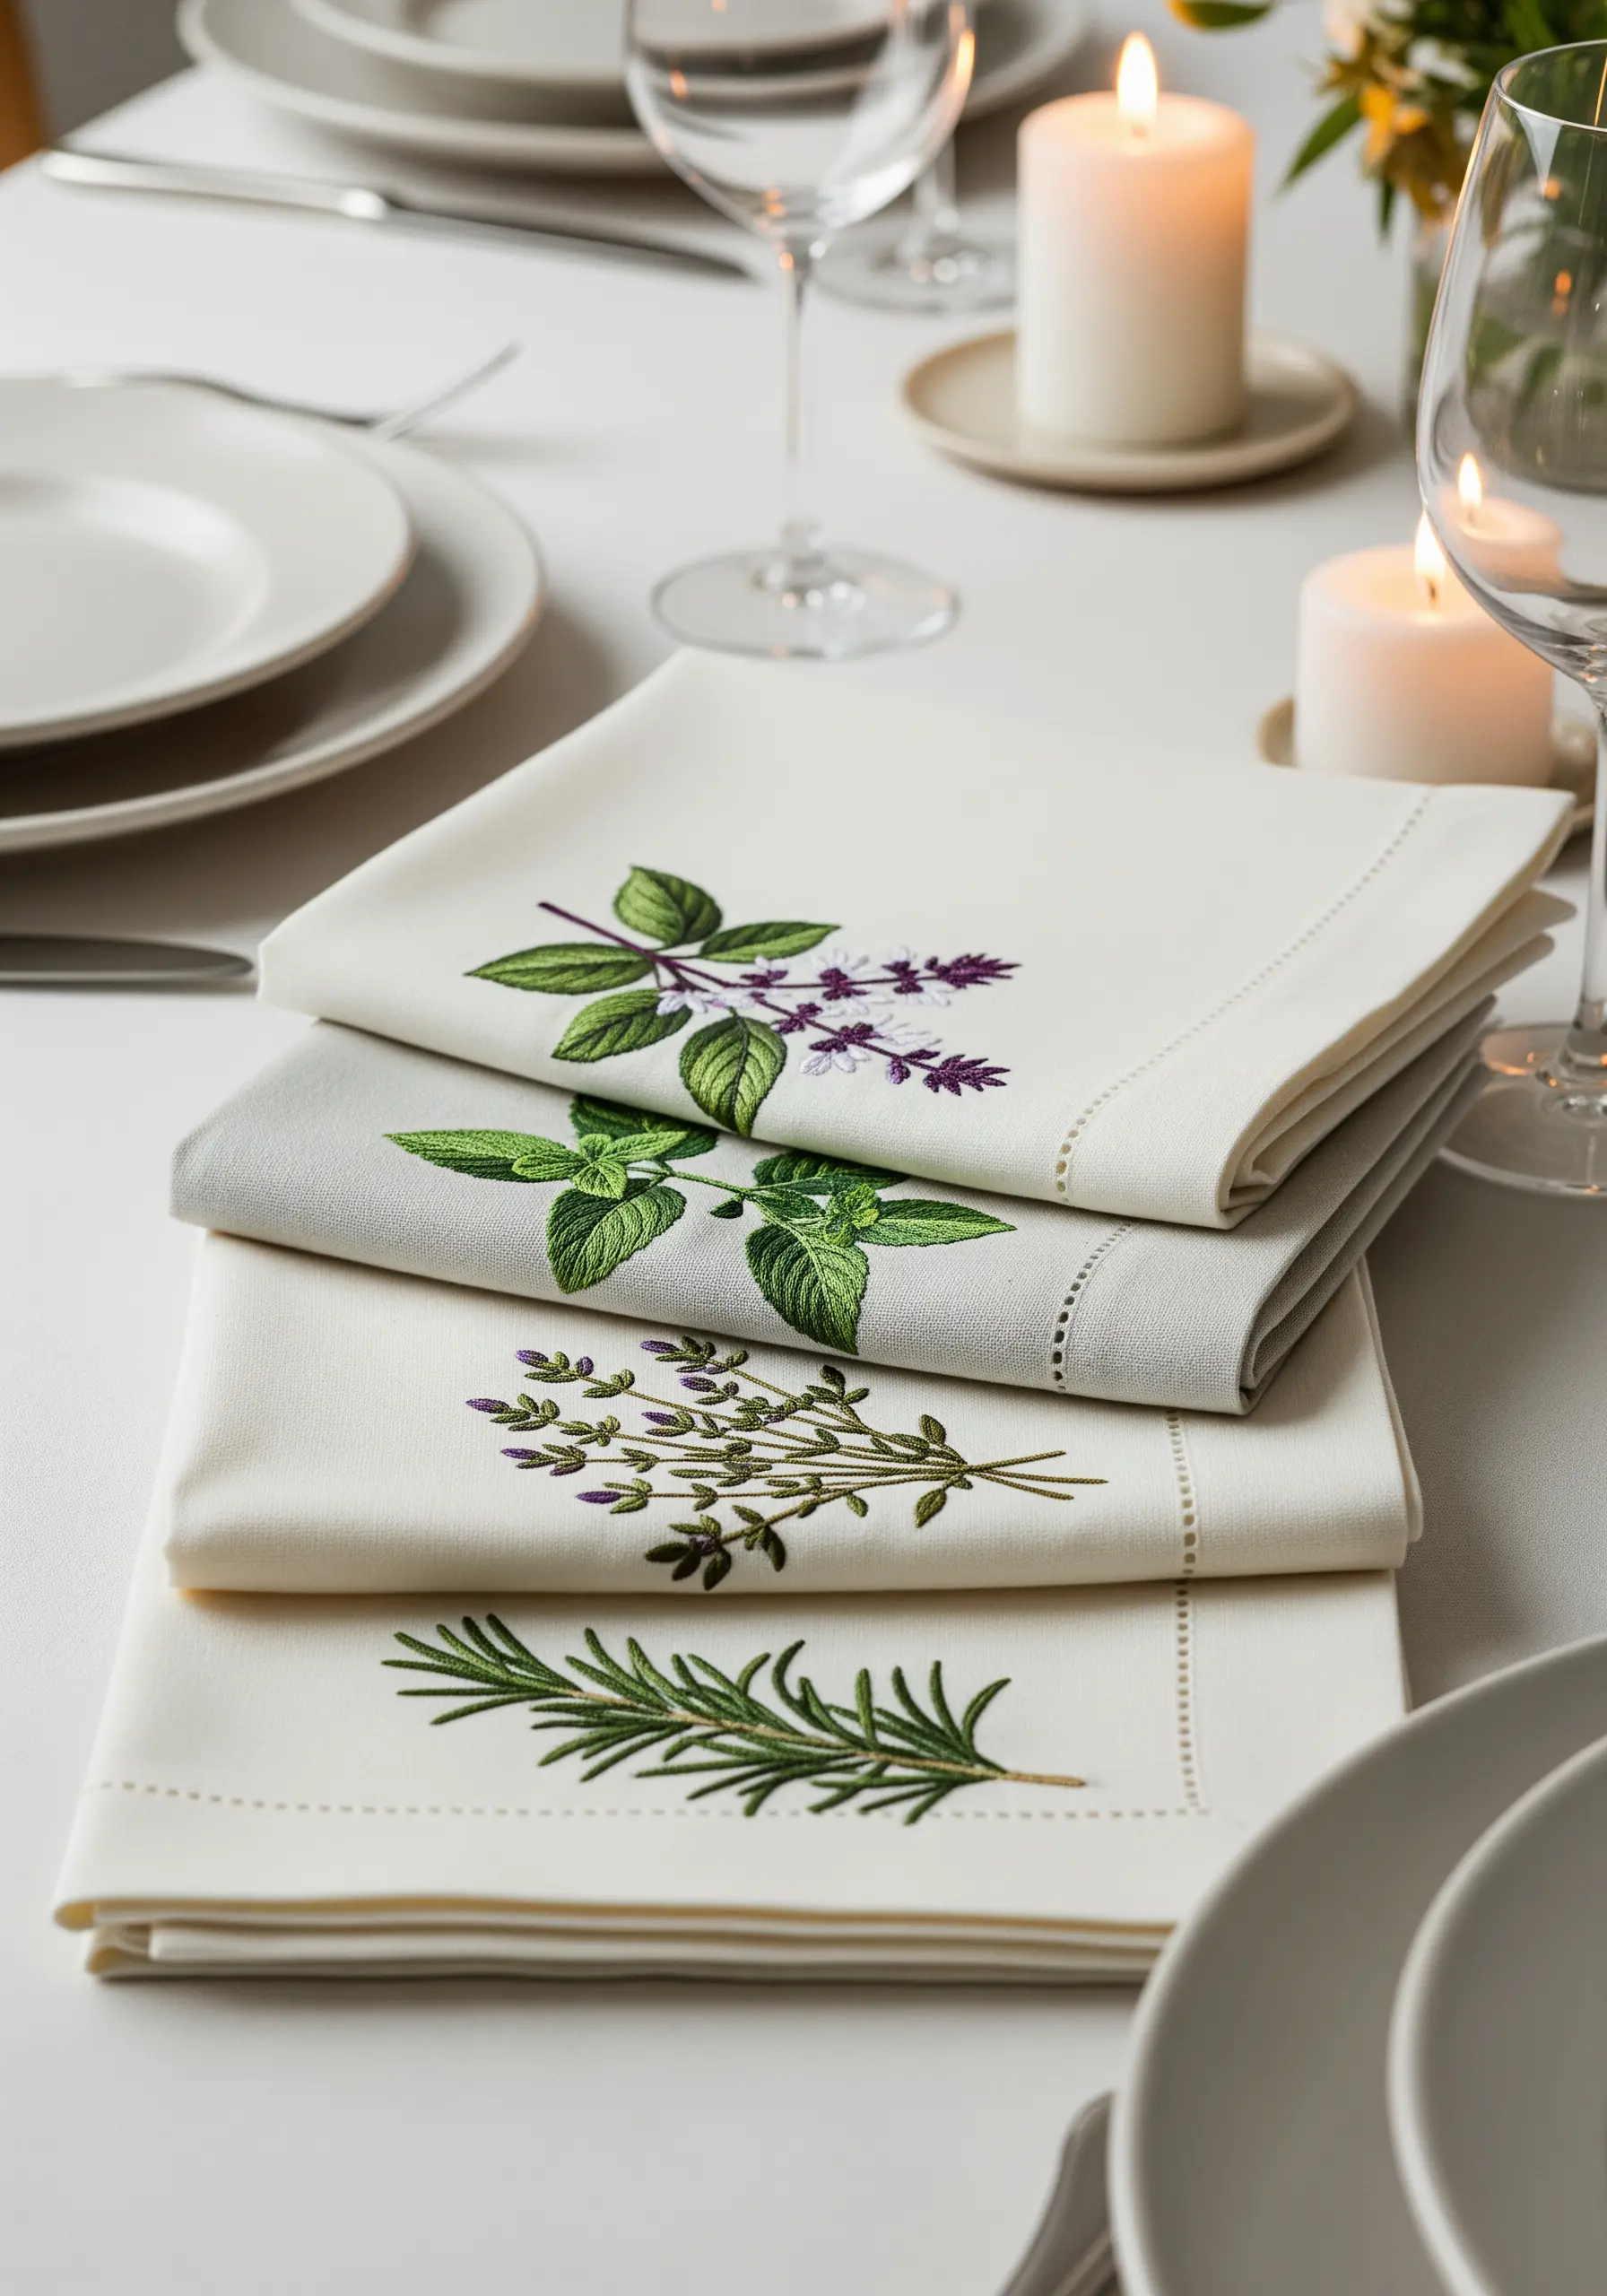
When embroidering on functional items like napkins, composition is key to achieving an elegant, uncluttered look.
Select a single, well-defined sprig of each herb—rosemary, thyme, or basil—rather than a dense bunch.
Position the motif off-center or in a corner, leaving ample negative space to maintain the napkin’s sophistication.
Always use a stabilizer behind the fabric to prevent puckering after washing, ensuring your stitches remain smooth and tight on the fine linen.
6. Creating a Statement Wall Tapestry
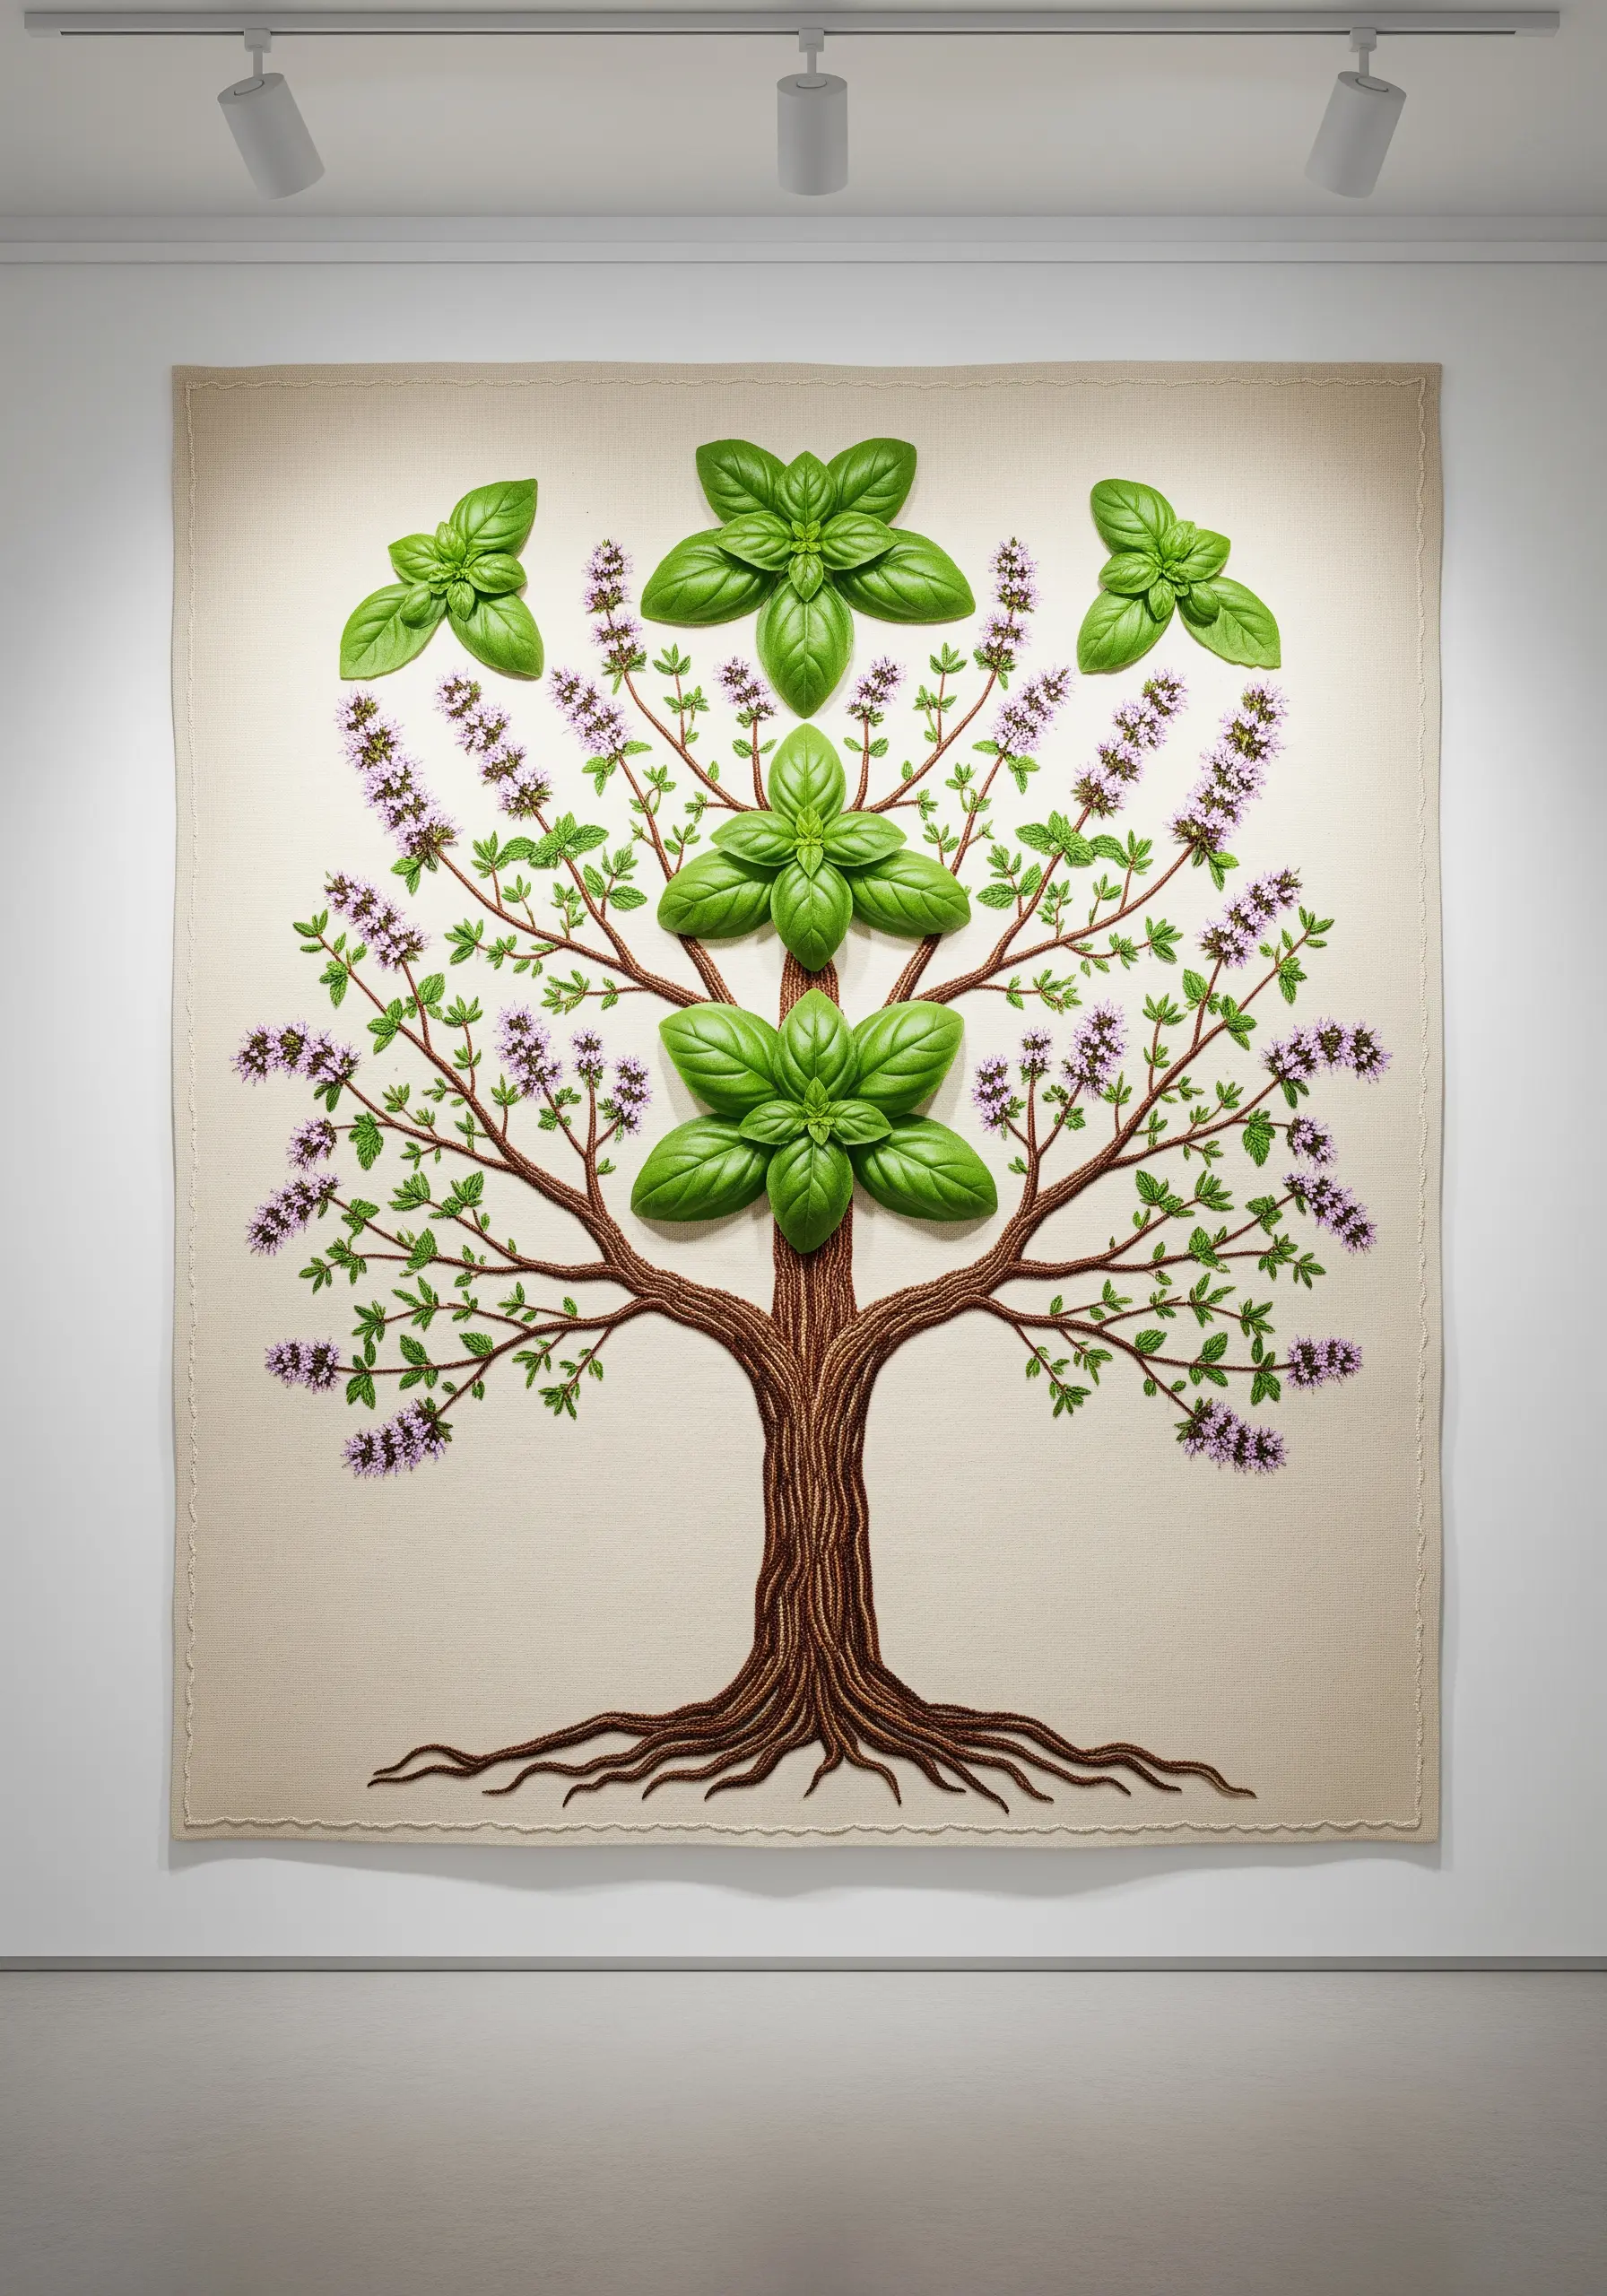
To transform a simple botanical sketch into a large-scale work of art, you need to think about visual weight and texture.
For the powerful tree trunk and branches, use a thicker crewel yarn and a stem stitch worked in tight, contoured rows to mimic the texture of bark.
Contrast this with delicate, traditional six-strand floss for the thyme blossoms to make them appear finer.
The oversized basil leaves are the focal point; apply sculptural embroidery surfaces using padded satin stitch to make them stand out with dramatic, touchable dimension.
7. Adding Detail to a Slender Bookmark
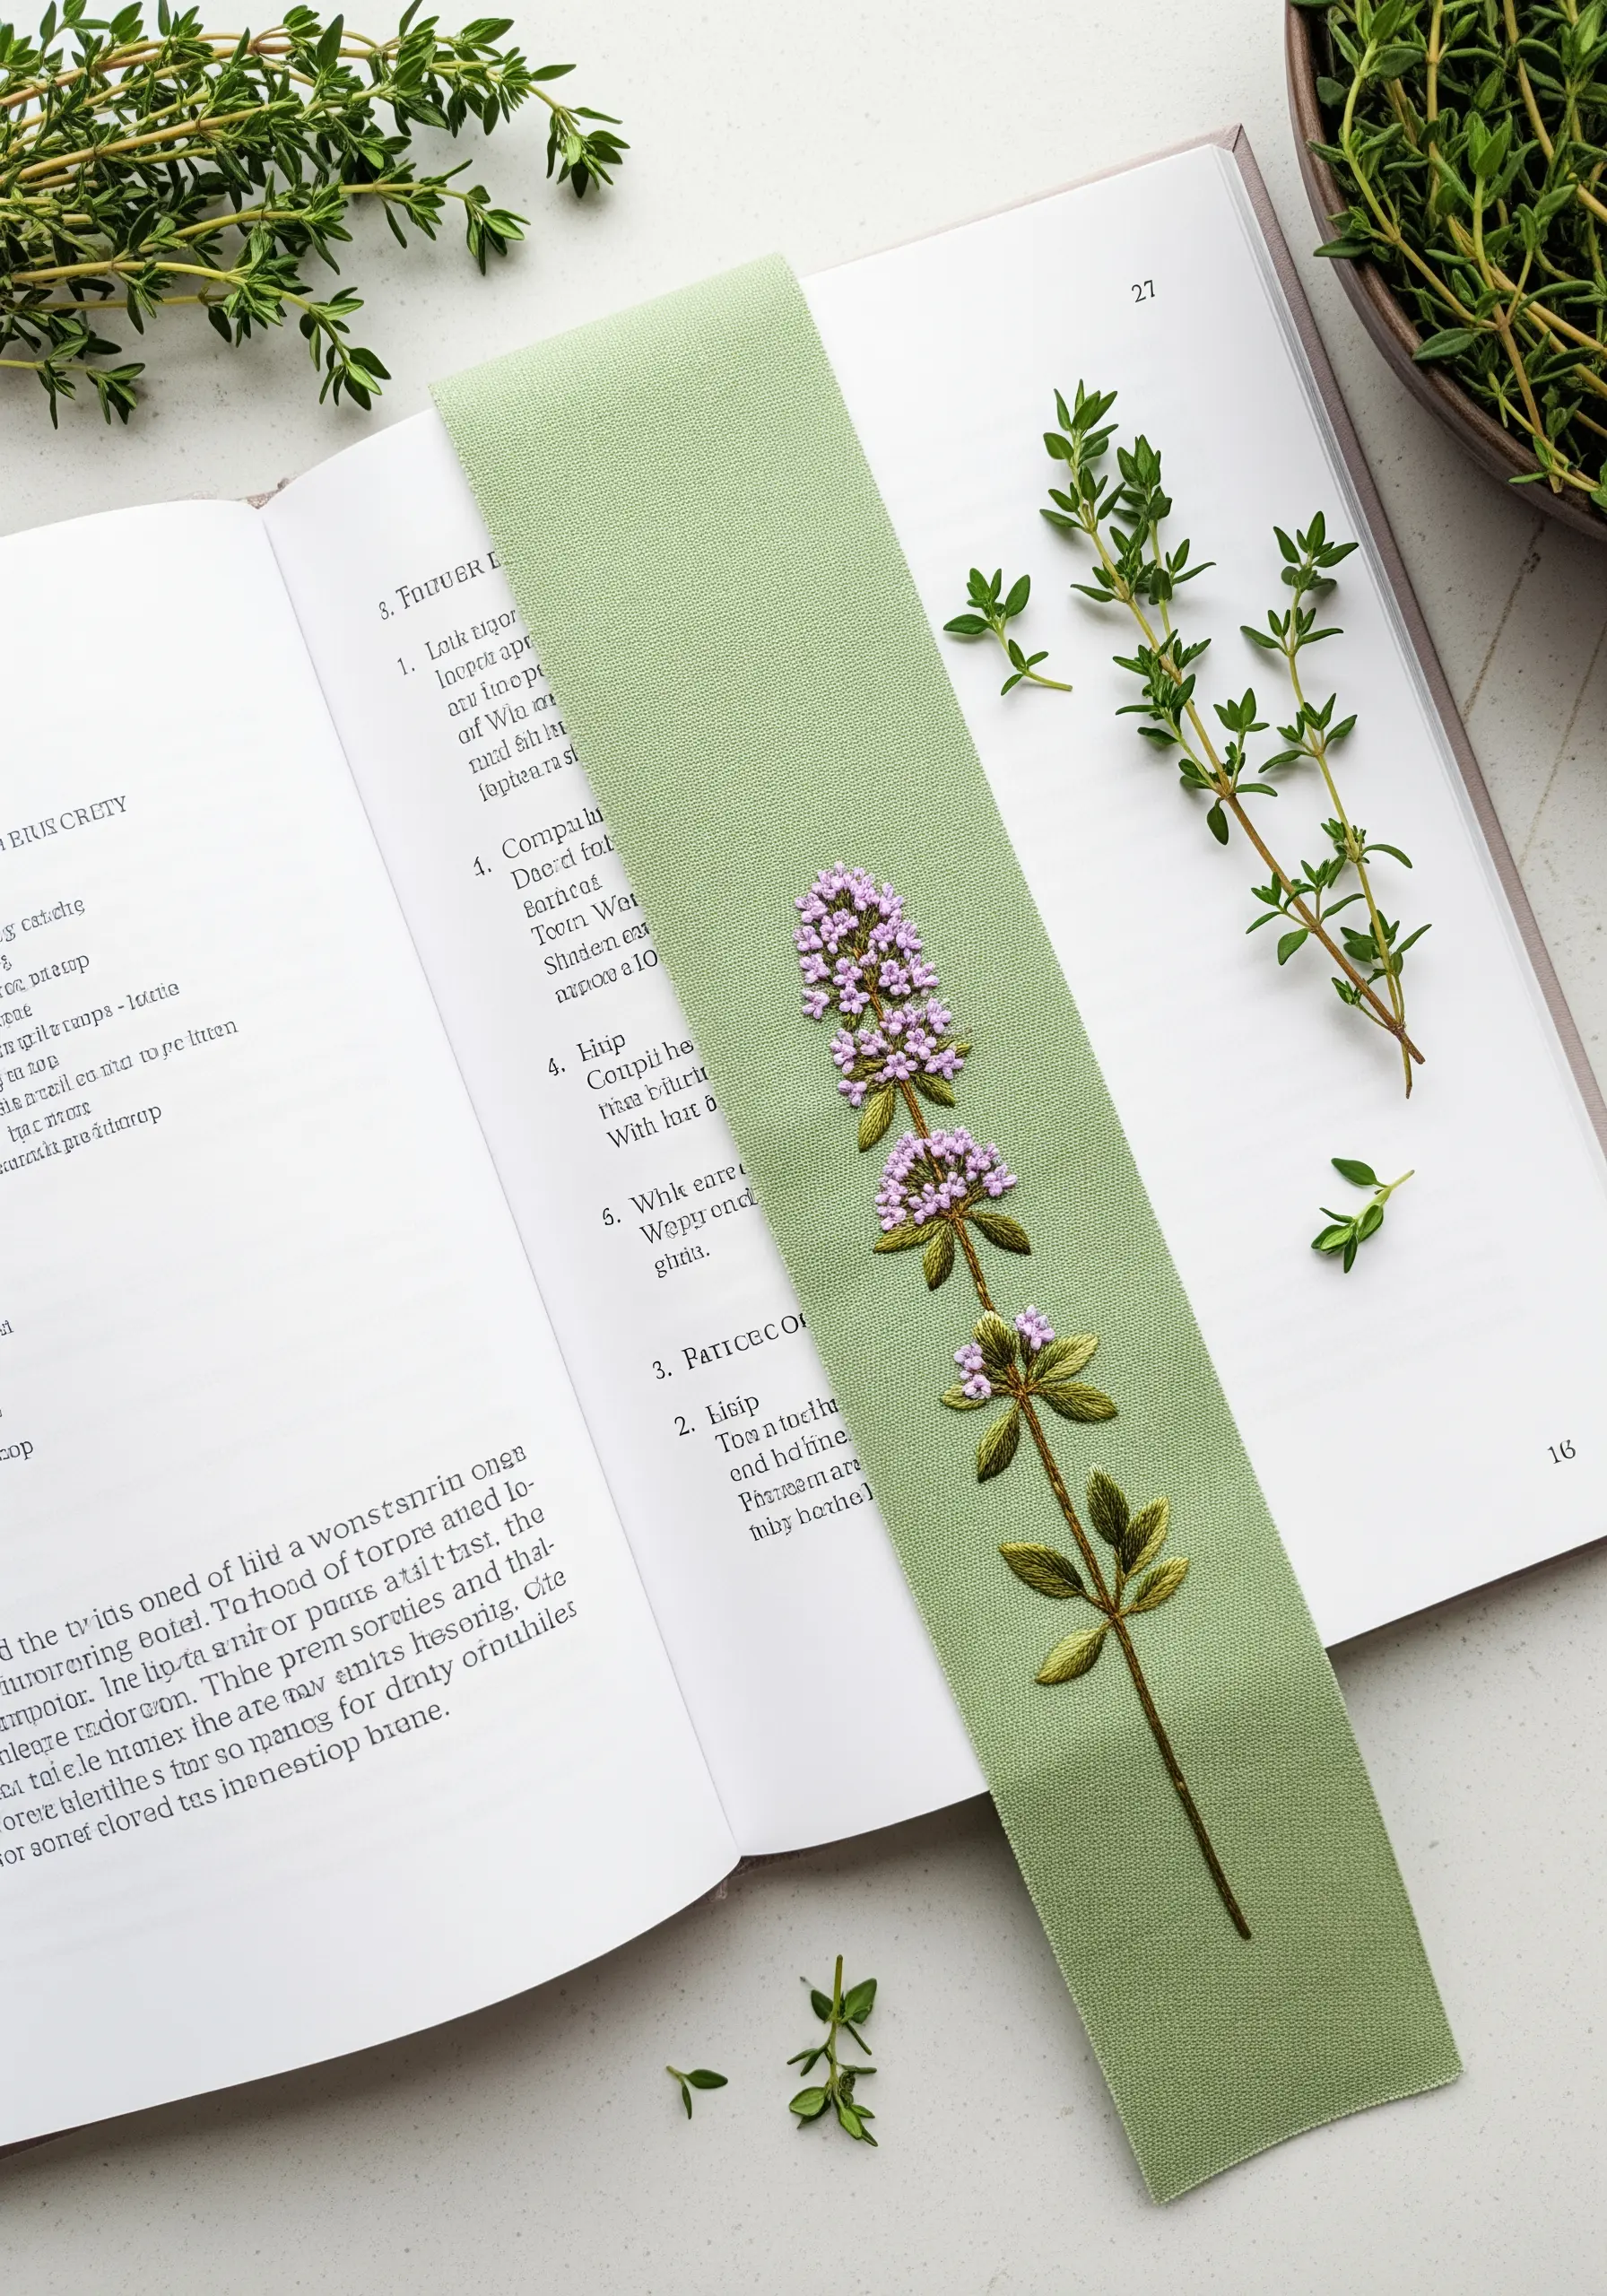
For a narrow project like a bookmark, clarity and precision are more important than complexity.
Use no more than two strands of floss to keep your thyme stalk and leaves from looking bulky.
Form the tiny leaves with single lazy daisy stitches, ensuring each one is a distinct oval shape before tacking it down.
For the blossoms, a cluster of French knots using a single strand of a contrasting color provides just enough texture without overwhelming the delicate scale of the design.
8. Making Colors Pop on Denim
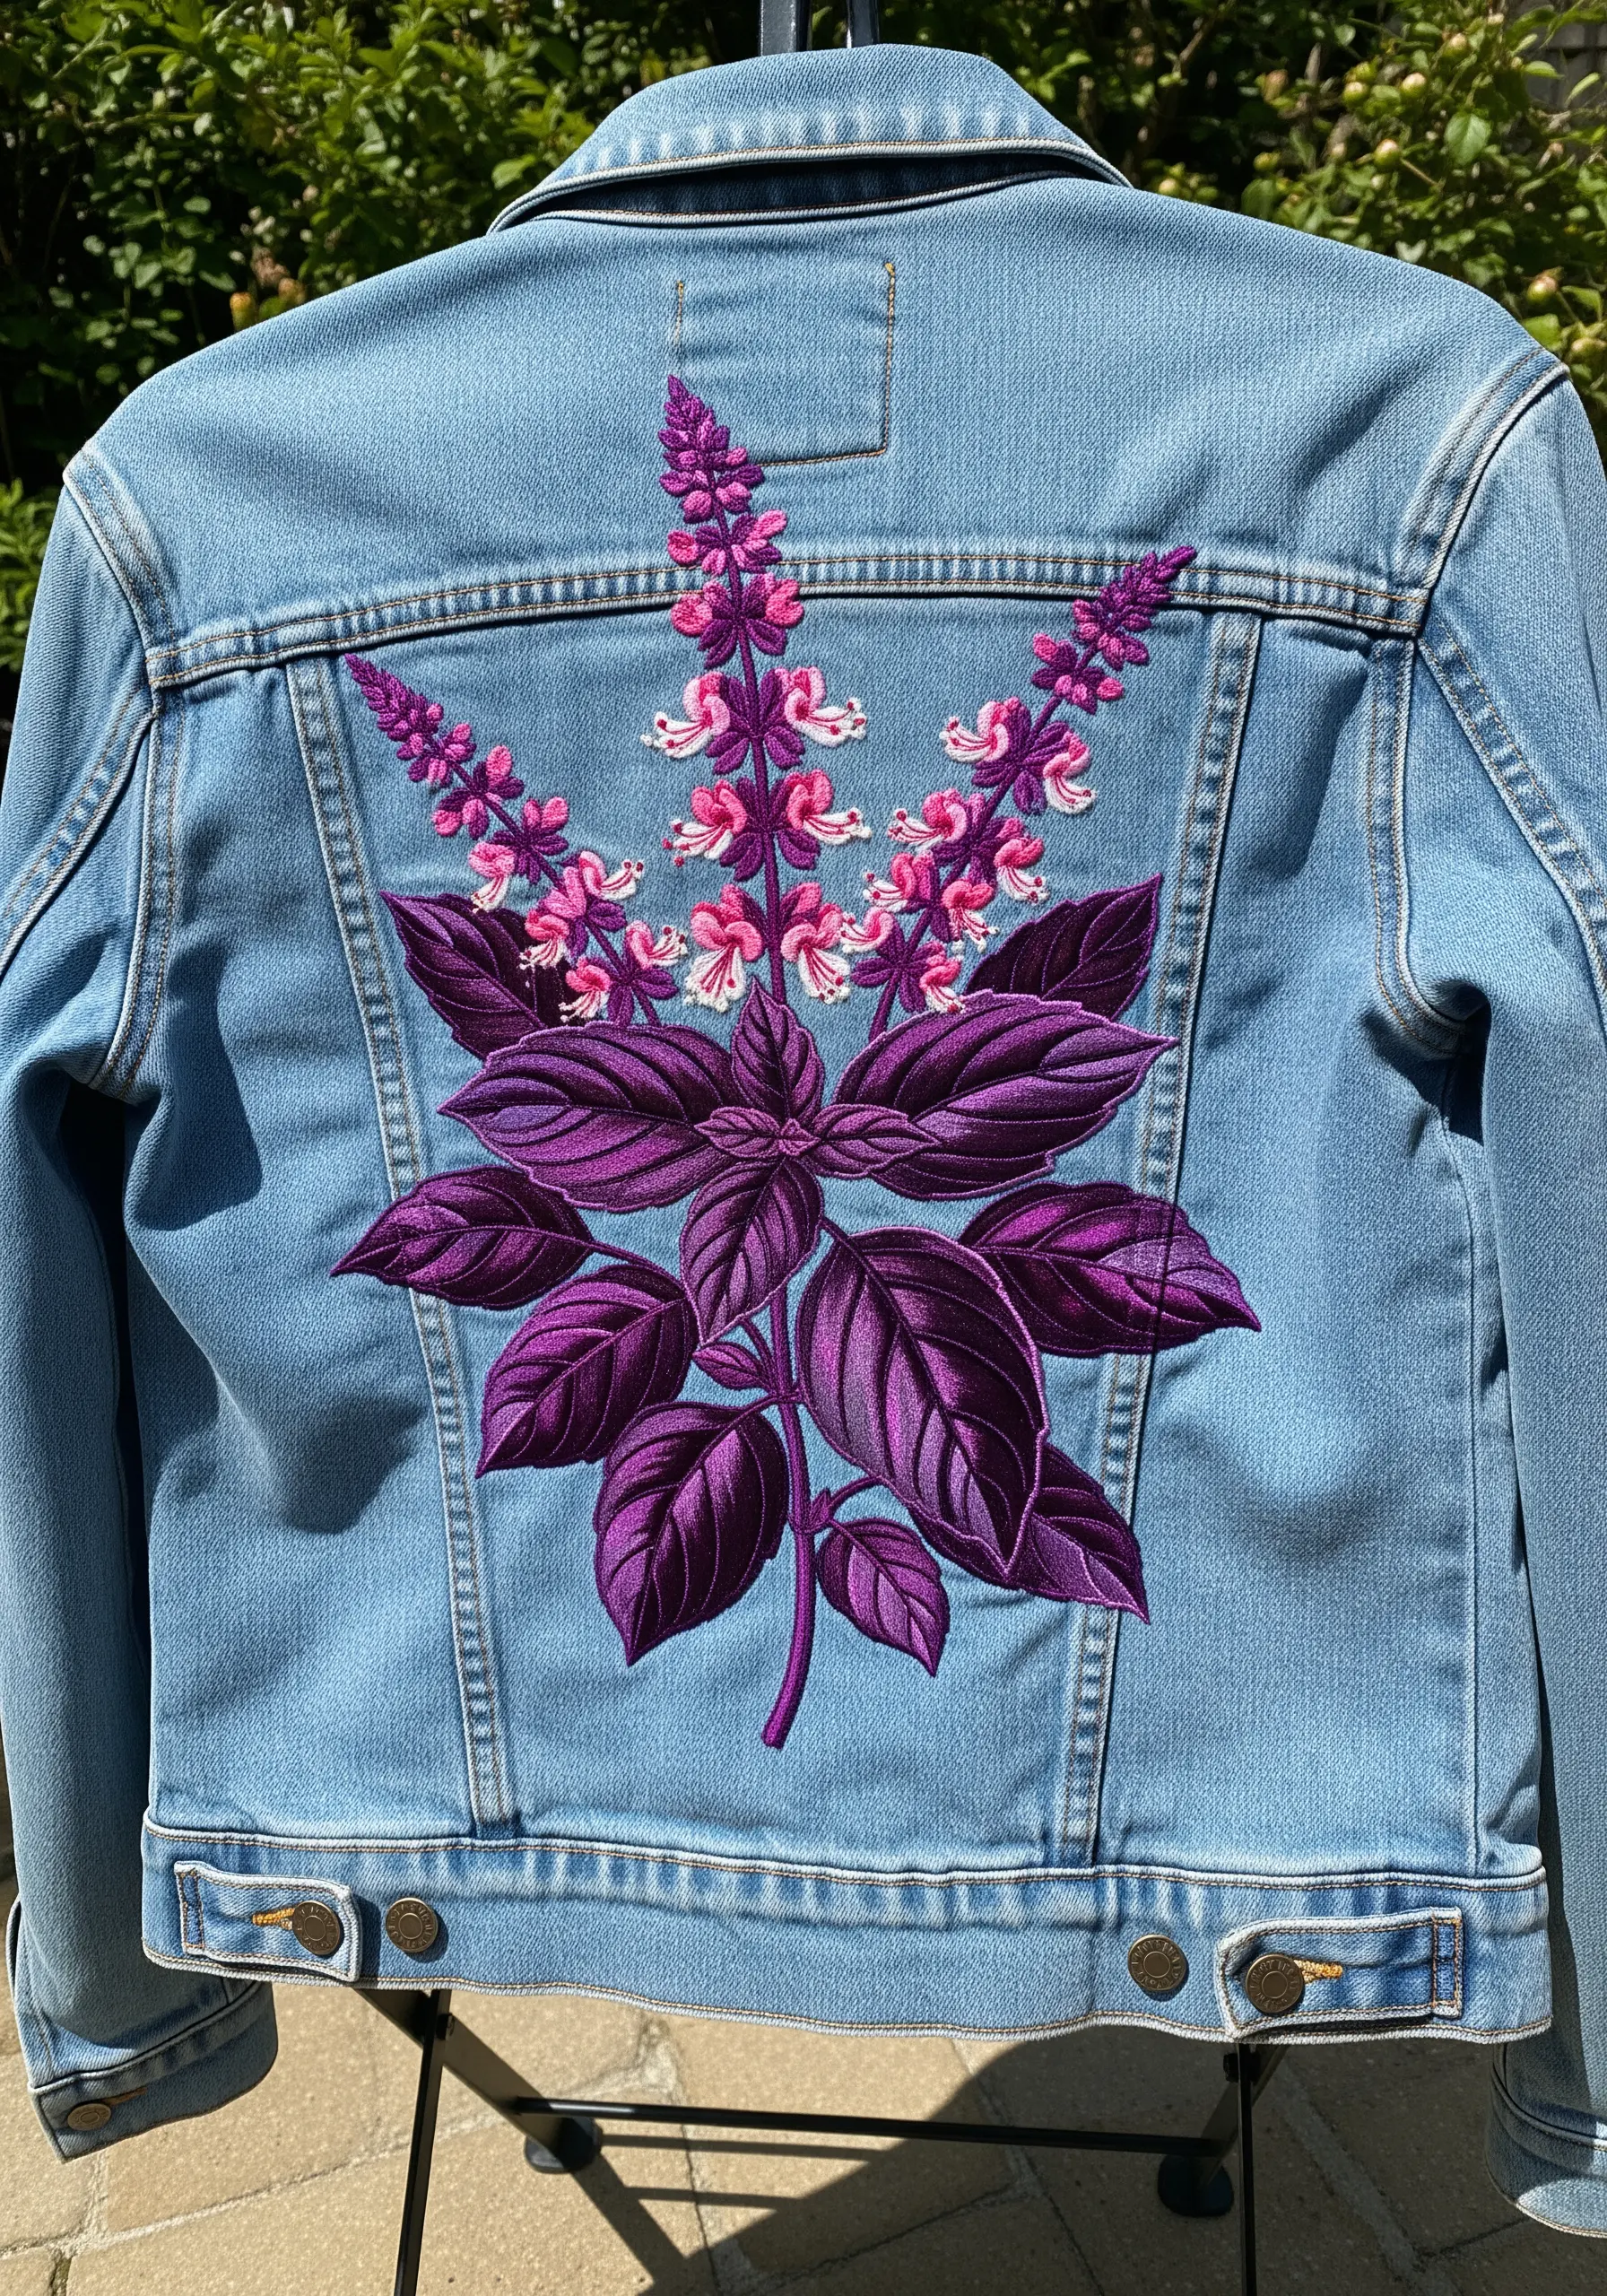
To ensure your purple basil design stands out vibrantly on a denim jacket, thread choice and preparation are crucial.
Use a high-sheen rayon floss instead of cotton; its reflective quality catches the light and prevents the purples and pinks from looking flat against the blue denim.
Always use a heavy-duty cut-away stabilizer on the inside of the jacket. This provides a solid foundation, preventing the dense satin stitches of the leaves from warping or puckering the fabric.
9. Embellishing Felt for a Nursery Mobile
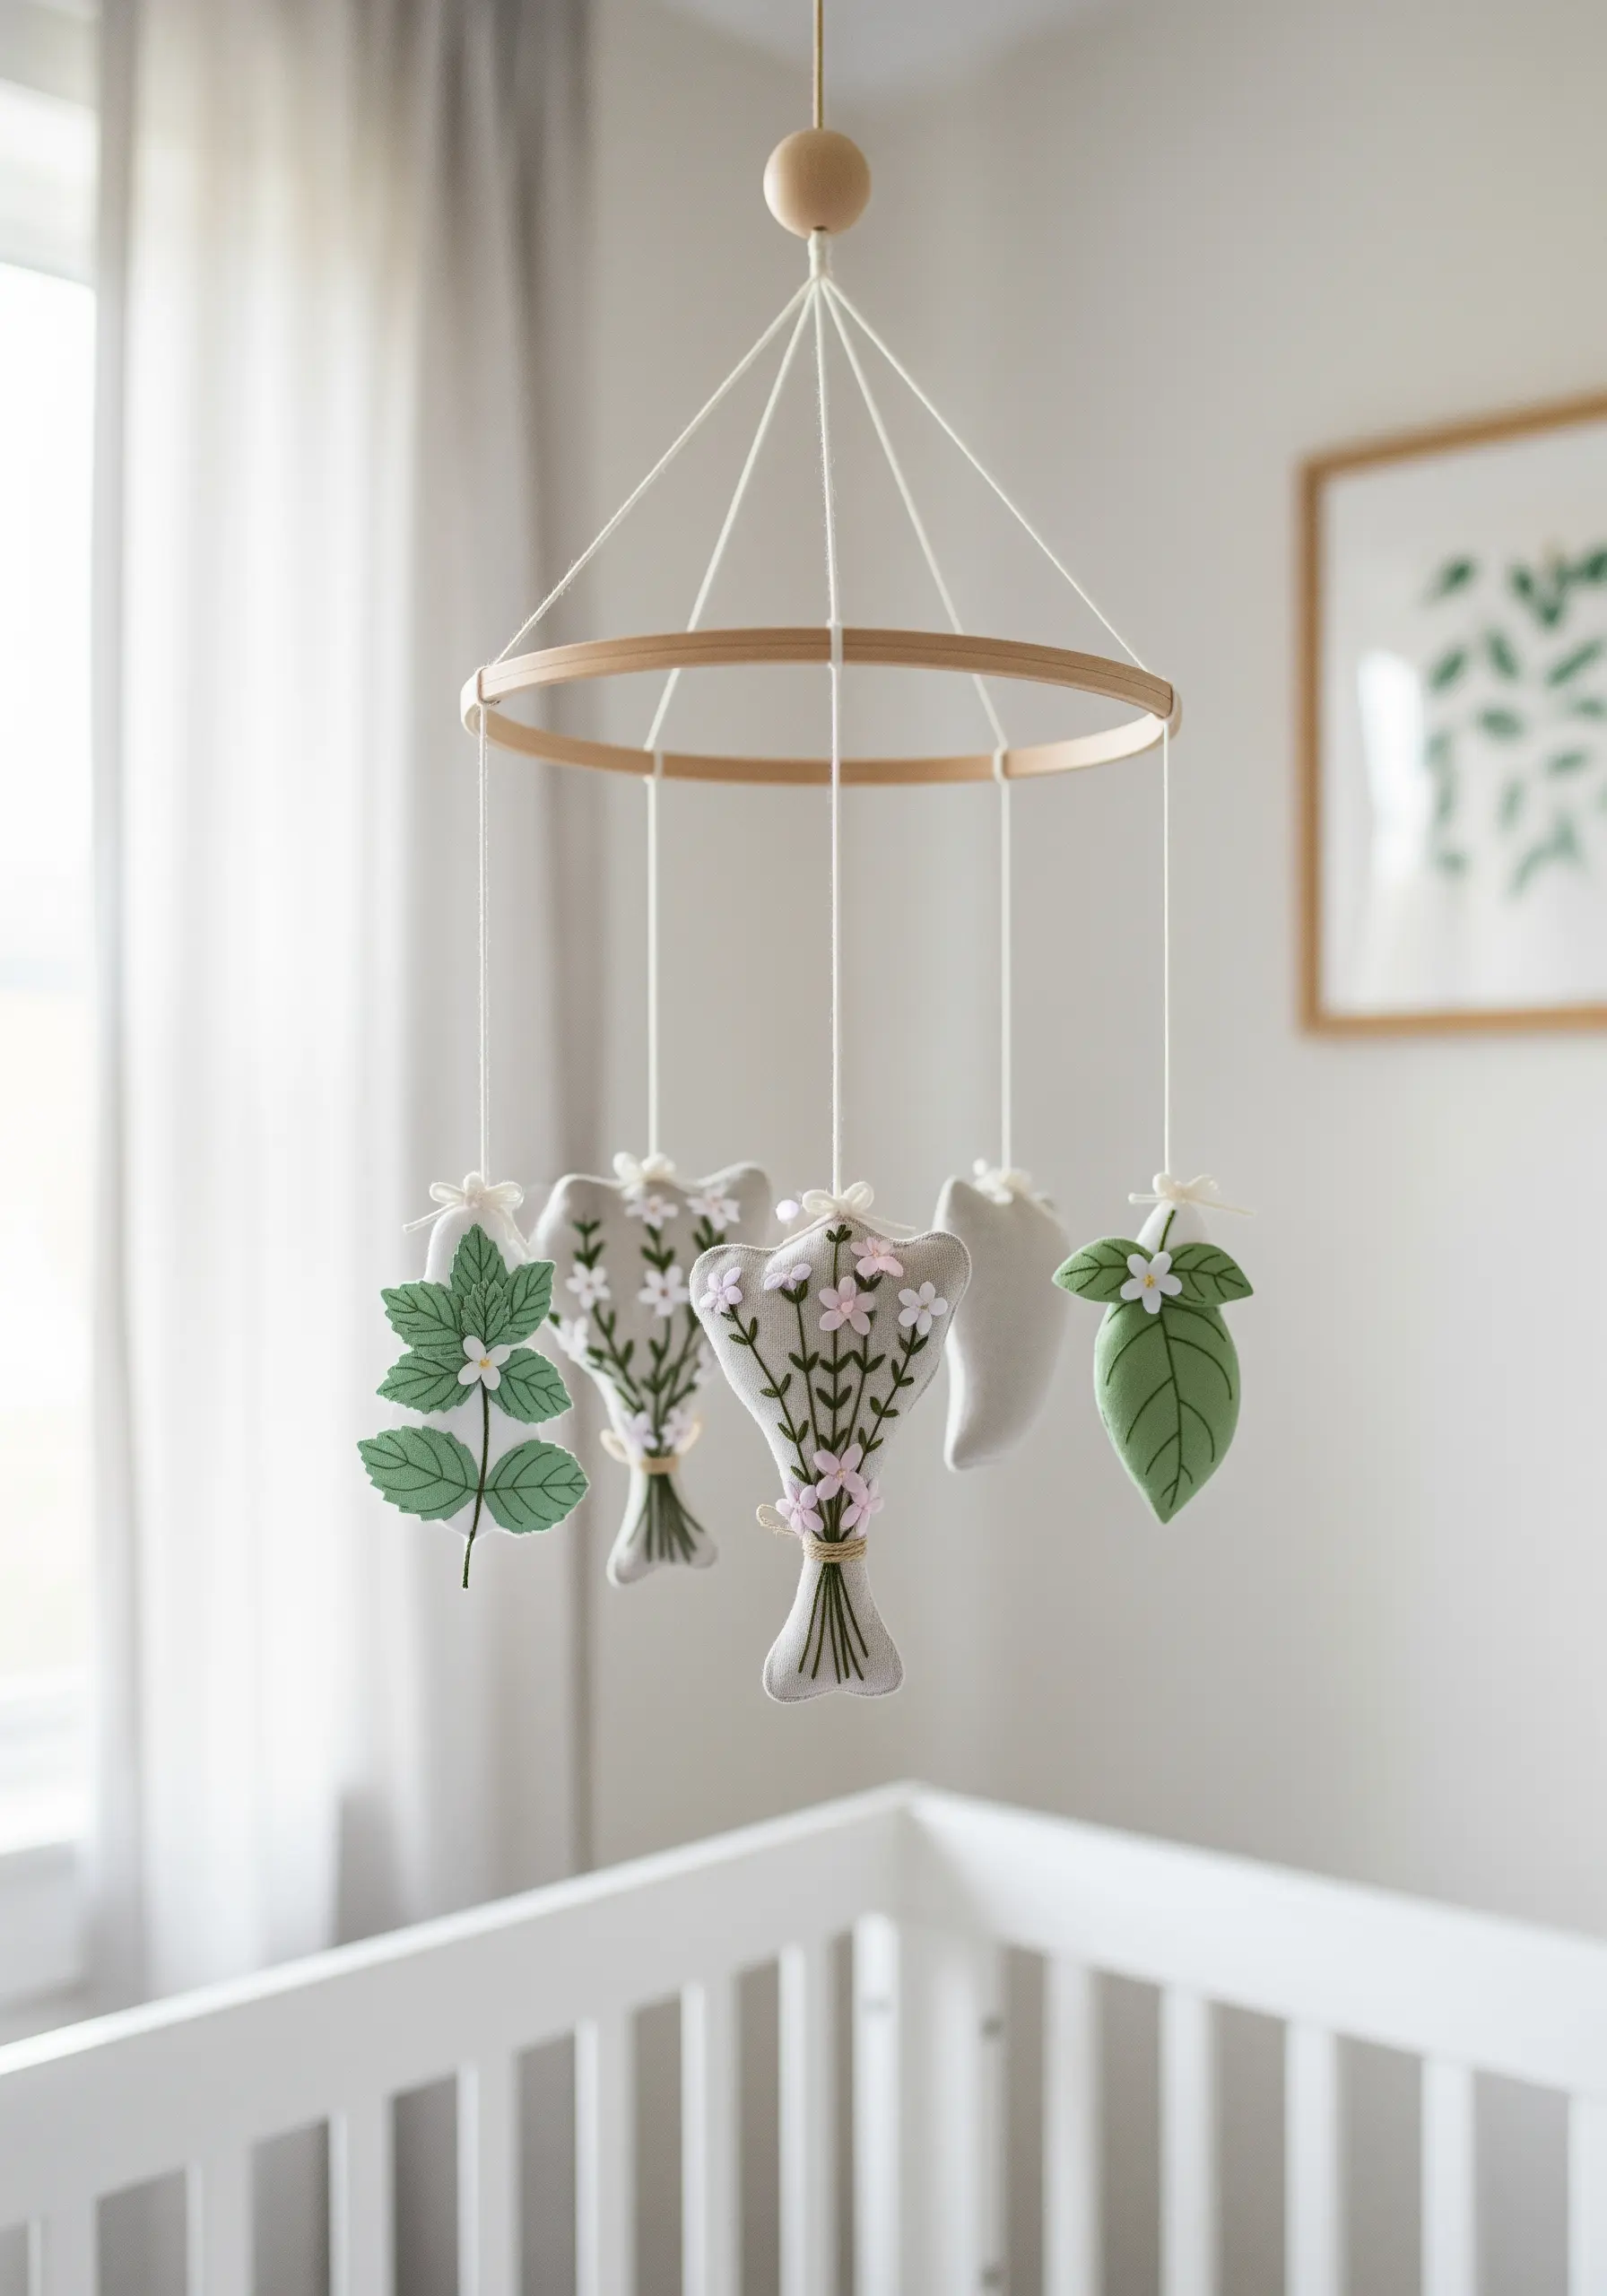
Elevate simple felt shapes for a baby mobile by adding thoughtful, hand-stitched details.
On the cut-out leaf forms, use a contrasting shade of green to add a central vein with a simple backstitch. This adds structure and a handmade touch.
For the tiny flowers, a few strategically placed French knots are all you need to transform a plain felt bouquet into a charming focal point.
These small embroidery ideas add character without compromising the soft, gentle aesthetic suitable for a nursery.
10. Stitching Clean Typography for Herb Sachets
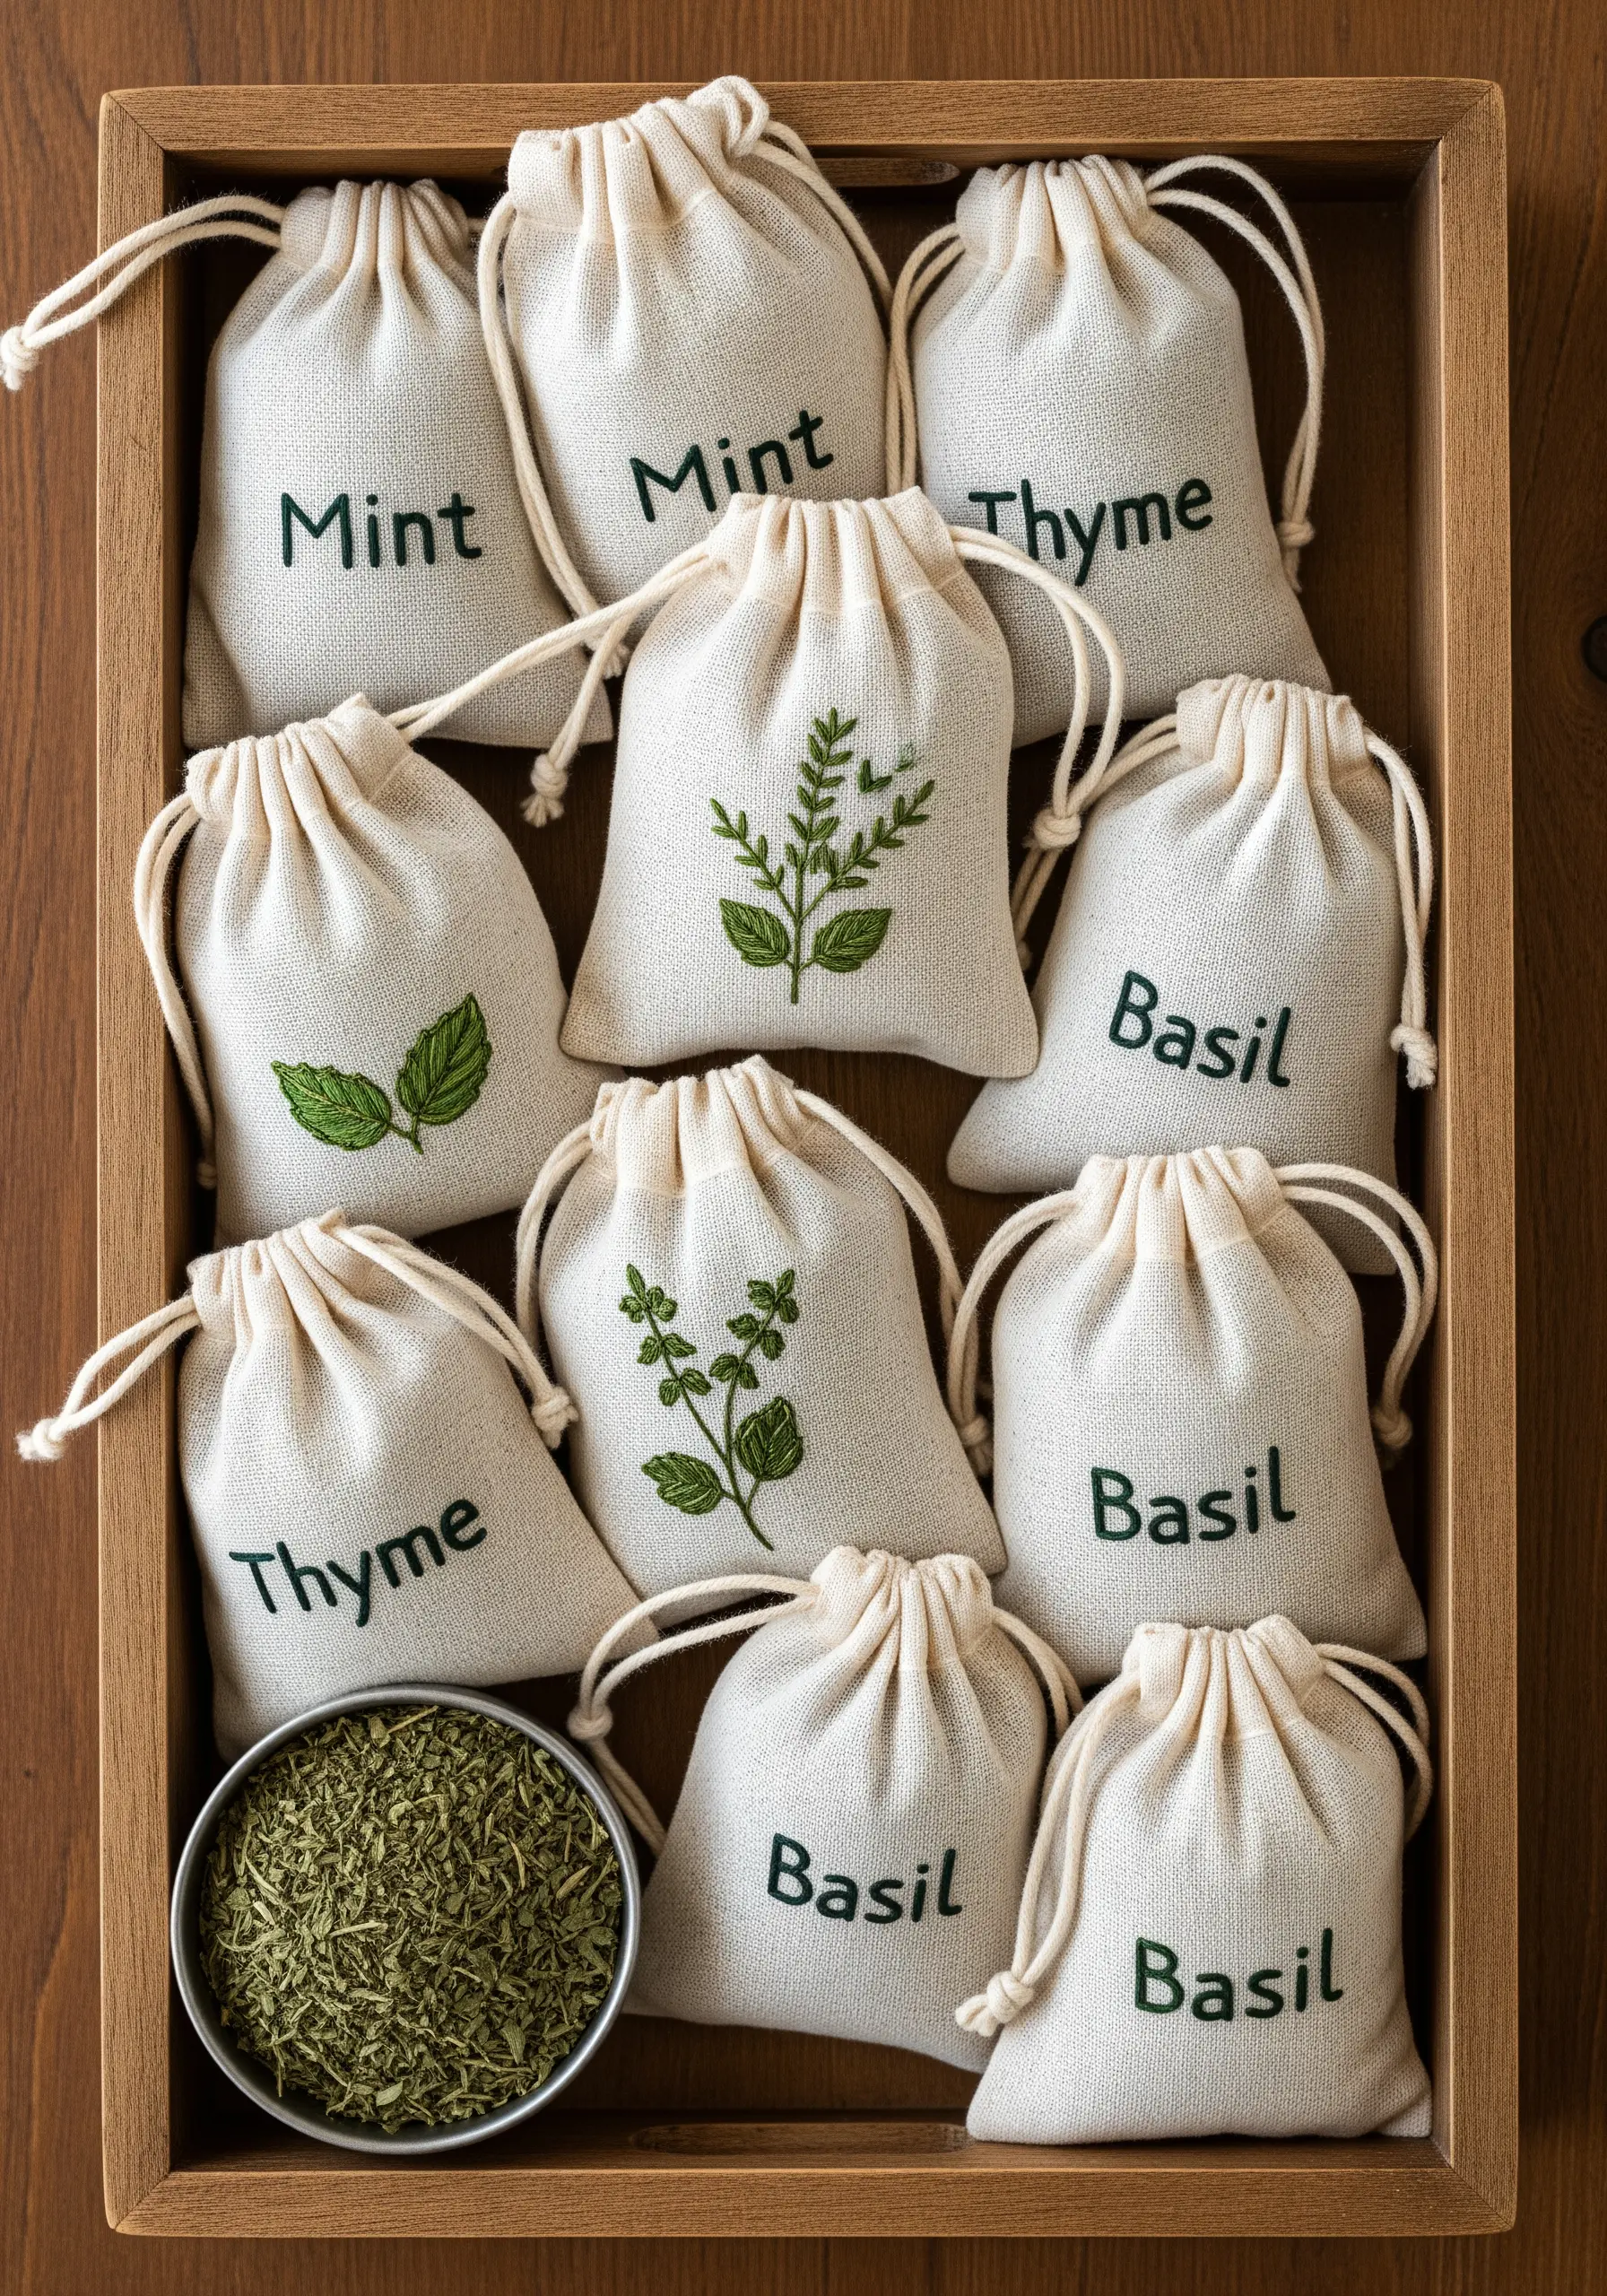
For clear, legible text on small herb bags, choose a stitch that provides a clean, continuous line.
A split stitch is an excellent choice for lettering, as it creates a solid line that resembles a miniature chain, making the letters sharp and easy to read.
Pair the text with a simple, single-color herb motif stitched in backstitch. Using the same thread weight for both the text and the icon creates a cohesive, rustic, and polished look.
11. Taming Burlap for Vibrant Leaf Designs
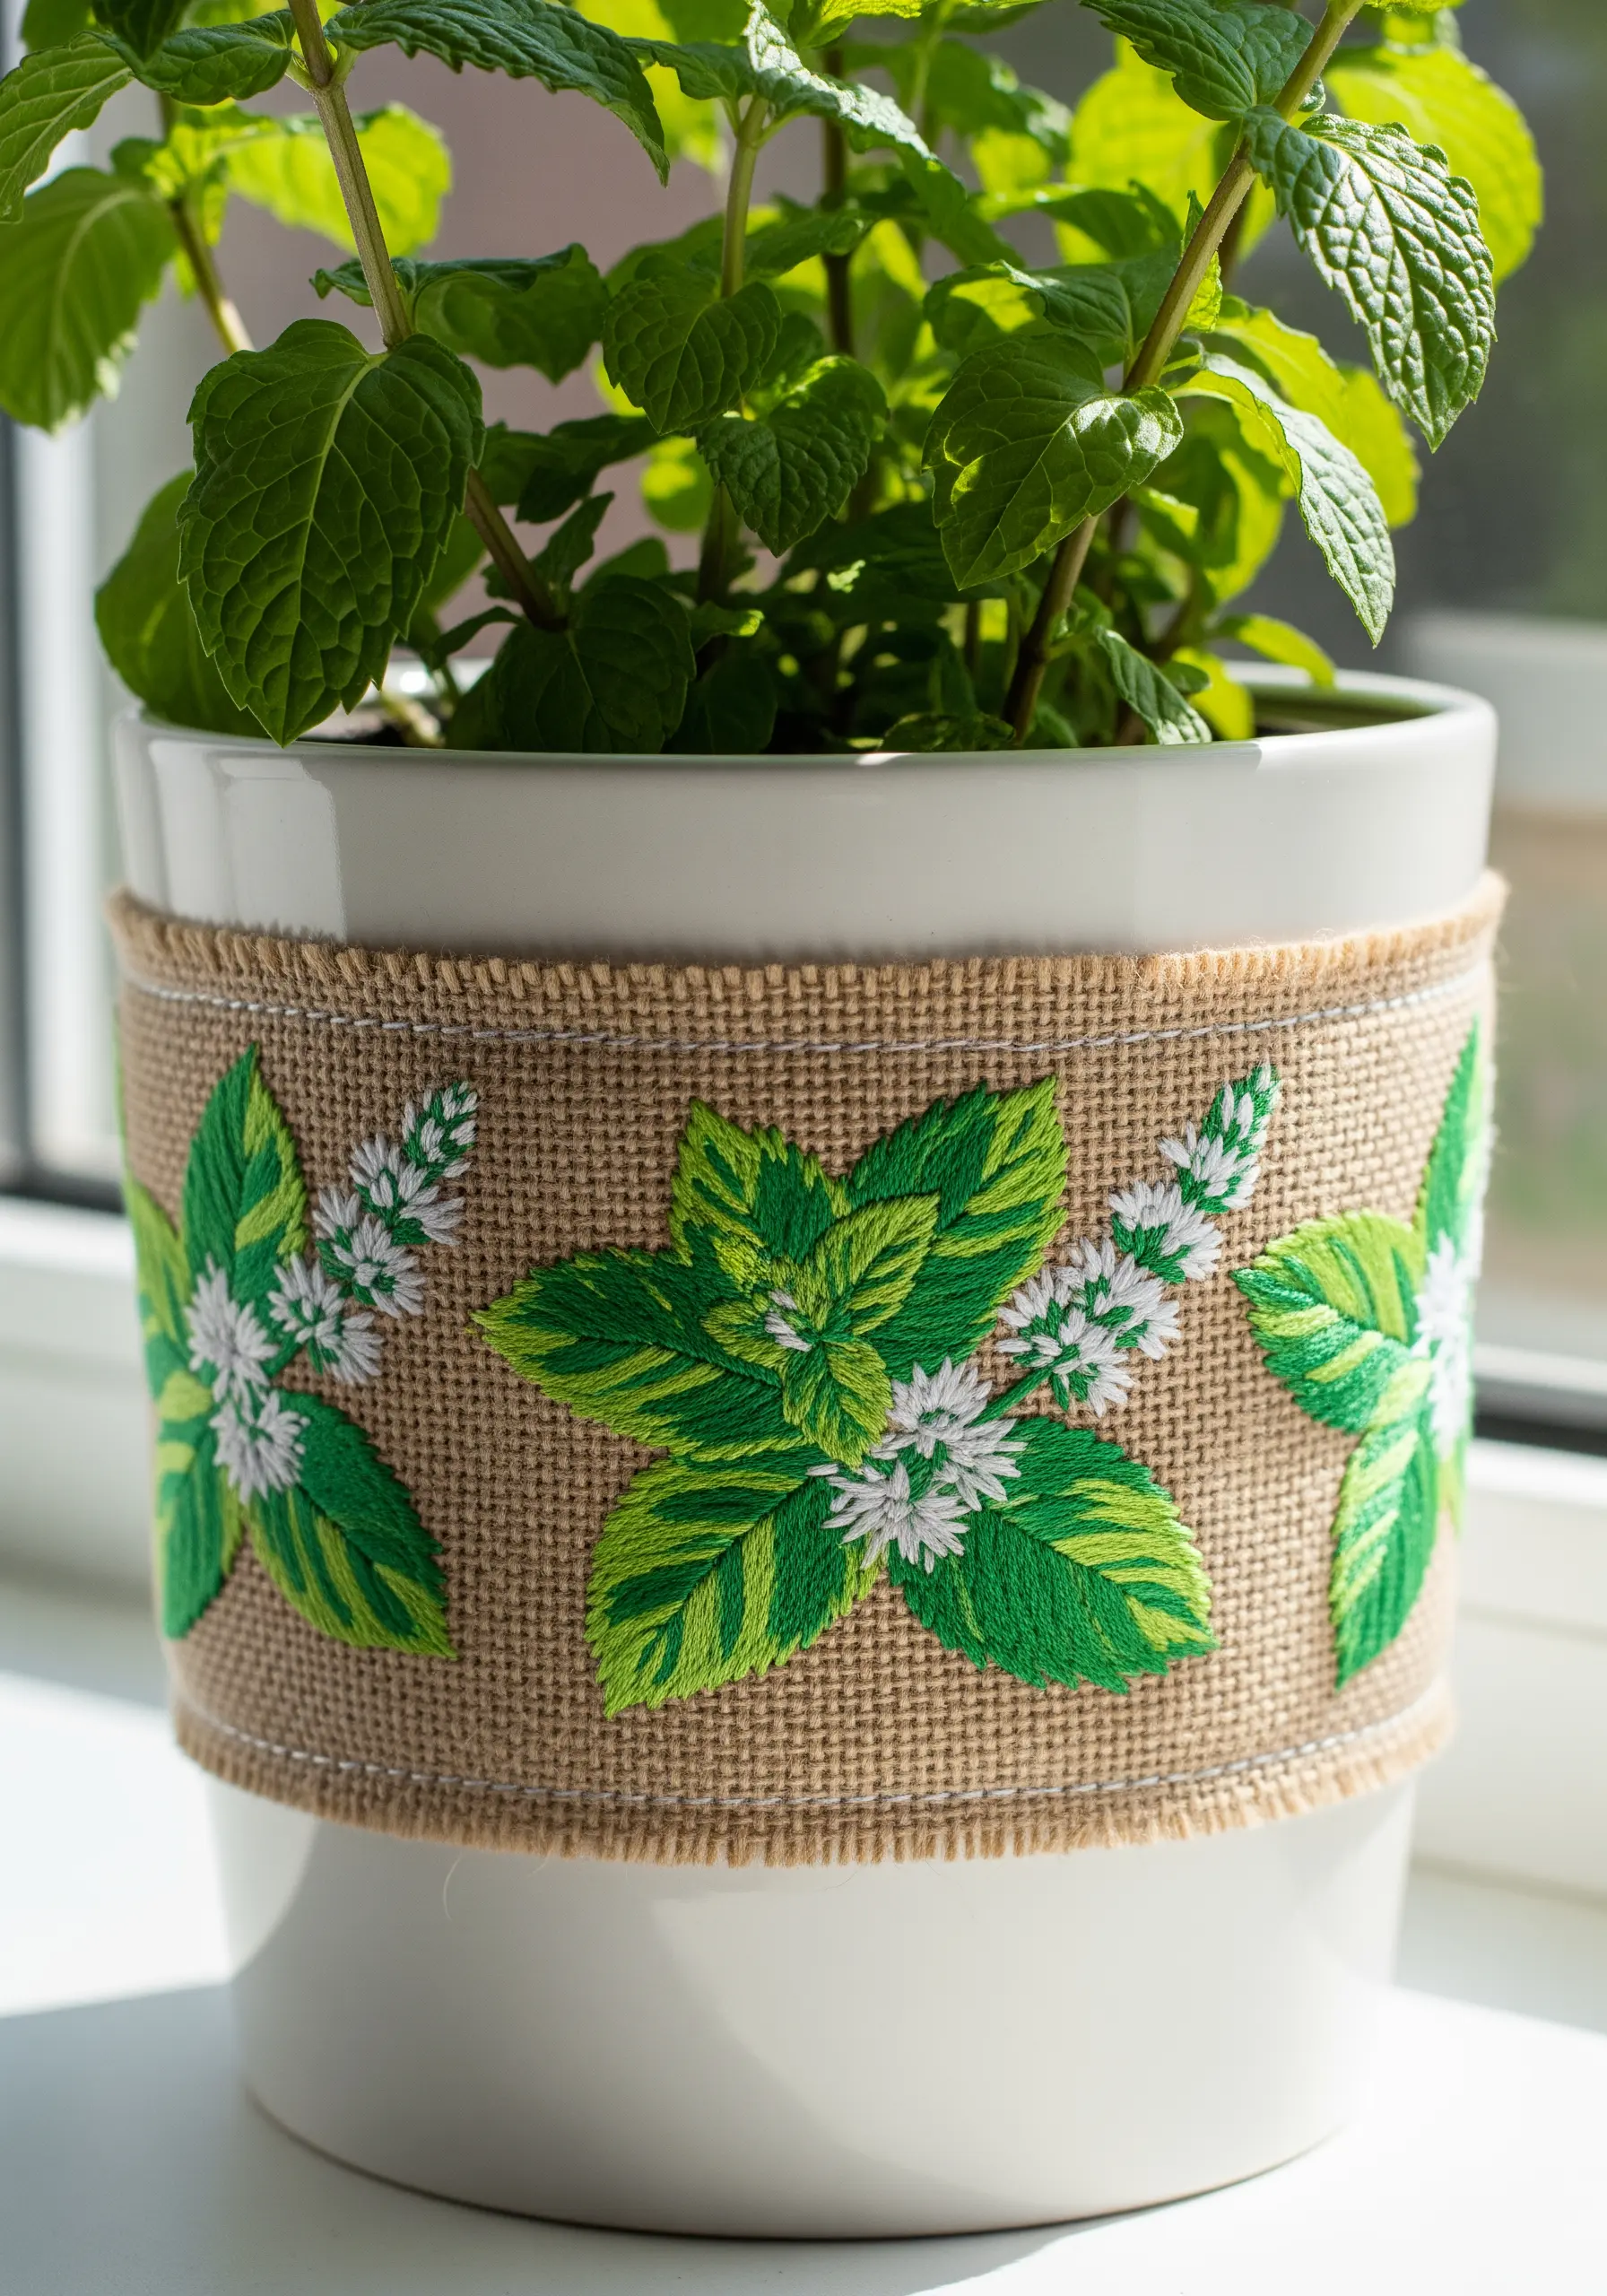
Stitching on a coarse, open-weave fabric like burlap requires a stable foundation to achieve clean shapes.
Iron on a fusible interfacing to the back of the burlap before you begin stitching. This closes the gaps in the weave and prevents your stitches from sinking or becoming distorted.
To create the variegated mint leaves, use a long-and-short stitch, blending two or three shades of green. This technique allows for smooth color transitions, even on a highly textured surface.
12. Crafting an Asymmetrical Floral Border
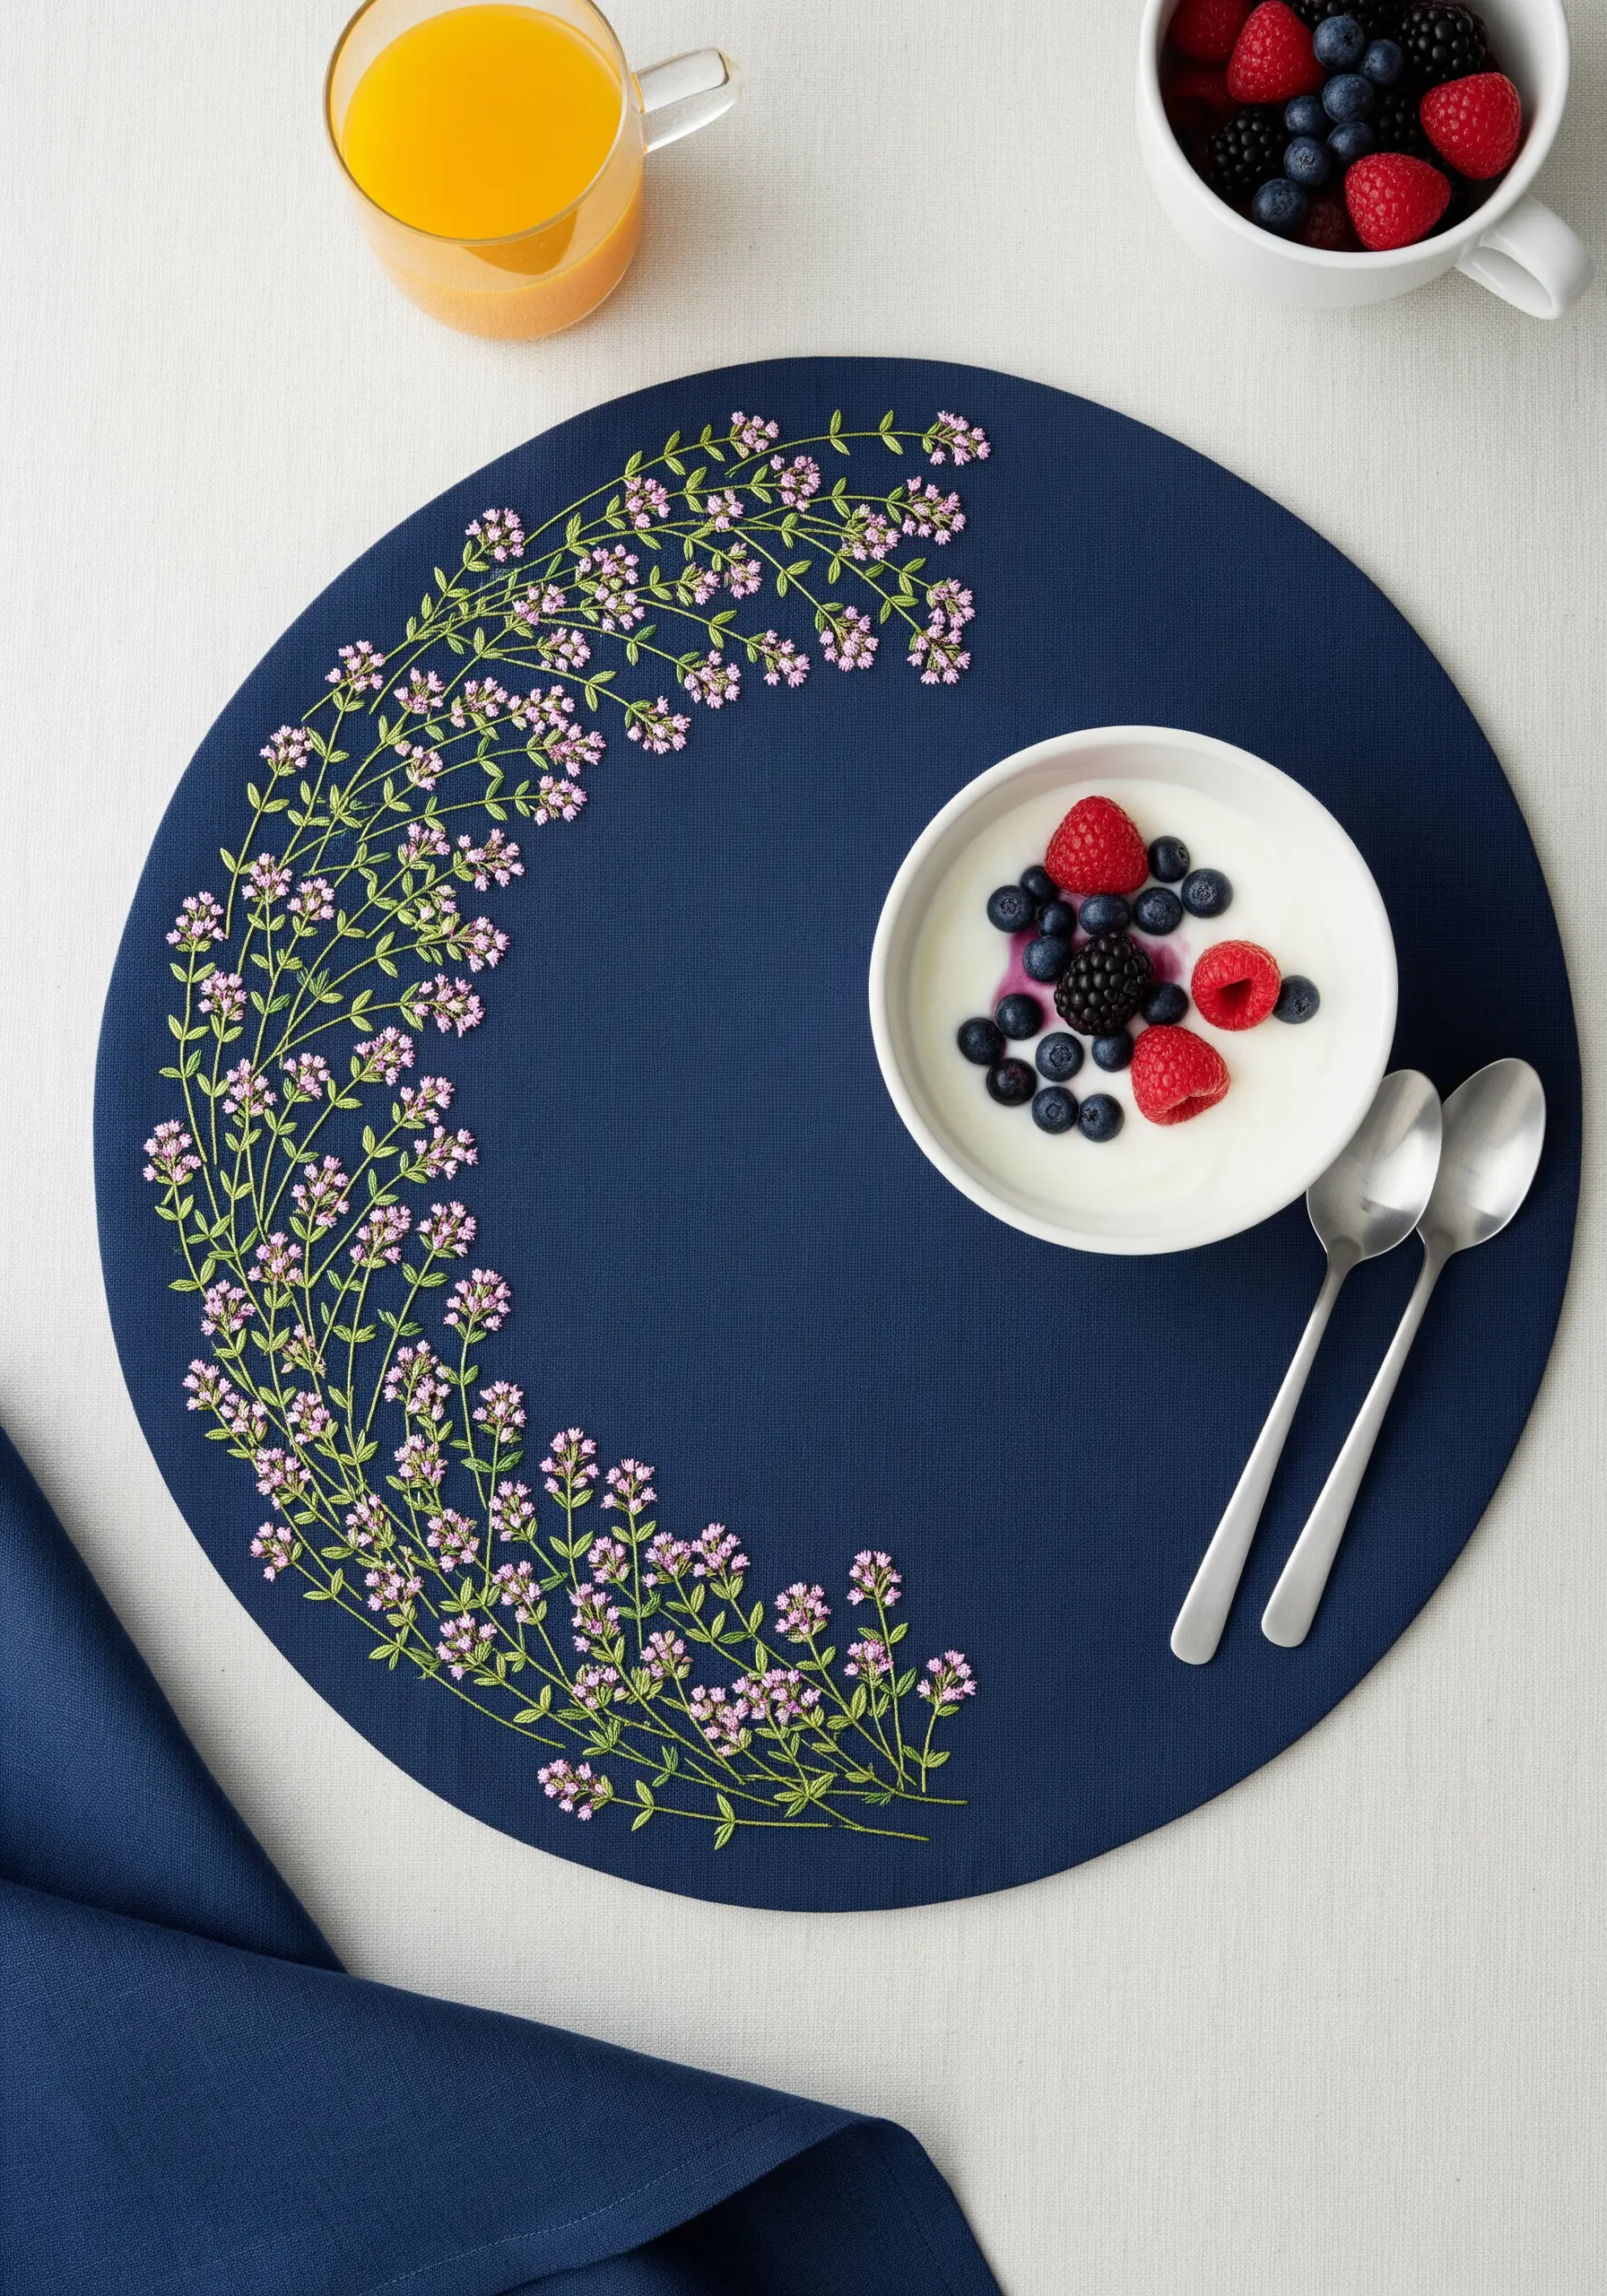
Create a sophisticated placemat by stitching an organic, crescent-shaped border of flowering thyme.
Lightly trace a curved guideline with a water-soluble pen to direct the flow of your stems. Vary the height and angle of each stem to create a natural, windswept appearance.
Use a mix of French knots and tiny seed stitches for the blossoms, concentrating them more heavily in the center of the curve and letting them scatter sparsely toward the ends. This creates a sense of rhythm and flow.
13. Embroidering on Sheer Kitchen Curtains
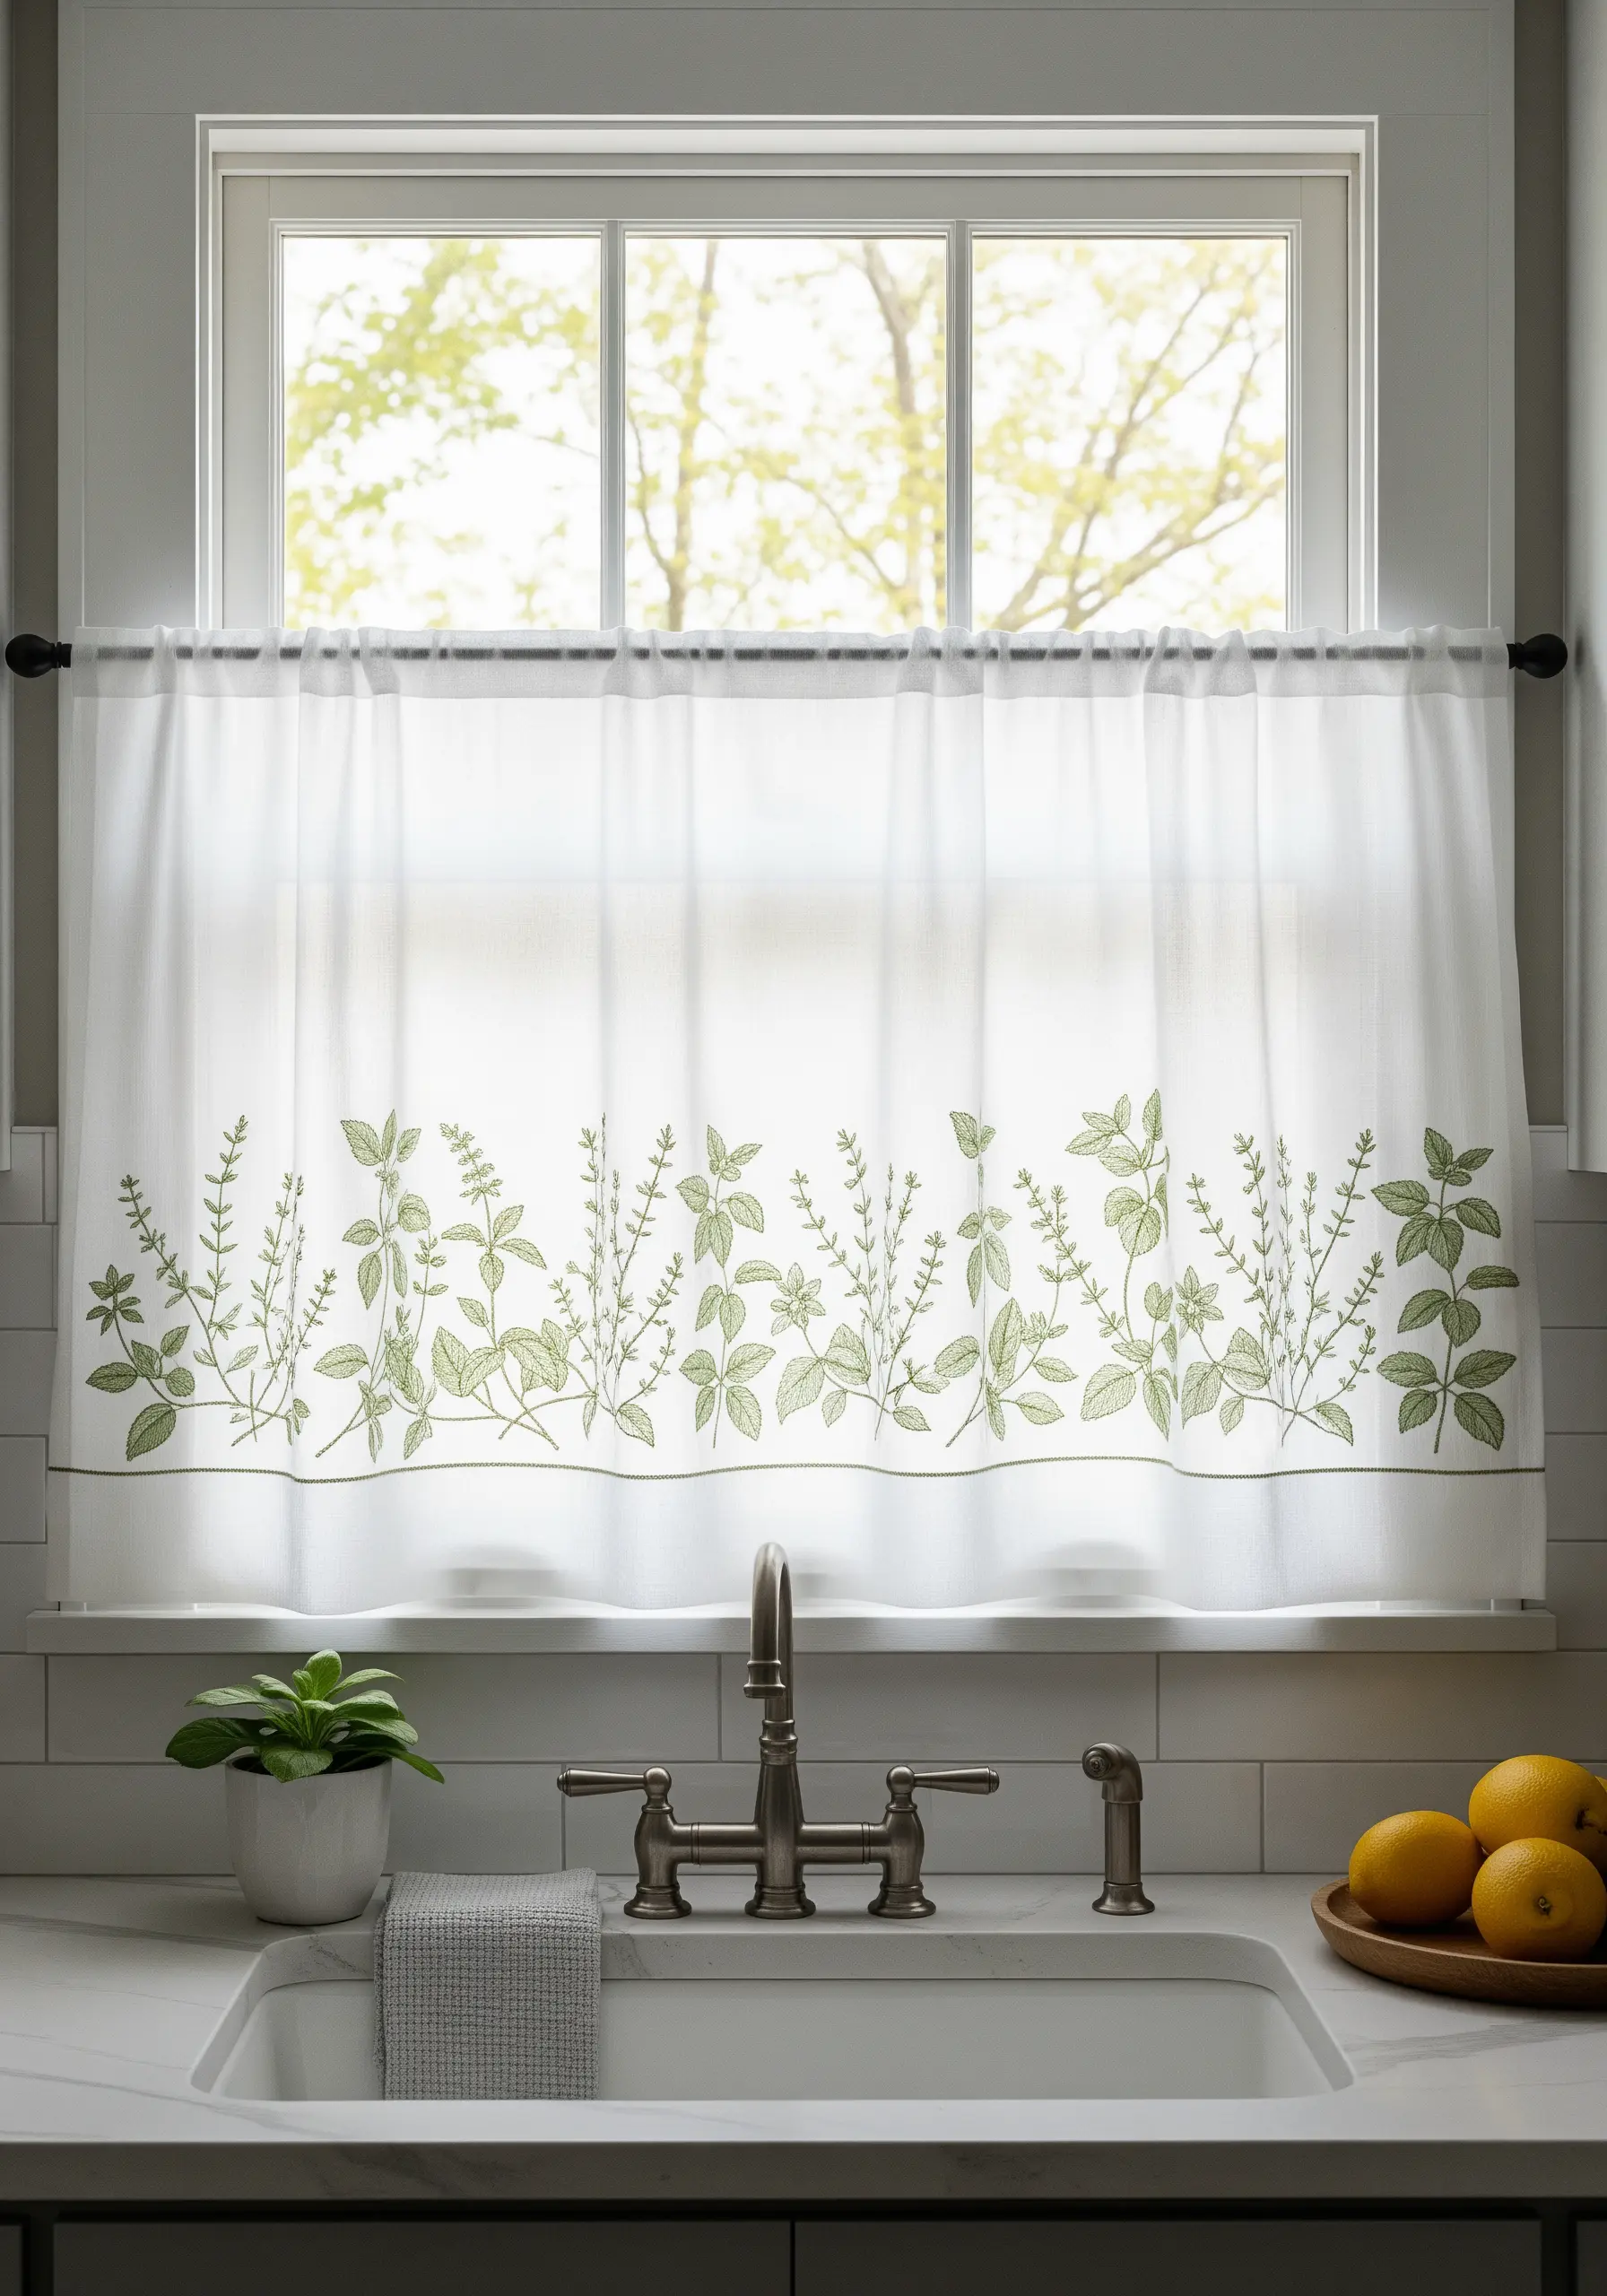
To add a delicate herb border to sheer café curtains without puckering the fabric, your technique must be lightweight.
Use a water-soluble stabilizer; it will provide the necessary support during stitching and then wash away completely, leaving no stiffness behind.
Choose a simple outline stitch like a stem stitch or backstitch, and use only two strands of floss. This keeps the design from becoming too heavy and causing the delicate fabric to sag.
14. Placing a Subtle Pocket Embellishment
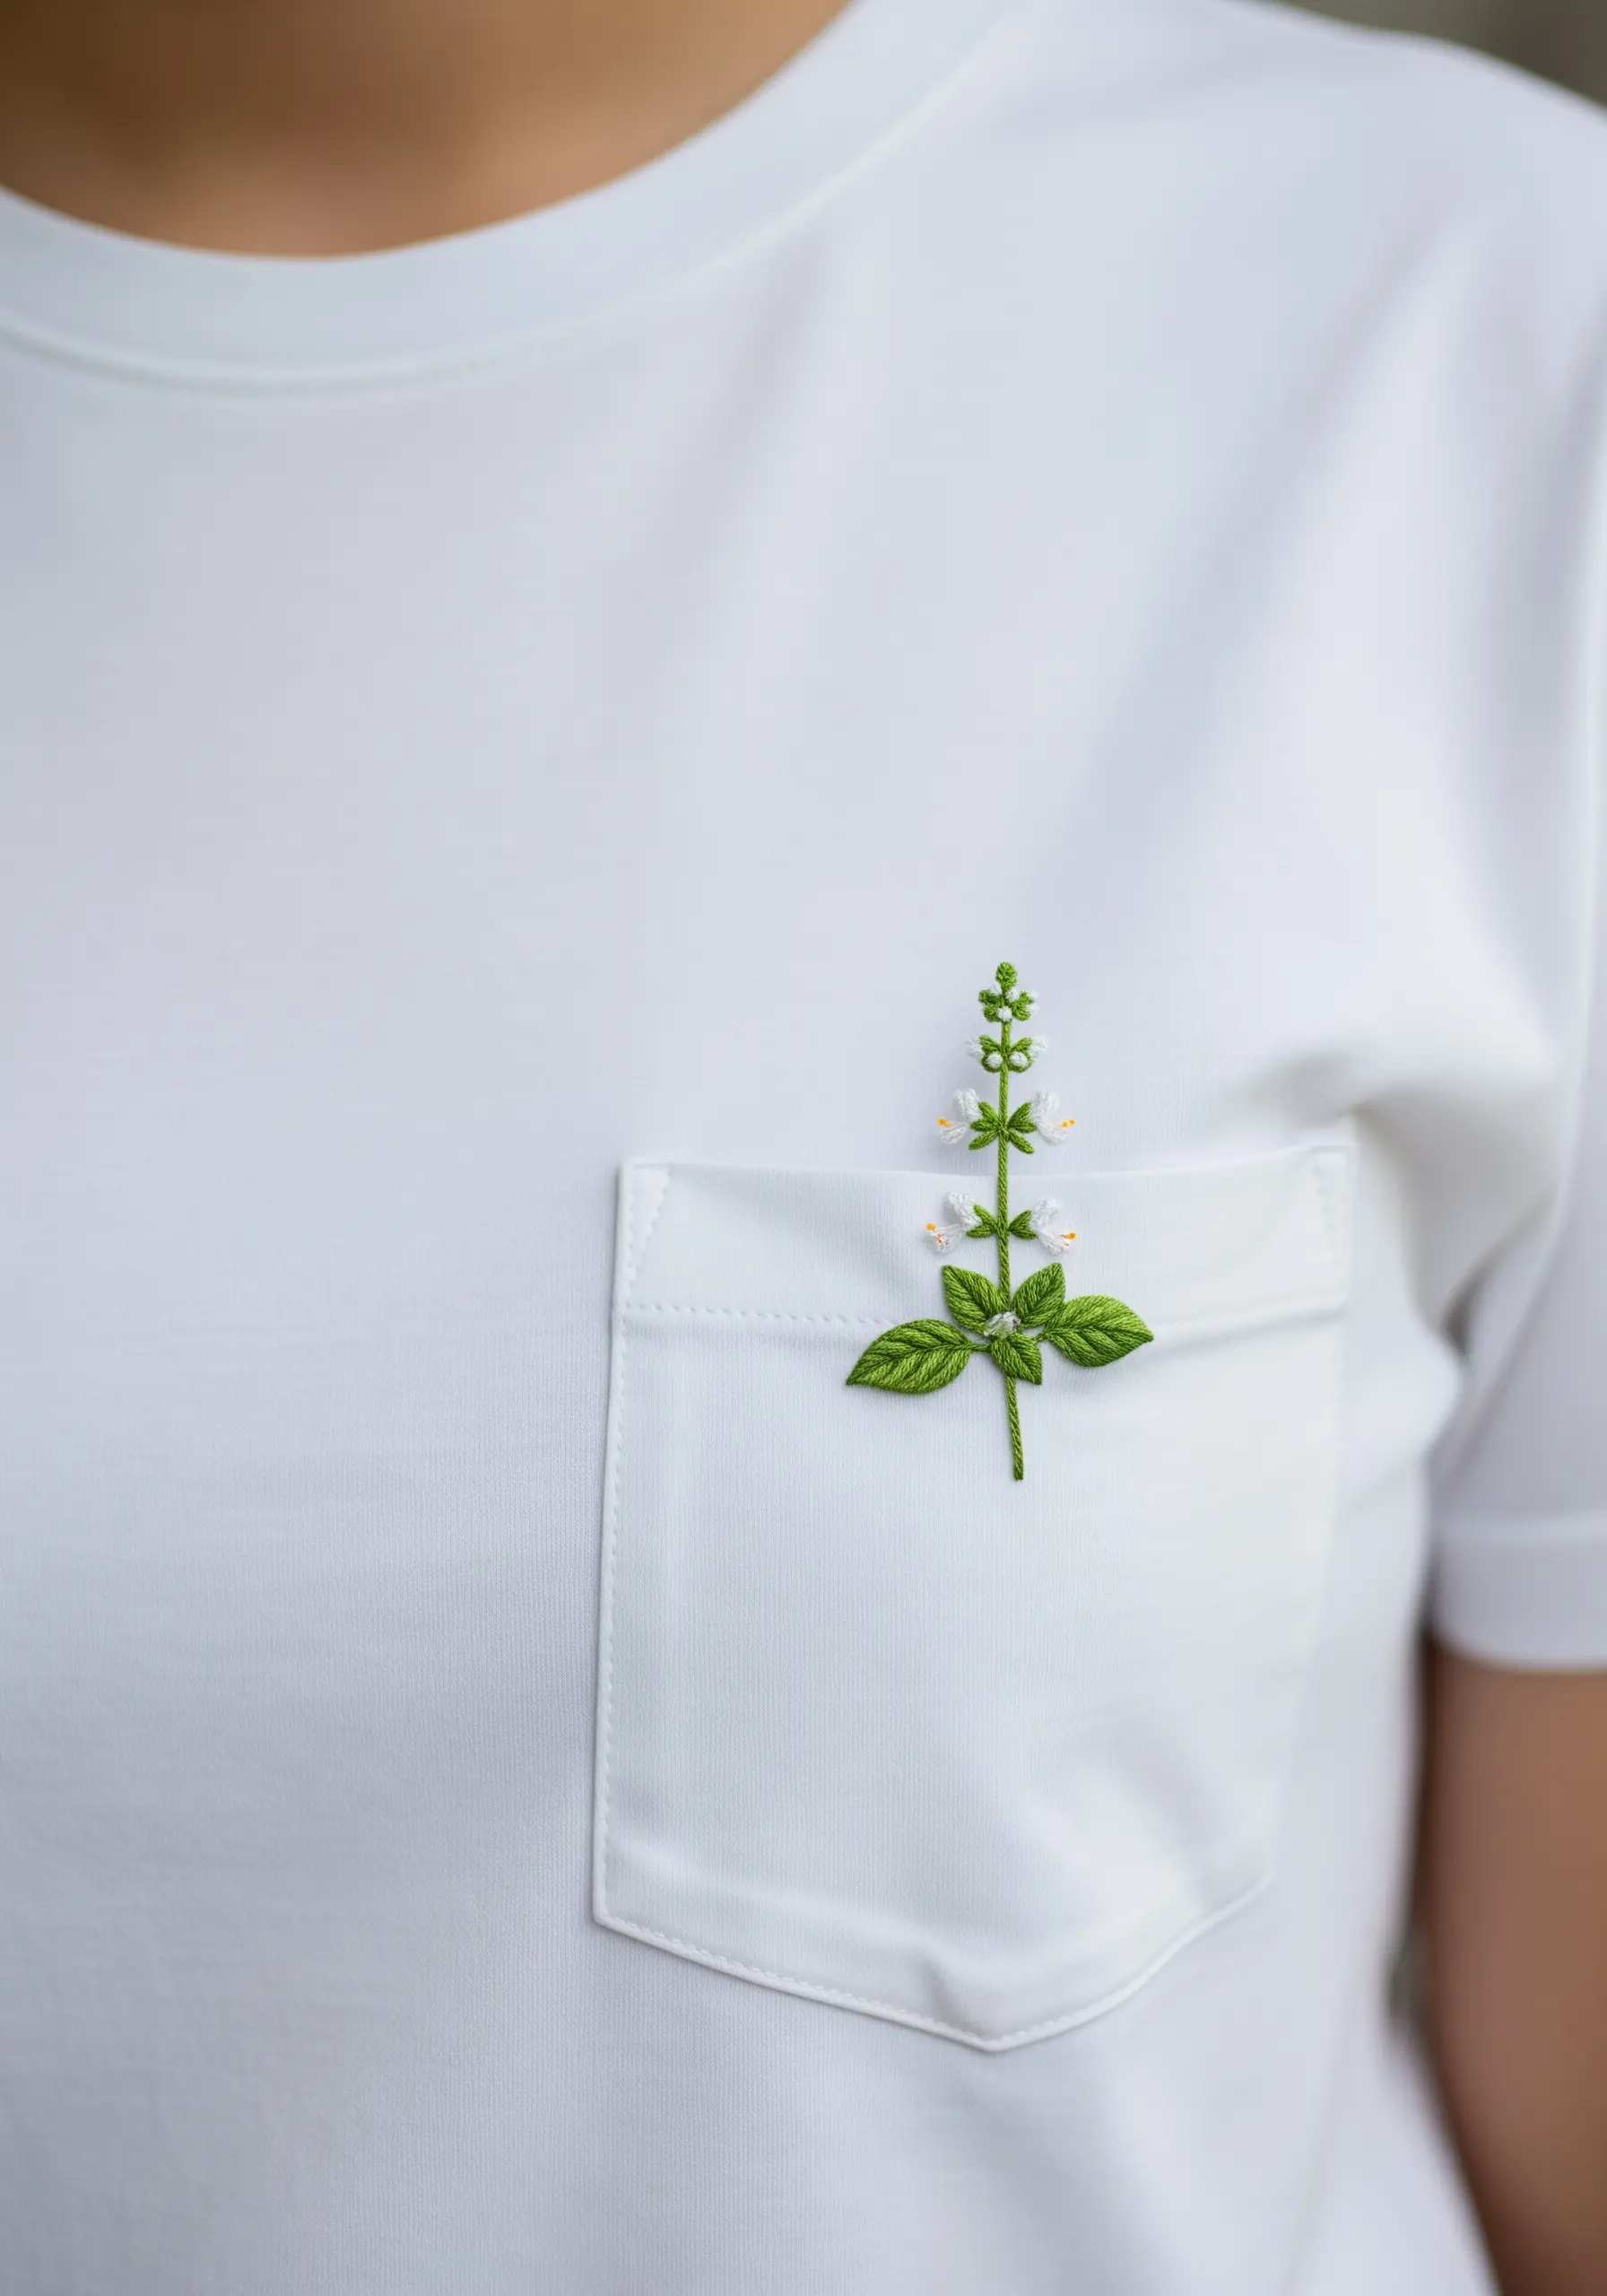
A tiny sprig of basil emerging from a t-shirt pocket is a masterful lesson in understated style.
The key to this design’s success is its perfect placement and scale; it should look as though it’s organically growing out of the pocket seam.
Always use a stick-on, tear-away stabilizer on the inside of the shirt to prevent the knit fabric from stretching while you stitch.
Use a sharp, ballpoint needle designed for knits to pierce the fabric cleanly without causing runs or holes.
15. Creating Graphic Impact on Dark Fabric
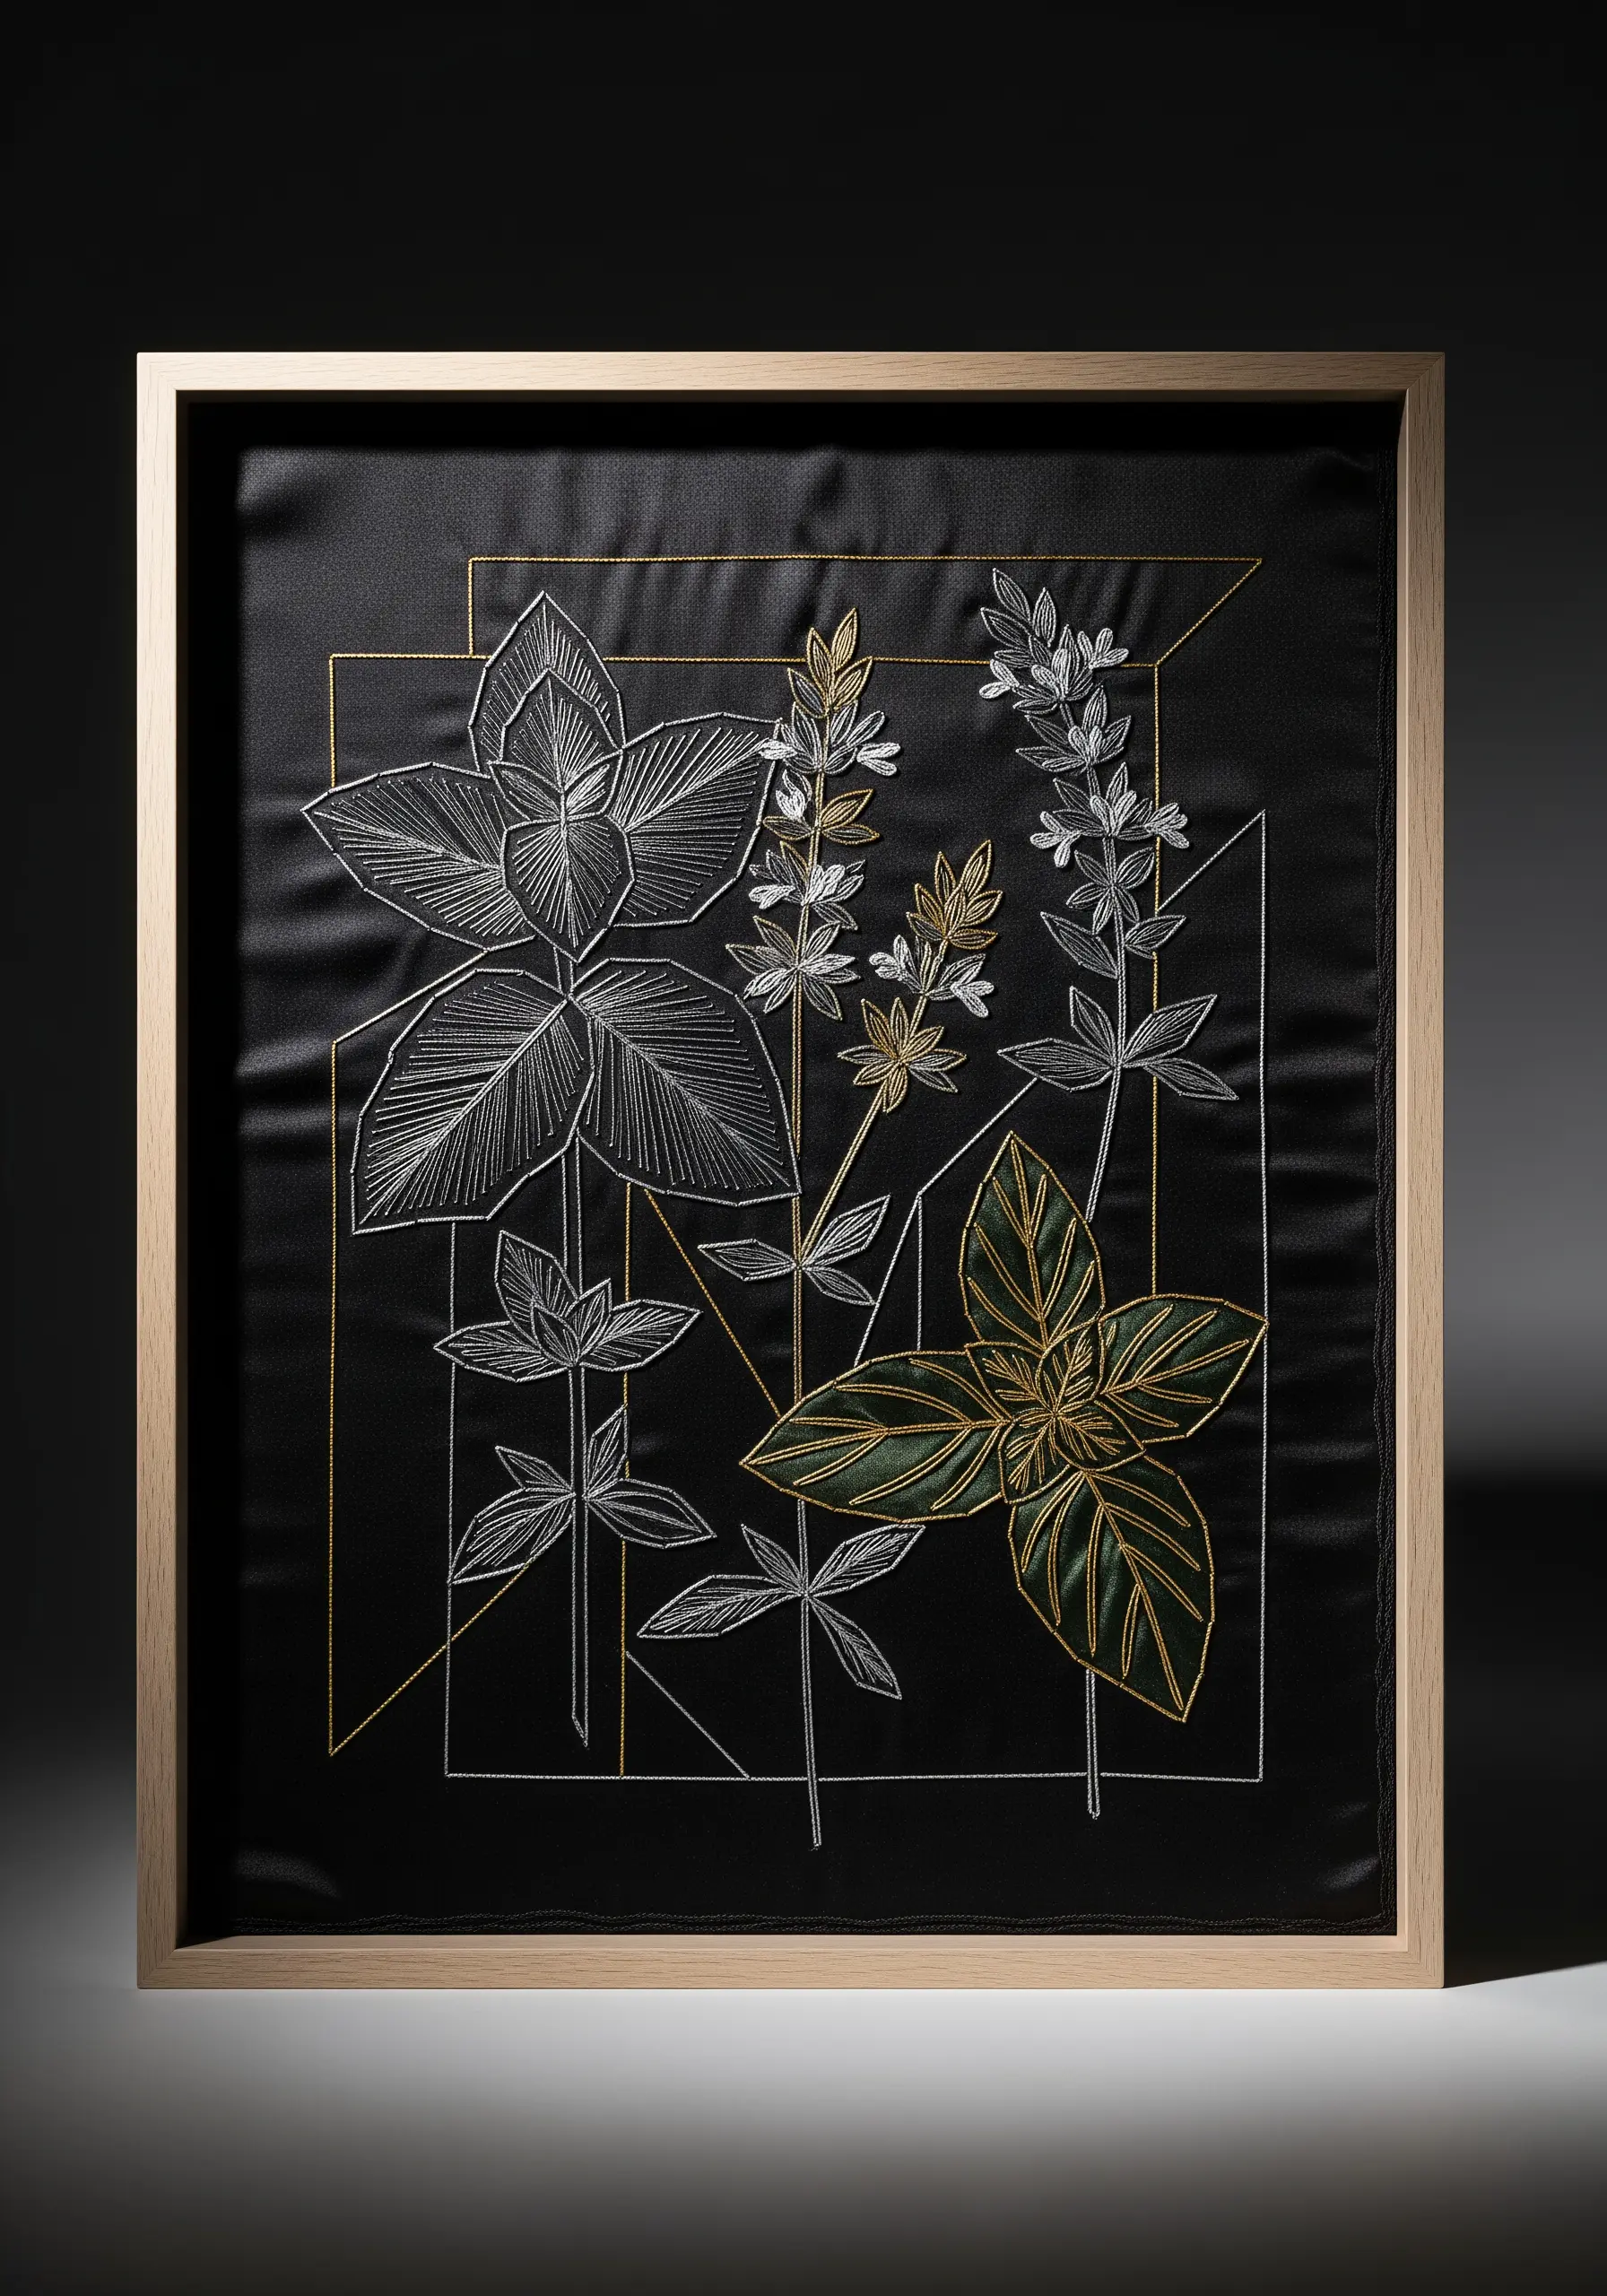
Achieve a modern, high-contrast look by stitching geometric botanical forms on black satin.
Use a single strand of metallic or bright white thread to create sharp, architectural lines with a simple backstitch. This ensures the focus remains on the clean shapes.
Maintain very even tension to prevent the delicate satin from puckering. If you struggle with tension, reduce your stitch length for better control.
This minimal chic look relies entirely on the precision of your linework against the dark, empty space.
16. Building Realistic Leaf Color with Thread Painting
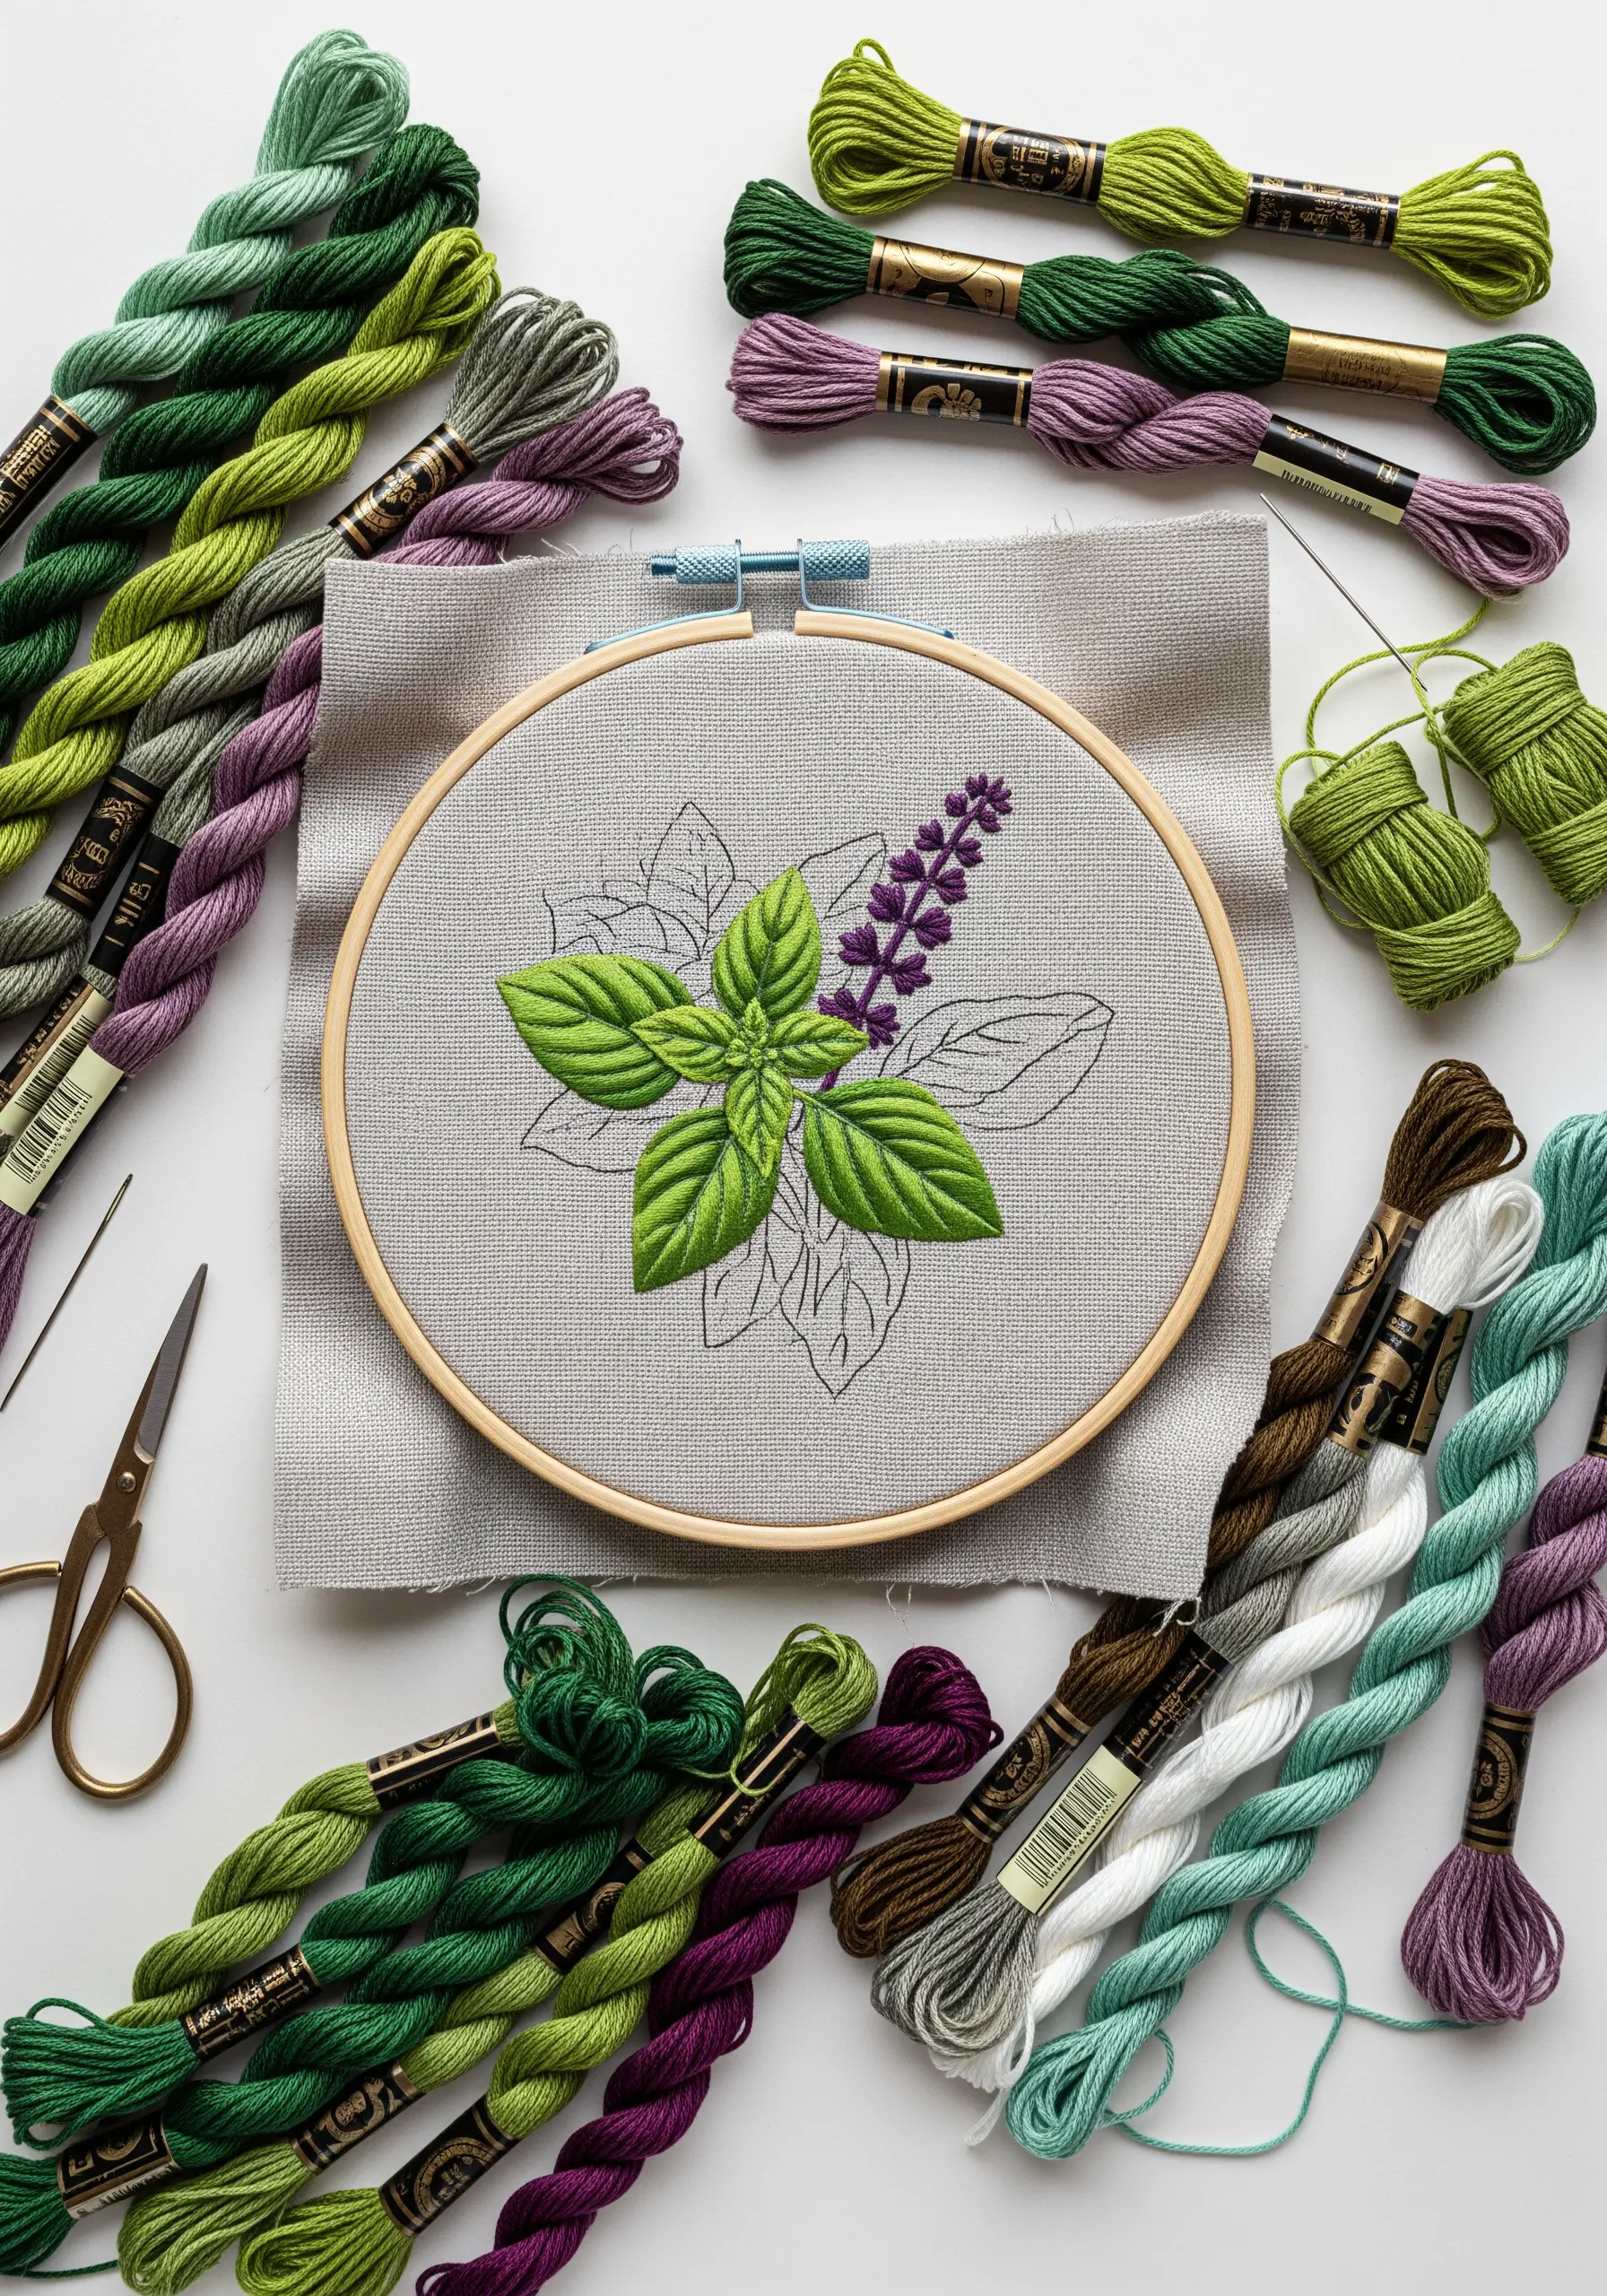
For lifelike basil leaves, approach your stitching like a painting, building up colors in layers.
Begin by filling the entire leaf with your lightest green using long-and-short stitch. Don’t worry about perfection; this is just your base canvas.
Next, use a medium green to add stitches that follow the direction of the leaf’s veins, blending them into the light green base.
Finally, add your darkest green sparingly in the shadows—along the central vein and under the leaf curls—to create depth and dimension.
17. Using Heavyweight Threads on a Cozy Throw
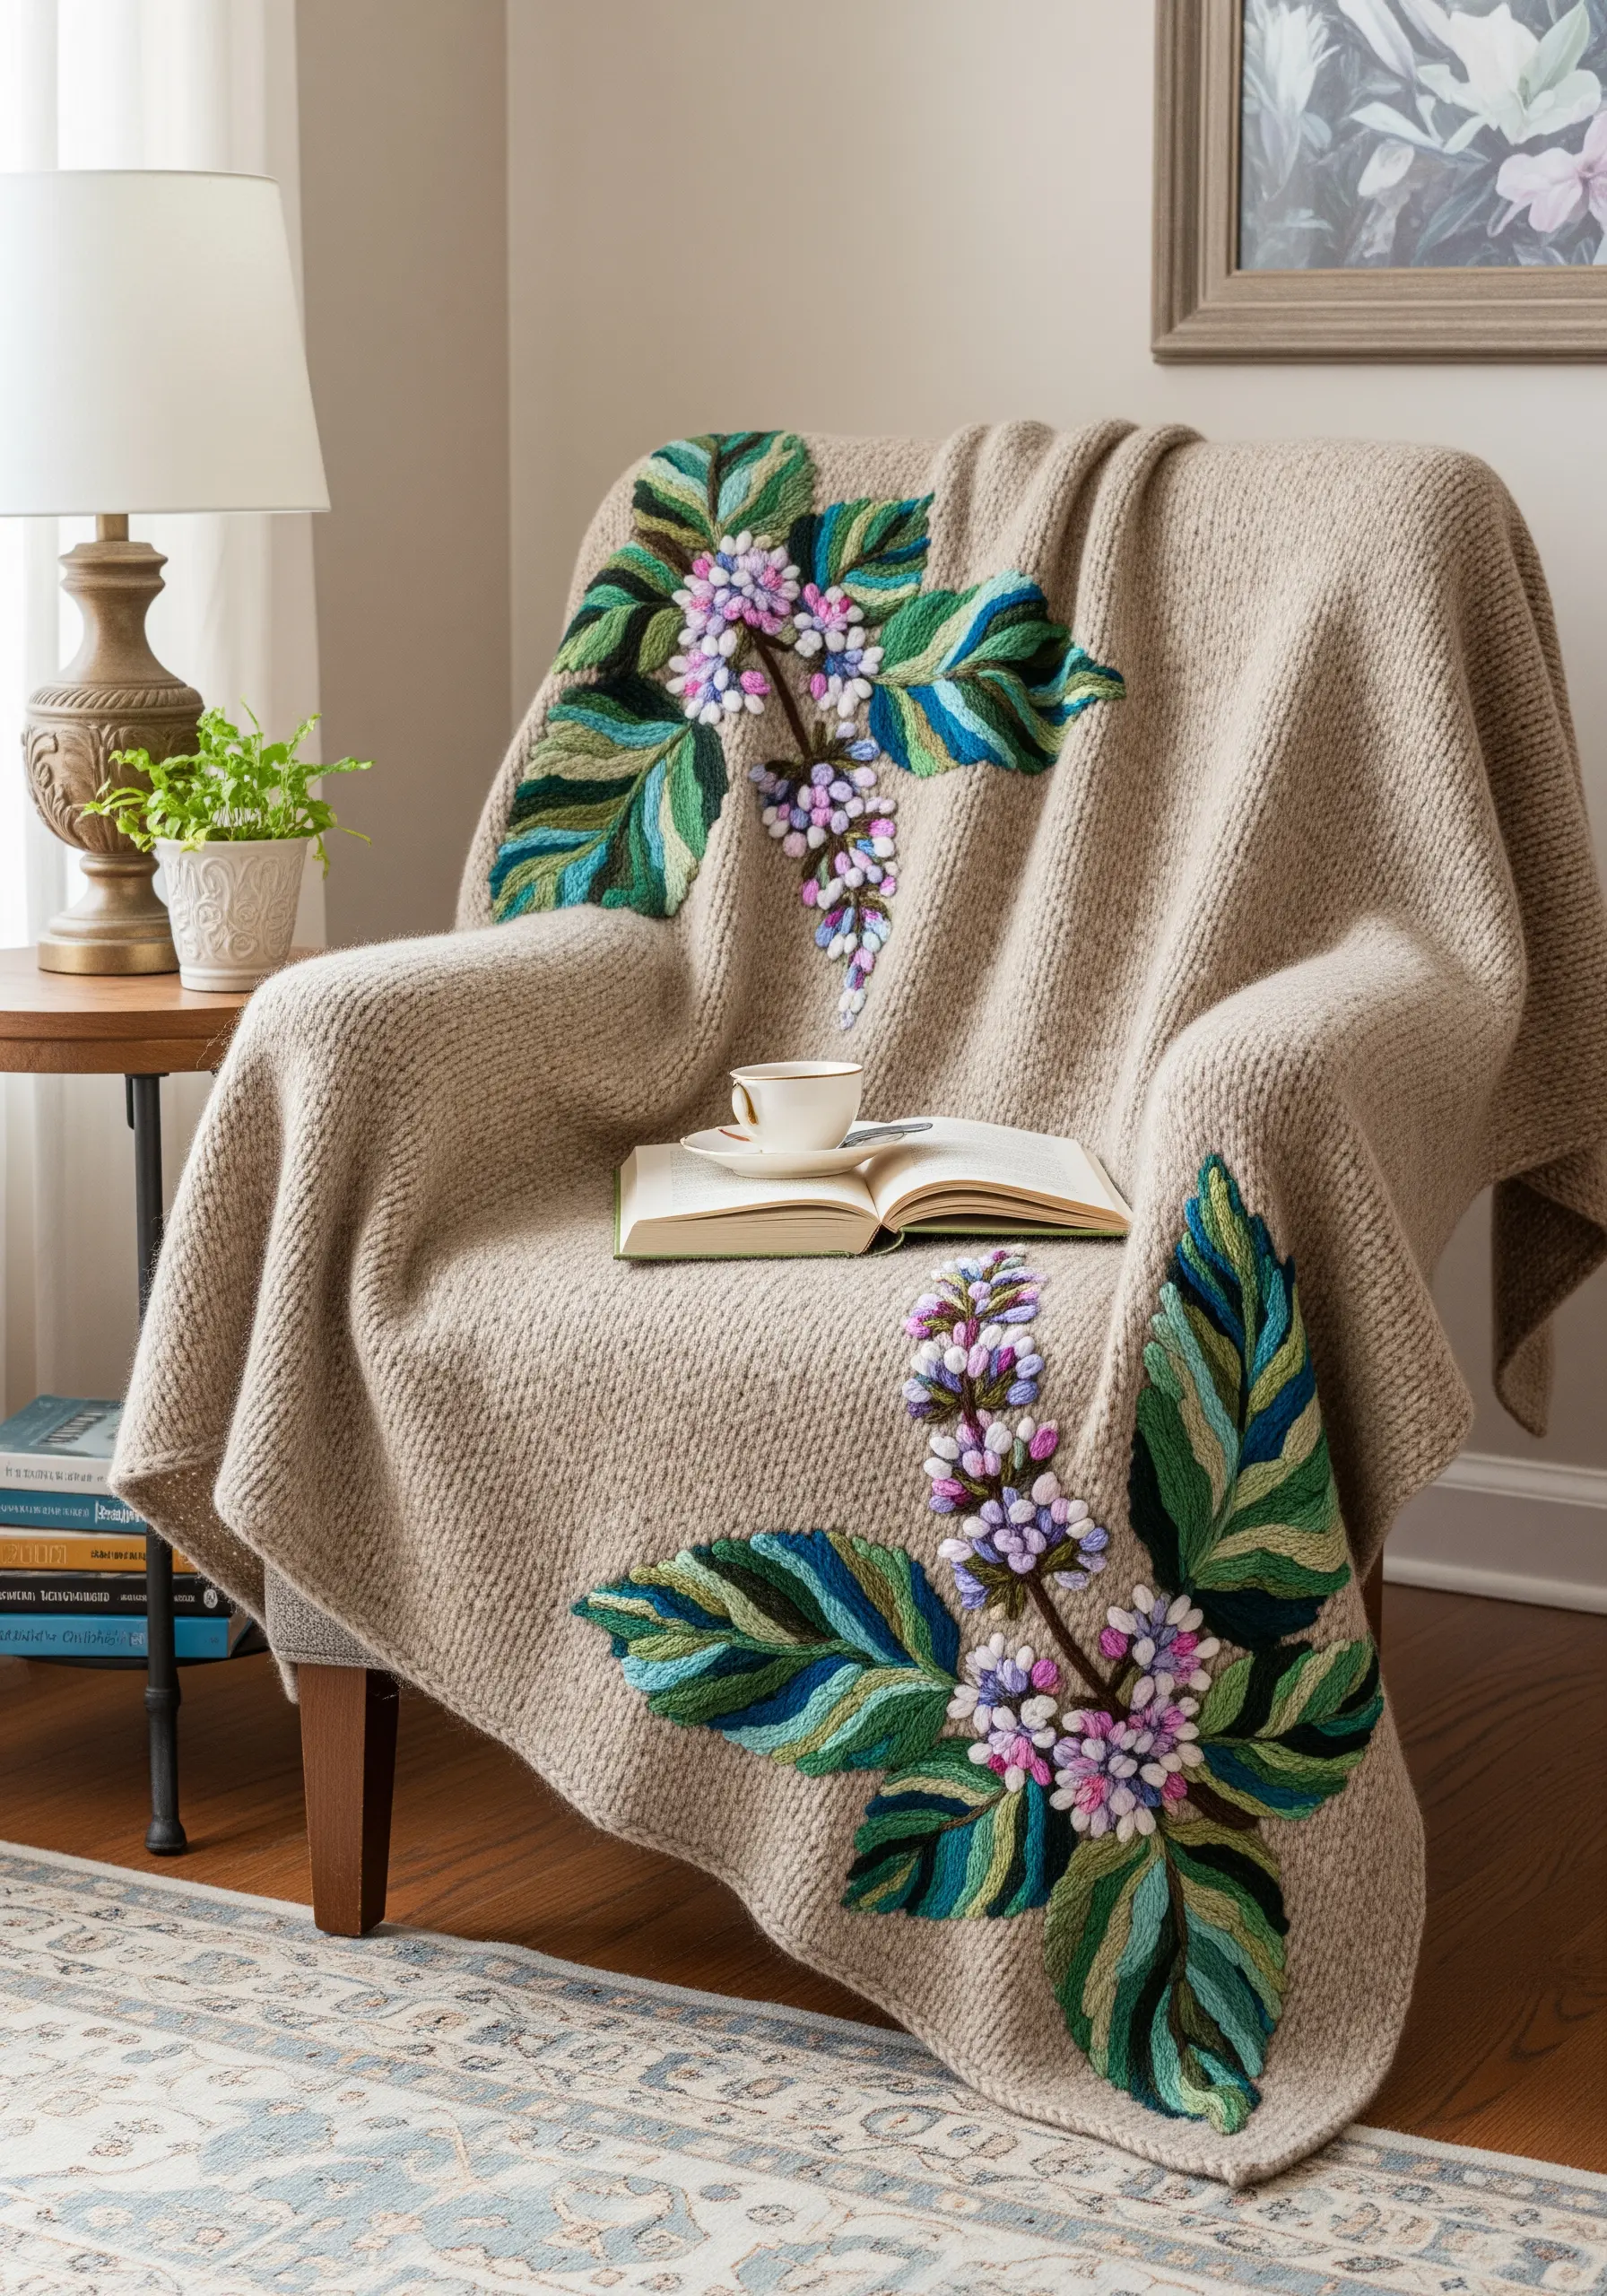
When embroidering on a thick, textured fabric like a wool blanket, standard cotton floss can get lost.
Switch to a heavier thread, such as Persian wool or tapestry yarn, to match the visual weight of the throw.
These thicker fibers will fill space more quickly and create a bold, plush textural design that feels intentional and integrated, rather than like a delicate afterthought.
Use a large-eyed chenille needle to handle the thicker thread without shredding it.
18. Constructing a Three-Dimensional Keepsake Box
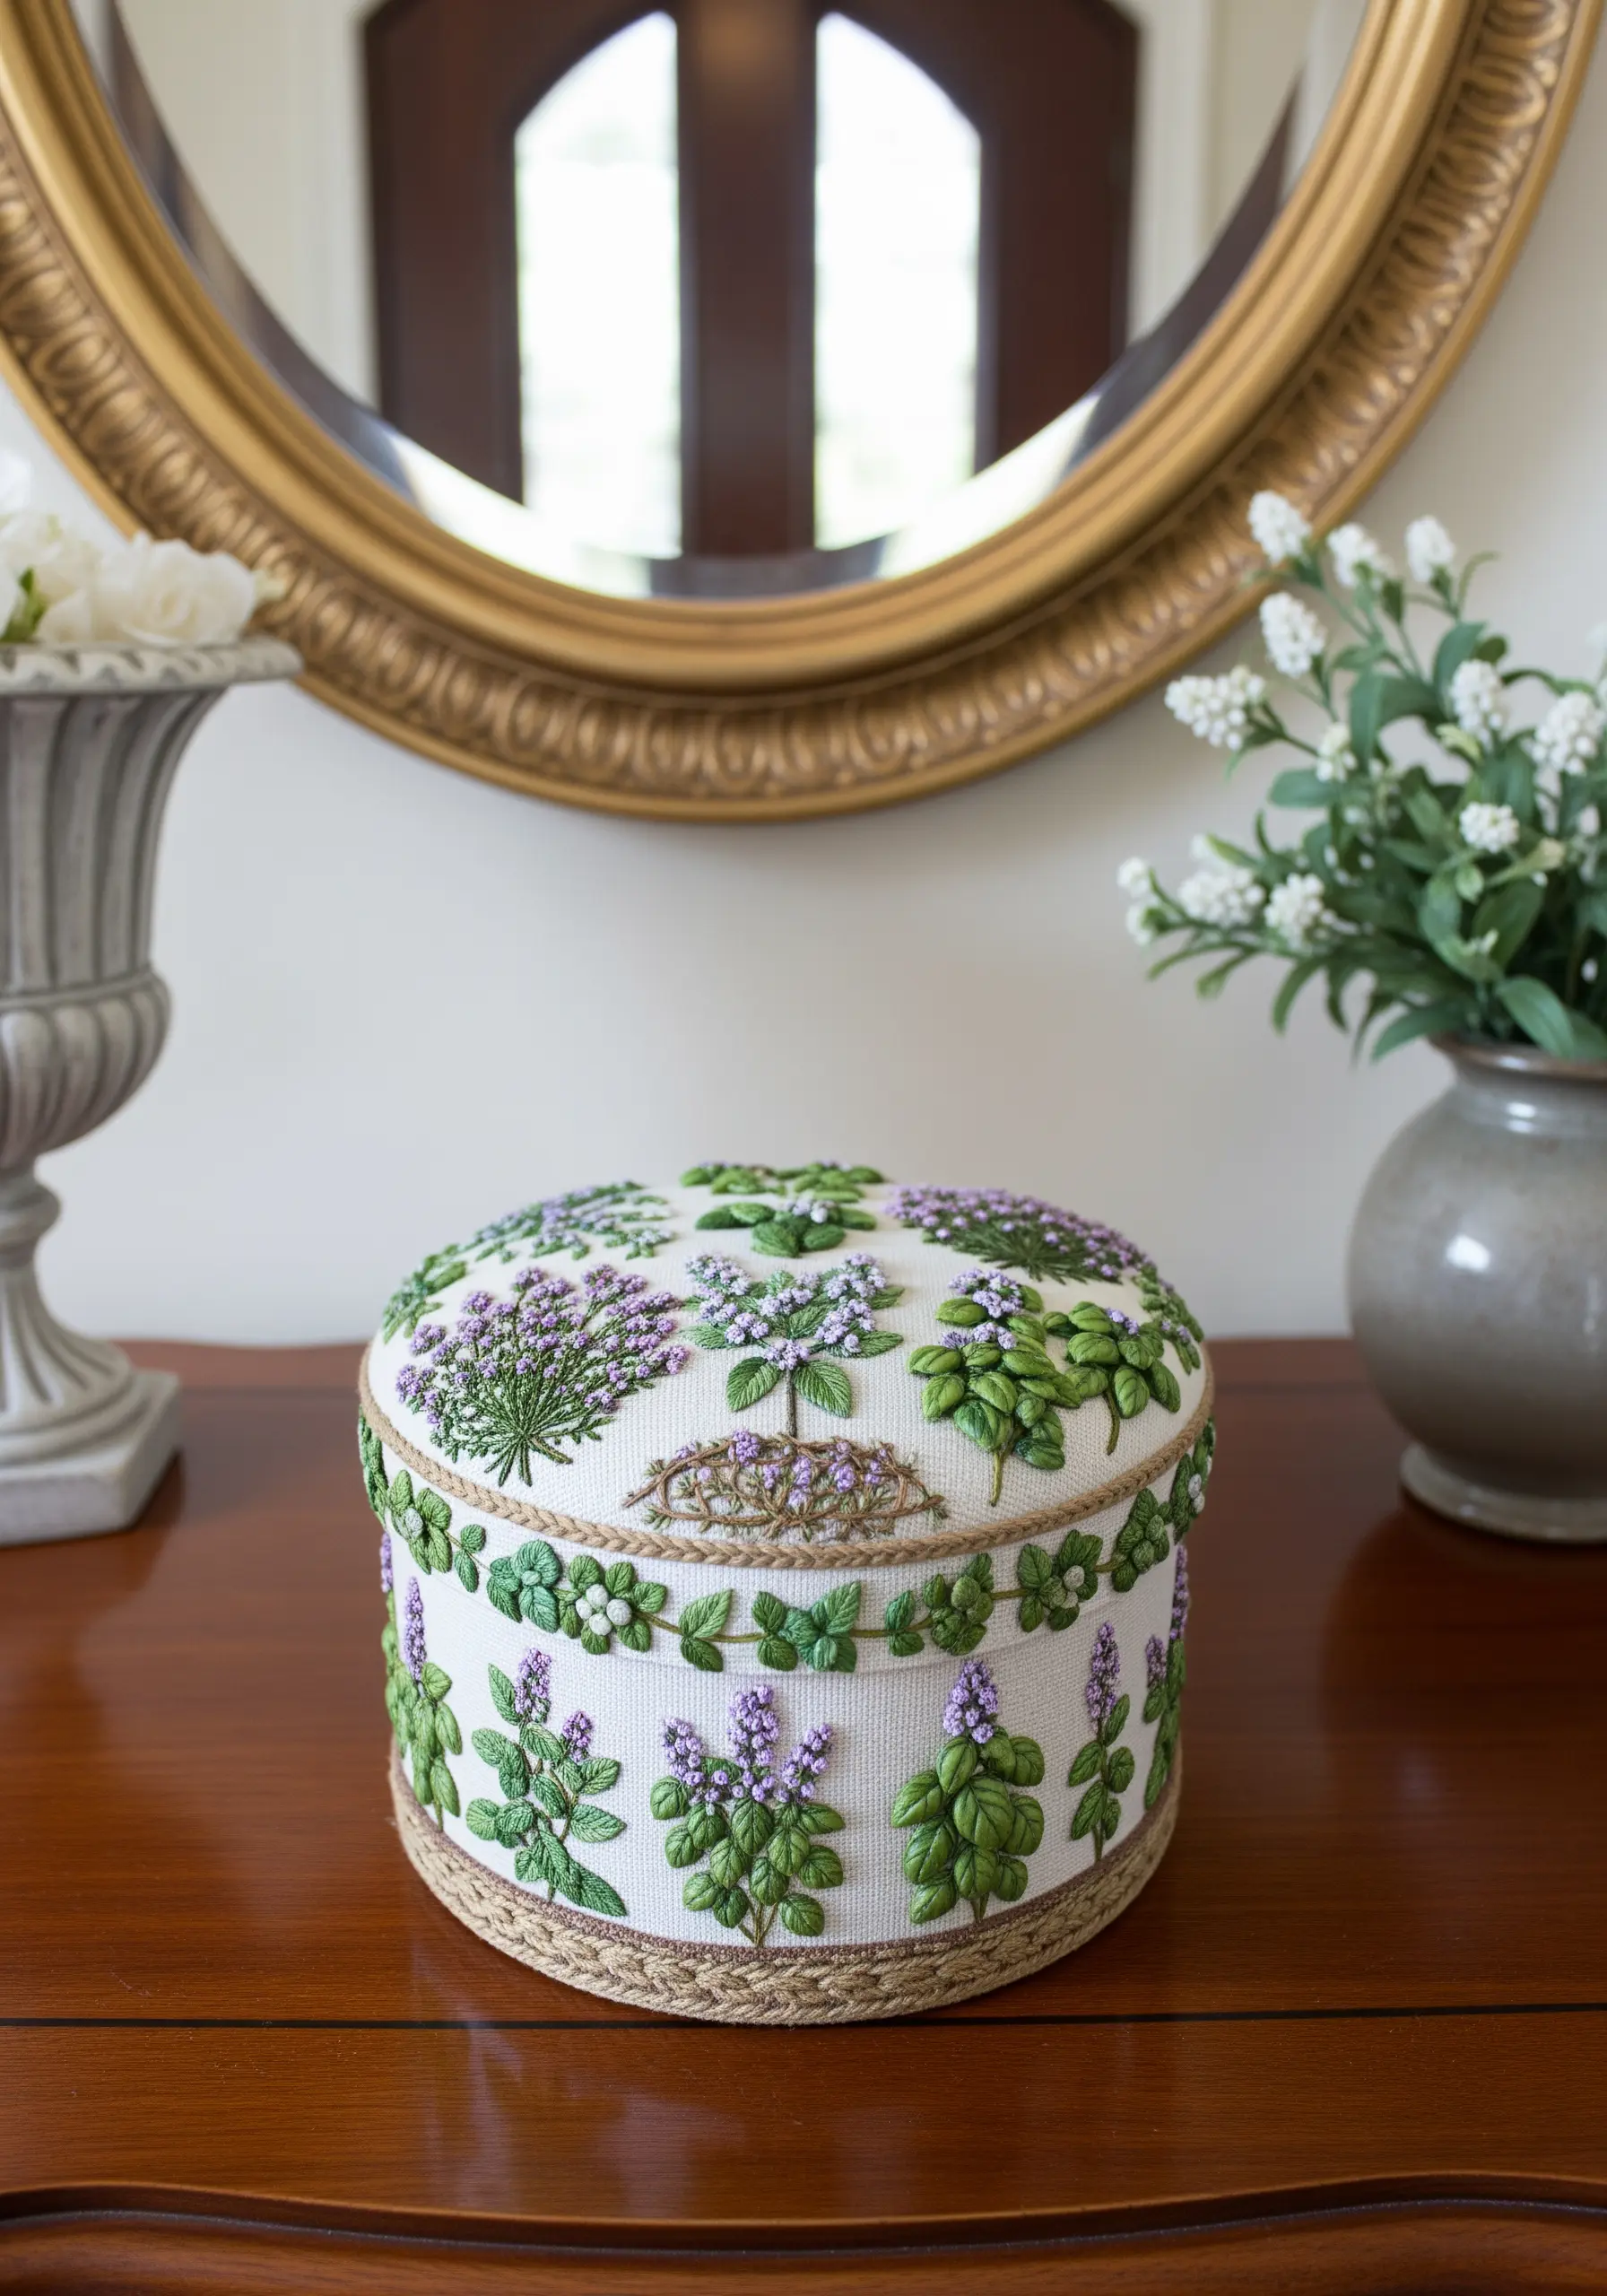
To bring the herbs on a decorative box to life, incorporate stumpwork techniques for a raised, sculptural effect.
For the basil leaves, use silk ribbon and a simple ribbon stitch, twisting the ribbon as you pull it through to create the natural curl of a leaf.
Create the lavender and thyme blossoms using bullion knots, which stand up from the fabric surface like tiny buds.
These 3D elements turn a simple embroidered surface into a tactile, heirloom-quality object.
19. Integrating Embroidery with Patterned Fabric
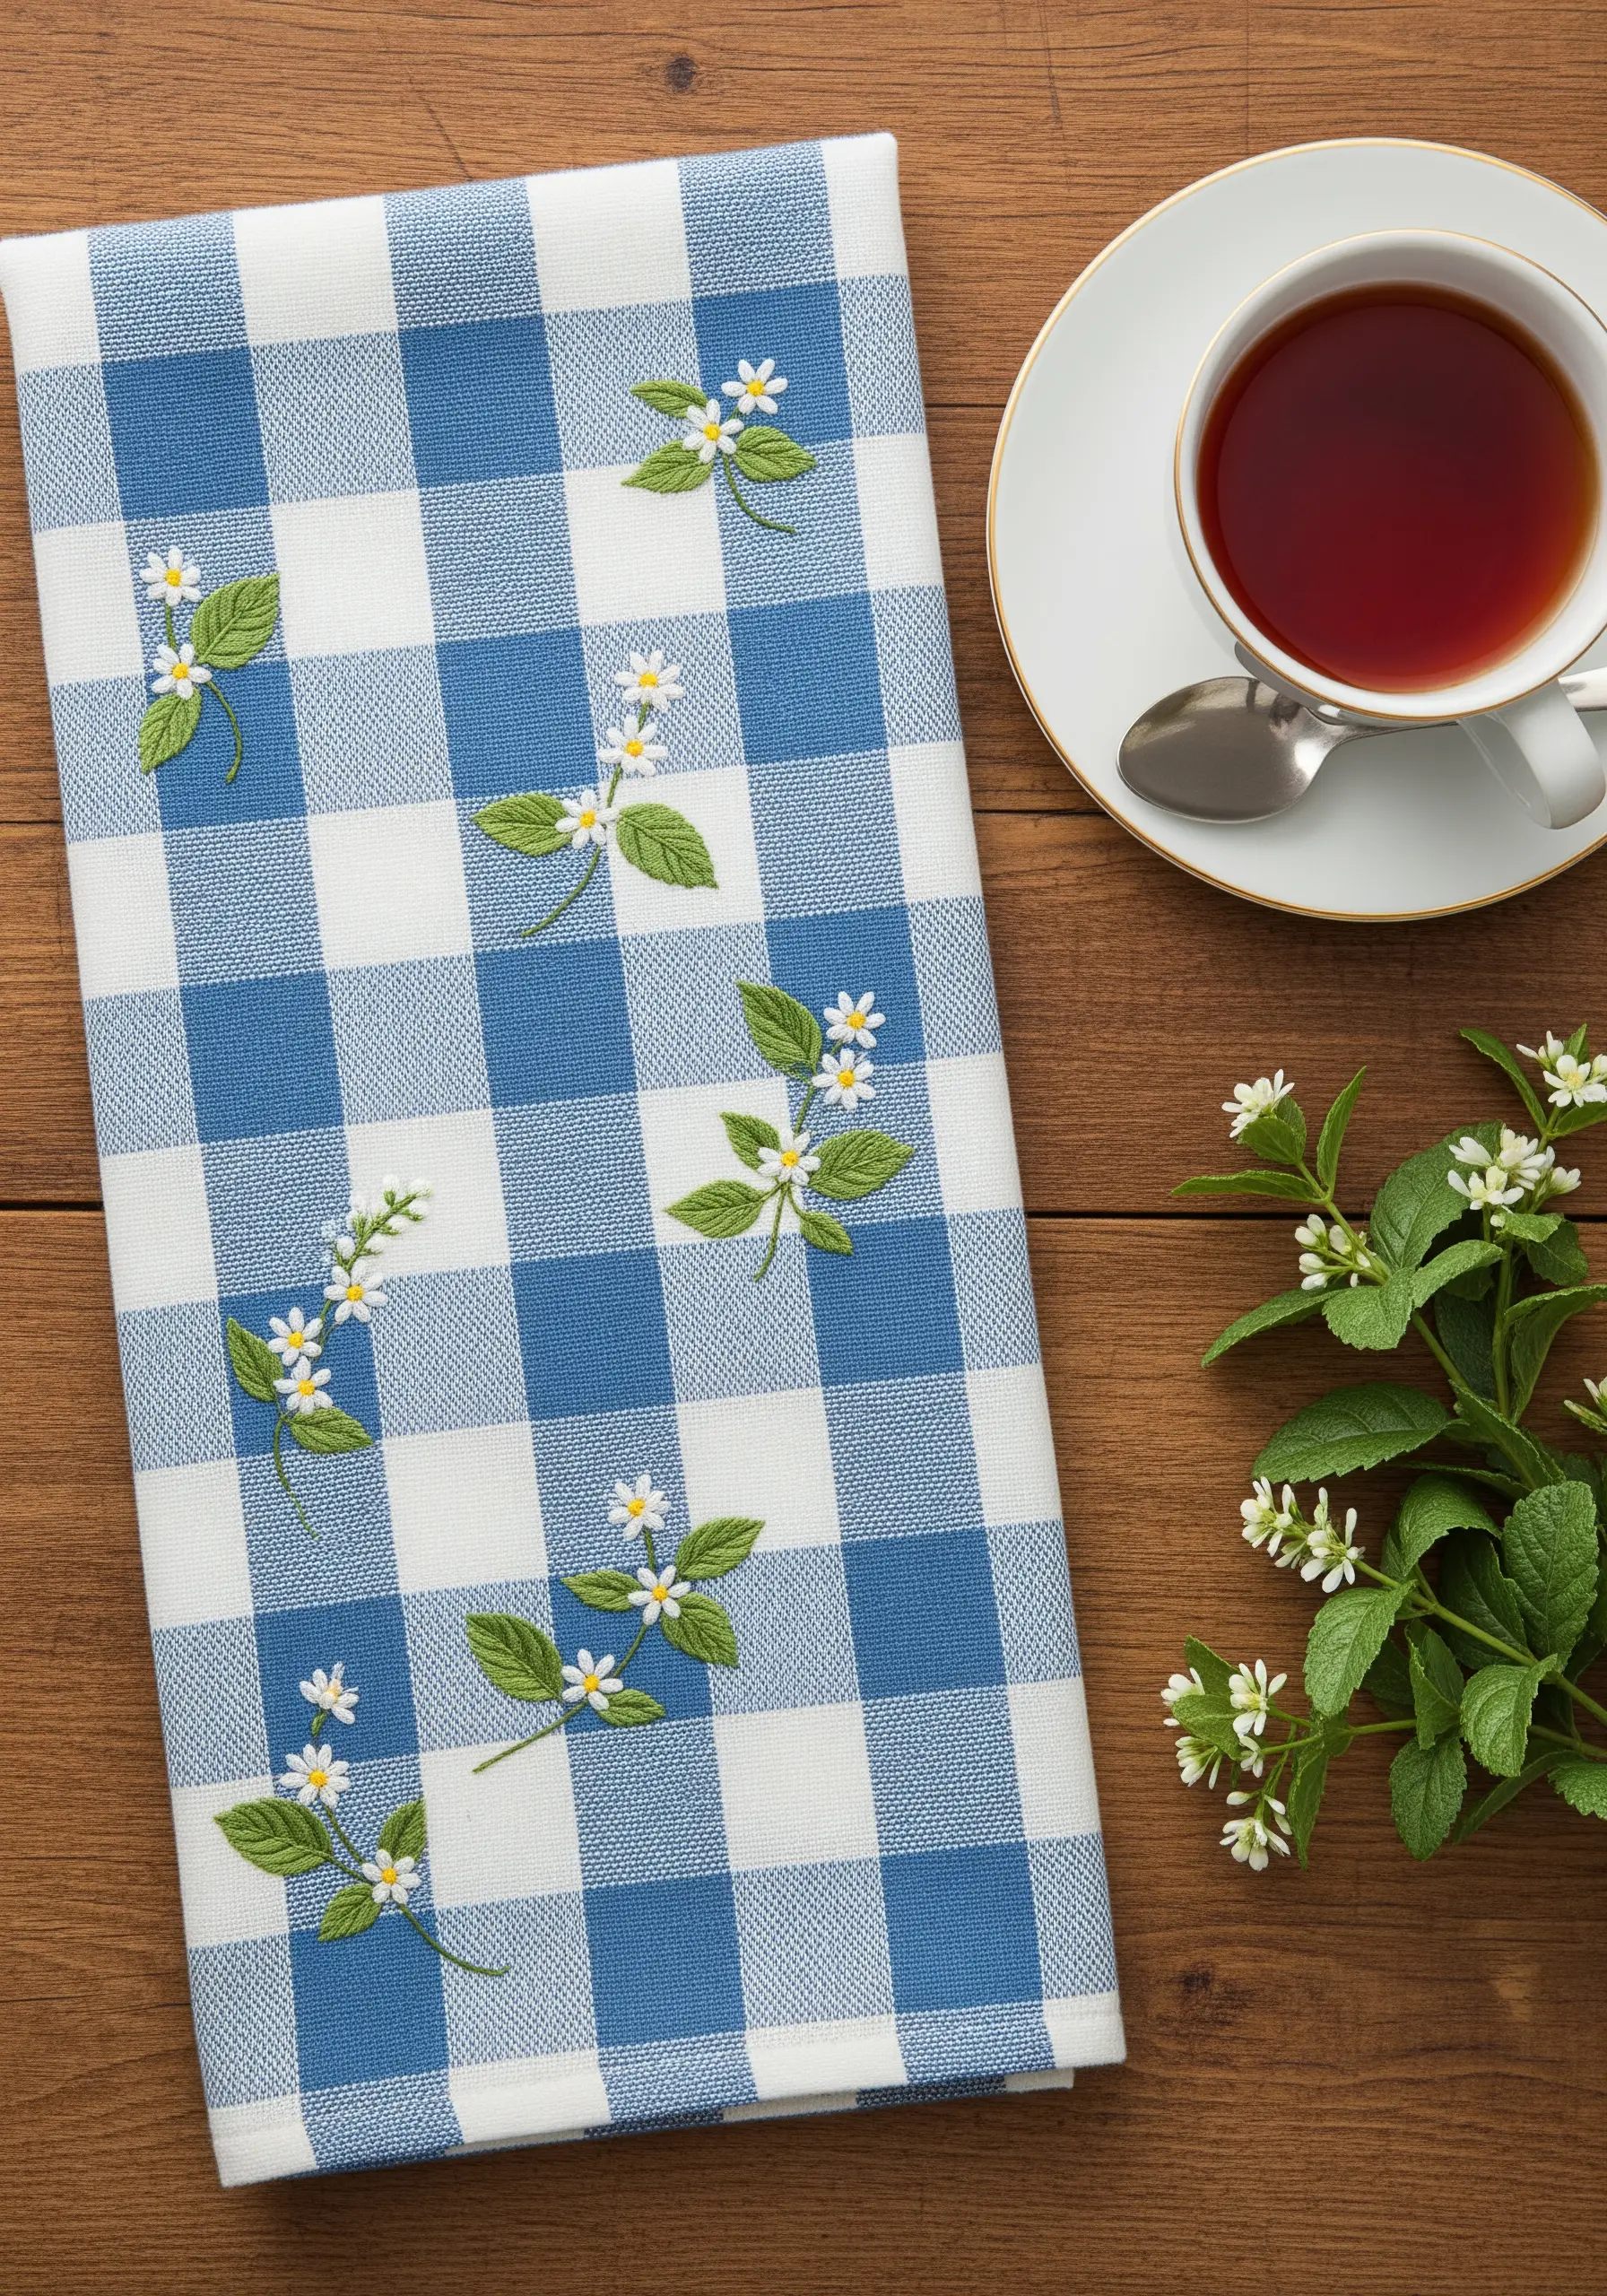
To successfully stitch on a busy pattern like gingham, your design must be simple and your color choices deliberate.
Choose a small, simple motif like a daisy-like blossom that can be completed within one of the fabric’s squares.
Use a color palette that complements the existing pattern. Here, the white floss echoes the white squares, and the green provides a gentle contrast without competing for attention.
This creates a charming, integrated look where the embroidery enhances the pattern instead of fighting it.
20. Designing for Light and Shadow on a Lampshade
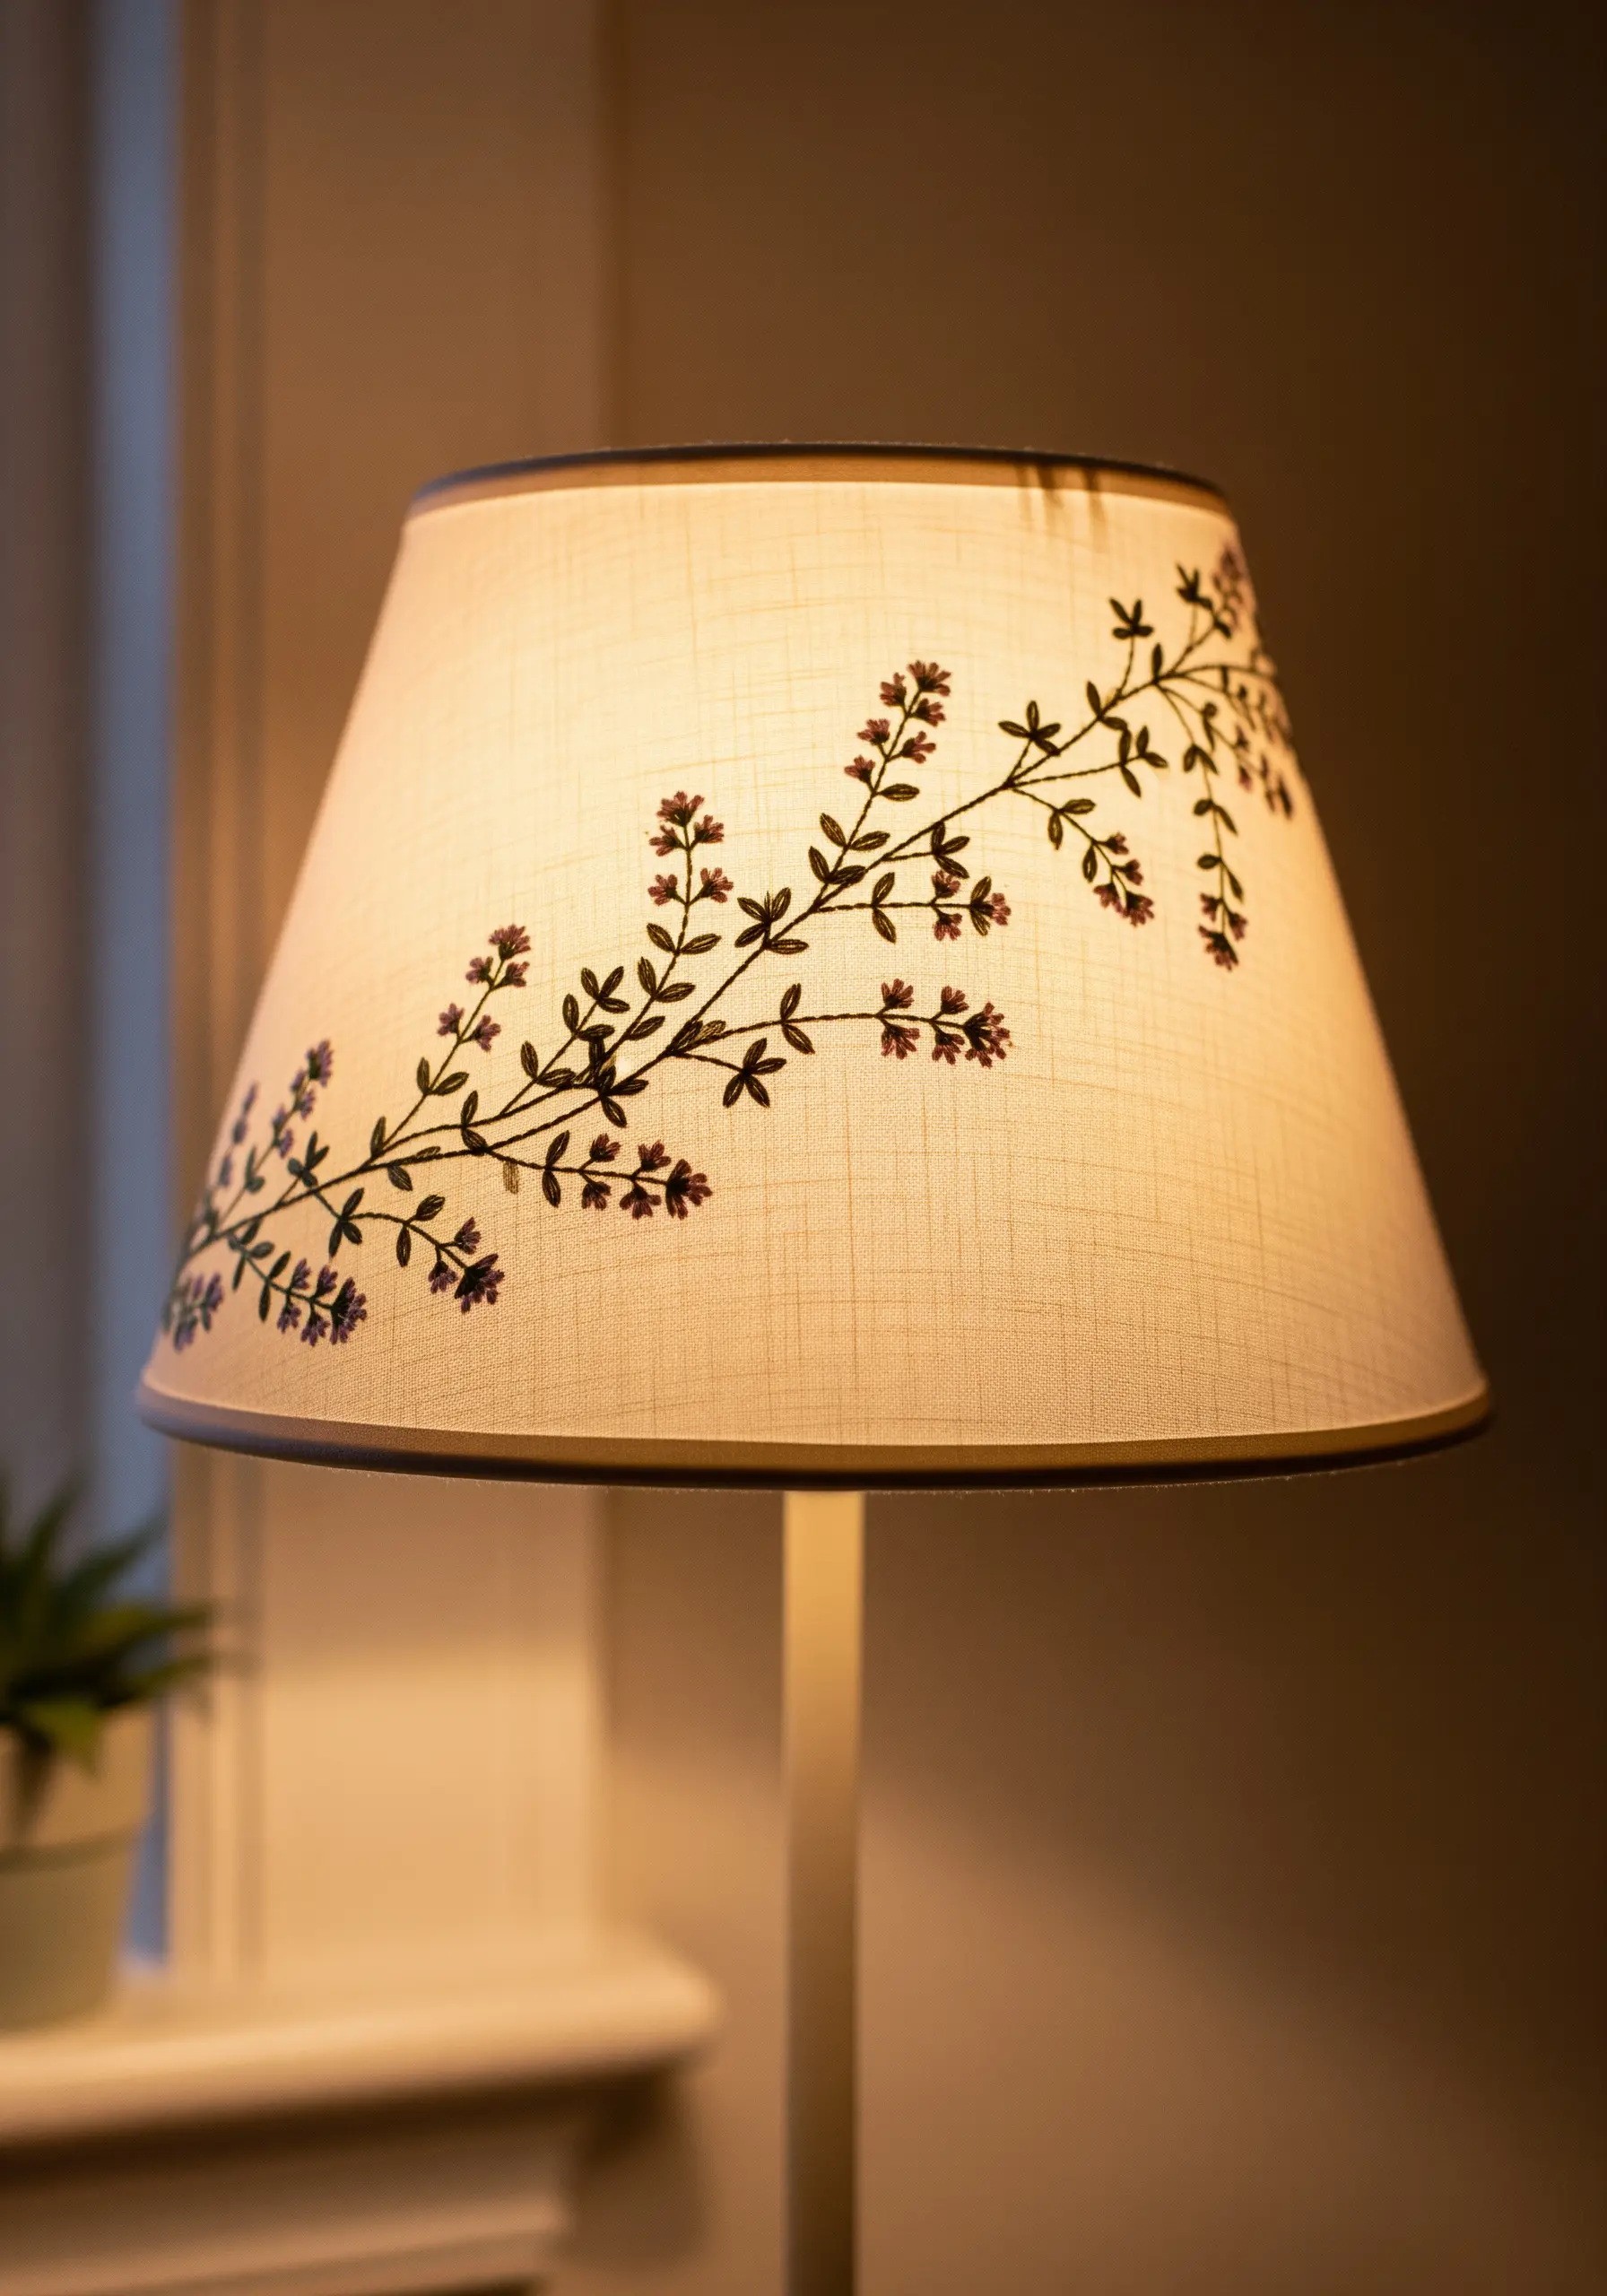
When embroidering a lampshade, your design has two lives: one in daylight and one when illuminated.
Use a dark thread and a simple backstitch or stem stitch to create a strong silhouette that will be clearly visible when the light is on.
Avoid dense fill stitches, as they will block the light and appear as dark, heavy patches. The beauty of this project lies in the delicate interplay of stitched lines and the warm glow passing through the fabric.
21. Creating a Botanical Stitch Sampler
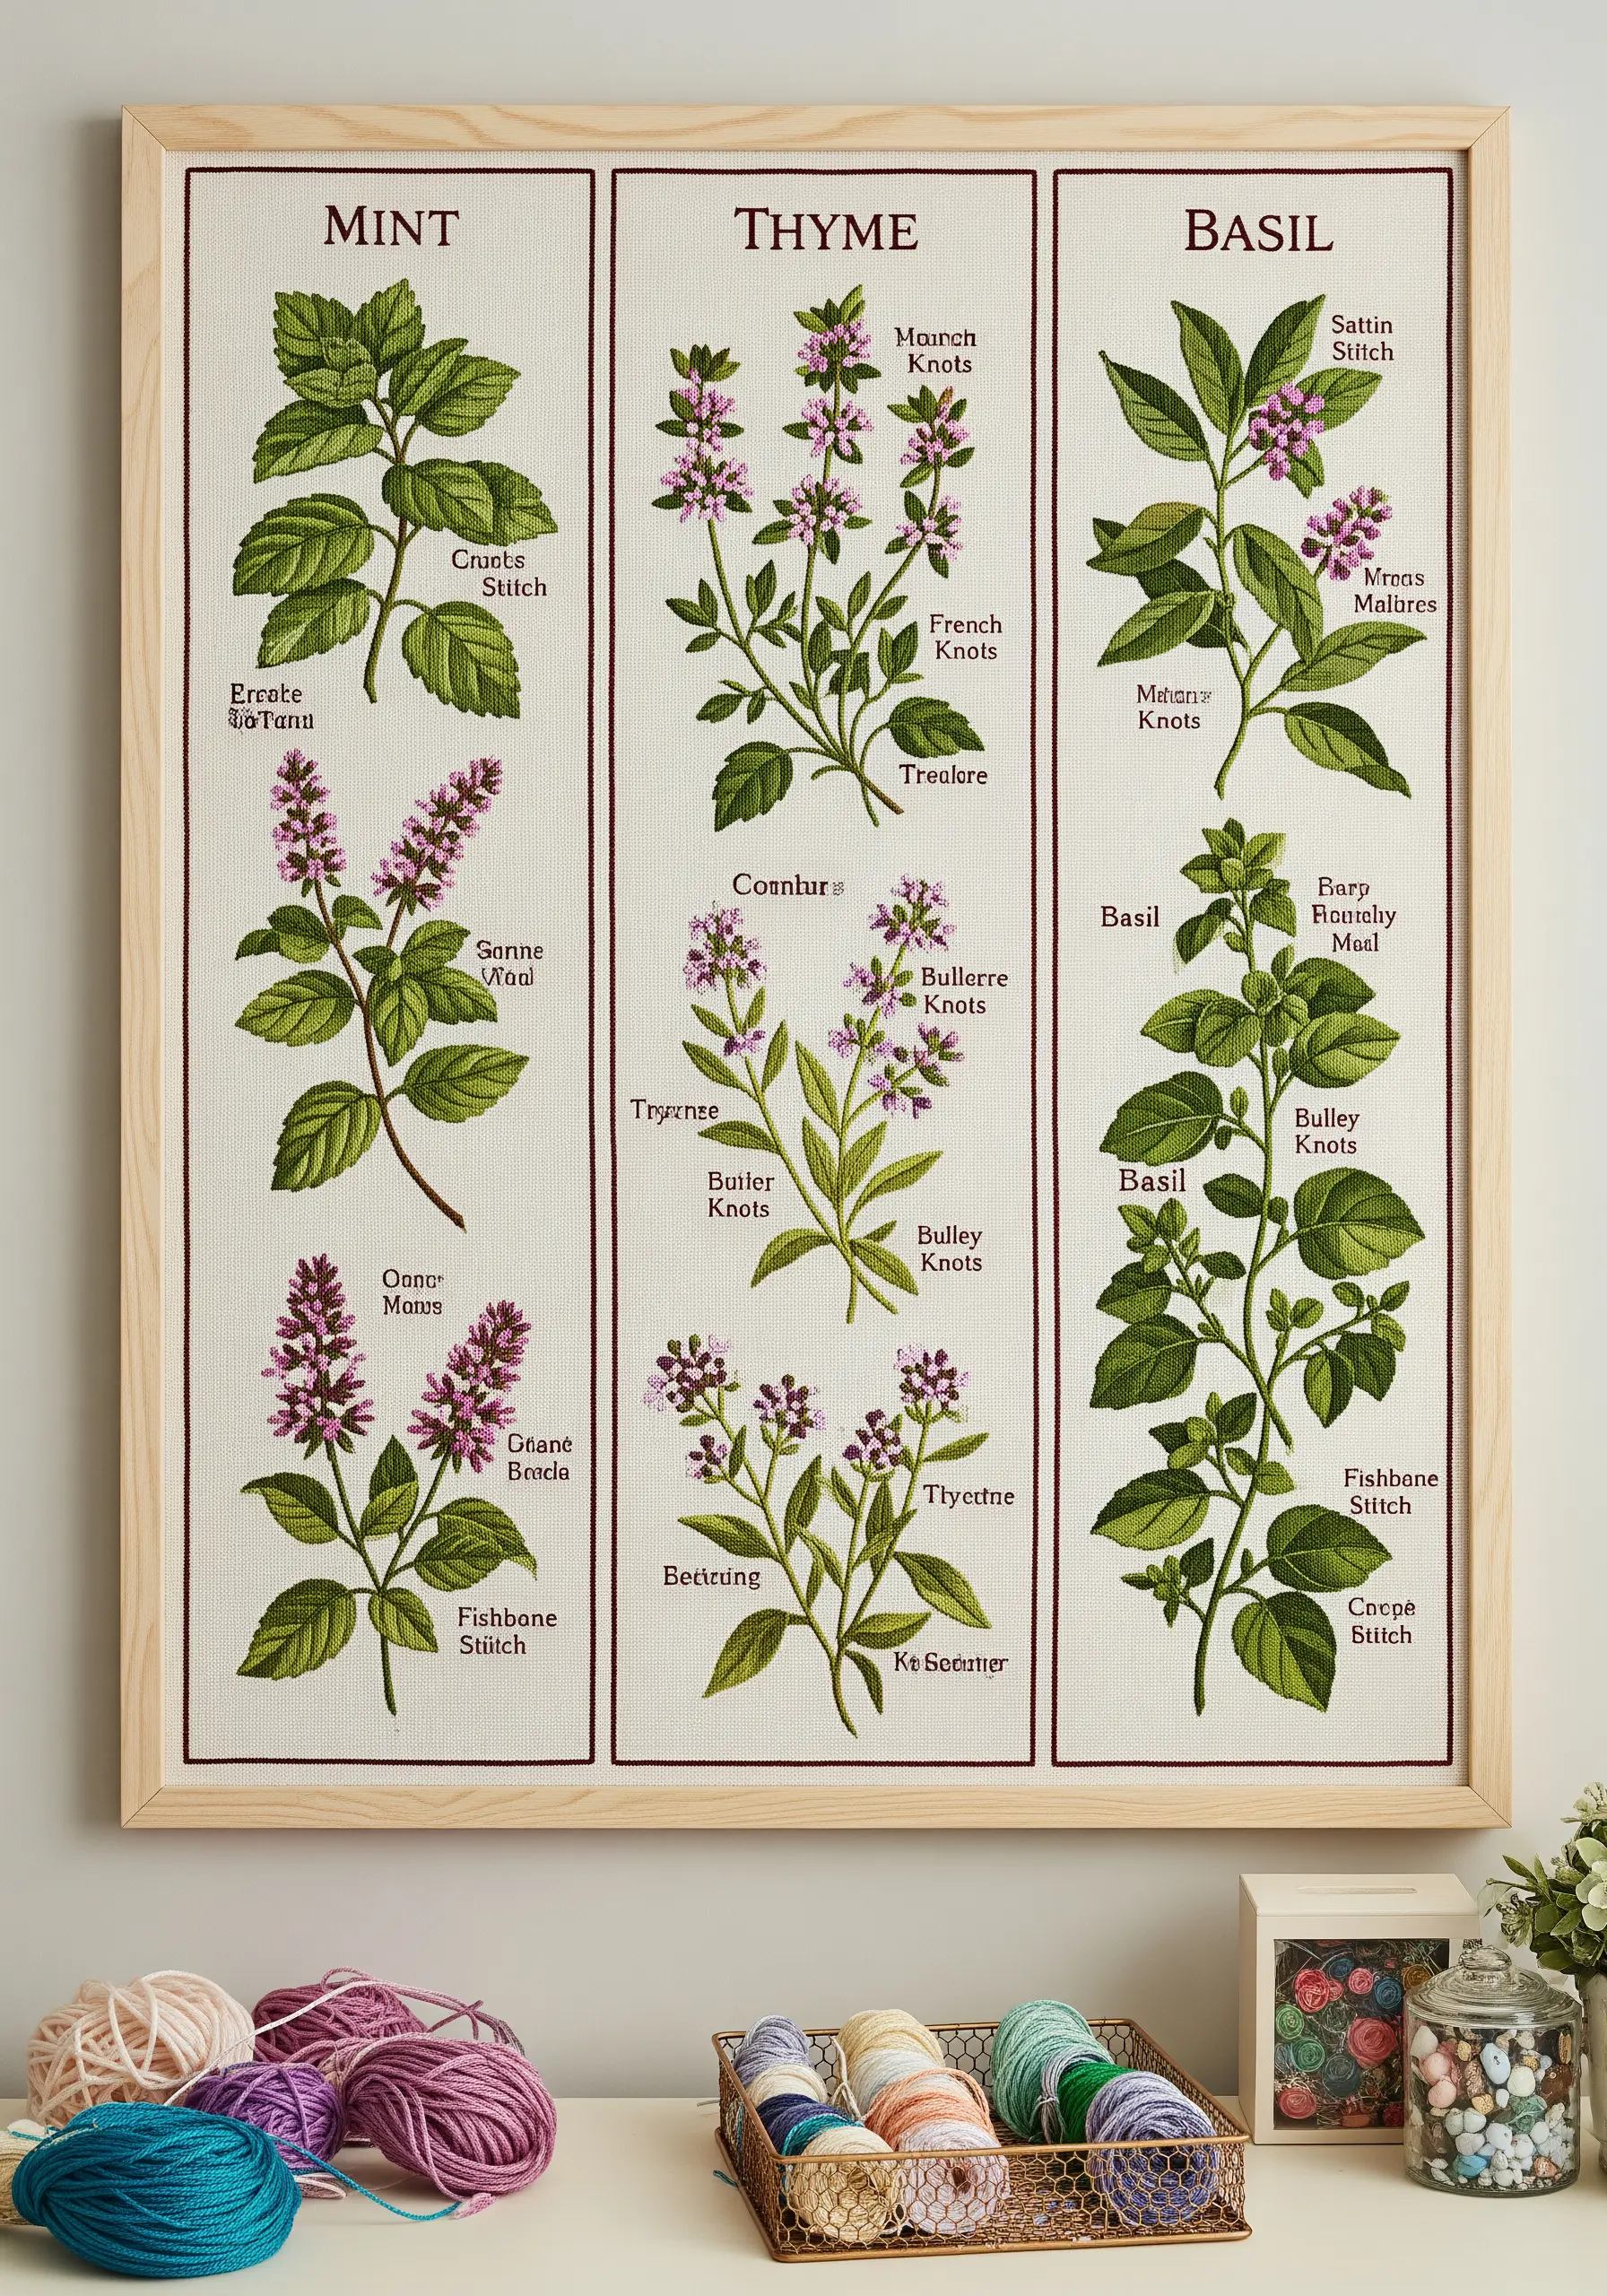
Turn your herb studies into a beautiful and educational piece by creating a framed sampler.
Dedicate a section to each herb—mint, thyme, and basil—and experiment with different stitches for each part of the plant.
Use this as an opportunity to master leaf stitches like fishbone, cretan, and fly stitch, and blossom techniques like French, bullion, and woven wheel knots.
Labeling the stitches turns your practice work into a finished botanical garden sampler that is both decorative and useful for future reference.
22. Executing Flawless Micro-Embroidery
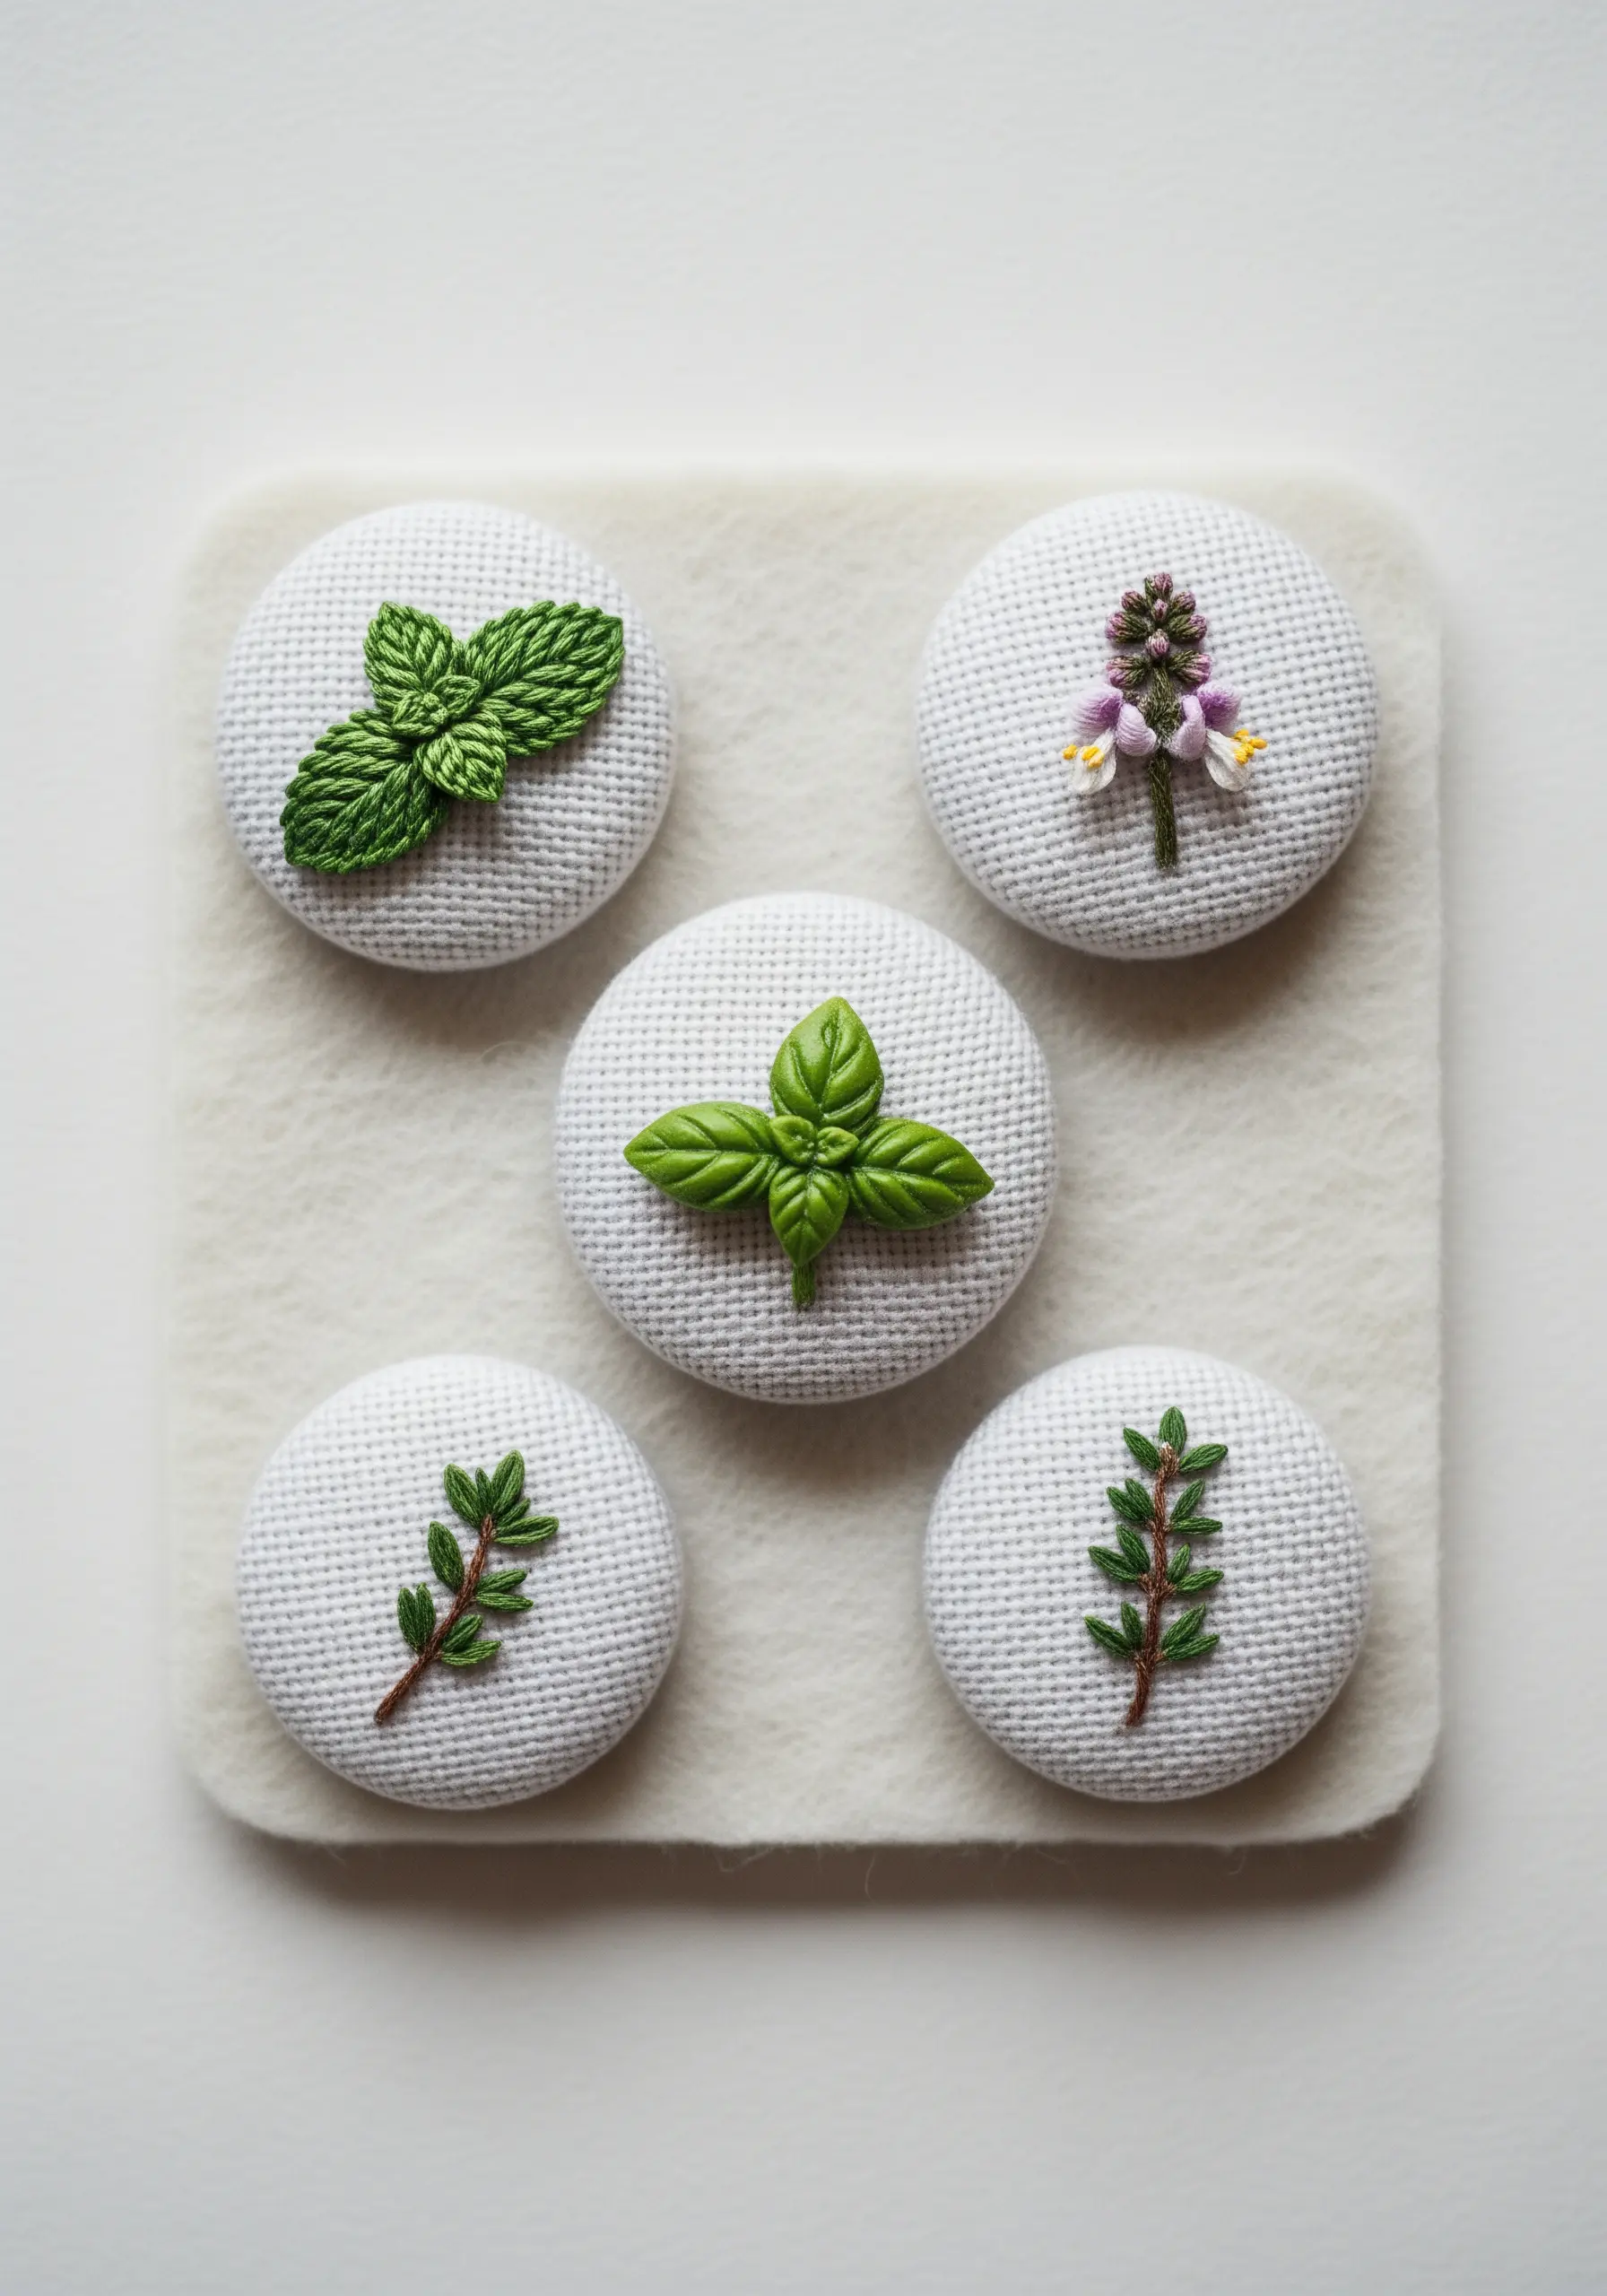
When working on a miniature scale for projects like covered buttons or pins, simplification is your most powerful tool.
Reduce each herb to its most recognizable element: a single basil leaf, a sprig of thyme, or a mint leaf cluster.
Use a single strand of six-strand floss to achieve the finest possible detail. For the leaves, a well-placed satin stitch or fishbone stitch is enough to convey the shape and texture without overcrowding the tiny space.
23. Layering Botanicals Over Bold Typography
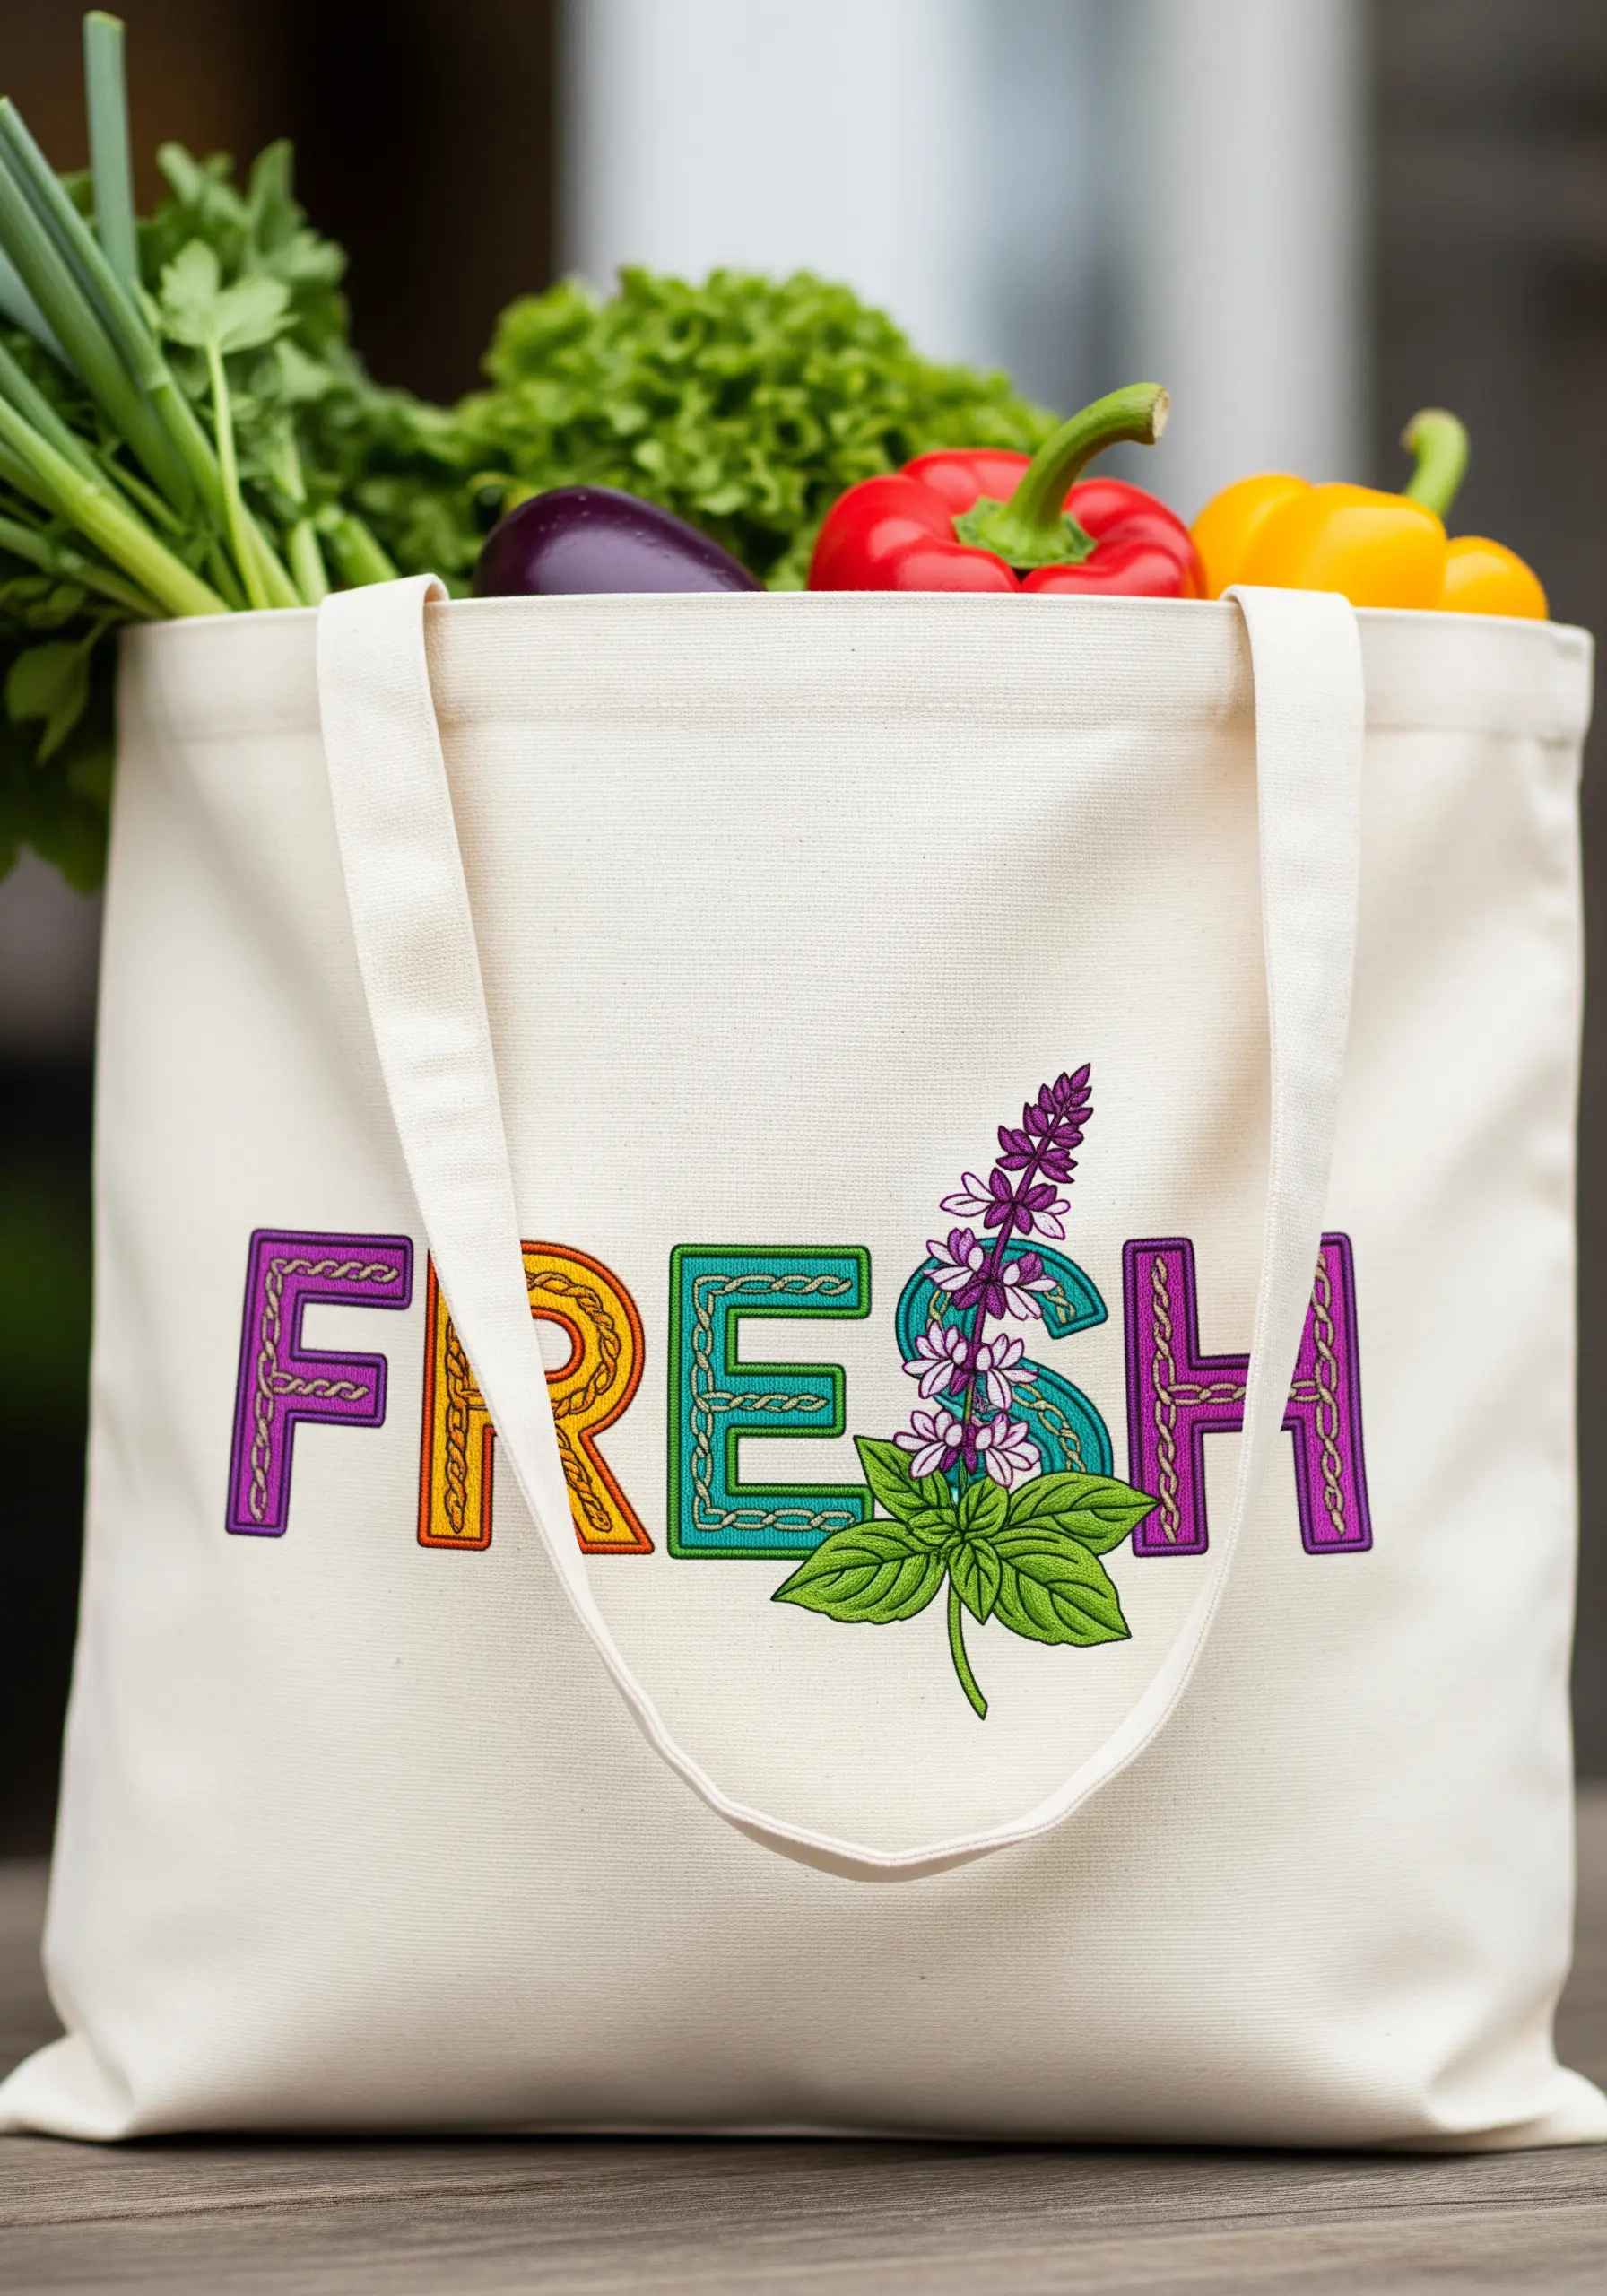
Combine lettering and florals on a tote bag by treating them as distinct but interacting layers.
First, stitch your letters, filling them with interesting textural stitches like chain stitch or woven filling stitch to give them substance.
Next, embroider your basil sprig so that it overlaps one or two of the letters. This creates a dynamic composition with a clear sense of foreground and background, making the entire design feel more integrated and professionally designed.
24. Curating a Cohesive Botanical Wall Trio
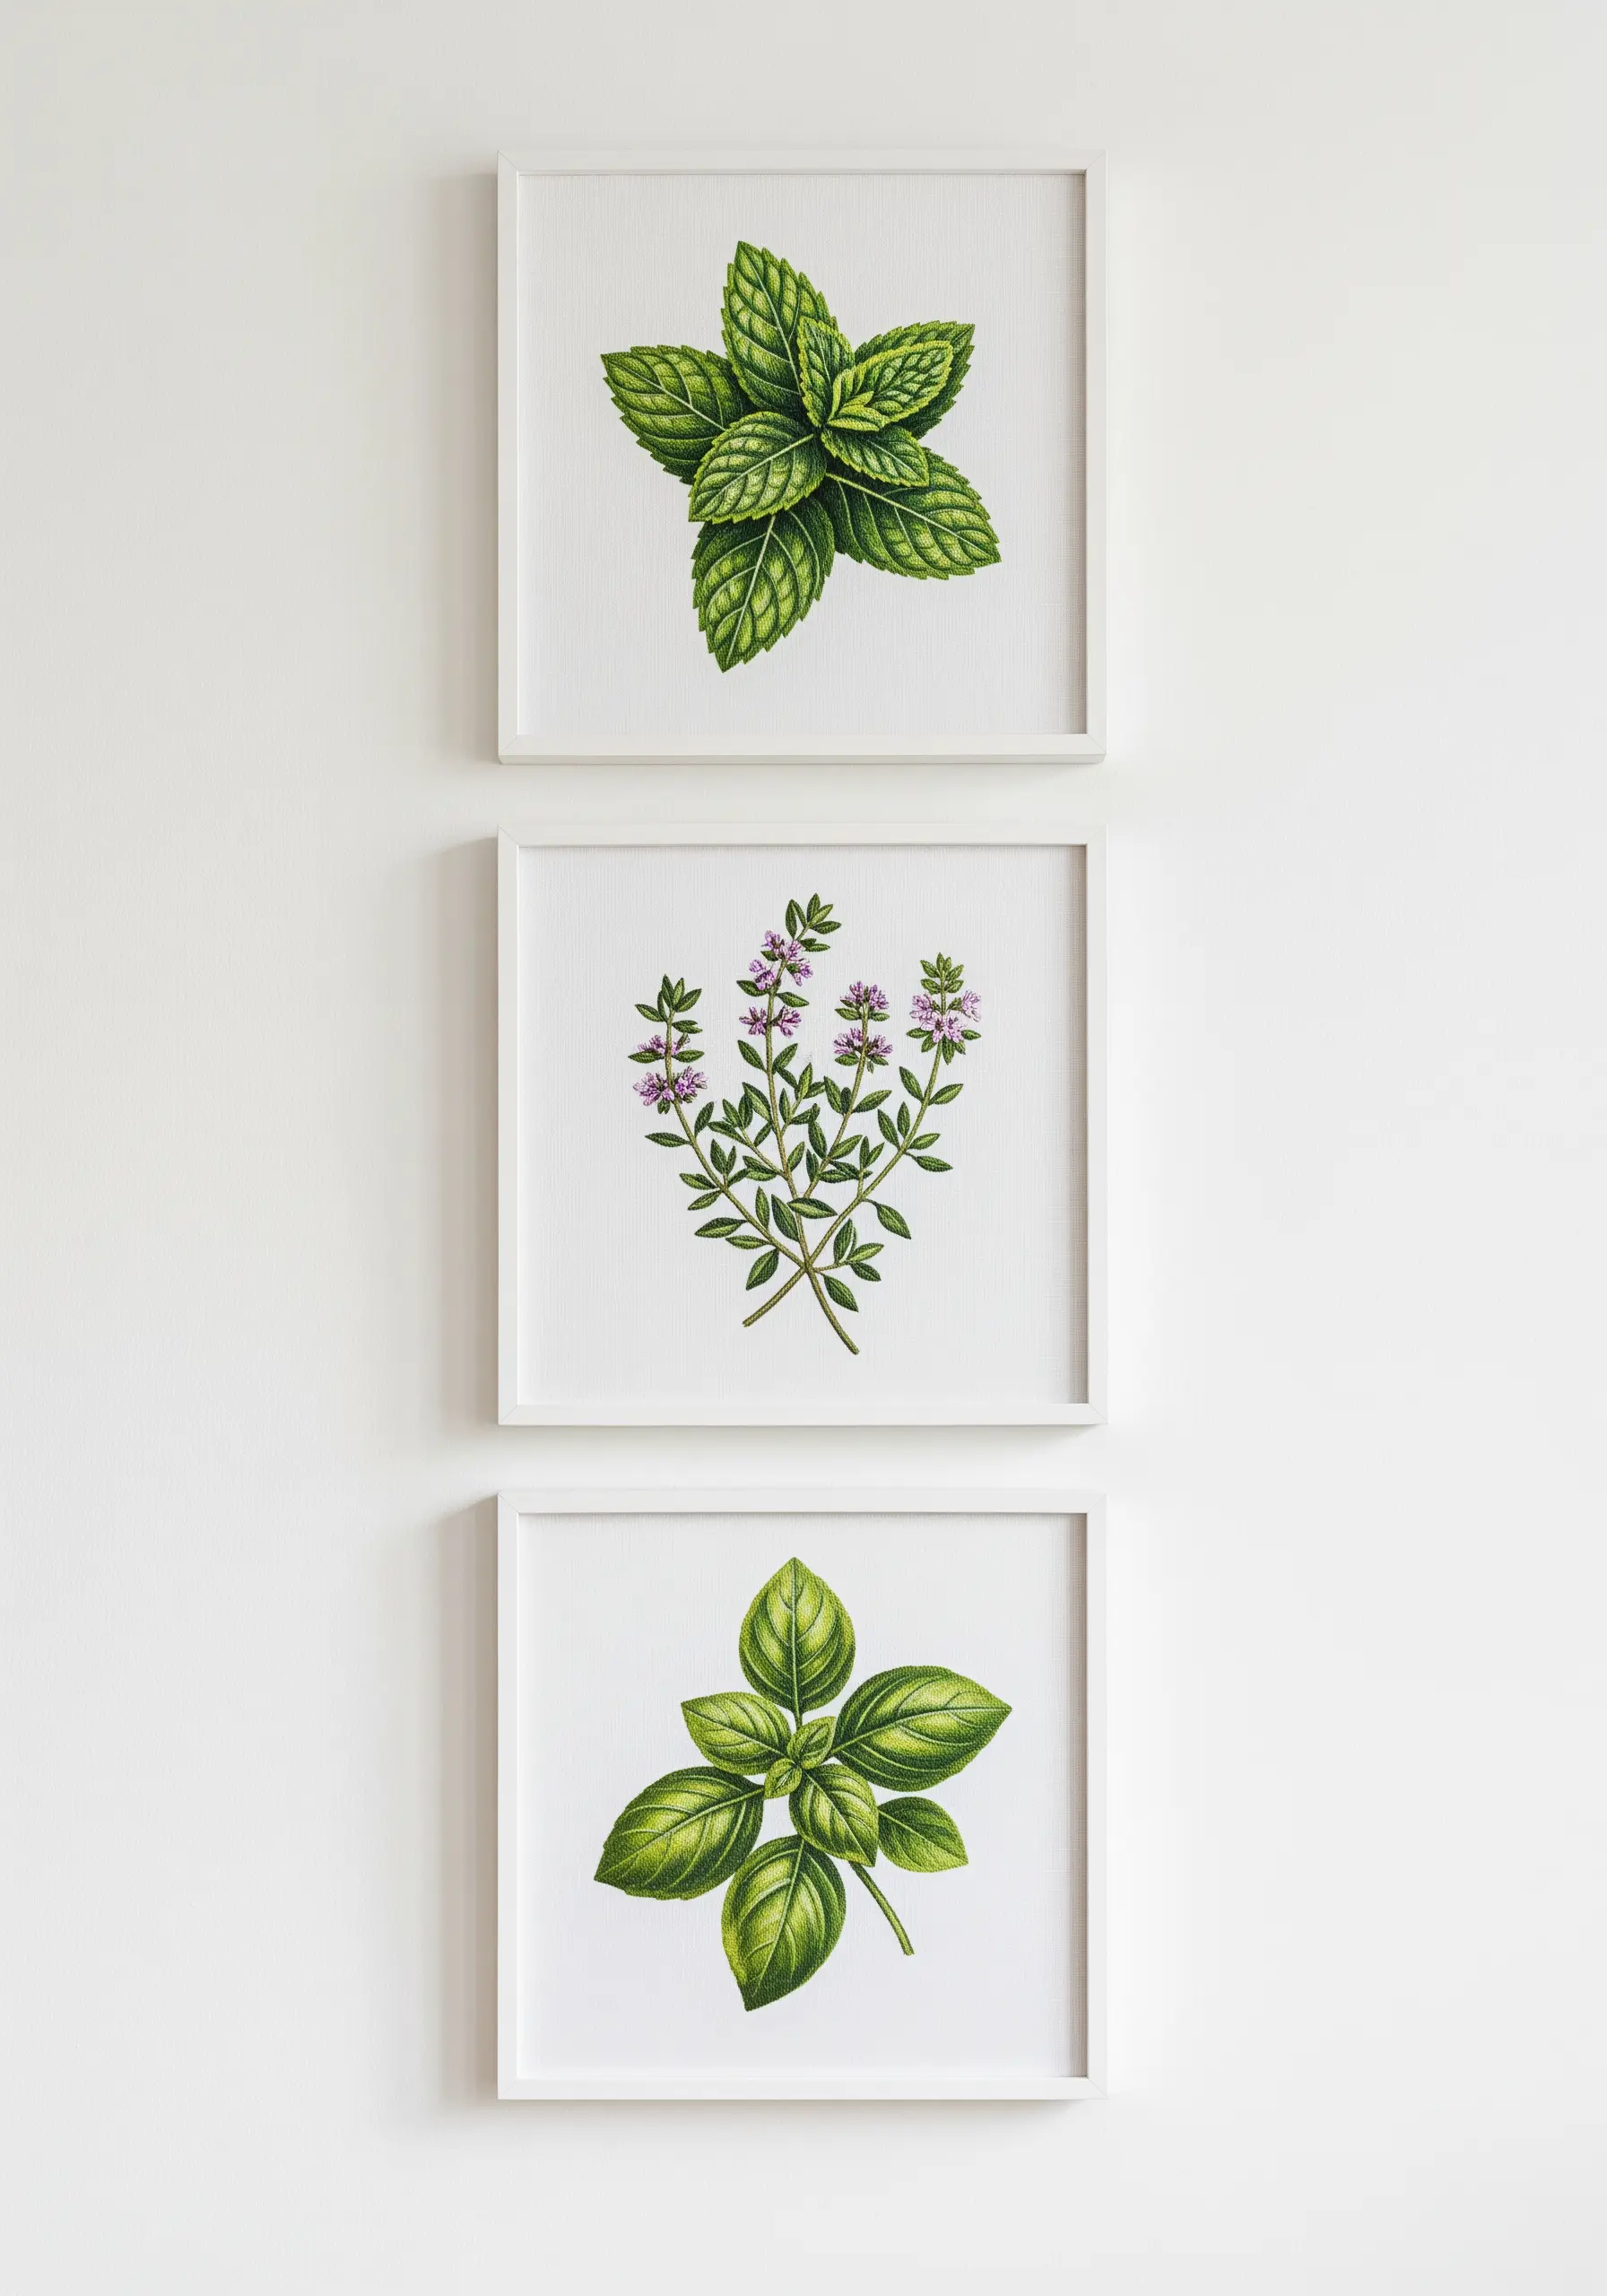
To create a polished set of framed herb portraits, consistency is just as important as the stitching itself.
Use the same count and color of fabric for all three pieces to create a unified canvas.
While the herbs are different, try to use a similar thread painting technique and color palette across all three to ensure they feel like a deliberate collection.
Finally, choose identical simple, white frames that let the detailed stitchwork remain the star of the show.
25. Stitching on Non-Traditional Materials
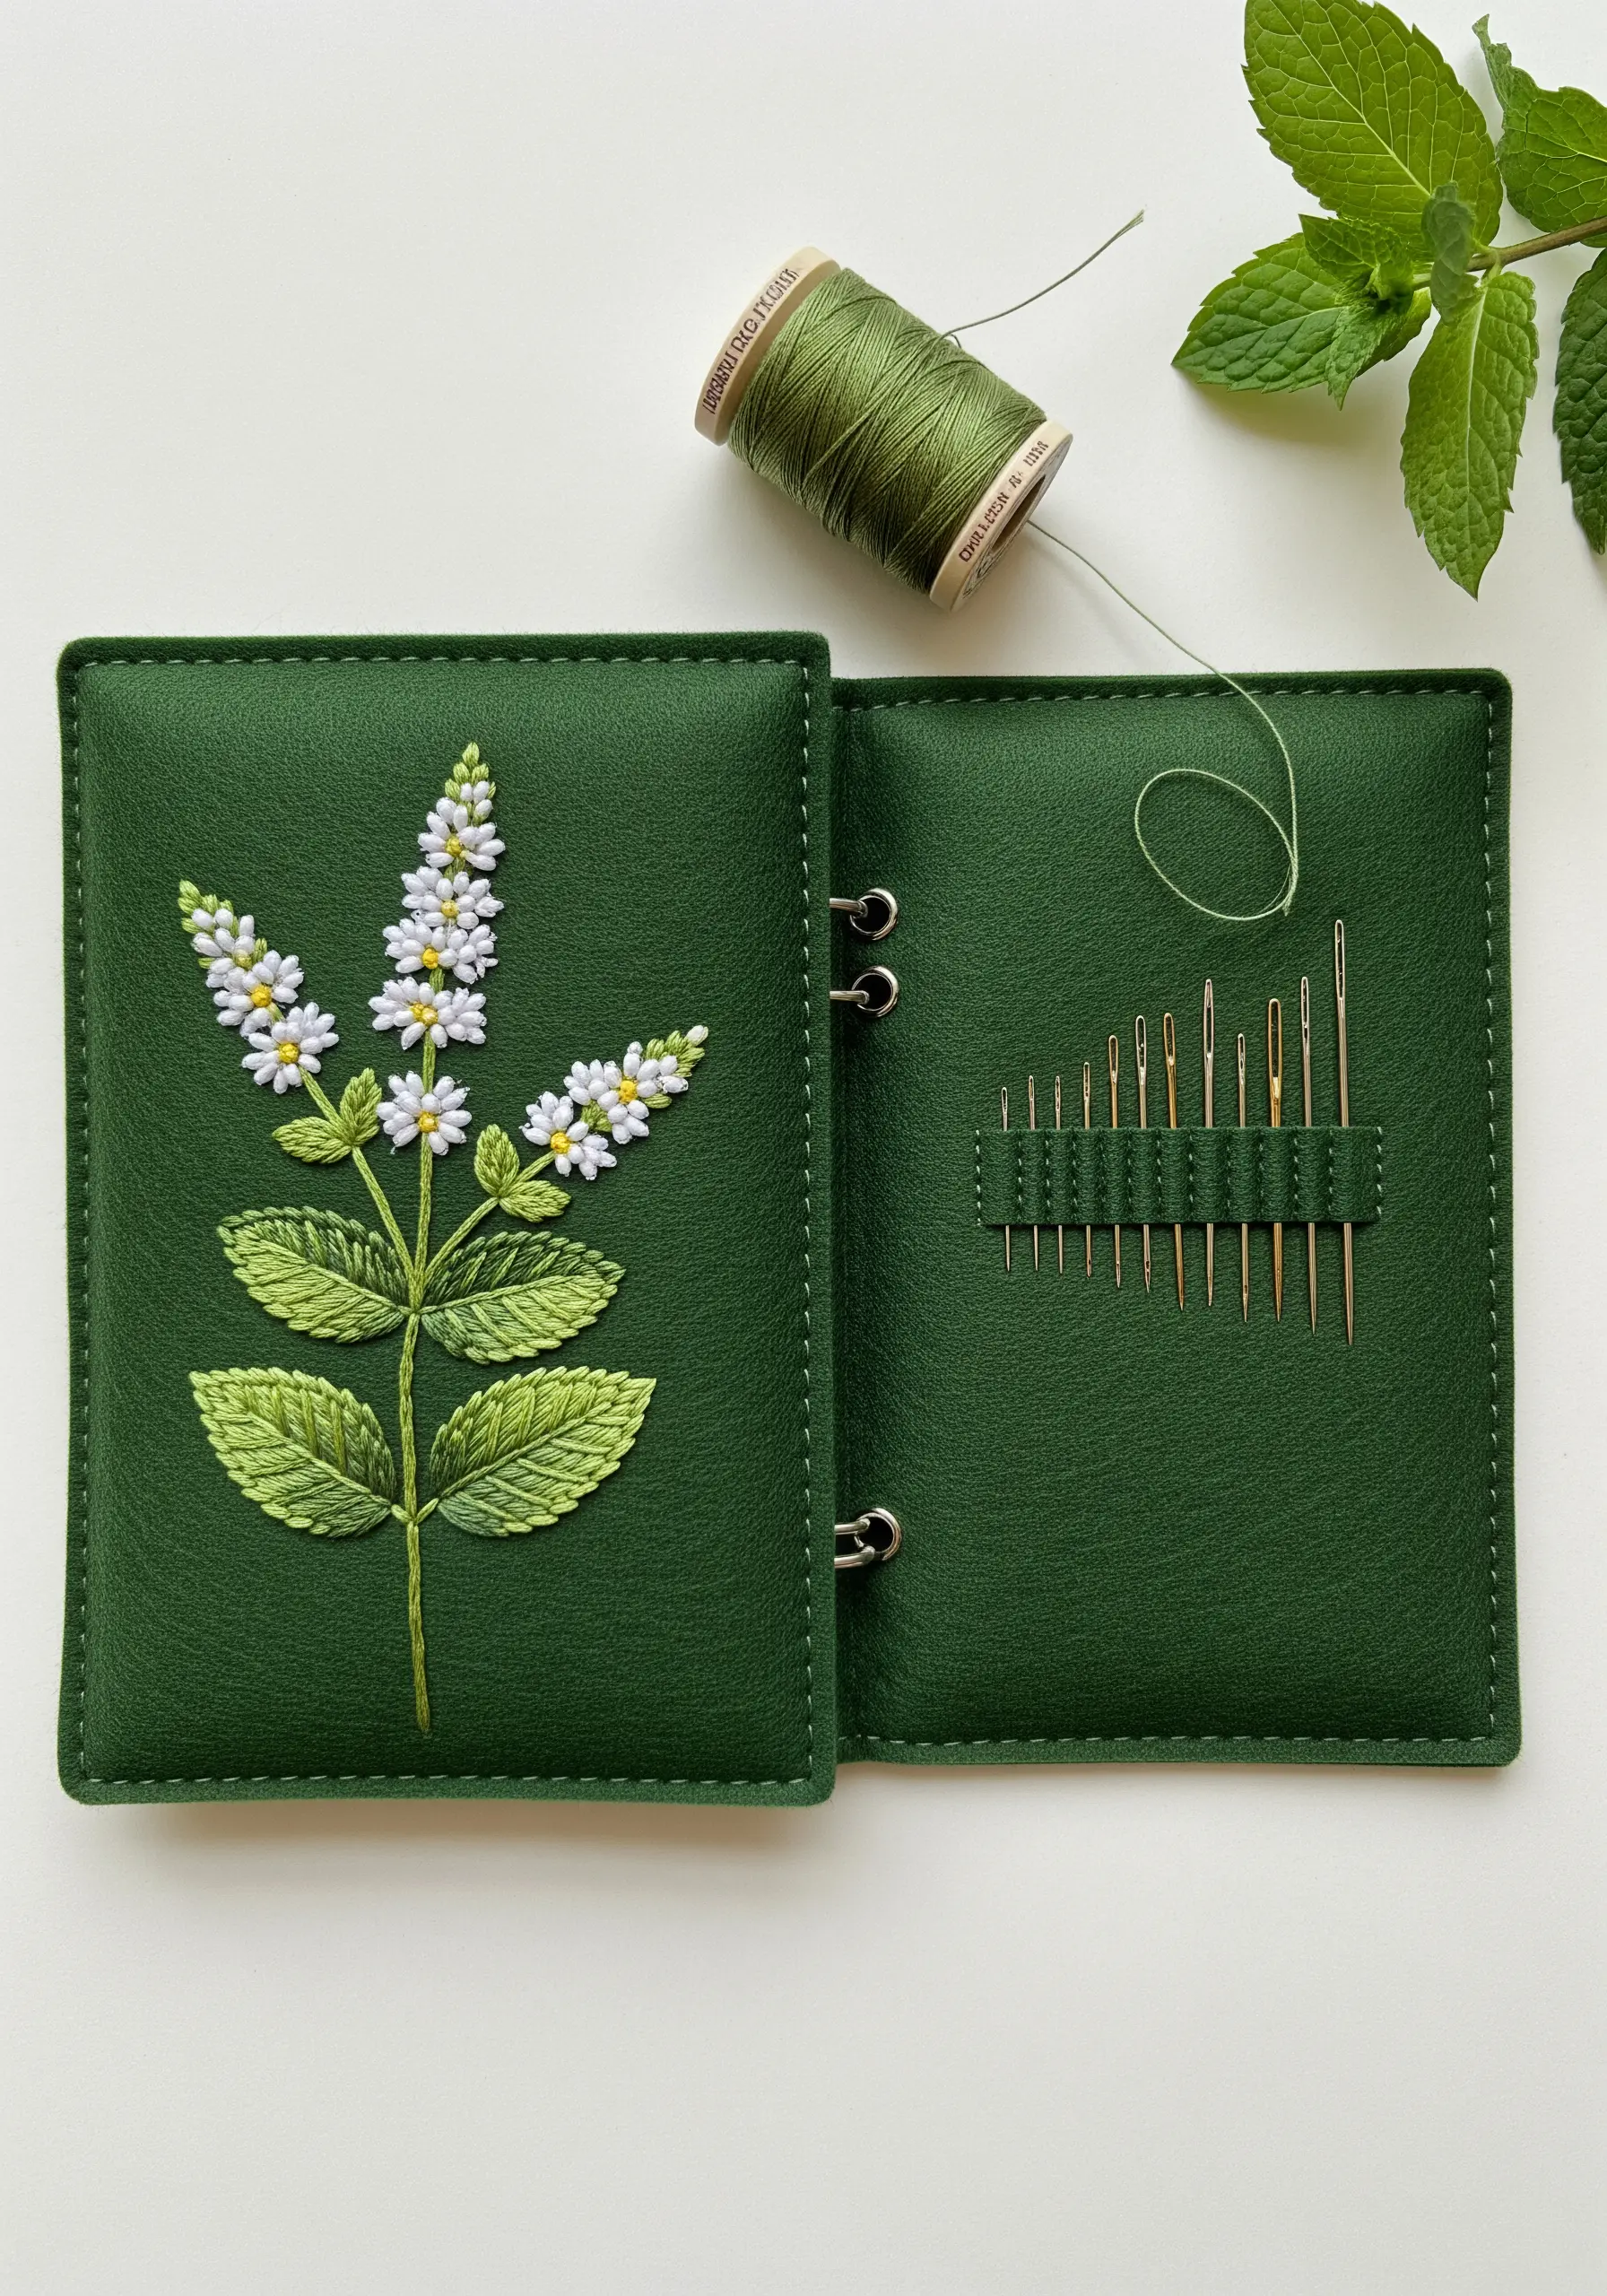
Embroidering on faux leather for a project like a needle book requires a different approach than fabric.
Use a sharp, fine needle (like a leather needle or a standard sharp) to cleanly pierce the material without leaving large, visible holes.
Do not use a hoop, as it can permanently mark the surface. Instead, hold the material taut with your hands.
Keep your stitches slightly longer and avoid placing too many perforations close together, as this can weaken the material and cause it to tear.
26. Achieving Crisp Monograms on Terrycloth
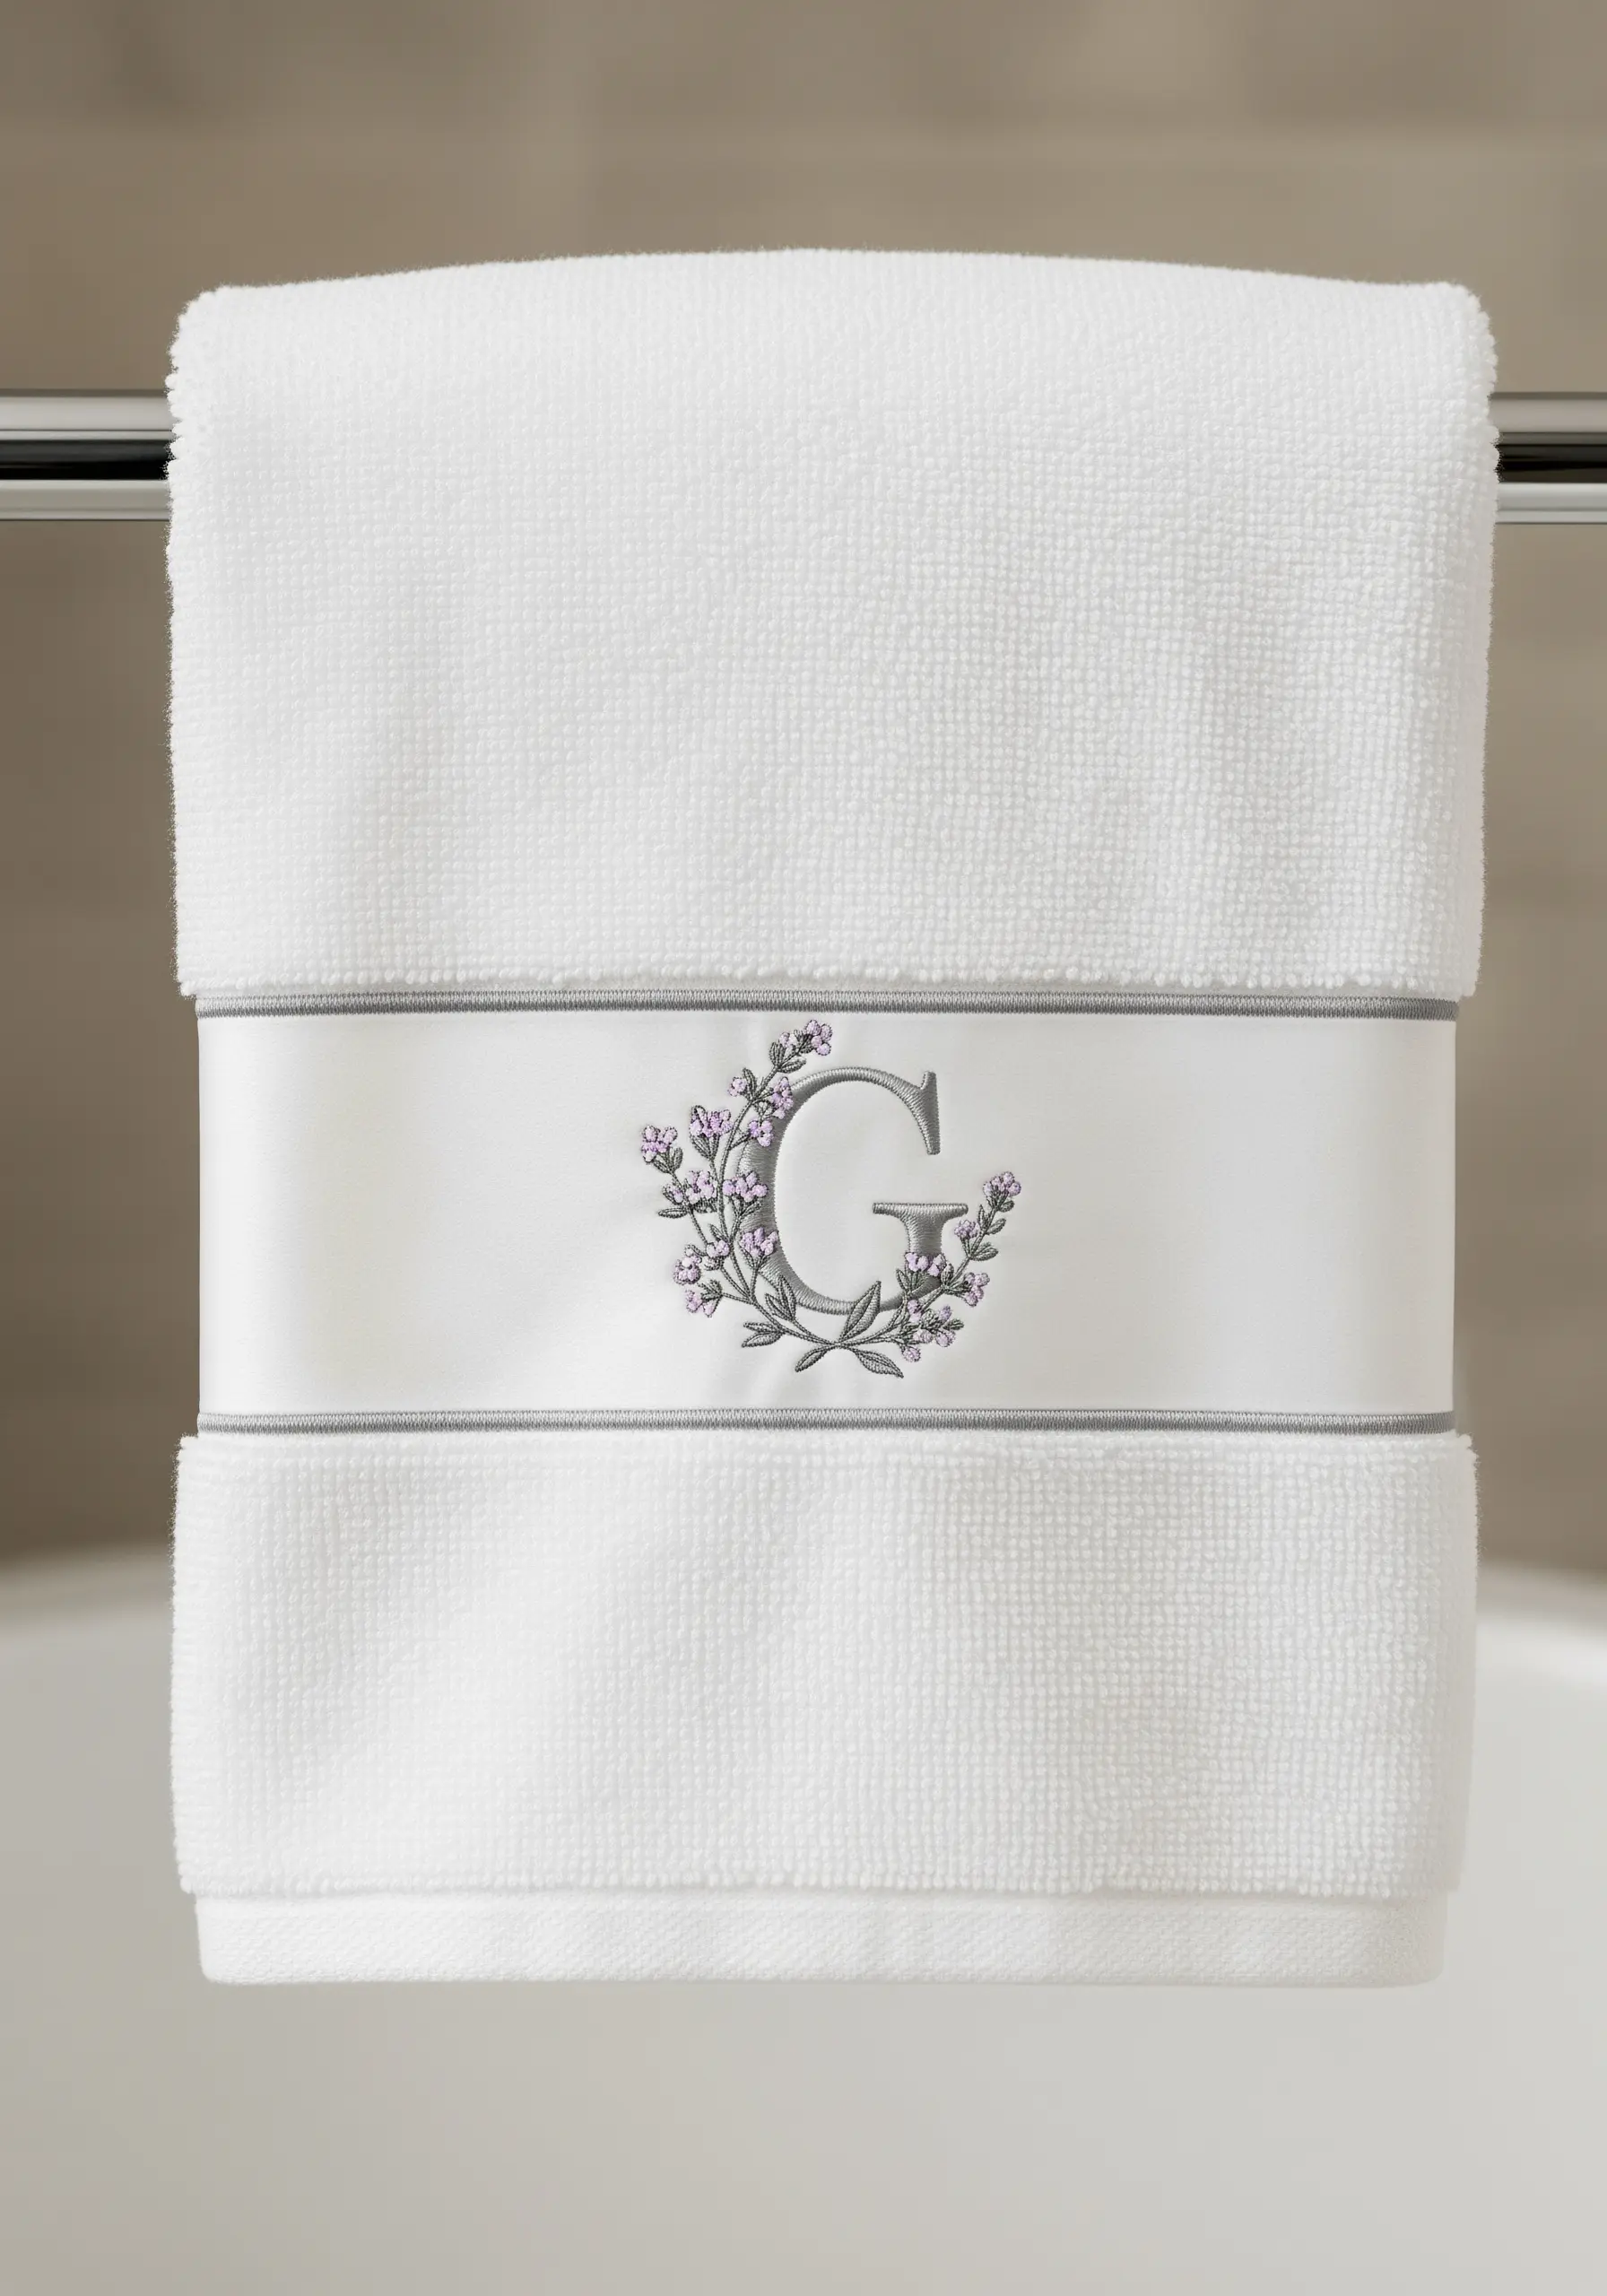
To prevent your stitches from disappearing into the plush loops of a towel, you must create a smooth surface to work on.
Place a layer of water-soluble topping stabilizer over the area you plan to stitch. This clear film acts as a temporary flat surface, holding the terrycloth loops down so your stitches sit cleanly on top.
Once you are finished, the topping gently tears or washes away, leaving behind a crisp, professional-looking botanical monogram that is not buried in the pile.
27. Designing a Graphic Herb Pennant
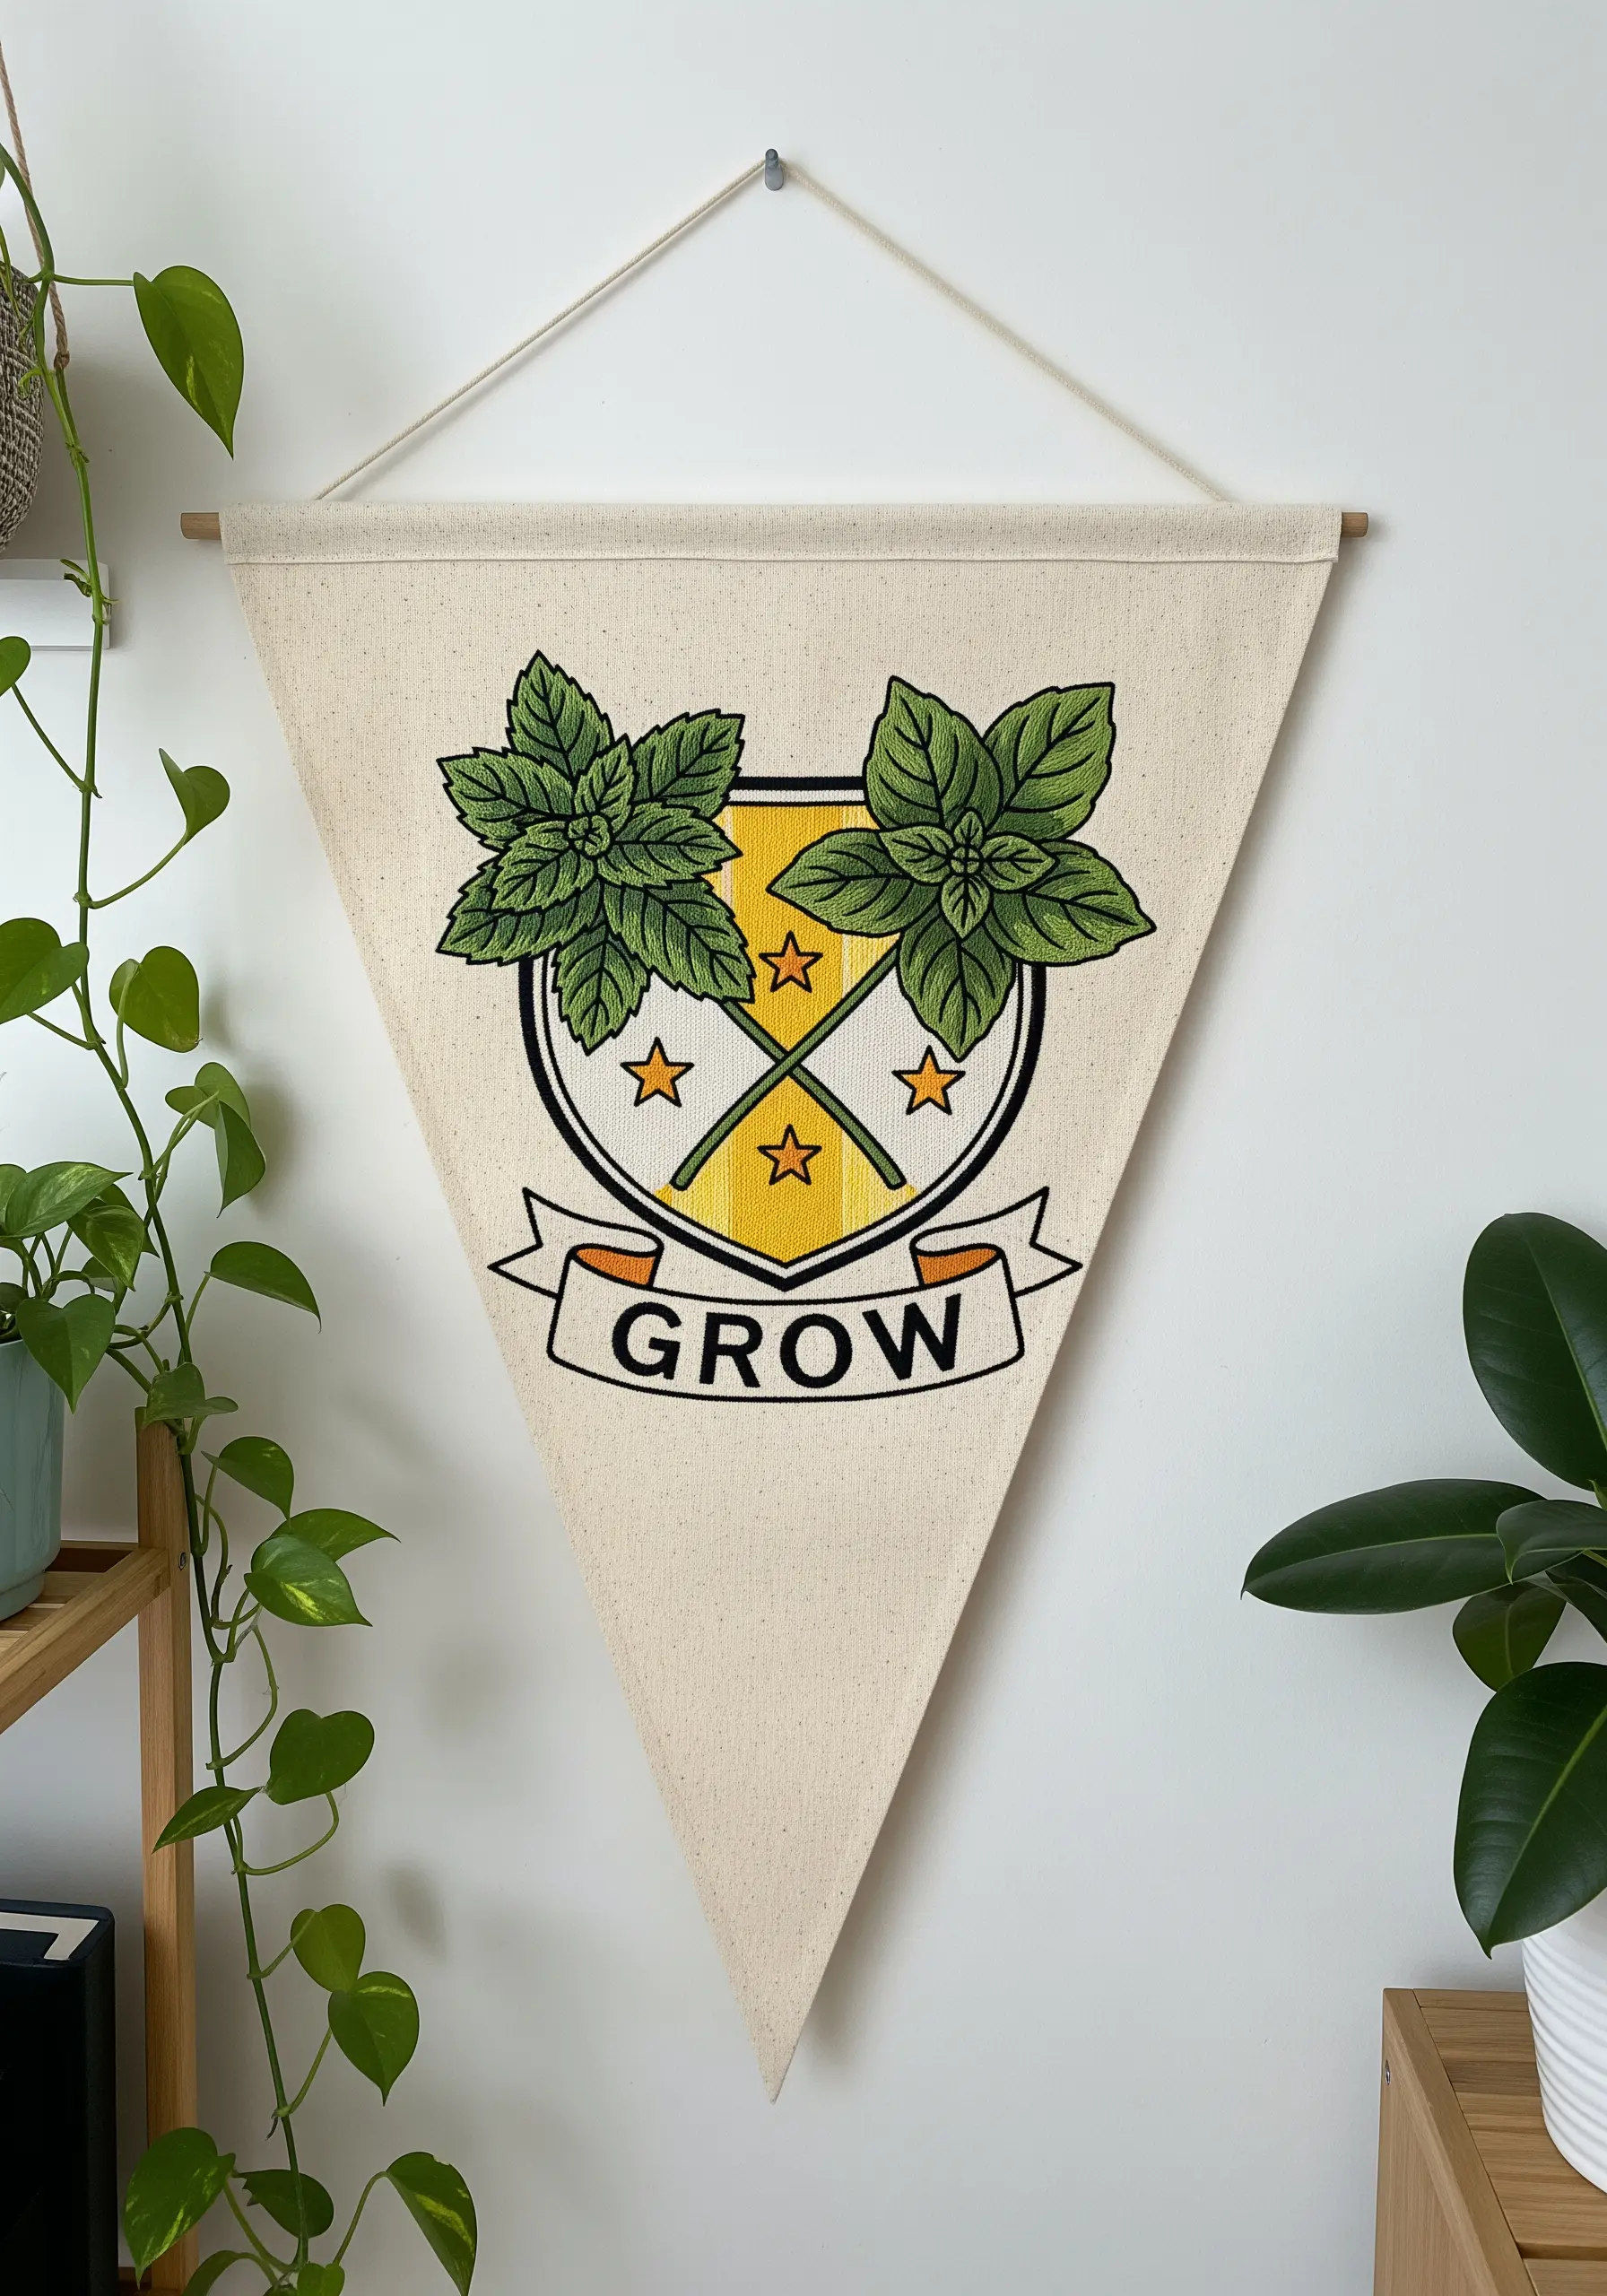
For a bold, graphic design like a pennant, think in terms of solid shapes and clean outlines.
Use a dense satin stitch or even fabric appliqué for the large colored areas of the shield and banner to create smooth, solid blocks of color.
Define the edges of the mint leaves and the lettering with a thick, contrasting outline using a three-strand backstitch. This gives the entire design a crisp, illustrative quality that reads well from a distance.
28. Creating an Ethereal ‘Floating’ Table Runner
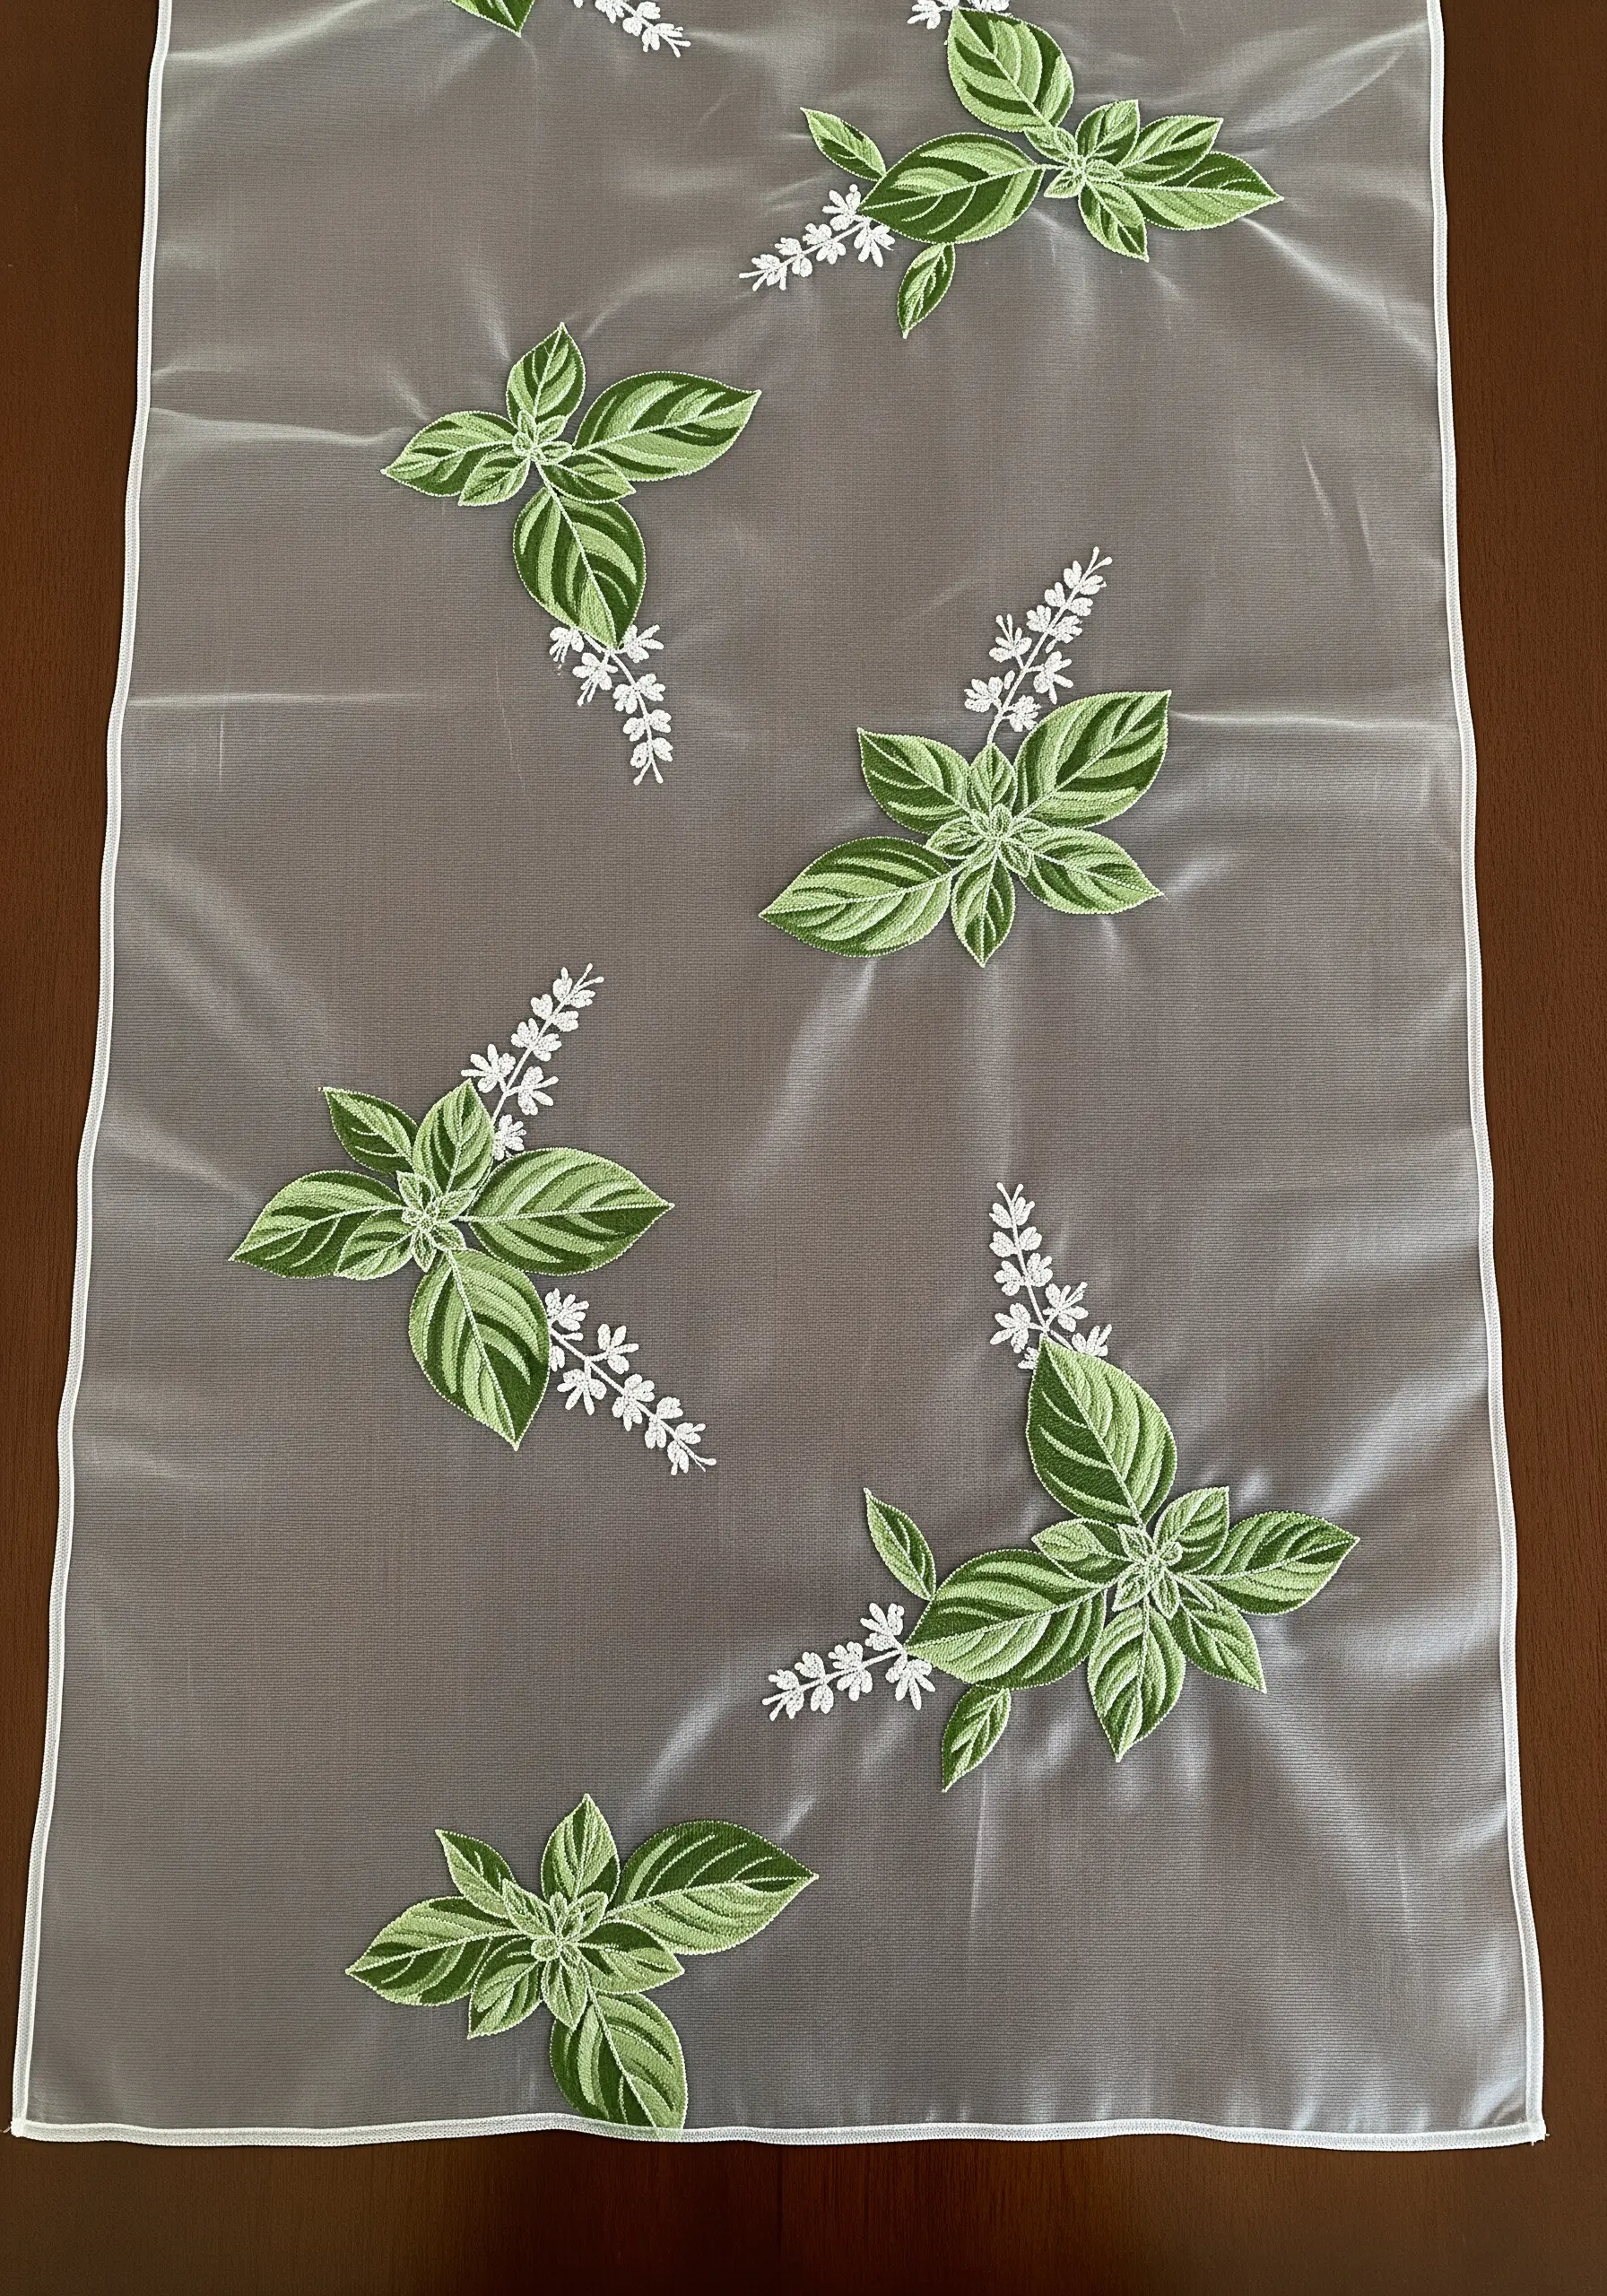
The magic of embroidering on sheer organza is creating the illusion that the motifs are floating on the surface.
To achieve this, minimize any visible support structures. Use a water-soluble stabilizer that disappears completely after washing.
Secure your threads on the back by weaving them under existing stitches rather than tying knots, which would be visible through the transparent fabric.
This meticulous finishing is the secret to a truly ethereal and professional-looking piece.
29. Embroidering Durable Designs on Footwear
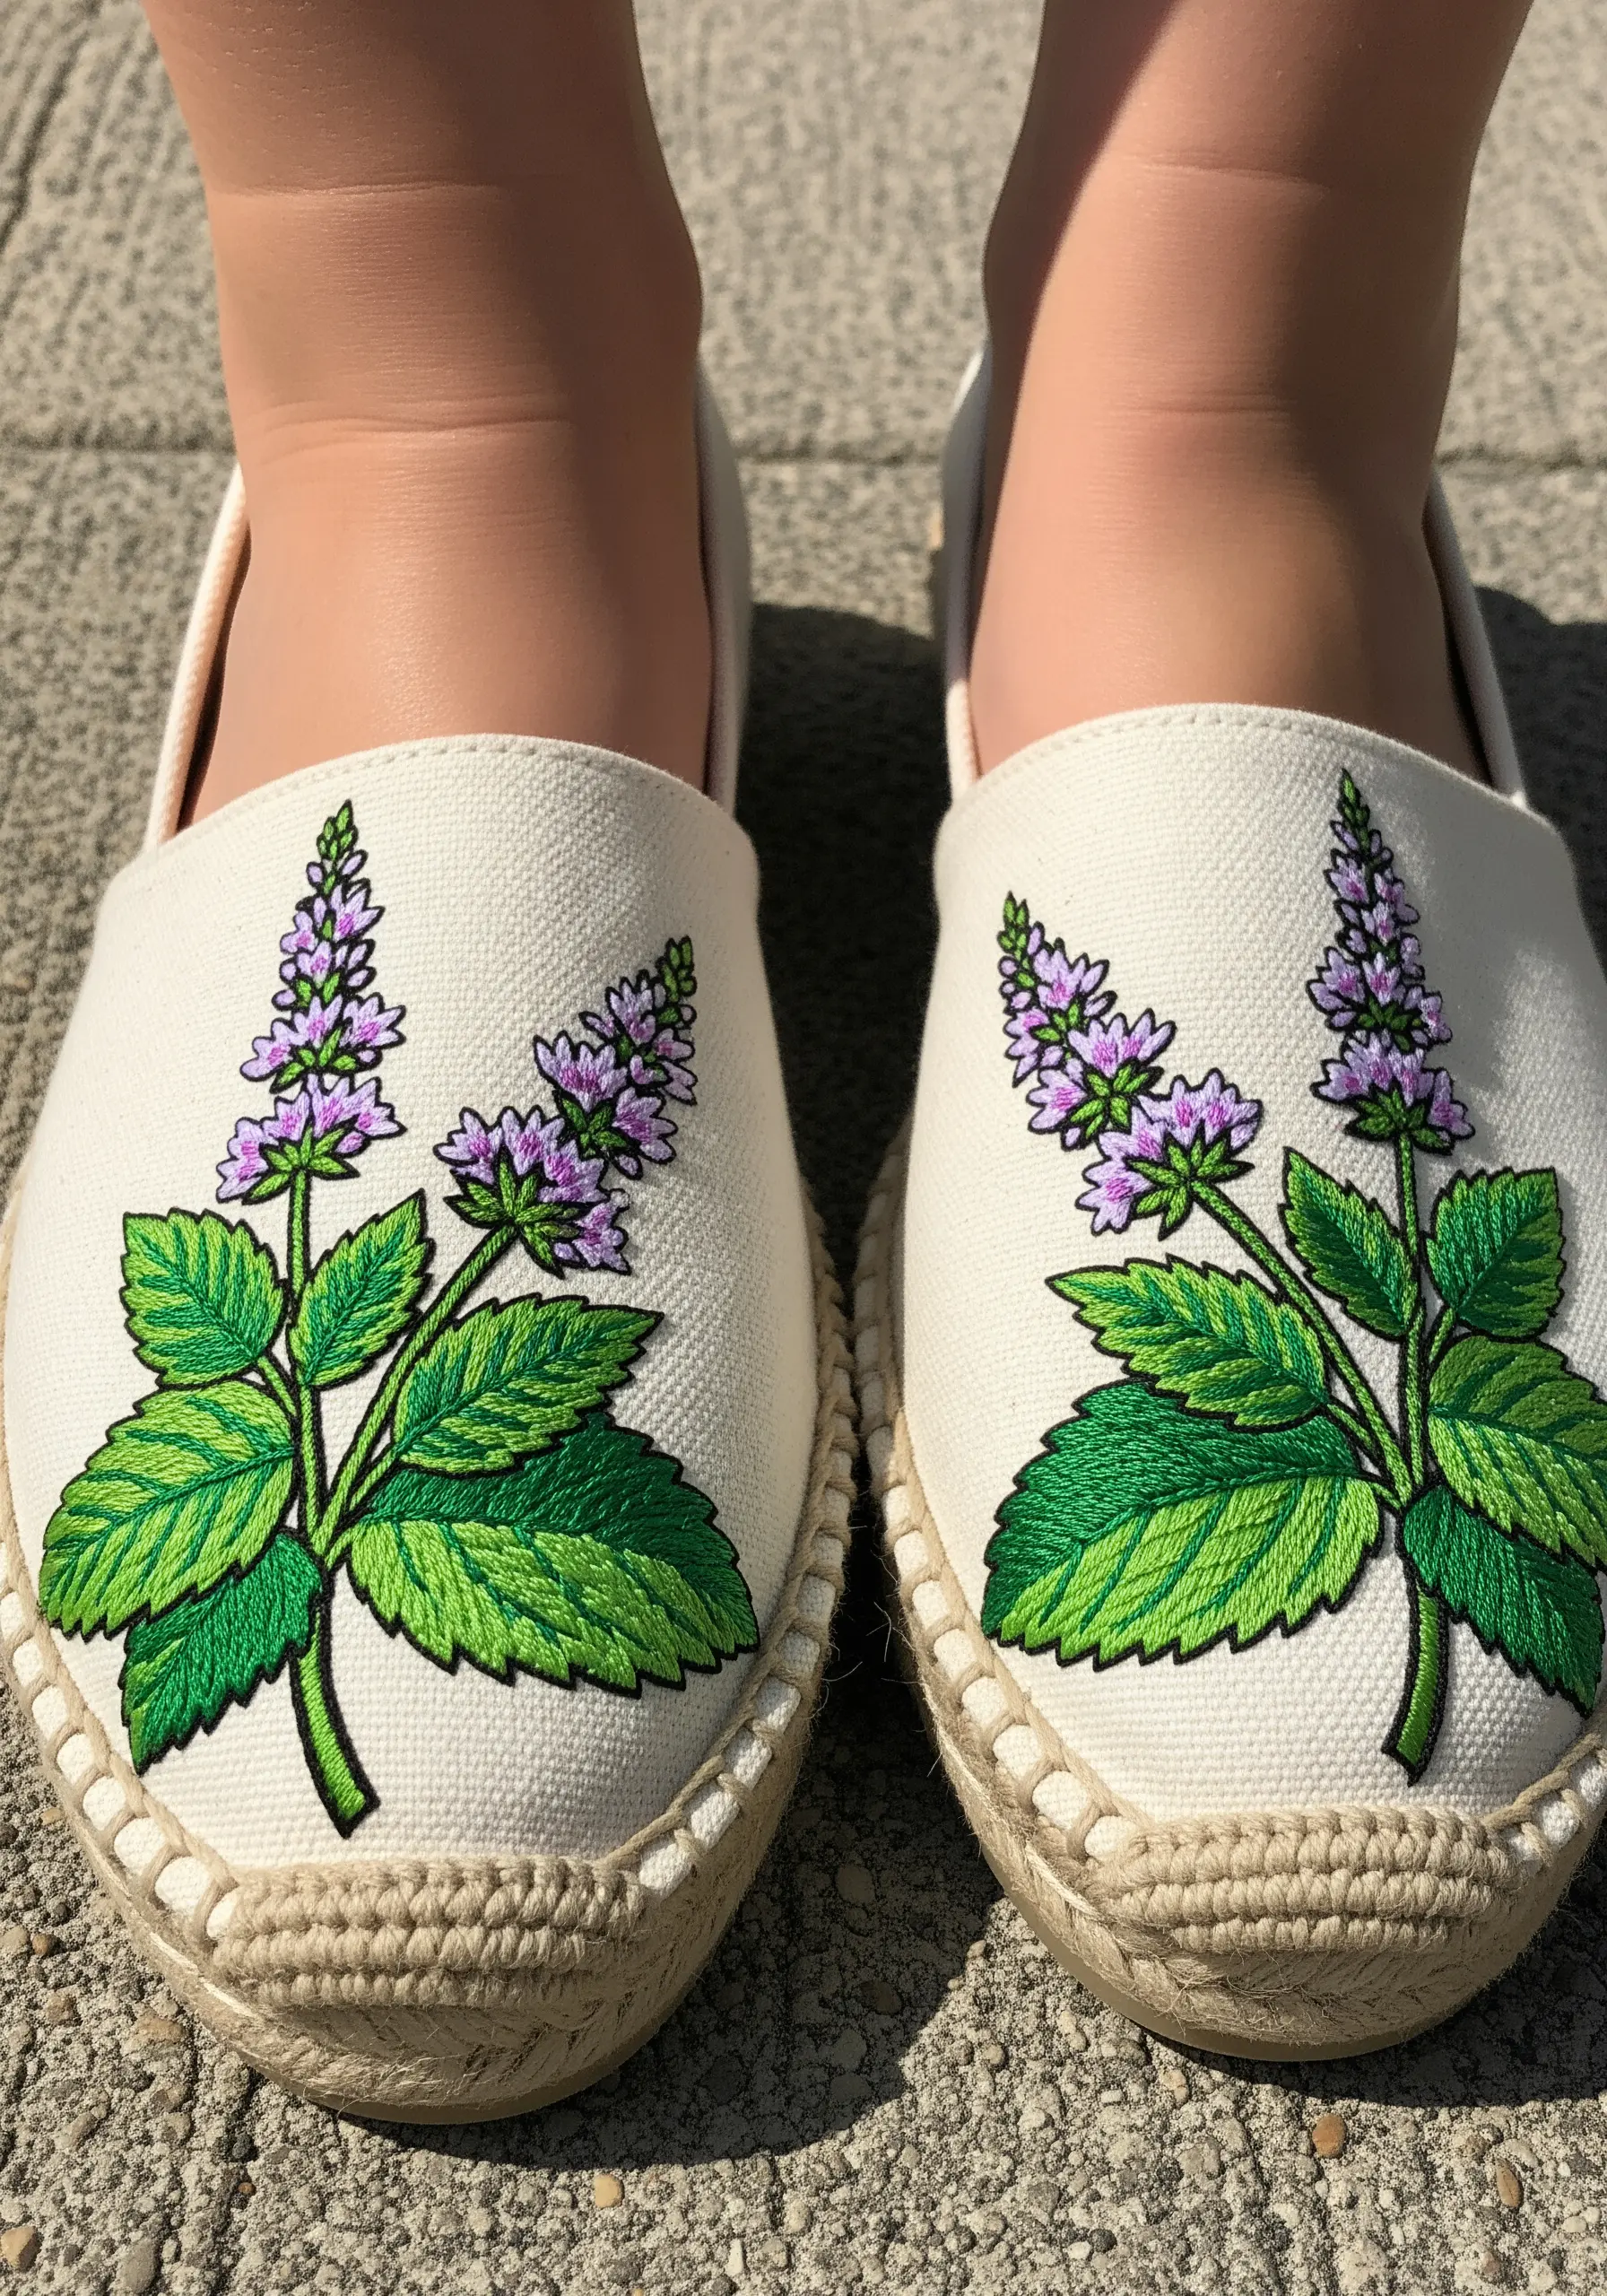
When adding embroidery to shoes like espadrilles, durability is paramount.
Choose a high-quality, colorfast cotton floss that can withstand abrasion and cleaning. DMC and Anchor are reliable choices.
Since you cannot hoop the shoe, use the ‘stabbing’ method: push the needle through from the top, then guide it back up from the inside. This gives you precise control over stitch placement.
Coat the back of your finished work with a flexible fabric glue like Fray Check to secure the threads and prevent them from unraveling with wear.
30. Engineering a Seamless Repeat Pattern
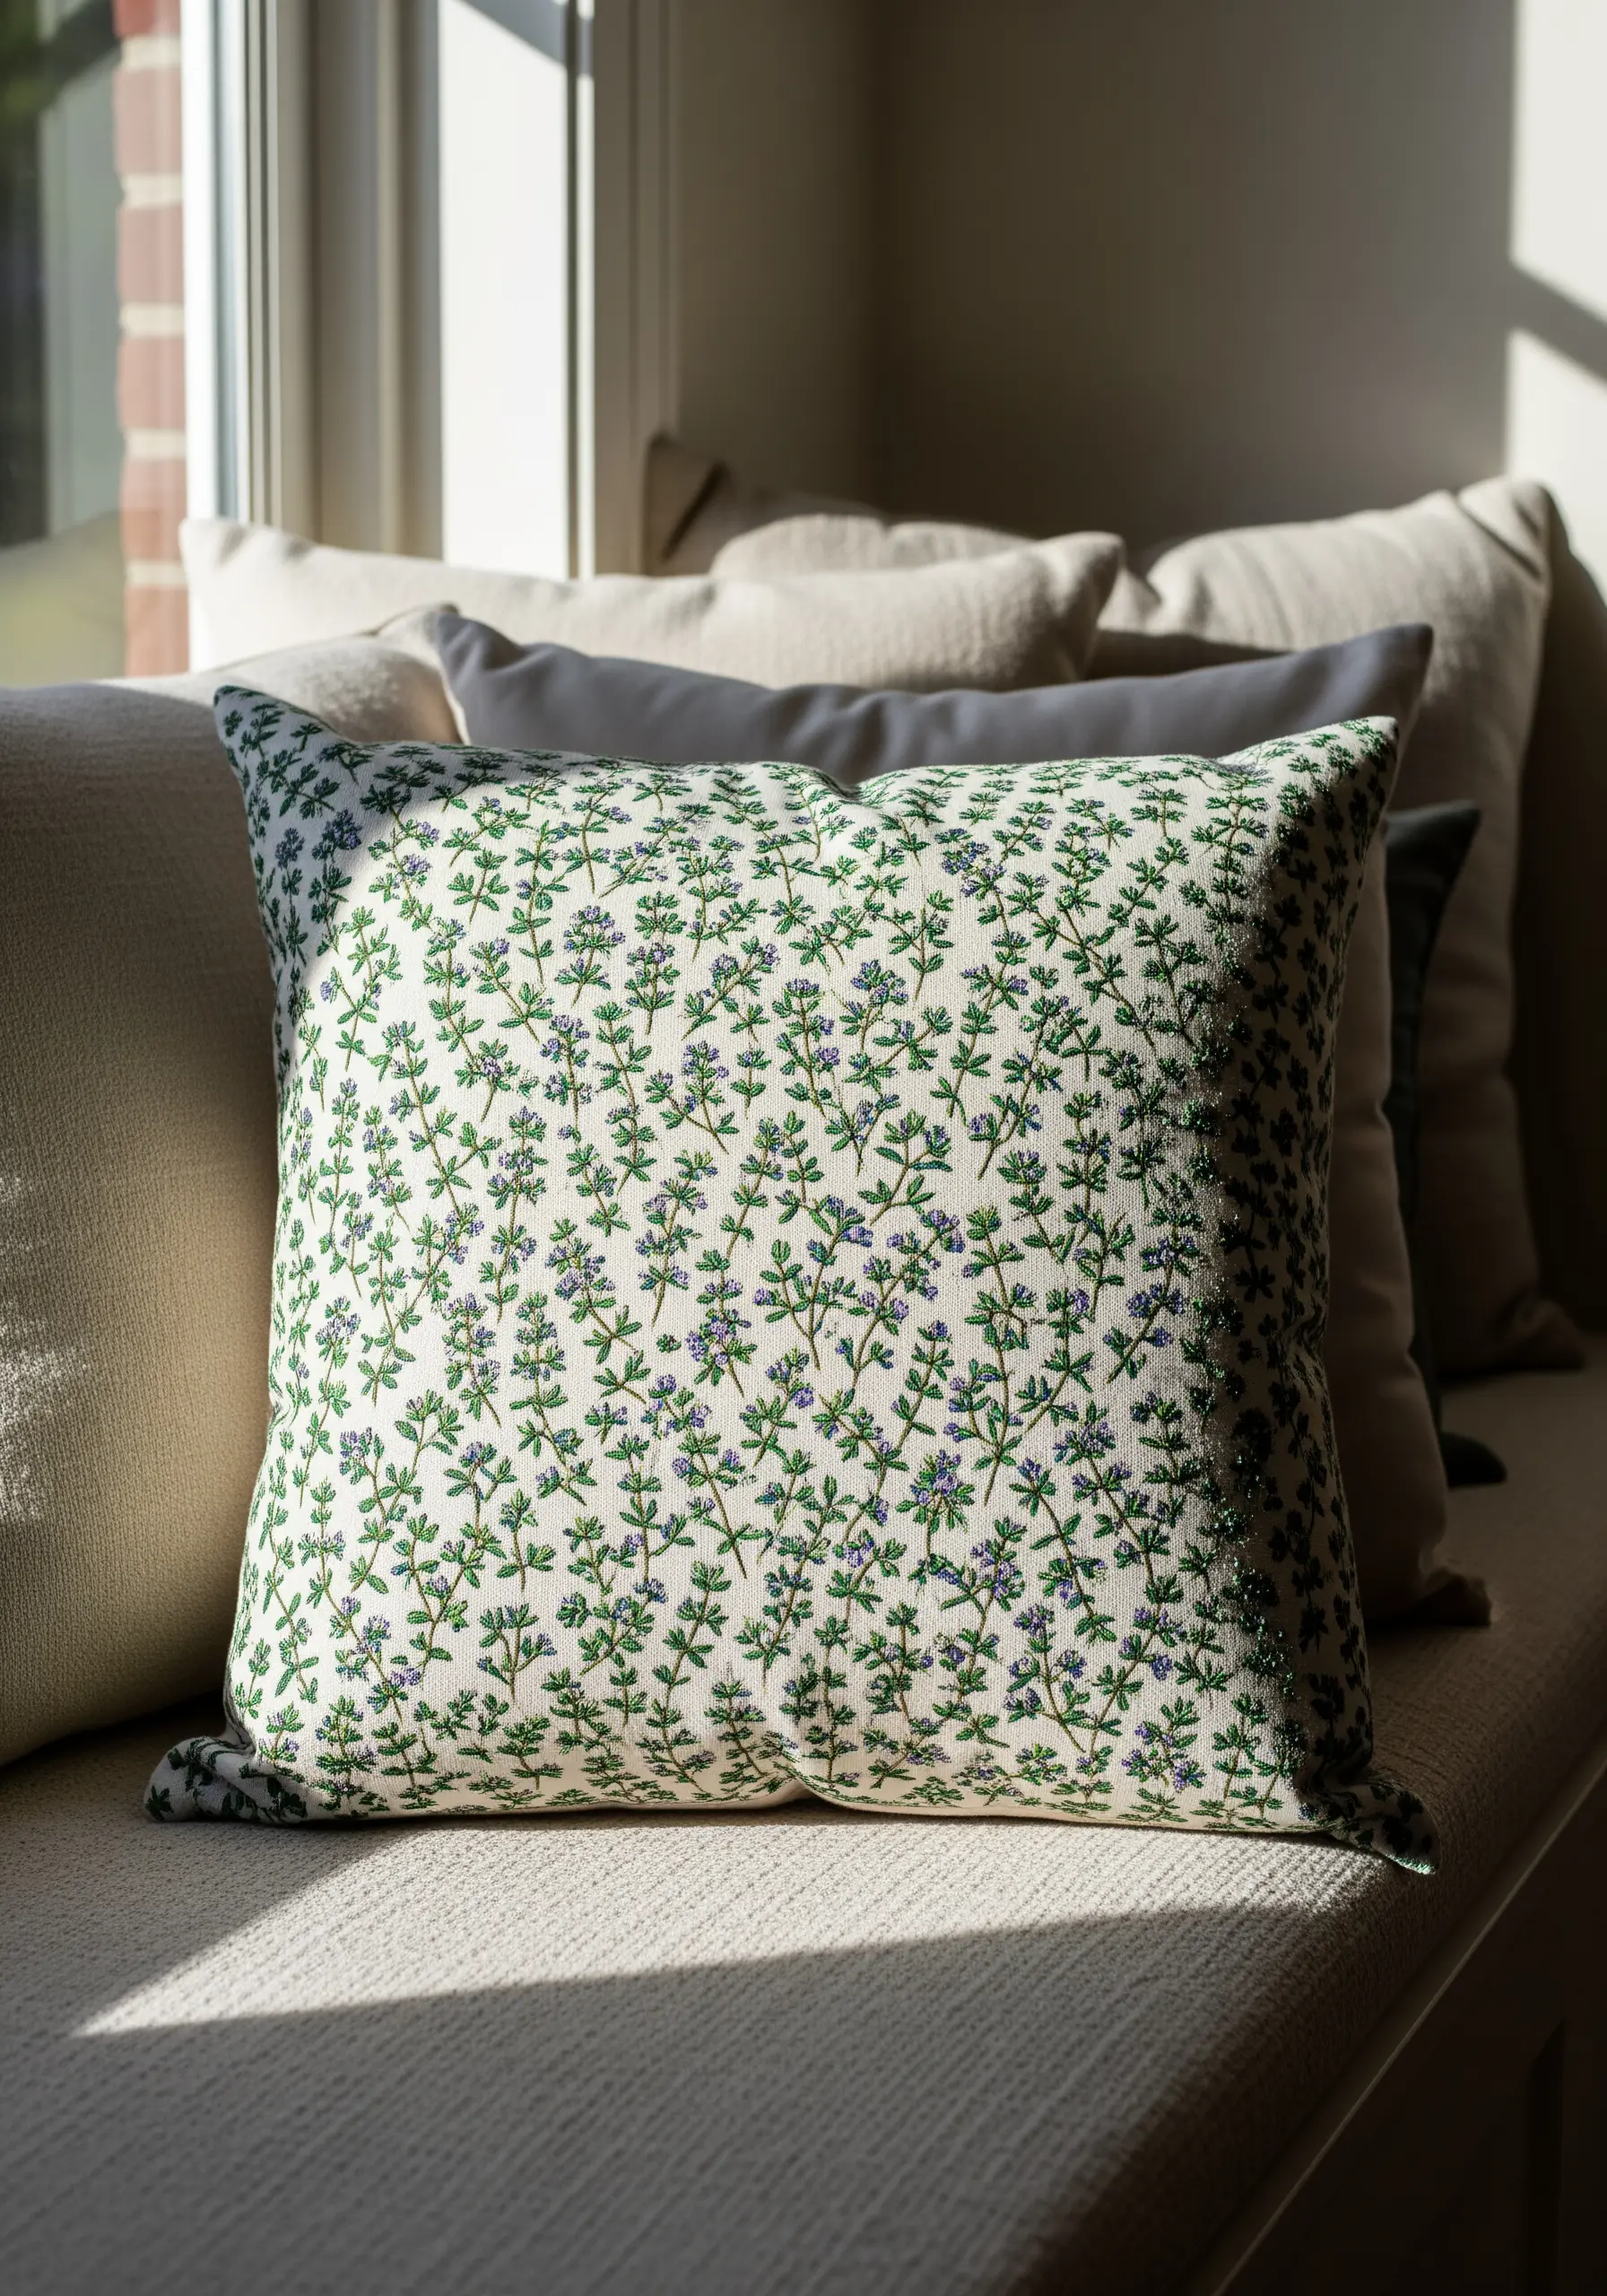
To create an all-over pattern on a pillow that looks balanced and professional, careful planning is essential.
Create a small, simple thyme sprig stencil on paper or cardboard. Use this stencil with a heat- or water-erasable fabric pen to mark the placement of each motif across the fabric.
Slightly alter the angle of the stencil for each repetition—tilting it left or right—to give the final pattern a more organic, less rigid feel, as if the herbs were scattered by hand.
31. Embracing Minimalism with Felt Coasters
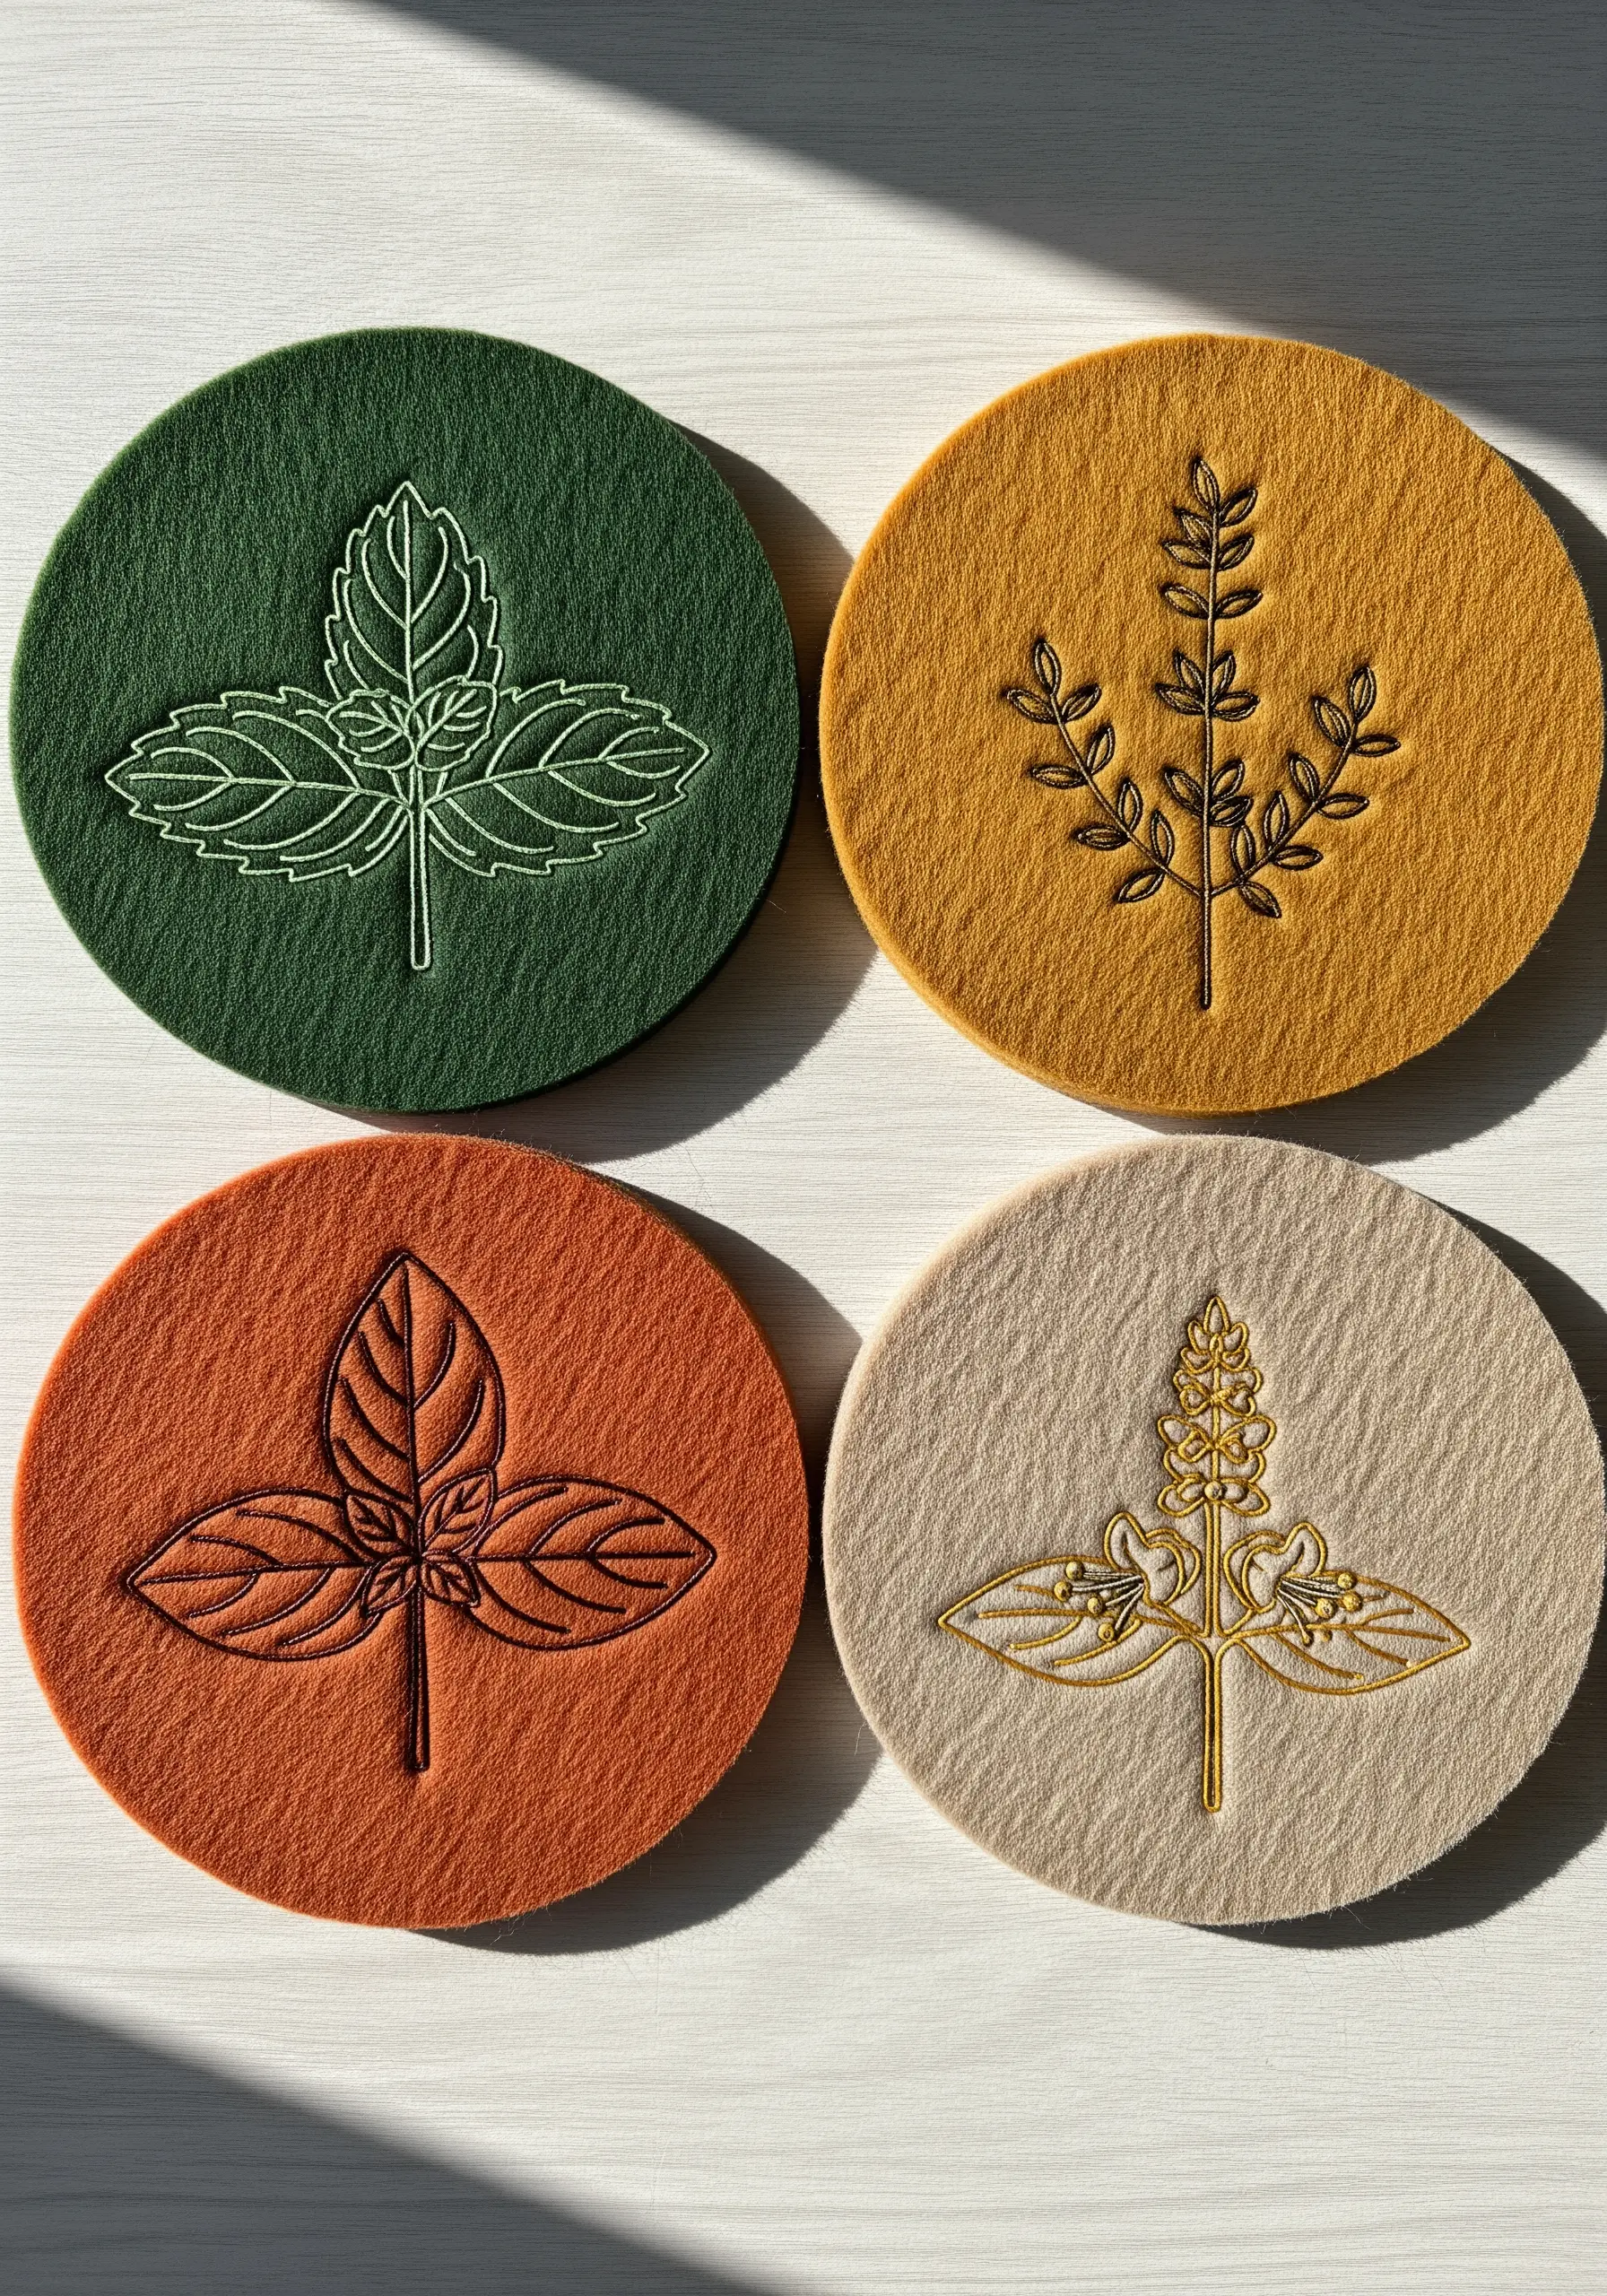
When working with a beautifully textured material like pressed felt, you can make a big impact with very little stitching.
Choose a simple, single-line drawing of each herb. The negative space inside the outline is just as important as the stitched line itself.
Use a backstitch with two or three strands of floss to create a clean, consistent line. The contrast between the simple threadwork and the soft, matte surface of the felt creates a sophisticated and modern aesthetic.
32. Designing a Wreath for a Cylindrical Surface
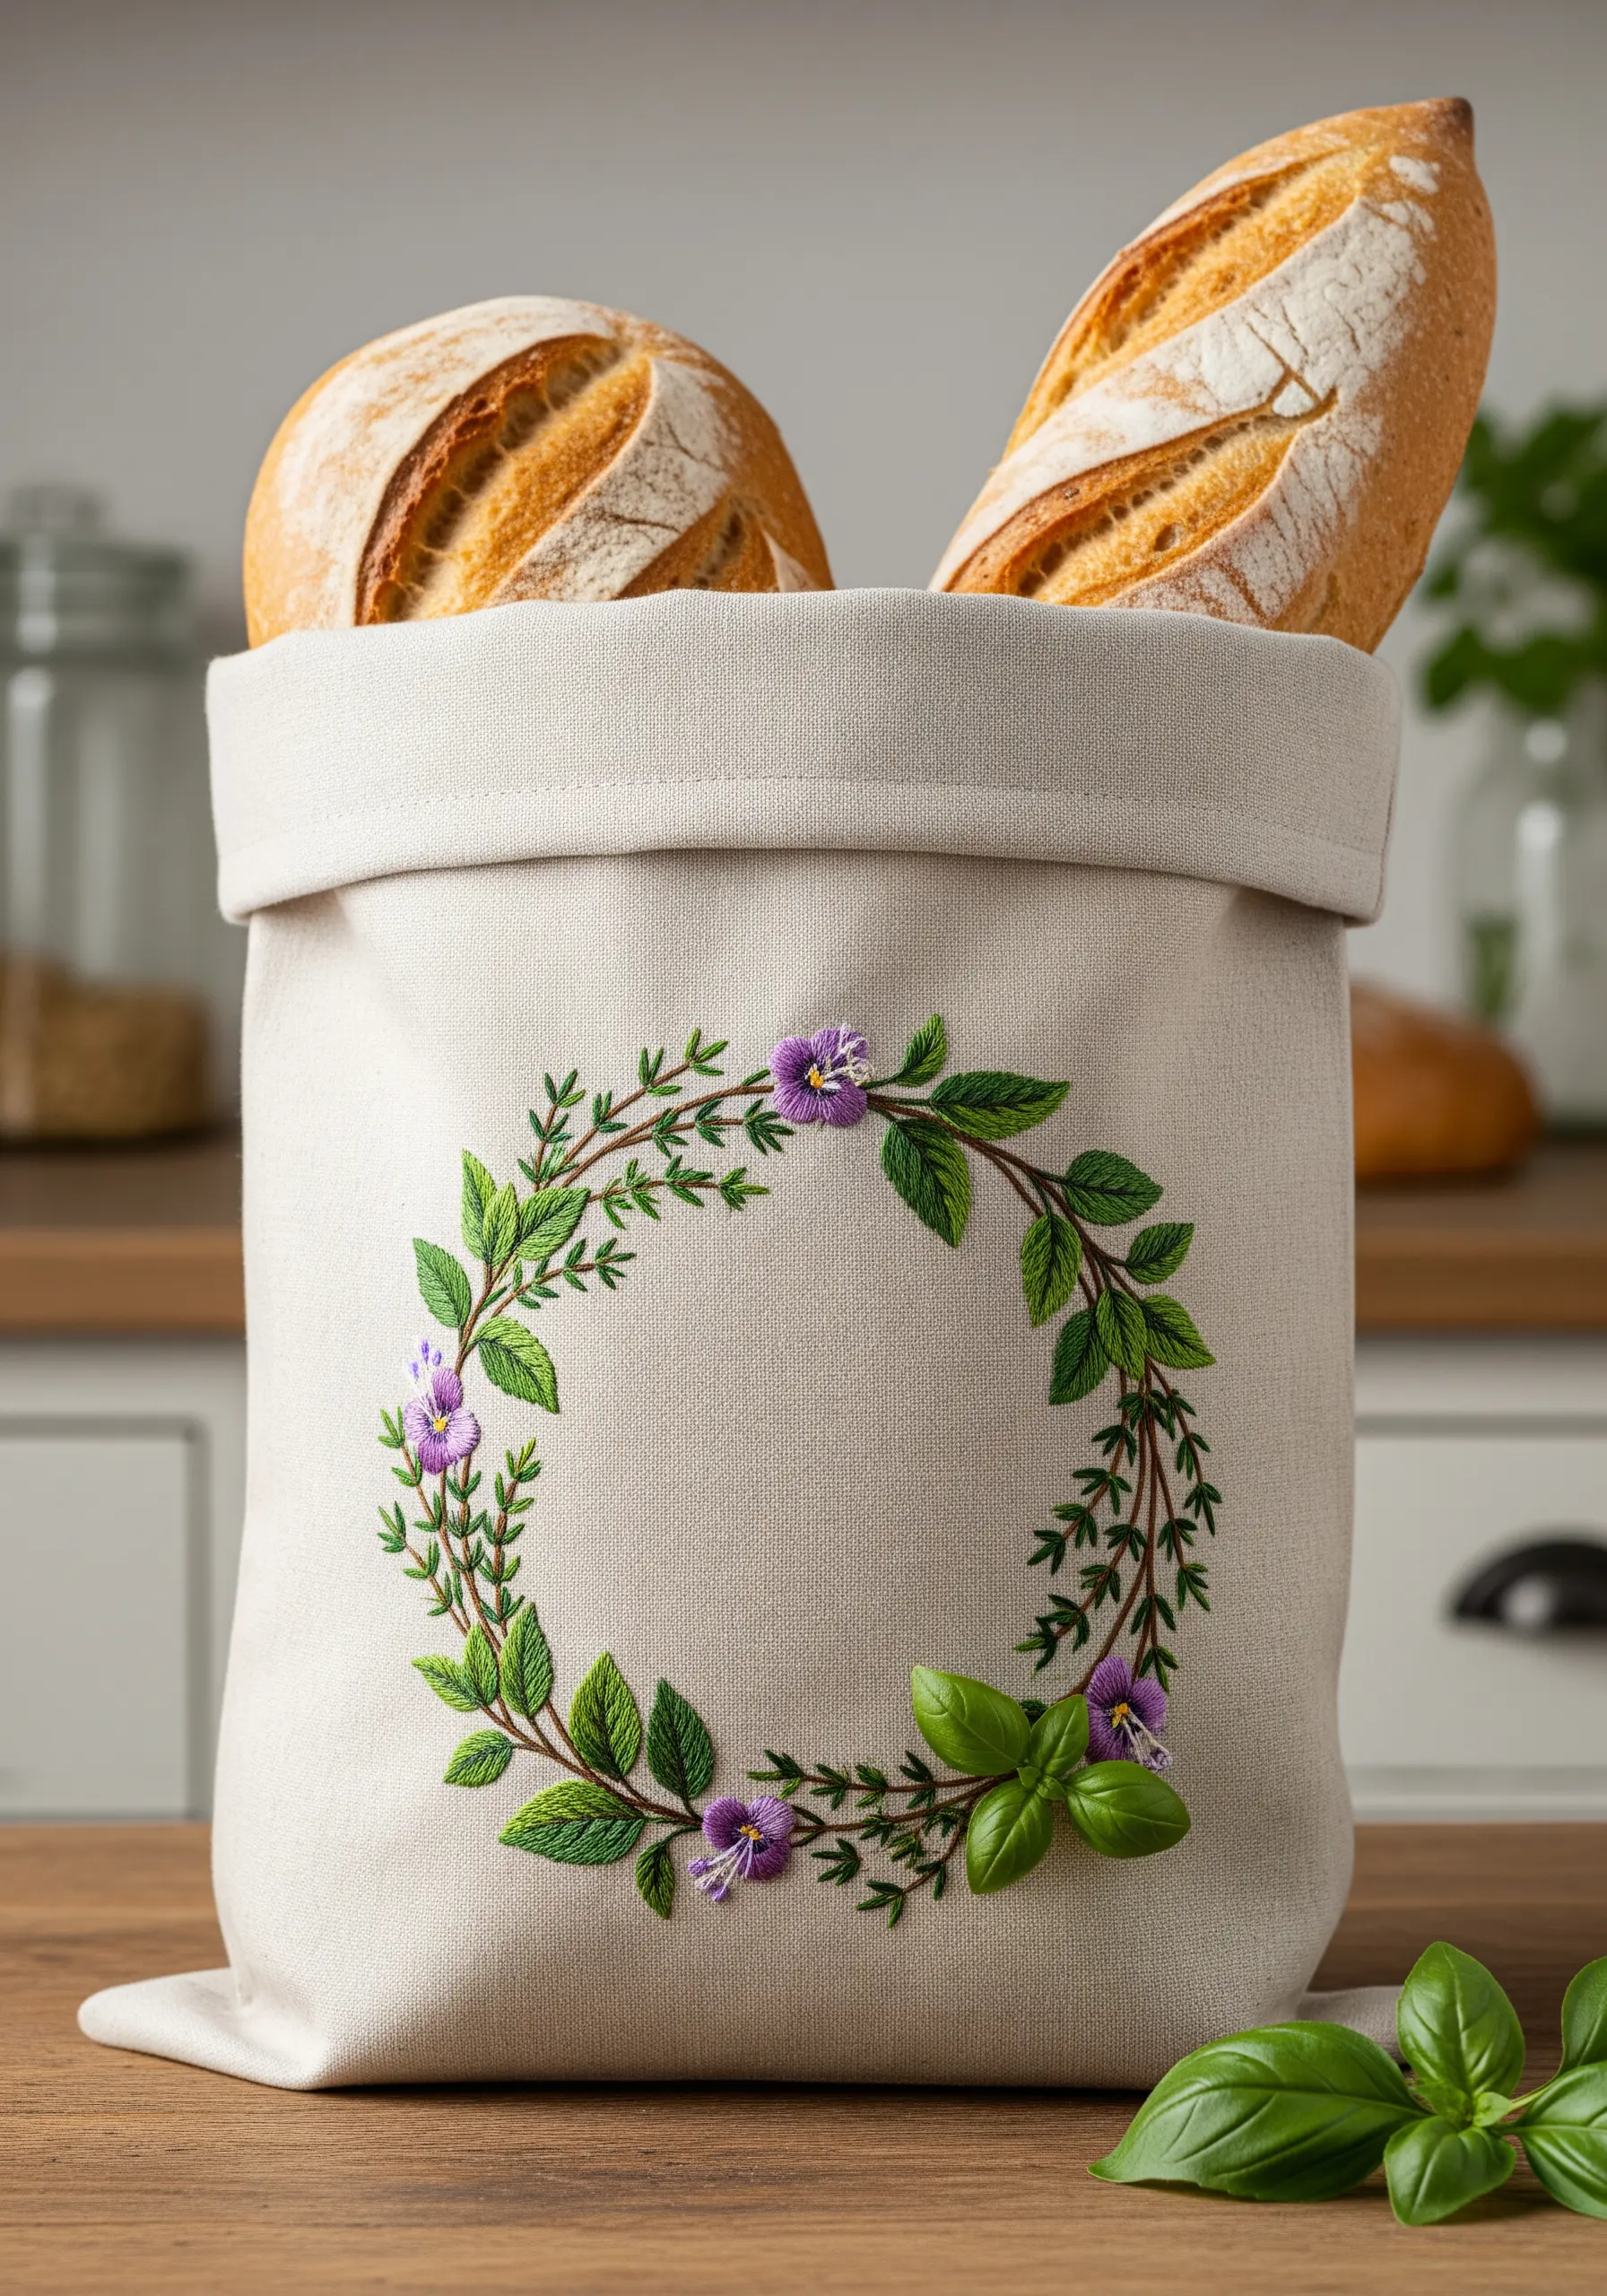
When embroidering a wreath on a functional, three-dimensional object like a bread bag, ensure the design looks good from all angles.
Position the most detailed elements—the larger leaves and flower clusters—at the front ‘focal point’ of the wreath.
Allow the sides to be simpler, with smaller leaves and sparser stems. This draws the eye to the front of the bag and prevents the design from looking overly busy when viewed from the side.
33. Painting a Landscape with Thread
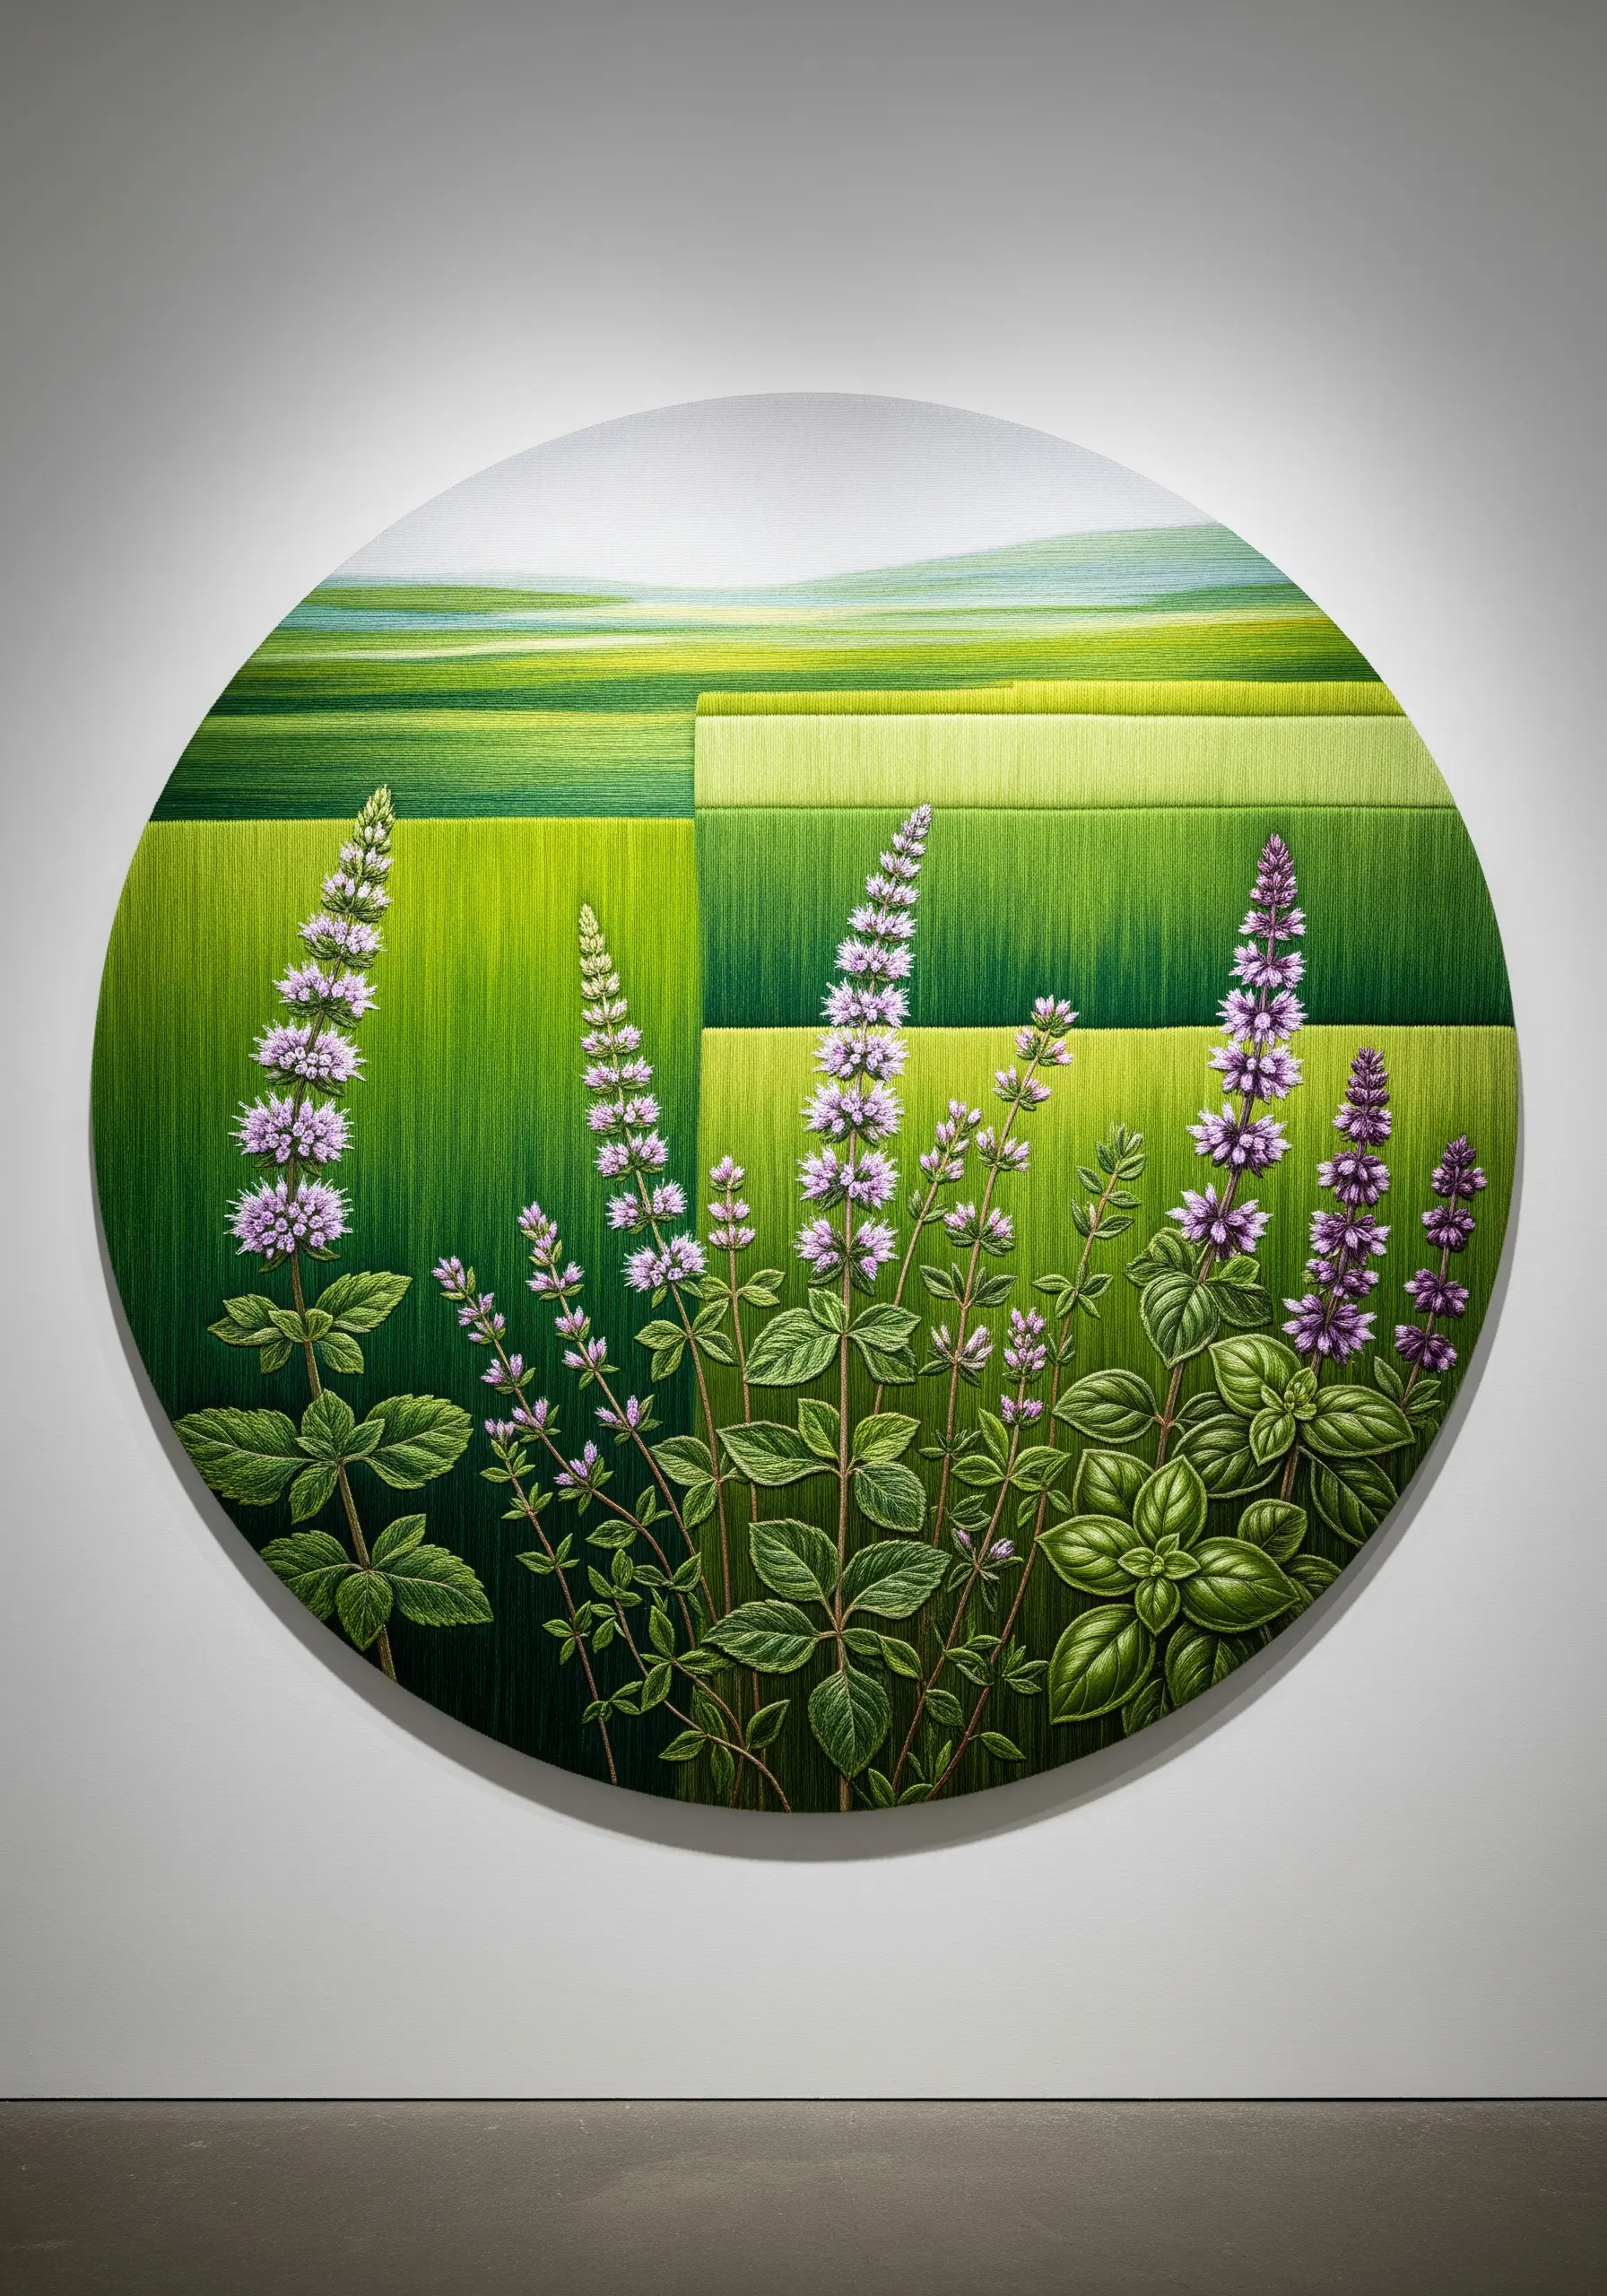
Create a modern, painterly background for your botanicals by using thread to block in color like a landscape artist.
Fill large sections of the background with long, straight satin stitches laid side-by-side. Vary the shades of green and yellow to create the impression of distant fields and light.
The contrast between the geometric, abstract background and the detailed, realistic mint plants in the foreground creates a stunning piece of modern embroidered tapestry with incredible depth and visual interest.