

There is a distinct difference between embroidery that looks like a hobby and embroidery that looks like a heritage piece. Often, you might find yourself staring at a hoop, wondering why it feels flat or unfinished despite your best efforts. The answer usually isn’t more complexity—it’s better design choices and a deeper understanding of texture.
Vintage styles offer a masterclass in these elements. They don’t just use thread; they use dimension, fabric manipulation, and structural stitches to create work that demands to be touched. By revisiting these techniques, you aren’t just copying the past; you are learning the foundational rules of weight, tension, and material that make textile art timeless.
In this collection, we are looking at specific, actionable techniques borrowed from the past that you can apply to your modern work today. From the way you treat a seam to the tension of a knot, these are the details that will elevate your craftsmanship from simple stitching to artistry.
1. Elevate seams with feather stitch variations
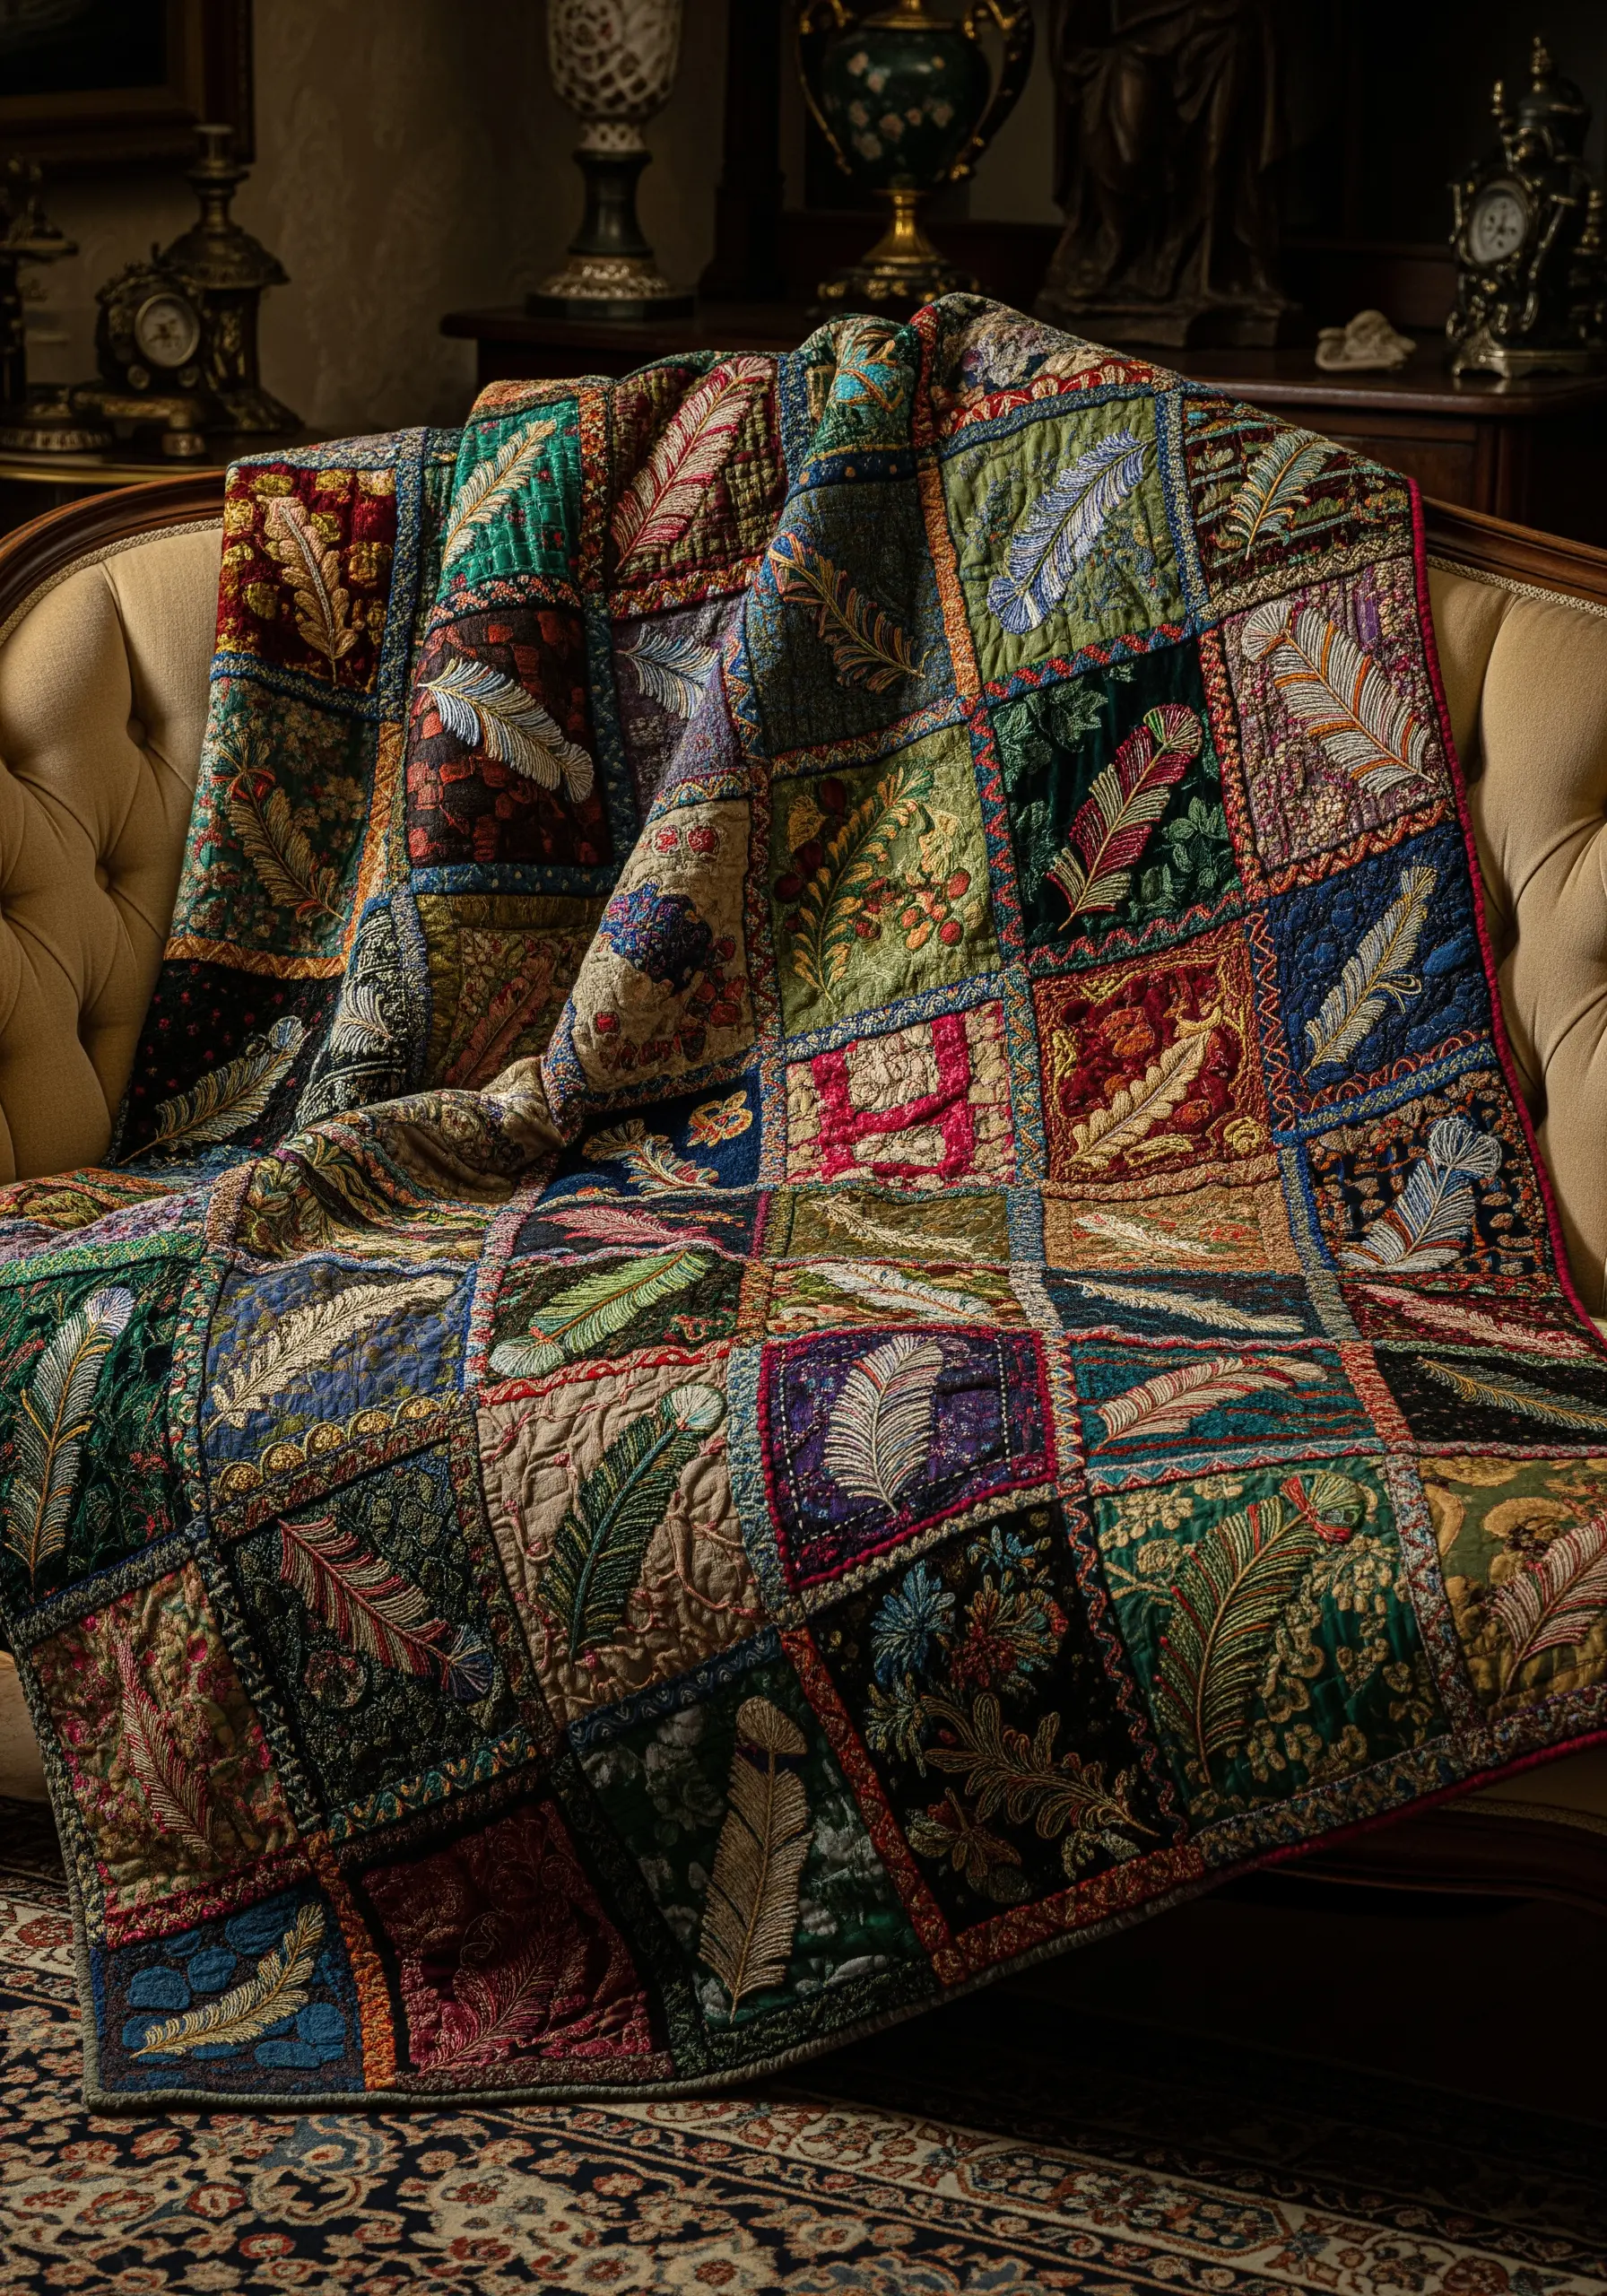
Vintage crazy quilting relies on the richness of the seam treatments to unify disparate fabric scraps.
Instead of a standard running stitch, use a dense feather stitch or herringbone stitch to bridge the velvet and silk patches.
You can modernize this by incorporating metallic threads or small seed beads into the spine of the stitch for added light reflection.
This technique turns heirloom style table linen embroidery patterns inspired by victorian tea rooms into textural masterpieces.
2. Master the dimension of silk ribbon roses
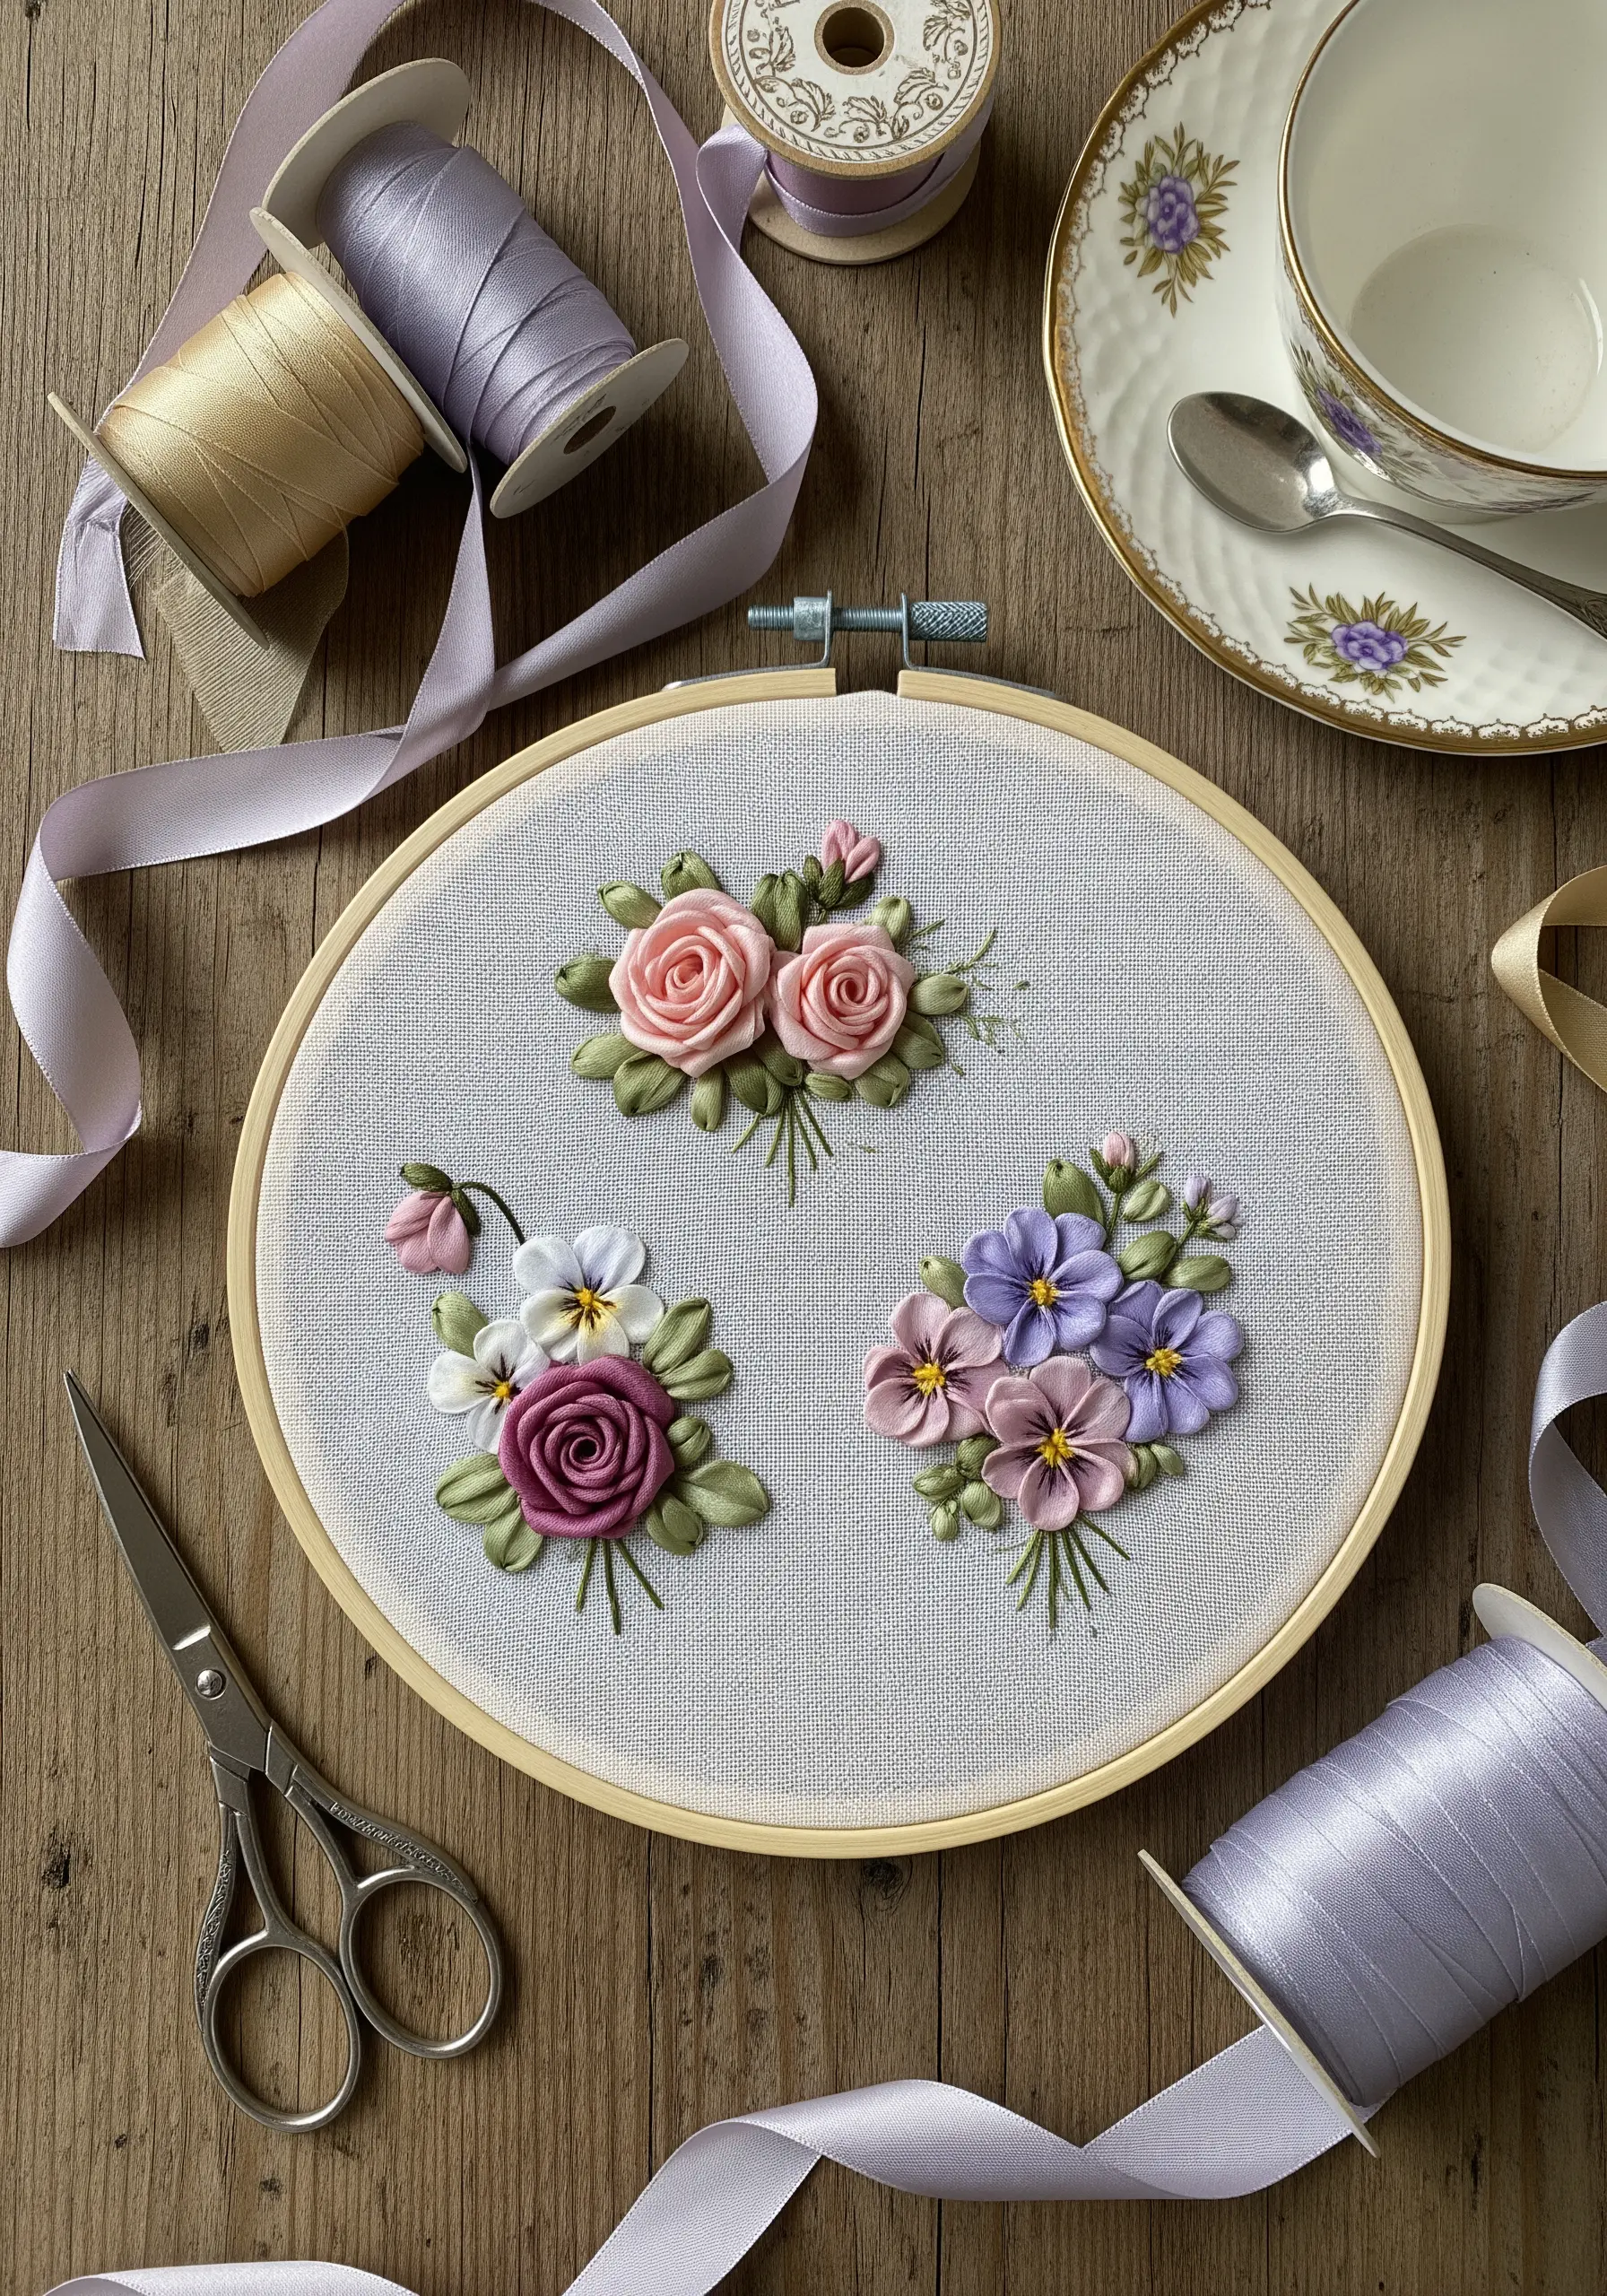
Silk ribbon embroidery offers a three-dimensional lushness that standard floss simply cannot mimic.
The secret to a realistic rose is keeping the tension loose; if you pull too tight, the ribbon loses its soft, petal-like fold.
Use a chenille needle with a large eye to prevent the ribbon from fraying as it passes through the fabric.
These are perfect floral inspired ribbon embroidery ideas for textured petals and 3d statement pieces.
3. Refine line work with the classic stem stitch
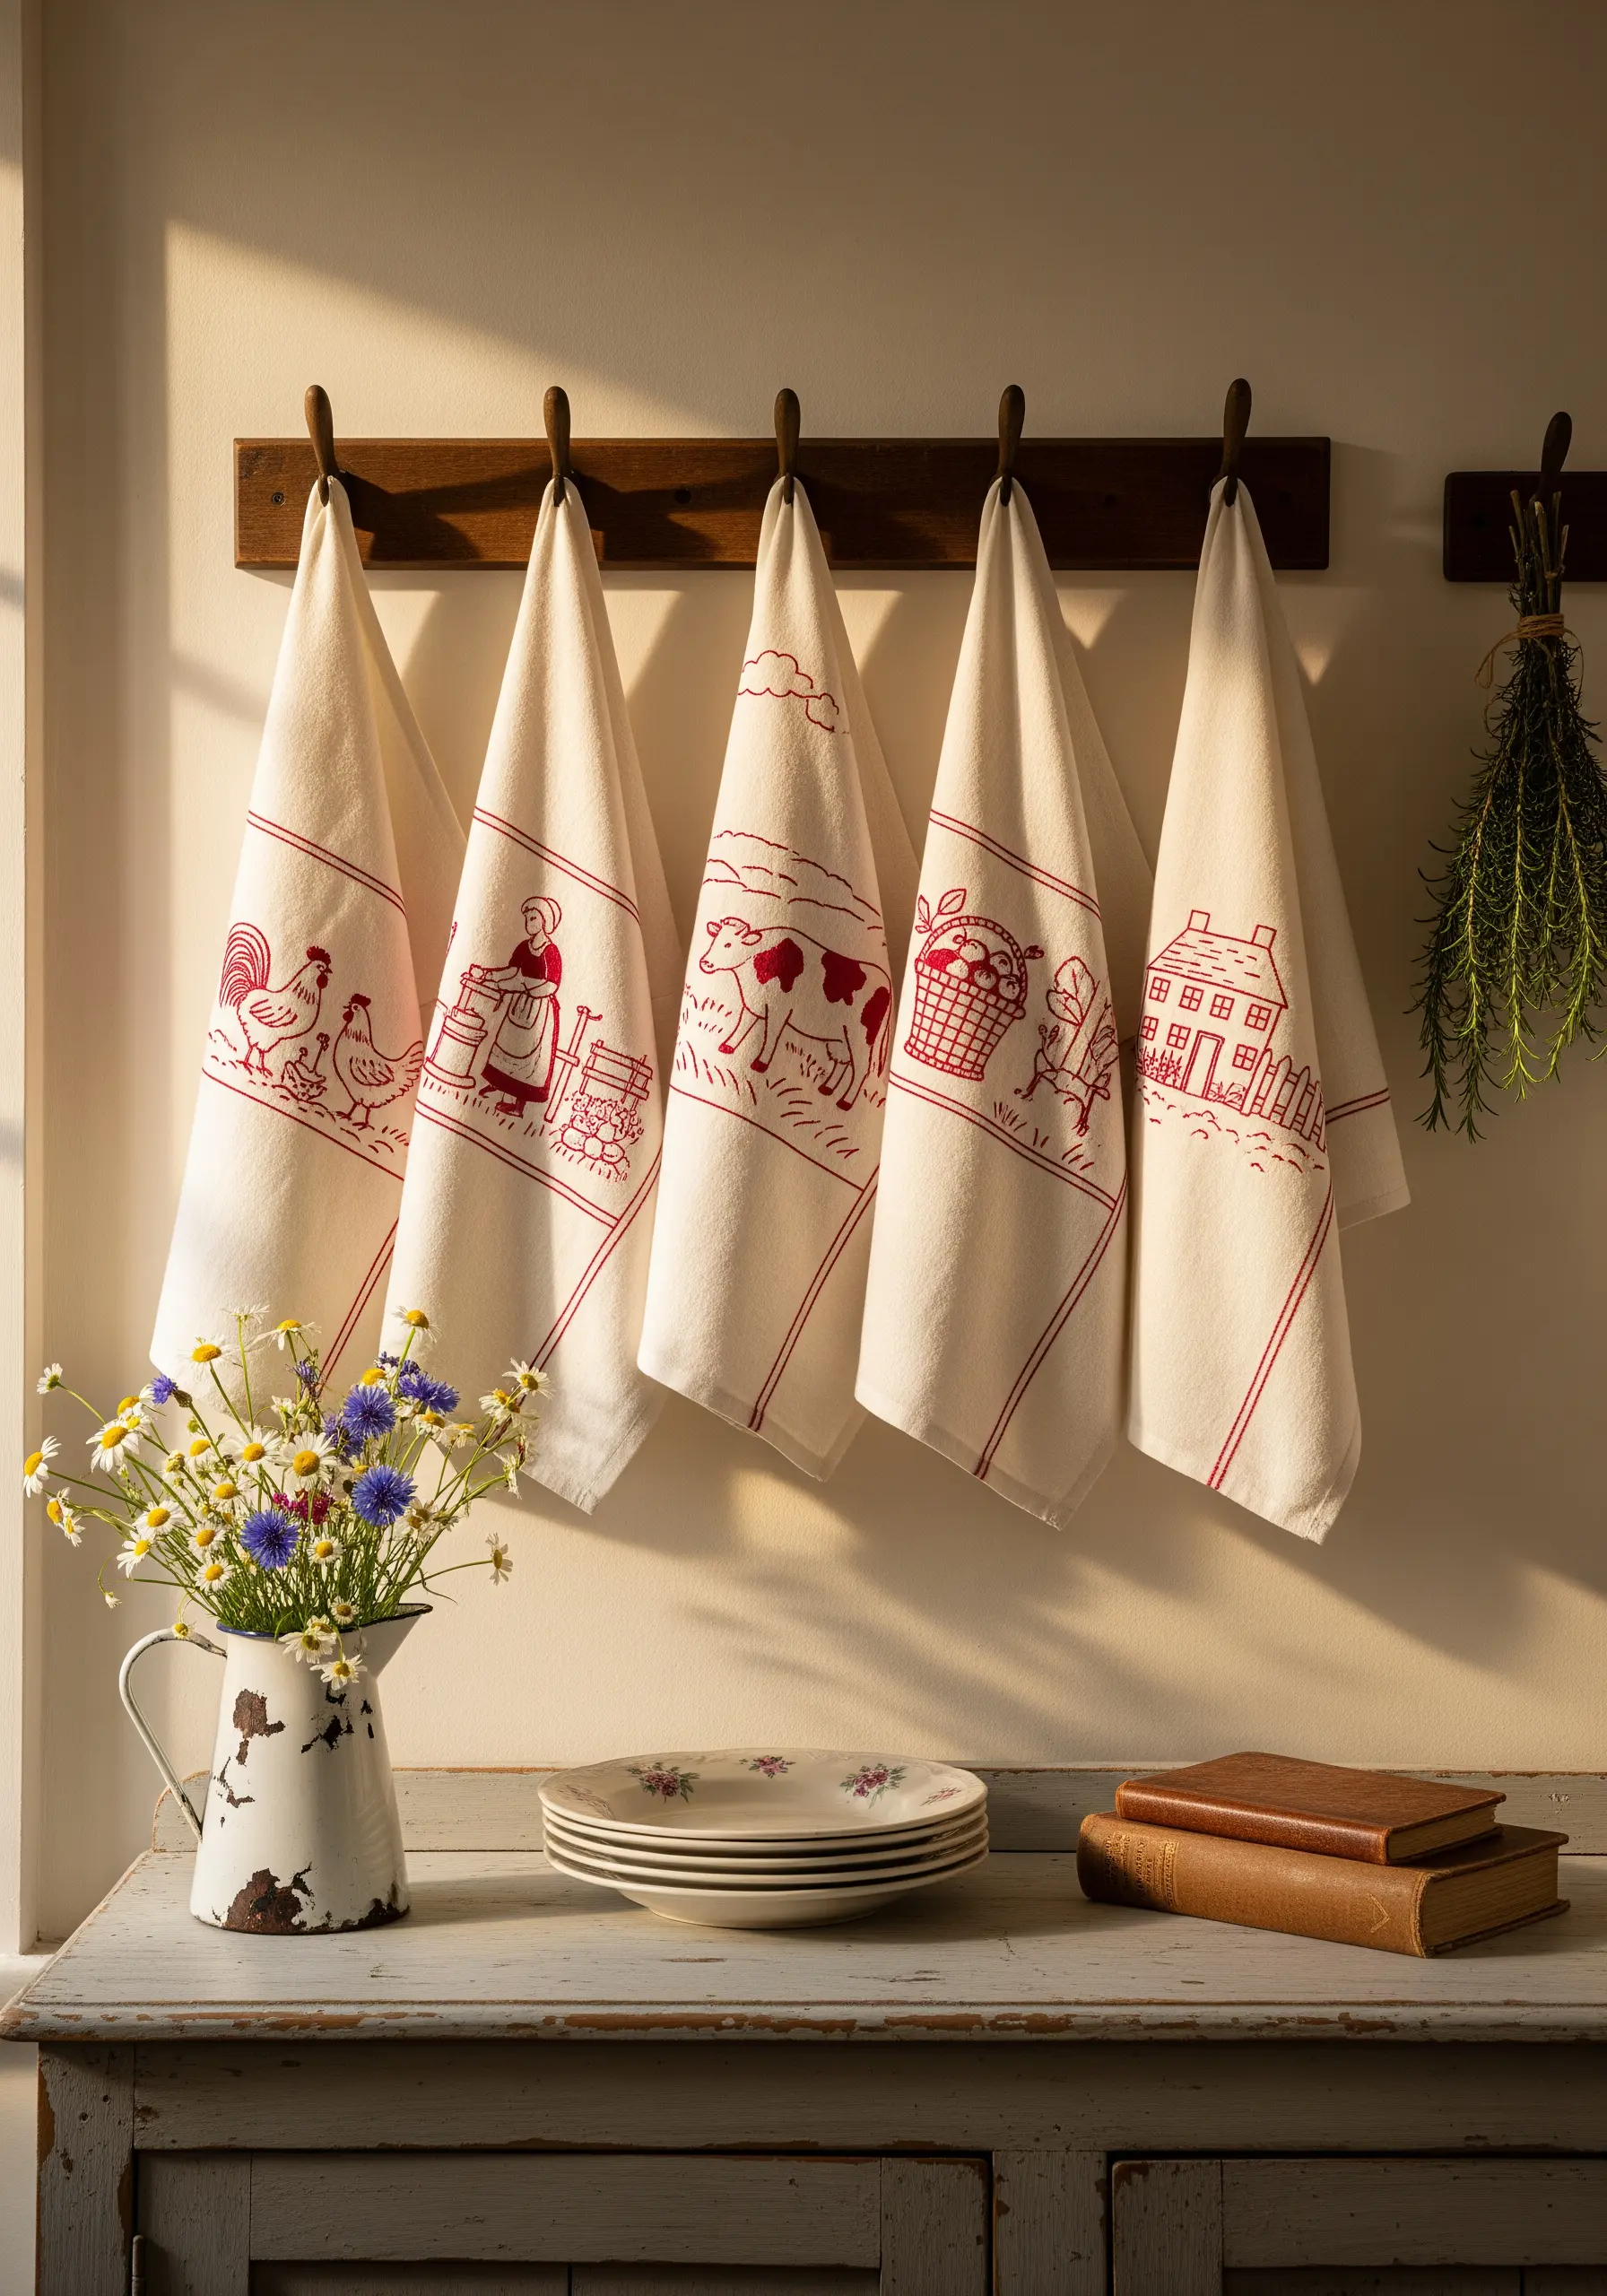
Redwork relies entirely on the weight and fluidity of your outline to convey the image.
Use a single strand of heavy cotton thread and a tight stem stitch to create smooth, unbroken lines that look like ink drawings.
Ensure your stitch length remains consistent, especially around curves, to avoid a jagged or segmented appearance.
Apply this to embroidered kitchen towel designs that add personality to tiny urban kitchens.
4. Build texture with wool crewel techniques
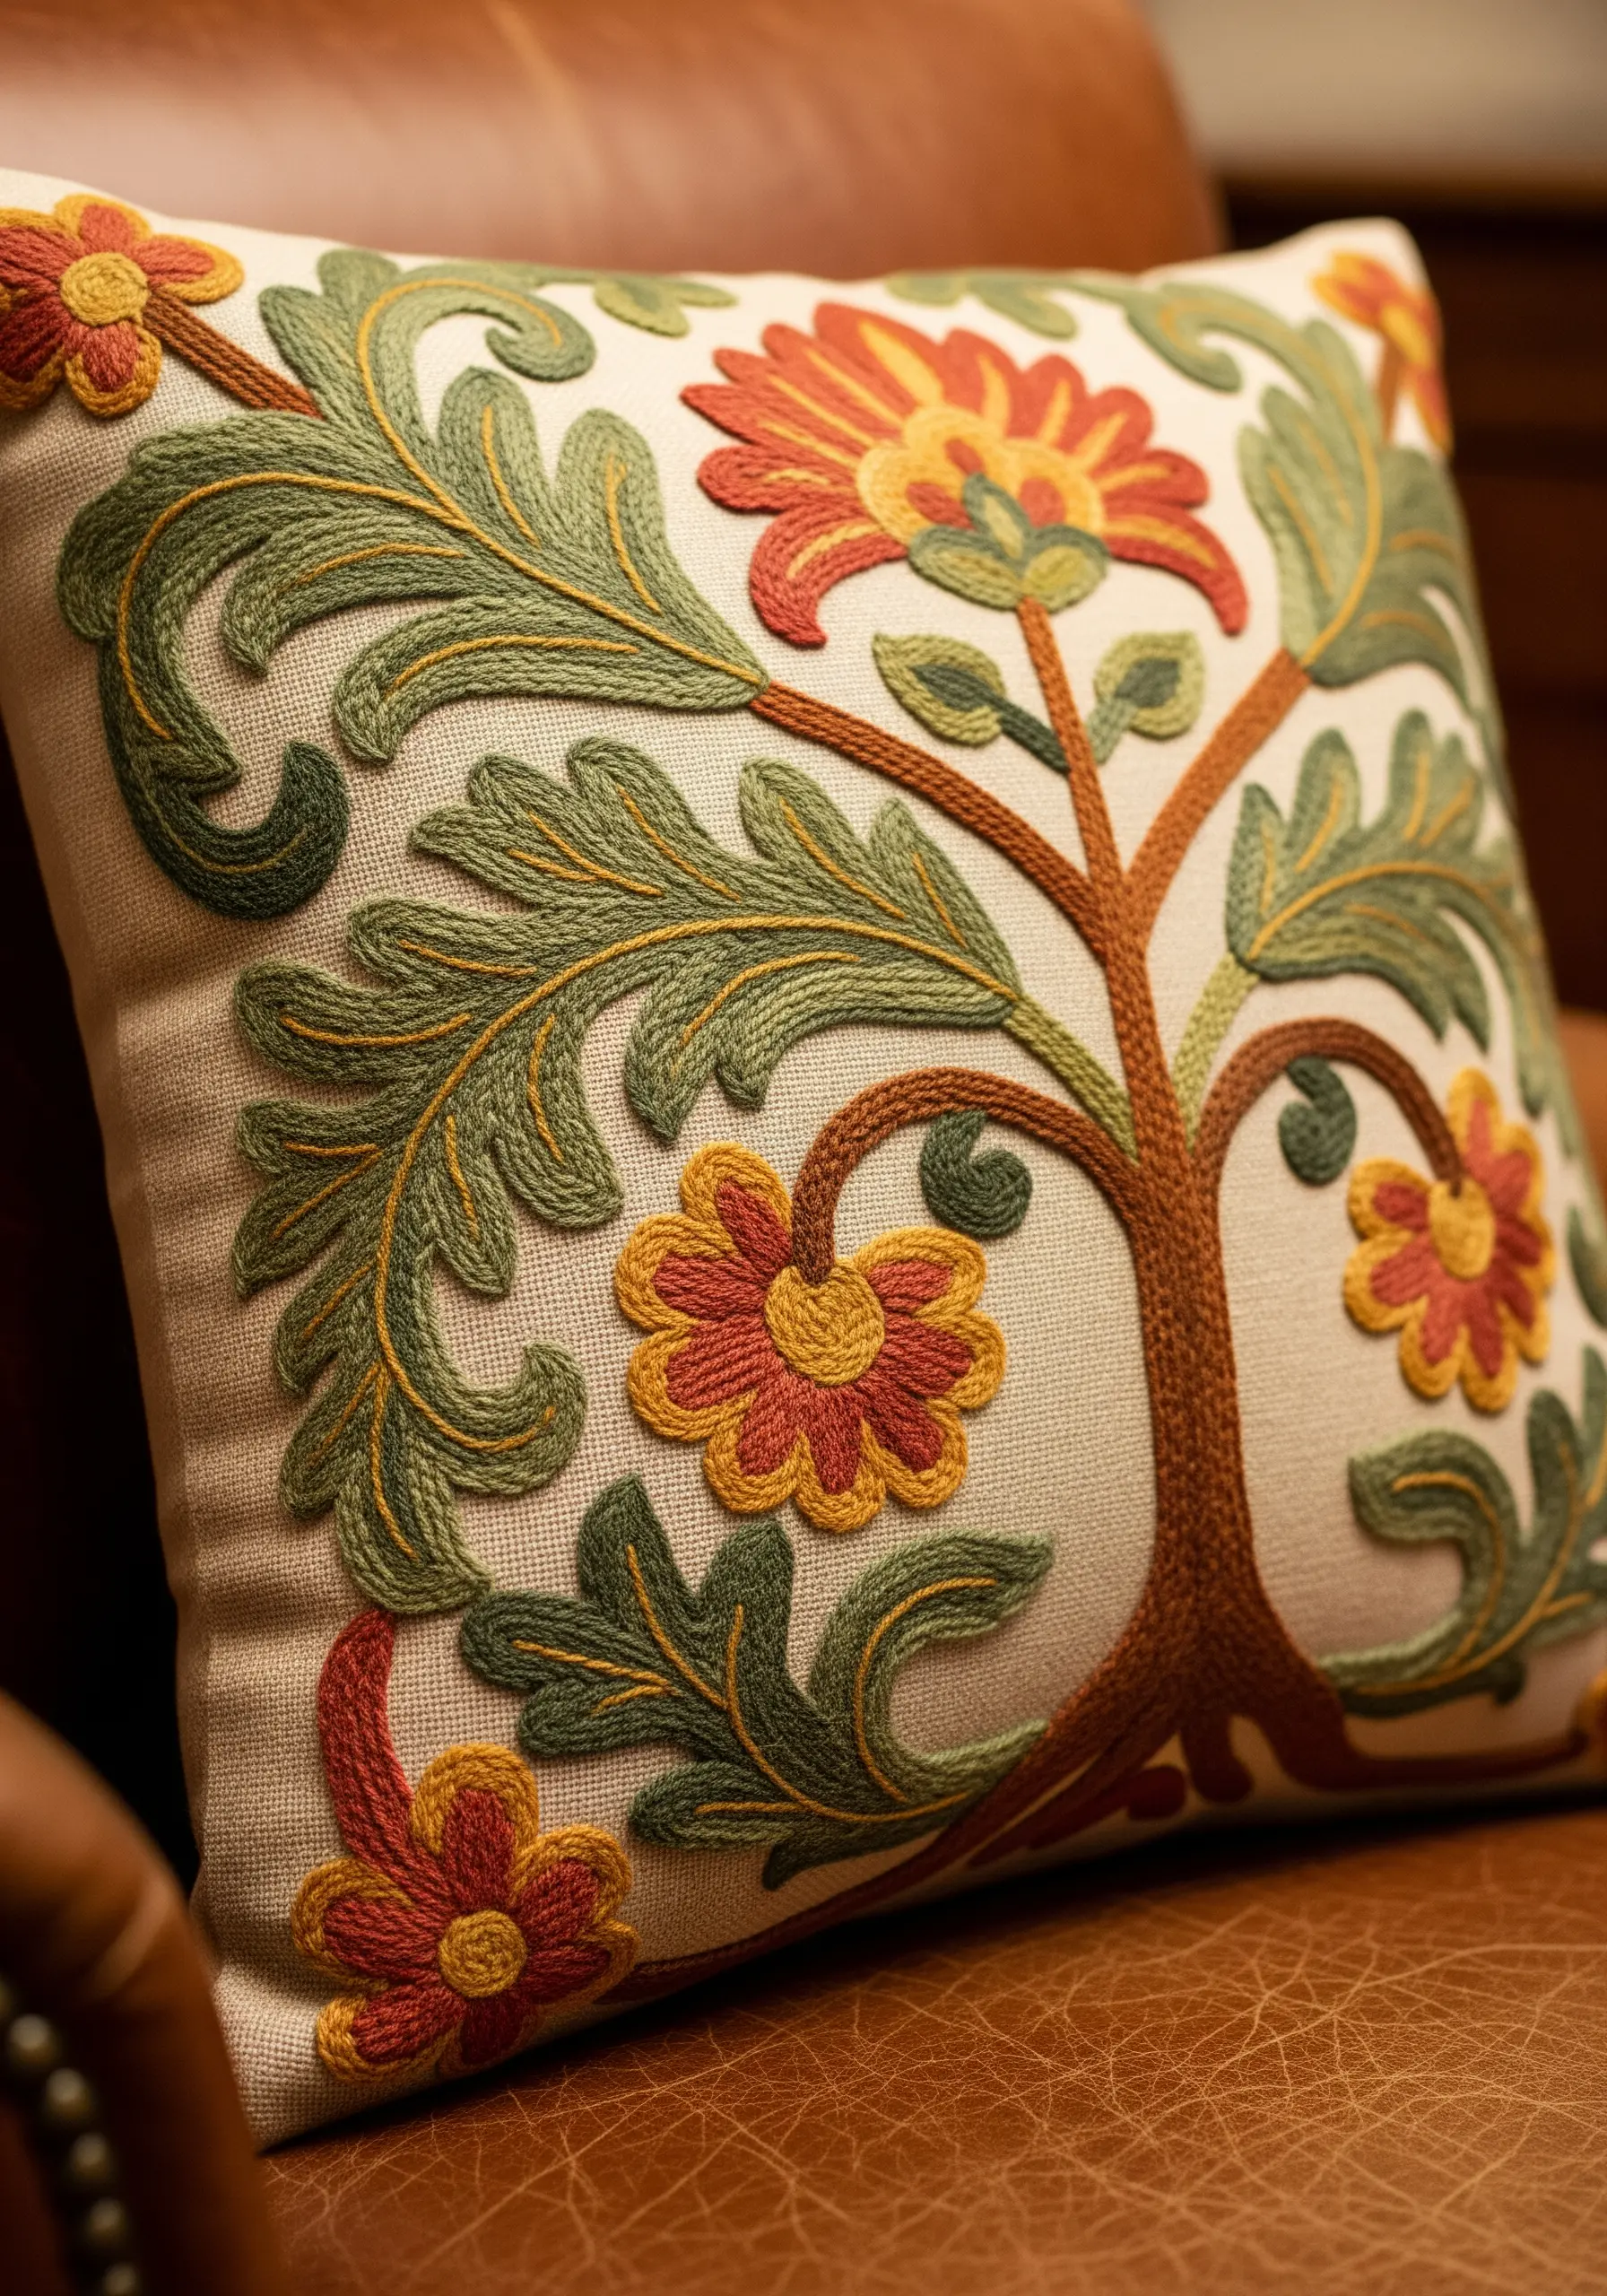
Crewel work utilizes wool yarn, which covers the fabric surface more rapidly and adds a warm, matte texture.
Focus on the long-and-short stitch to blend colors within the large floral motifs, creating a painterly gradient.
The thickness of the wool demands a sturdy linen backing to prevent puckering under the tension of the stitches.
This style informs statement textured embroidery techniques for 3d wall decor that pops.
5. Align historical alphabets for precise samplers
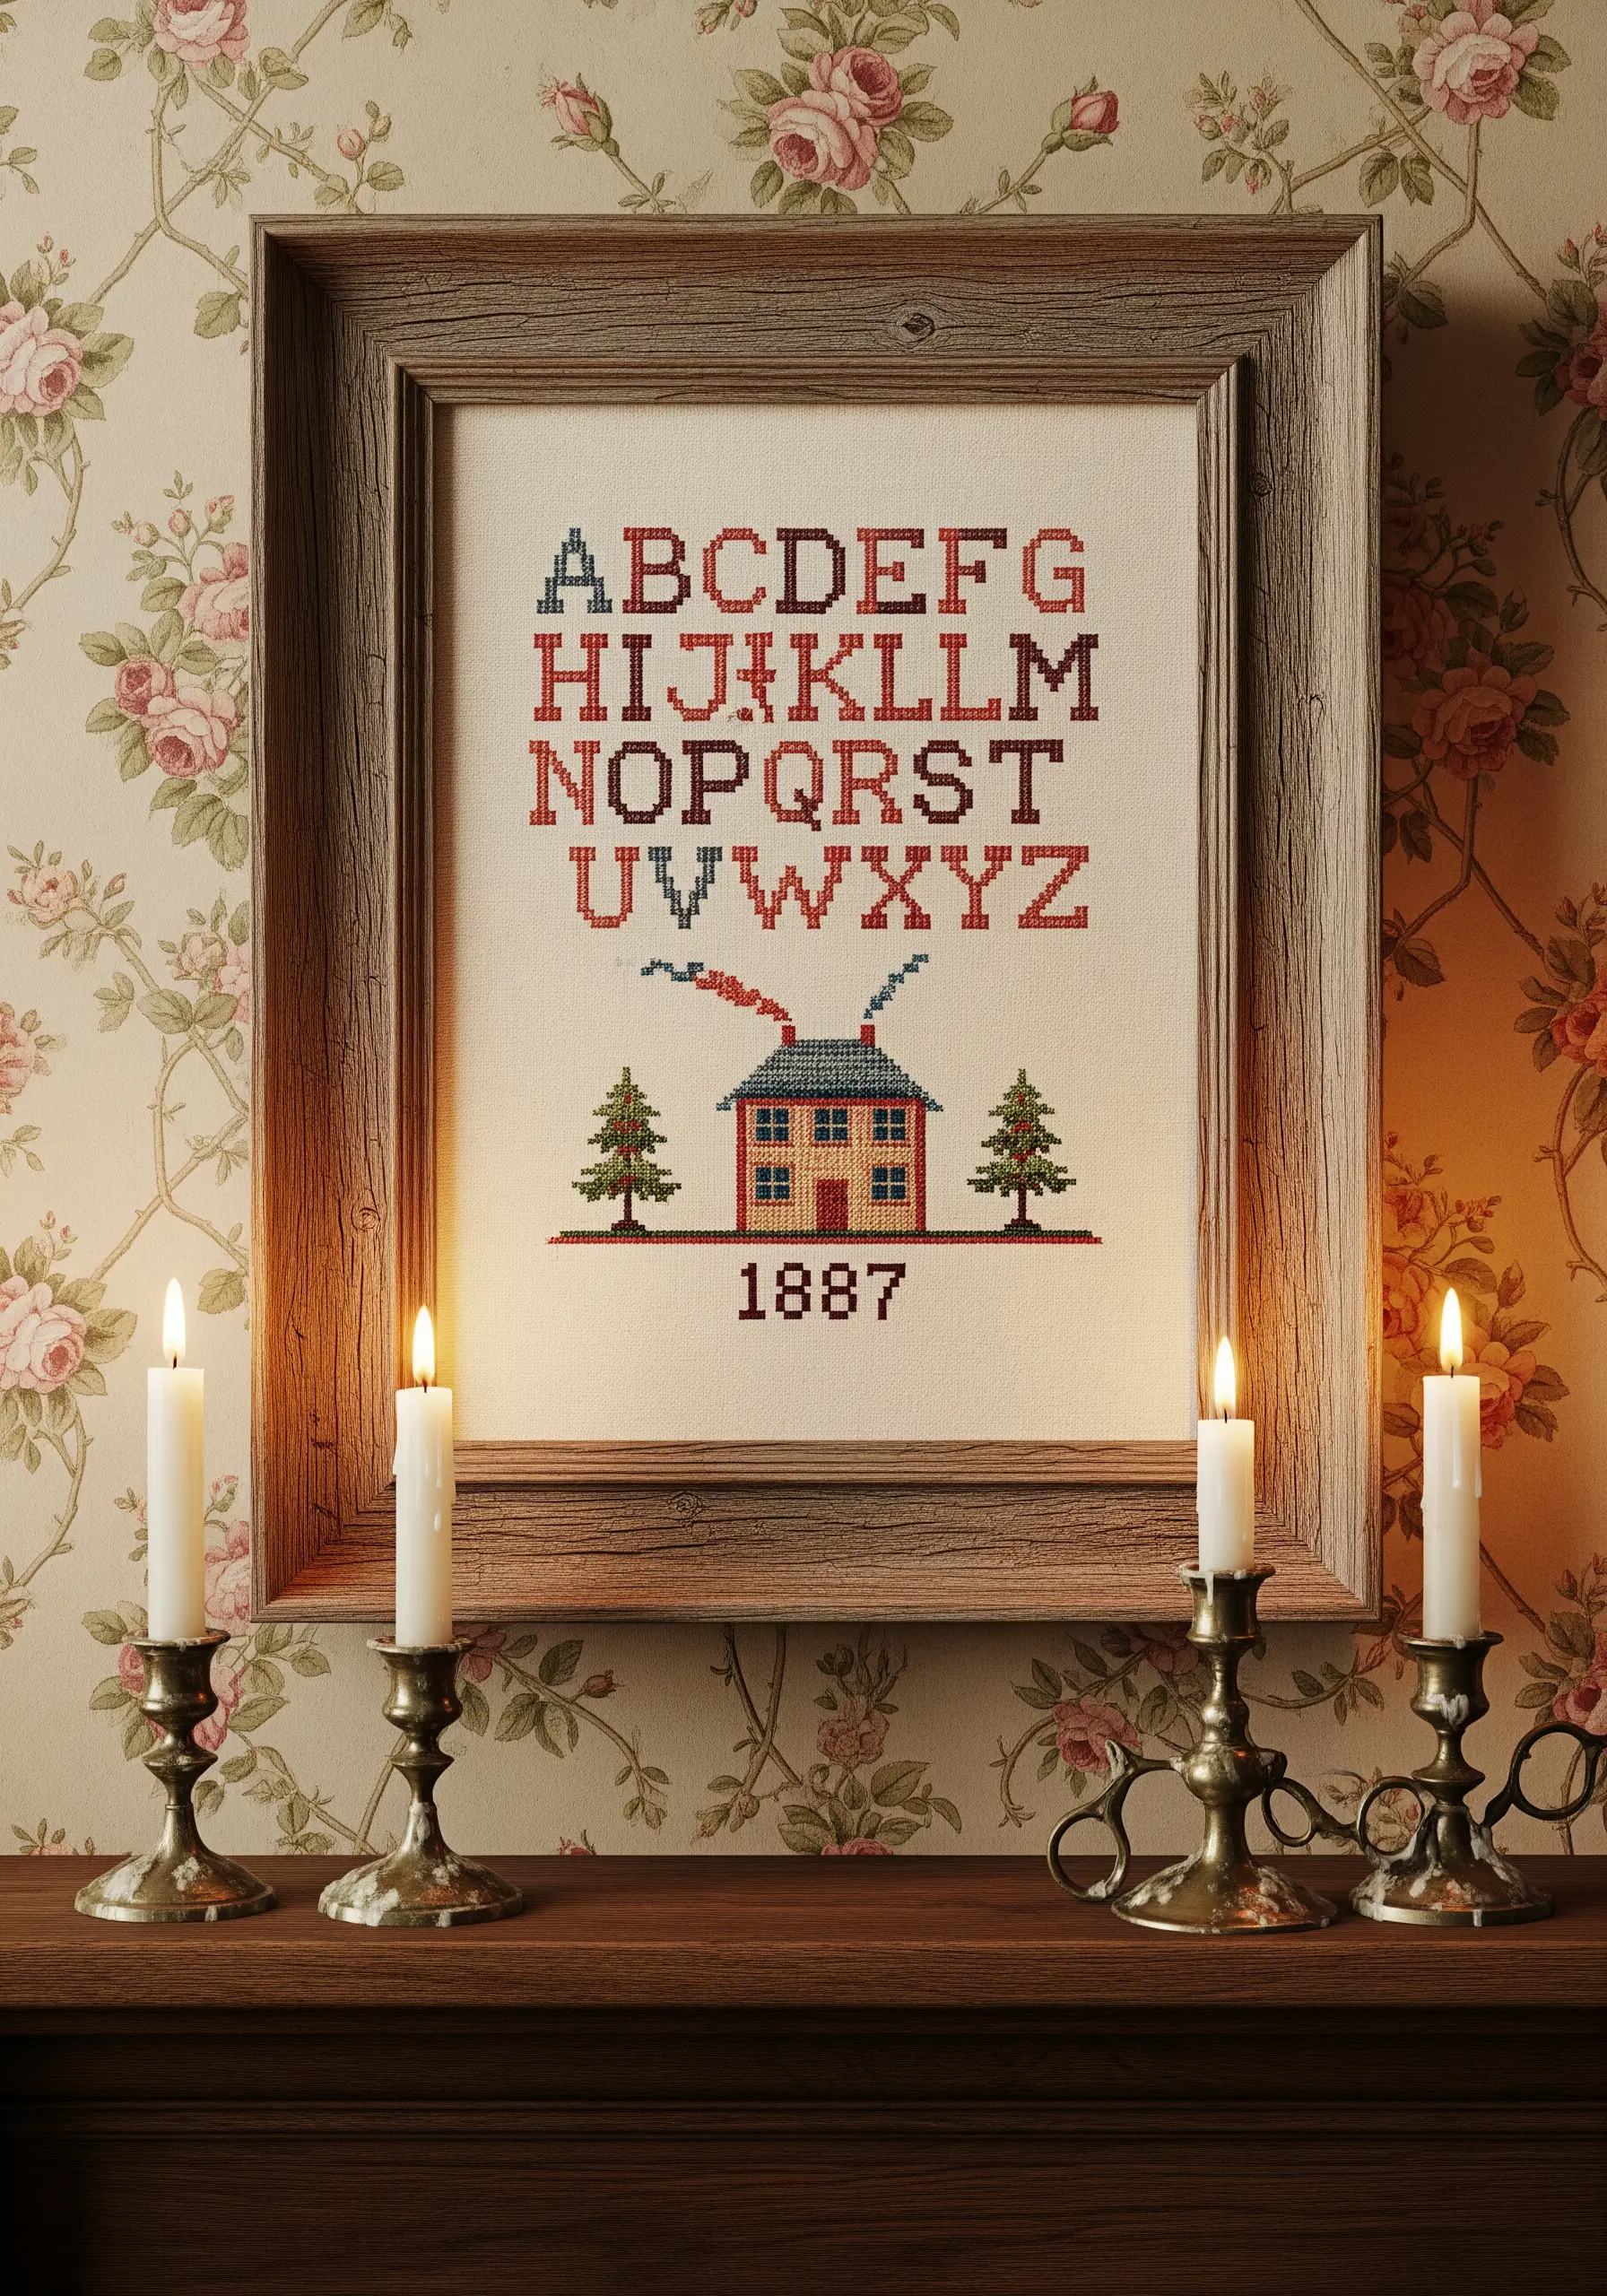
The beauty of a cross-stitch sampler lies in the mathematical precision of the grid and the balance of negative space.
When stitching text, verify your centering before starting; a single miscounted square can throw off the entire symmetry.
Use unbleached linen for an authentic antique look that softens the contrast of the thread colors.
These are excellent botanical garden sampler ideas to practice new stitches with style.
6. Strengthen denim with geometric Sashiko
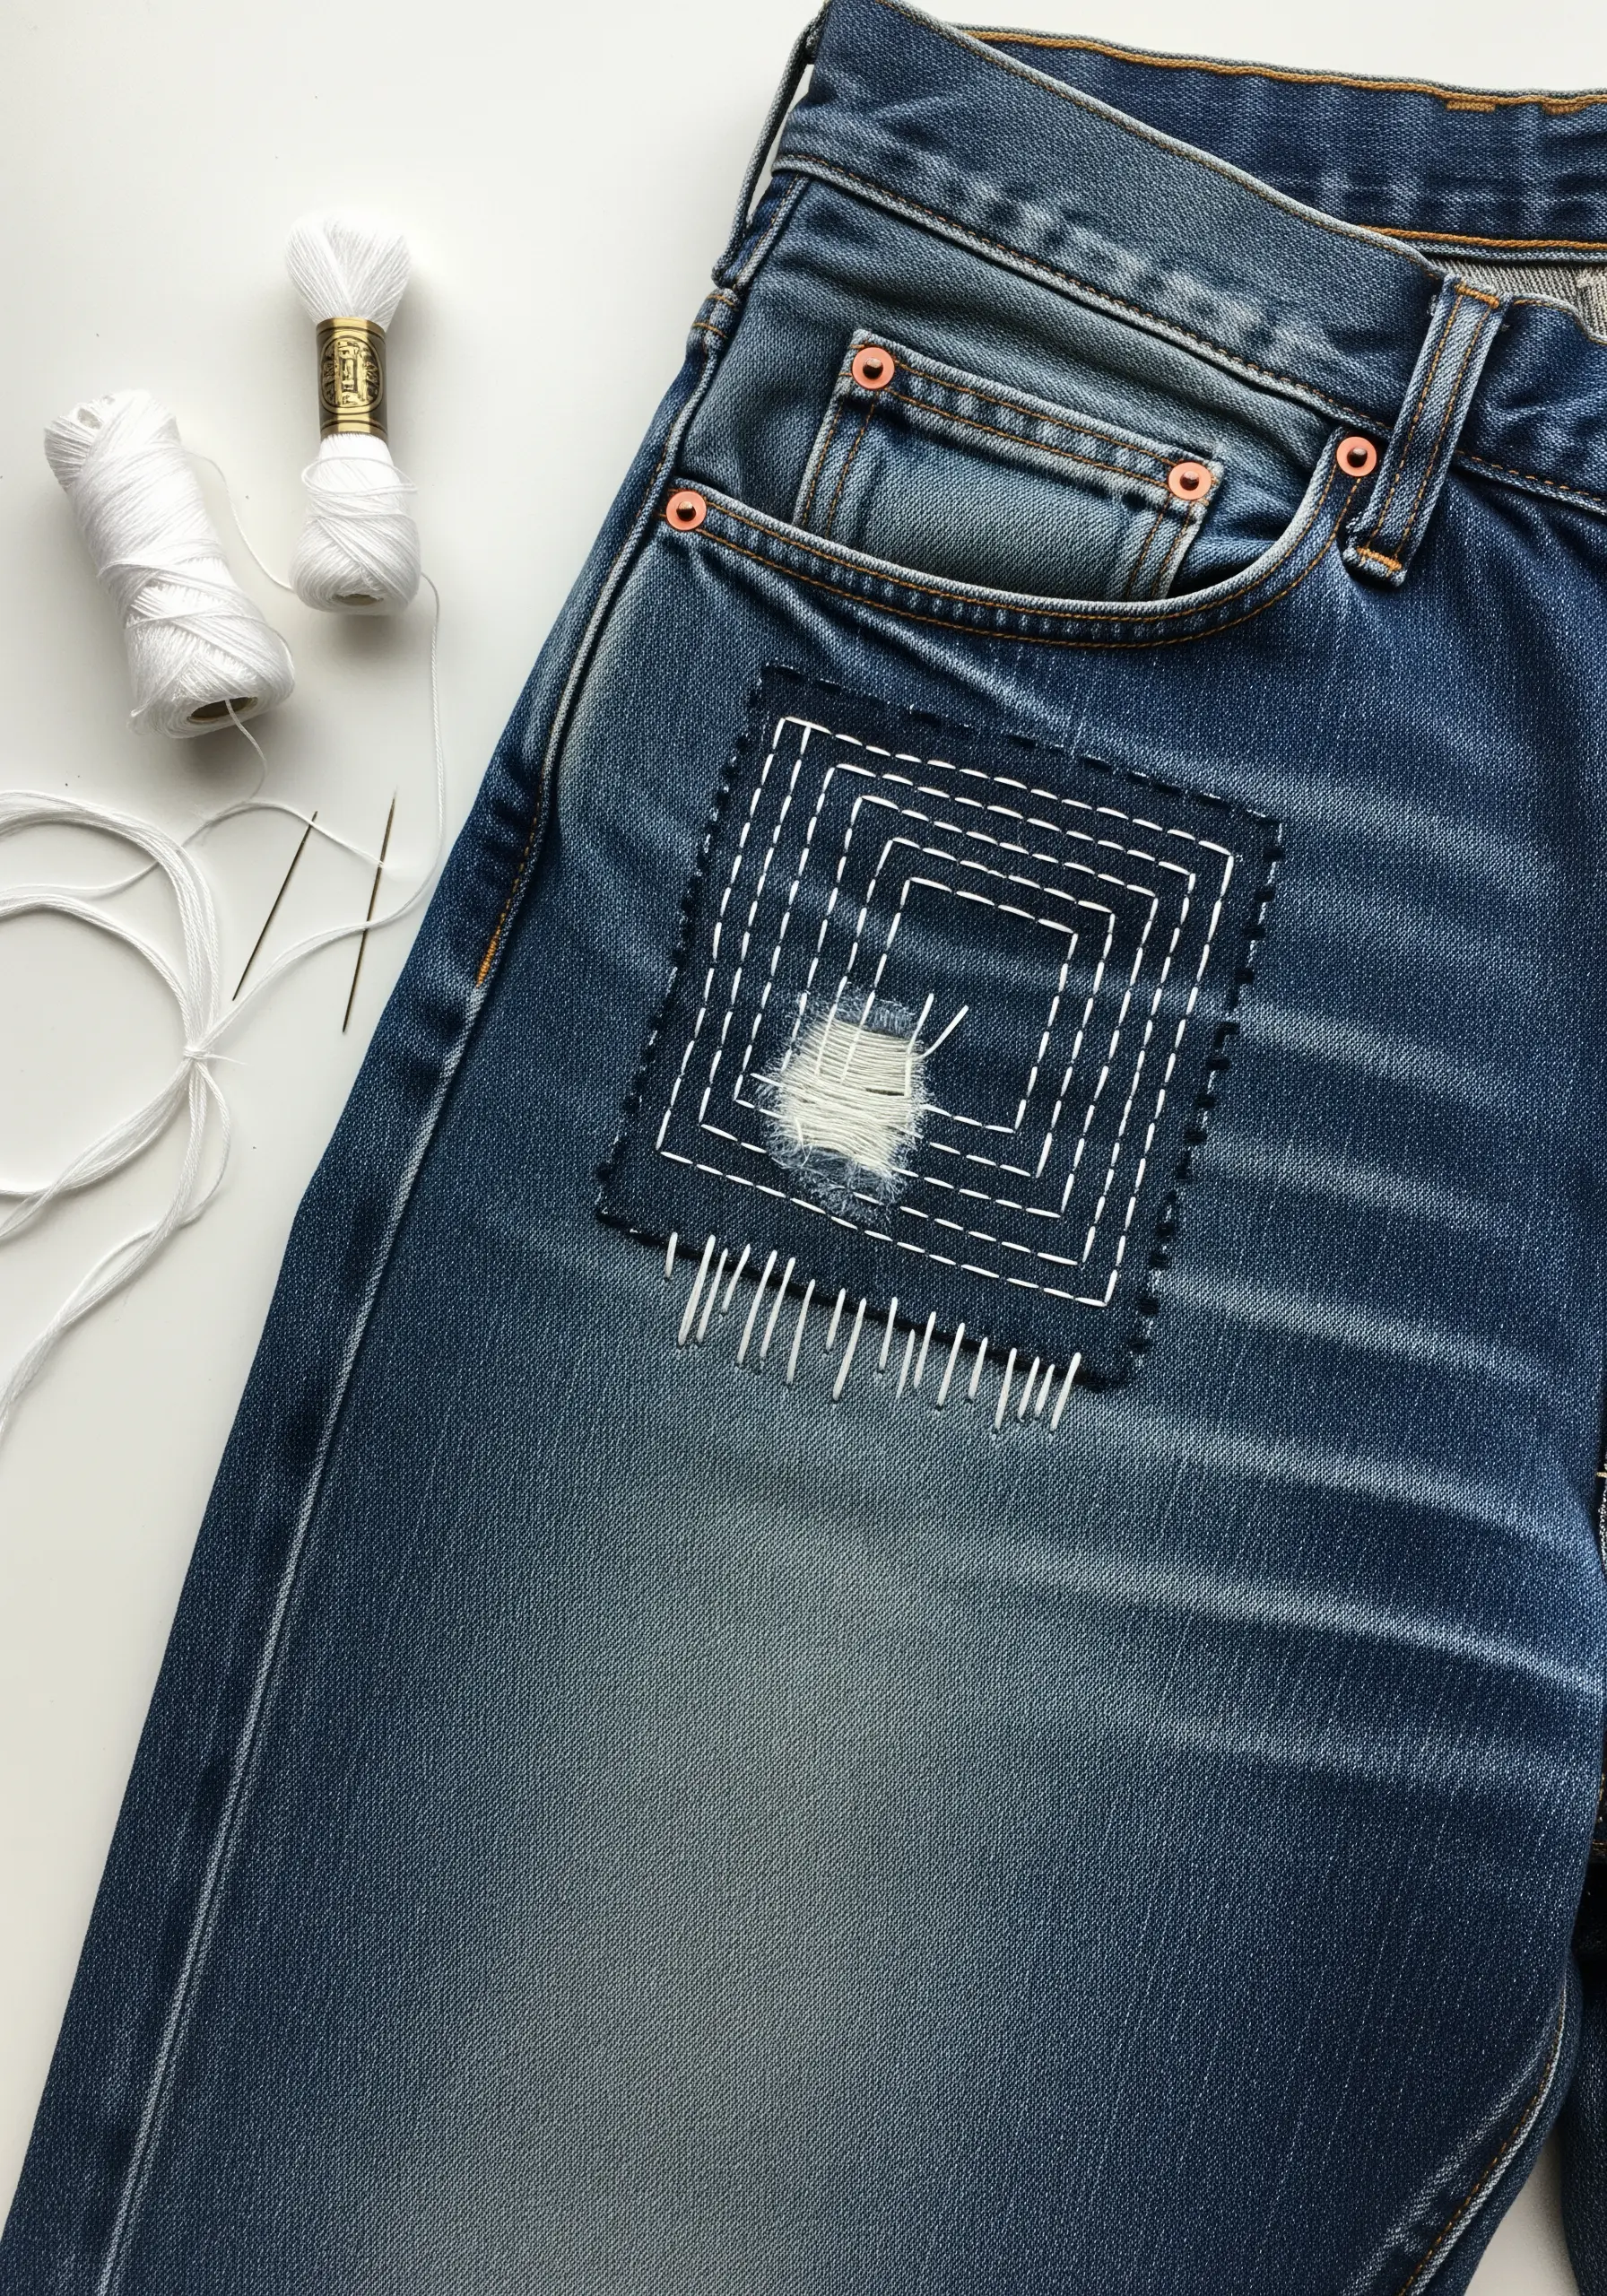
Sashiko is not just decorative; it is a structural reinforcement technique that beautifies repairs.
Use a long darner needle to load multiple running stitches at once, ensuring your lines remain straight and even.
The white thread against indigo denim creates high visual contrast while stabilizing the frayed fabric underneath.
This connects to embroidered flower patch ideas to turn old jeans into trendy upcycled fashion.
7. Create density with beaded Art Deco motifs
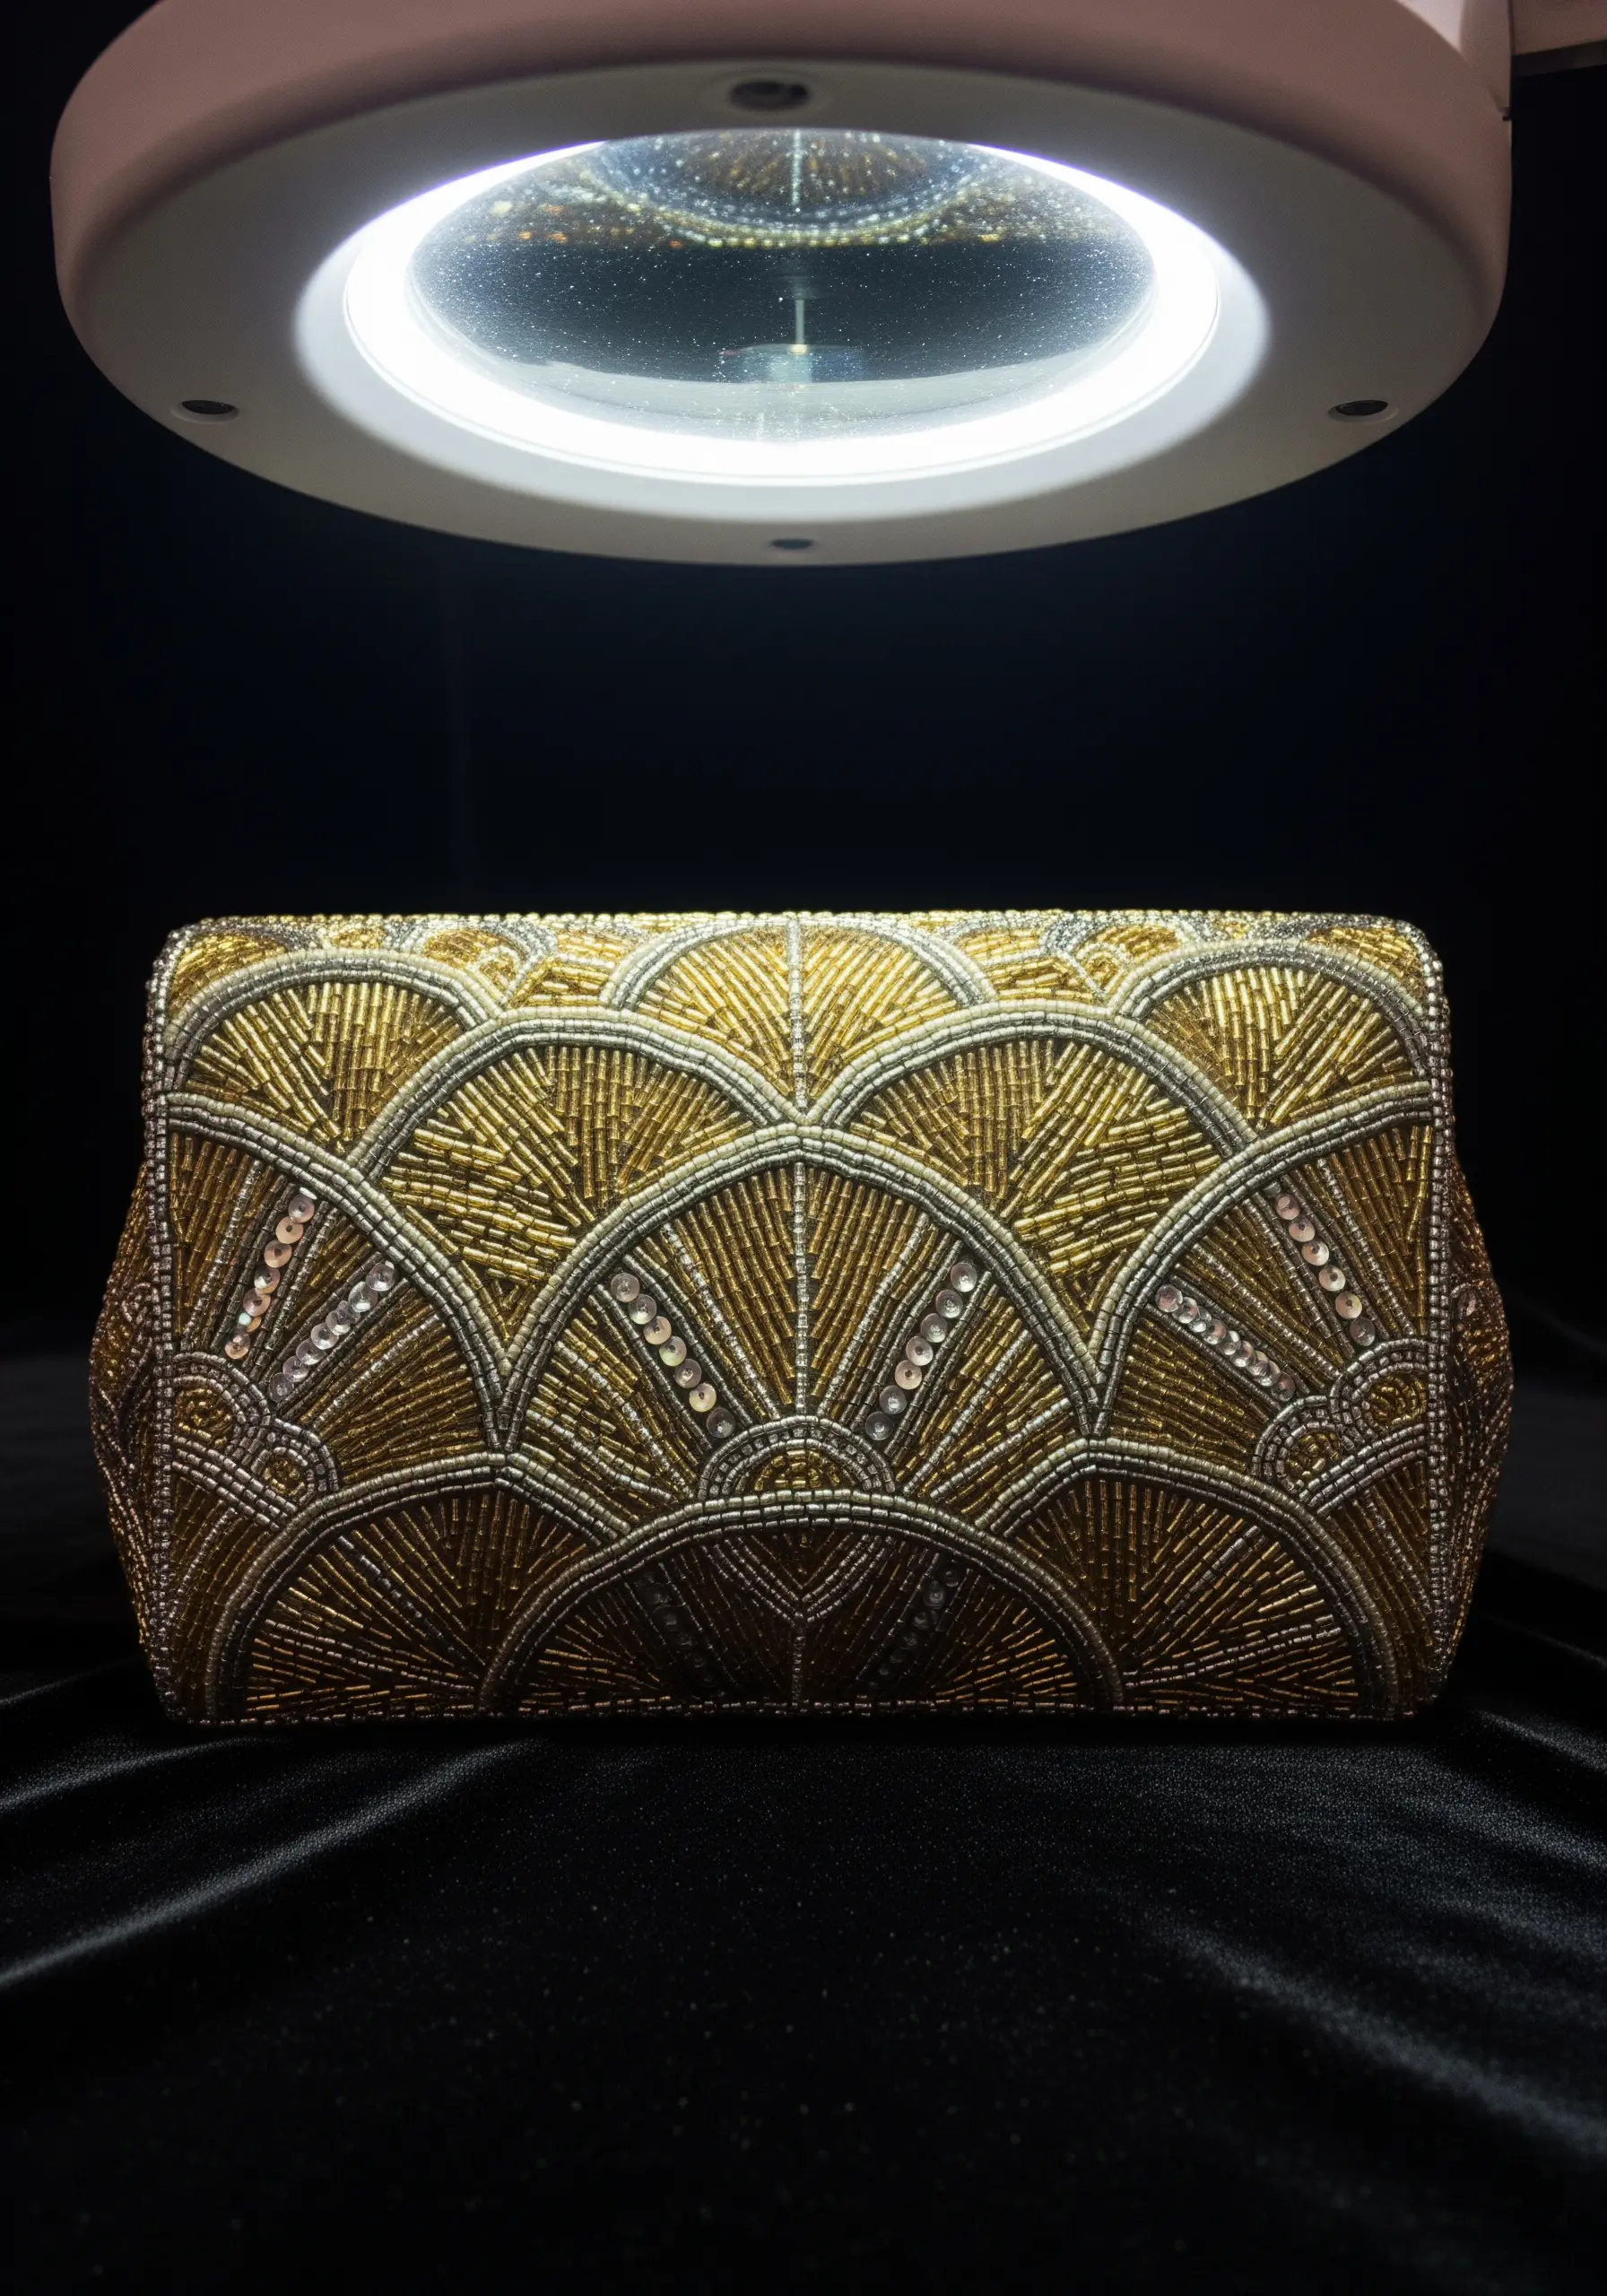
Beaded embroidery requires a methodical approach to fill delicate patterns without overcrowding.
Use a beading needle and strong nylon thread to secure each bead, backstitching every few beads for security.
The scalloped, fan-like patterns catch light differently depending on the direction of your stitching line.
These are contemporary metallic thread designs that scream luxury avant garde style.
8. Utilize fabric scraps for yo-yo quilt textures
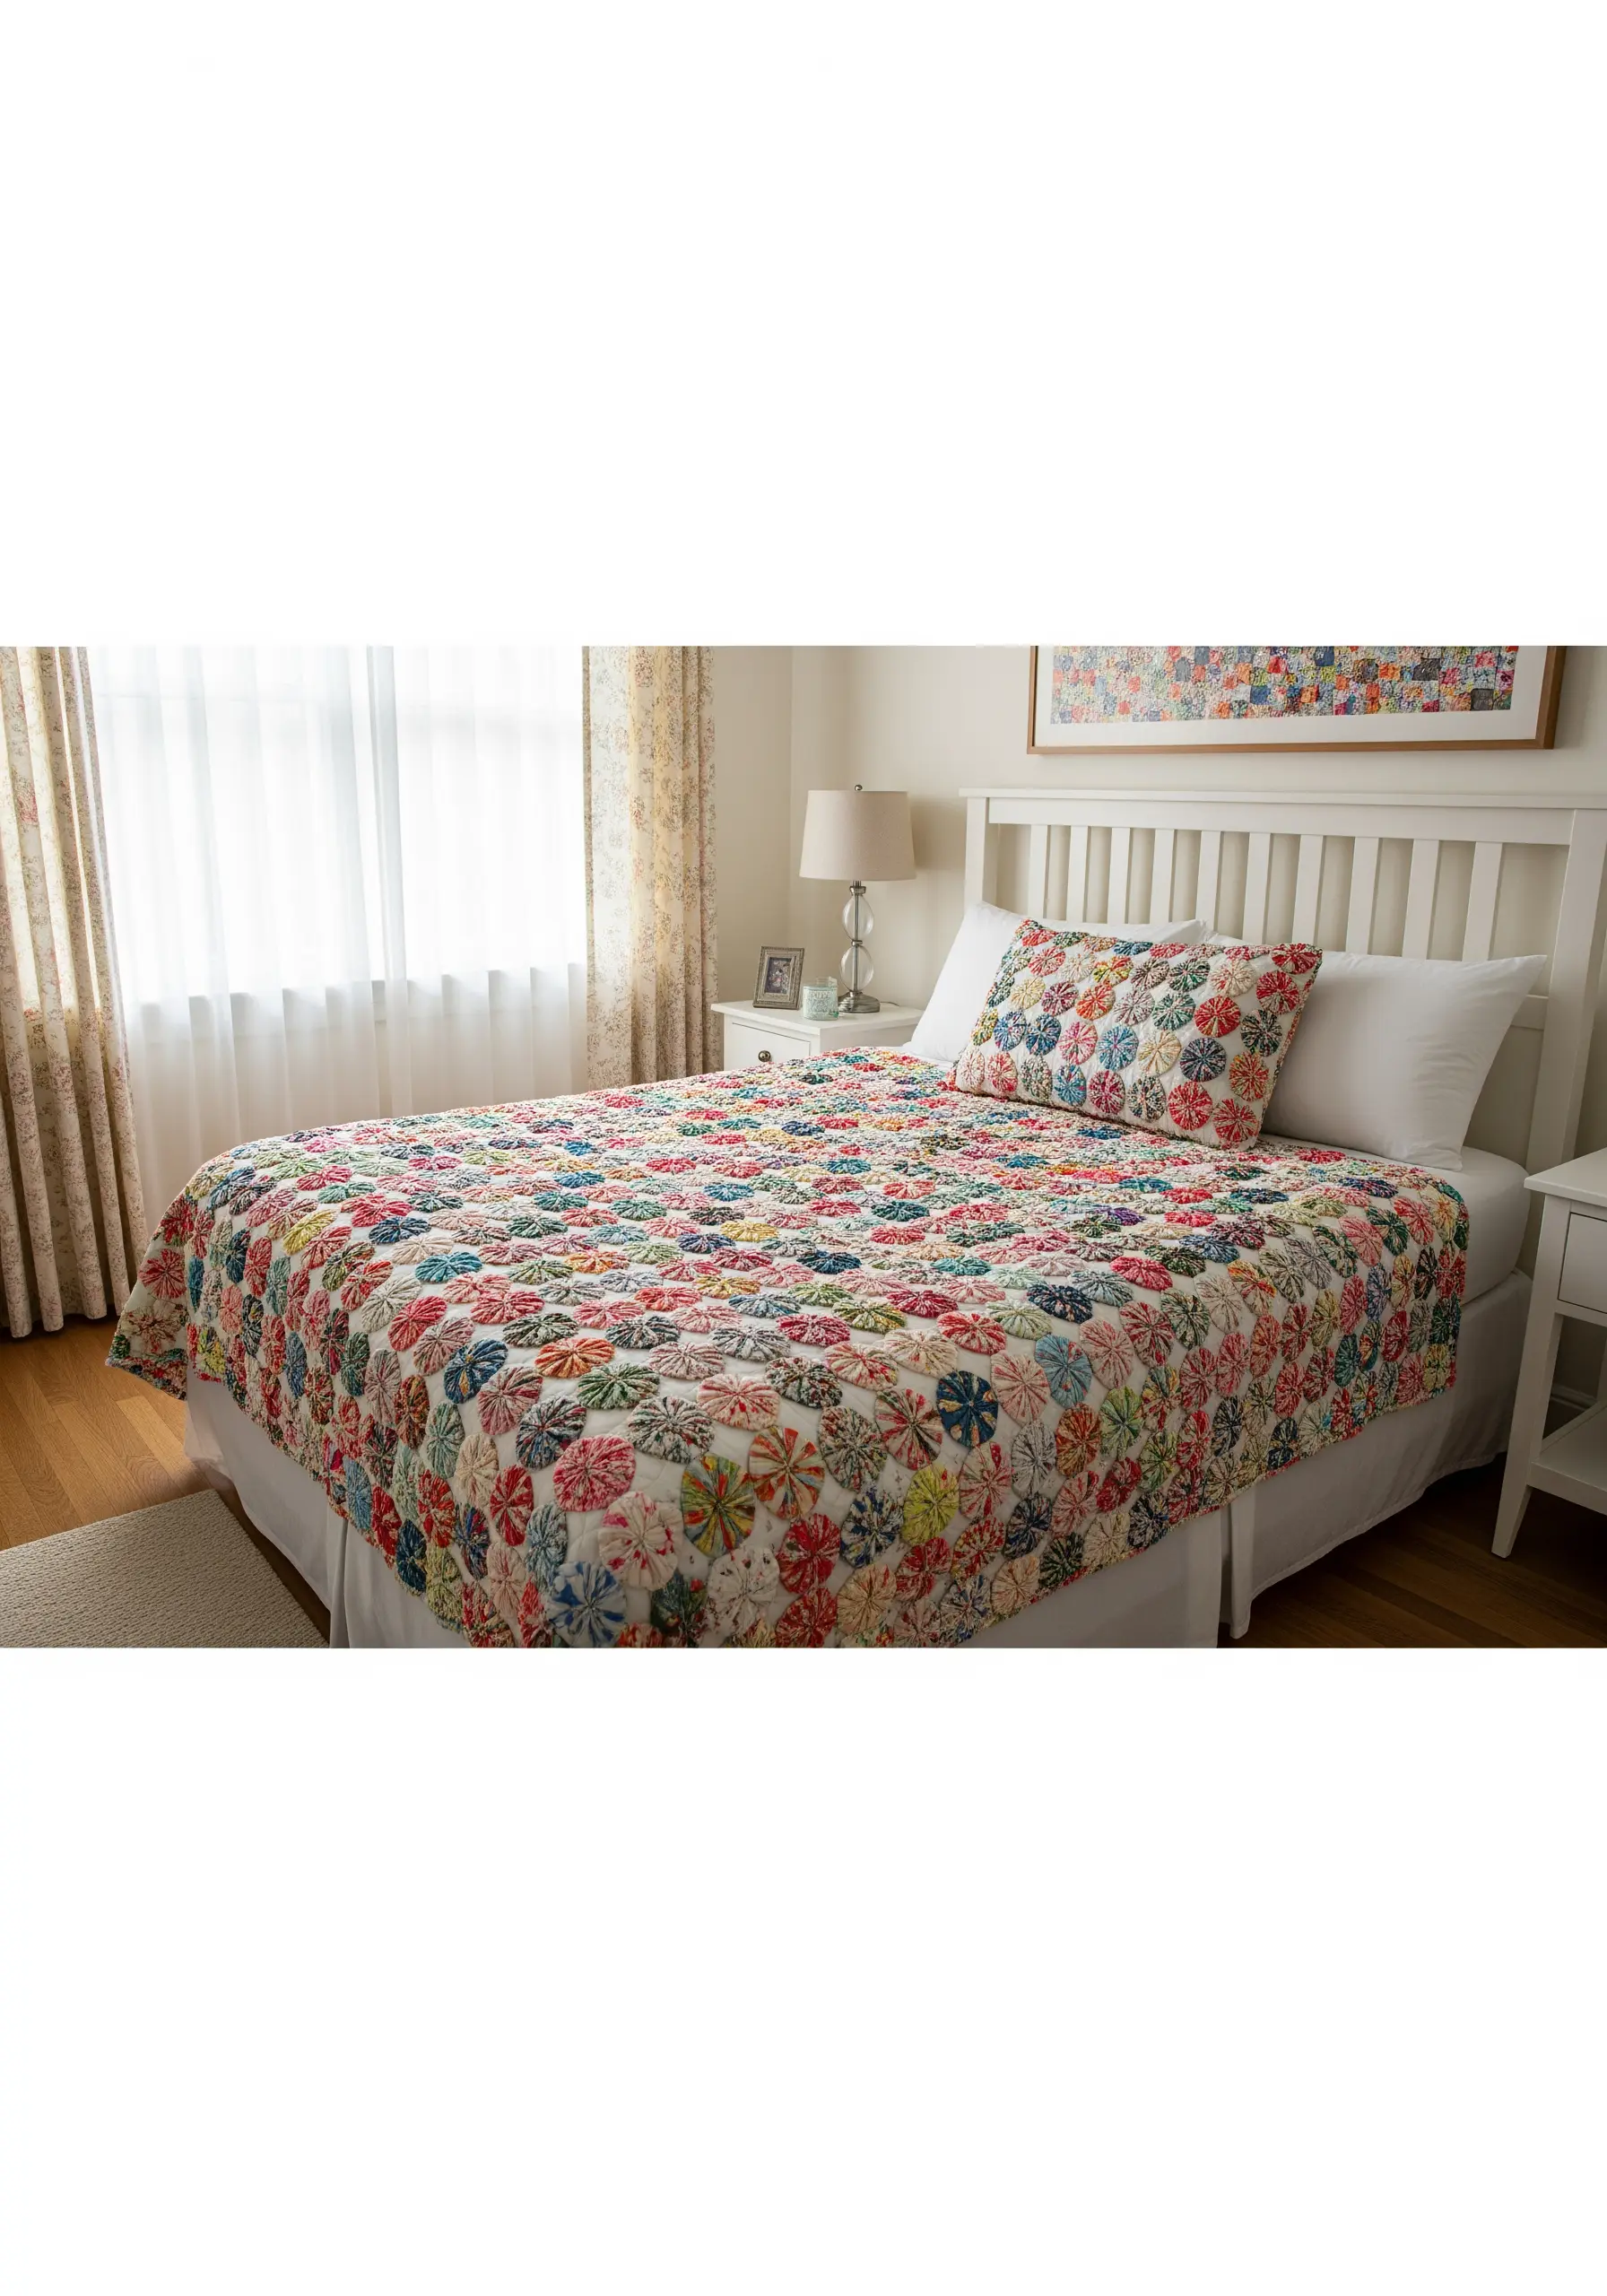
Suffolk puffs, or yo-yos, transform small fabric circles into gathered, dimensional texture.
Ensure your running stitch around the perimeter is small and even to create a tight, uniform center gather.
Joining these puffs creates a lightweight, airy textile that works beautifully as a coverlet or wall hanging.
This is one of the creative ways to turn old fabrics into fun embroidery projects.
9. Frame vintage lace for instant gallery art
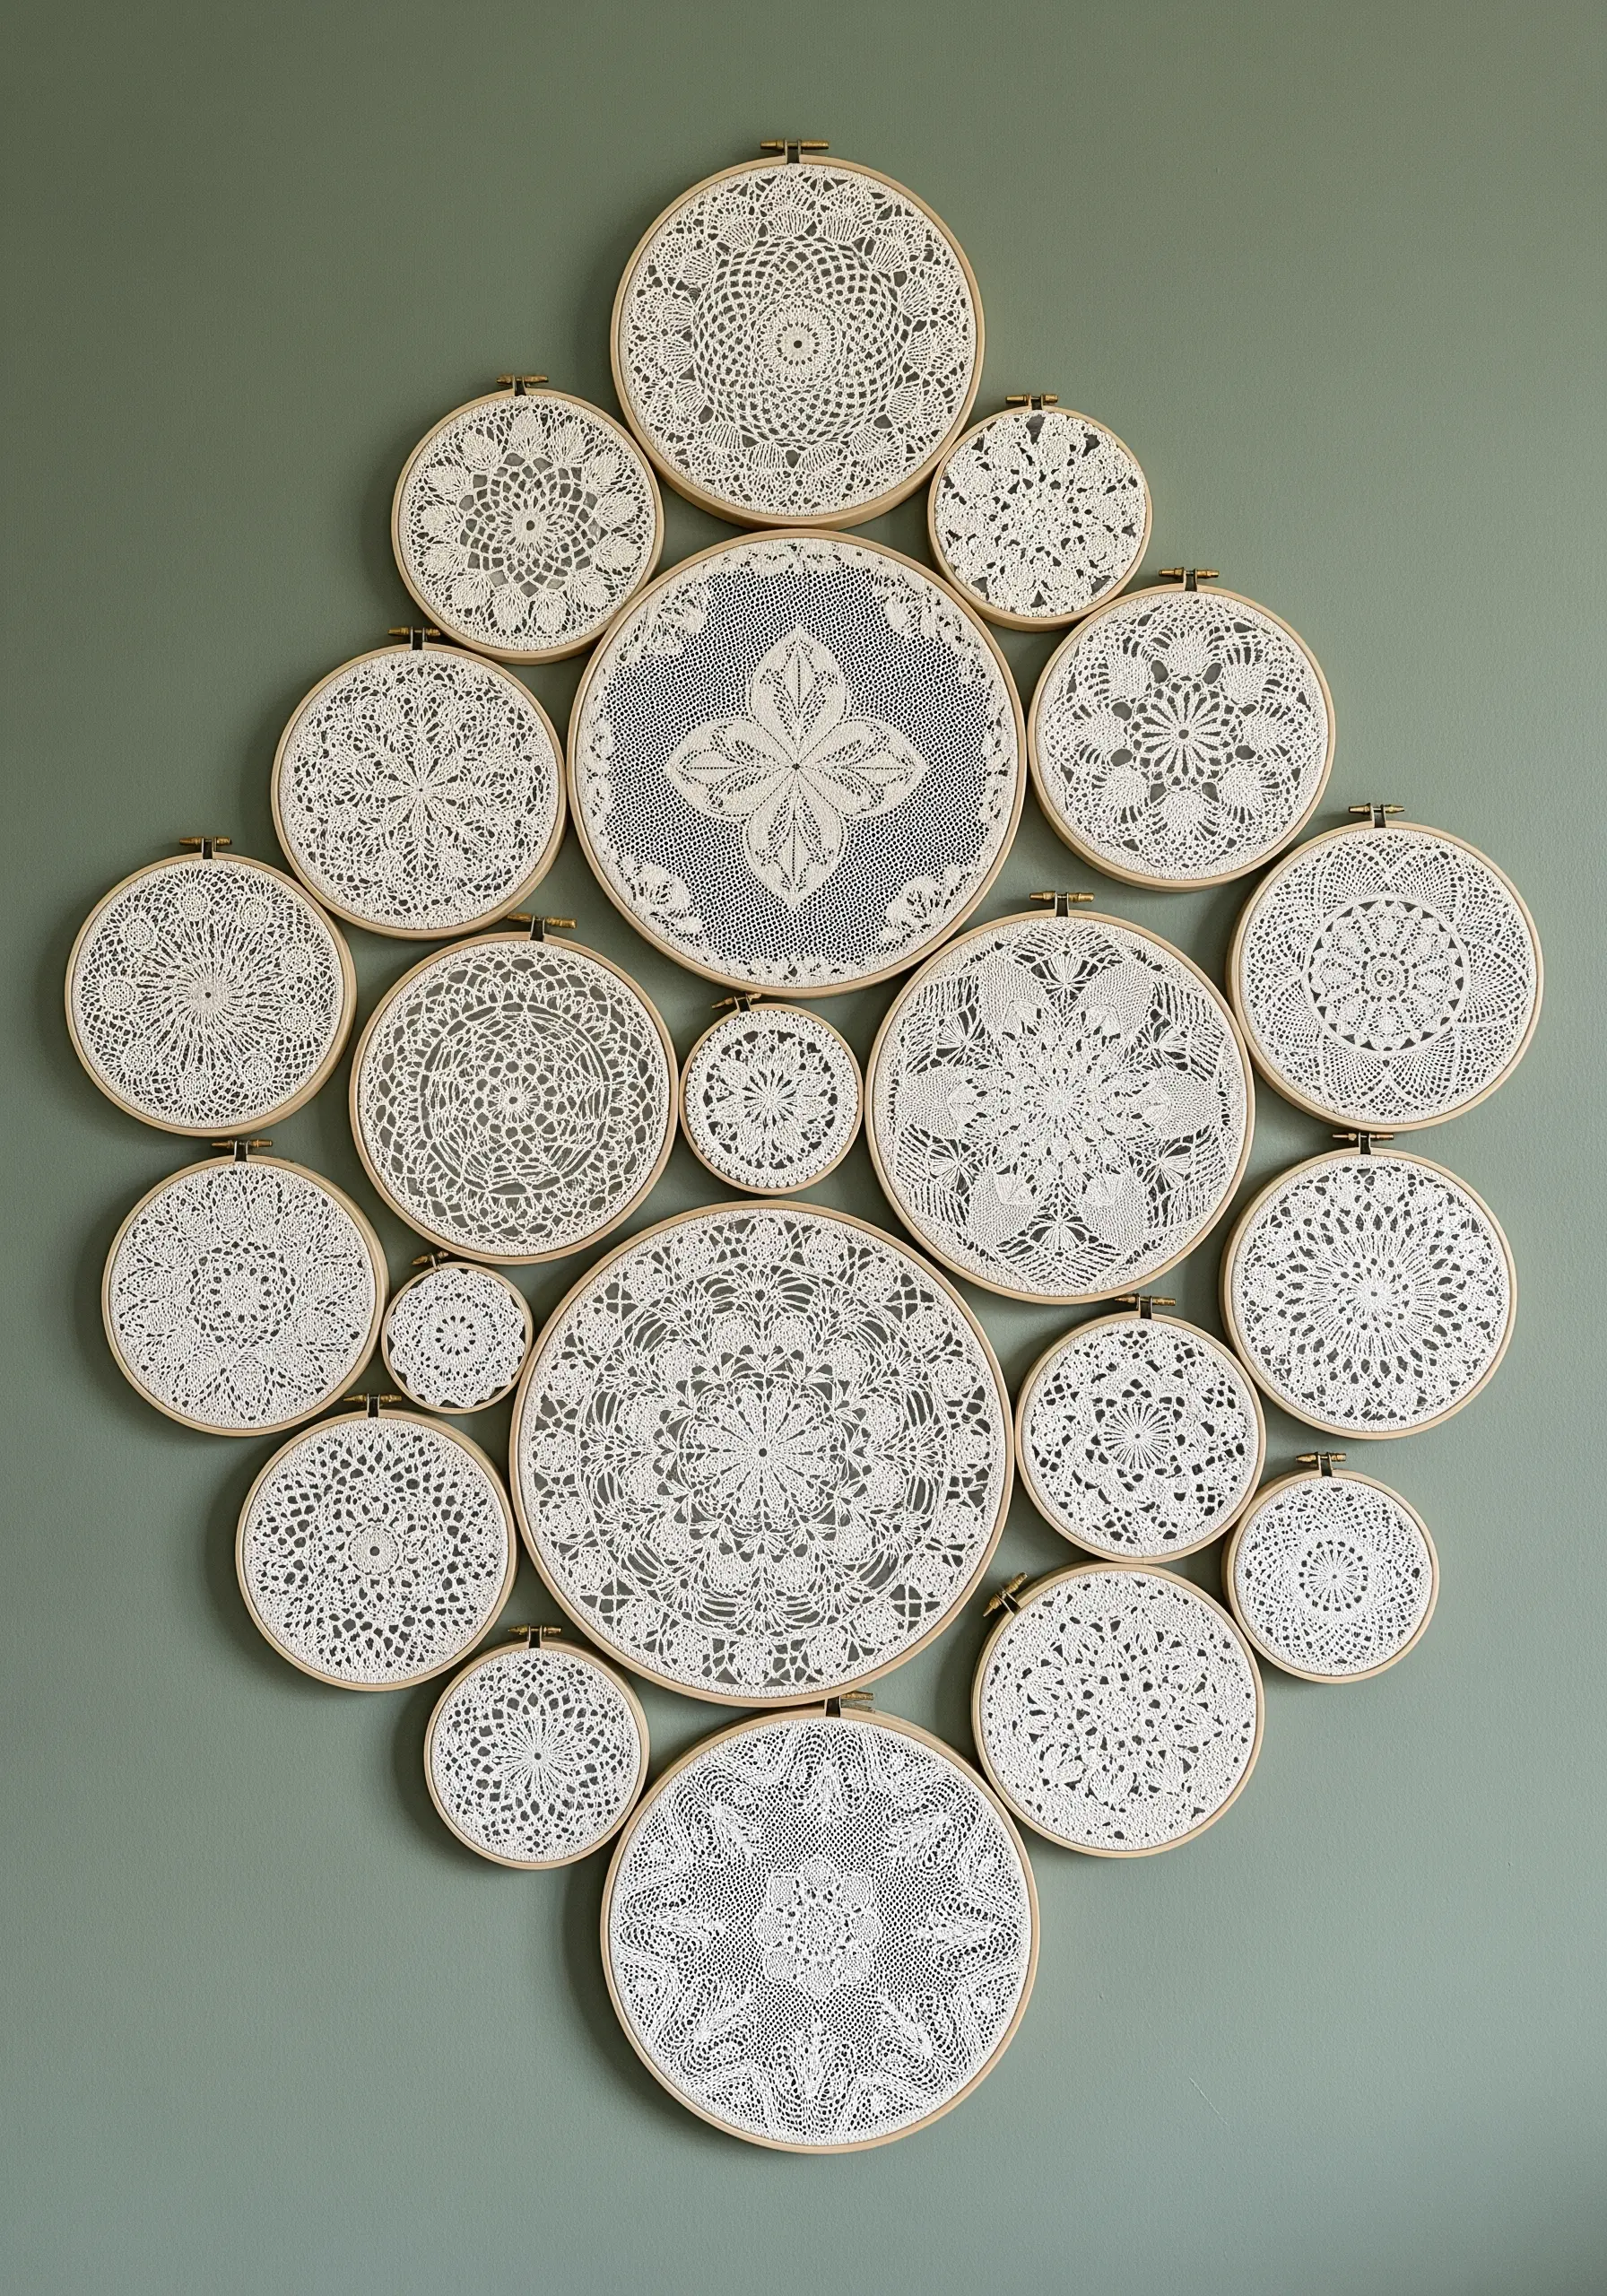
Repurposing vintage doilies in embroidery hoops highlights the intricate negative space of the crochet work.
Stretch the lace tautly to reveal the geometry of the pattern, but be careful not to distort the radial symmetry.
Grouping varying sizes and shades of white creates a sophisticated, monochromatic architectural display.
These are unique wall hoop art designs you can finish in a weekend.
10. Stabilize edges for crisp whitework eyelets
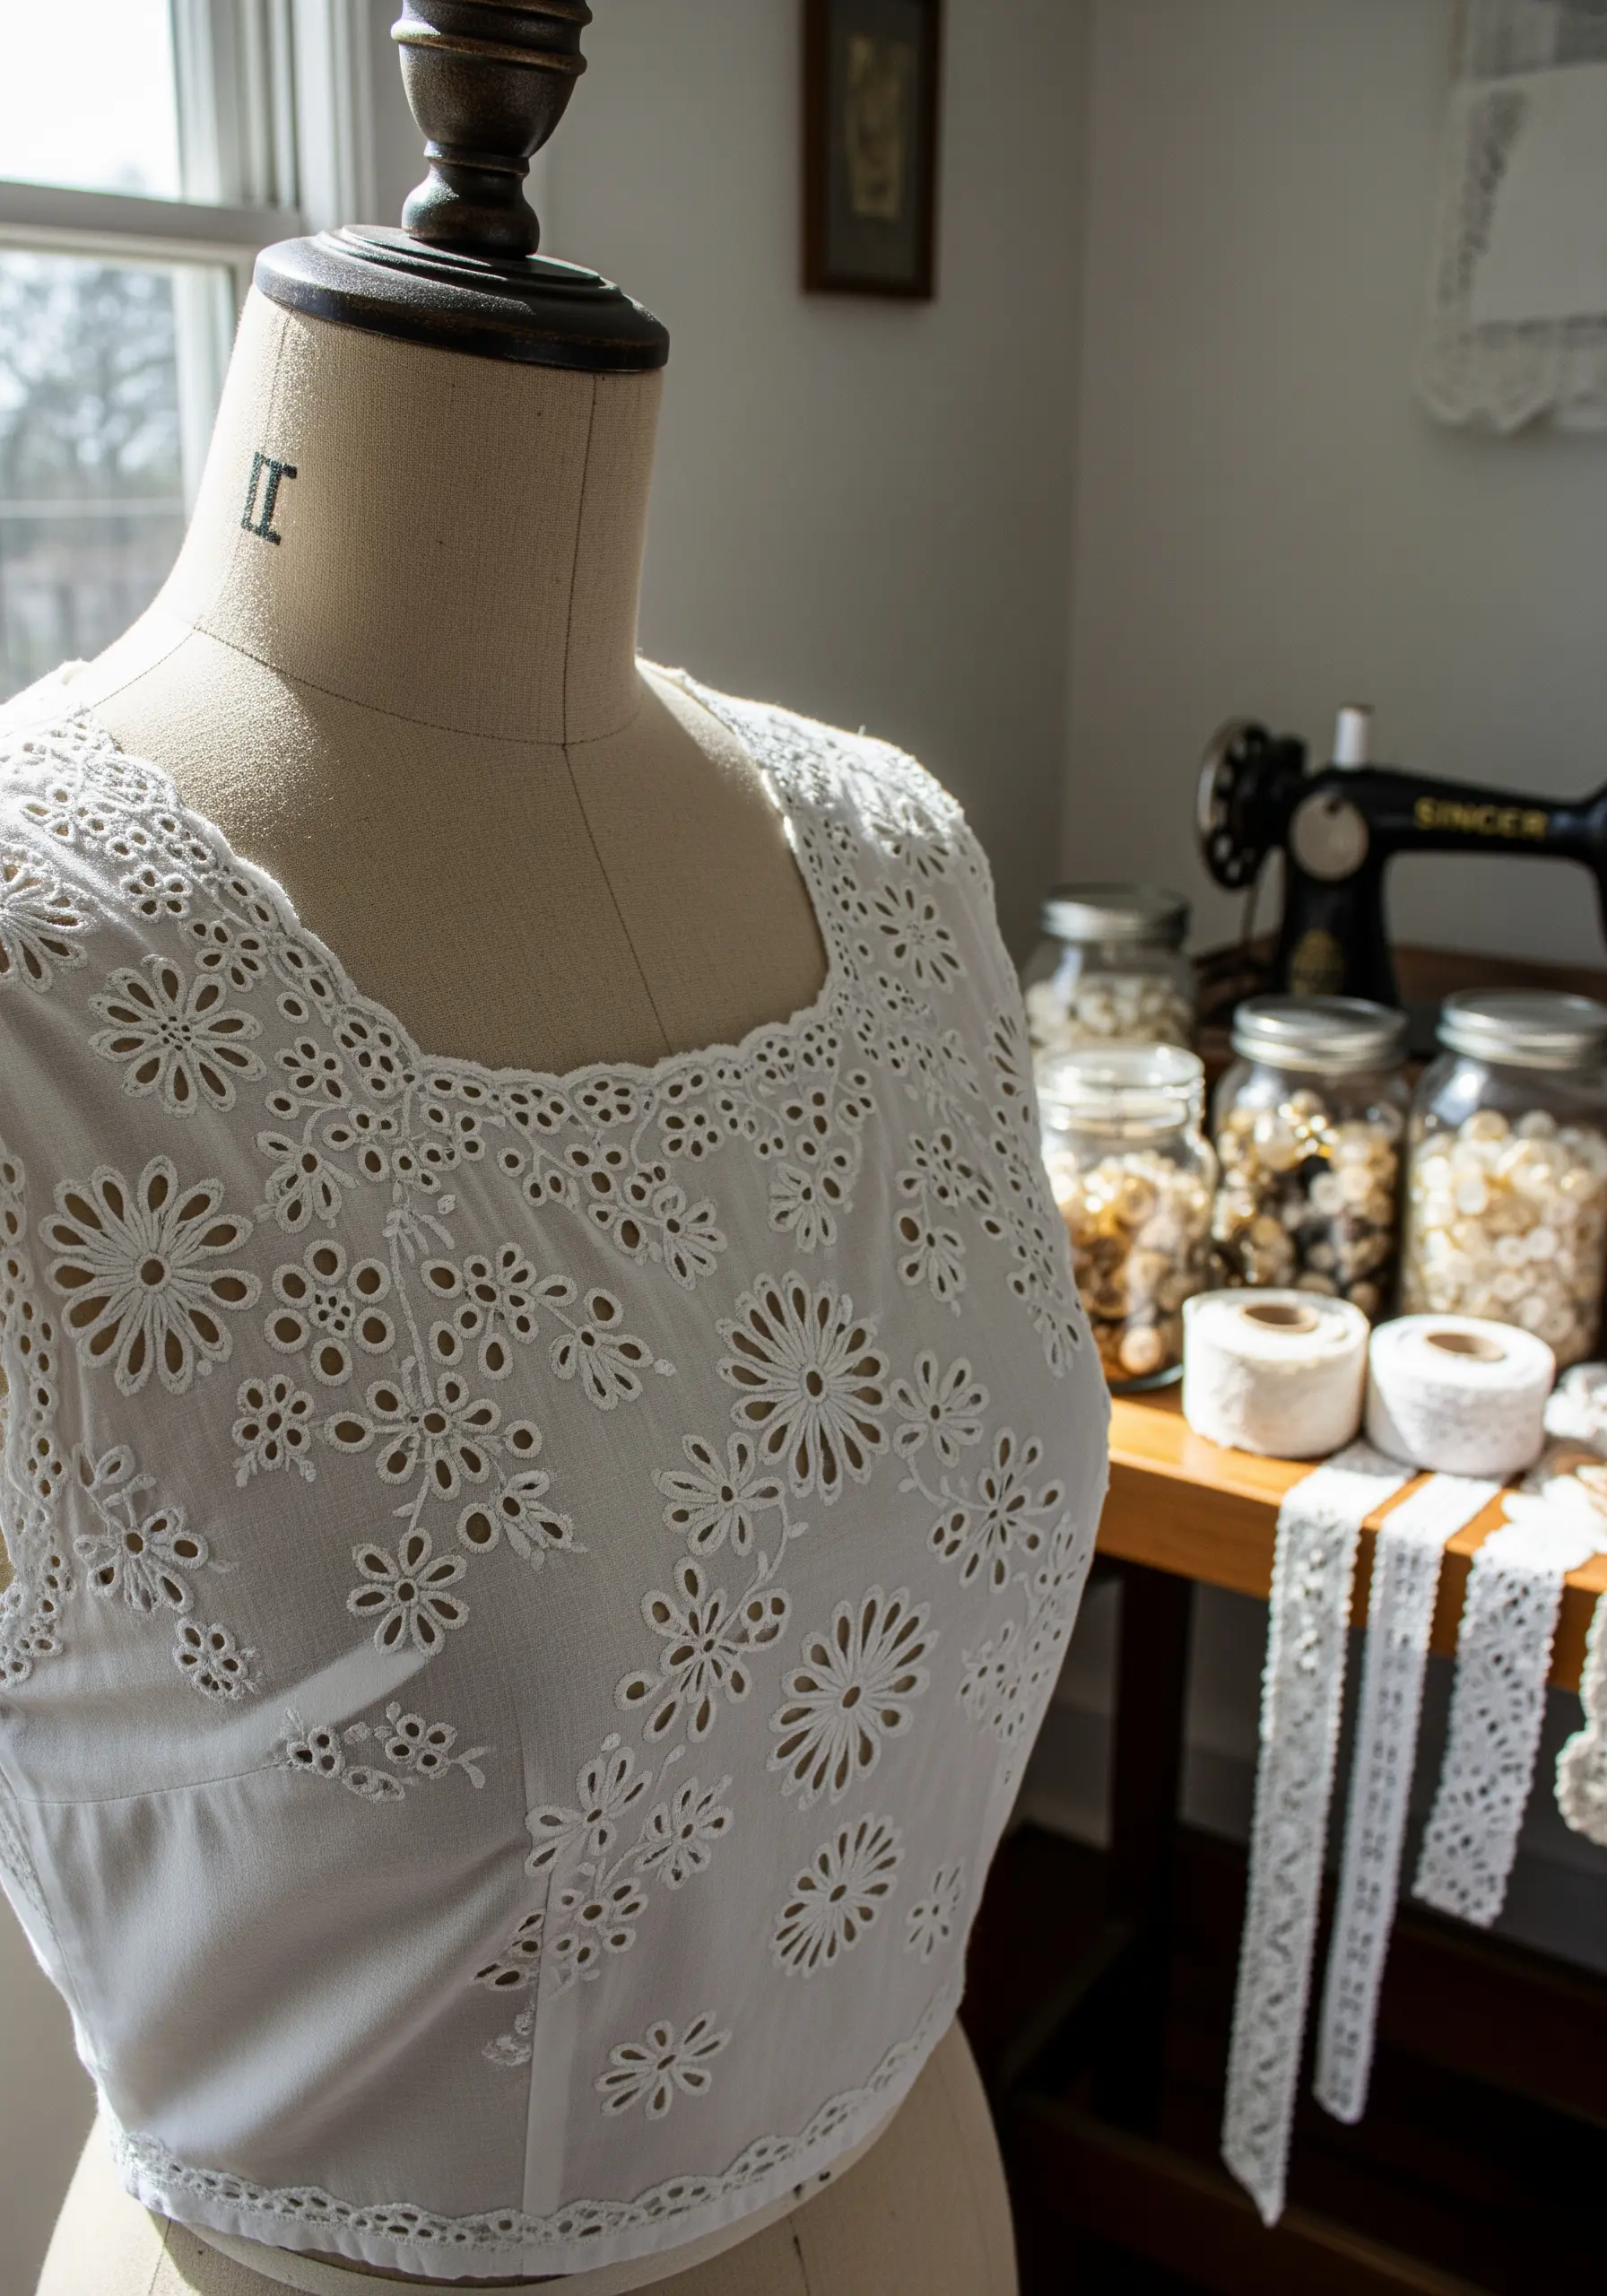
Broderie Anglaise relies on the buttonhole stitch to bind raw edges of cut fabric holes.
Run a small running stitch around the outline before cutting the fabric to prevent stretching and fraying.
This technique creates a durable, lacy effect that feels airy yet structurally sound on garments.
A perfect fit for soft white taupe thread palettes for embroidered throws that match every neutral living room.
11. Coil fabric strips for sculptural table runners
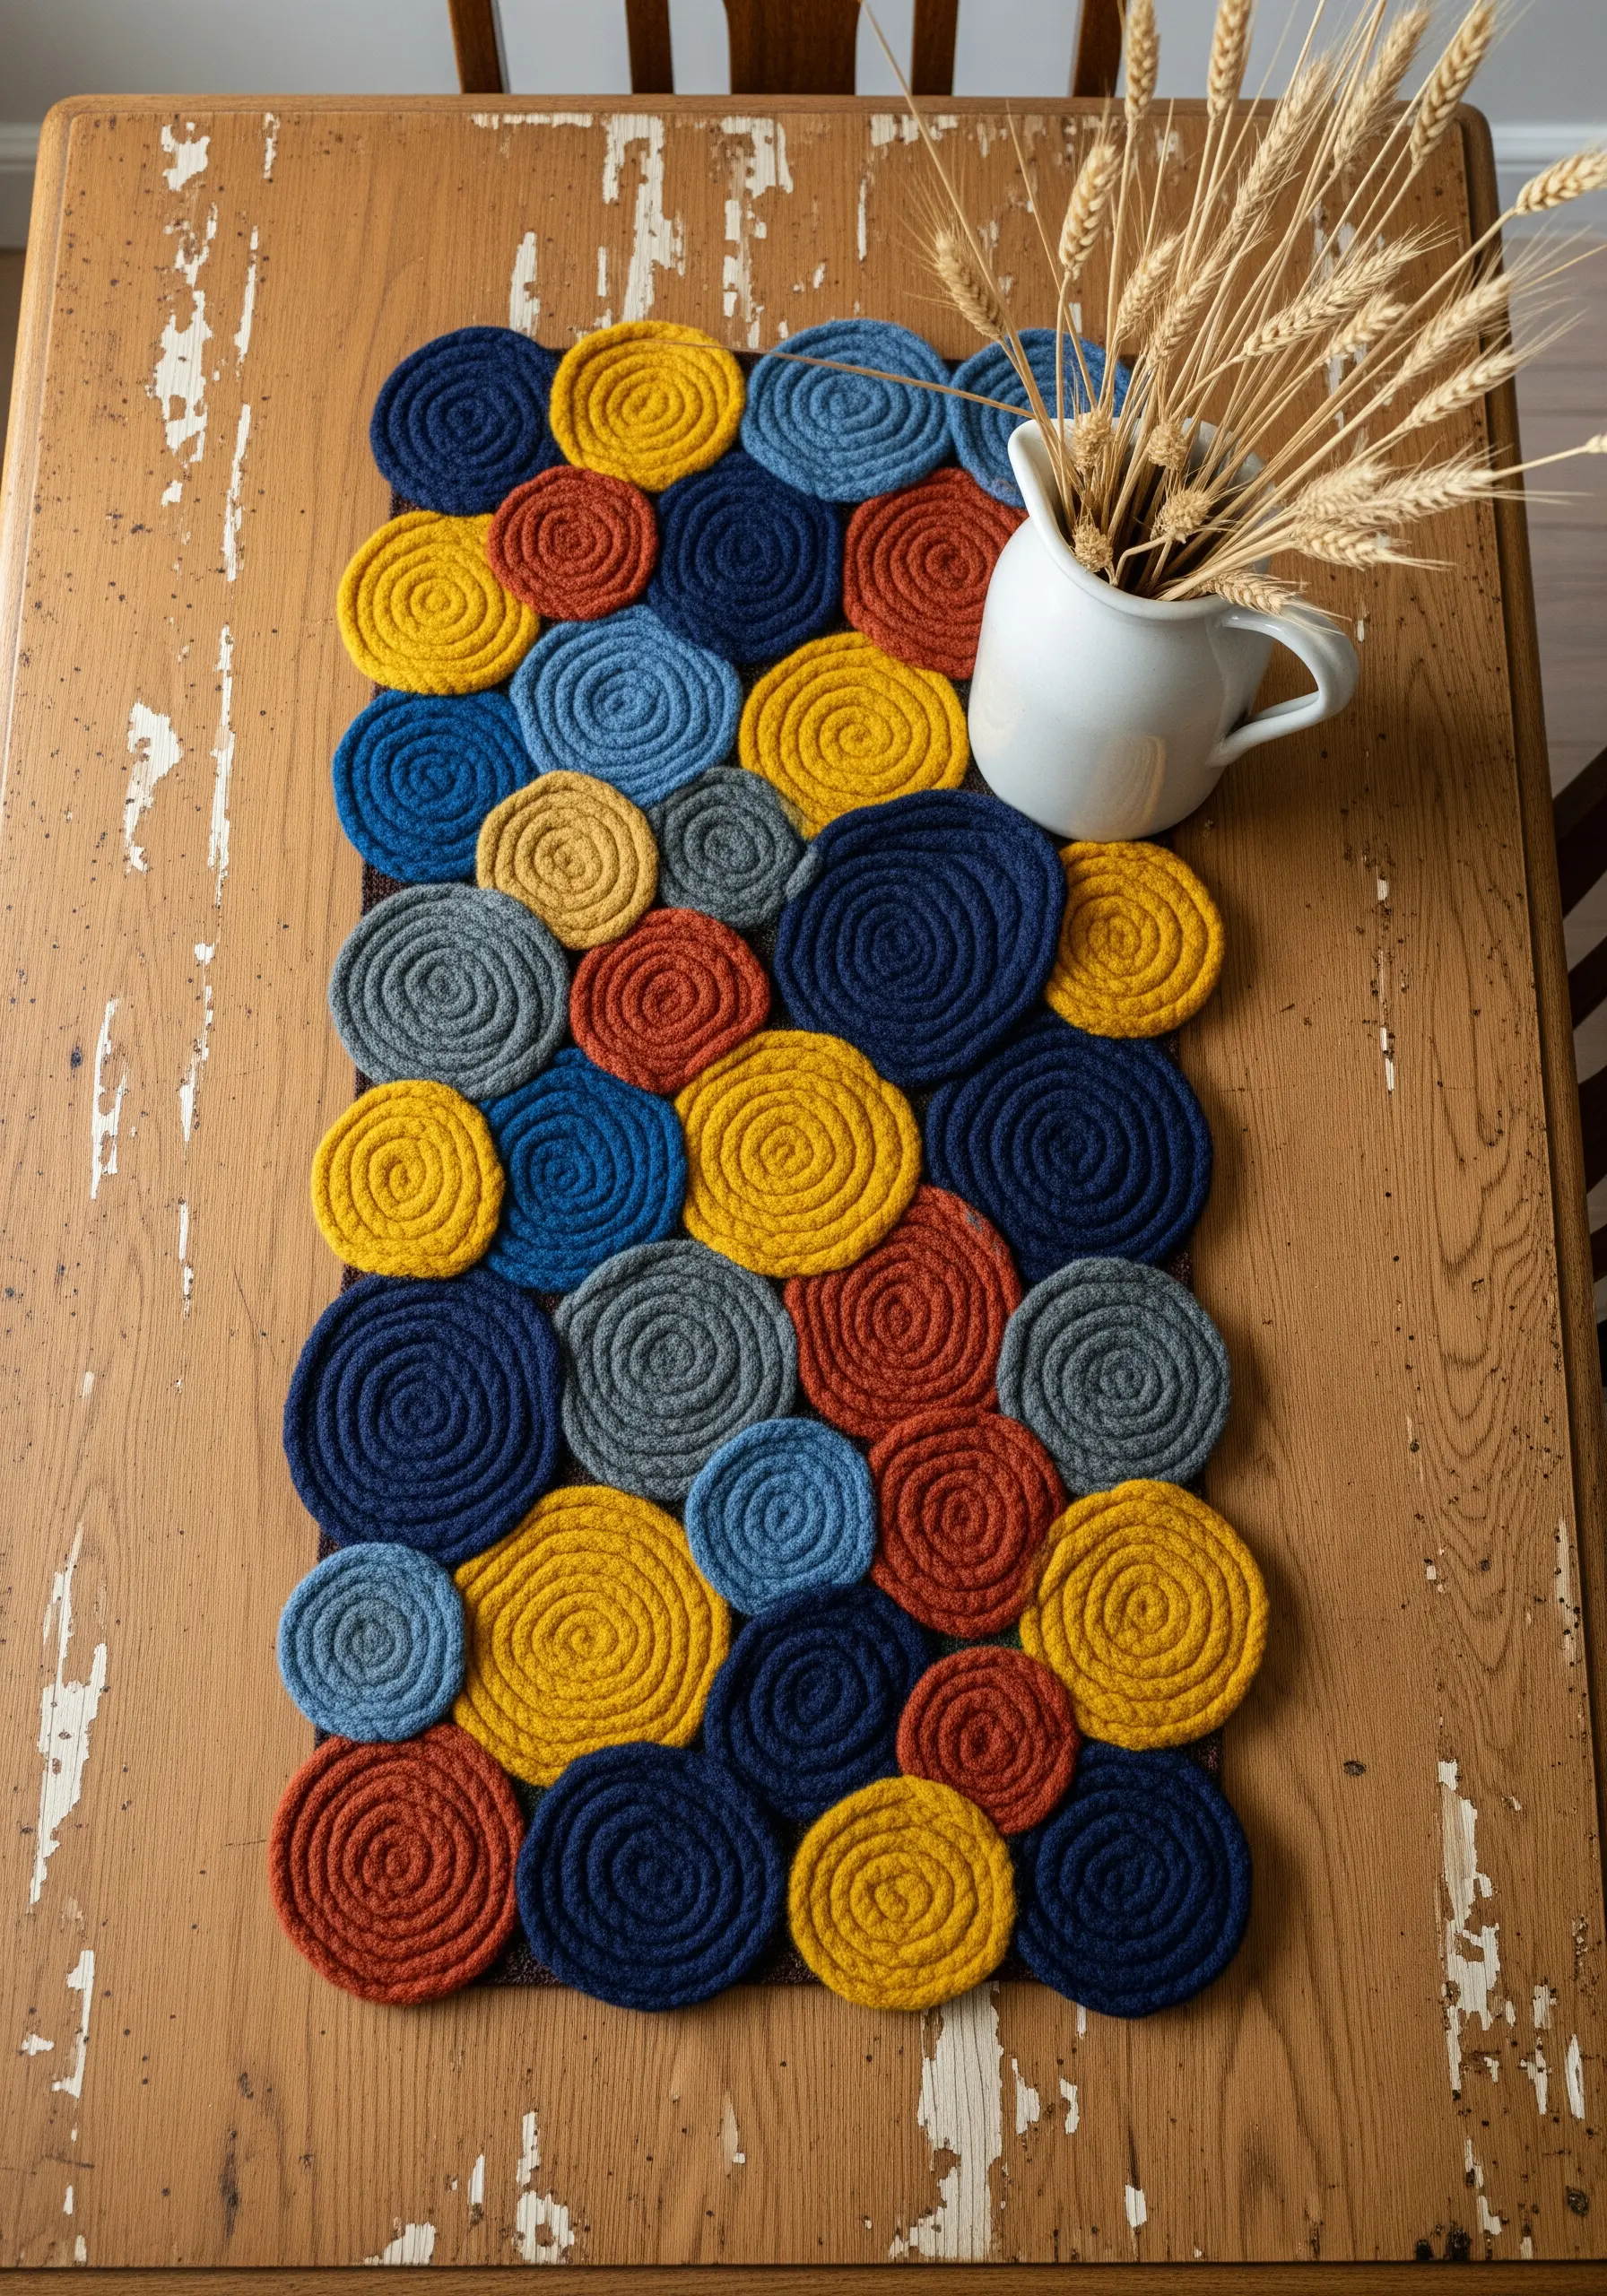
Coiling fabric scraps involves wrapping thread around a core to create sturdy, spiraling discs.
Vary the color of the wrapping thread to create subtle patterns within the coils themselves.
Join the discs with a zigzag stitch or a strong whip stitch to ensure the runner lies flat on the table.
These are fabric crafts that combine thread texture and color beautifully.
12. Raise the surface with stumpwork techniques
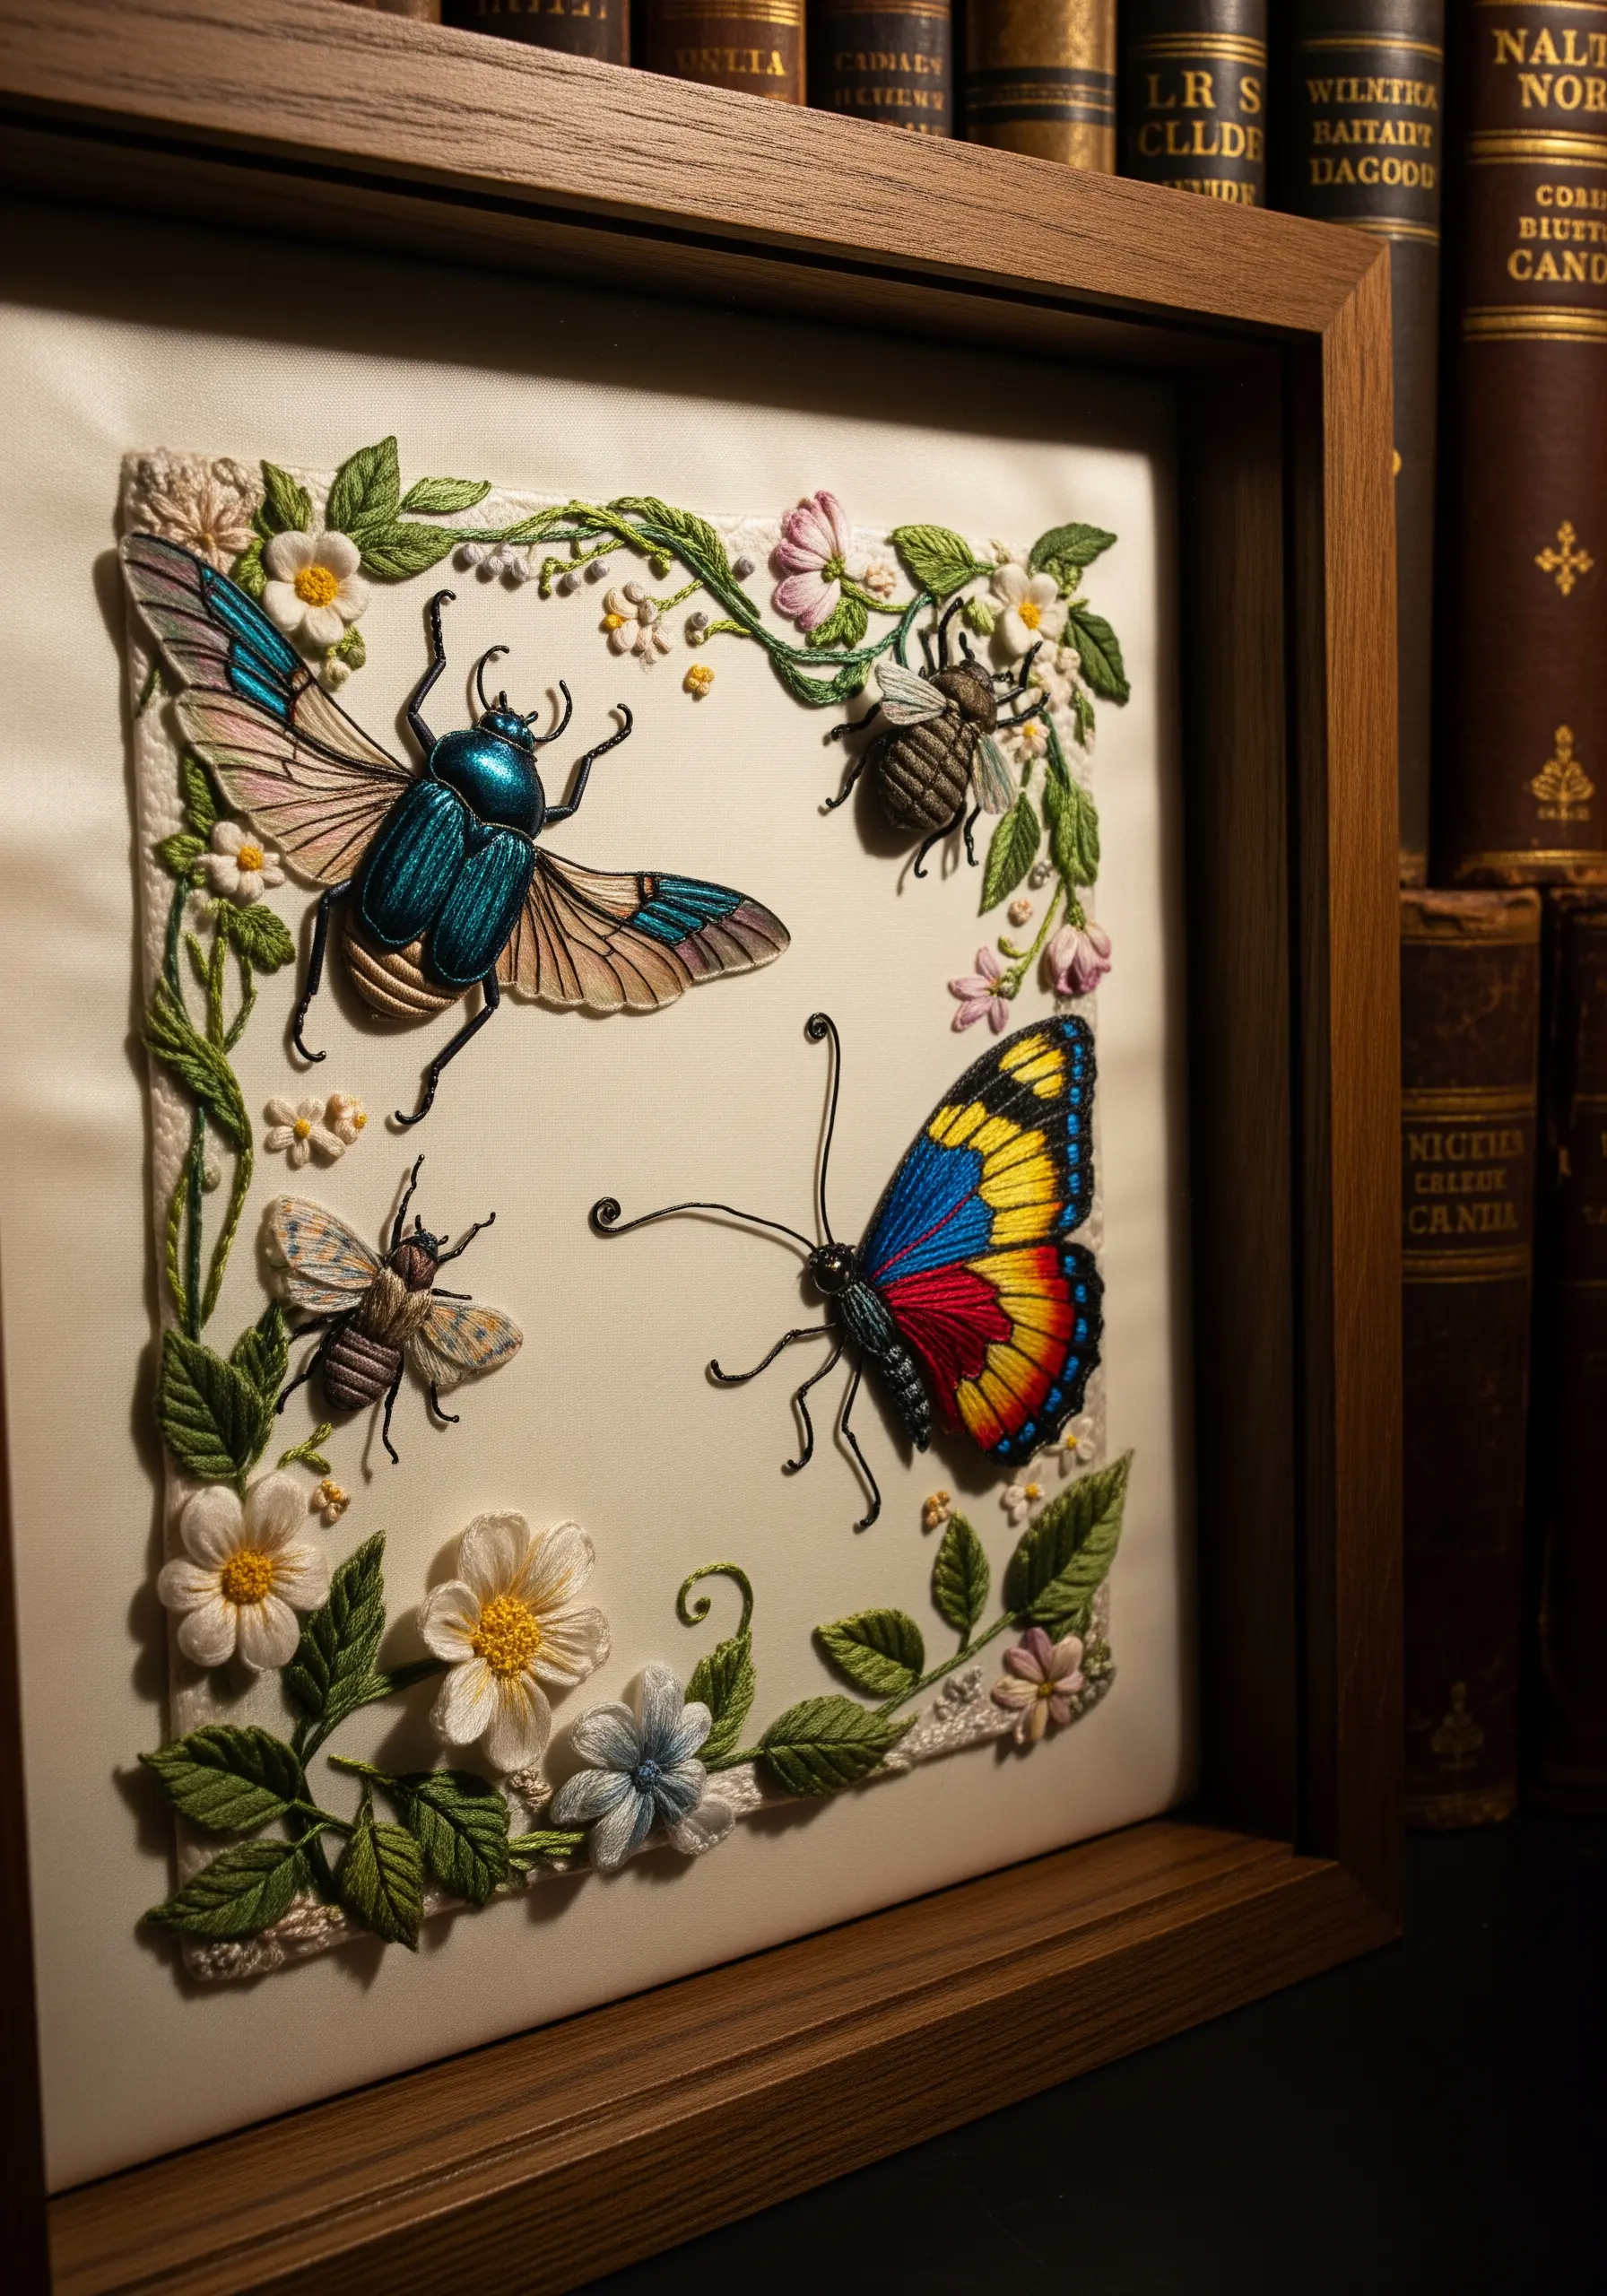
Stumpwork adds dramatic realism by lifting motifs off the background fabric using padding or wire.
Use thin craft wire along the edges of detachable elements, like insect wings, before stitching over them.
This allows you to bend and shape the embroidery for a lifelike, museum-quality specimen effect.
Use this for butterfly moth embroidery patterns that feel like they could take flight.
13. Balance knot tension in fiber wall art
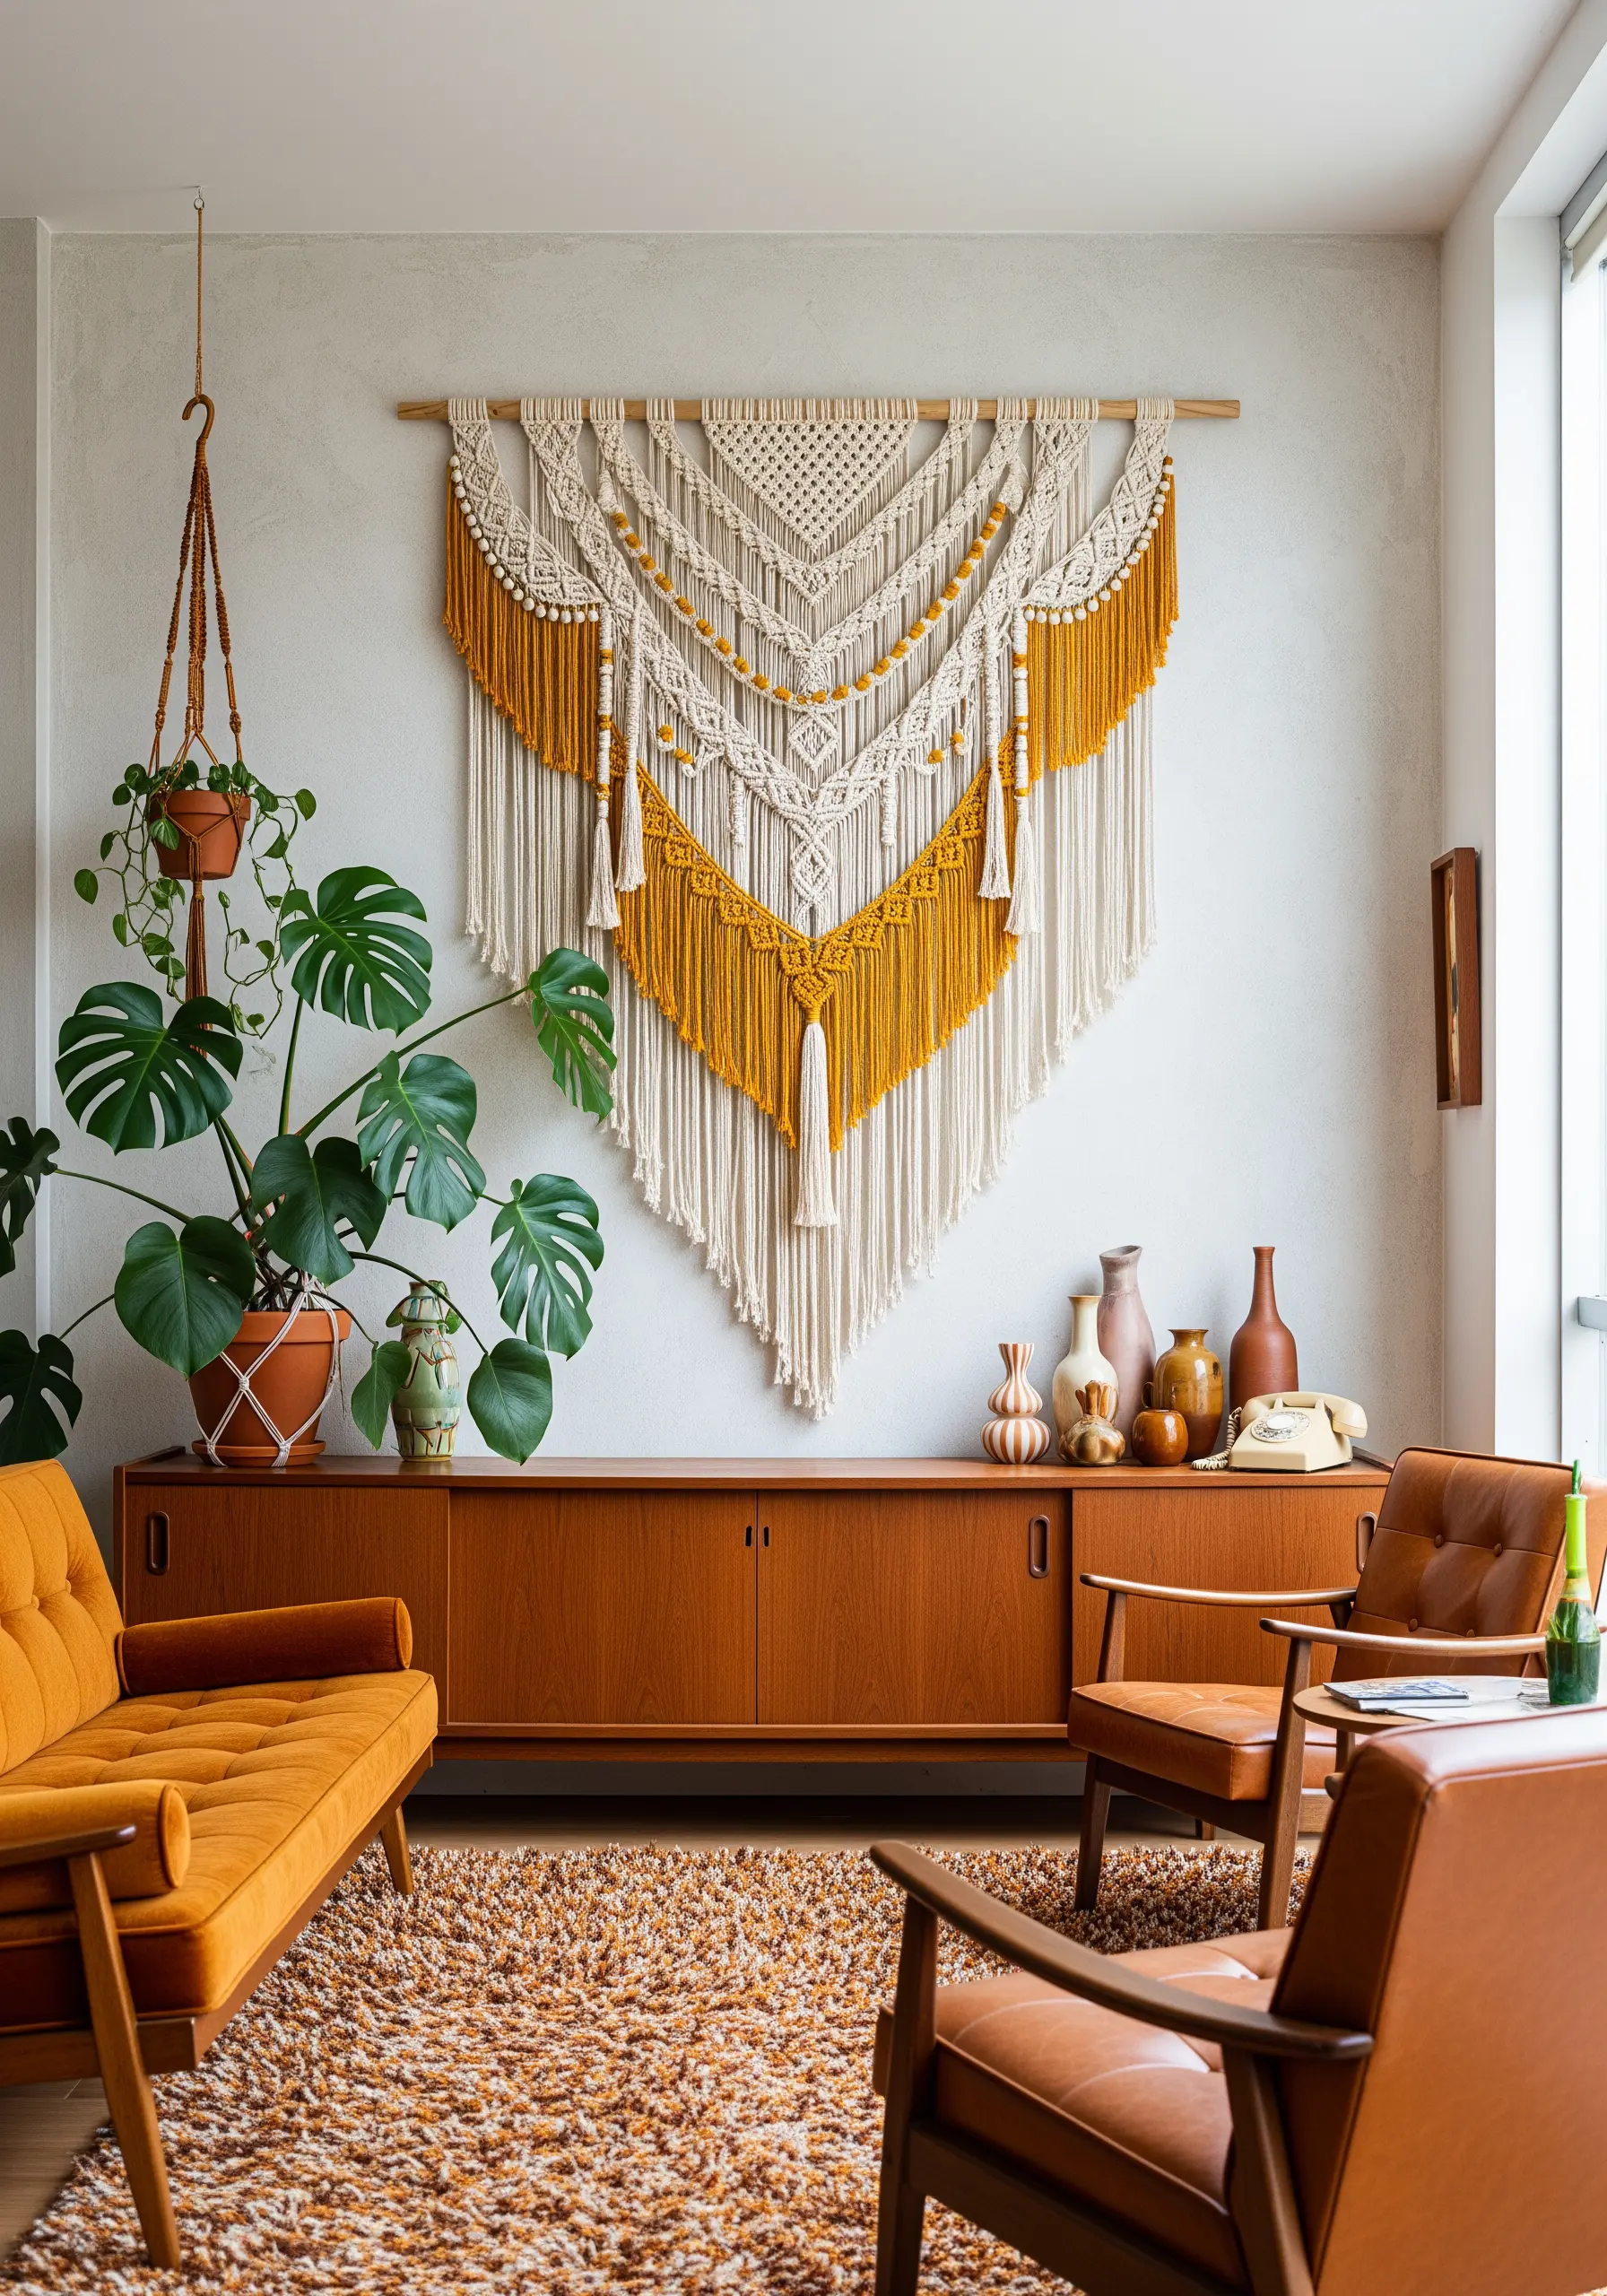
Macramé wall hangings depend entirely on the consistency of your knot tension for a clean look.
Incorporate colored yarn, like mustard or rust, to modernize the vintage 70s aesthetic.
Combing out the fringe at the bottom adds softness that contrasts with the structured geometric knots above.
See more bold yarn wall art patterns that turn blank walls into statements.
14. Enhance printed toile with selective stitching
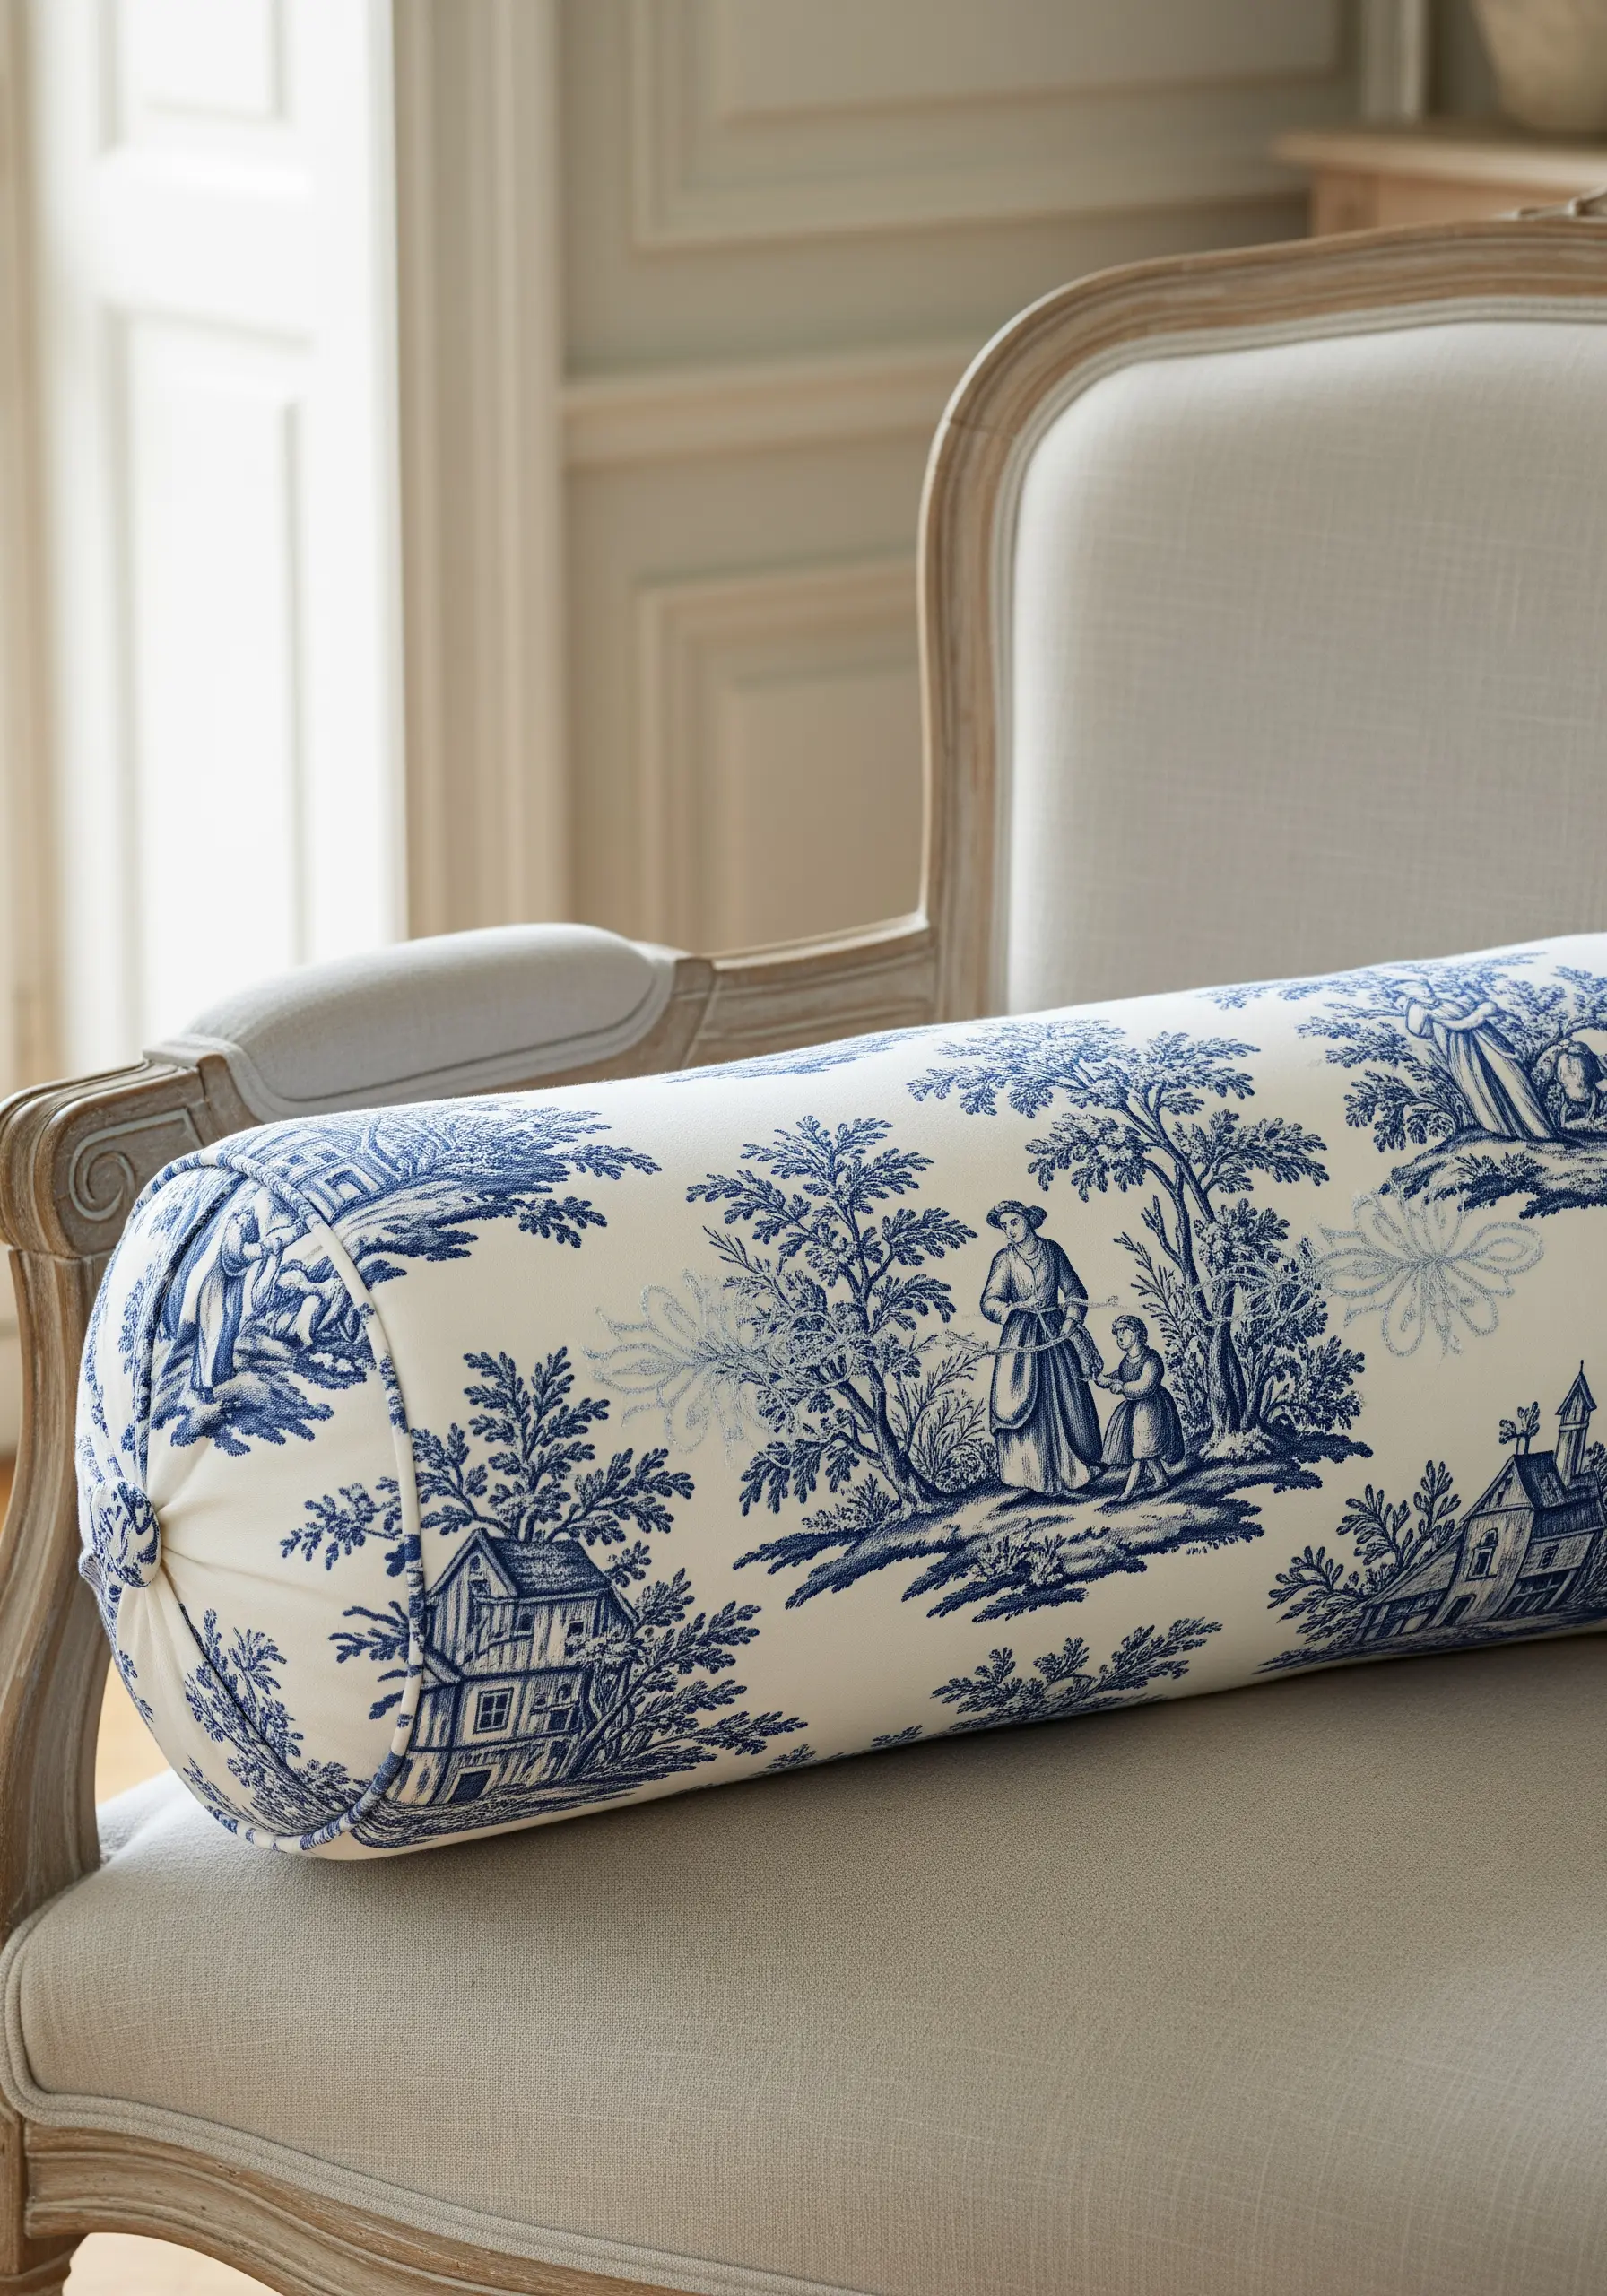
Embroidery doesn’t always need a blank canvas; you can stitch directly over printed fabrics like Toile de Jouy.
Use a single strand of matching floss to outline figures or add satin stitch highlights to trees and clothing.
This adds texture and depth to the flat print, making the fabric look luxurious and bespoke.
Try vintage inspired embroidery wall decor that makes any room feel nostalgic.
15. Fold fabric precisely for dimensional appliqué
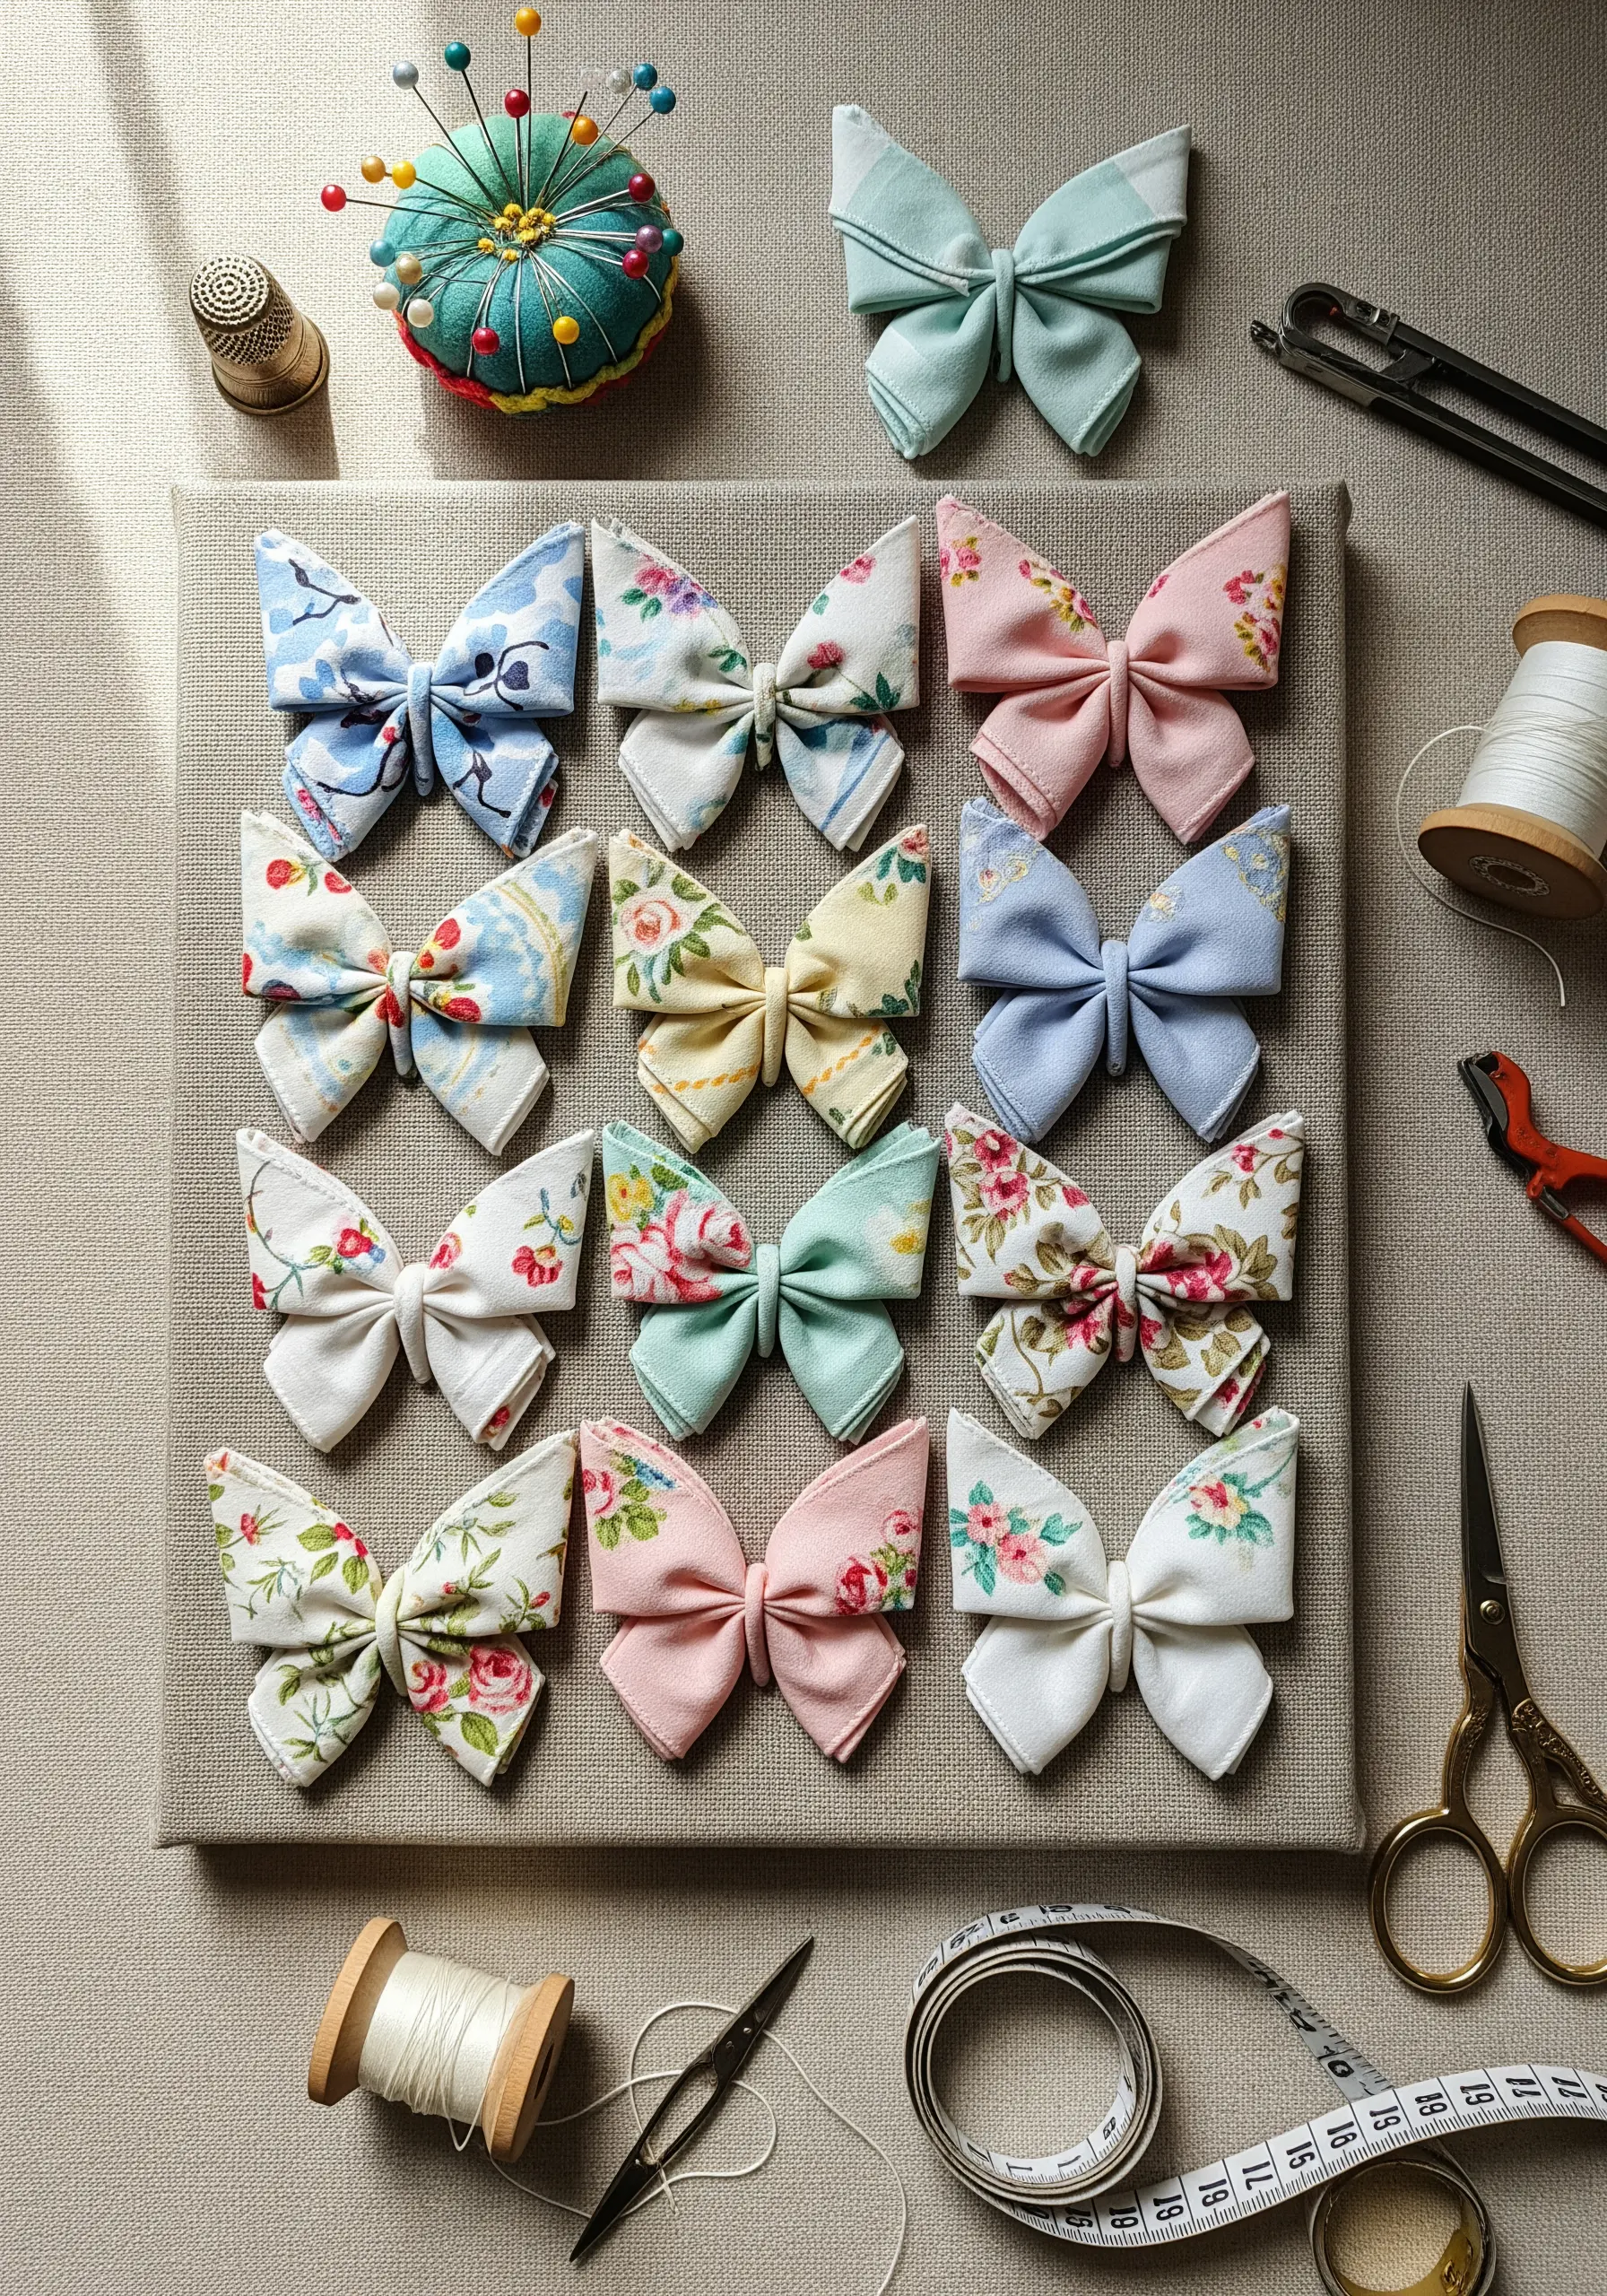
Origami-style fabric folding creates sharp, clean lines that soft stuffing cannot achieve.
Press your creases with an iron before stitching to ensure the butterfly shapes remain crisp.
Tack the centers down firmly, leaving the wings free to cast shadows on the mounting board.
These are mixed fiber creations that blend tradition and modern style.
16. Pad your goldwork for royal opulence
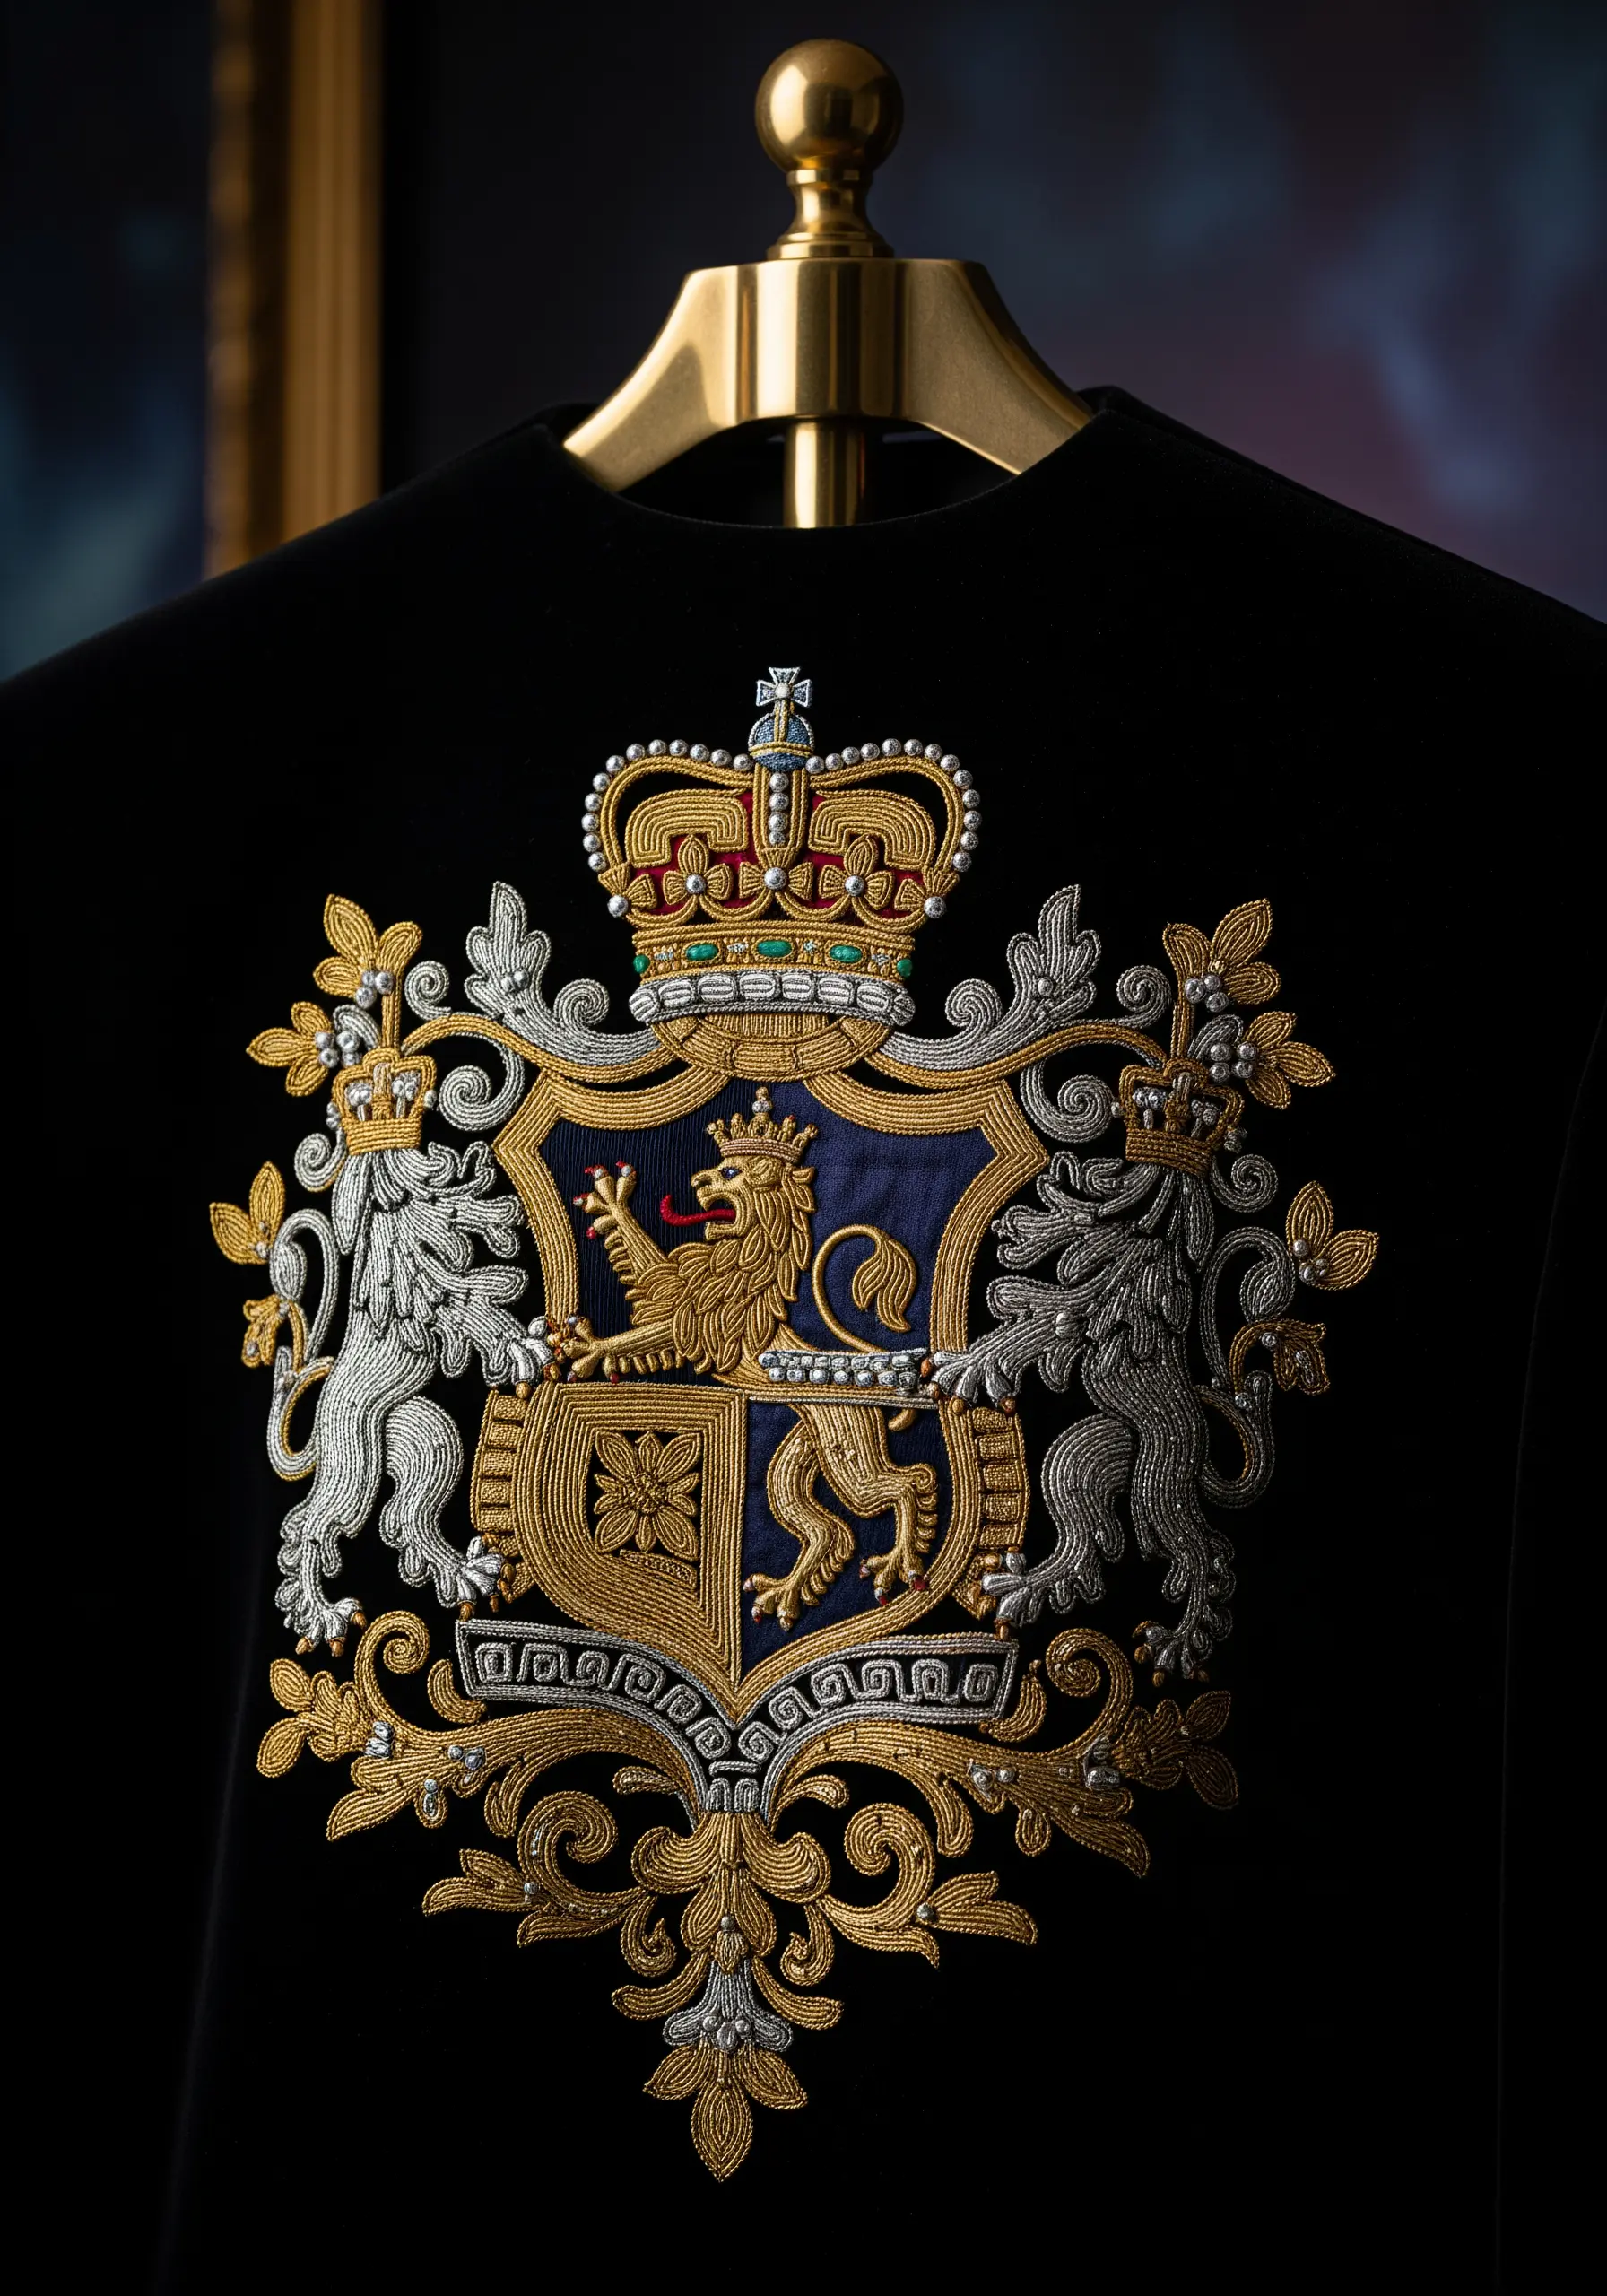
Goldwork achieves its regal look by stitching metallic bullion over a padded felt base.
Cut your felt shapes slightly smaller than the final motif to ensure the gold wire covers the edges completely.
This creates high relief that catches the light and adds a sense of weight and authority to the piece.
Explore luxury metallic thread wall decor ideas that look straight out of high end hotels.
17. Create texture with tonal candlewicking knots
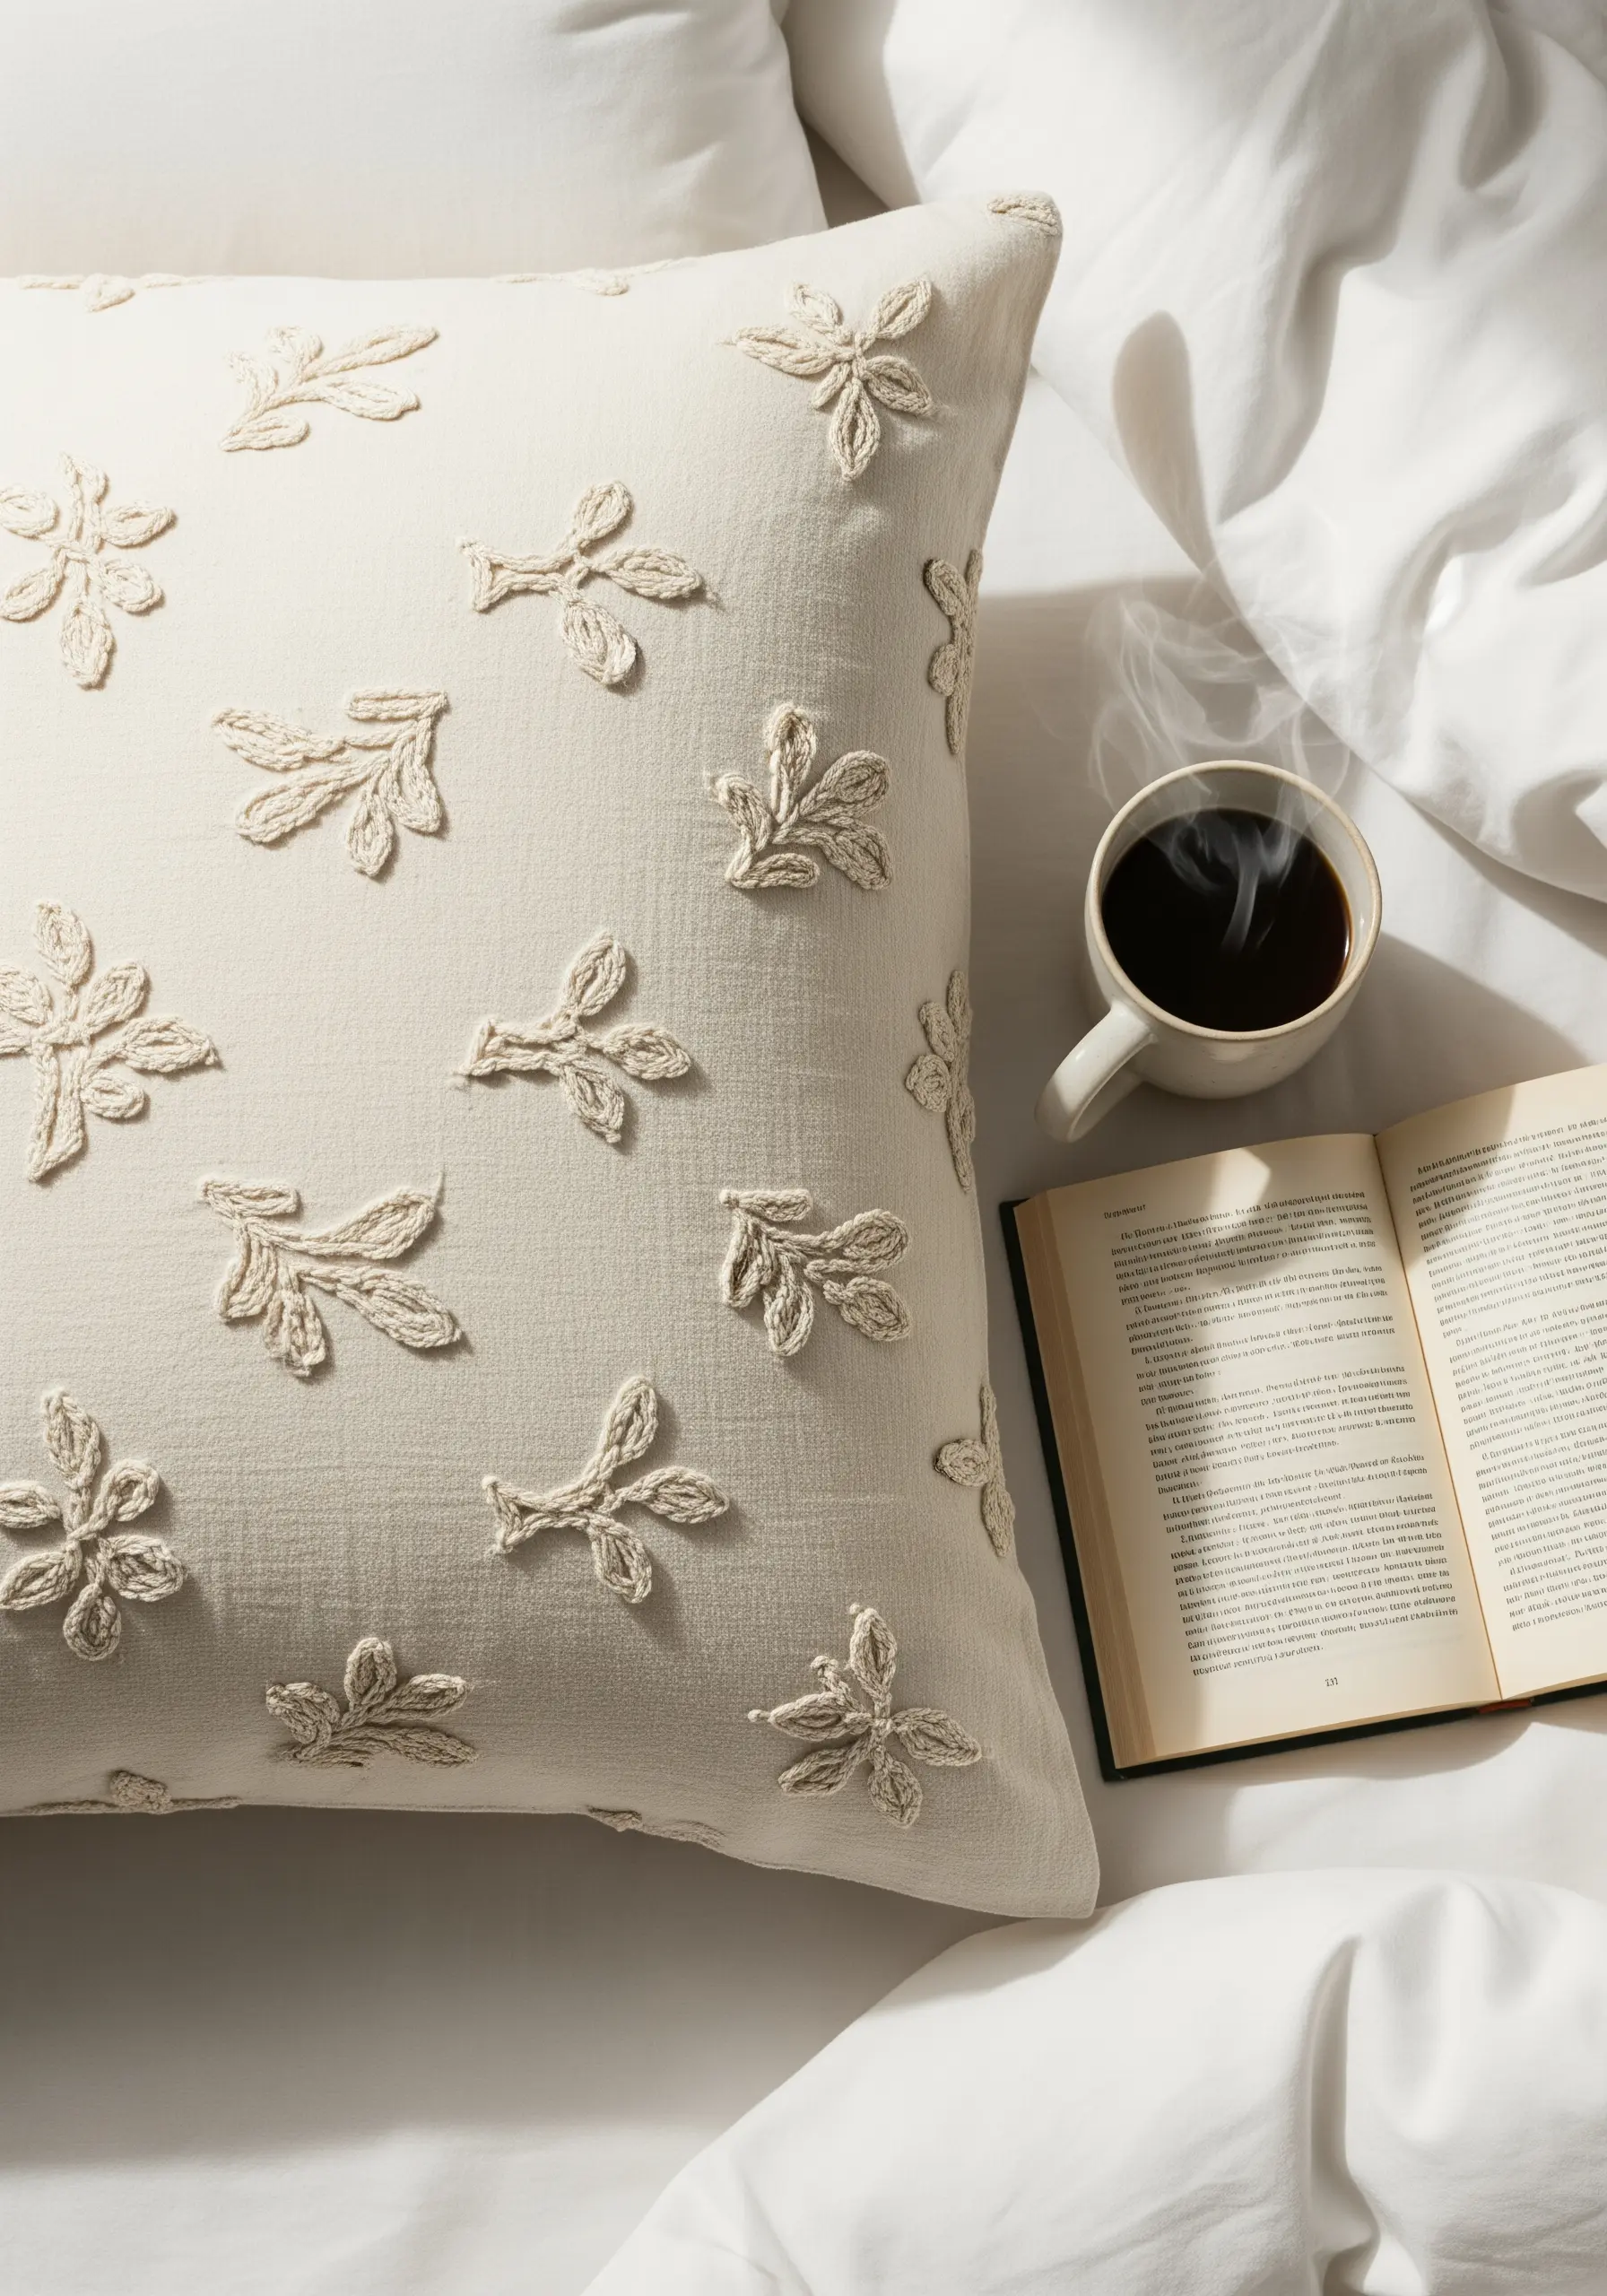
Candlewicking relies on the colonial knot to create raised patterns using heavy, unbleached cotton thread.
The lack of color contrast means texture is everything; keep your knots tight and uniform.
Space the knots evenly to form geometric lines or floral shapes that are tactile and visually soothing.
Apply to simple stitch ideas that add elegance to your pillow covers.
18. Join braids seamlessly for flat rugs
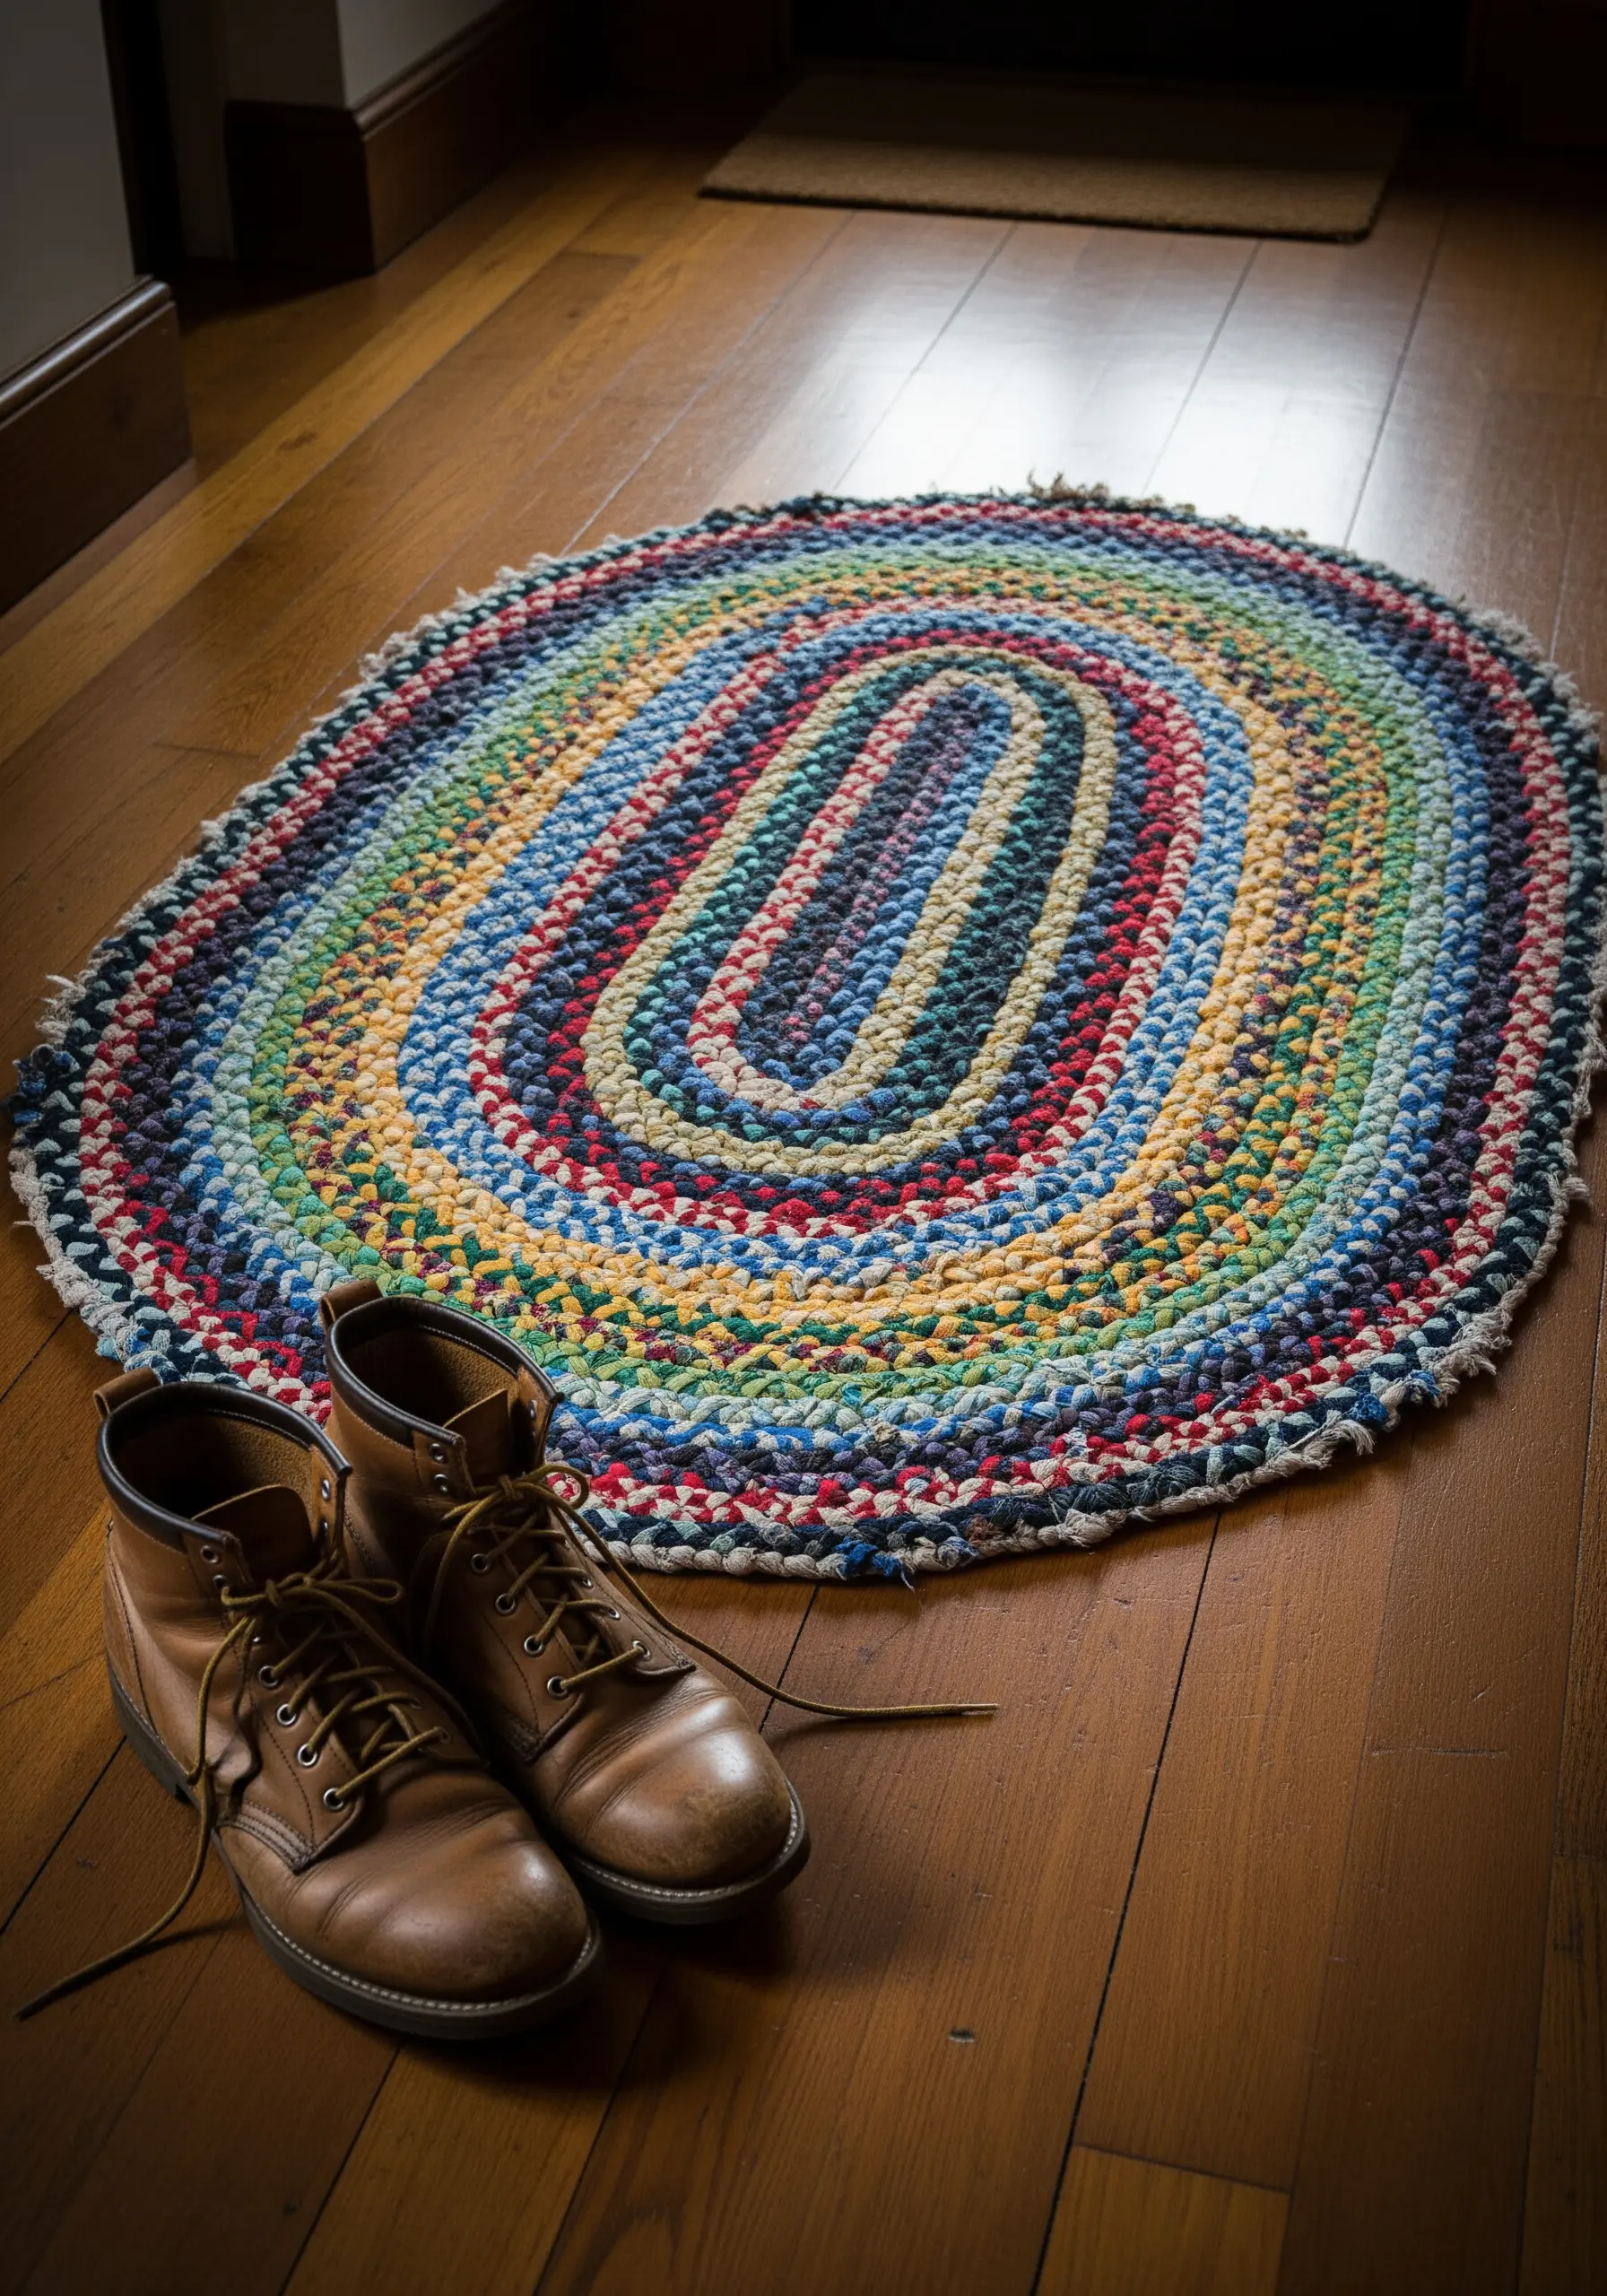
Braided rugs utilize long strips of scrap fabric, making them sustainable and durable.
When lacing the braids together, use a strong linen thread and stitch horizontally through the loops.
Keep the tension consistent to prevent the rug from cupping or rippling in the center.
These handmade art pieces that feel personal and heartfelt last for decades.
19. Arrange buttons for mosaic-style impact
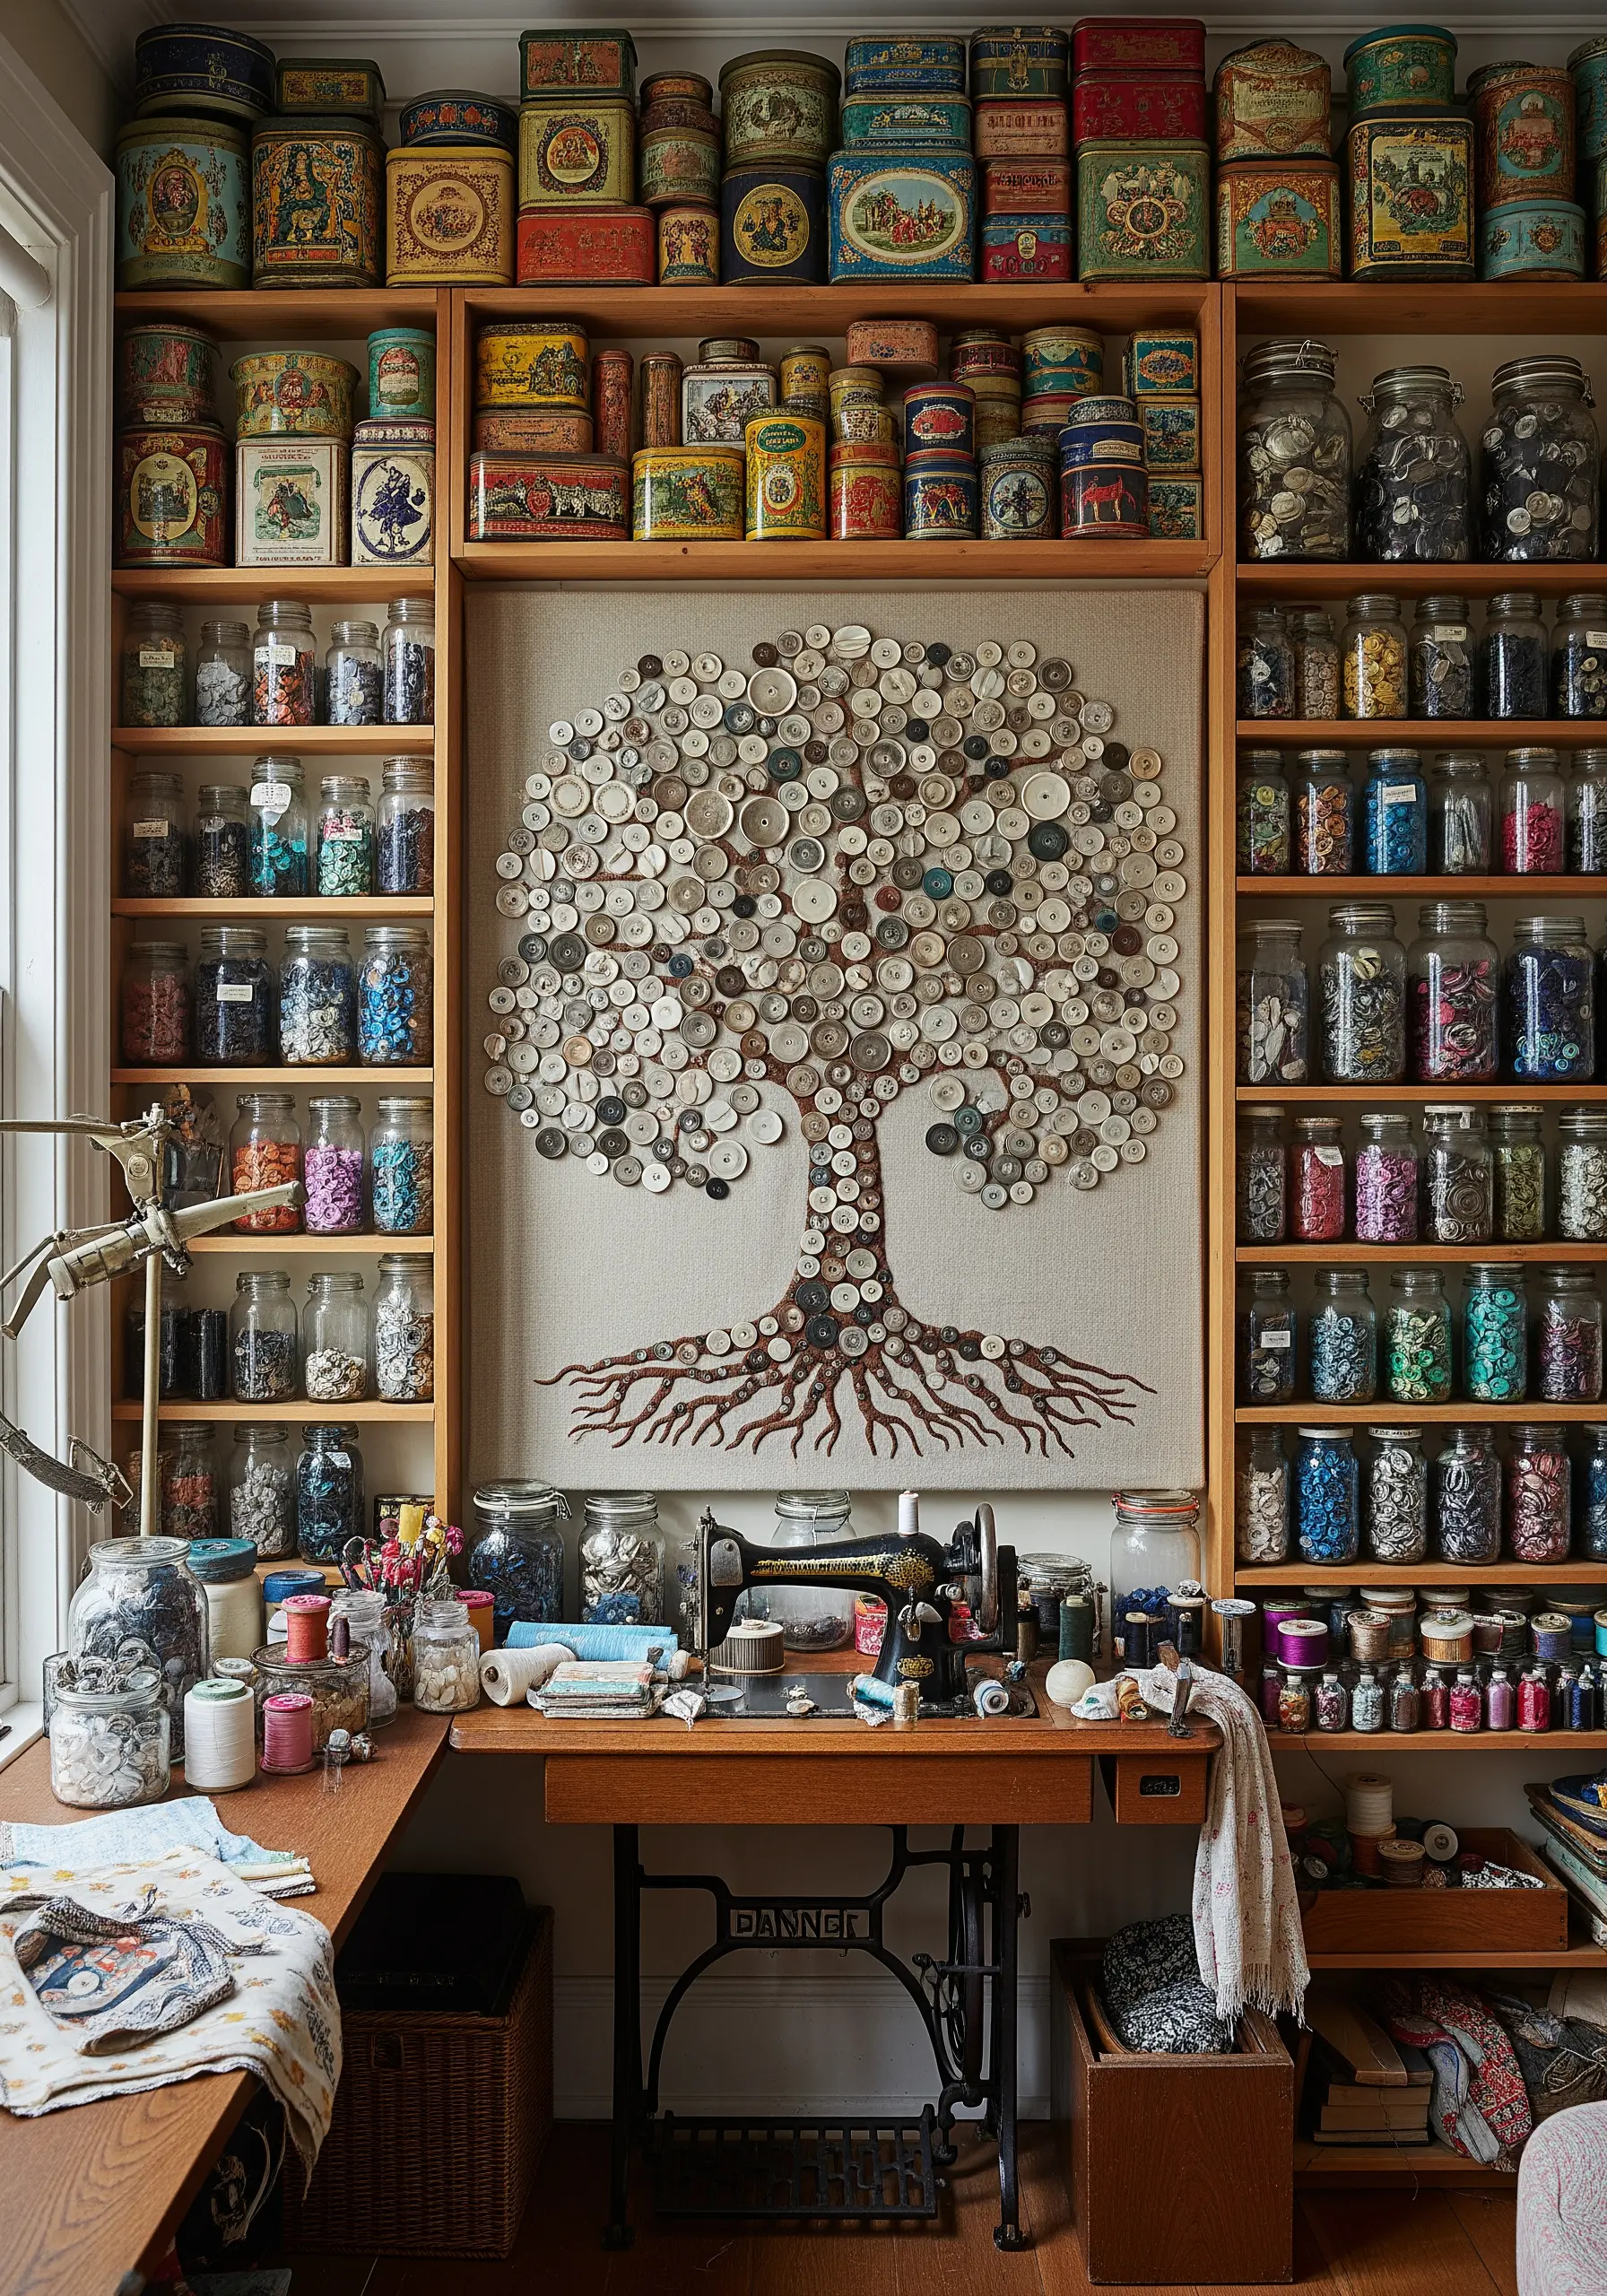
Button art mimics the look of pointillism or mosaic tiles using vintage fasteners.
Sort your buttons by size and shade before gluing or stitching to ensure a balanced gradient.
Overlap edges slightly to hide the background fabric and create a dense, encrusted surface.
Discover mixed media techniques for embroidery lovers who crave unique art.
20. Improve durability with the tent stitch
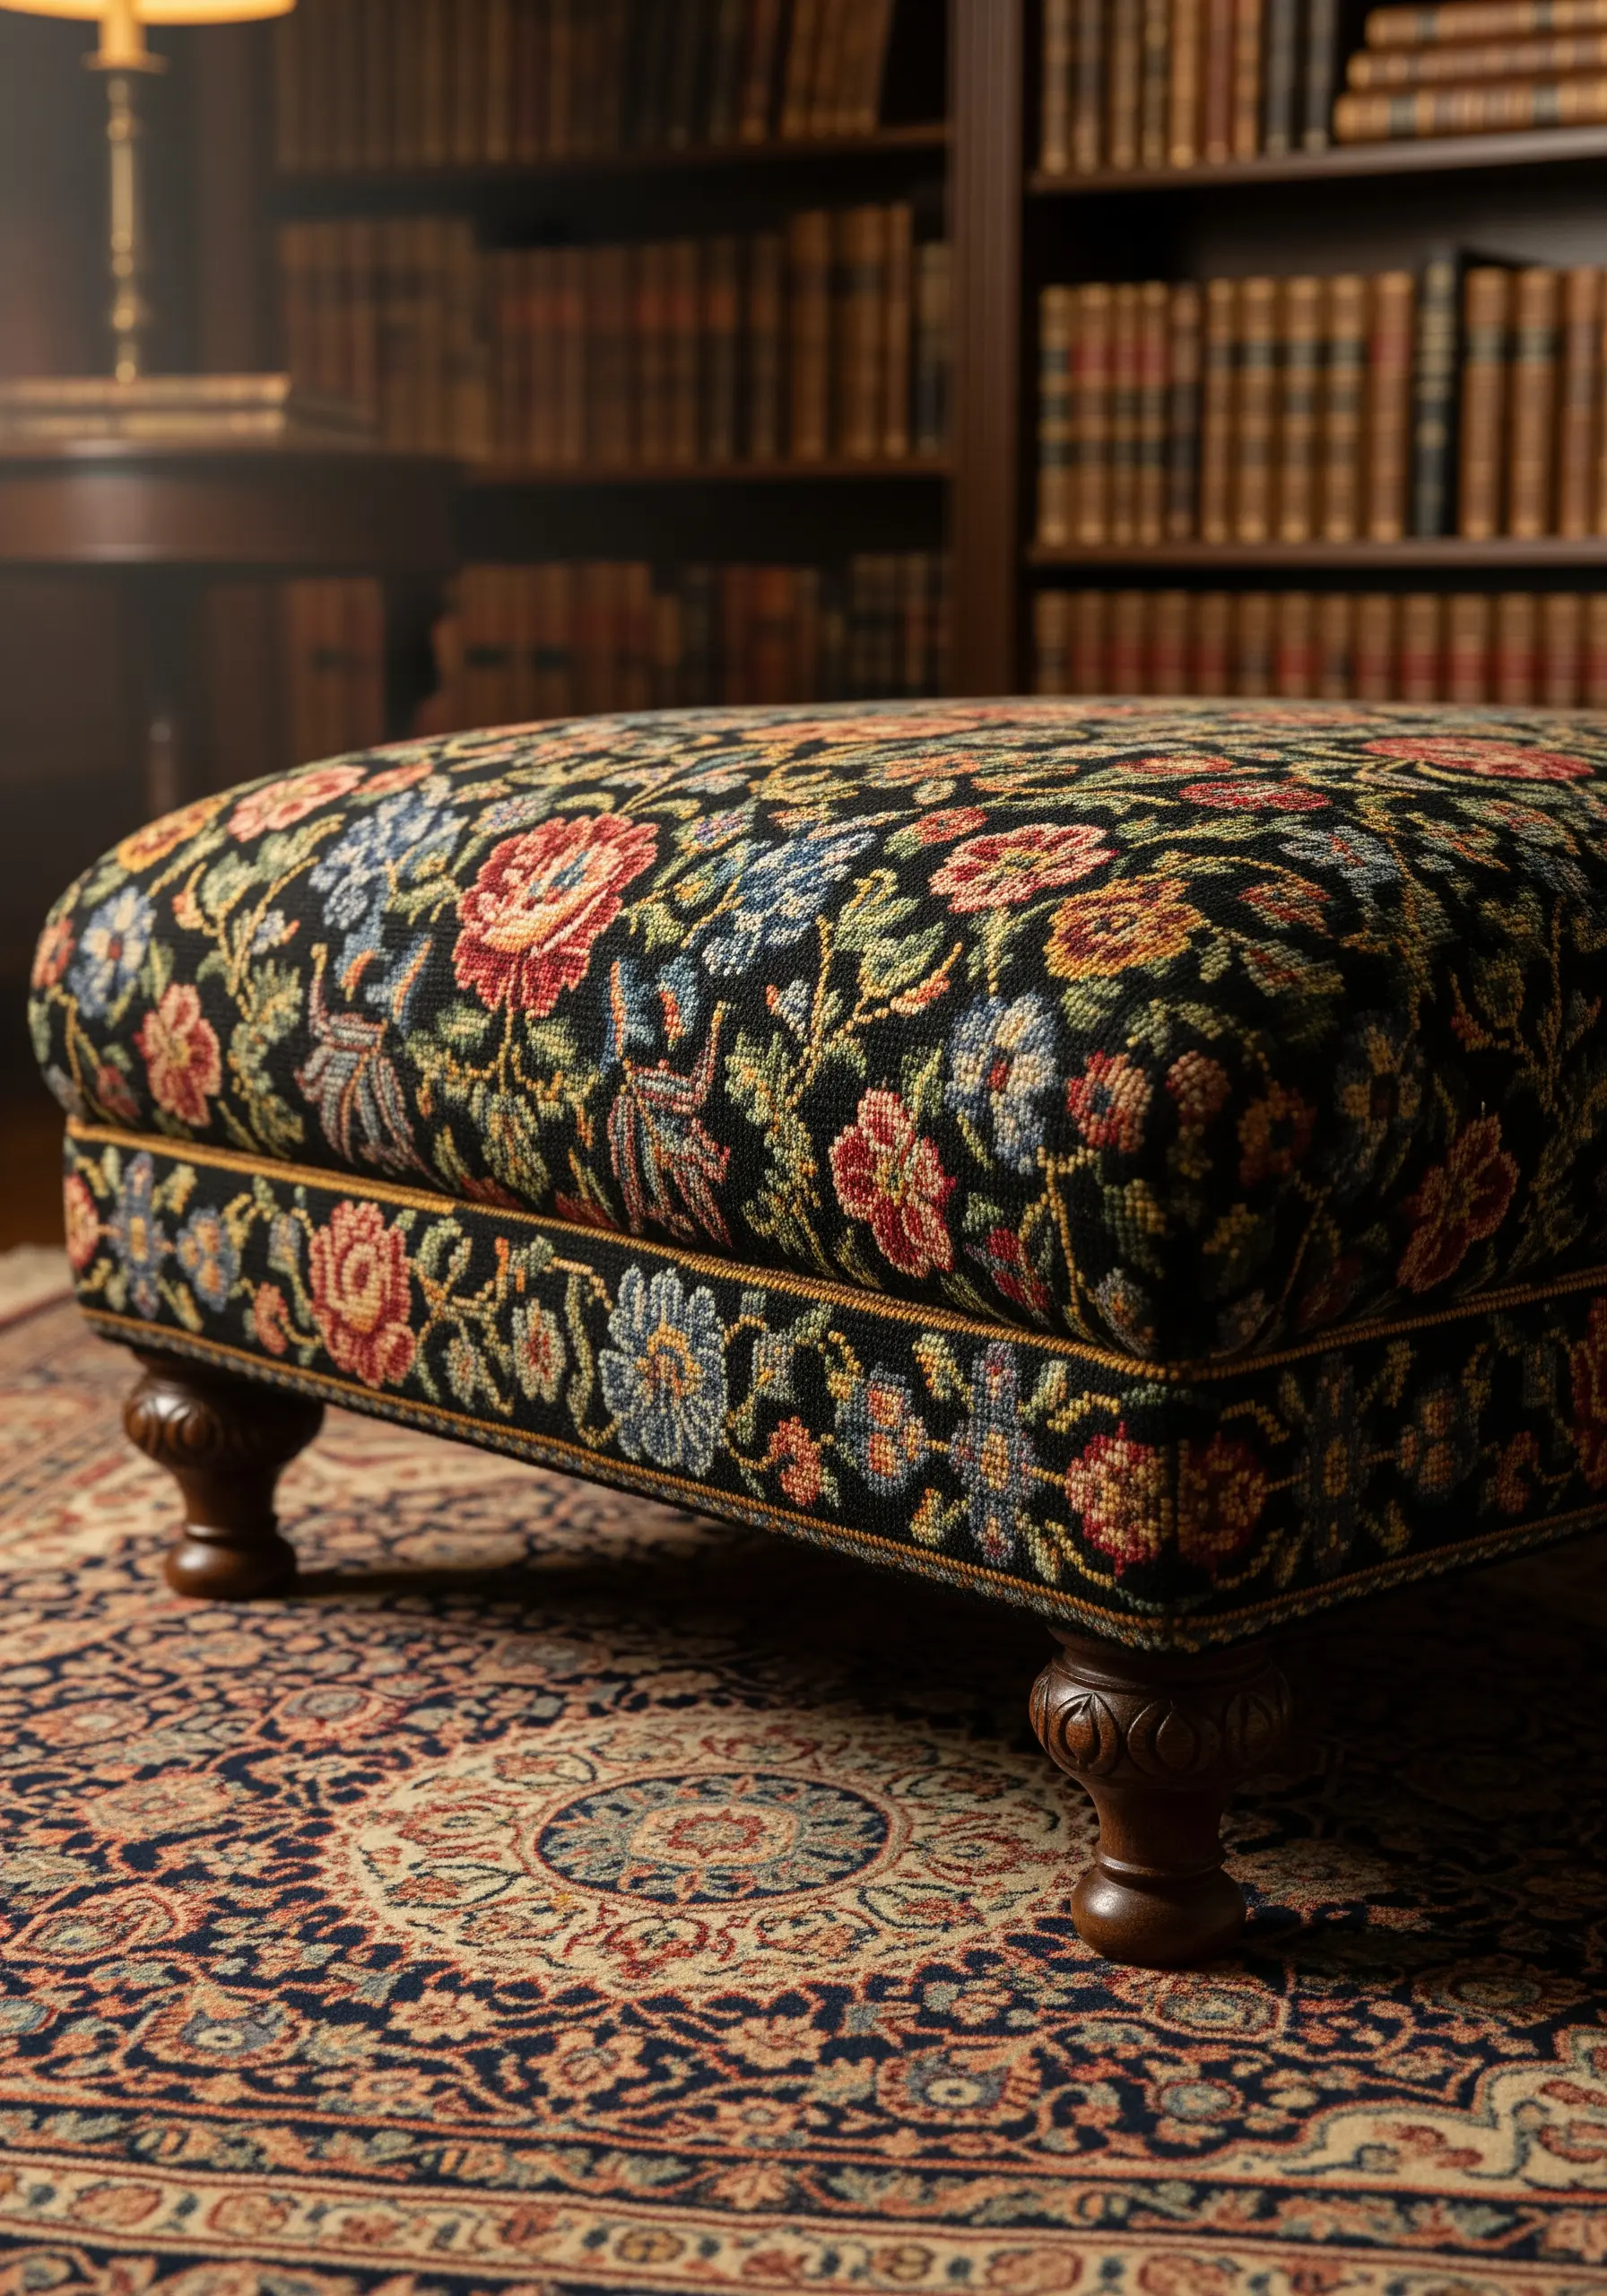
Needlepoint footstools require a stitch that can withstand wear, like the basketweave or continental tent stitch.
These stitches provide a thick backing on the reverse side, preventing the canvas from distorting over time.
Use wool yarn for its resilience and ability to bounce back from pressure.
Try floral embroidery wall decor projects that bring gardens indoors without watering.
21. Use gingham grids for effortless smocking
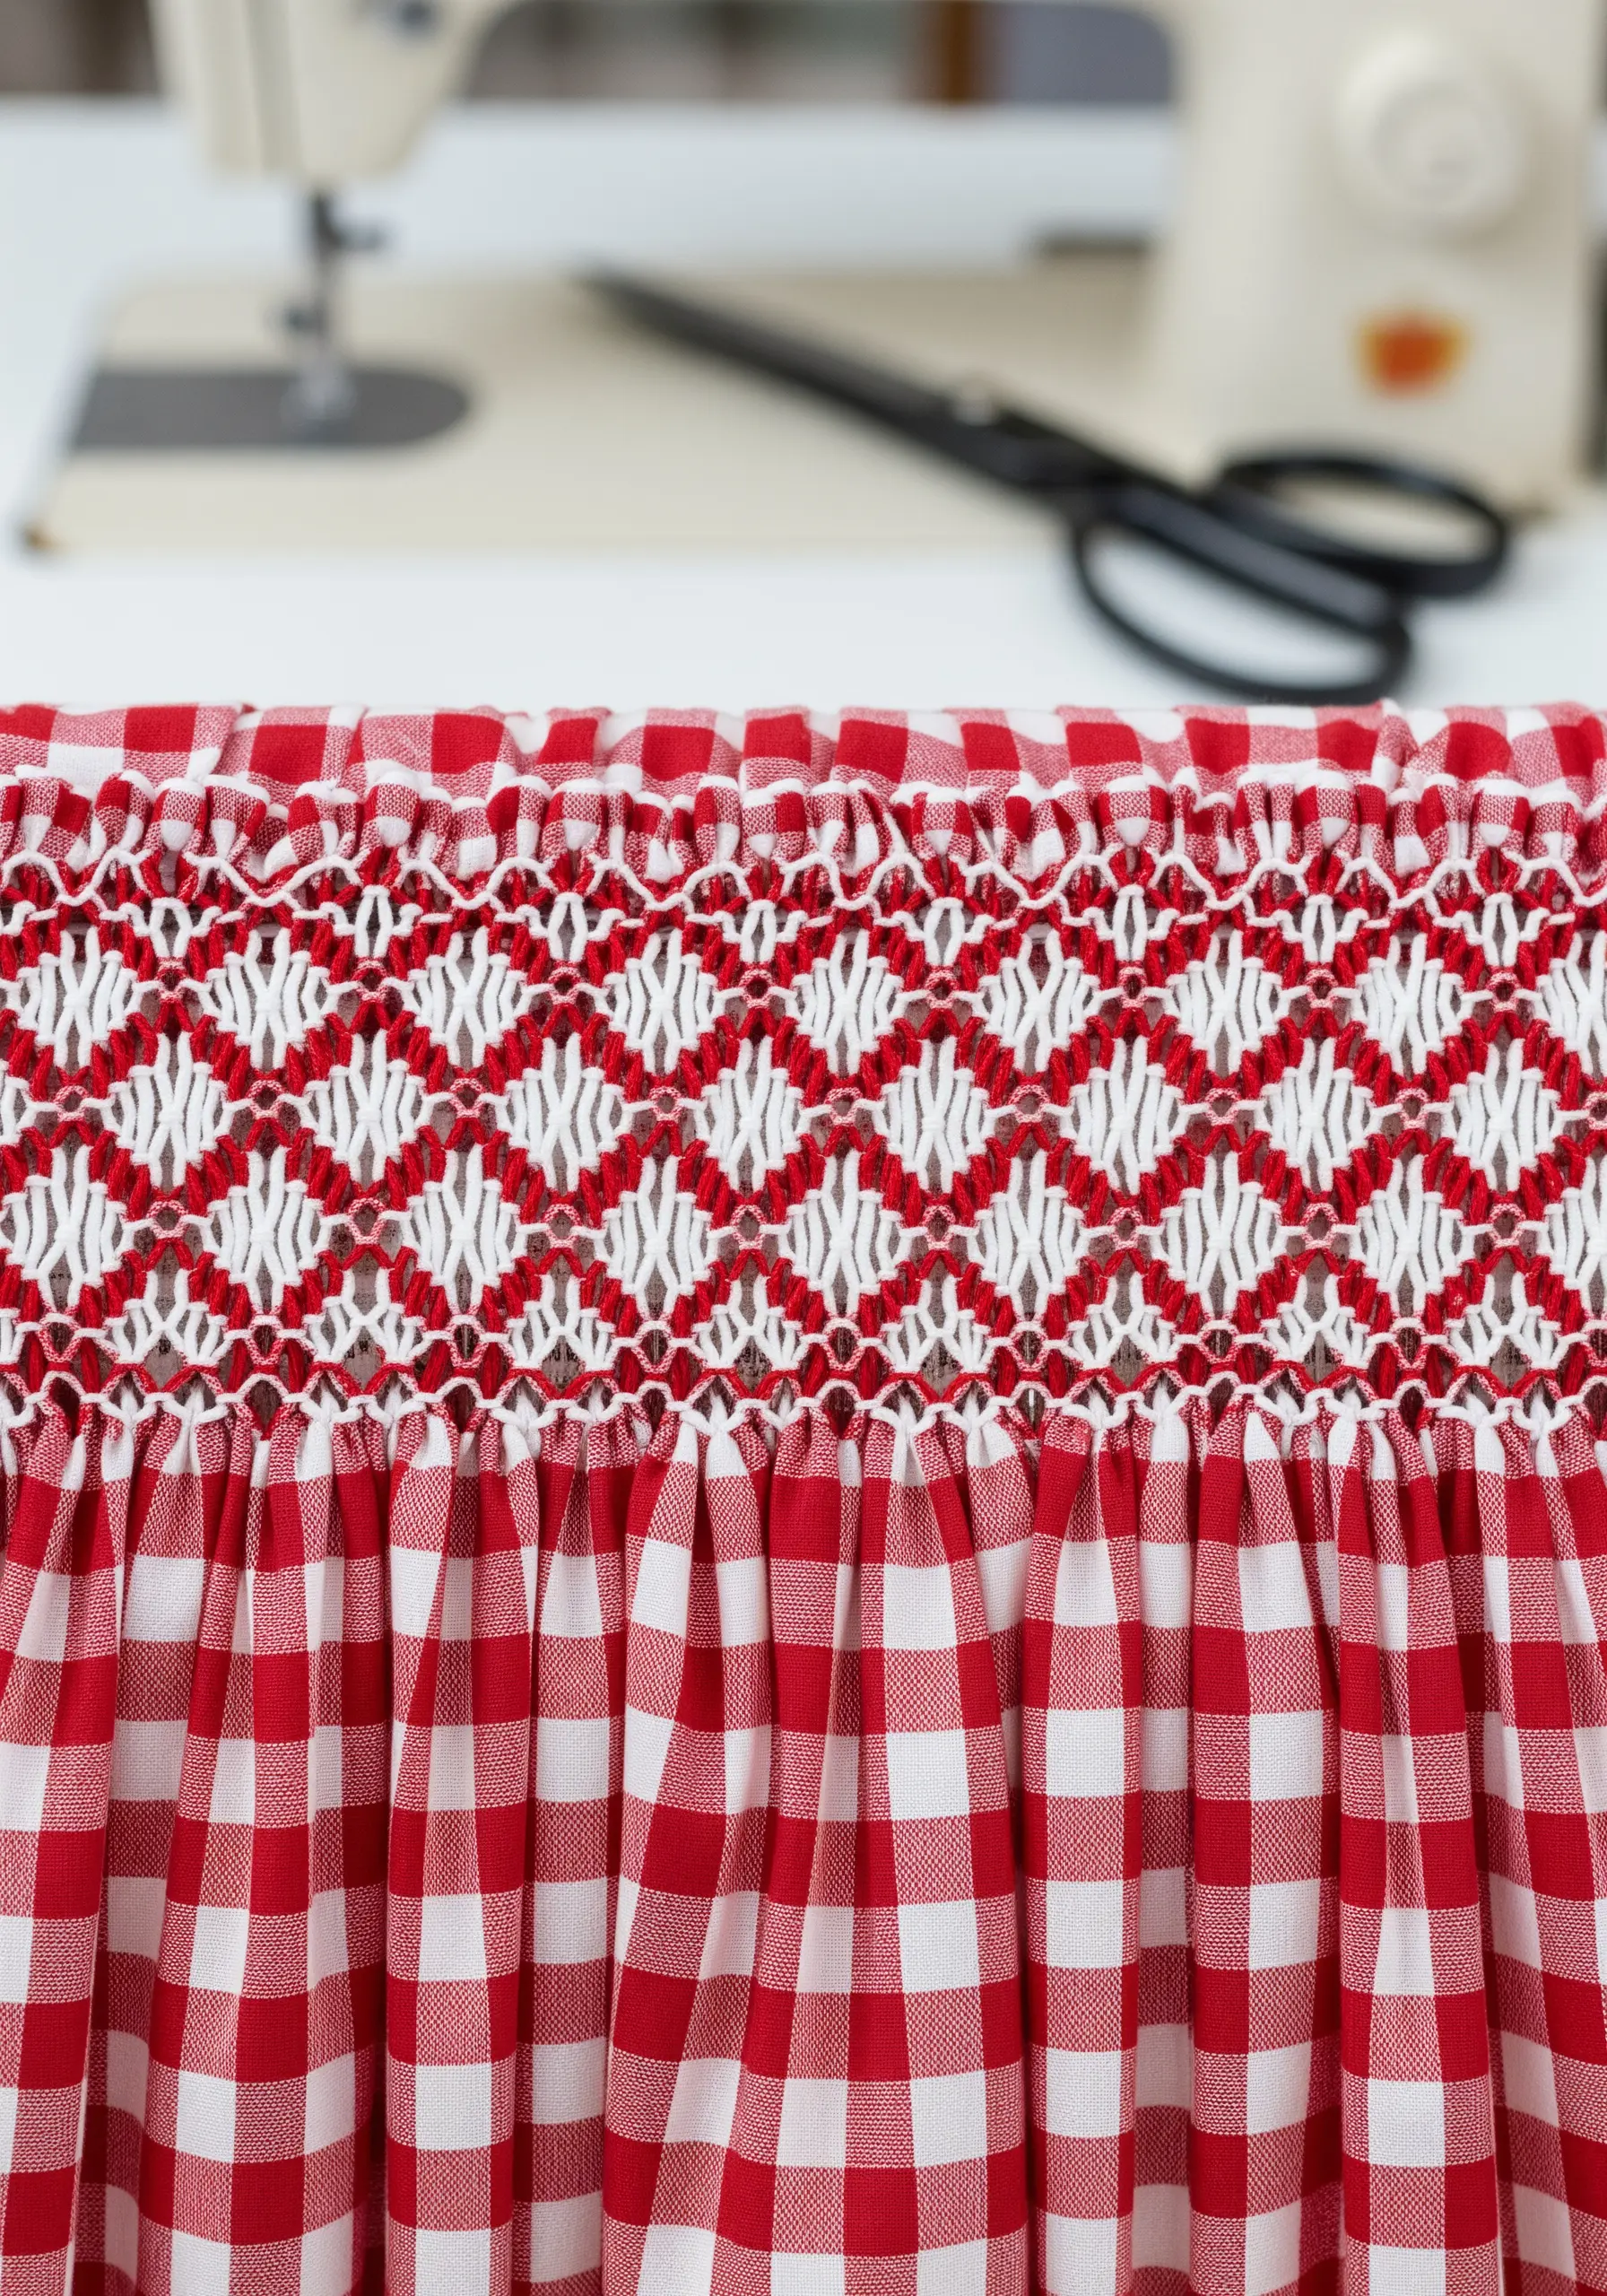
Gingham fabric provides a built-in grid, making it the perfect base for learning honeycomb smocking.
Gather the pleats using the checks as a guide to ensure perfect vertical alignment.
Surface embroidery on the peaks of the pleats adds elasticity and decoration simultaneously.
These are rustic cottagecore table linen embroidery motifs for cozy countryside kitchens.
22. Layer latch hook yarn for dense pile
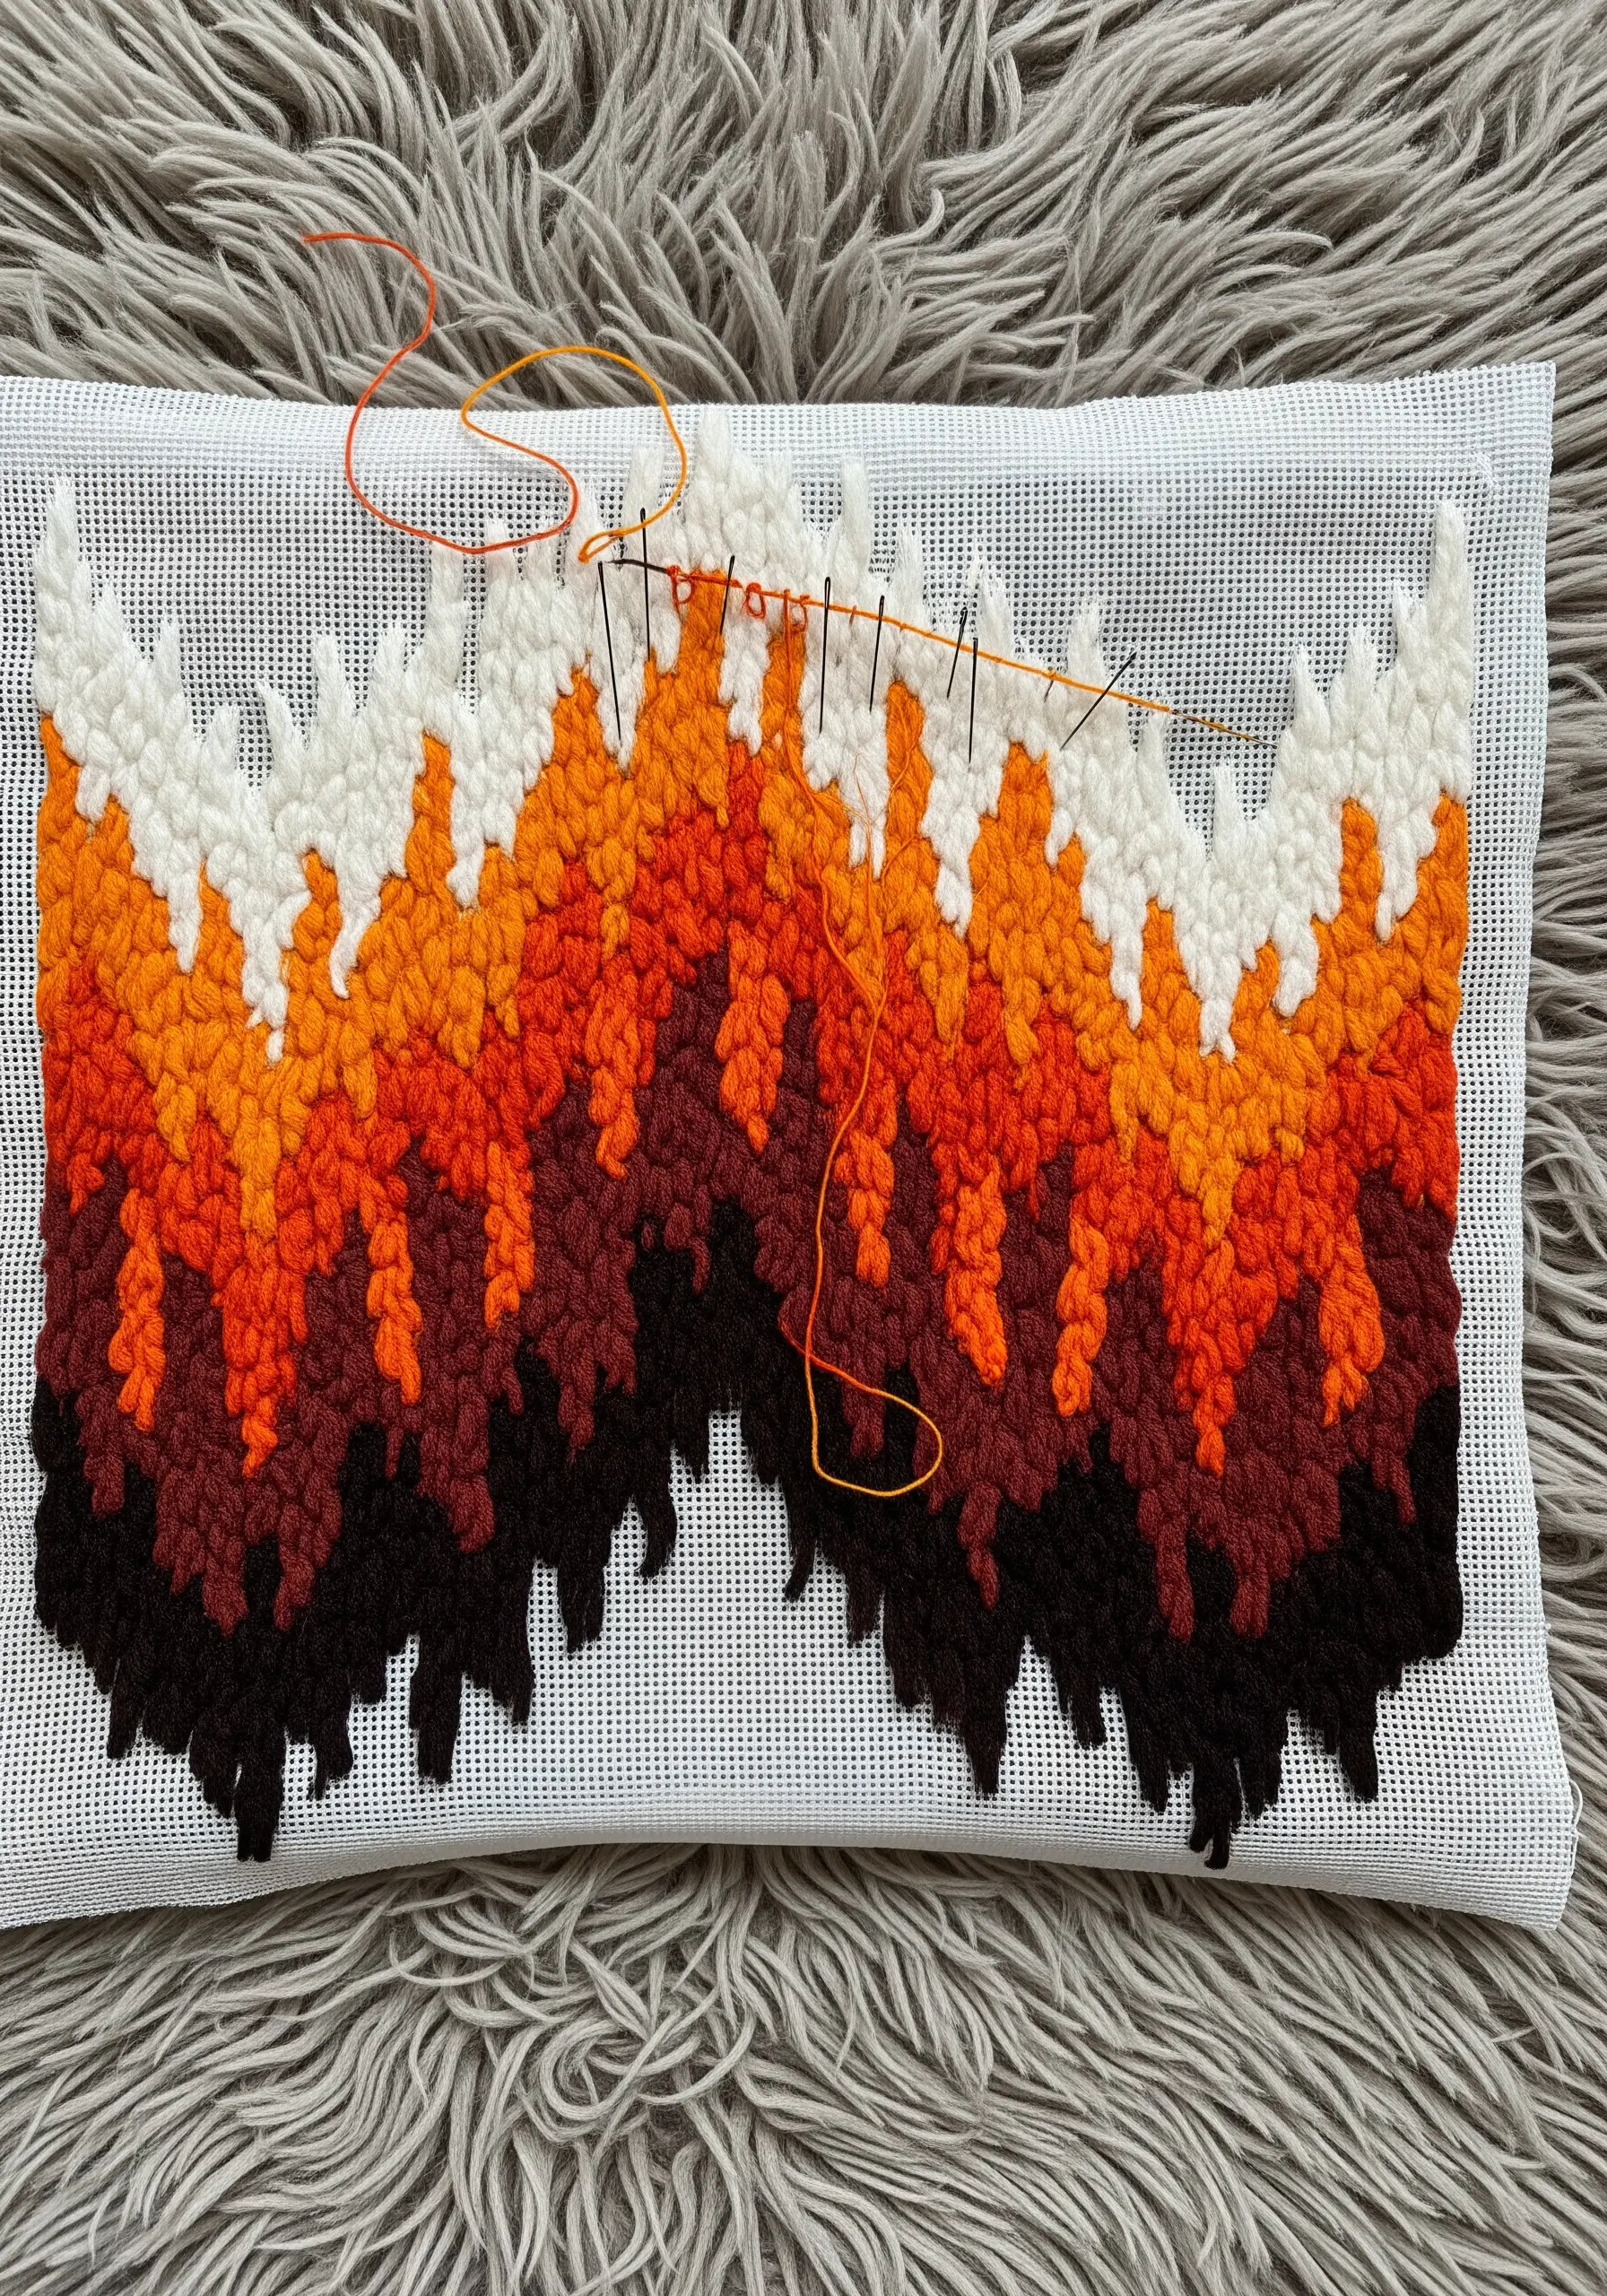
Latch hooking allows you to build a shaggy, rug-like texture that works beautifully as wall art.
To create a gradient ‘flame’ effect, mix two shades of yarn in a single knot where colors transition.
Keep the yarn strands uniform in length unless you are intentionally sculpting the surface for 3D effects.
Look into inspiring yarn wall art projects from pinterest creators.
23. Maintain radial tension in Teneriffe lace
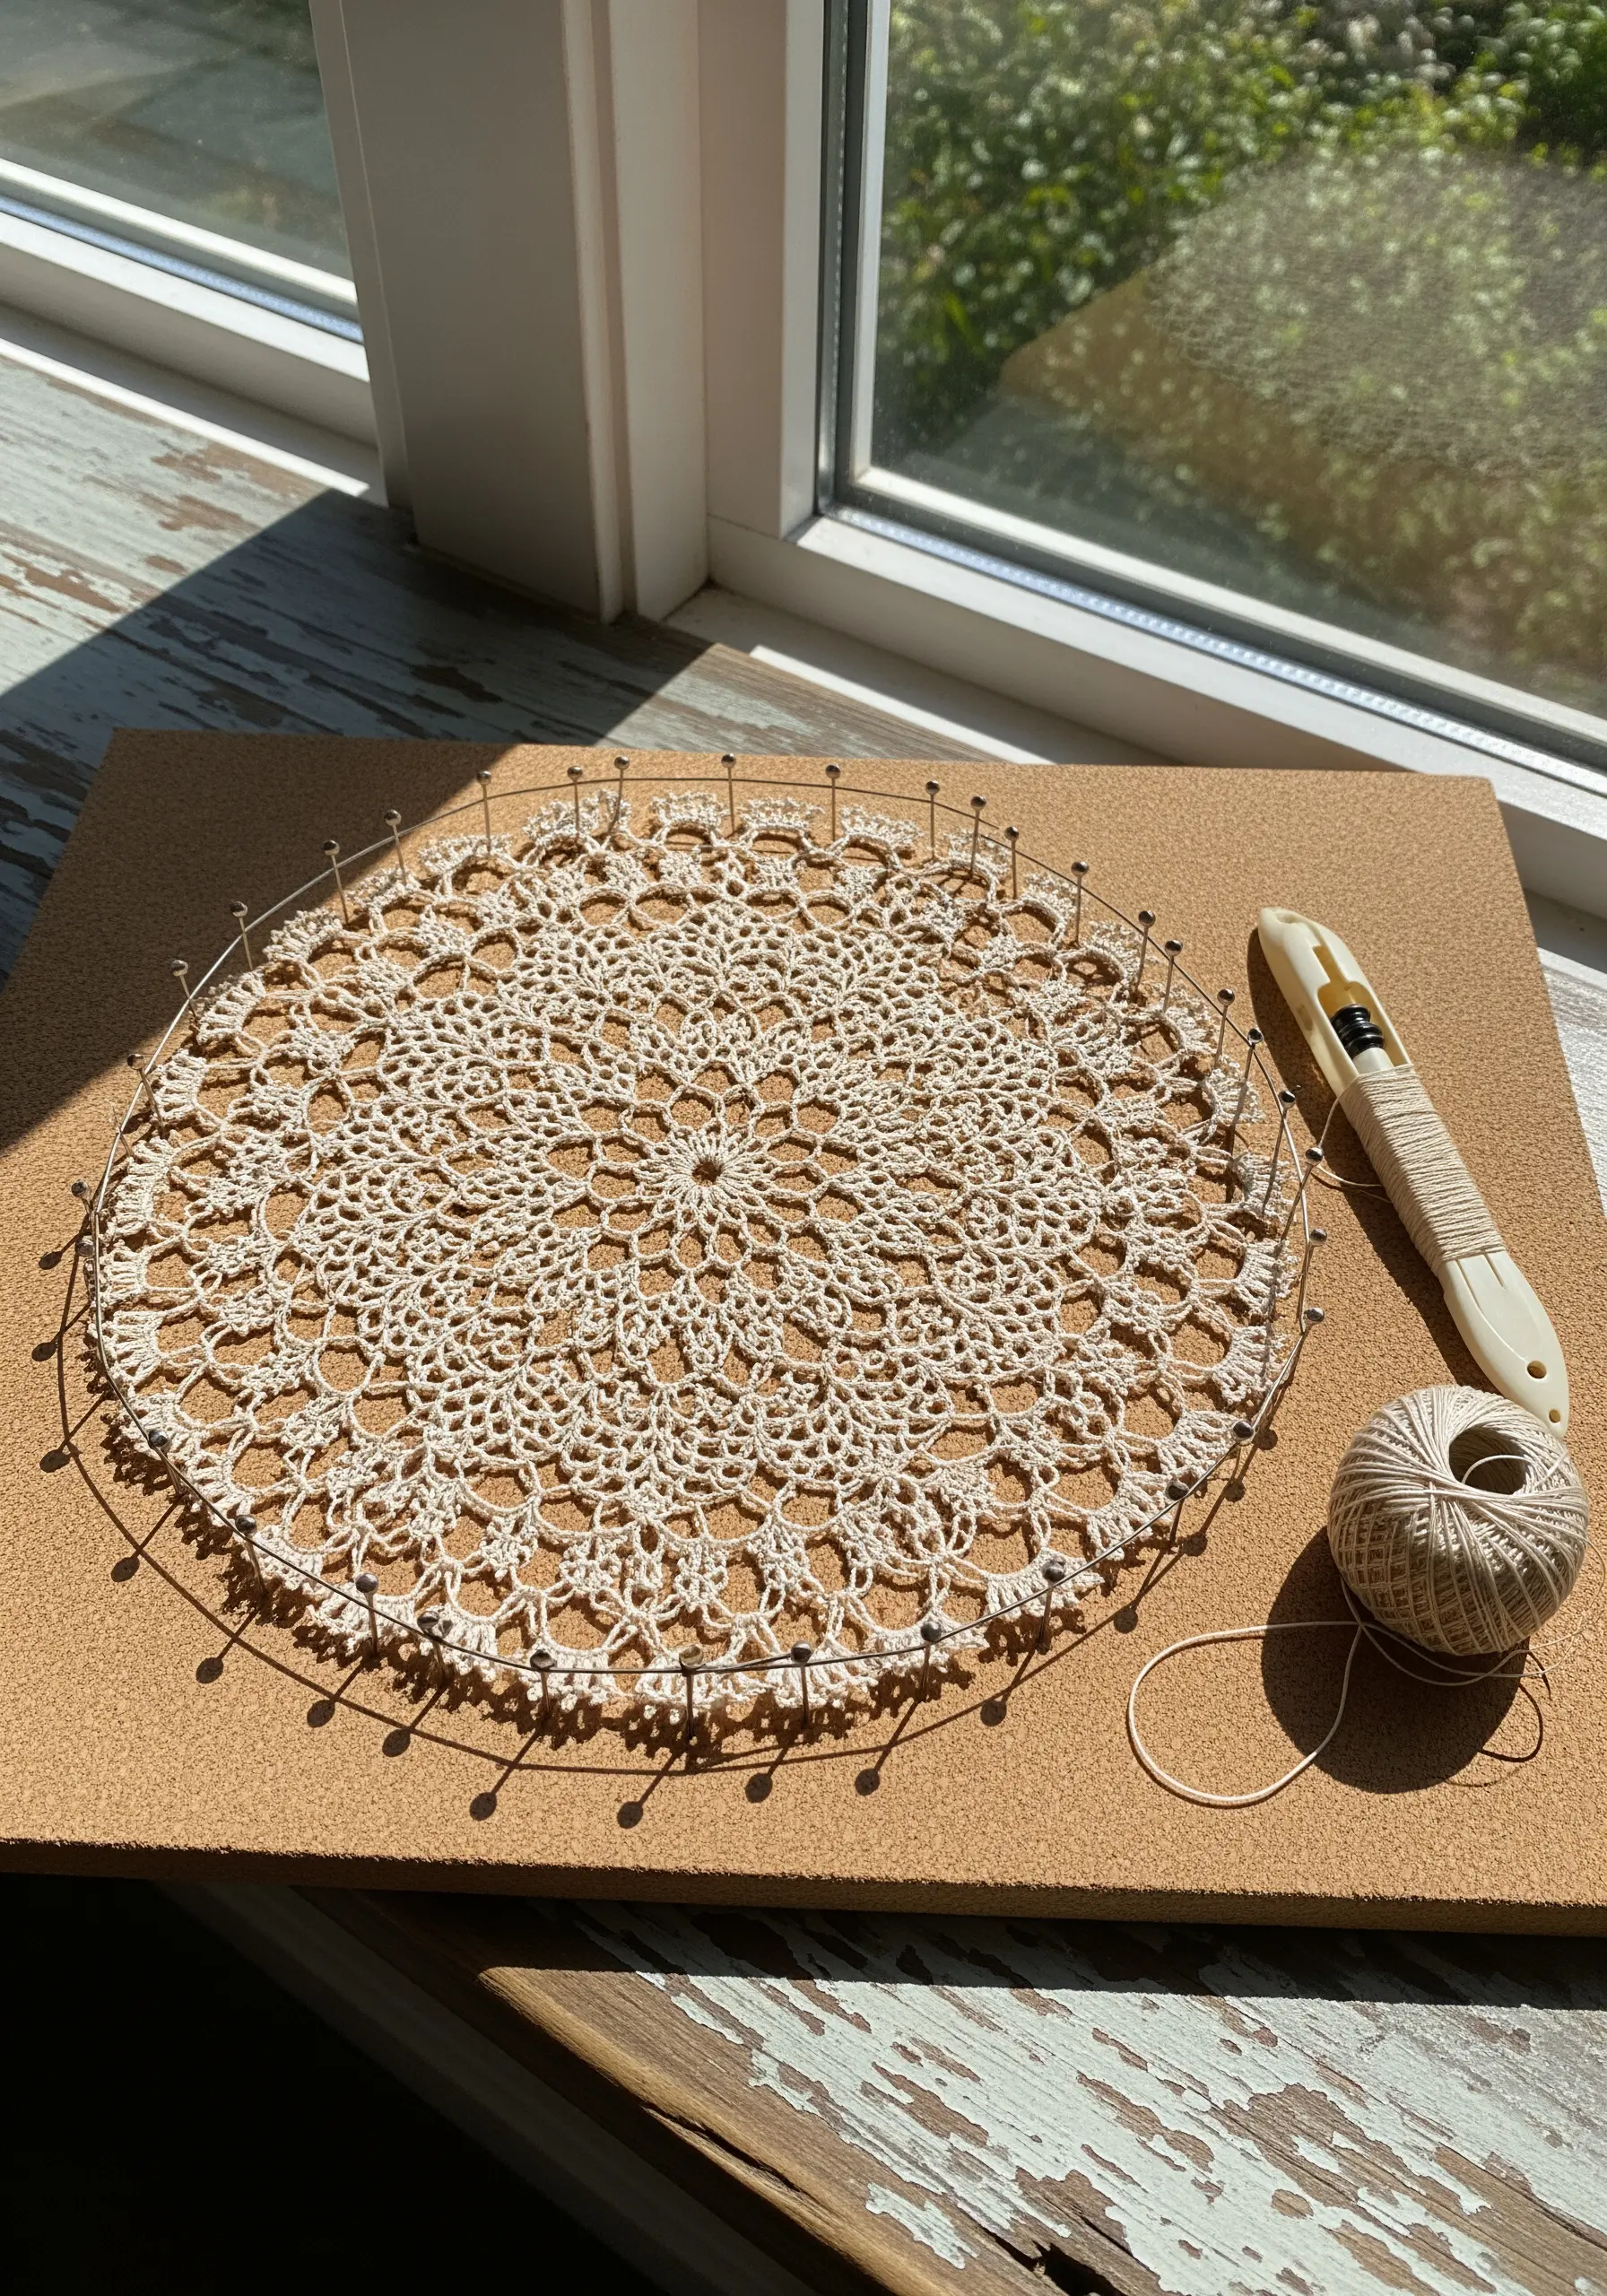
Sol lace, or Teneriffe lace, is built on a radial loom of pins, weaving threads from the center outward.
The key is keeping the center spoke threads tight; if they sag, the intricate weaving will lose its definition.
Use a blunt tapestry needle to weave without splitting the structural threads.
These are handmade mixed fiber ideas perfect for gifting this season.
24. Secure felt appliqué with blanket stitches

Felt appliqué is charming and accessible, but the edge finish defines the quality.
Use a contrasting thread and an evenly spaced blanket stitch to secure the edges and prevent peeling.
Adding beads or sequins to the felt layers introduces sparkle without complex stitching.
Perfect for festive tote bag embroidery ideas to personalize holiday gift bags.
25. Achieve solid blacks in silhouette embroidery
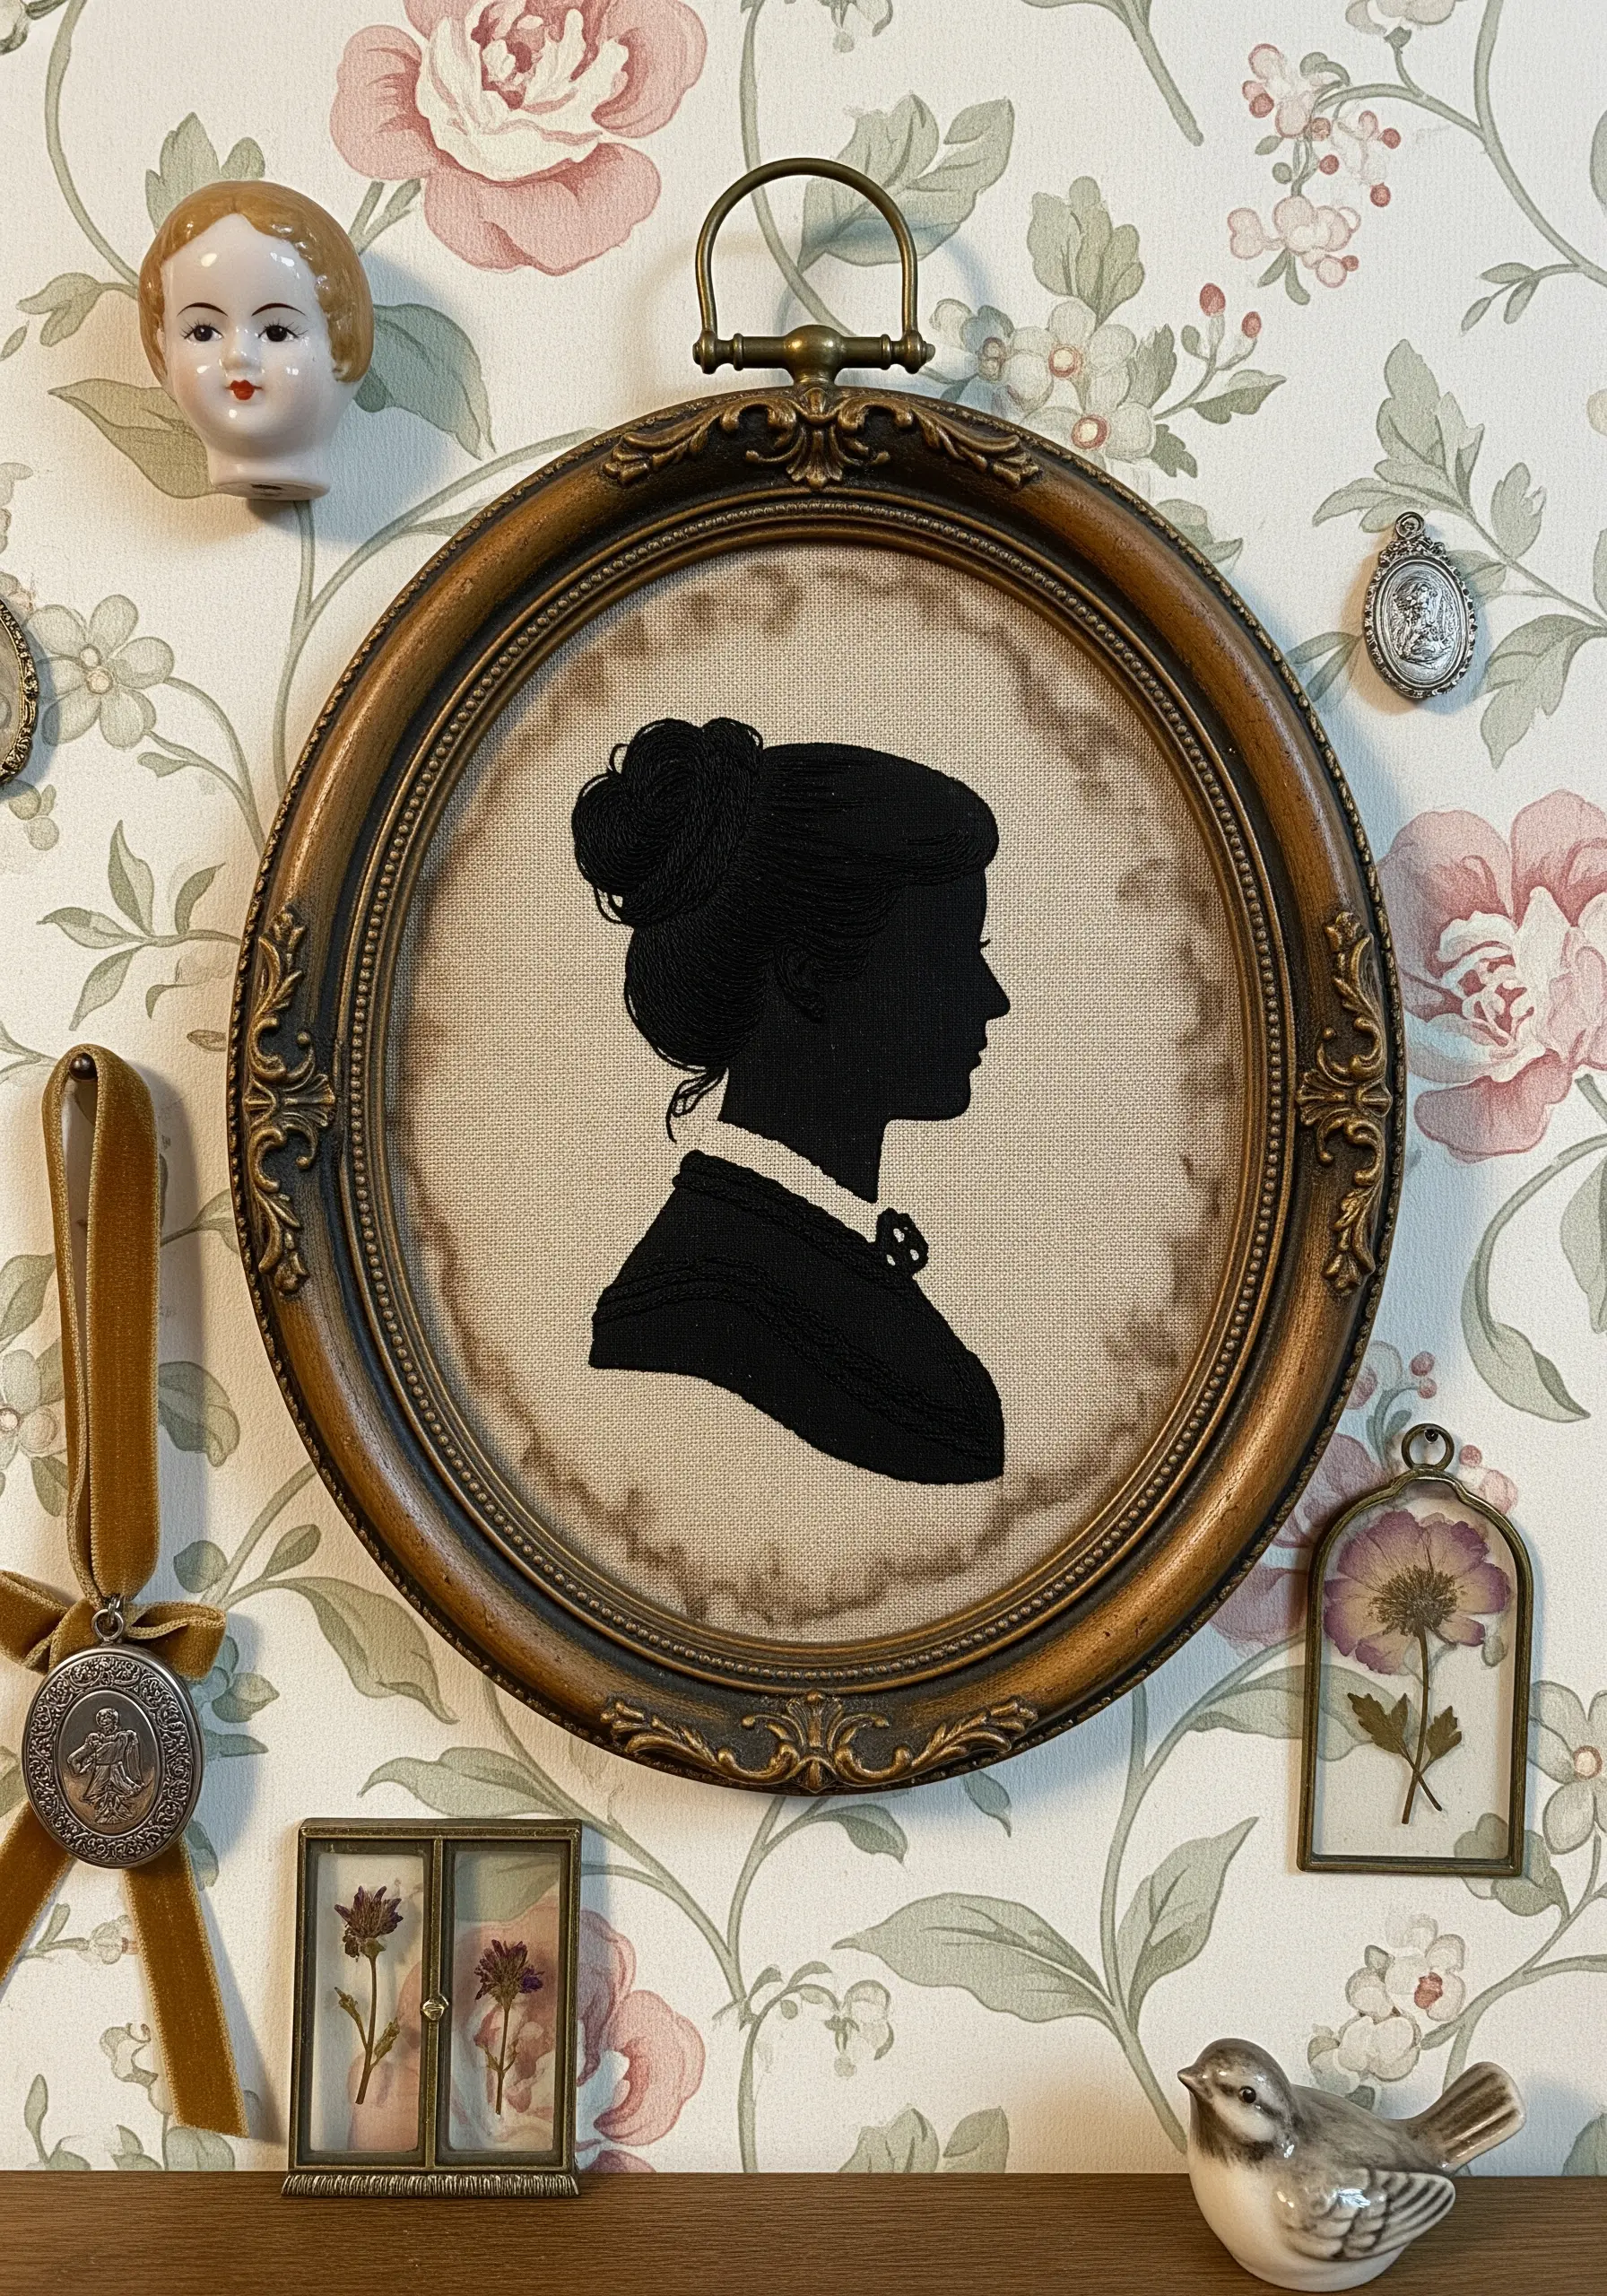
Silhouette portraits require a dense, impenetrable fill to look like traditional paper cuts.
Use a split stitch to outline the profile first, then fill with satin stitch or long-and-short stitch.
Change the angle of your stitches to follow the contours of the hair, adding subtle texture to the shadow.
Try micro embroidery portrait designs that make narrow hallway walls feel luxurious.
26. Sharpen patchwork with high contrast fabrics
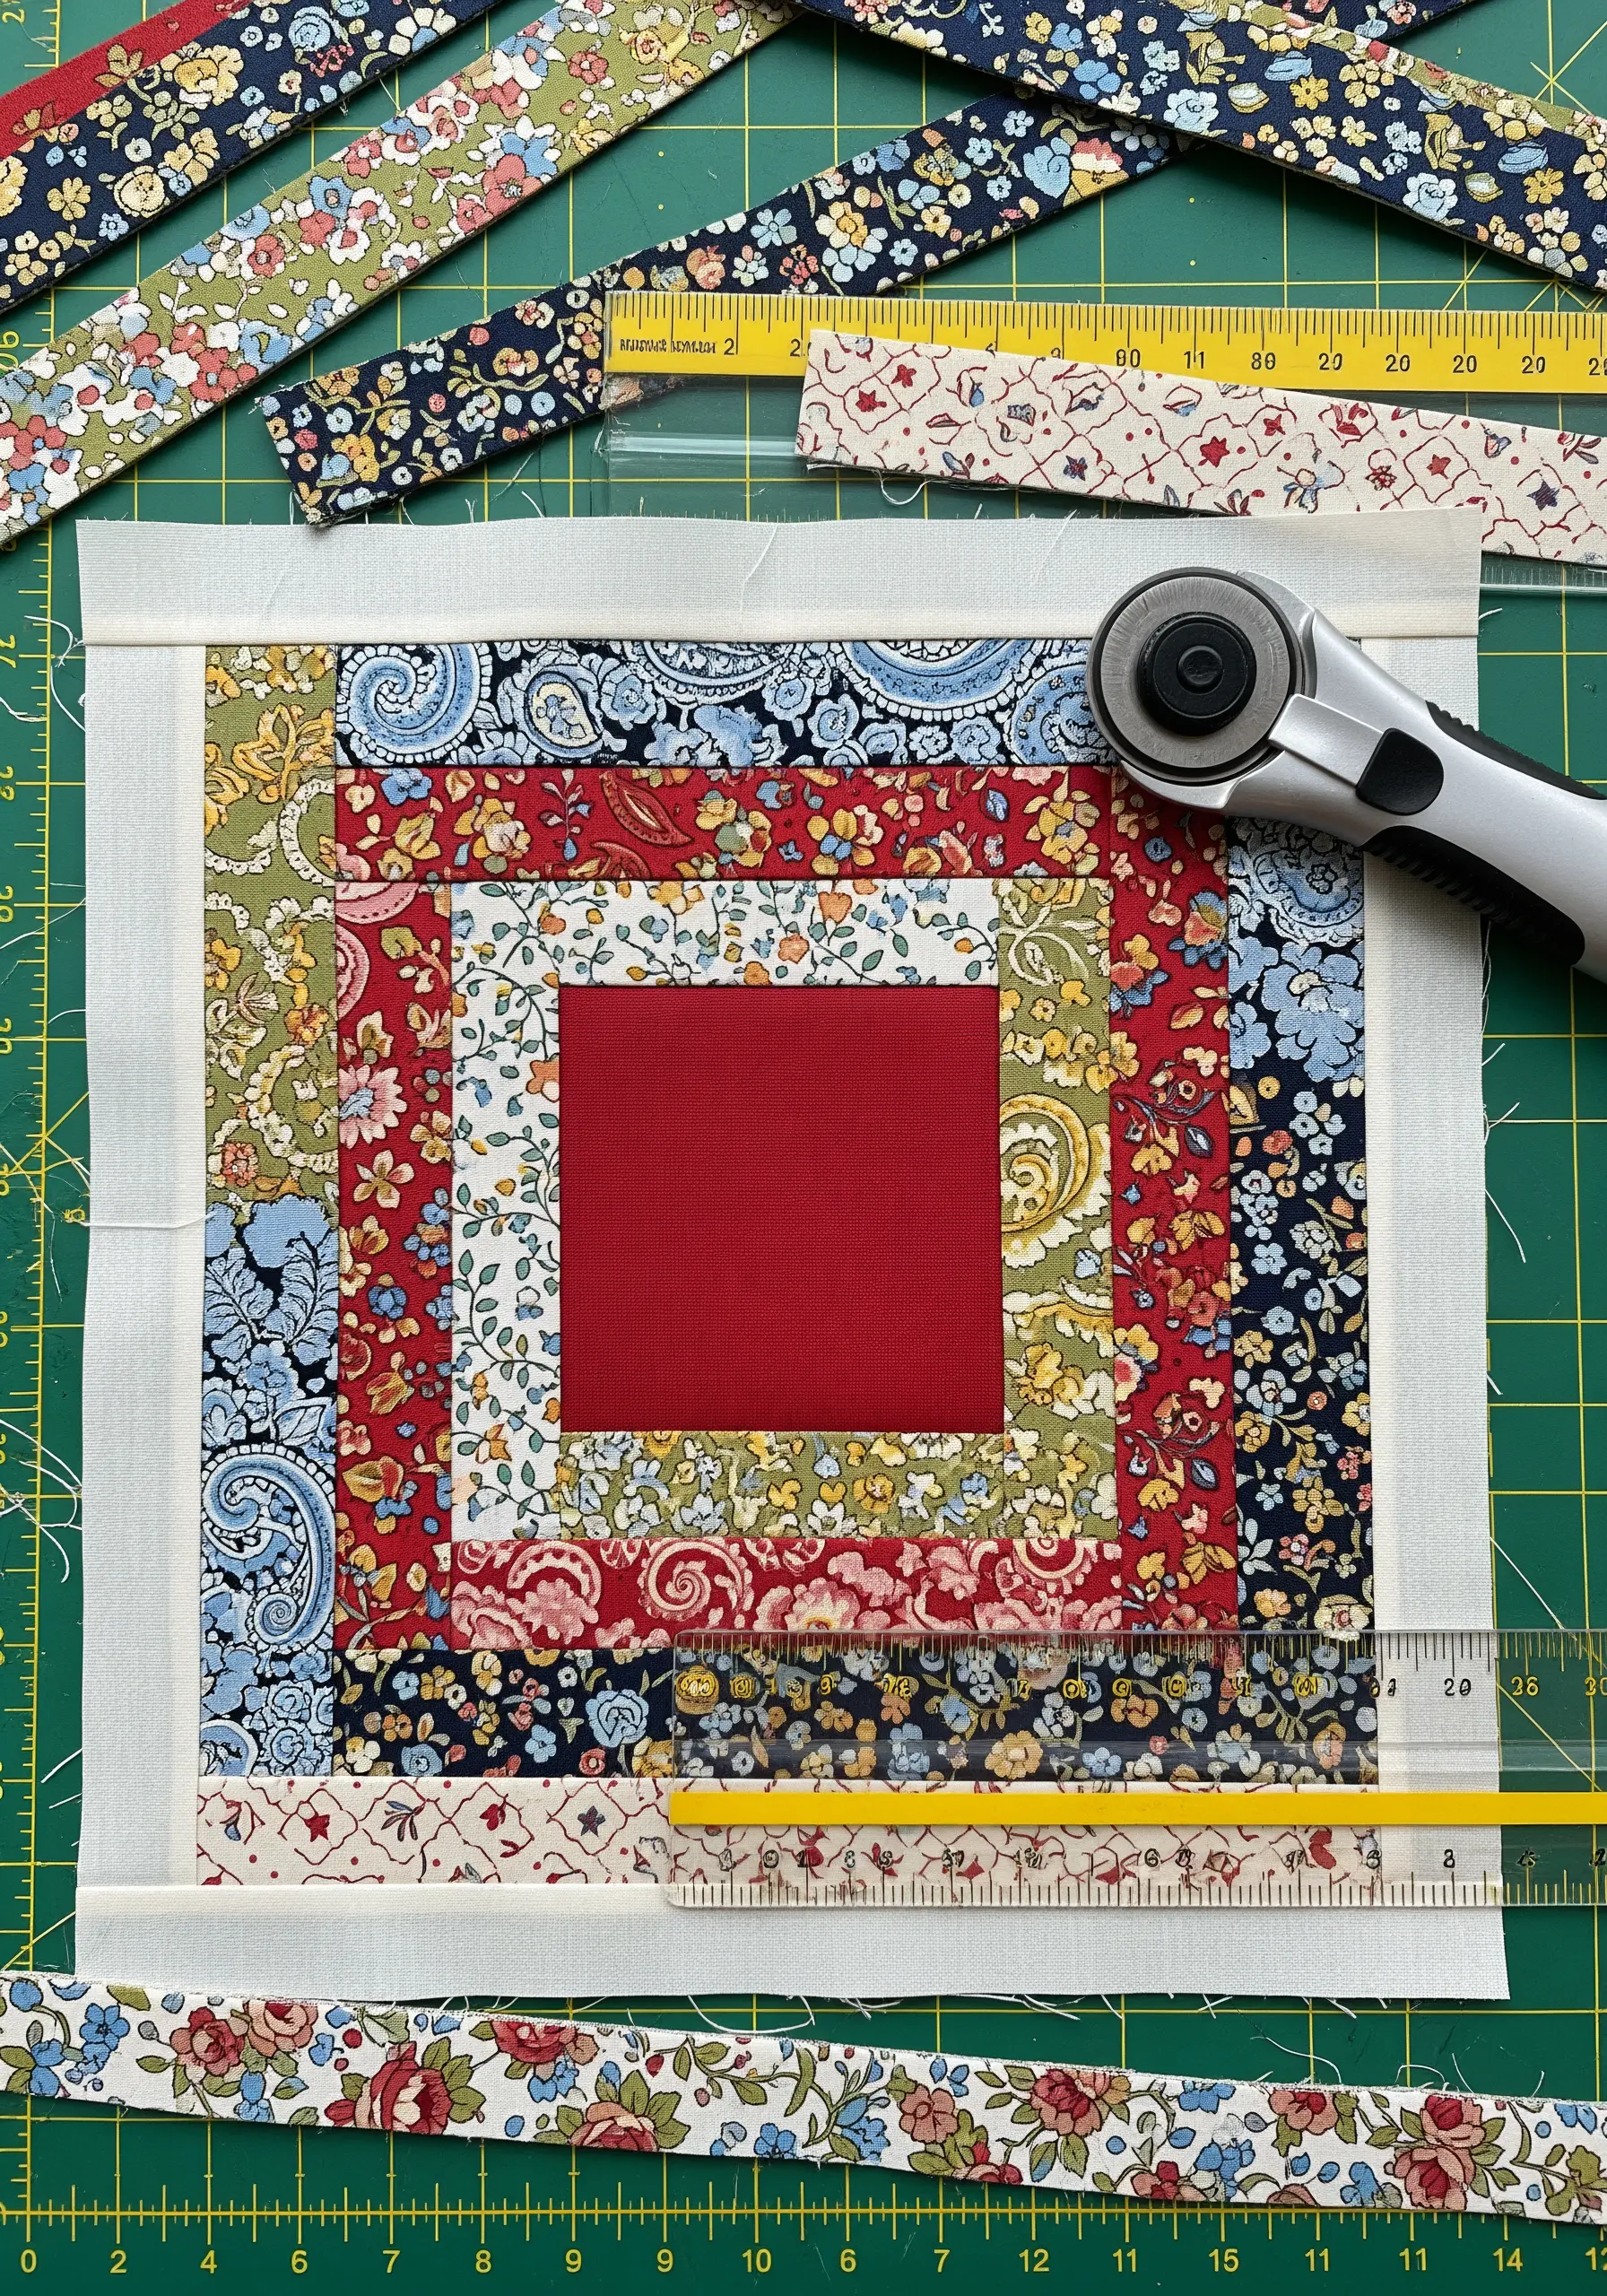
The Log Cabin block is visually striking because of the interplay between light and dark strips.
Precision in cutting and a consistent quarter-inch seam allowance are non-negotiable for square blocks.
Use a rotary cutter for clean edges that make piecing the strips significantly more accurate.
Use this for fabric collage embroidery backgrounds that instantly elevate any design.
27. Shape pincushions with strong thread subdivision
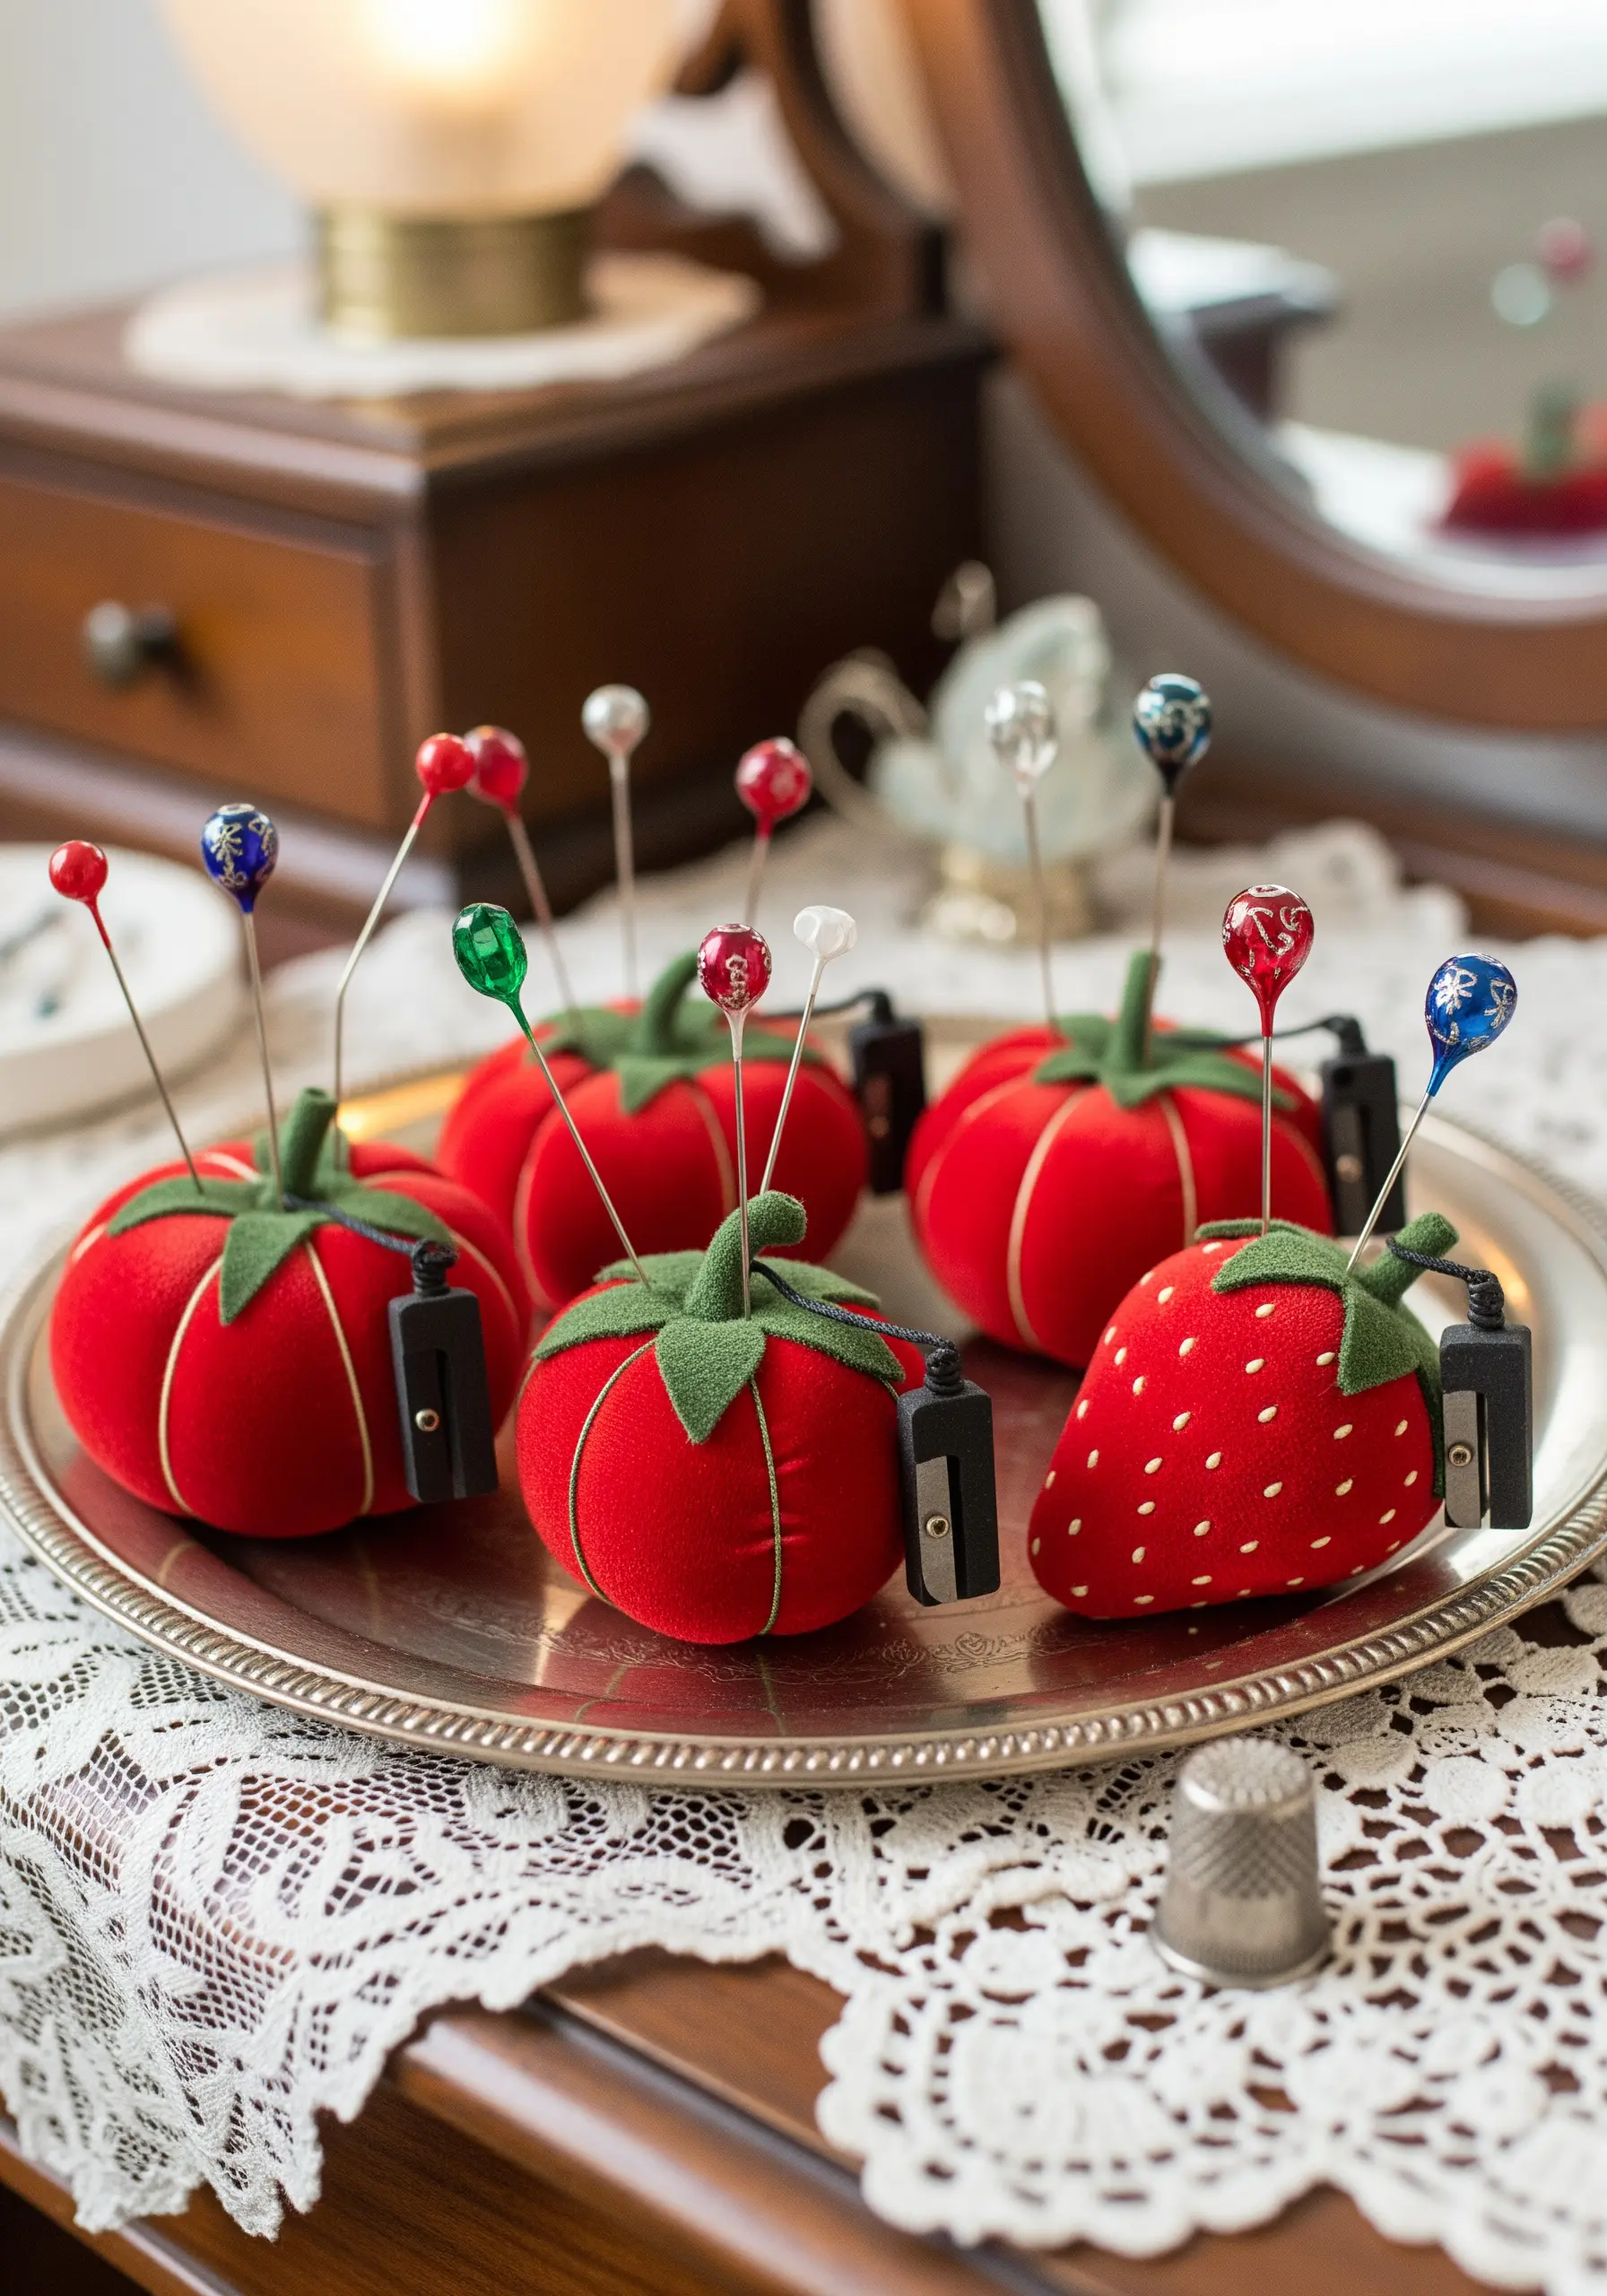
The classic tomato pincushion gets its shape from the thread tension dividing the segments.
Stuff the velvet or felt body firmly with walnut shells or wool roving before applying the external shaping threads.
Pull the thread tightly through the center to create the characteristic pumpkin-like indentations.
These are small diy home accents that look expensive but are easy to make.
28. Embrace raw edges for organic landscapes
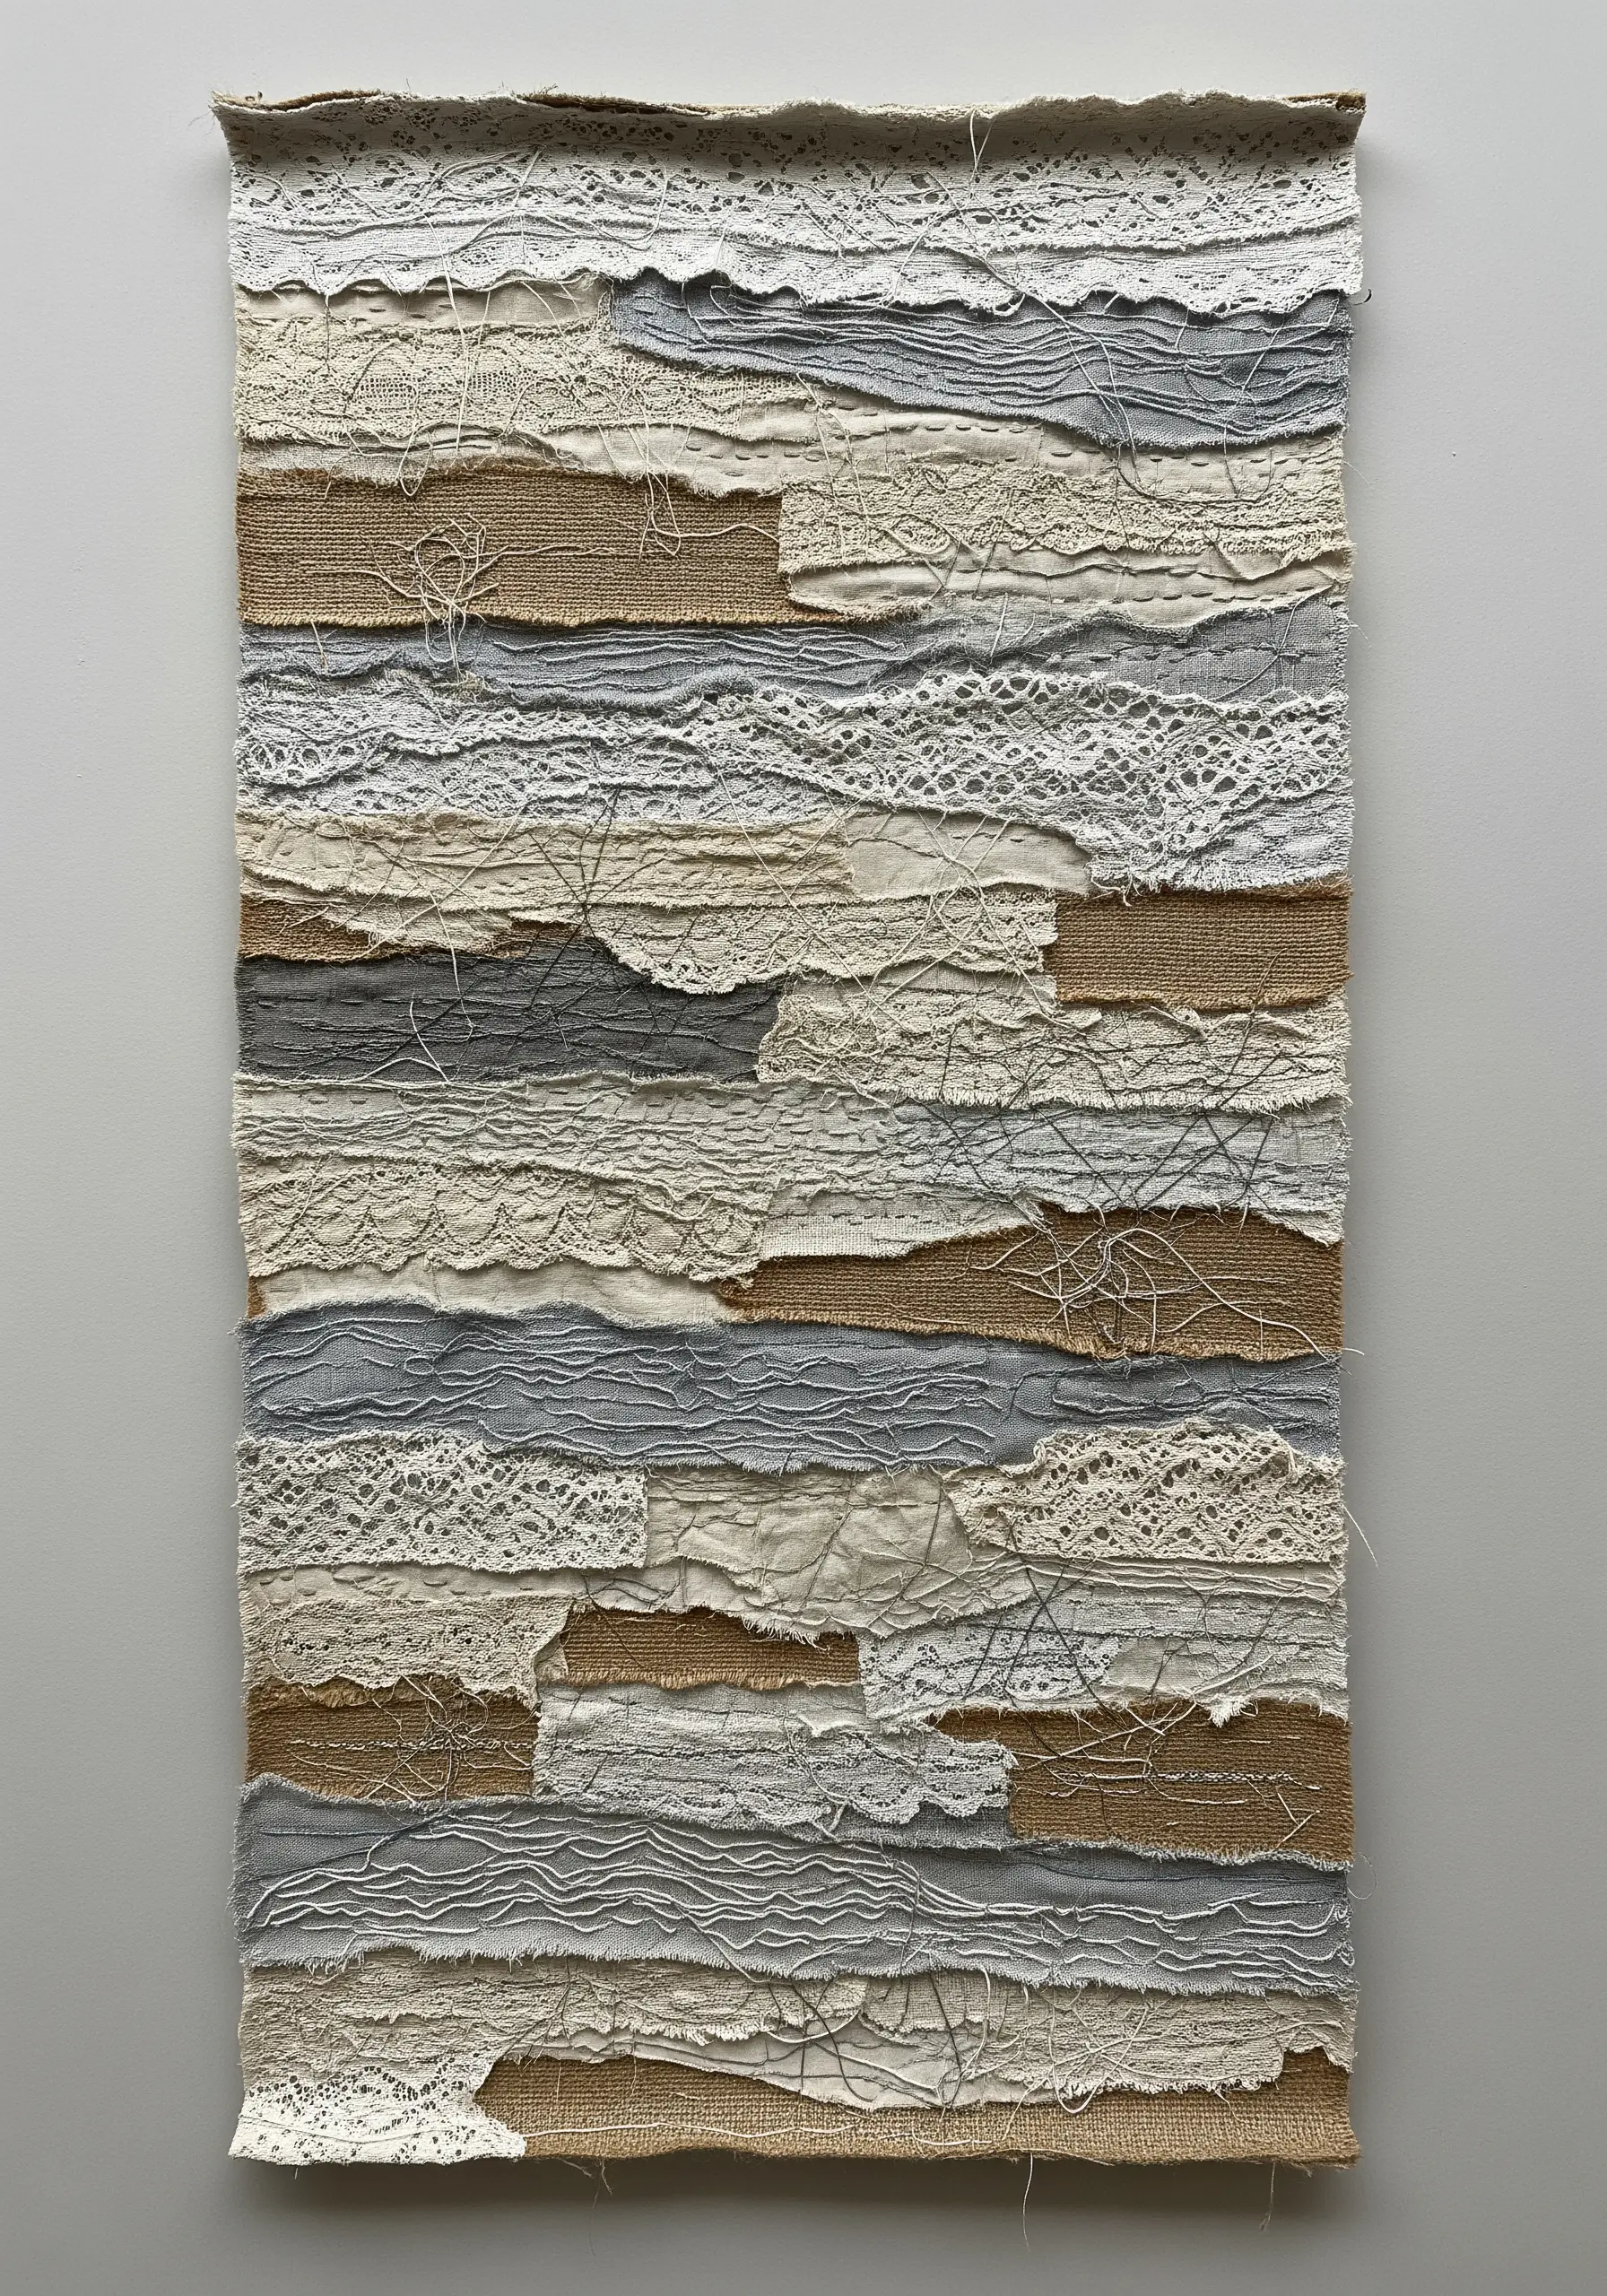
Creating textile landscapes often benefits from the raw, frayed edges of layered linen strips.
Instead of hemming, let the threads unravel slightly to mimic the natural textures of earth and stone.
Secure layers with a simple running stitch that blends into the weave of the fabric.
Explore layered thread collage projects that blend embroidery with mixed media textures.
29. Pre-punch holes for paper embroidery
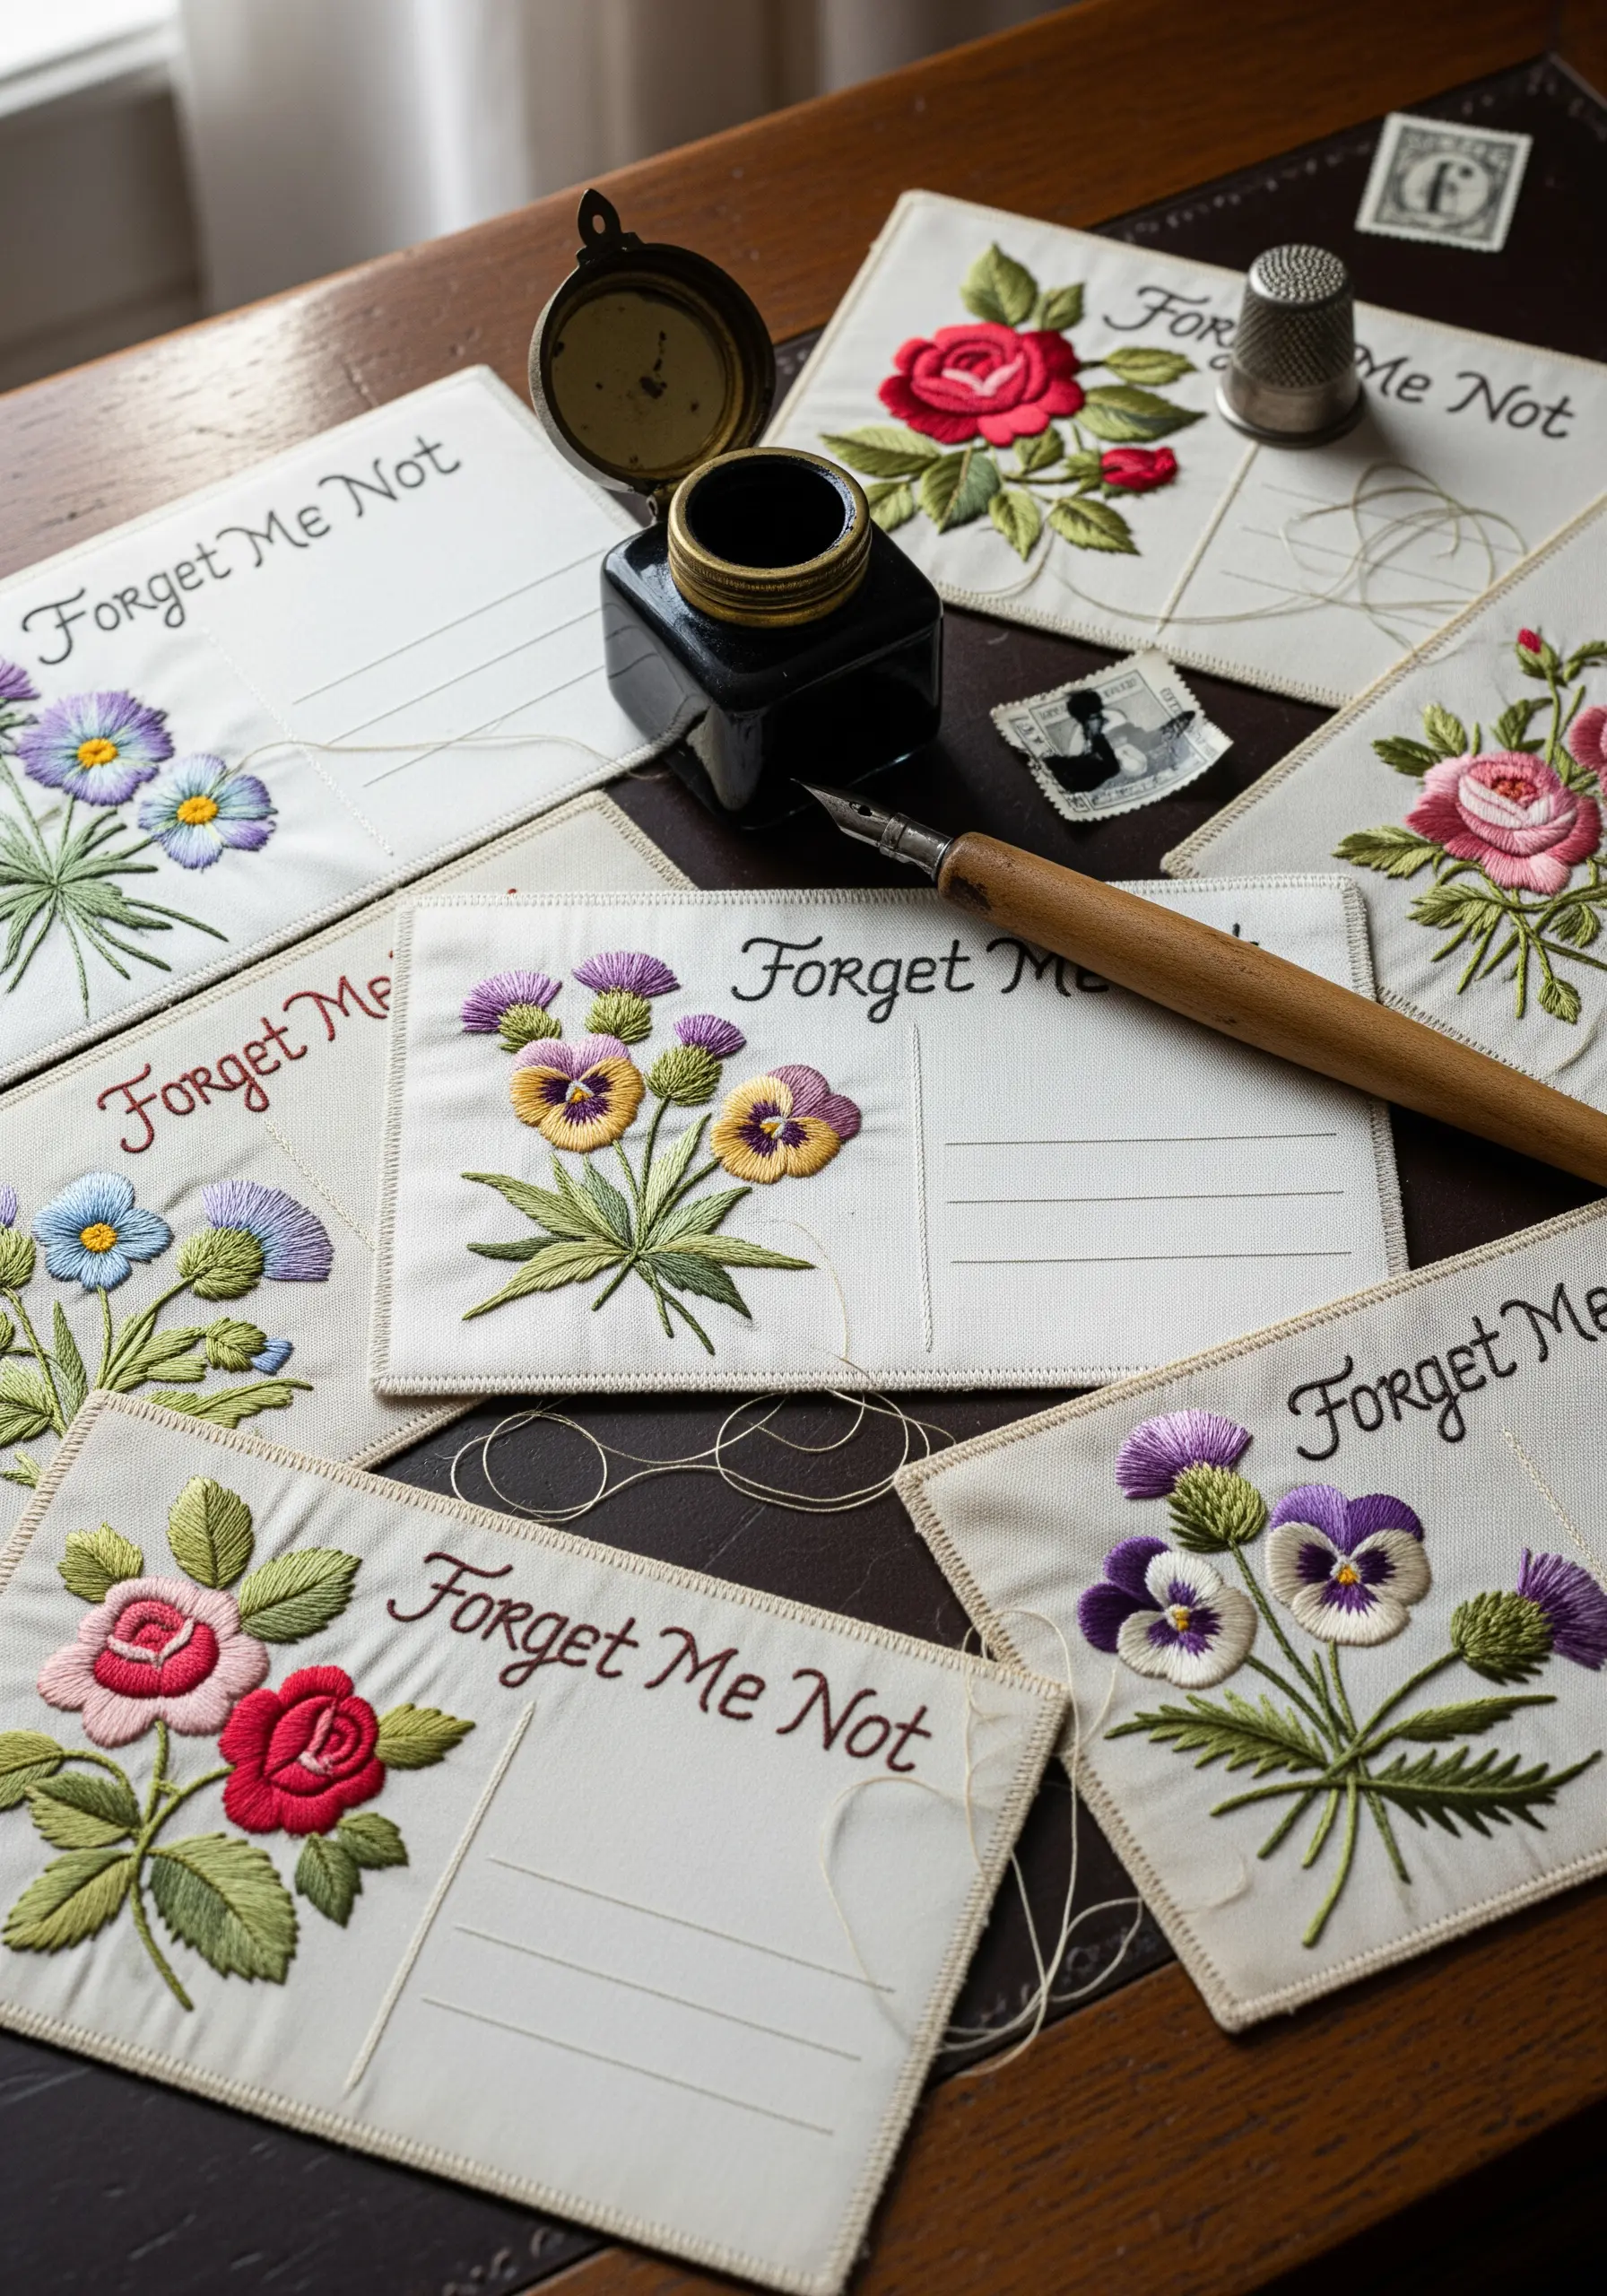
Embroidering on paper postcards requires preparation to avoid creasing or tearing the cardstock.
Use an awl or a sharp needle to pre-punch your stitching holes before threading your needle.
Keep your thread tension lighter than usual; paper has no give and will rip if pulled too tight.
Create diy embroidered cards and mini gifts that pack a big punch.



Fabulous collection. Thank you for sharing.
Gail