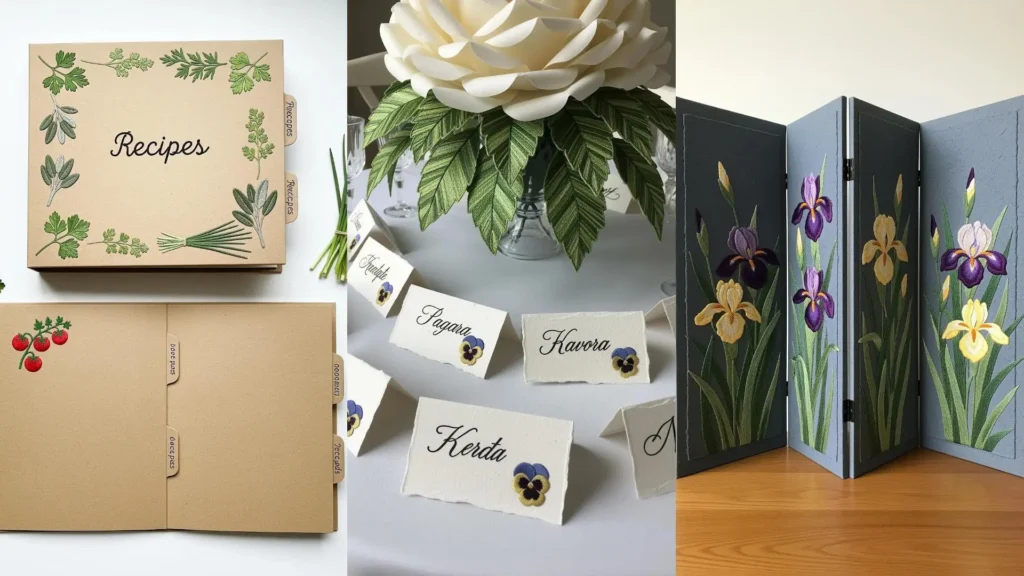
You have the thread, the needles, and a deep love for the texture and rhythm of stitching. But sometimes, you find yourself wanting something more—a different kind of canvas that can bring a new structure and sharpness to your work. It’s time to invite paper to your embroidery practice.
Blending paper and thread isn’t just about stitching on a new surface; it’s about redefining the roles these materials play. Paper offers a crisp, stable foundation that allows for precise lines and graphic shapes, while thread introduces softness, texture, and dimension that paper alone can’t achieve. This combination allows you to build layered stories, where each material enhances the other.
In these tutorials, you won’t find overly complex techniques. Instead, you will find new ways of seeing. You will learn to use a simple running stitch to create topographic maps on torn paper mountains, or a dense satin stitch to give typography a raised, tactile finish. Consider these ideas a starting point to explore how two familiar, humble materials can come together to create something truly extraordinary.
1. Layer Botanical Illustrations with Textural Stitches
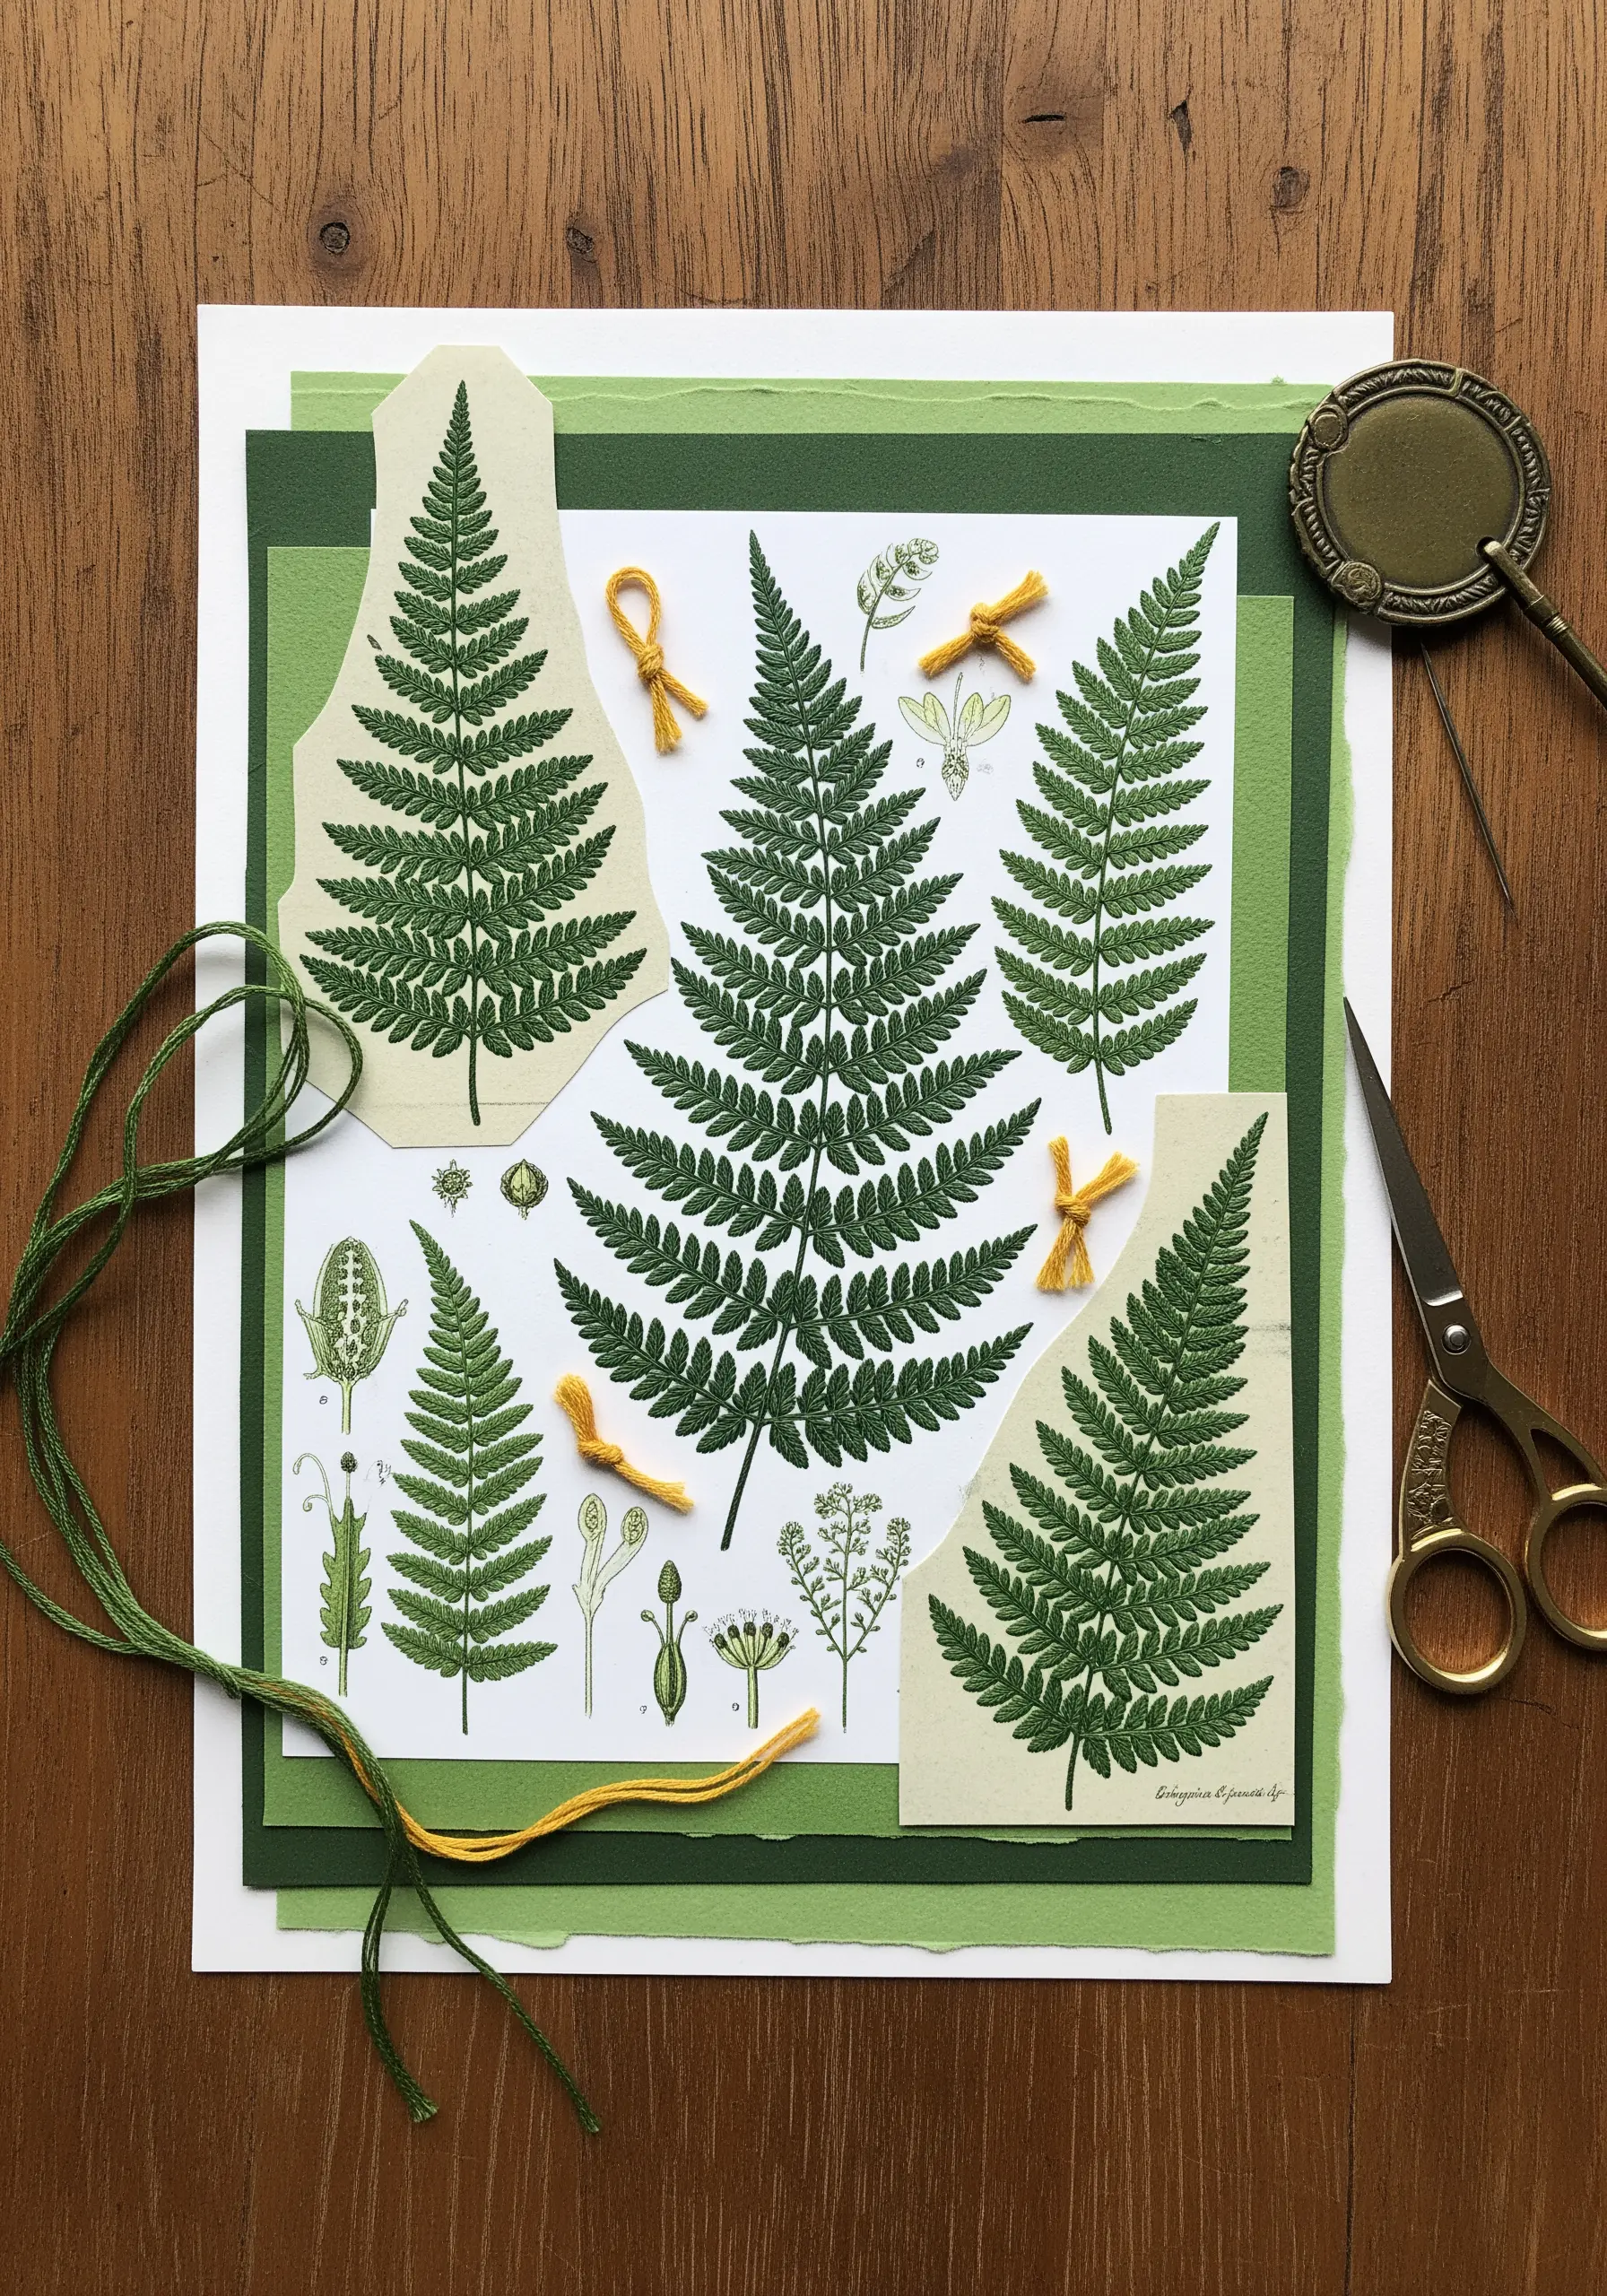
Begin with a high-quality botanical print as your canvas.
Instead of stitching the entire motif, use thread to selectively enhance details—a line of split stitch along a stem, or tiny French knots for spores.
This technique adds dimension without overwhelming the original illustration, creating a delicate balance between paper and thread.
For the small yellow knots, use a contrasting color like mustard yellow and create simple overhand knots, trimming the tails closely to form textured accents.
Always pre-pierce your paper with a fine needle or awl to prevent tearing and ensure clean entry points for your thread.
2. Sculpt a Celestial Scene with Beads and Metallics
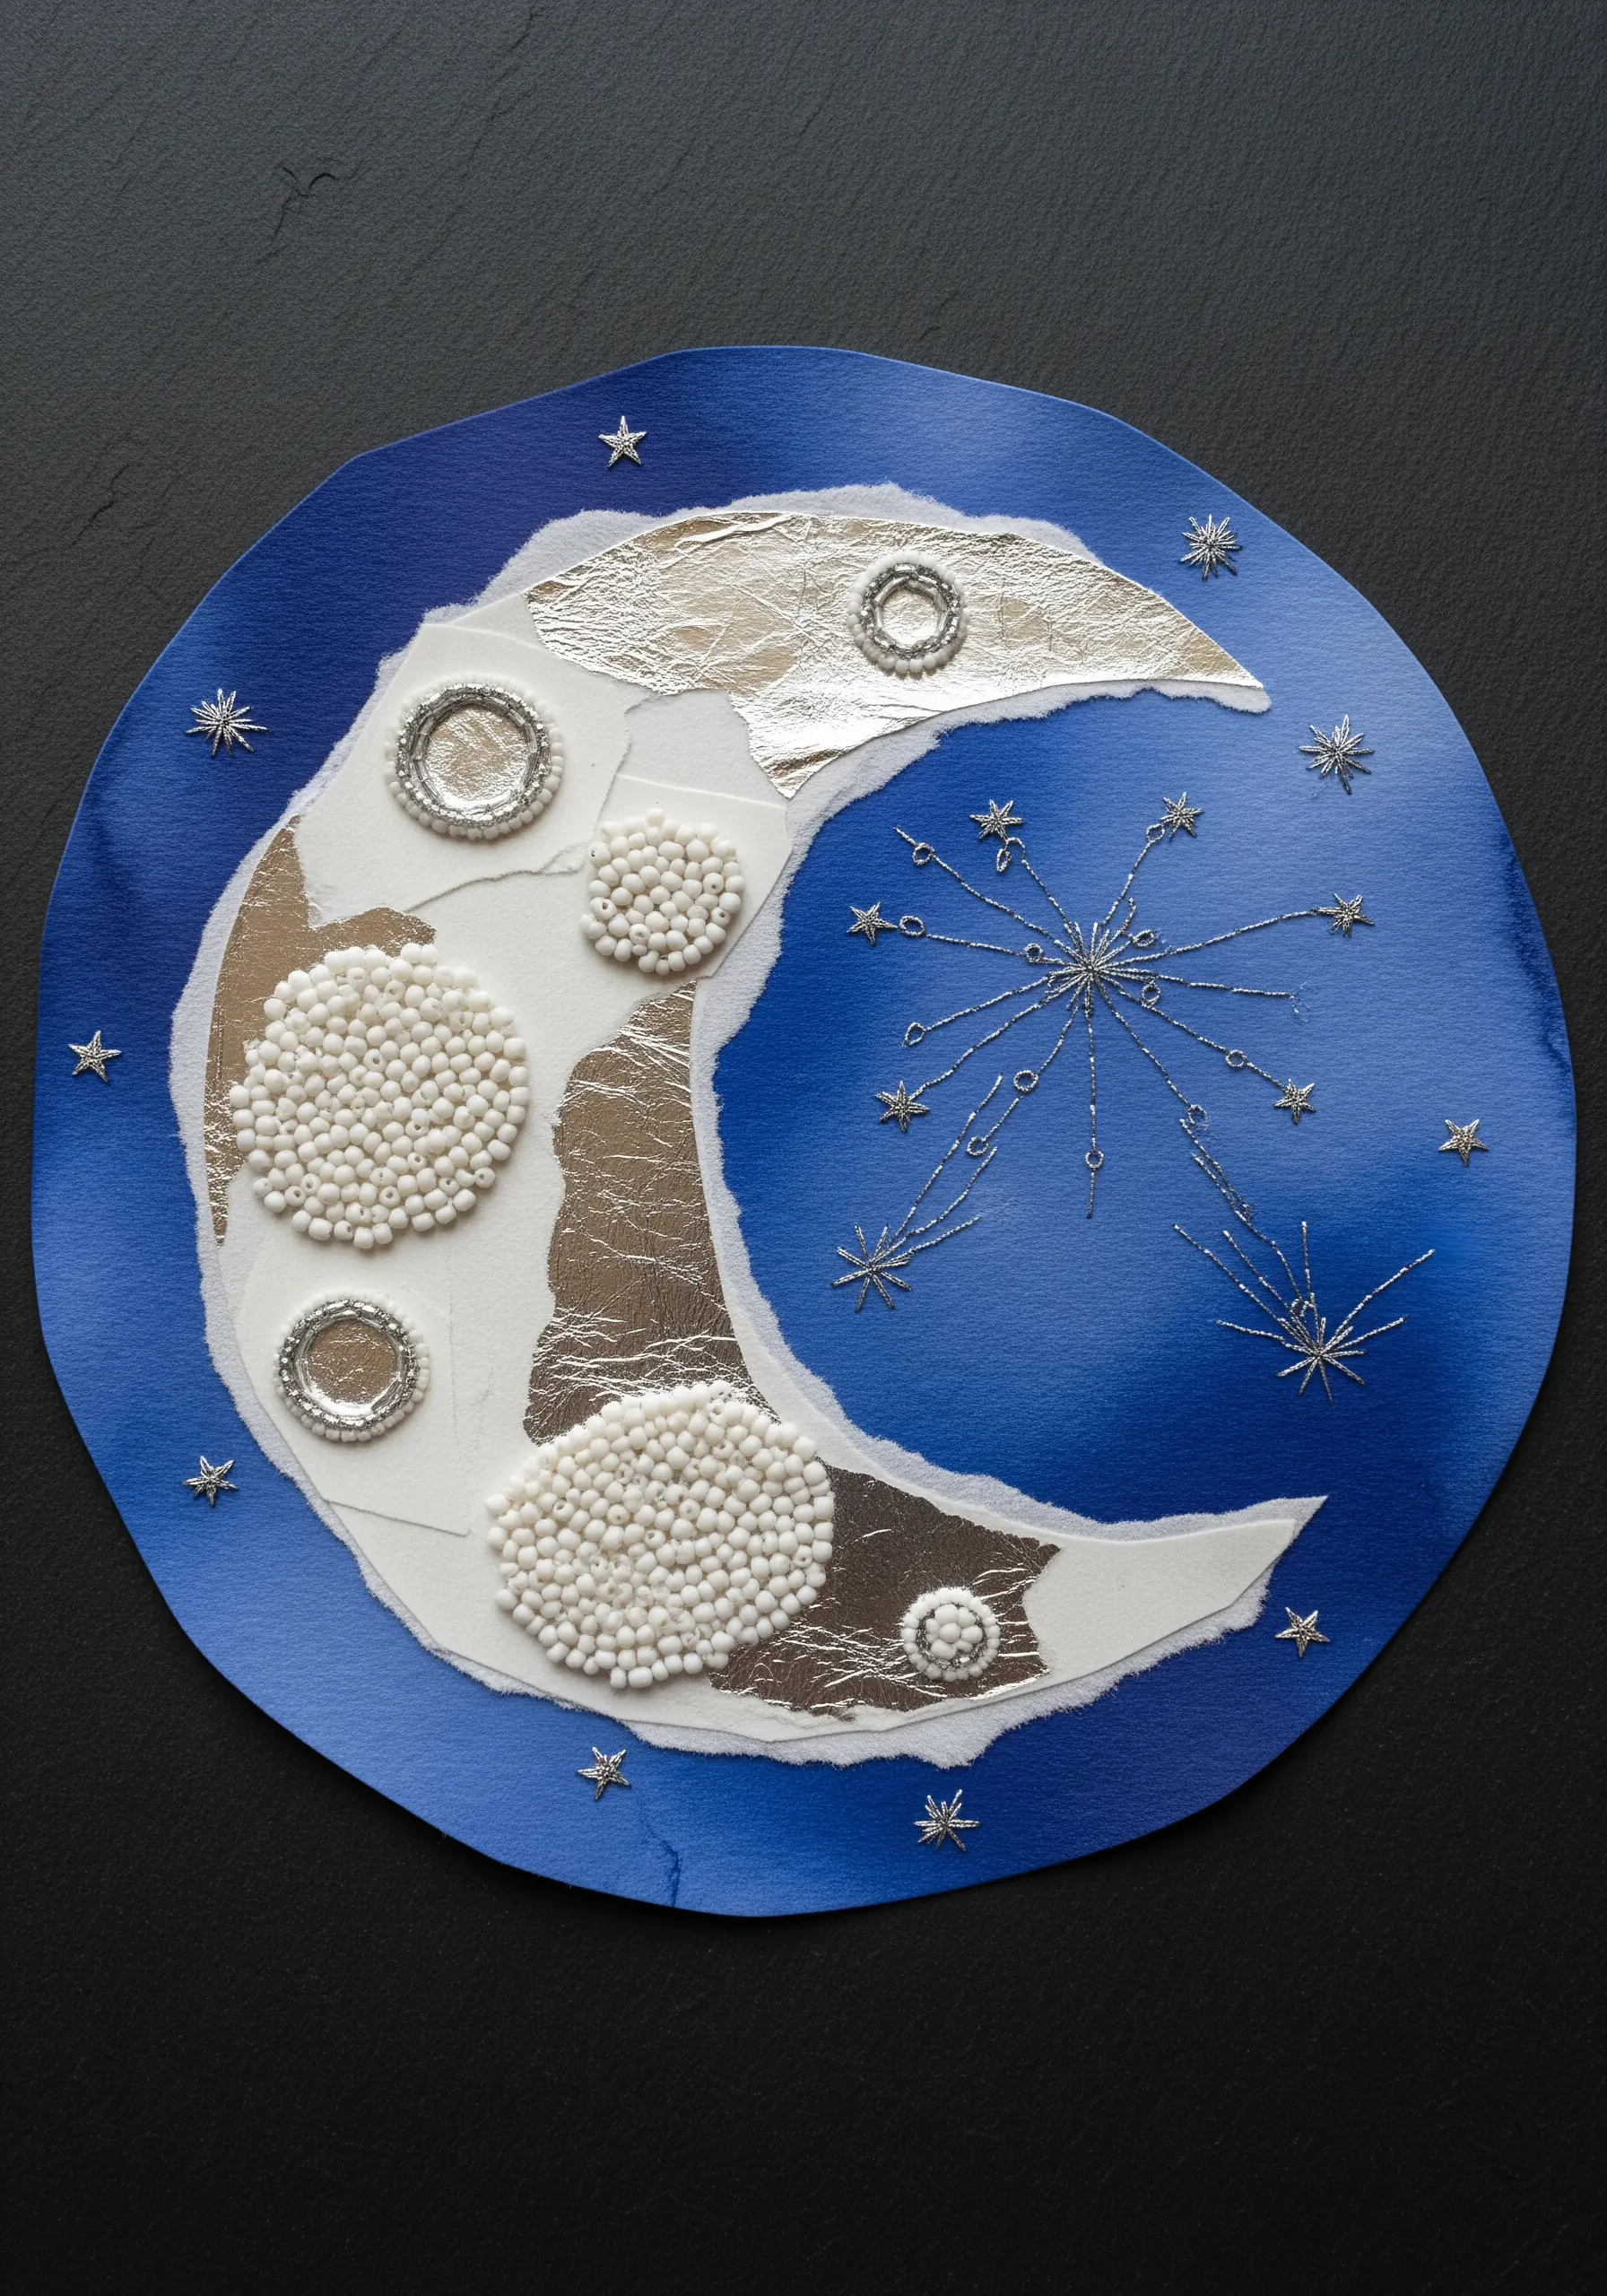
Create a celestial body by layering torn paper—use a watercolor wash for the background and metallic foil paper for the moon’s surface.
To create the crater effect, fill circular areas with densely packed seed beads or French knots in a single, neutral color like off-white or silver.
Outline the torn edges of your metallic paper with a fine silver thread using a couching stitch; this secures the paper and creates a polished, integrated edge.
For the stars, use simple straight stitches radiating from a central point, varying their length to create a twinkling effect.
3. Use Thread as a Bold Graphic Element in Abstract Art
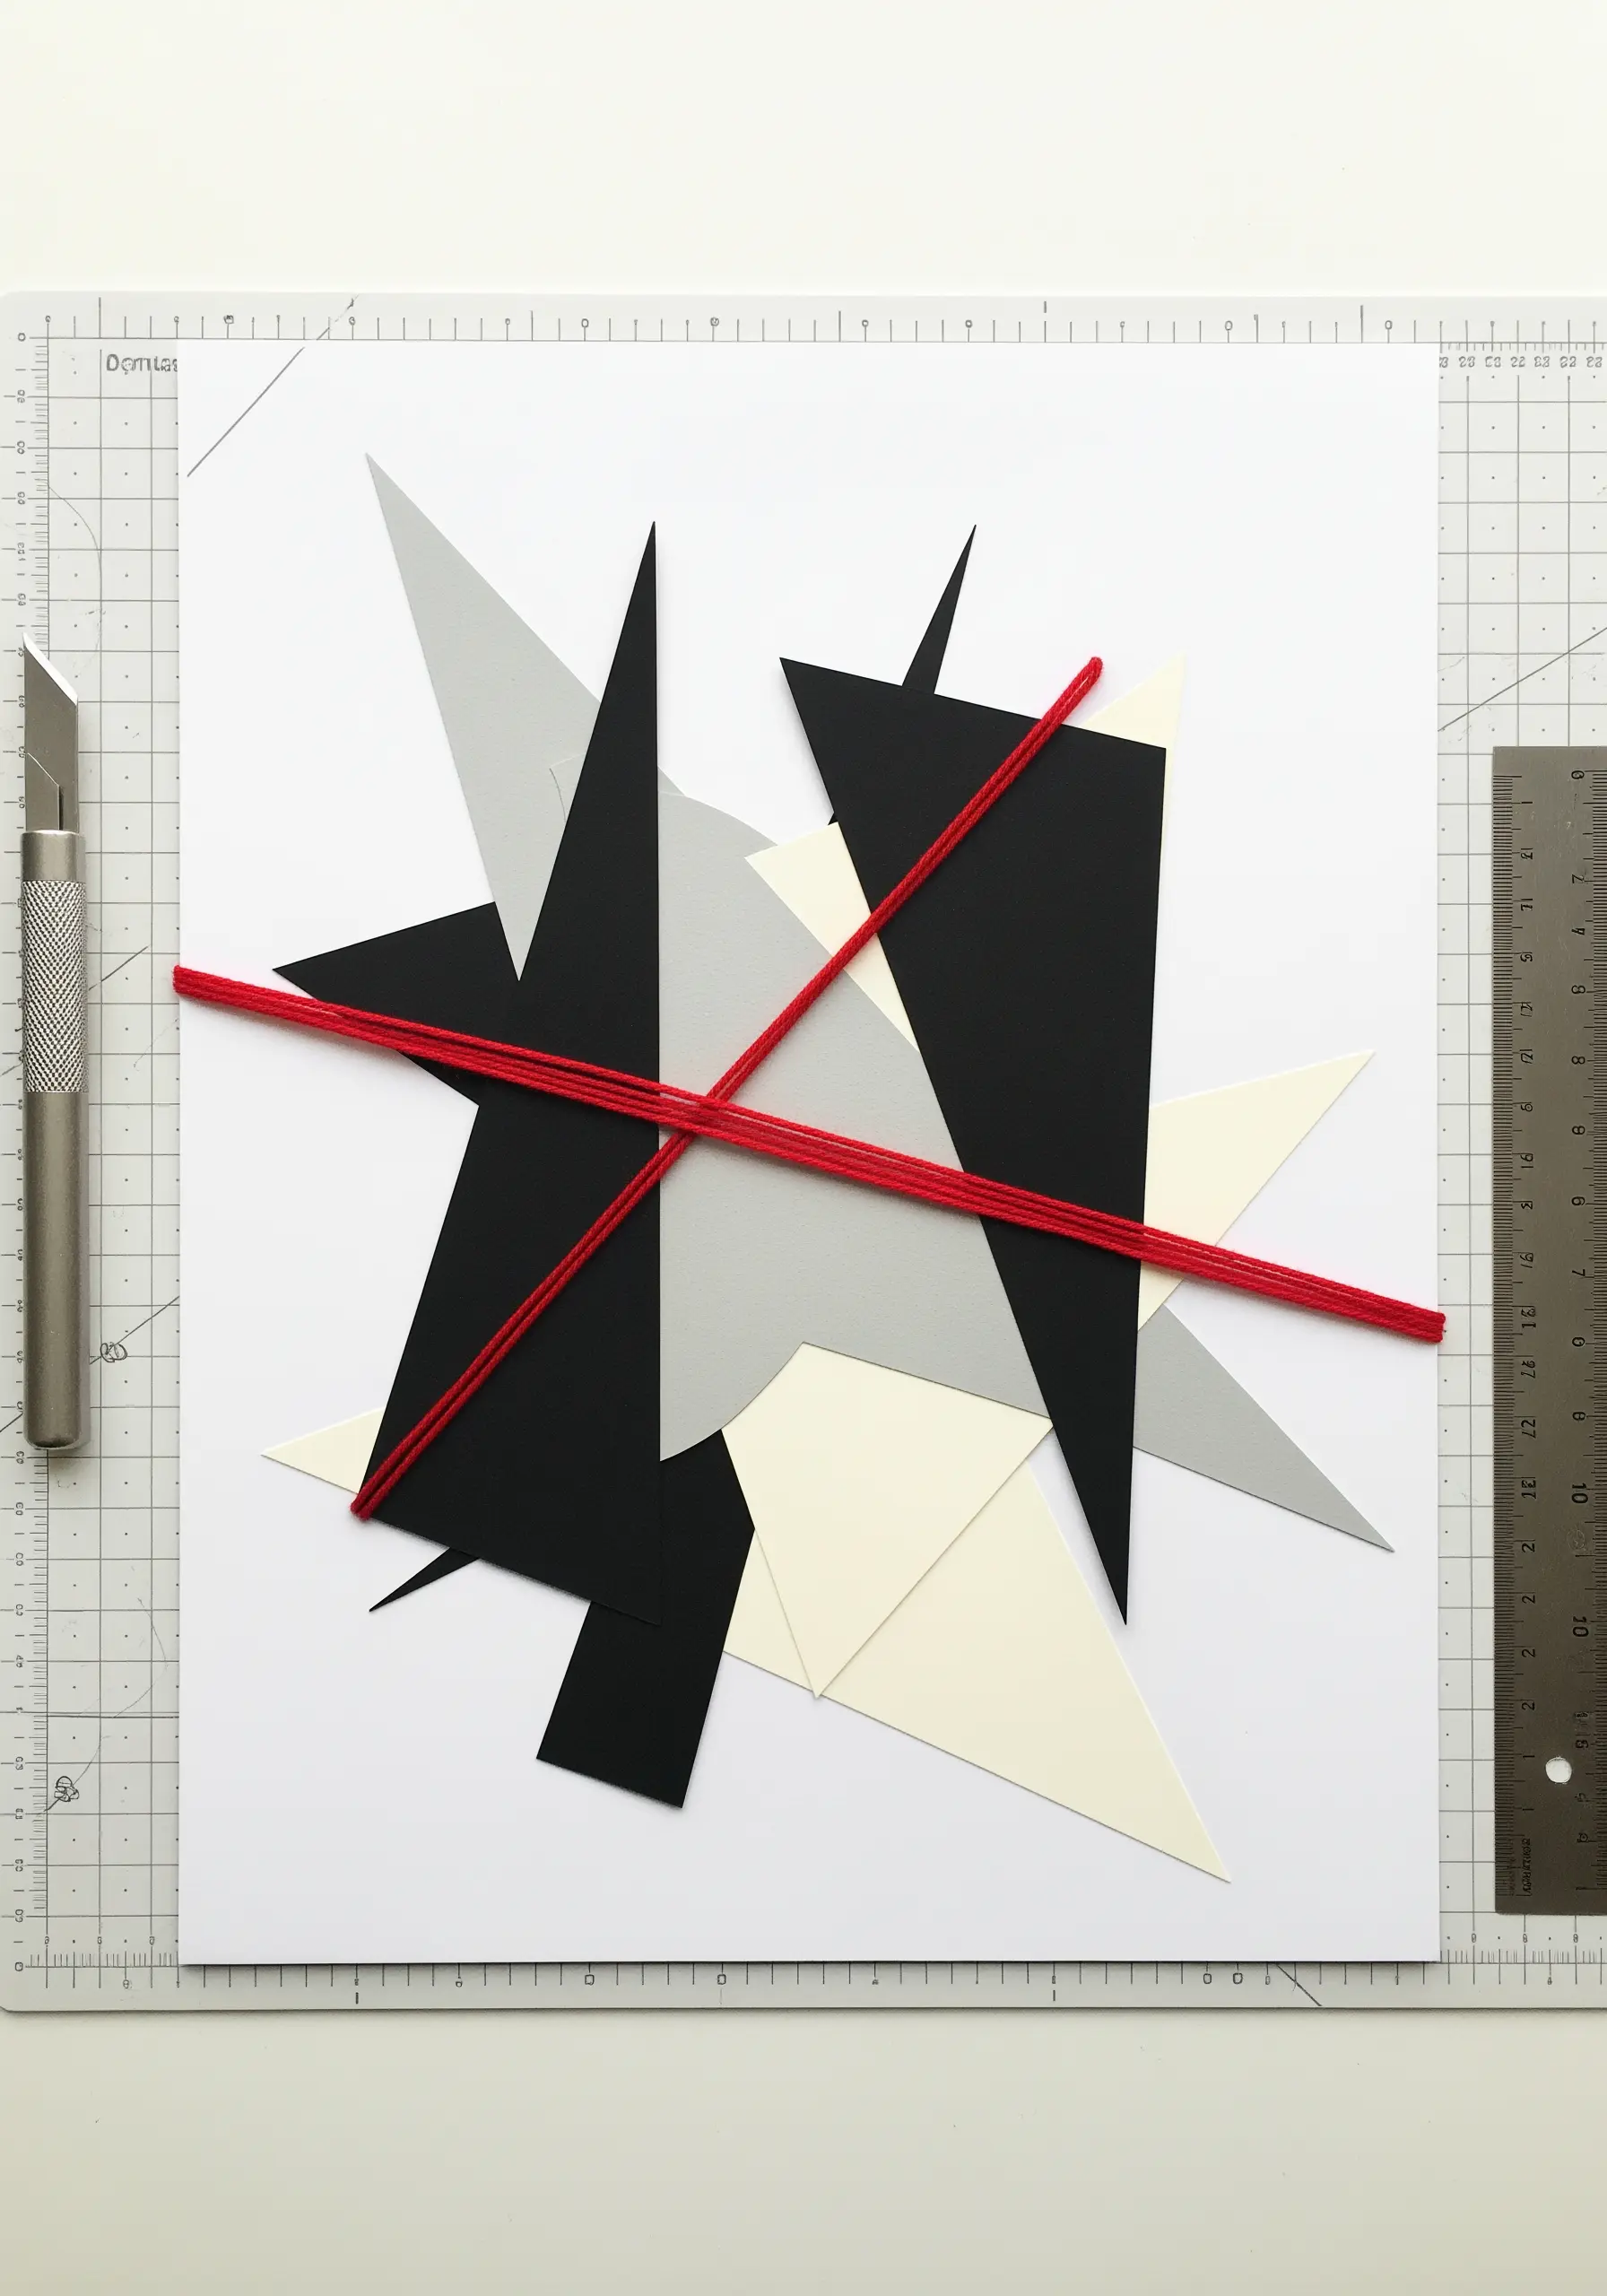
Move beyond using thread for detail and treat it as a primary compositional line.
Arrange sharp, geometric paper cutouts in a dynamic composition on a clean background.
Then, stretch a thick, contrasting thread or yarn across the entire piece, piercing the backing paper only at the entry and exit points.
This method uses tension to create a powerful visual interruption, transforming the thread from an embellishment into a structural element.
Secure the ends on the back with tape or a dab of glue for a clean finish.
4. Weave Seafoam Narratives with Layered Paper and Thread
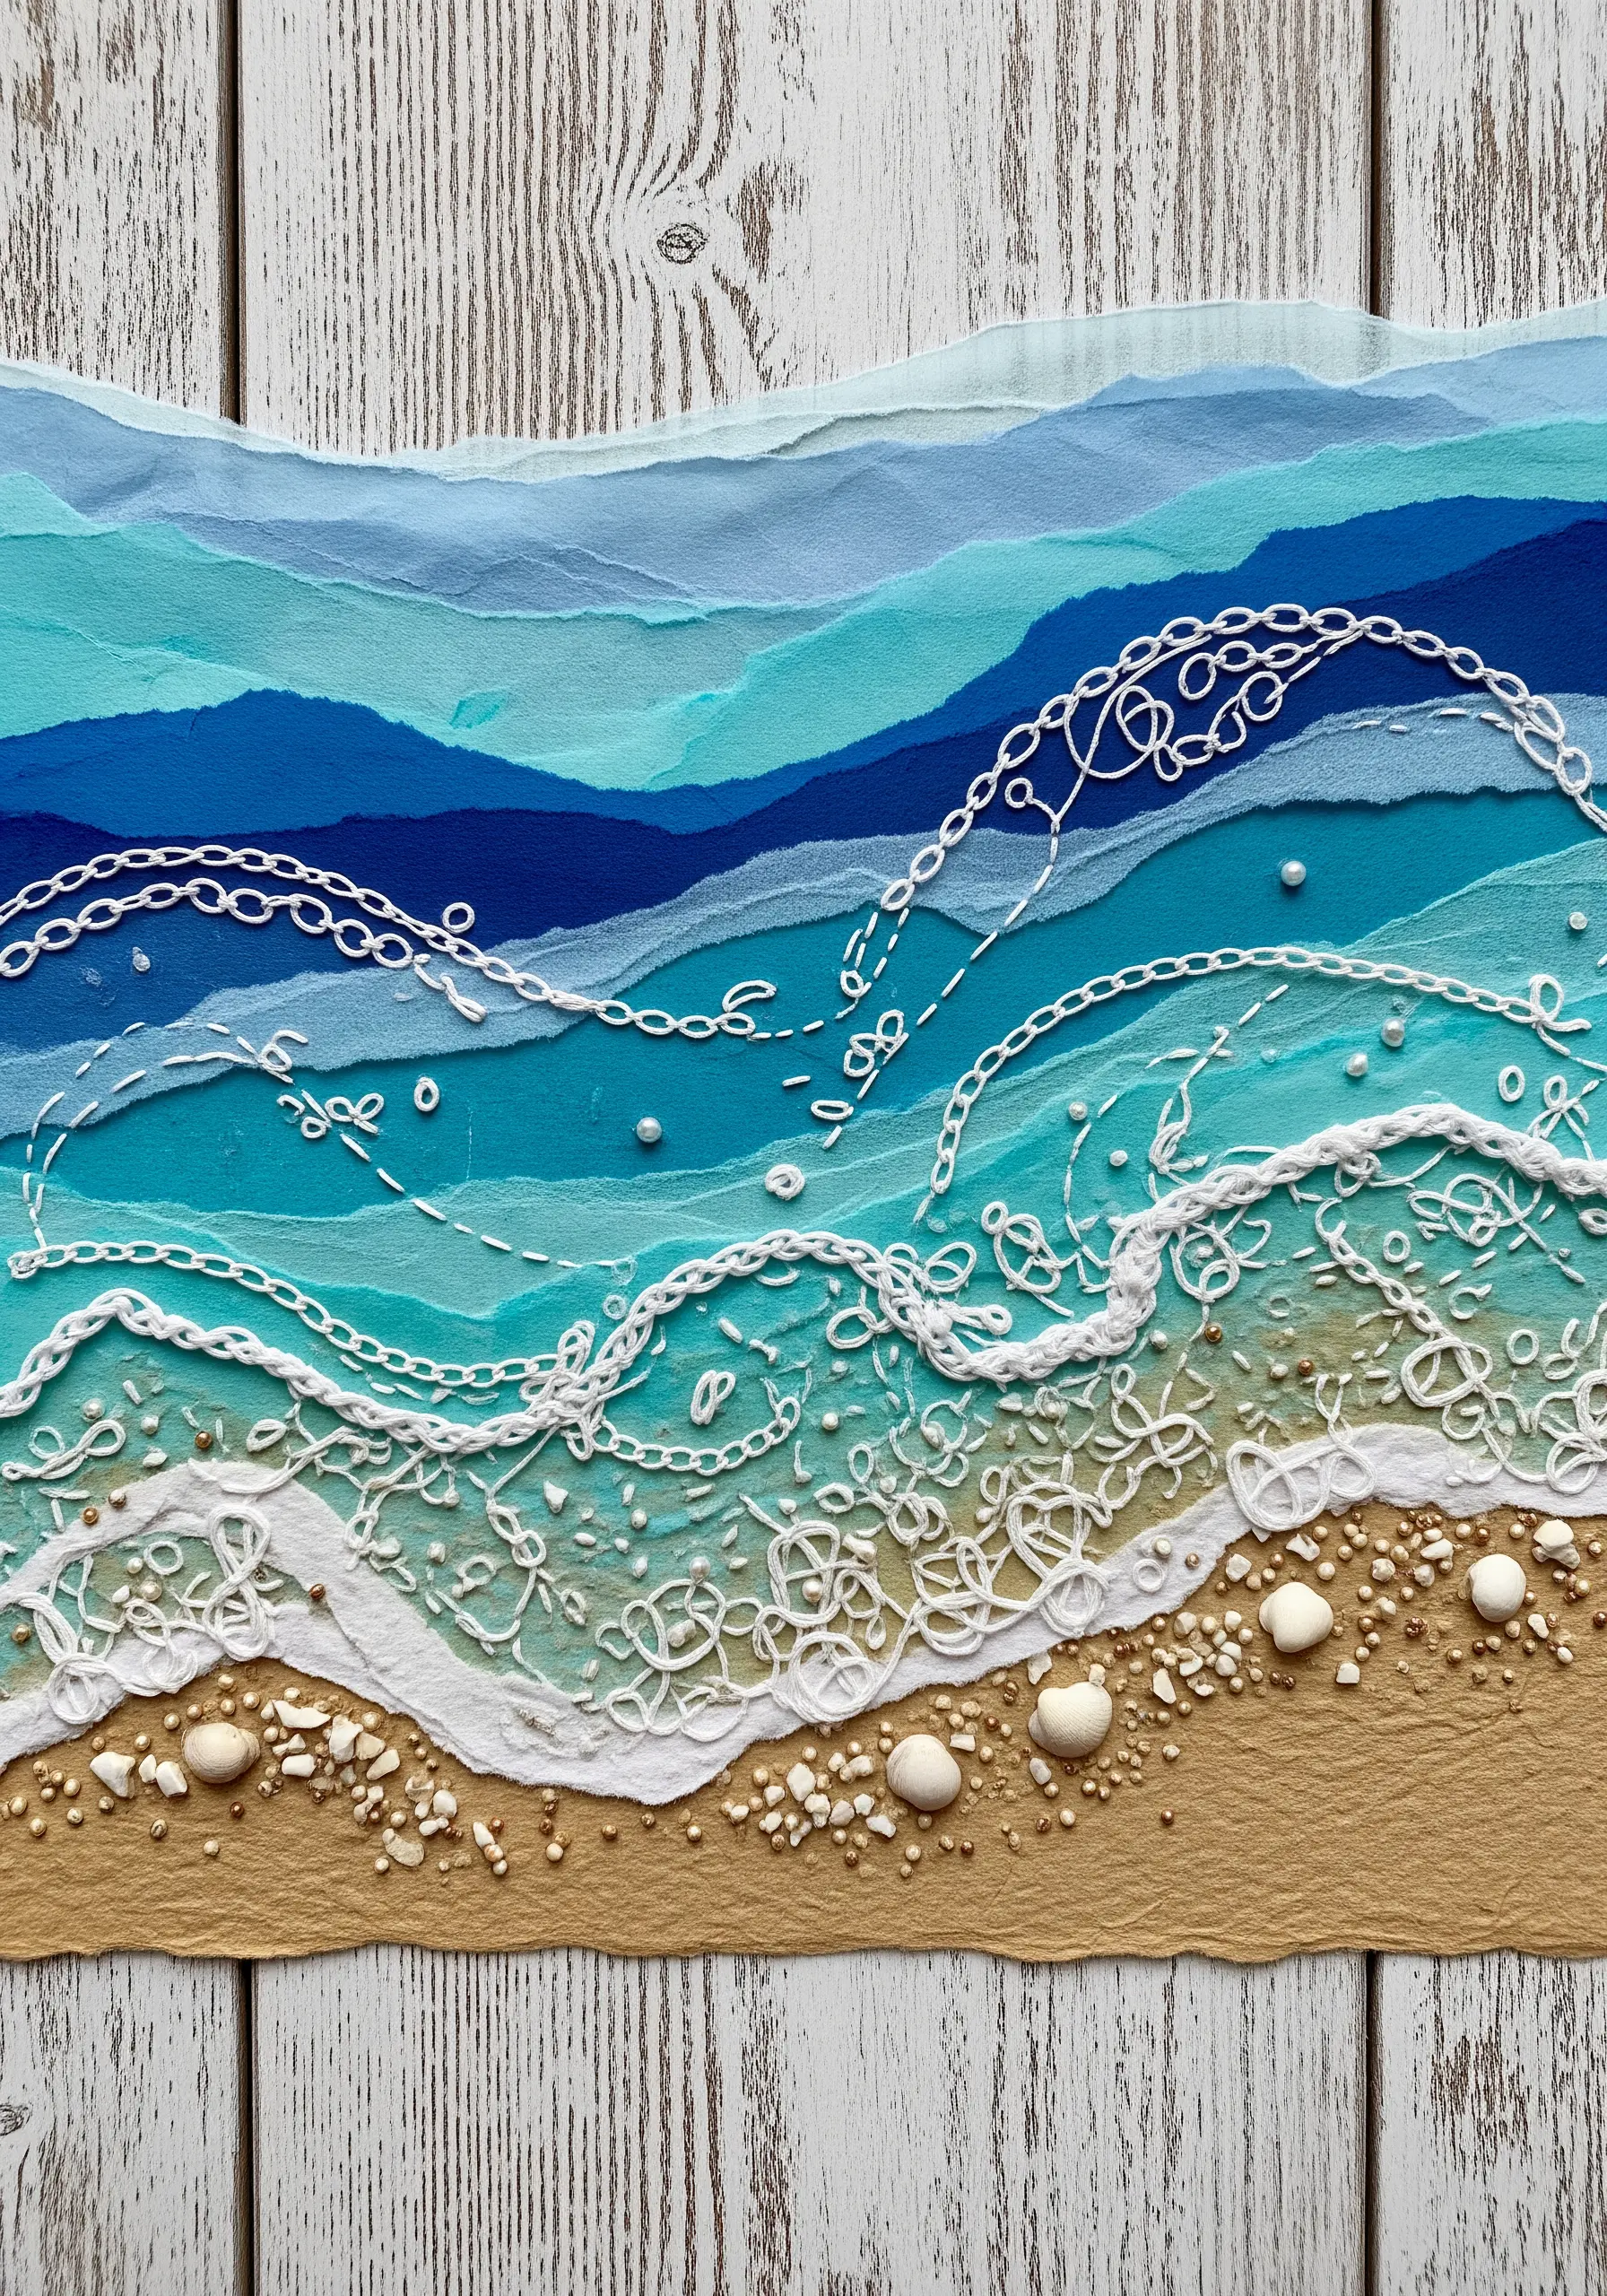
Build an ocean scene by layering torn strips of blue and turquoise paper or thin fabric to create a sense of depth and movement.
Use a single strand of white thread to stitch looping and swirling patterns that mimic the motion of seafoam.
Vary your stitches—combine chain stitch for thicker lines of foam, running stitch for delicate spray, and scattered seed stitches or French knots for bubbles.
This technique turns simple stitches into a visual story, capturing the energy of the waves through the direction and density of your threadwork.
5. Construct Whimsical Scenes with Patterned Paper and Simple Stitches
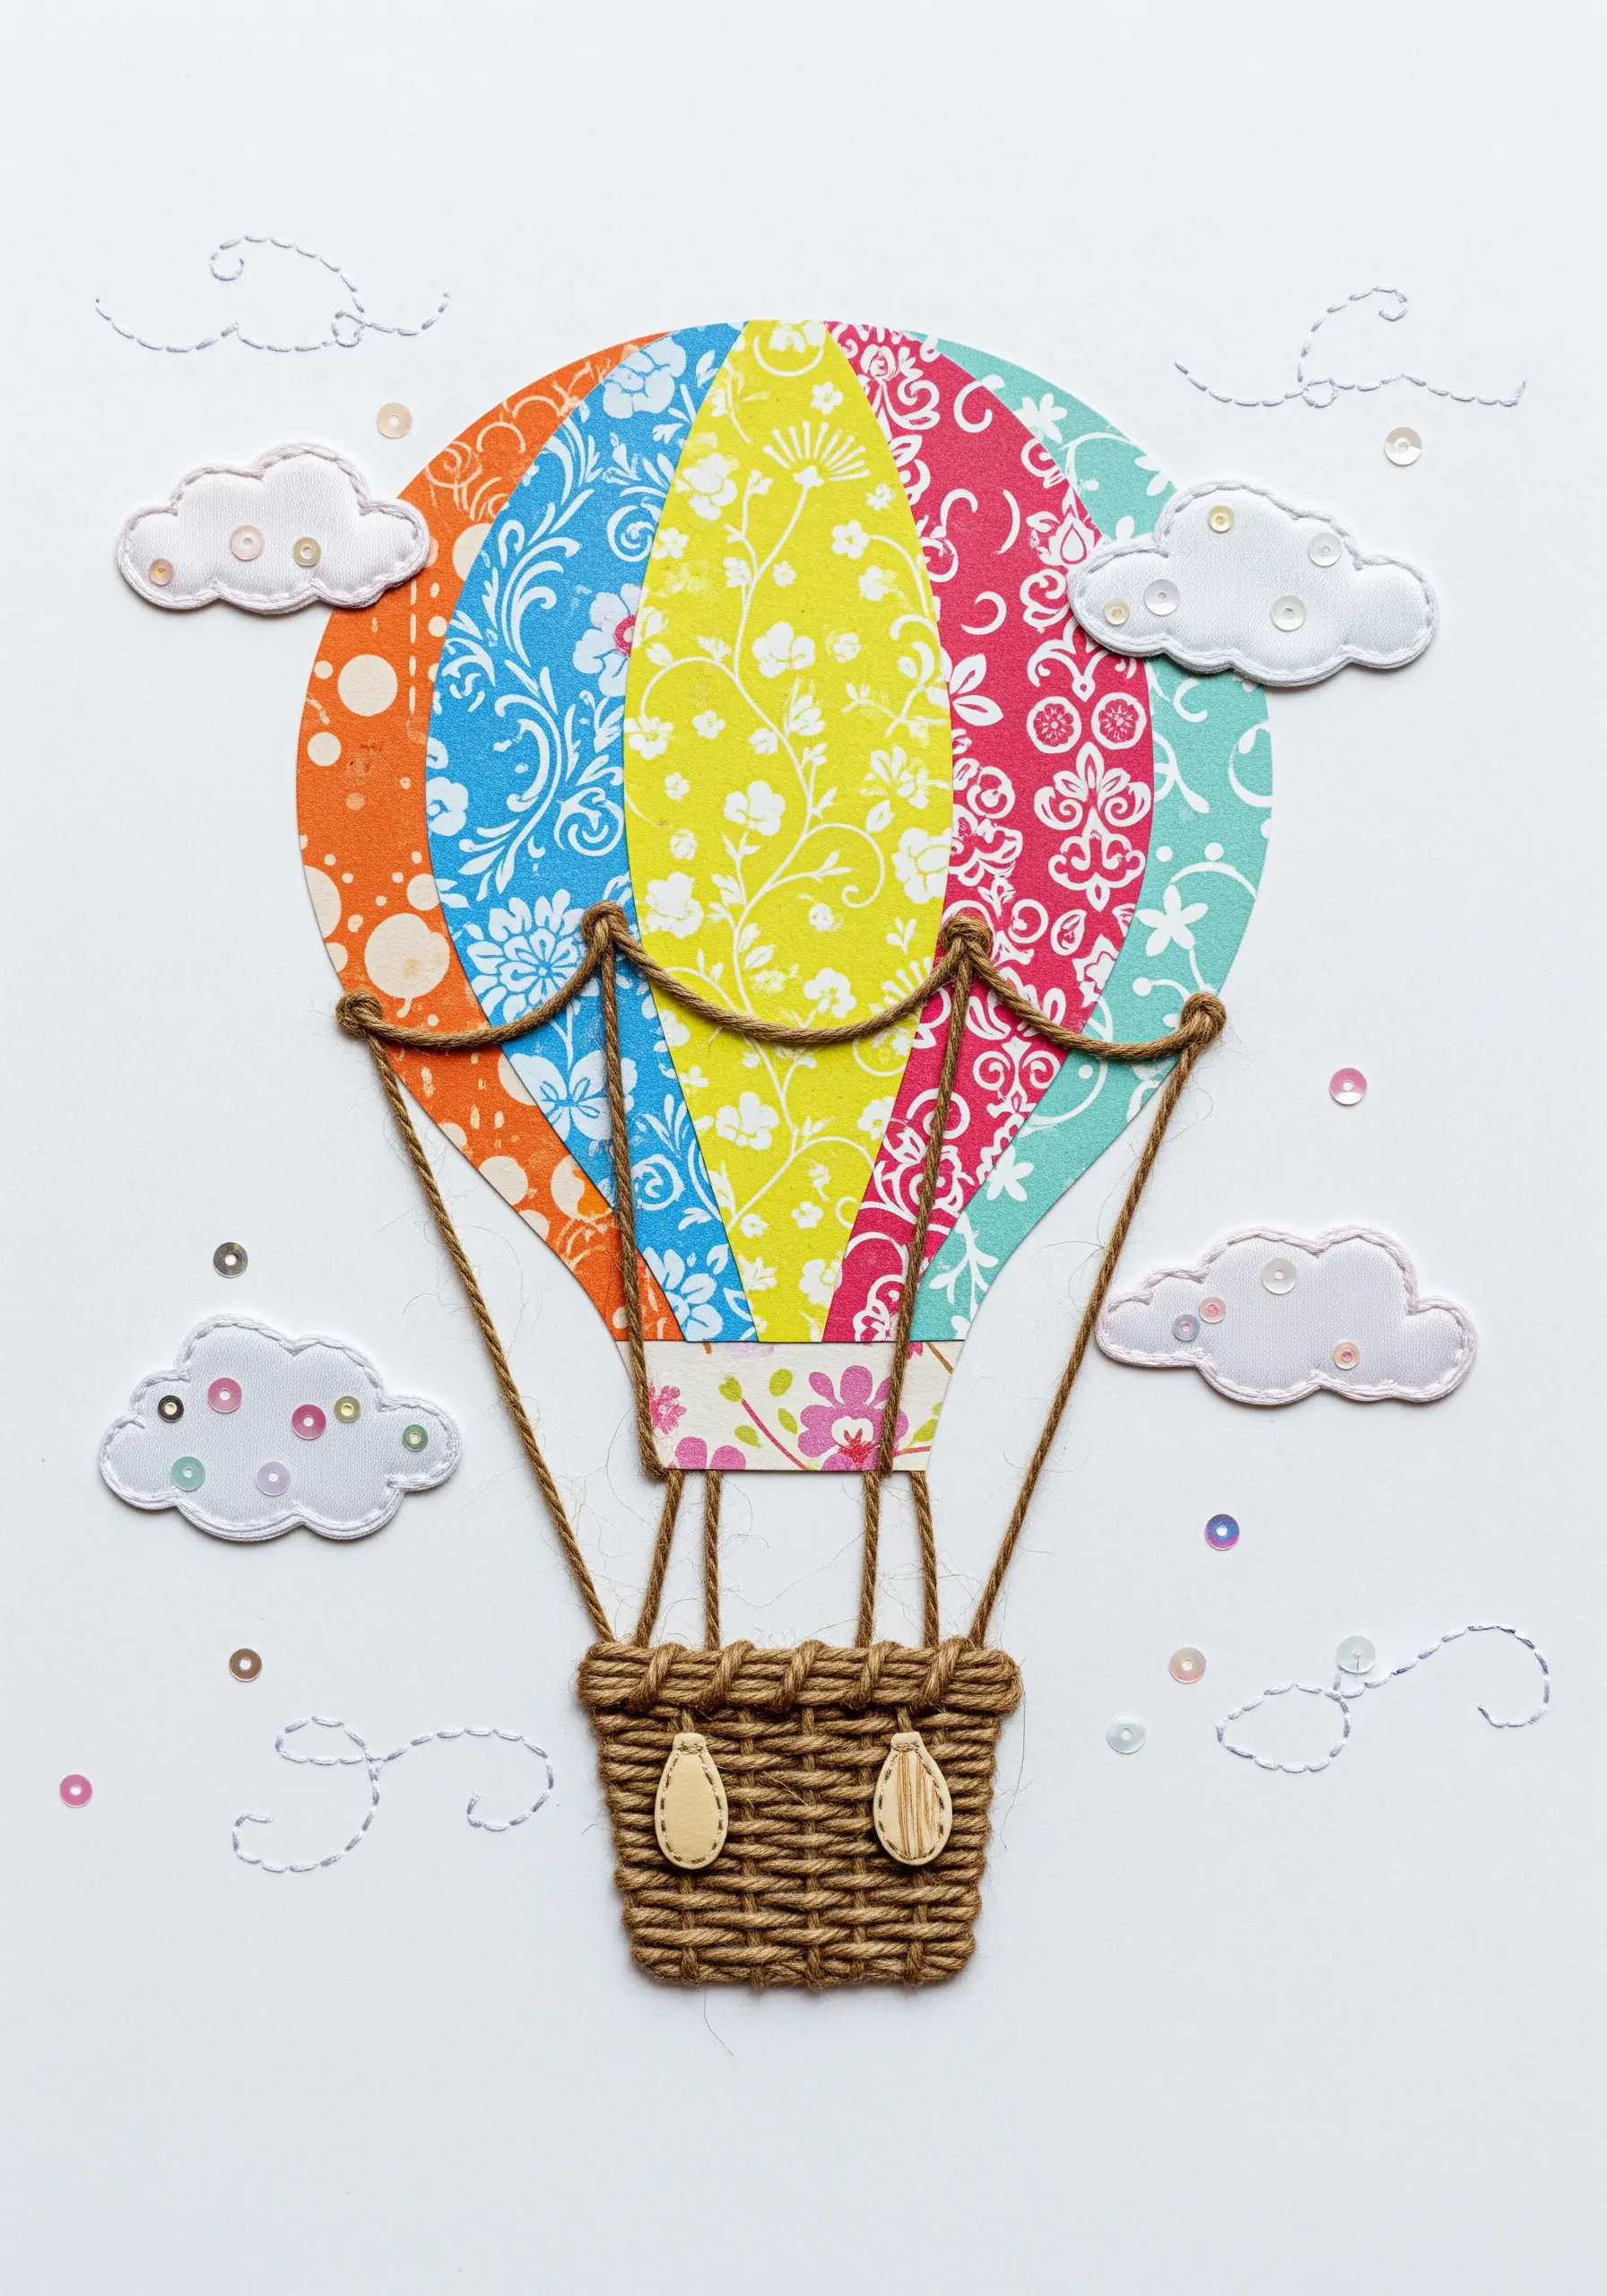
Cut your main shapes, like the balloon panels, from various patterned papers to create a vibrant, quilted effect.
Use a thick, sturdy thread like twine or Perle cotton for structural elements like the balloon ropes and basket.
Instead of stitching directly through the main paper shapes, apply stitches around them to define the outlines or add delicate details like the clouds.
A simple backstitch or running stitch is all you need to anchor the paper elements to the background, creating a clean and charming illustration.
6. Deconstruct a Portrait with Thread and Floral Collage
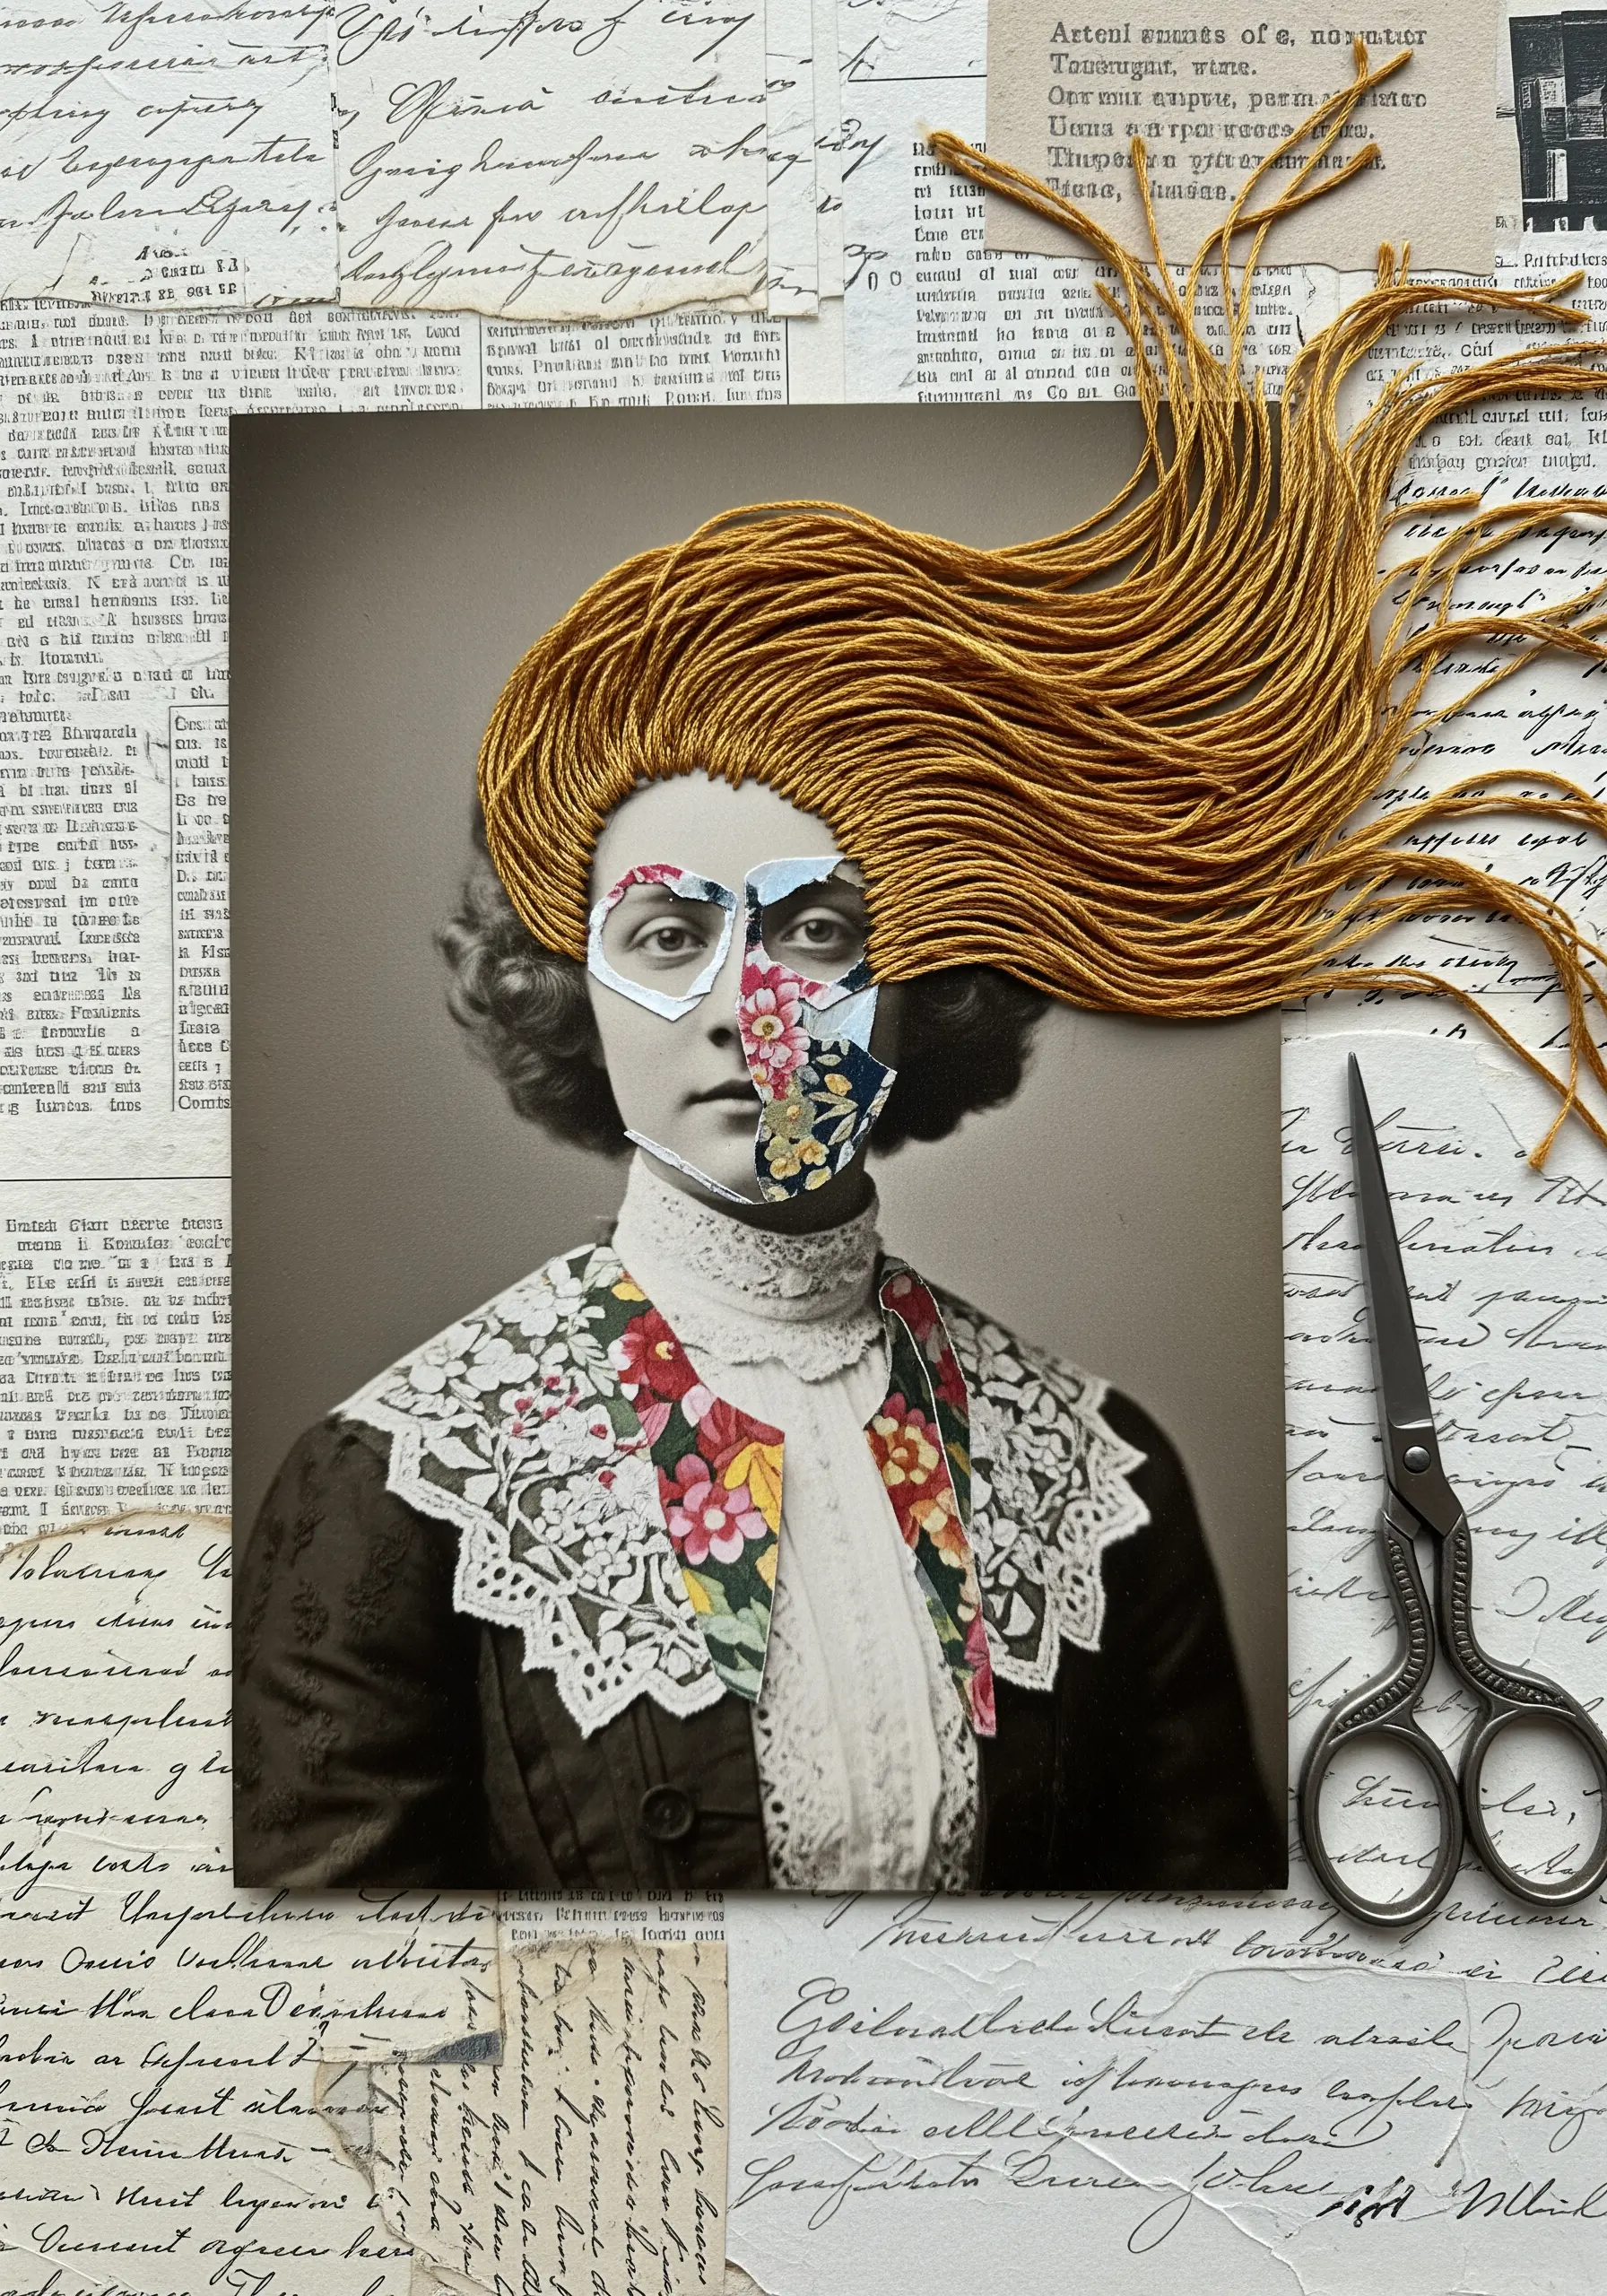
Transform a vintage photograph by selectively obscuring and embellishing it with paper and thread.
Cut away a portion of the face and collage floral paper in its place to introduce a surreal, modern element.
Then, use a dense cascade of straight stitches to create hair, letting the threads flow freely off the paper to add dramatic texture and movement.
This method allows you to reconstruct an image, adding a new layer of meaning and turning a static portrait into a dynamic piece of mixed-media art.
7. Add Subtle Sparkle to Natural Elements
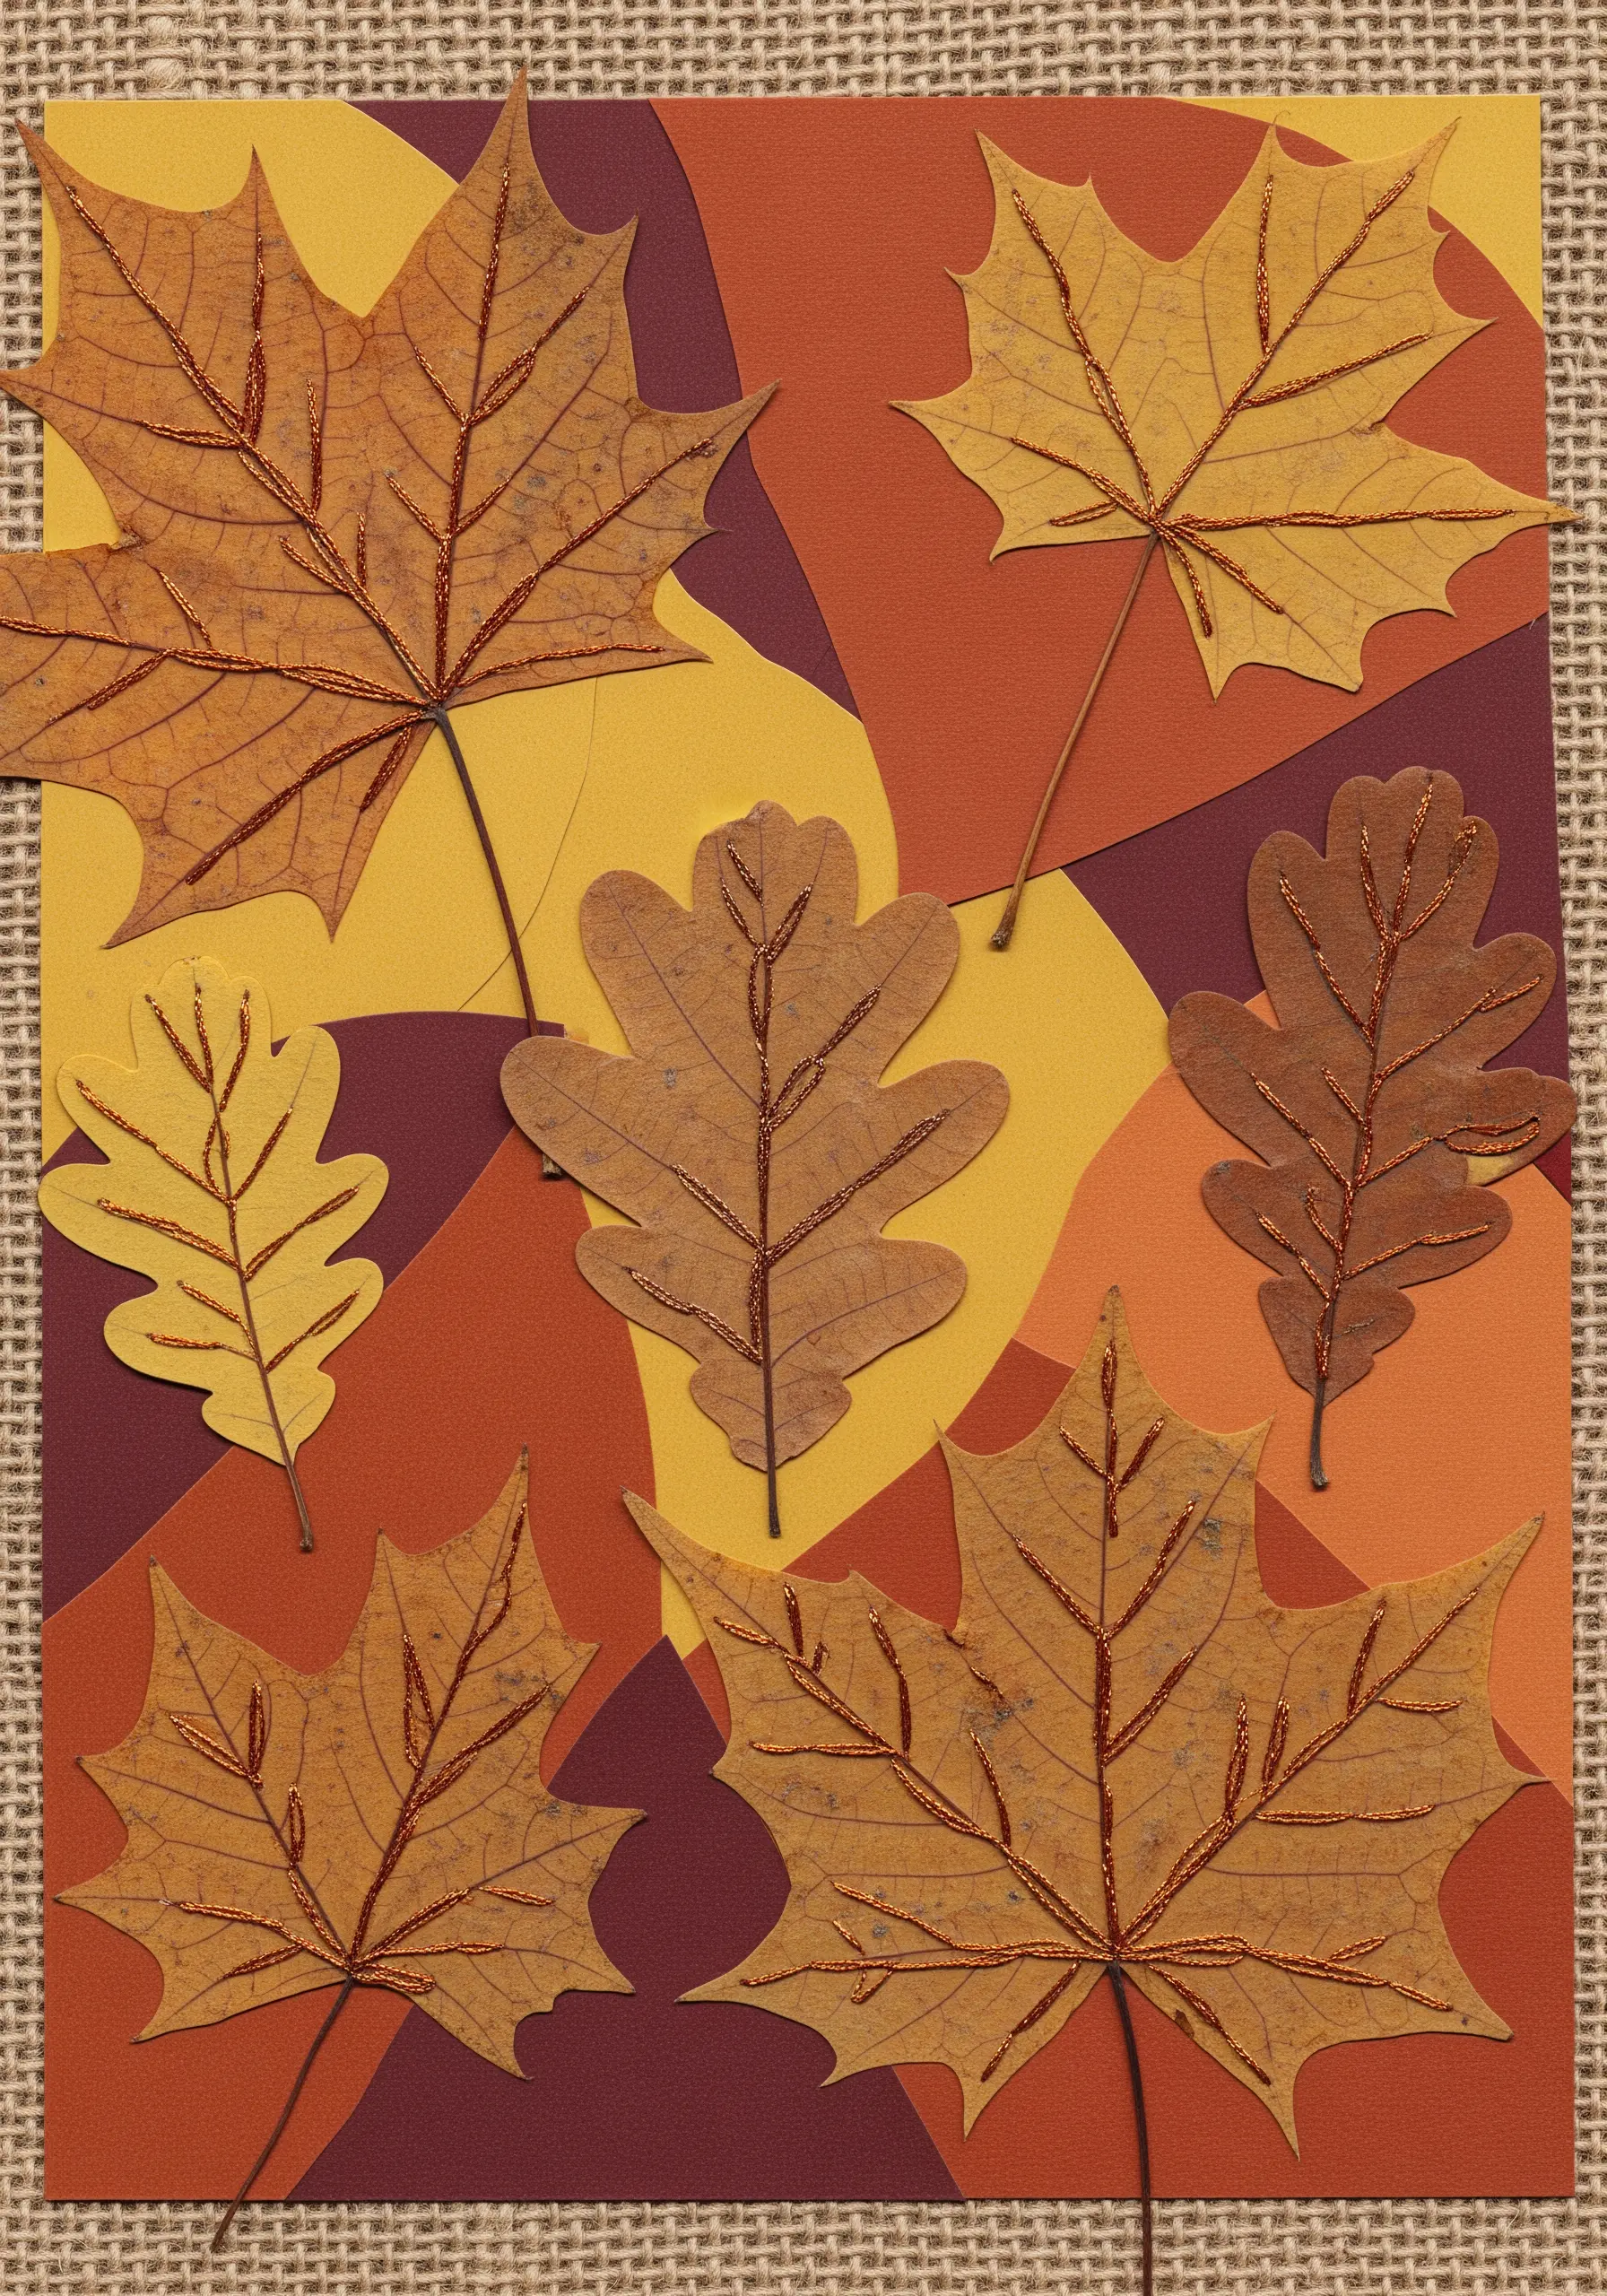
Start with real pressed leaves or carefully cut paper leaf shapes as your focal point.
Select a fine, metallic, or glitter thread that complements the autumnal tones of the leaves without overpowering them.
Use a simple backstitch to trace the central veins of each leaf.
This minimalist approach adds a touch of light and texture, highlighting the natural forms and unifying the composition with a subtle, cohesive shimmer.
The sparkle works because it’s used sparingly, drawing the eye without creating a distraction.
8. Define an Architectural Collage with Linear Stitching
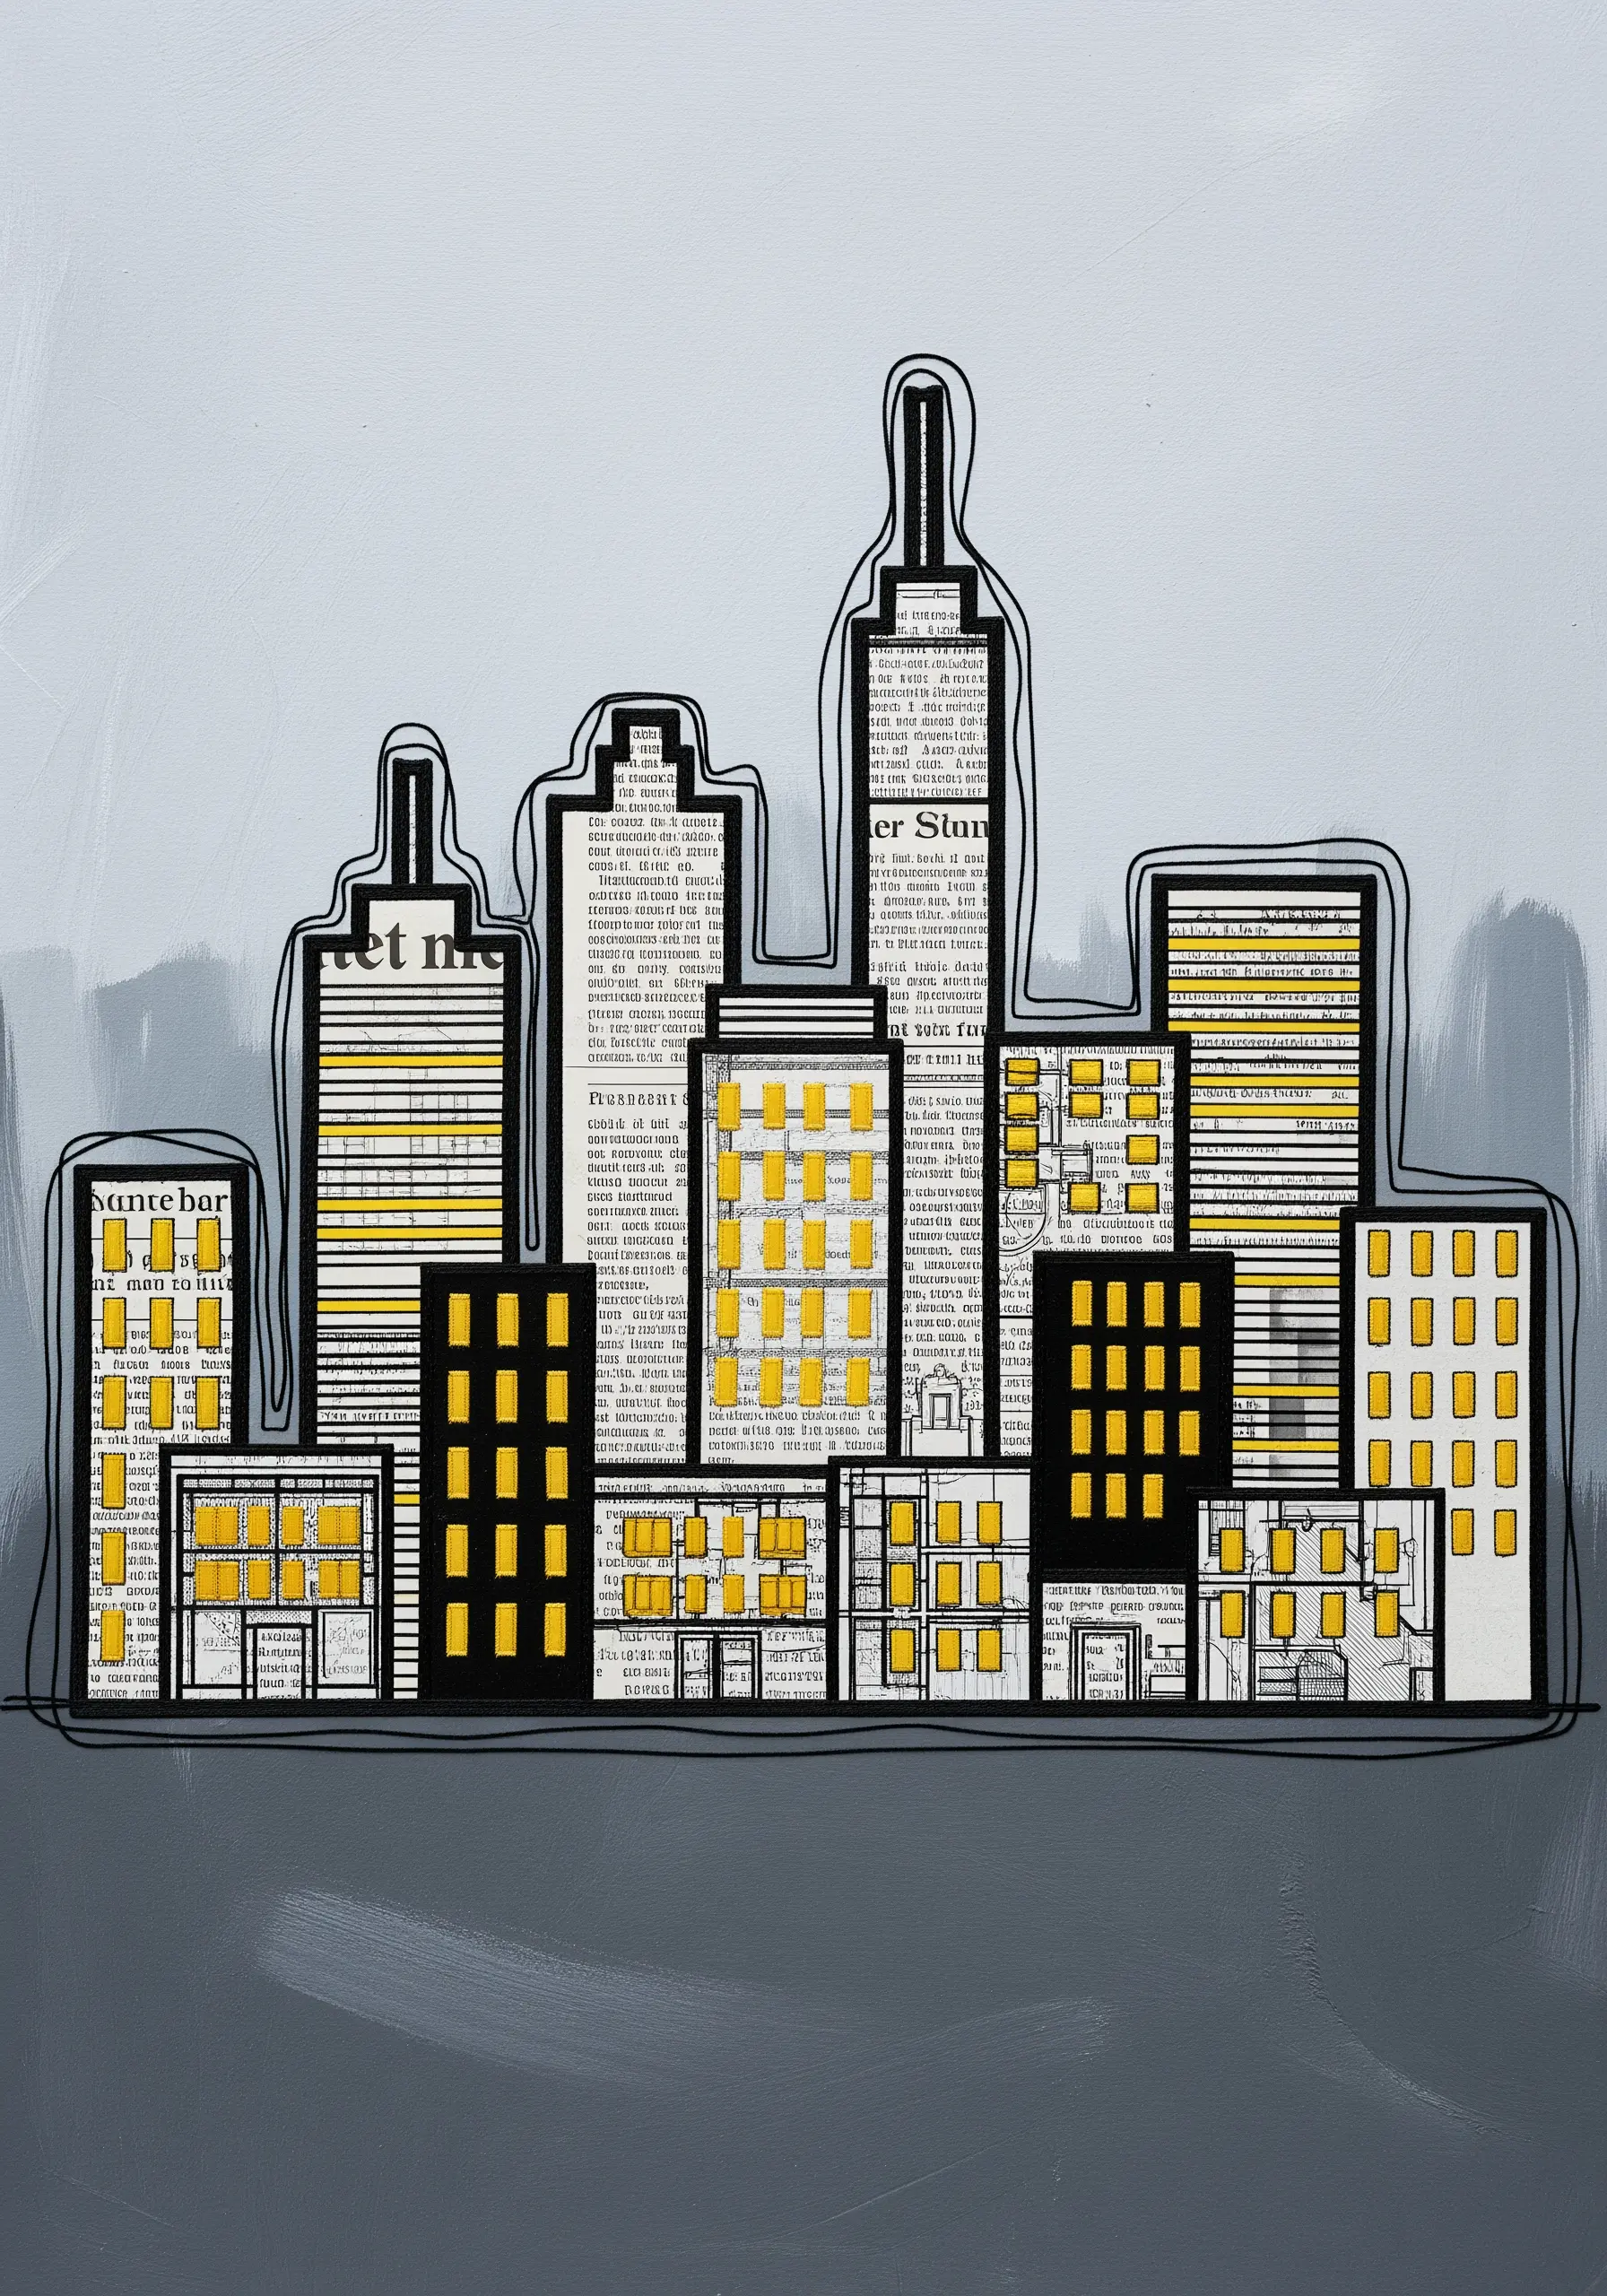
Create a cityscape using paper cutouts from newspaper or book pages for an urban texture.
Instead of drawing outlines, use a single, continuous line of black thread and a backstitch to delineate the silhouette of each building.
Let the stitched lines be loose and sketchy to create an artistic, hand-drawn feel that contrasts with the sharp edges of the paper.
Add color and focus by filling in the windows with satin-stitched blocks of bright thread, which draws the eye and adds a welcome pop of warmth.
9. Build a Forest Floor with Layered Paper and Varied Stitches
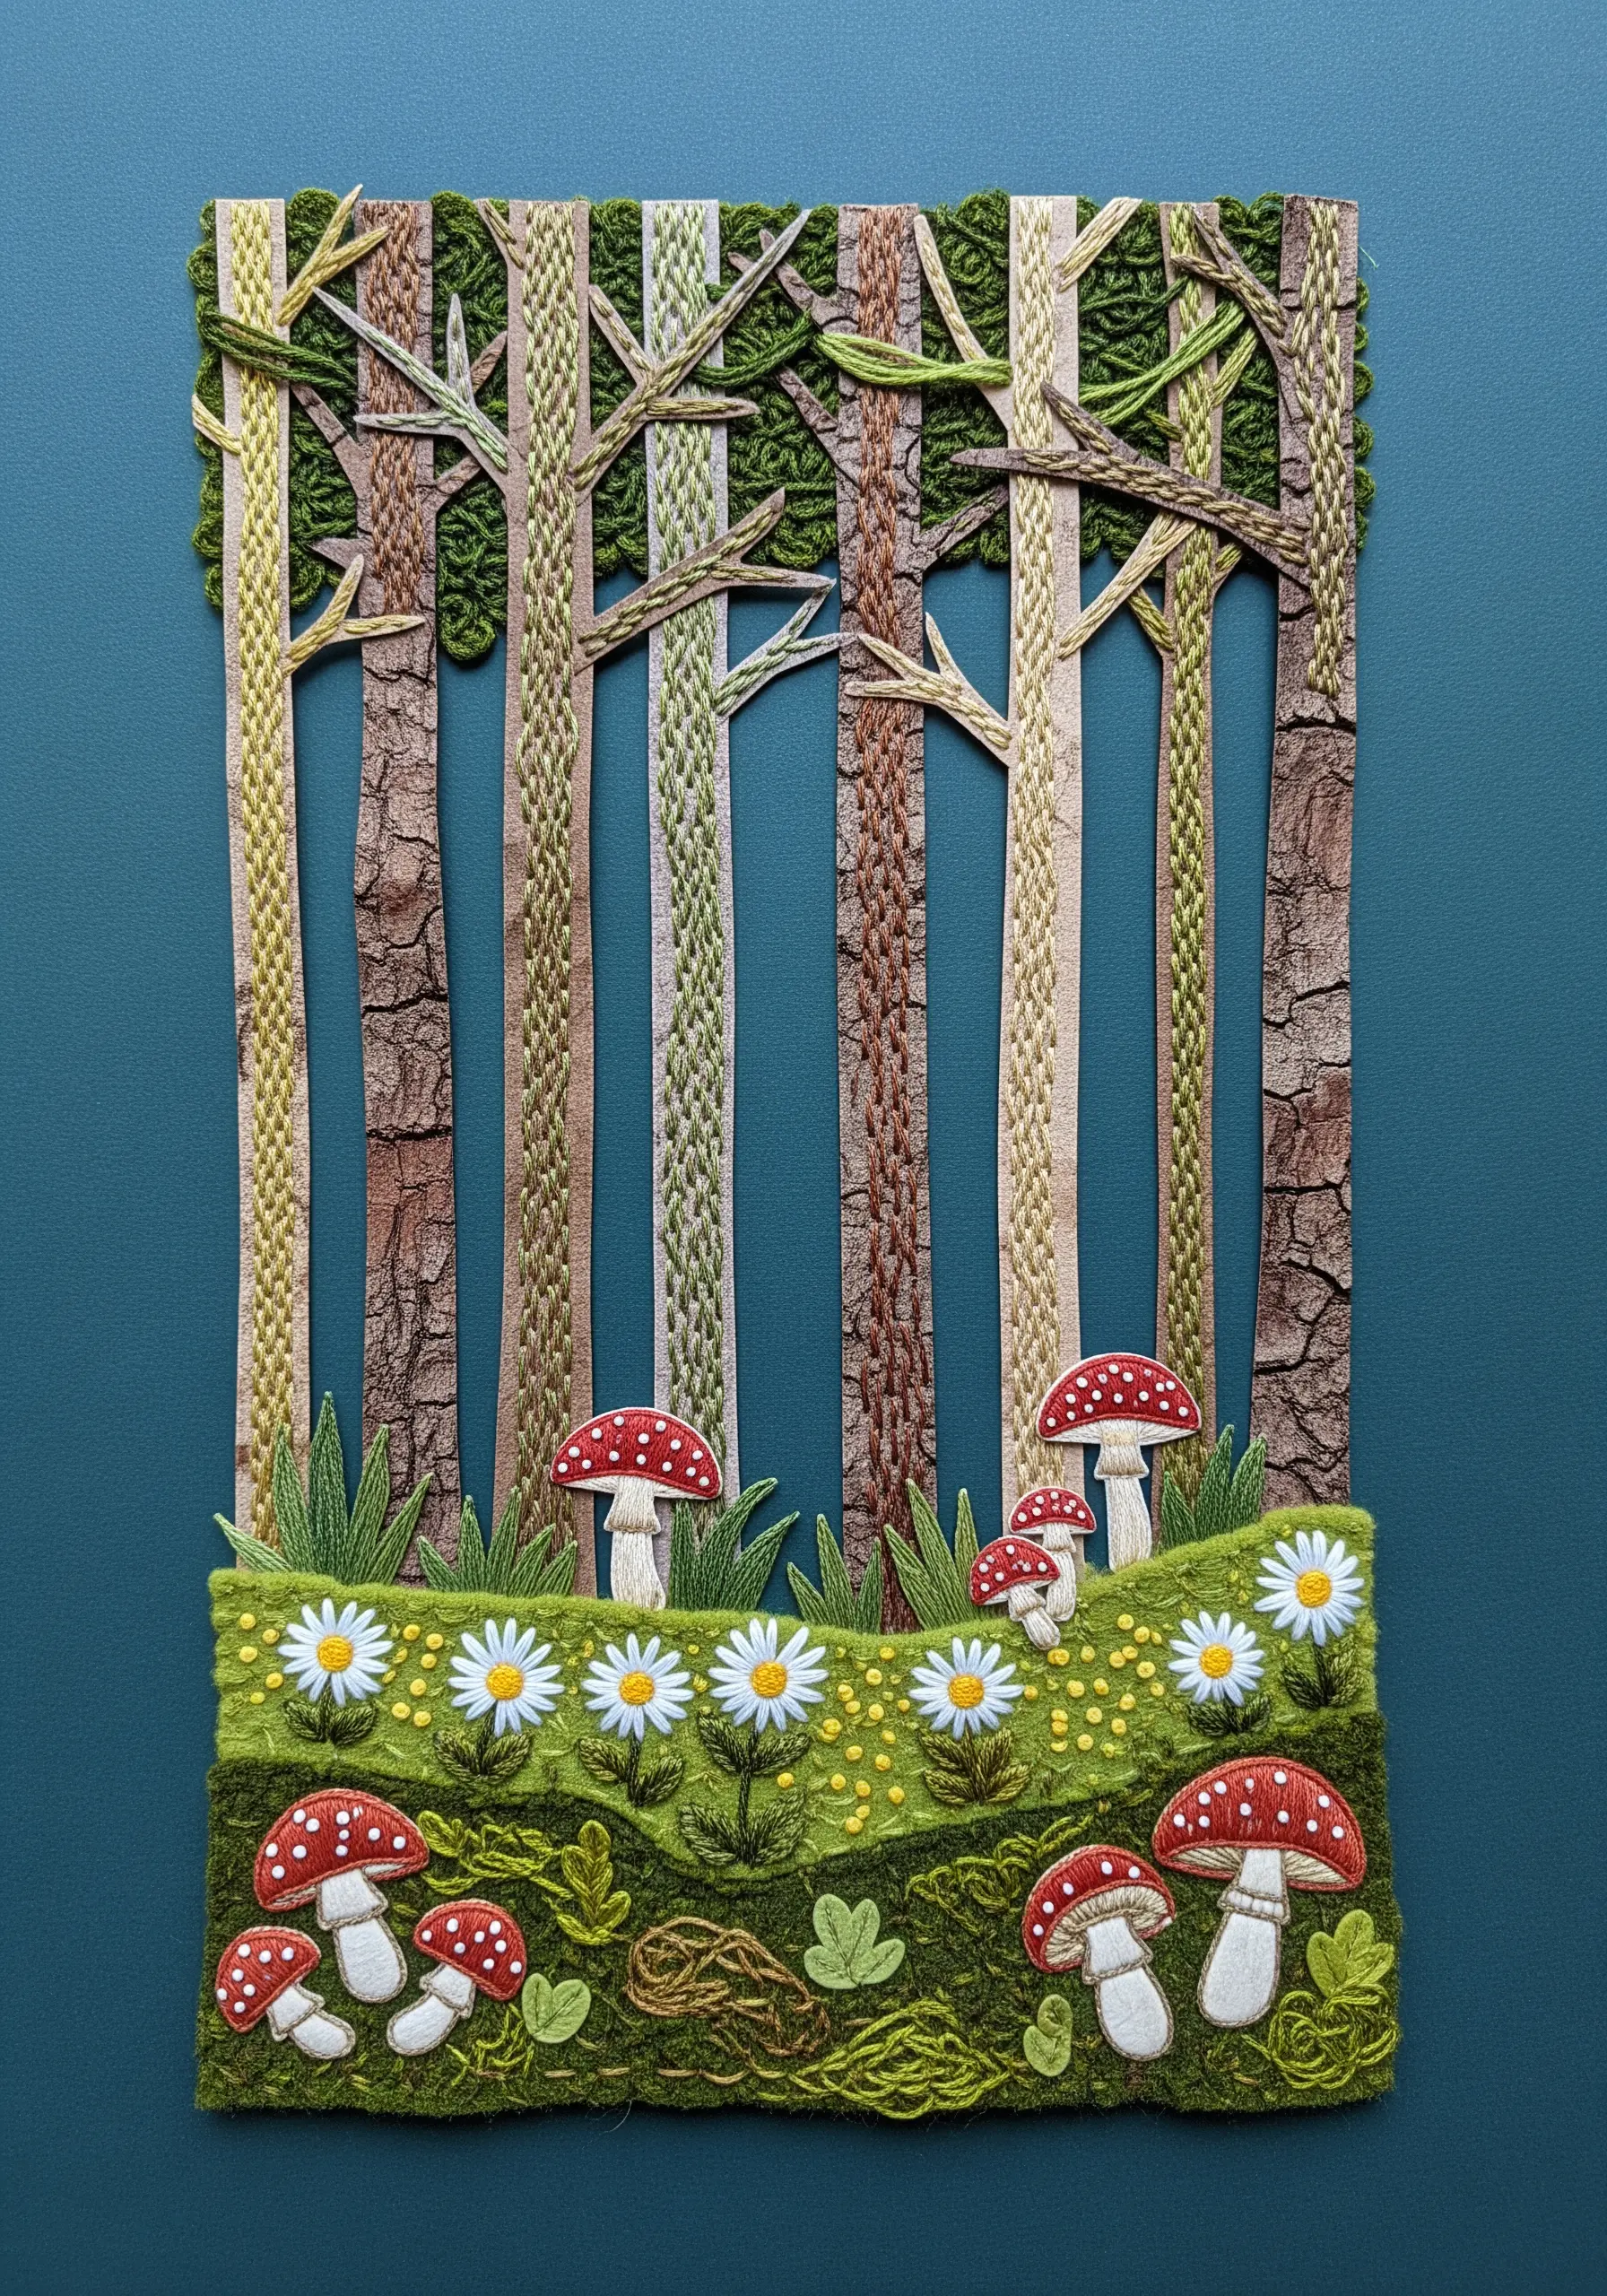
Create a sense of depth by layering paper elements—start with a solid background, add the tree trunks, and then layer the felt or textured paper for the forest floor.
Assign a unique stitch combination to each tree to give it personality and texture; use vertical satin stitches for smooth bark, French knots for rough bark, and split stitches for fine lines.
For the mushrooms, use a padded satin stitch to give the caps a raised, three-dimensional look that makes them pop against the background.
This piece works by combining the flat structure of paper with the rich, tactile quality of diverse embroidery stitches.
10. Transform Typography with Dimensional Satin Stitch
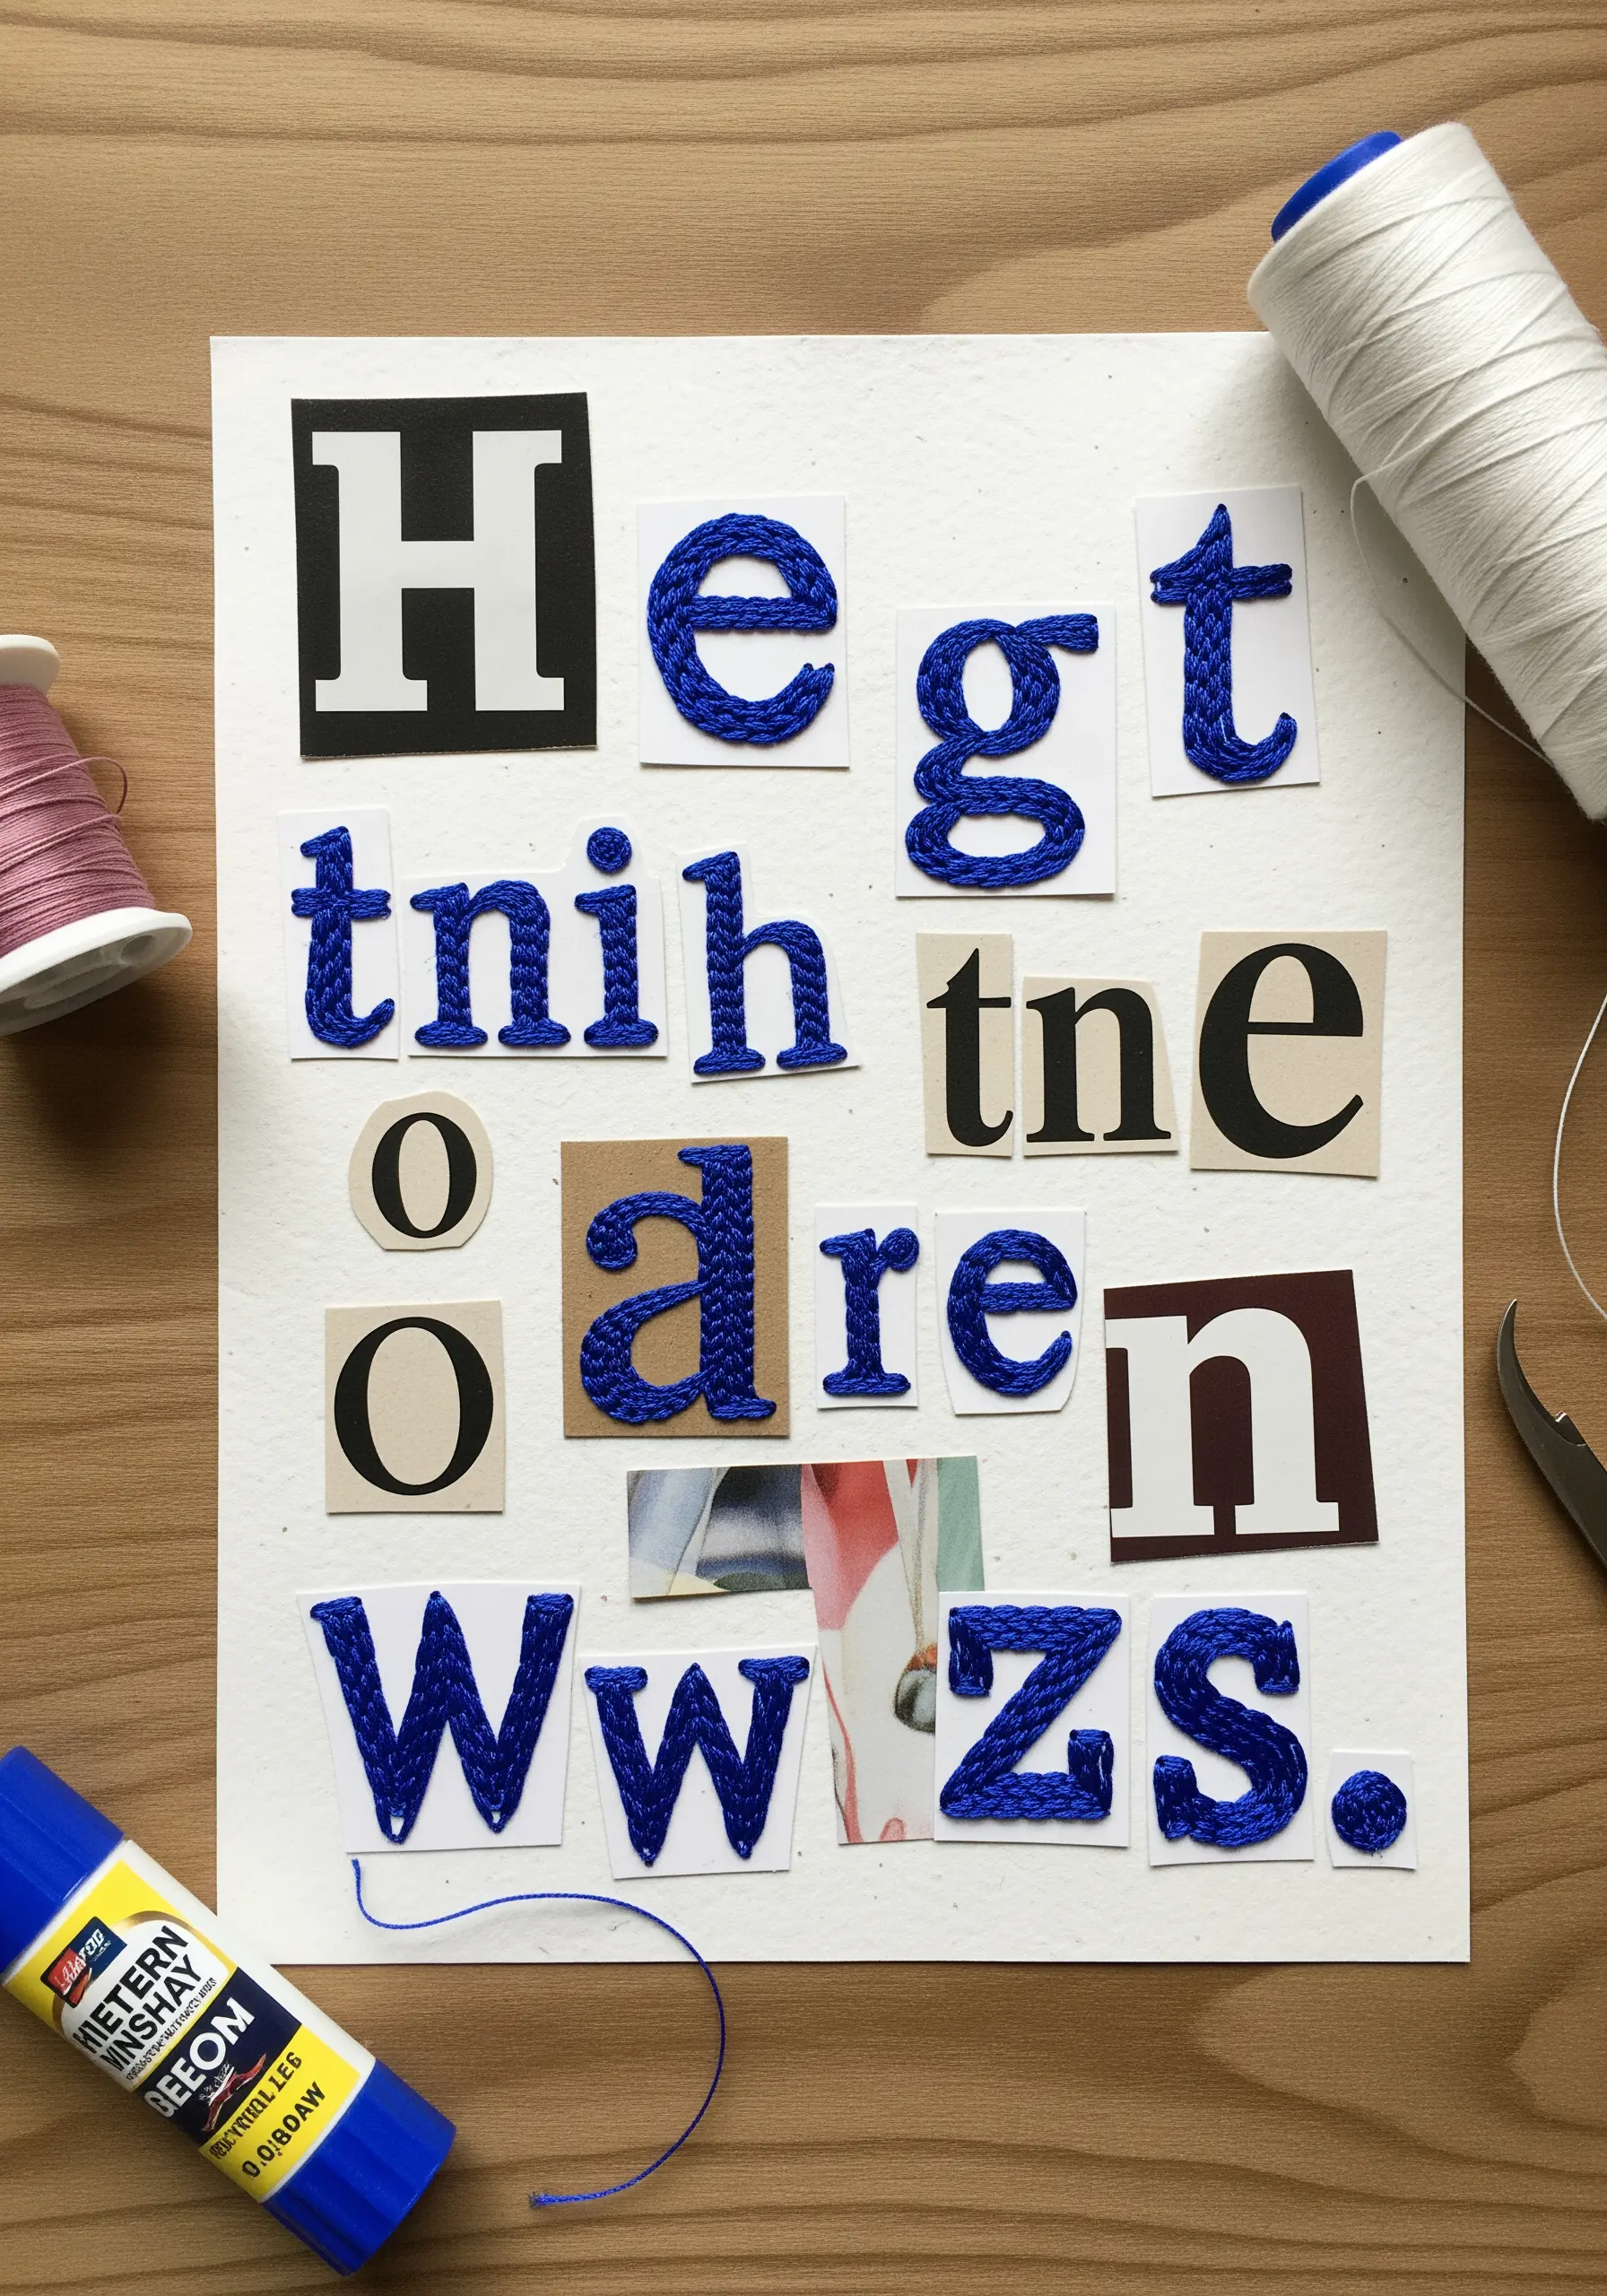
Arrange cut-out letters on heavy cardstock to create your composition, leaving some letters as plain paper for contrast.
For the letters you want to embroider, use a dense satin stitch, ensuring your stitches are tight and uniform to create a smooth, raised surface.
Work your stitches in a consistent direction for each letter segment—horizontally for crossbars, vertically for stems—to create a clean, graphic look.
This technique turns flat typography into a tactile experience, making the letters themselves the focus of the artwork.
11. Create Iridescence with Satin-Stitched Paper Segments
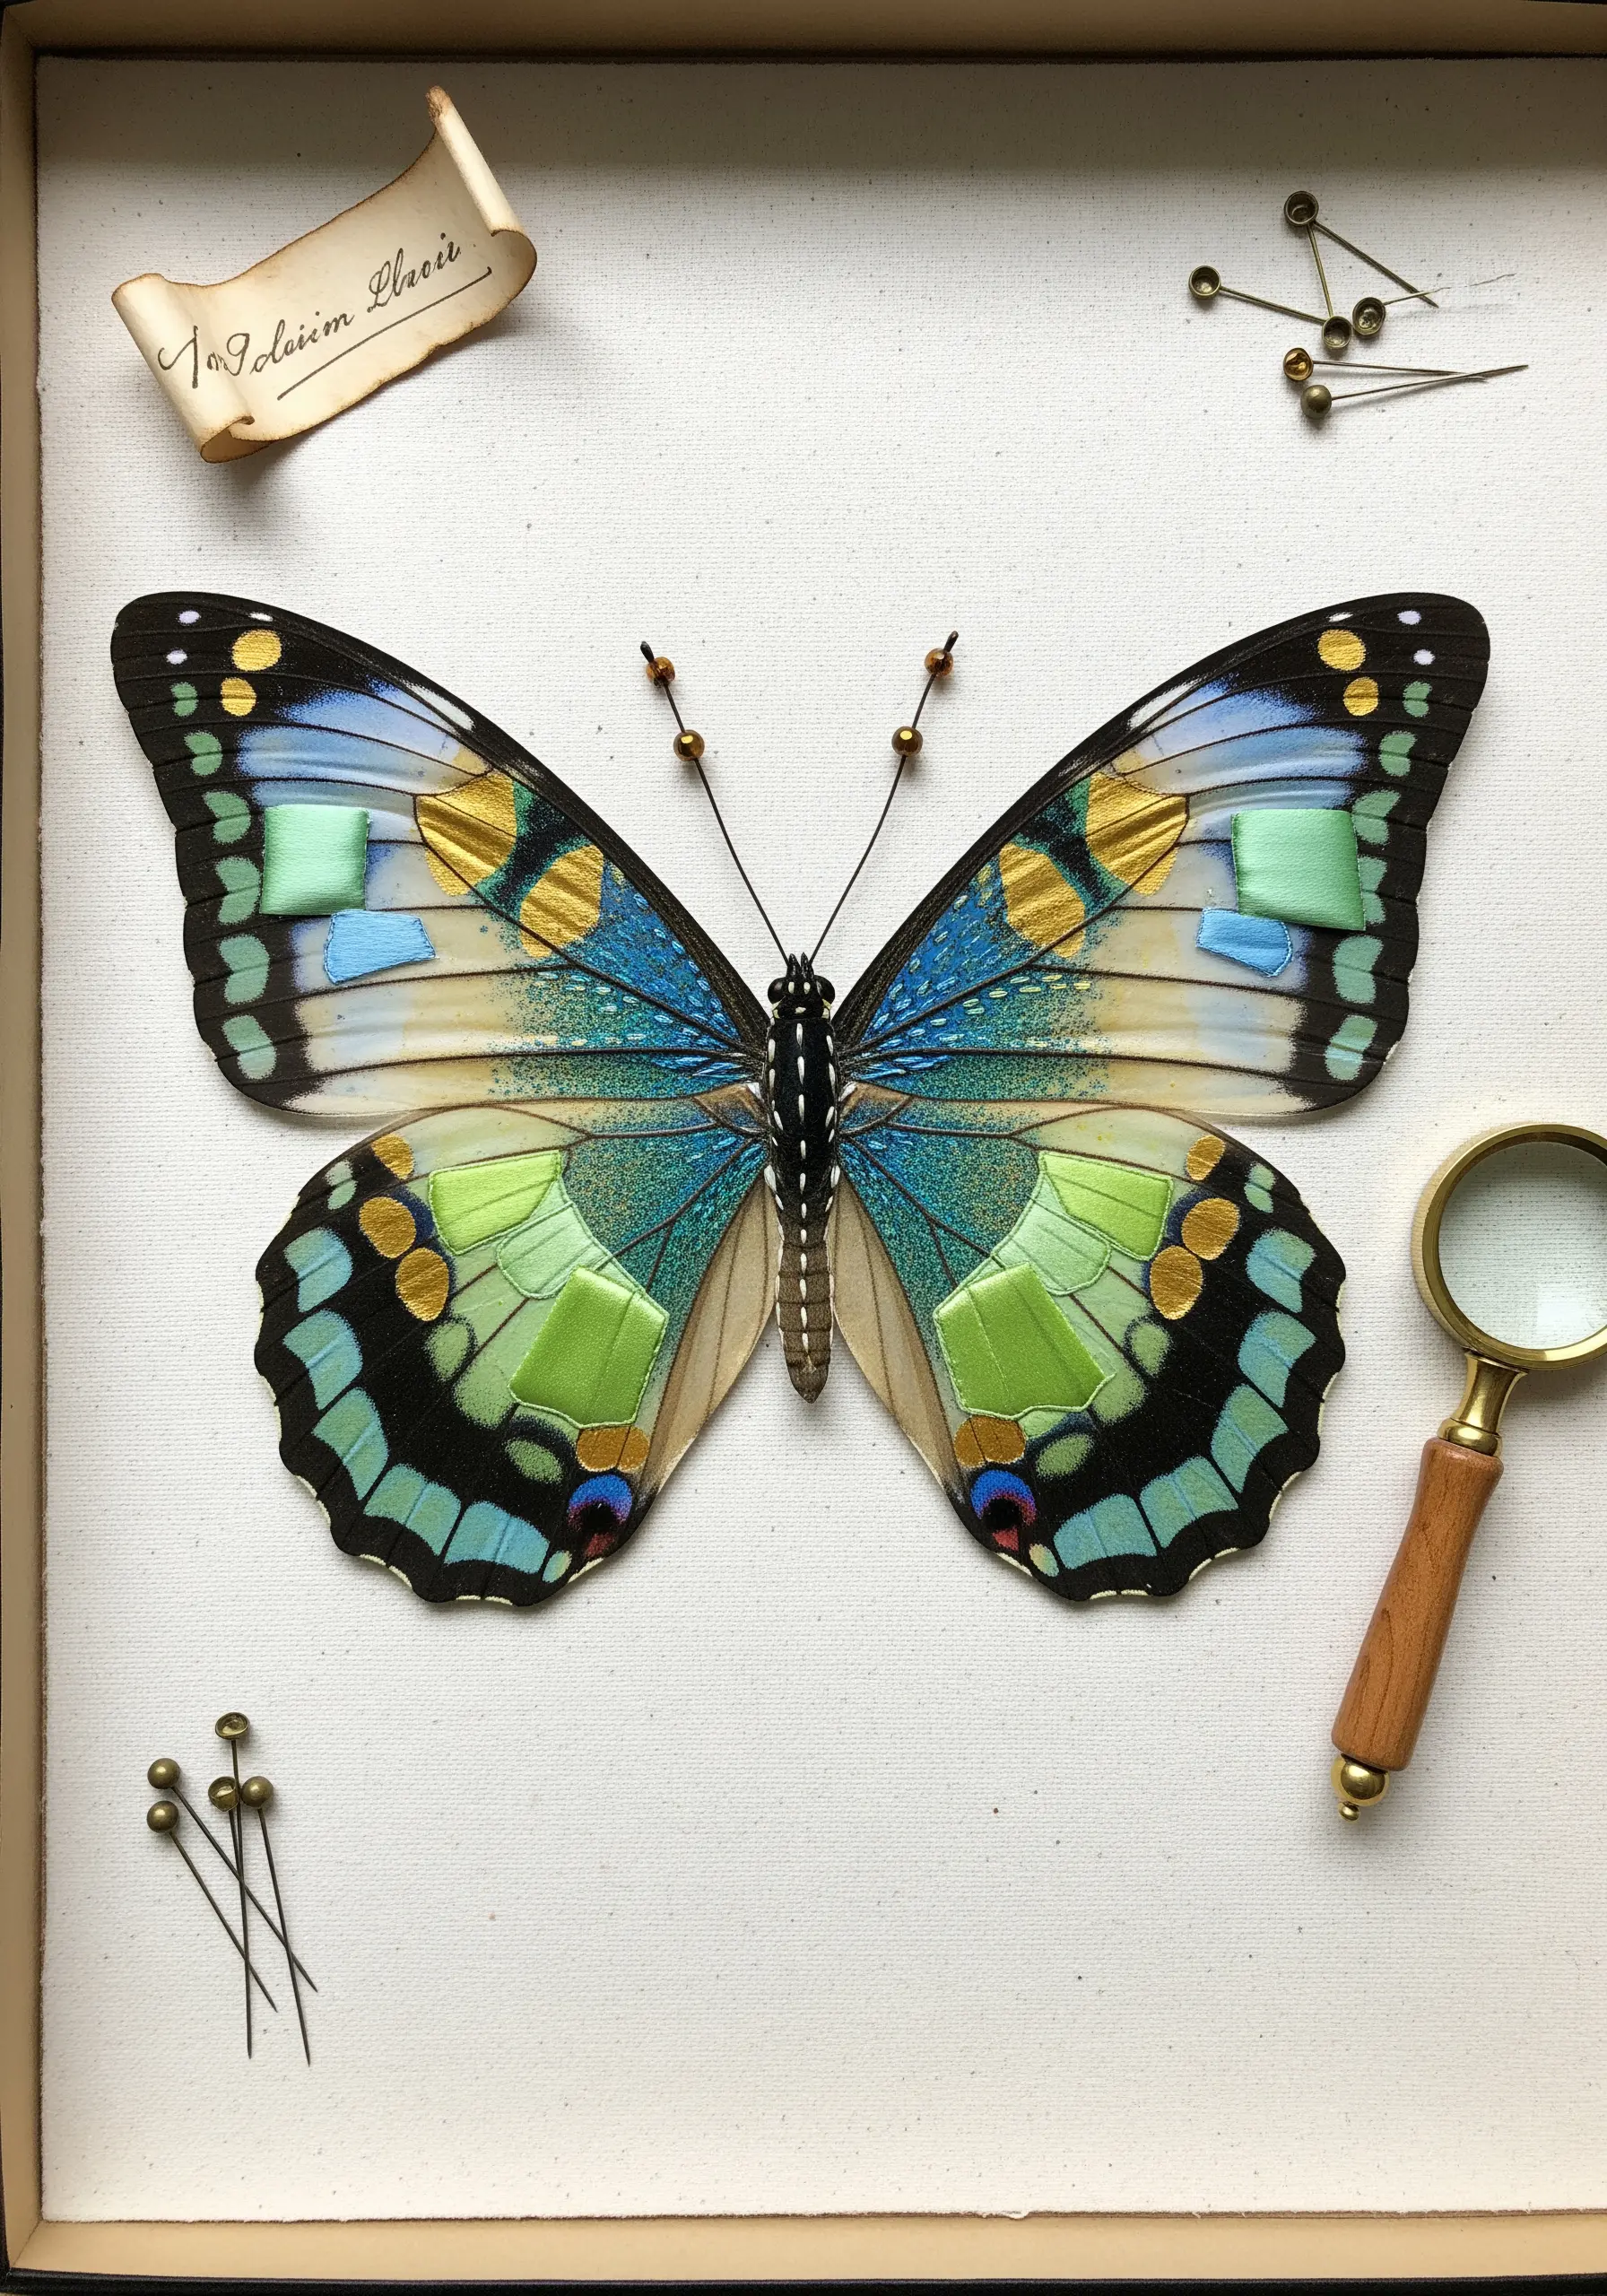
To build a butterfly wing, first cut the distinct color sections from paper and glue them onto a stable base.
Then, fill each paper segment with a long and short stitch or a satin stitch, using silky, high-sheen embroidery floss.
Vary the direction of your stitches slightly in each section to catch the light differently, mimicking the natural iridescence of a butterfly’s wing.
This method of “thread painting” over paper blocks gives you precise color control and a beautifully lustrous finish.
12. Unify a Busy Pattern with Goldwork Accents
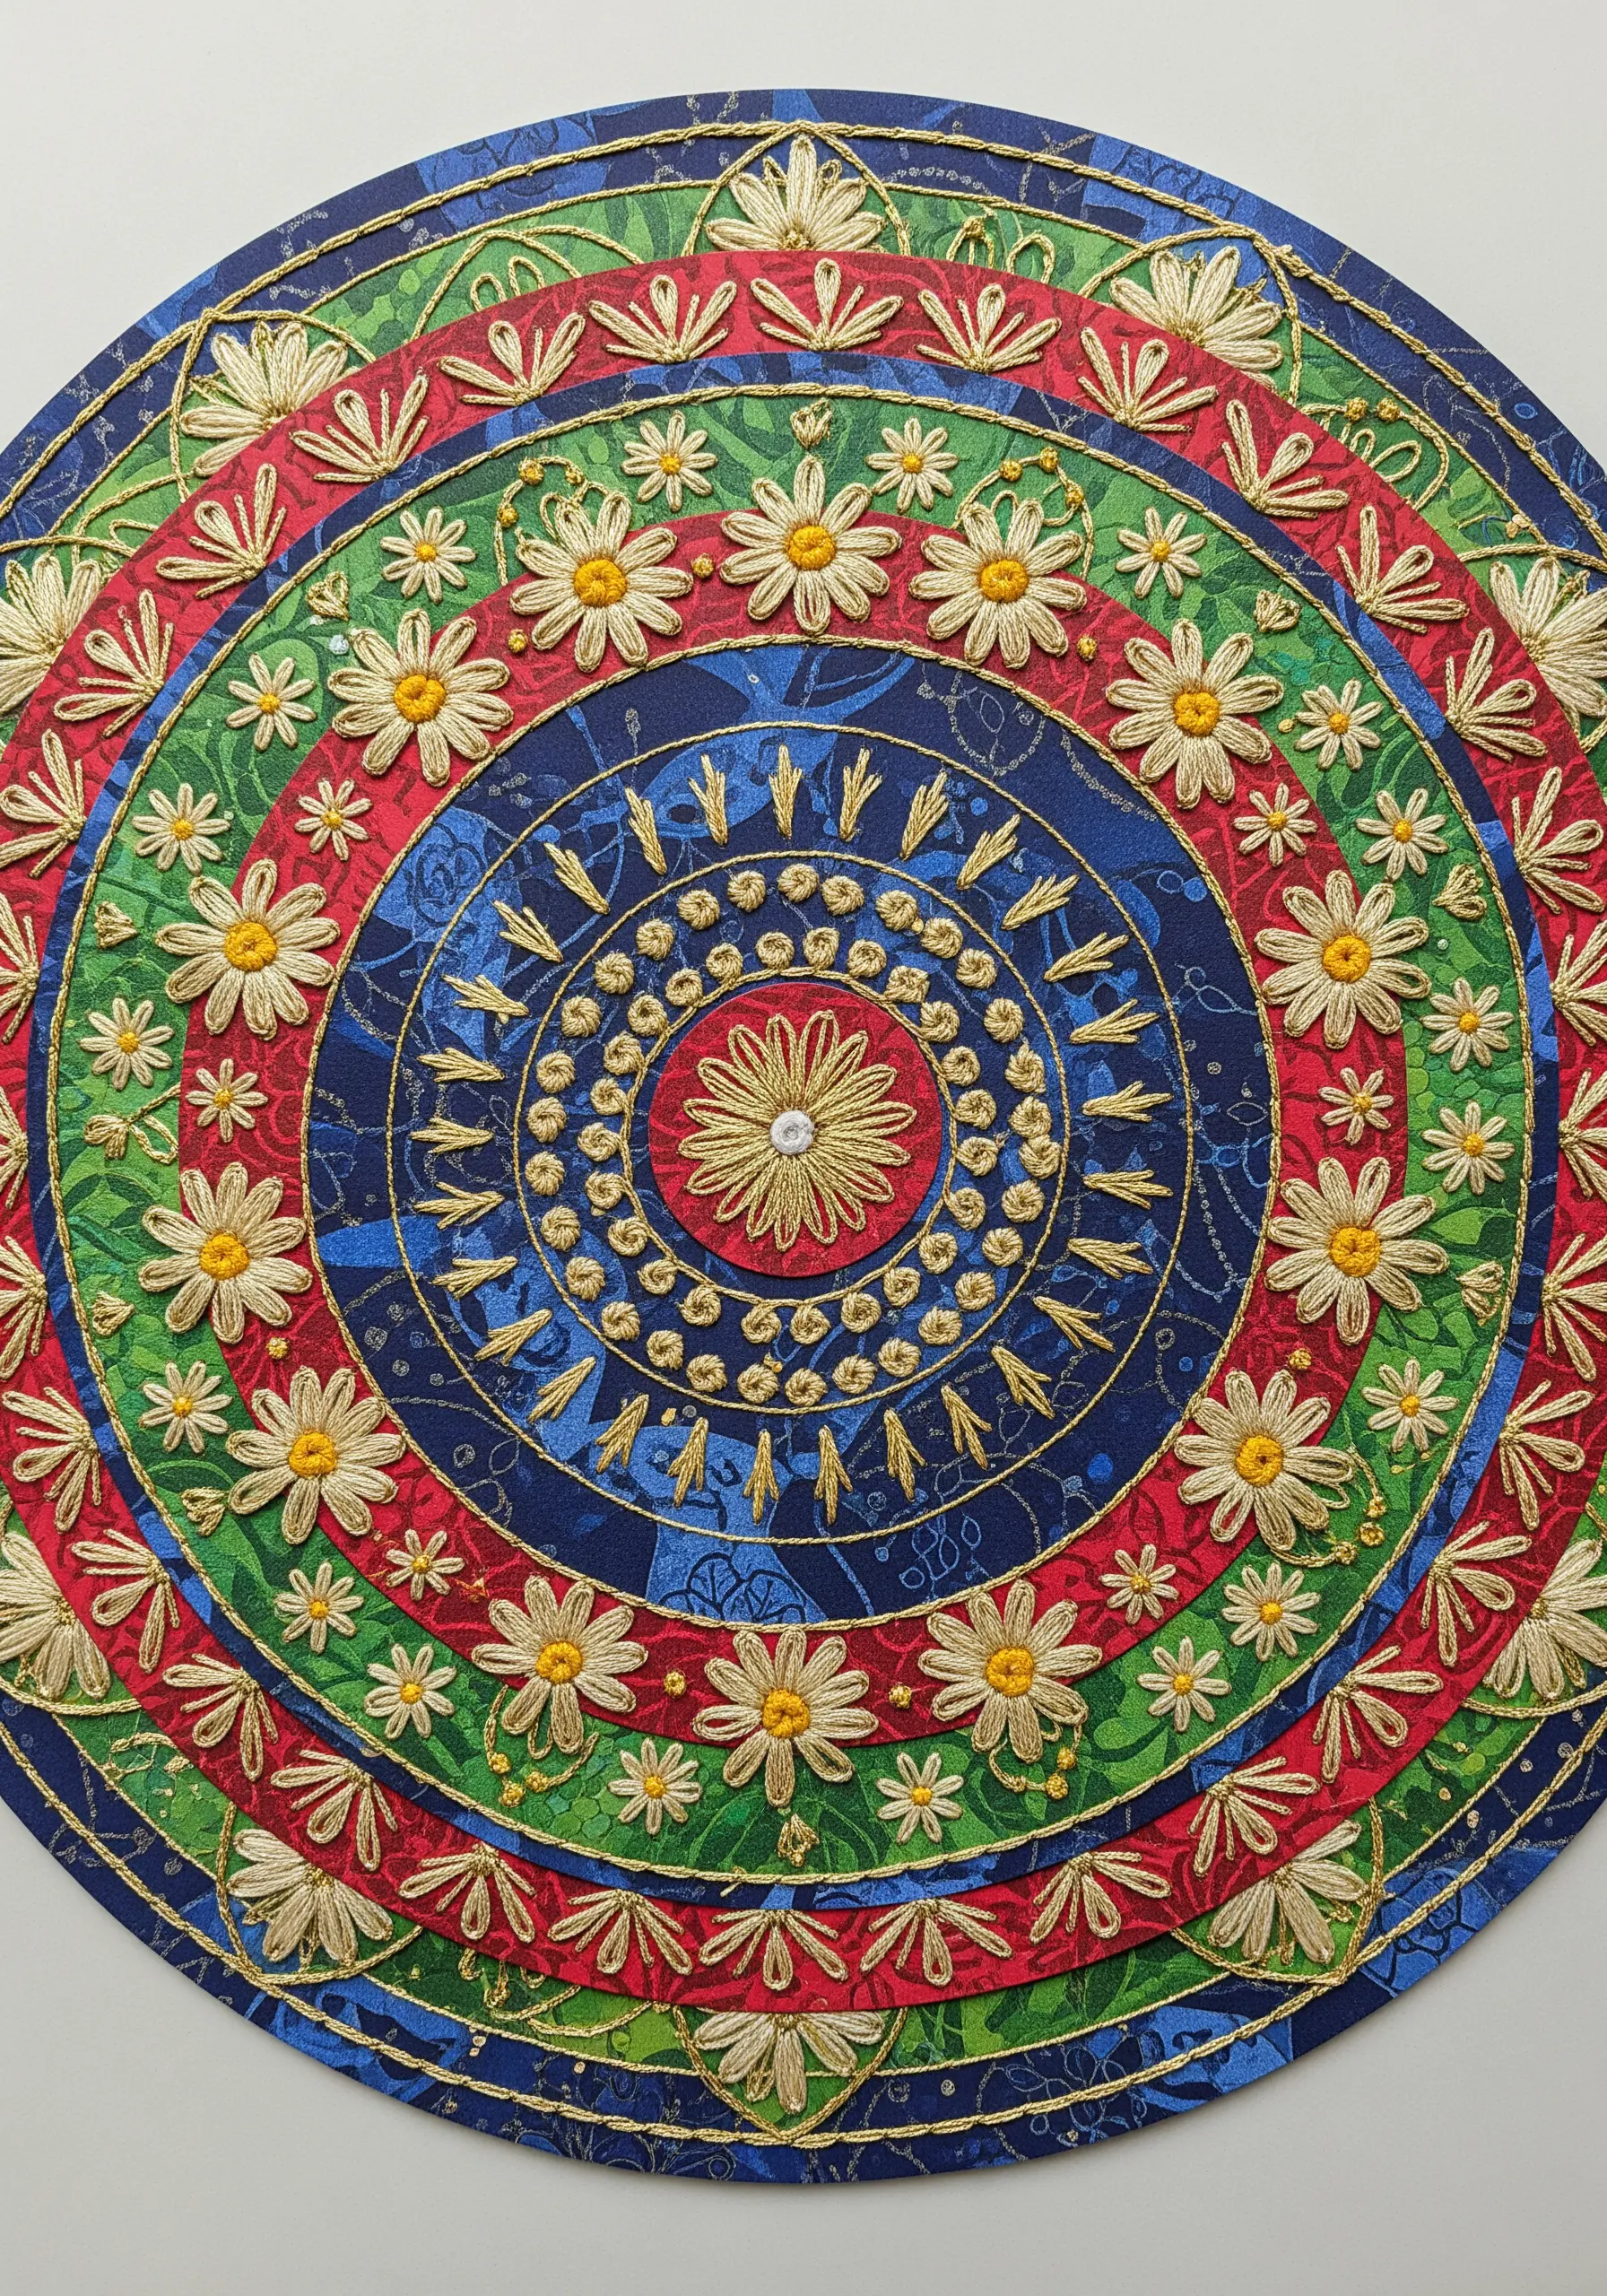
When working on a vibrant, patterned paper base, use a single color of metallic thread to create cohesion and elegance.
Instead of introducing more colors, stitch simple, repeating motifs like lazy daisies, French knots, and straight stitches using only gold thread.
This approach highlights certain areas of the pattern without competing with it, allowing the gold to act as a unifying element that adds a touch of luxury.
The contrast between the matte paper and the shimmering thread creates a rich, dynamic visual texture.
13. Illustrate Orbital Paths with Thread and Sequins
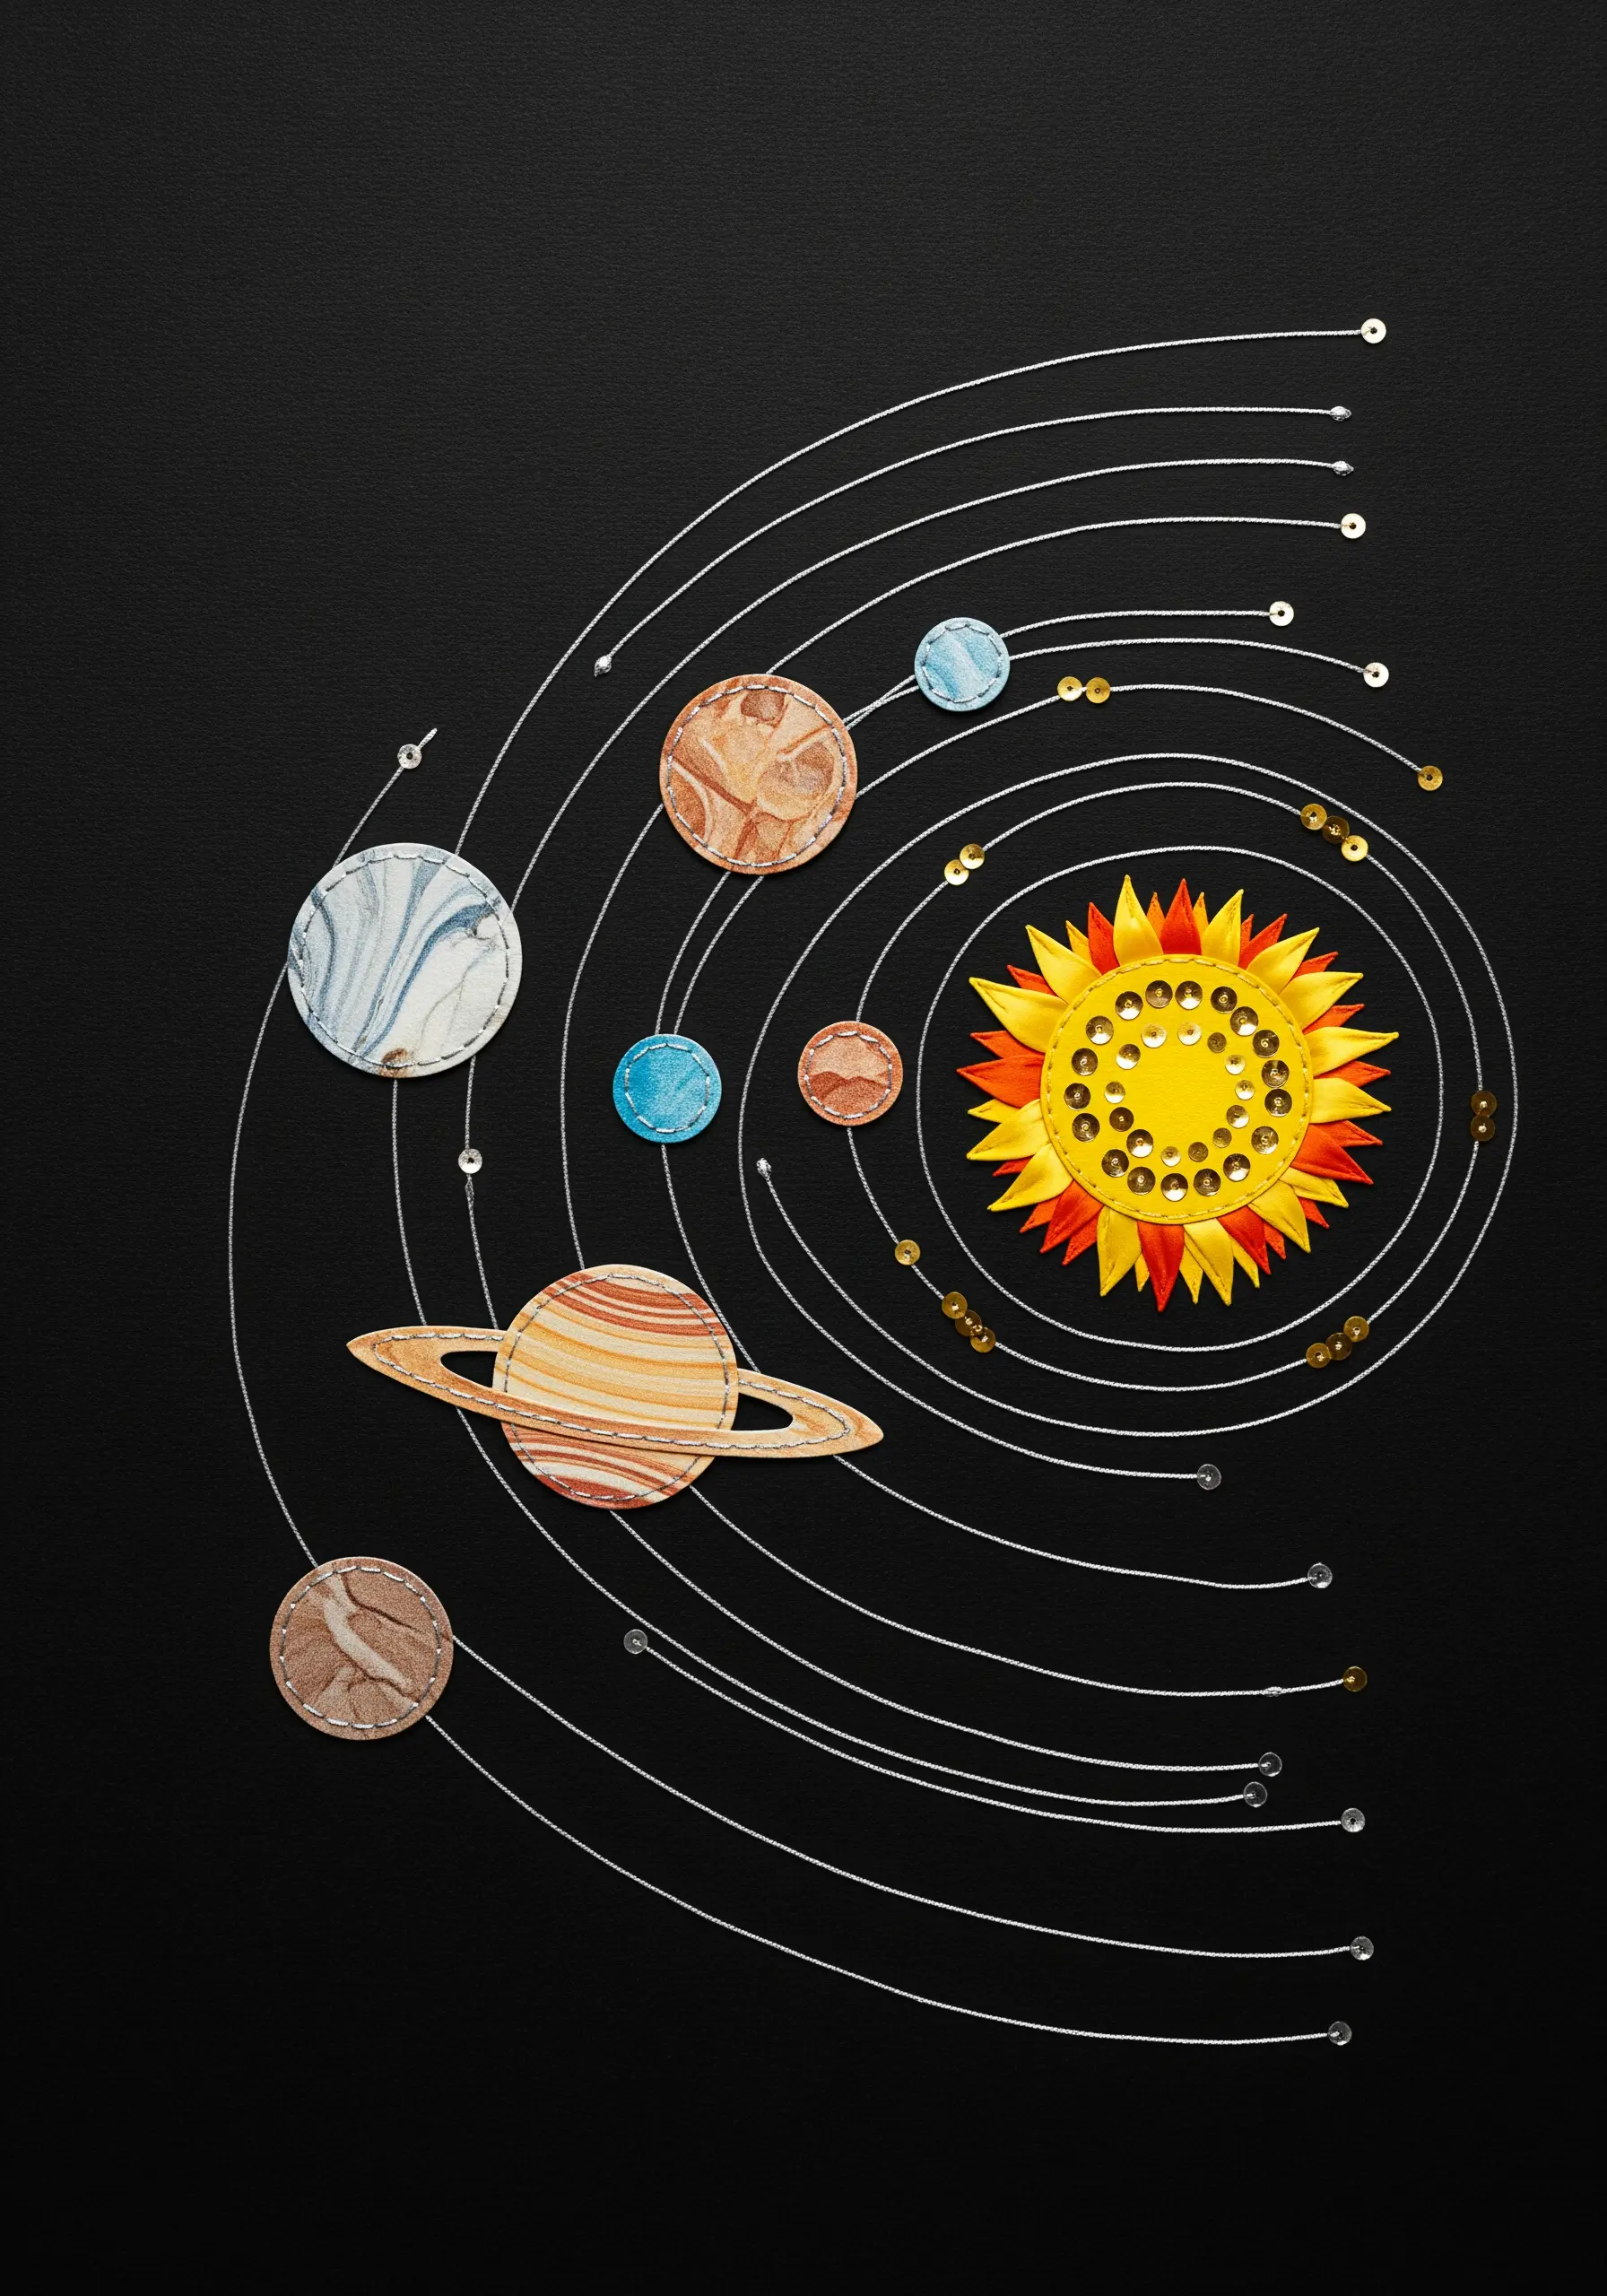
Create your planets from marbled or textured paper cutouts, stitching their outlines with a simple backstitch for definition.
To map out the orbits, use a fine, light-colored thread like silver or white, stitched in long, elegant curves using a running stitch or backstitch.
Strategically place single sequins along the orbital paths to represent smaller celestial bodies or add a touch of sparkle.
This technique effectively uses negative space, allowing the delicate stitched lines to define the vastness of the solar system on a dark background.
14. Add Realistic Dimension with Thread Painting on Paper
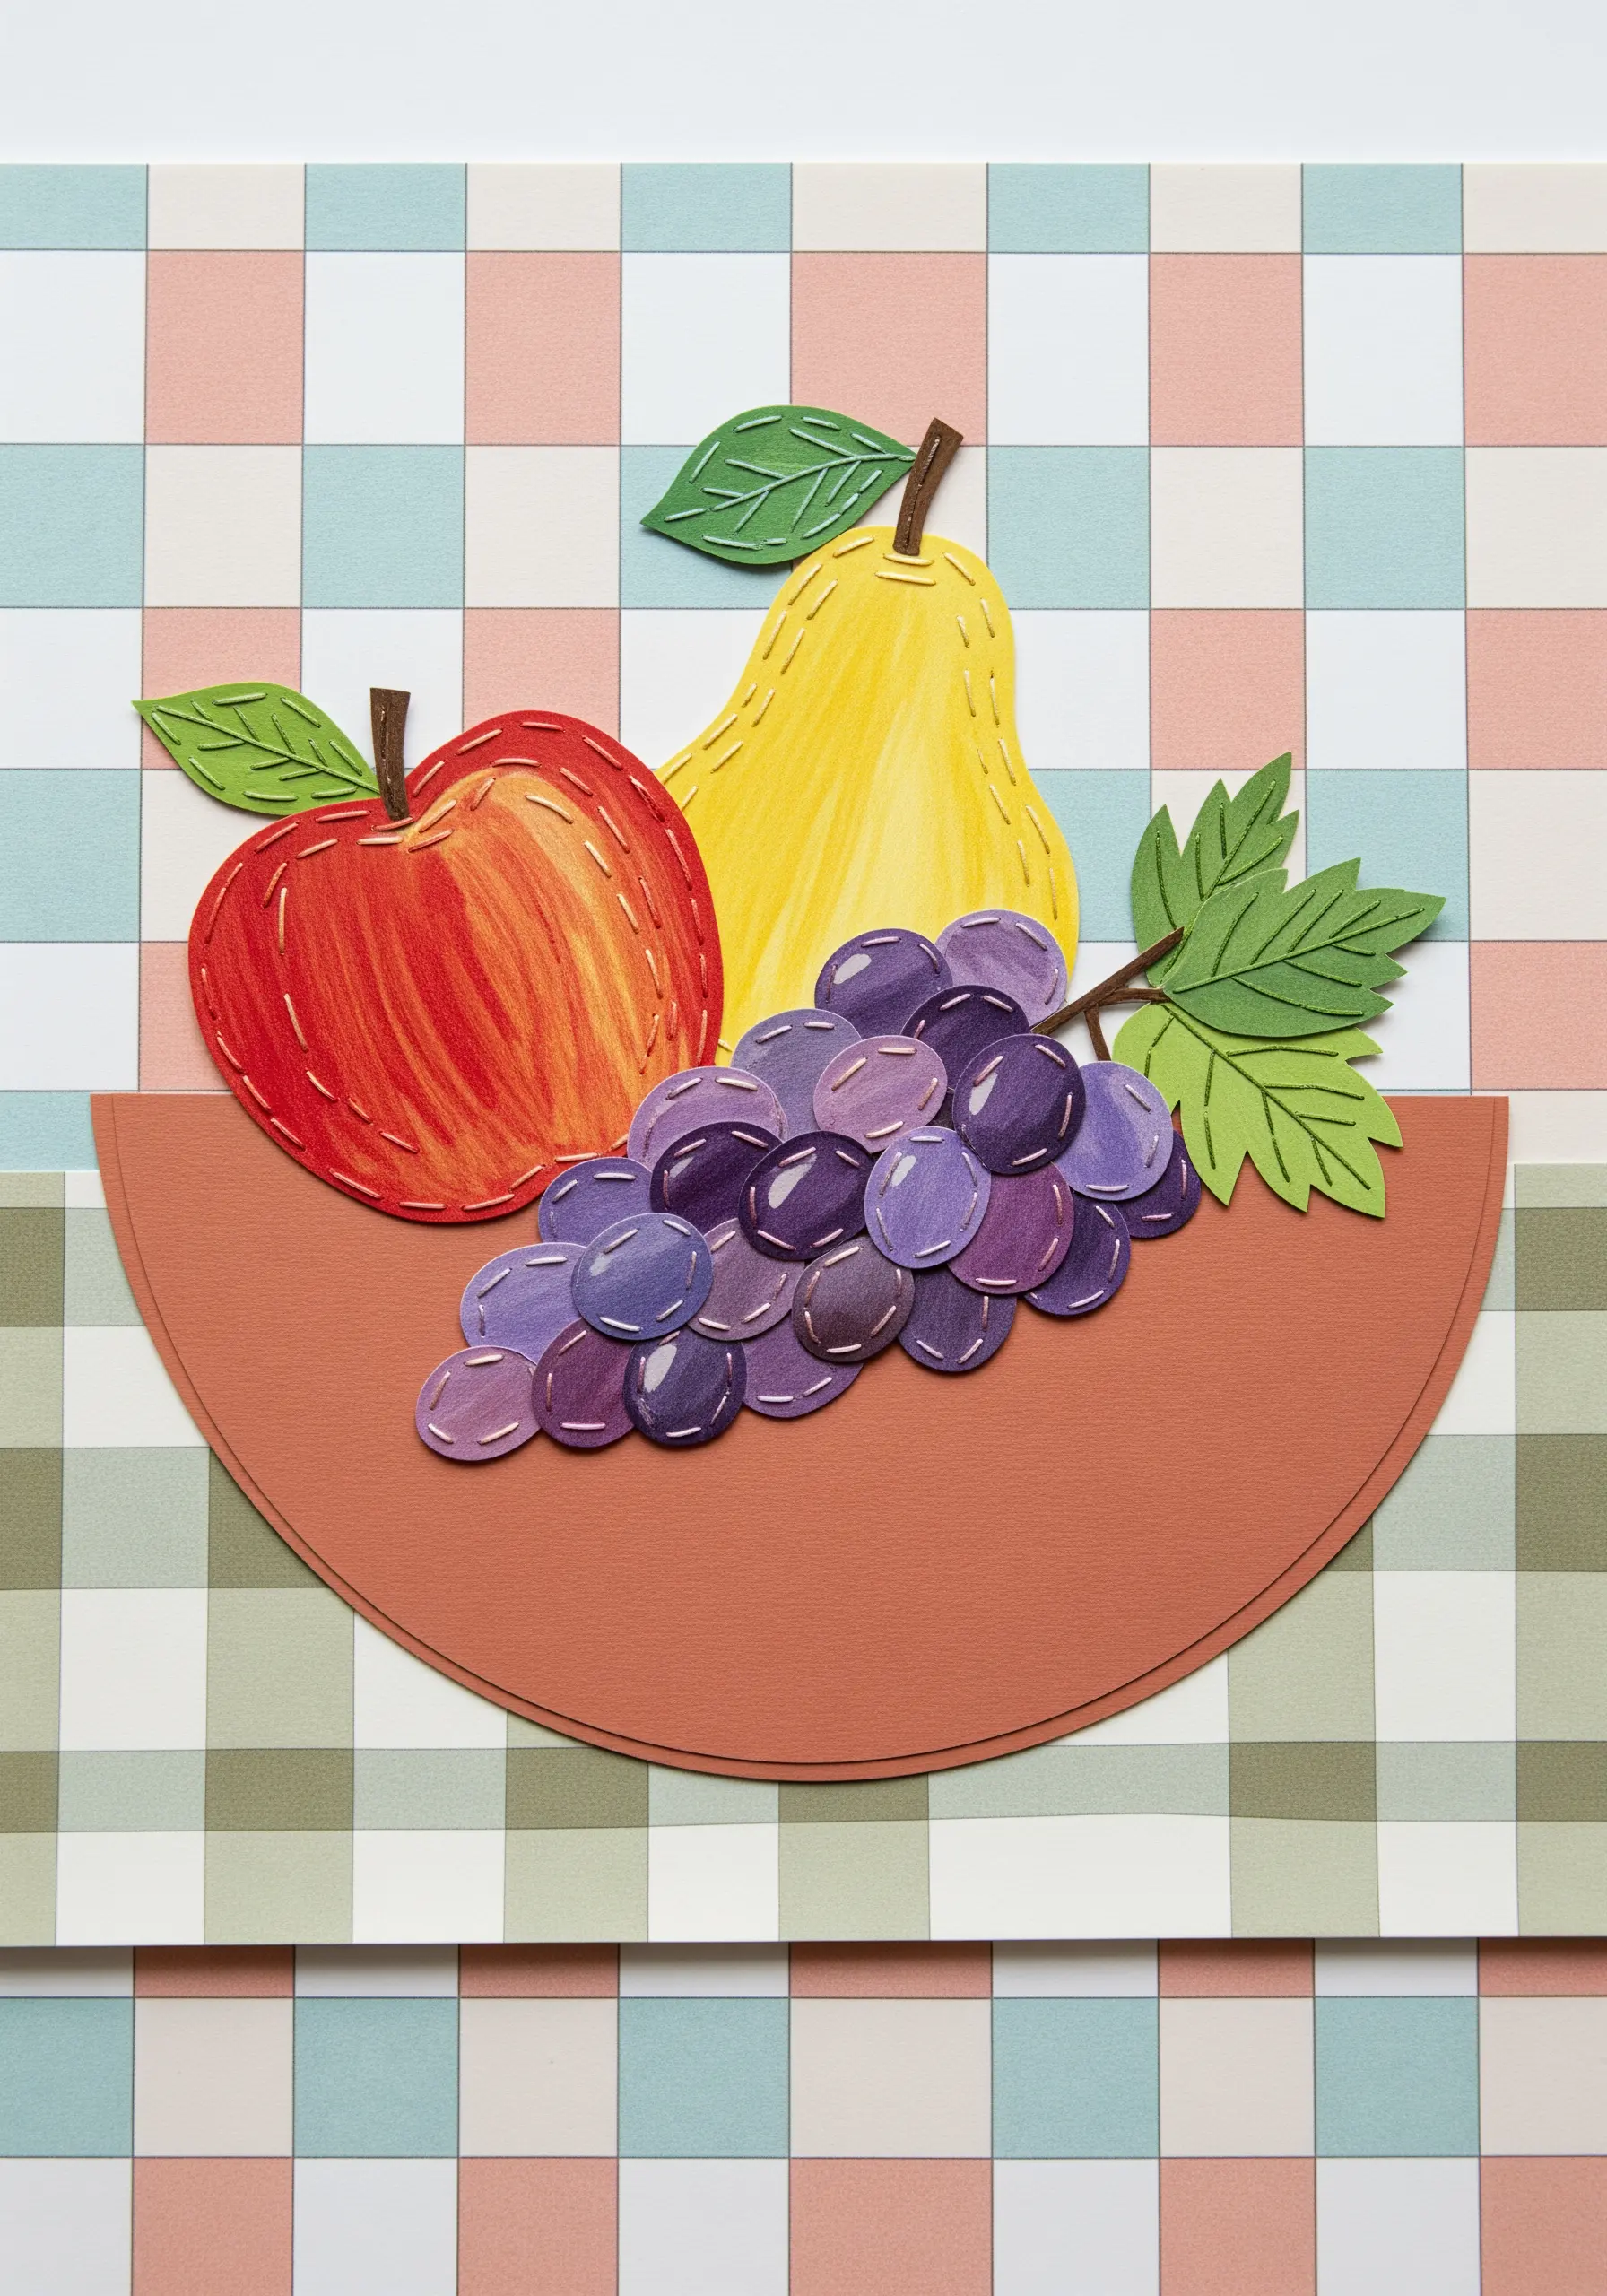
For each fruit, begin with a solid paper cutout as your color base.
Using 2-3 shades of floss for each color, apply long and short stitches directly onto the paper to create gradients and highlights.
For the grapes, stitch each one individually, layering darker purple on the bottom and a lighter shade on top to create a rounded, plump look.
This thread painting technique adds a remarkable level of realism and depth that paper alone cannot achieve.
15. Construct a Fashion Illustration with Fabric and Beadwork
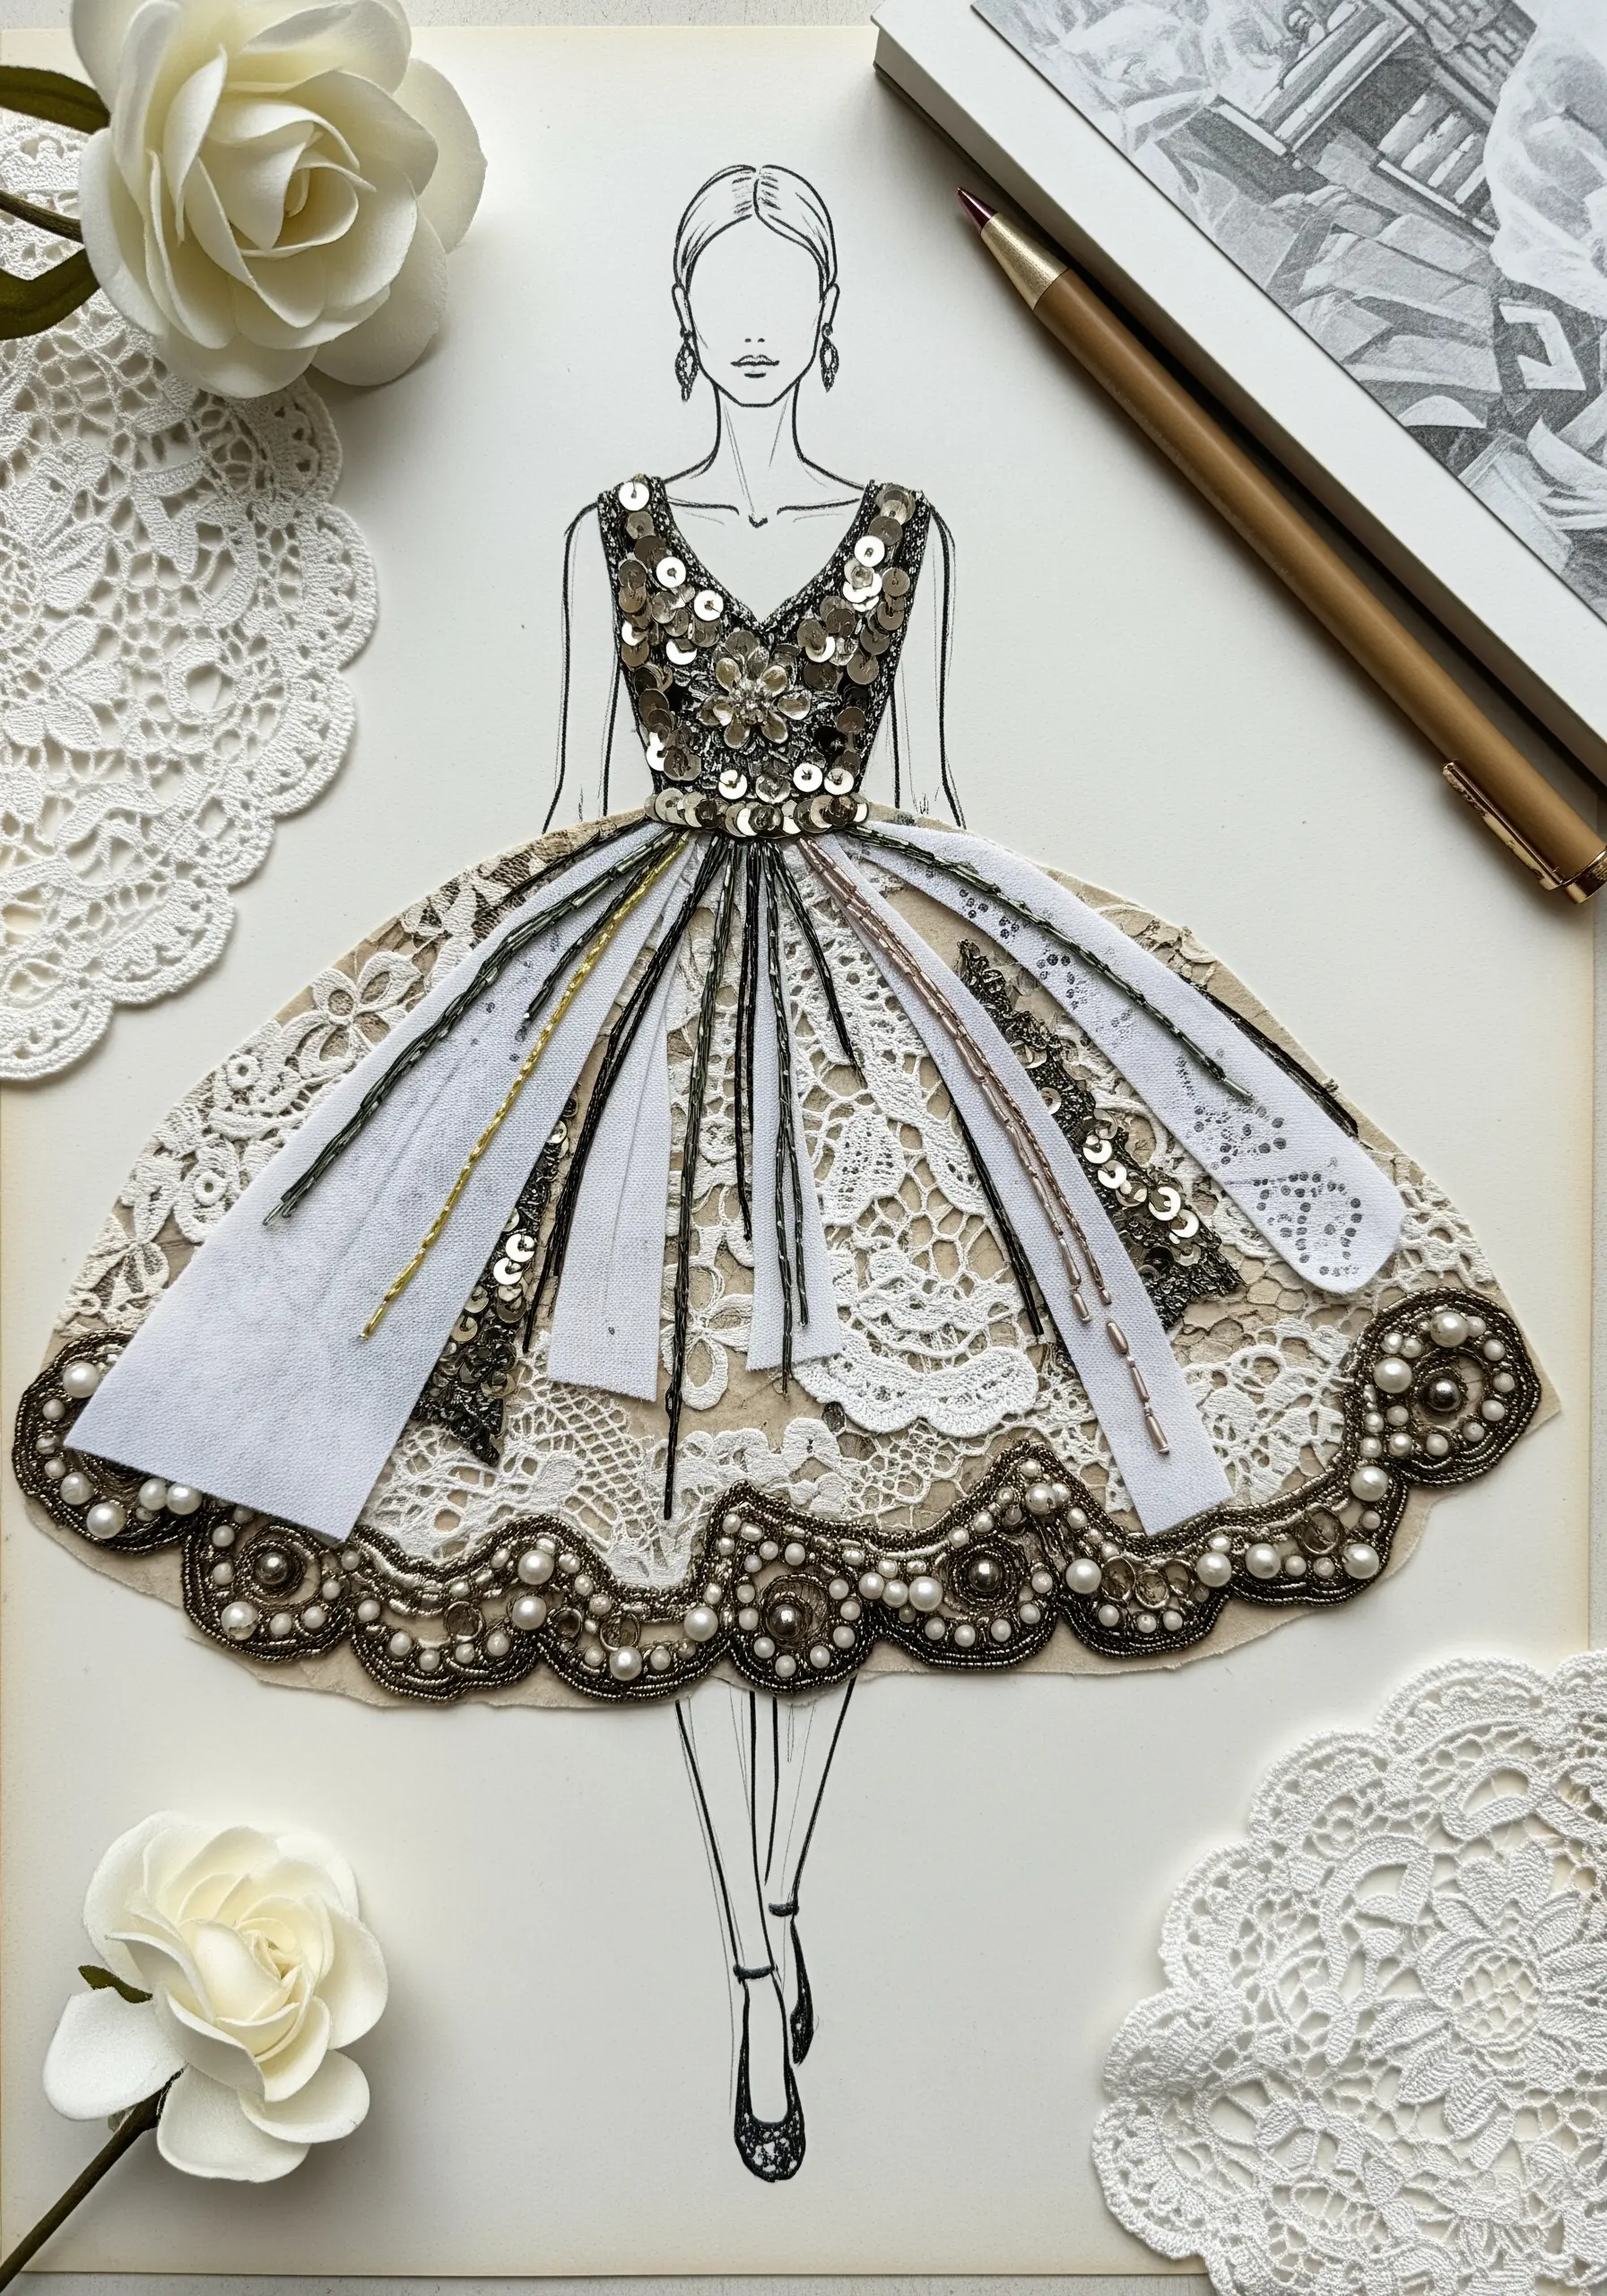
Start with a simple line drawing of a figure as your guide.
Create the gown’s silhouette by layering scraps of lace, tulle, and textured fabric, allowing the edges to remain raw for an expressive look.
Then, add luxurious detail by couching metallic threads, sewing on lines of beads, and scattering sequins across the bodice.
This approach transforms a flat illustration into a tactile haute couture design, focusing all the texture and embellishment on the garment itself.
16. Create a Lush Jungle with Layered Paper and Woven Stitches
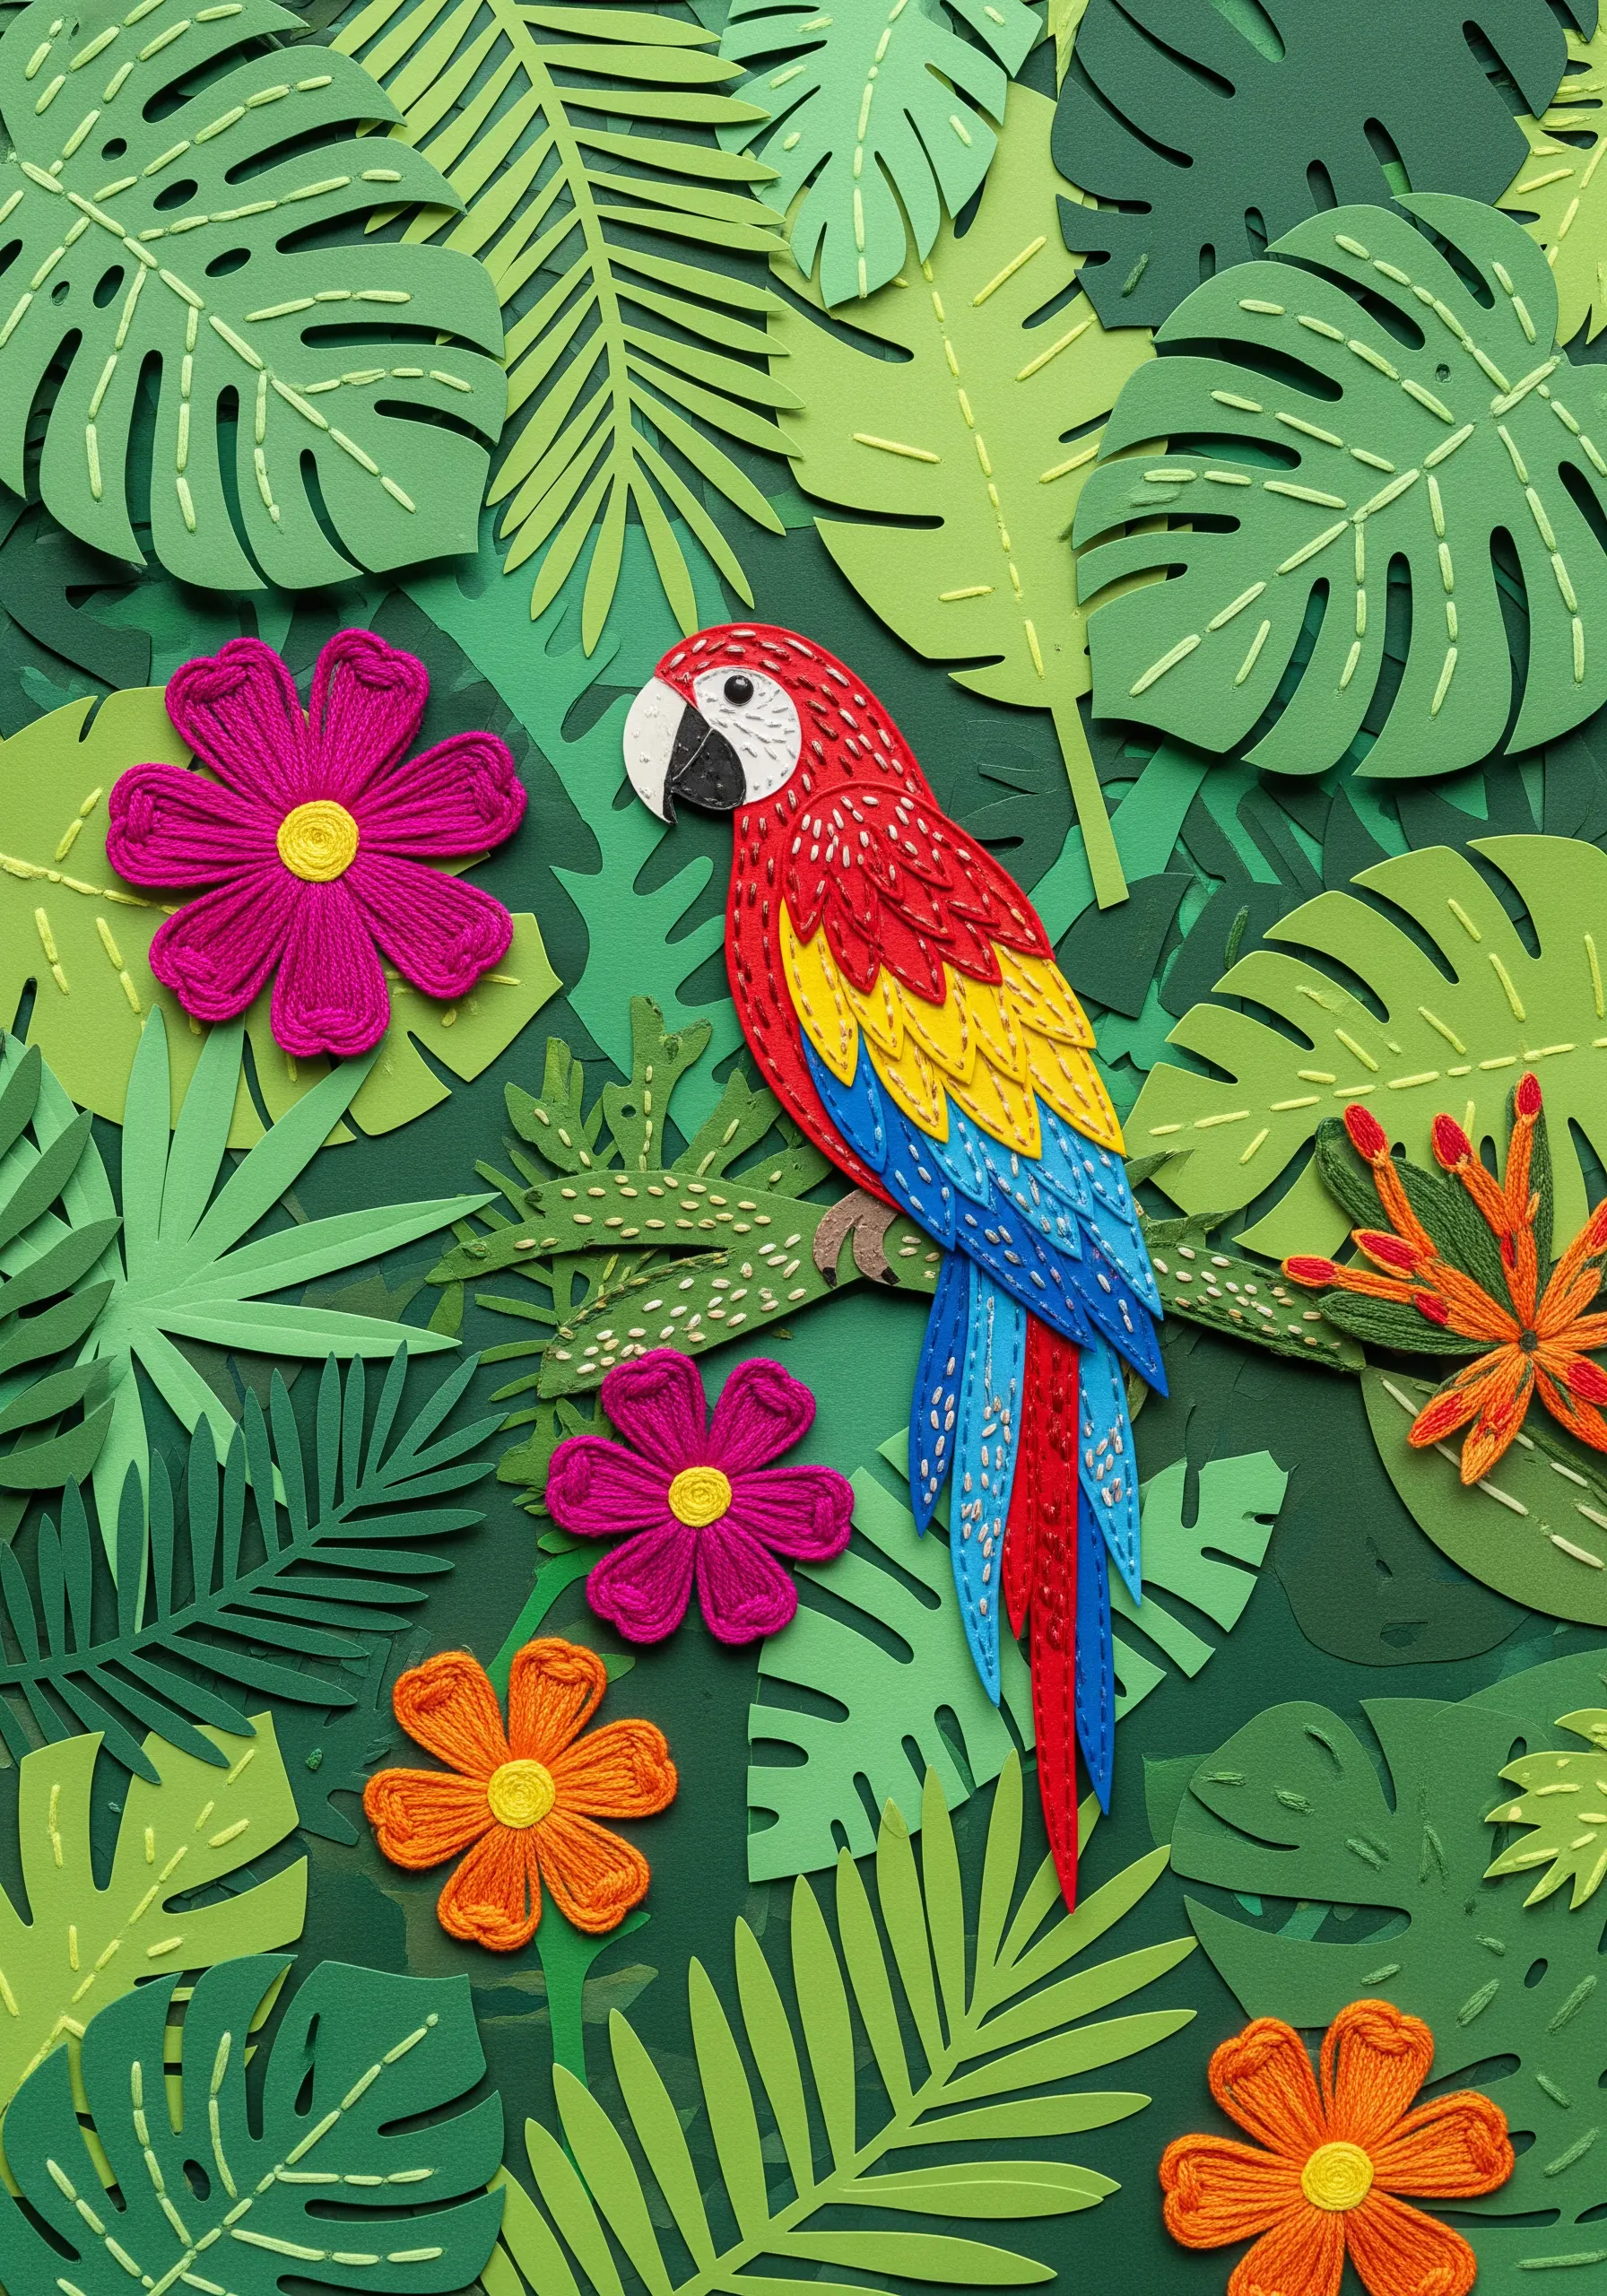
Achieve a dense, tropical feel by layering multiple shades of green paper cut into leaf shapes.
For the flowers and parrot, use a woven wheel stitch (or spider web stitch) to create thick, textural petals and feathers.
This stitch is perfect for paper because it requires minimal piercing; you create a foundation of straight stitches and then weave the thread over and under them.
The result is a highly dimensional element that sits on top of the paper rather than passing through it excessively, preserving the paper’s integrity.
17. Suggest Ideas with Minimalist Line Stitching

Combine printed paper elements with delicate, suggestive line stitching to complete a scene.
Here, the steam from the coffee cup is created with just a few wavy lines of single-strand white thread using a simple backstitch.
The stitching doesn’t just decorate; it adds an element of motion and warmth that isn’t present in the paper cutouts.
This minimalist approach is powerful because it trusts the viewer’s imagination to fill in the gaps, creating a charming and evocative image with very little thread.
18. Sculpt a Landscape with Torn Paper and Textural Knots
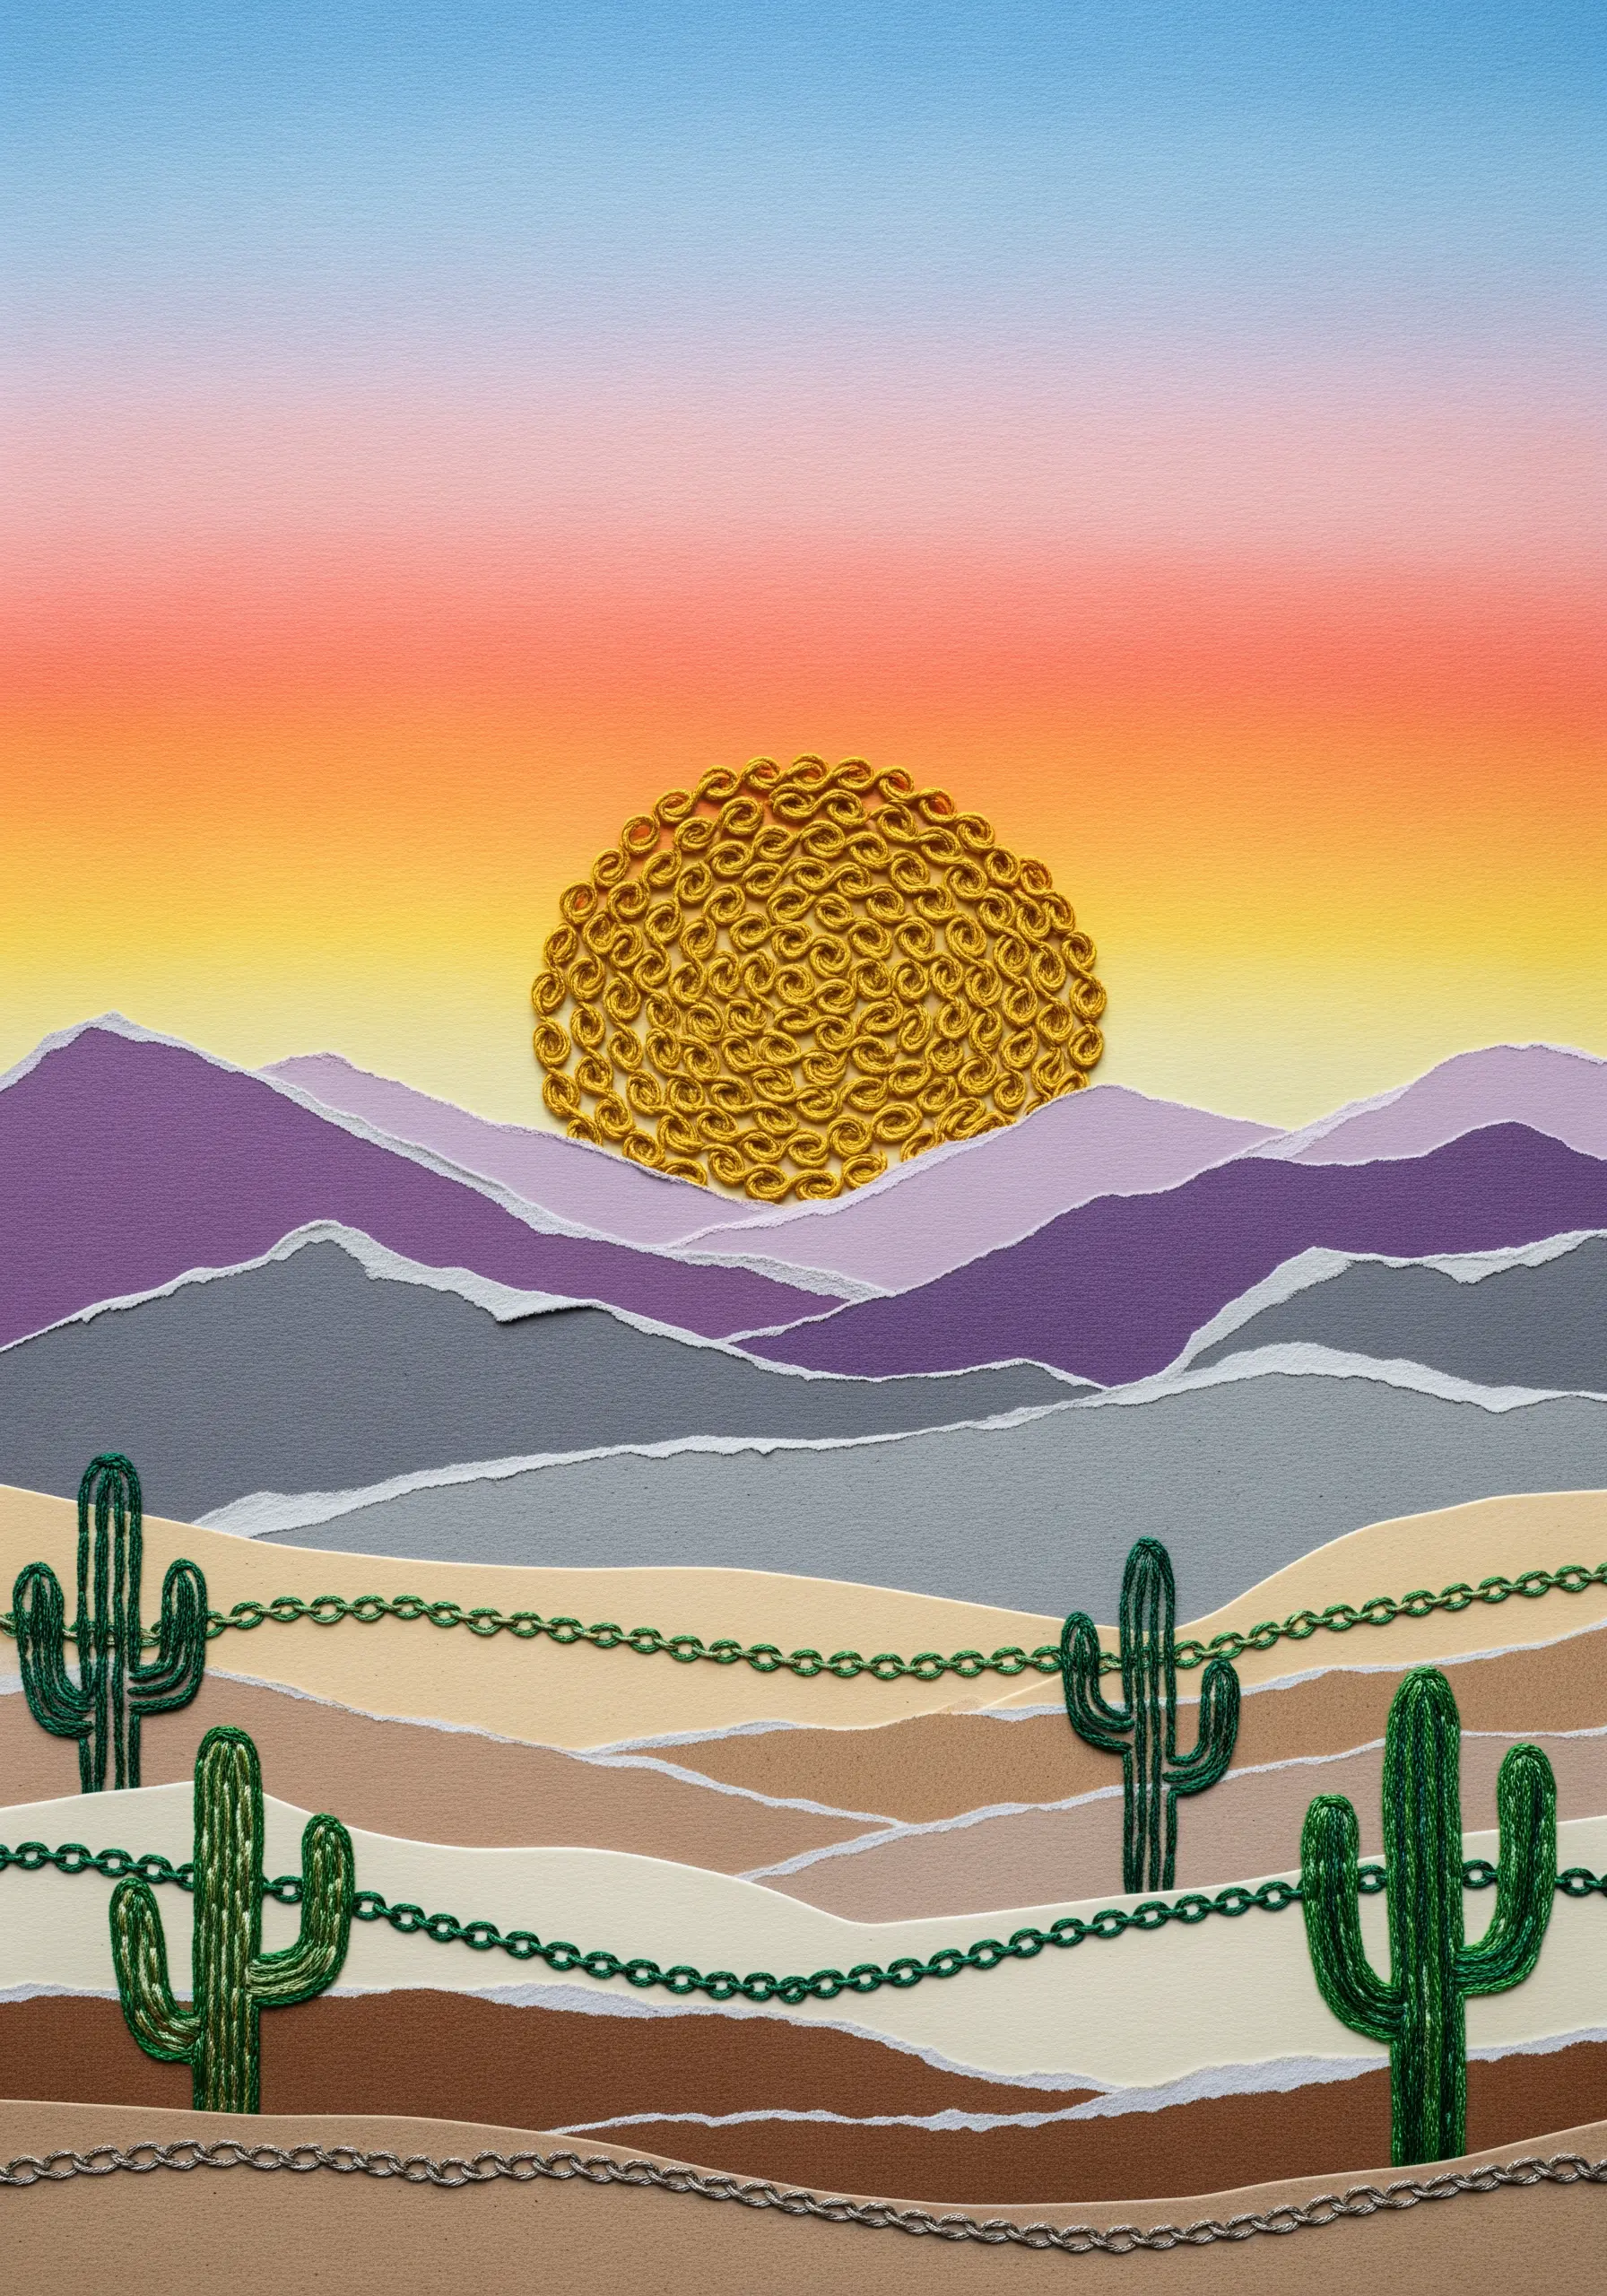
Create rolling hills and mountains by layering torn paper in various earth tones; the torn edges provide a soft, organic texture that mimics natural terrain.
For the sun, create a dense cluster of bullion knots or French knots using a vibrant golden-yellow thread.
The high texture of the knots contrasts beautifully with the flat paper, making the sun a powerful focal point.
Use a simple chain stitch for linear elements like fences, which adds a graphic detail that grounds the composition.
19. Weave Thread Through Paper to Express Movement

Use sheet music or any meaningful text as your background to instantly add a layer of narrative.
Instead of stitching *on* the paper, weave thick, multicolored floss *through* it by making small, strategic slits with a craft knife.
This allows the thread to flow organically across the page, interacting with the paper elements in a dynamic and fluid way.
The technique turns the thread into a sculptural element, symbolizing the movement and emotion of the music itself.
20. Populate a Coral Reef with Dimensional Stitches
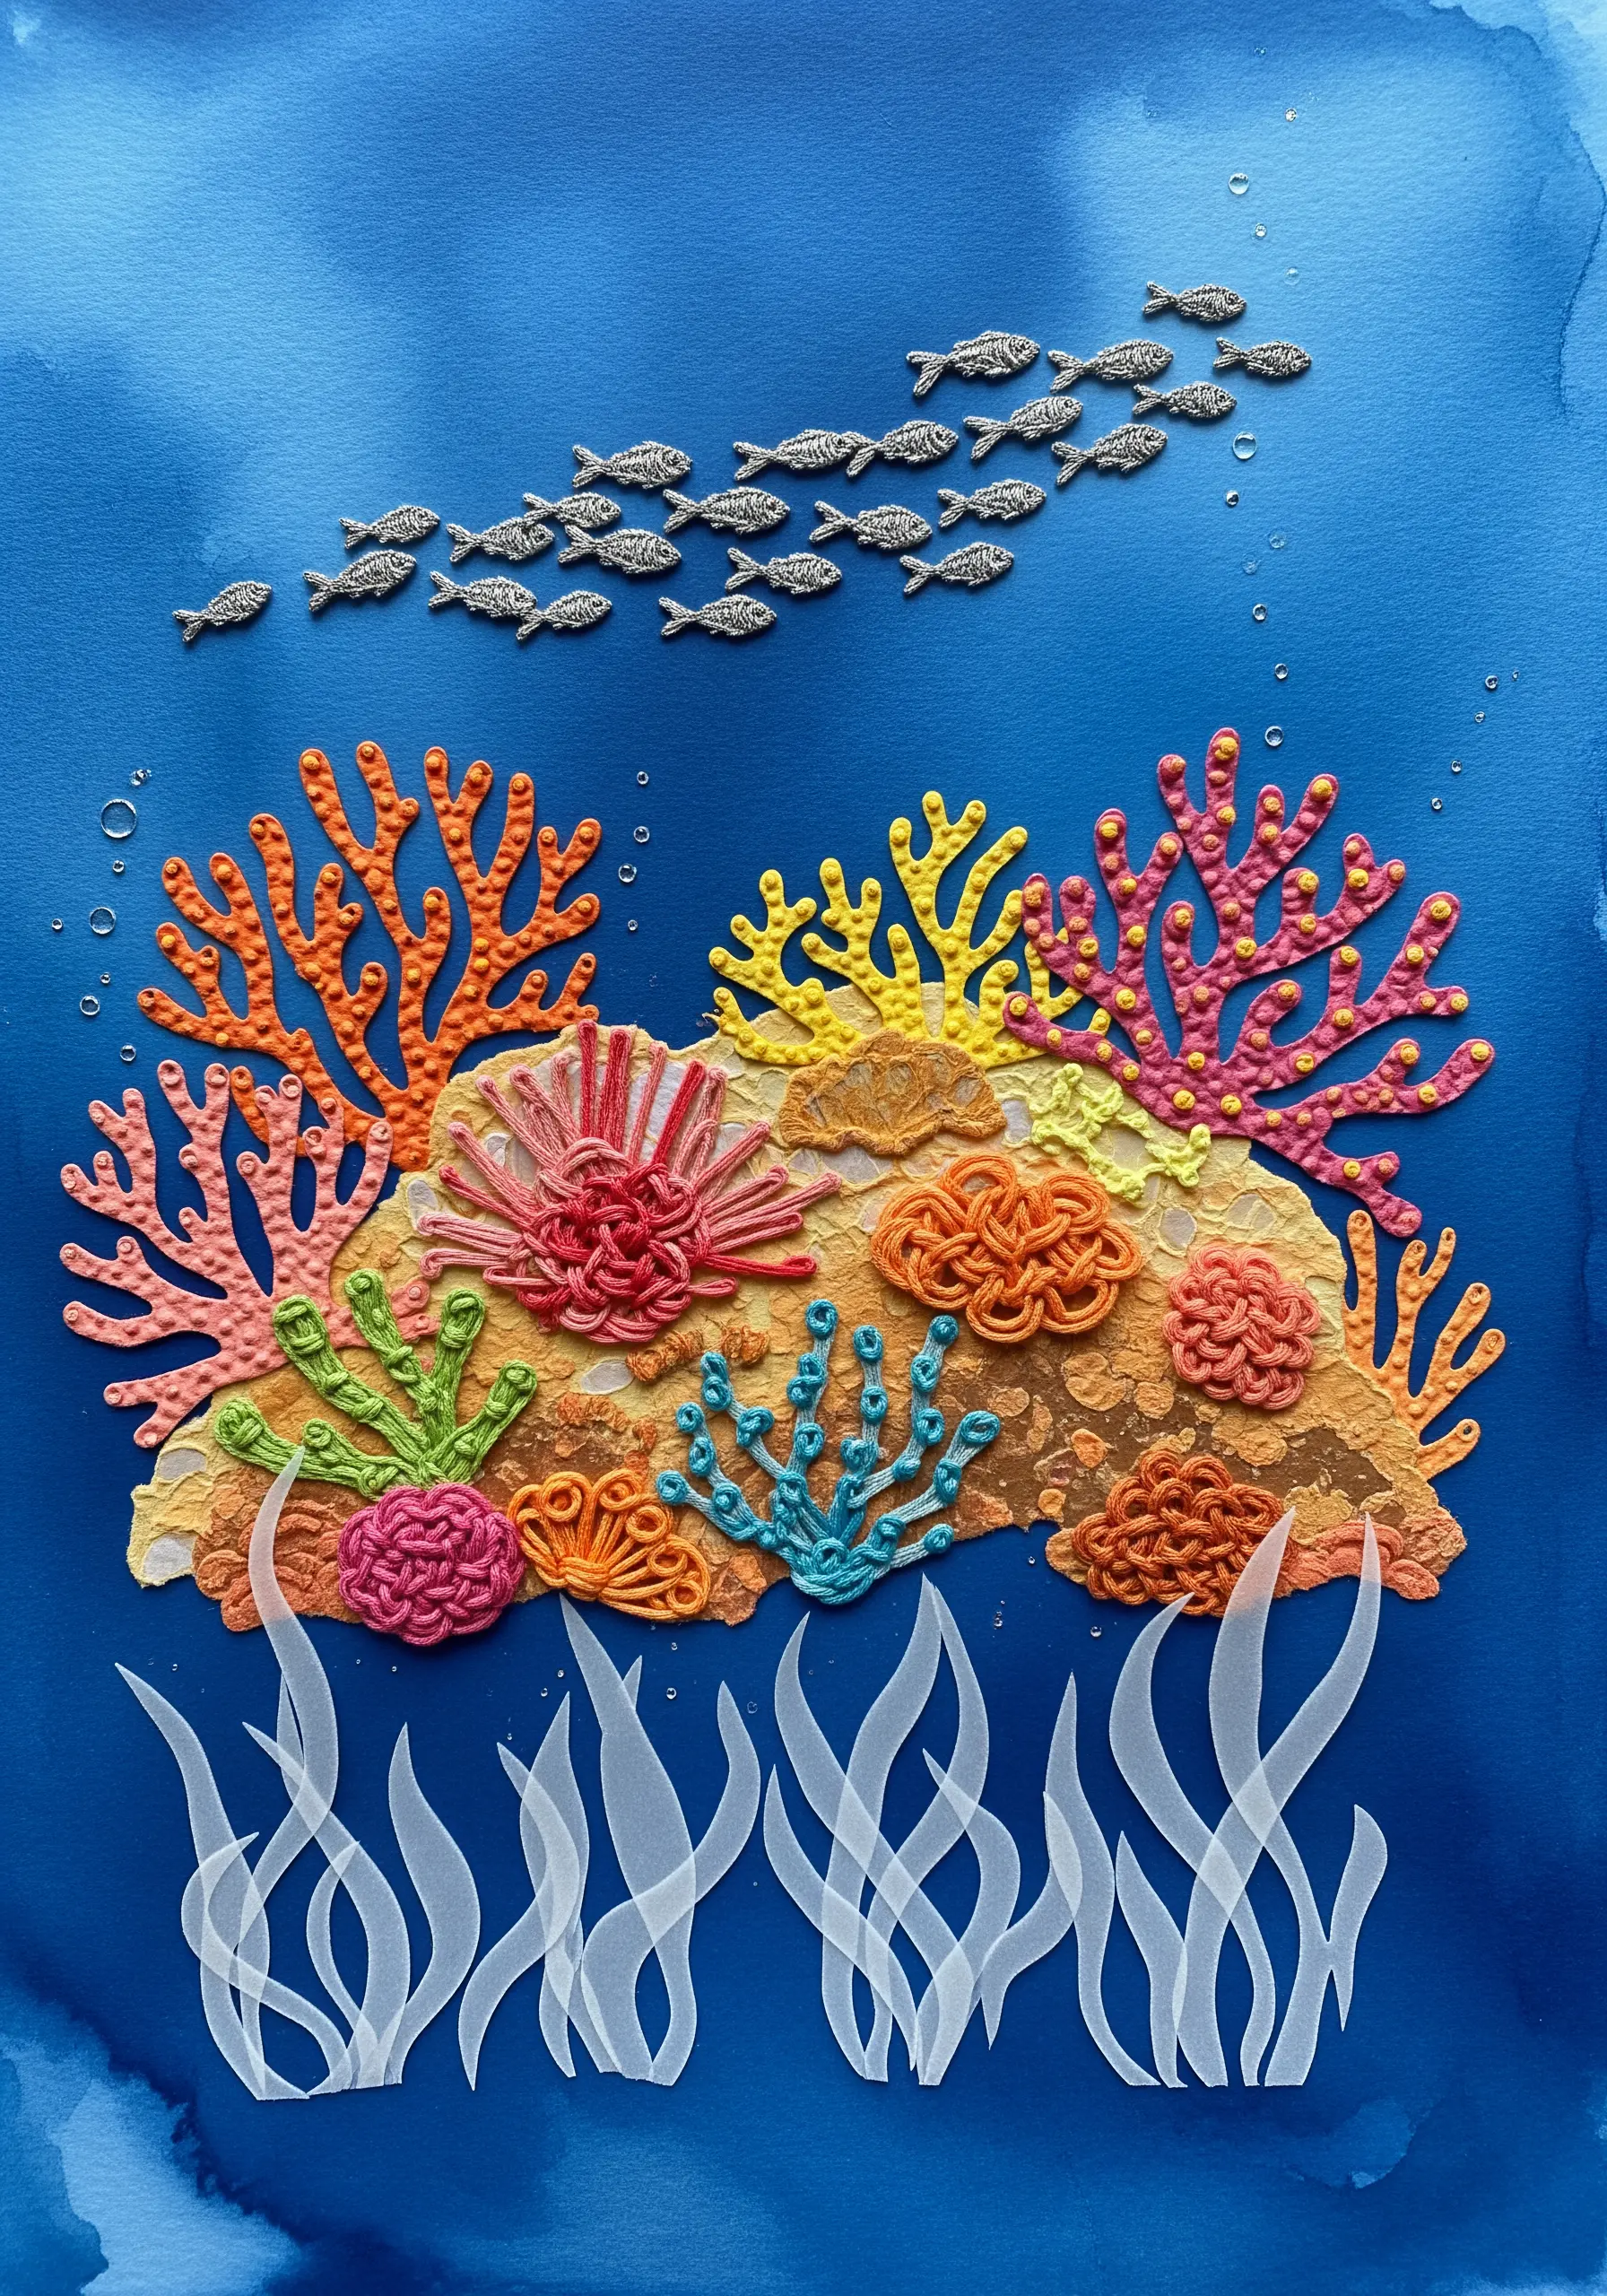
Start with a watercolor-washed paper background to create an underwater atmosphere.
Use a variety of highly textural stitches to build the coral shapes: woven wheel stitches for circular forms, cast-on stitches for finger-like corals, and French knots for bumpy textures.
Group your stitches tightly and use bright, contrasting colors to mimic the biodiversity of a real reef.
Adding tiny metallic fish beads or sequins provides a final touch of movement and light, completing the vibrant ecosystem.
21. Mimic Stained Glass with Bold Outlines and Translucent Paper
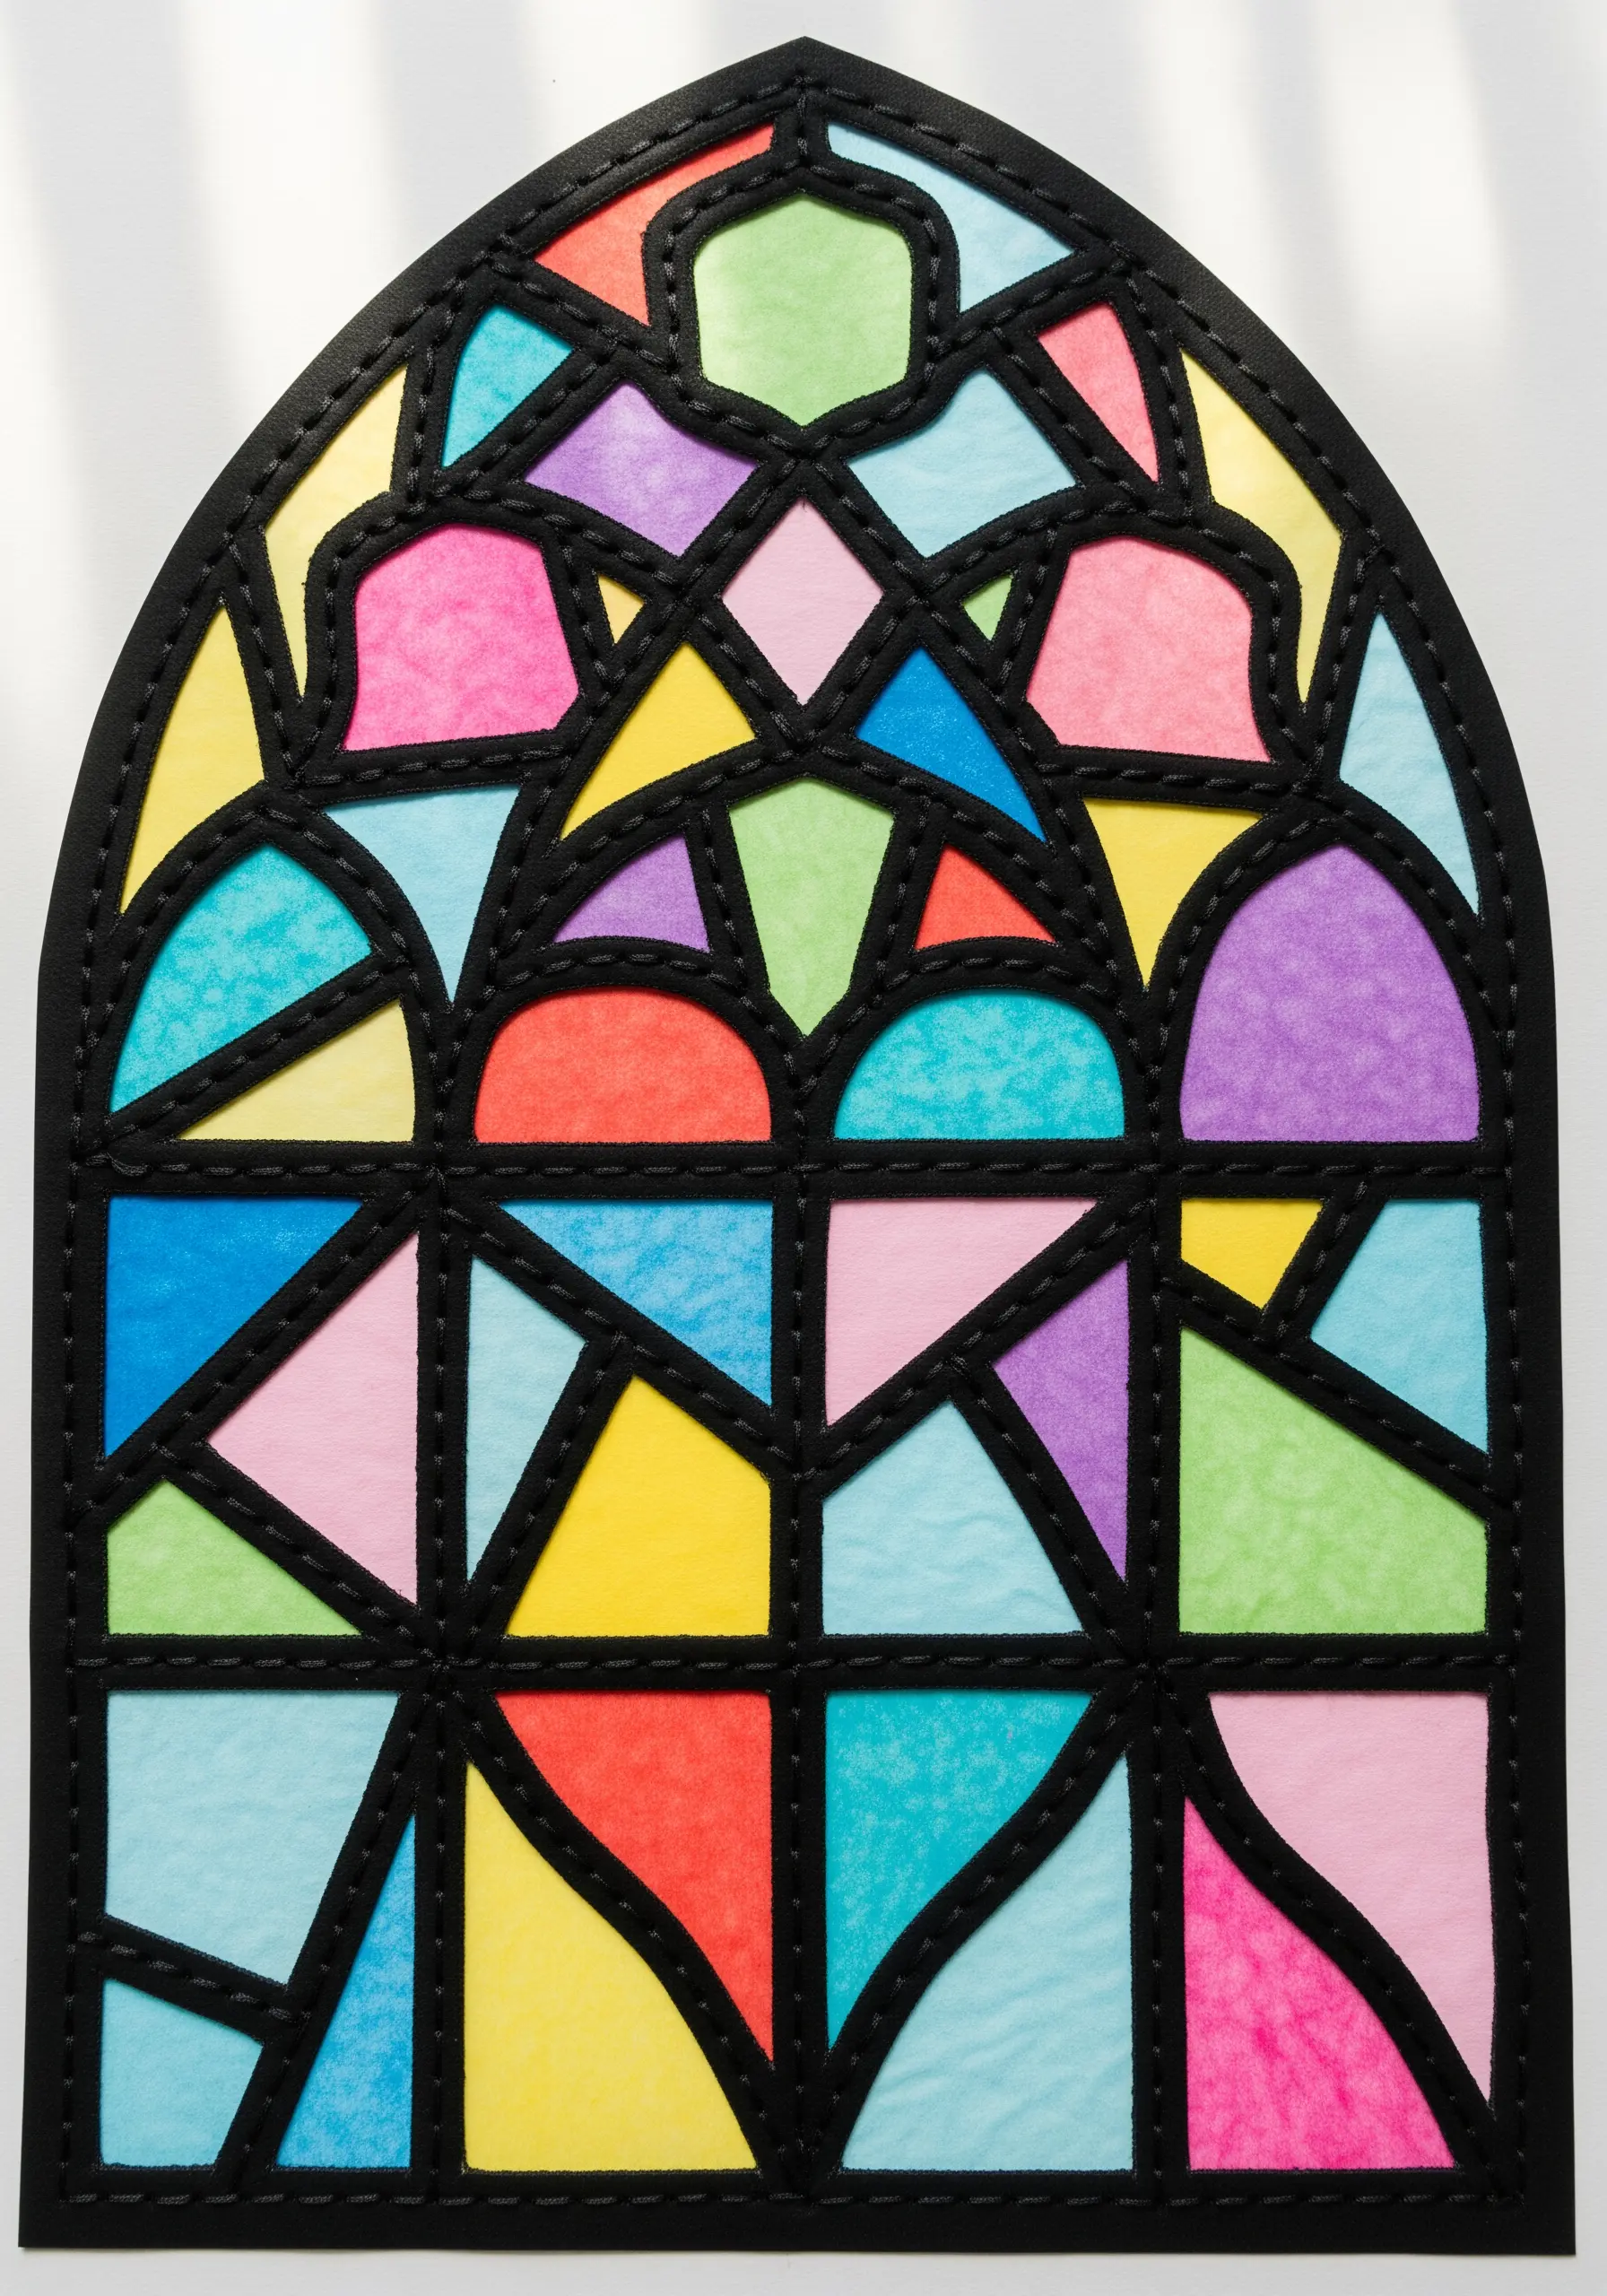
To achieve a convincing stained-glass effect, the “lead” lines are crucial.
Create your frame and interior lines from black cardstock, then fill the open spaces from behind with colored vellum or tissue paper.
Use a thick black thread, like cotton Perle, and a satin stitch to cover the paper seams where the colors meet.
This stitched outline not only hides the paper edges but also adds a soft, textile quality that elevates the piece beyond a simple paper craft.
22. Personalize a Letterform with Thread Wrapping and Collage
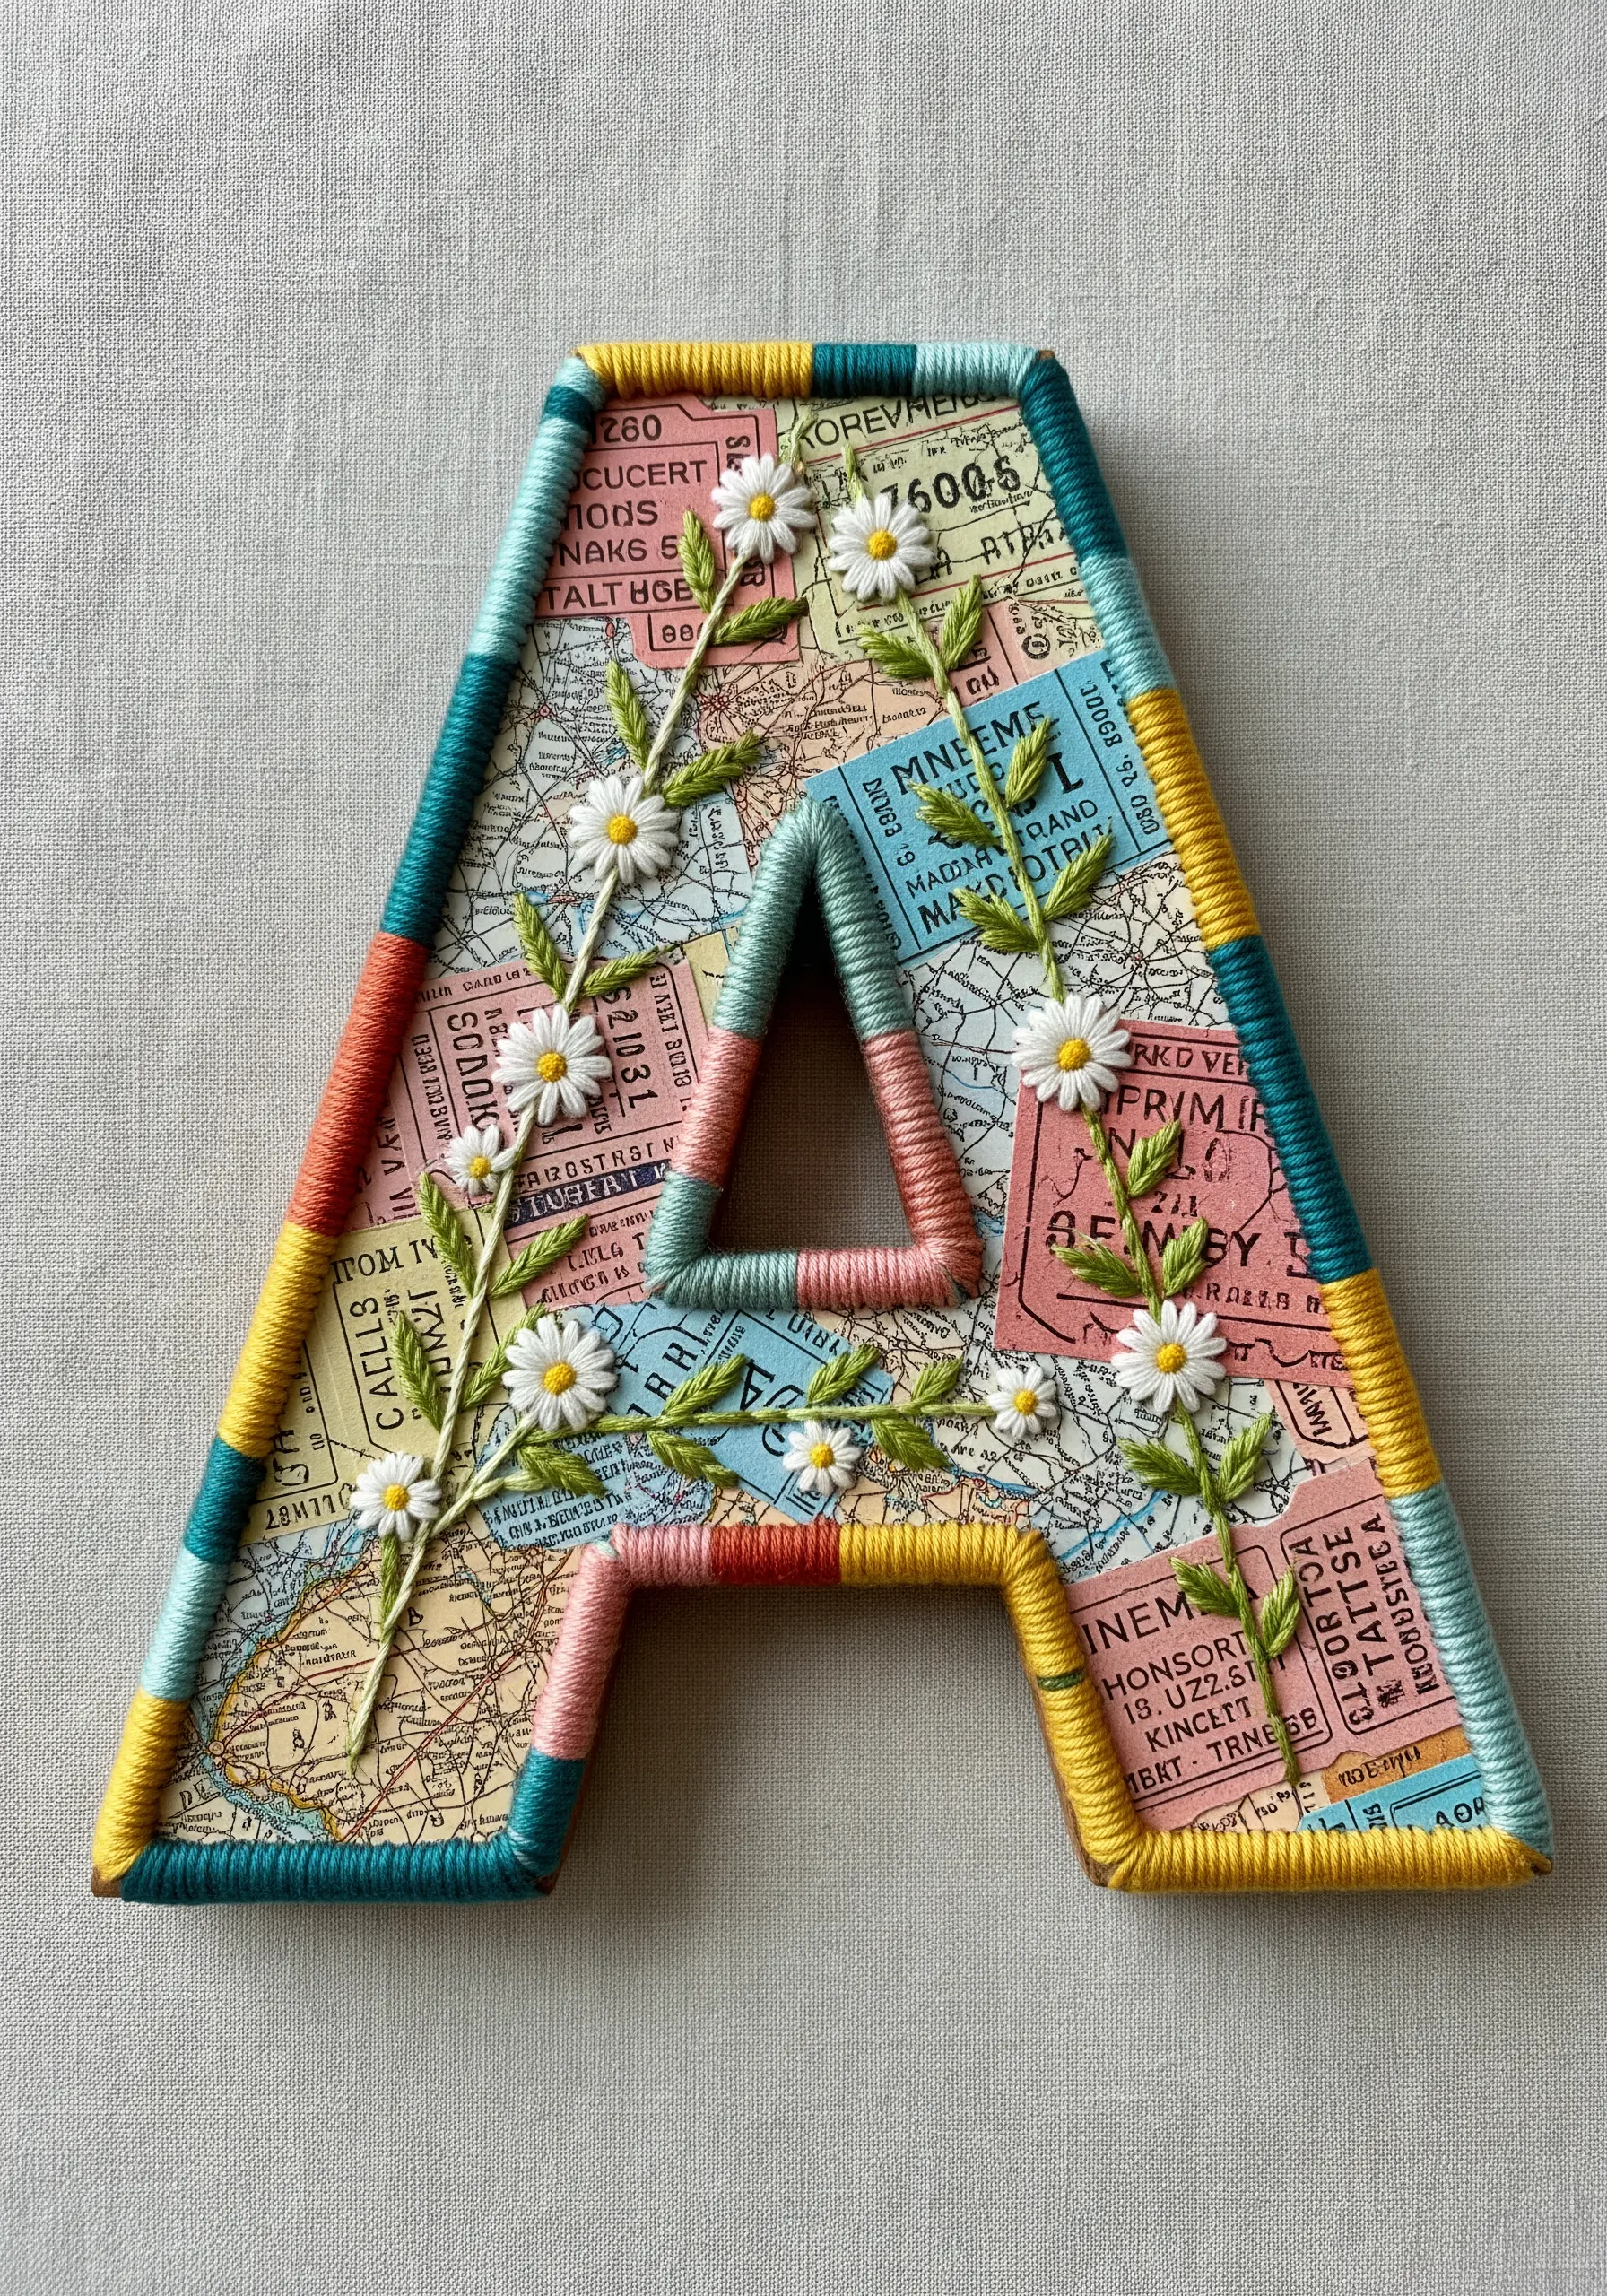
Begin with a large papier-mâché or wooden letter as your base.
Create a collage surface using torn maps, ticket stubs, or vintage ephemera that tells a personal story.
Then, use variegated embroidery floss to wrap sections of the letter, creating colorful, striped borders that frame the collage.
Finally, add delicate embroidered motifs, like these lazy daisy flowers, directly onto the paper surfaces for a final layer of handmade detail. This lets you cover a cardboard letterform in a uniquely personal way.
23. Create a Garden Path with 3D Flowers and Paper Mosaic
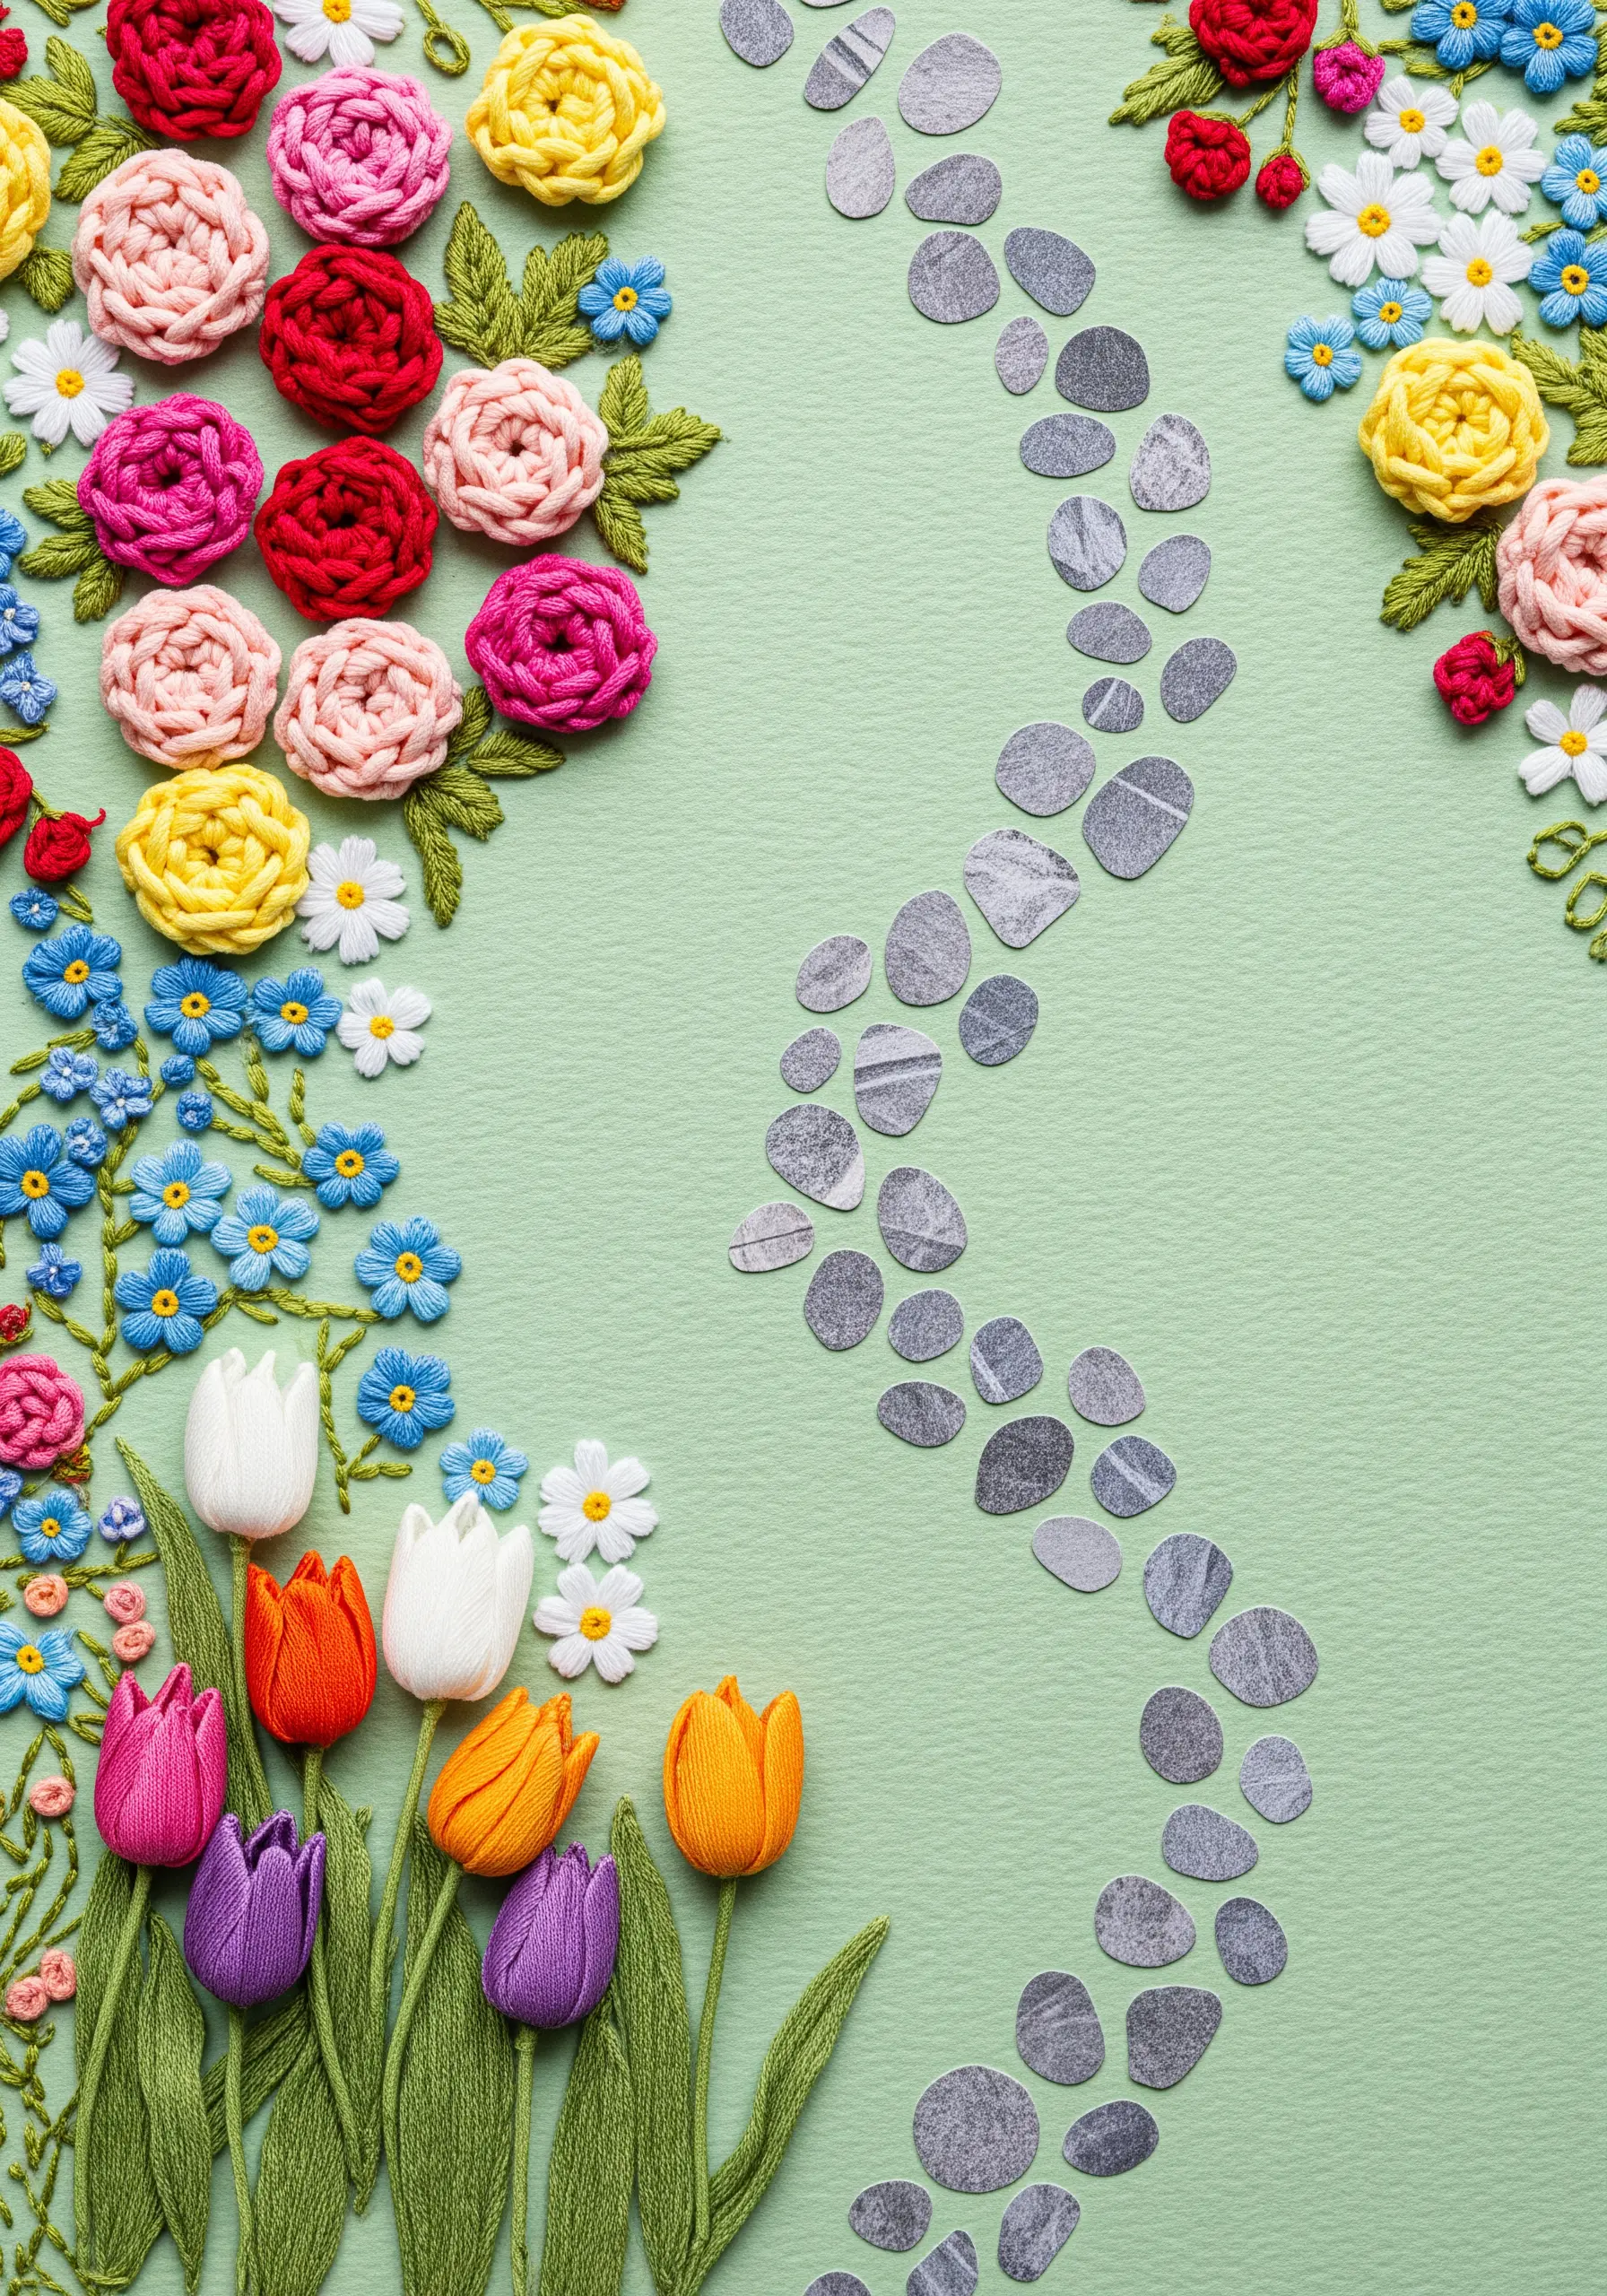
Contrast highly dimensional, embroidered elements with flat paper ones for a stunning visual effect.
Stitch the flowers using three-dimensional techniques like woven wheel roses, cast-on stitch tulips, and bullion knot buds.
For the path, create a mosaic from small, irregular cutouts of textured grey paper to simulate stepping stones.
This juxtaposition of soft, raised embroidery and flat, hard-edged paper makes both textures appear more dramatic and intentional.
24. Use Expressive Stitches to Unify an Abstract Collage
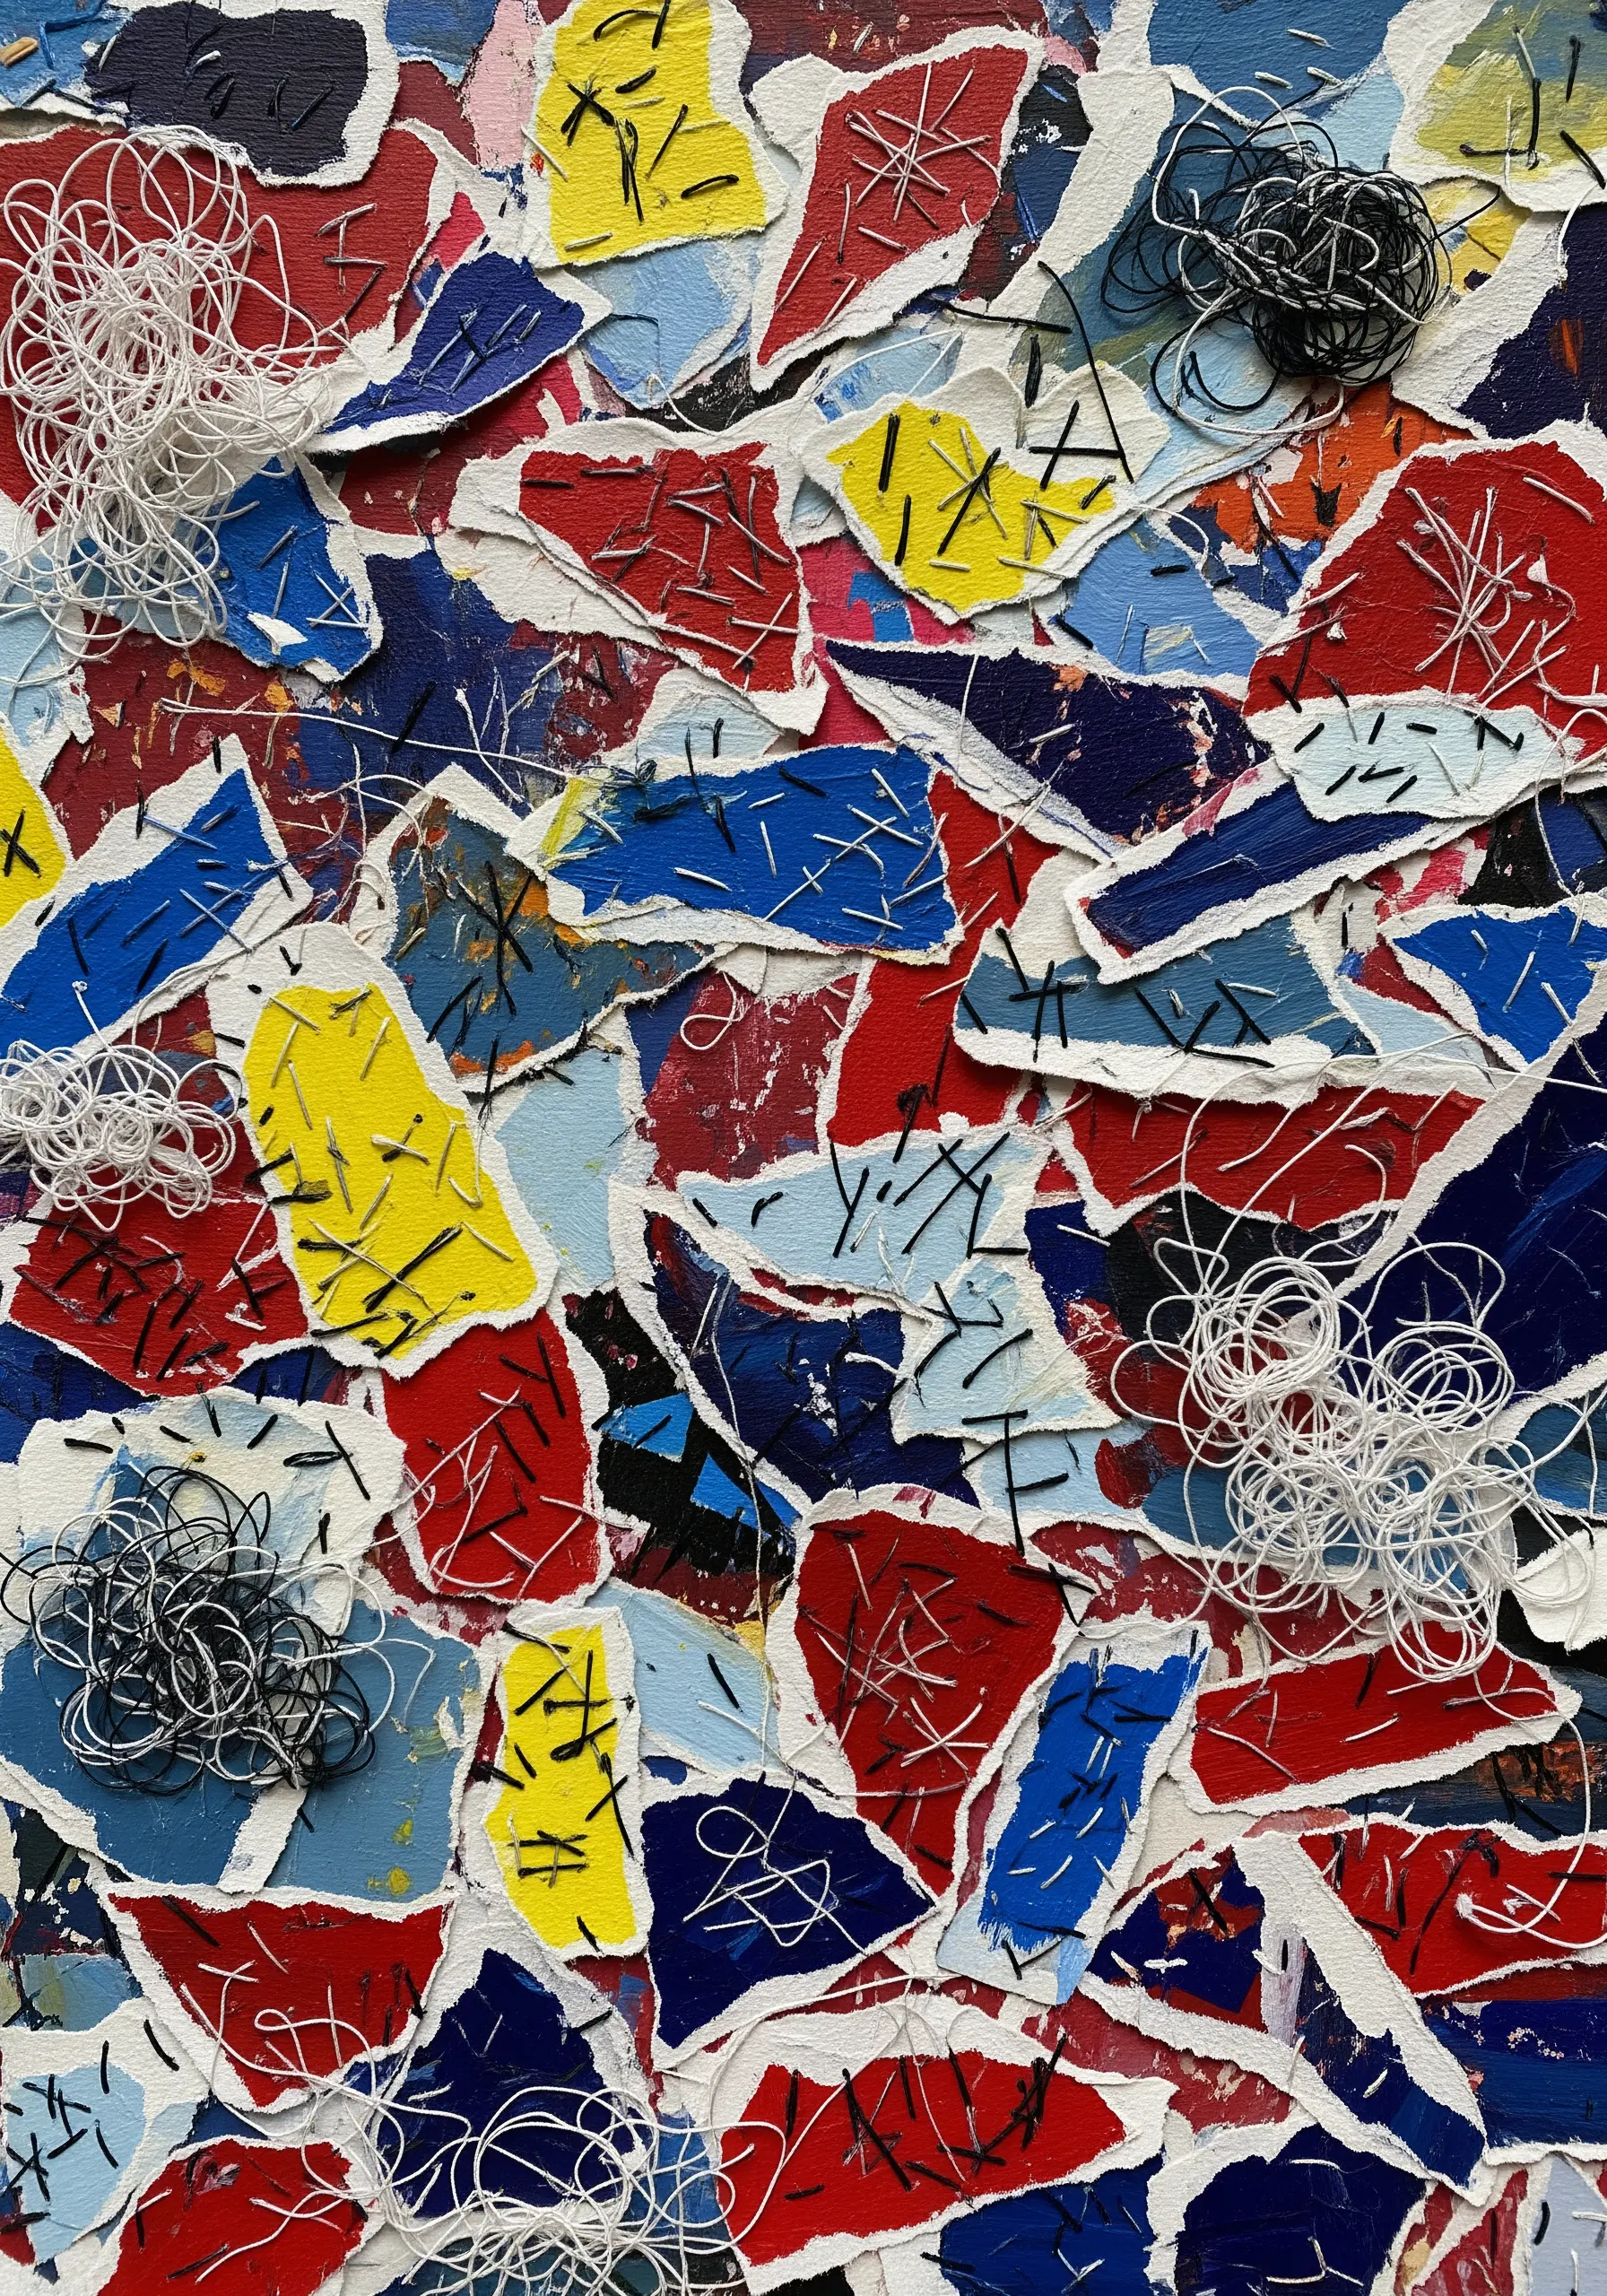
Start by creating a chaotic, energetic background with torn and painted paper scraps.
Instead of adding more color, use a limited palette of thread—like black and white—to stitch directly through the paper layers.
Use simple, expressive marks like seed stitches, straight stitches, and cross stitches to connect different paper fragments.
The stitching acts as a unifying force, adding a layer of texture that holds the disparate elements of the collage together visually.
25. Achieve Art Deco Glamour with Metallic Thread and Symmetry
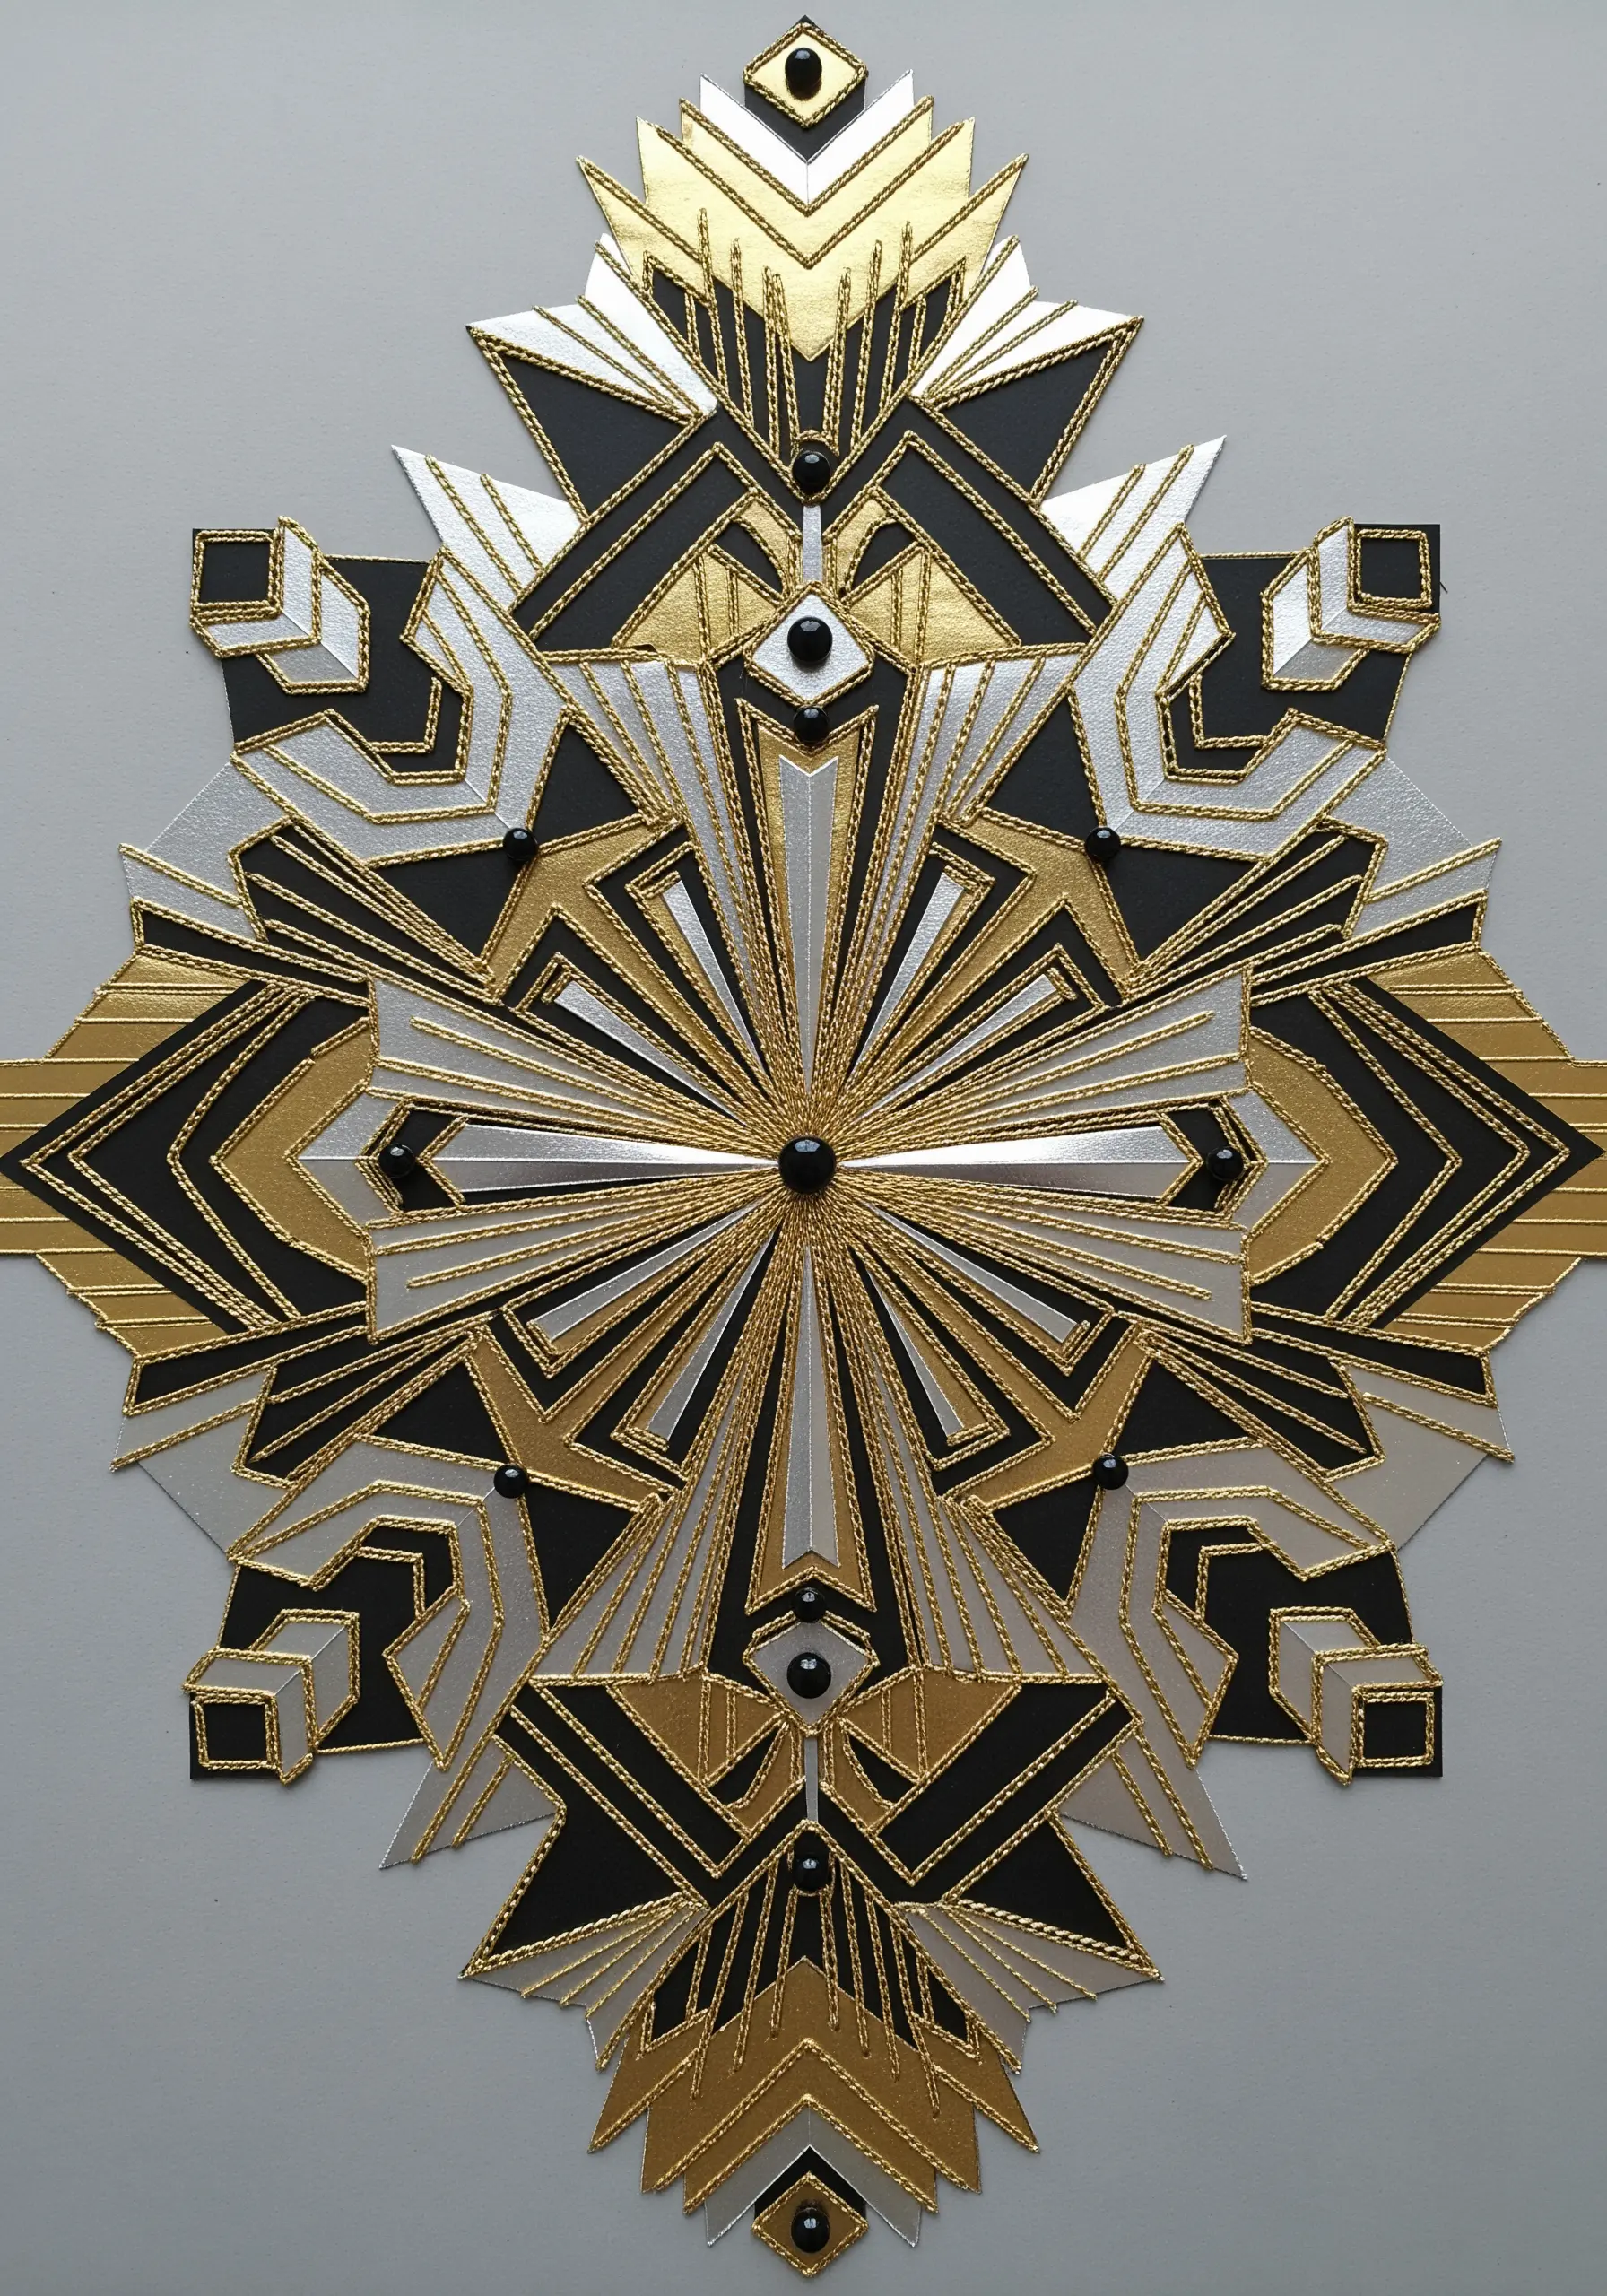
Build a geometric design using precisely cut black, gold, and silver cardstock.
Use a high-sheen metallic thread to add fine, radiating lines within the paper shapes, using a simple straight stitch.
The key is precision: pre-punch your holes with a template to ensure your stitched lines are perfectly symmetrical and evenly spaced.
This technique elevates a paper construction into a luxurious piece by adding the texture and shimmer of fine metalwork.
26. Set a Scene with Minimal Stitching and Simple Cutouts
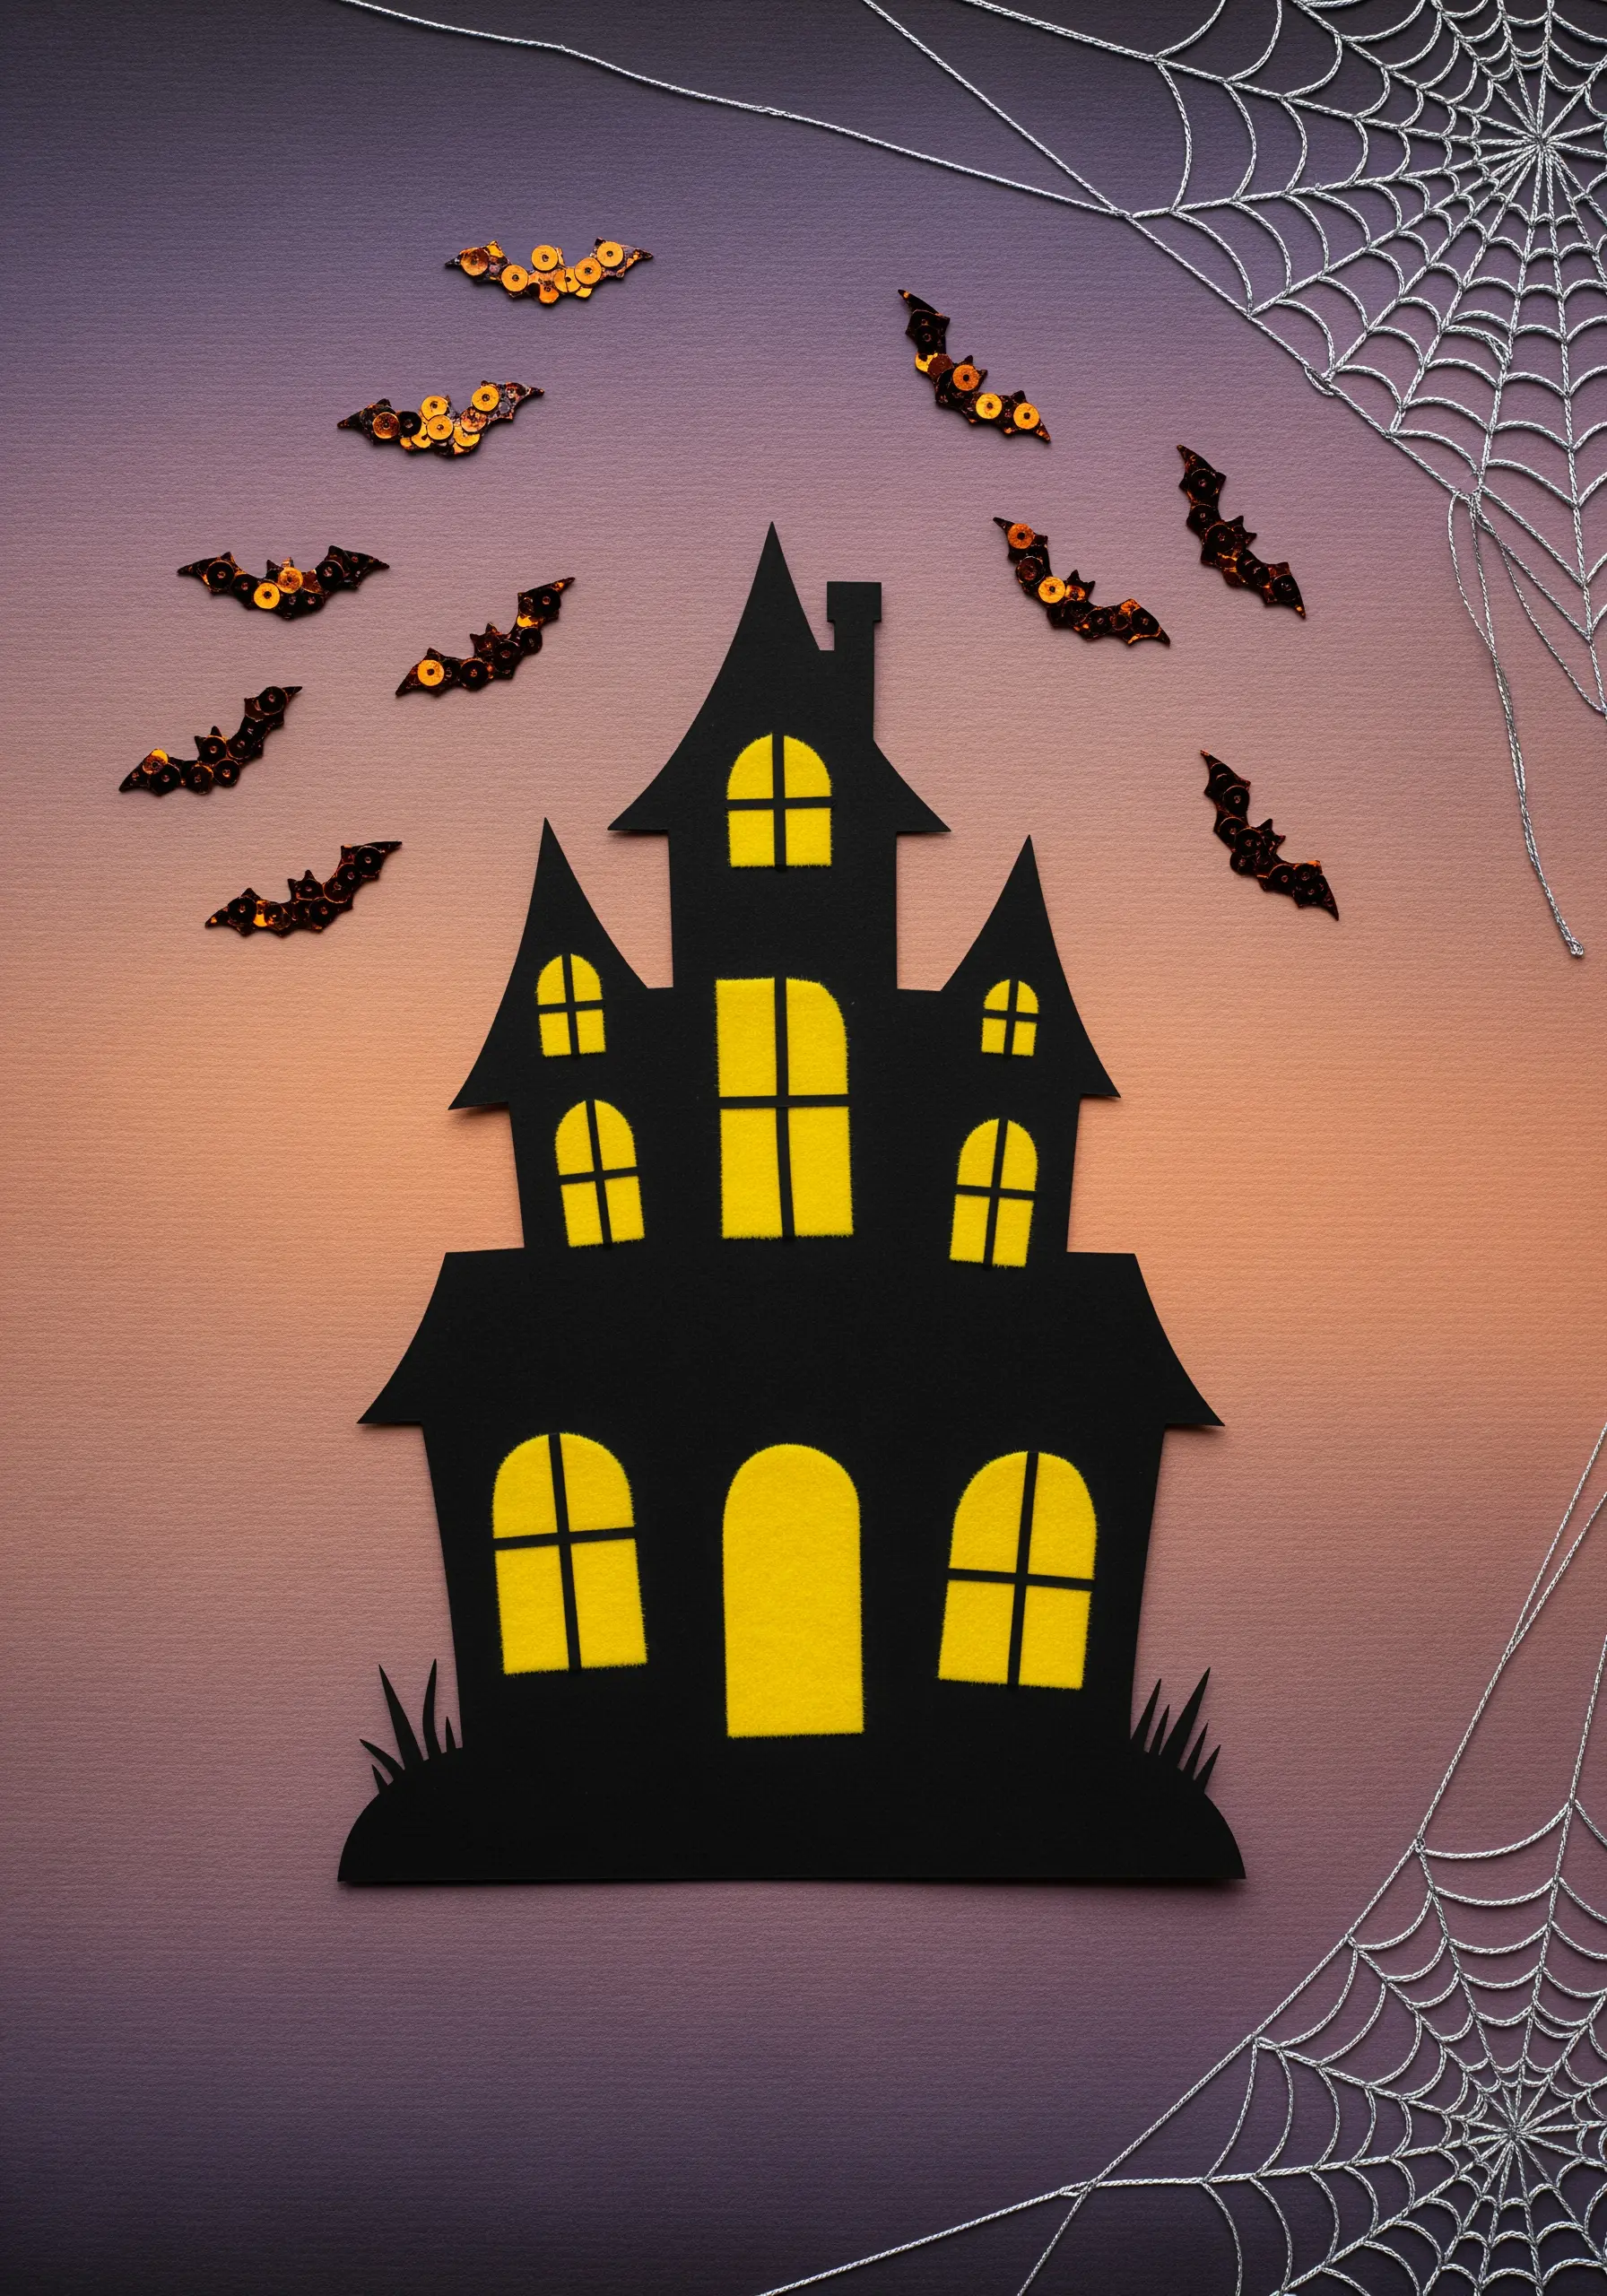
Sometimes, the thread’s job is to play a supporting role.
Use a single strand of metallic thread to create a delicate spiderweb with long straight stitches, anchoring them at a few points on the paper.
The paper cutouts—the house and sequin bats—provide the main subject, while the subtle, shimmering web creates the atmosphere and sense of place.
This shows how a minimal amount of thread can define the entire mood of a composition without being the focal point.
27. Add Subtle Detail to Three-Dimensional Paper Objects
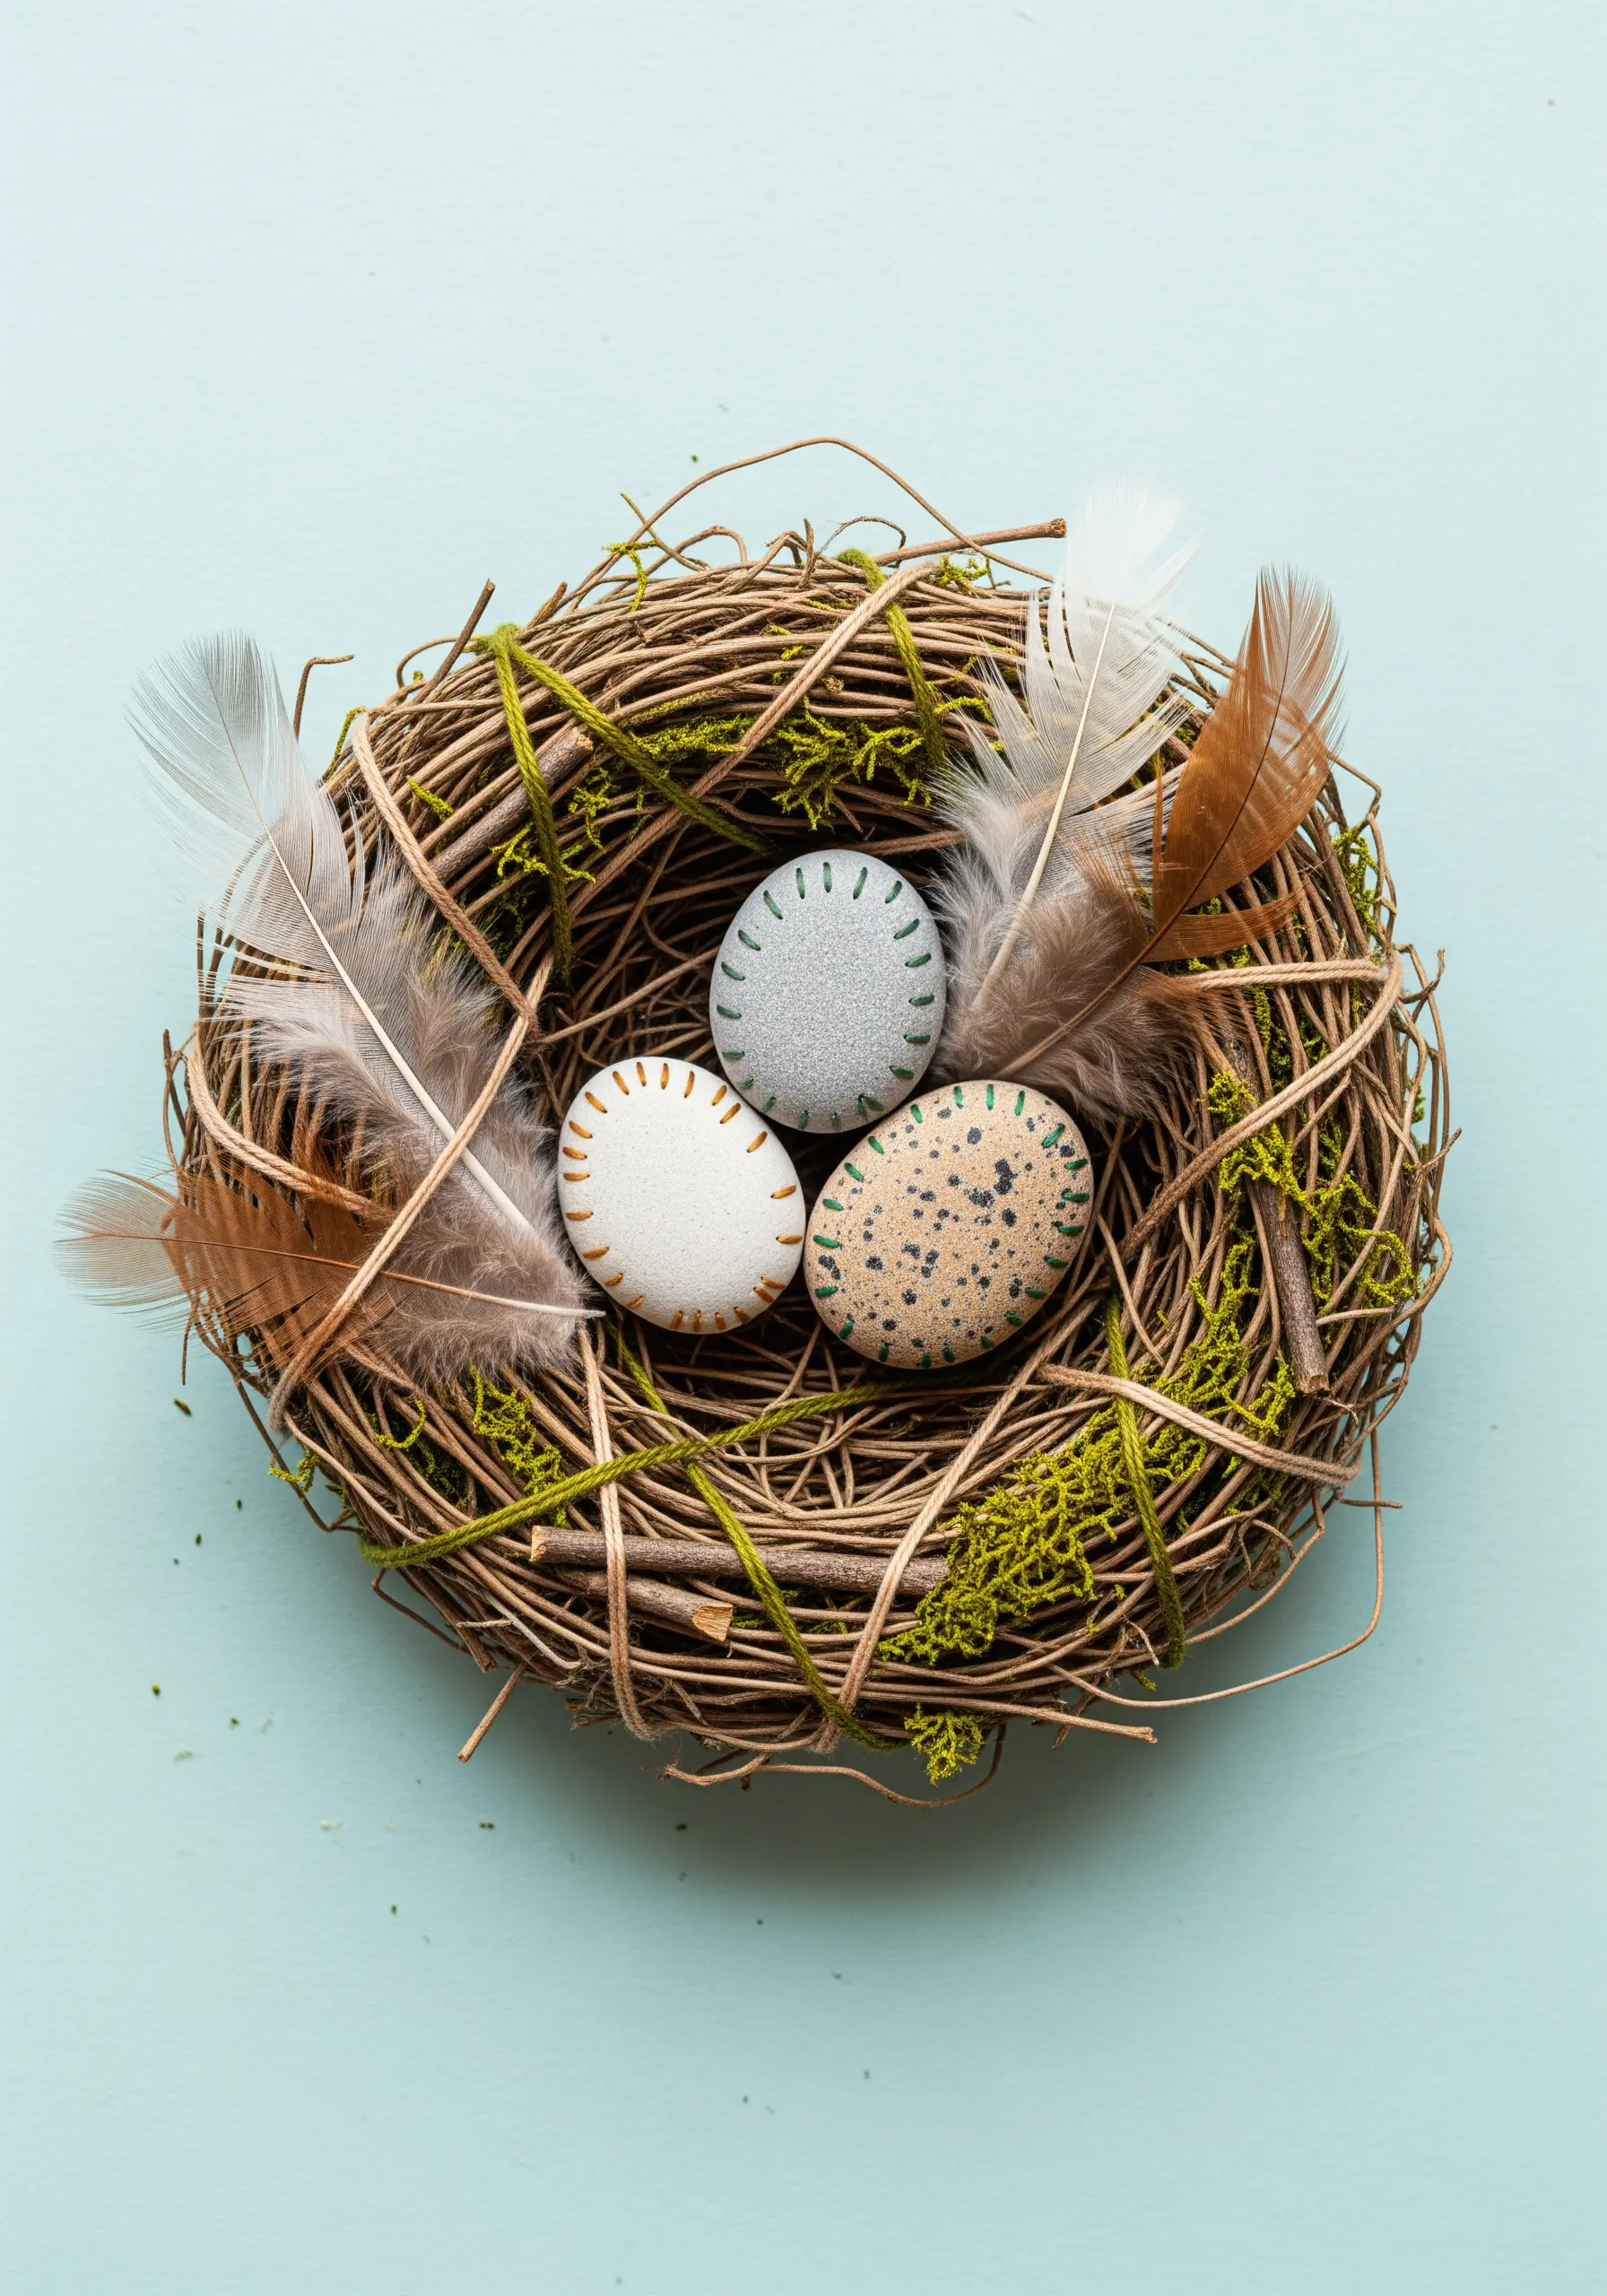
Create your main objects—in this case, eggs—from thick cardstock or papier-mâché for a sturdy base.
Instead of painting on details, use simple embroidery stitches to add pattern and texture.
A few straight stitches in a contrasting color, a line of backstitch, or some scattered seed stitches can create sophisticated patterns.
This technique adds a warm, handmade quality to paper sculptures, giving them a unique tactile appeal that paint cannot replicate.
28. Define Botanical Illustrations with Outline Stitching
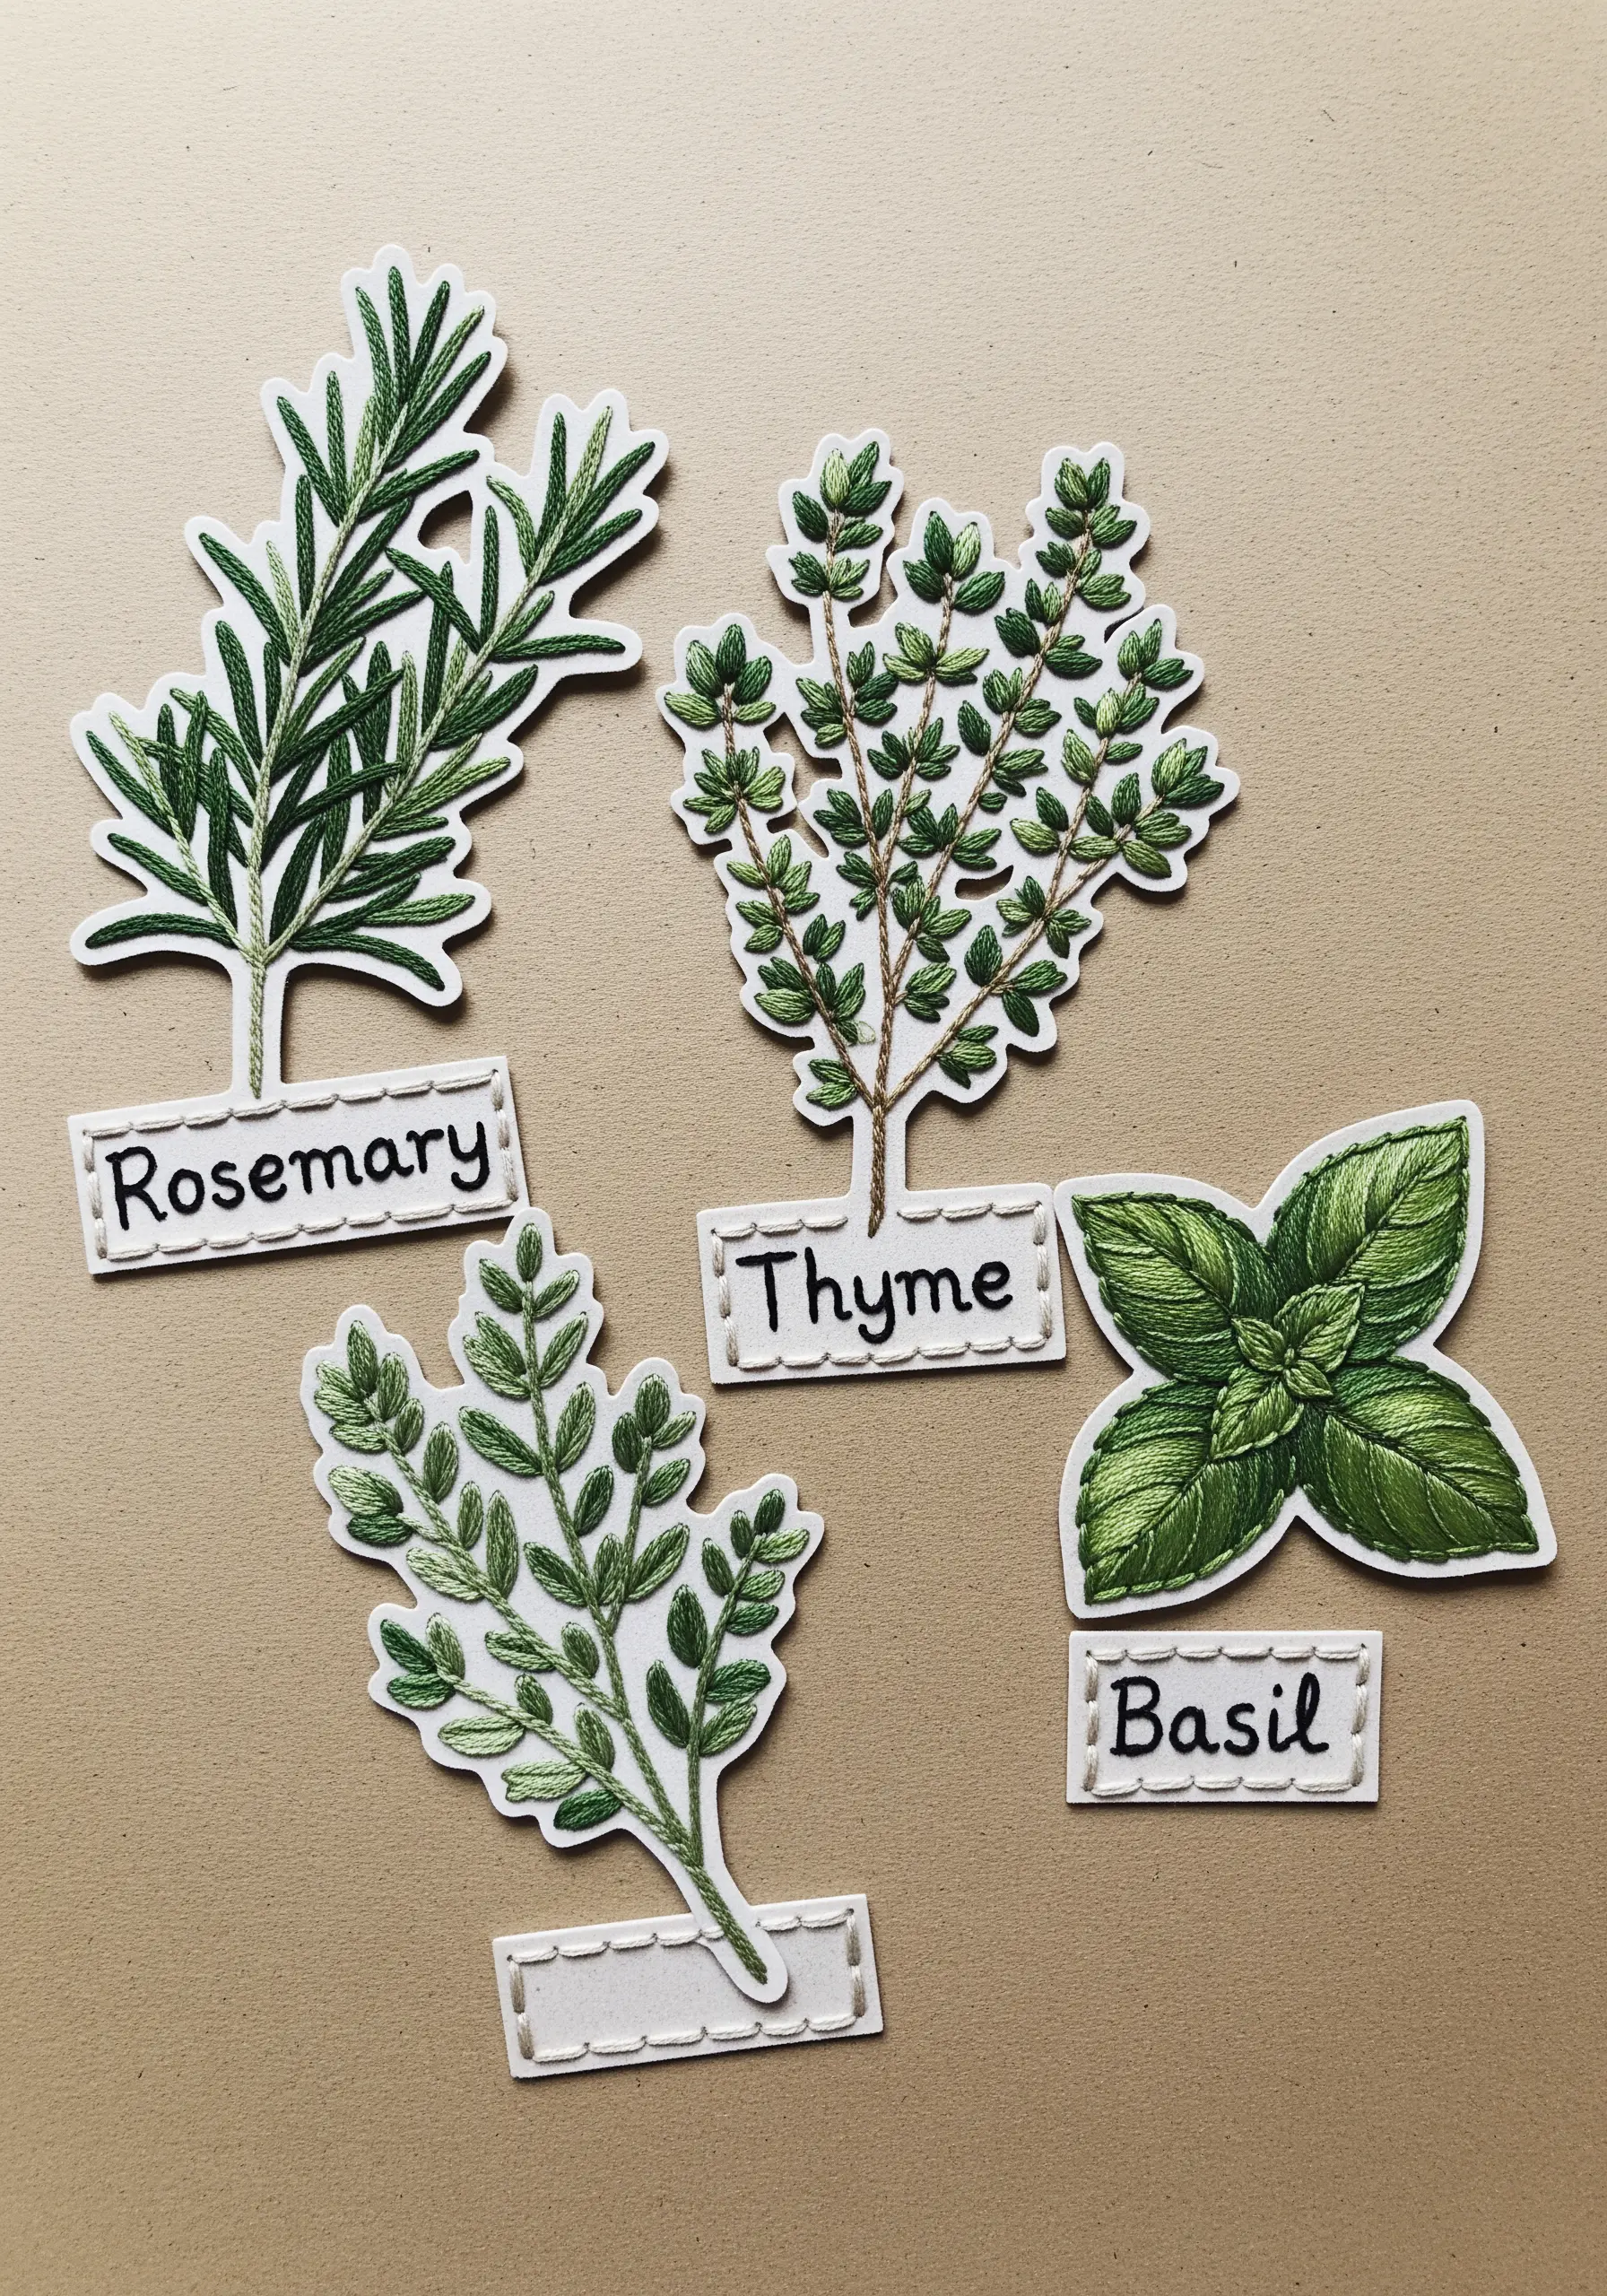
After printing or drawing your botanical motifs onto heavy cardstock, carefully cut them out.
Use a two-strand backstitch or stem stitch to outline the edges of the leaves and stems.
This technique adds a crisp definition and a soft, textile border to the paper cutouts, making them feel more substantial and finished.
For the labels, use a simple running stitch to create a dashed border, which adds a charming, rustic touch.
29. Create Topographic Lines with Running Stitches

Build a mountain range by layering torn paper in shades of blue, grey, and black.
To add detail and the illusion of form, stitch contour lines onto the paper peaks using a simple running stitch.
Use a contrasting thread—like black on the lighter mountains and white on the darker ones—to ensure the lines are visible.
This technique cleverly uses a basic stitch to mimic the lines on a topographic map, adding a layer of graphic detail and enhancing the sense of elevation.
30. Embellish Paper Feathers with Linear Stitches
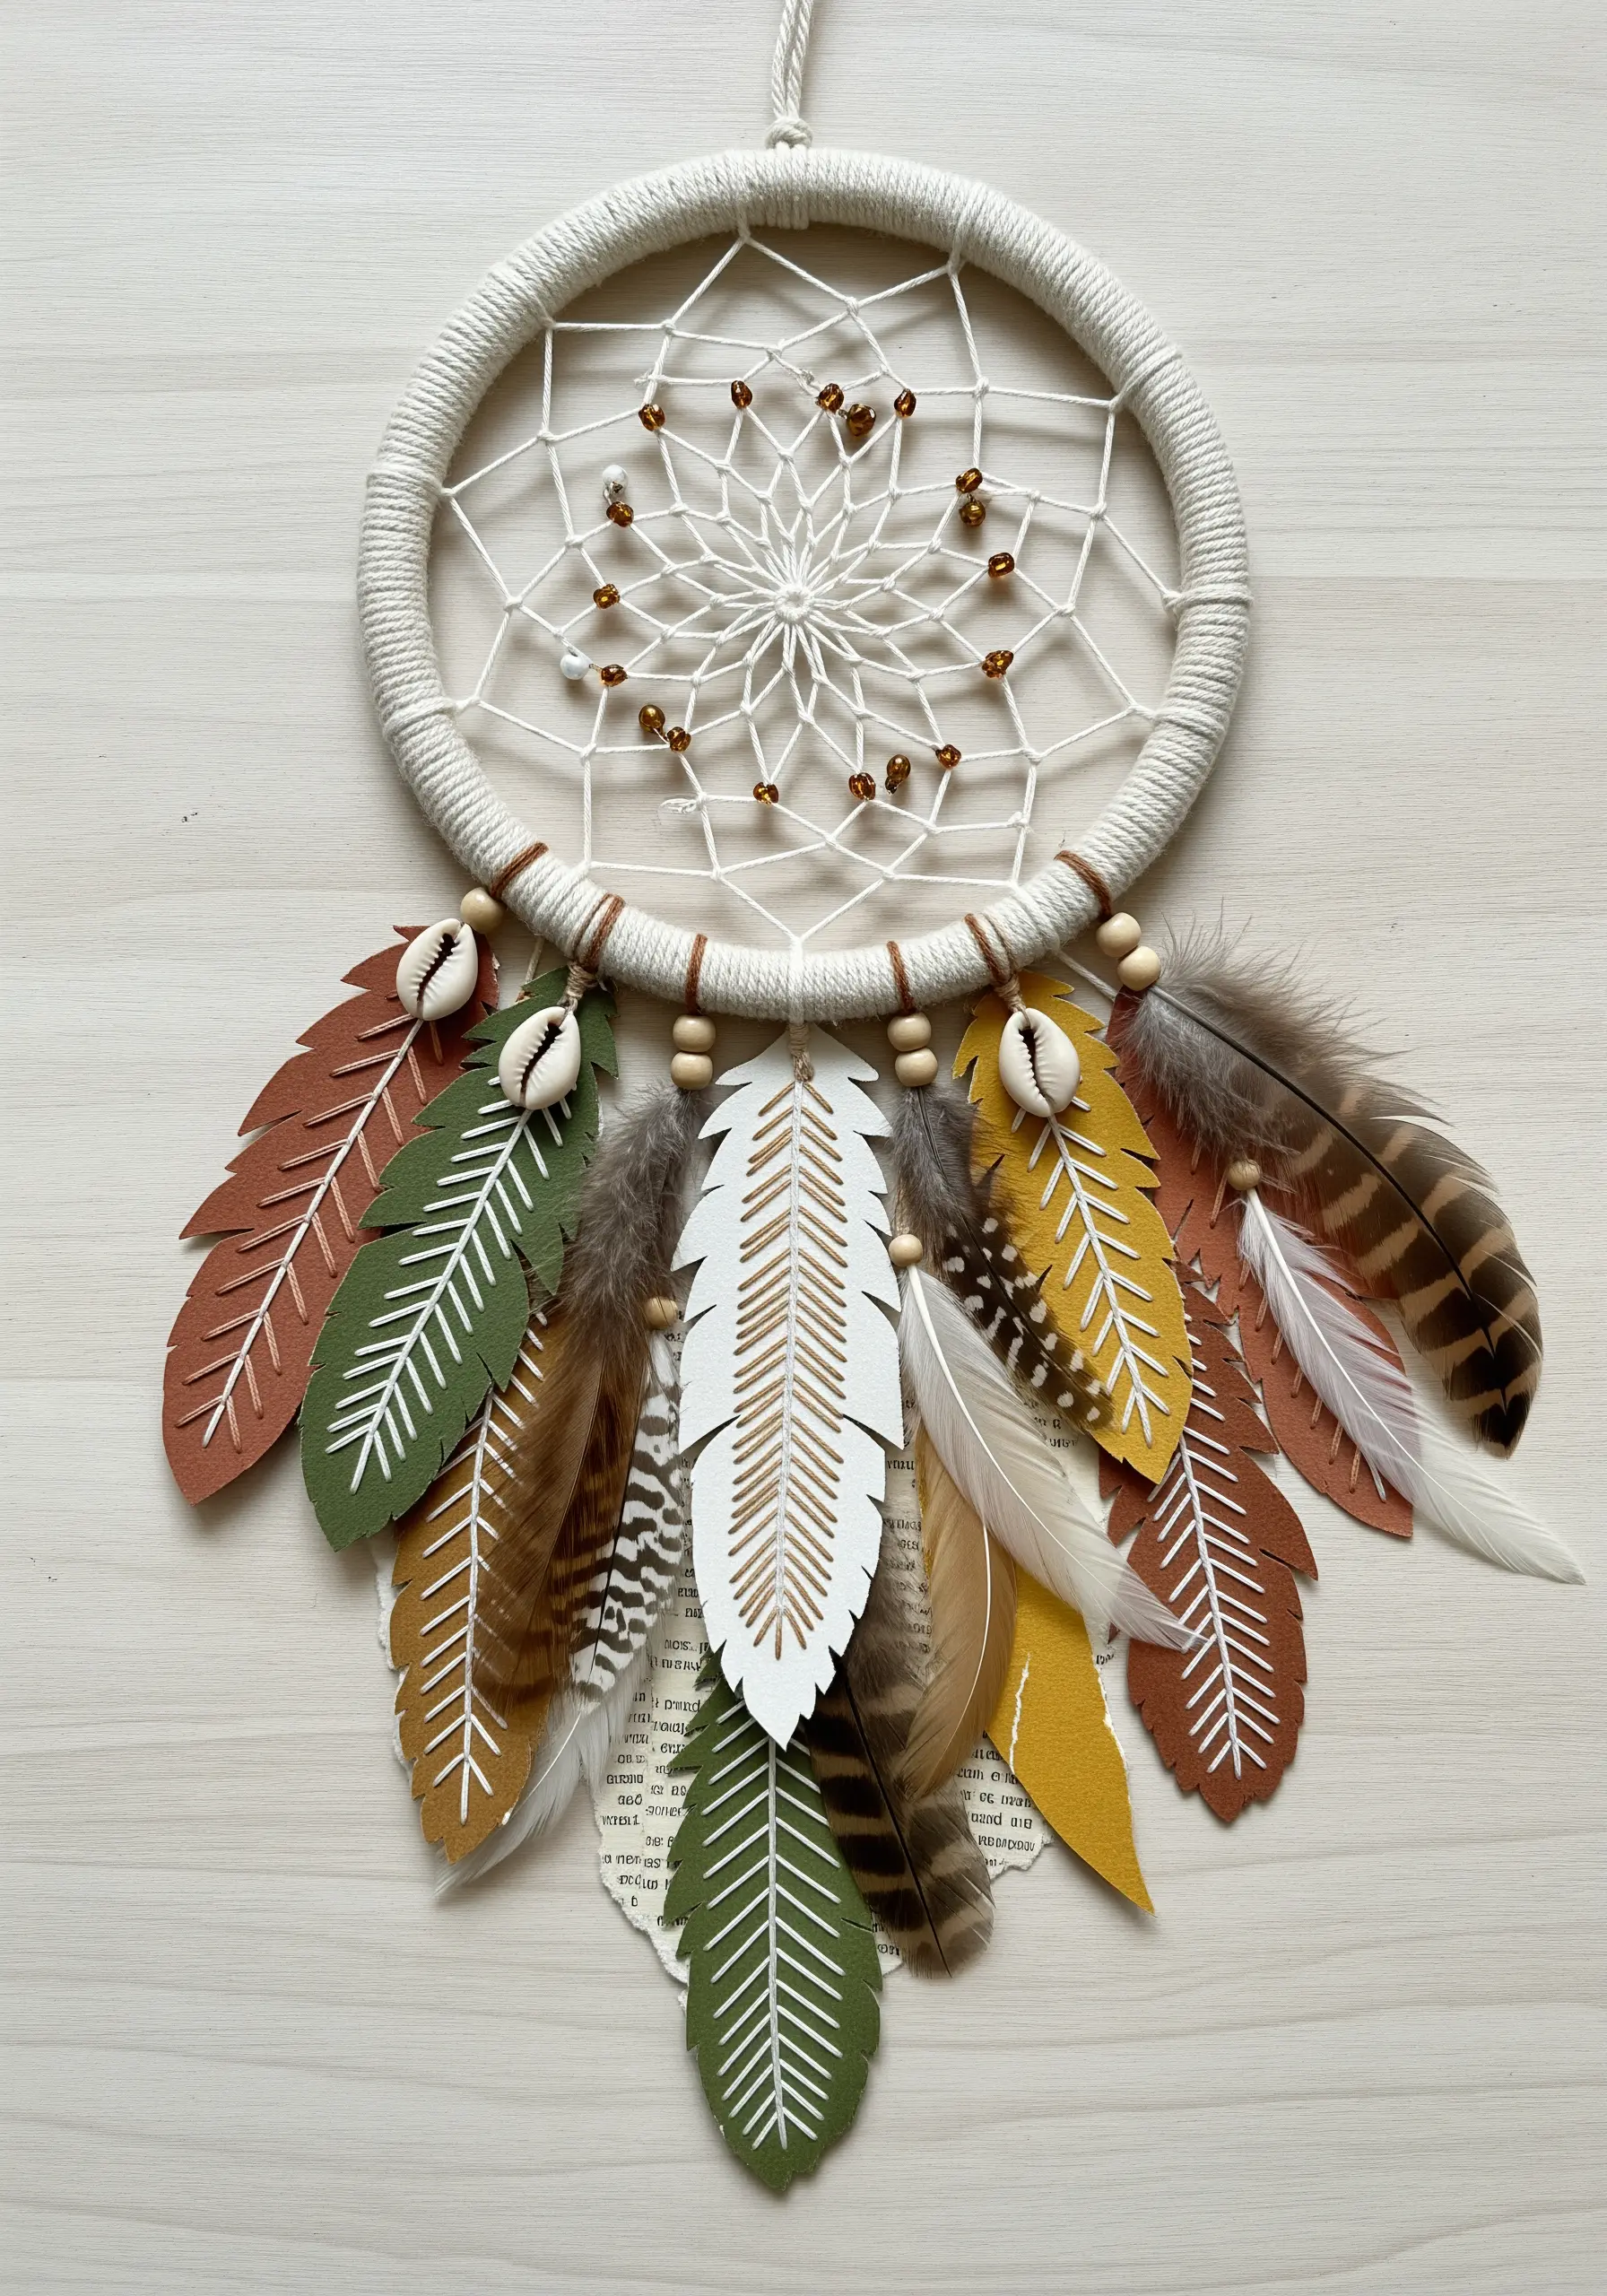
Cut feather shapes from various colors of cardstock. For extra texture, you can use paper with subtle patterns or printed text.
Use a single strand of white or cream thread to stitch the central quill and the delicate barbs with simple straight stitches.
You don’t need to stitch every single line; suggesting the texture is more effective and elegant.
This method transforms simple paper cutouts into detailed, lifelike feathers that add a soft, organic element to your work.
31. Use Thread to Add Whimsical Flourishes
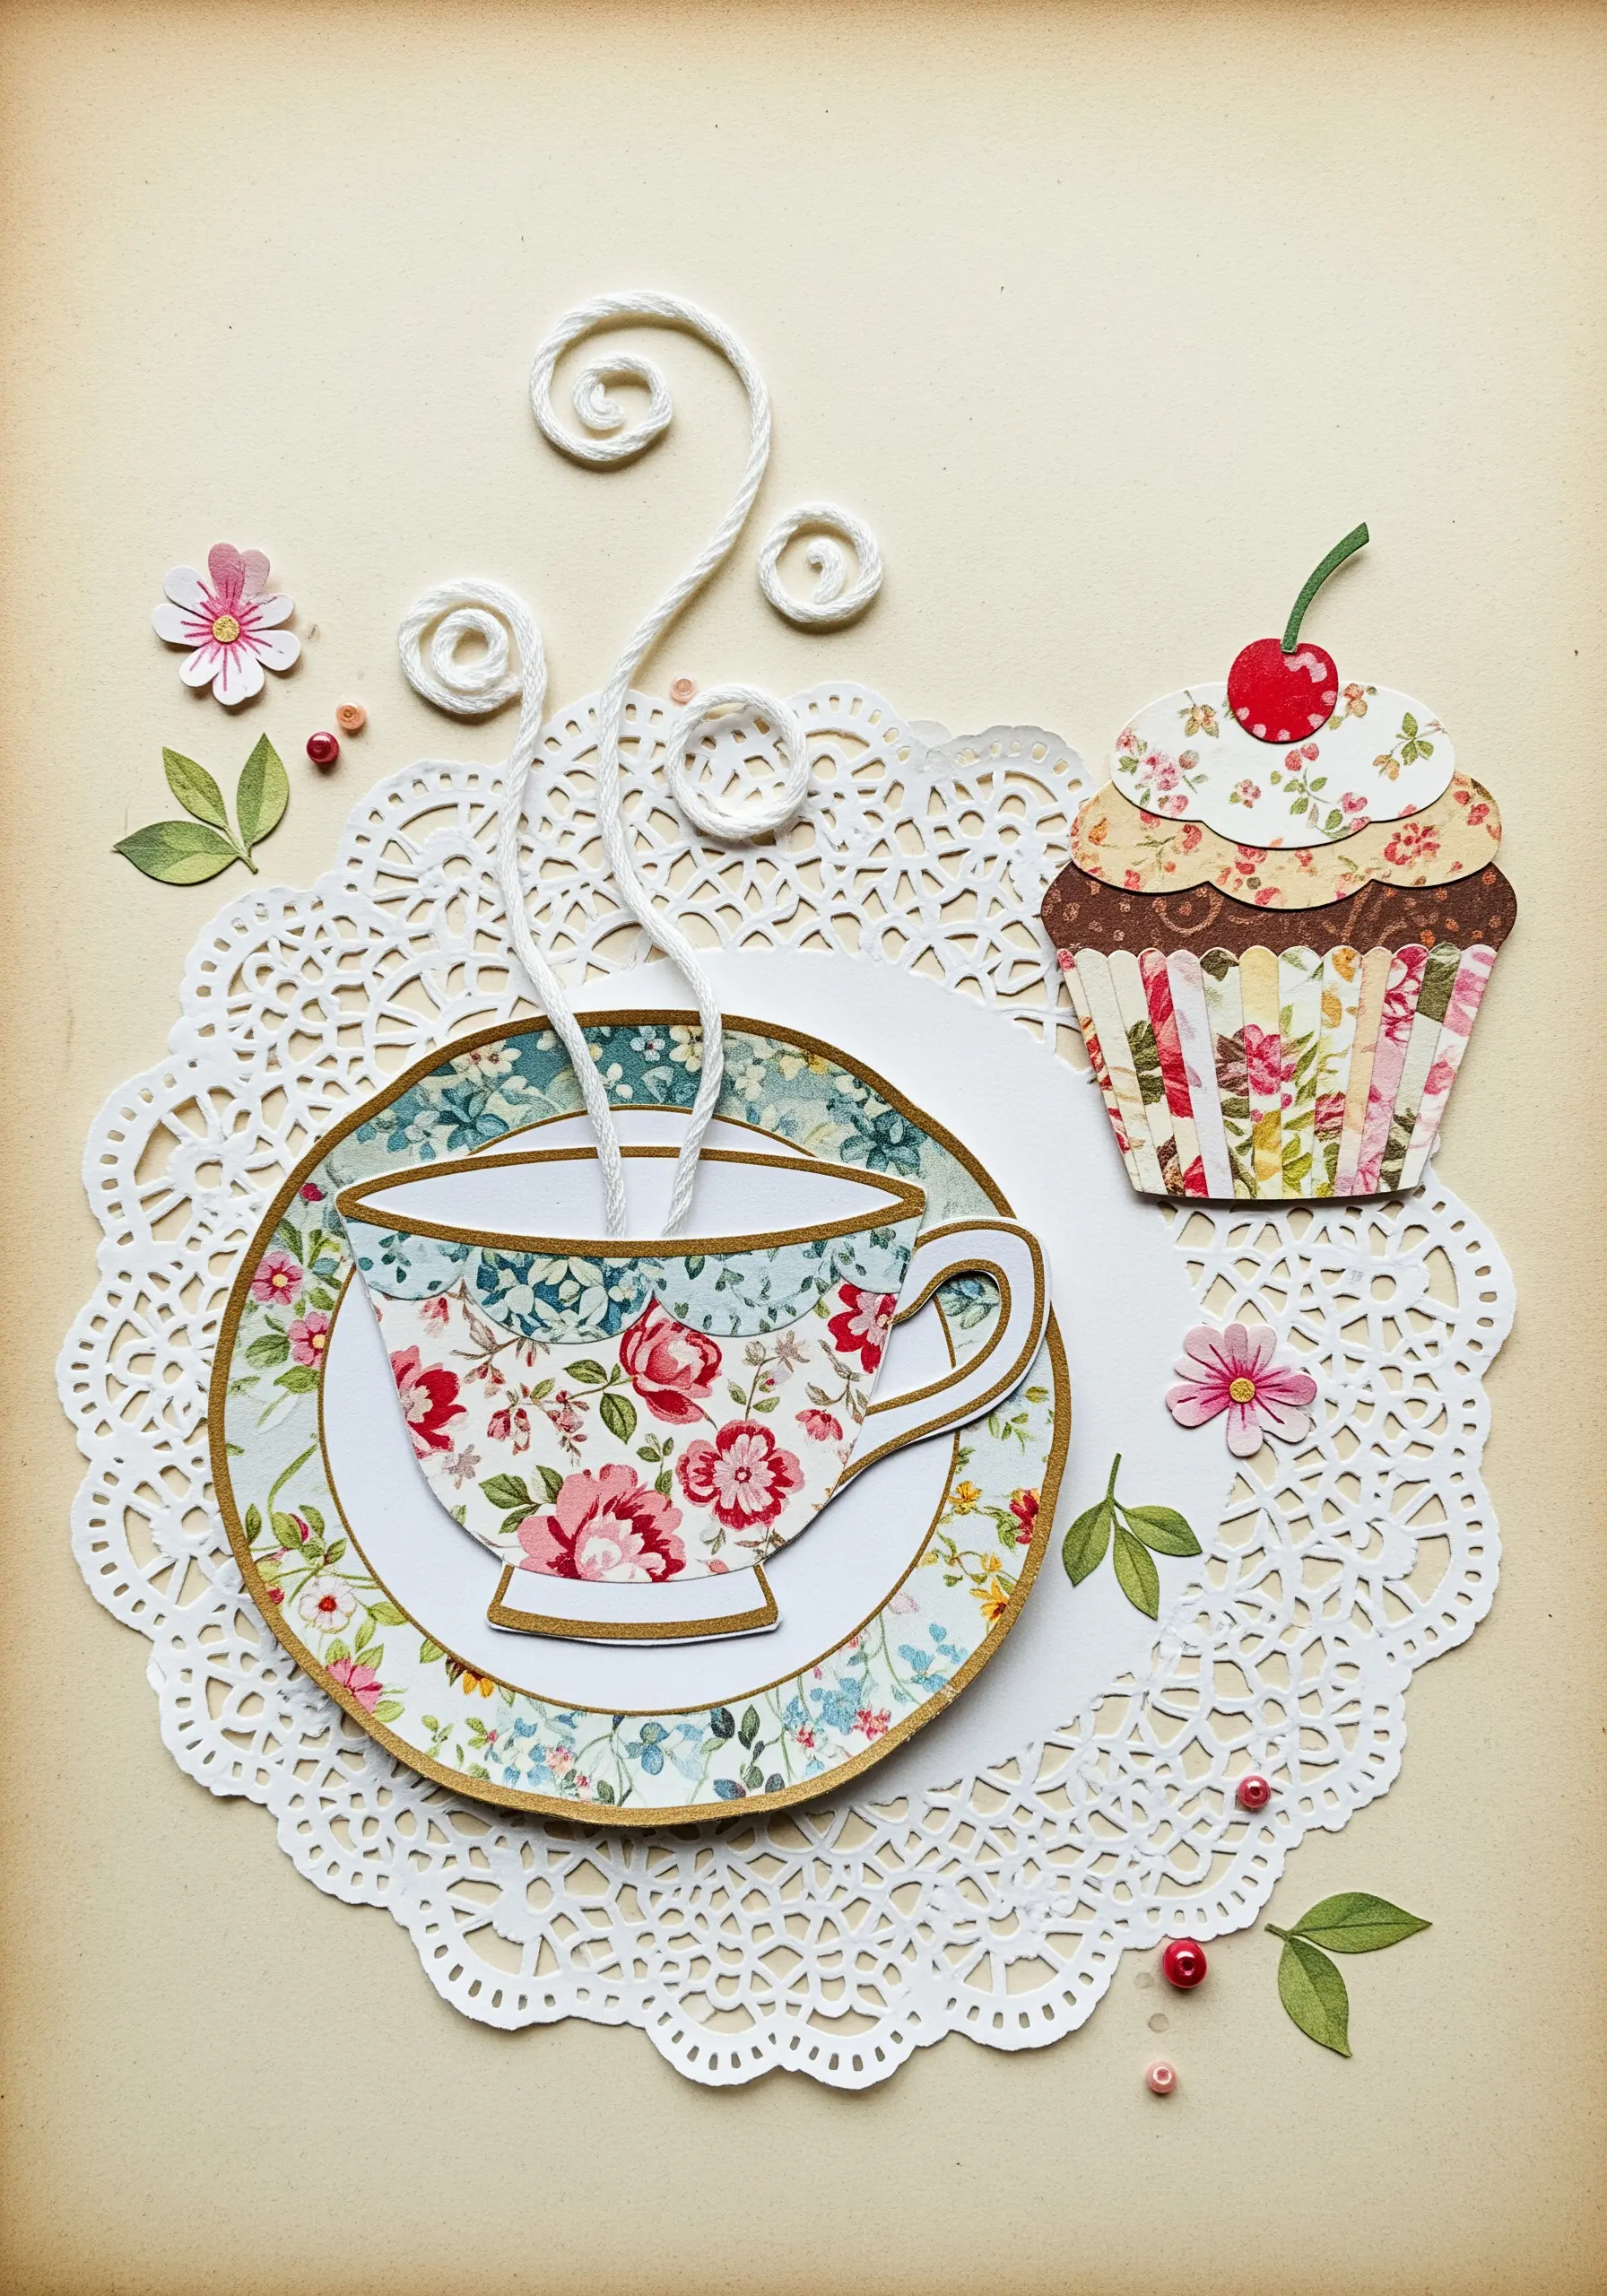
In a composition made primarily of paper collage, use thread to create elements that are too fine or delicate to cut from paper.
Here, curled white thread is used to represent steam or aroma, adding a sense of whimsy and movement.
Stiffen the thread with a bit of fabric glue or starch, shape it into curls, and let it dry before tacking it onto the page with a few tiny, invisible stitches or dots of glue.
This allows you to draw with thread in three dimensions, adding a sculptural flourish to your flat collage.
32. Map Constellations with Beads, Sequins, and Thread
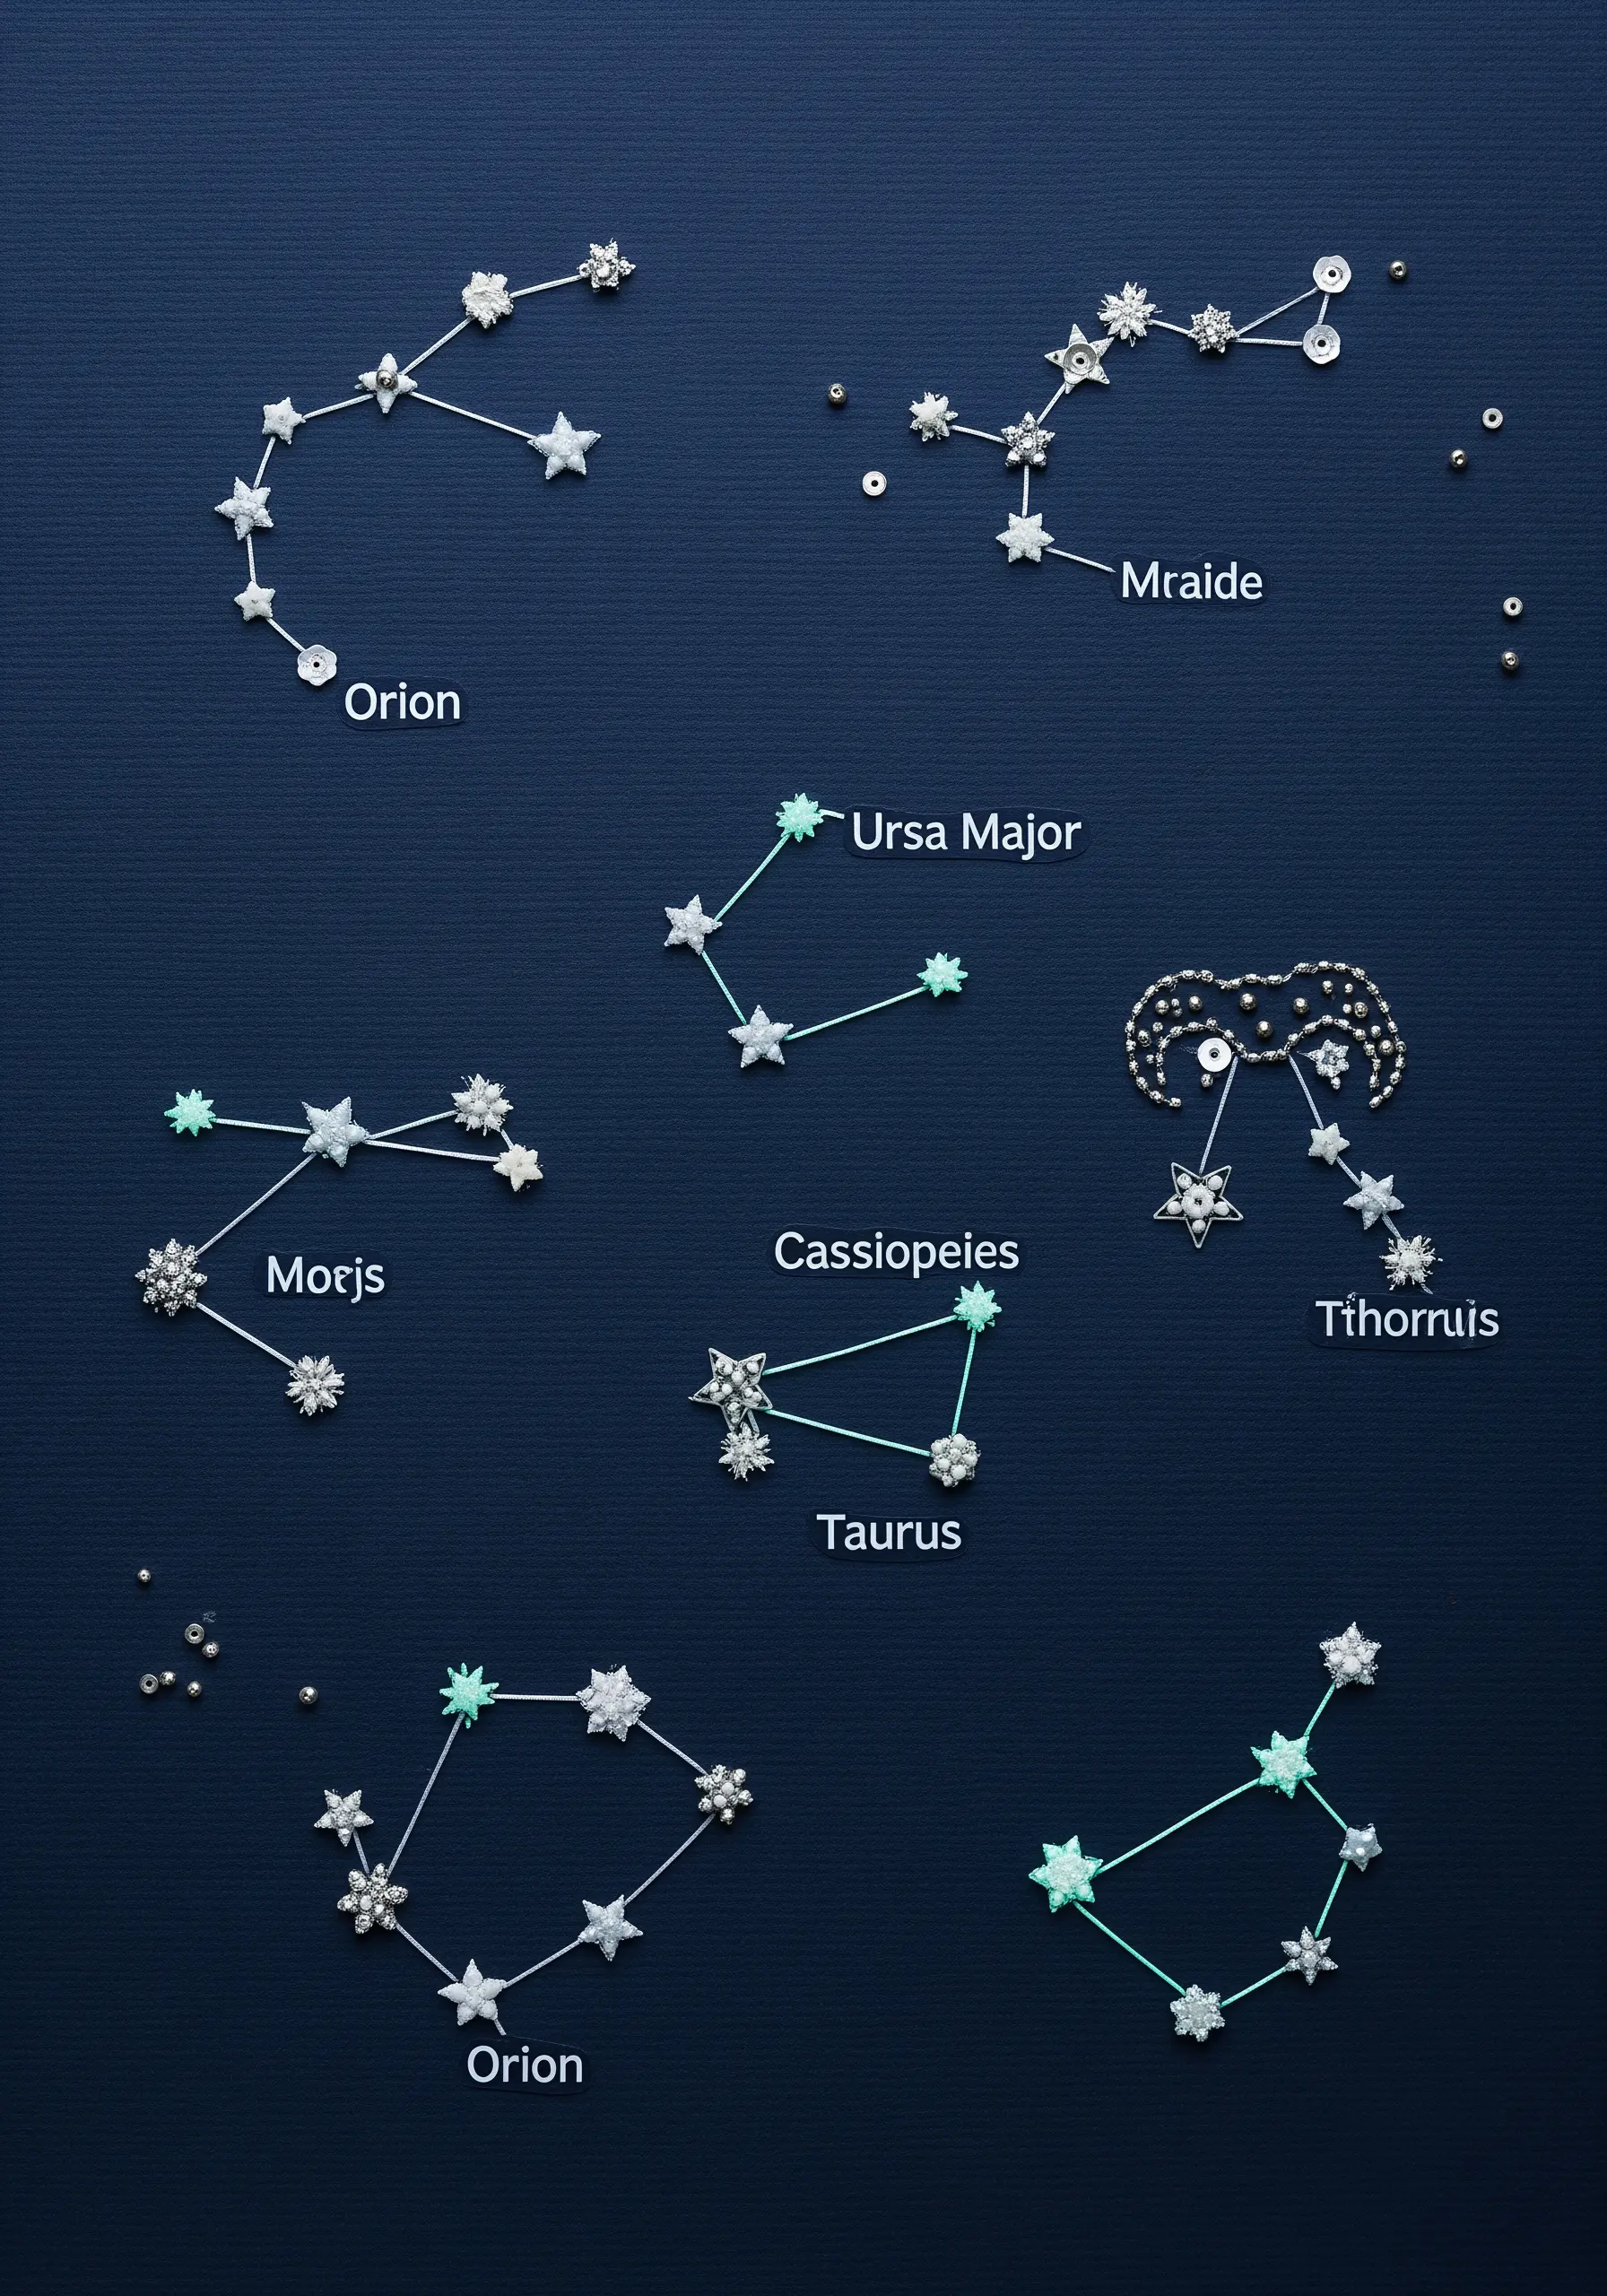
On a dark, heavy cardstock, lightly pencil the positions of your stars.
Represent the stars themselves using a mix of silver seed beads, star-shaped sequins, and tiny French knots for variety in brightness and texture.
Connect the stars with a fine, light-colored thread using a simple backstitch to create the constellation’s shape.
This combination of materials creates a beautiful, multi-textured celestial map that sparkles and feels far more dynamic than a simple drawing.
33. Create Water Ripples with Echoed Stitching
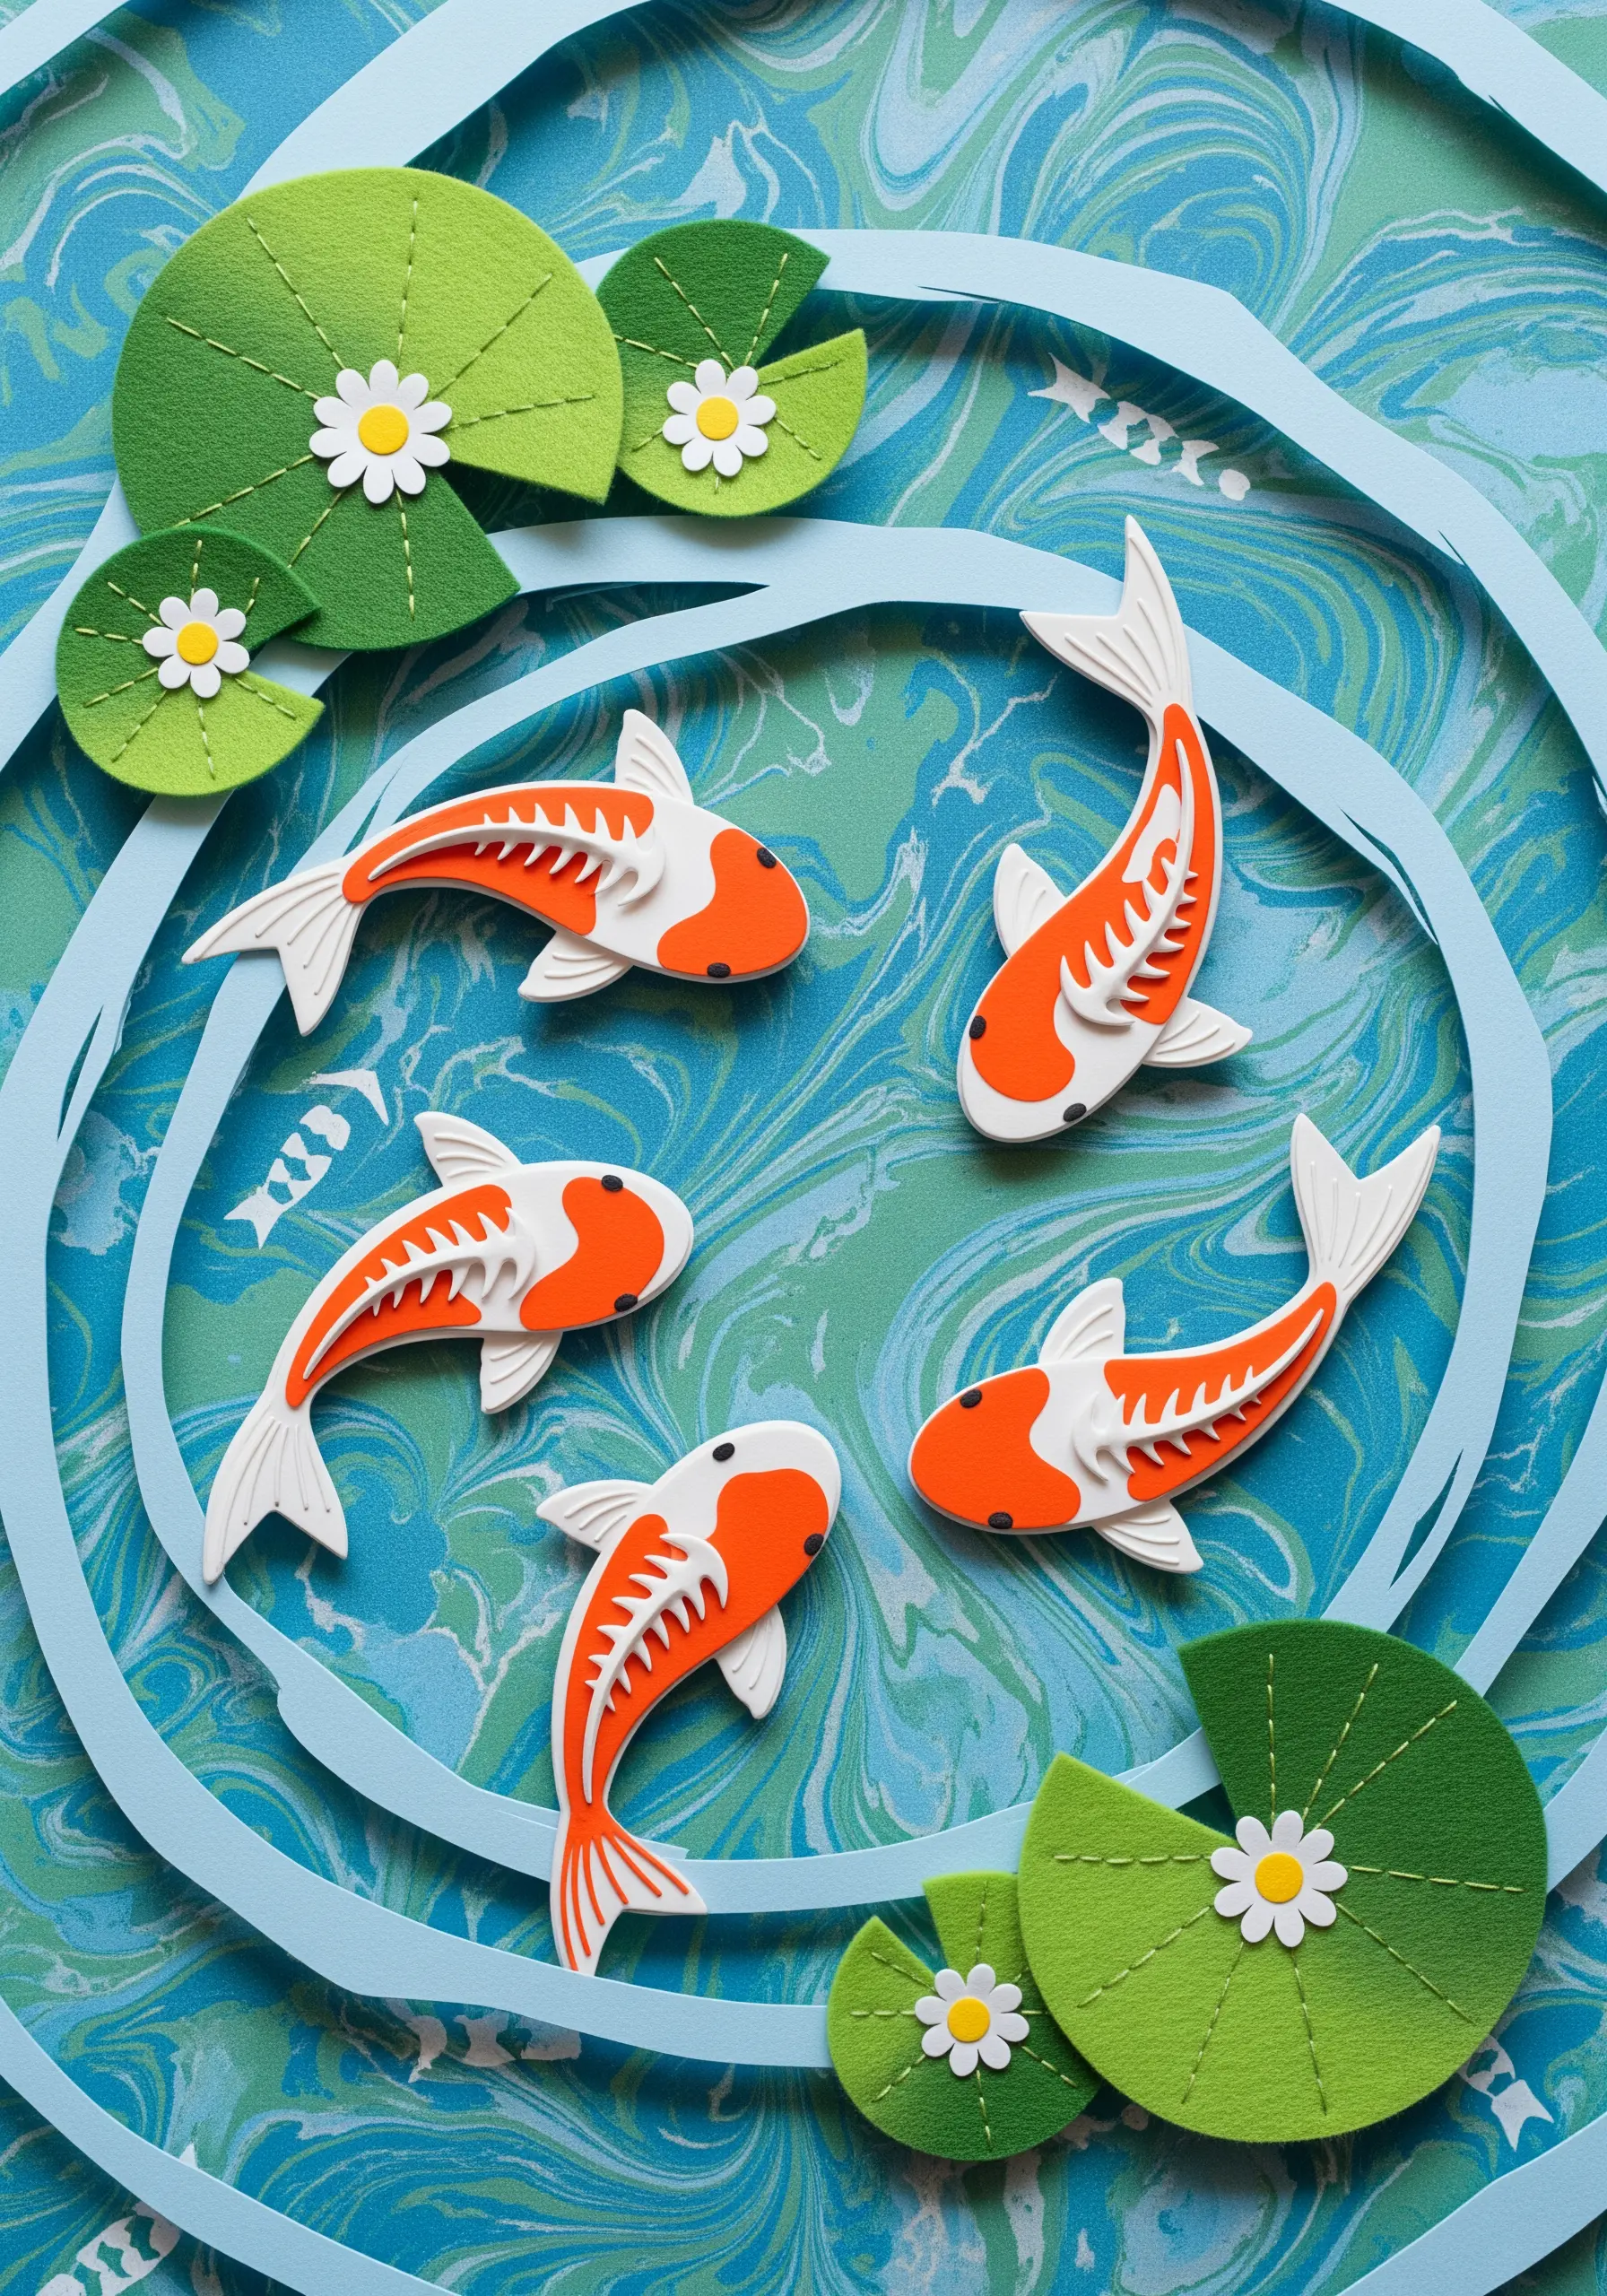
To suggest movement in water, use concentric circles of simple running stitch on your paper background.
The paper itself can be marbled or patterned to create a base texture, but the stitching is what activates the surface.
Place your paper fish or lily pads first, then stitch your ripple lines outward from them.
This technique of echoed stitching is a simple but highly effective way to create a sense of energy and motion radiating through the scene.
34. Add Gilded Titles with Goldwork on Paper
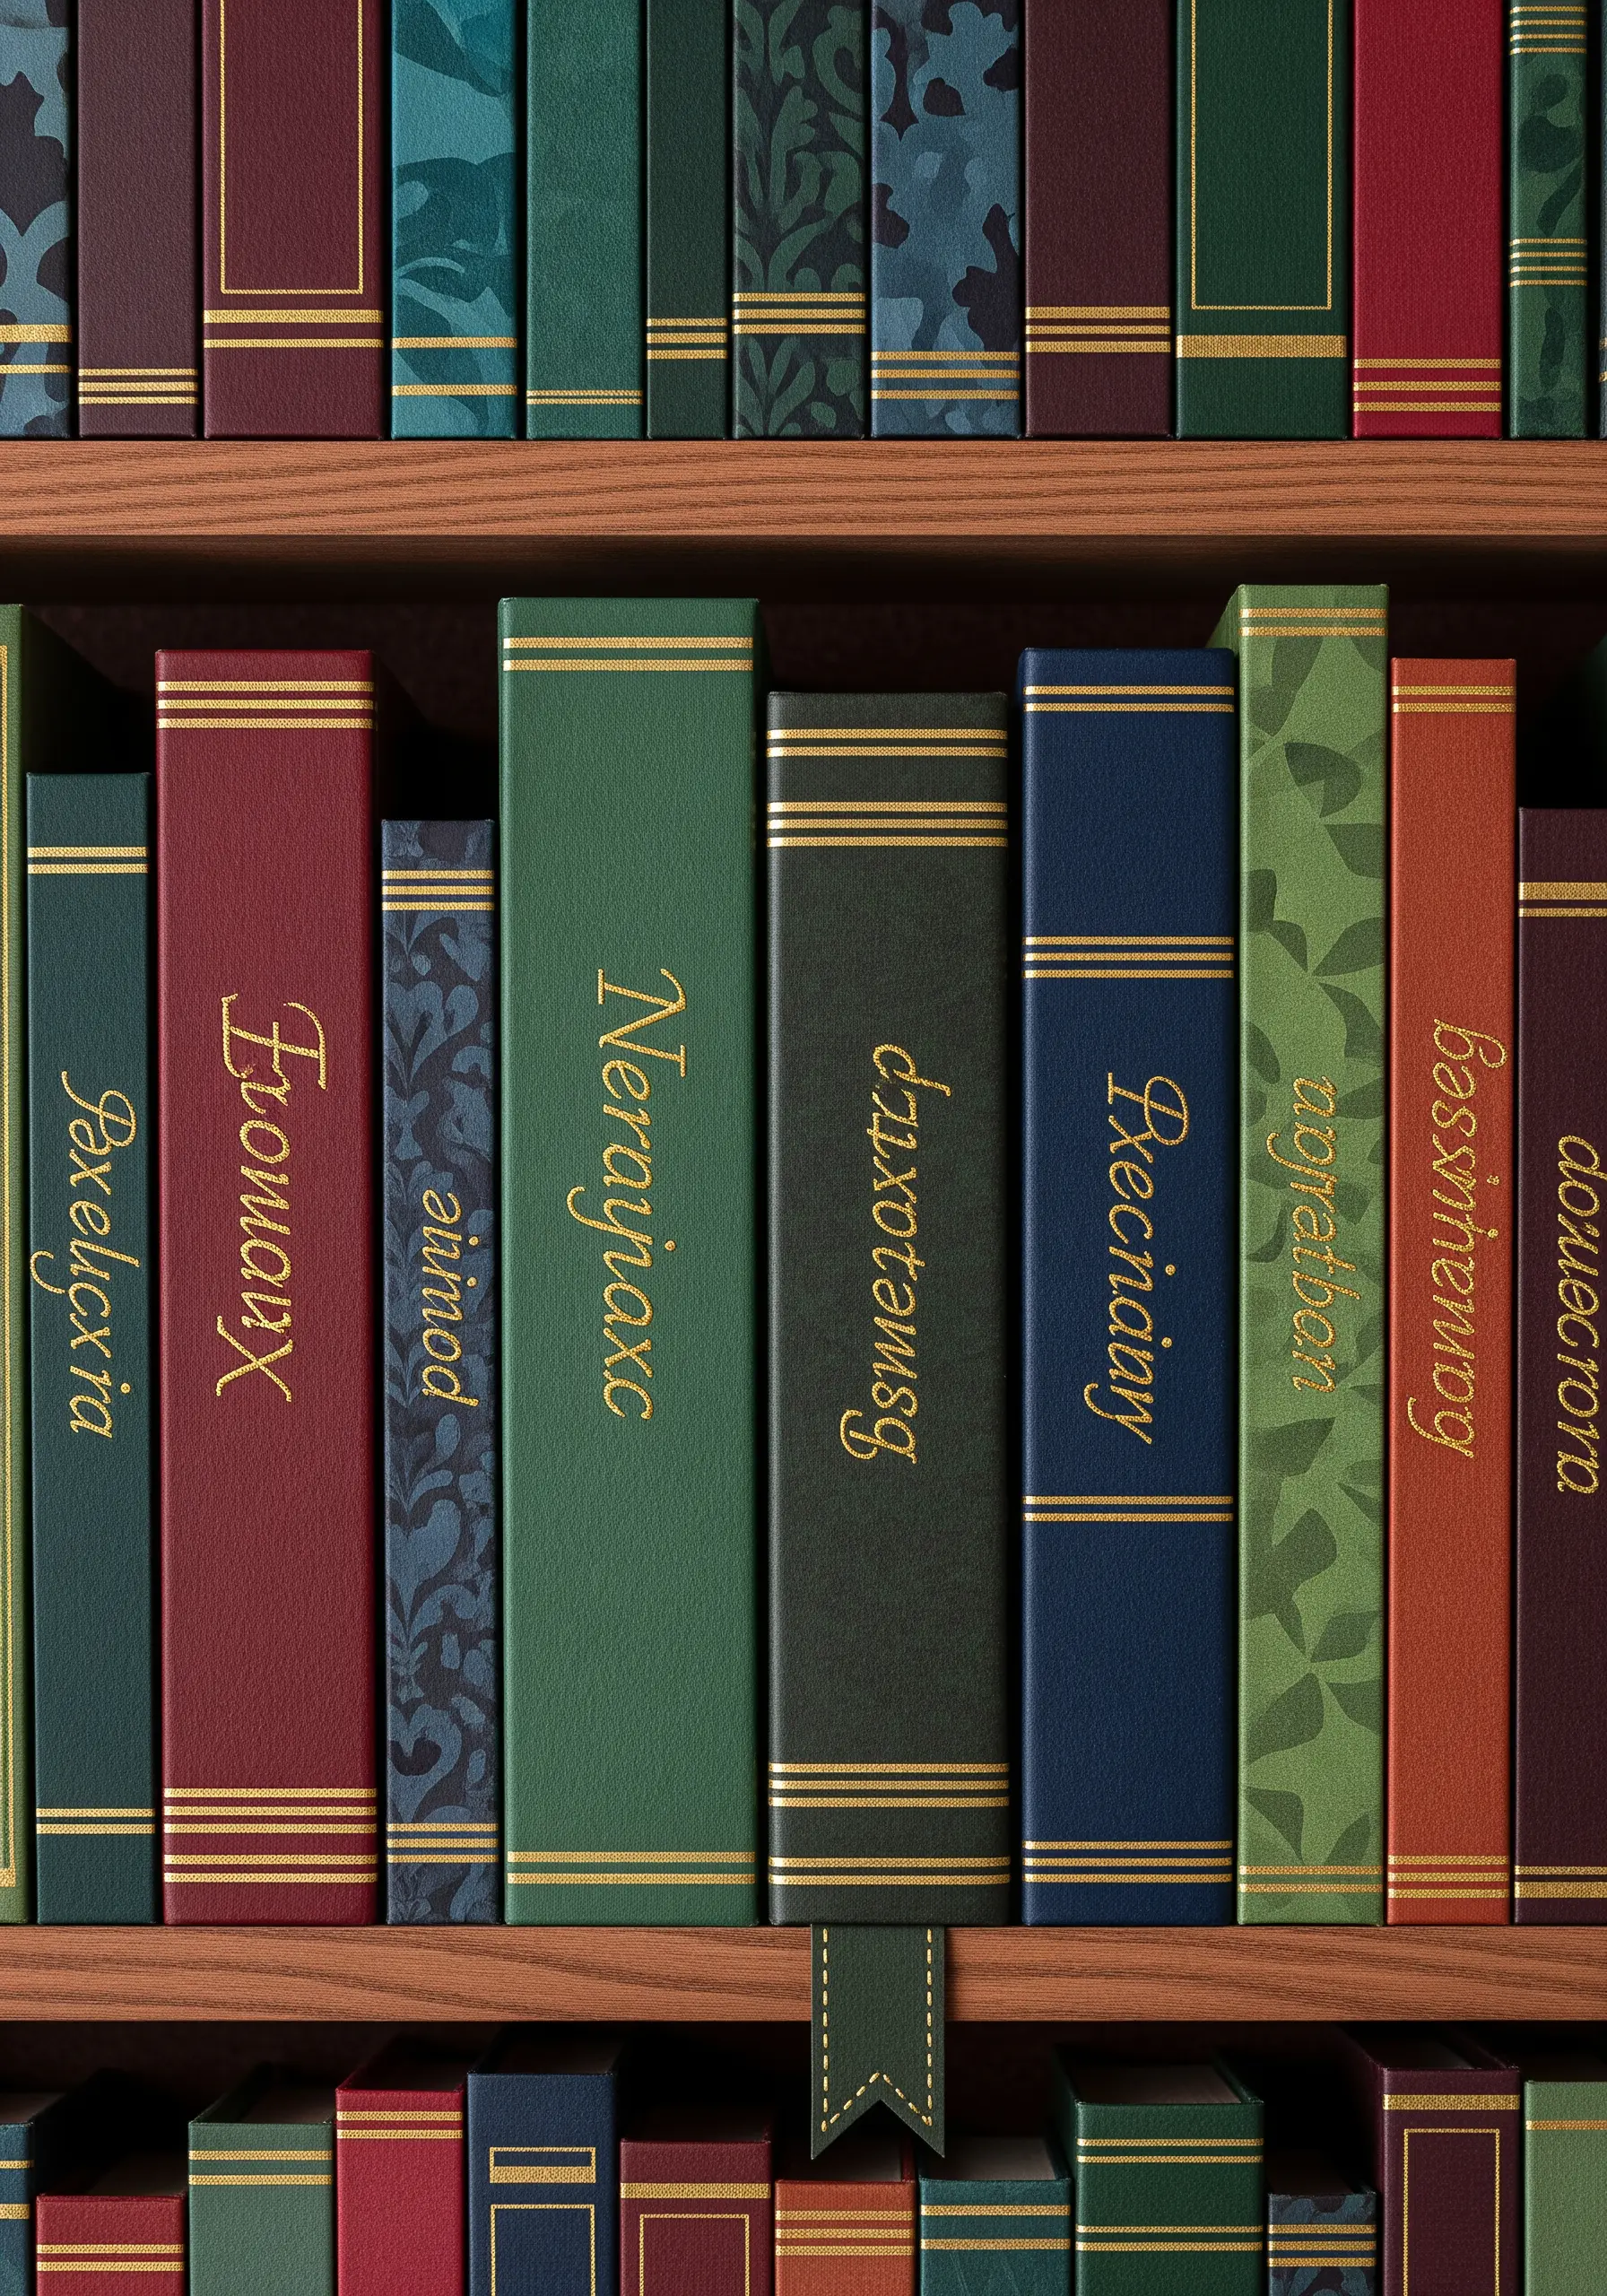
Elevate a simple paper book spine by adding embroidered titles.
Use a fine metallic thread and a tiny backstitch or split stitch to create elegant, script-like lettering.
Pre-piercing the holes for your letters is absolutely essential when working with metallic thread on paper to avoid shredding the thread or tearing the surface.
This detail mimics the look of classic gold foil embossing, adding a touch of timeless luxury and craftsmanship to your paper projects.