You’ve mastered the stitches, your lines are clean, and your color palettes are beautiful. But you feel a pull toward something more—something that lifts off the fabric and interacts with the world around it. This is where your embroidery can evolve into sculpture. It’s not about learning a hundred new, complex techniques. It’s about rethinking the one you already love.
The secret is learning to see in layers. Whether you’re stacking hoops, stitching on transparent surfaces, or wrapping thread around a form, you are building dimension. This dimension creates shadow, and shadow creates life. It turns a static design into a dynamic object that changes with the light, telling a story that a flat surface simply cannot.
In the following ideas, I want you to look past the finished piece and see the simple principle at its heart. Notice how a line becomes a plane, how space between layers becomes a tool, and how light becomes your final, most important material. This is your invitation to build, to construct, and to sculpt with thread. You already have the skill; now it’s time to add a new dimension.
1. Geometric Thread Weaving for Dynamic Shadow Play
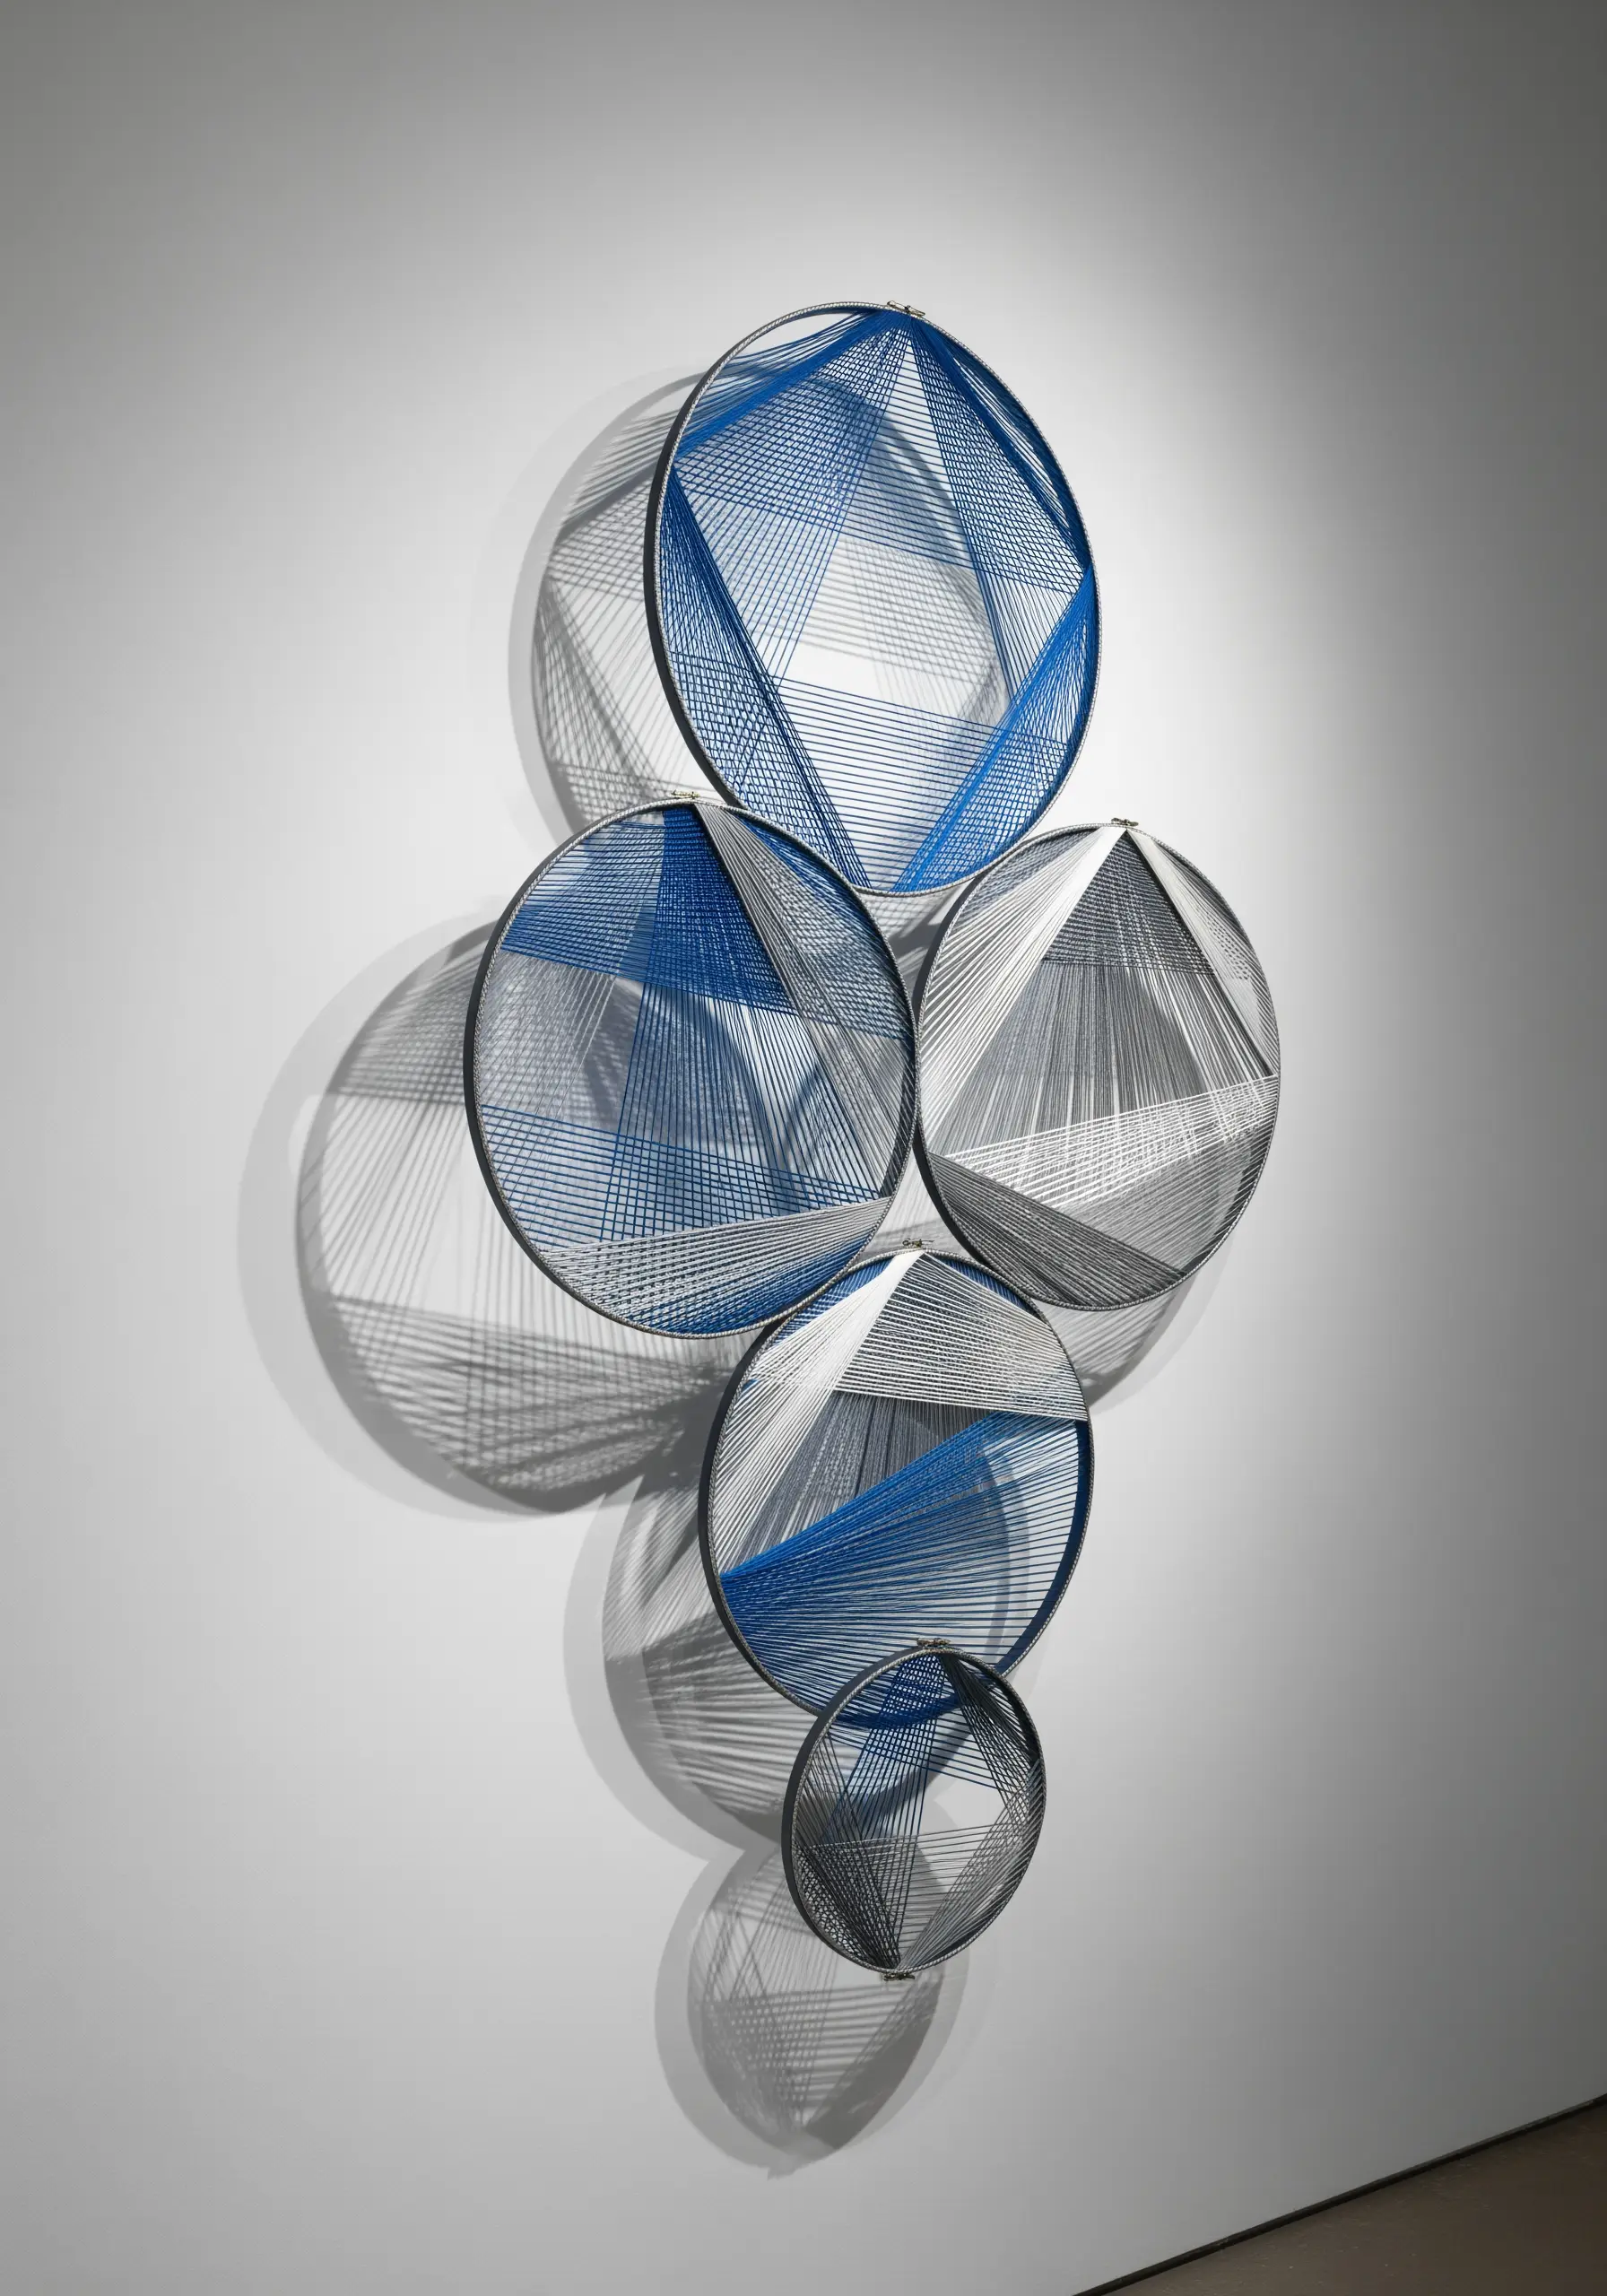
This technique moves beyond the fabric, using sturdy metal hoops as open-air looms to stretch thread tautly between anchor points.
The key is layering—crossing threads at different angles and in distinct color blocks creates captivating moiré patterns and visual depth.
For defined shadows, use a single, strong light source from the side or above.
A high-contrast, mercerized cotton thread will catch the light beautifully, casting sharp, graphic shadows that become part of the art.
Grouping hoops of various sizes creates a cohesive installation that feels intentional and complete.
2. Sculptural Punch Needle for High-Relief Texture
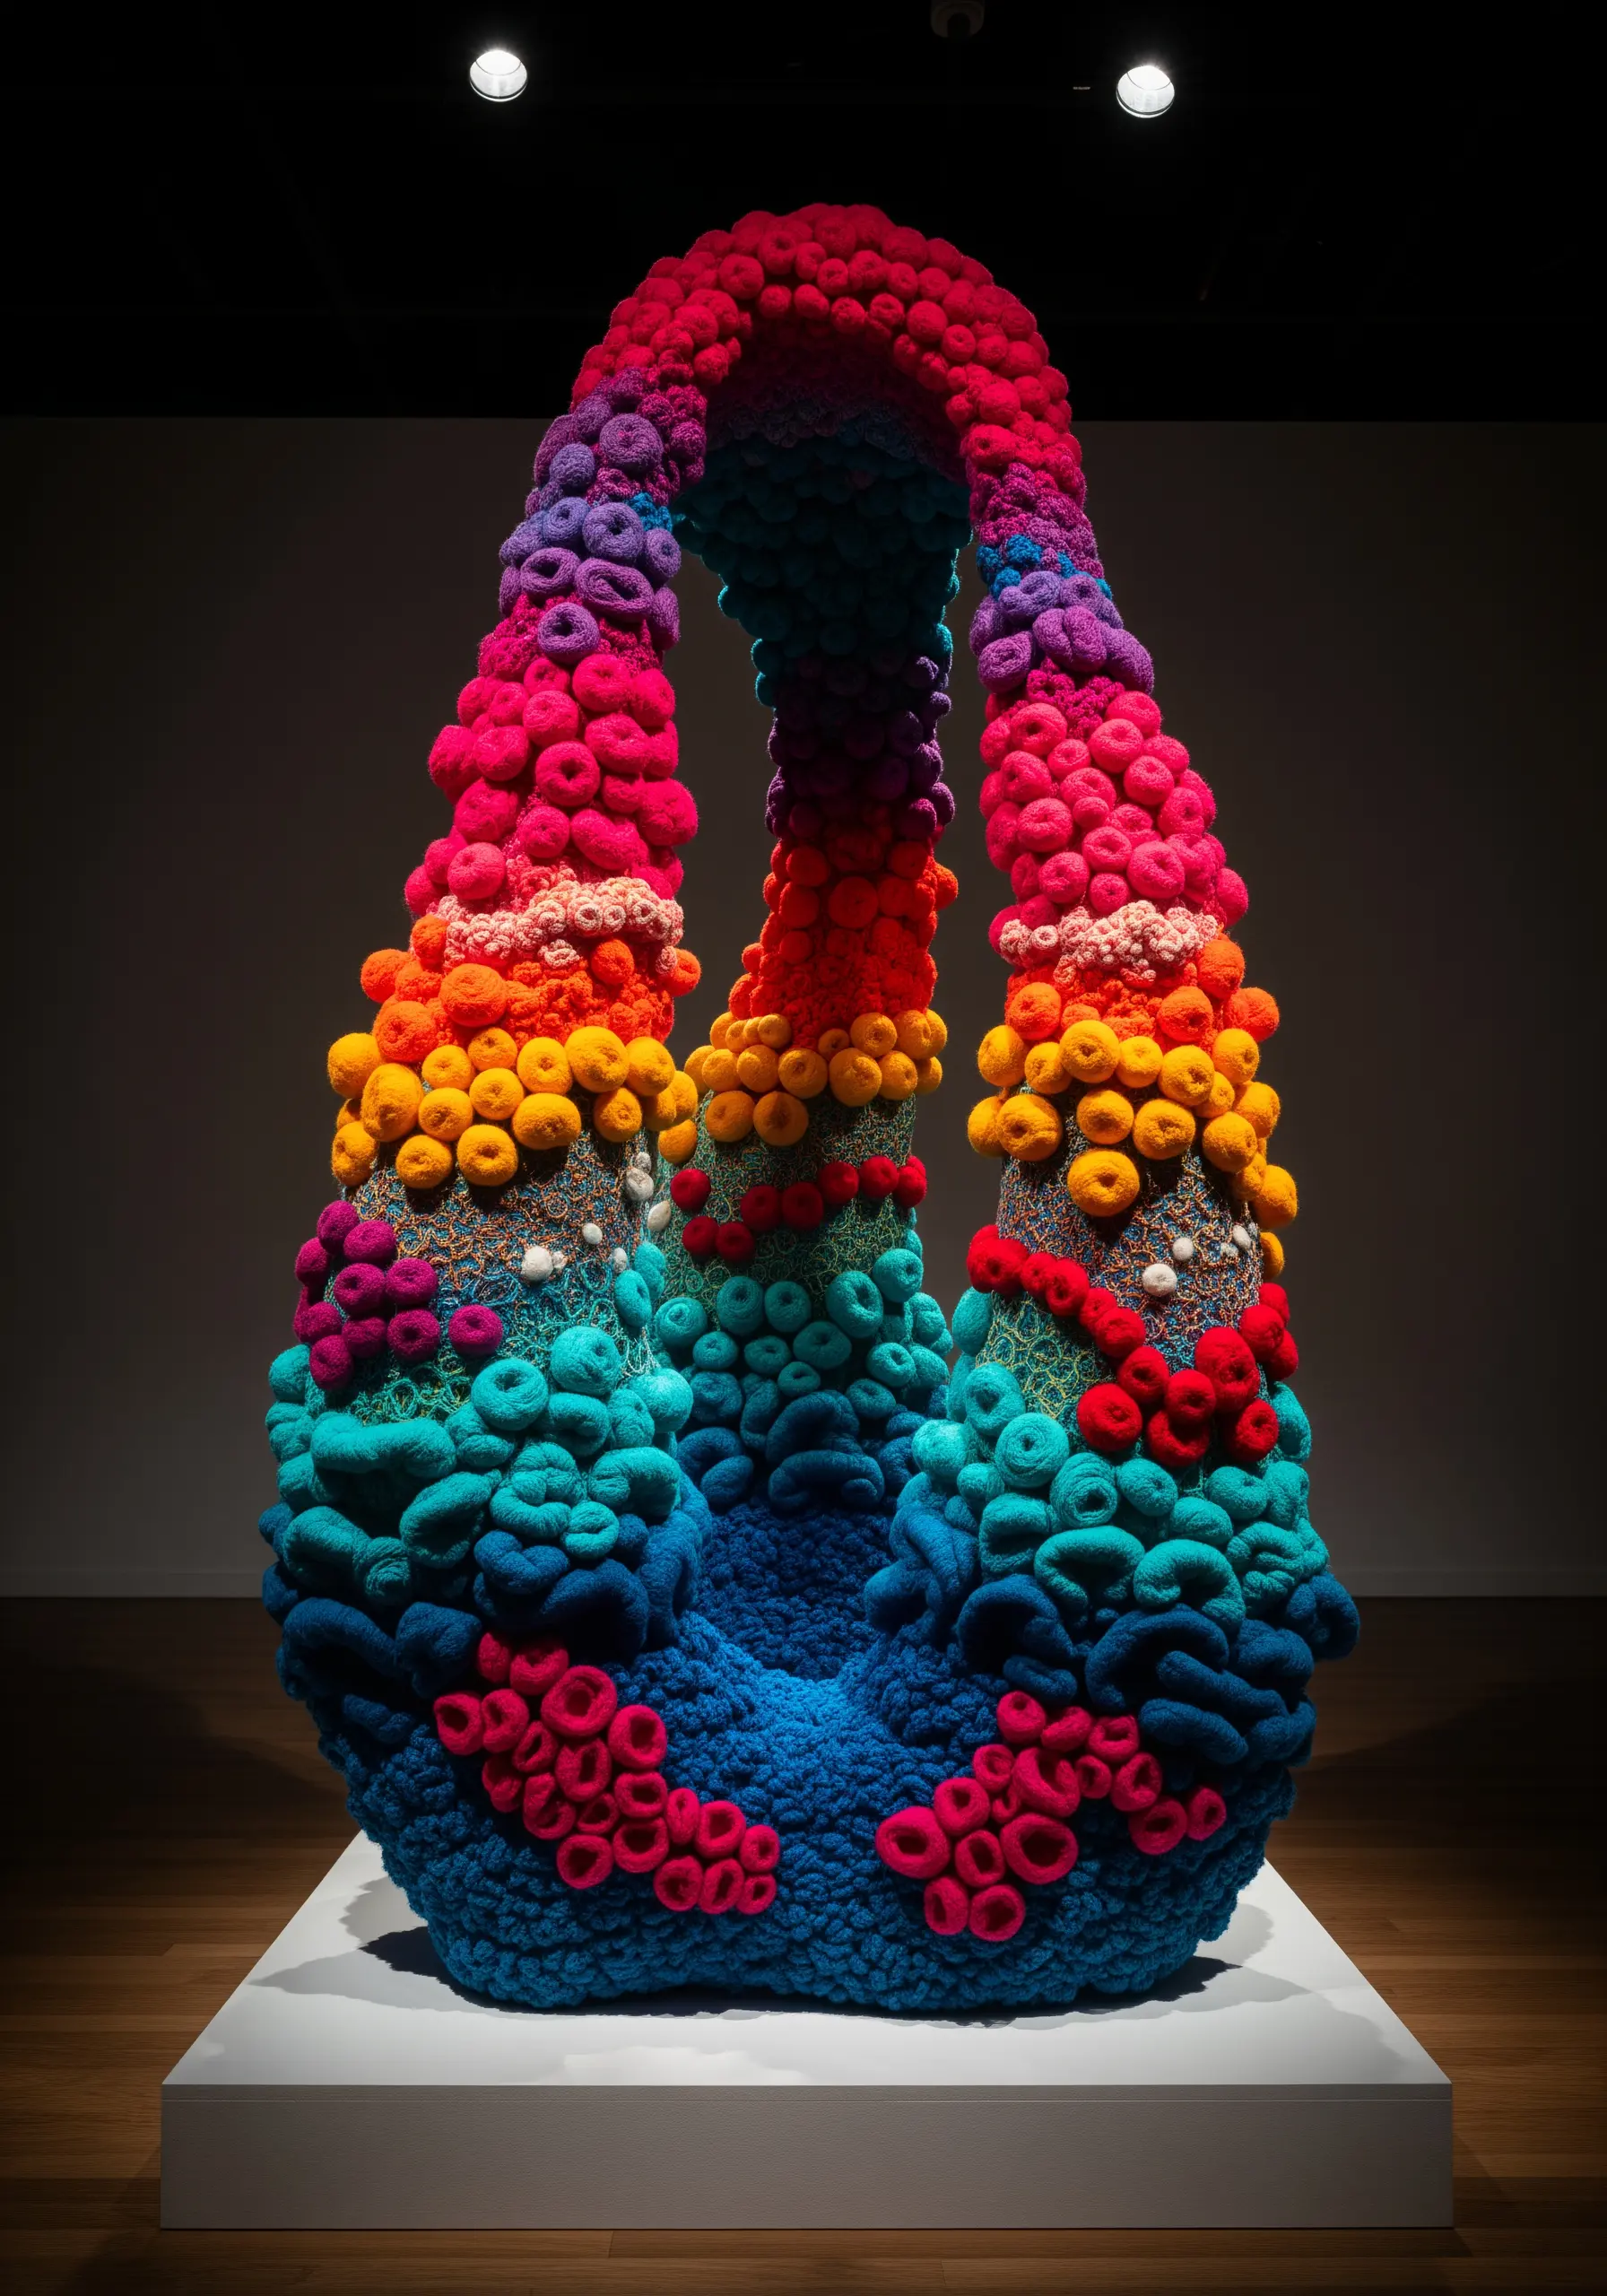
Achieve this vibrant, coral-reef-like texture by combining punch needle loops of varying heights with densely packed French knots.
Use a range of yarn weights, from chunky wool to finer cotton, to build organic, undulating forms.
Instead of a flat canvas, work directly onto a soft, sculptural base like carved foam or stuffed fabric shapes to create true three-dimensionality.
The magic is in the density—pack your loops and knots tightly together so they become self-supporting surfaces. These statement textured embroidery techniques allow the piece to command its space.
3. Topographic Layering with Appliqué and Cord
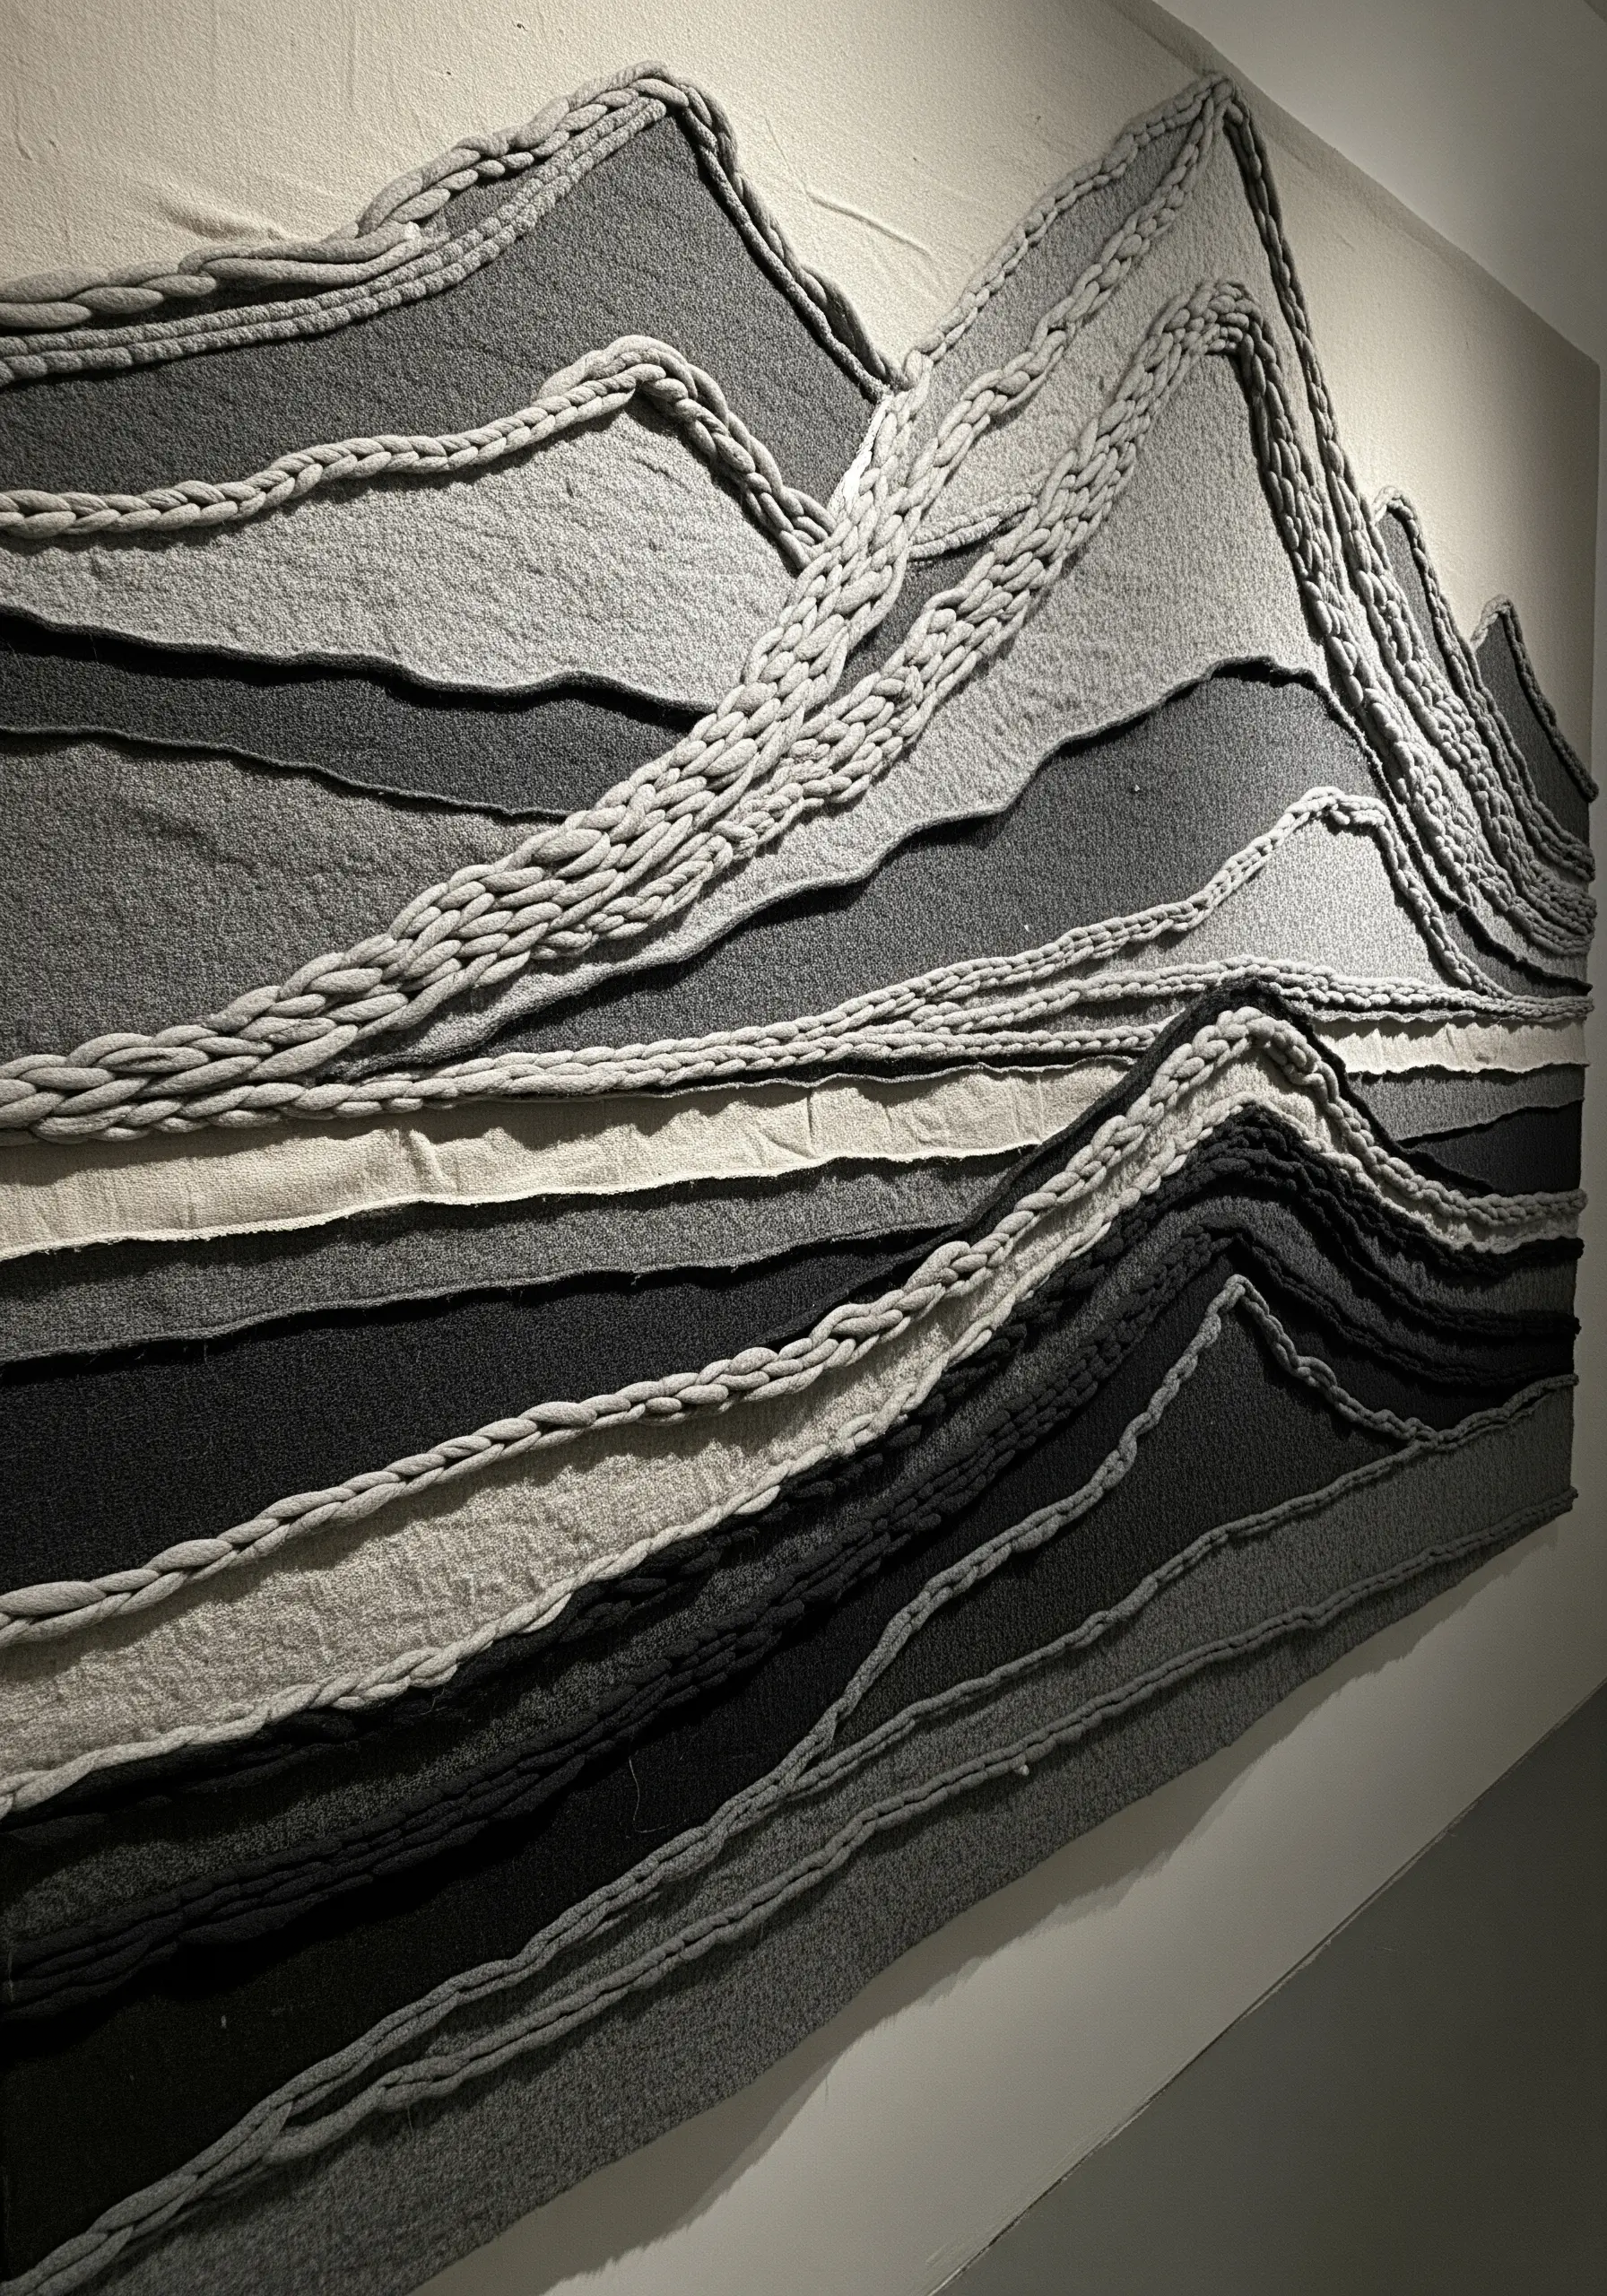
Create the illusion of a mountain range by layering torn or raw-edged fabric scraps in a monochromatic palette.
Stitch these layers onto a heavy canvas backing, allowing the frayed edges to create natural shadow lines that suggest elevation.
To define the ridges and add dramatic relief, couch thick, braided yarn or fabric cording along the contours.
This technique combines appliqué with sculptural couching, transforming flat textiles into a landscape with palpable dimension and tactile appeal.
4. Creating Optical Depth with Radial Threading
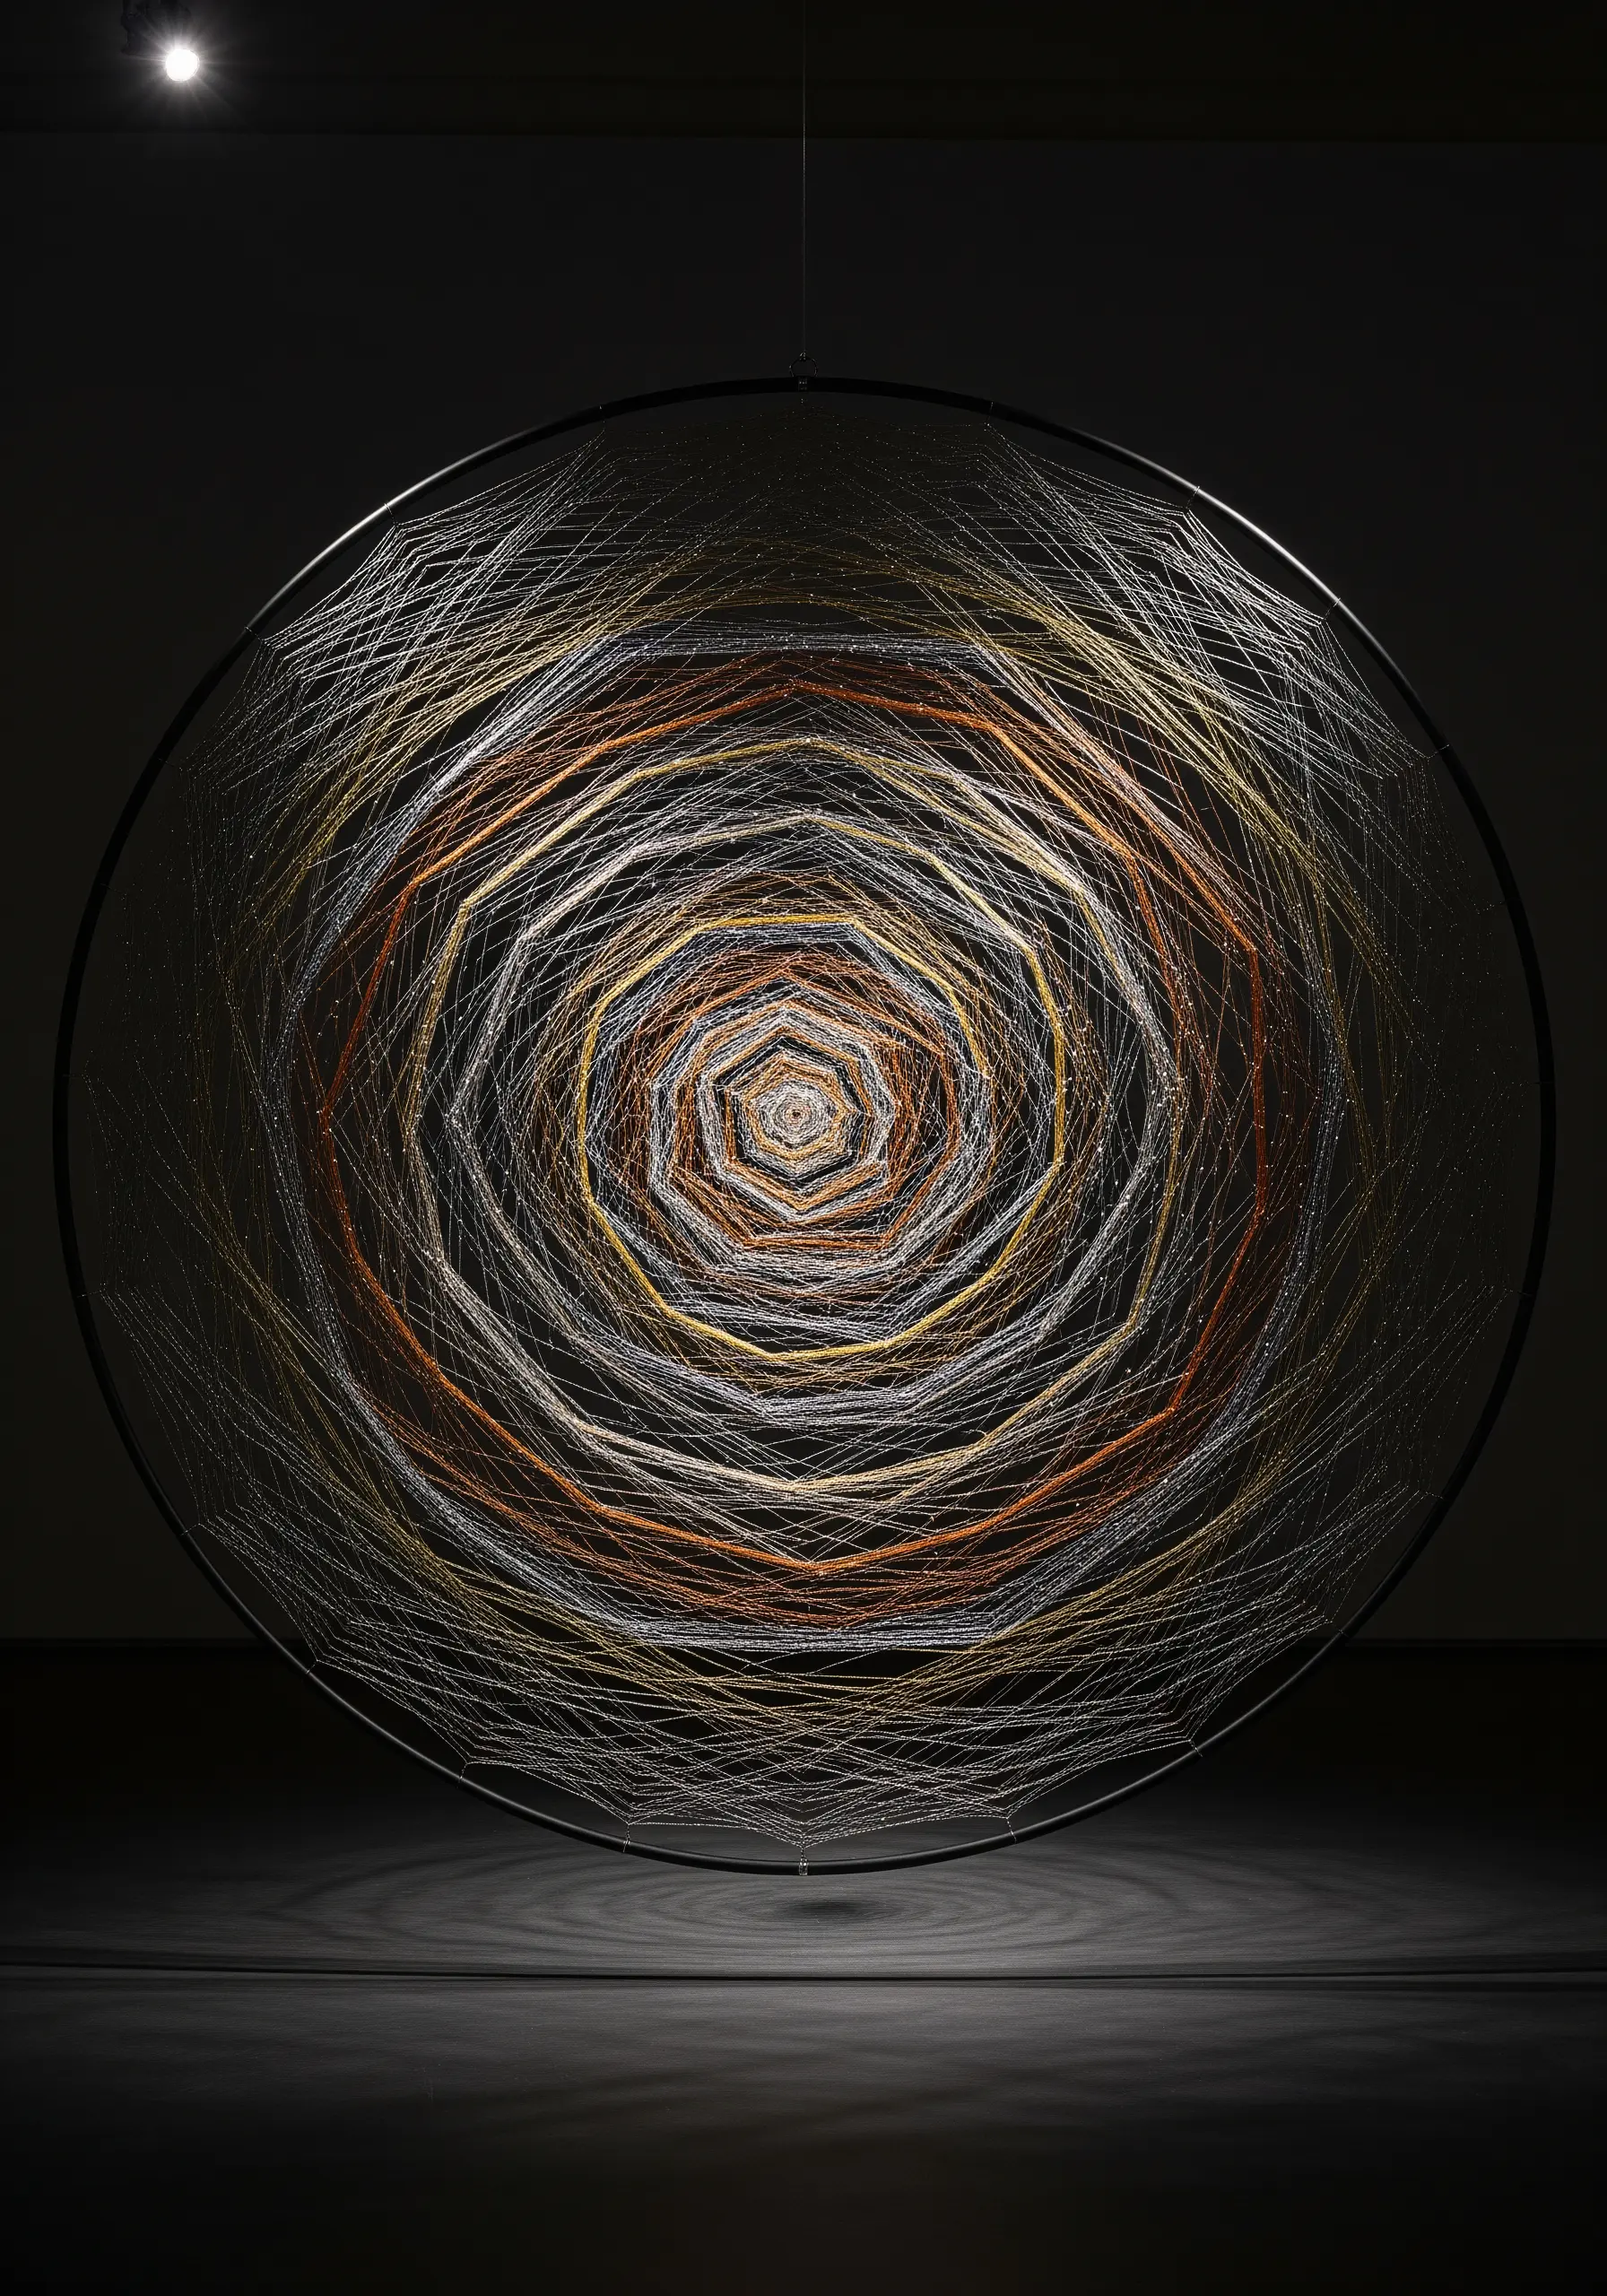
This mesmerizing effect comes from stringing thread across a large circular frame in a precise geometric sequence.
Start with a metal hoop and mark equidistant points around the circumference—the more points, the denser the final piece.
By wrapping thread from one point to another in a repeating pattern (e.g., connecting every point to the one 10 spaces away), you build layers that create the illusion of a vortex.
Use metallic or silk threads in an analogous color scheme to catch the light and enhance the powerful sense of depth and movement.
5. Architectural Thread Silhouettes in a Shadow Box
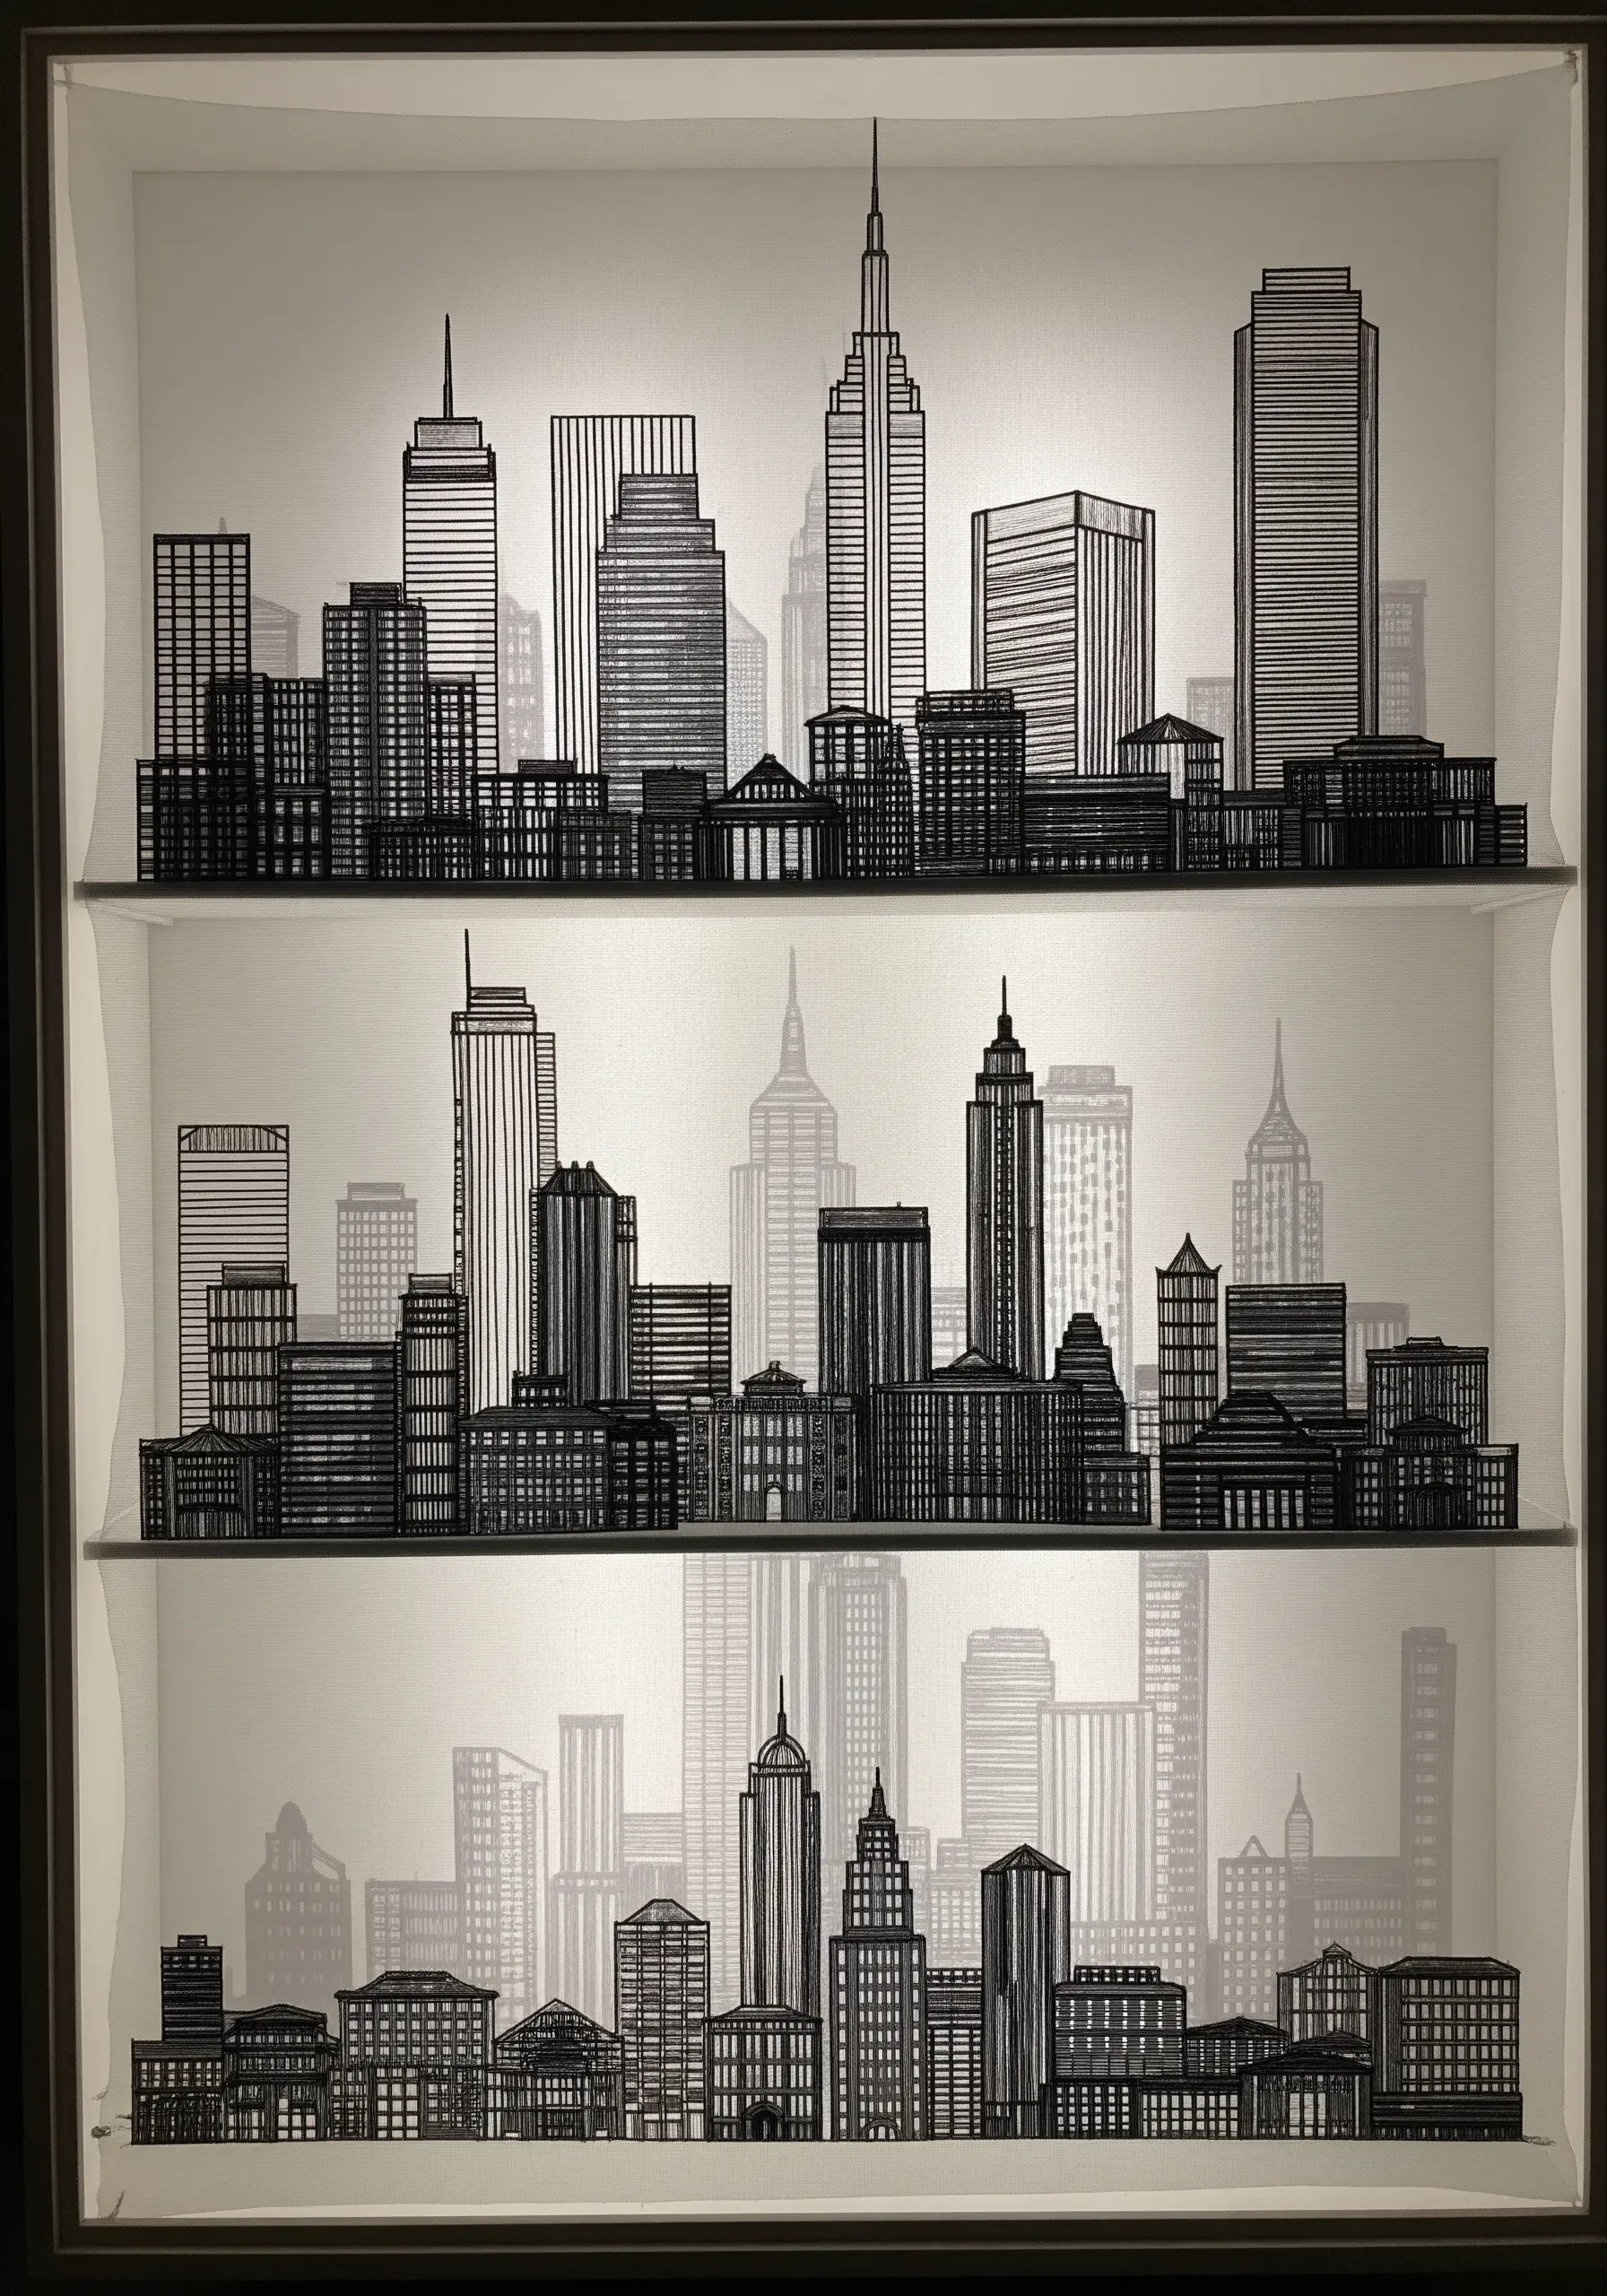
Build a miniature city by stitching minimalist building outlines onto separate layers of sheer organza or tulle.
Stretch each completed layer on its own frame and stack them inside a deep shadow box with at least an inch of space between each one.
The foreground layer should have the most detail and darkest thread, while subsequent layers use finer thread or simpler shapes to suggest atmospheric perspective.
When backlit, the silhouettes pop and cast subtle, overlapping shadows, creating a stunning 3D effect from simple lines.
6. Floating Botanical Veins on Water-Soluble Stabilizer
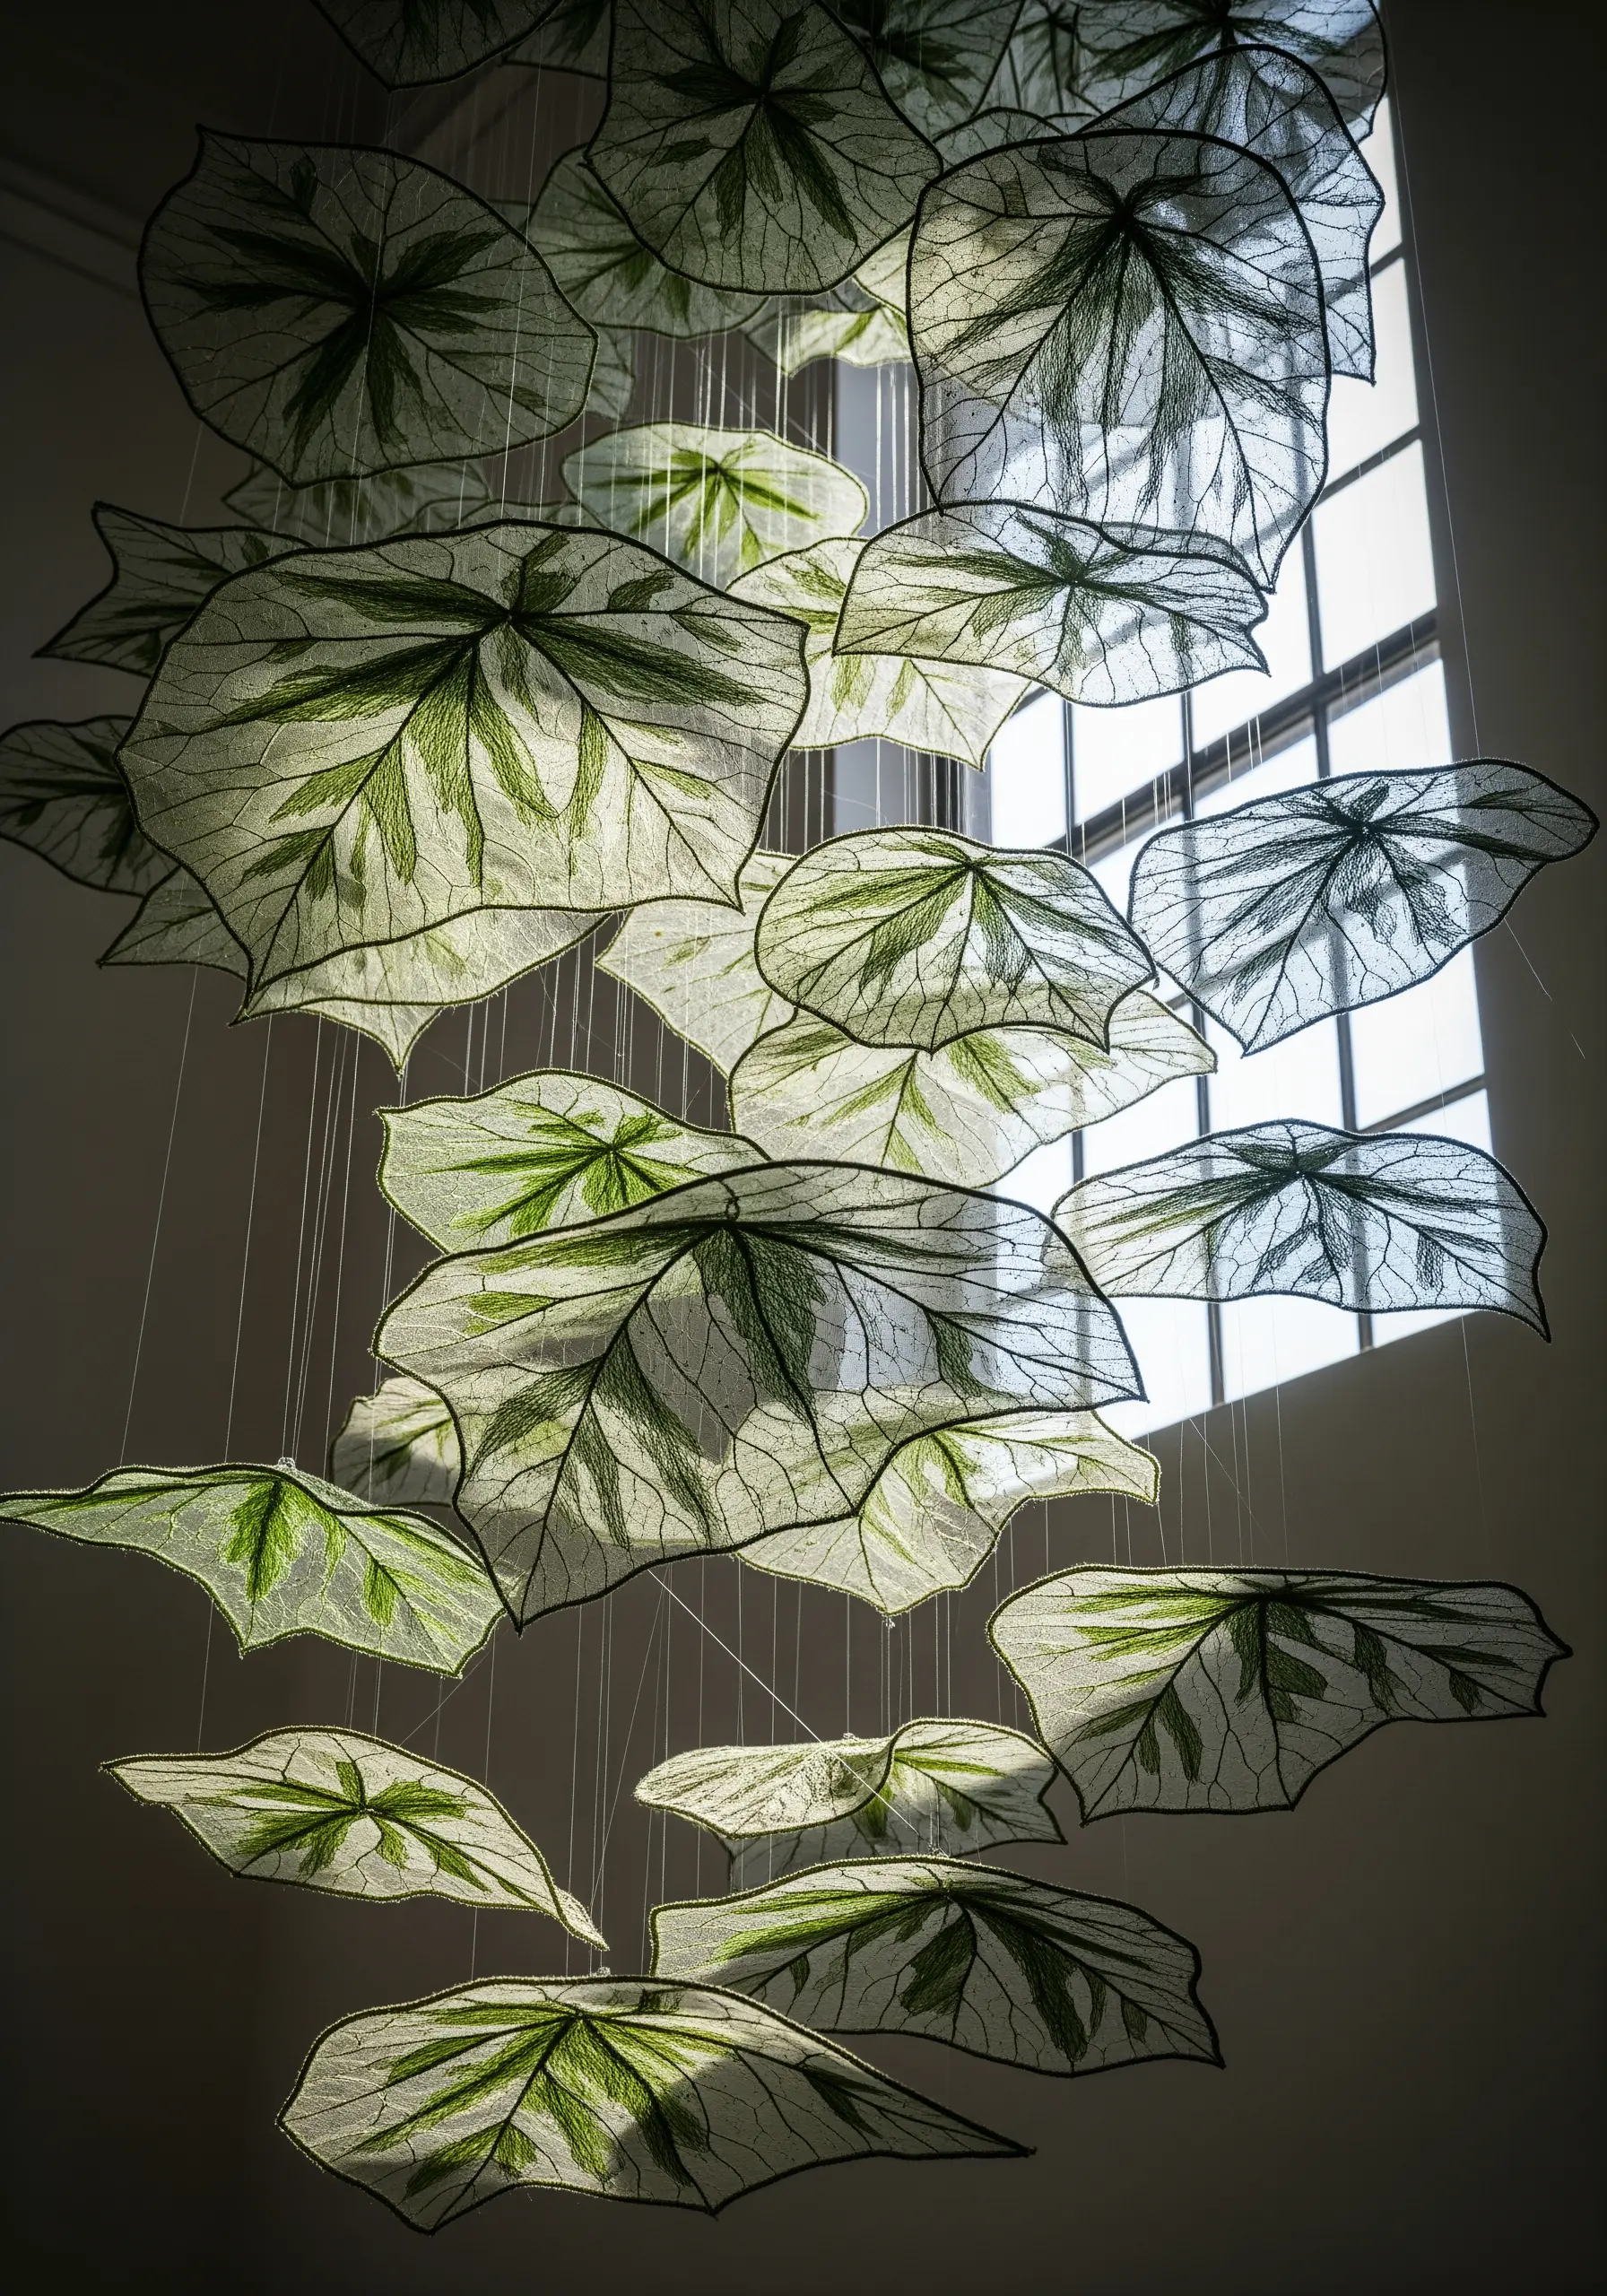
Stitch intricate leaf vein patterns directly onto a heavy-duty water-soluble stabilizer, as if drawing with your needle.
Use a free-motion embroidery foot or meticulous hand backstitching with a fine, strong thread to create the delicate structure.
Overlap your stitches generously to build a sturdy, self-supporting framework.
Once the design is complete, dissolve the stabilizer in warm water, leaving behind a delicate, thread-only skeleton. These fiber art installations that look like they’re floating can be hung as a mobile to interact with light and air.
7. Topographic Thread Winding for Solid Forms
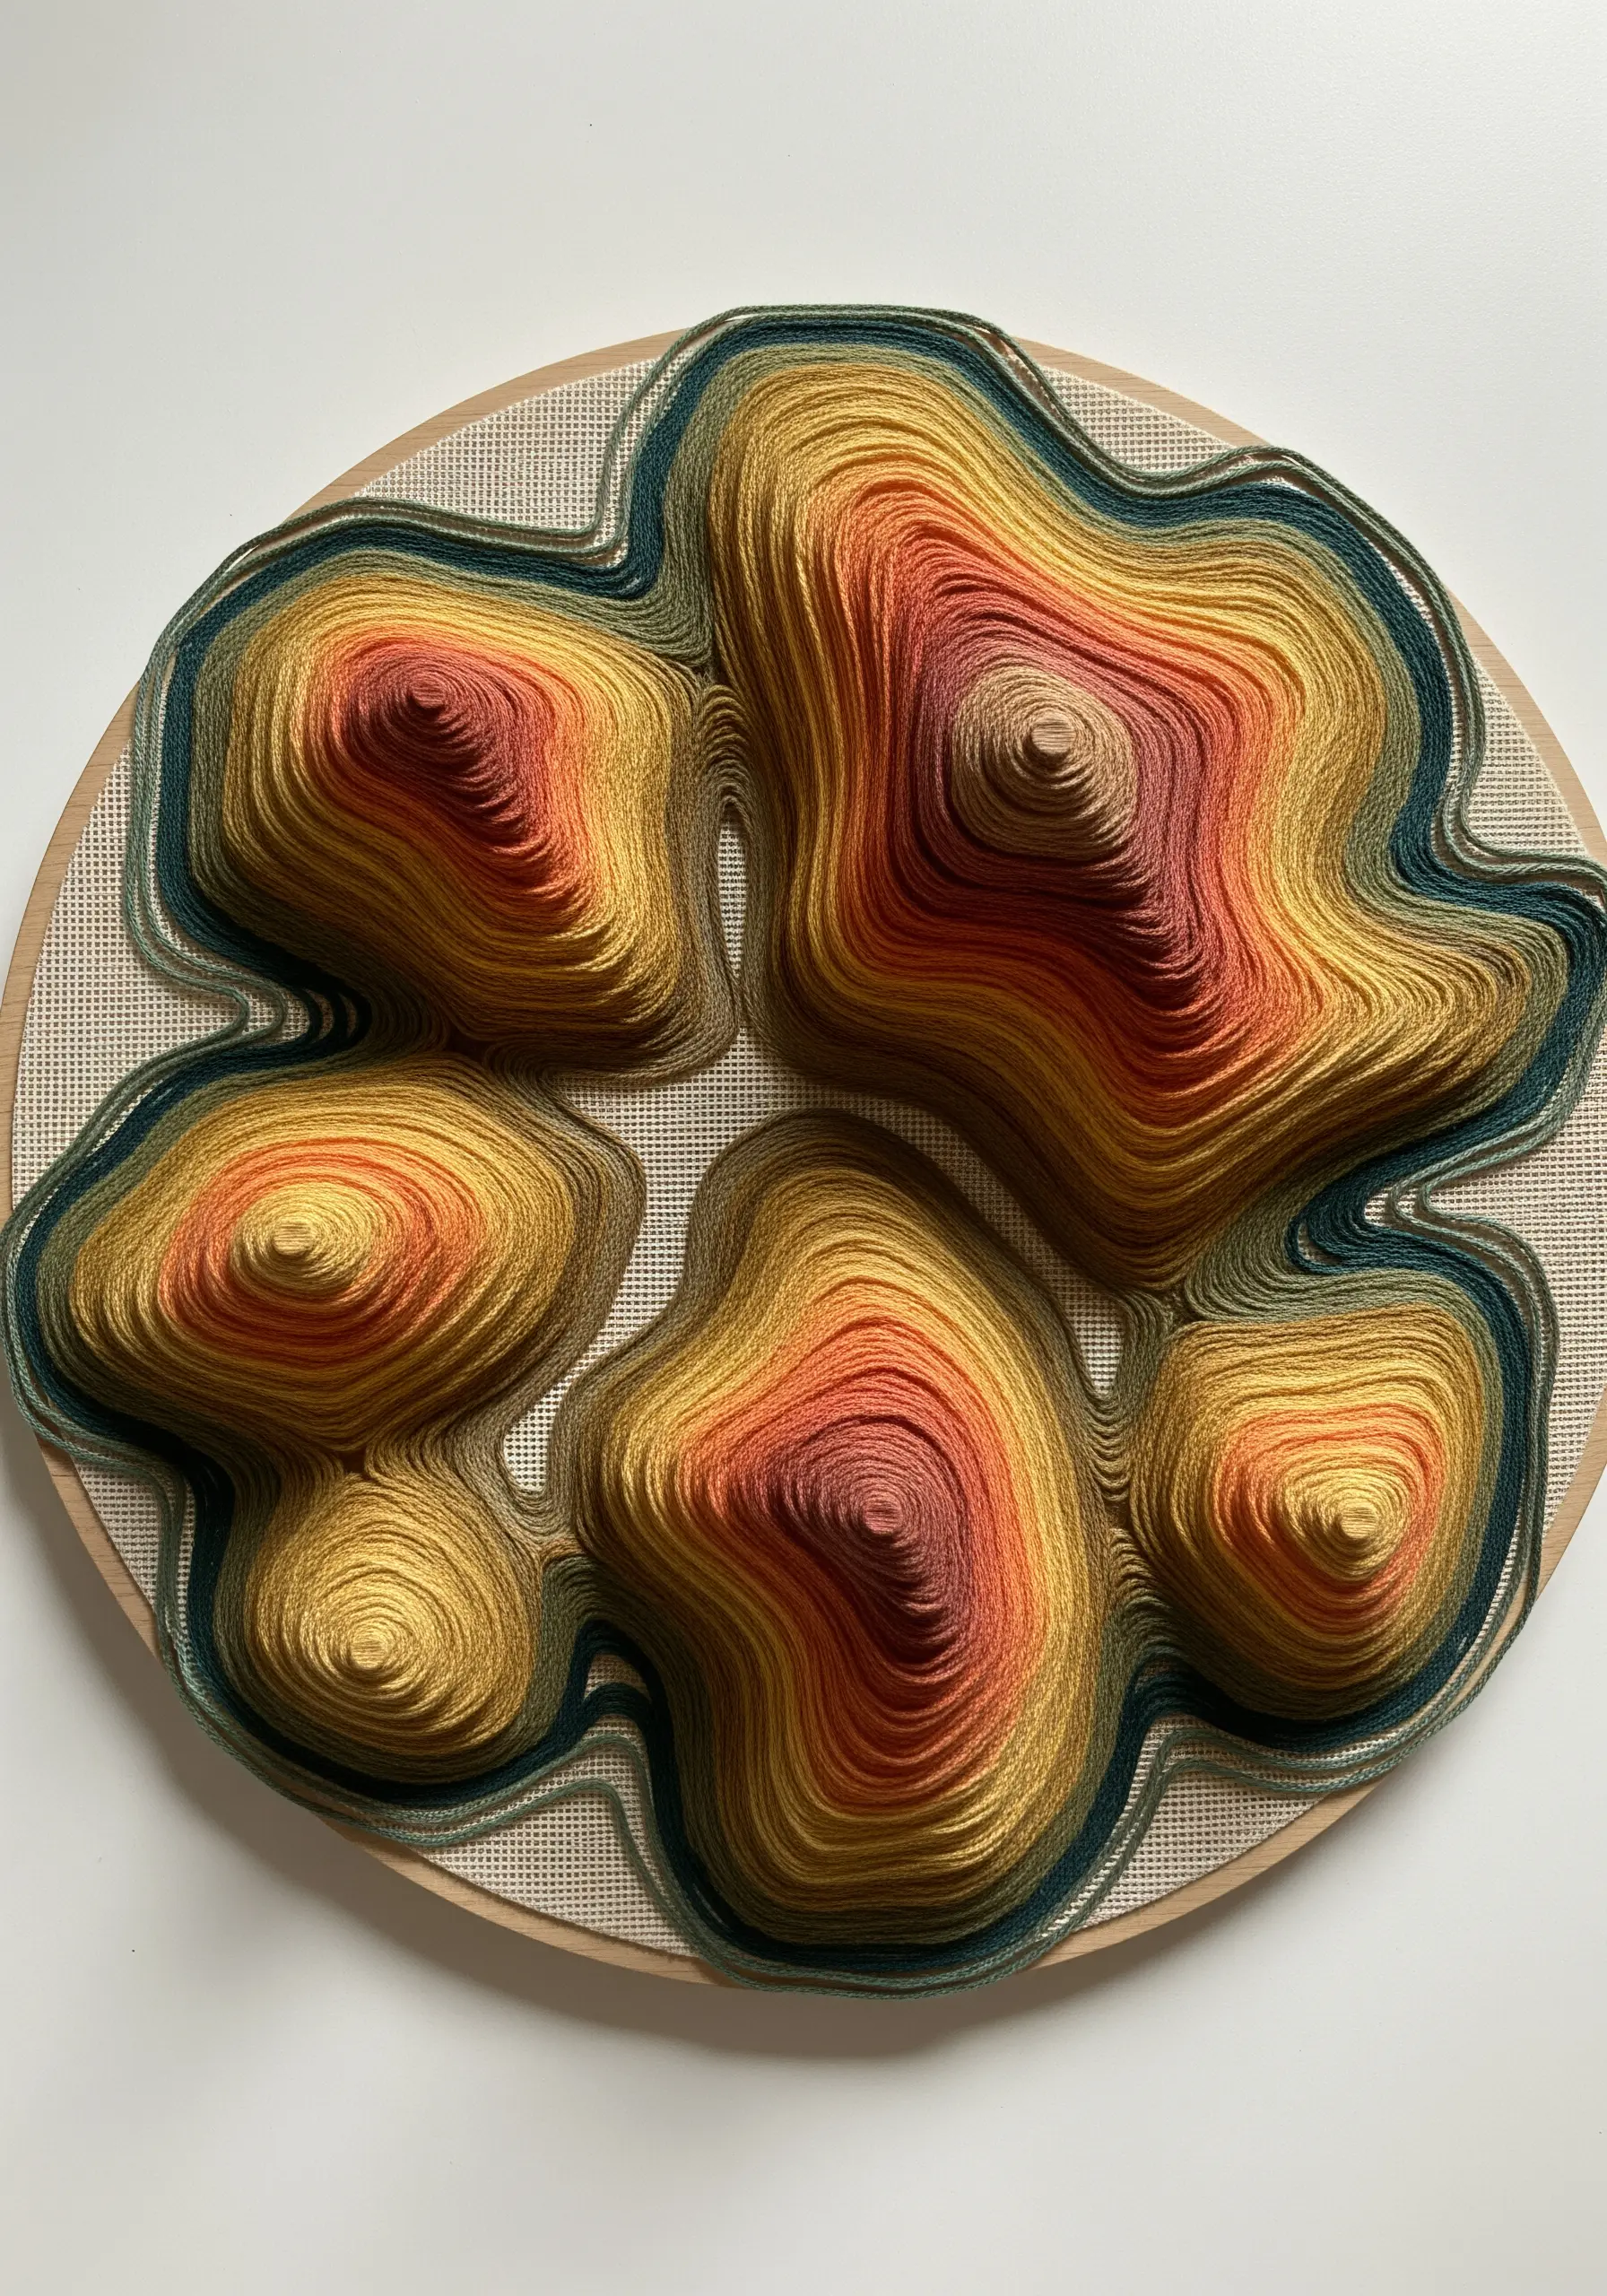
This is a form of thread sculpting where no stitches are used—only tension and layering.
Carve a base shape from a block of high-density foam or have one 3D printed.
Then, begin tightly and methodically wrapping thread around the form, layer by layer, as if cocooning it.
Change thread colors strategically to represent different elevations, creating an ombre or blocked effect. This method transforms a simple line of thread into a solid, touchable object with incredible visual texture.
8. Deconstructing an Image into Layered Thread Planes
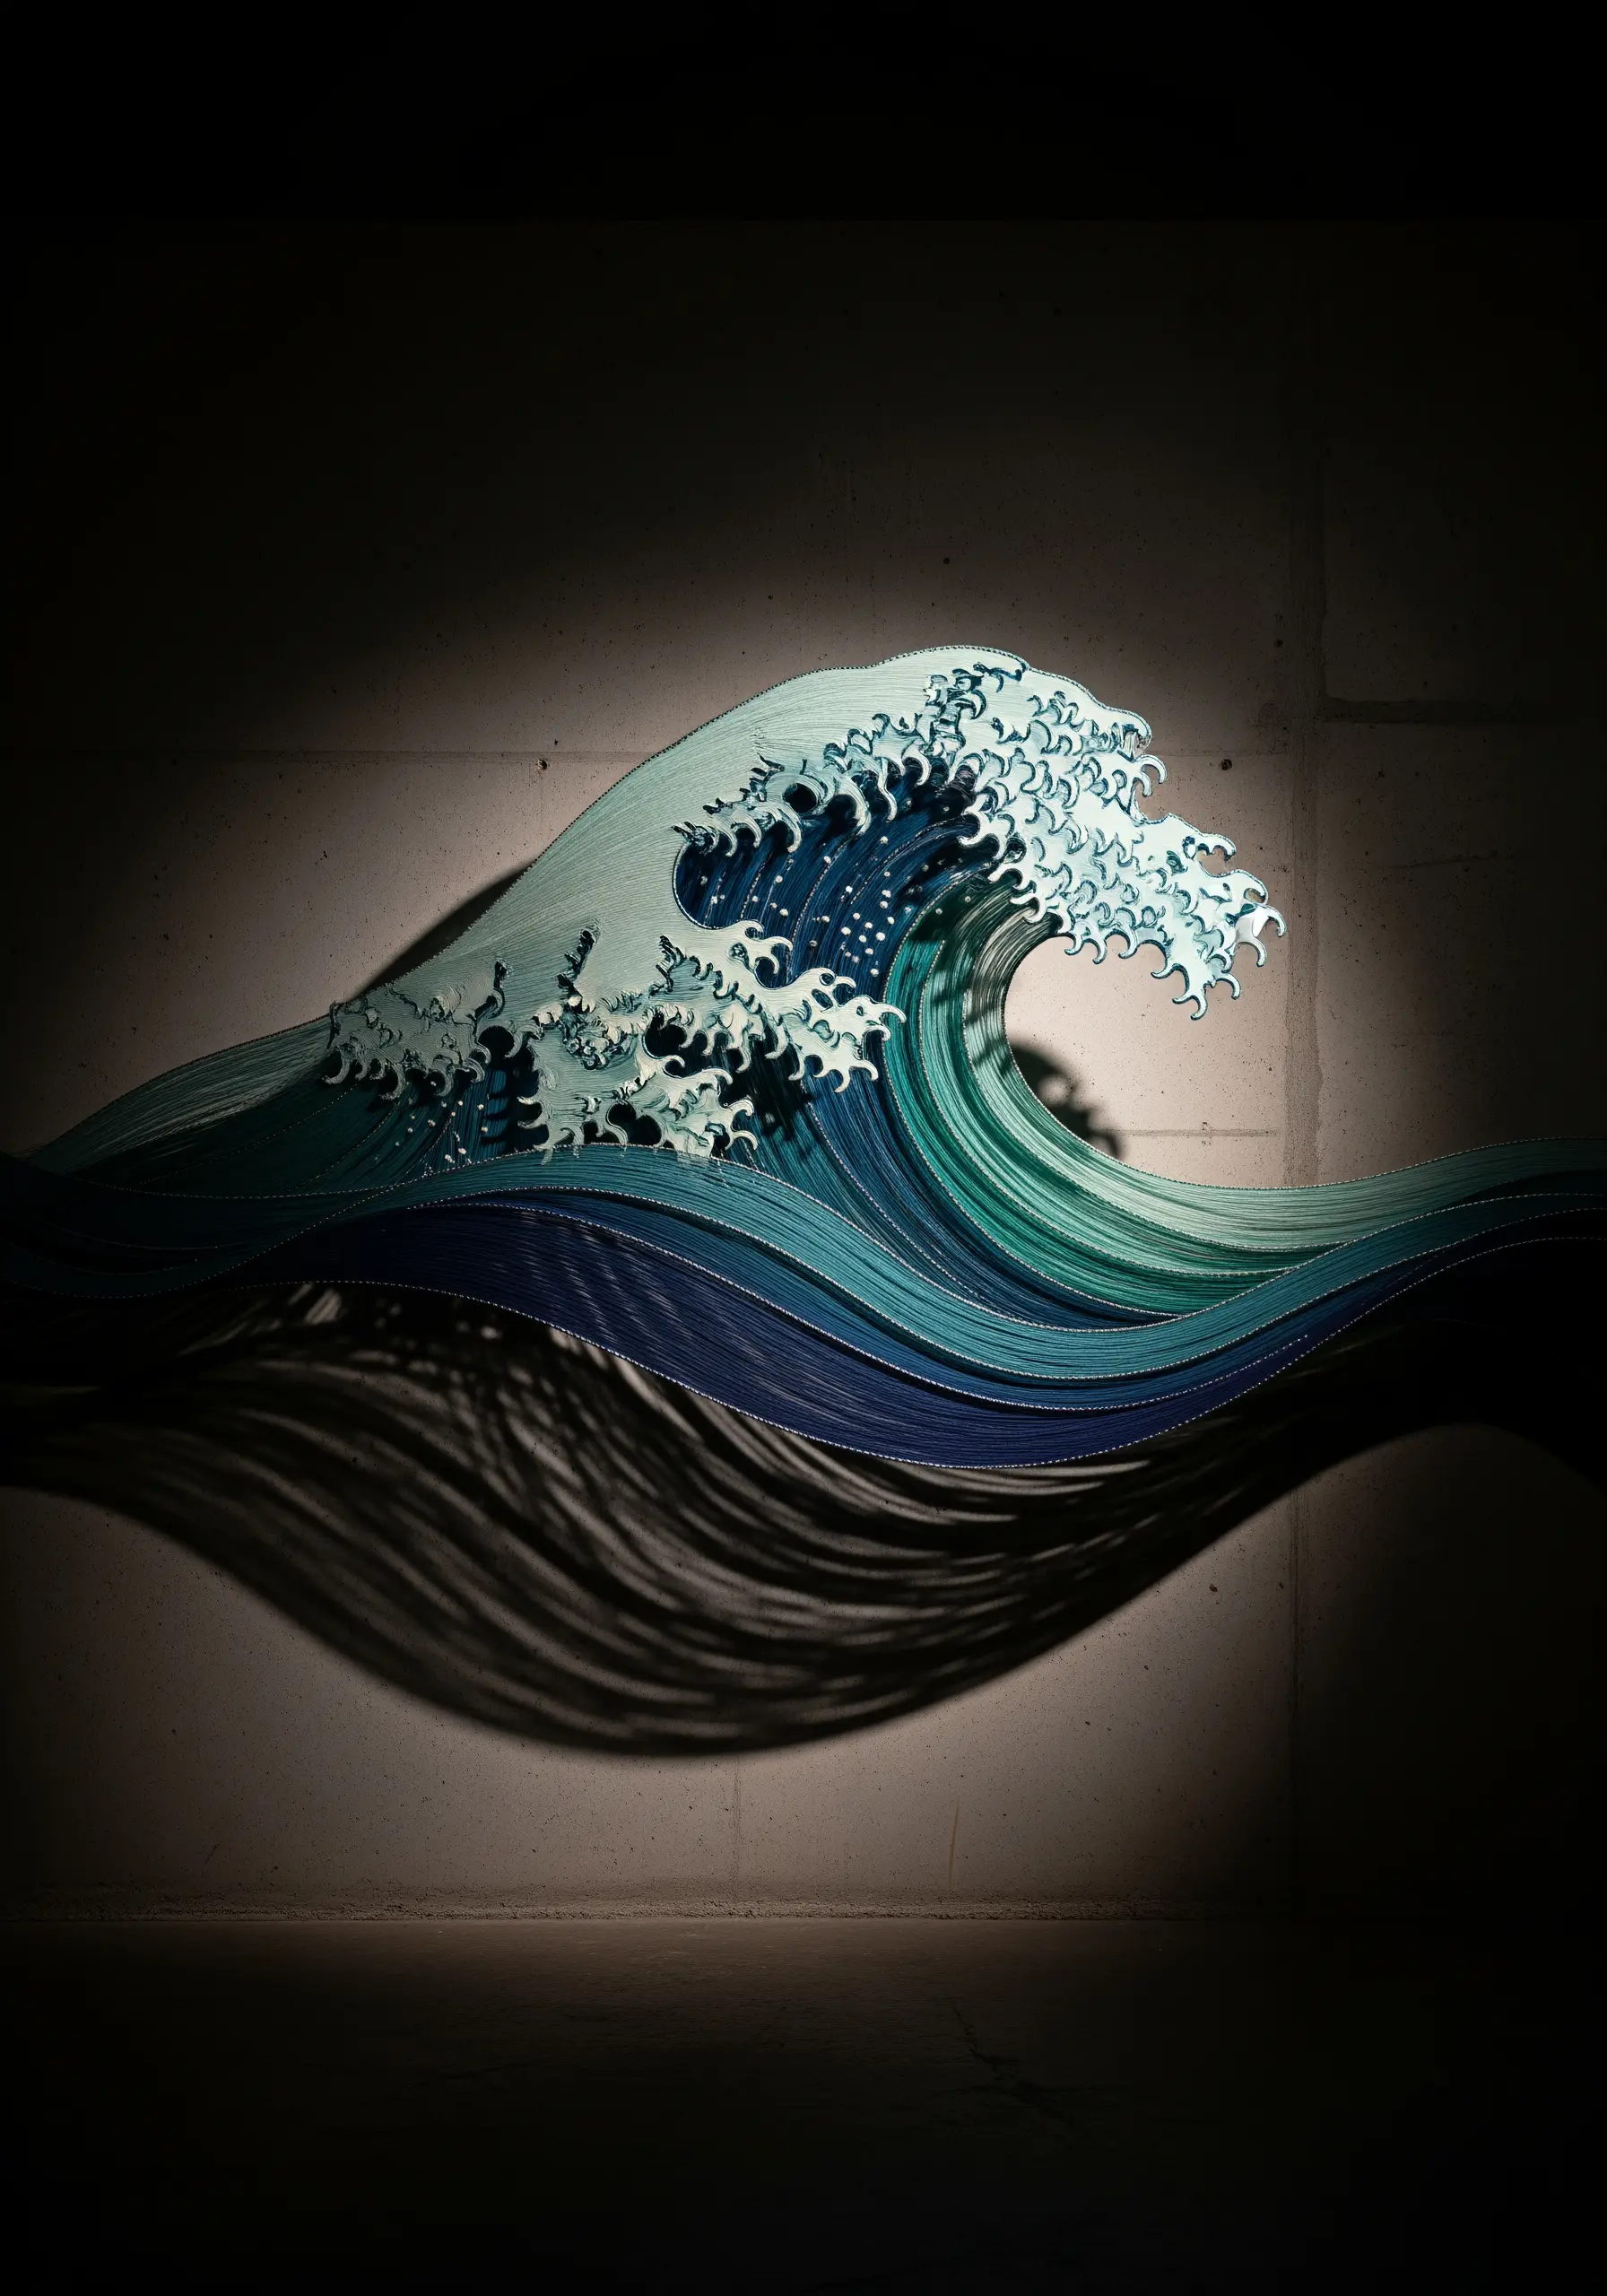
To achieve this effect, break a complex image down into its fundamental layers of color and form.
Cut each layer’s shape from a stiff material like cardstock or thin acrylic.
Wrap each piece tightly with thread, using color gradients to mimic shading, then assemble the pieces with hidden supports, allowing space between them.
This separation creates literal depth and allows light to cast dramatic shadows, bringing a flat image to life as a 3D embroidery wall art sculpture.
9. Anatomical Cross-Sections with Suspended Thread Layers
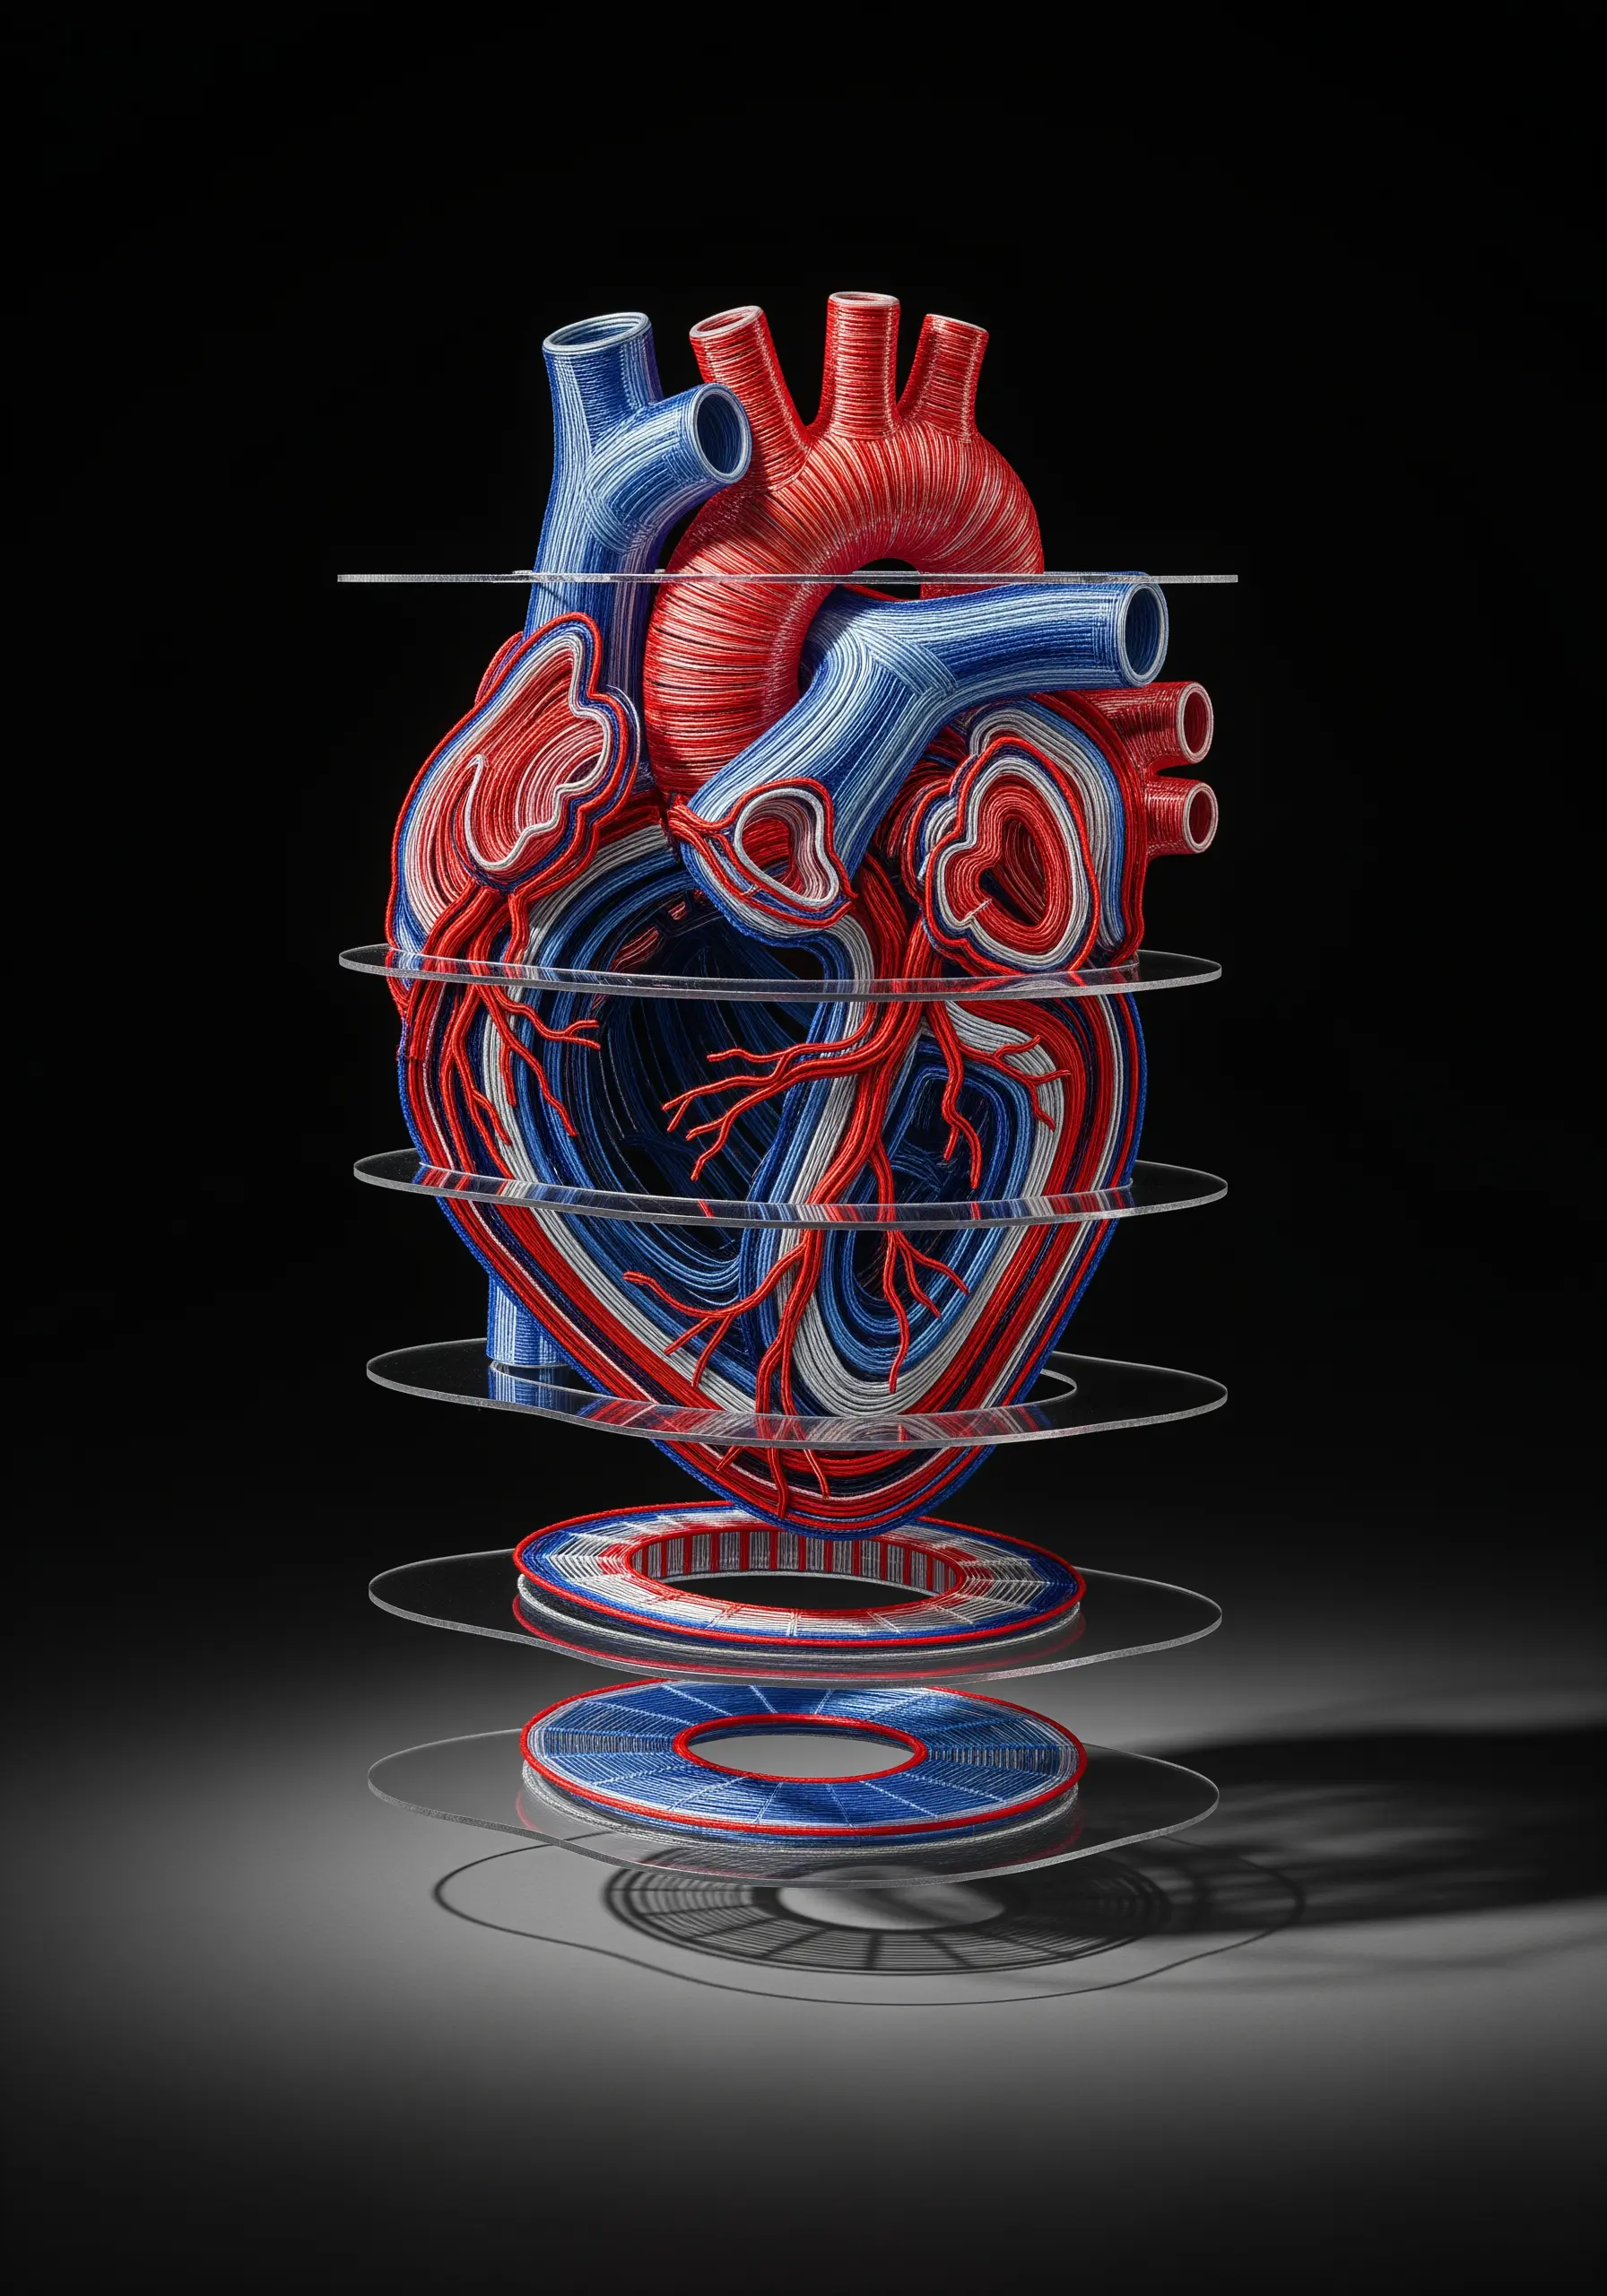
This technique visualizes an object’s interior by creating distinct cross-sections that appear to float in space.
Each layer is a single “slice” of the object, stitched or wound onto a clear acrylic or acetate sheet.
When you stack these transparent sheets with small spacers between them, the full 3D form emerges, but you can still see through it.
Use dense satin stitching or methodical thread wrapping to fill in the shapes on each slice for a solid, graphic appearance.
10. Building Tactile Fields with Woven Wheel Medallions
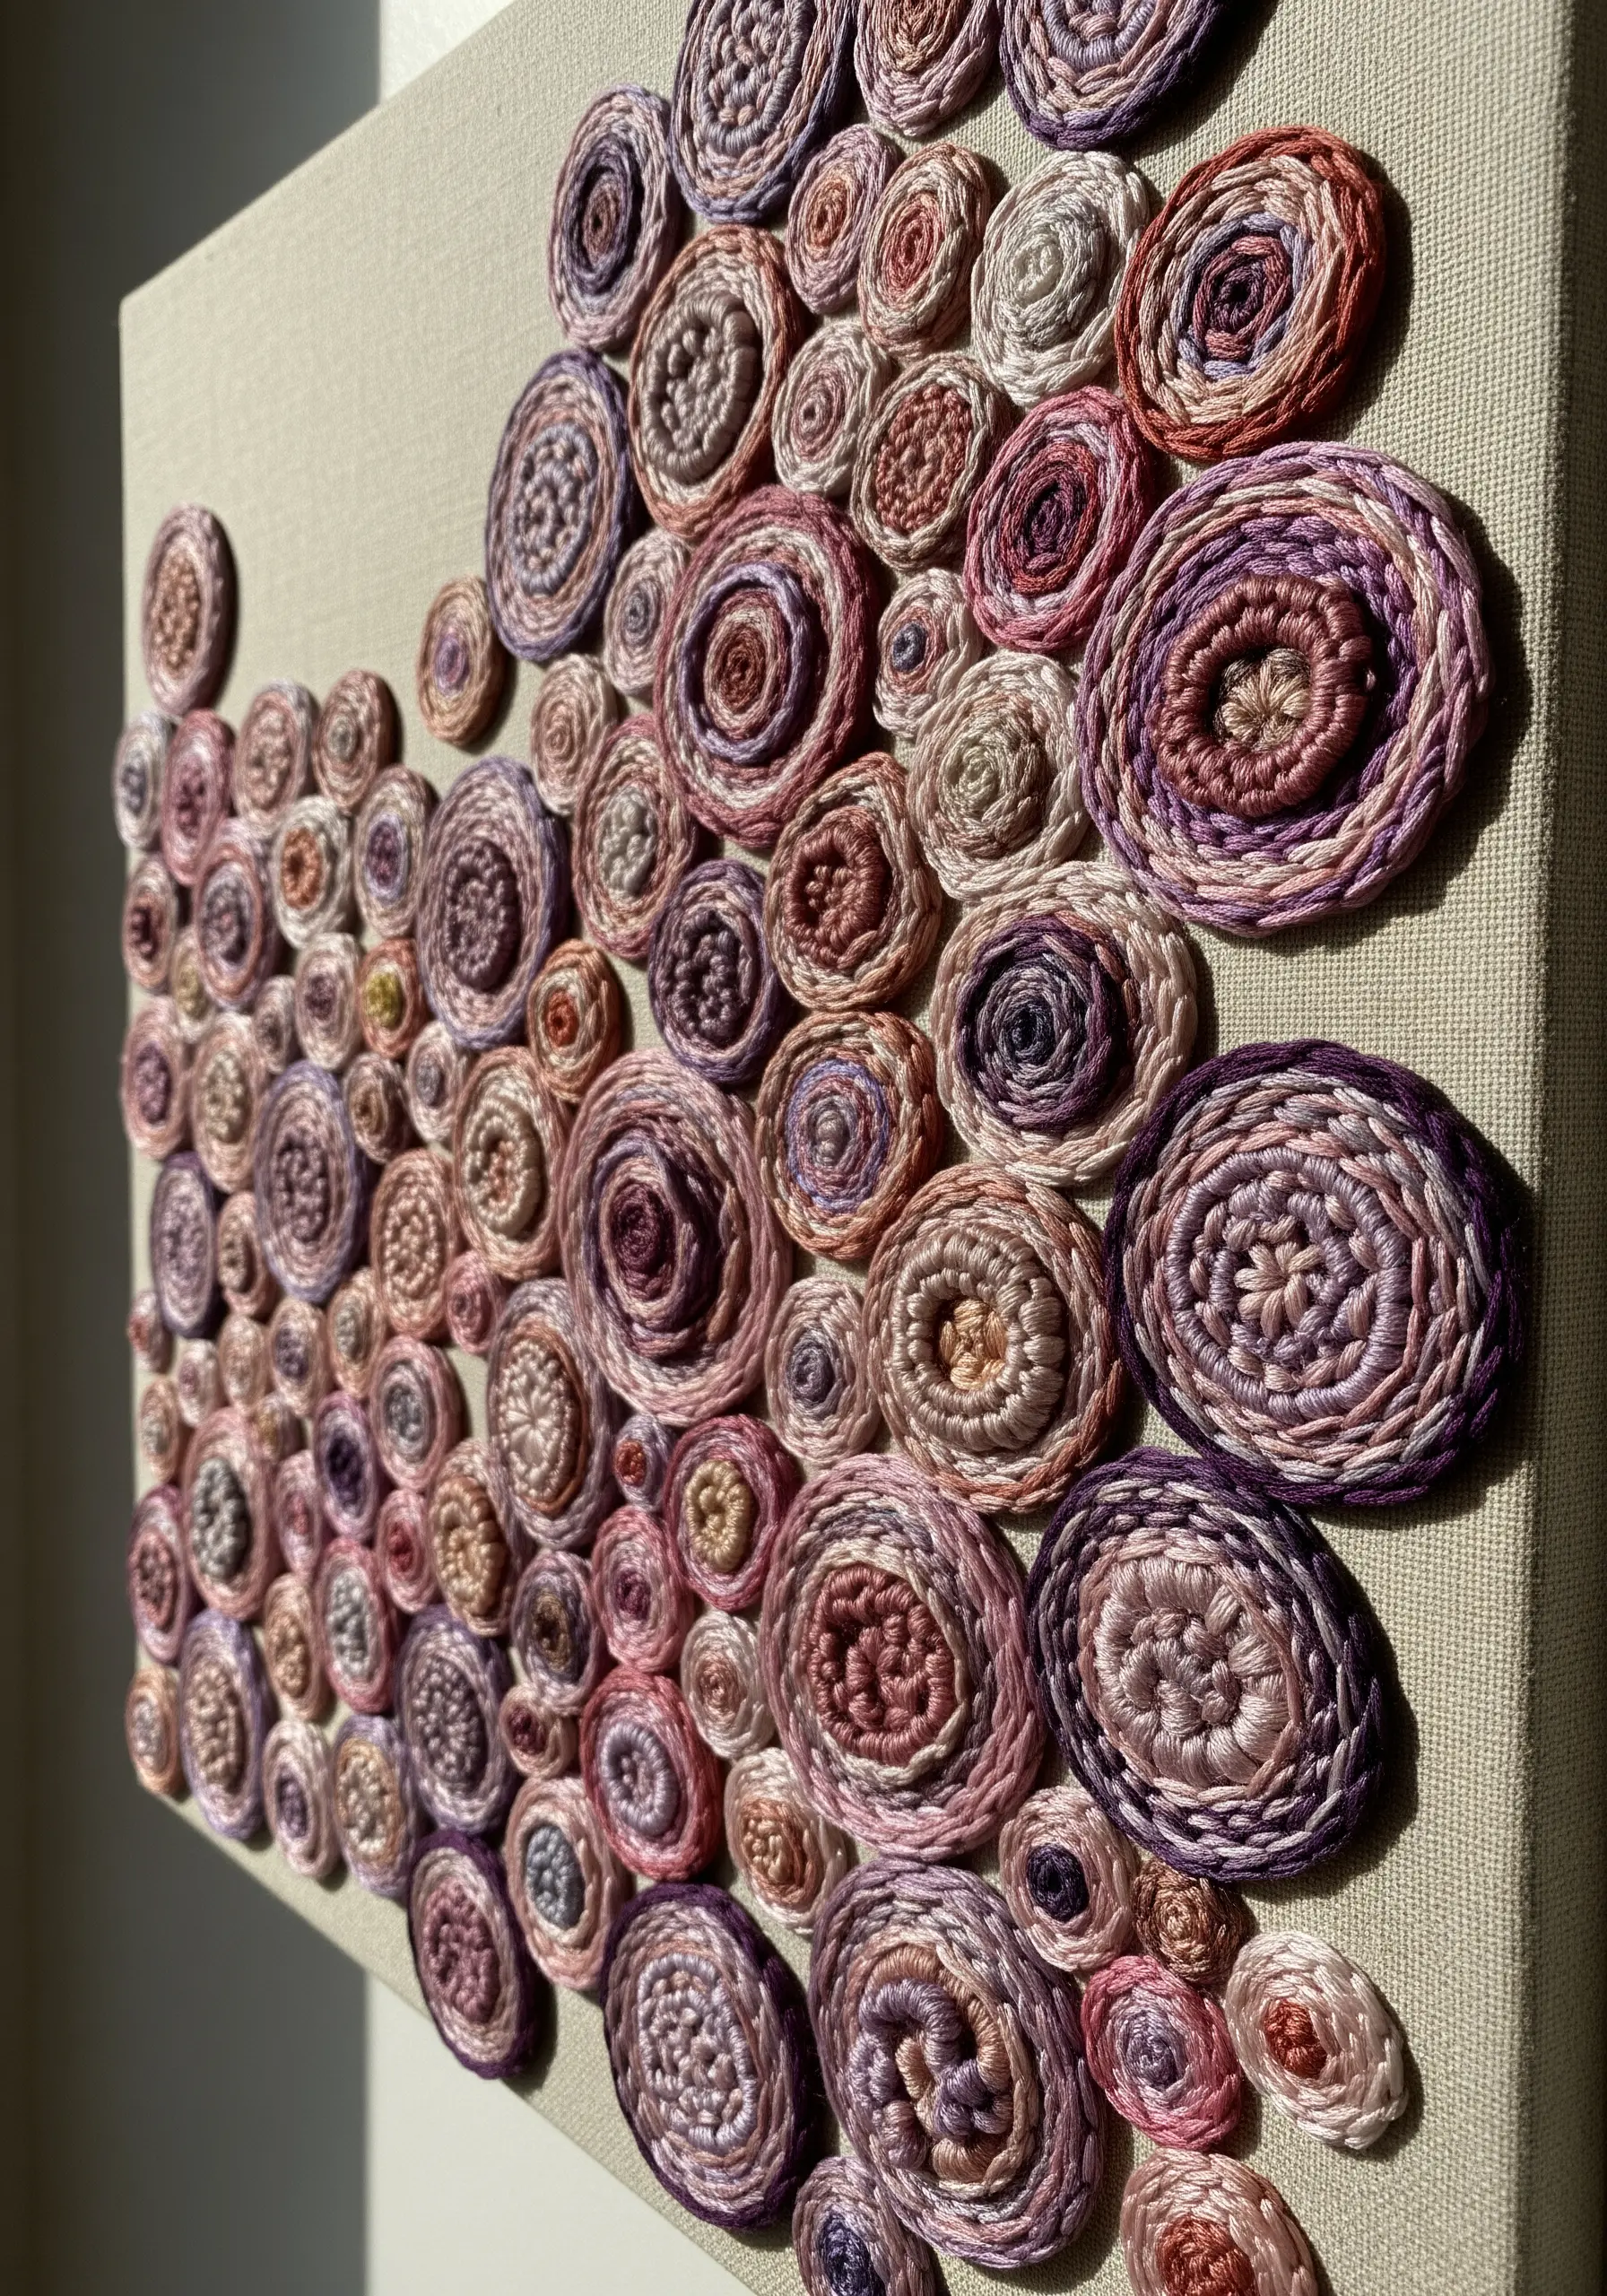
These dimensional discs are created using a padded woven wheel stitch, also known as a wagon wheel or spider web stitch.
To achieve extra height, create a base of several straight stitches radiating from a central point, then place a small felt circle or a tuft of batting in the center before you begin weaving.
By varying the tightness of your weave, the thickness of your thread, and the amount of padding, you can control the final texture and puffiness of each unique medallion.
11. Architectural Thread Canopies for Immersive Environments
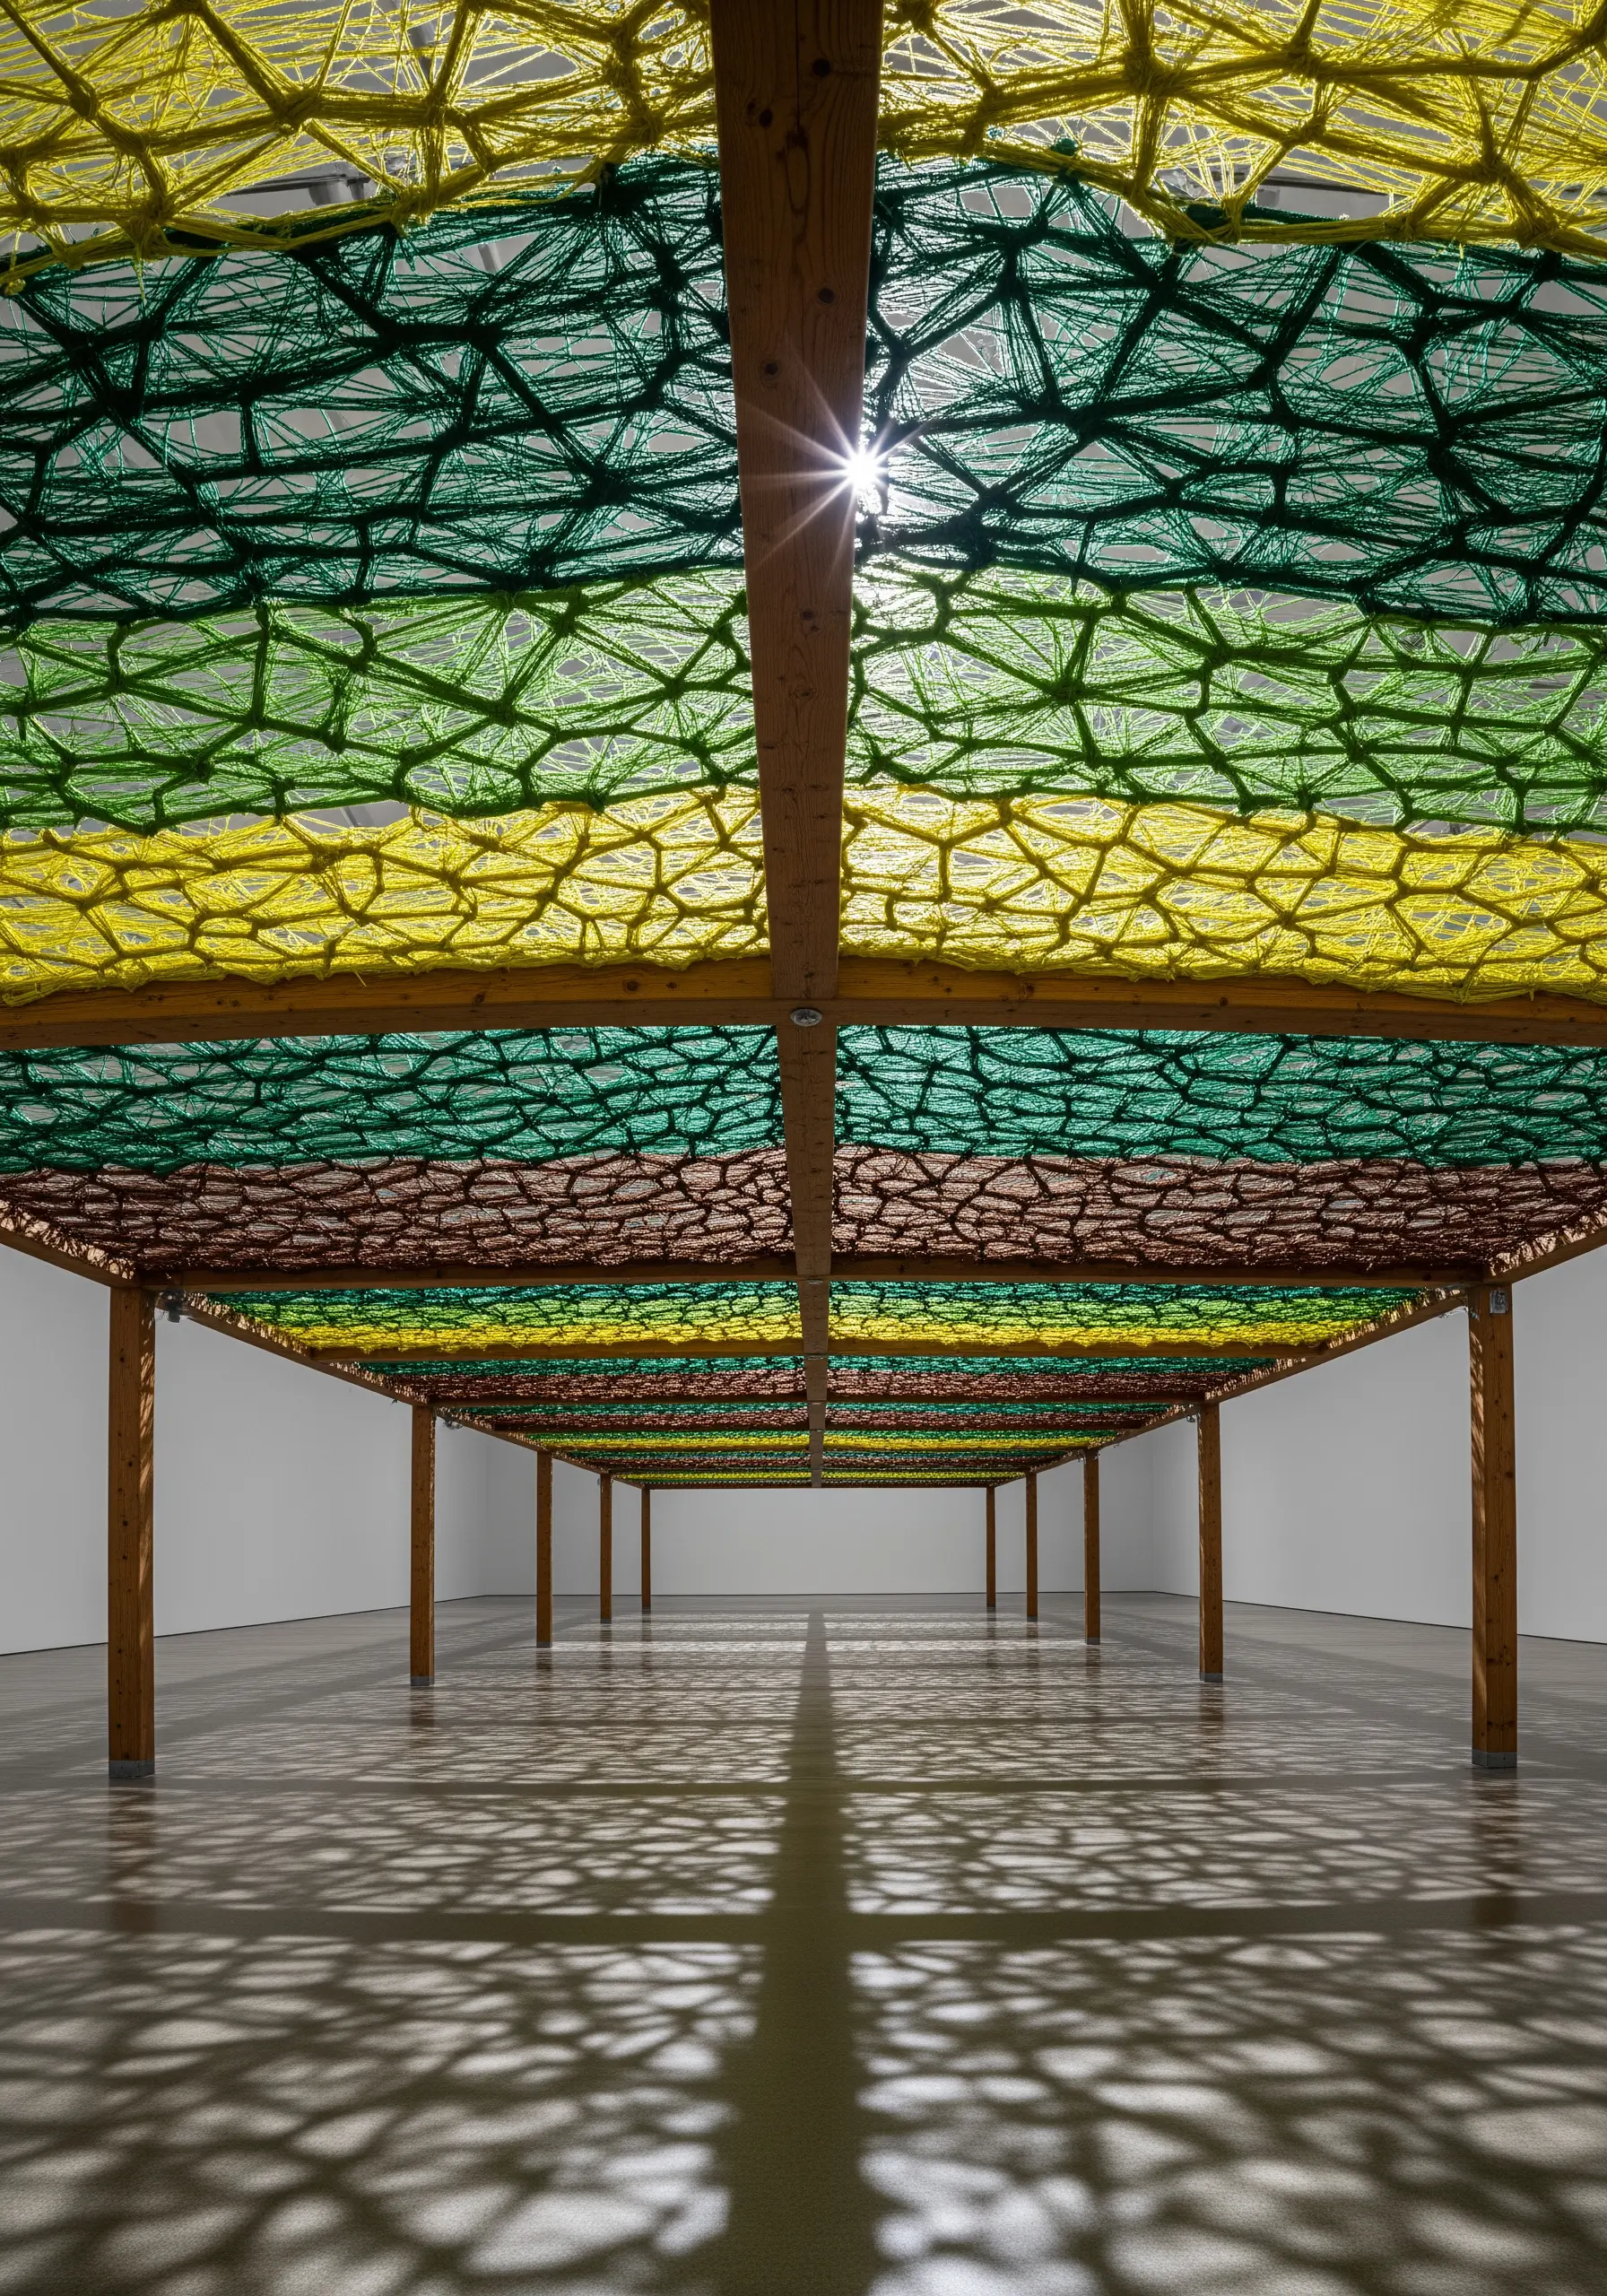
Transform an entire room by stretching thread between structural anchor points like beams, walls, and pillars.
This is large-scale string art that plays with light, color, and perspective, making the viewer part of the artwork.
Plan your grid and layer different colors to create a sense of depth or a gentle gradient.
Use a strong, non-stretch thread like nylon or waxed linen to maintain tension over a large span, as the shadows cast by the canopy become as important as the threads themselves.
12. Stitching on Non-Traditional Surfaces for Light Refraction
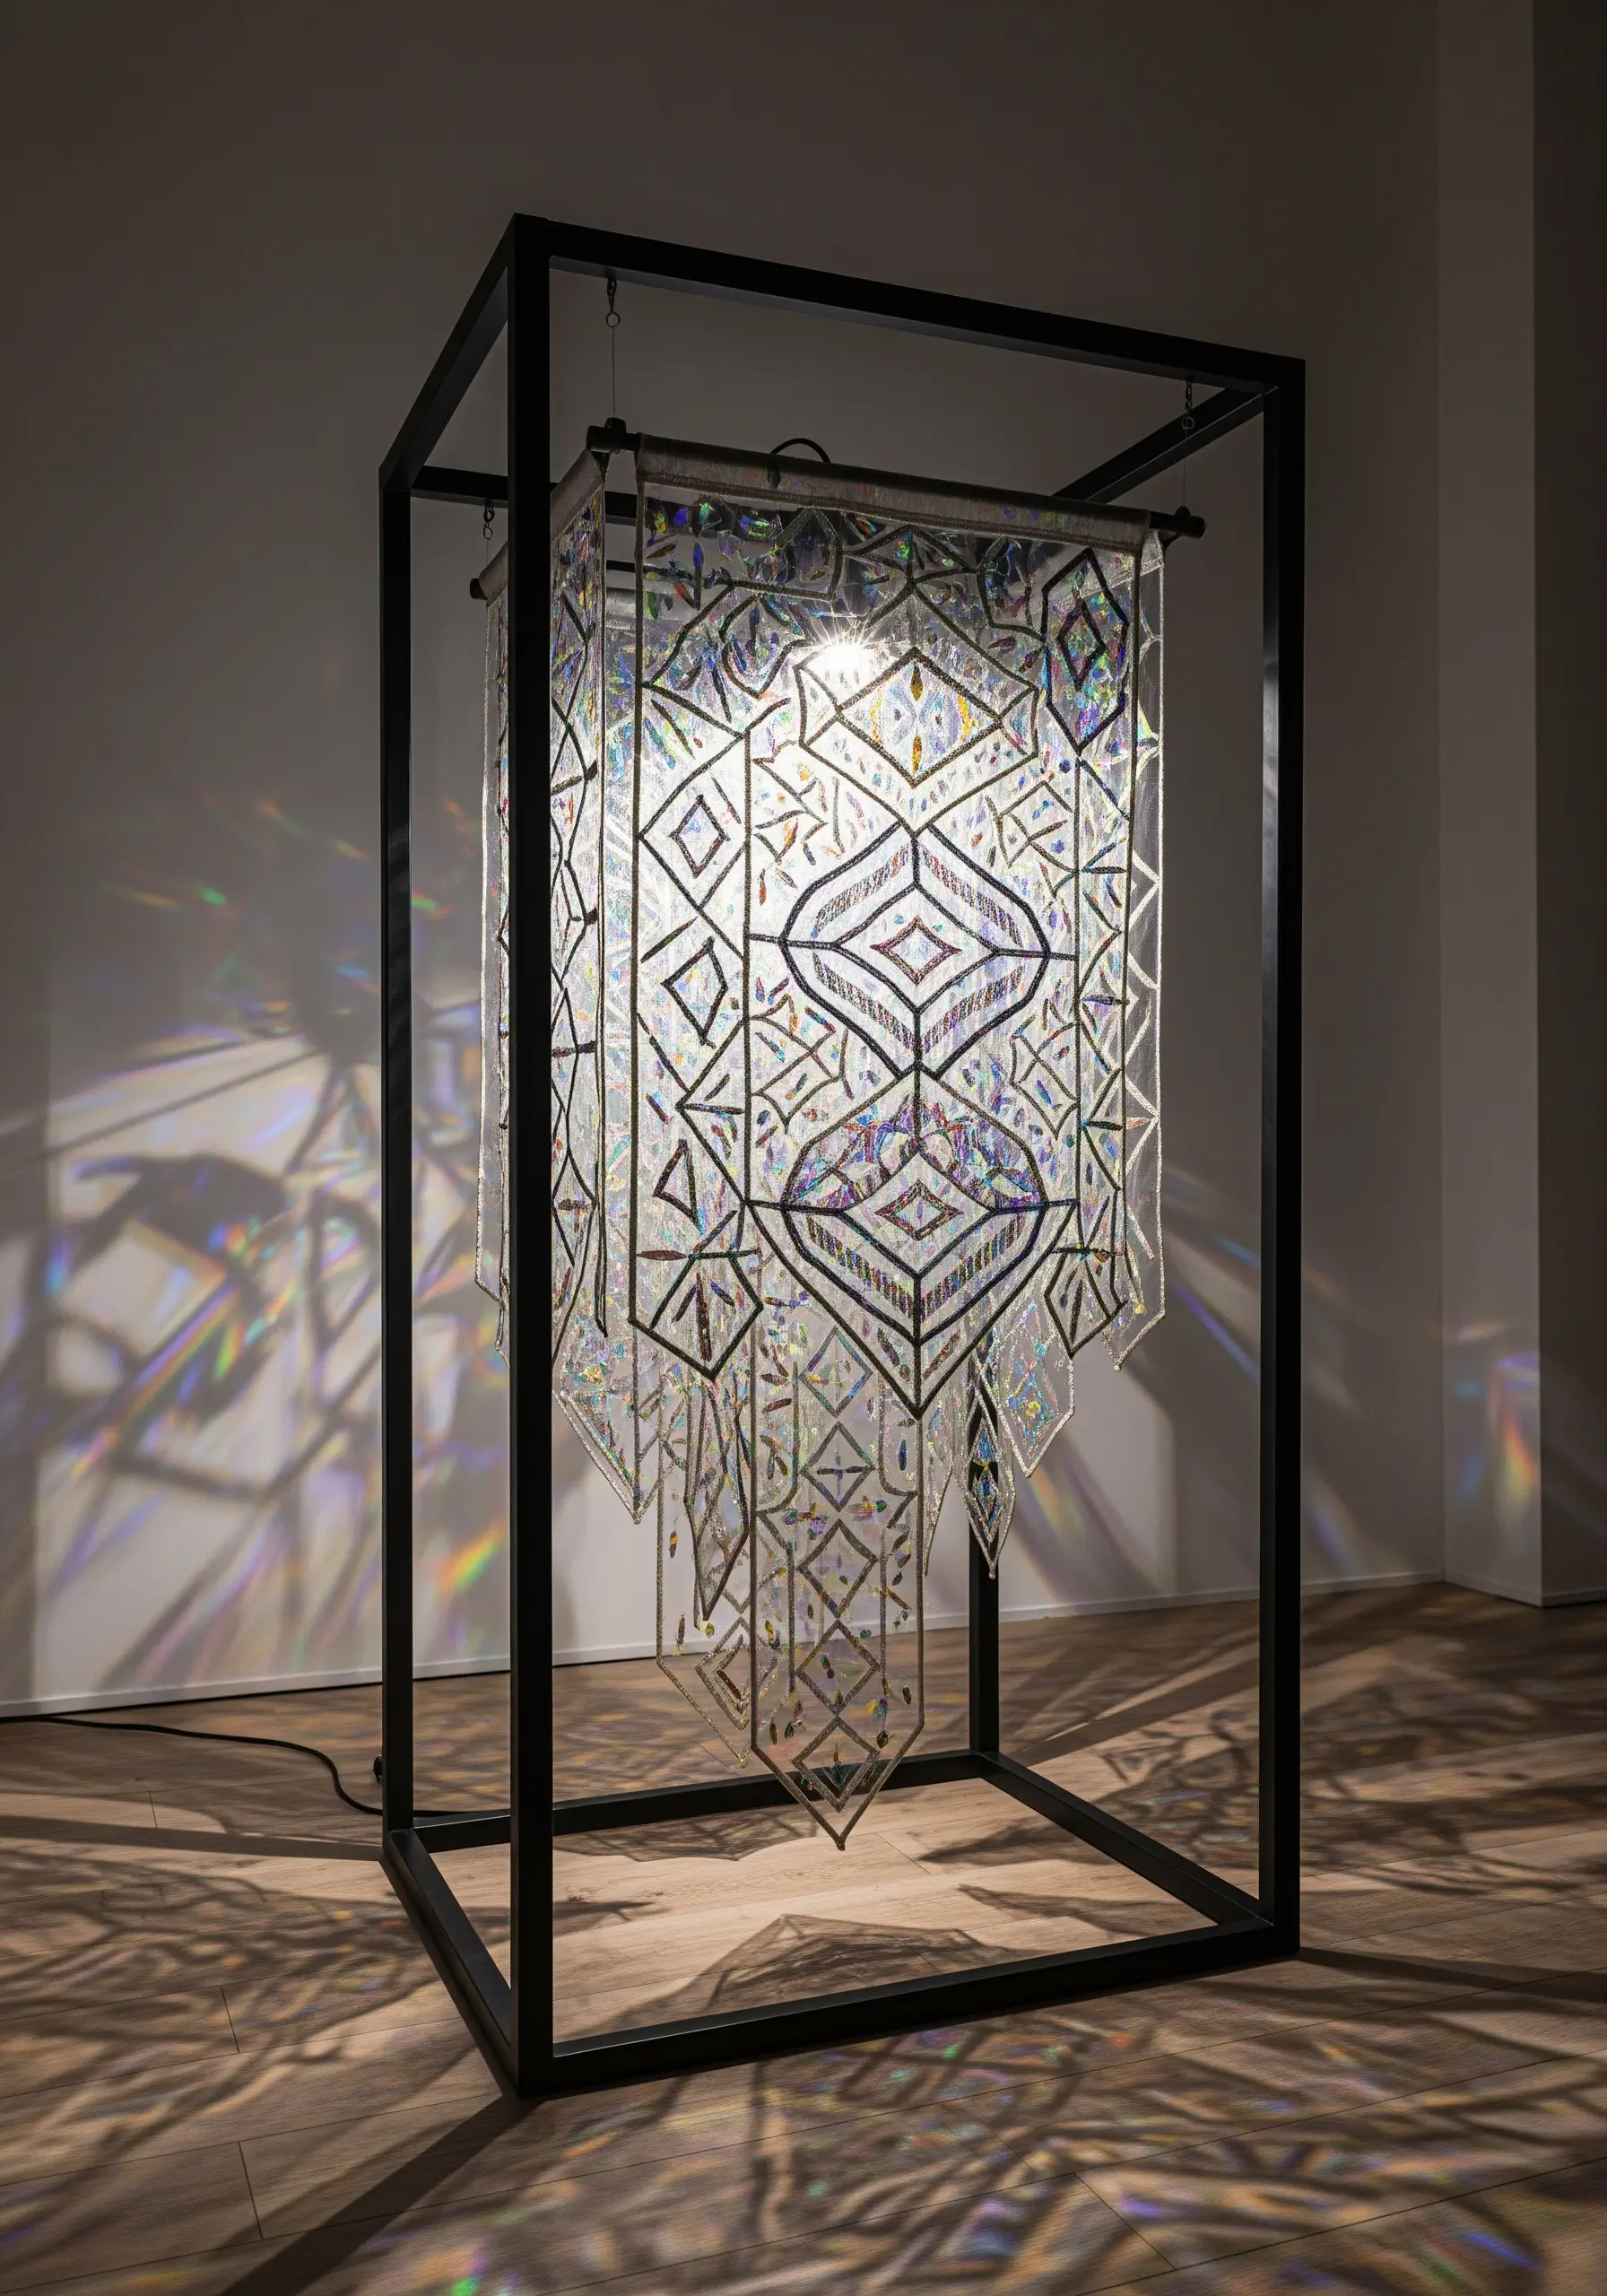
Move beyond fabric and embroider directly onto materials like iridescent film, acrylic sheets, or fine metal mesh.
You will need to pre-punch your stitching holes carefully with a sharp awl to avoid tearing or cracking the material.
Use a simple backstitch or running stitch to create clean, geometric patterns that don’t overly stress the surface.
The magic happens when you light the piece, as the thread creates a graphic overlay while the surface material catches and refracts the light, casting colorful, kaleidoscopic shadows.
13. Weaving with Deconstructed Fabric for Geological Textures
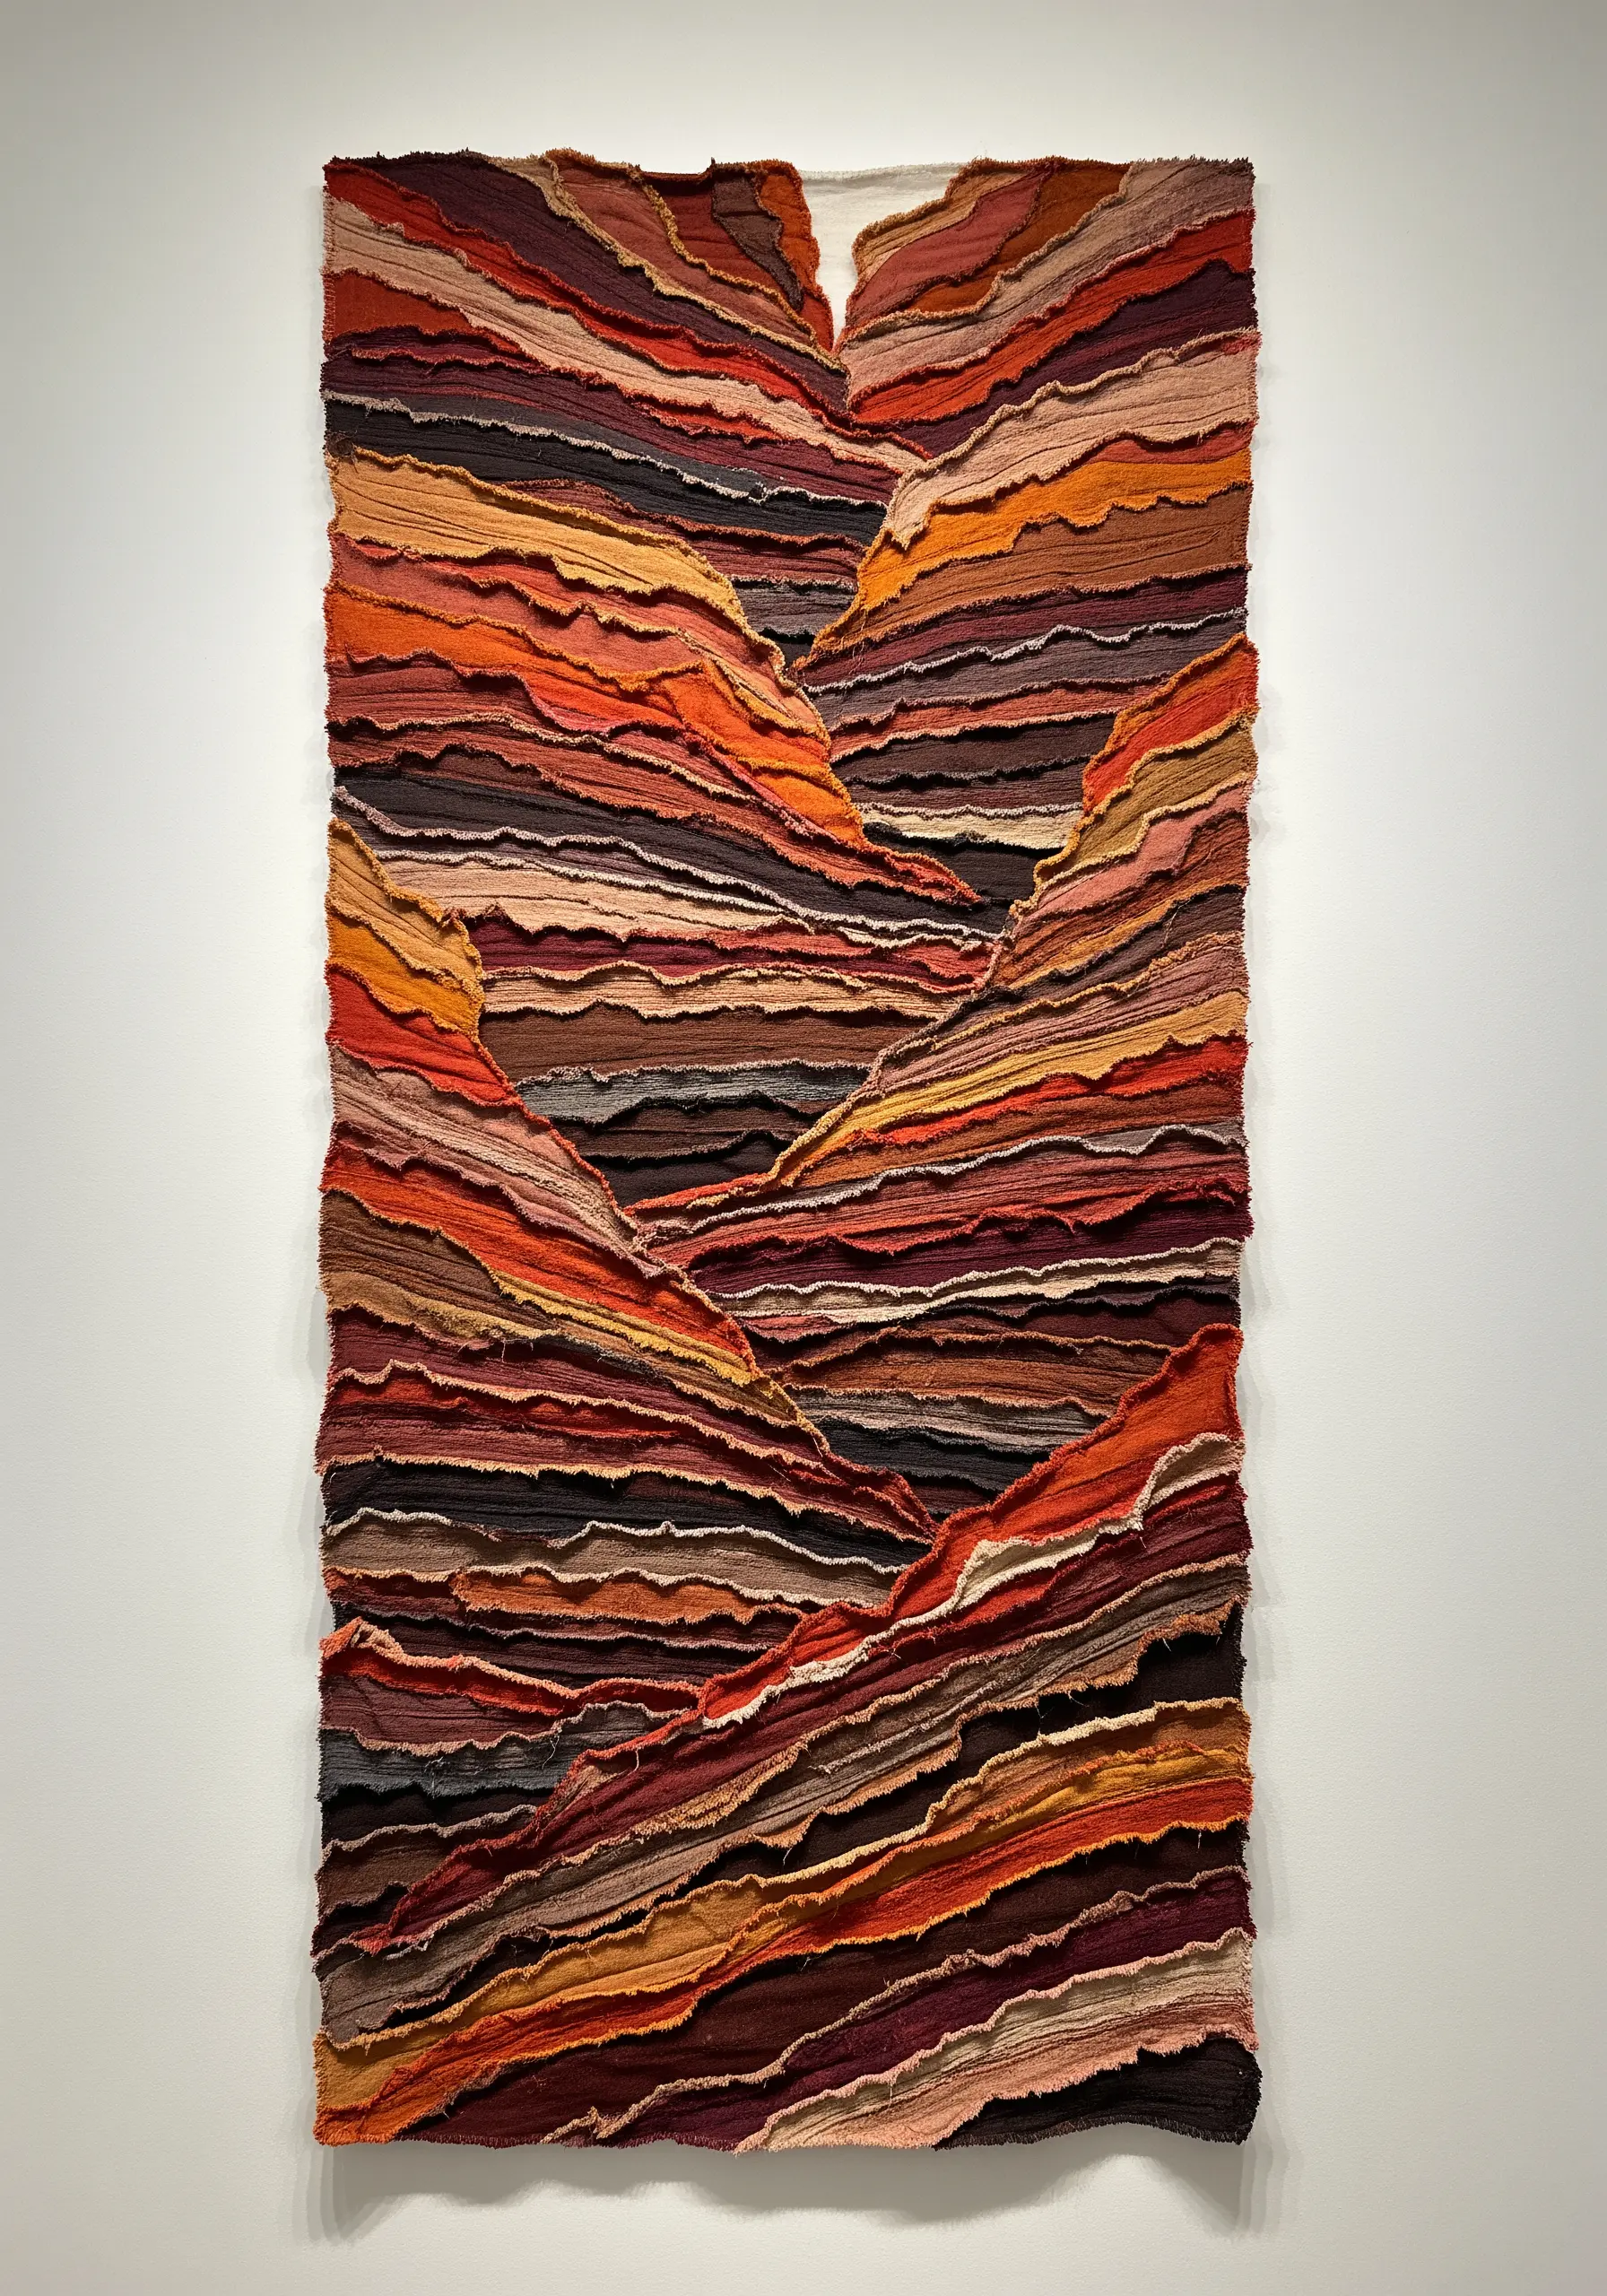
This method is a form of textile collage that mimics the appearance of natural geological strata.
Start with a sturdy backing fabric, then arrange and stitch down strips of torn or raw-edged fabric in an earthy color palette.
Overlap the strips organically, allowing the textures and raw edges to create their own shadow and definition.
Introduce a few rows of simple running stitches or couched threads to add linear detail and secure the layers. These earthy embroidery projects add immense warmth and raw beauty.
14. Visualizing Sound with Graduated Thread Lengths
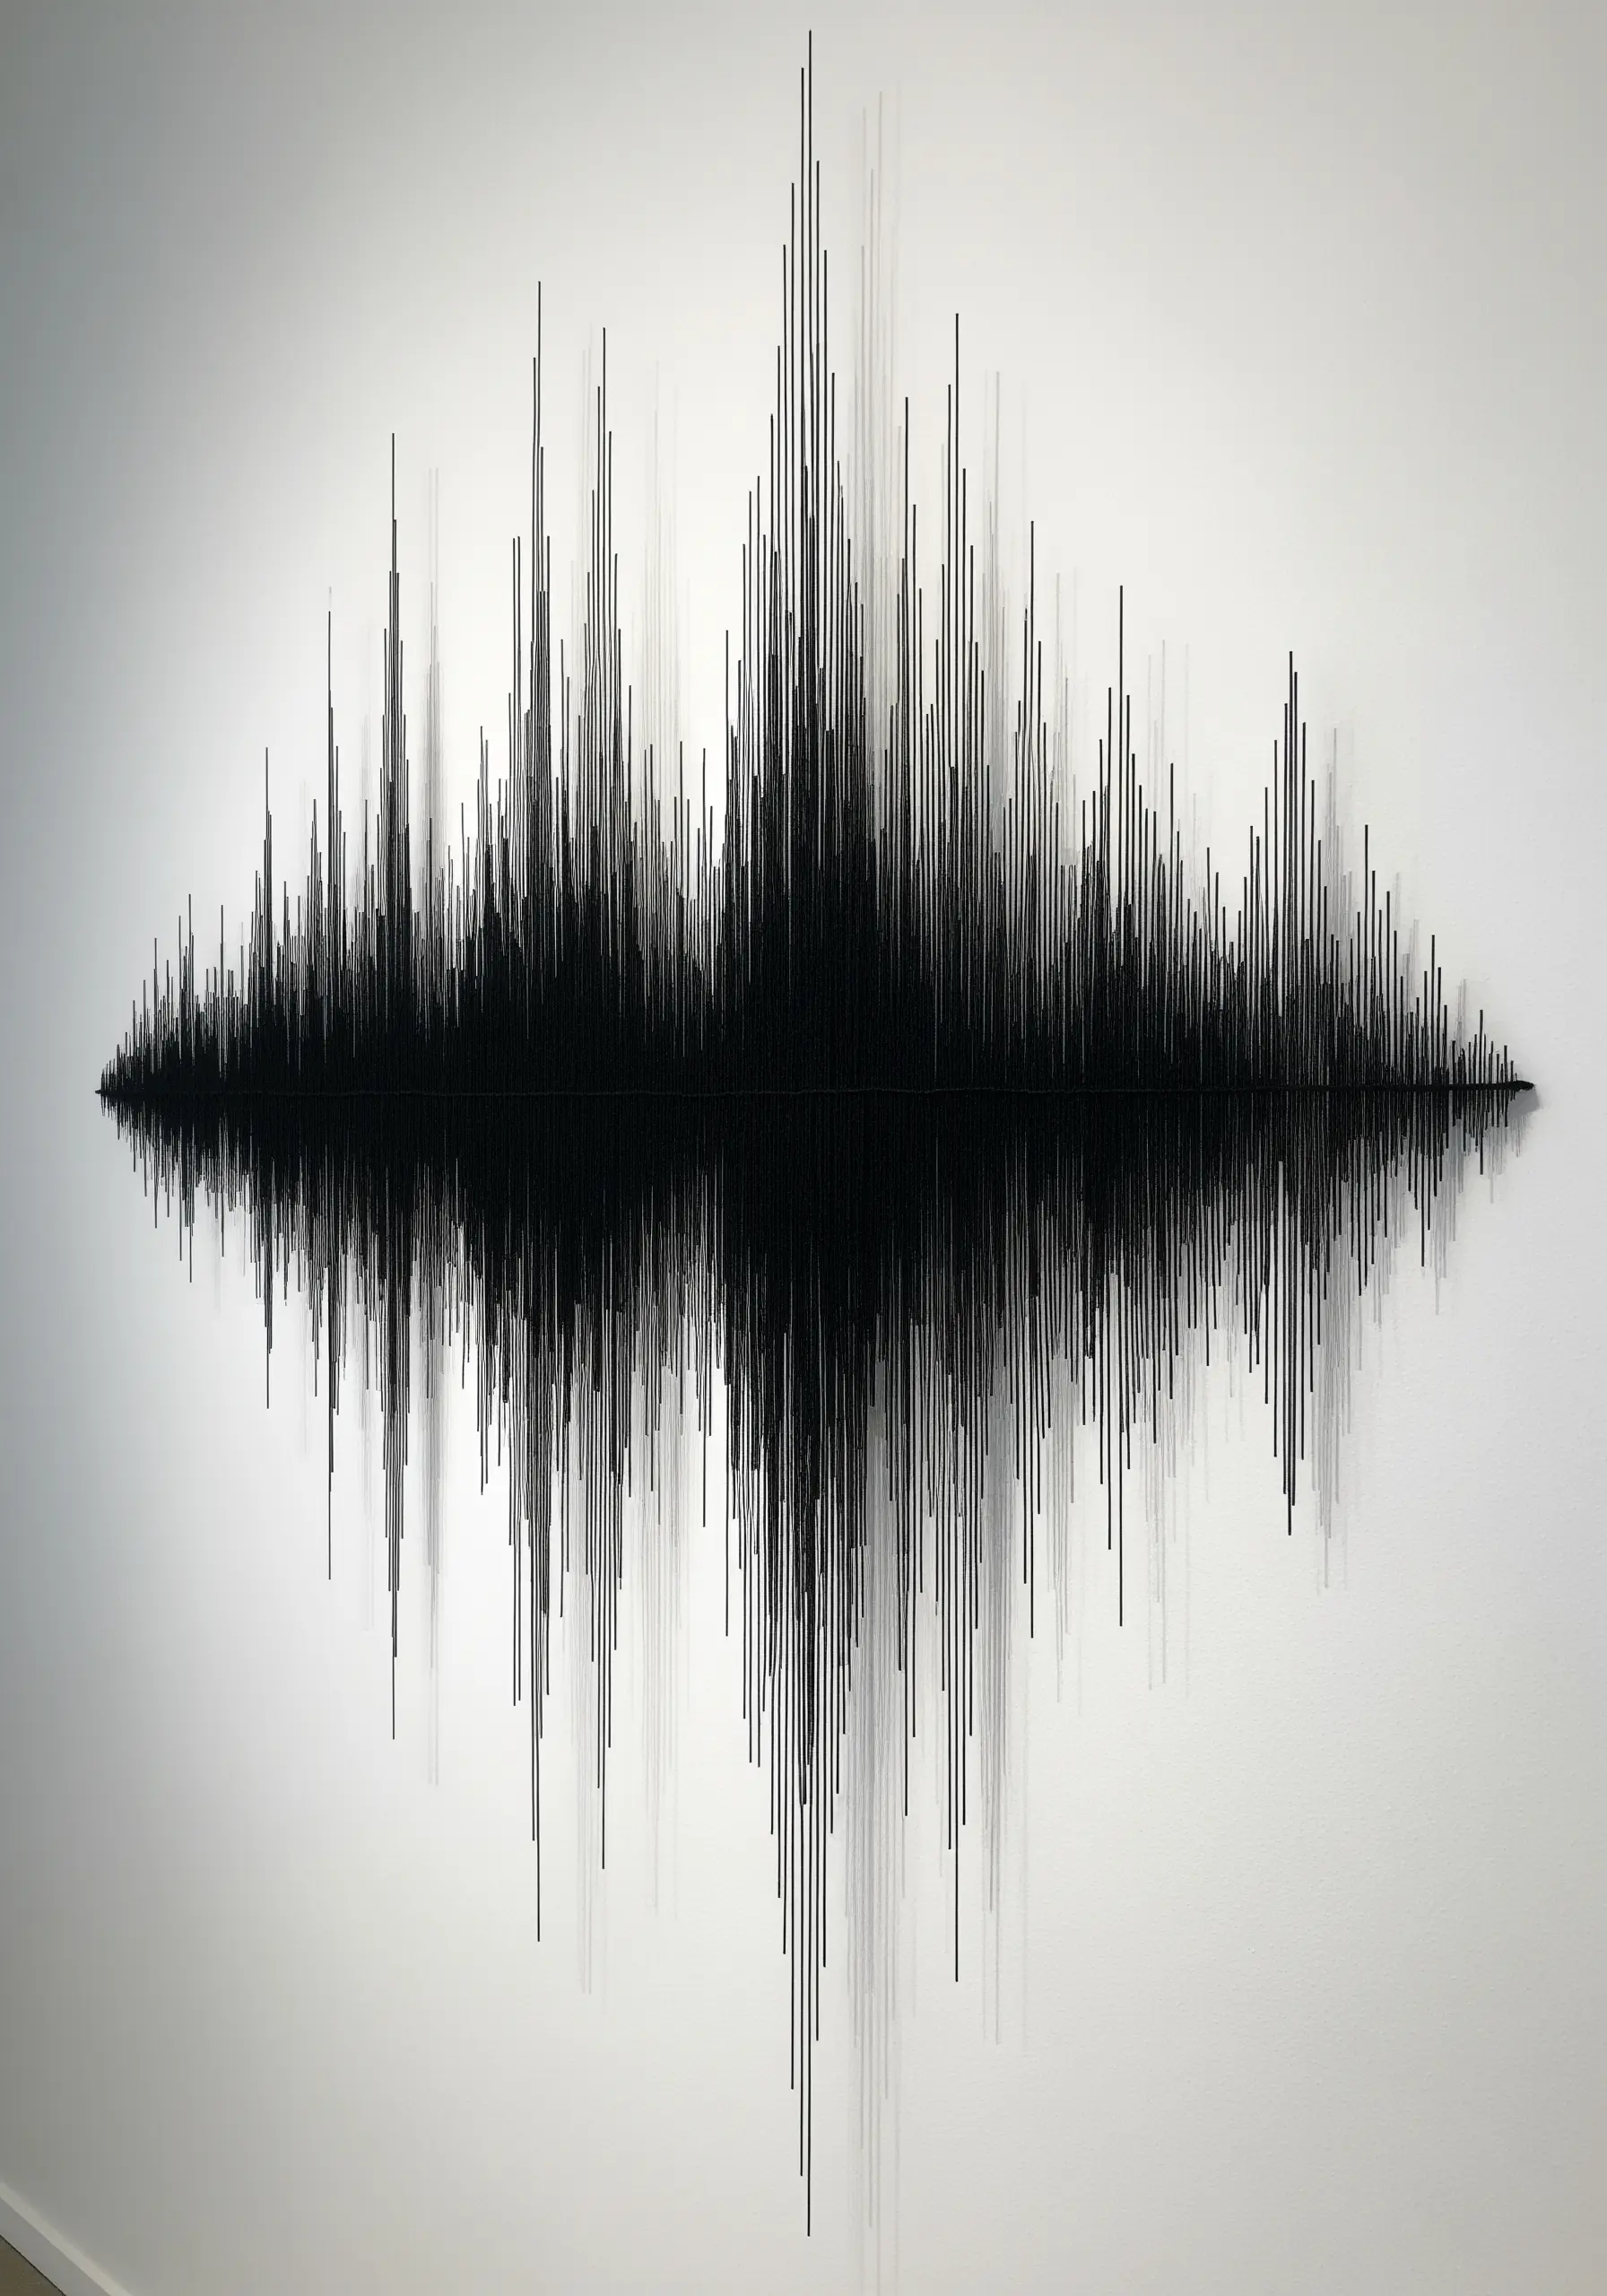
Translate invisible data, like a soundwave, into a physical object with tangible form.
This technique involves precisely cutting thousands of threads to specific, graduated lengths and suspending them from a clear acrylic base.
The tops of the threads are secured, often with adhesive, into a pre-drilled grid that maps to the data points.
The varied lengths of the hanging threads create the 3D form, while a mirrored base can create a reflection that completes the shape.
15. Building 3D Forms with Thread Pointillism
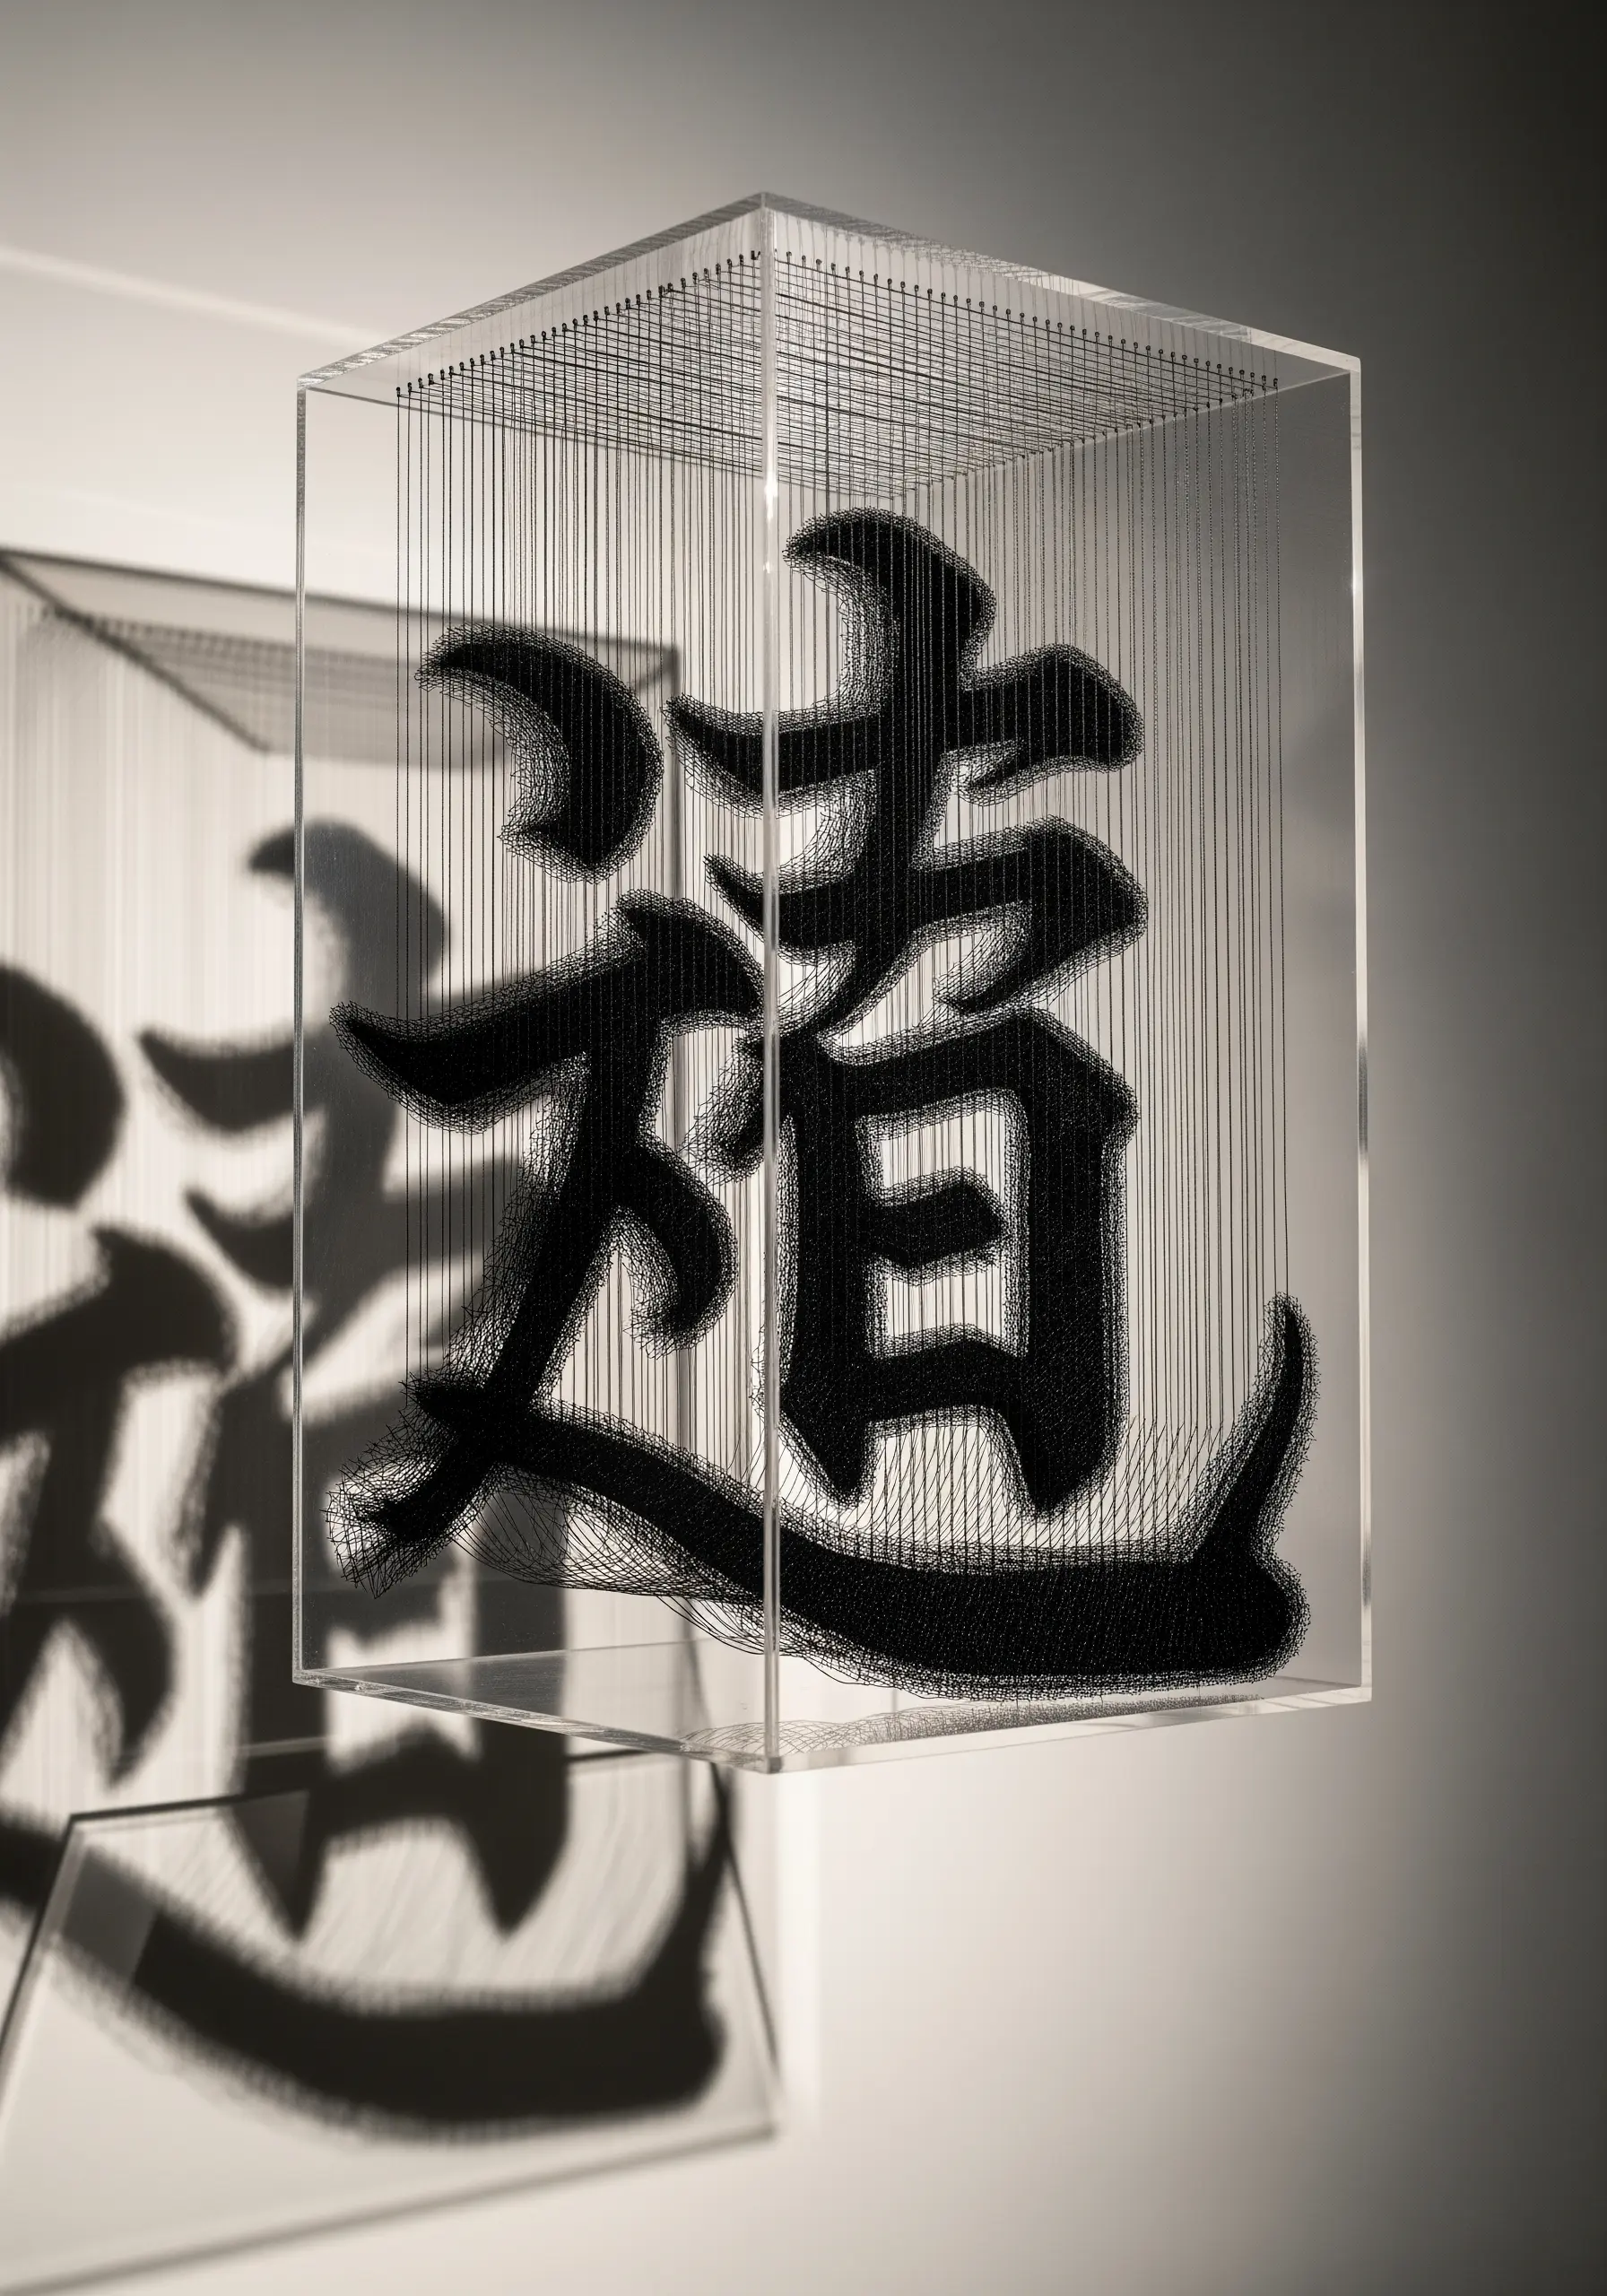
This advanced technique creates a solid-looking form from thousands of individual lines, appearing to float in mid-air.
A grid of threads is stretched vertically and horizontally through a clear box, creating a 3D canvas.
A second, colored thread is then meticulously woven or wrapped around the grid threads at specific intersection points.
By building up density in certain areas, a floating, three-dimensional image emerges, similar to a pointillist painting in 3D space.
16. Layered Hoop Compositions for Narrative Depth
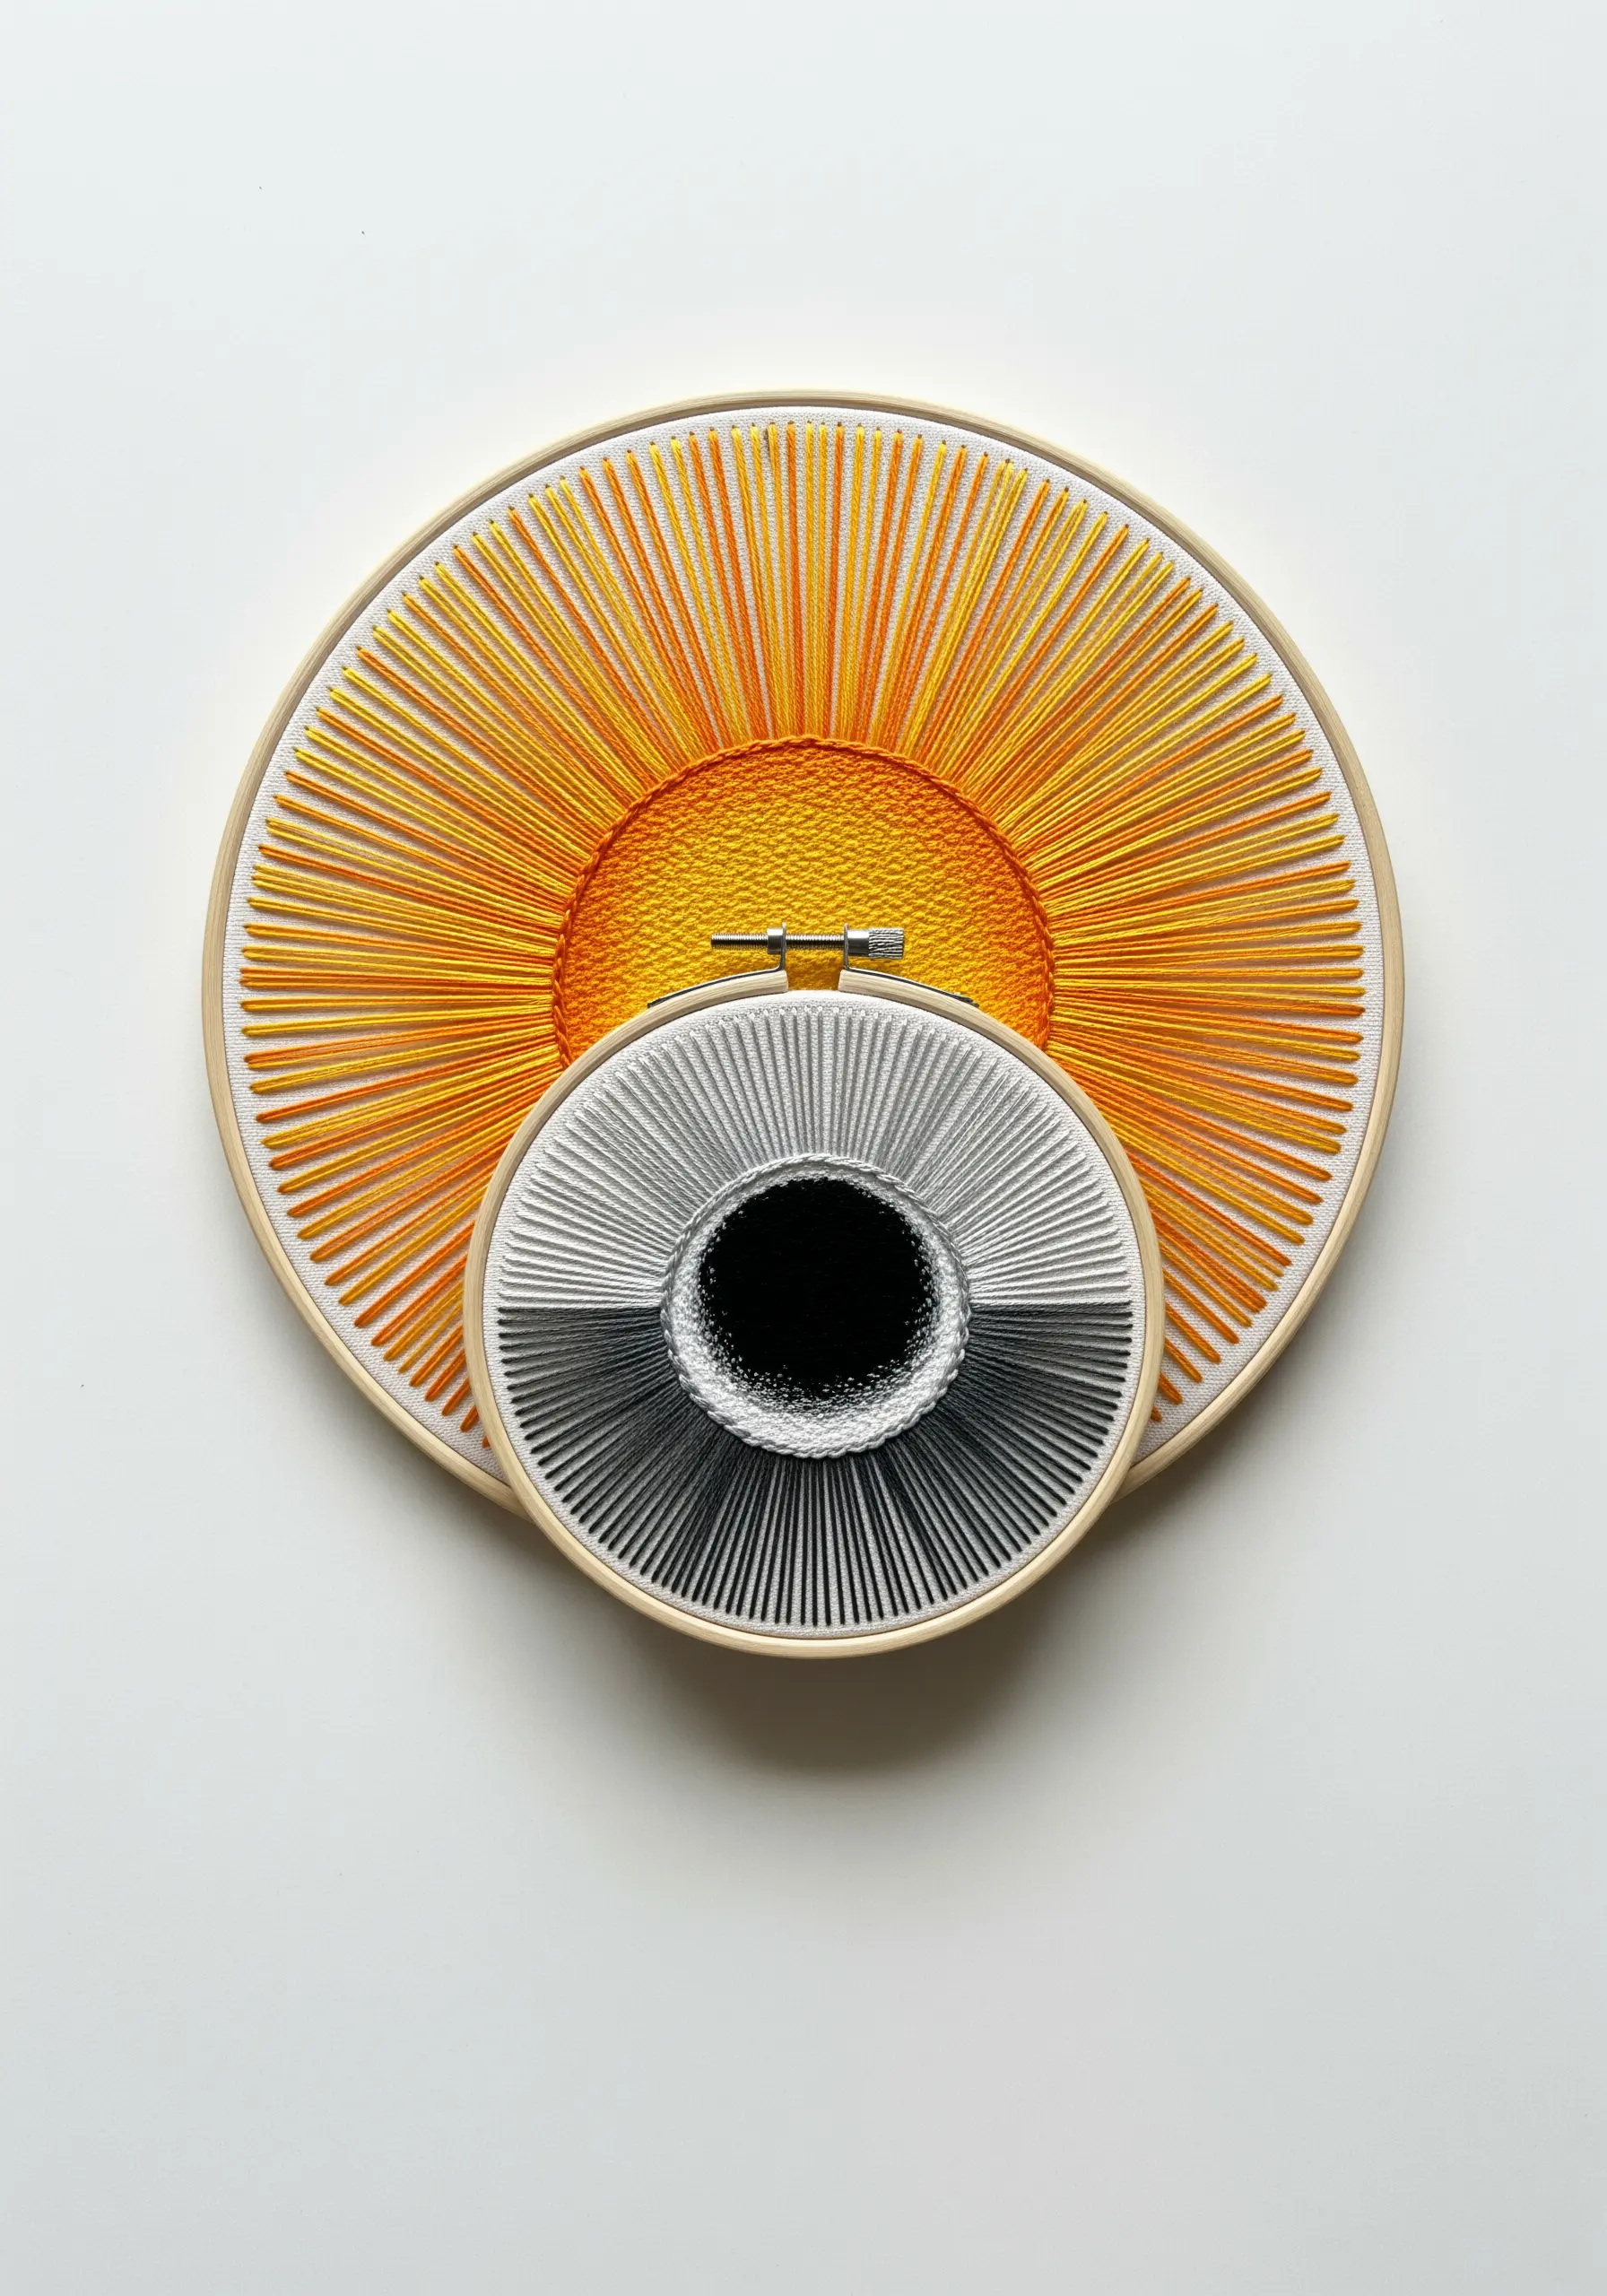
Create a dynamic composition by physically layering two or more embroidery hoops to tell a simple story.
Stitch the background element (like a sun) on a larger hoop and the foreground element (an eclipse) on a smaller one that sits on top.
Use dense, radiating straight stitches to create a sense of light and energy that draws the eye inward.
The physical separation between the hoops automatically creates depth and shadow, adding a powerful sculptural quality to an otherwise flat design.
17. Interactive Sculptures with UV-Reactive Thread
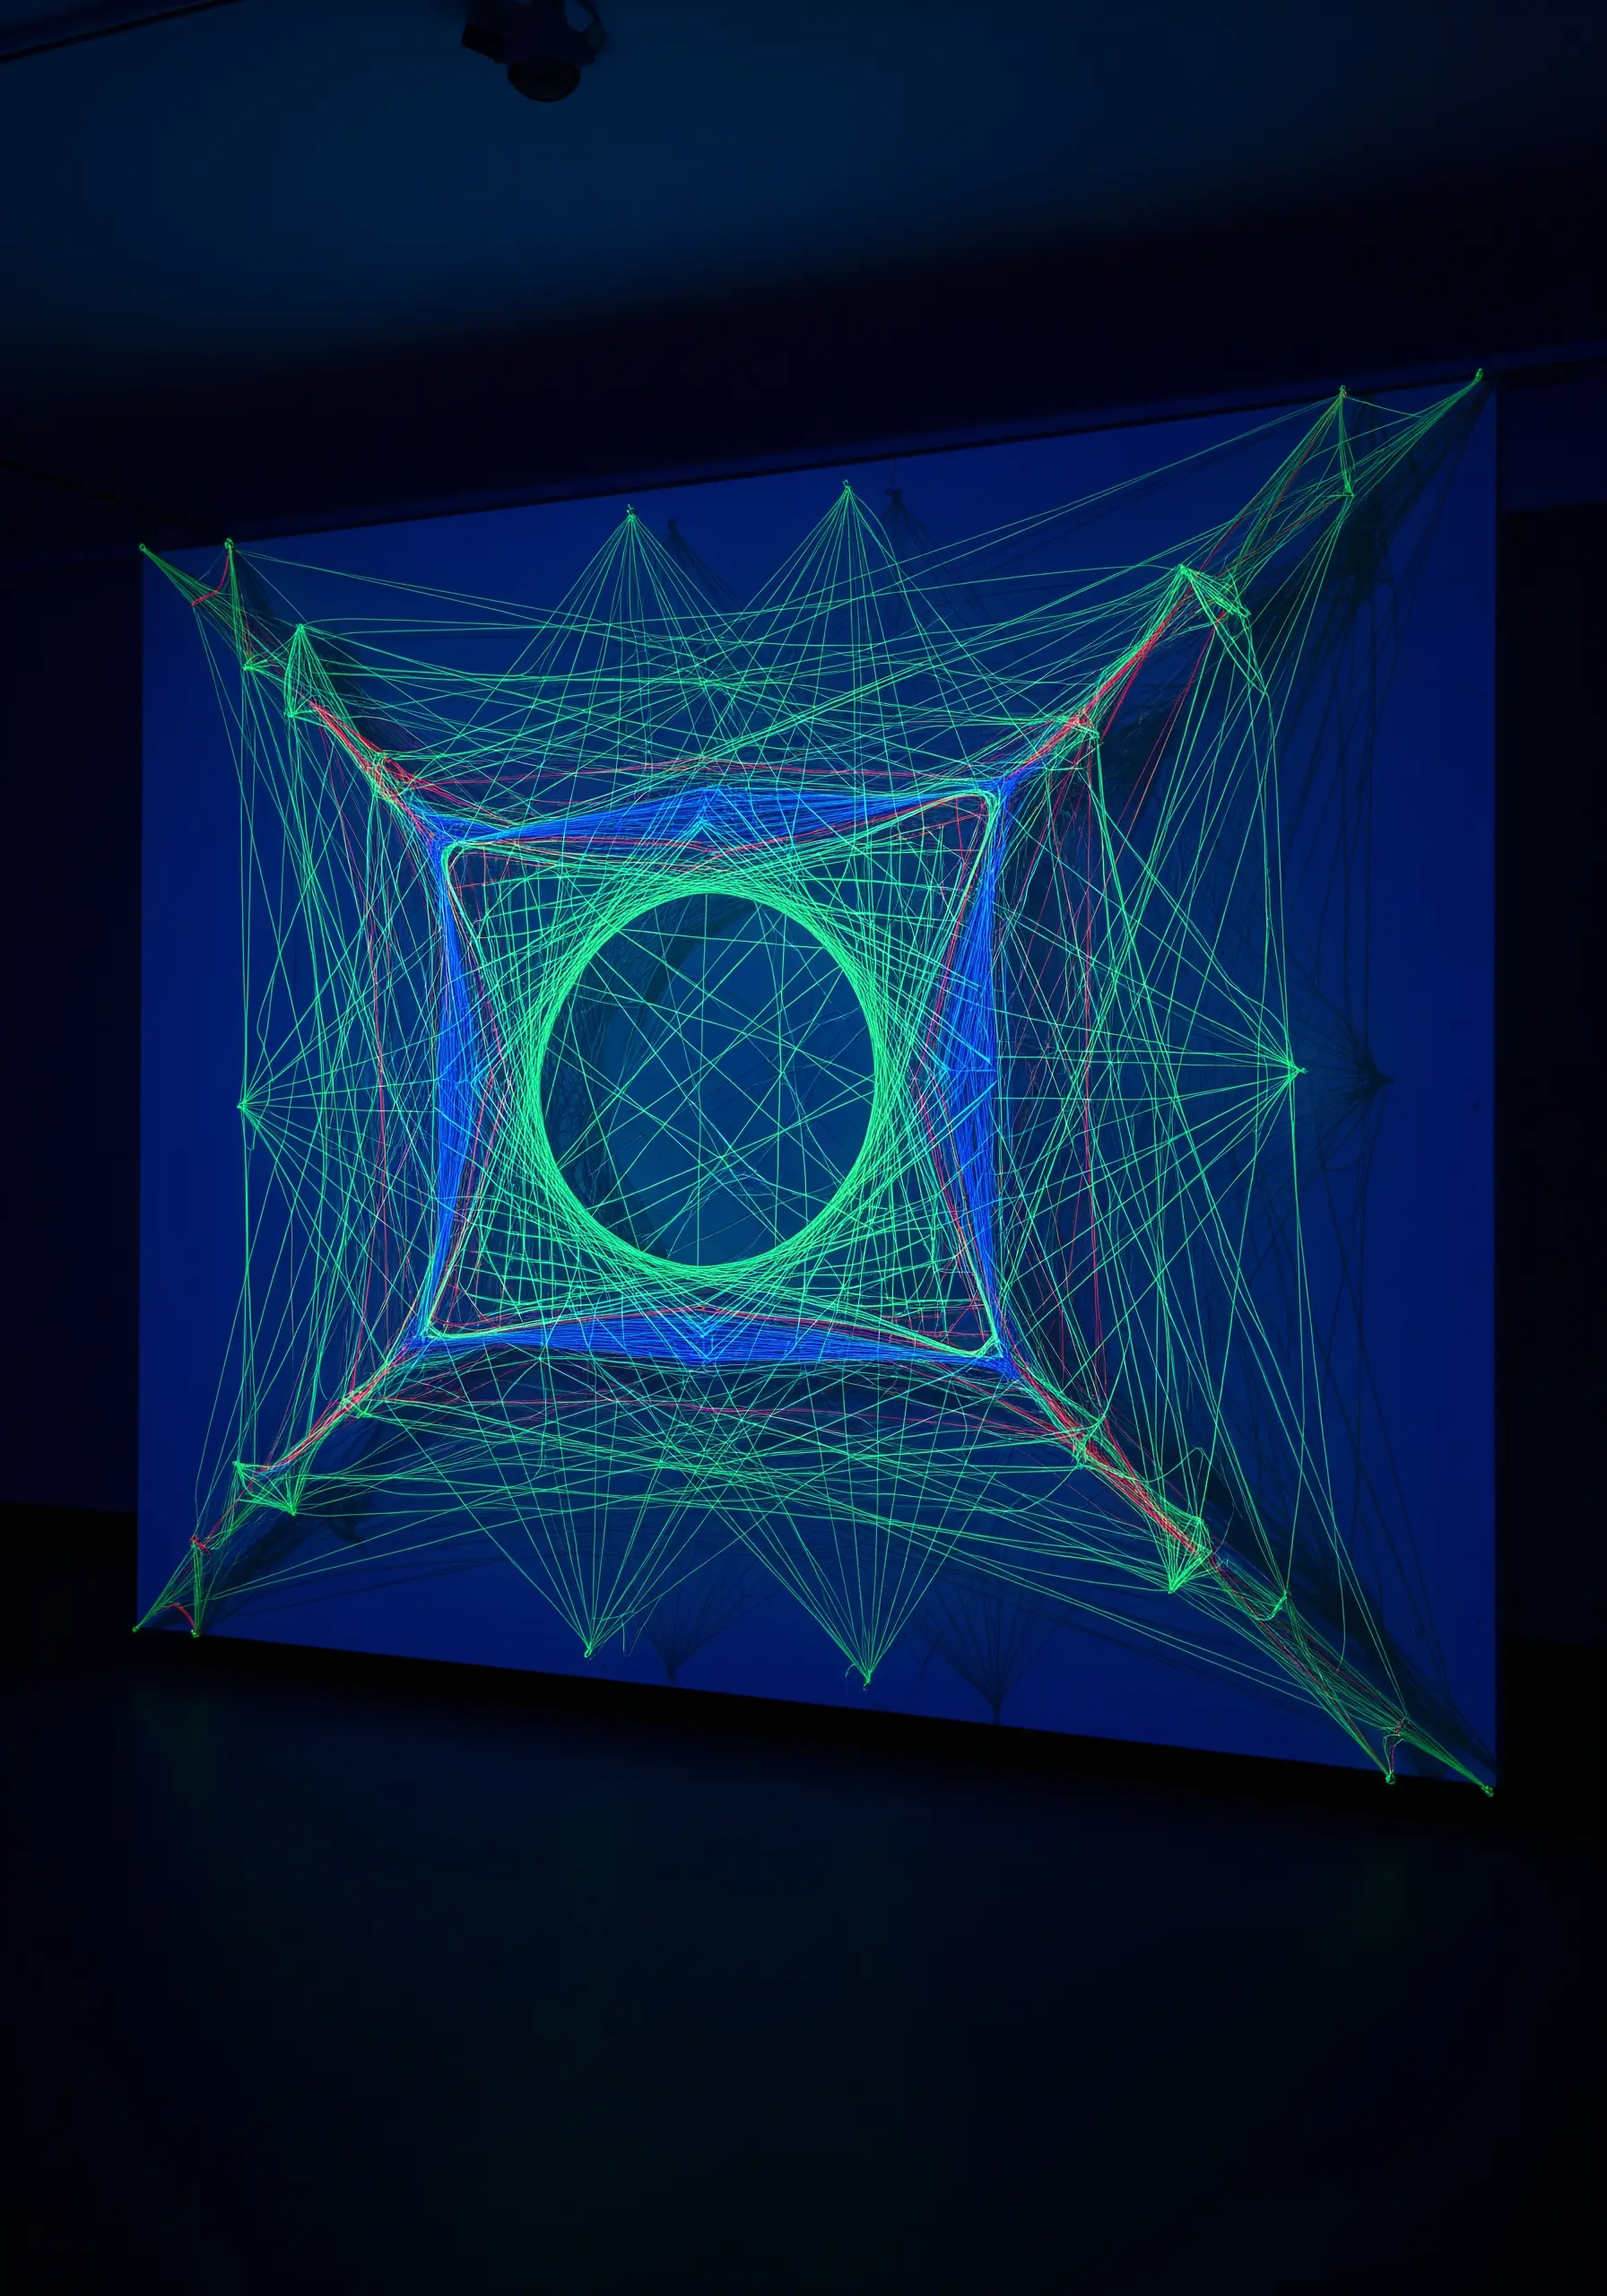
Elevate geometric string art by using fluorescent or neon threads that react dramatically under ultraviolet (black) light.
Construct your design by stretching threads between anchor points on a dark wall or painted frame.
In normal light, it’s a colorful piece; under UV light, it transforms into a glowing, ethereal light sculpture.
The key is to choose threads specifically manufactured to be UV-reactive for the most vibrant and otherworldly effect.
18. Deconstructive Weaving for Abstract Expression
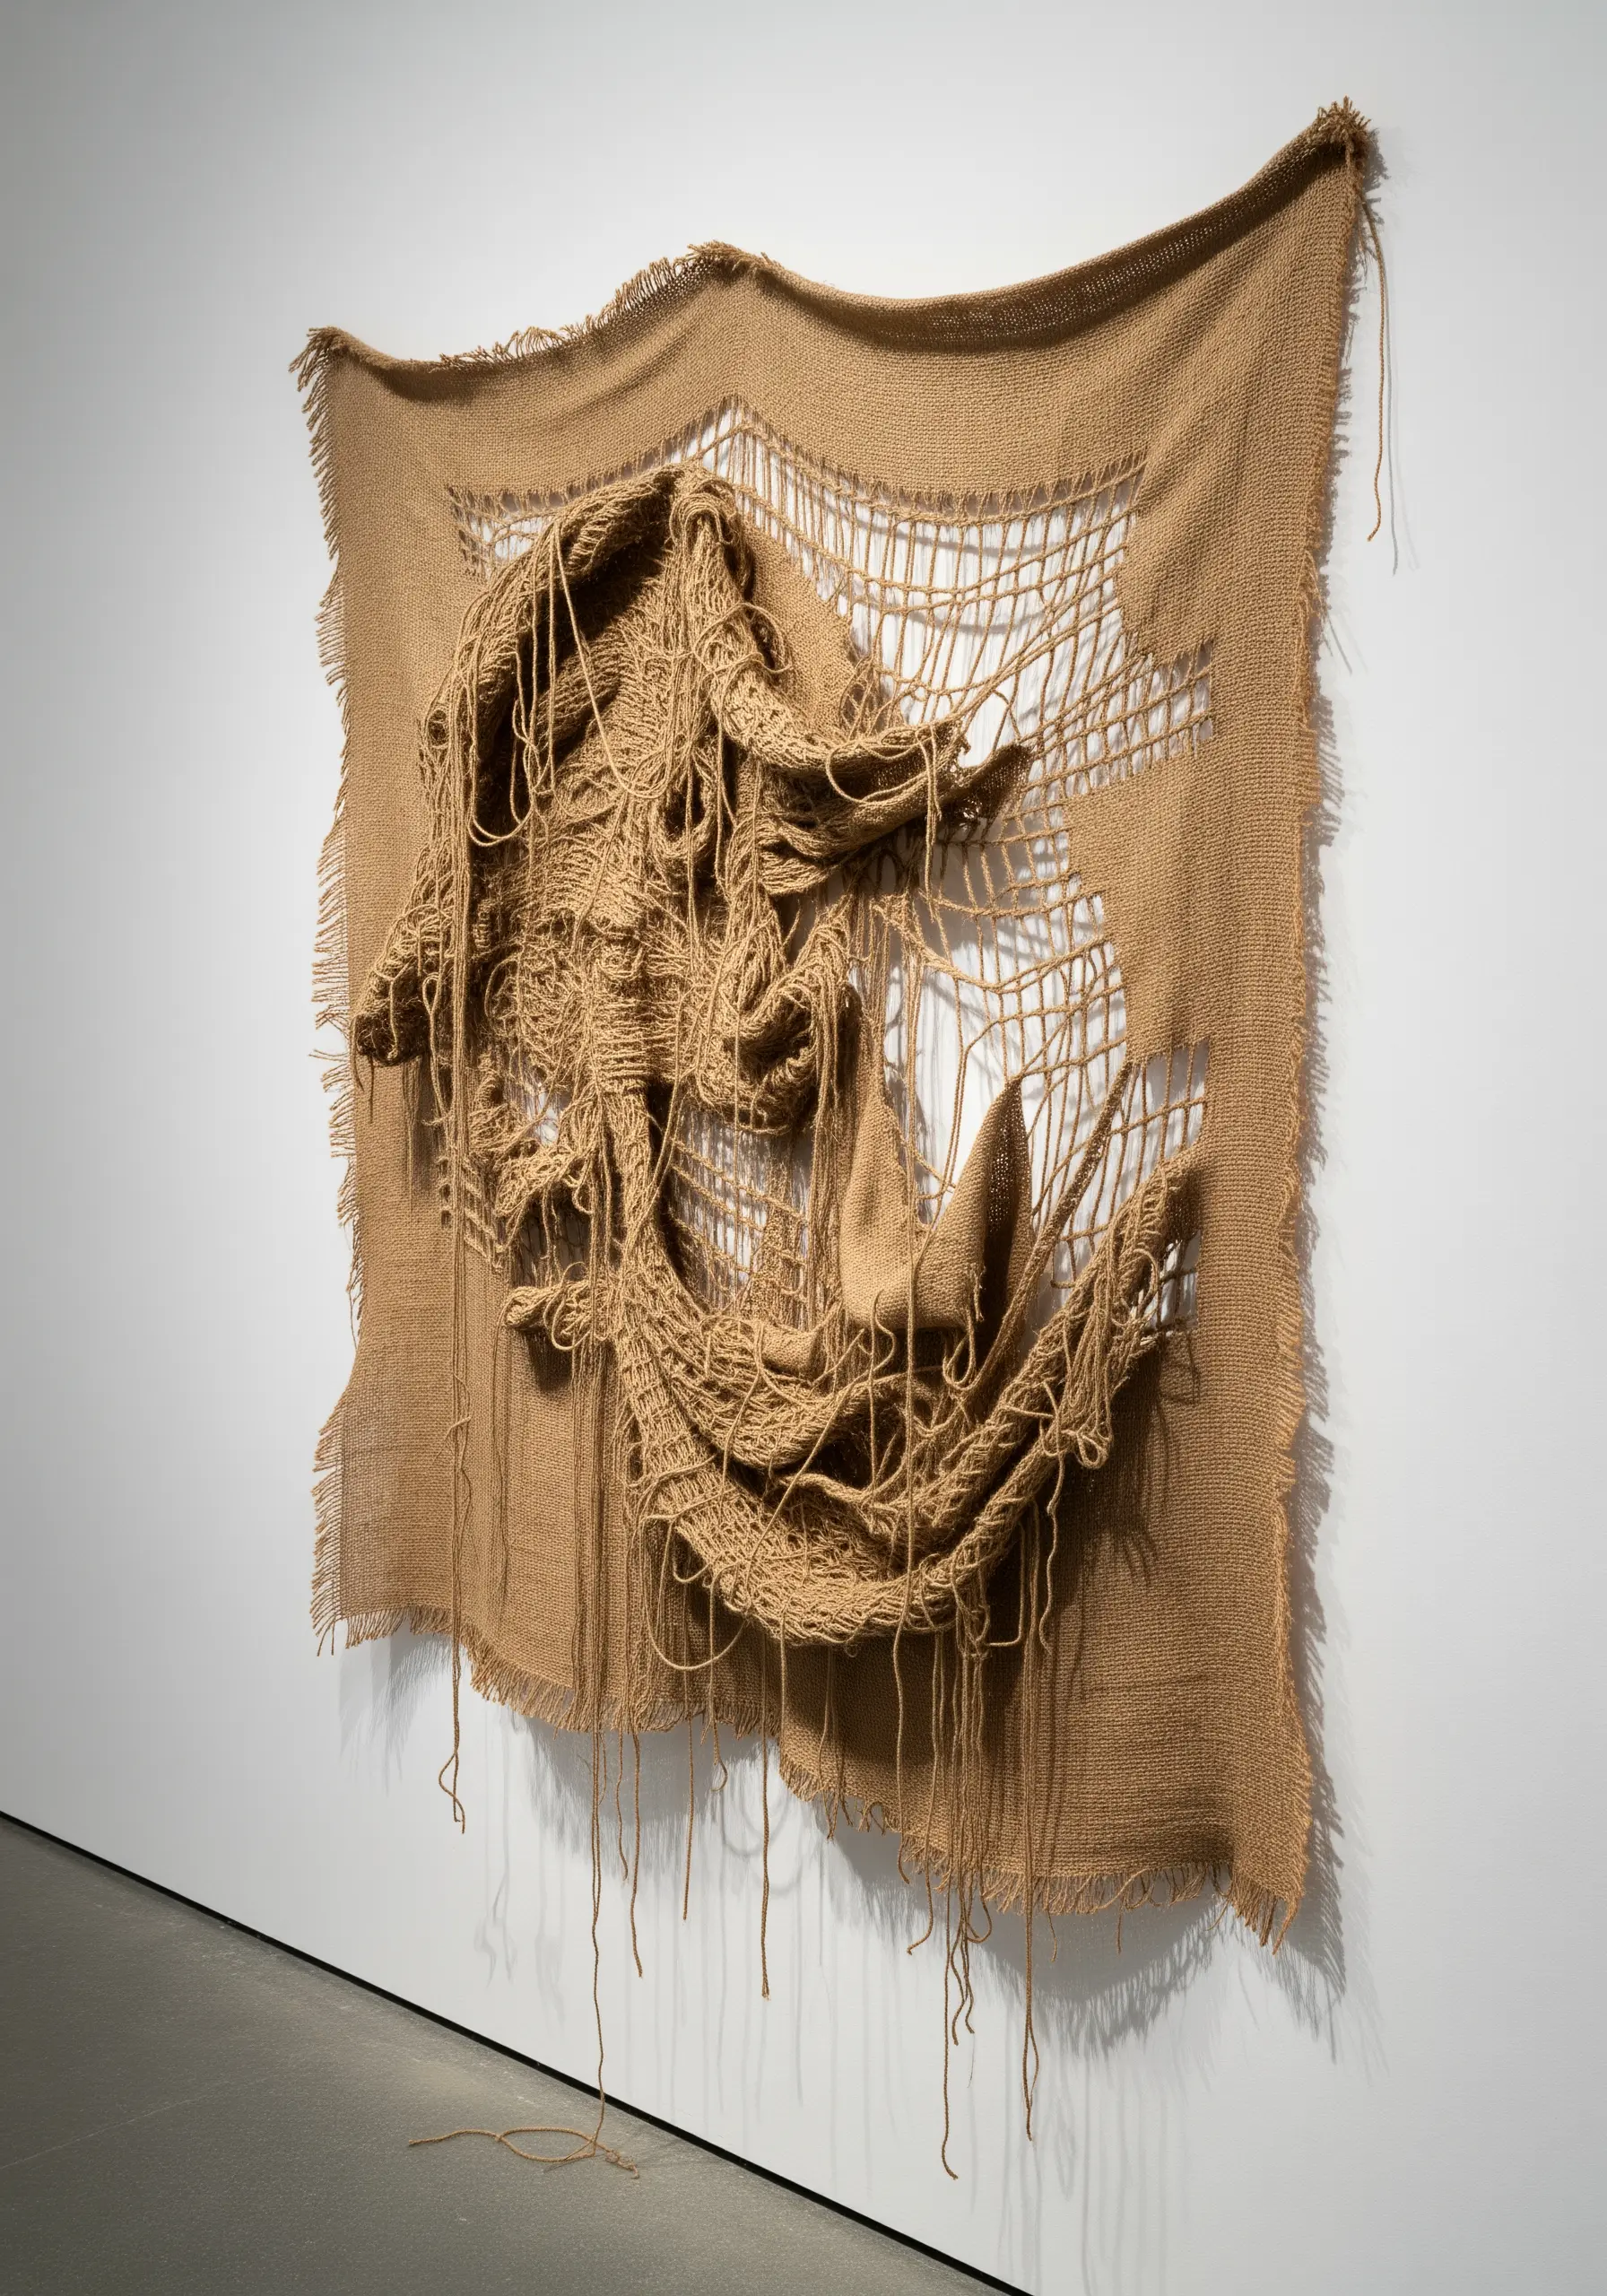
Instead of only adding thread to fabric, this powerful technique involves removing it as well.
Start with a loose-weave textile like burlap or linen. Carefully pull out sections of the warp and weft threads to create windows of negative space.
Then, use the remaining threads as an integrated loom, weaving back into the fabric with thicker, more textural yarn to create abstract, sculptural forms.
This process of un-making and re-making results in a piece with incredible raw texture and a sense of history.
19. Building Crystalline Structures with Thread and Light
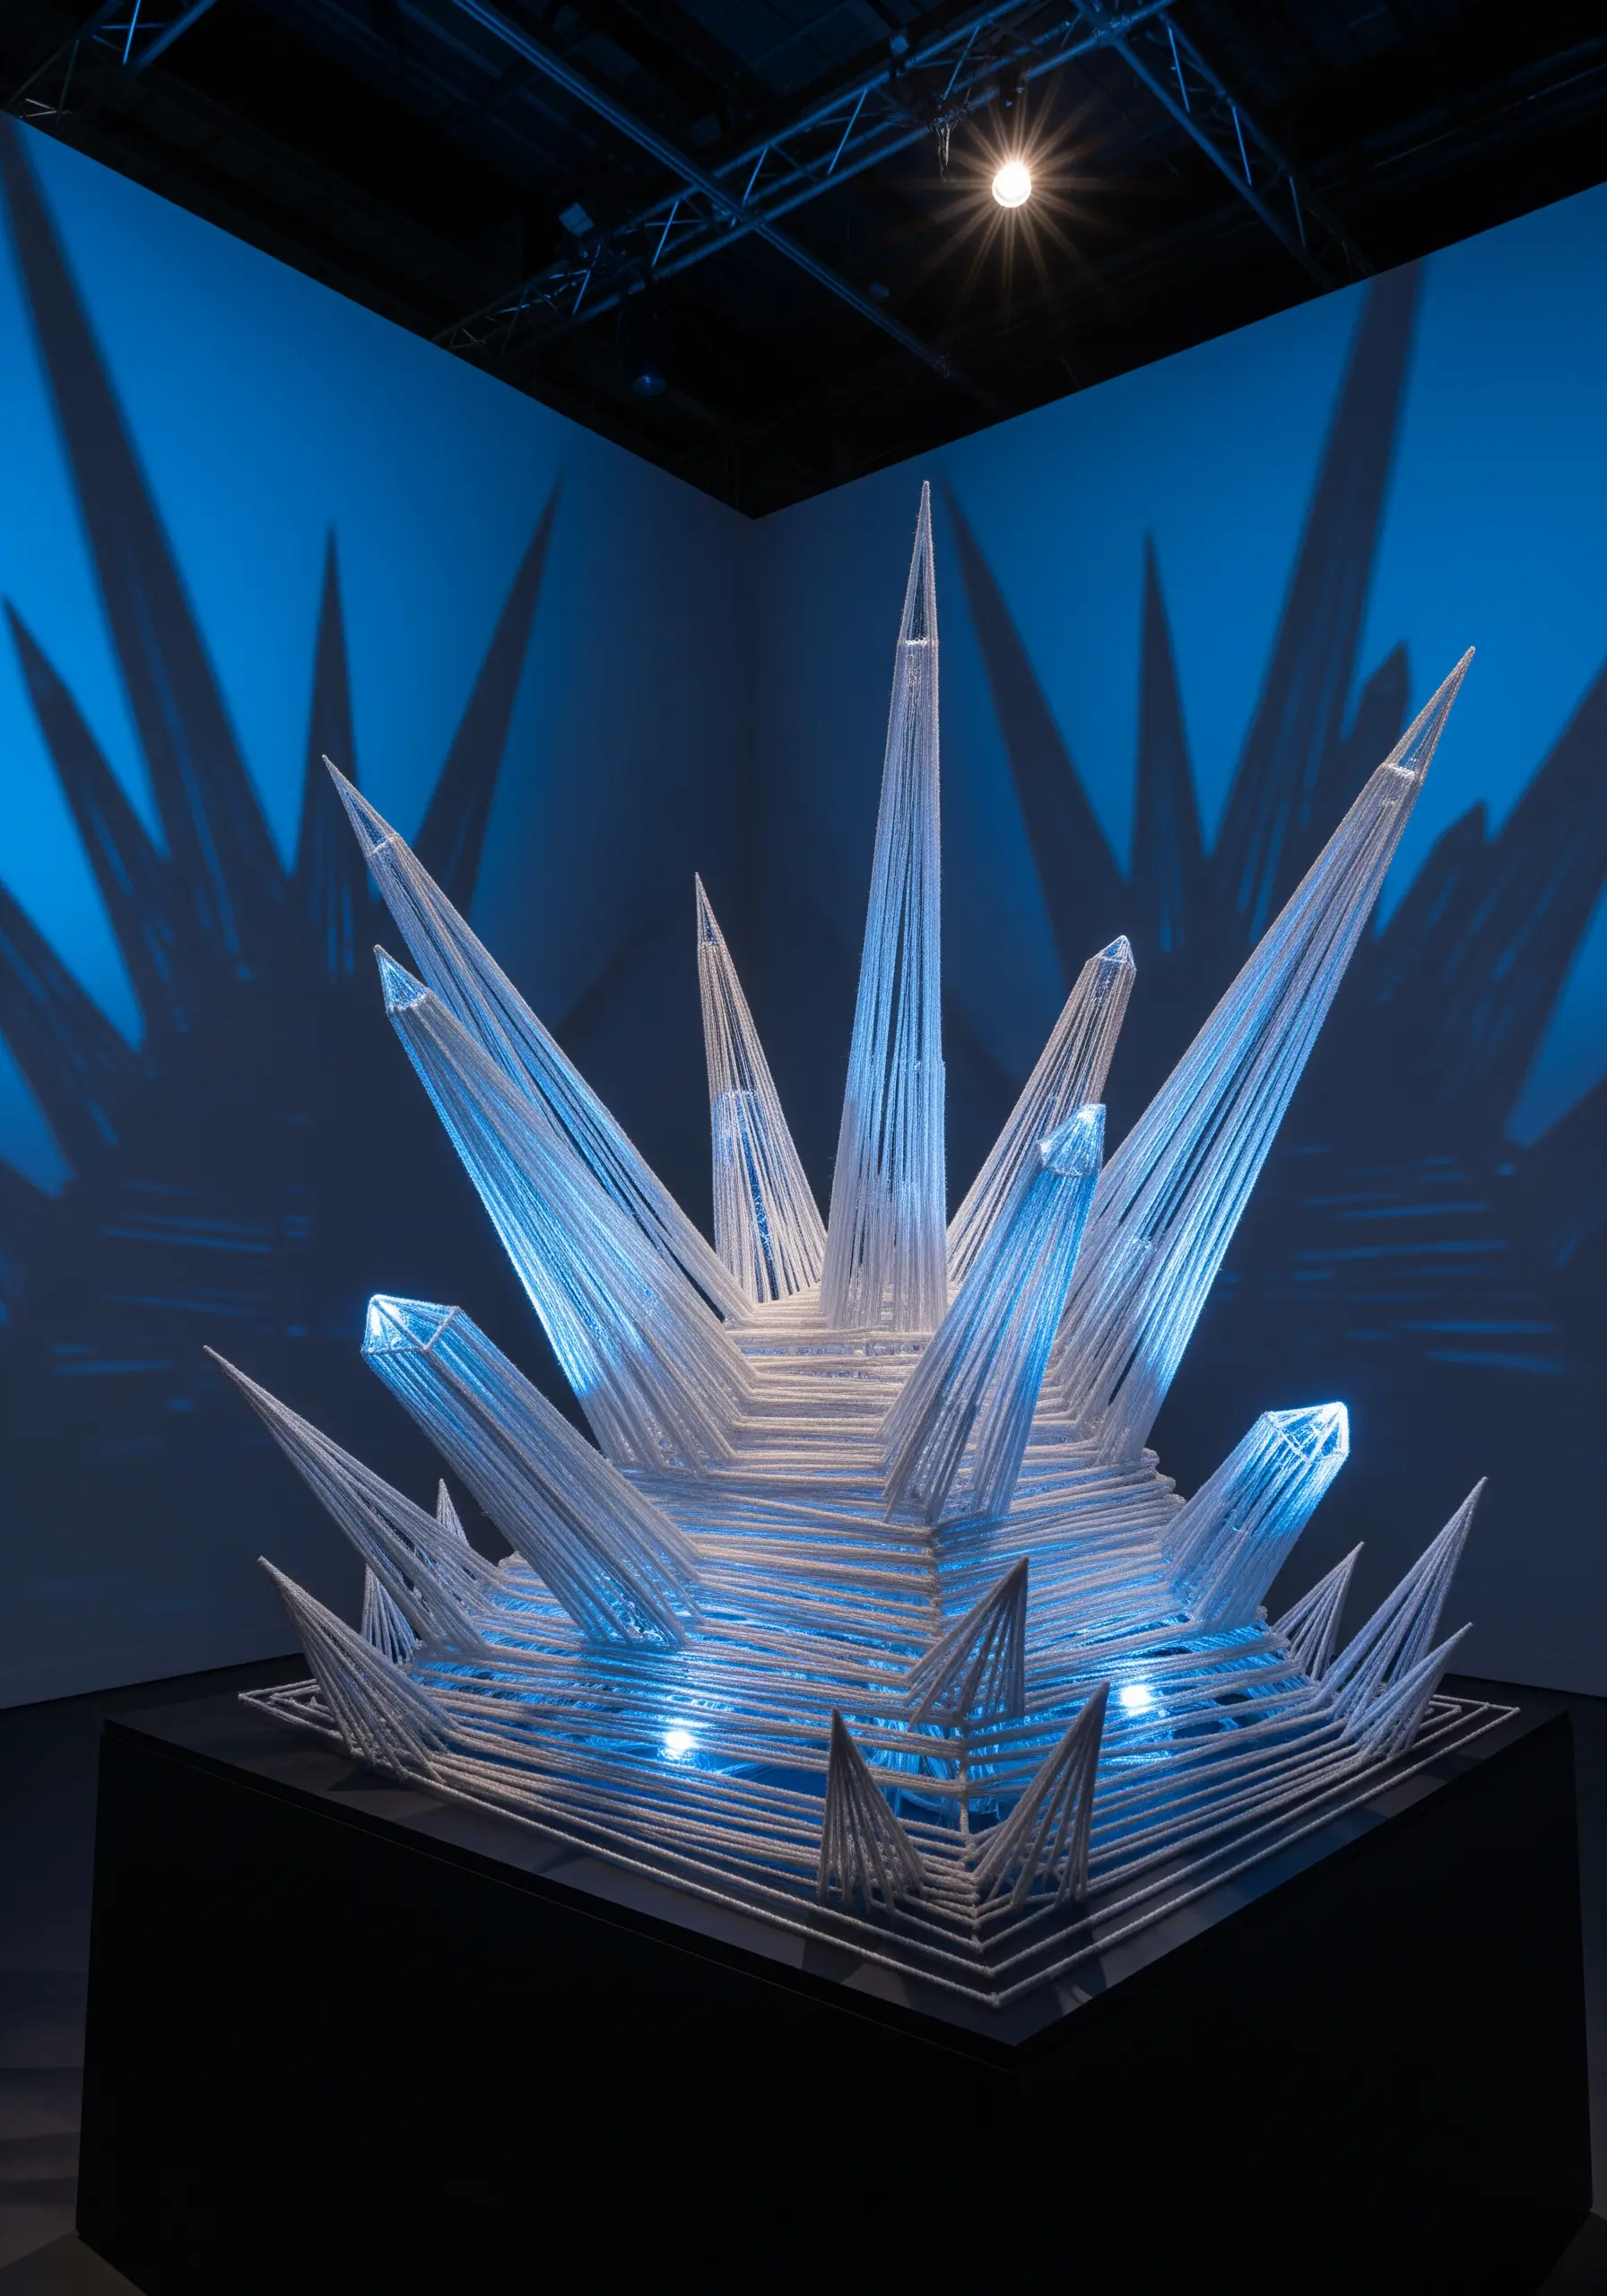
Construct geometric frameworks from wood dowels, wire, or clear acrylic rods to form the skeleton of your sculpture.
Then, wrap thread tautly and repeatedly around these frames to create the flat, solid “crystal” facets.
The density of the wrapped thread will determine its opacity and how it interacts with light.
The final step is internal illumination. Placing small LED lights within the structure makes the thread glow, casting dramatic, angular shadows.
20. Contour Line Portraits with Layered Thread
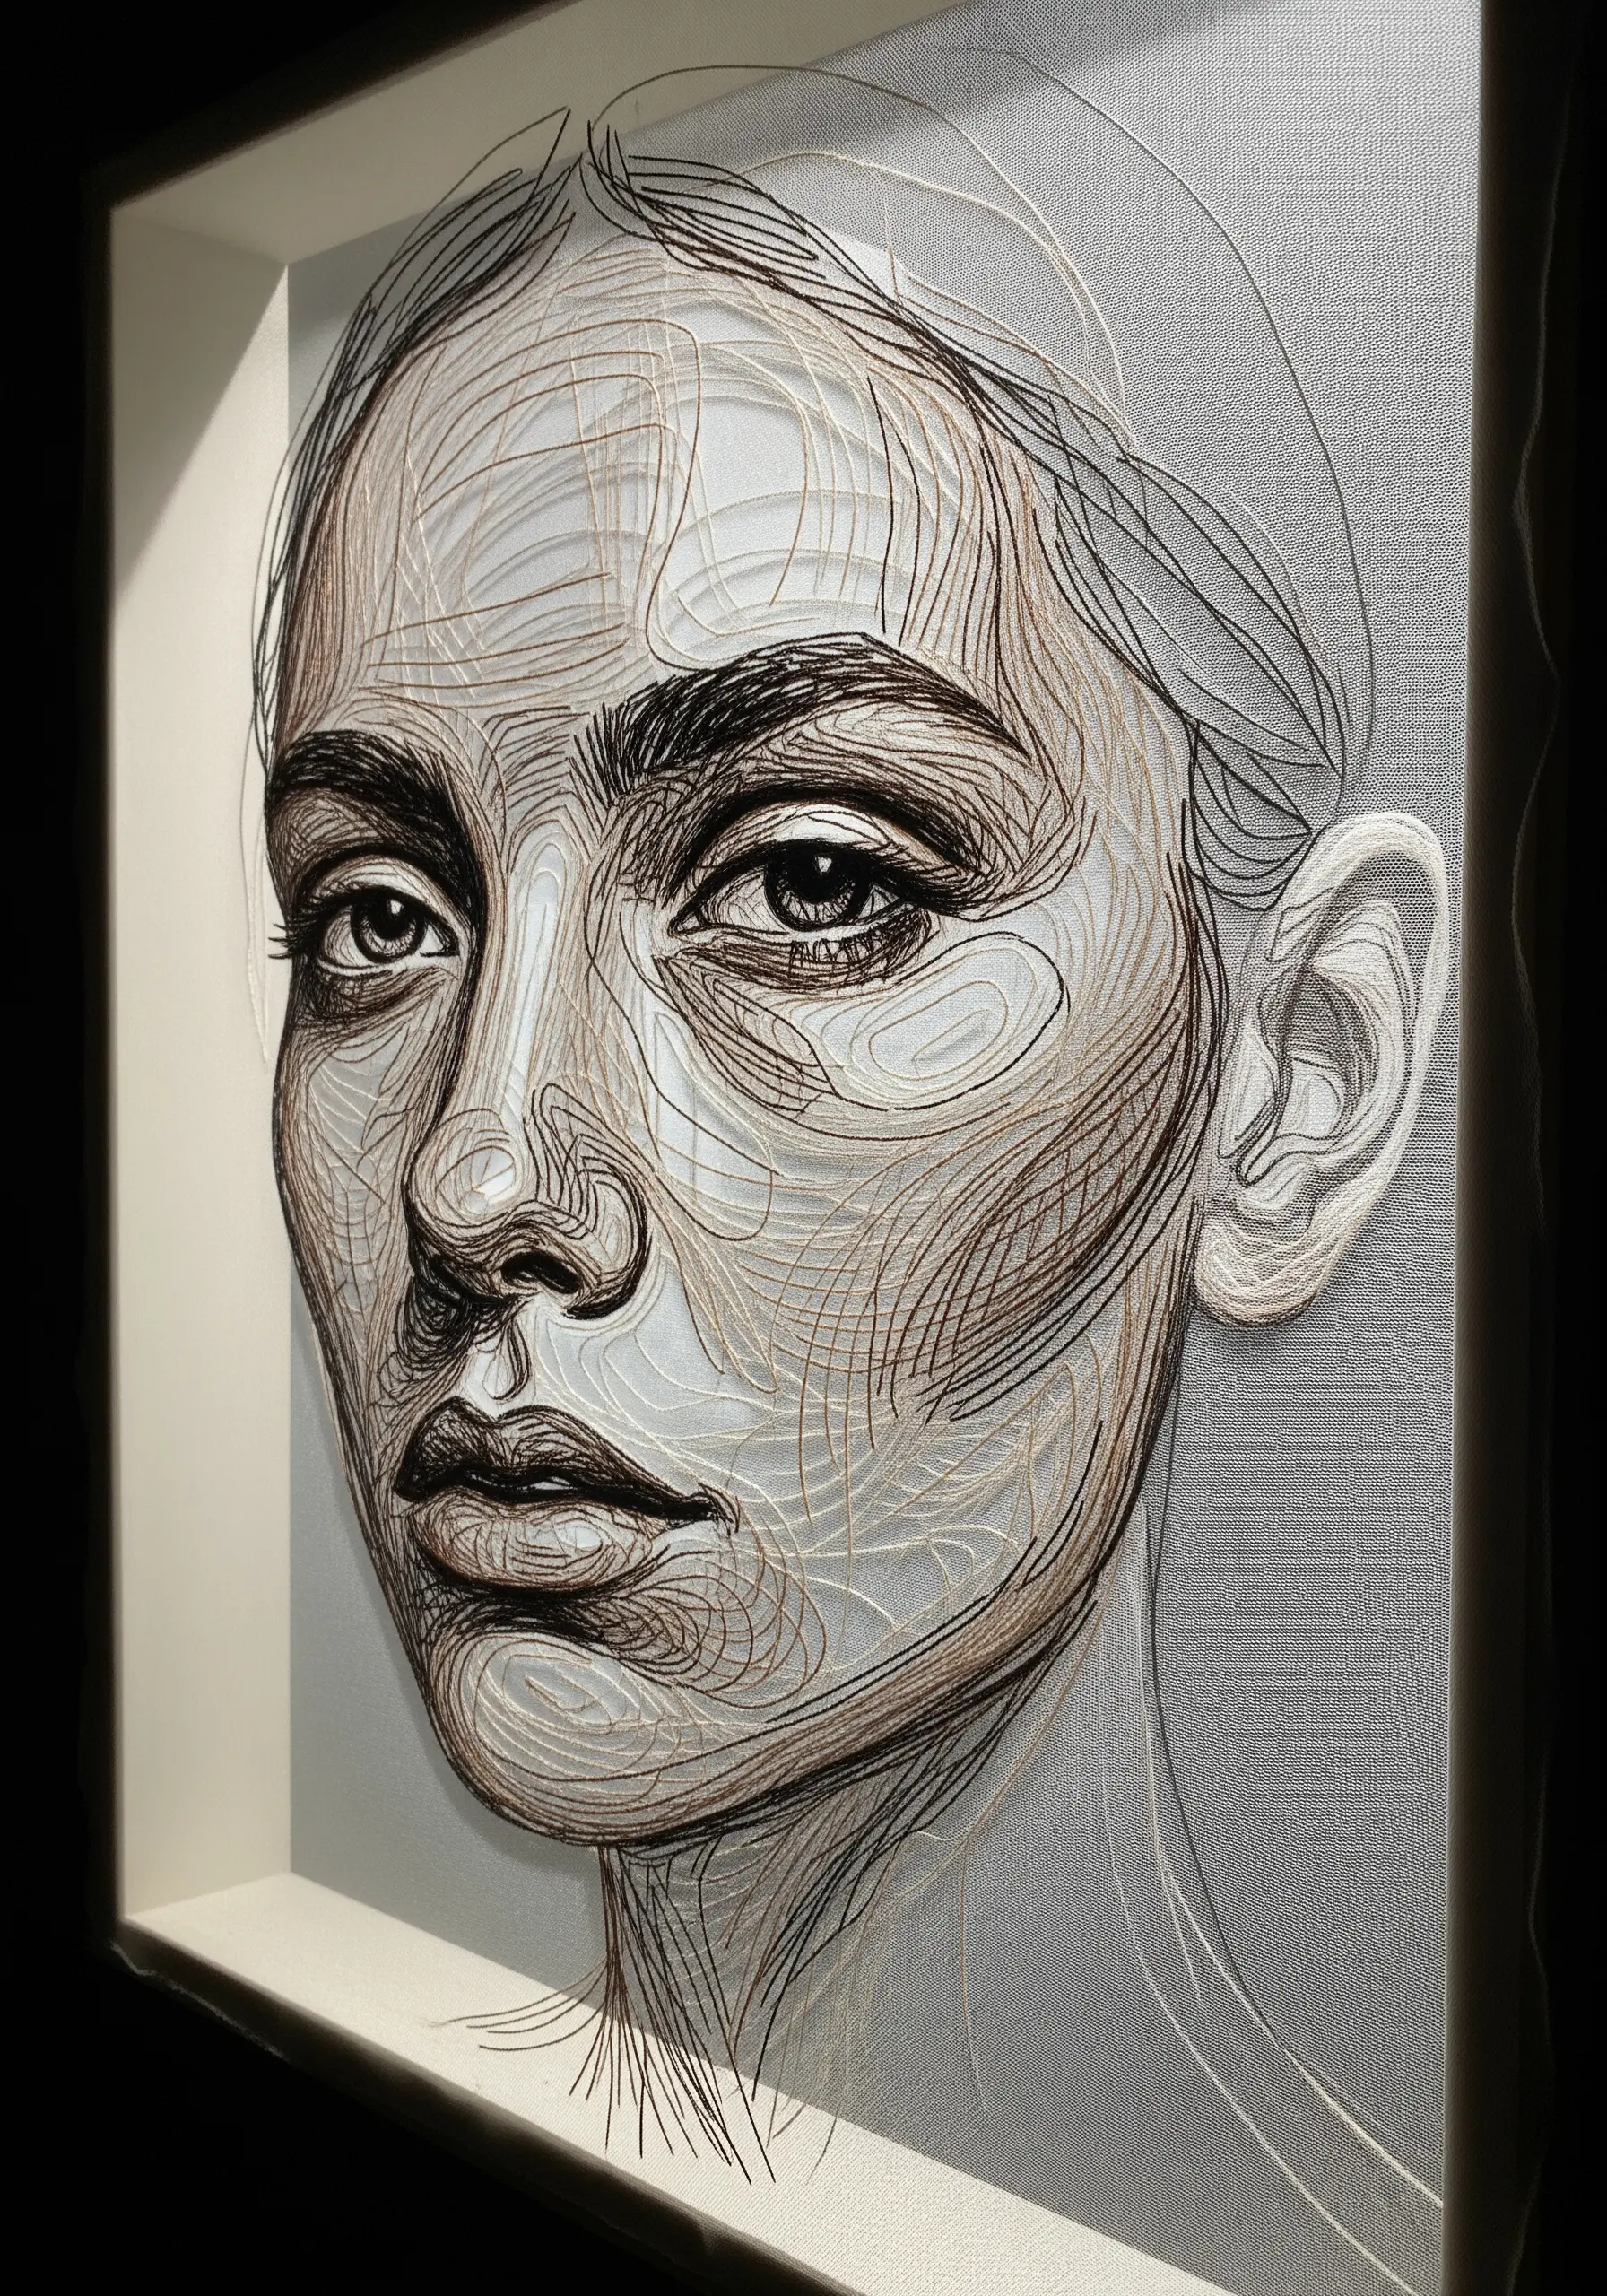
Create a portrait using the principles of contour mapping to build a likeness with physical depth.
First, reduce a photo to its essential contour lines. Cut these shapes from layers of cardstock or foam core, with each layer representing a different plane of the face.
Wrap these individual shapes with thread, using darker thread for shadow areas and lighter for highlights.
Finally, stack and mount these layers in a shadow box to create a modern line-art portrait with real, topographical depth.
21. Meditative Color Theory on a Circular Loom
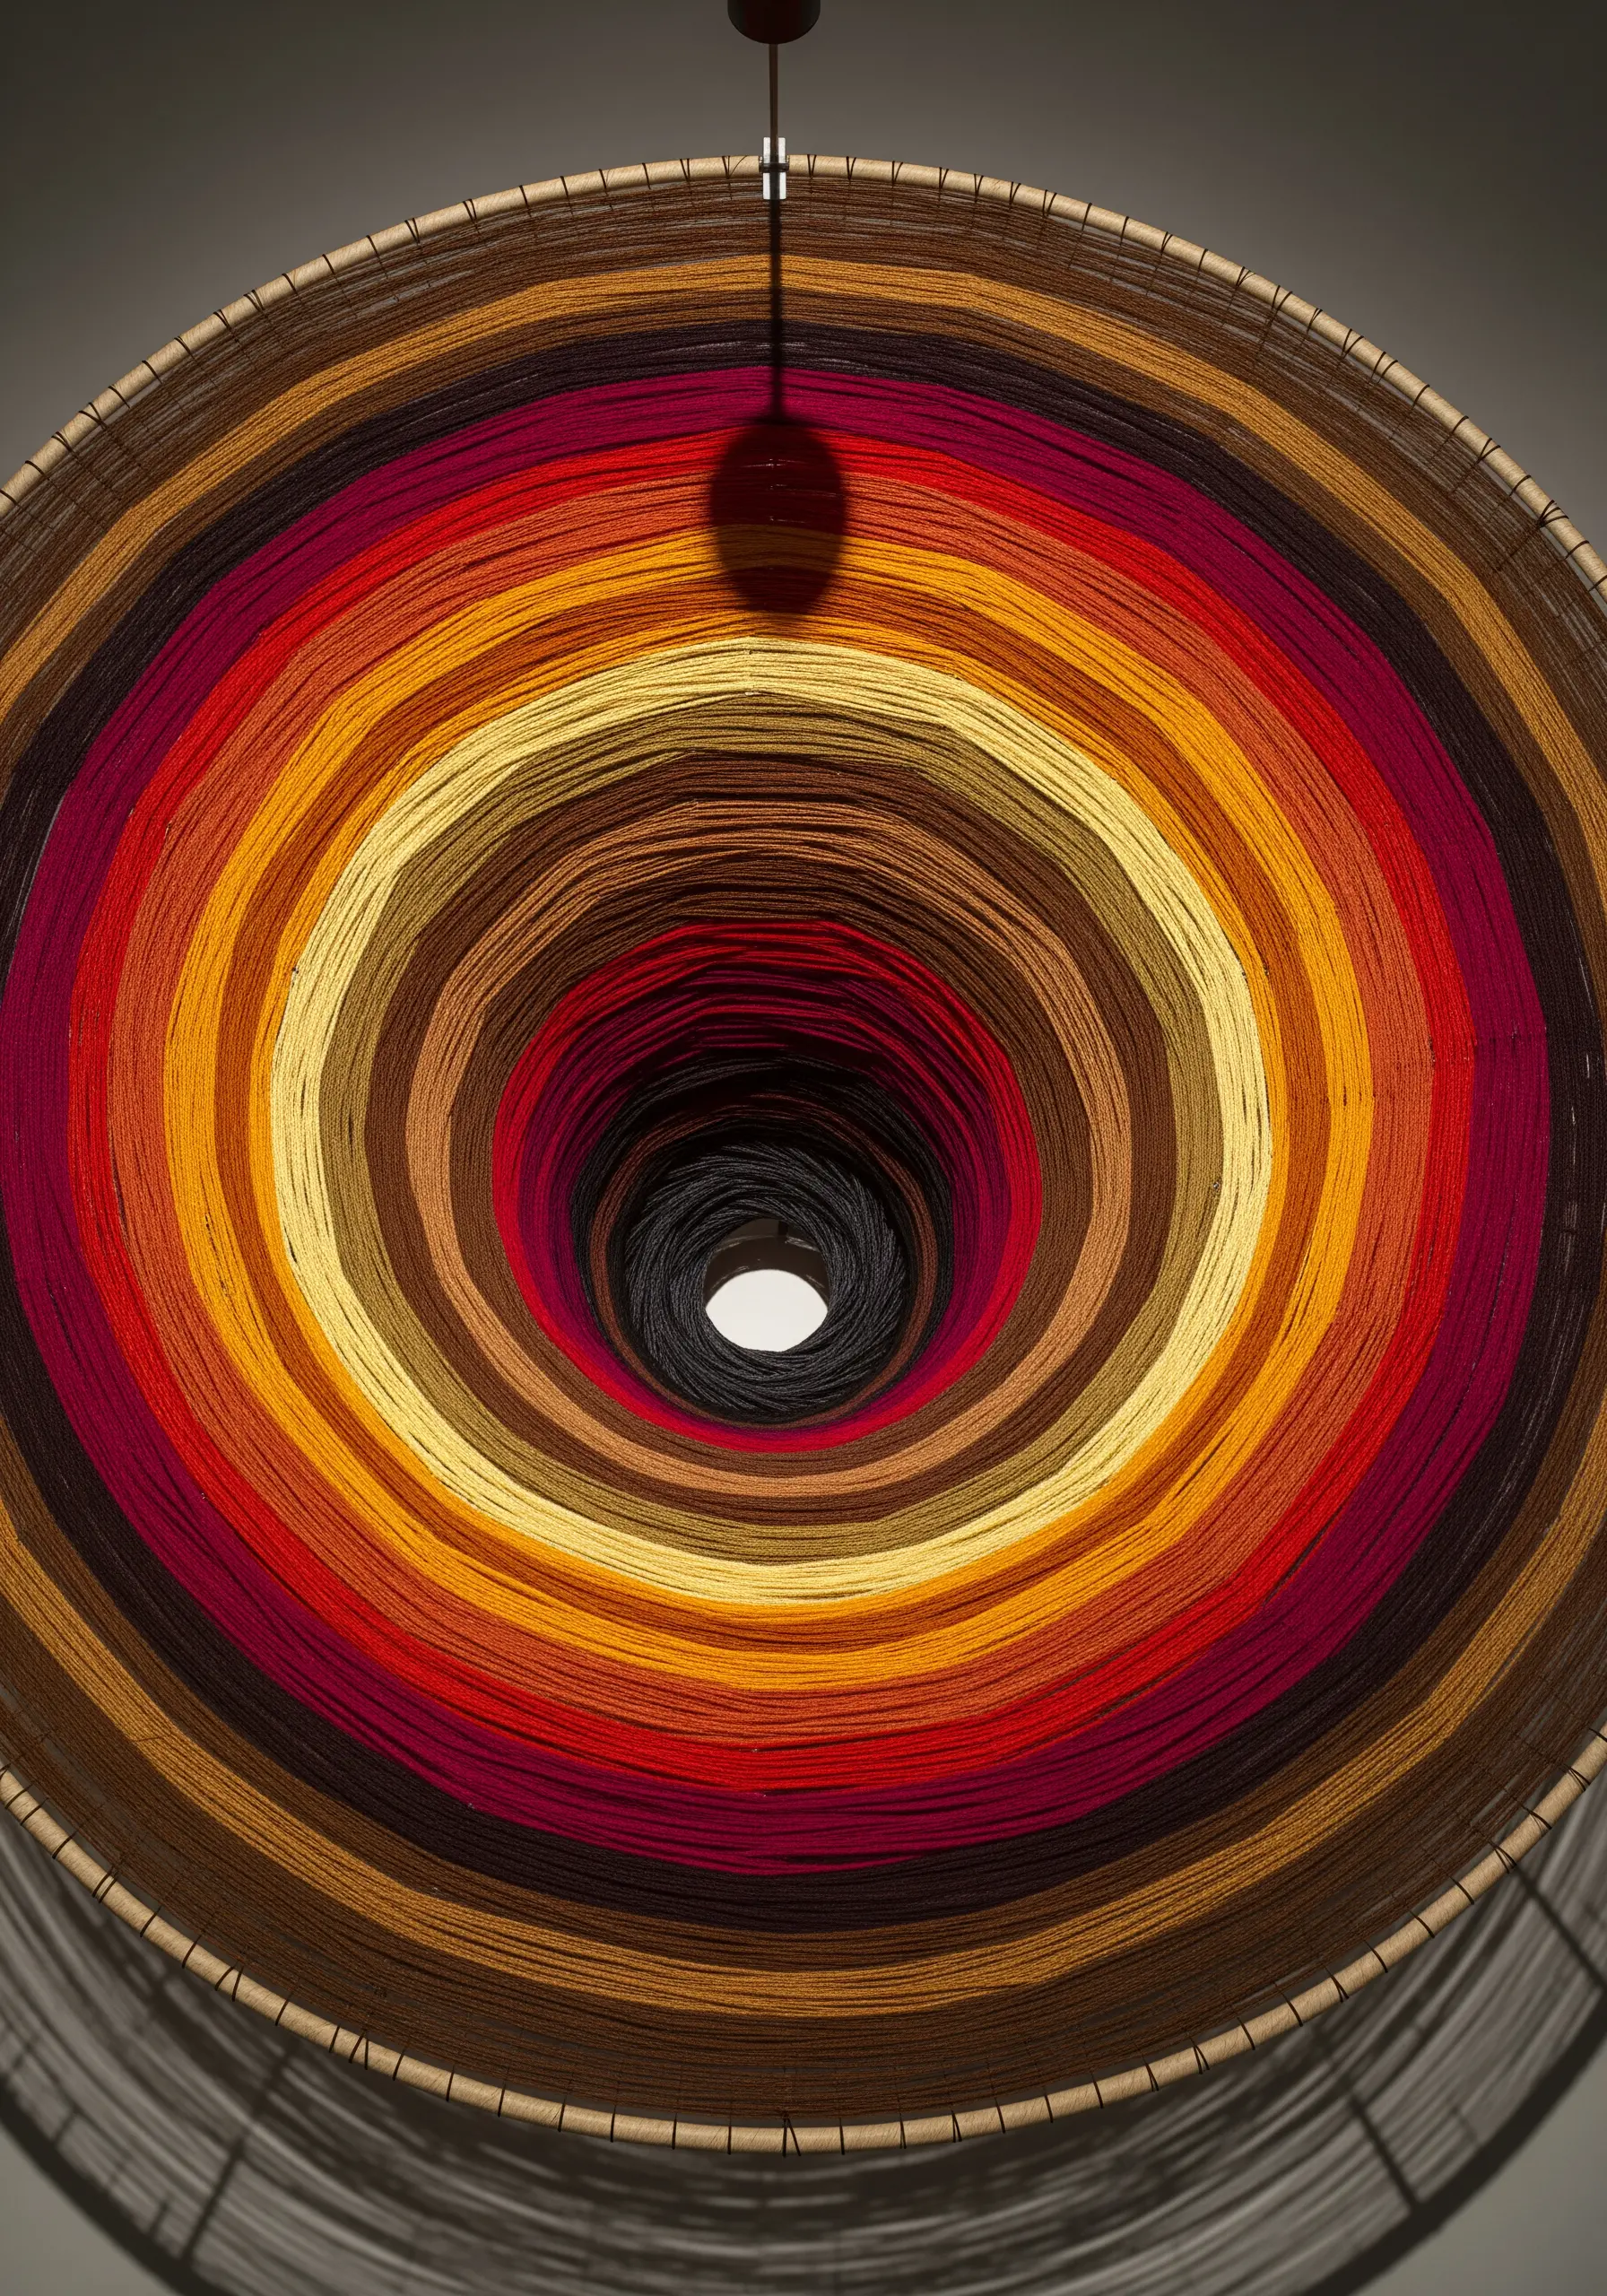
This technique uses a large hoop as a simple loom to explore powerful color relationships.
By wrapping yarn or thick thread continuously around the hoop—passing through the center each time—you build up dense, concentric circles of color.
The visual impact comes from the careful sequencing of your colors. Arrange them in a smooth gradient or in bold, contrasting blocks for different emotional effects.
The repetitive process is highly meditative, and the result is a graphic statement piece that celebrates the visual weight of color.