When winter arrives, you might feel the pull to create something cozy and personal. But instead of just following a pattern, what if you could transform a simple motif like a penguin or a polar bear into a small work of art? It begins with rethinking texture, light, and placement.
True artistry in embroidery isn’t about mastering hundreds of complex stitches. It’s about the thoughtful choices you make—selecting a fuzzy thread to capture the softness of a Santa hat, using a single strand of metallic floss to suggest a distant star, or placing a tiny penguin on a cuff for a hidden bit of joy. These are the details that elevate your work from a craft project to a cherished piece.
Use these ideas as a starting point. Look closely at how a stitch direction can mimic light on water, or how a simple outline can feel more powerful than a fully colored design. This is your invitation to stitch with intention, building not just beautiful objects, but the confidence to make any design your own.
1. Create Plush Fur with the Turkey Stitch
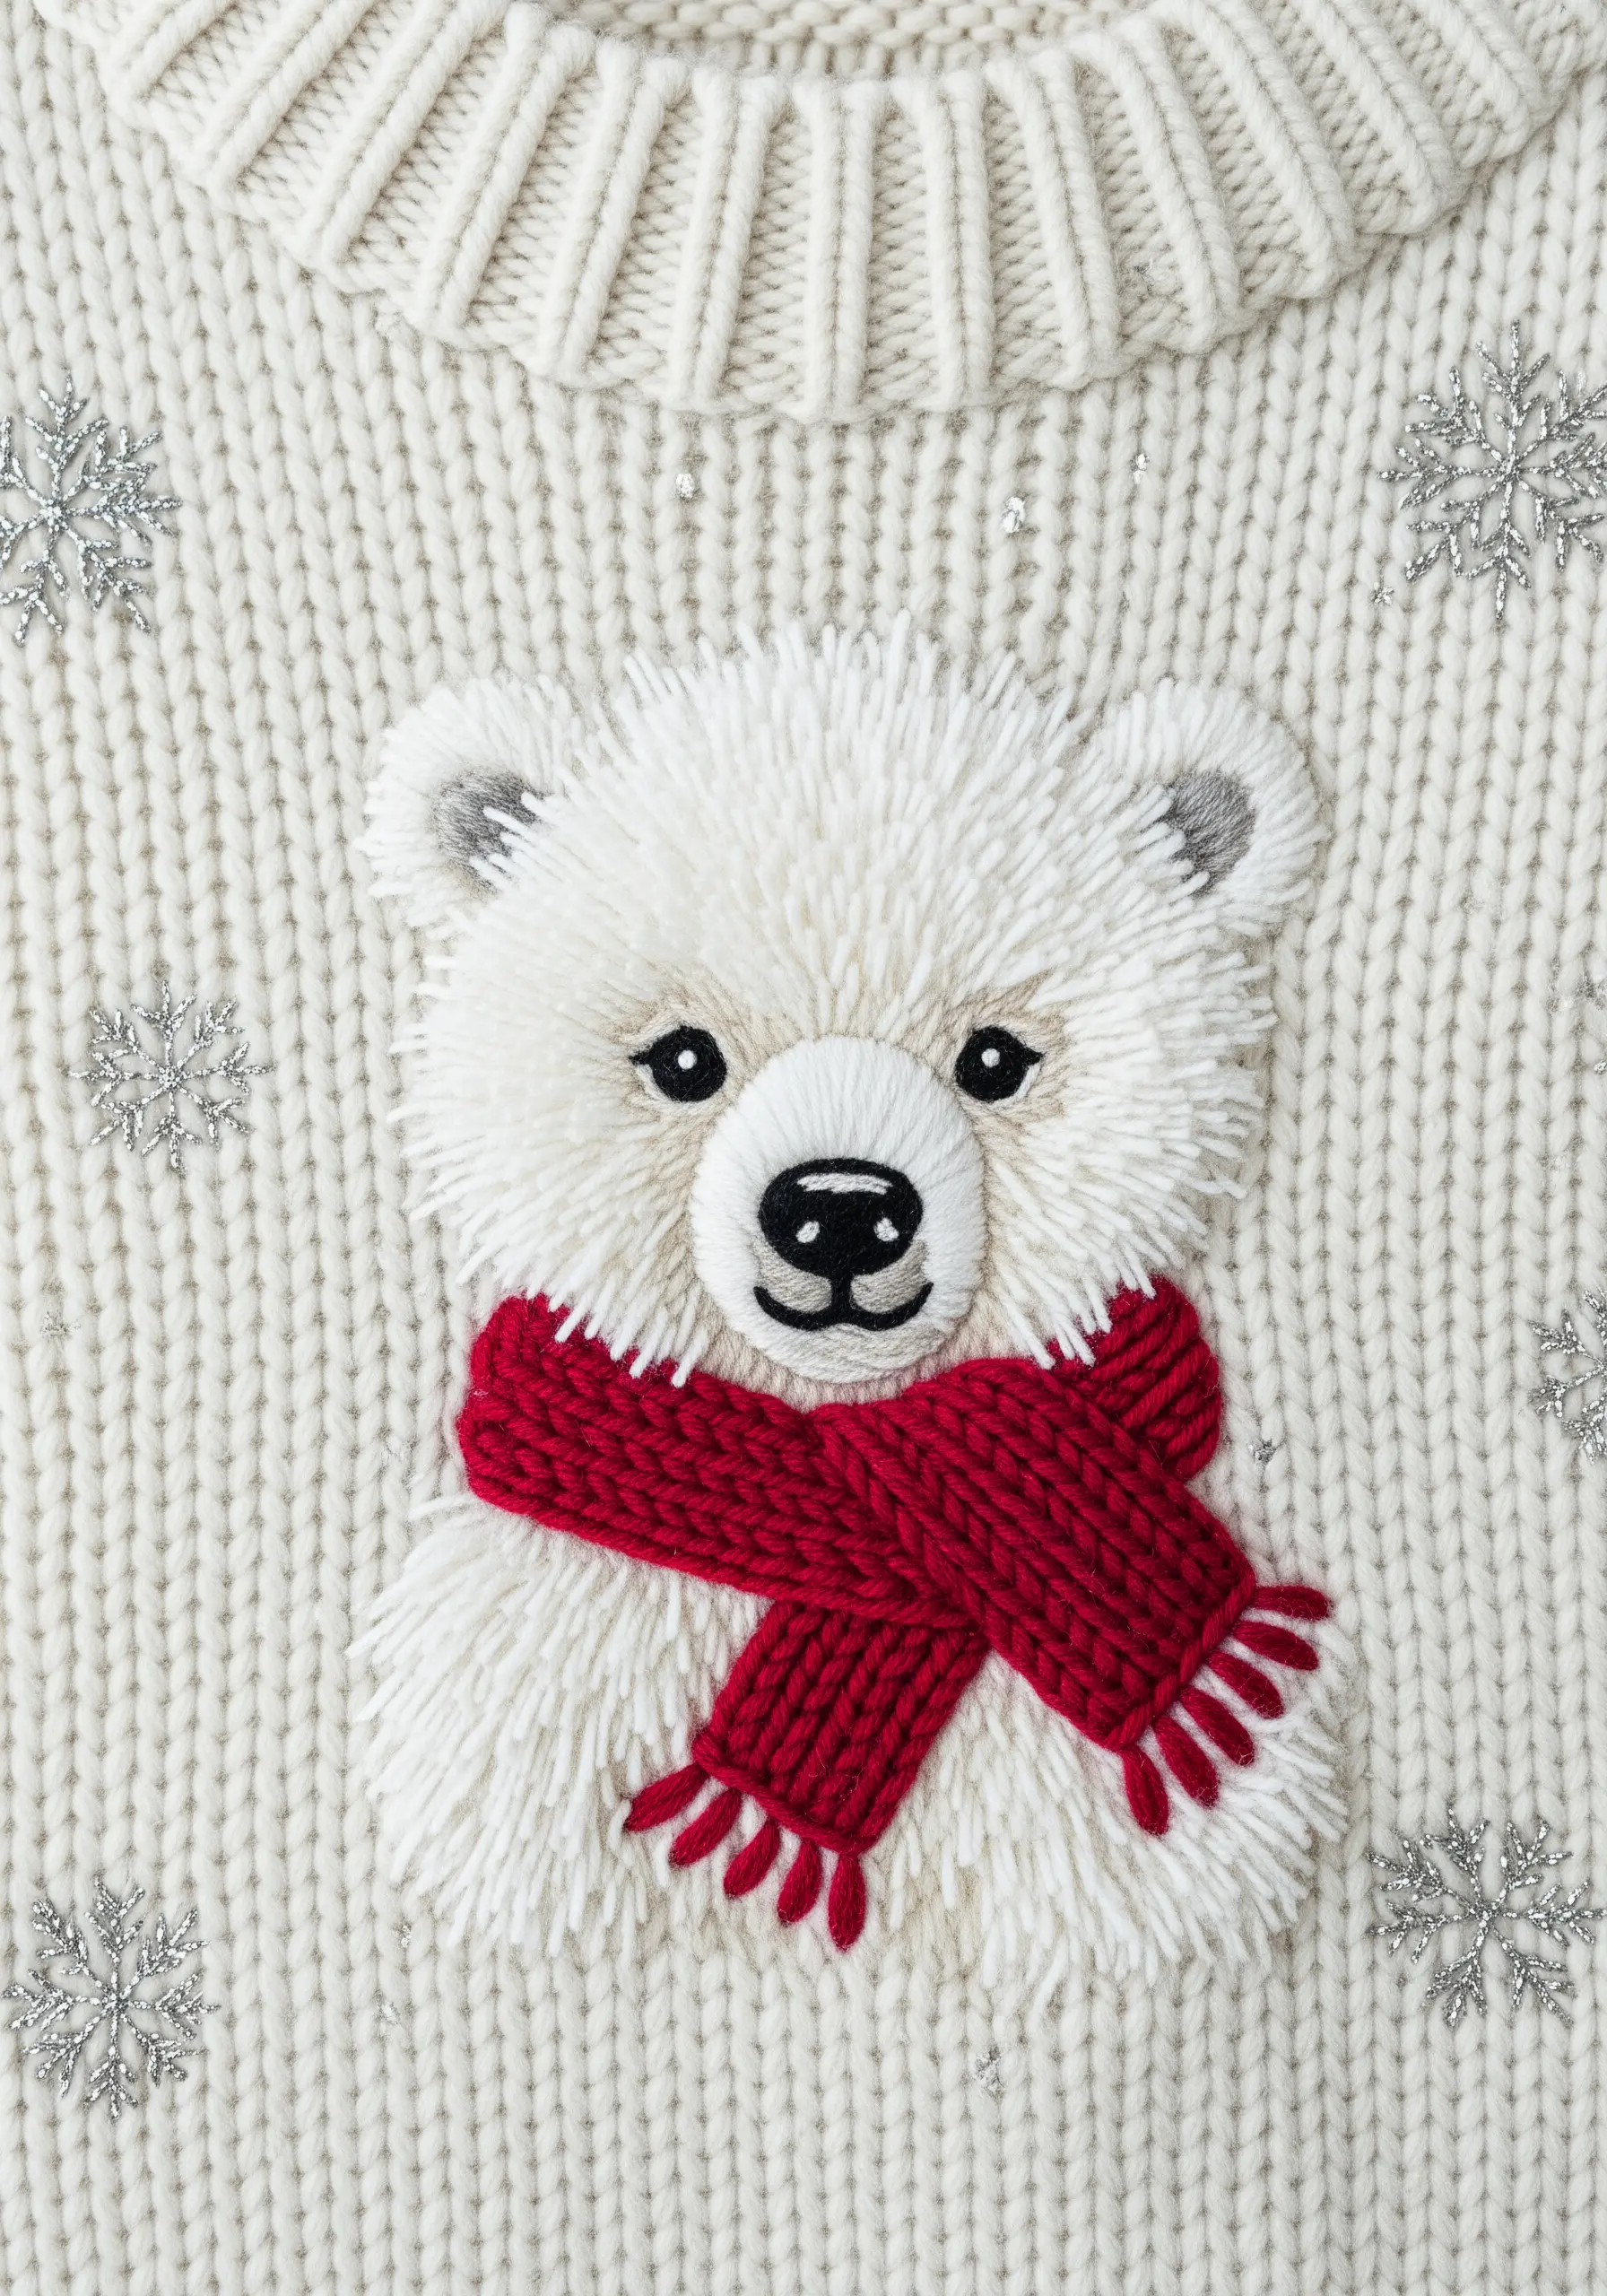
Give your polar bear a touchable, three-dimensional fur by using the turkey stitch.
Work rows of this looped stitch across the bear’s body, then carefully trim the loops to your desired length to create a soft, dense pile.
For the scarf, switch to a tightly woven satin stitch or even a basketweave stitch using a thicker wool thread to create a textural contrast that makes the fur look even fluffier.
Integrate silver metallic thread for the snowflakes using simple straight stitches; this adds a subtle glint that catches the light without overpowering the central motif.
2. Define Clean Edges with a Split-Stitch Outline
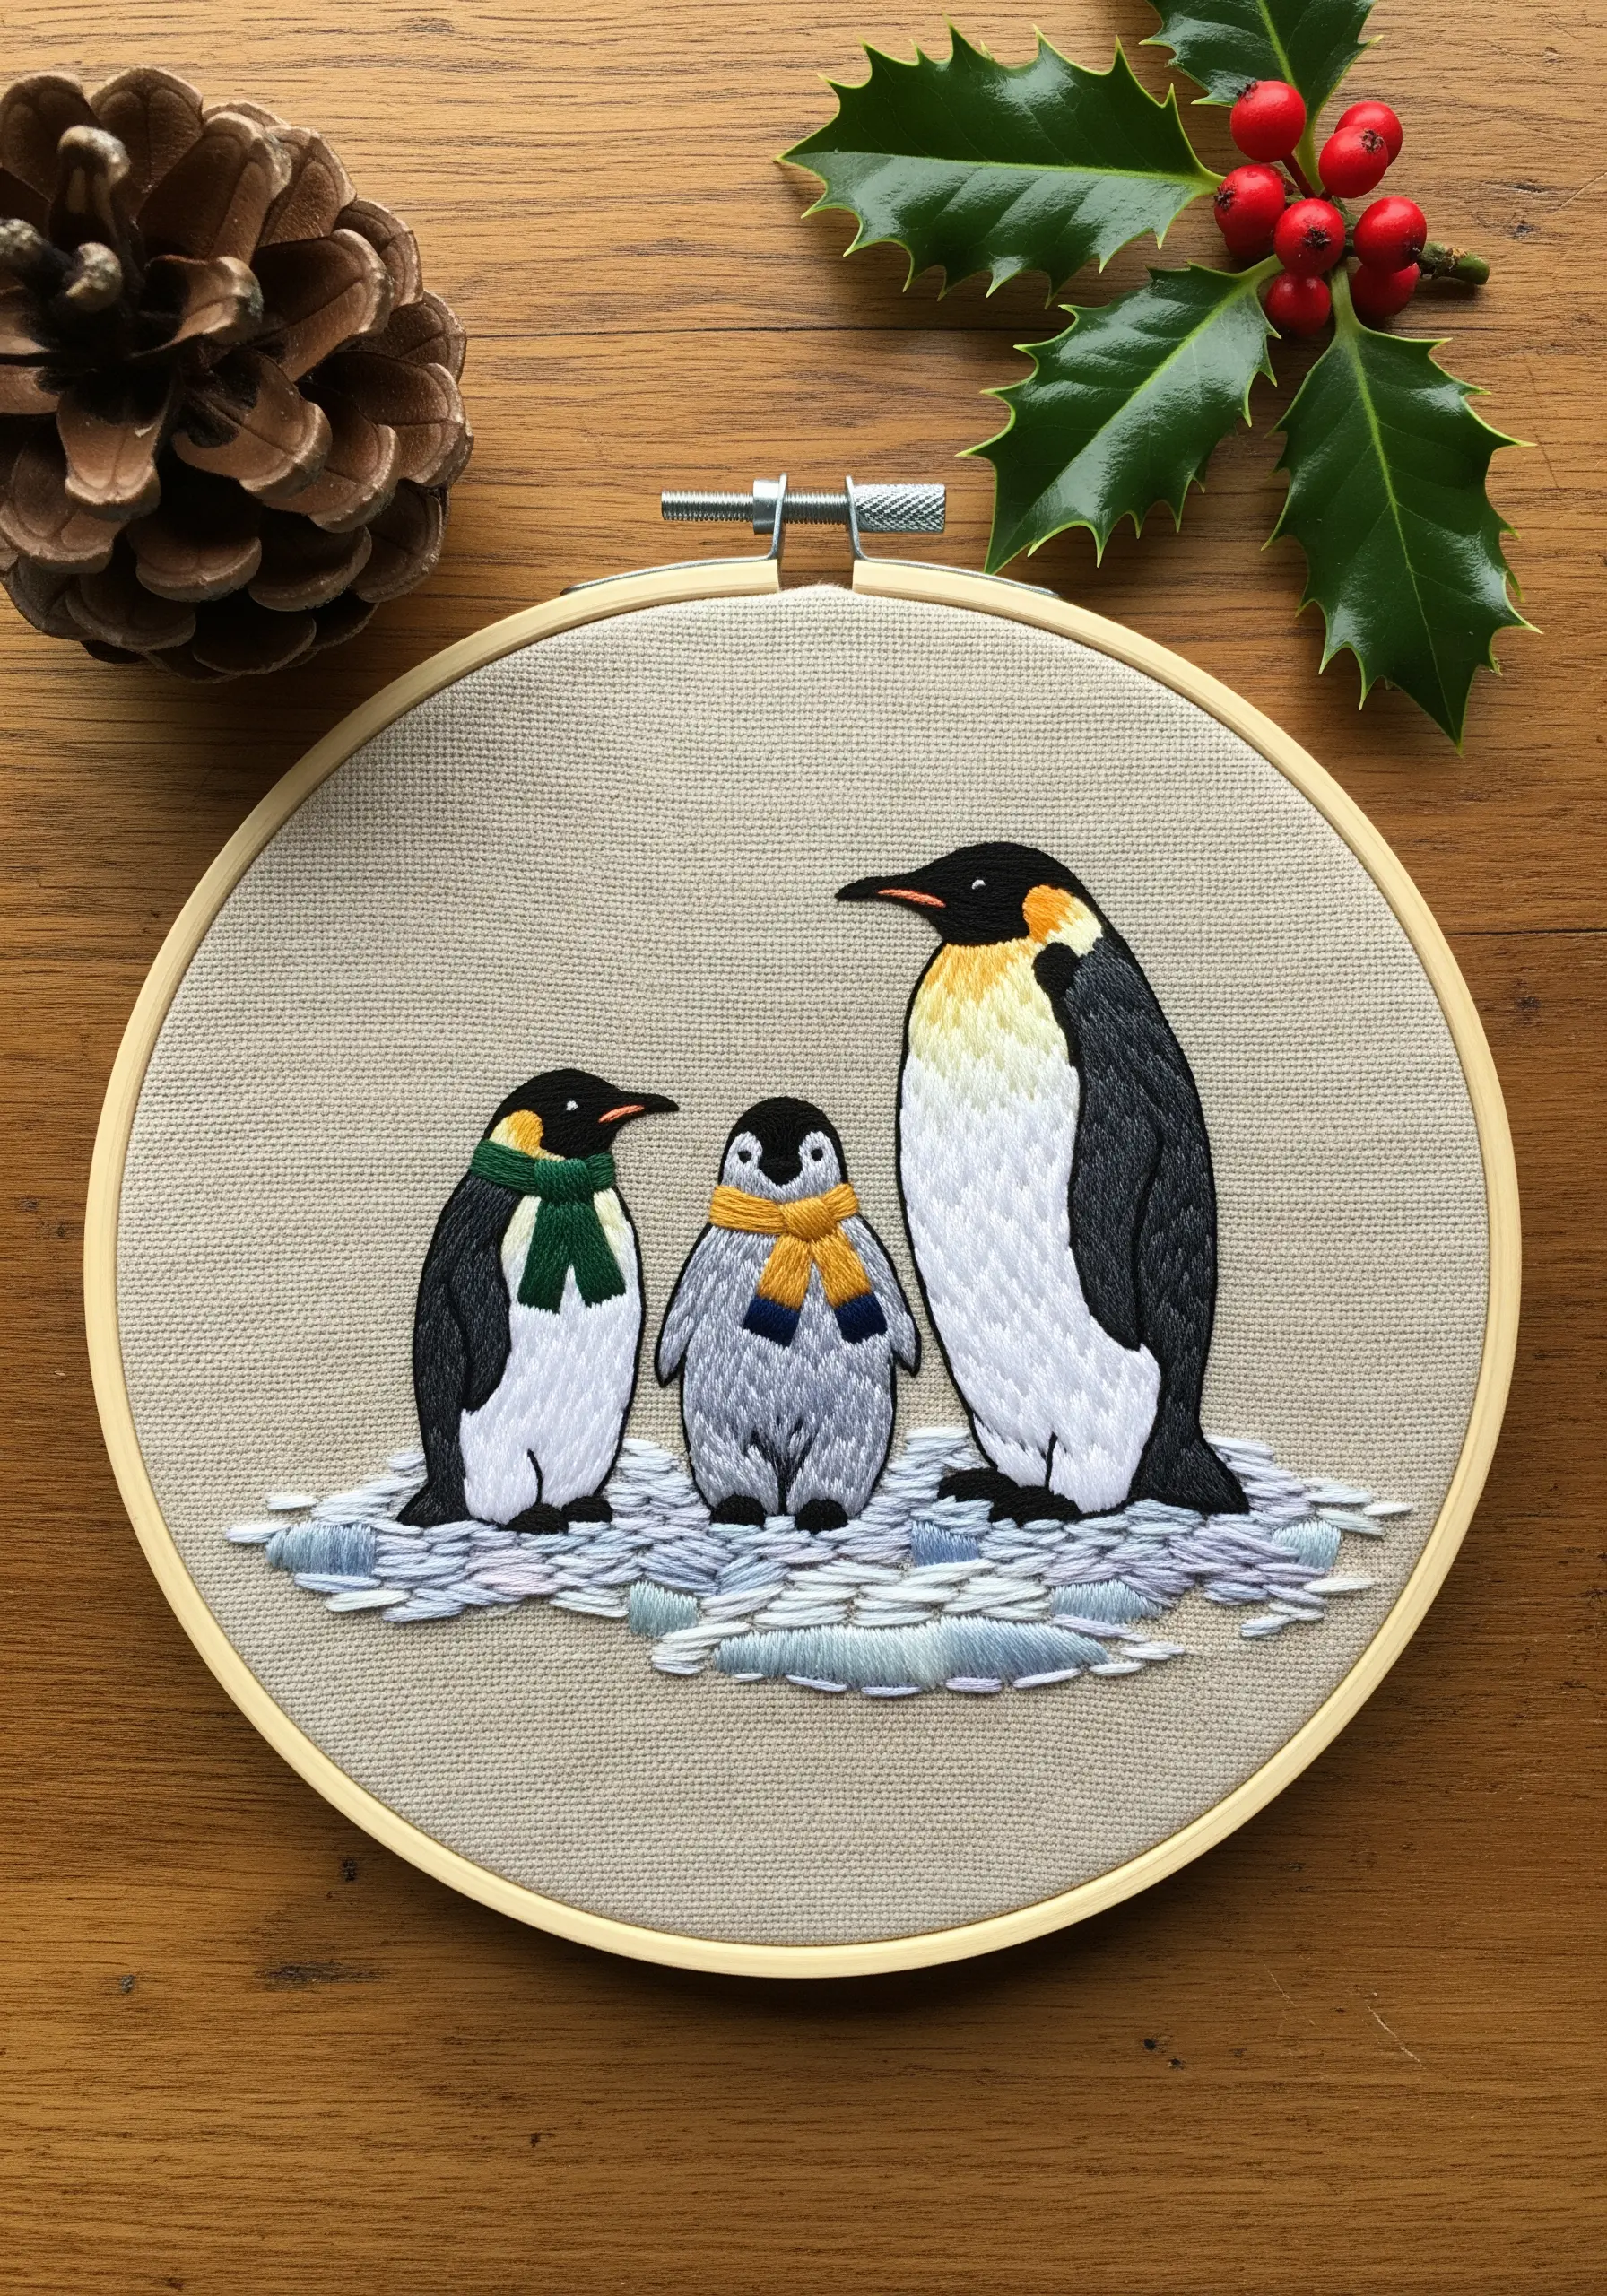
To achieve the crisp, clean look of these penguins, first outline each color section with a precise split stitch using two strands of floss.
This simple step creates a slightly raised barrier, allowing you to nestle your satin fill stitches right up against it for a perfectly contained, professional edge.
For the icy ground, use single strands of floss in variegated shades of pale blue, lavender, and white.
Lay these as long, horizontal satin stitches, slightly overlapping them to create the subtle, reflective sheen of ice.
3. Master Understated Elegance with Minimalist Outlines
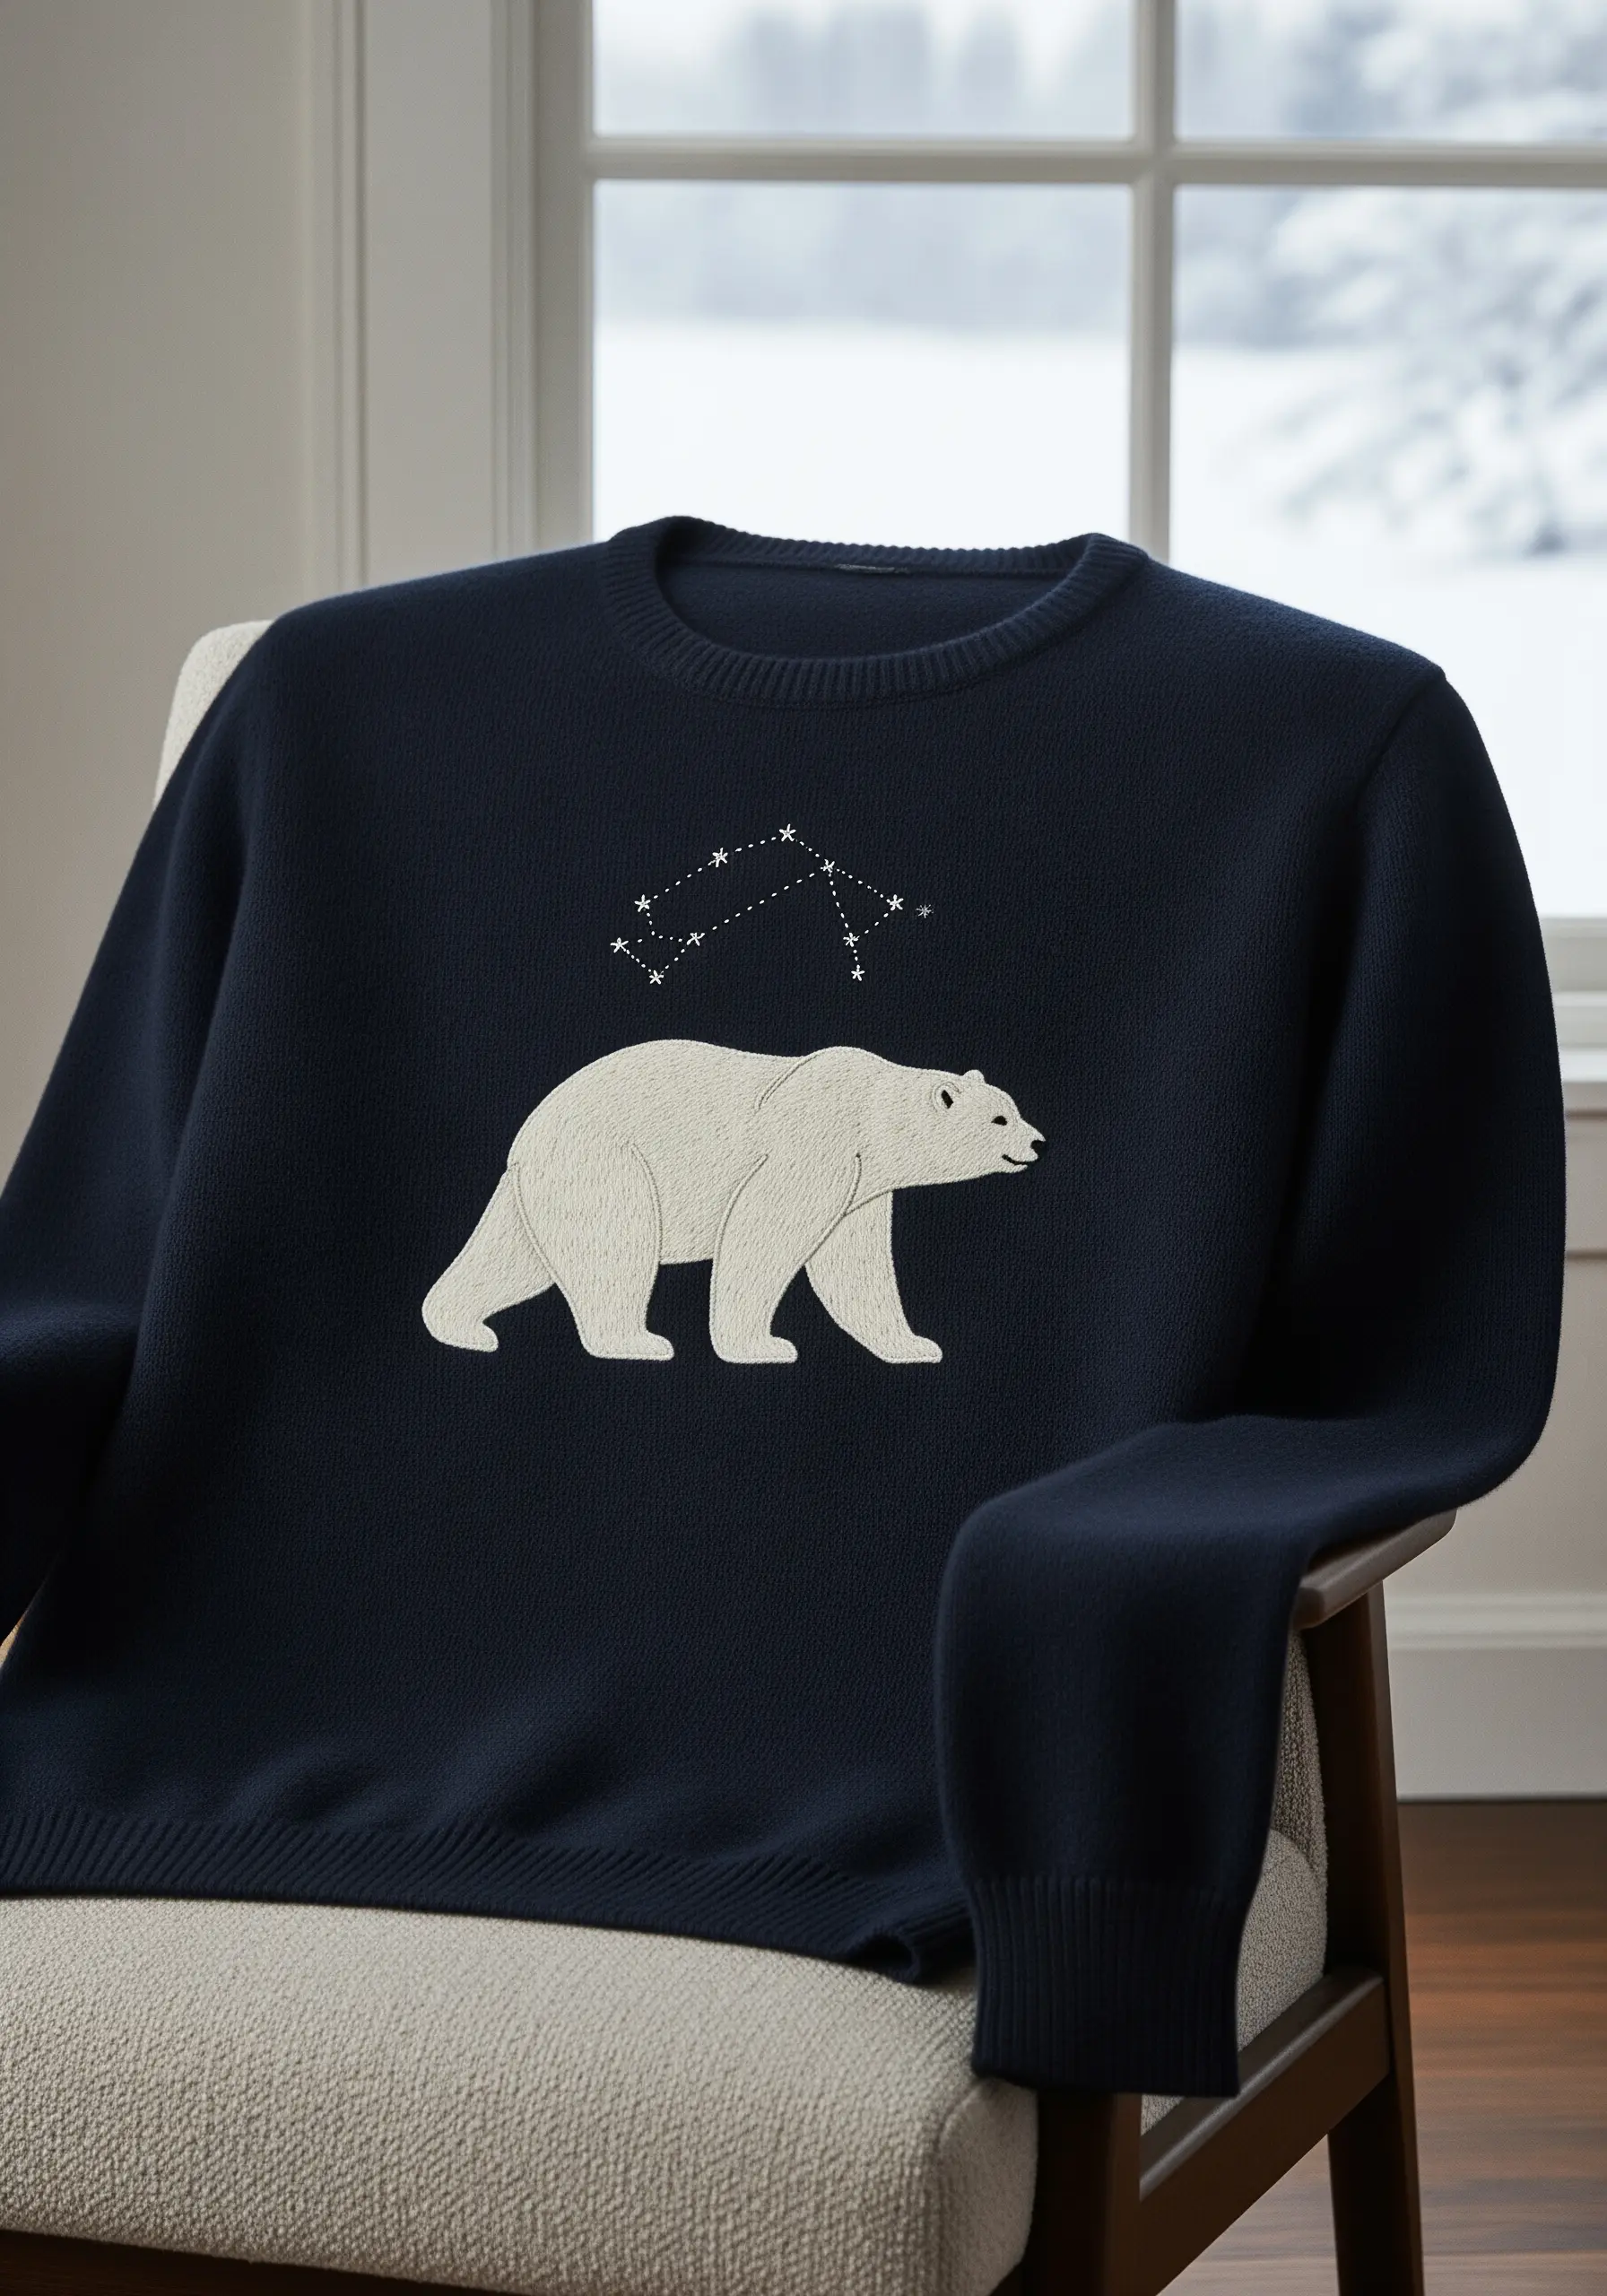
Elevate a simple sweater with a clean, graphic polar bear using only an outline stitch.
A stem stitch or a whipped backstitch will give you a smooth, rope-like line that stands out beautifully against the dark knit fabric.
For the constellation, use a single strand of a light silver or white thread to make tiny seed stitches for stars, connecting them with a delicate backstitch.
This thoughtful use of negative space creates a sophisticated, modern aesthetic that feels intentional and uncluttered.
4. Paint the Northern Lights with Vertical Stitches
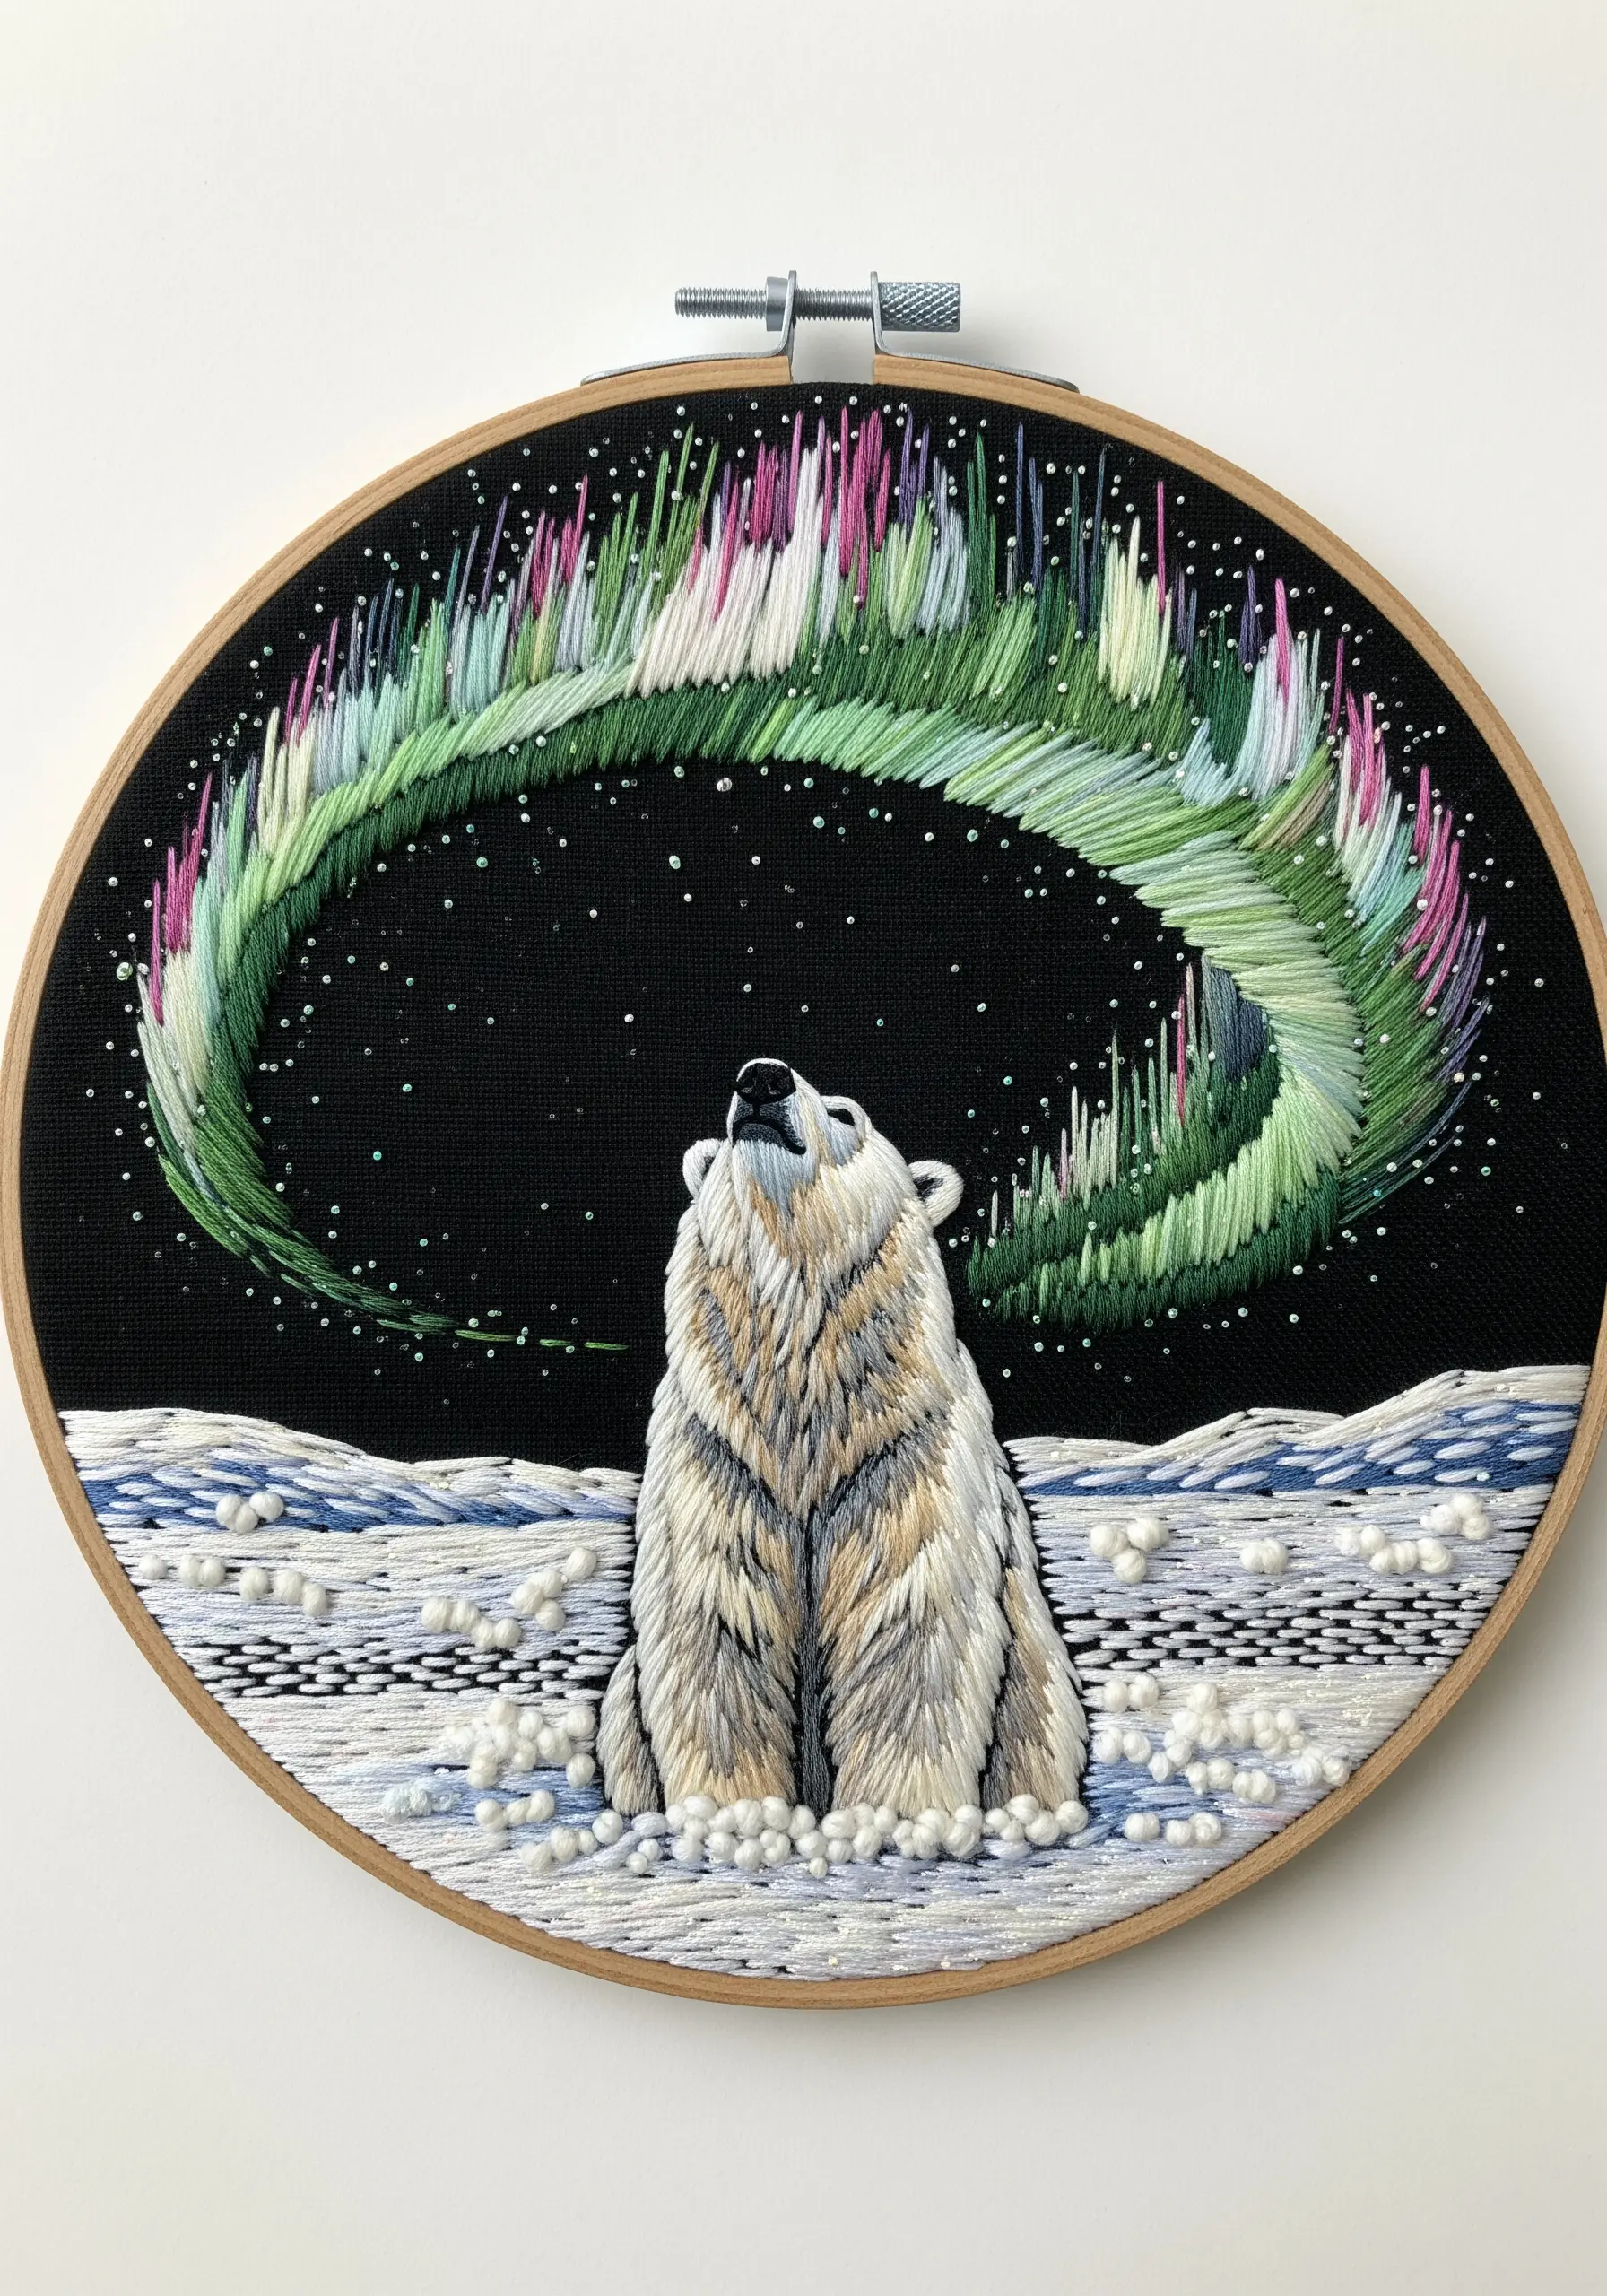
Recreate the aurora borealis by using vertical straight stitches in varying lengths and colors, like a curtain of light.
Use single strands of floss in vibrant greens, pinks, and whites, blending them at the edges to create a soft, ethereal glow against the black fabric.
For the snowy ground, use a dense cluster of French knots in different sizes and shades of white and pale grey to build dimension.
The polar bear’s fur is best achieved with long-and-short stitch, allowing you to blend cream and grey tones for a realistic, painterly effect.
5. Add a Playful Detail with Cuff Embroidery
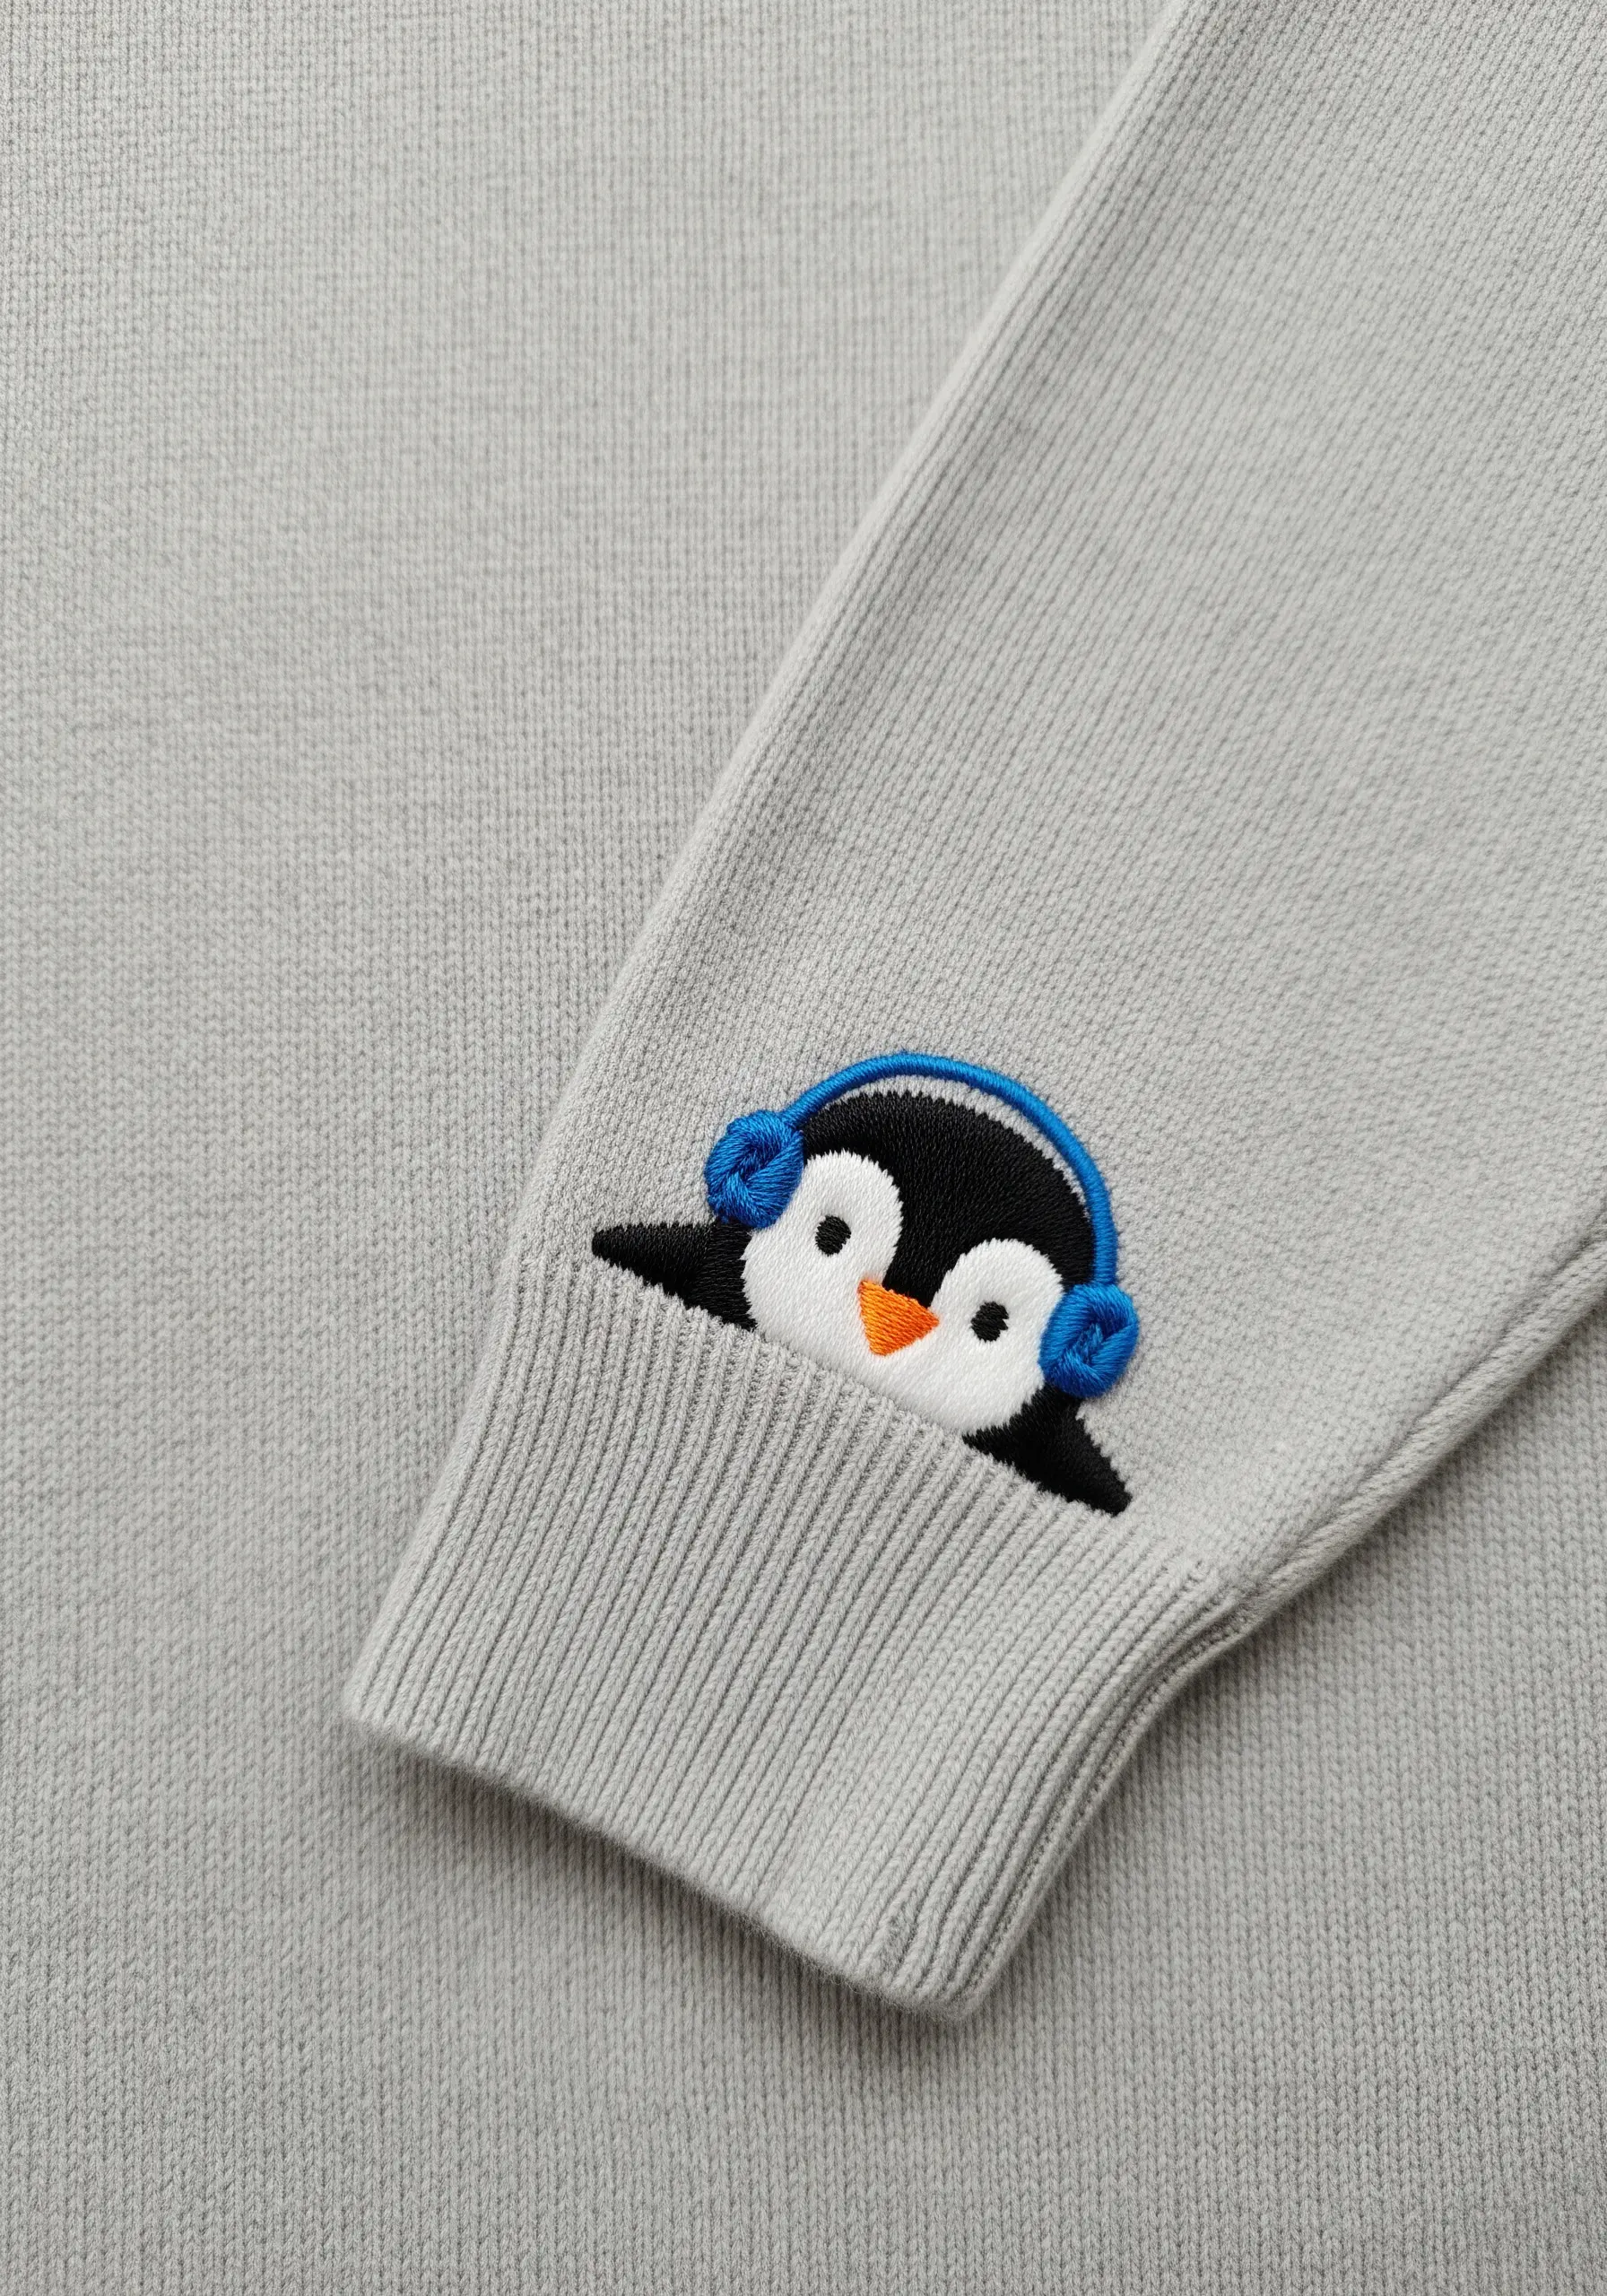
Transform a simple sweater with a tiny, unexpected motif peeking out from the cuff.
When stitching on stretchy knit fabric, always use a water-soluble or tear-away stabilizer on top to prevent the stitches from sinking into the weave and to ensure your design remains crisp.
Use a sharp needle to part the knit fibers rather than piercing them, which helps avoid snags and holes.
This subtle placement turns a basic garment into a piece with personal, charming detail.
6. Frame Your Motif with a Botanical Wreath
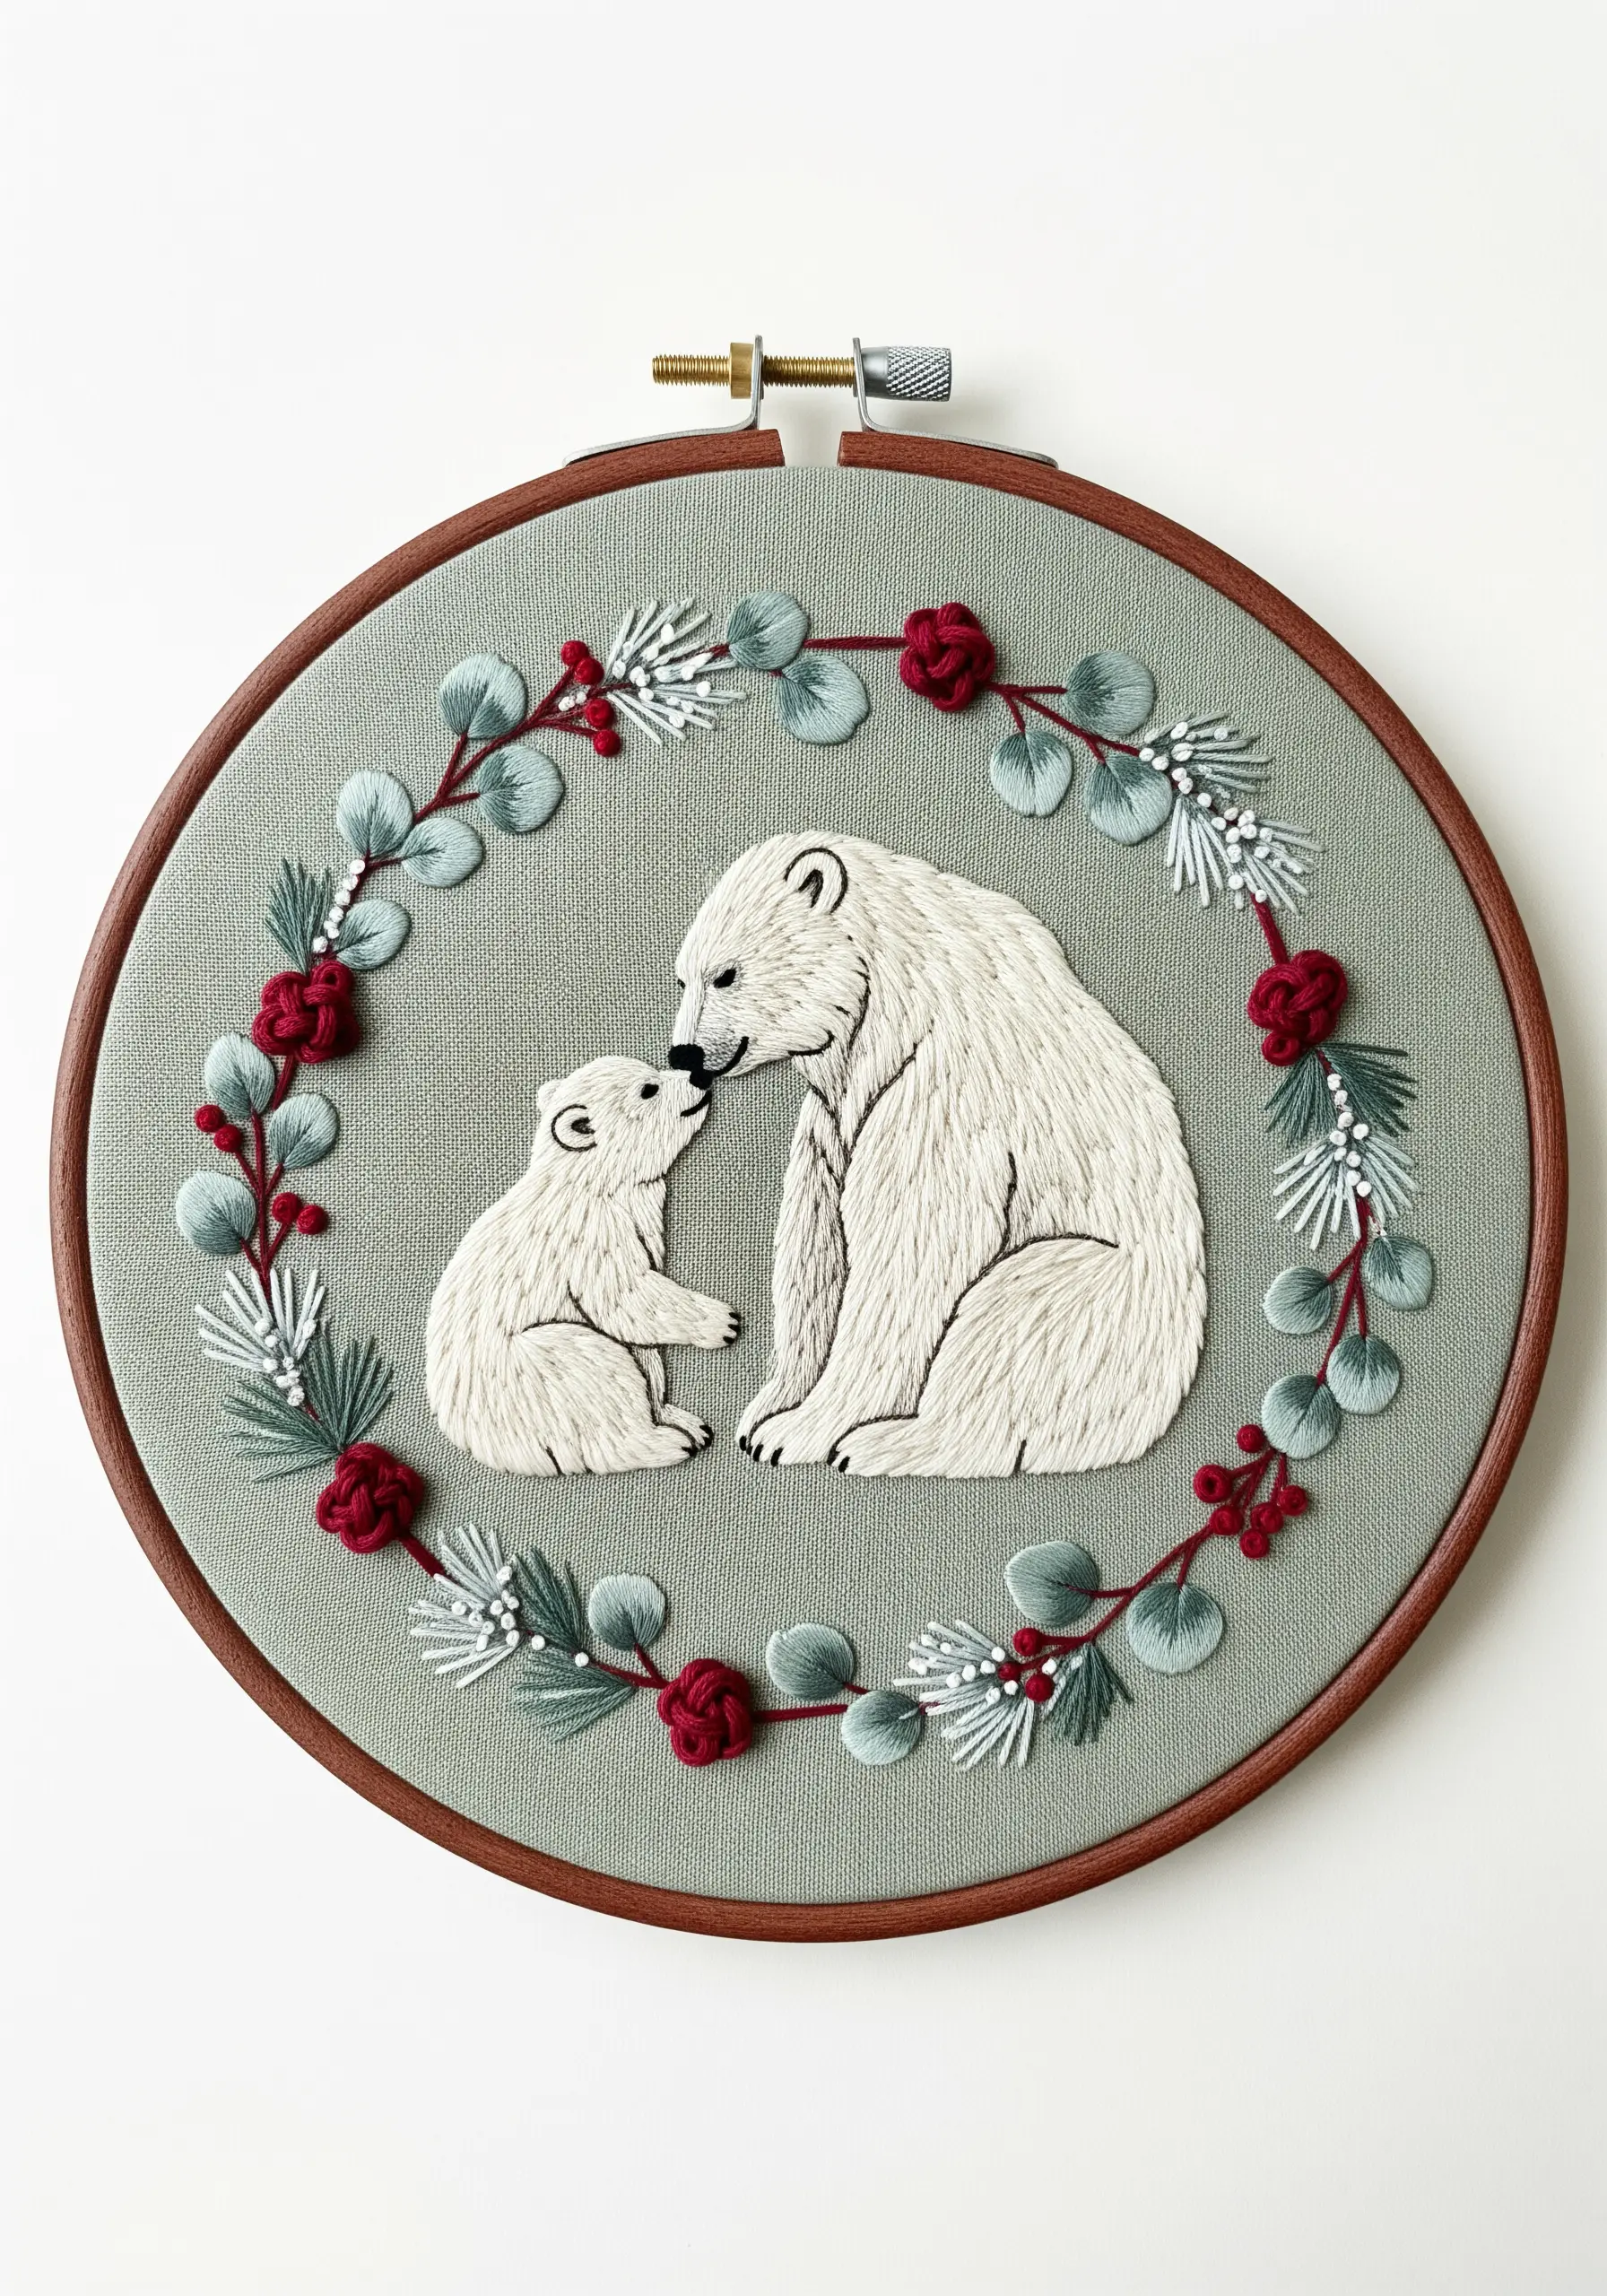
Create a beautifully balanced composition by encircling your polar bears with a delicate botanical wreath.
Use detached chain stitches (lazy daisies) for the eucalyptus leaves and small, tight French knots for the red berries to add varied texture.
The pine needles can be rendered with simple straight stitches fanning out from a central stem.
This technique turns a simple animal portrait into a complete piece of wildflower hoop art, perfect for gifting or holiday decor.
7. Achieve a Modern Look with Geometric Facets
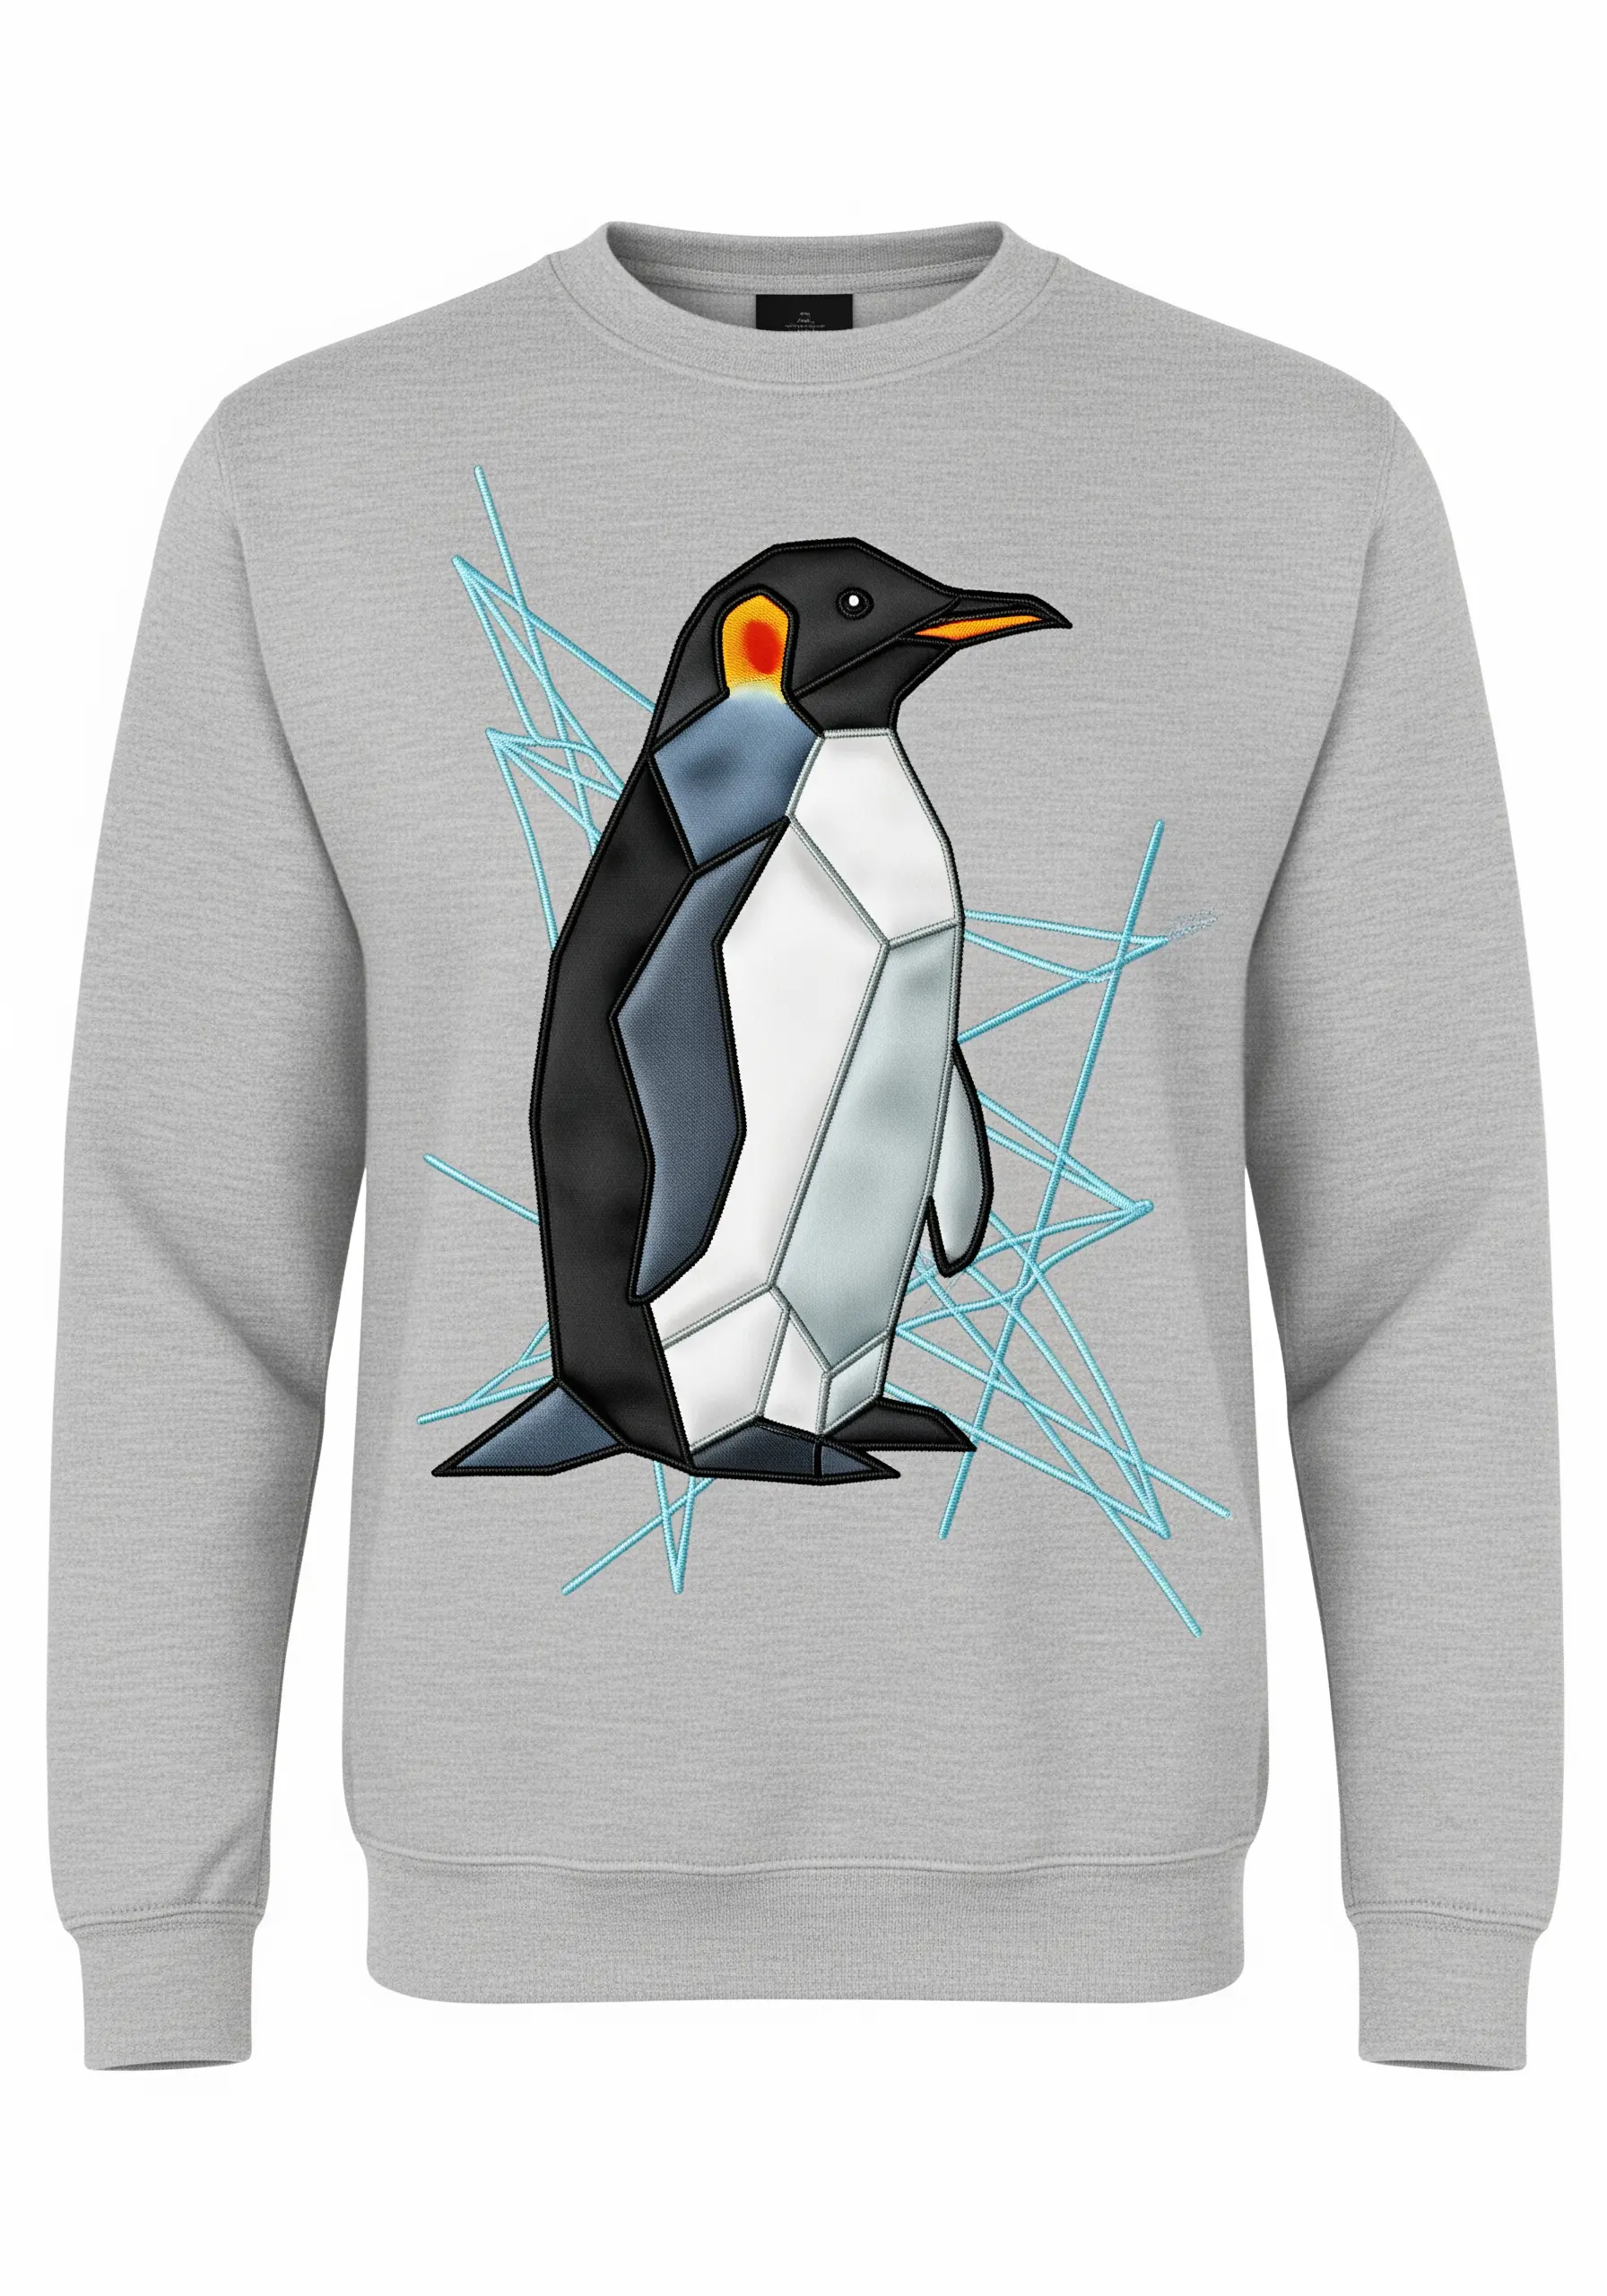
Give a traditional penguin motif a contemporary edge by rendering it in a geometric, faceted style.
Outline each distinct plane with a sharp backstitch in black to create strong definition.
Fill each shape with satin stitch, slightly altering the direction of your stitches for each facet.
This causes the light to reflect differently off each section, creating a subtle illusion of three-dimensional form and depth.
8. Capture Moonlight on Water with Variegated Blues
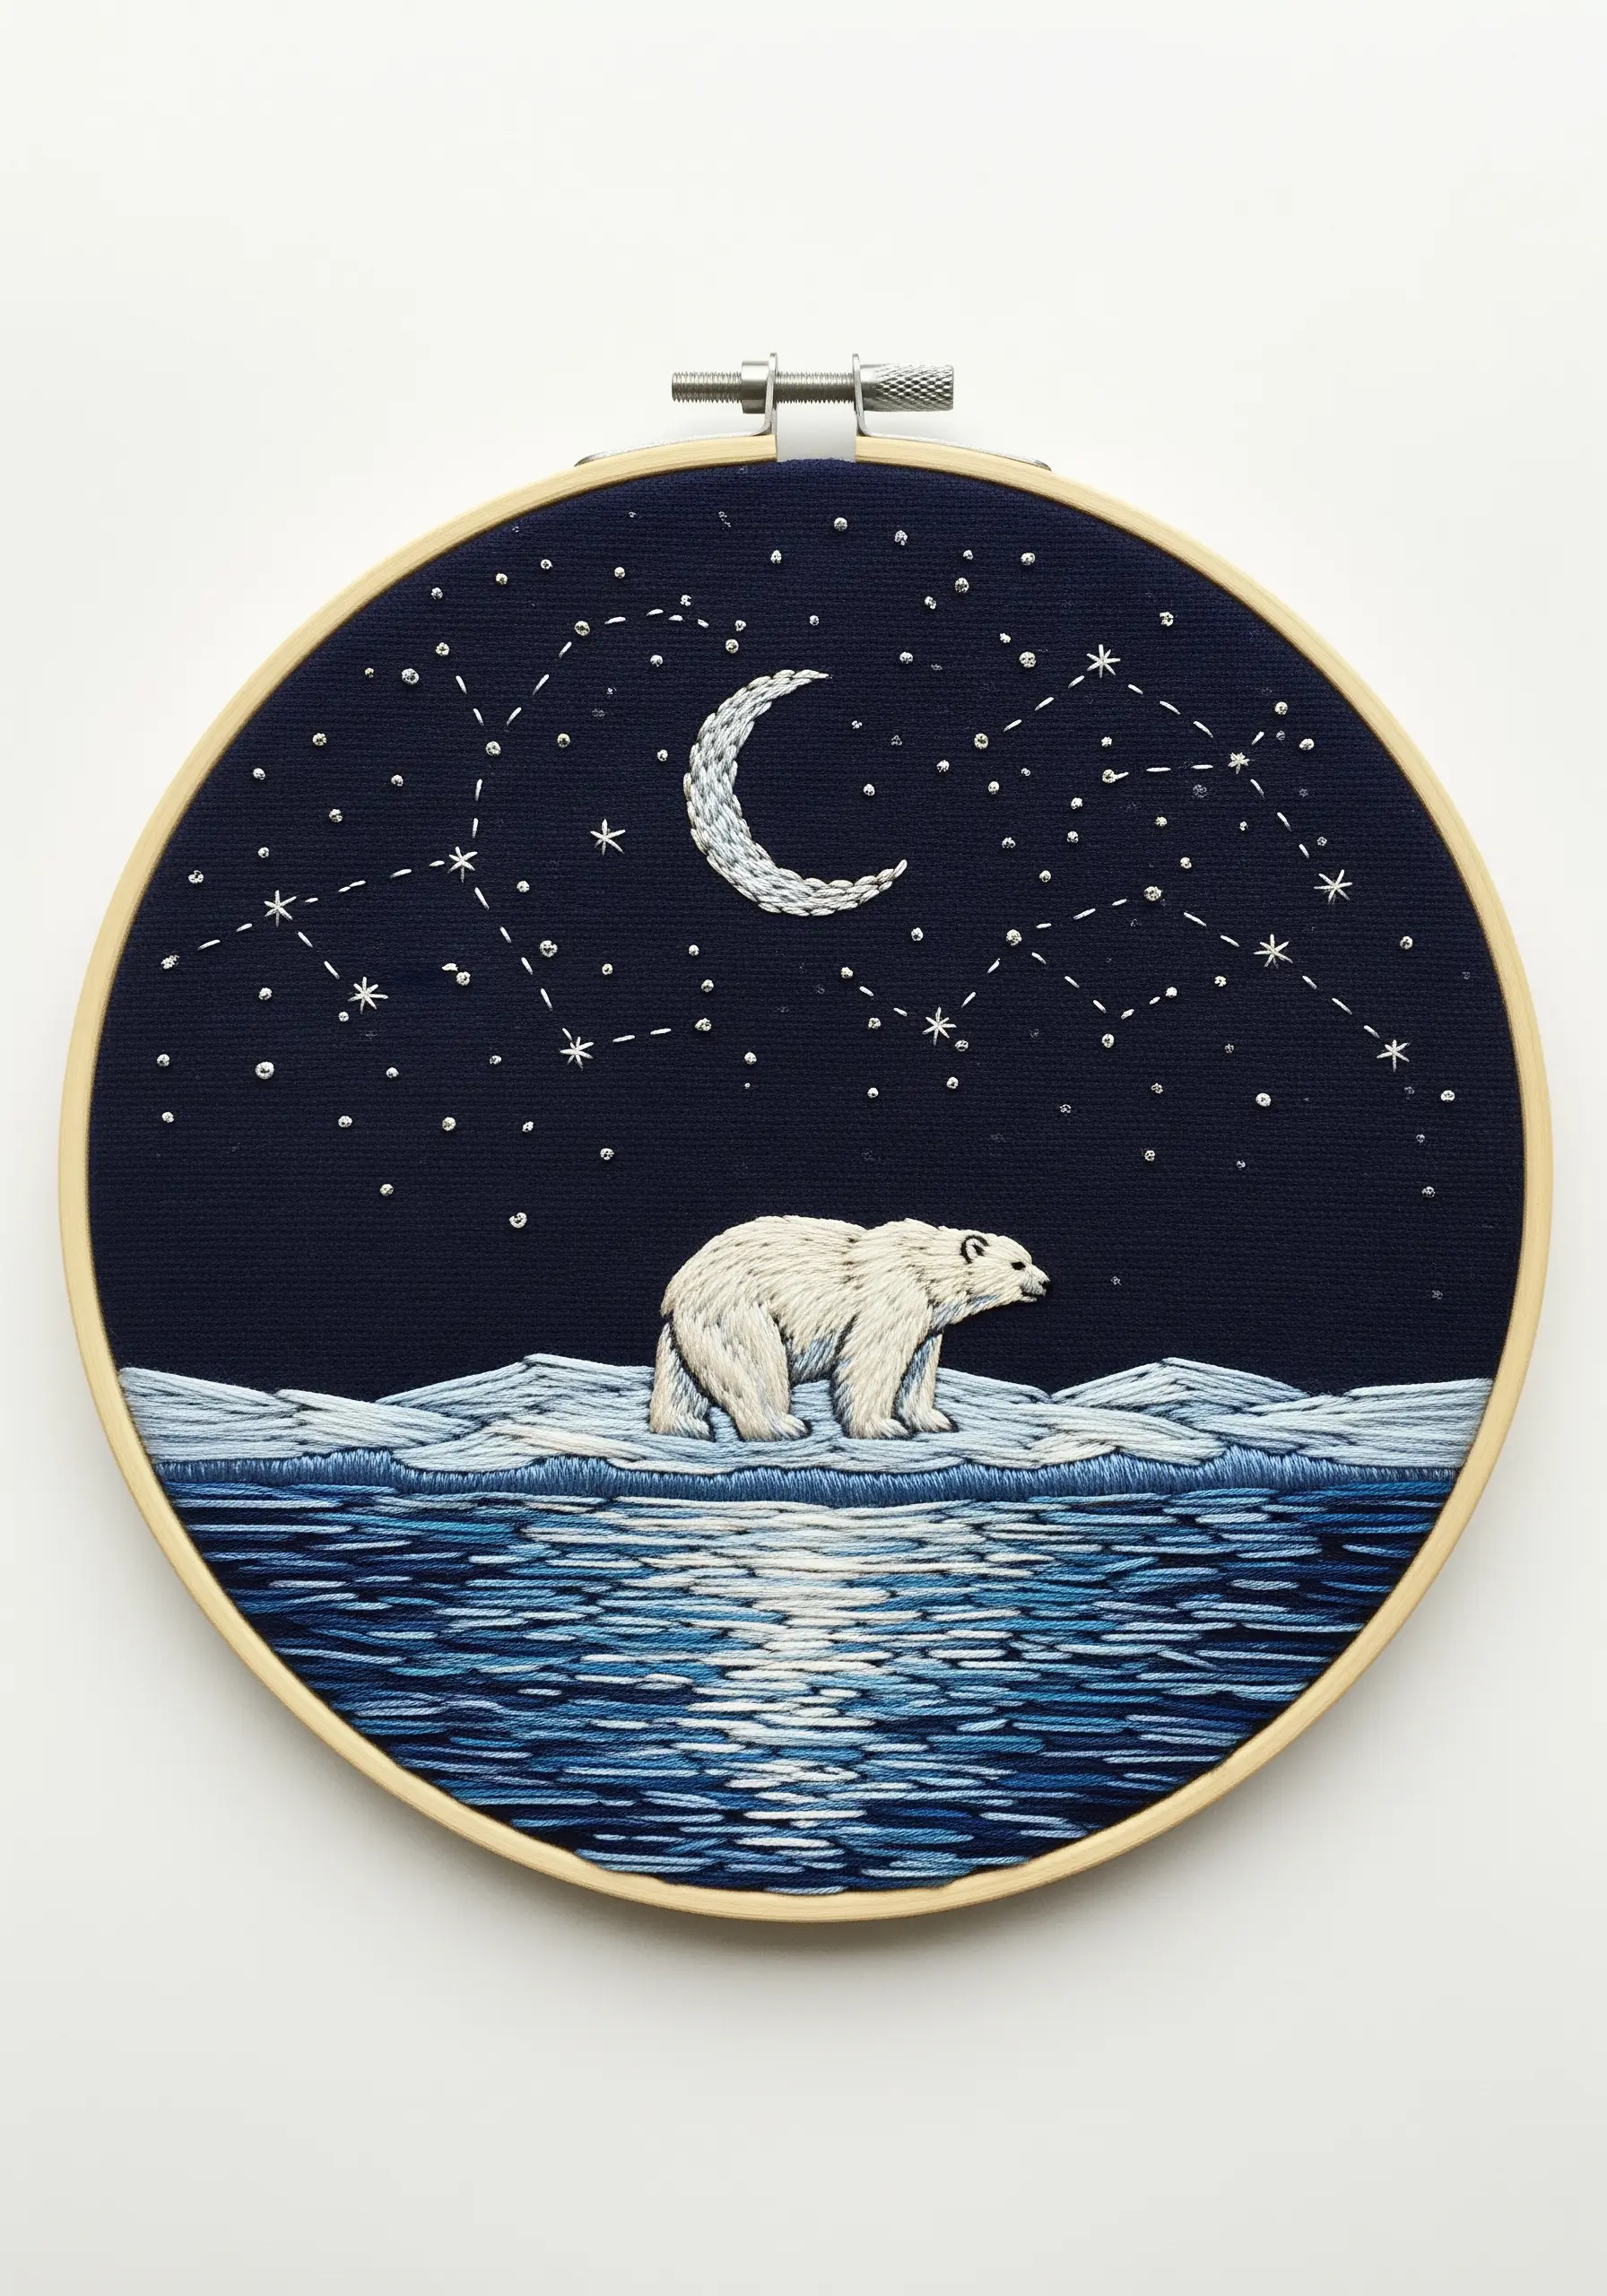
To create the illusion of shimmering water, fill the area with long, horizontal satin stitches using several shades of blue floss, from navy to cobalt.
Interrupt these stitches with single, sporadic strands of white or light grey thread to represent the reflection of moonlight.
For the ice floes, use a dense, padded satin stitch in white to give them a raised, solid appearance that contrasts with the fluid water.
This play on light and texture brings the entire nocturnal scene to life.
9. Build Up Snowy Texture with French Knots
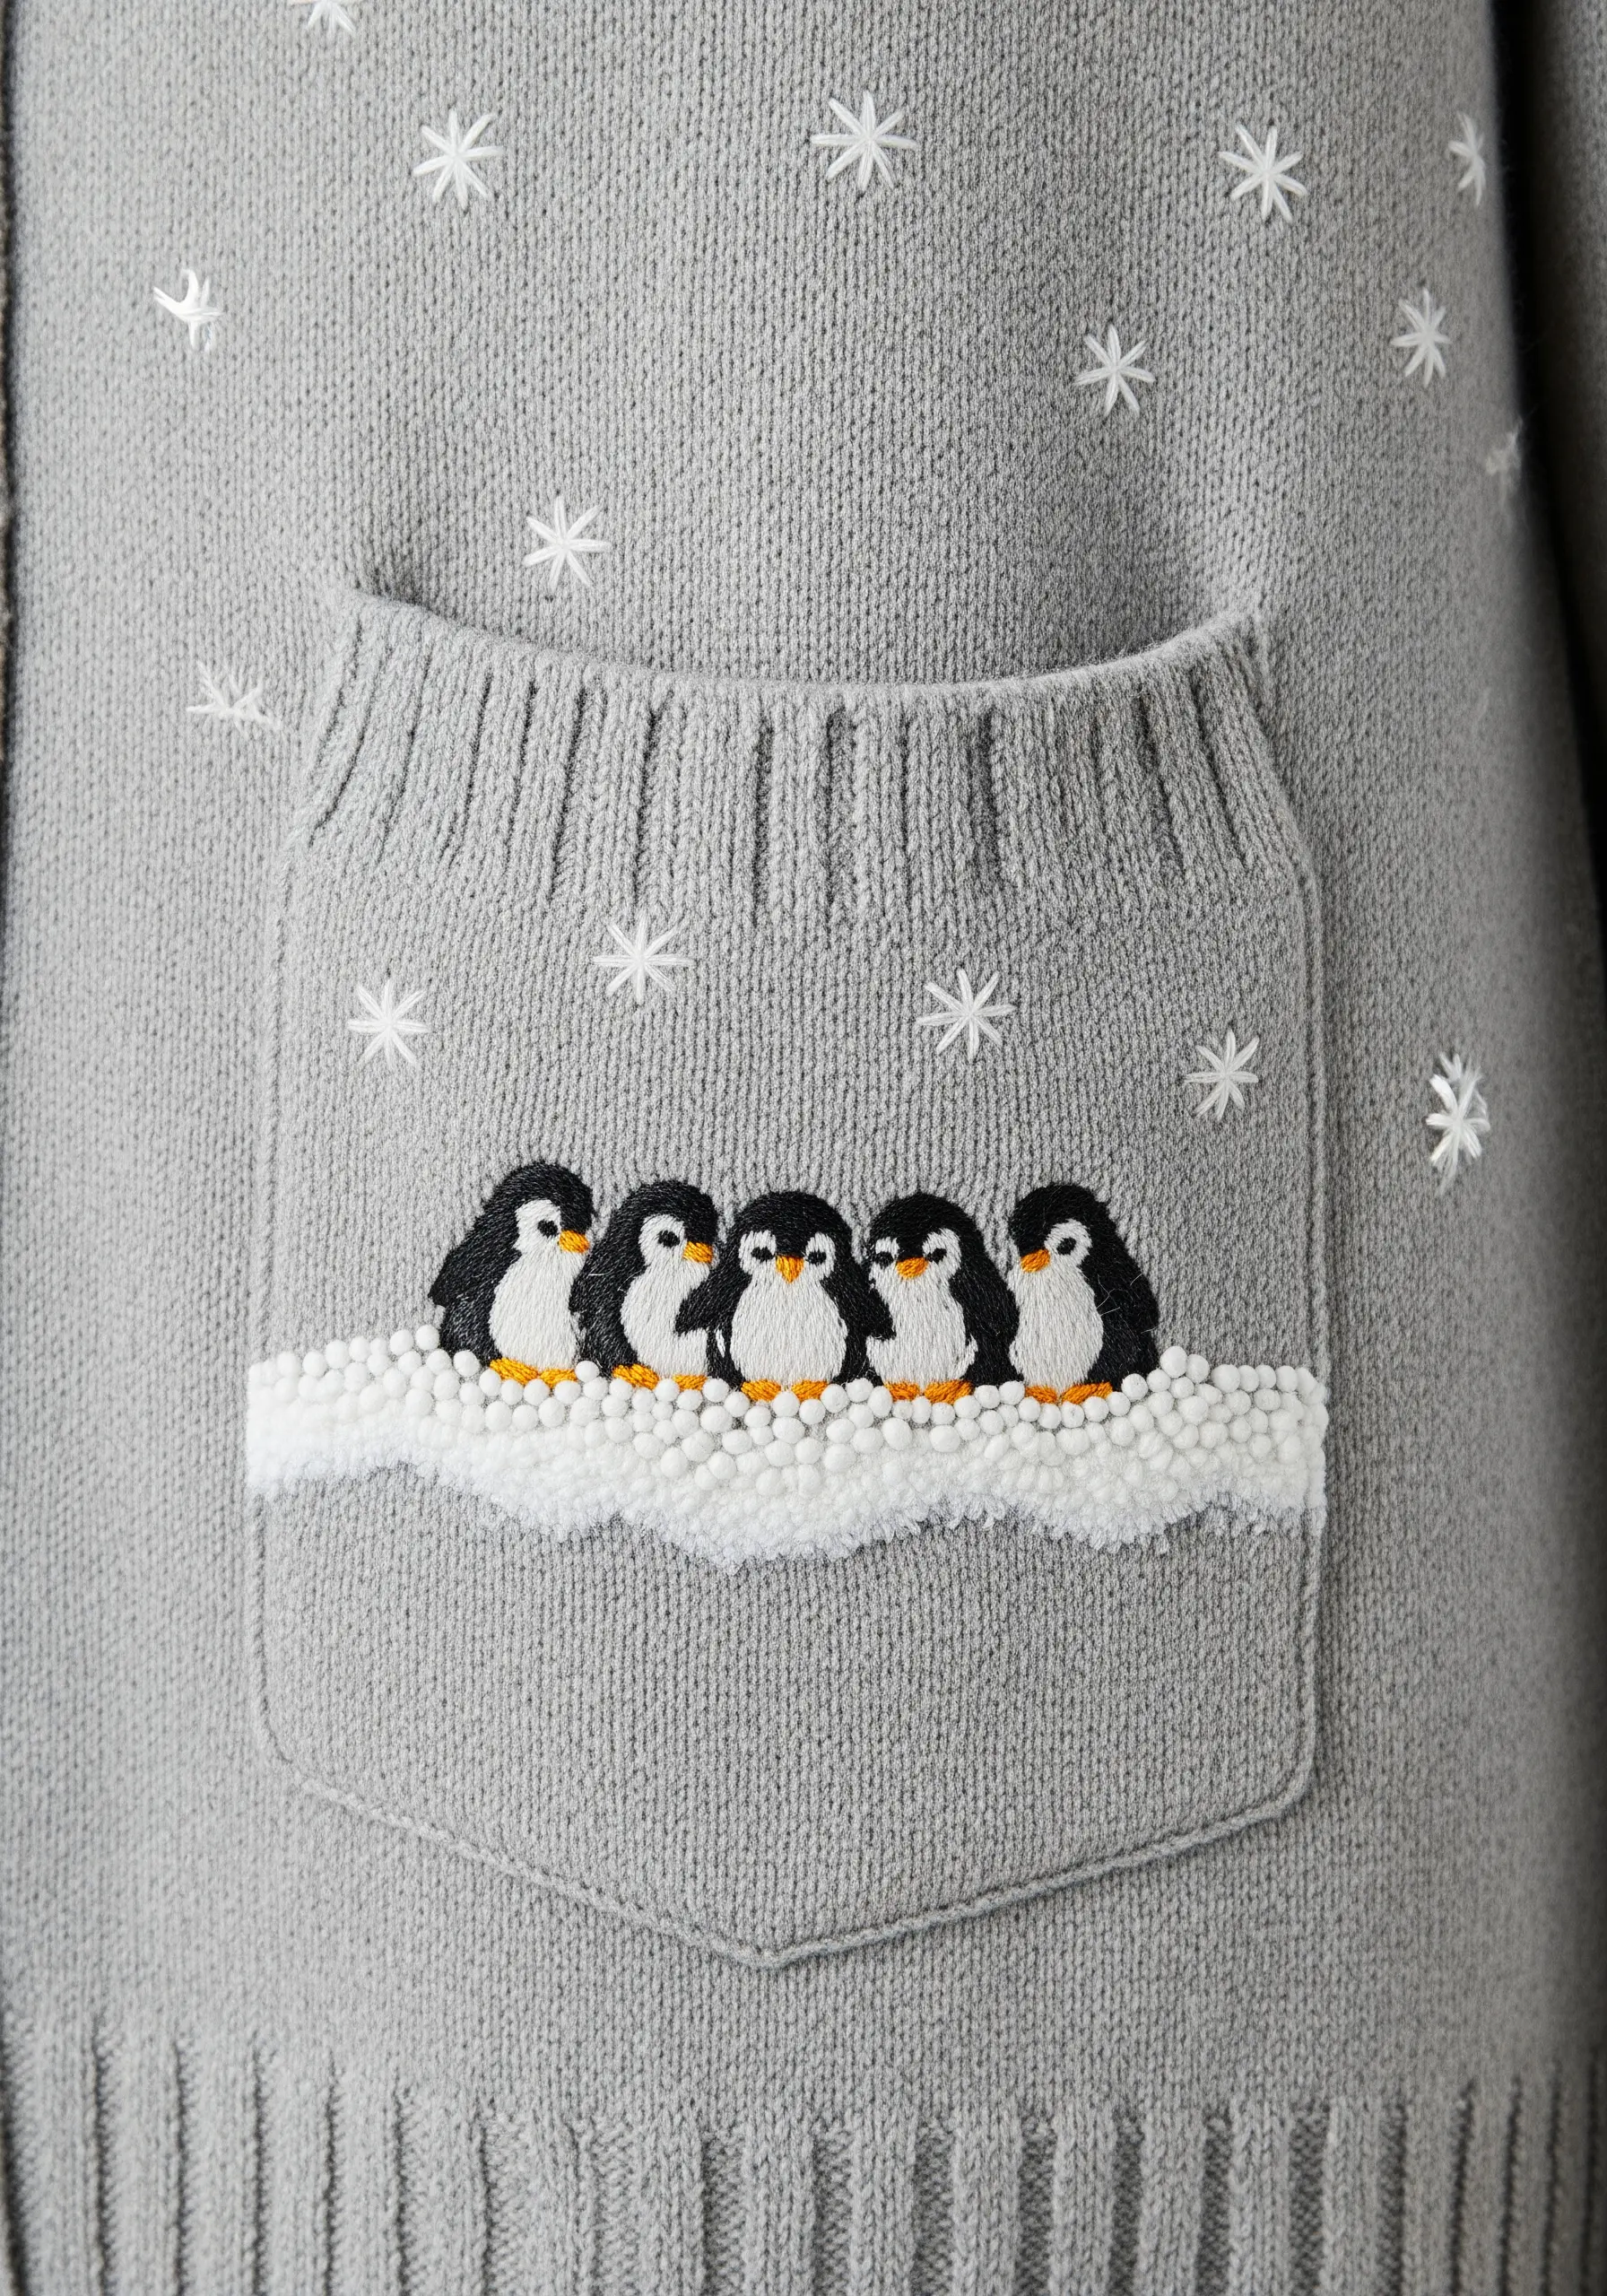
Create a bank of fluffy, dimensional snow for your penguins by using a dense application of French knots.
For an even more textured and quicker result, use a fuzzy or chenille-style white yarn instead of standard floss.
Cluster the knots tightly together, varying the size slightly by changing how many times you wrap the thread around the needle.
This technique provides a wonderful tactile contrast to the flat, smooth stitches of the penguins and the knit pocket.
10. Add Softness with Velvet Floss and a Pom-Pom
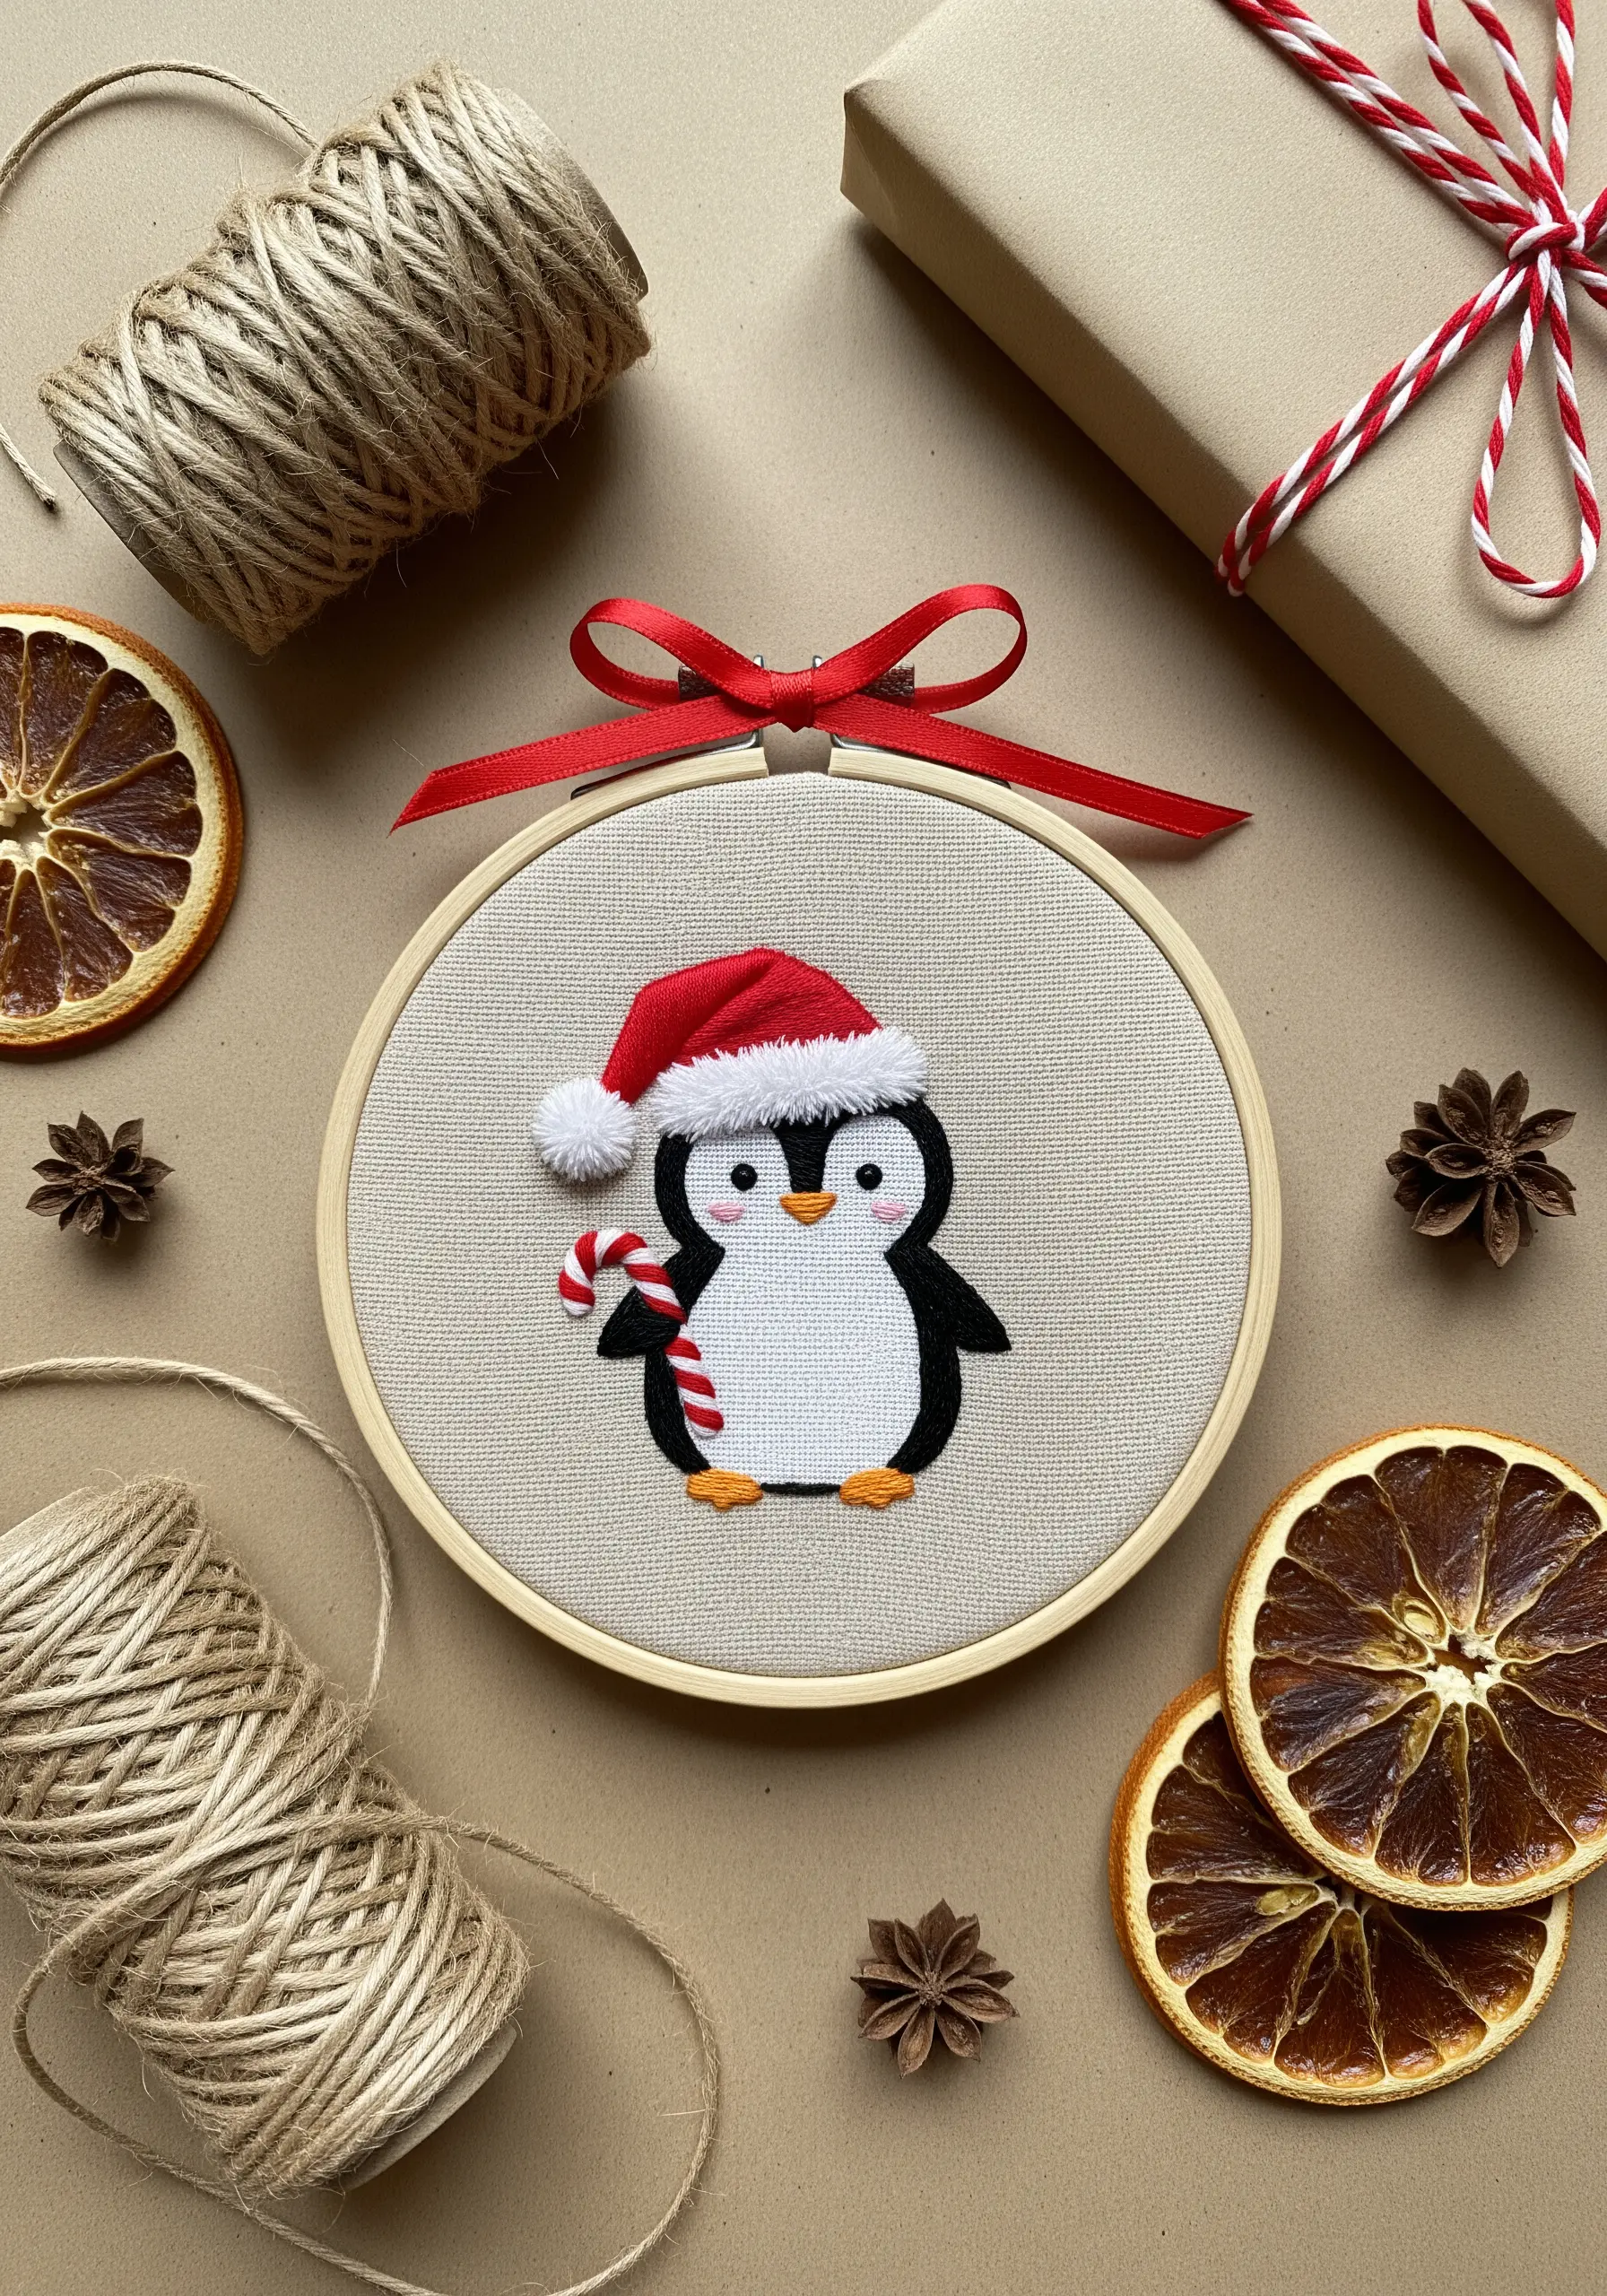
Elevate a classic Santa hat by stitching the white trim with a specialty thread like velvet floss or a fine chenille.
This instantly adds a soft, fuzzy texture that contrasts beautifully with the traditional red satin stitch of the hat itself.
For the pom-pom, create a small tuft using the turkey stitch and trim it into a sphere, or simply sew on a tiny craft pom-pom for a playful, 3D effect.
These small material choices make your holiday design feel extra special.
11. Blend Colors for a Realistic Thread-Painted Portrait
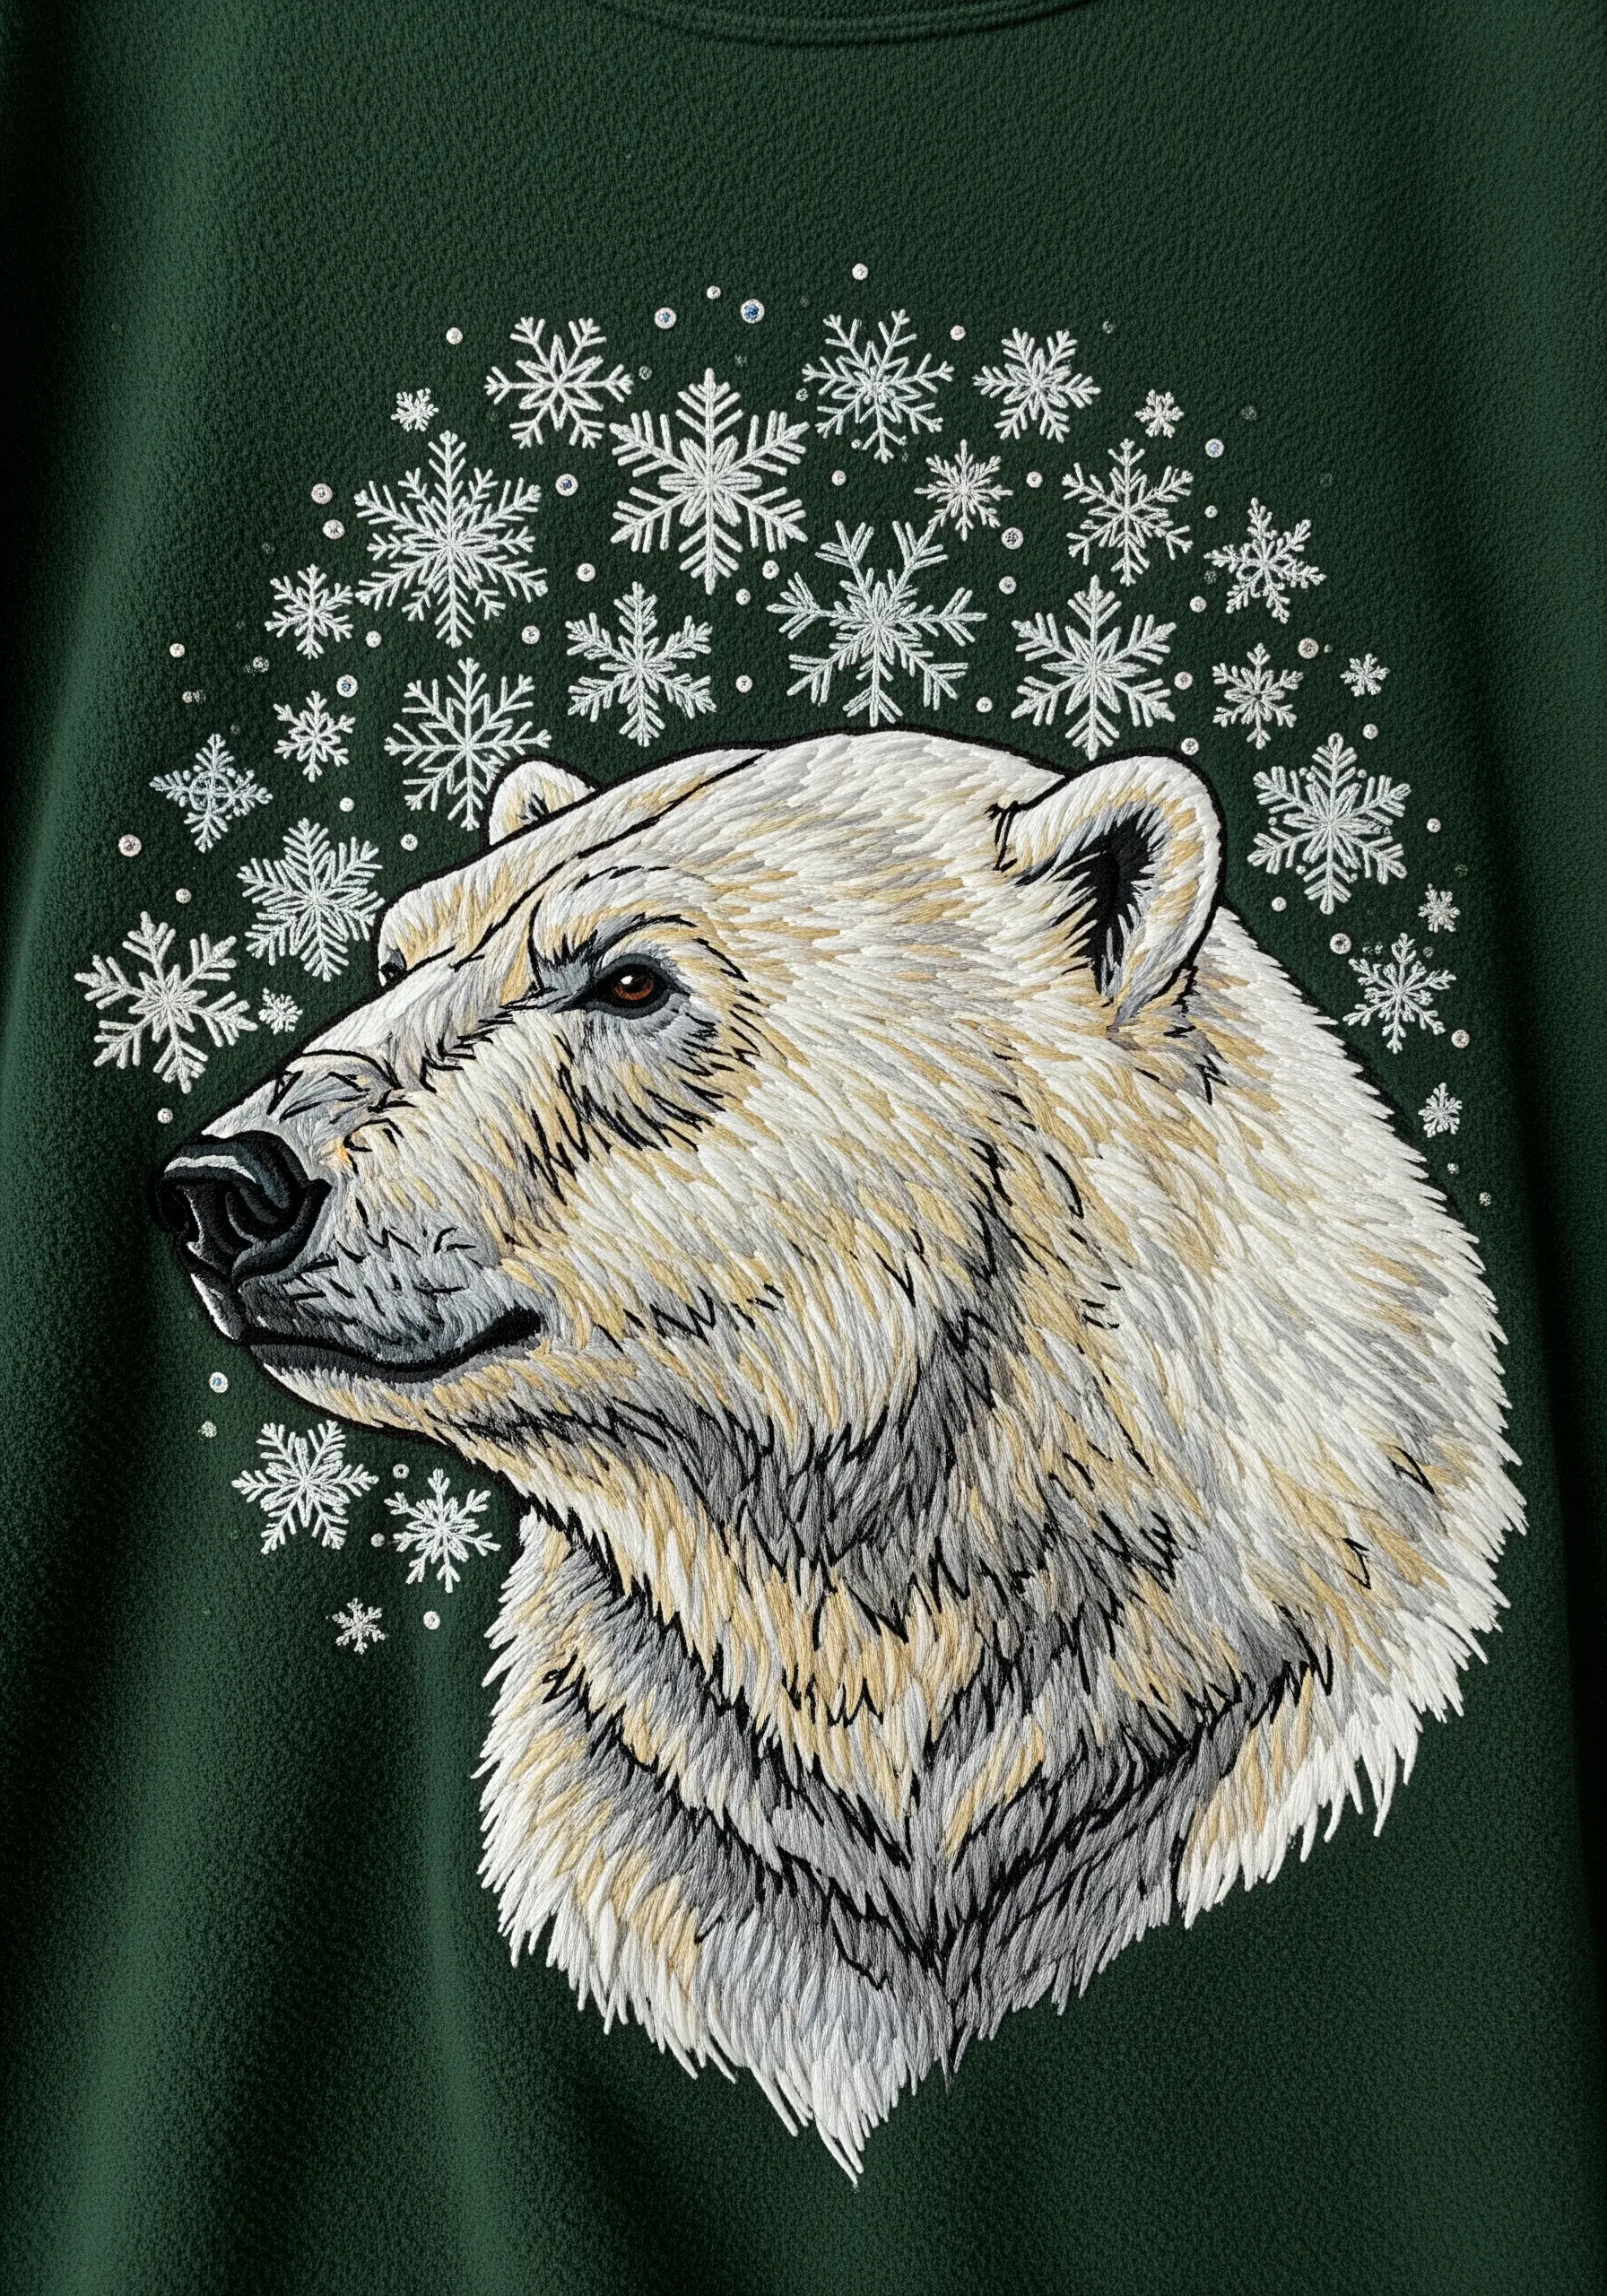
Achieve a realistic, painterly effect by using the long-and-short stitch technique, also known as thread painting.
Work with a single strand of floss at a time, using several shades of off-white, cream, and light grey to build up layers of color and shadow.
Always follow the natural direction of the fur’s growth with your stitches to create movement and realism.
This meticulous process results in a stunning portrait with incredible depth, turning your embroidery into a true work of art.
12. Incorporate Felt Appliqué for Bold Shapes
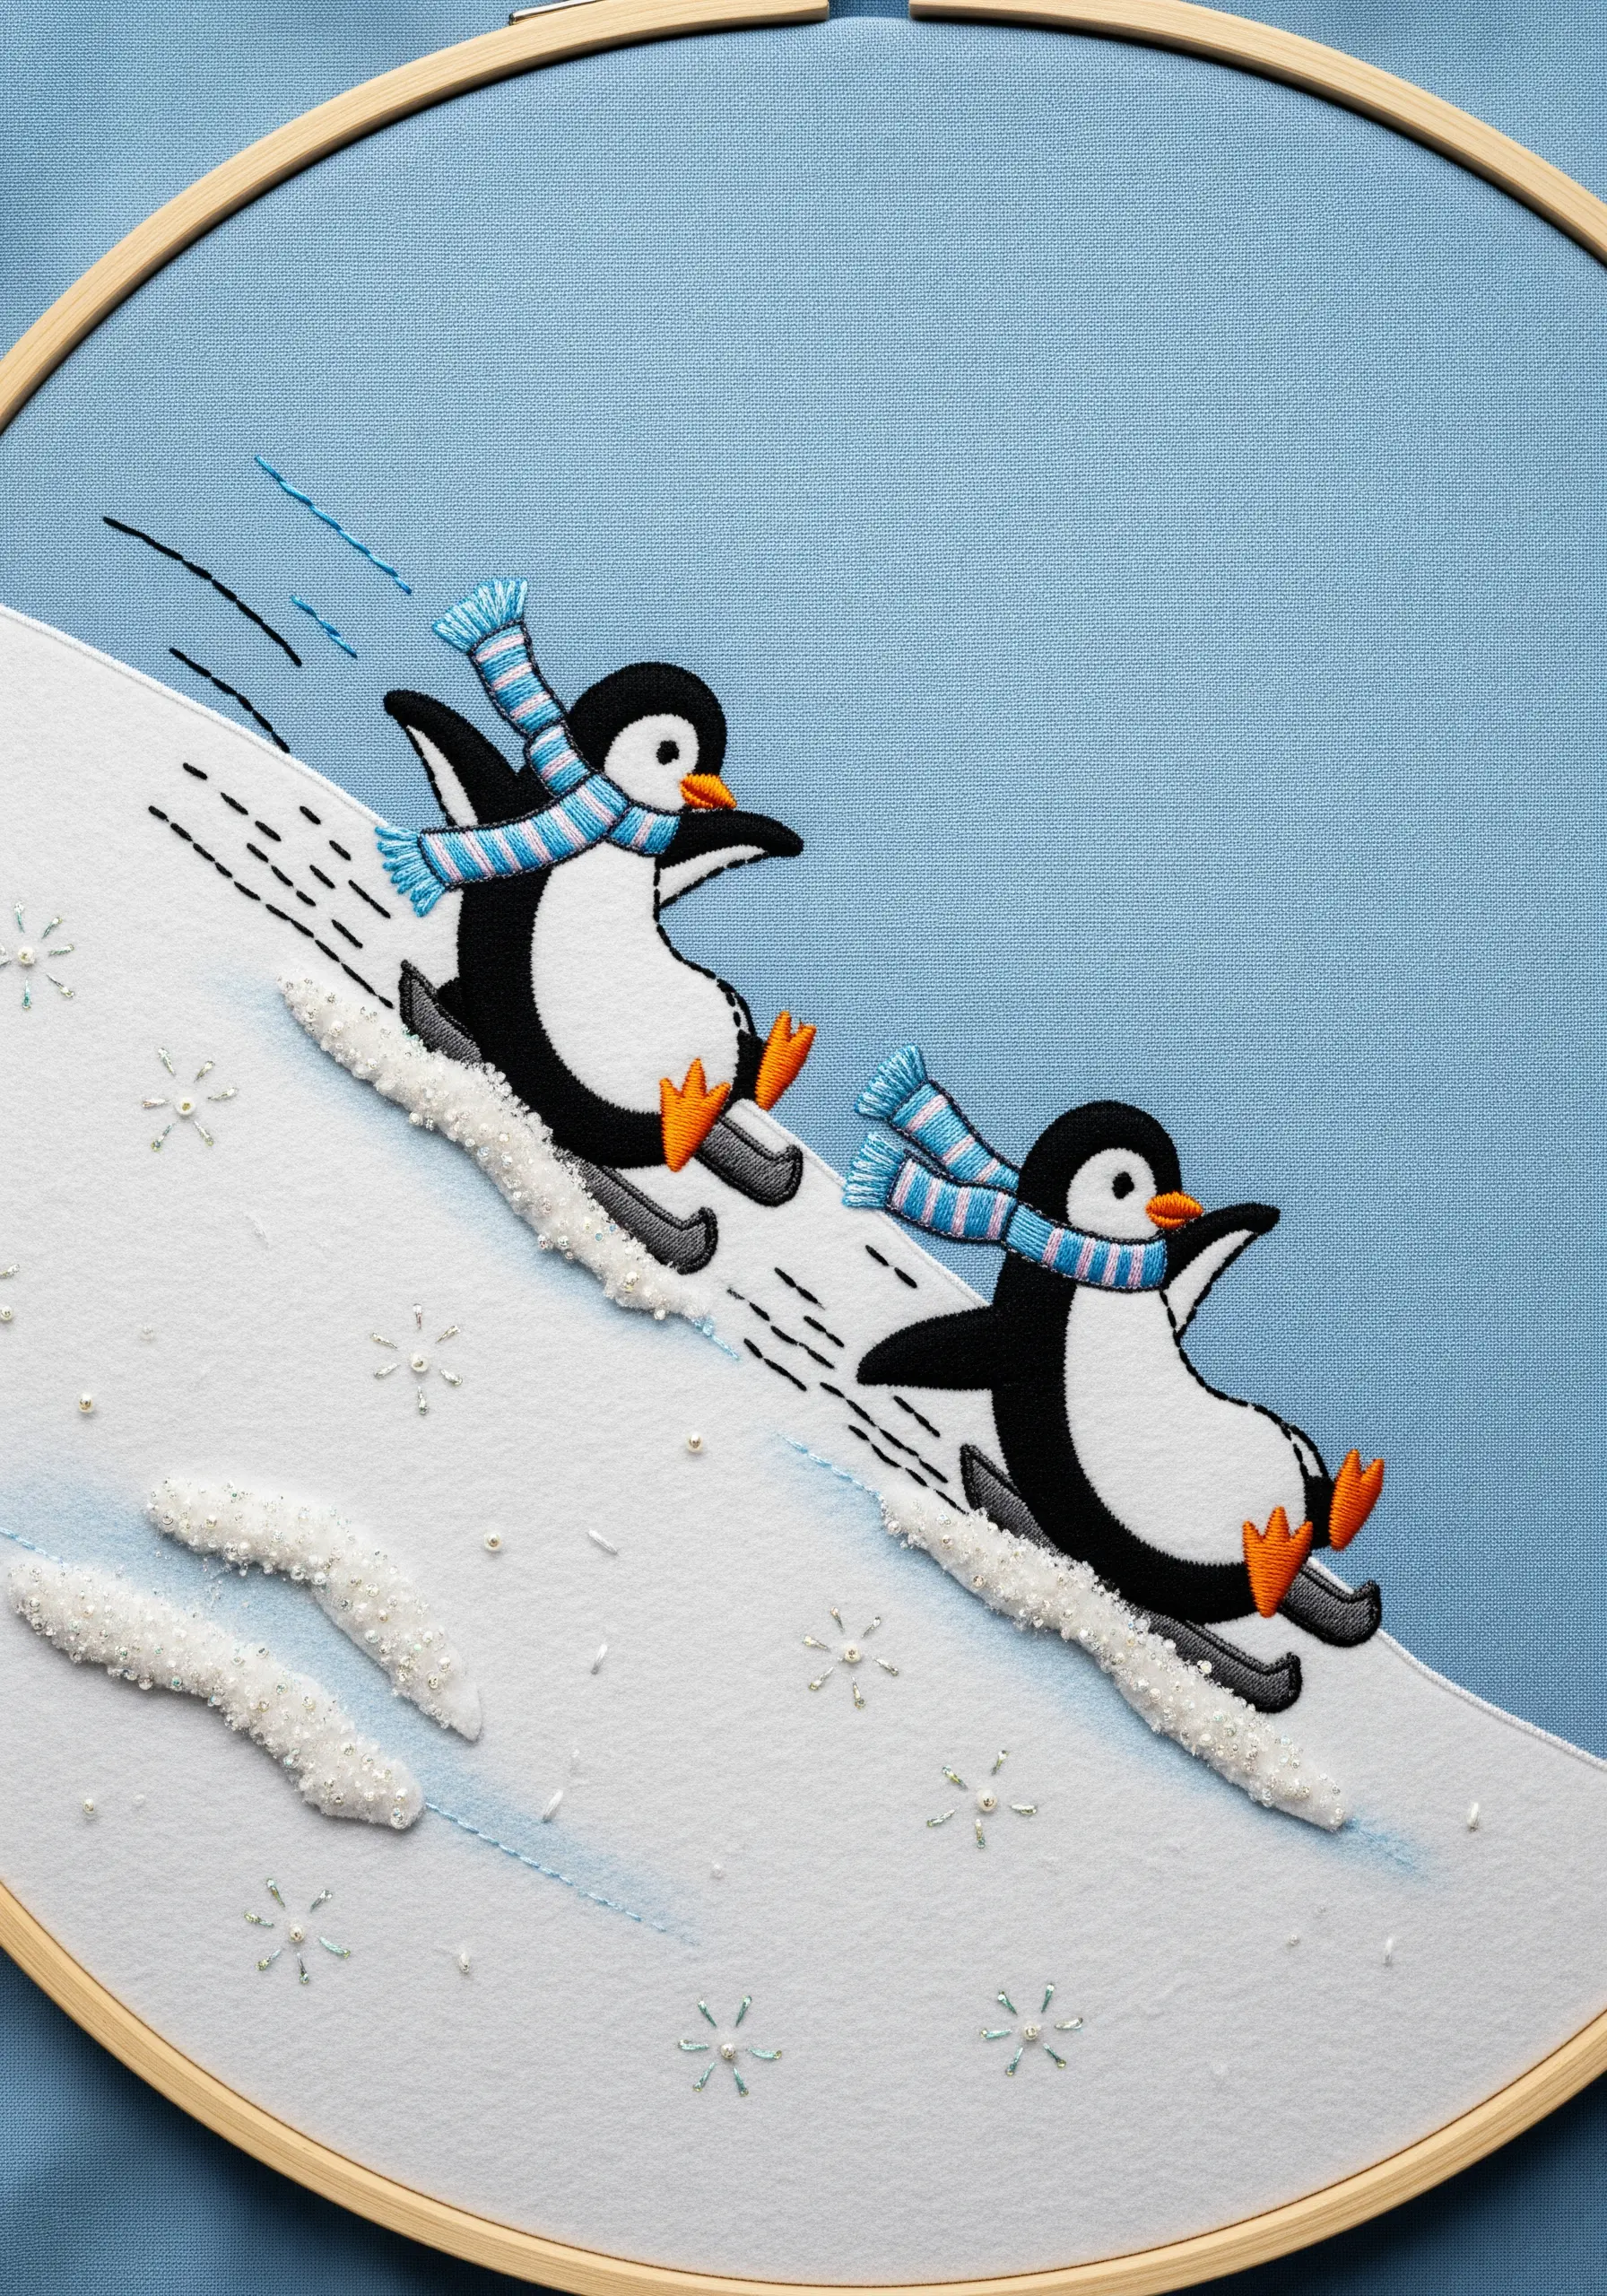
For a dynamic scene like this, use felt appliqué to create the snowy slope.
Cut the felt to your desired shape and secure it to your background fabric with a simple running stitch or a neat blanket stitch around the edge.
You can then embroider details directly onto the felt, like the beaded texture of the snow spray.
This mixed-media approach is perfect for covering large areas with solid color and adds wonderful dimension to your hoop art.
13. Tell a Story with a Single Continuous Line
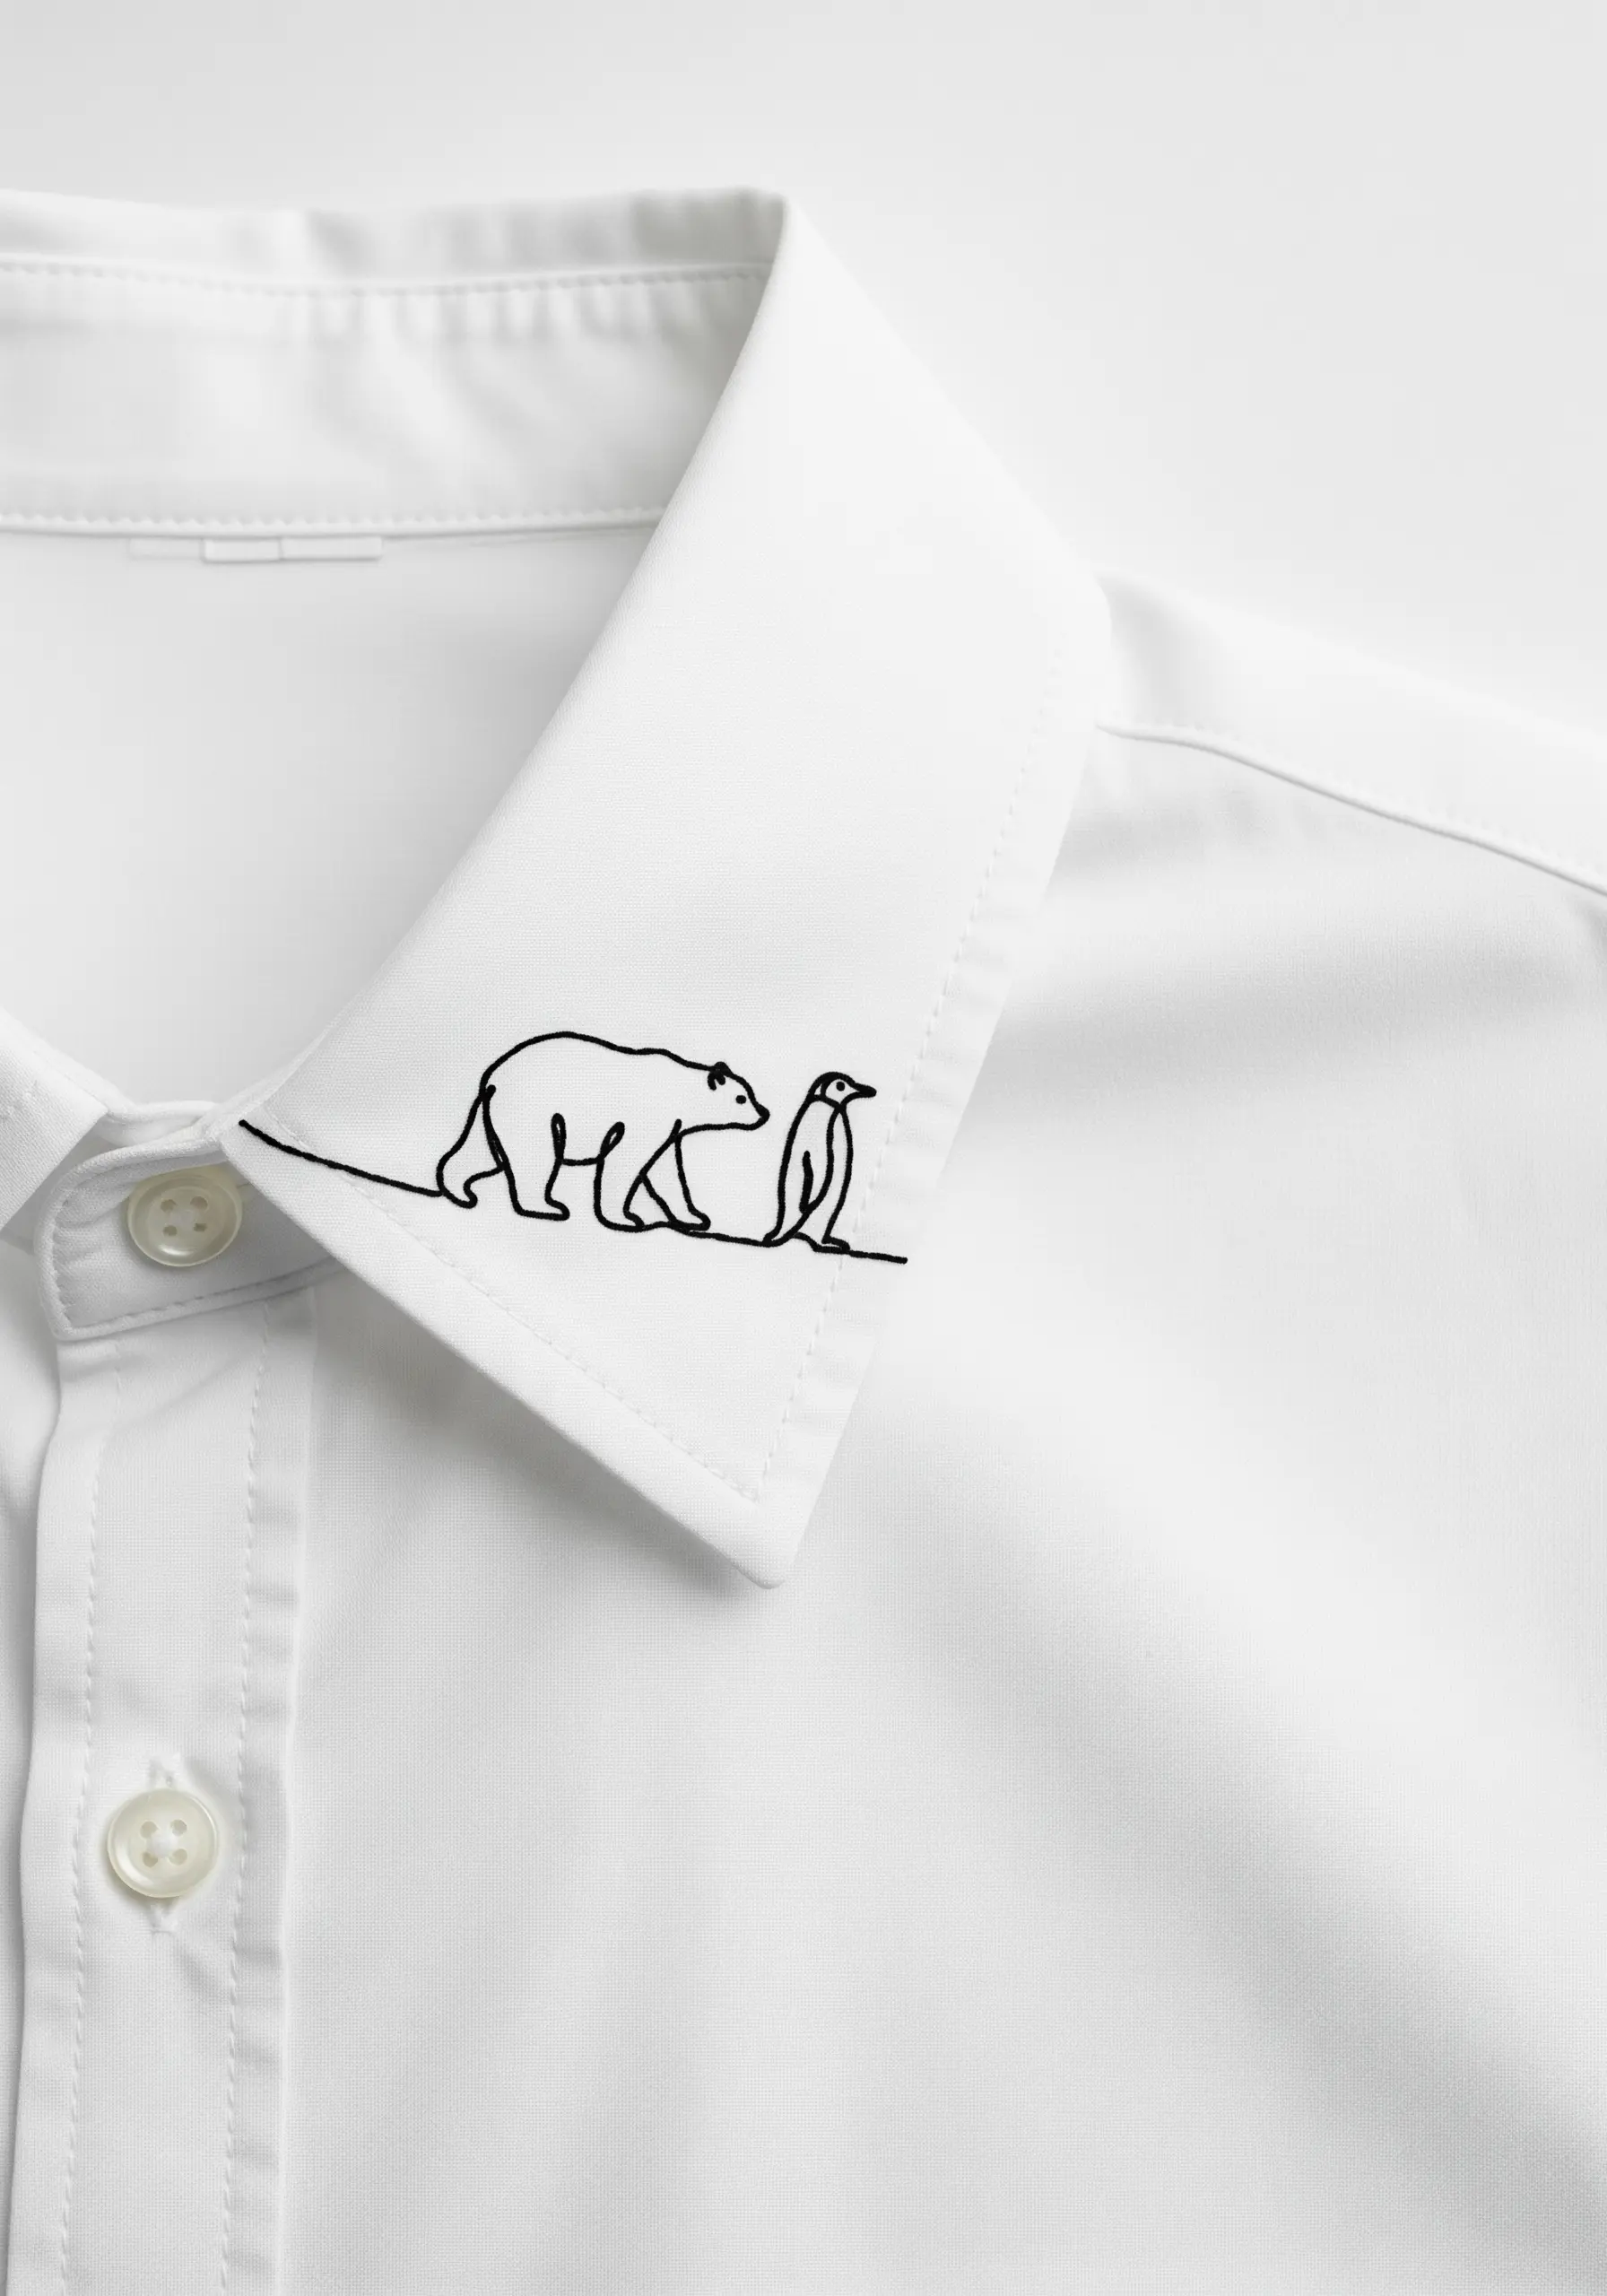
Explore the beauty of simplicity with a continuous one-line art design stitched along a shirt collar.
To get a smooth, unbroken line, use a whipped backstitch or a stem stitch, which creates a corded effect without any gaps.
Trace your design with a water-soluble pen first and stitch slowly to maintain the fluid motion.
This sophisticated technique turns a simple garment into a conversation piece and works beautifully for modern, minimalist embroidery projects.
14. Create Weight and Volume with Chunky Stitches
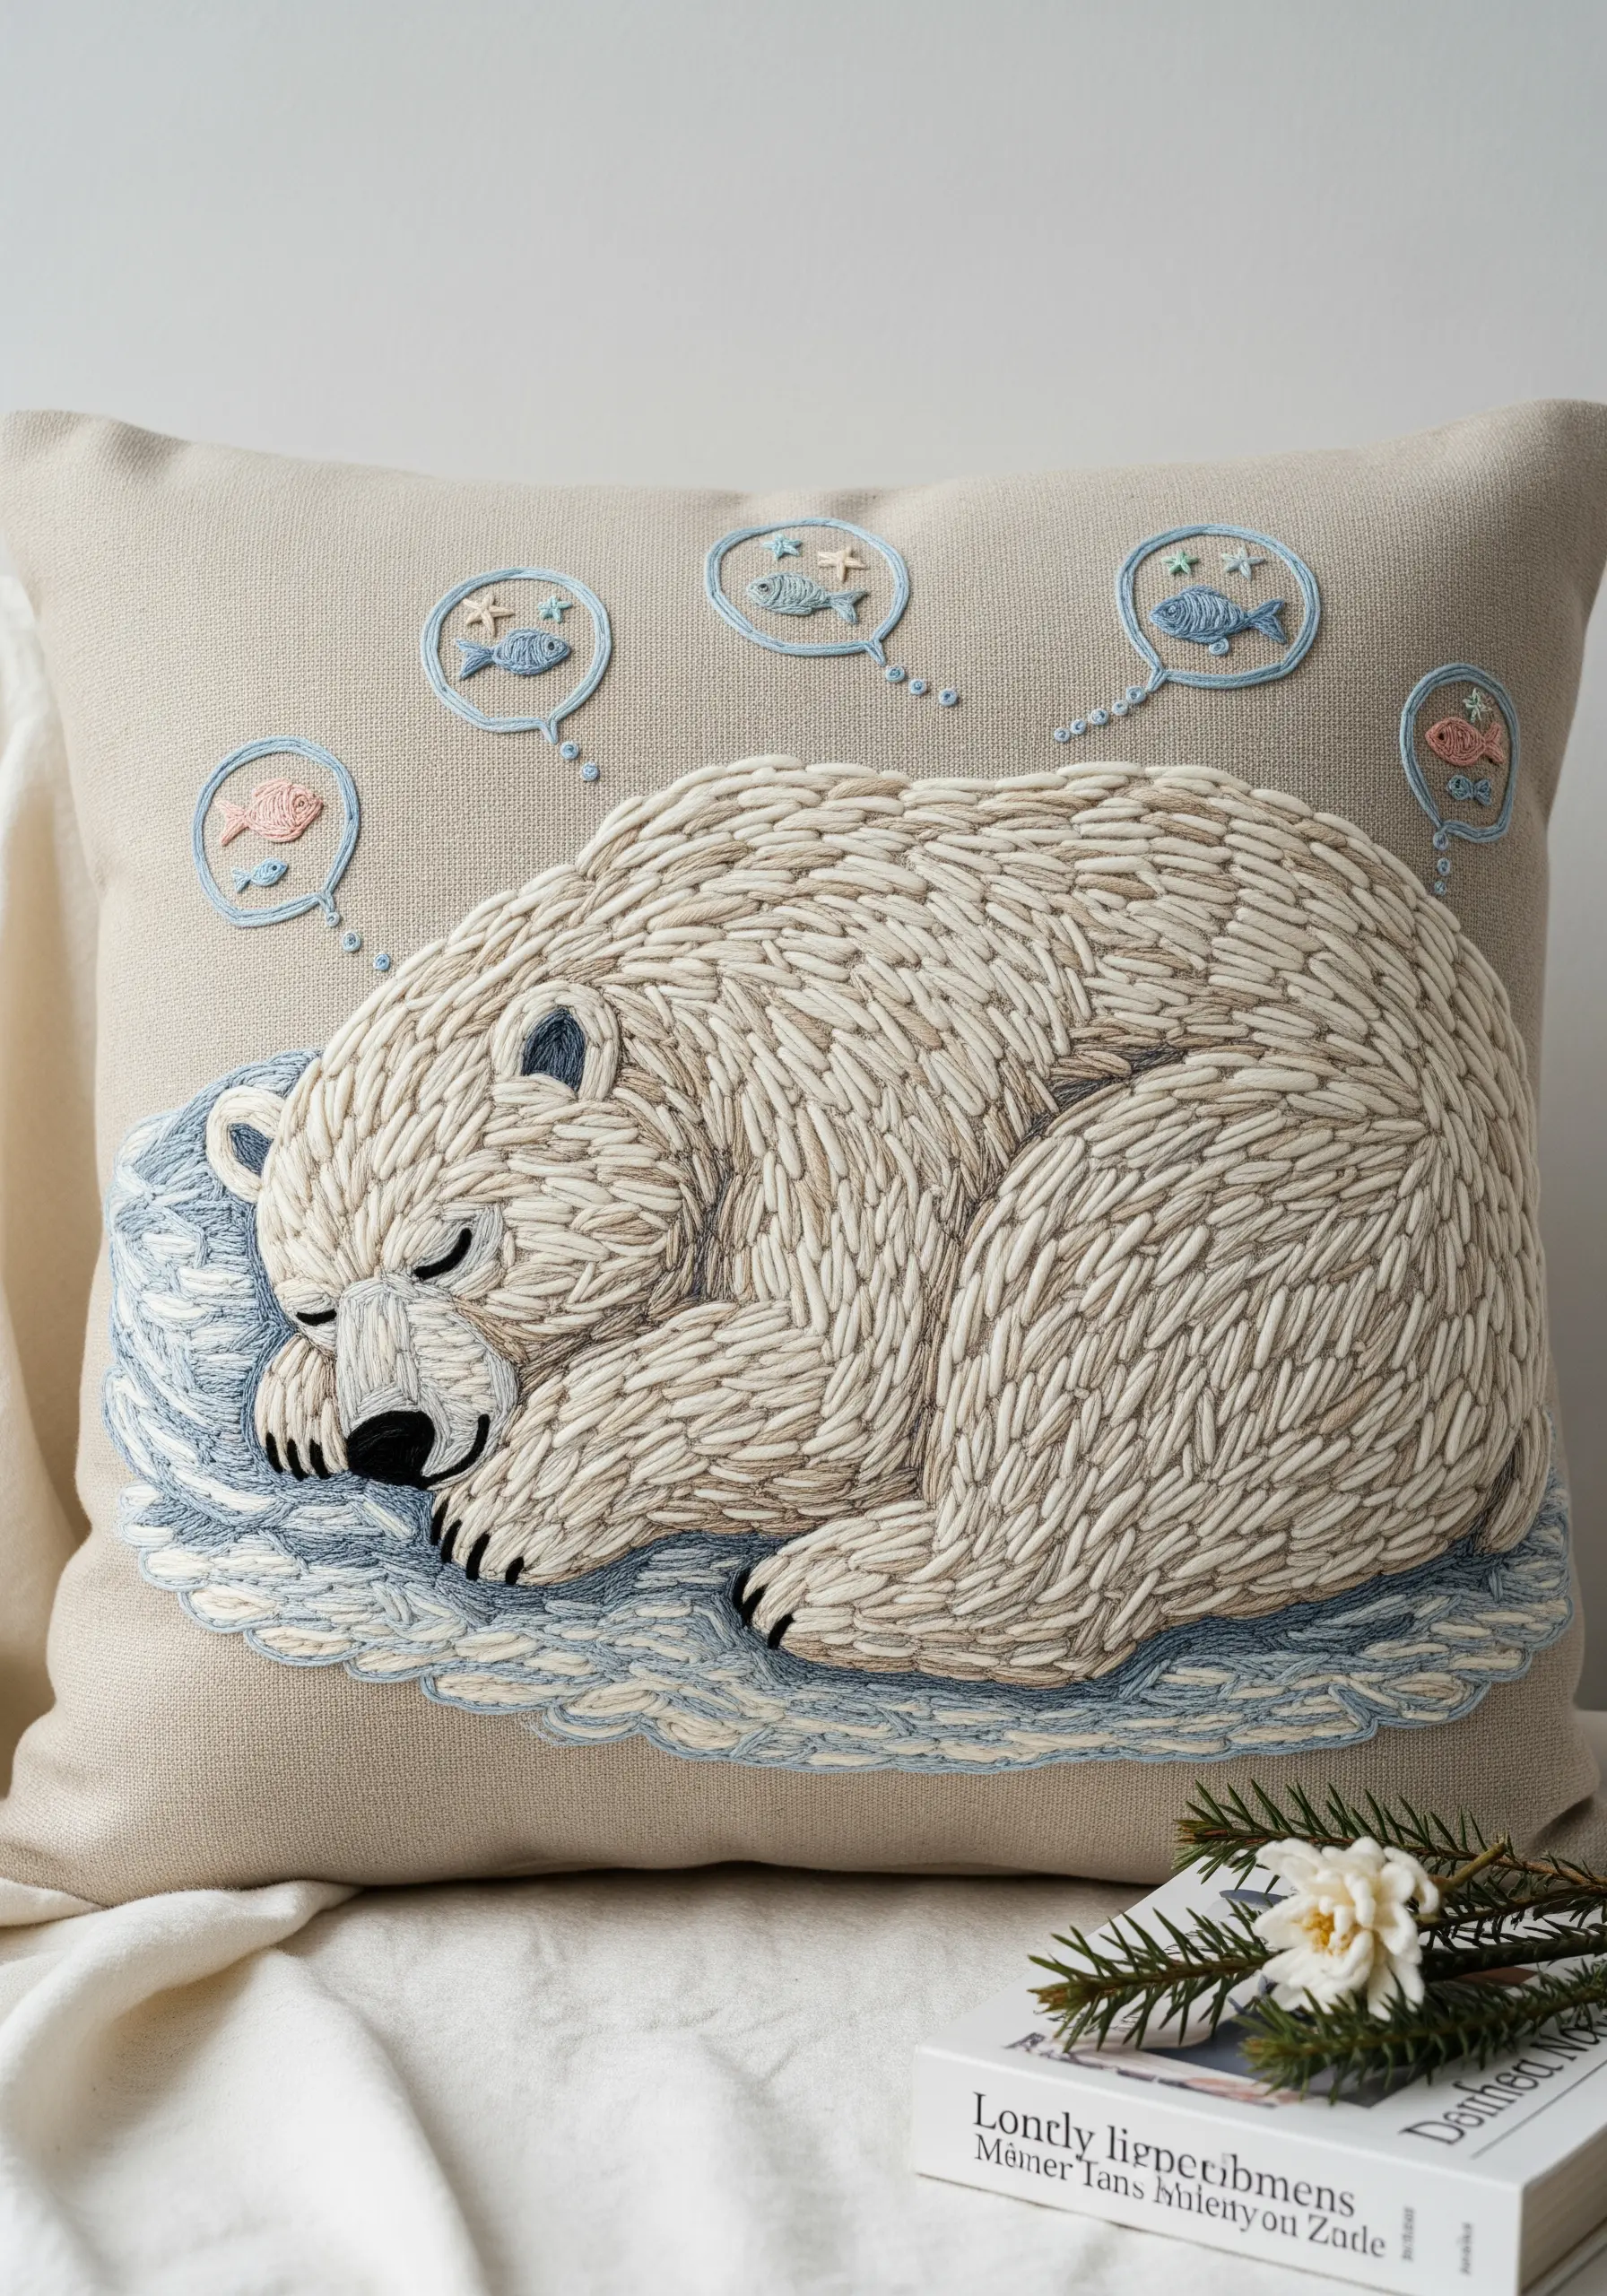
Give your sleeping polar bear a satisfying sense of weight and coziness by using a thicker thread, like pearl cotton or multiple strands of floss.
Fill the body with long, slightly overlapping satin stitches that follow the contours of its shape, creating a dense, sculptural feel.
Define the form with a contrasting backstitch outline in a darker color to keep the bulky fill from looking amorphous.
This technique is perfect for an embroidery cushion that’s meant to be both seen and snuggled.
15. Build a Lush Pine Tree with Layered Stitches
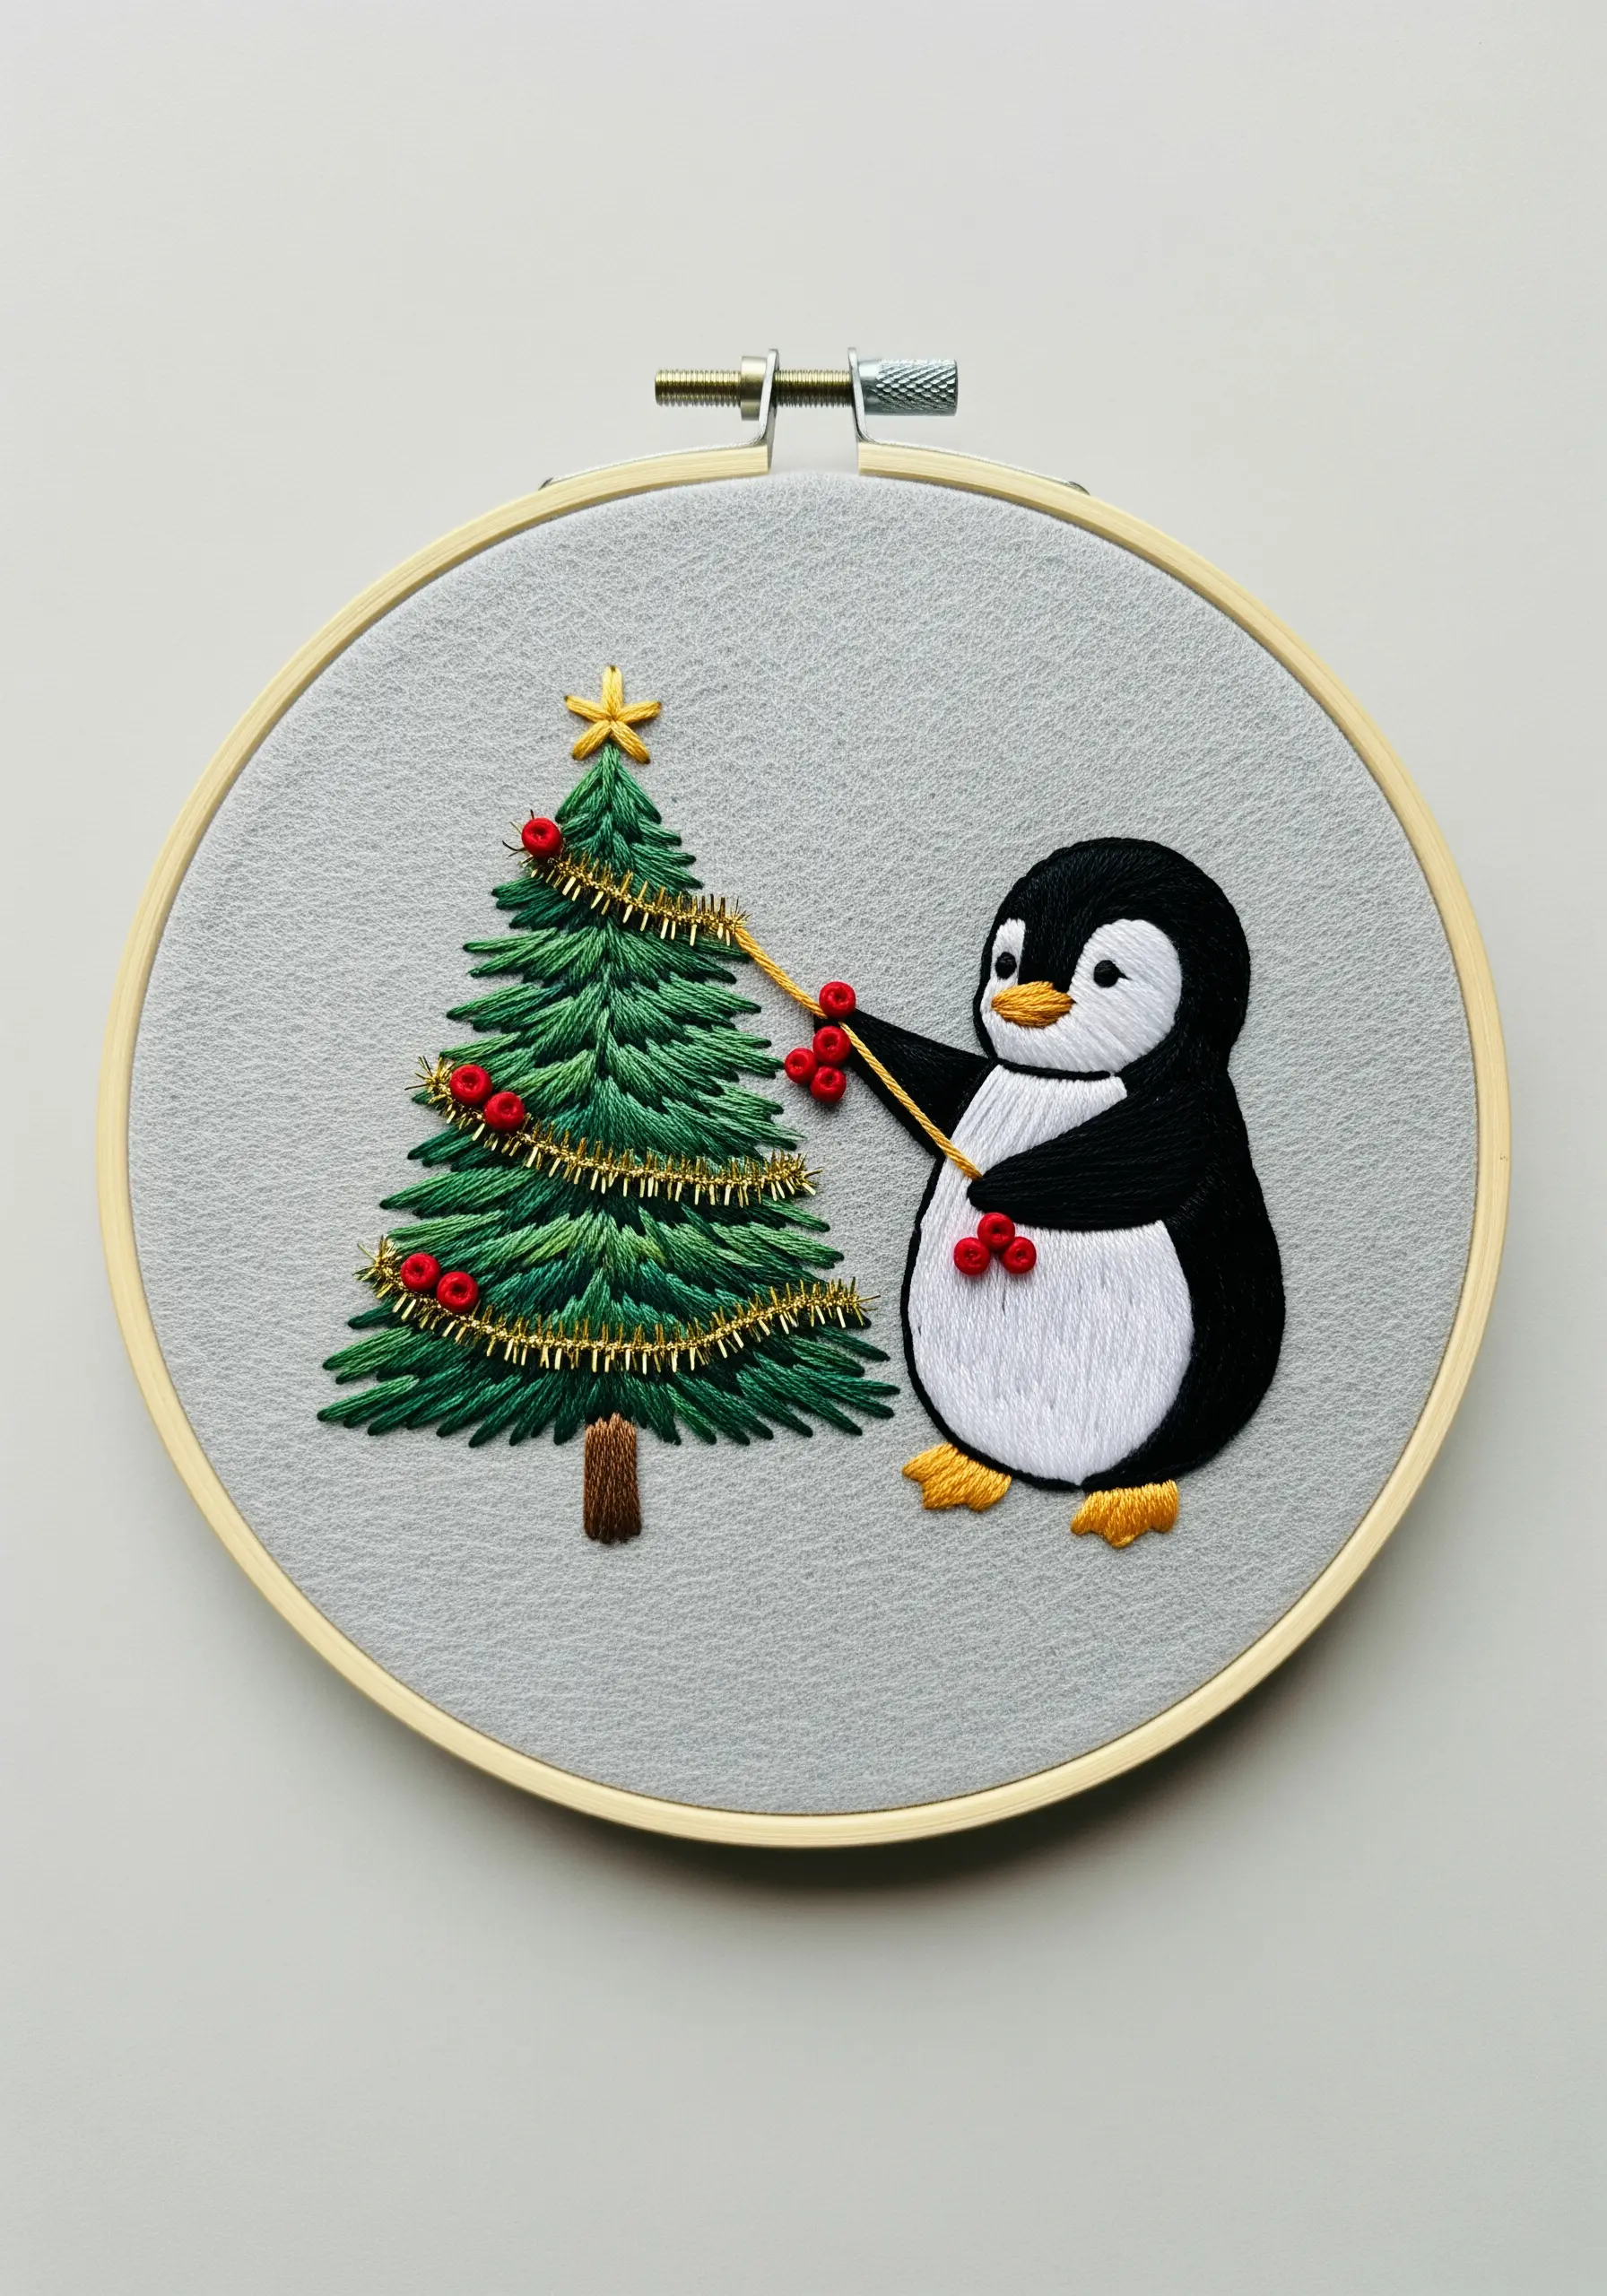
Create a Christmas tree with realistic depth by layering different stitches.
Use fly stitches arranged in vertical rows to form the base of the pine boughs, then add individual straight stitches on top for extra fullness.
For the garland, couch a piece of metallic thread onto the surface with small, color-matched tacking stitches.
Finally, add French knots or tiny beads for ornaments. This multi-layered approach makes the simple tree motif feel rich and dynamic.
16. Transform Denim with a High-Contrast Back Piece
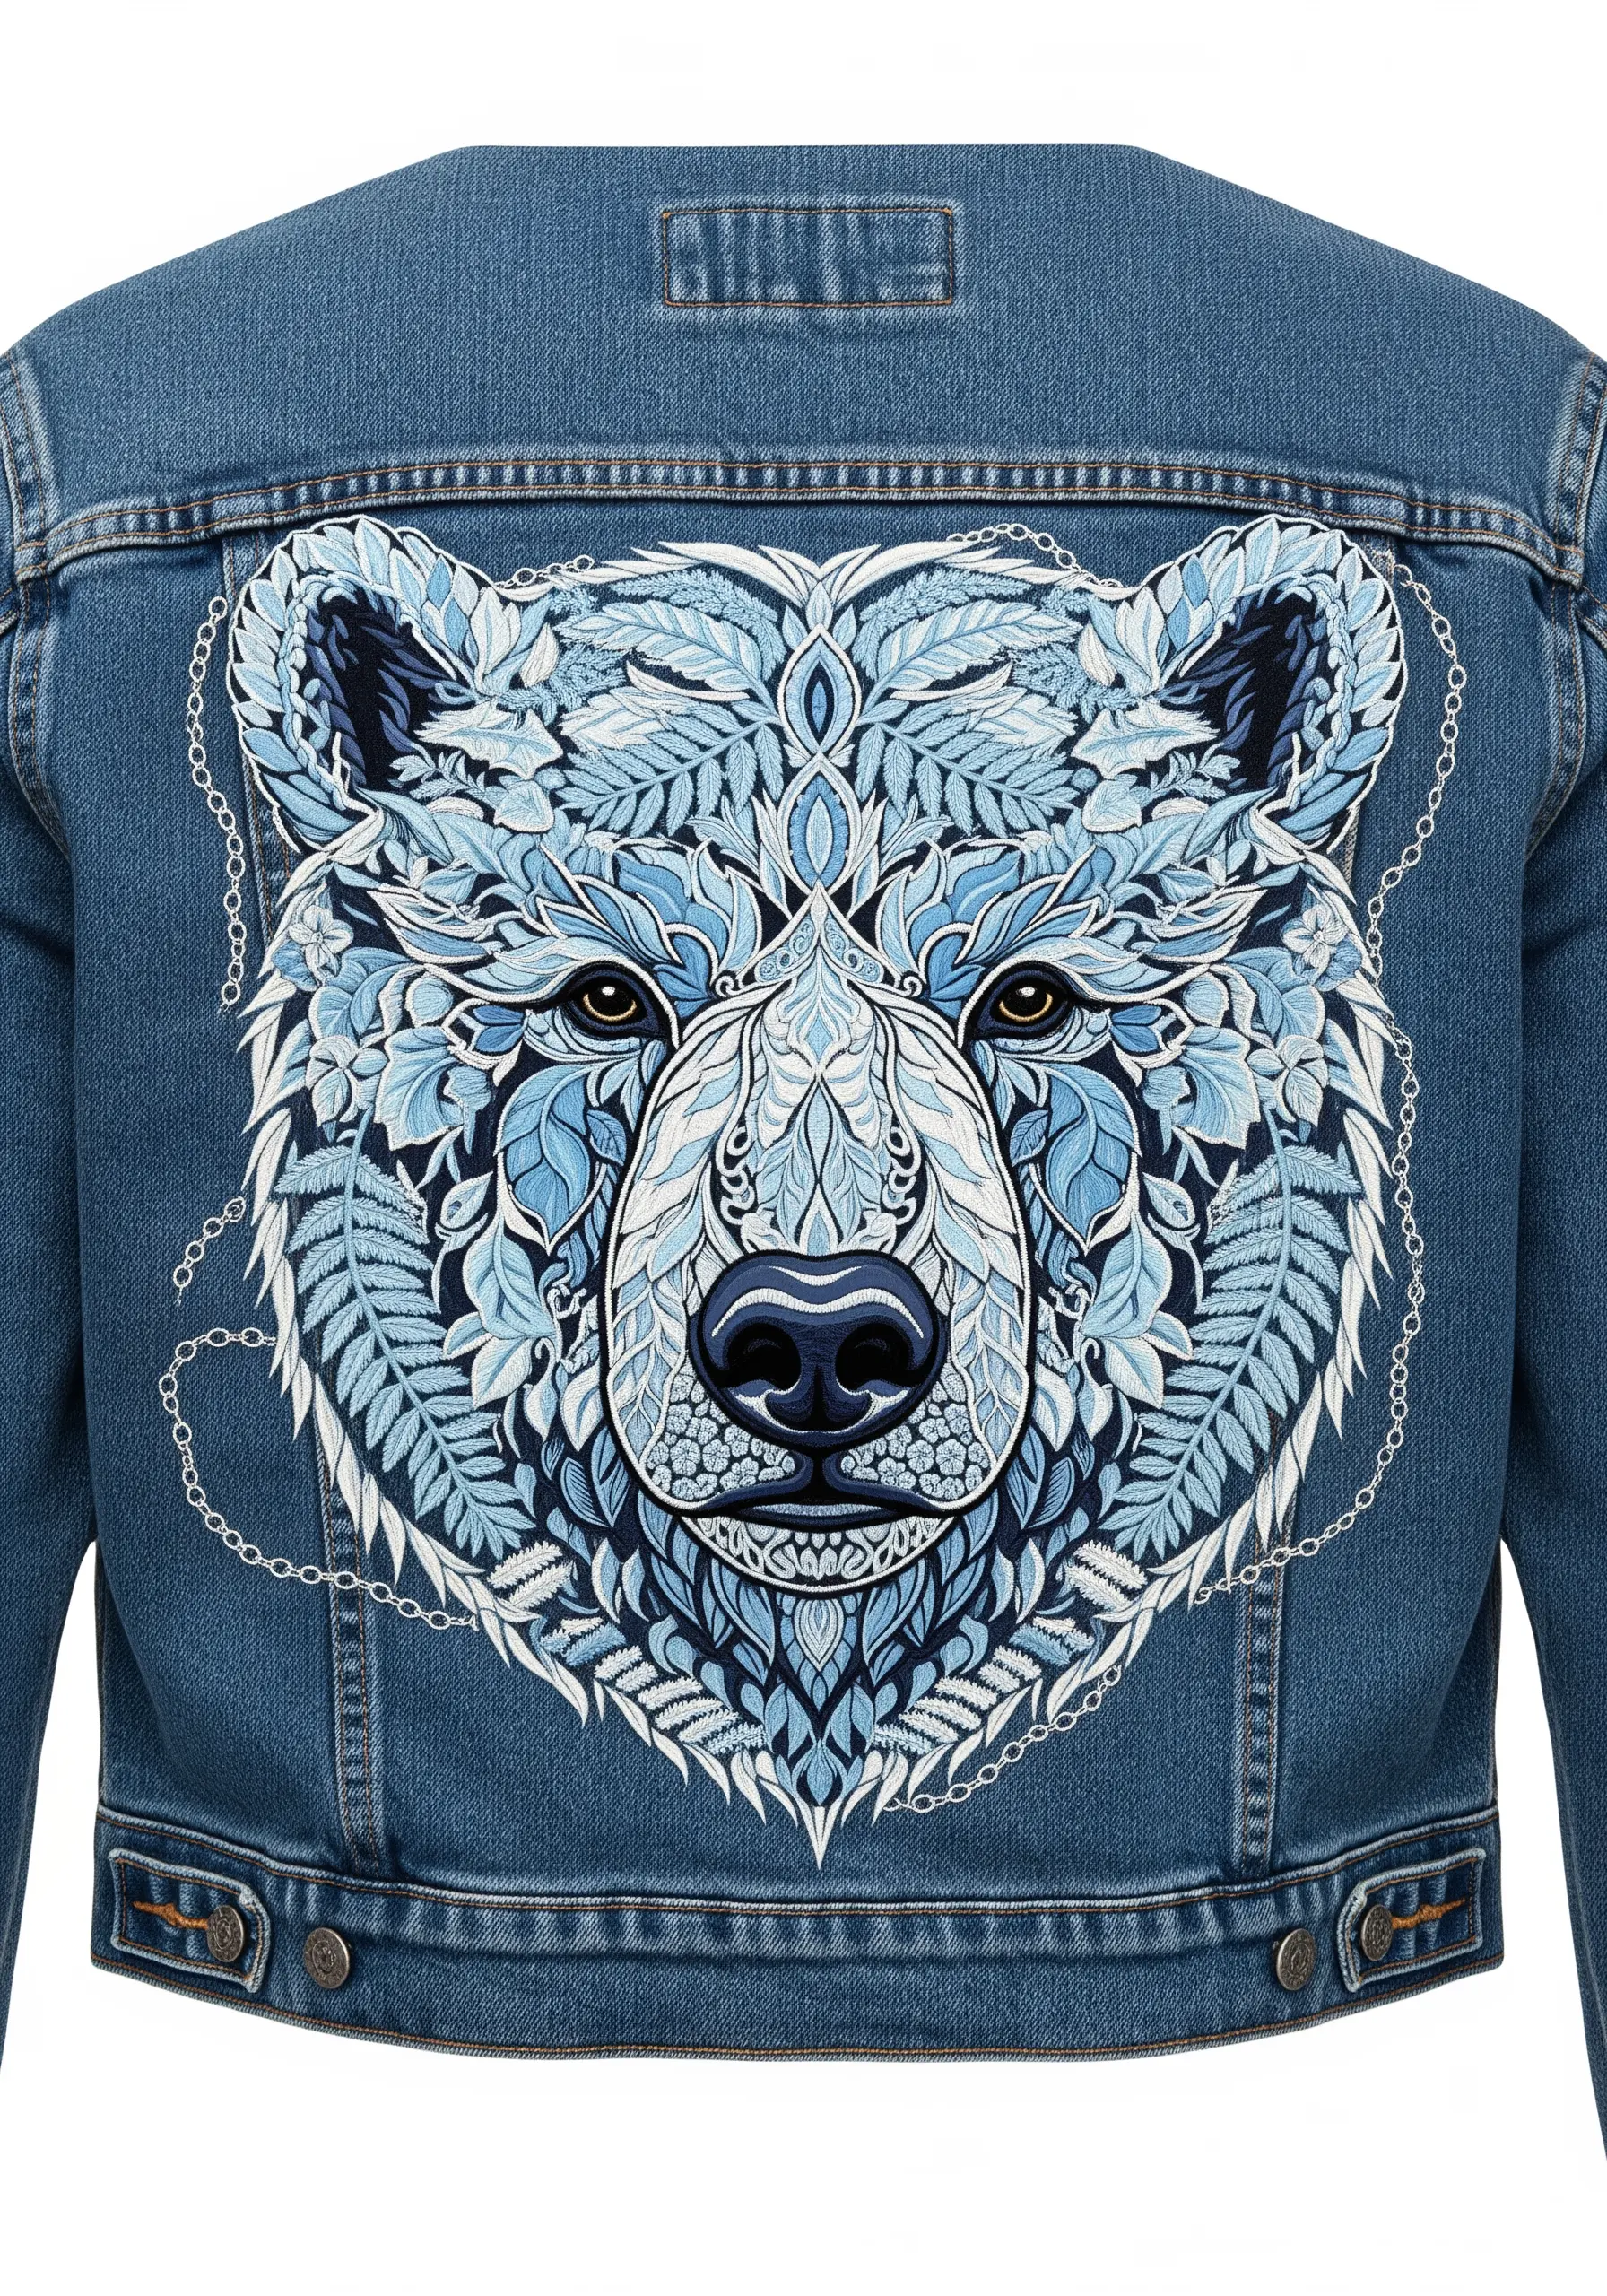
Make a bold statement by embroidering an intricate design on the back panel of a denim jacket.
Choose a limited color palette—like the blues and whites seen here—to ensure the complex pattern feels cohesive and not overwhelming.
Use a heavy-duty tear-away stabilizer on the inside of the jacket to support the weight of the stitches and prevent the denim from puckering.
A design of this scale turns everyday apparel into wearable art, perfect for wildflower embroidery patterns to turn blank denim jackets into boho fashion statements.
17. Design a Clean and Modern Embroidered Patch
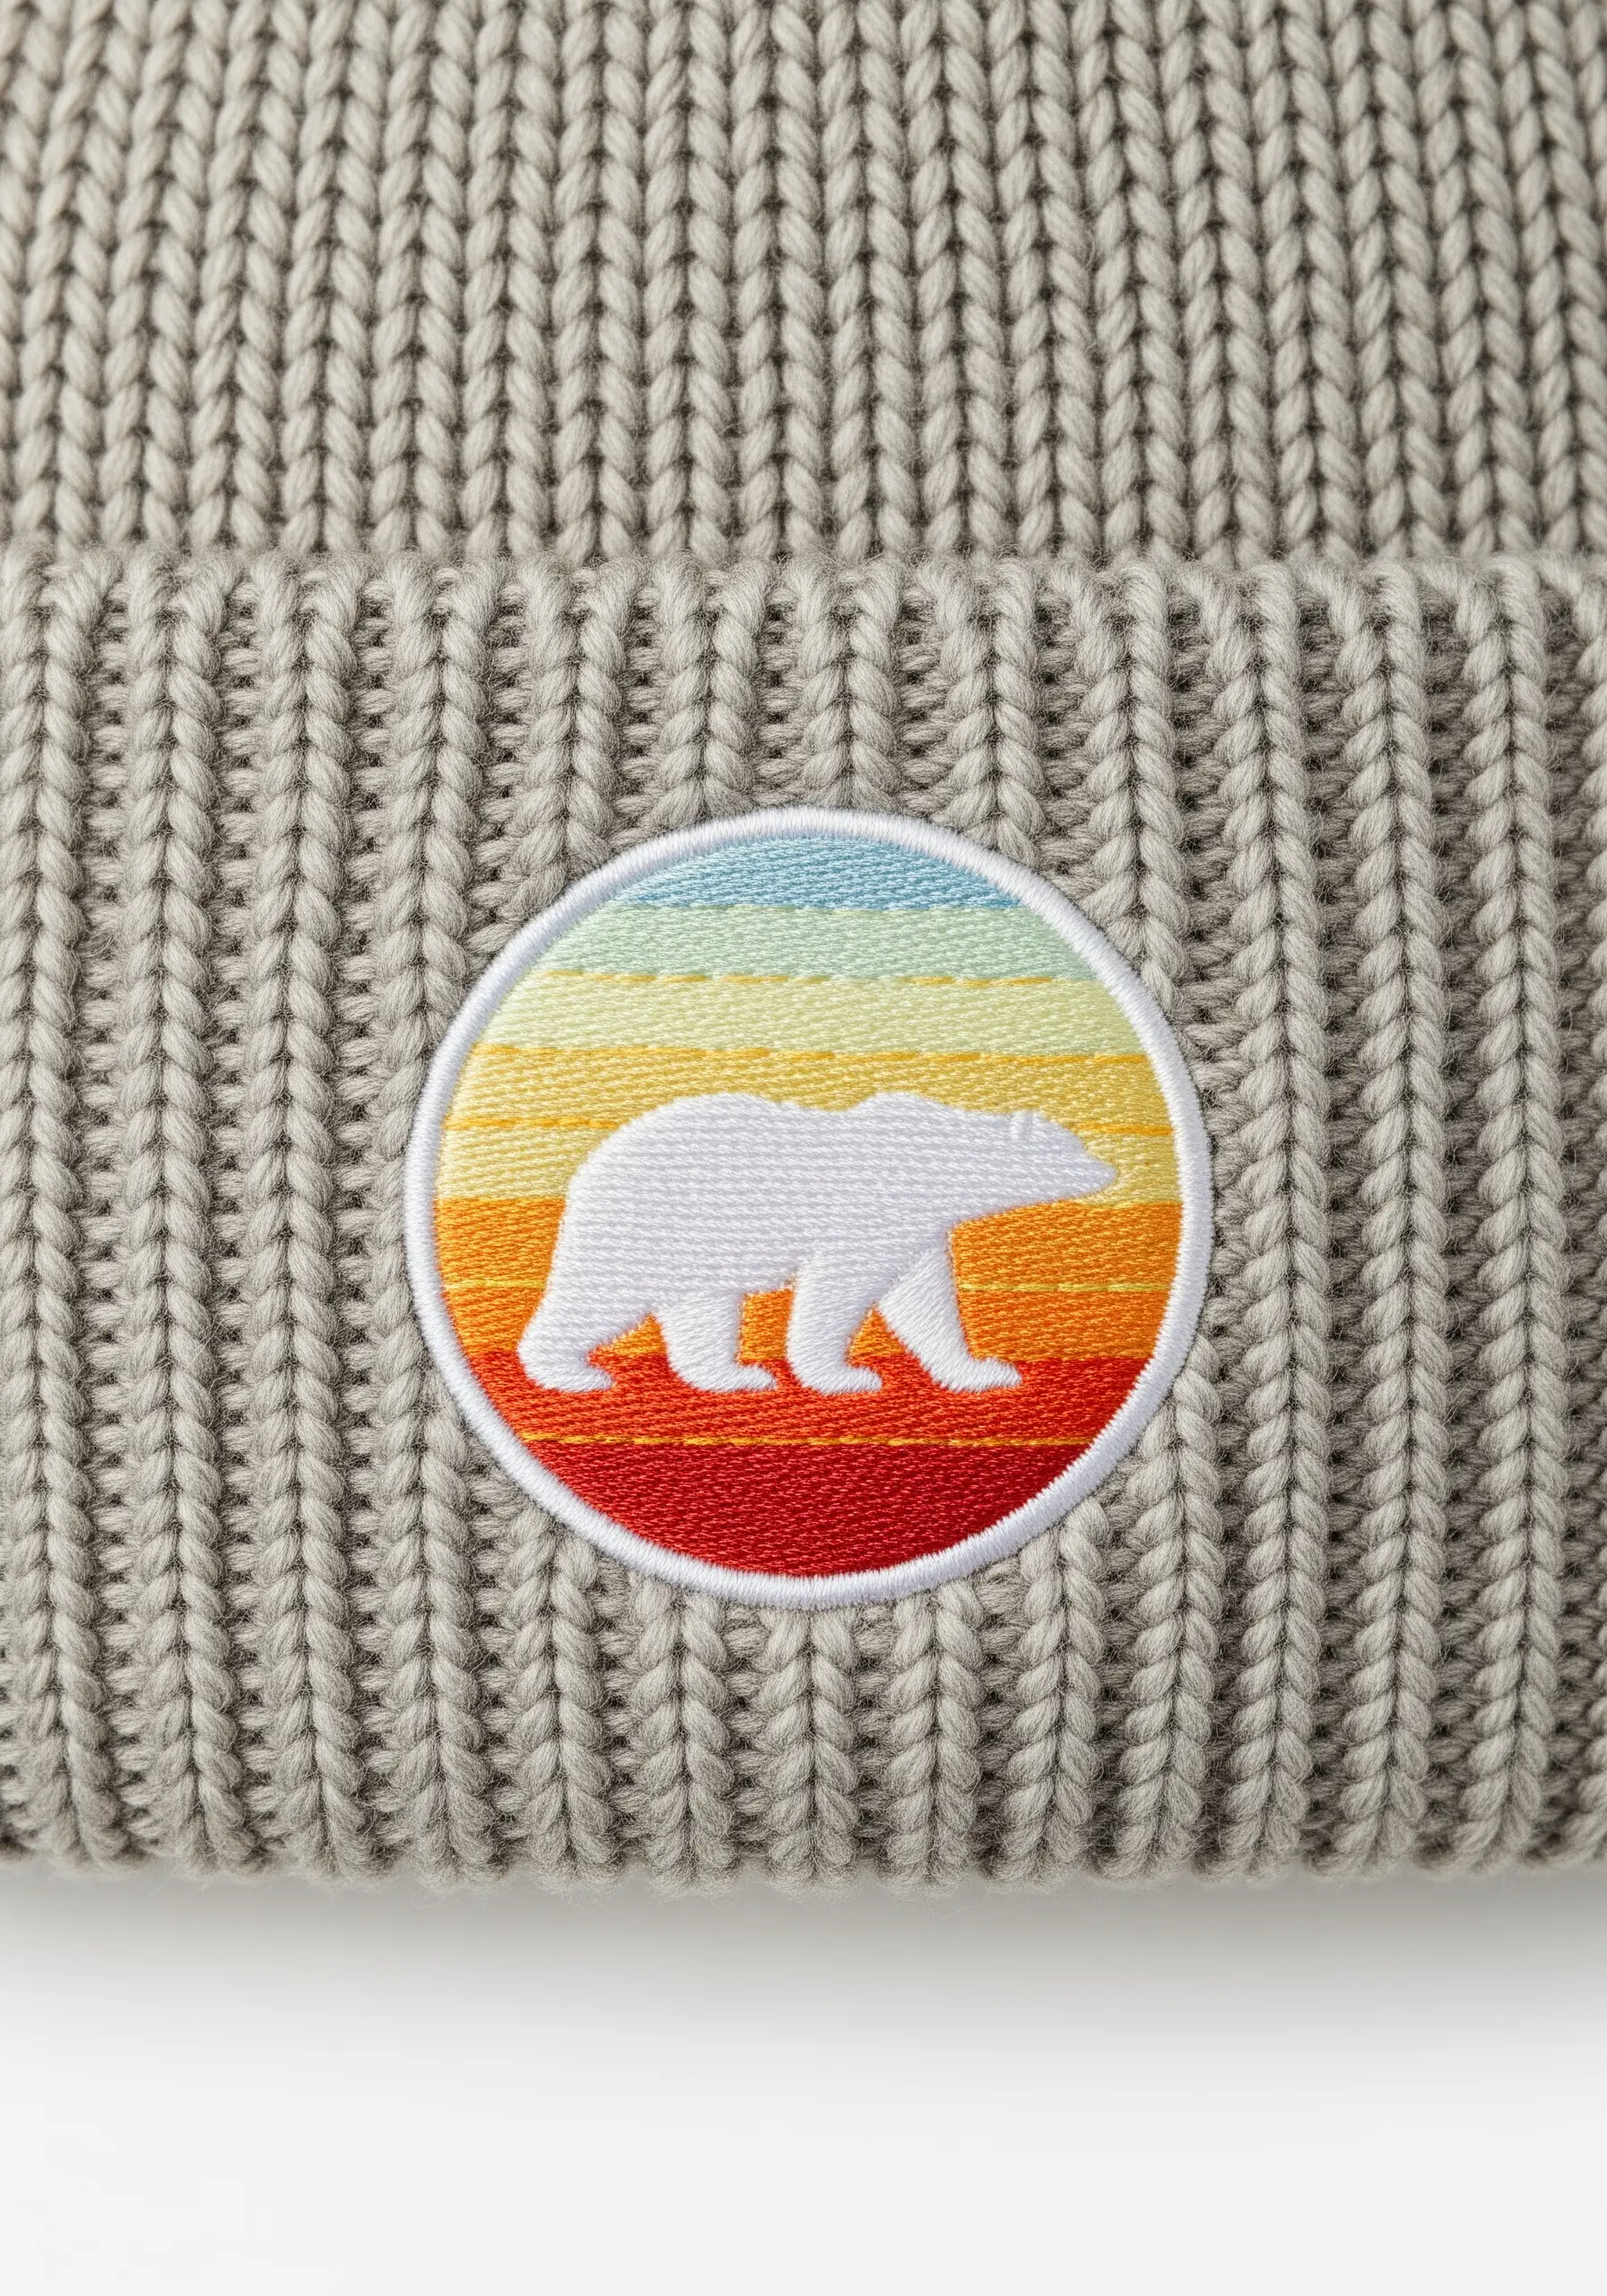
For a crisp, professional look on a textured item like a beanie, create your design as a separate patch.
Embroider your motif onto a sturdy, non-stretchy fabric like felt or canvas duck, ensuring your satin stitches are dense and smooth.
Once complete, carefully cut out the shape, leaving a small, clean edge. Then, securely attach the patch to your beanie using a neat whip stitch around the border for a durable, store-bought finish.
18. Craft a Realistic Water Reflection
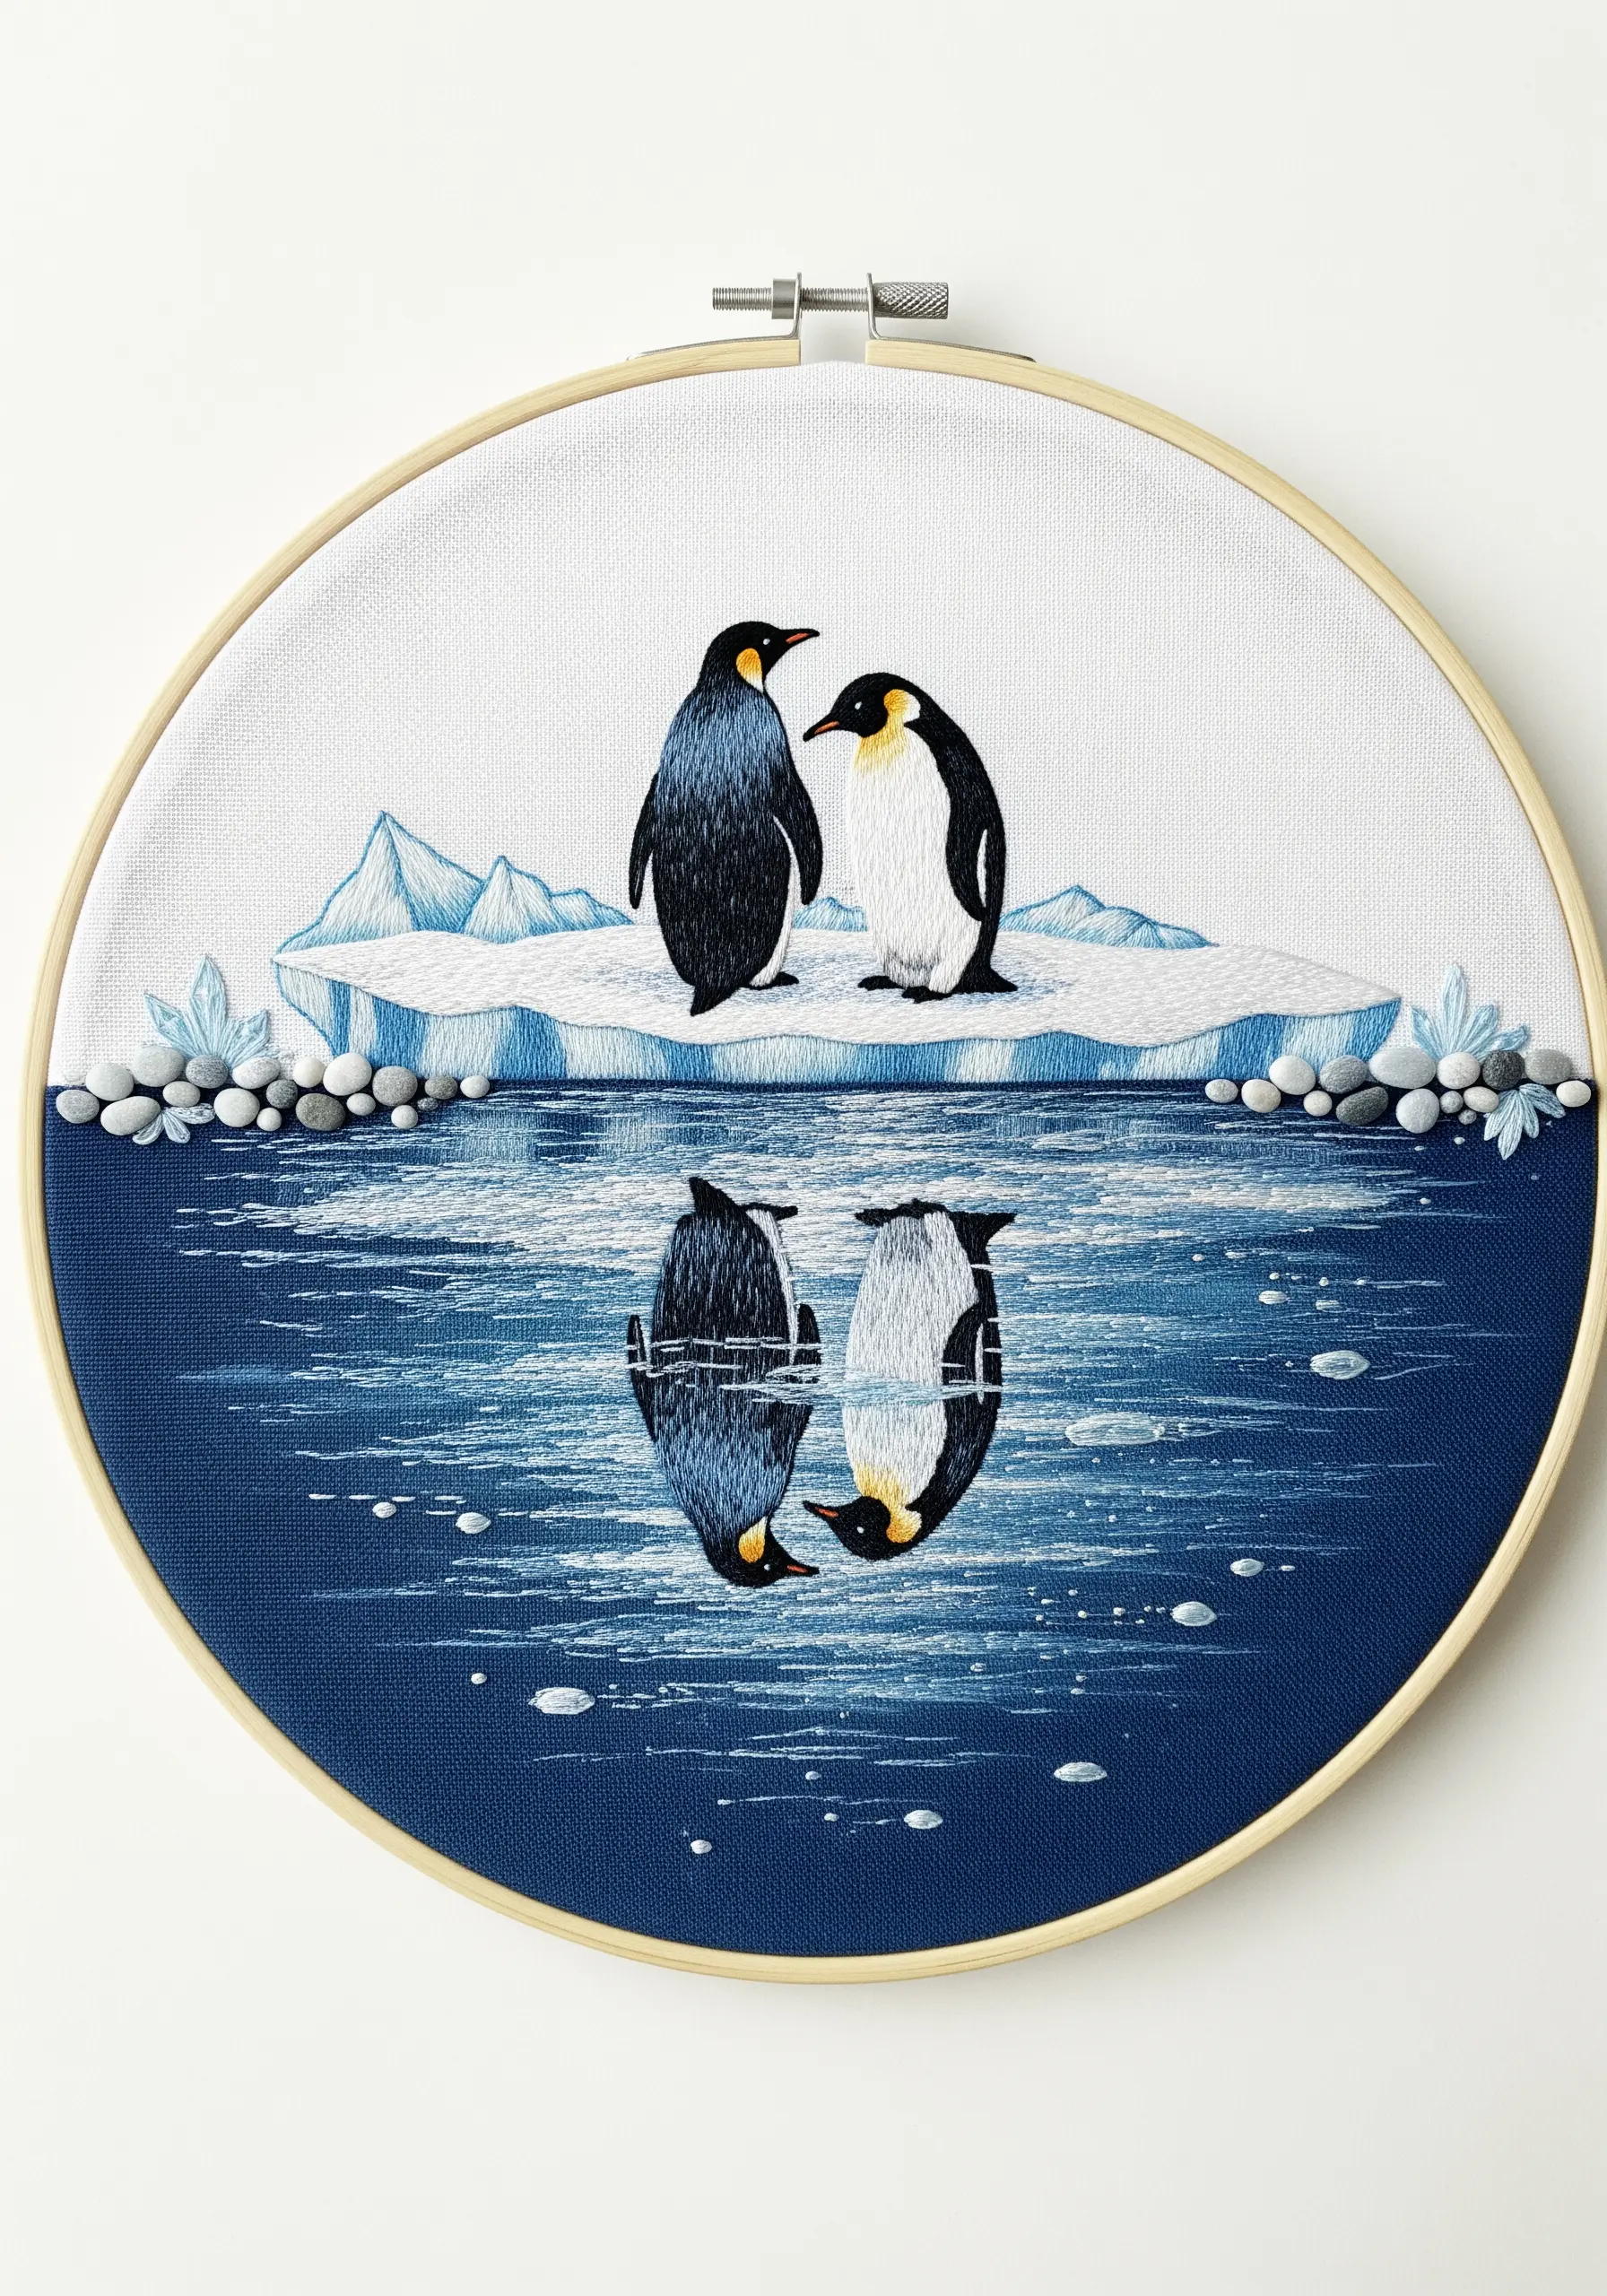
To create a convincing reflection, stitch the primary subject with clear, detailed stitches.
For the mirrored image below, use the same colors but switch to long, vertical satin stitches with slightly looser tension to create a distorted, watery effect.
Avoid outlining the reflection. Instead, add a few scattered horizontal stitches in a darker shade over the top to break up the image and suggest ripples on the water’s surface.
19. Give Your Design a 3D Lift with Padding
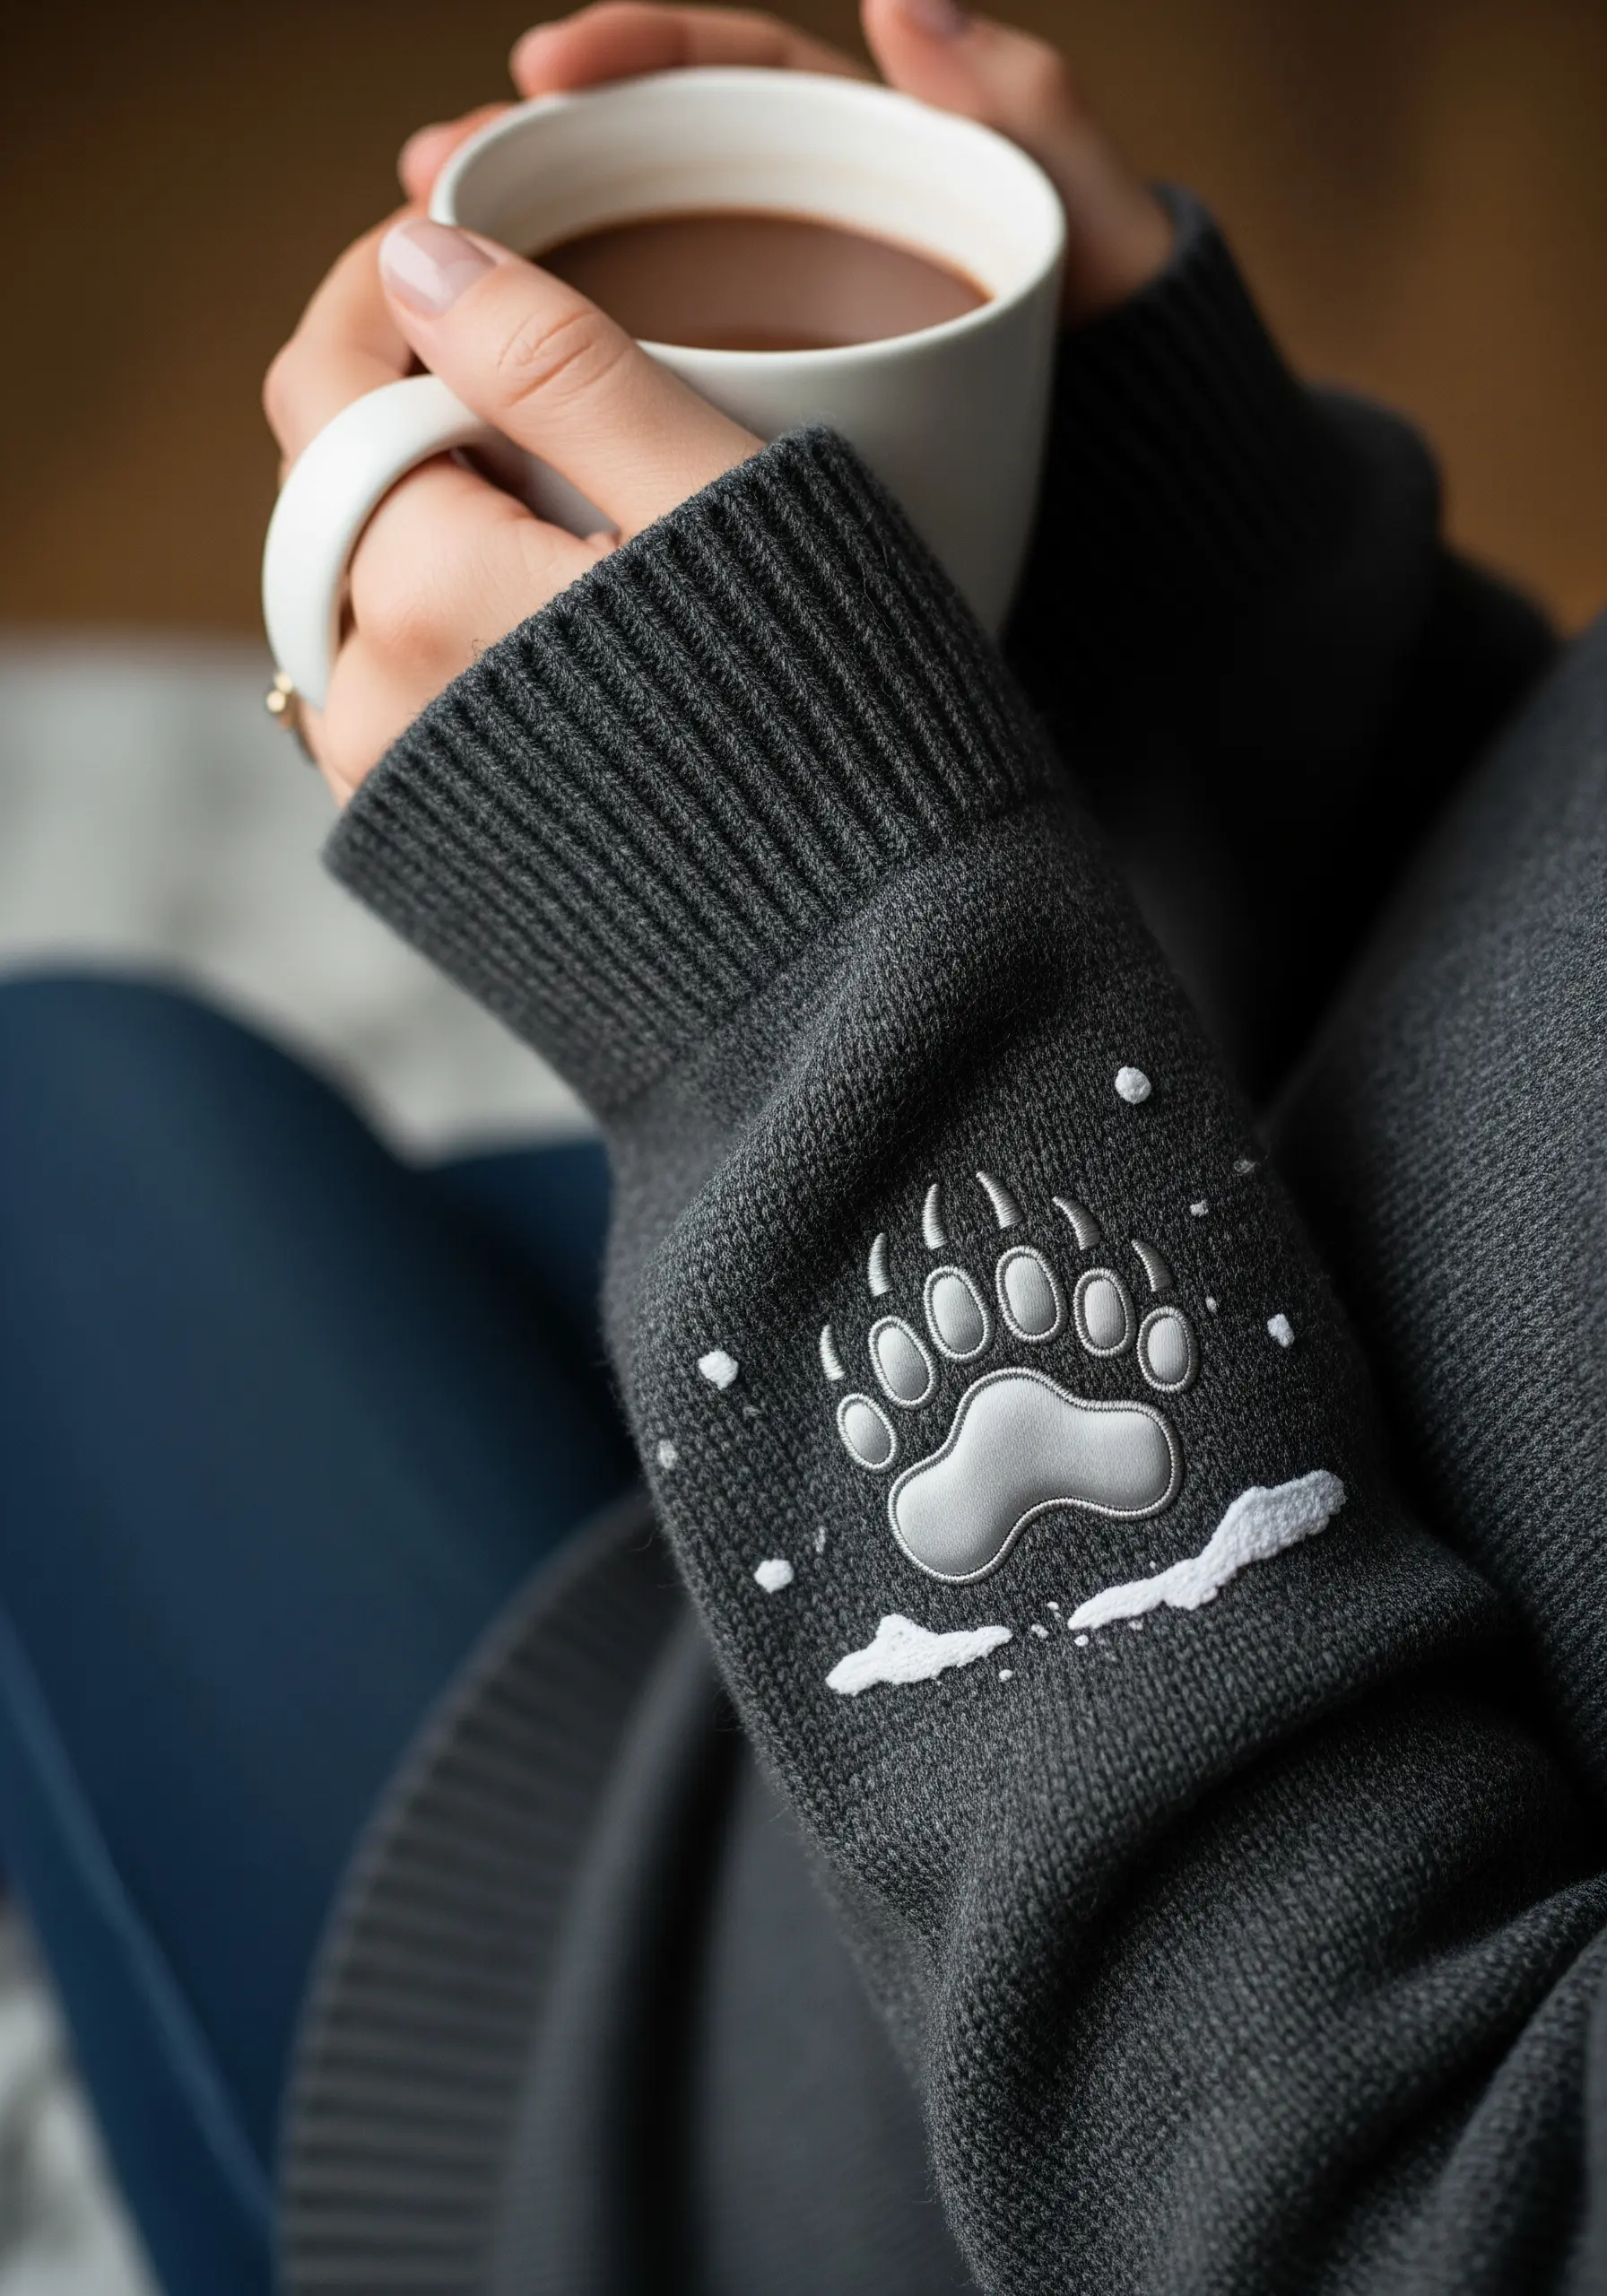
Make a simple design element, like this paw print, pop by using padded satin stitch.
First, fill the interior of the shape with a foundation of small, horizontal straight stitches. Then, cover this padding with your final layer of satin stitches, worked in the opposite direction (vertically).
This underlayer raises the surface of the embroidery, giving it a subtle, three-dimensional quality that catches the eye and adds a pleasing tactile element.
20. Mimic Punch Needle with Dense French Knots
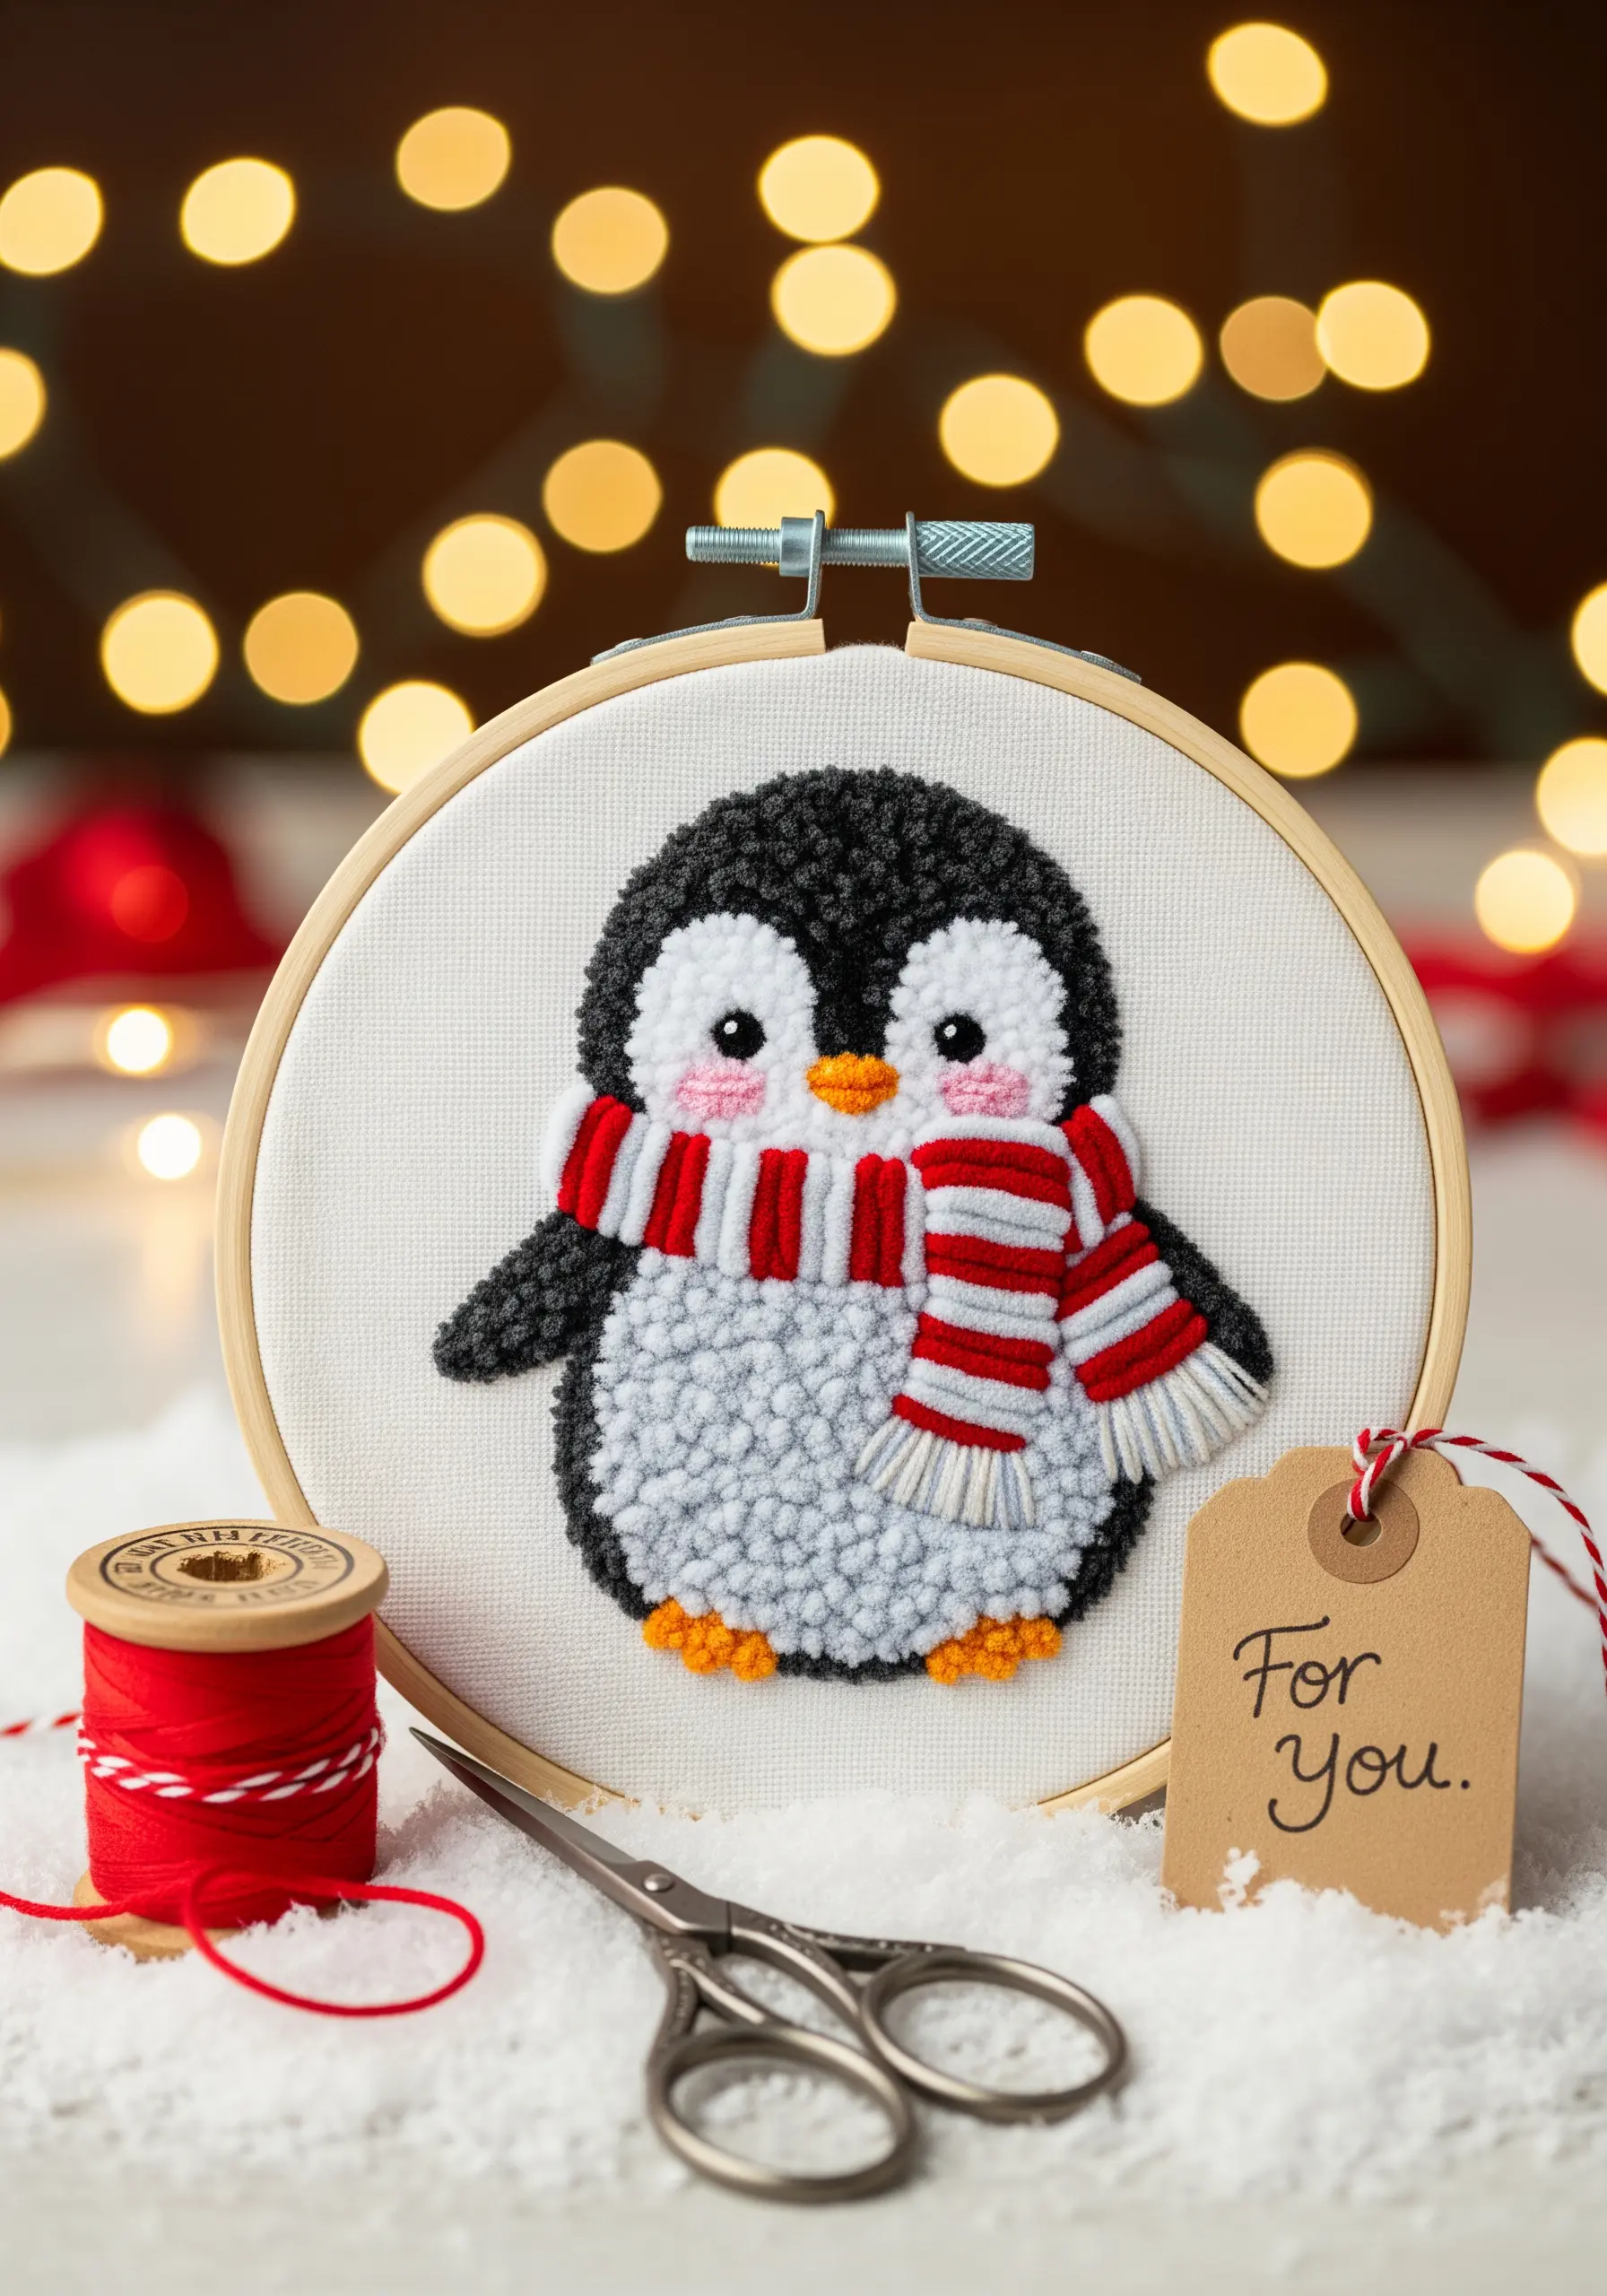
To achieve a plush, looped texture similar to punch needle without the special tool, rely on the French knot or the turkey stitch.
For the penguin’s belly, use a chunky white yarn or multiple strands of floss to create very dense, tightly packed French knots.
For the black sections, use the turkey stitch and trim the loops very short and even to create a velvet-like pile.
This highly textural approach results in an incredibly soft and huggable finish, perfect for a thoughtful gift.