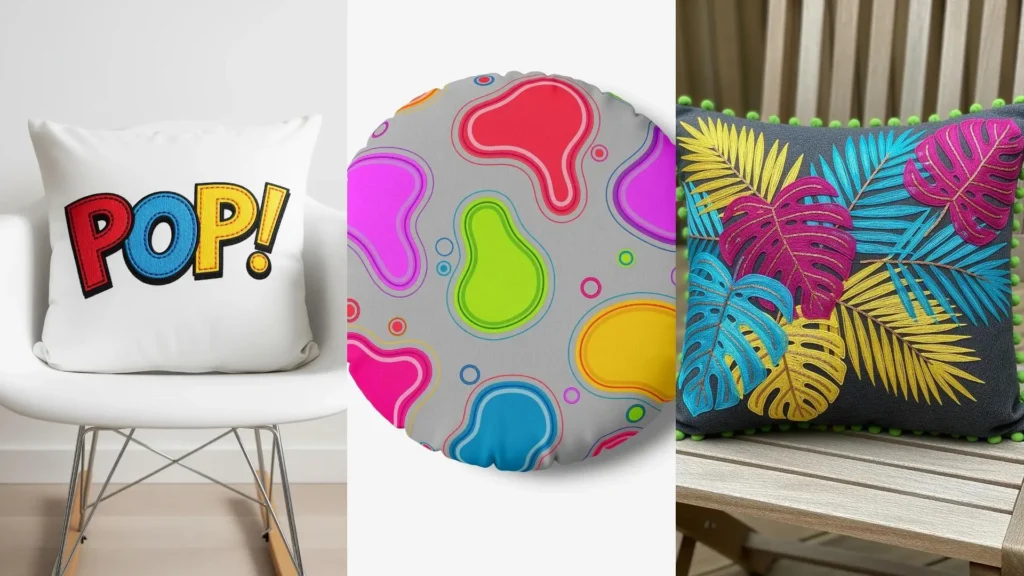
There is a unique joy in preparing your home for a special gathering—transforming your space to welcome the people you love. Your embroidery can be a quiet, meaningful part of that ritual, a way to infuse your personal touch into the very fabric of the celebration.
Table linens are the perfect canvas. They are not just decorative; they are part of the shared experience of a meal. Here, we move beyond just patterns and focus on technique. You’ll discover how a simple shift in stitch direction can make a flower look more real, how couching a metallic thread can add effortless luxury, or how combining beads and floss can create a texture that invites touch.
These are not complex changes, but intentional ones. They are small adjustments that create a significant impact, elevating your work from simply handmade to artfully handcrafted. Let this be your guide to creating pieces that feel both festive and deeply, beautifully yours.
1. Classic Holly Border with Metallic Accents
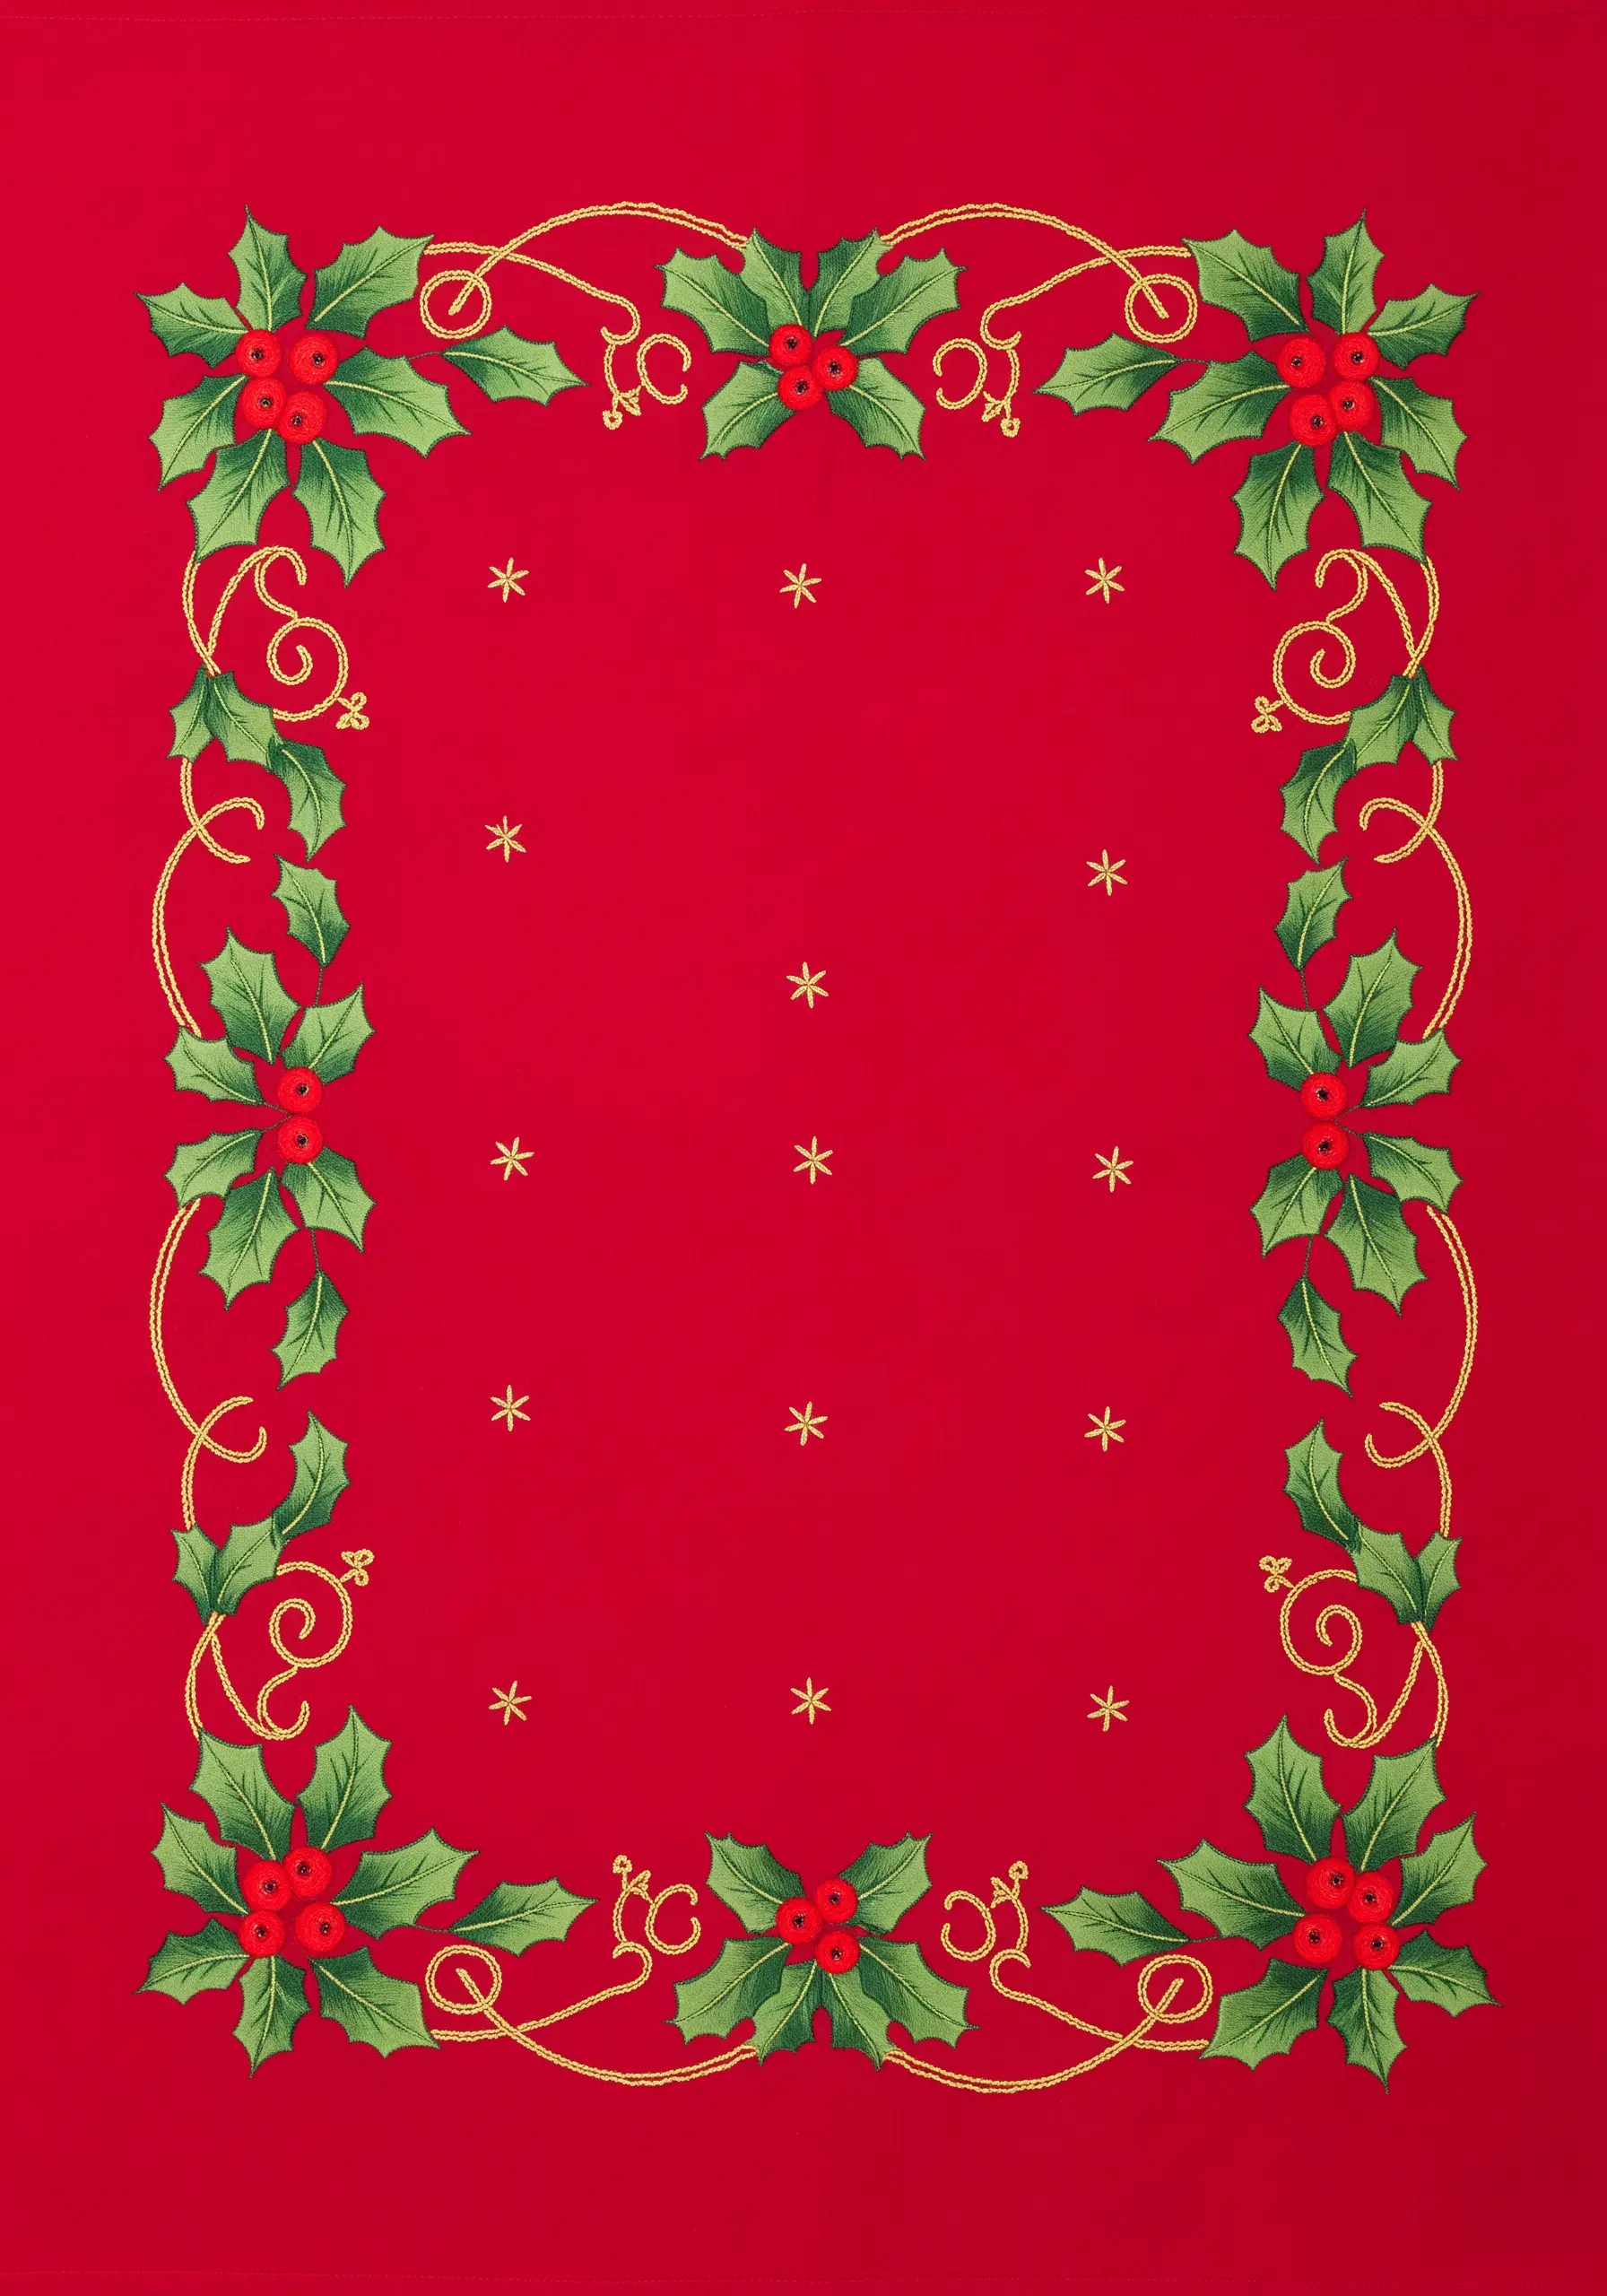
To achieve that clean, shimmering gold outline, use a couching stitch for your metallic thread.
Simply lay the metallic thread on the surface and tack it down with a finer, matching cotton floss—this prevents the delicate metallic from splitting or snagging as you stitch.
For the holly leaves, use a fishbone stitch to create a defined central vein, then fill each half with satin stitch for a smooth, raised finish.
Cluster three to five French knots for the berries, using a vibrant red floss to make them pop against the green leaves.
2. Zardozi-Inspired Paisley with Dimensional Couching
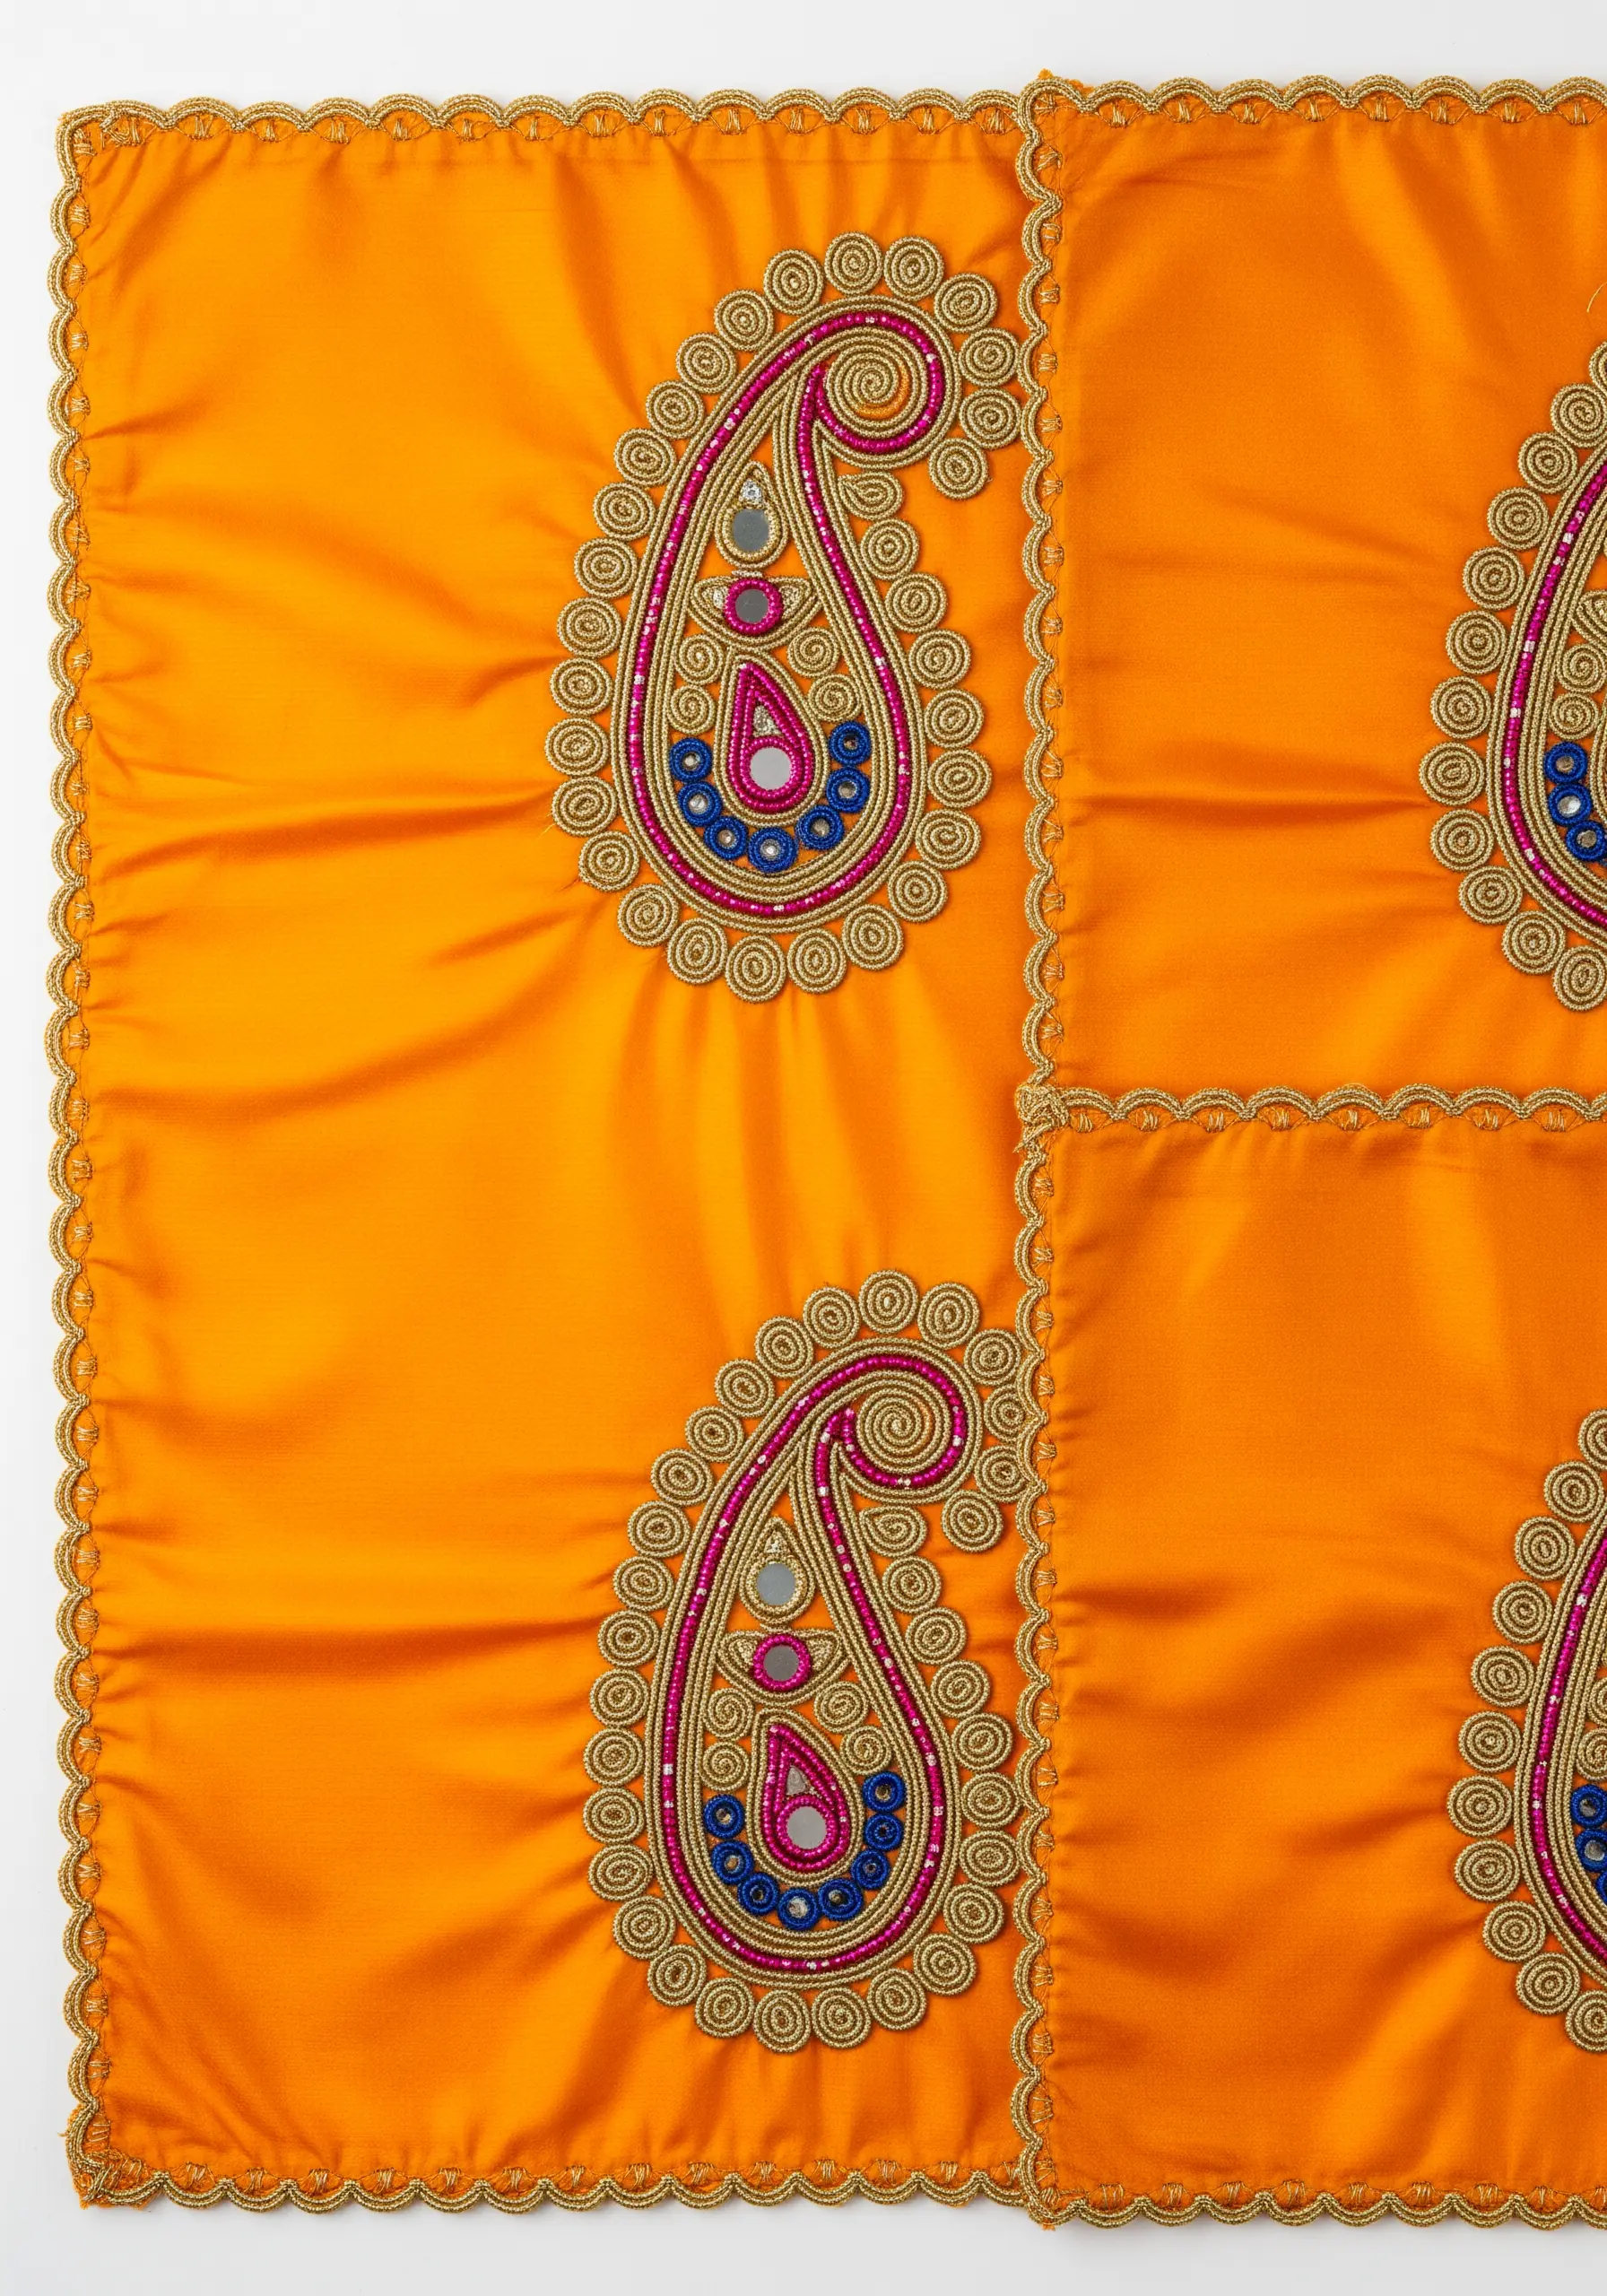
Create the luxurious, raised outline of this paisley motif by couching a thick cord, like a gold gimp or soutache braid, onto the fabric.
Inside this frame, combine different textures like shimmering sequins, small beads, and concentric circles of chain stitch.
This technique, inspired by Indian Zardozi, plays with light and shadow, giving the design a rich, three-dimensional quality perfect for a festive occasion like Diwali.
The high contrast between the bright inner colors and the gold outline is essential for making the pattern feel vibrant and alive.
3. Celestial Lace Effect for Eid Celebrations
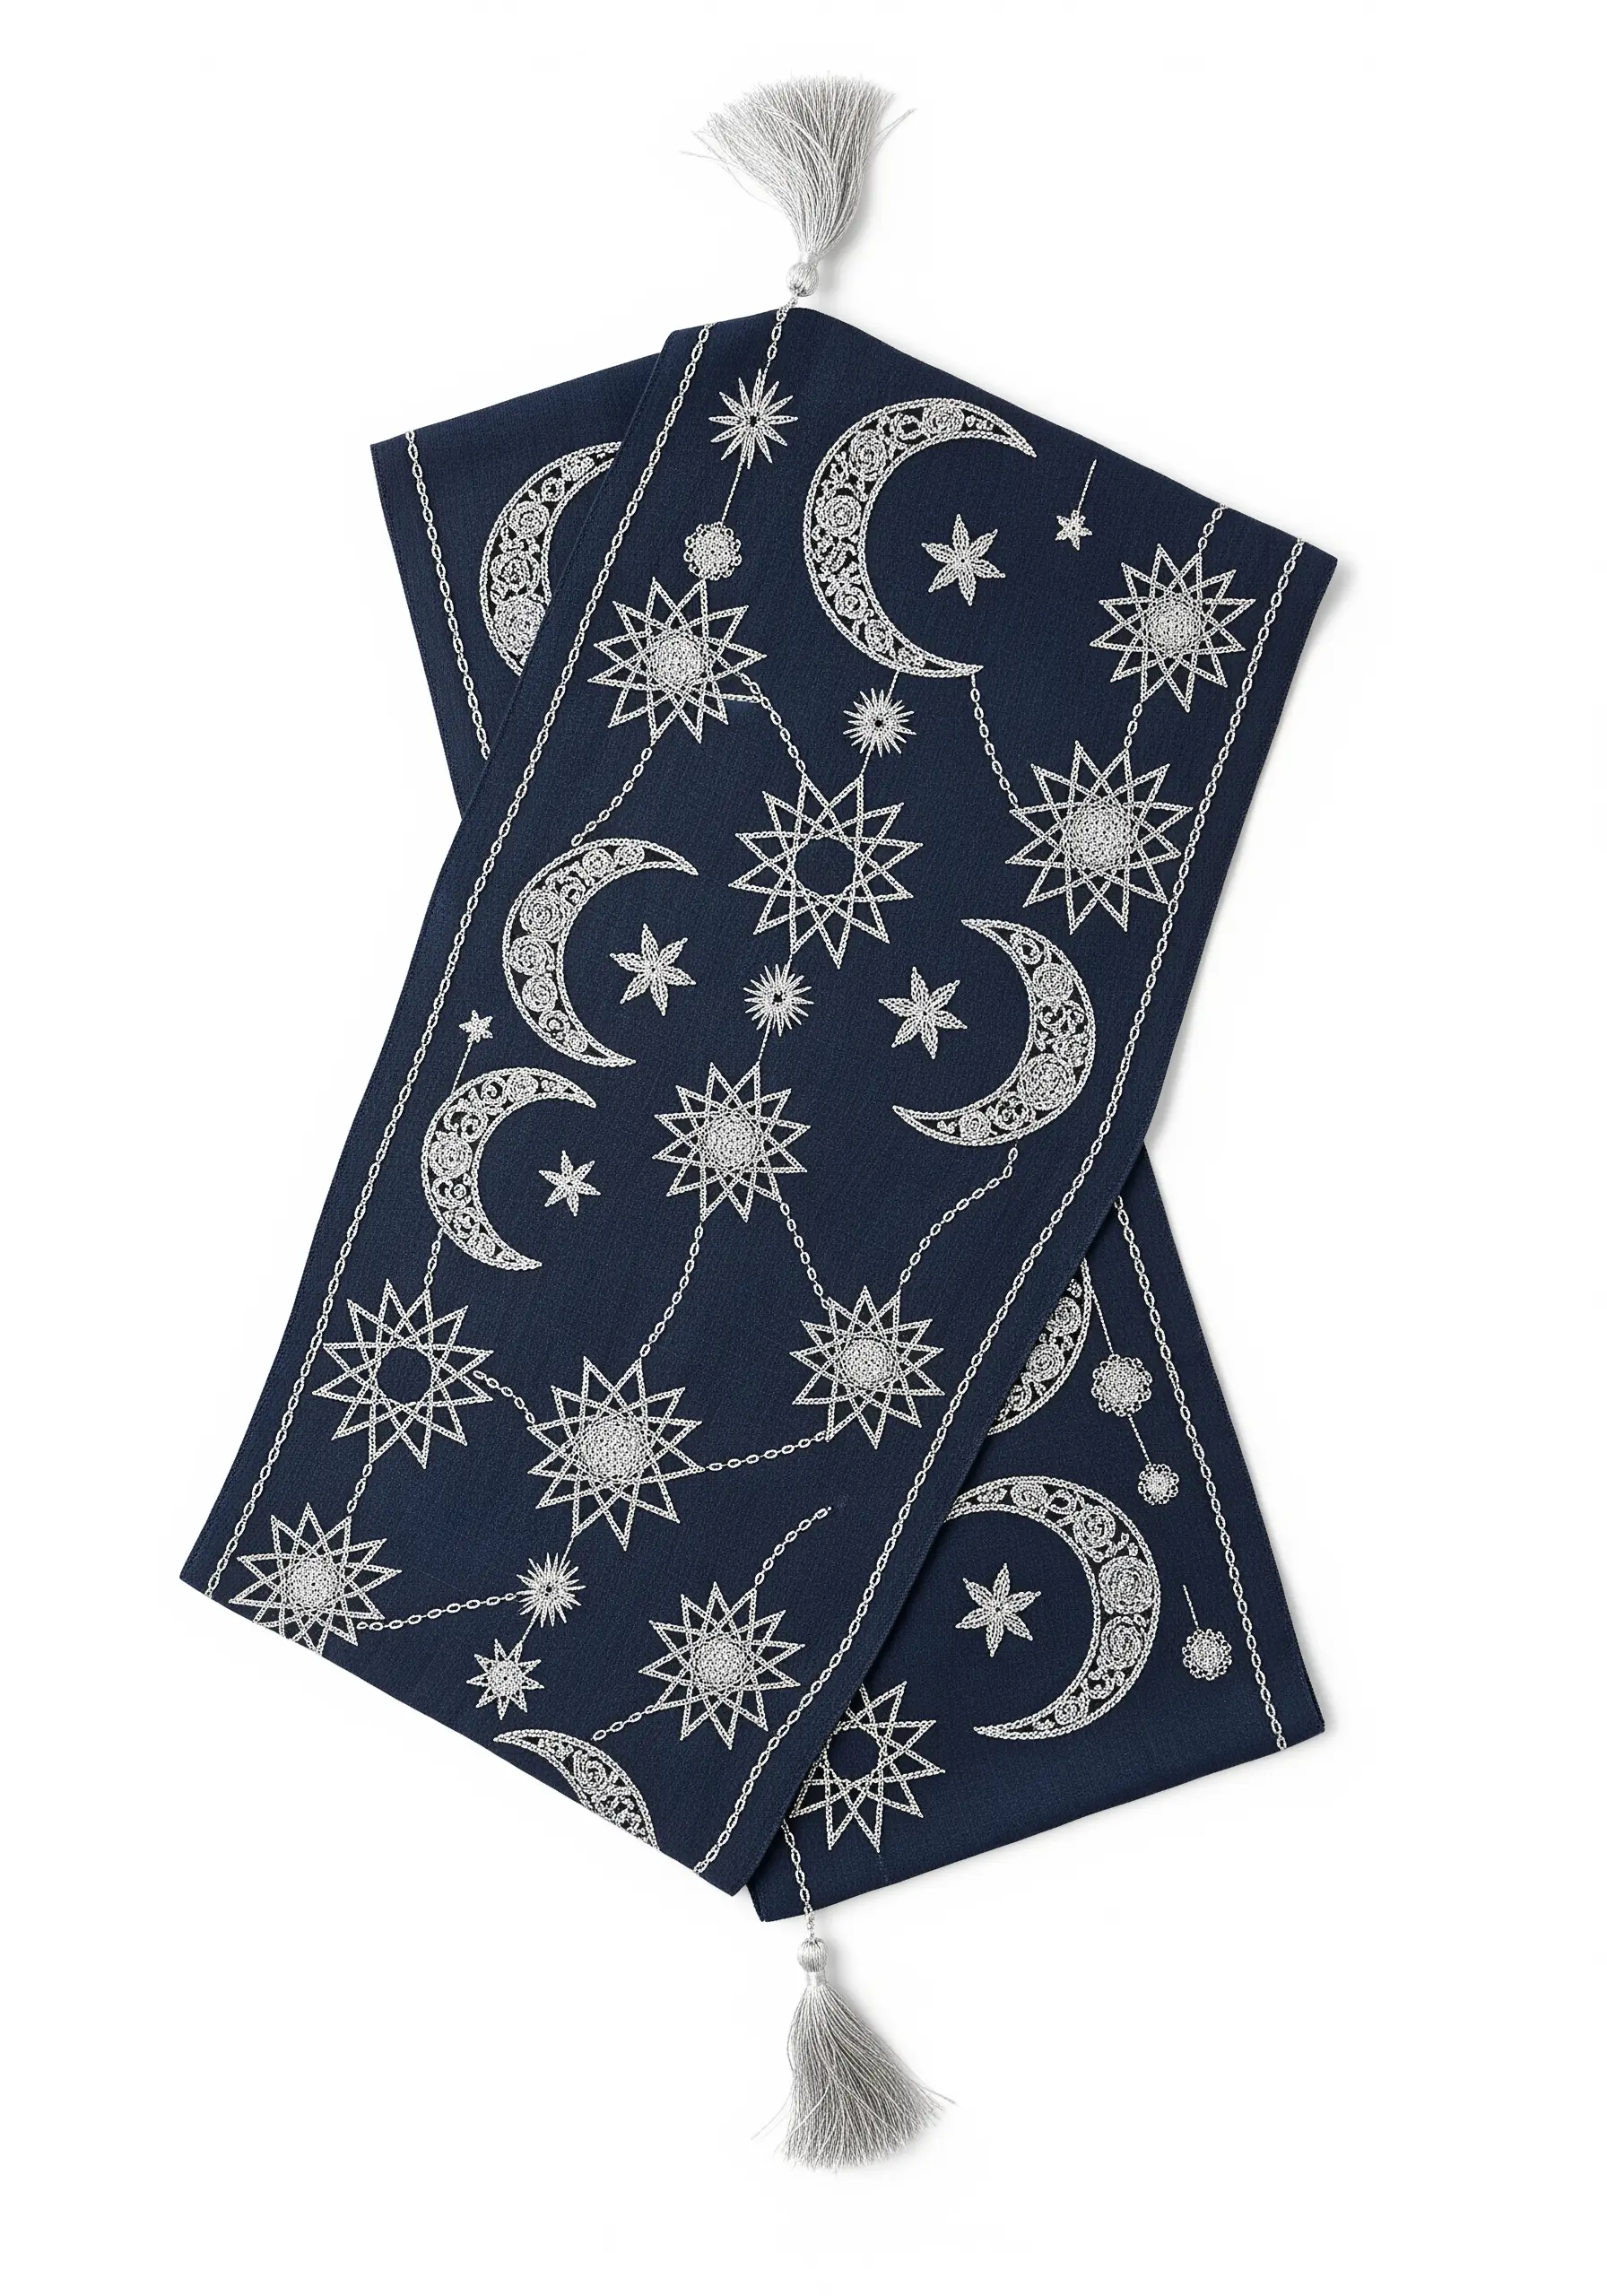
To create this delicate, lace-like effect, choose a fine, high-sheen thread like a single strand of silver metallic or white rayon floss.
The intricate look comes from using open fill stitches—such as tiny seed stitches, spaced-out cross-stitches, or even simple geometric patterns using straight stitches.
Define each crescent and star shape first with a simple backstitch outline; this provides a clear boundary for your fill pattern and keeps the edges crisp.
For the delicate chains connecting the motifs, a whipped backstitch will give you a smooth, uninterrupted line.
4. Thread Painting for a Harvest Cornucopia
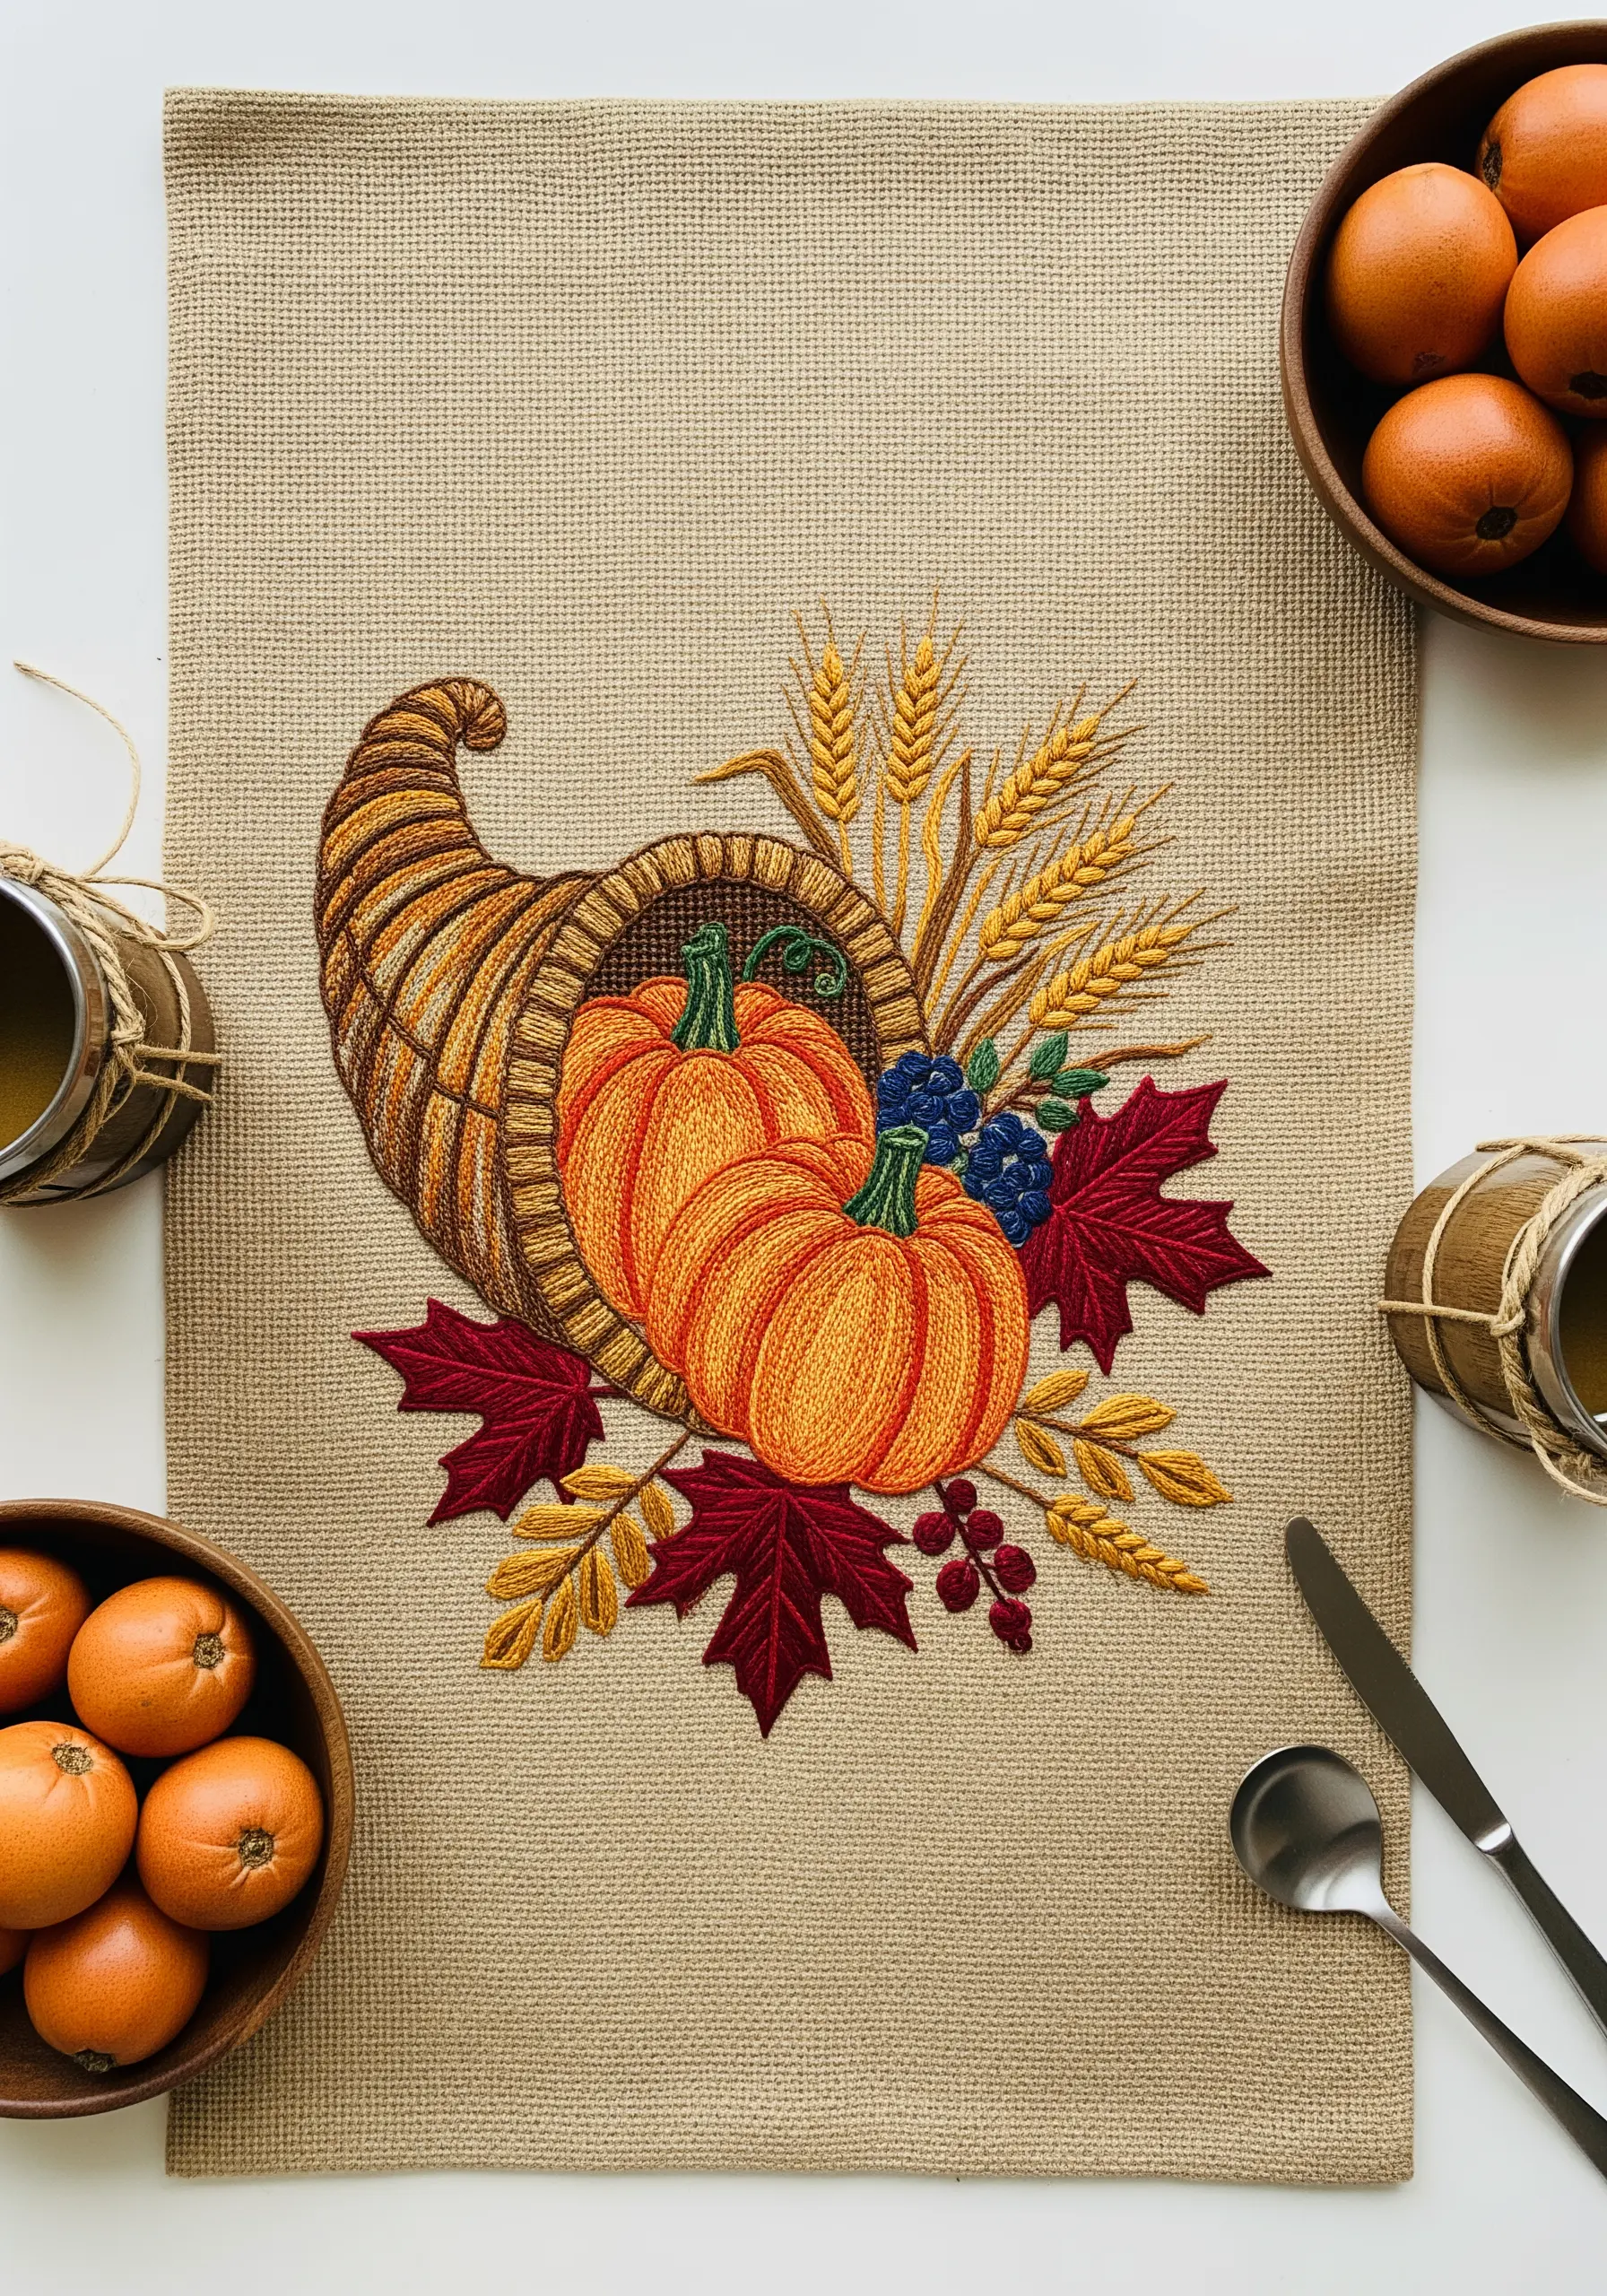
This design is a perfect canvas for practicing your thread painting, using long-and-short stitch to blend colors seamlessly.
For the pumpkins, use at least three shades of orange, working in curved lines to suggest their roundness.
To create the woven texture of the cornucopia, vary the direction of your stitches, laying them in short, overlapping blocks.
The key to realism here is using multiple shades of each color, which builds depth and dimension without adding complexity.
5. Geometric Color Blocking with Satin Stitch
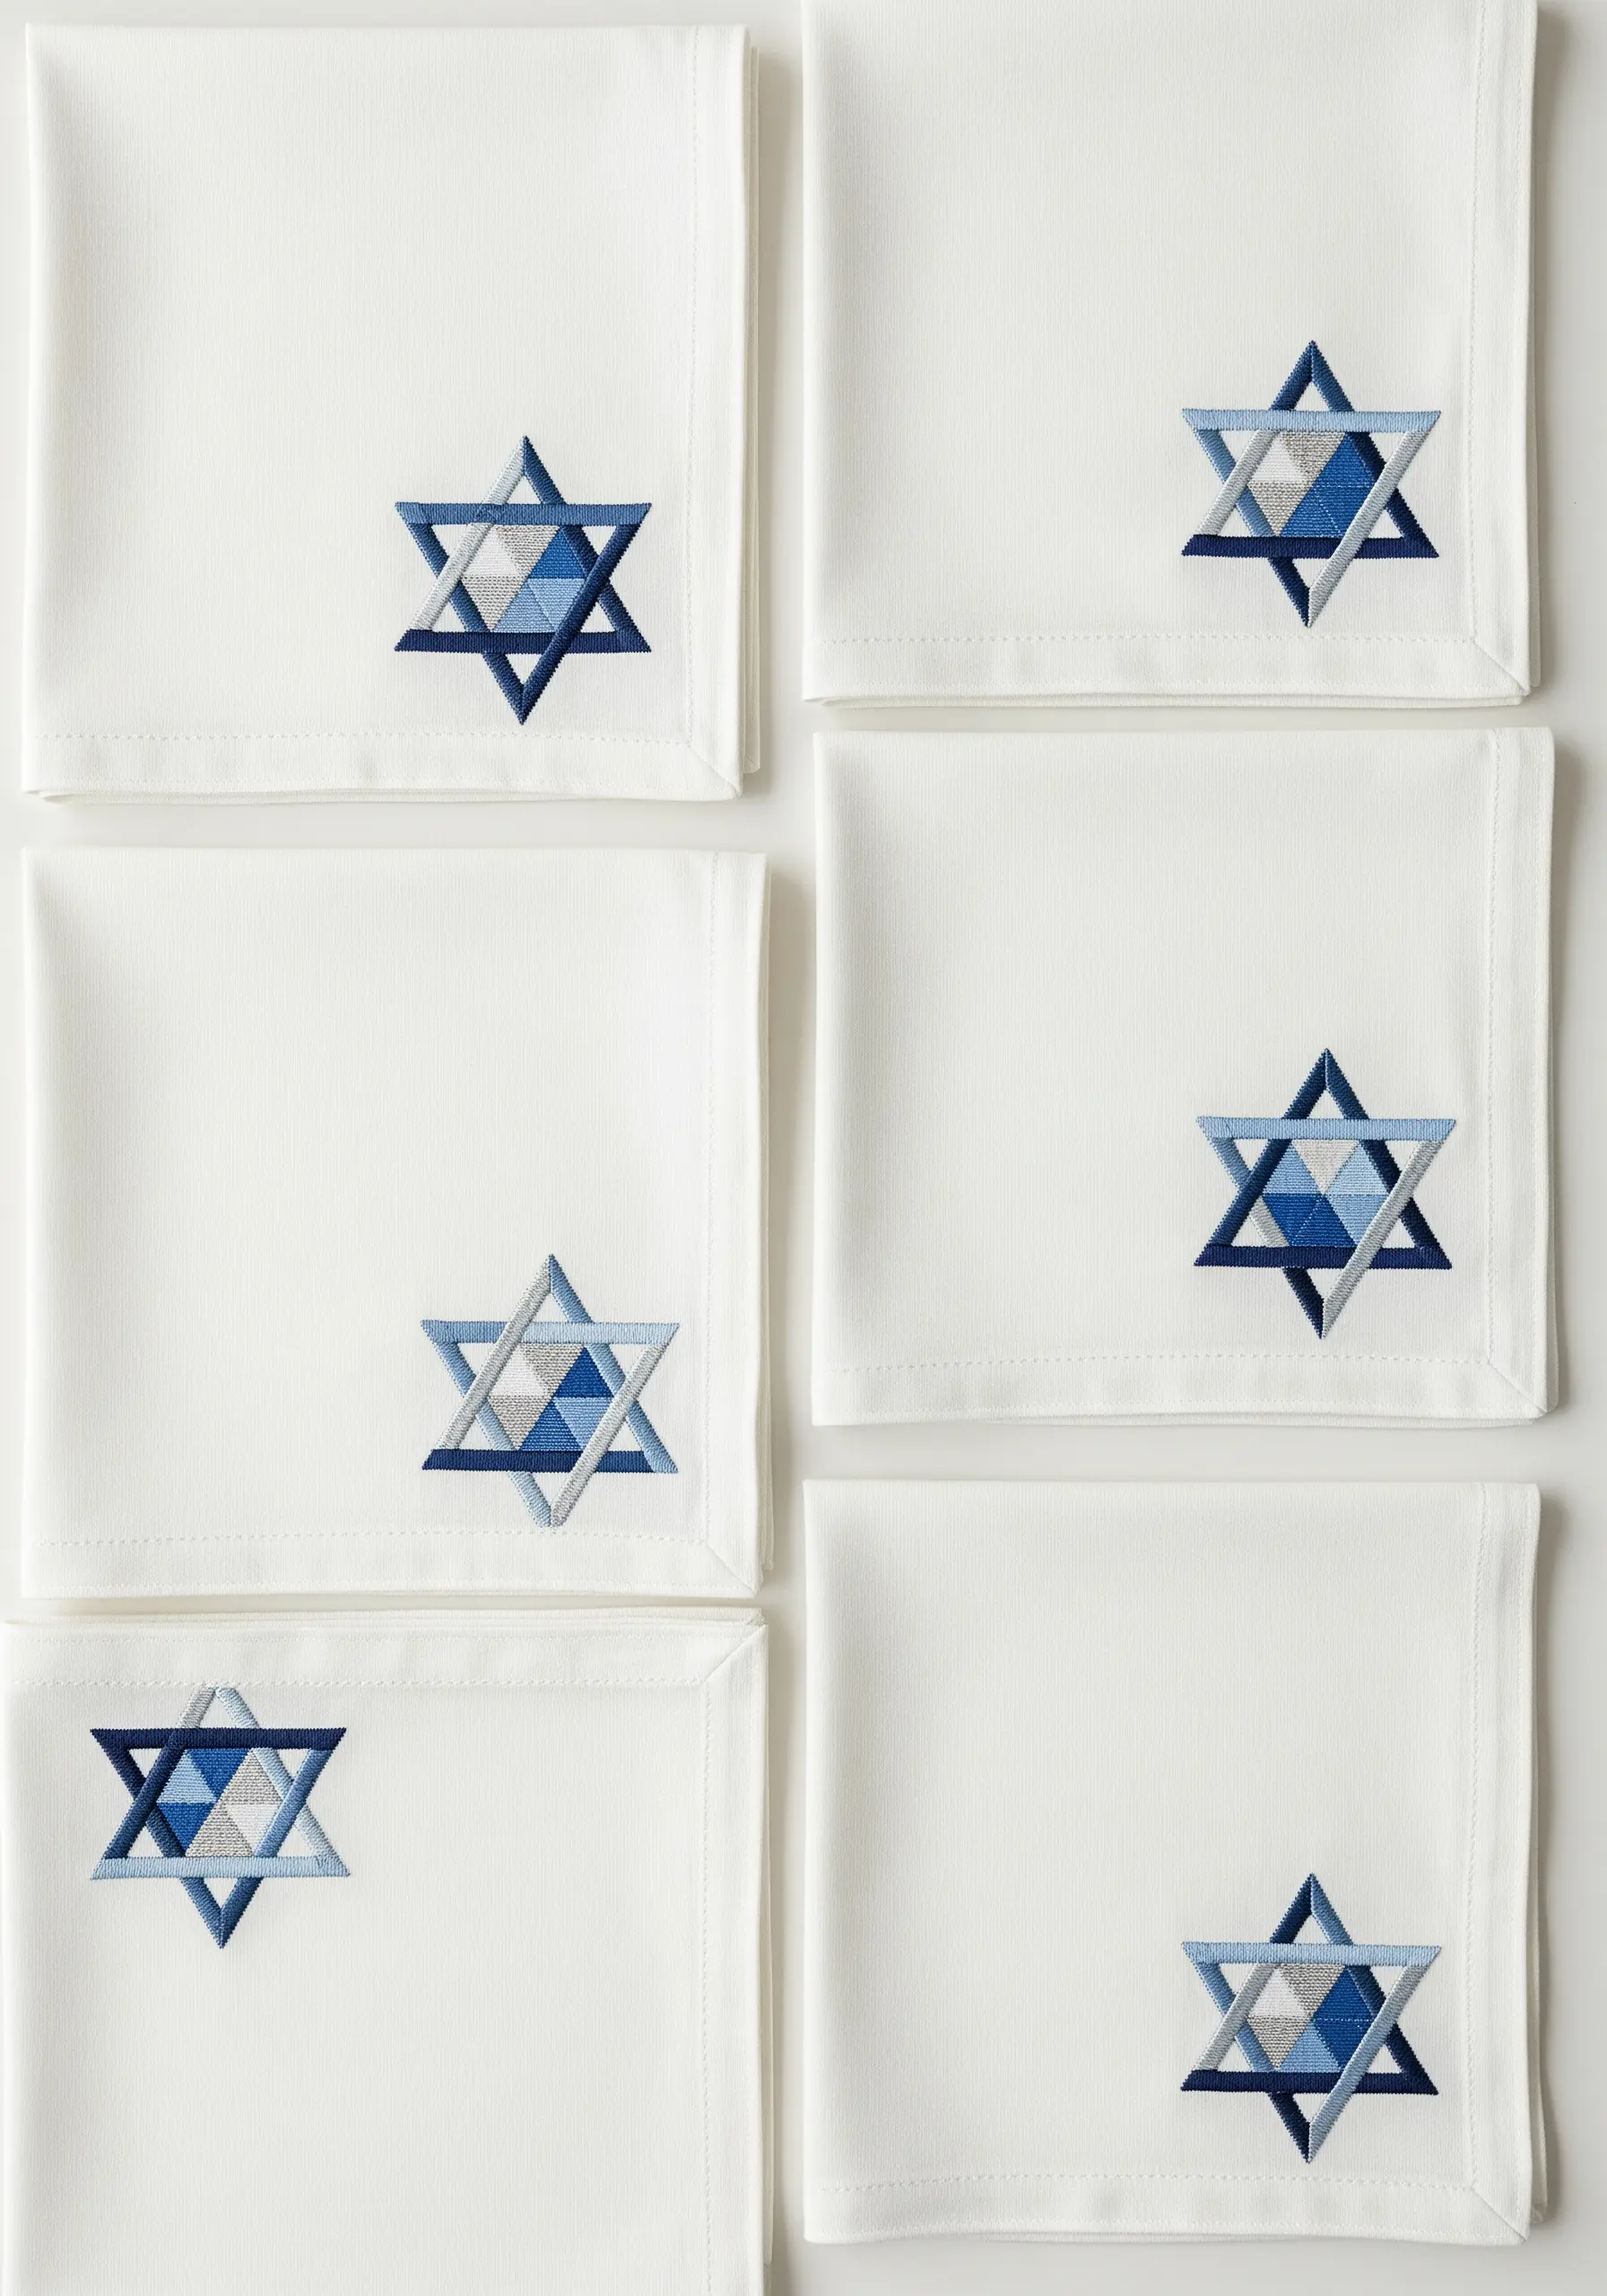
The success of this sharp, geometric design lies in perfect execution of satin stitch.
To guarantee crisp edges and flat fills, first outline each small triangle with a split stitch.
This creates a slightly raised border for your satin stitches to rest against, ensuring a clean line where colors meet.
Use a single strand of floss for the smoothest possible finish, and incorporate one metallic thread to add a sophisticated, light-catching accent.
6. Creating a Narrative Scene with Varied Textures
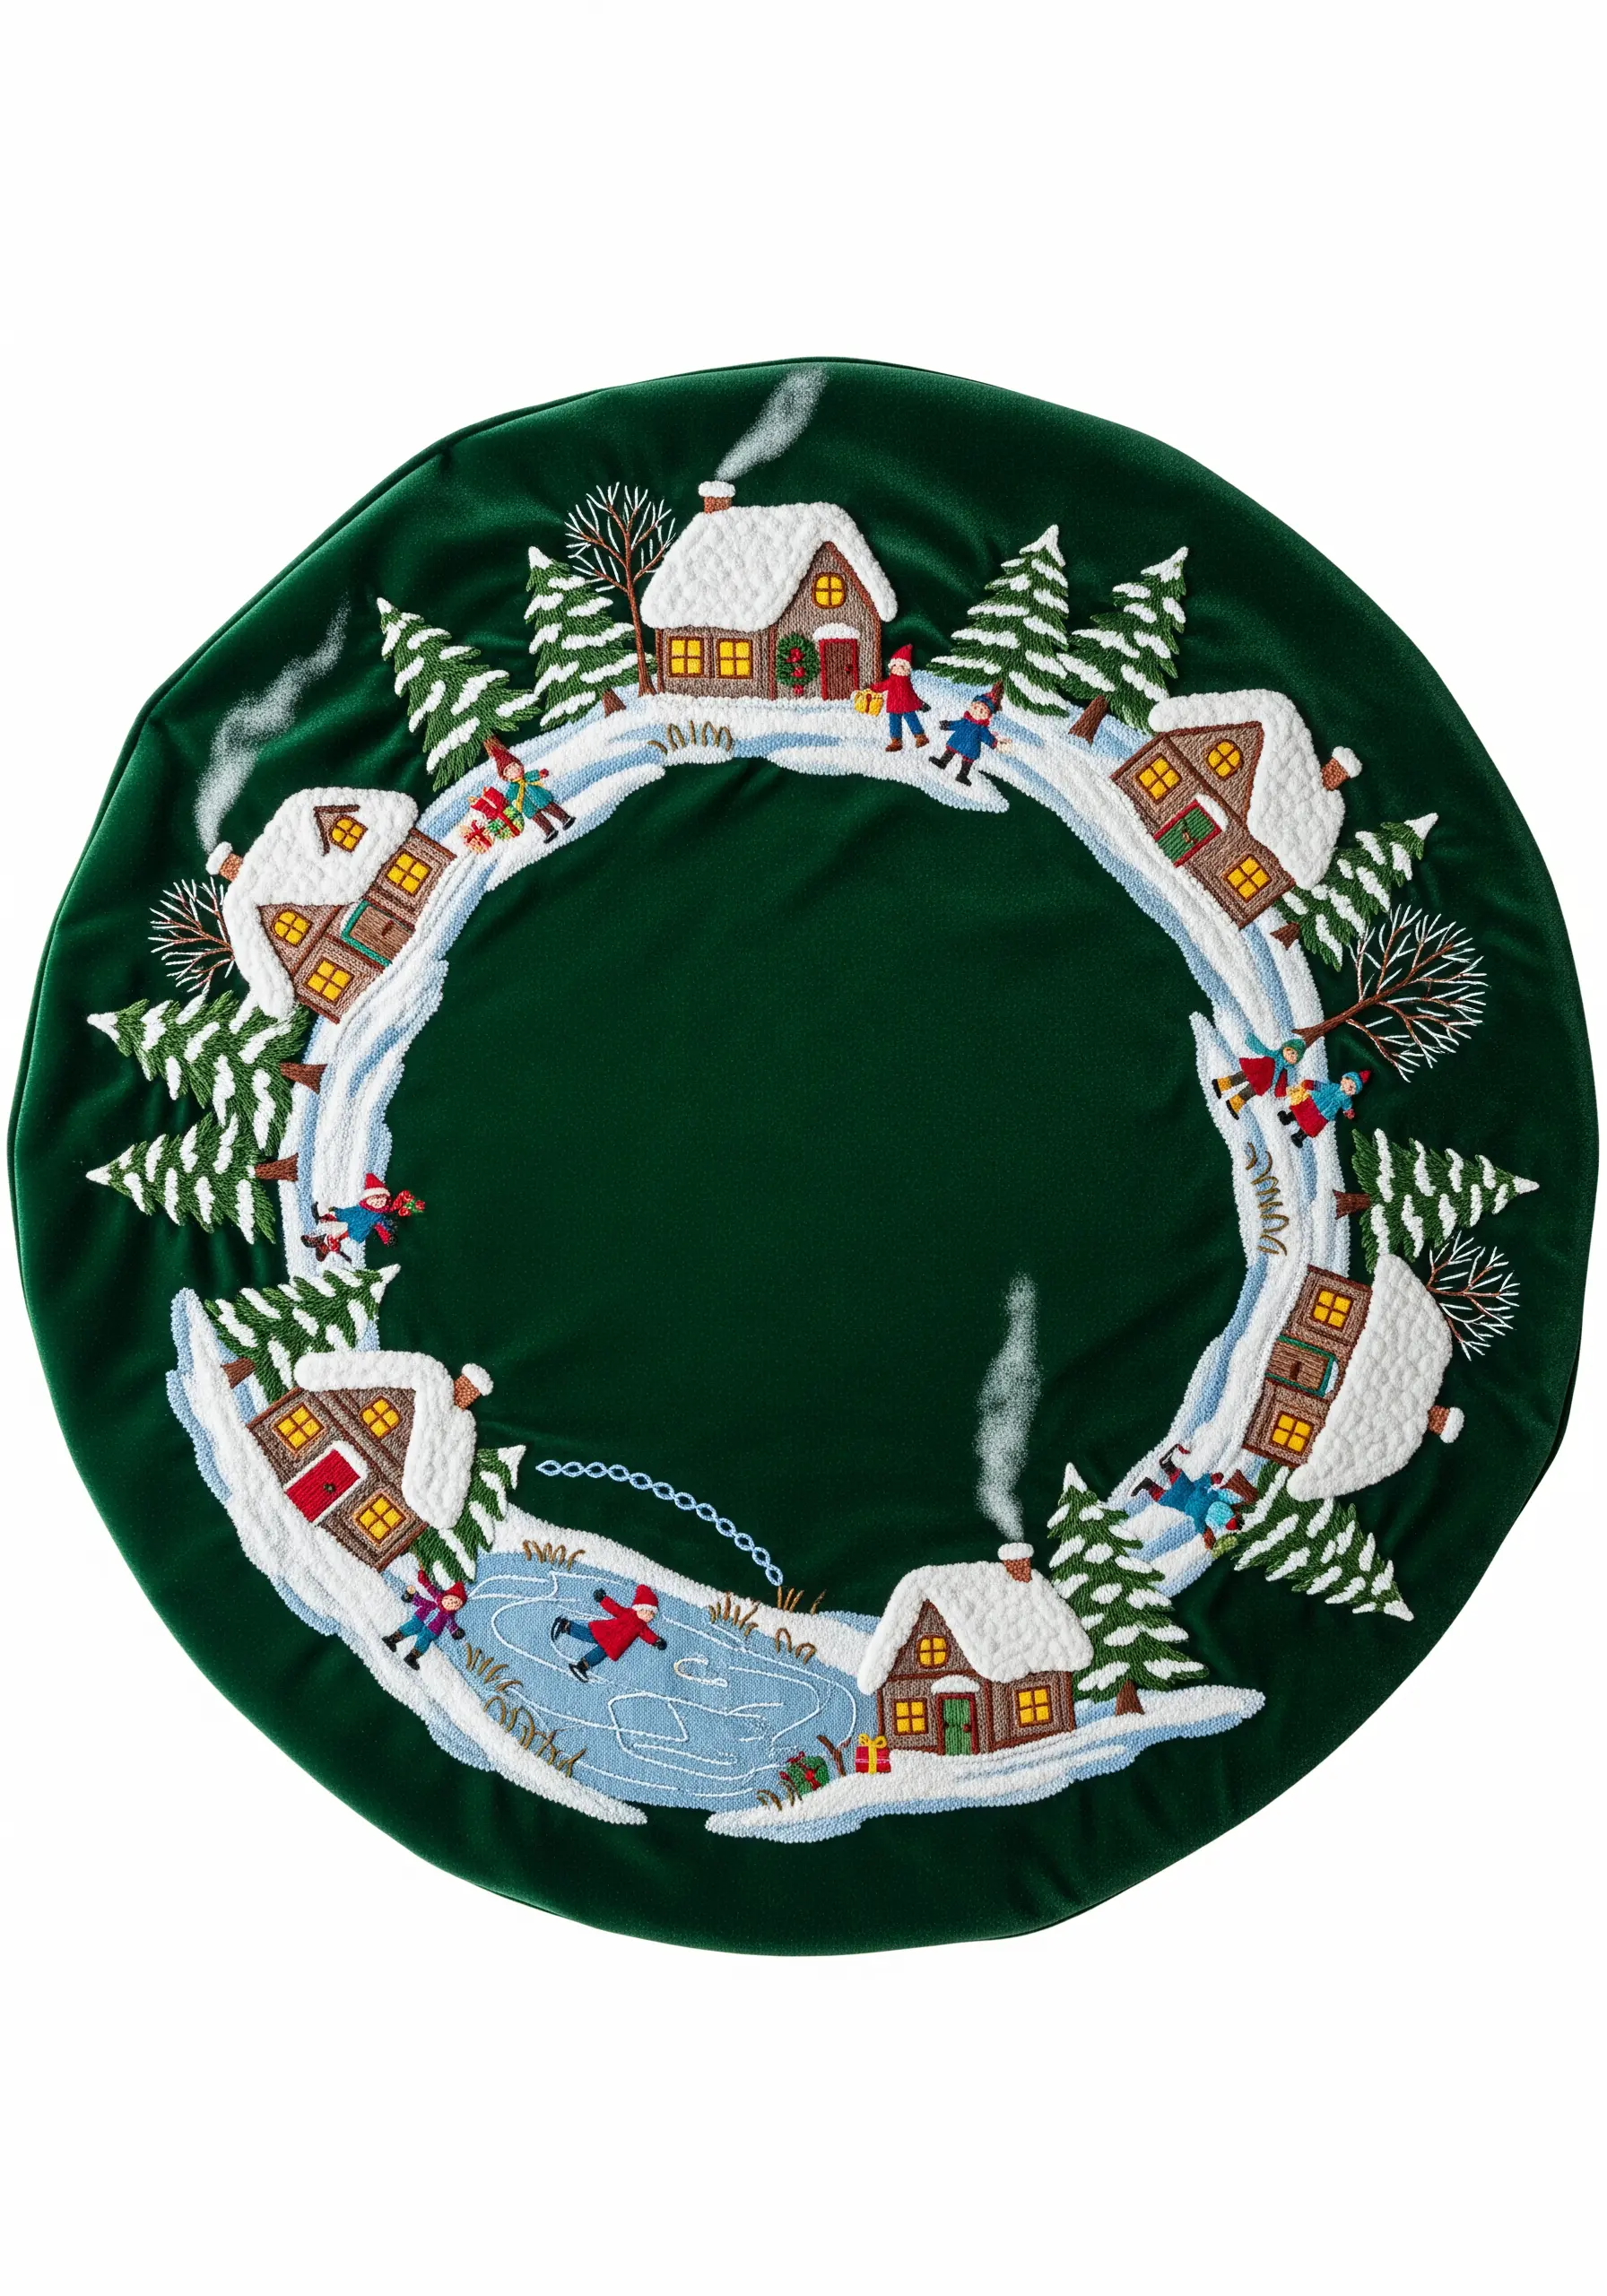
Bring a winter village to life by assigning different stitches to different textures.
Use Turkey work or dense French knots for the snow on the roofs and ground; this creates a plush, three-dimensional effect that you can trim to your desired height.
For the frozen pond, use long, horizontal satin stitches in a light blue or silver thread to mimic a reflective, icy surface.
Keep the figures and trees simple with backstitch outlines so they don’t visually clutter the detailed scenery.
7. Radiant Diwali Runner with Sequins and Satin Stitch
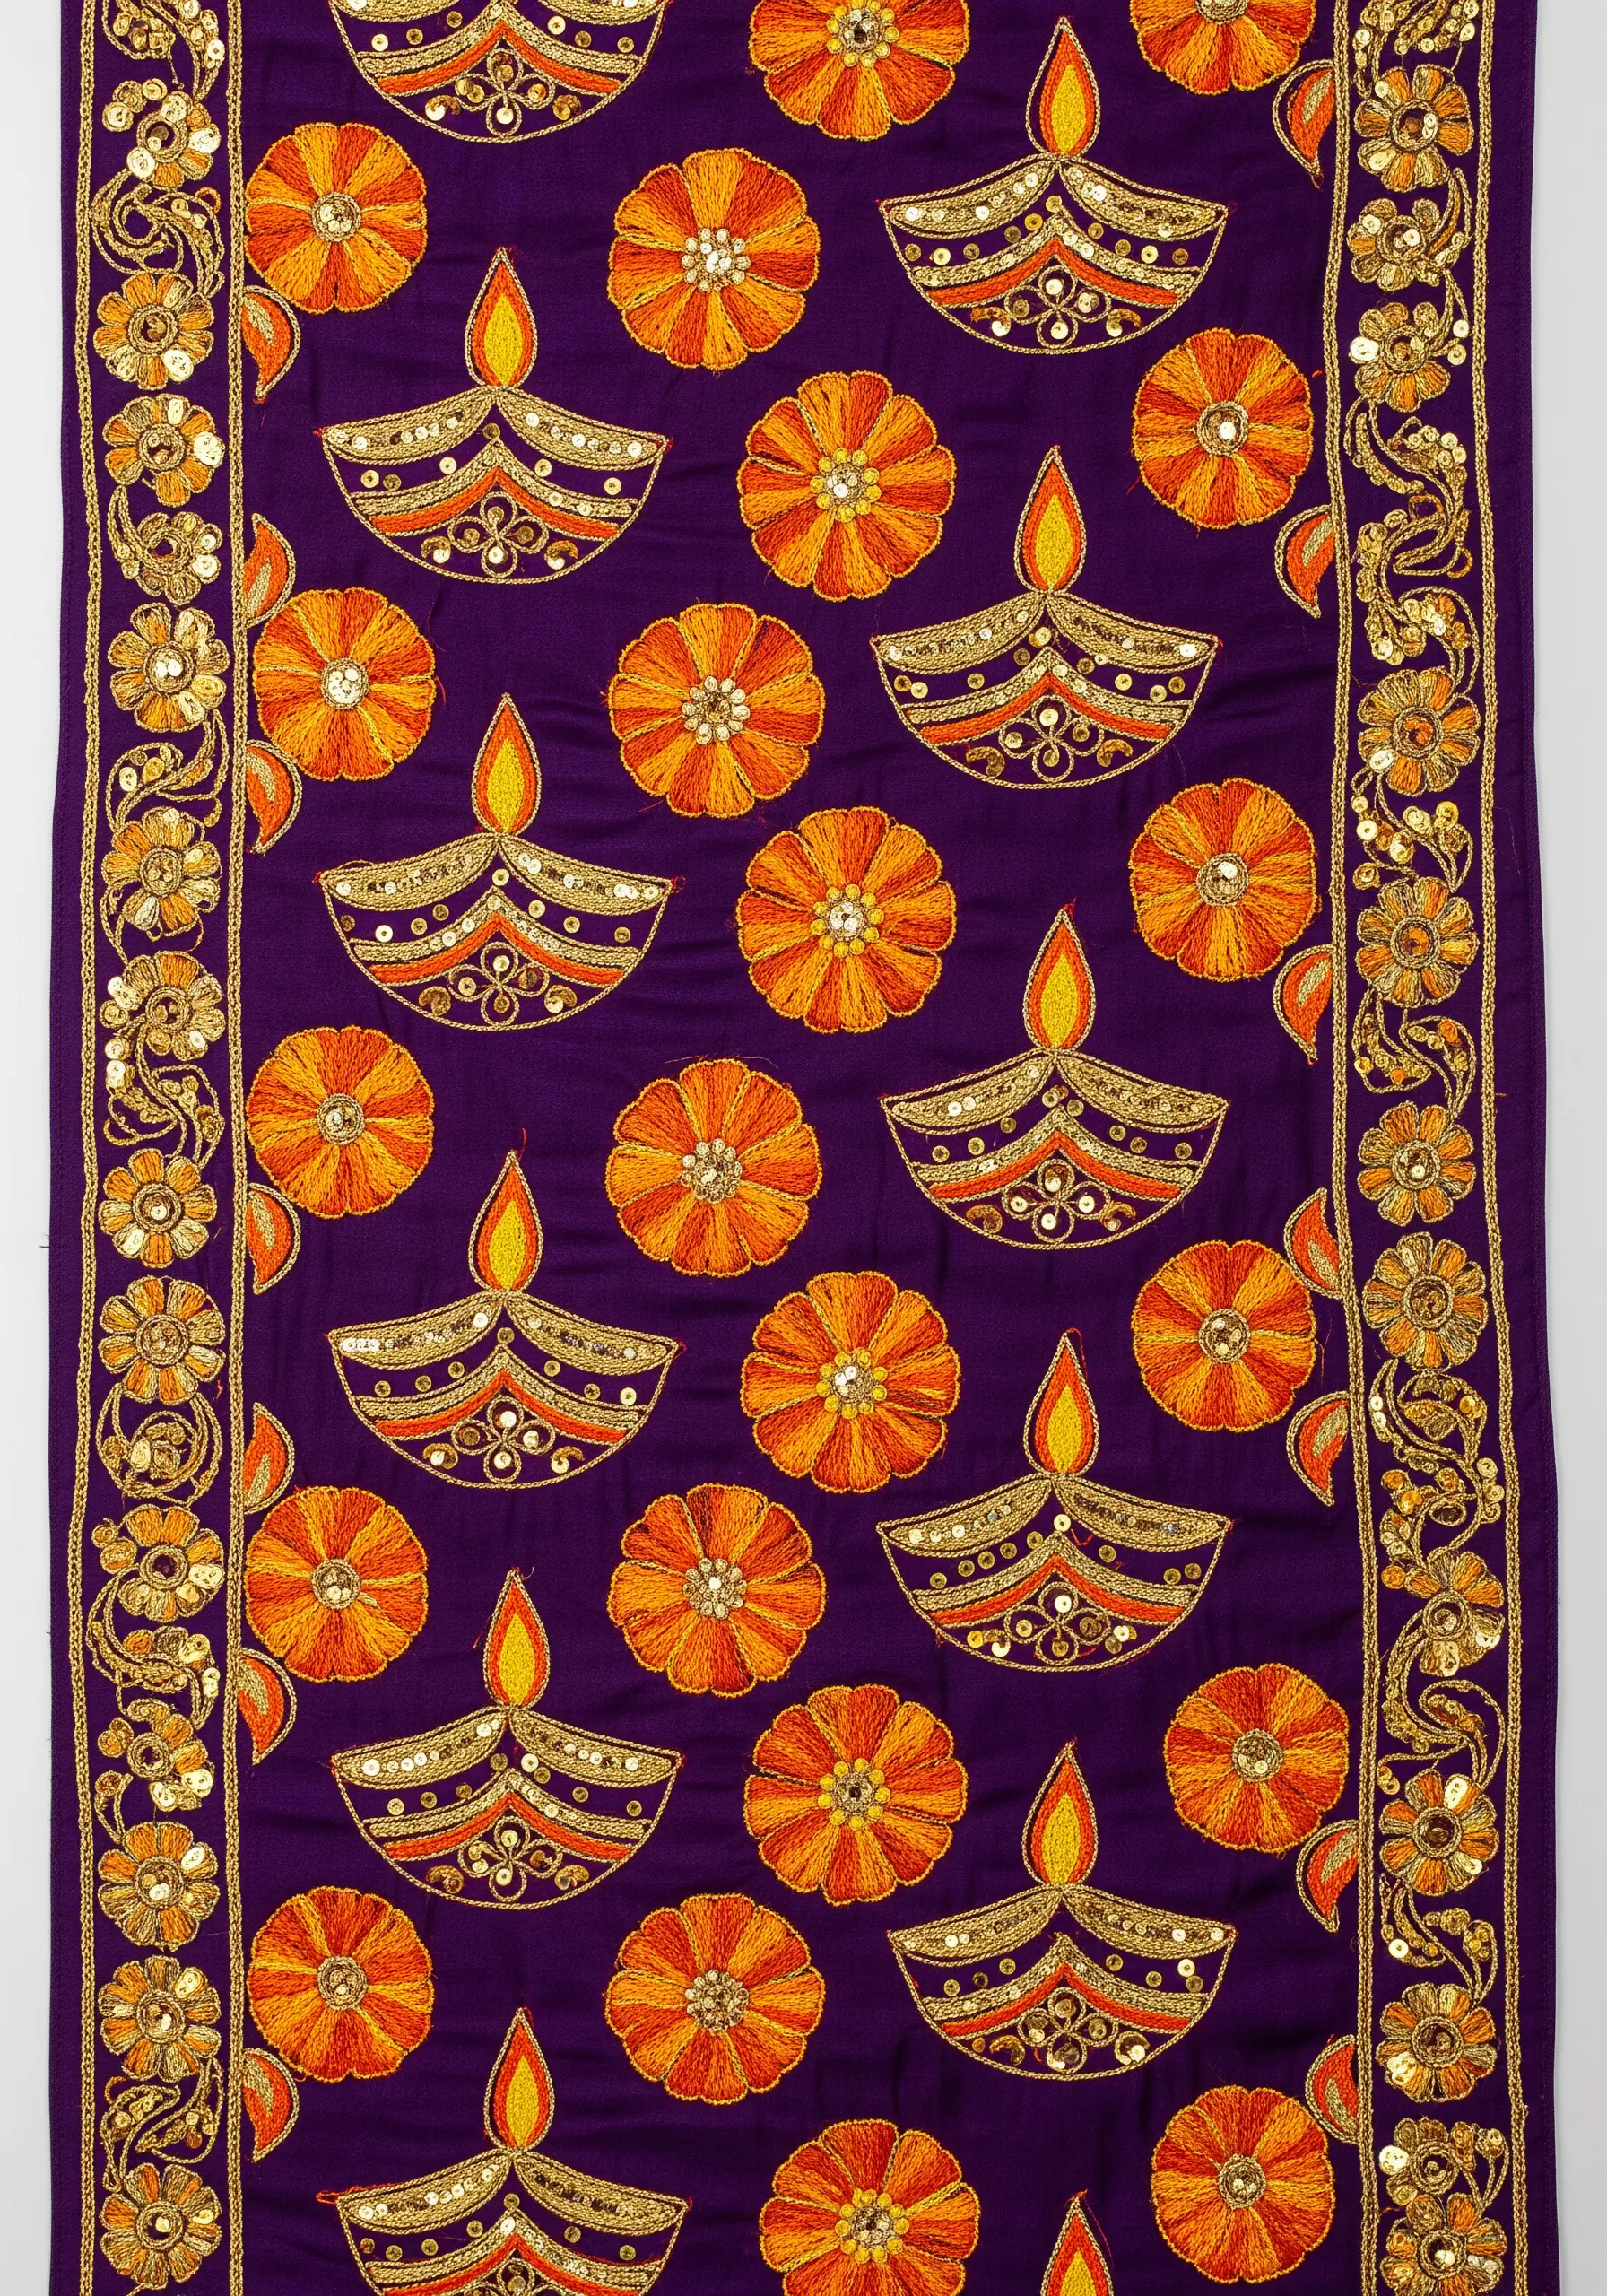
Capture the glow of diyas by combining rich satin stitch with the sparkle of sequins and metallic thread.
For the flames, blend yellow and orange floss using a long-and-short stitch to create a natural gradient.
After filling the marigolds and lamp bases with dense satin stitch, add a single gold sequin to the center of each flower and along the decorative borders.
This simple addition catches the light beautifully, enhancing the festive spirit of Diwali.
8. Architectural Elegance with Soft Botanical Fills
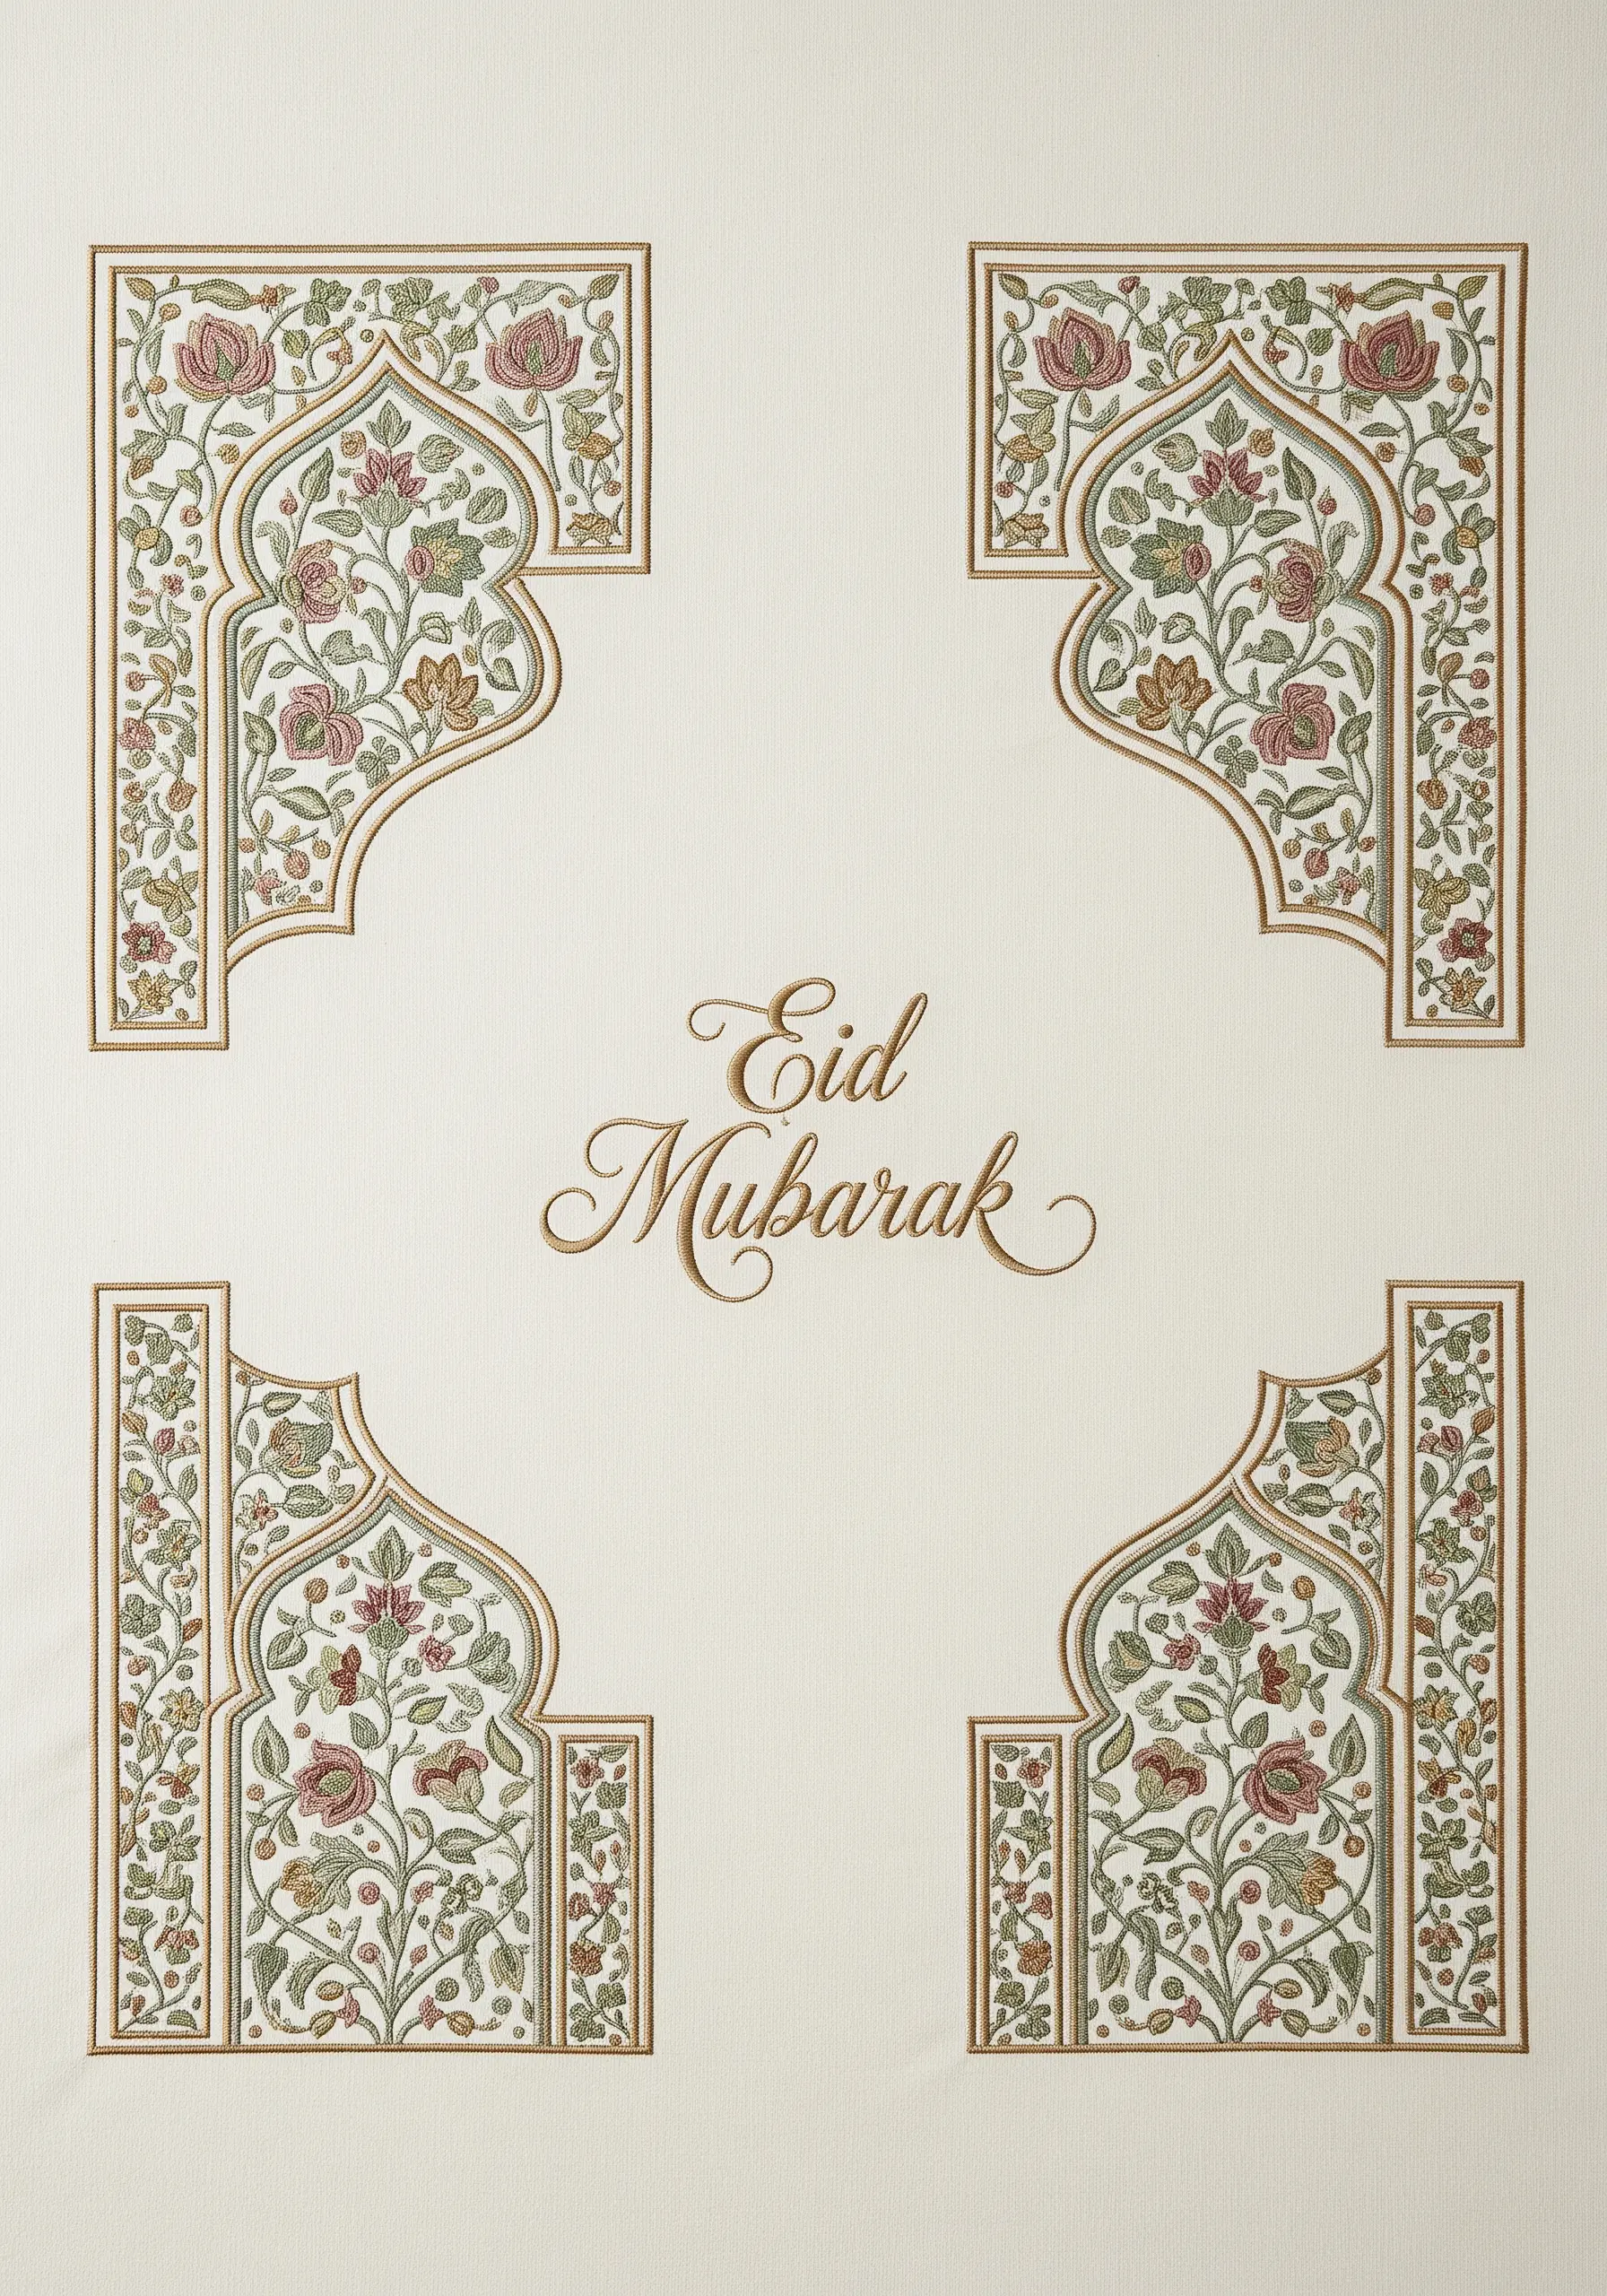
This design achieves its sophisticated look through the contrast between sharp lines and soft fills.
Use a fine, whipped backstitch with a gold metallic thread to create the crisp architectural outlines of the arches.
Inside, fill the floral motifs with muted, gentle colors using a looser seed stitch or short satin stitches.
This juxtaposition makes the metallic framework pop while giving the botanicals a delicate, almost painted appearance.
9. Dimensional Spring Florals with Padded Satin Stitch
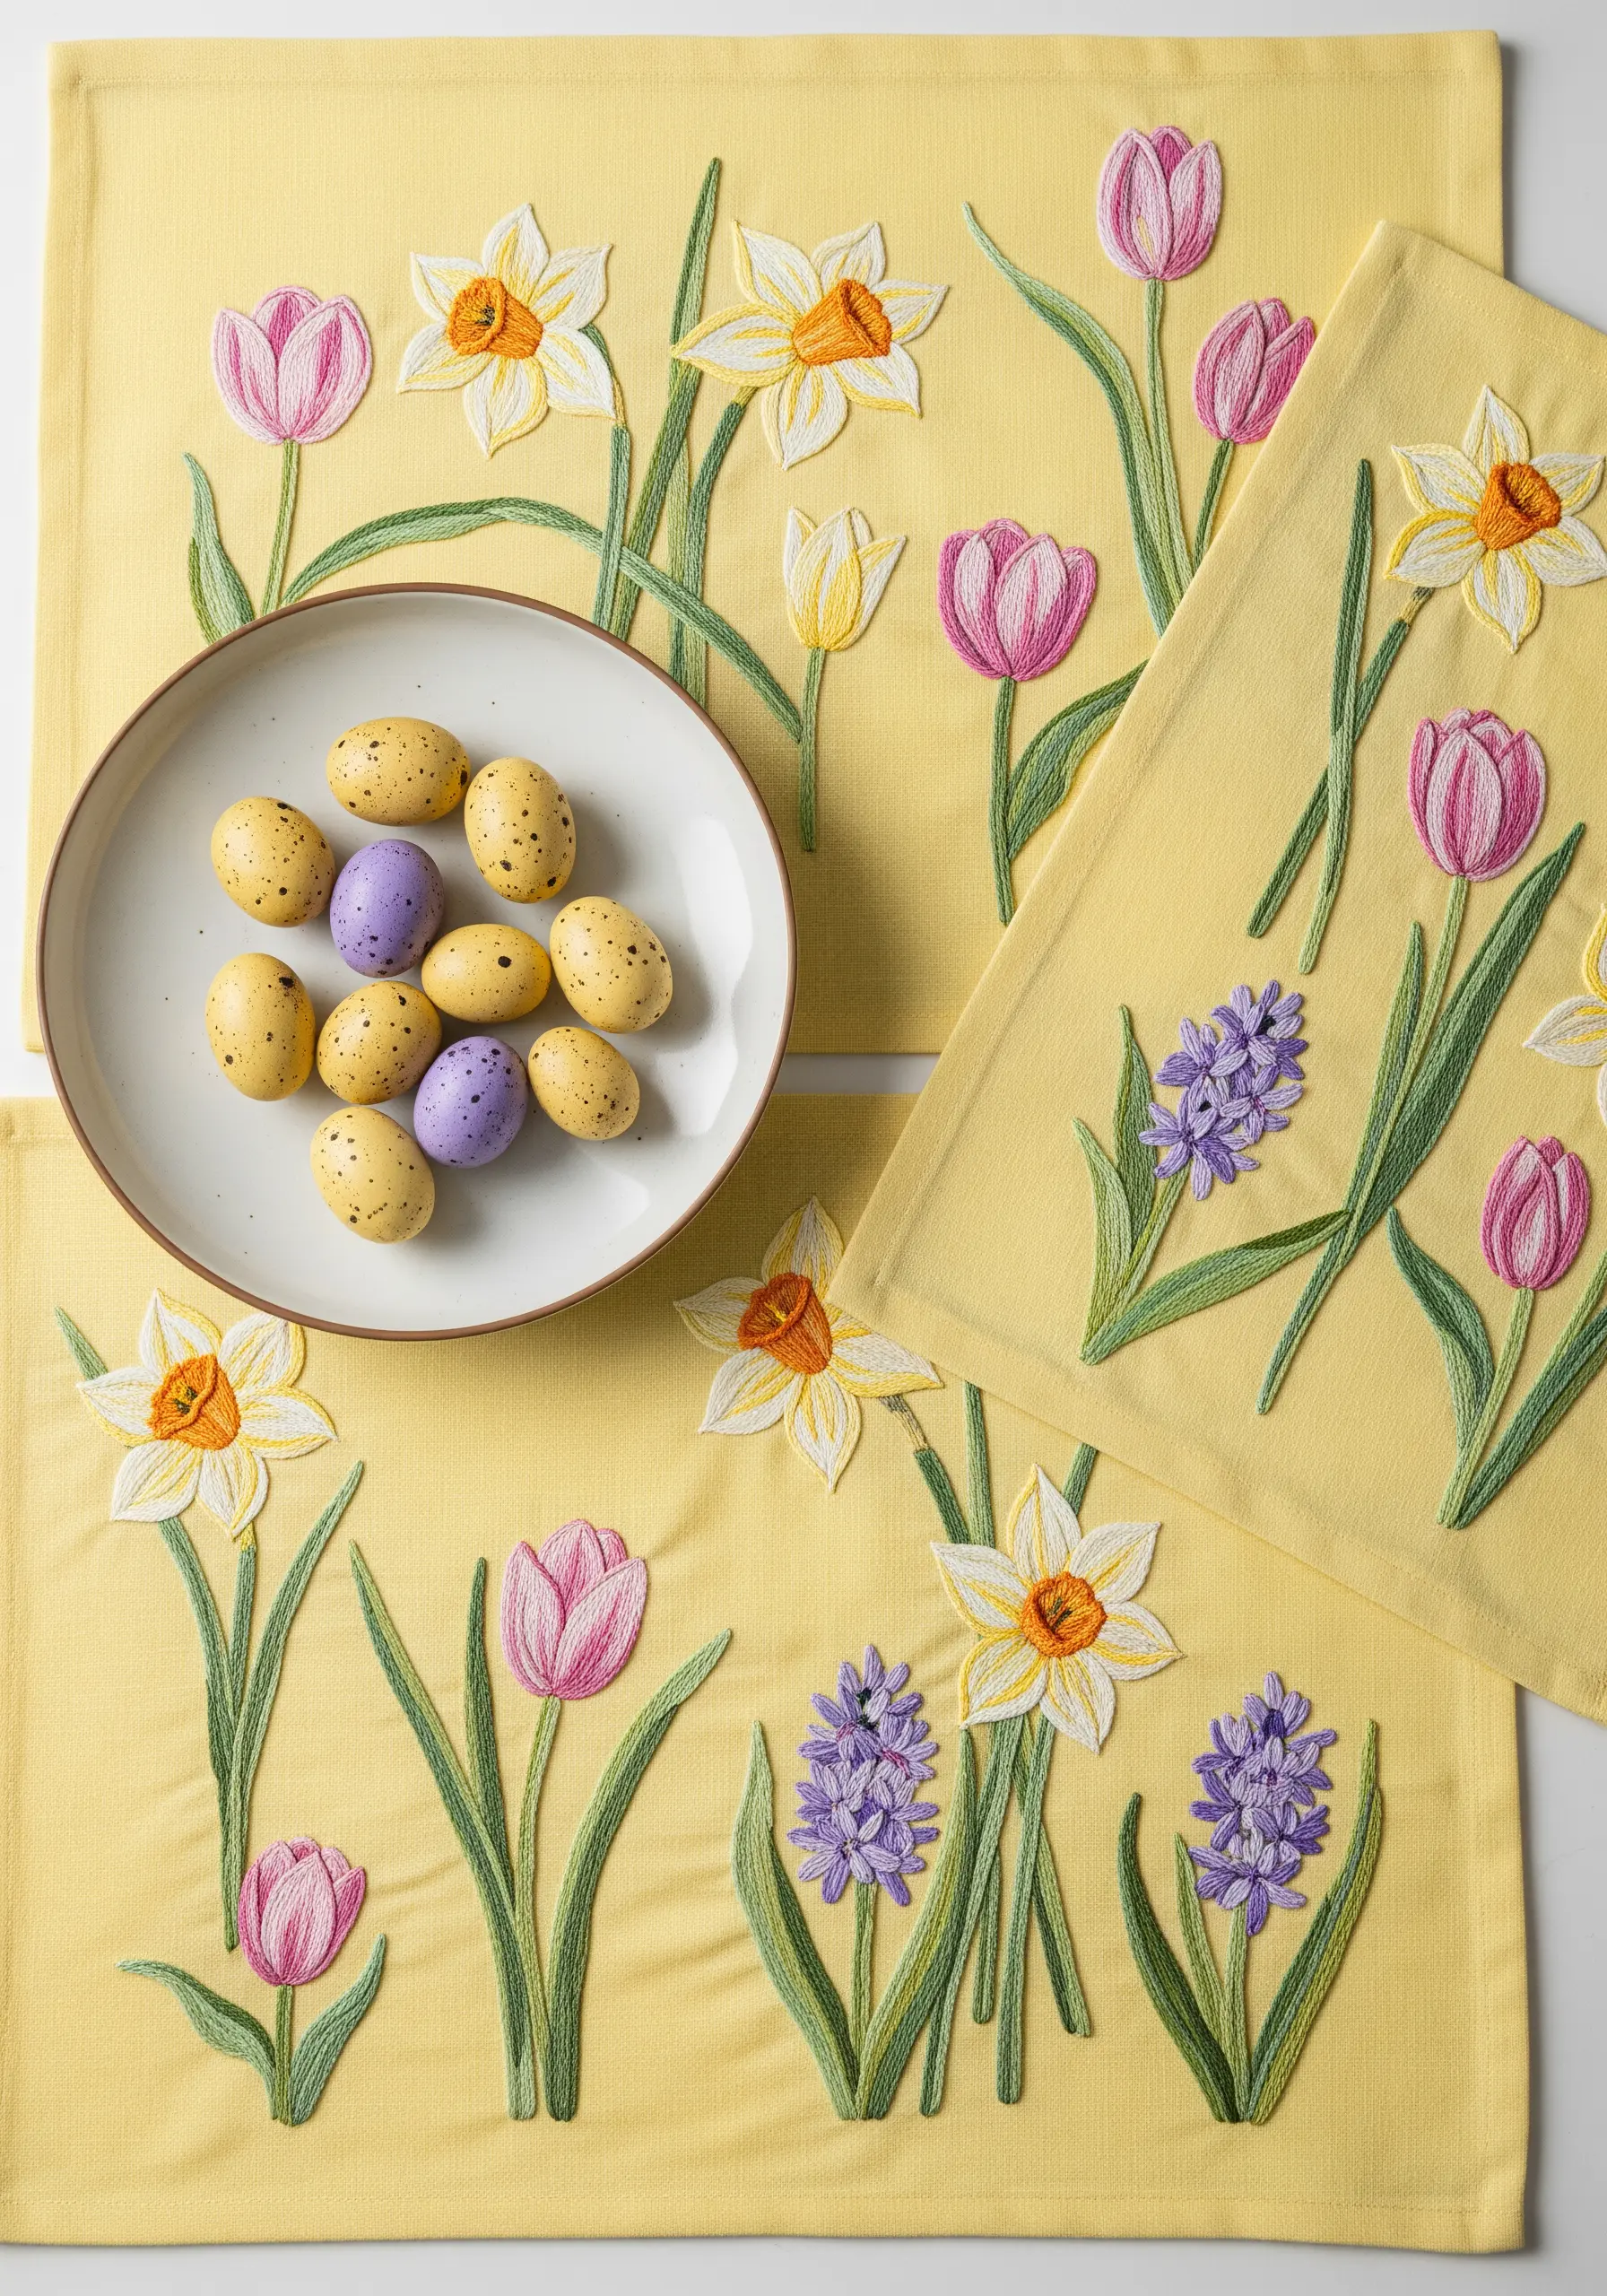
Give your embroidered flowers a subtle, raised quality by using padded satin stitch.
Before you begin your main stitching, lay down a foundation of small running stitches or seed stitches inside the petal shape.
Then, work your satin stitches over this padding, perpendicular to the foundation stitches.
This simple preparation lifts the embroidery off the fabric, making your daffodils and tulips look more lifelike and substantial.
10. Art Deco Glamour with Metallic Straight Stitches
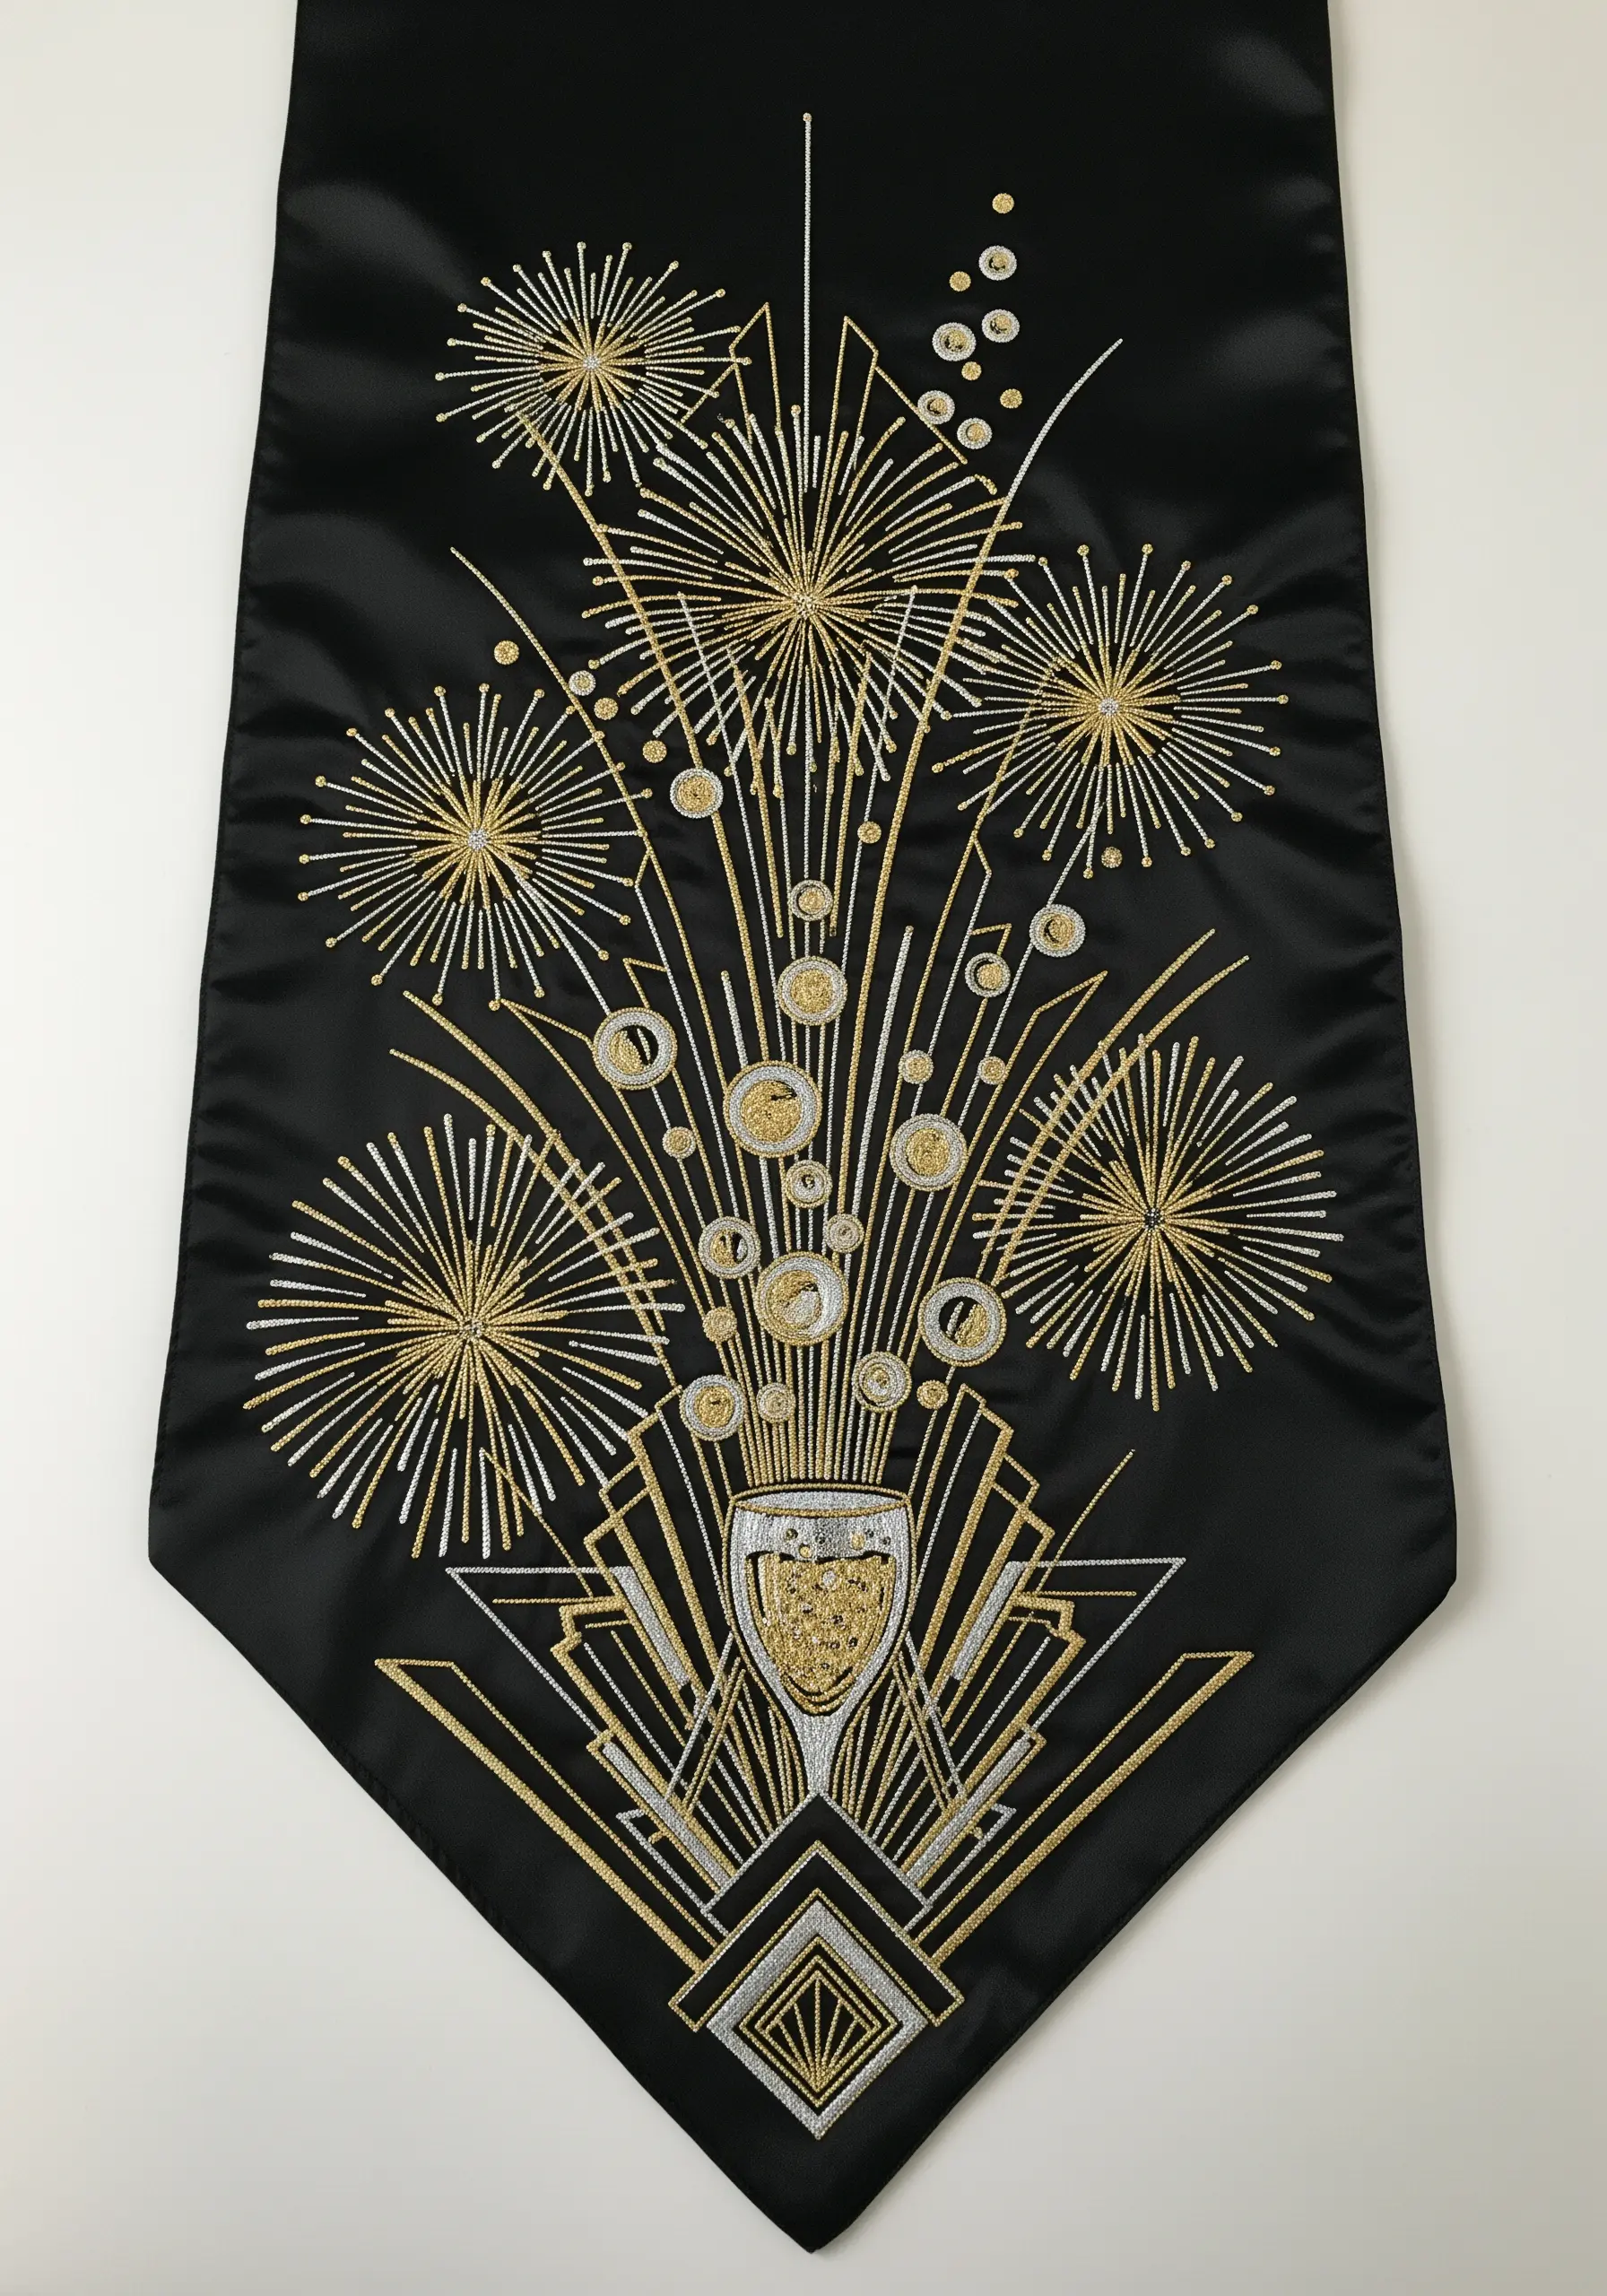
Capture the exuberant energy of a New Year’s Eve celebration with an Art Deco aesthetic.
This design is built entirely from straight stitches—the key is precision in their placement and length.
Use a combination of gold and silver metallic threads against a dark satin background for maximum contrast and glamour.
For the champagne bubbles, a playful cluster of French knots in white and silver adds a touch of effervescence and texture.
11. A Delicate Hanukkah Border with Line Stitches
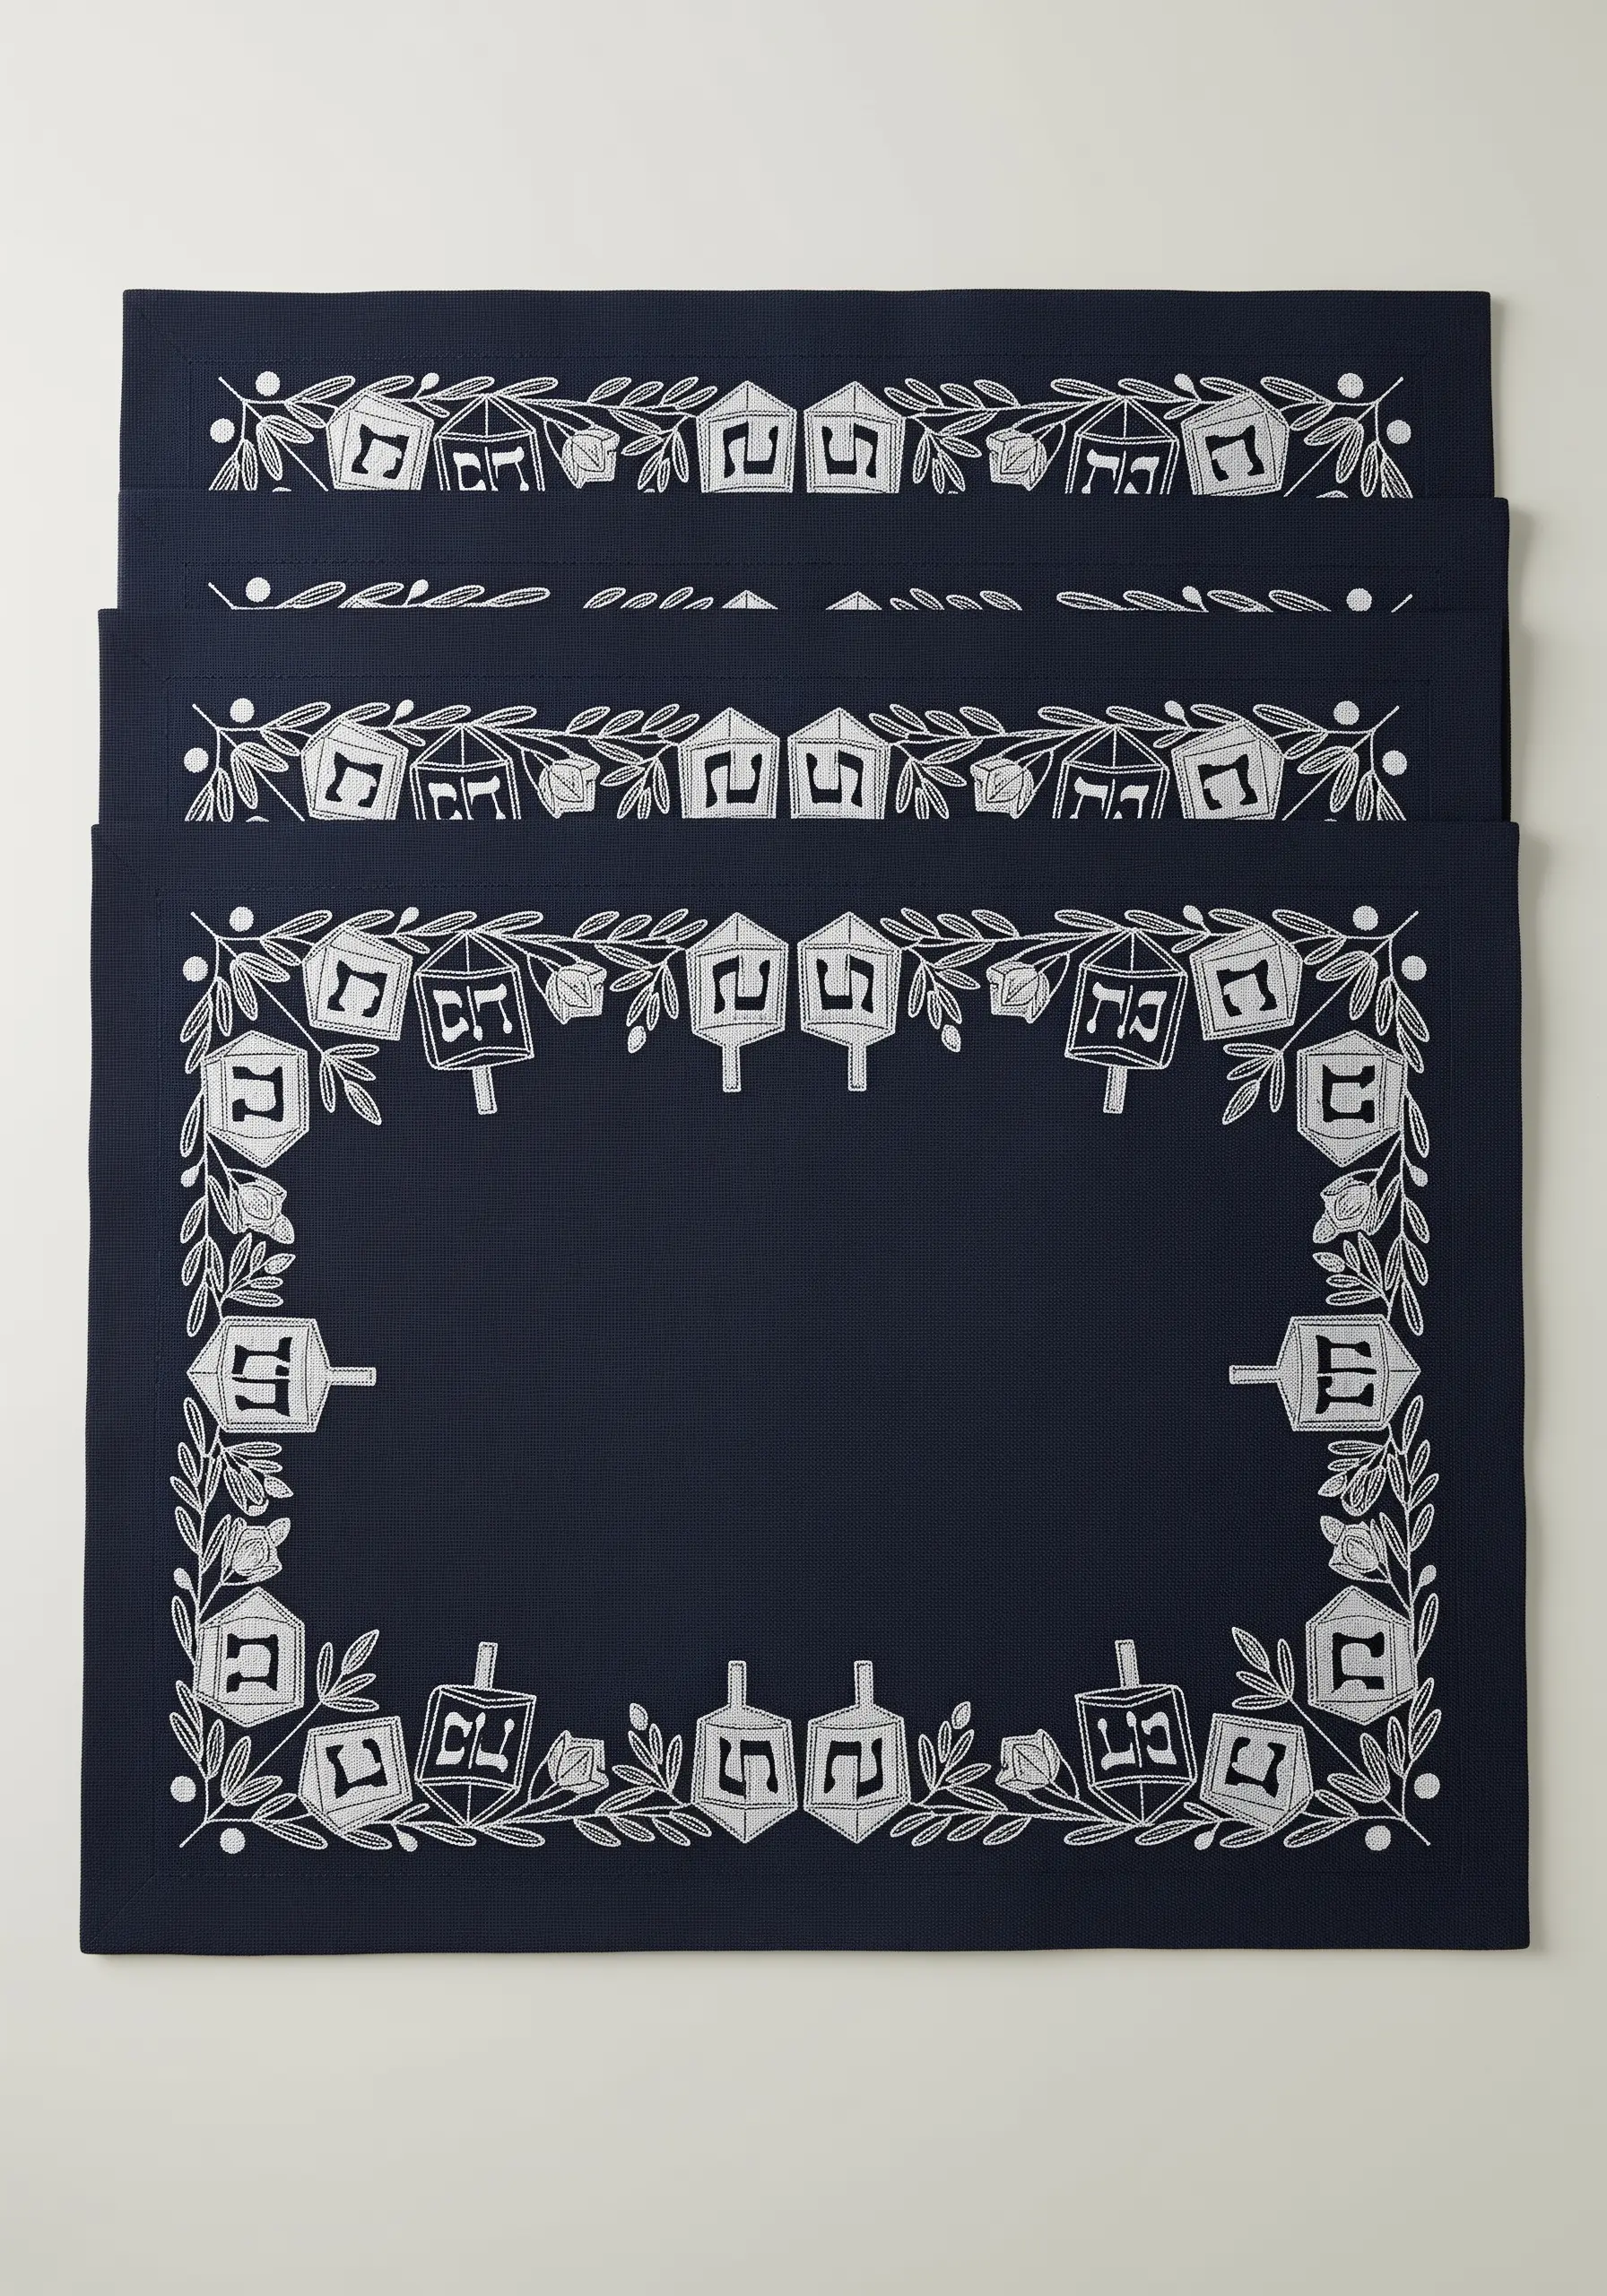
This elegant design demonstrates how powerful simple line stitches can be, especially with a high-contrast palette.
Use a bright white or silver thread on a dark linen base for a crisp, graphic effect.
The dreidels are formed with backstitch, while the leafy vines are a combination of stem stitch for the stems and fly stitches for the leaves.
Maintain consistent stitch length throughout the design to achieve a polished, cohesive look.
12. Scandinavian Holiday Style with Geometric Cross-Stitch
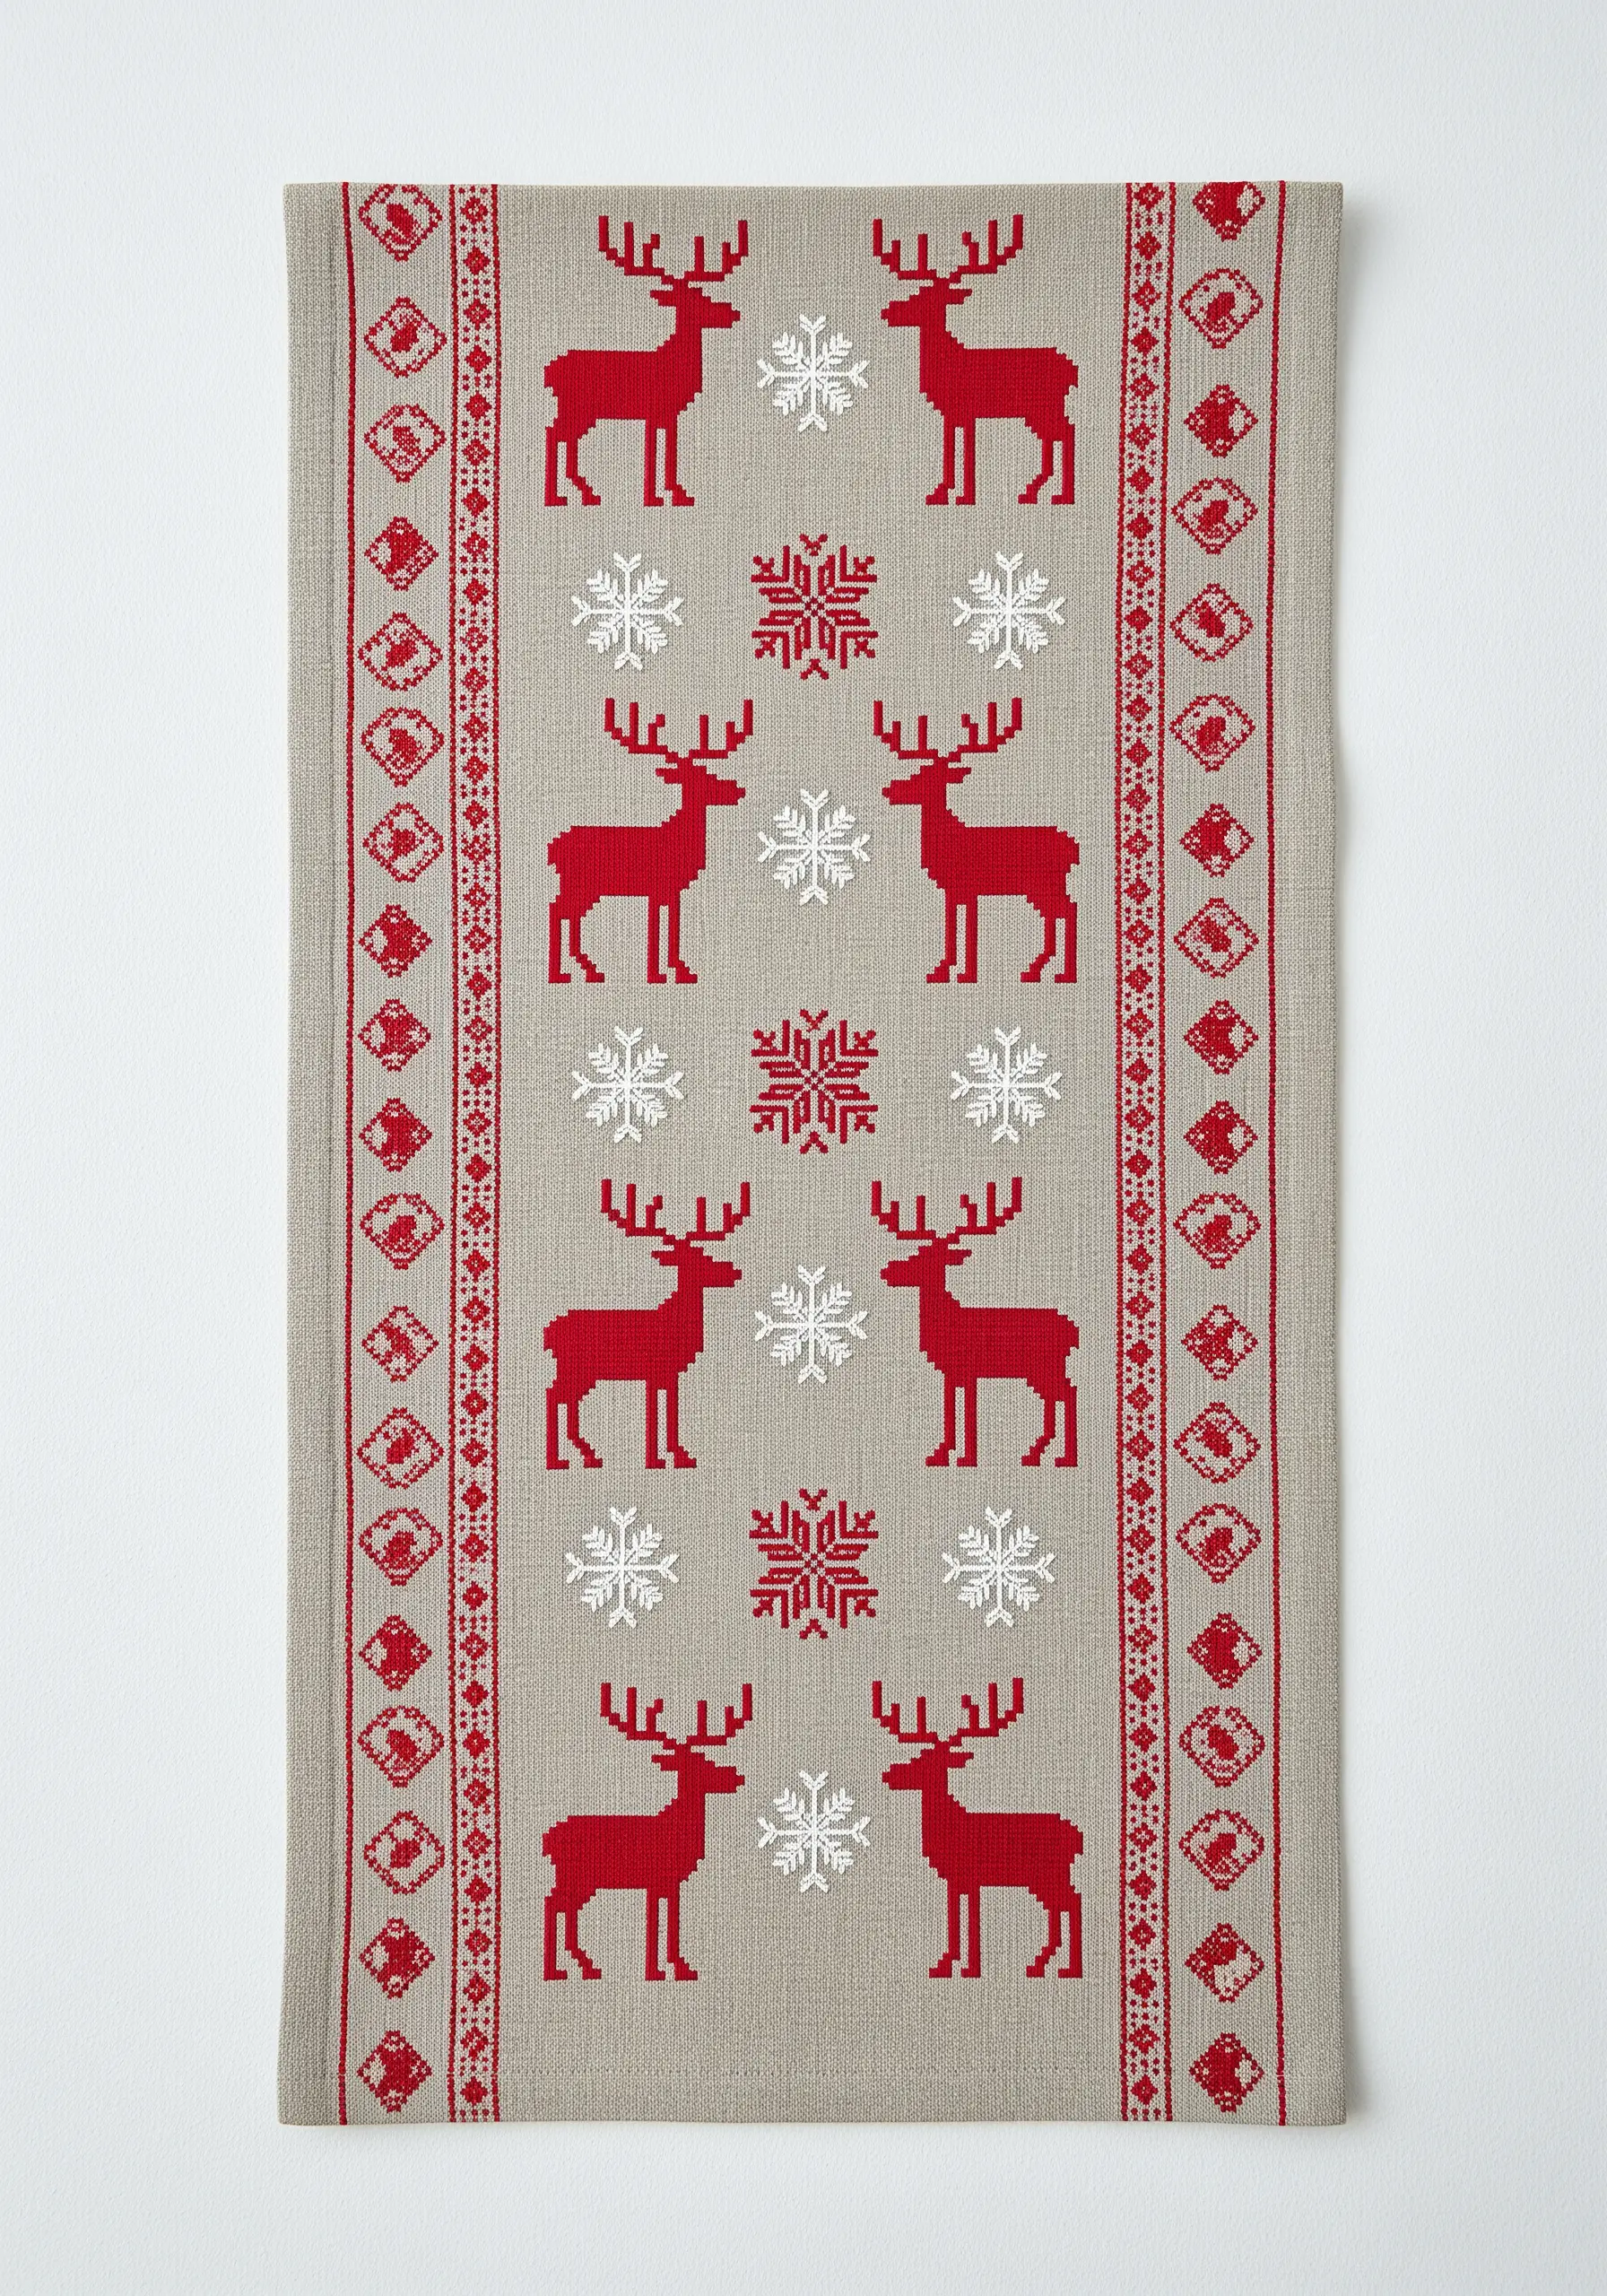
Embrace a rustic, Nordic aesthetic by using cross-stitch on an even-weave fabric like Aida or linen.
The charm of this style is in its clean, geometric simplicity.
To ensure your motifs have a bold presence, use three strands of embroidery floss instead of the typical two.
This small adjustment creates a plumper, more substantial stitch that gives the design greater visual weight and a cozy, handcrafted feel.
13. Vibrant Mandala with Shisha Mirror Work
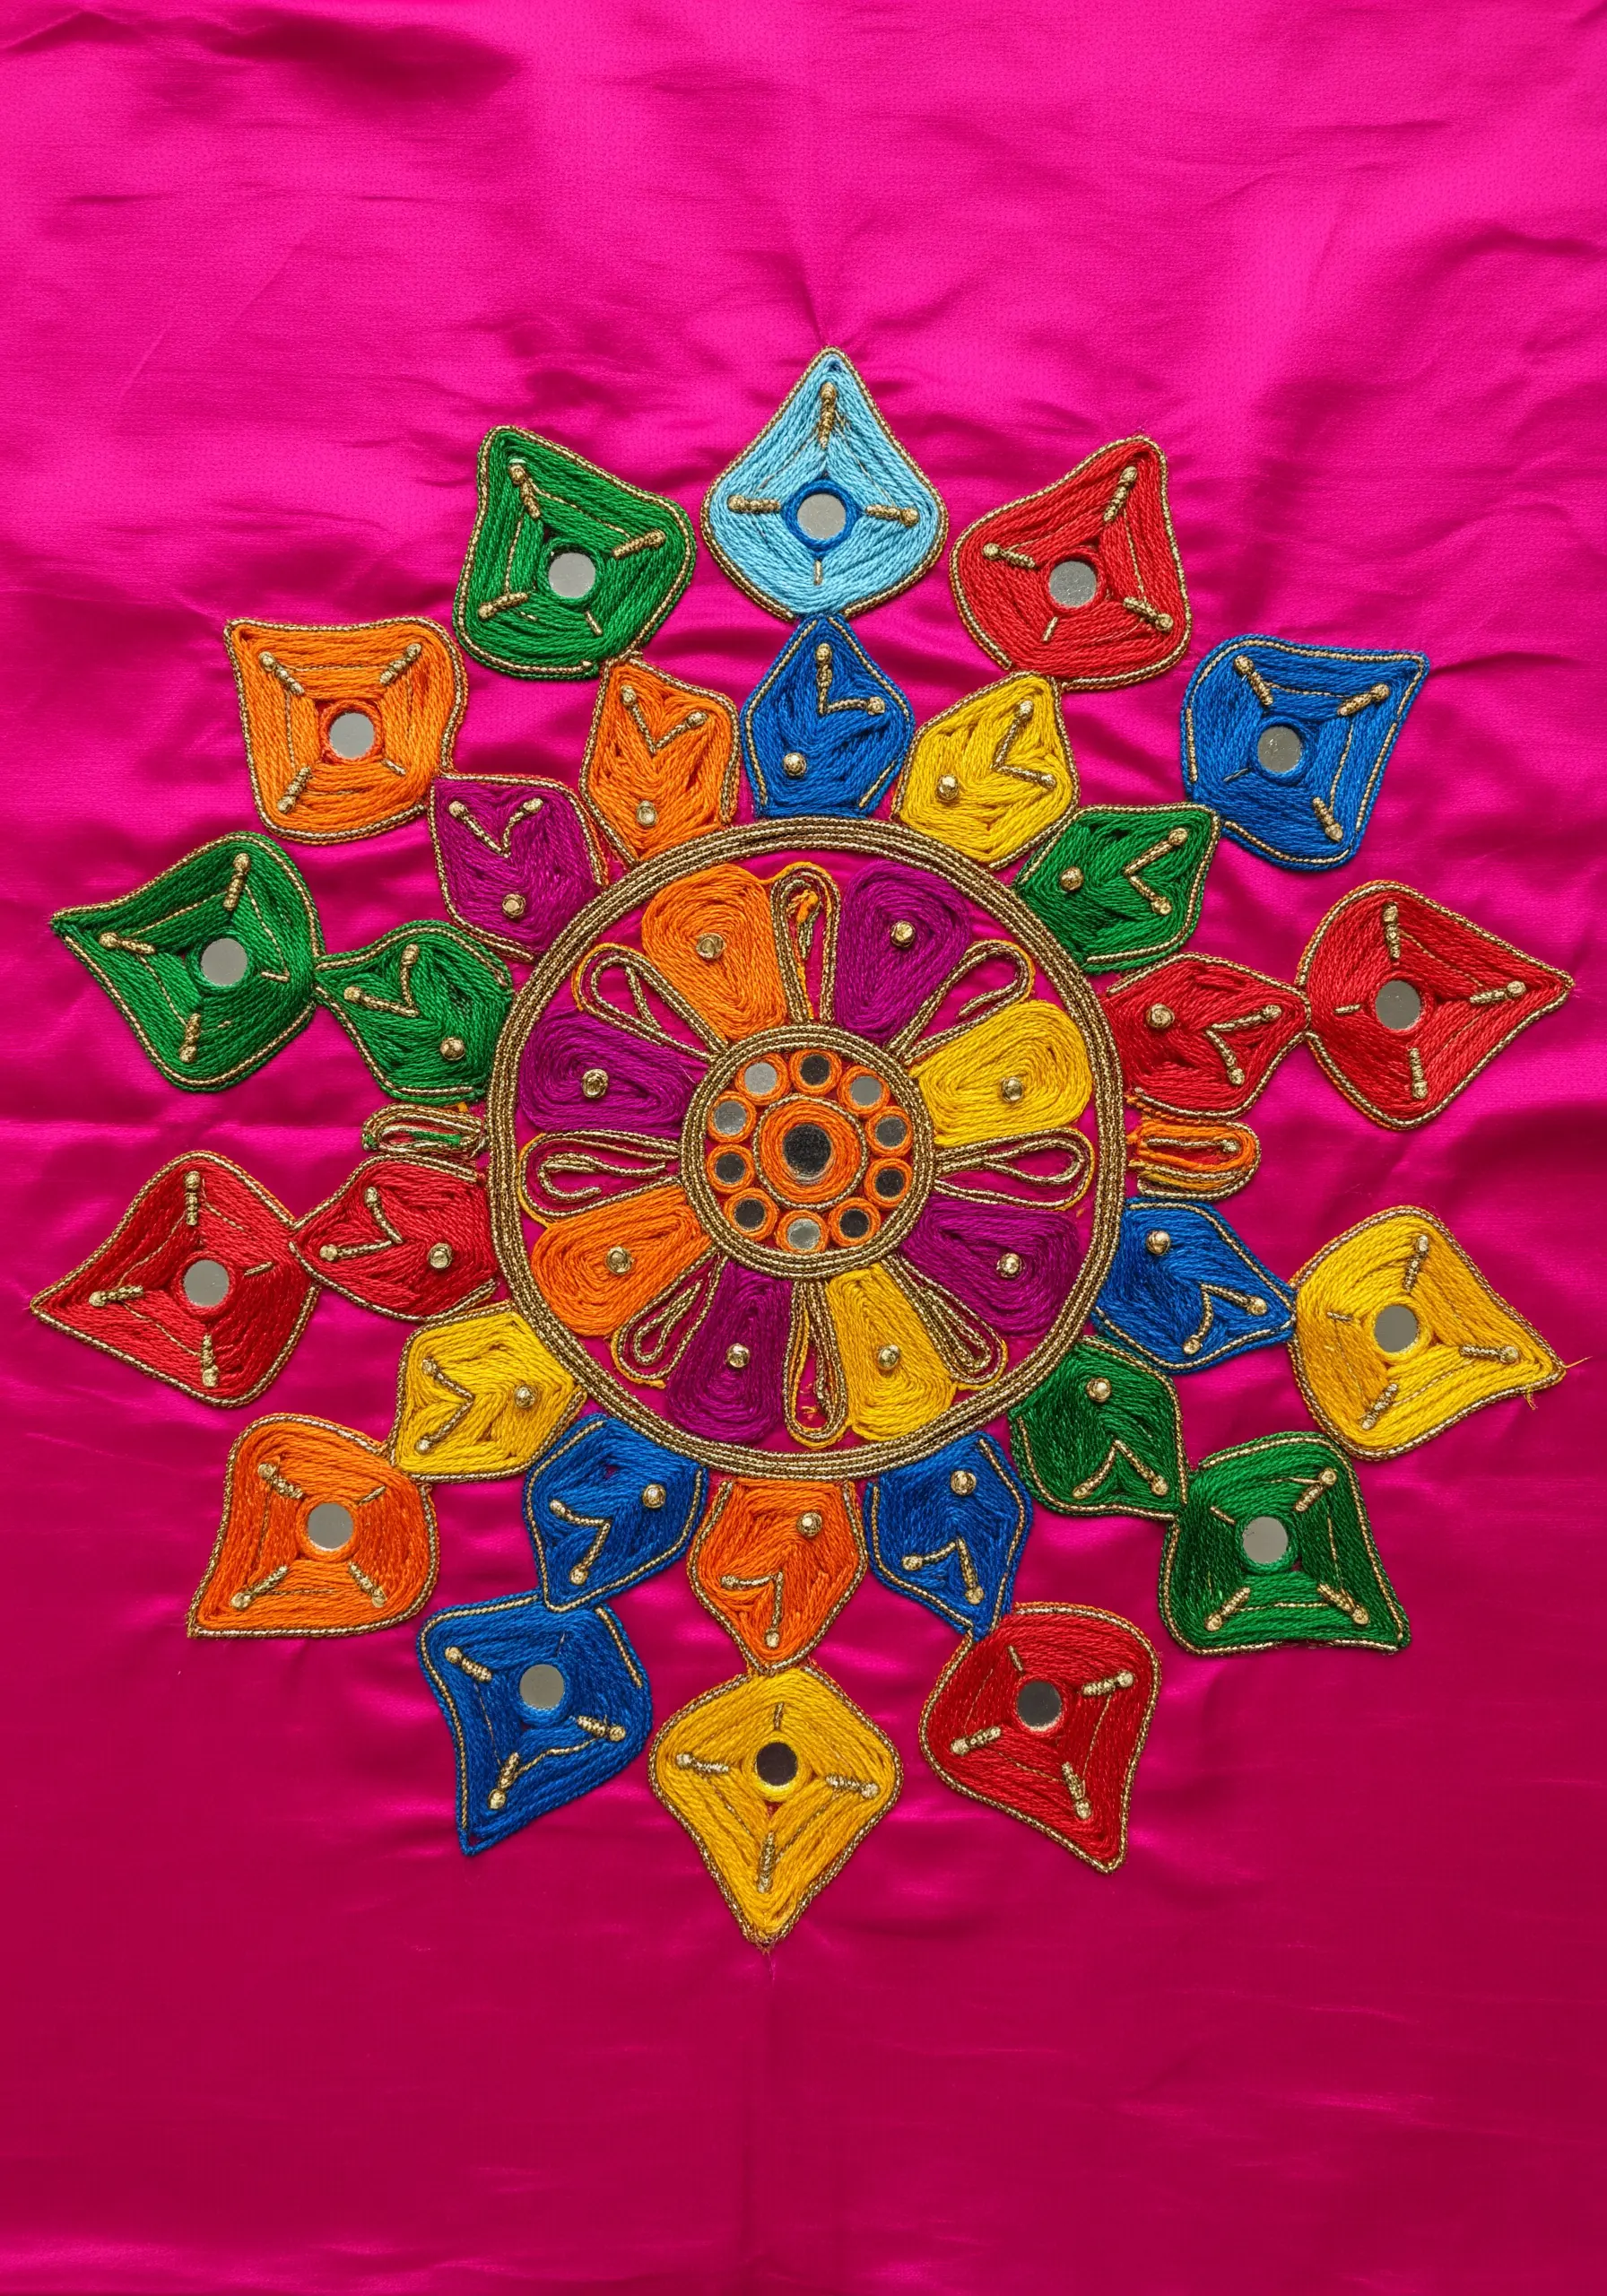
Incorporate traditional Shisha mirror work for a design that truly dazzles.
You can purchase small craft mirrors and secure them by creating a framework of foundation stitches over the mirror’s edge, then locking it in place with a tight buttonhole stitch.
Surround the mirrors with bold, colorful satin stitch blocks.
The reflective quality adds unparalleled depth and festivity, making it perfect for celebrations like Diwali or Holi.
14. Beaded Lantern Motifs for Ramadan Nights
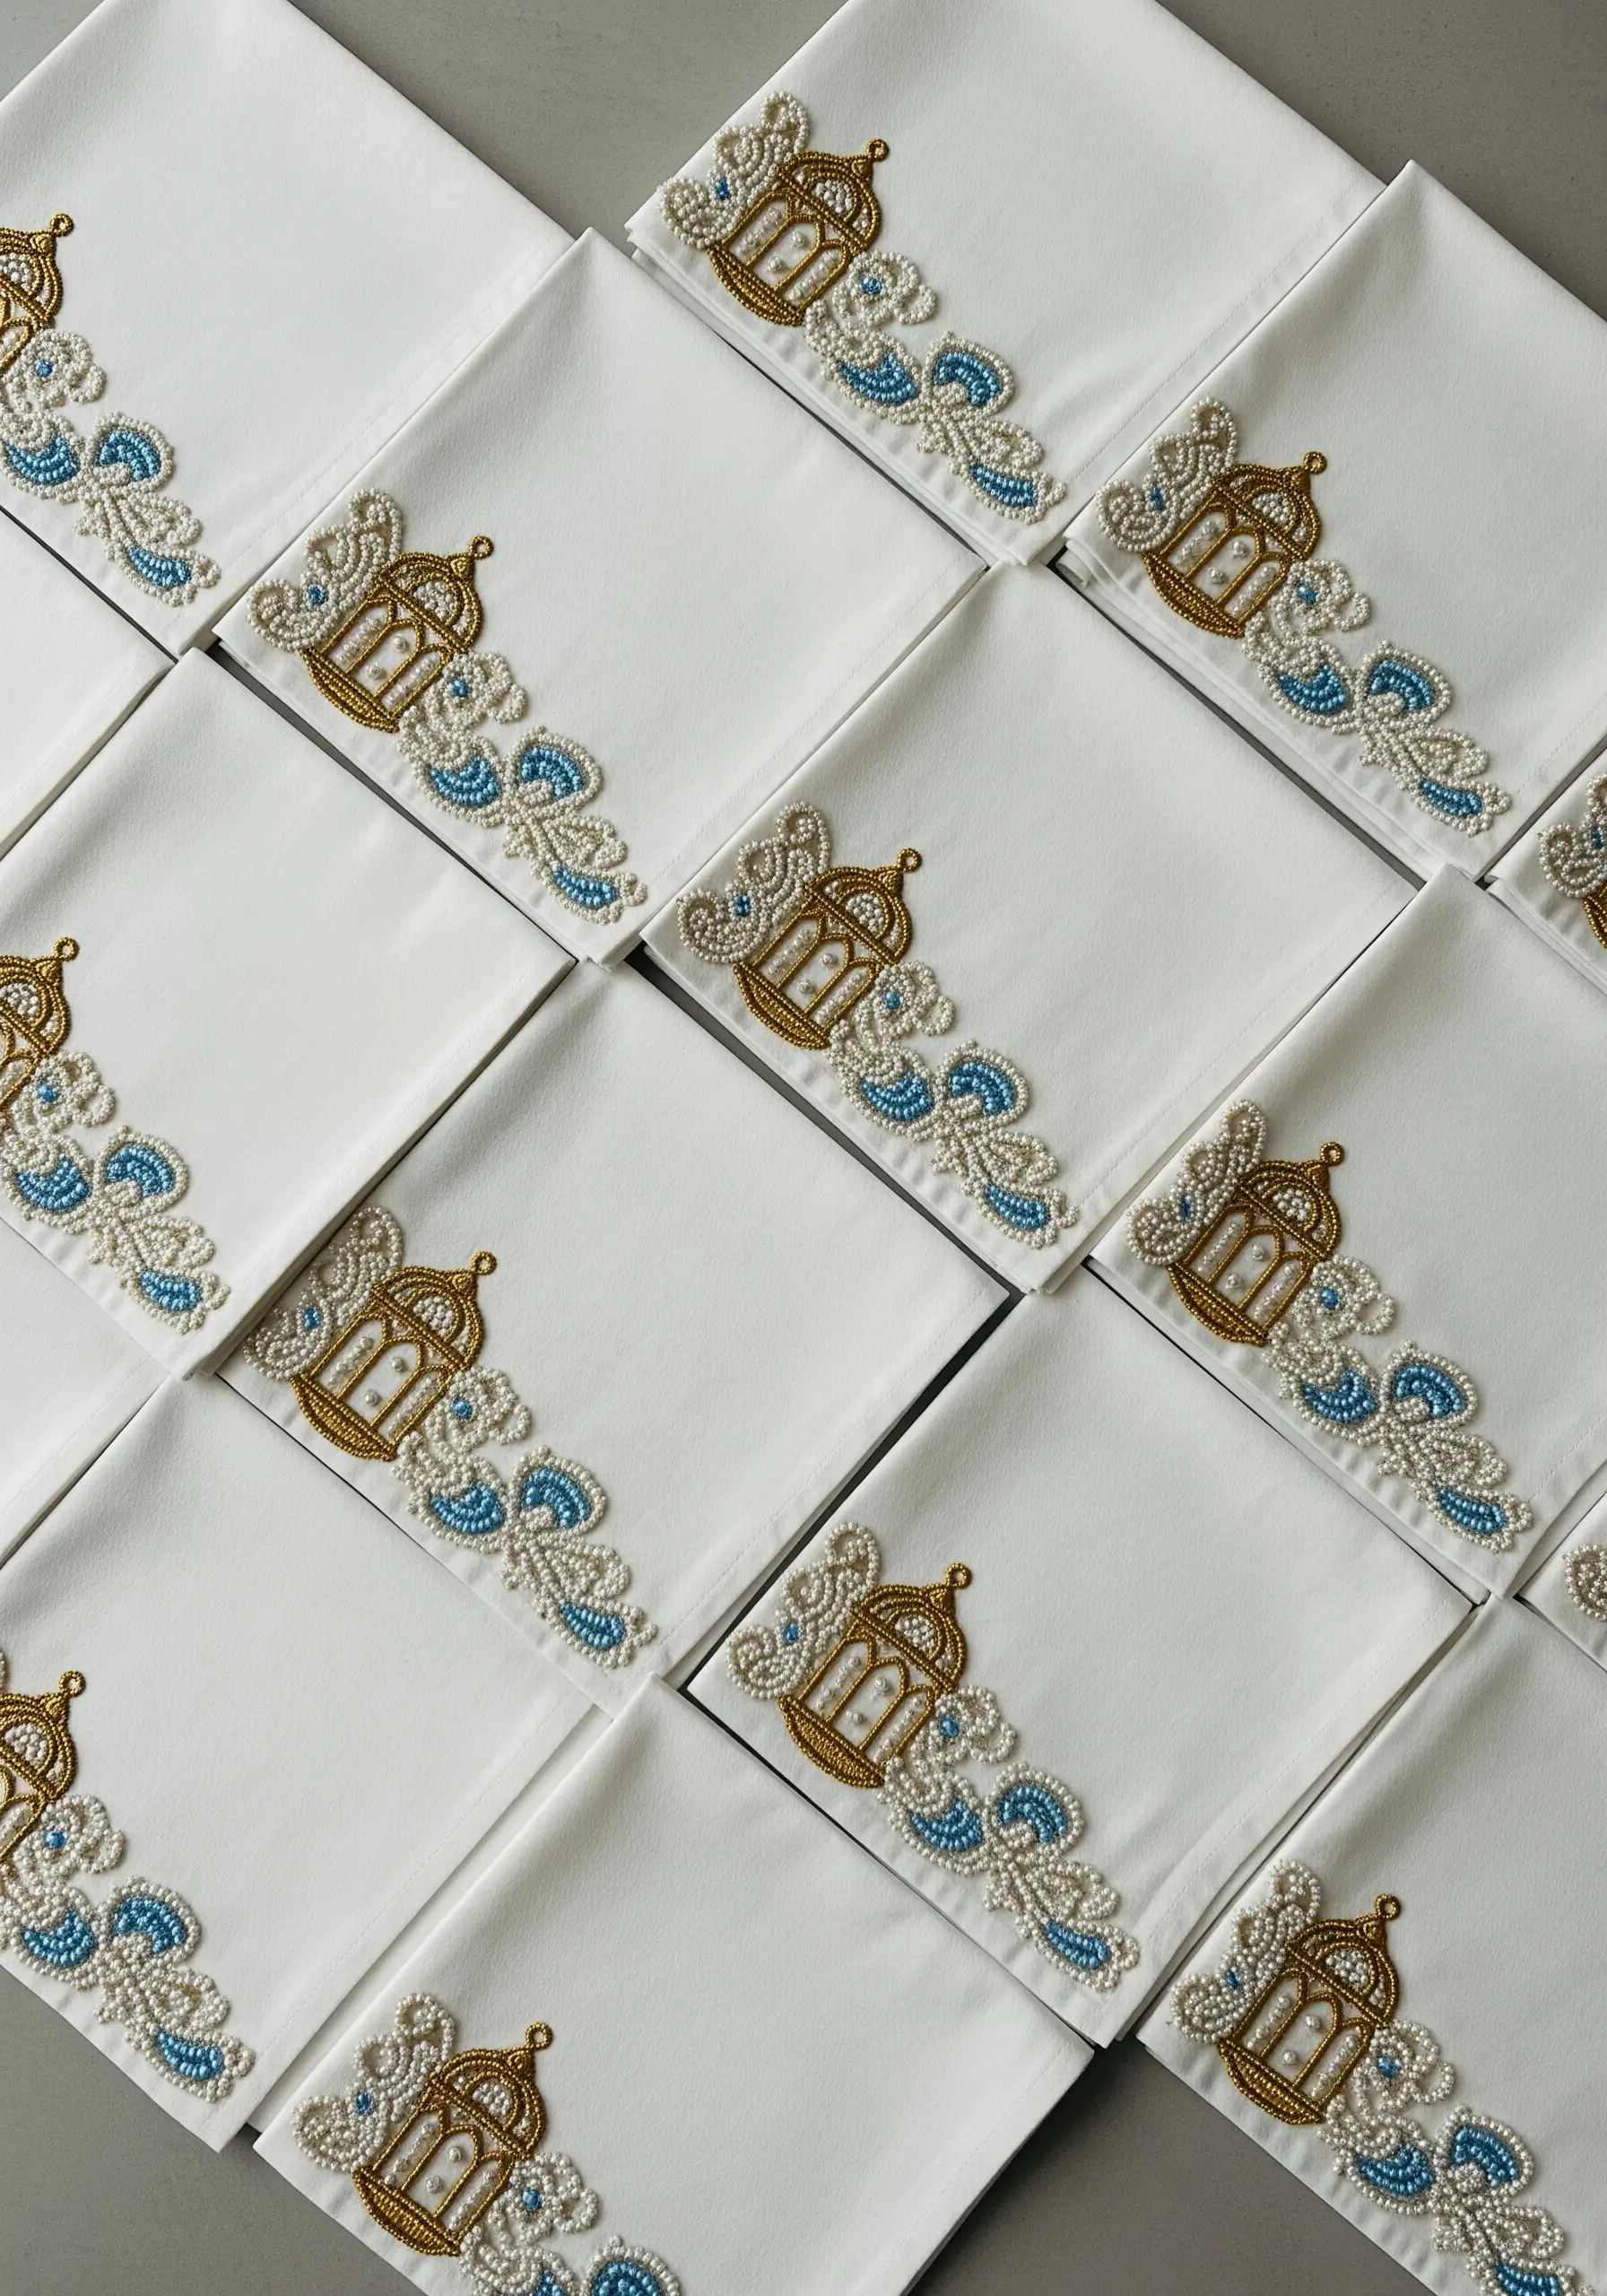
Elevate a simple line-work design with the subtle luxury of beadwork.
First, establish the lantern’s shape using a backstitch with gold metallic thread.
Then, instead of filling the decorative swirls with thread, stitch on tiny seed beads or small pearl beads.
This technique is often faster than filling with floss and adds a rich texture that catches the light, beautifully evoking the gentle glow of a Ramadan lantern.
15. Autumnal Gradient with Thread-Painted Leaves
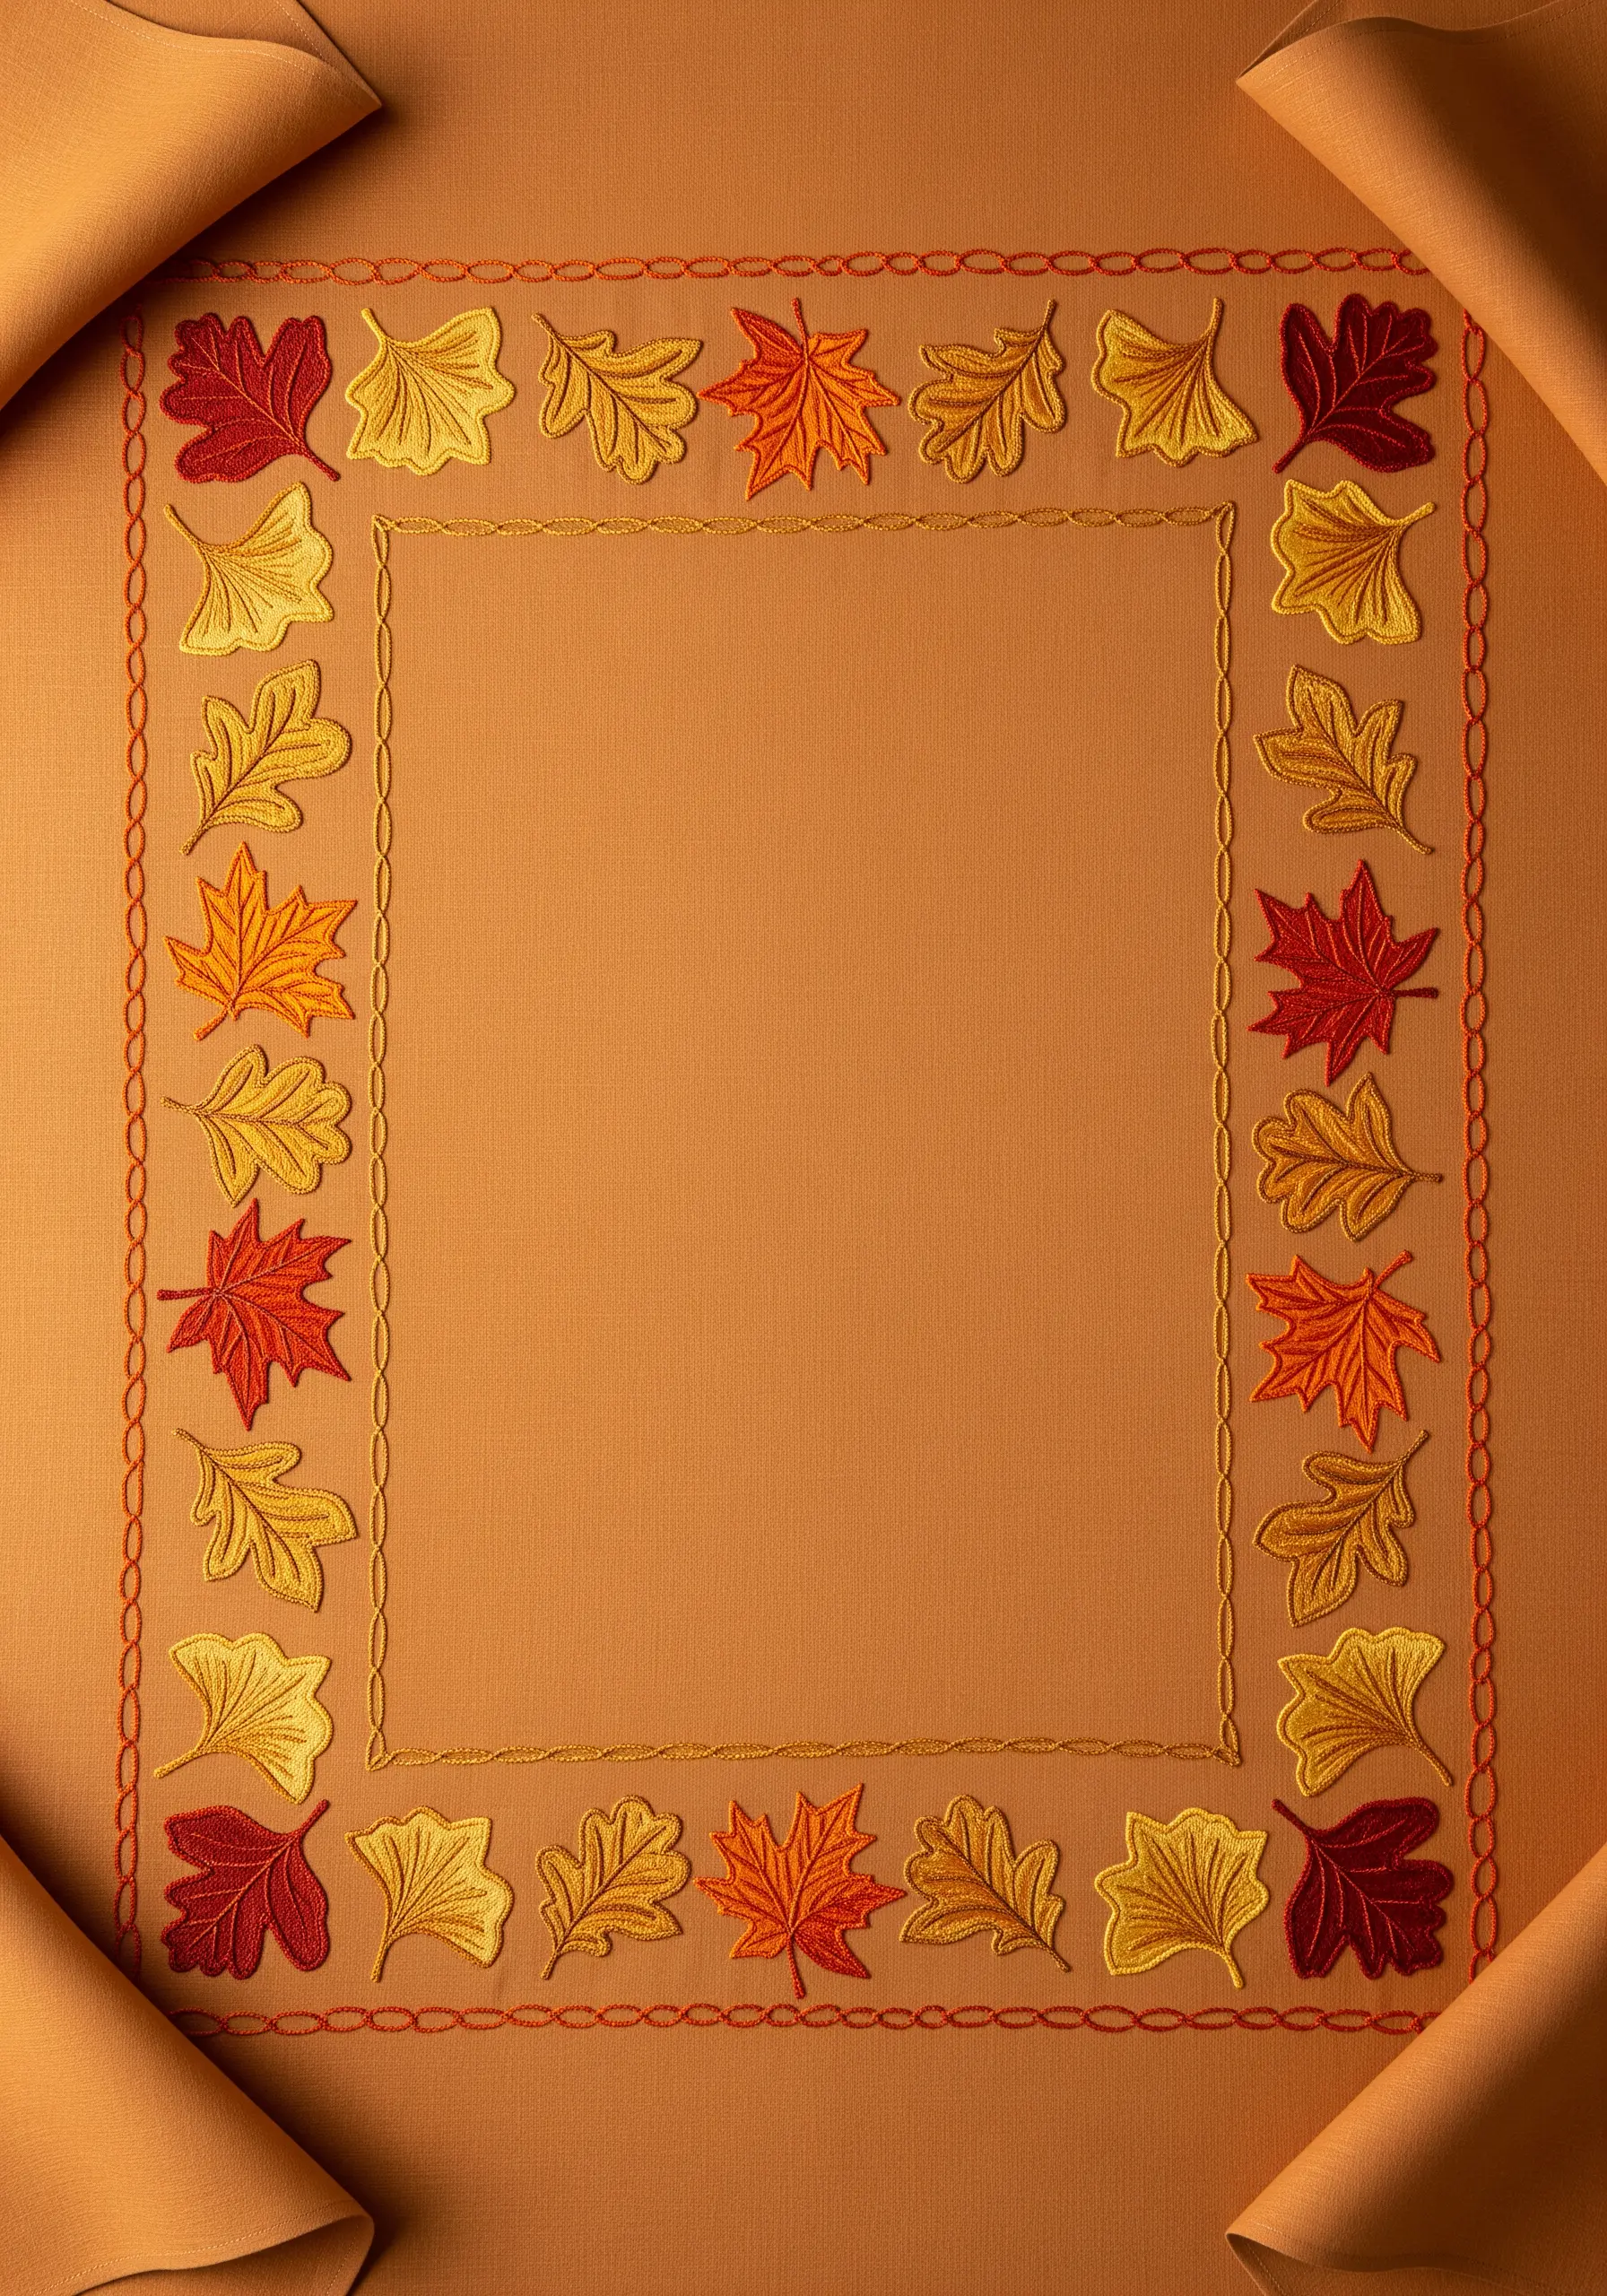
Capture the subtle color shifts of autumn leaves by using thread painting techniques.
For each leaf, select three shades of a color—light, medium, and dark.
Begin filling with the lightest color at the leaf’s outer edge, using long-and-short stitch to create a soft base.
Gradually introduce the medium and dark shades, always ensuring your stitches follow the natural direction of the leaf’s veins for a realistic effect.
16. Minimalist Texture with Couched Wool Roving
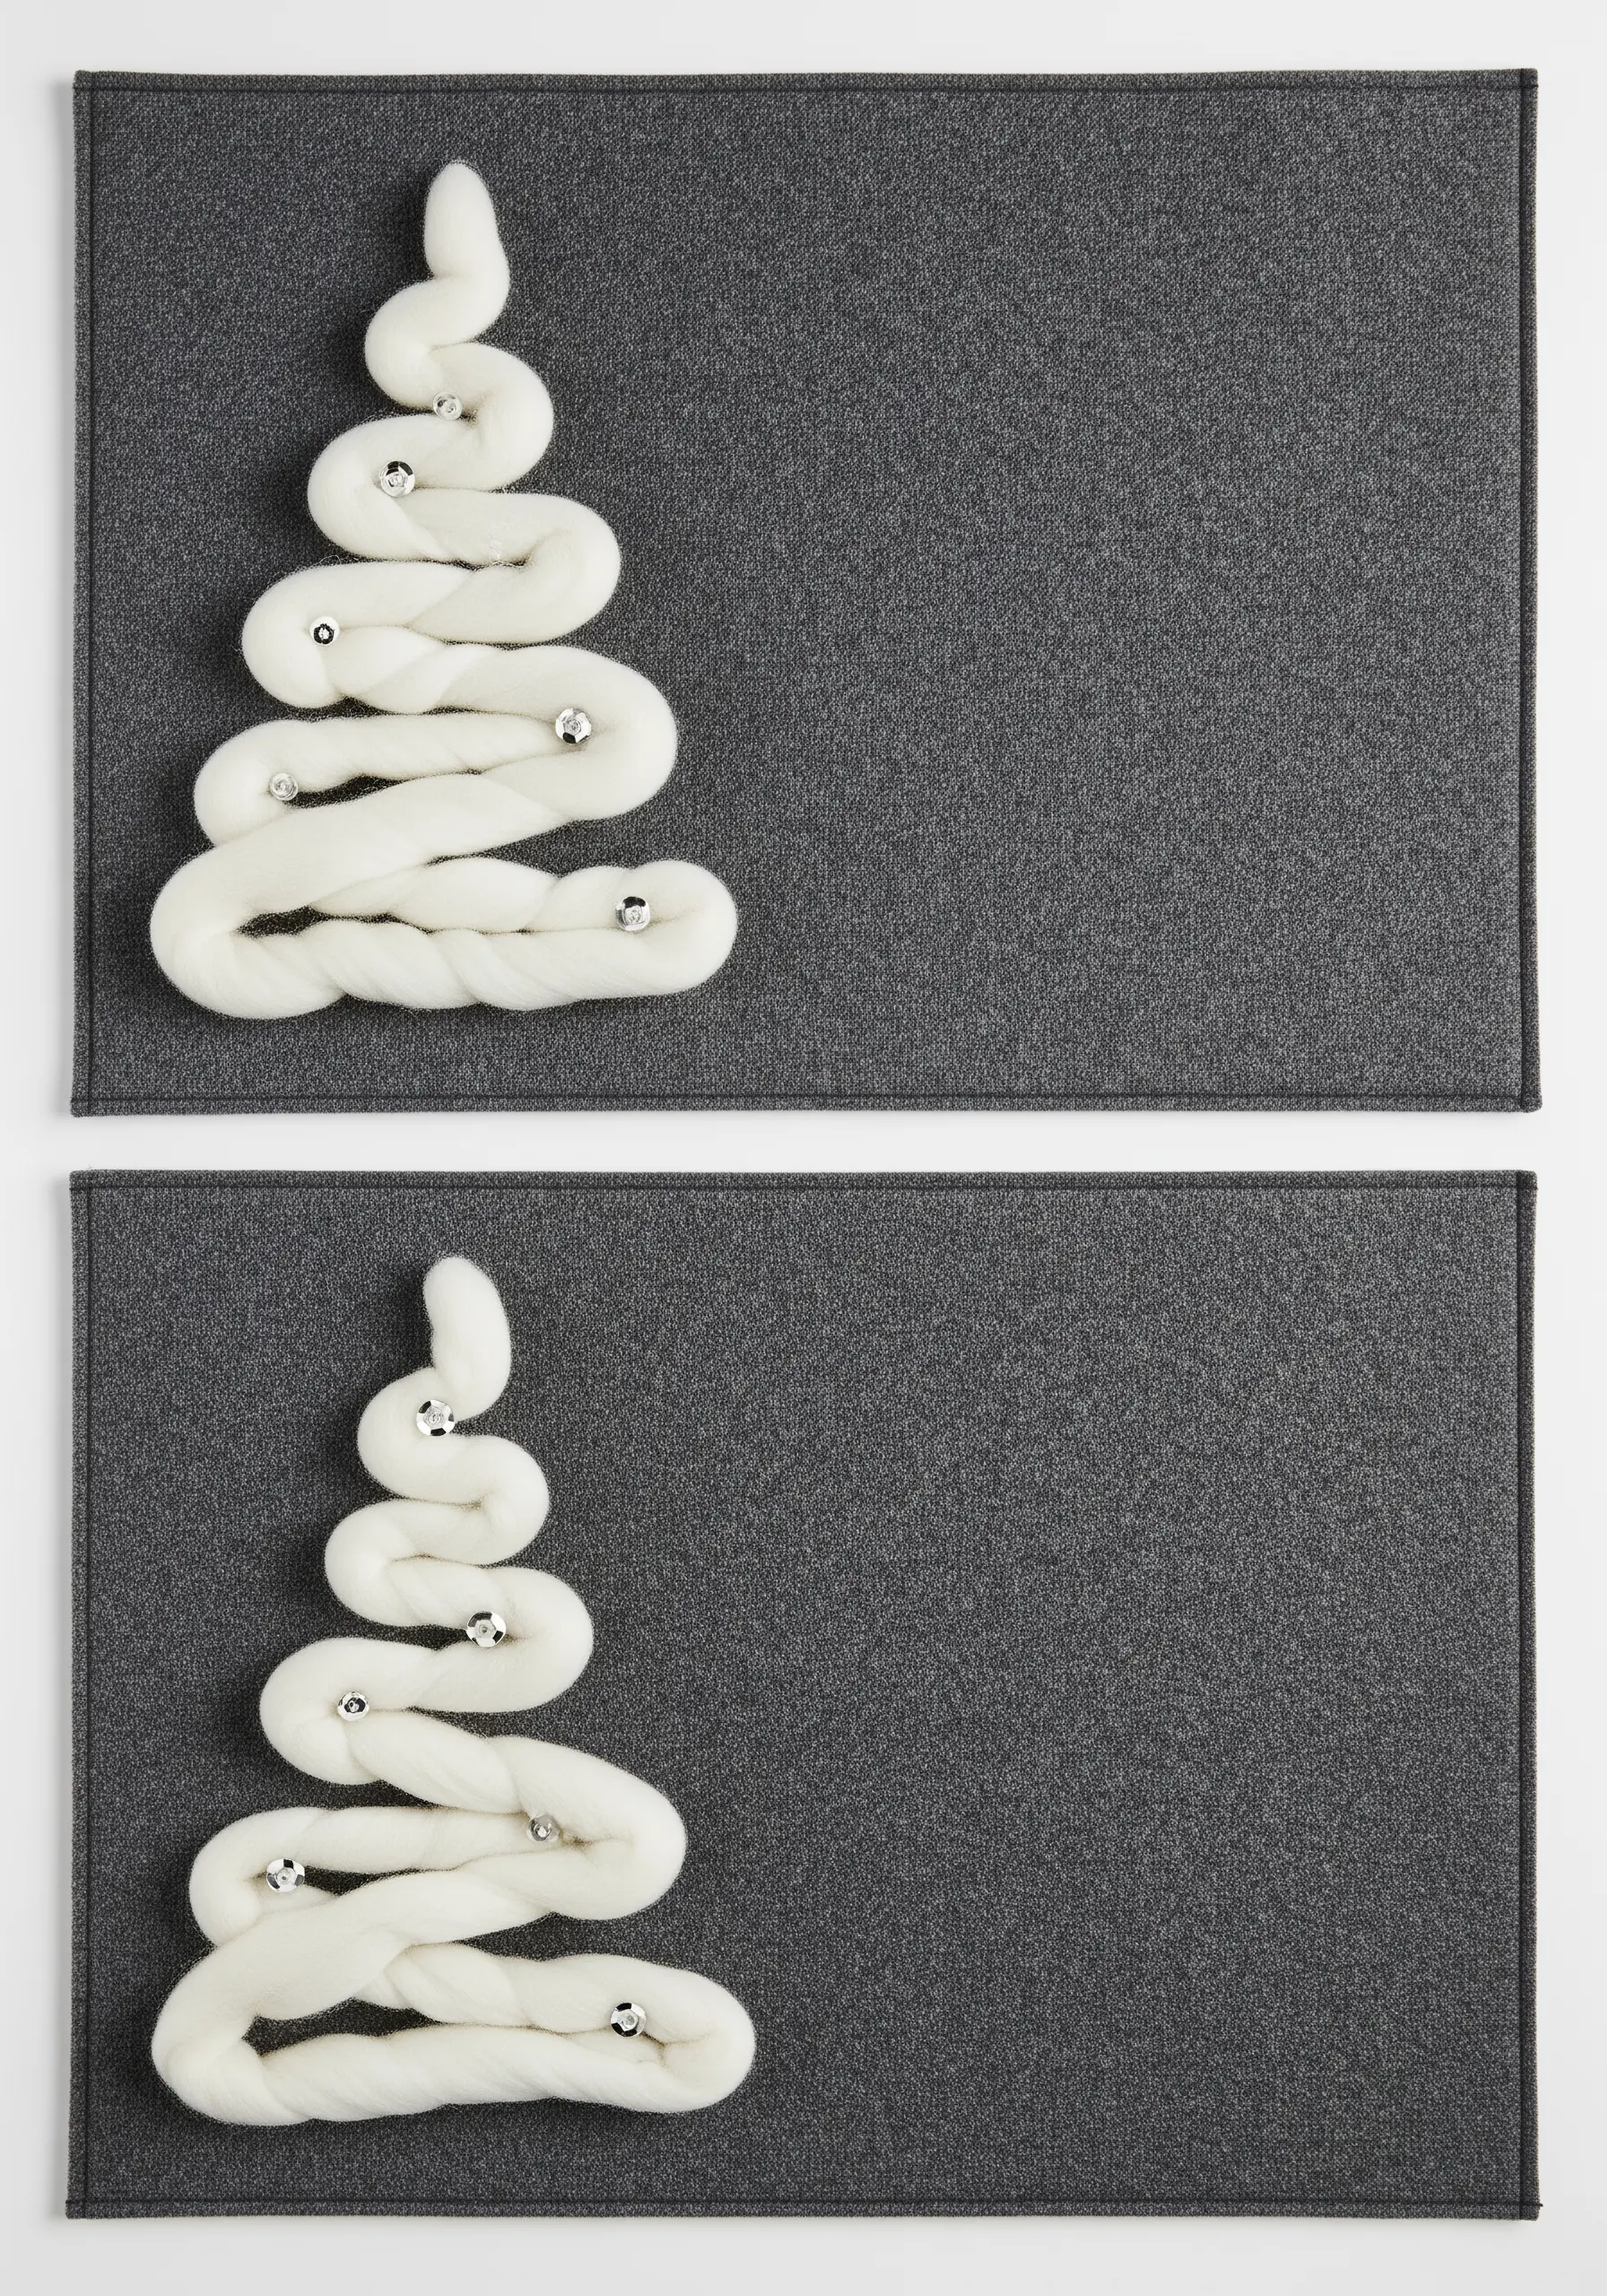
For a bold, modern, and quick-to-finish design, step away from floss and try couching a thick fiber like wool roving.
Simply lay the roving on your fabric in a simple shape, like this minimalist tree, and use a standard embroidery thread to tack it down with small, evenly spaced stitches.
This method creates a soft, sculptural element that adds immense texture and a cozy, contemporary feel to your table linens.
17. Combining Lettering and Botanicals for a Seder Plate
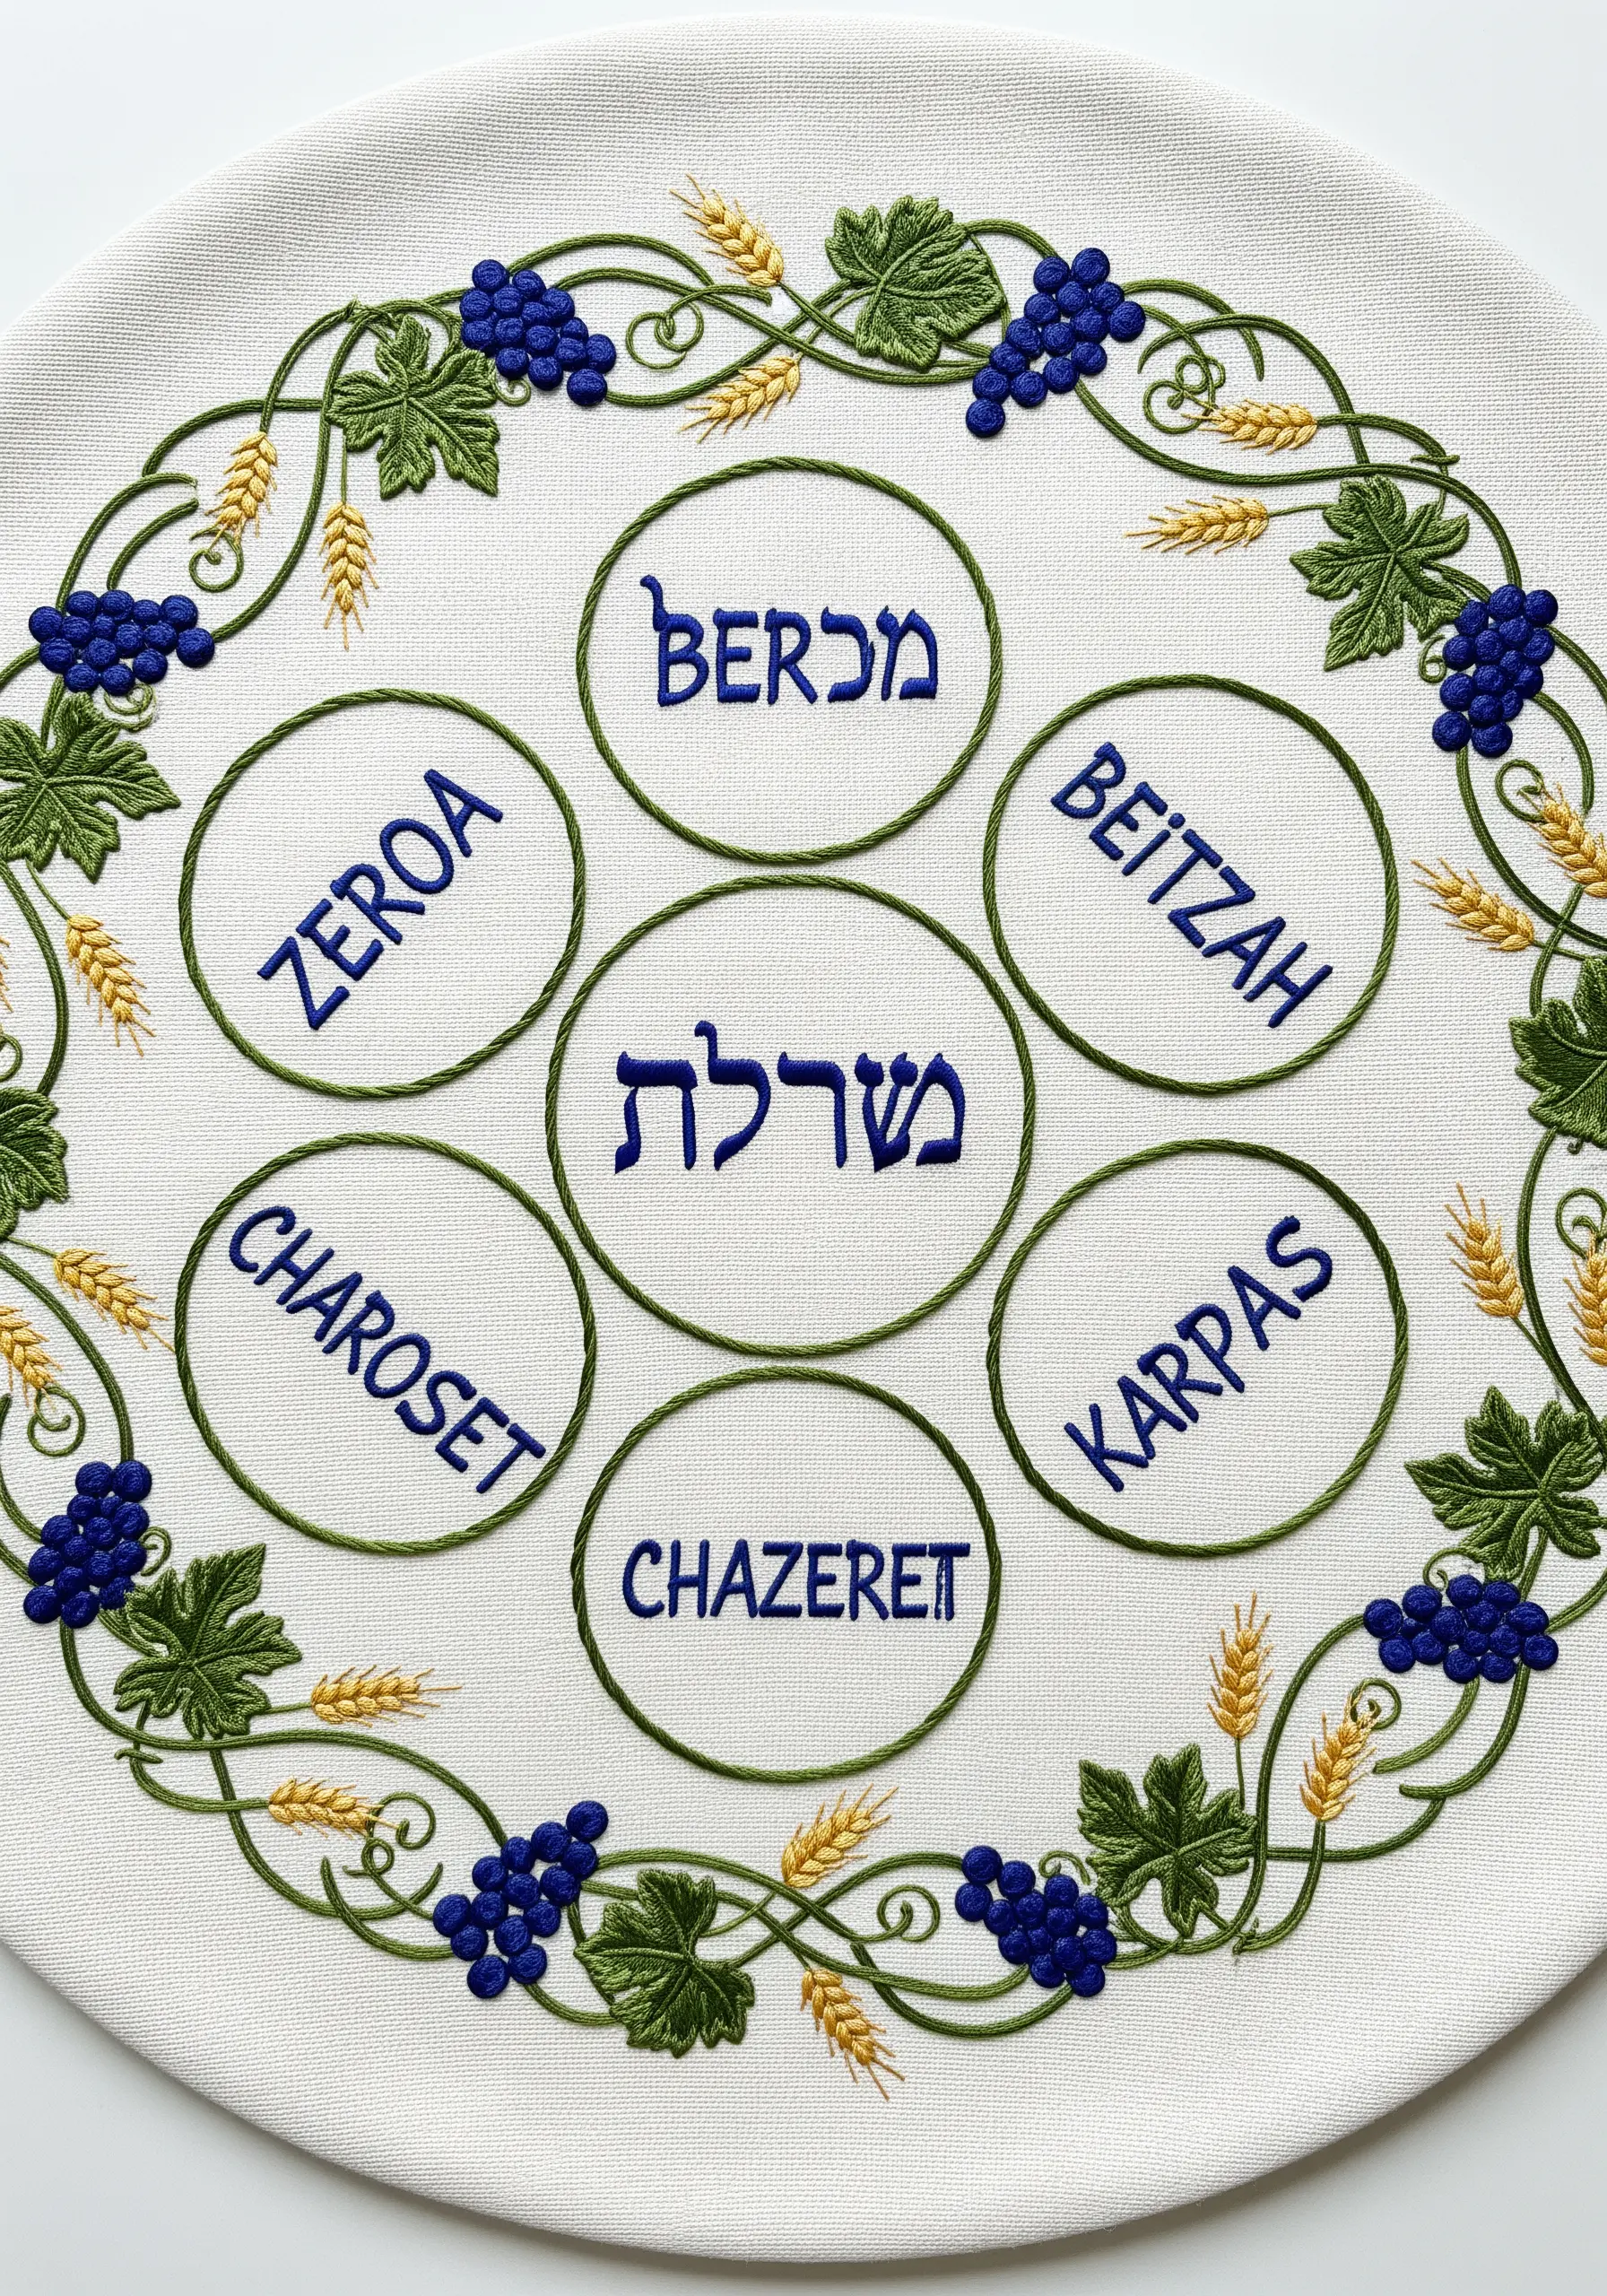
For clean, legible embroidered text, choose a stable stitch that creates a solid line, like a whipped backstitch or a two-sided stem stitch.
Contrast the smooth lettering with varied textures in the surrounding botanical elements.
Use clustered French knots for the grapes, satin stitch for the grape leaves, and detached chain stitches for the wheat kernels.
This combination of stitches adds visual interest and prevents the circular design from feeling flat.
18. Night Sky Elegance with Beaded Constellations
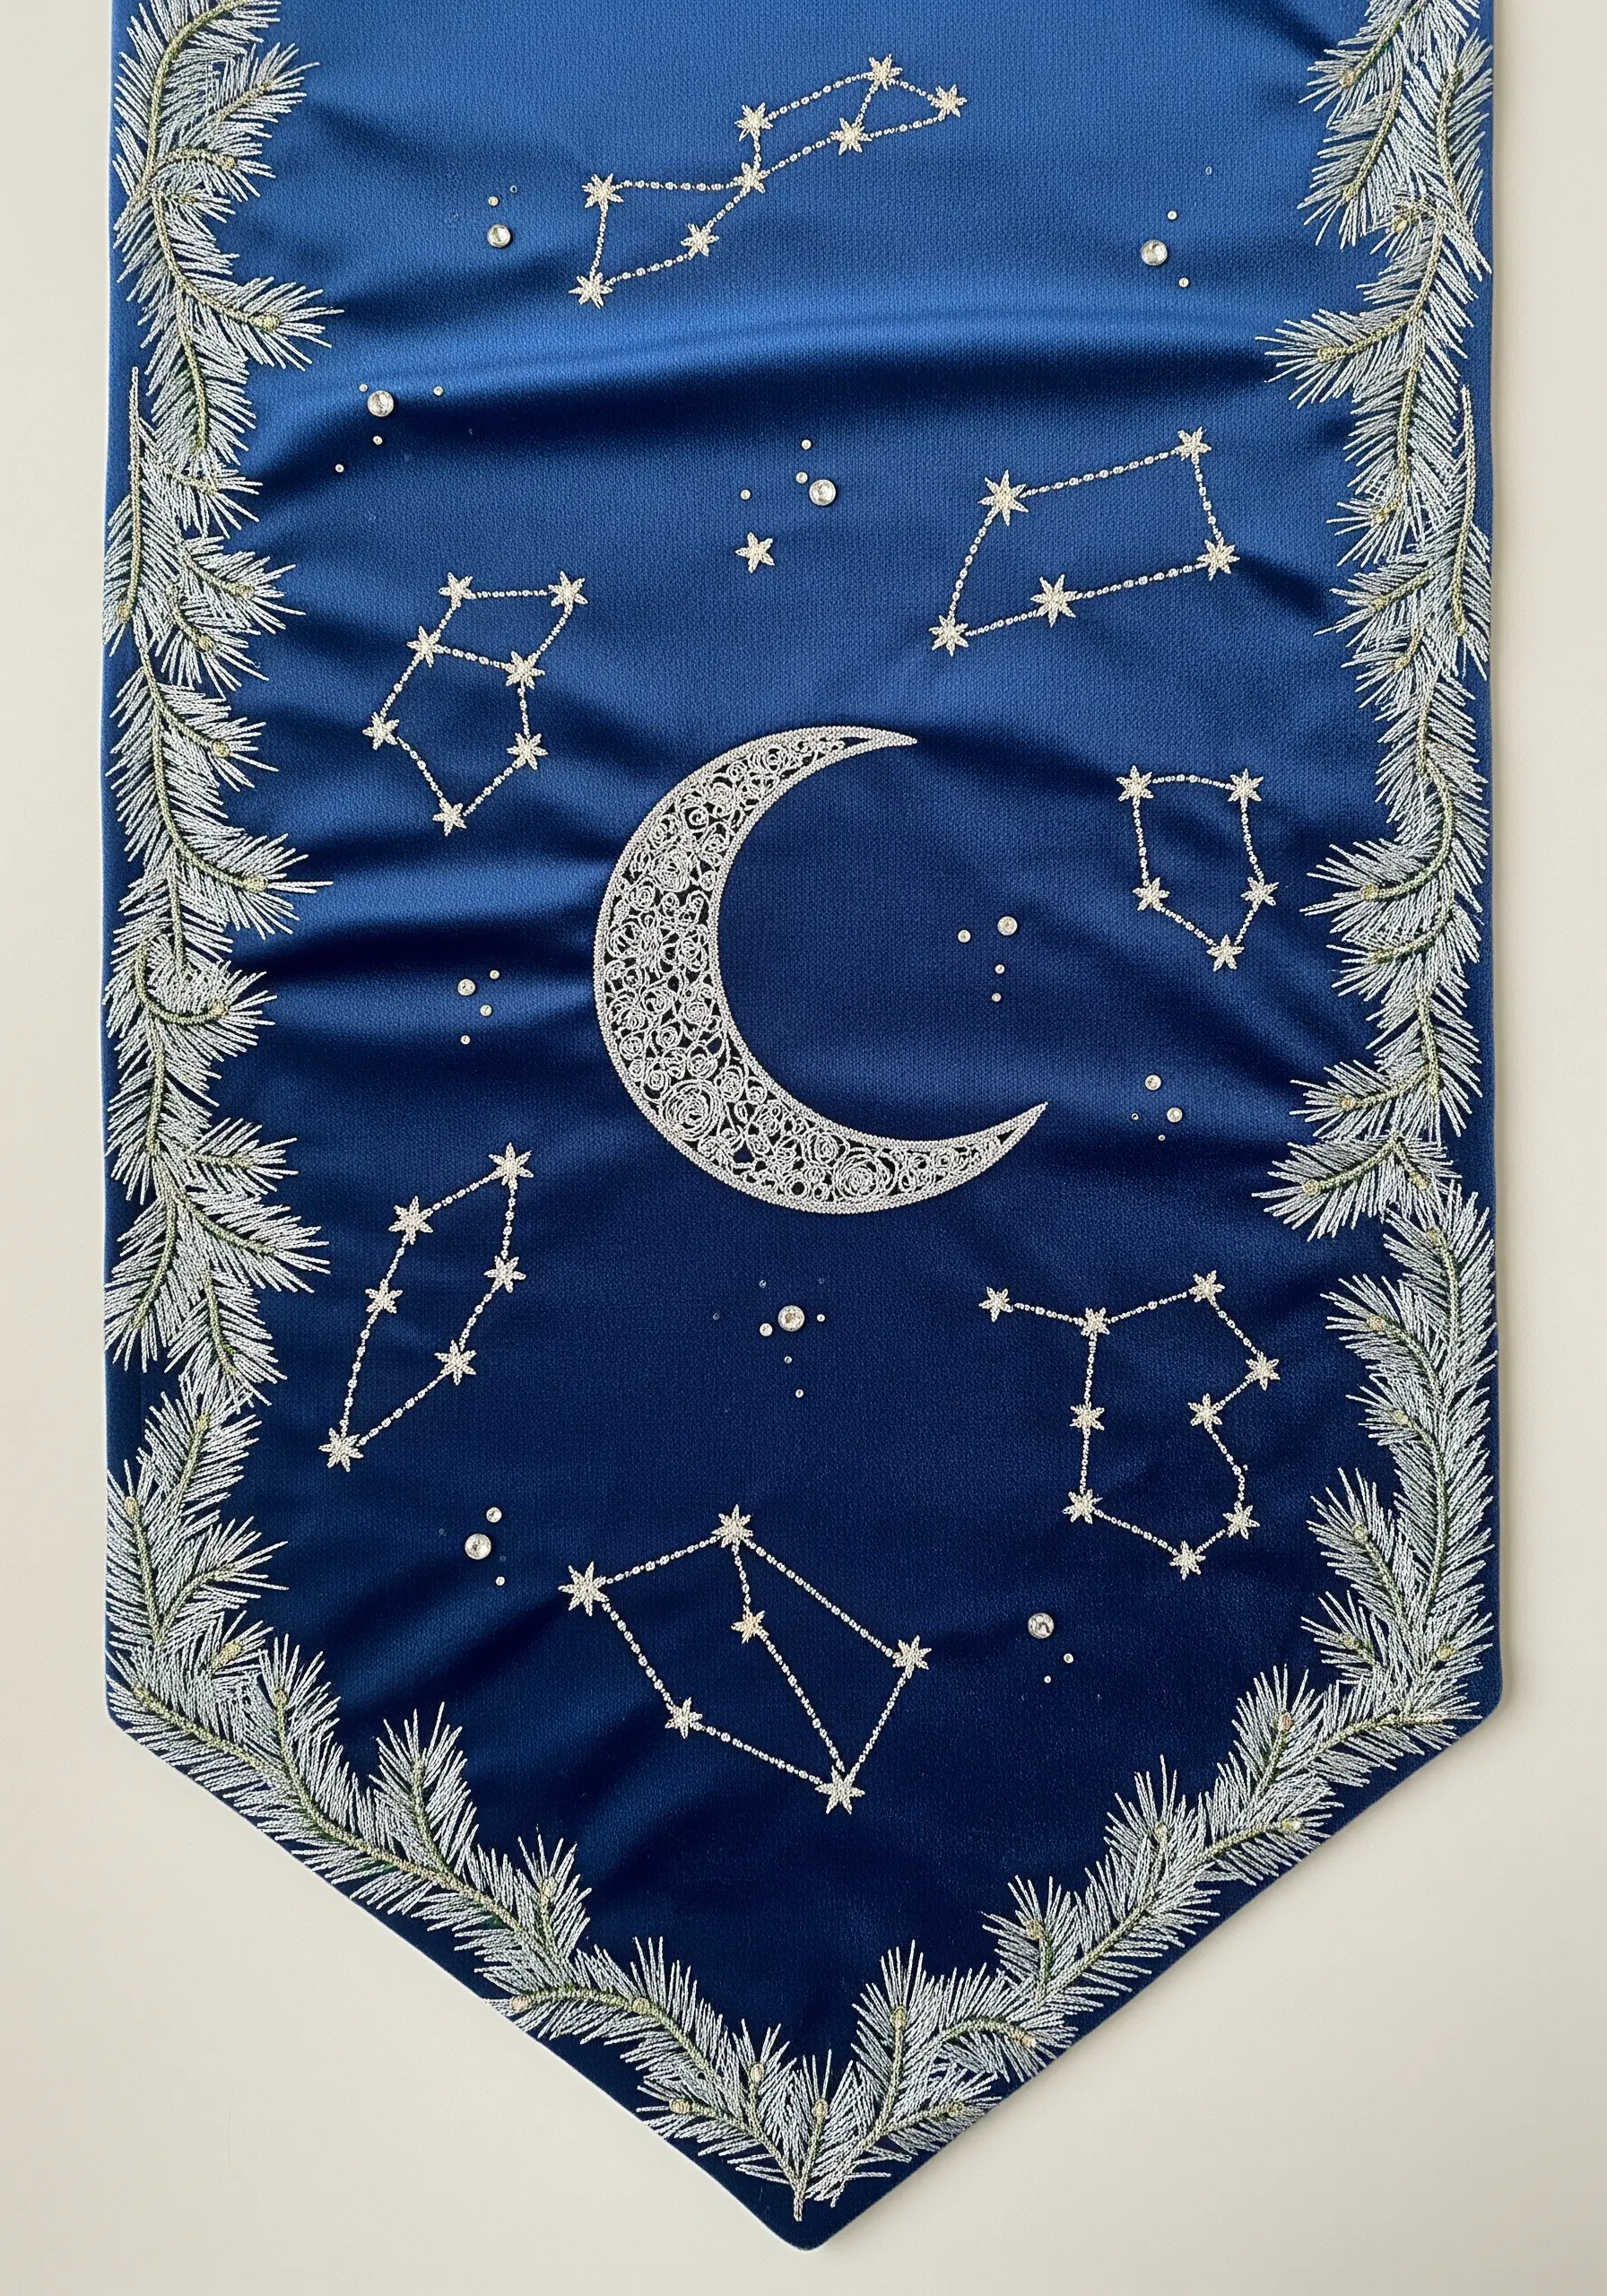
Create a stunning celestial scene on a dark, high-sheen fabric like satin.
Use a fine silver thread to connect the stars with a simple backstitch.
At each point where a star should be, add a single silver seed bead or a small, bright French knot to create a point of light.
For the frosted pine border, use layered straight stitches in white and silver, angled to mimic pine needles.
19. Whimsical Easter Scene with Appliqué and Texture
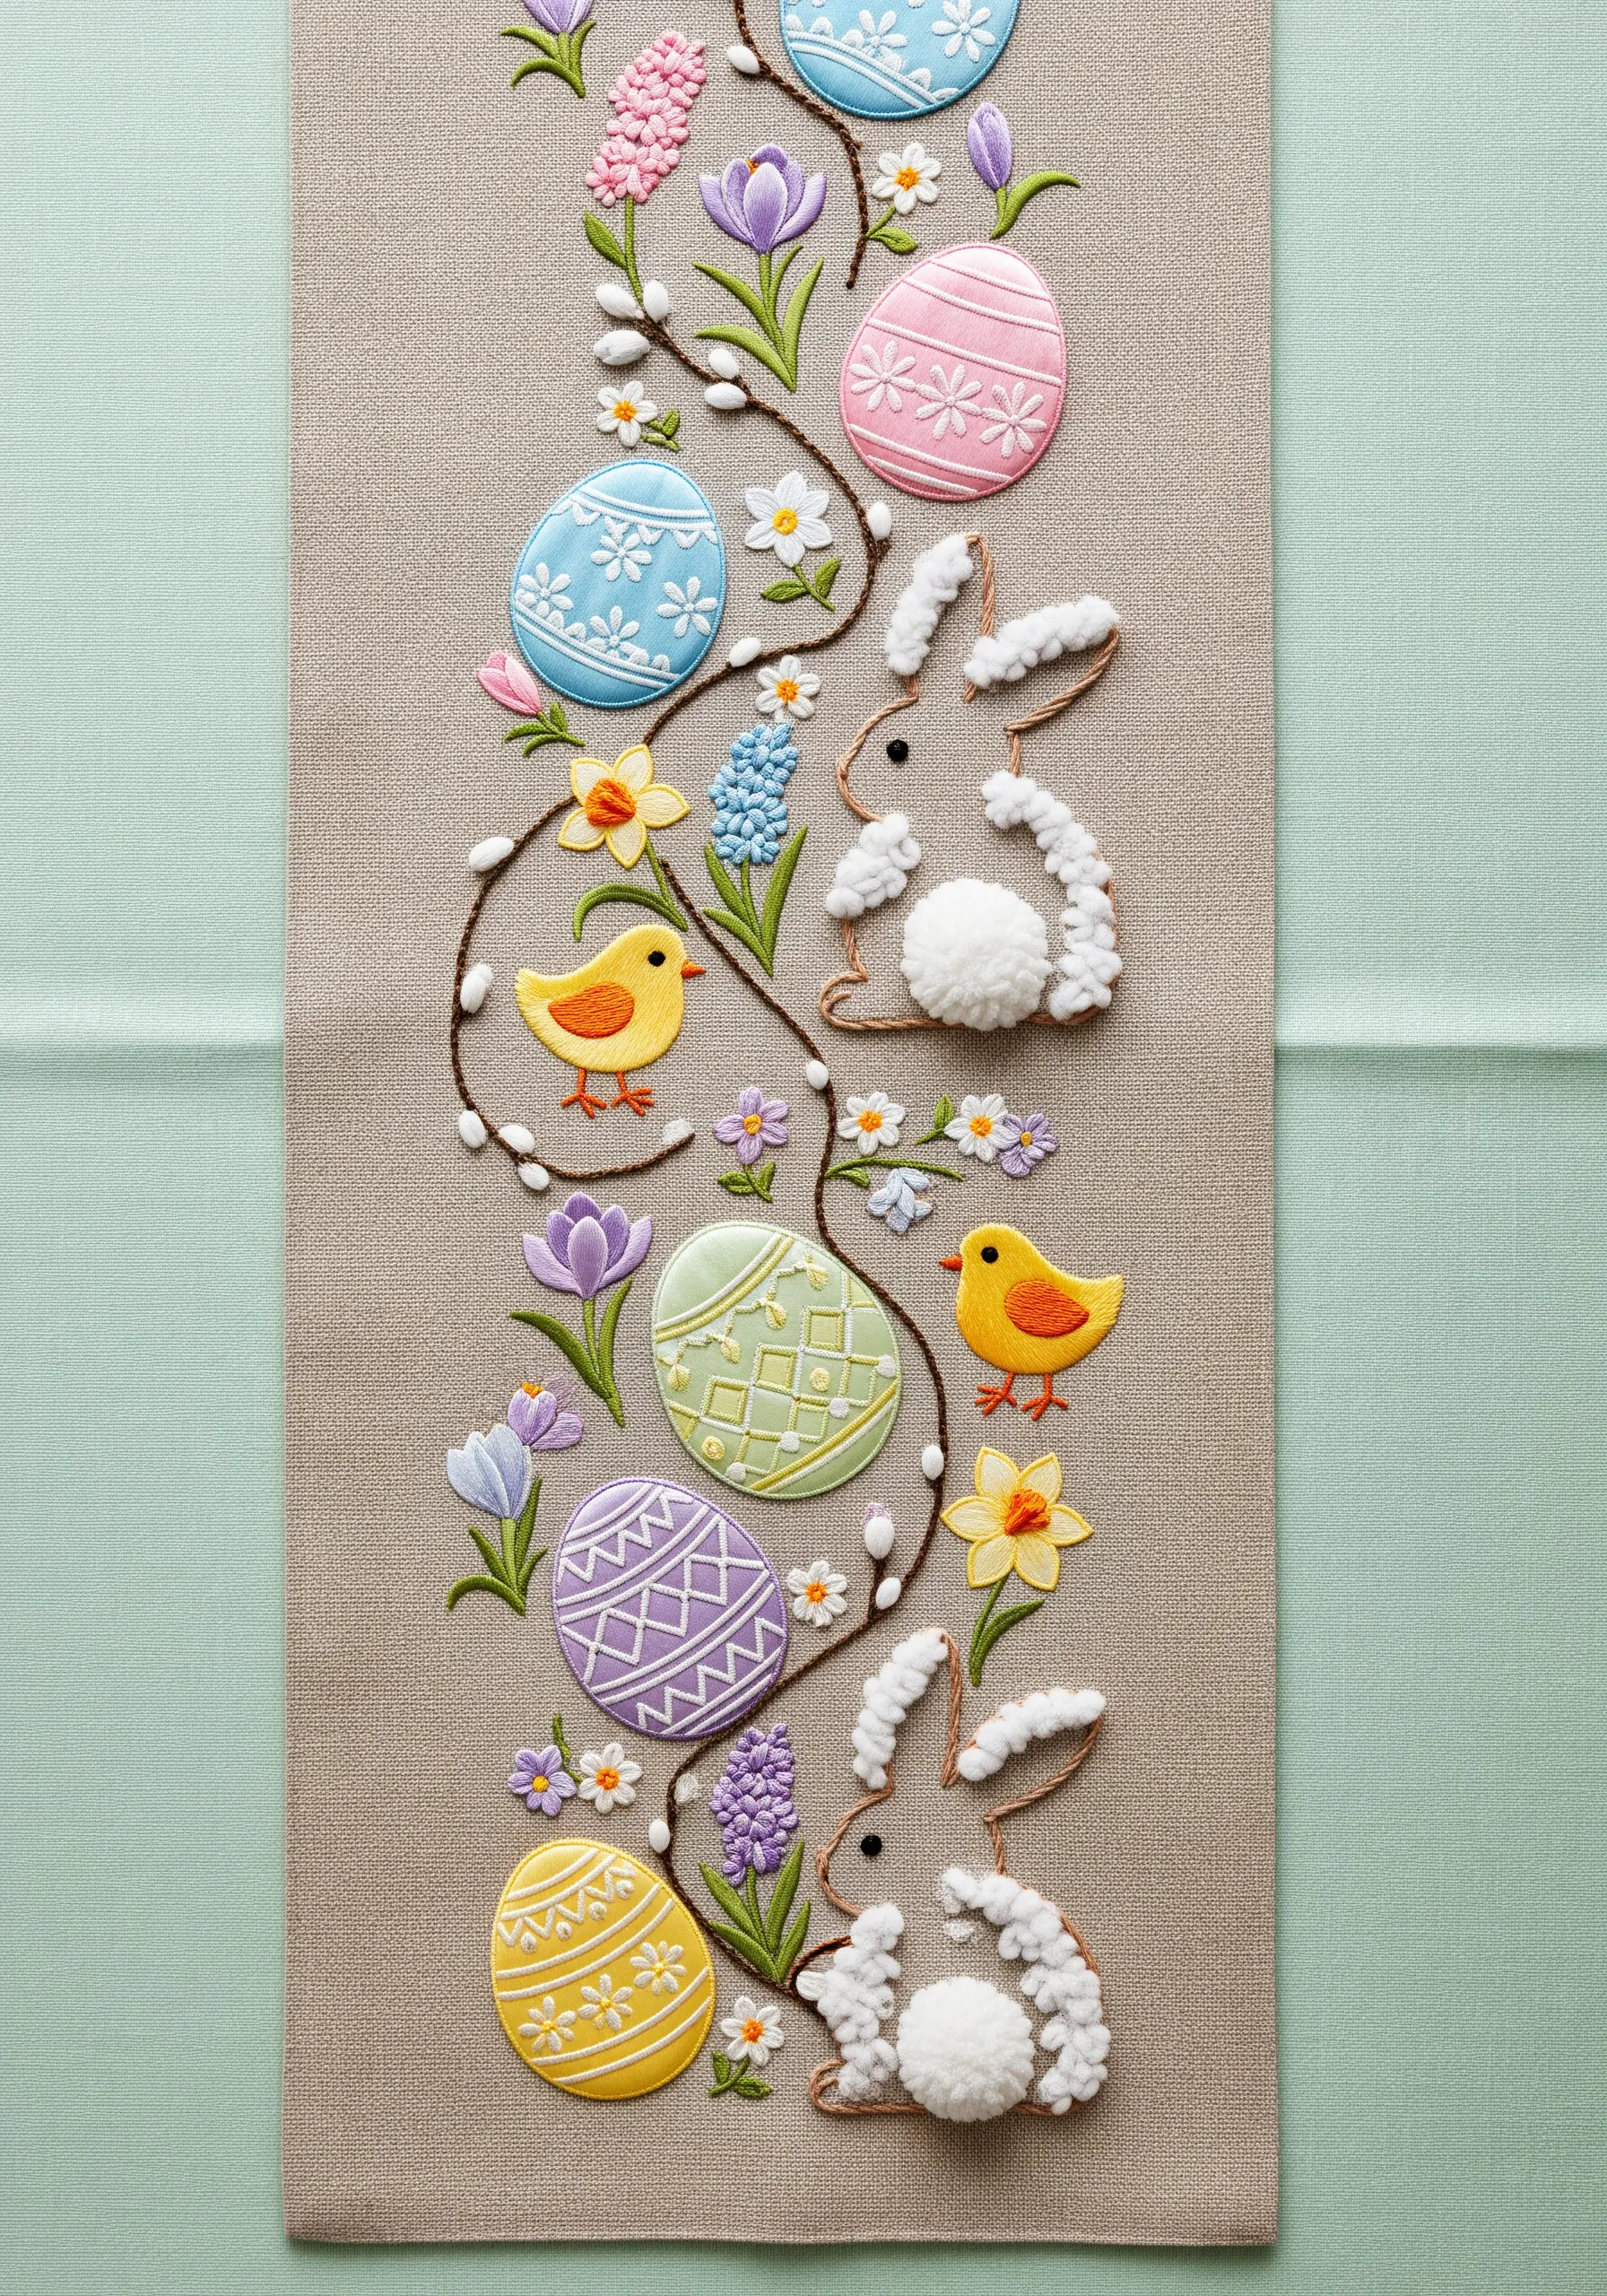
Create a playful, storybook effect by combining embroidery with simple appliqué.
Cut the egg shapes from pastel-colored felt and secure them with a decorative blanket stitch around the edges.
For the bunnies’ fluffy tails, use Turkey work—create loops of thread and then snip them for a soft, pom-pom texture.
This mixed-media approach adds dimension and tactile charm that’s perfect for a cheerful Easter table.
20. Mid-Century Modern Bursts with Metallic Highlights
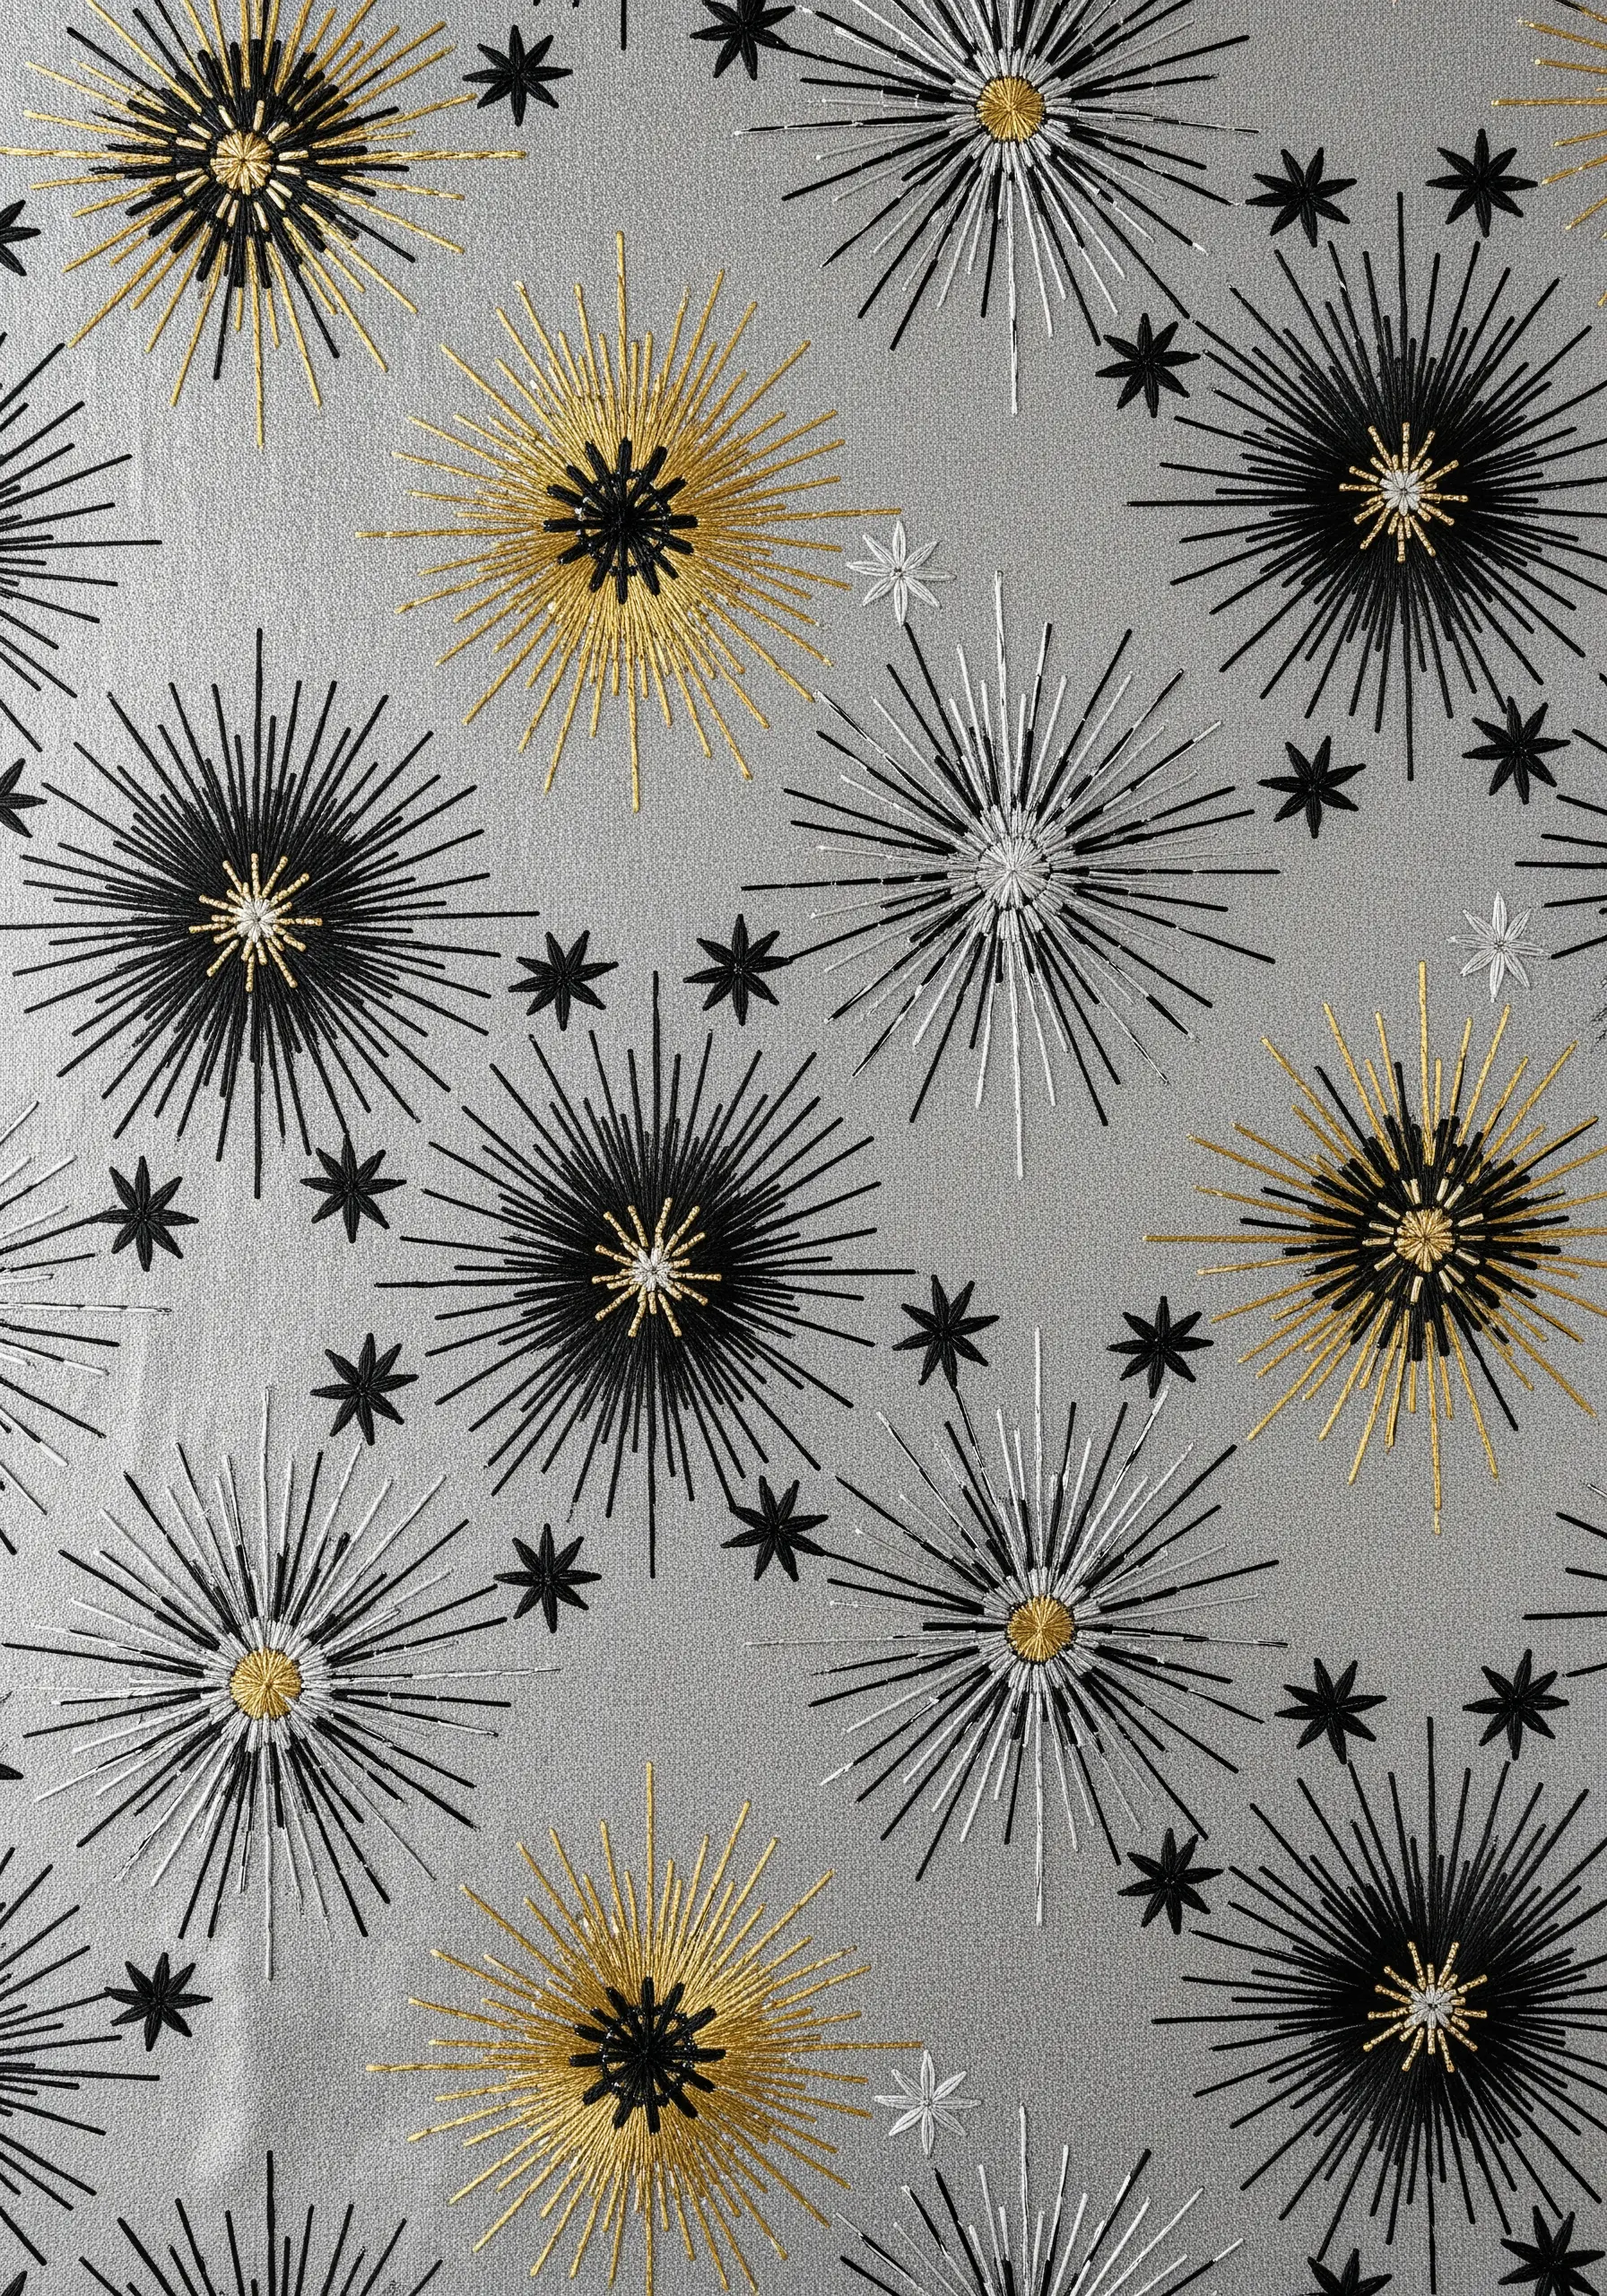
This retro-cool starburst pattern is all about the power of clean, radiating lines.
To keep your straight stitches neat and taut, always stitch from the center of the burst outwards.
Create a dynamic look by alternating between a matte black thread and a shimmering gold metallic thread—this contrast in sheen is key to the design’s impact.
A simple cluster of French knots at the center of each burst provides a perfect finishing touch.
21. Luxe Menorah on Velvet with Padded Satin Stitch
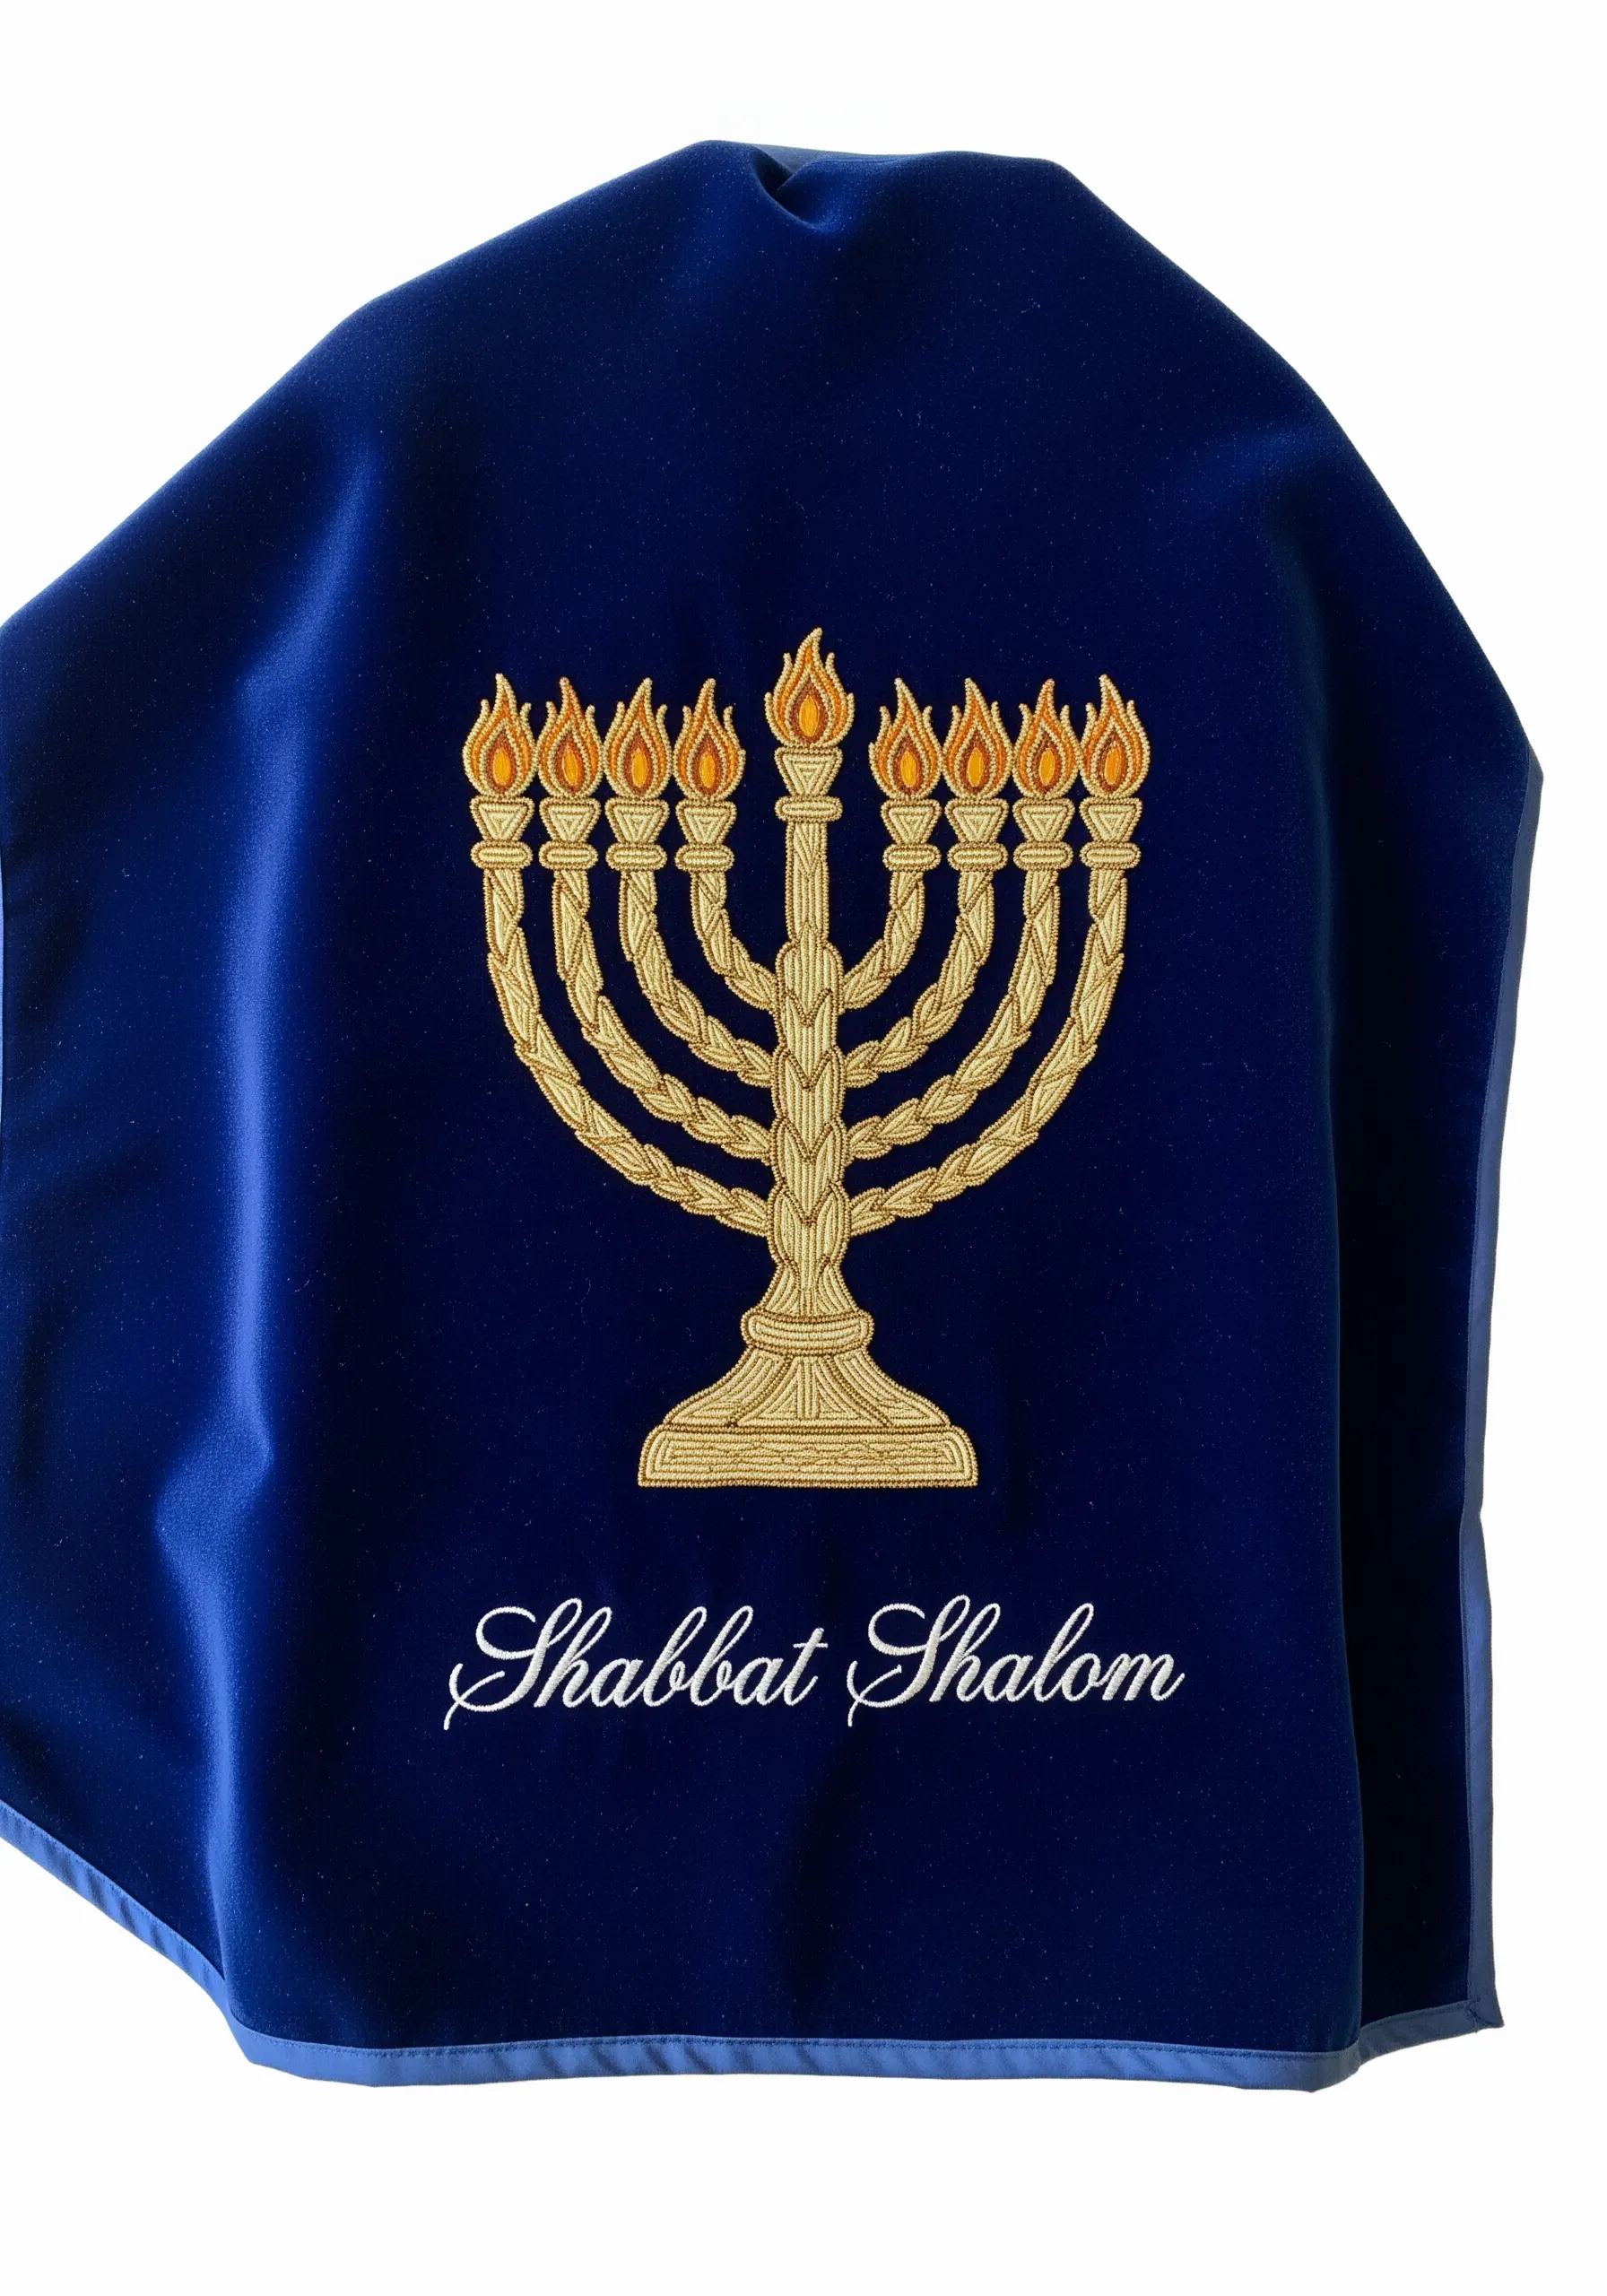
When embroidering on a plush fabric like velvet, your stitches can easily sink into the pile and lose their definition.
To counteract this, use a padded satin stitch.
First, create a foundation of split stitches or running stitches within the menorah shape, then cover this base with your gold satin stitches.
This underlay provides loft, allowing the design to sit proudly on the surface for a truly luxurious and regal finish.
22. Traditional Redwork for a Toile-Inspired Holiday
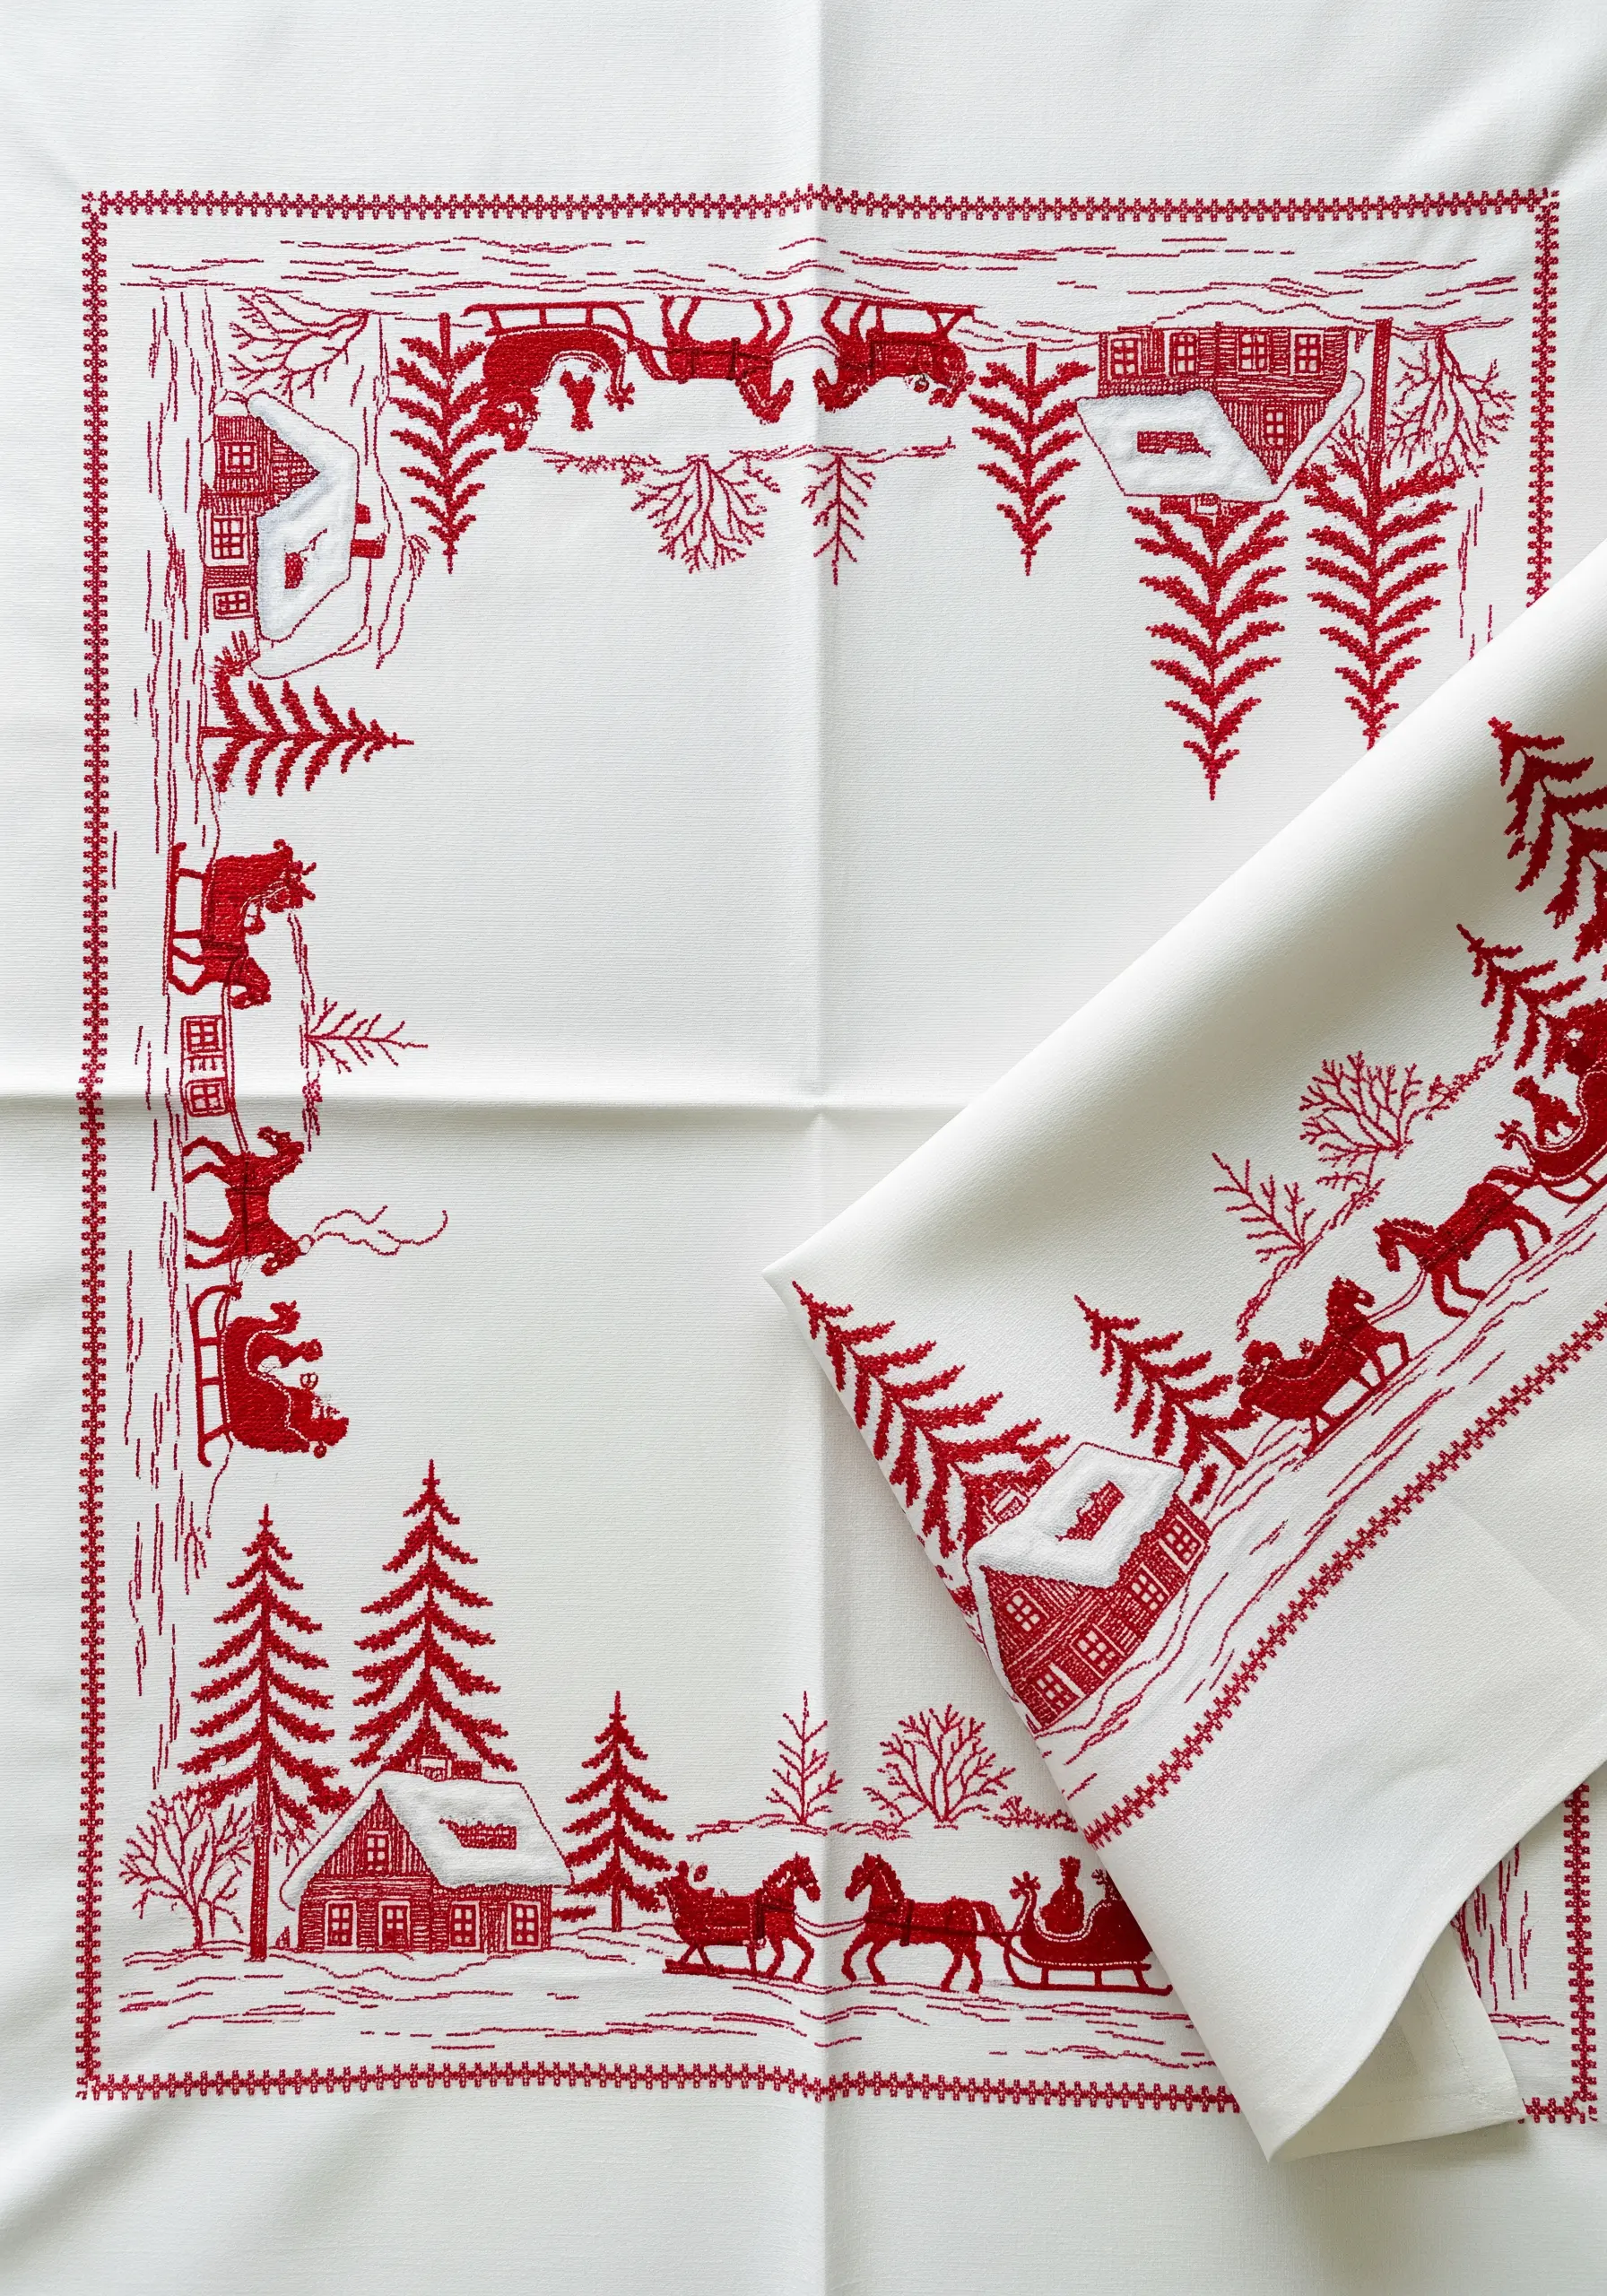
Channel the timeless charm of antique textiles with Redwork embroidery.
This technique uses a single color of thread (traditionally red) and relies on simple line stitches like stem stitch and backstitch to create an illustrative scene.
To create areas of shading or texture, such as on the snowy roofs or pine trees, use densely packed seed stitches or simple cross-hatching.
The result is an elegant, storybook effect that feels both classic and fresh.
23. Thread-Painted Peacock Feathers with Sequin Accents
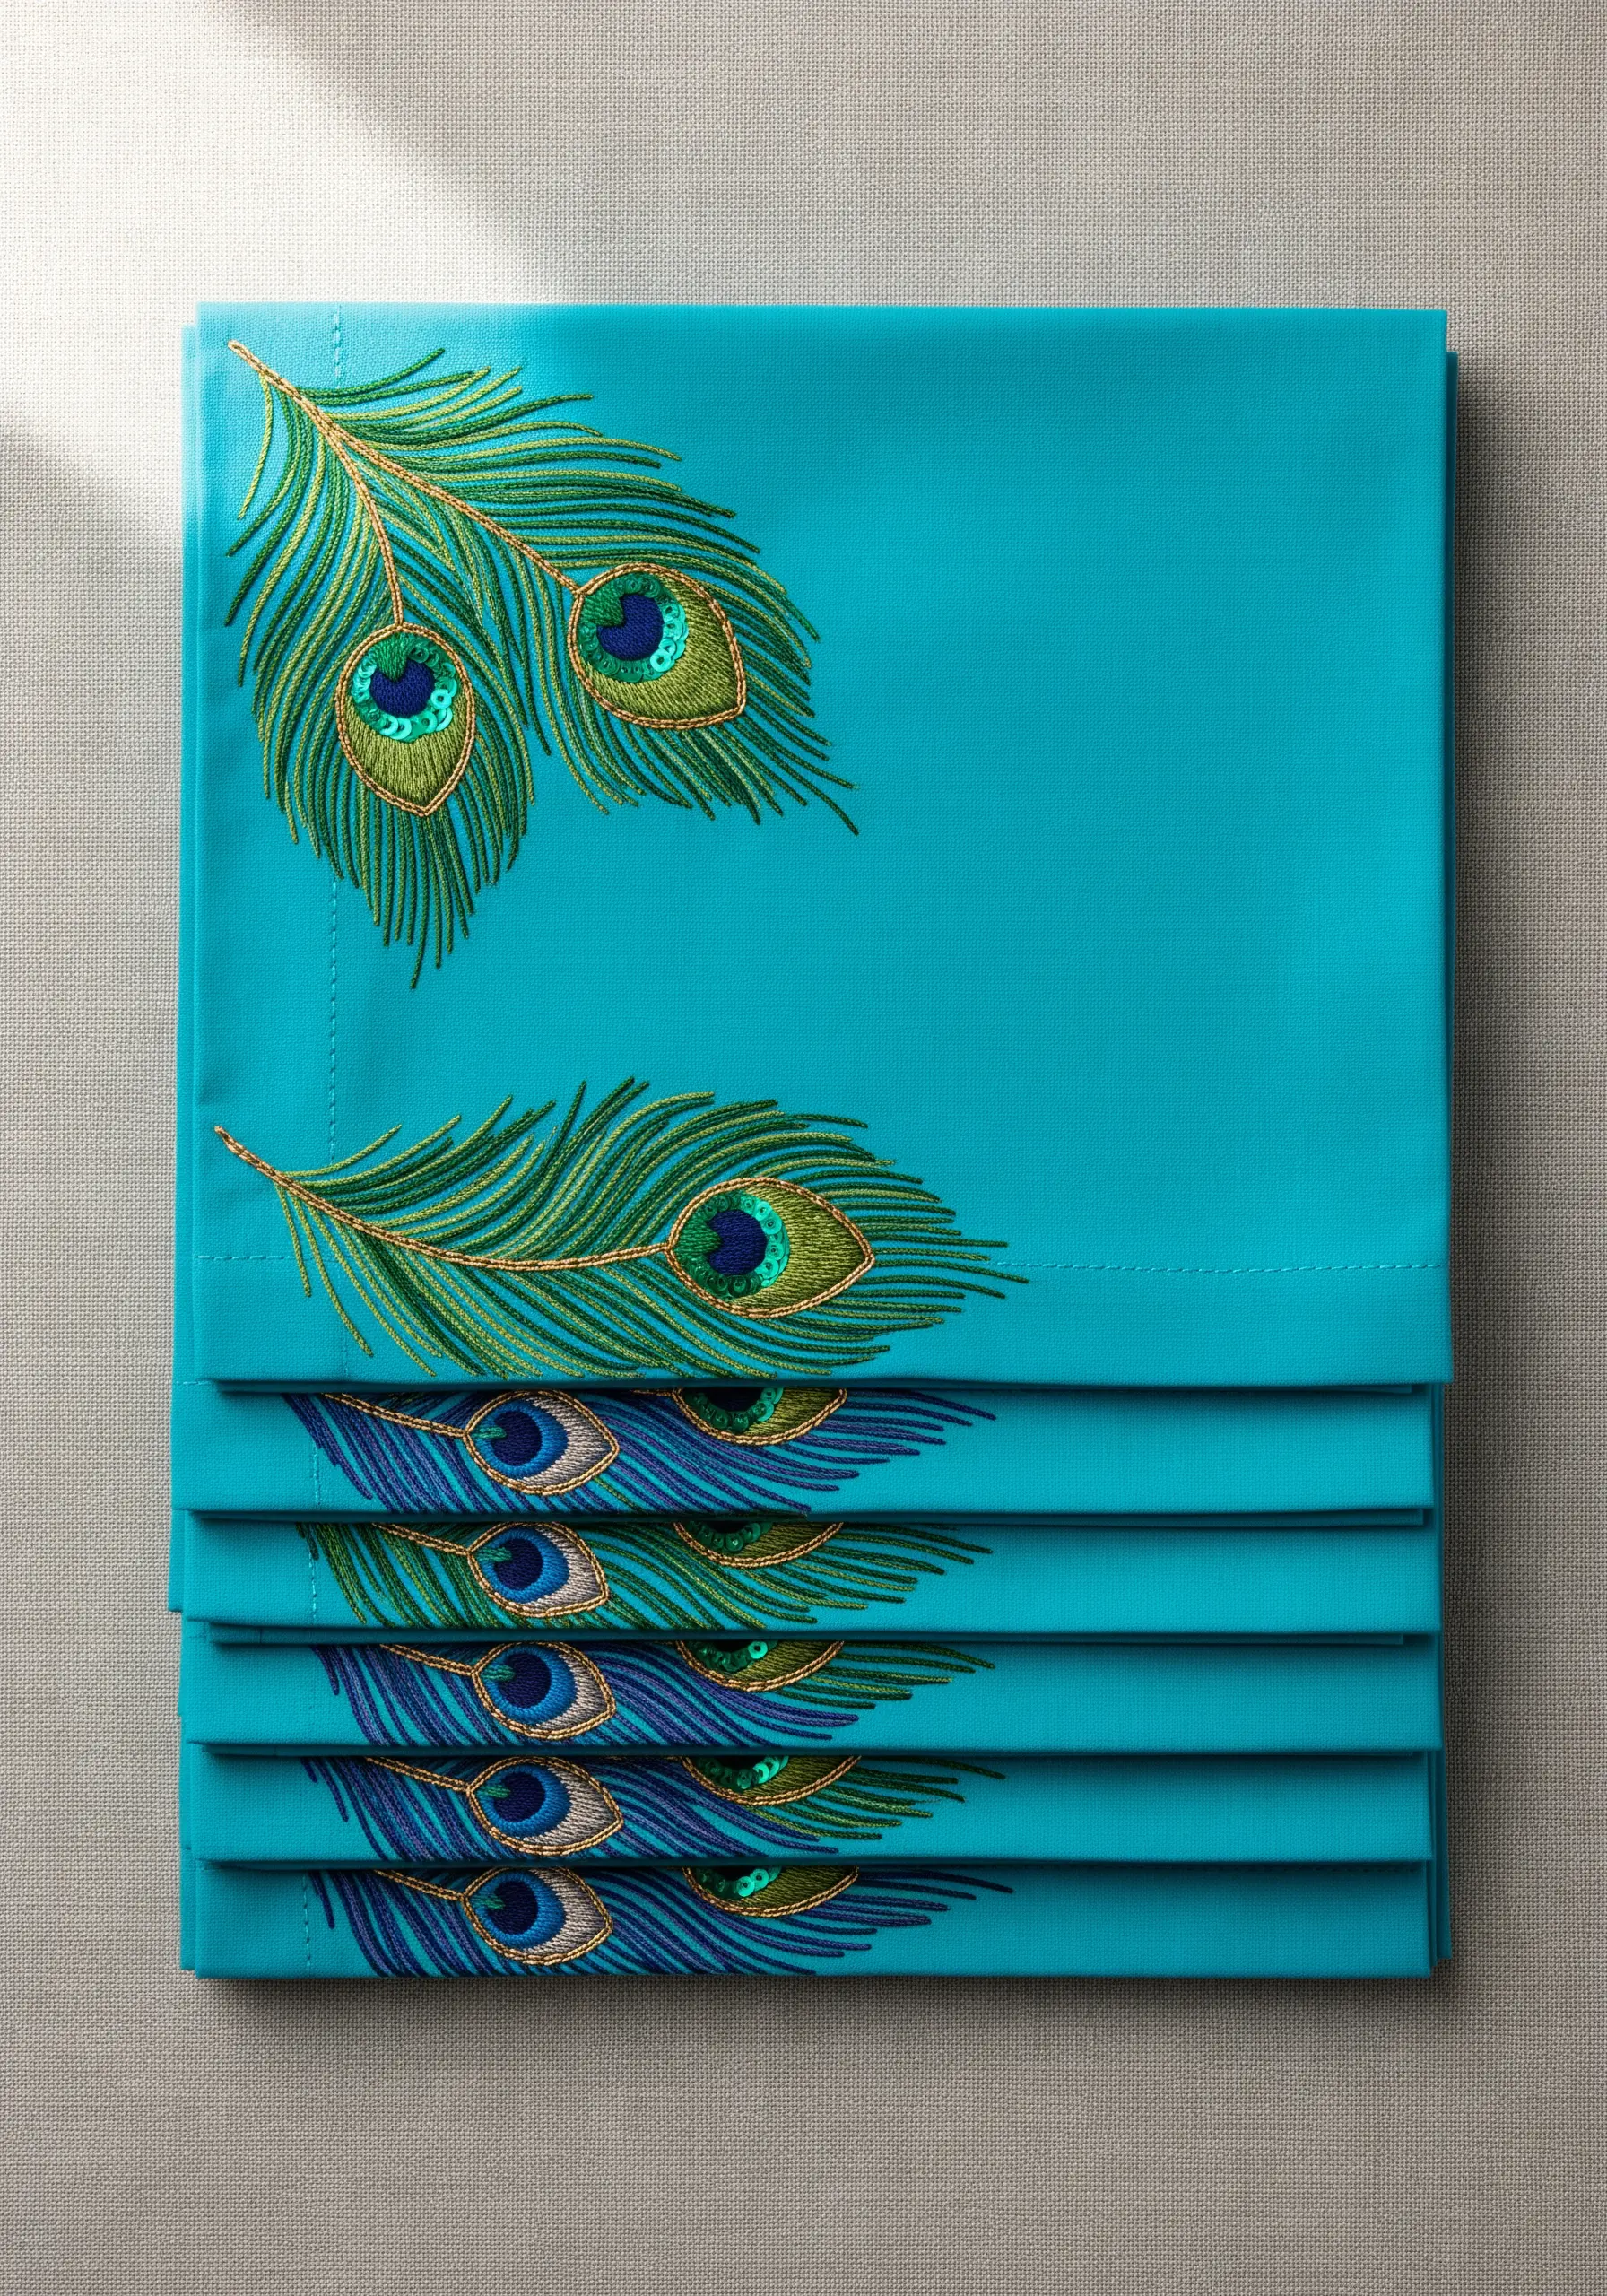
To capture the signature iridescence of a peacock feather, use long-and-short stitch with satin floss in rich jewel tones.
Let your stitches flow outwards from the central quill, blending shades of green, blue, and gold to create a shimmering gradient.
For the iconic “eye” of the feather, stitch a small circle of satin stitch and then secure a single, iridescent blue or green sequin in the center.
This adds a perfect flash of light that brings the motif to life.
24. Raised Satin Stitch for a Tiled Effect
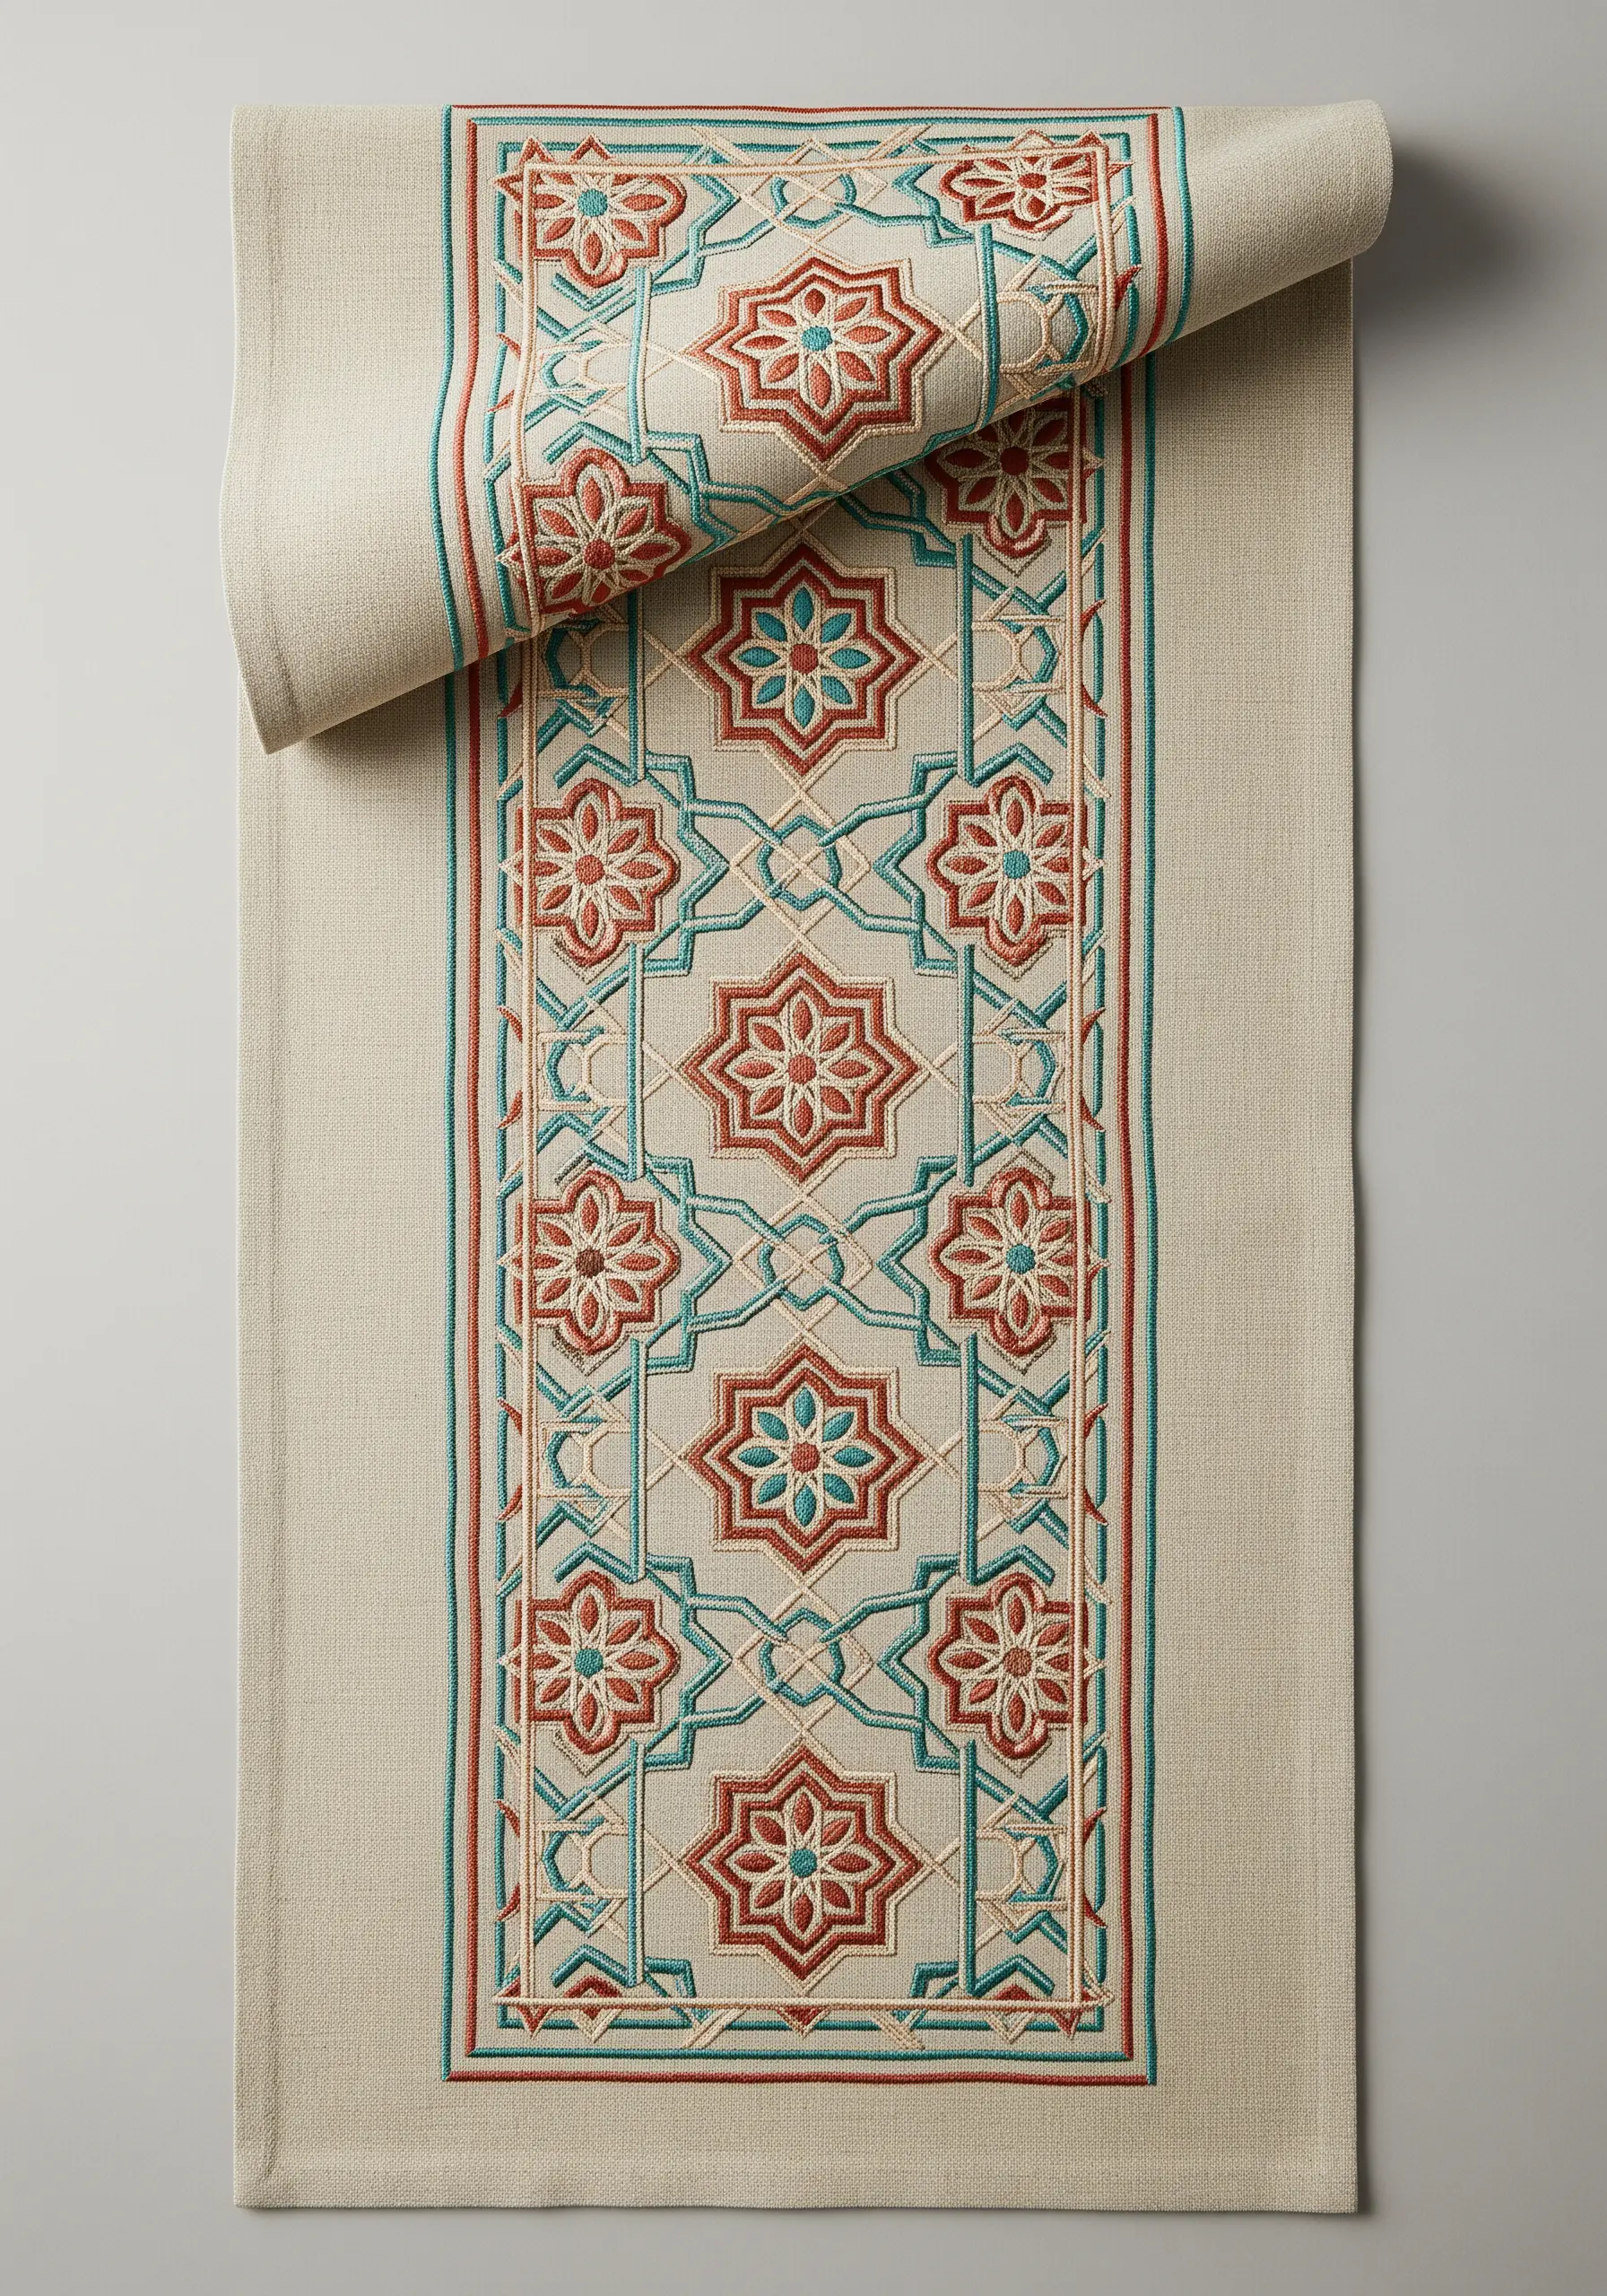
Recreate the look of architectural tilework using a raised satin stitch for your outlines.
First, create a padded foundation by stitching several parallel rows of backstitch or chain stitch along your design lines.
Then, cover this padding completely with satin stitches worked in the opposite direction.
This technique gives the lines a rounded, three-dimensional quality that makes the entire pattern feel substantial and beautifully tactile.
25. Textural Autumn Wreath with Dimensional Stitches
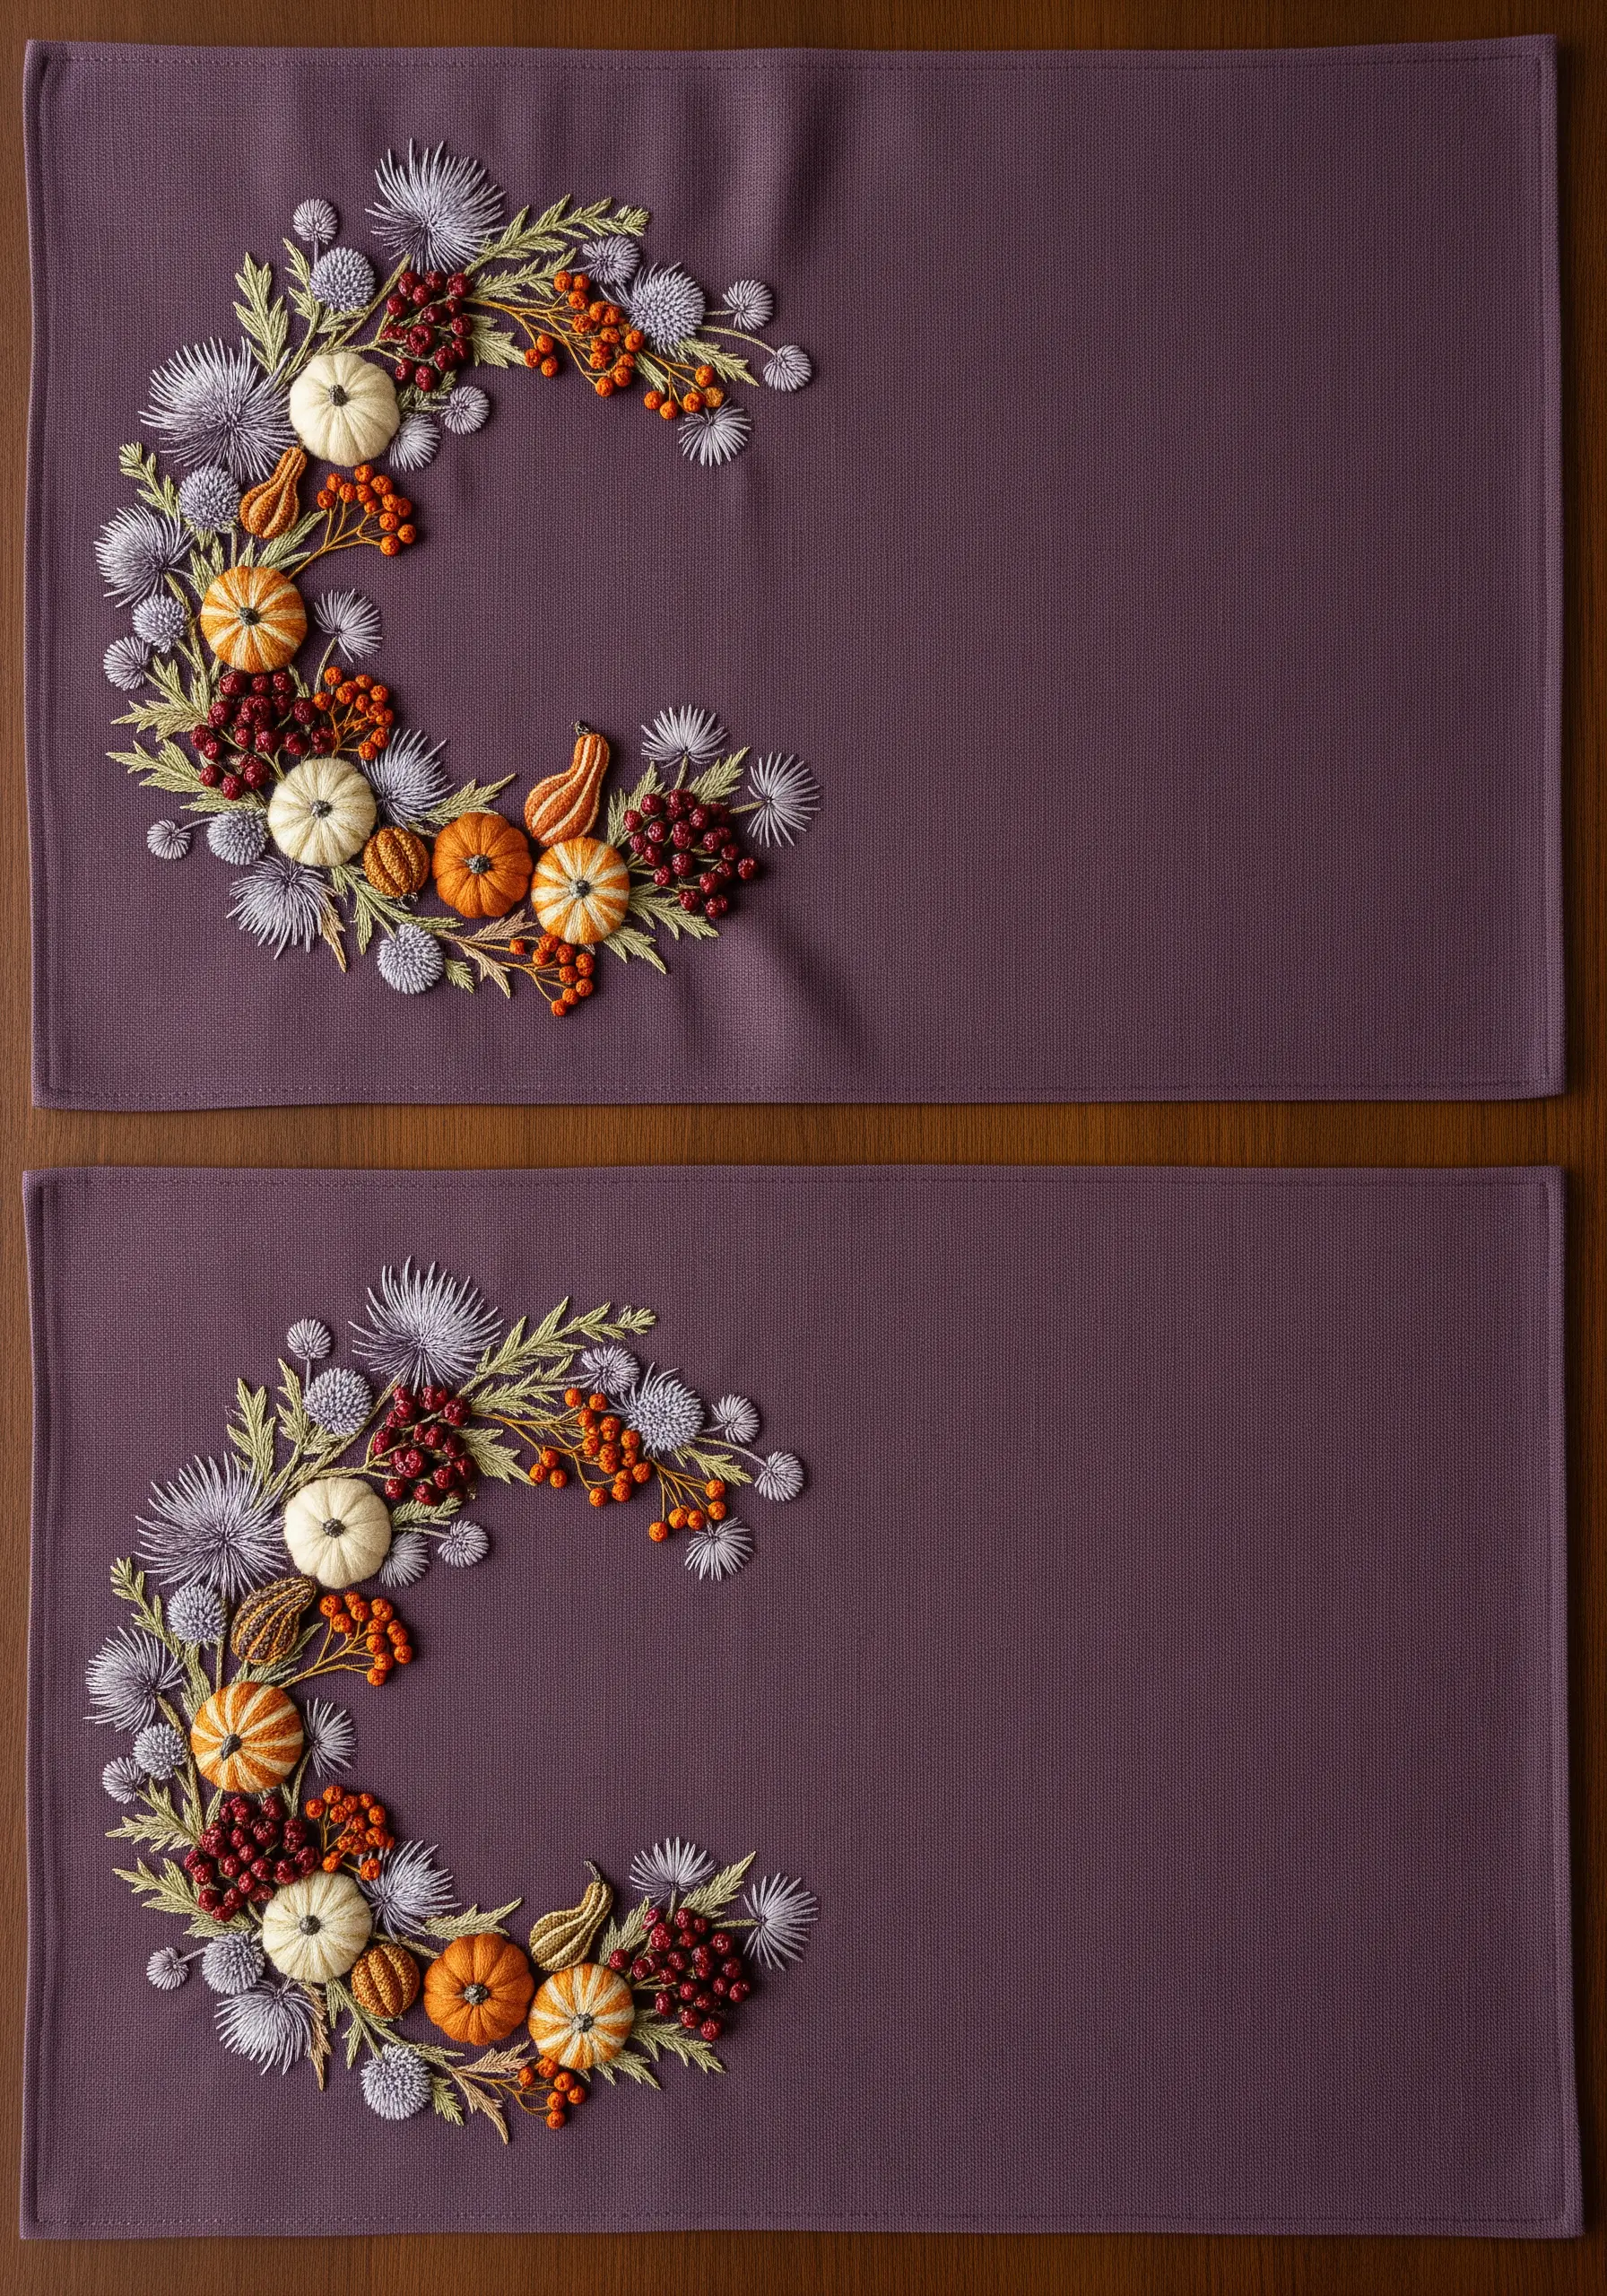
Build a wreath that is rich in texture by layering a variety of dimensional stitches.
For the spiky, thistle-like elements, use radiating straight stitches in a fine thread.
Create rounded pumpkins with padded satin stitch, and use colonial knots or French knots for the berries.
Varying the number of thread strands you use for the knots will change their size, adding to the organic feel.
This mix of textures is essential for a design that feels lush and natural.
26. High-Contrast Snowflakes on Patterned Fabric
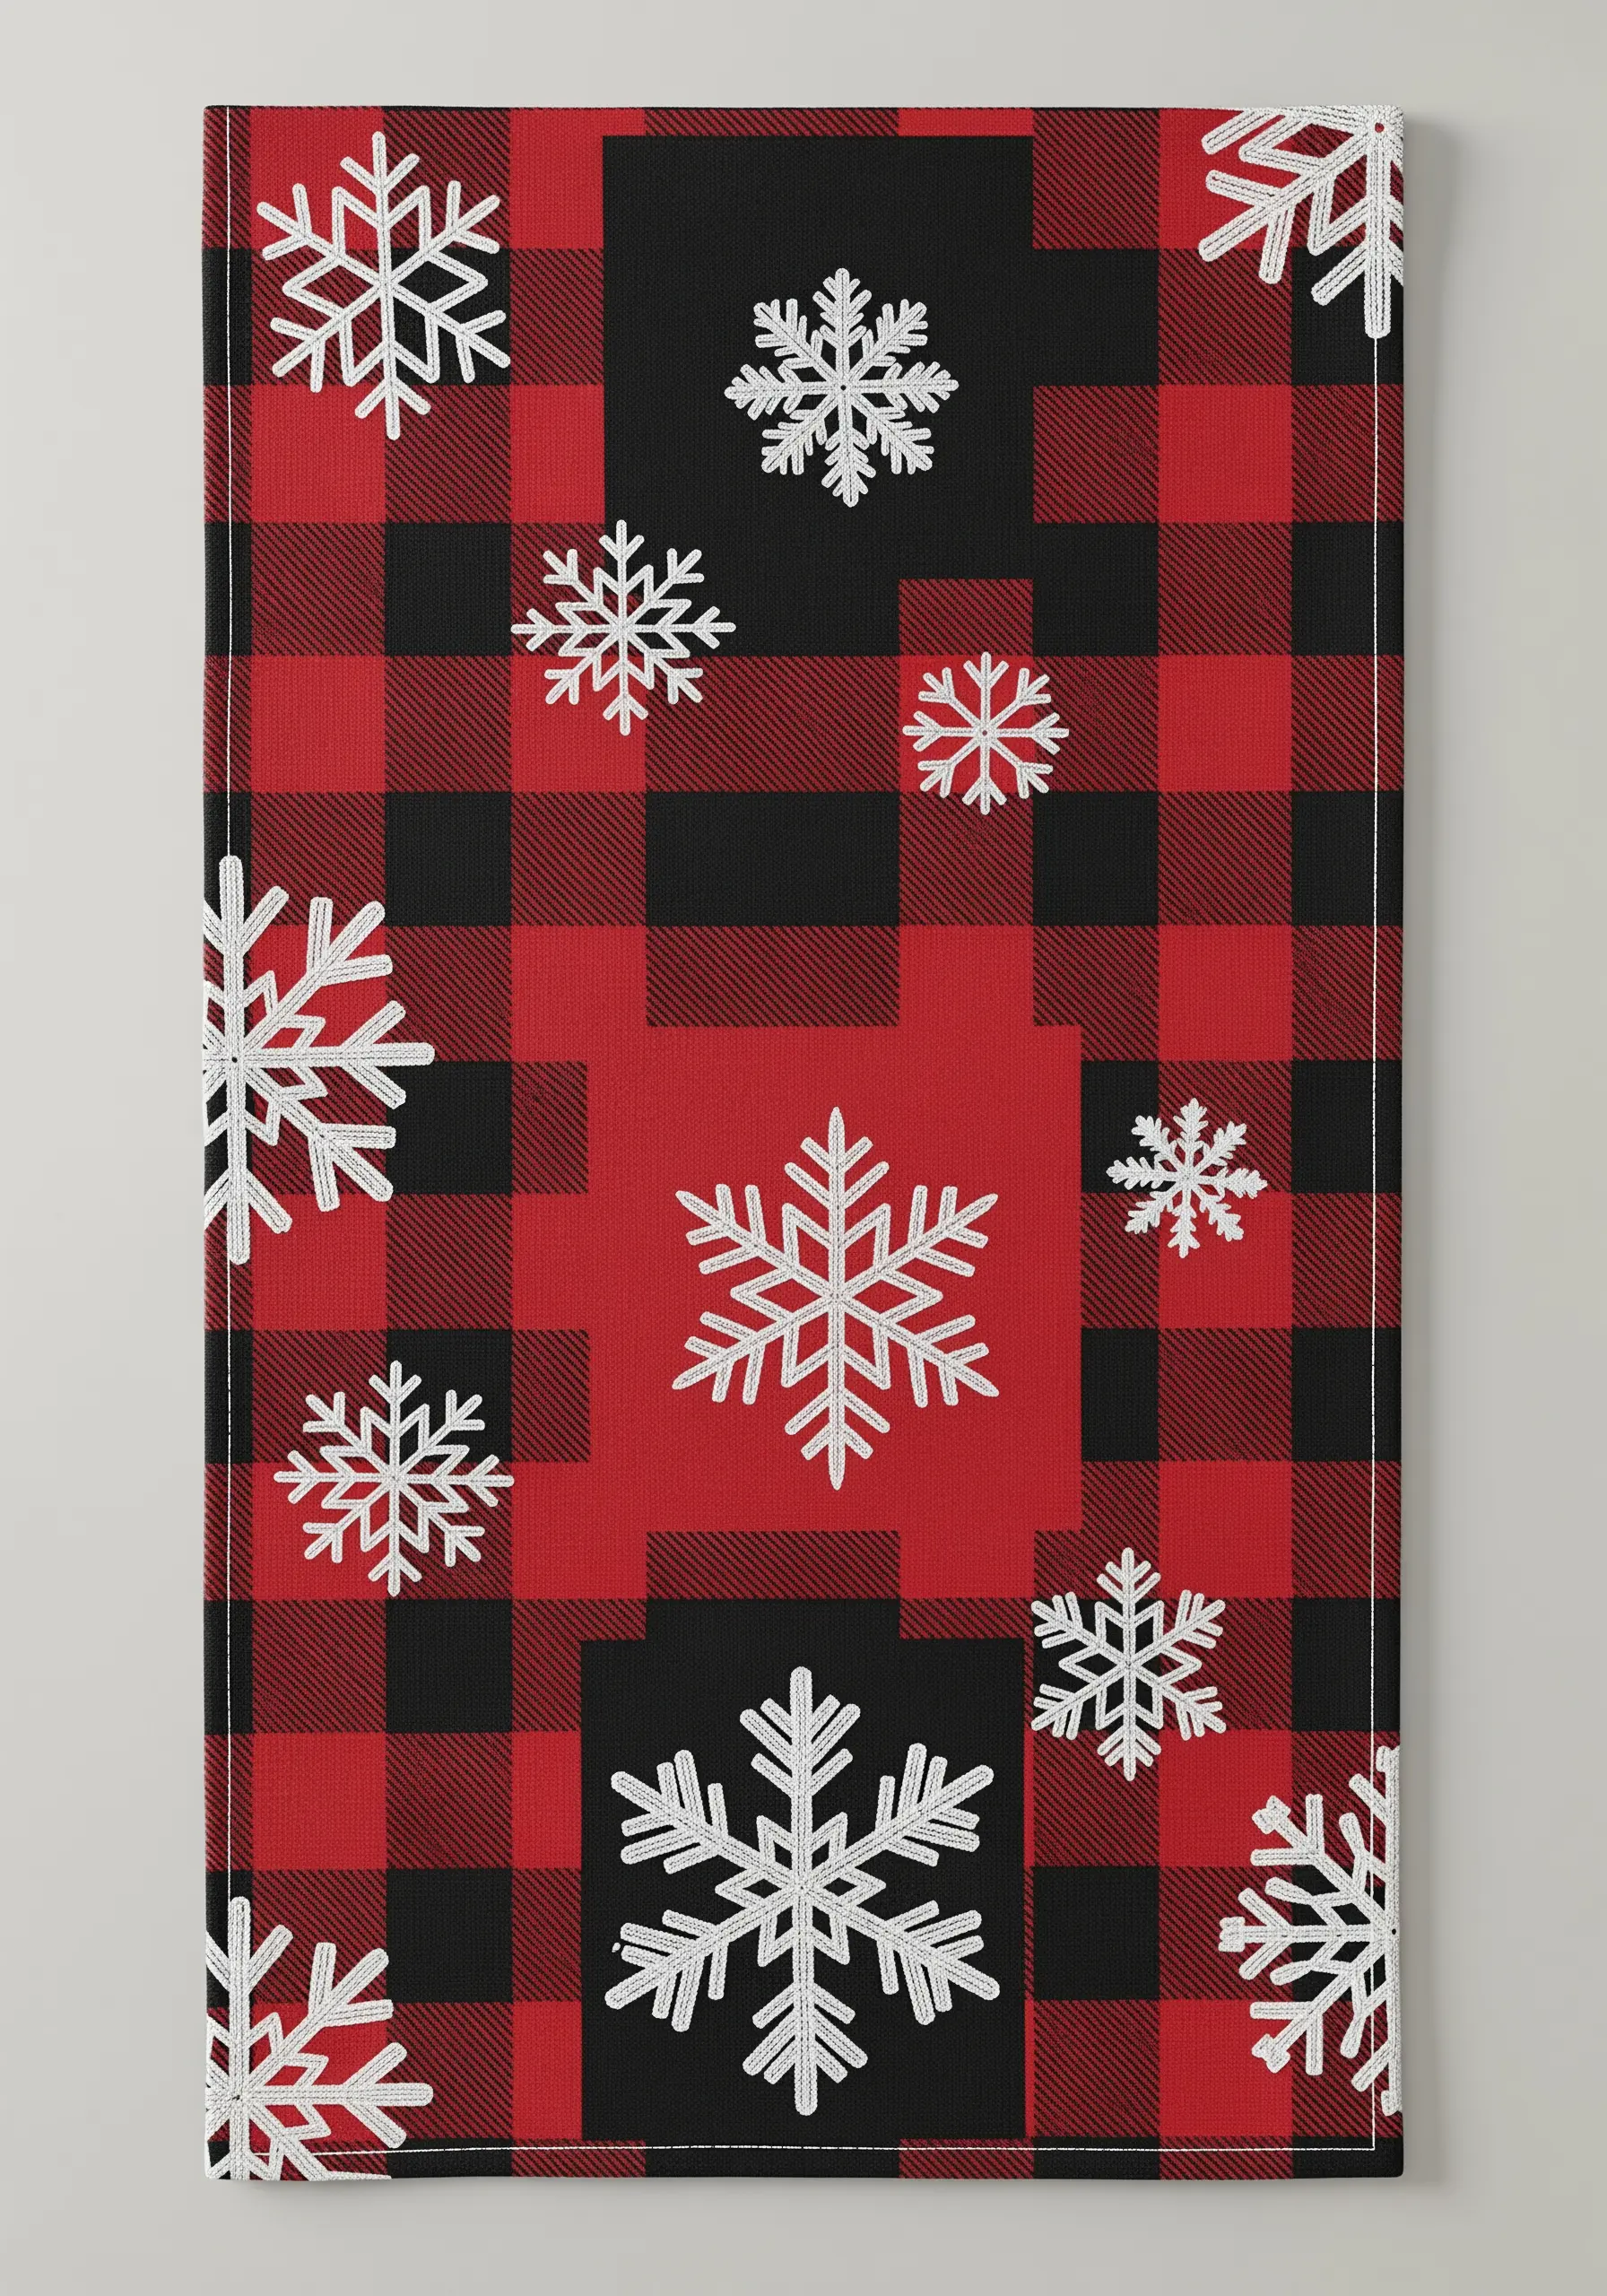
When you embroider on a bold, busy pattern like buffalo plaid, your motif needs to have a strong presence.
The solution is to use a thick, high-contrast thread.
Choose a bright white pearl cotton or use all six strands of standard embroidery floss.
Even with a simple backstitch, the thickness of the thread provides enough visual weight to stand out clearly against the background, creating a crisp, modern rustic look.
27. Interwoven Celtic Knots with a Whipped Backstitch
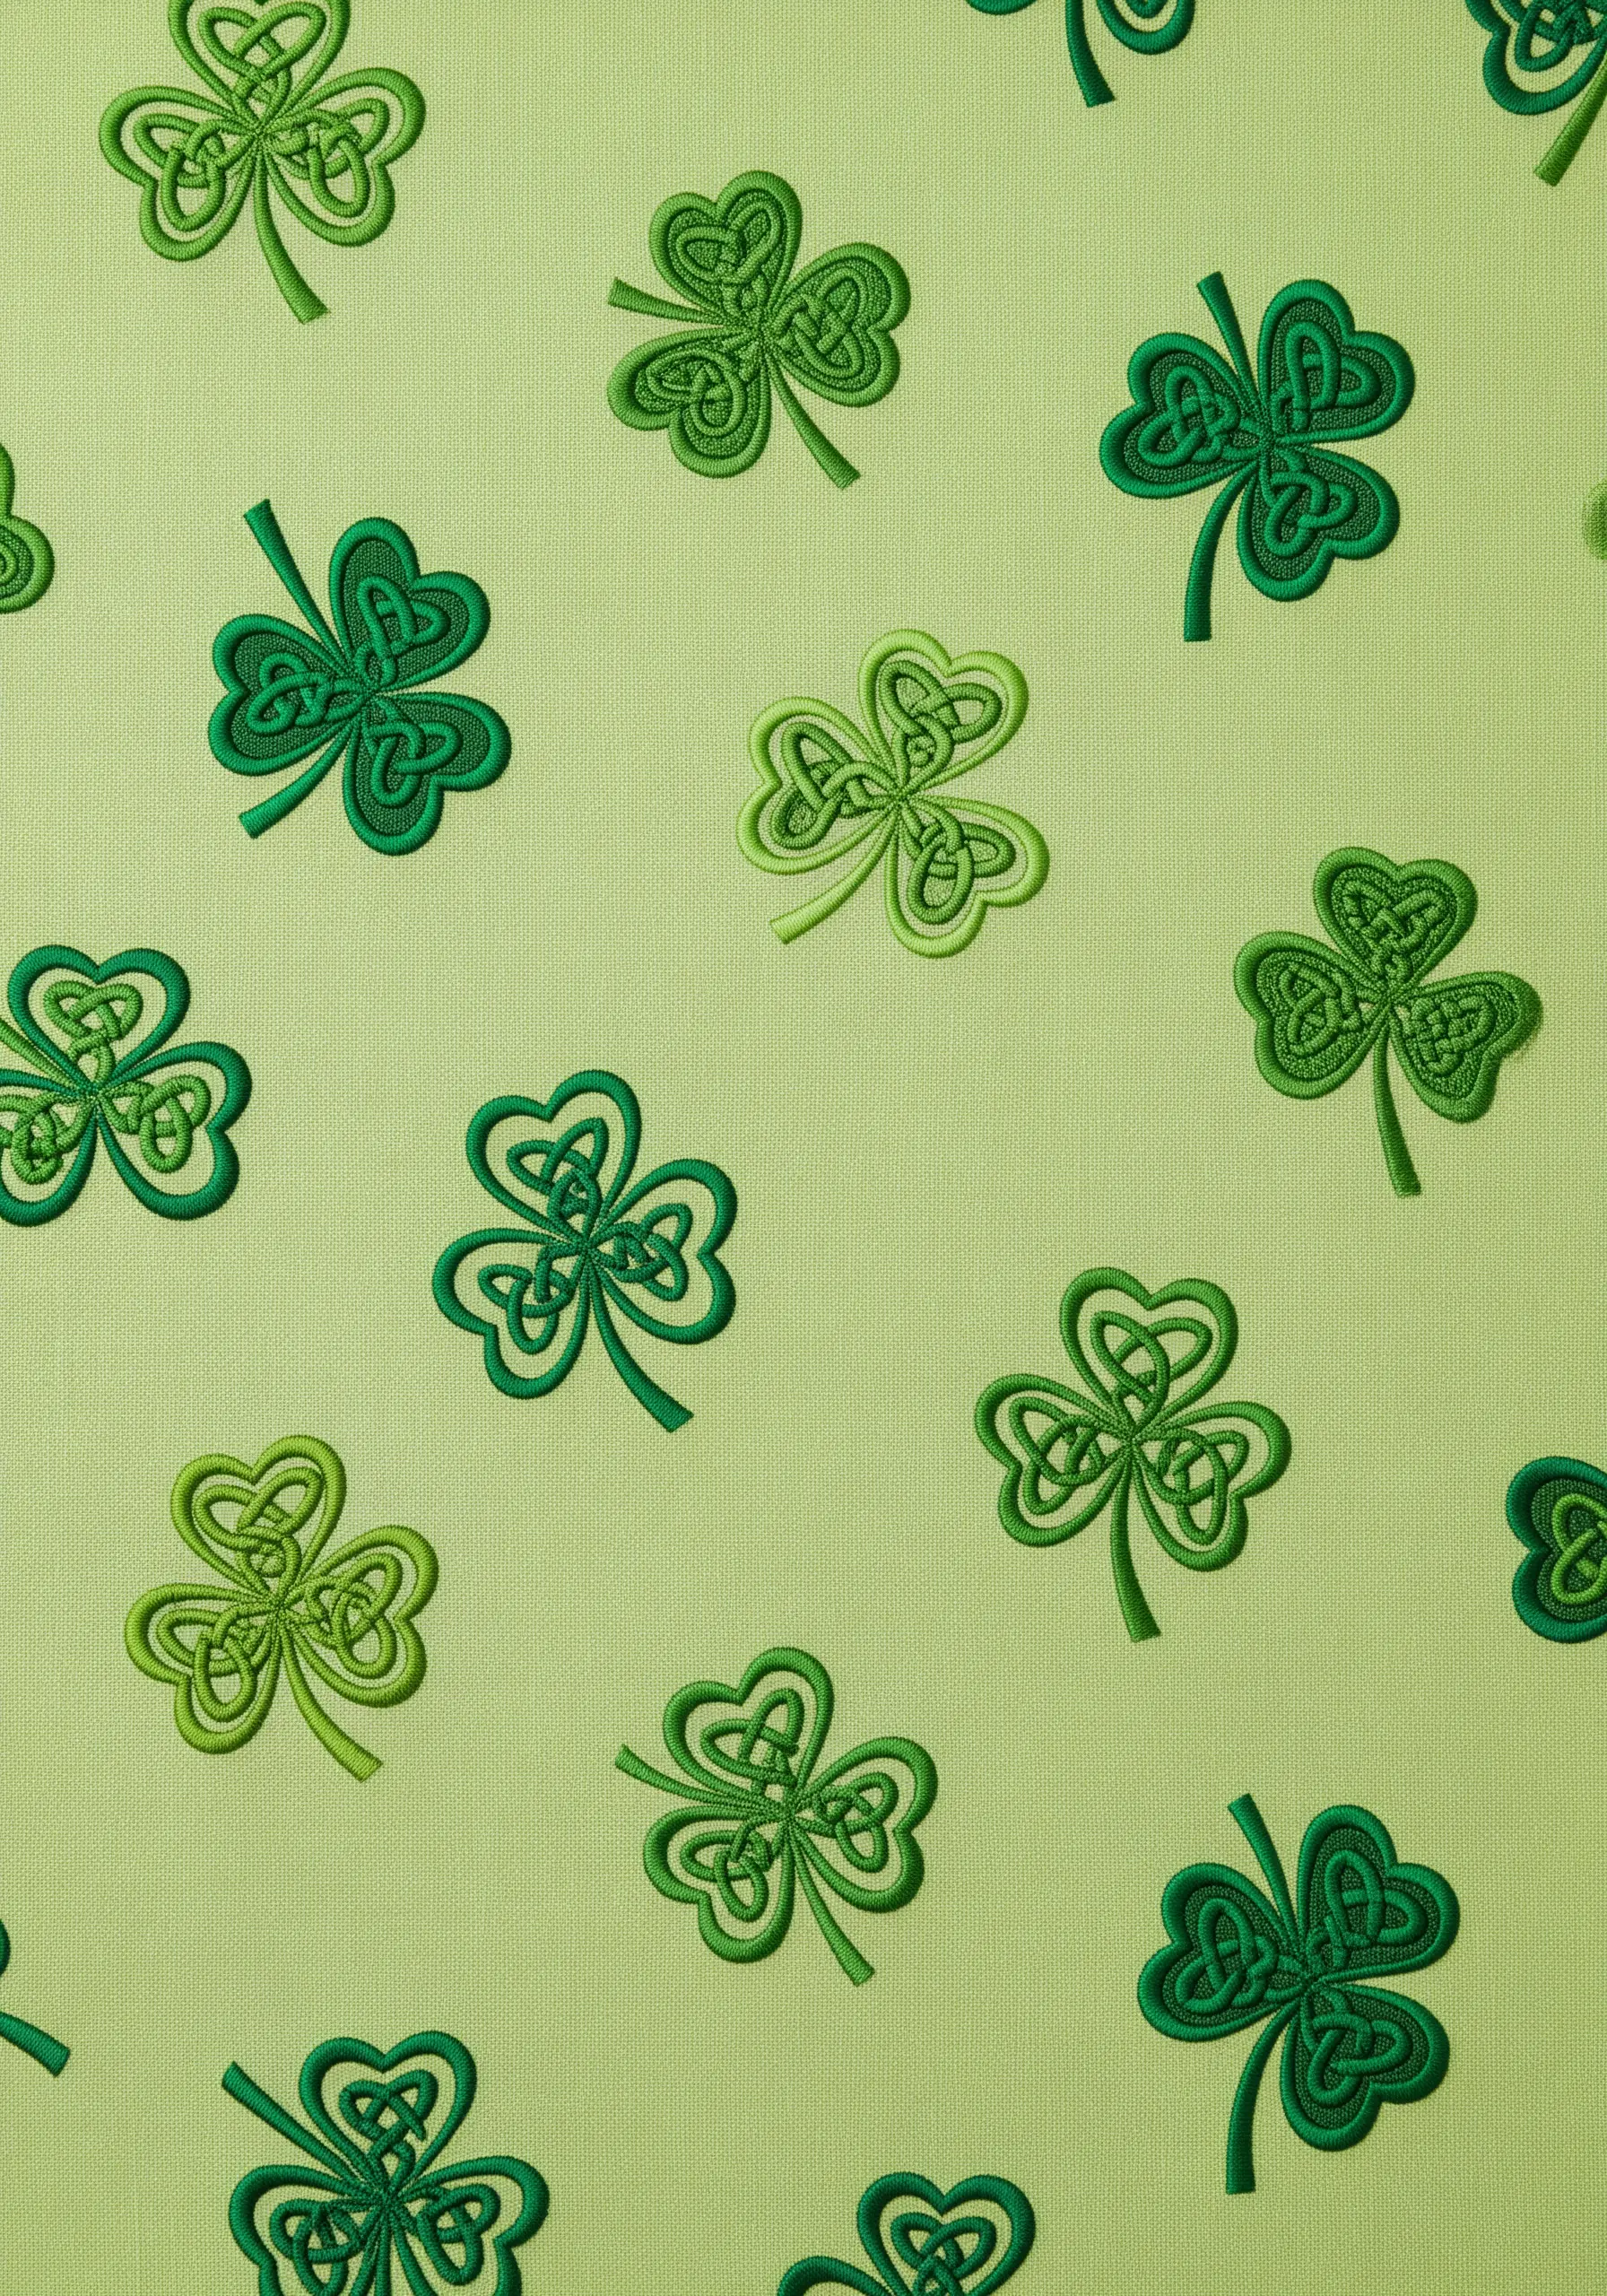
To achieve the smooth, unbroken lines essential for Celtic knotwork, the whipped backstitch is your ideal choice.
First, stitch the entire design using a standard backstitch.
Next, take a second length of the same thread and, using a tapestry needle, weave it through the backstitches without piercing the fabric.
This simple second step conceals the segmented look of the backstitch, resulting in a clean, rope-like line that perfectly highlights the interwoven pattern.
28. Majestic Dragon with Couching and Satin Stitch
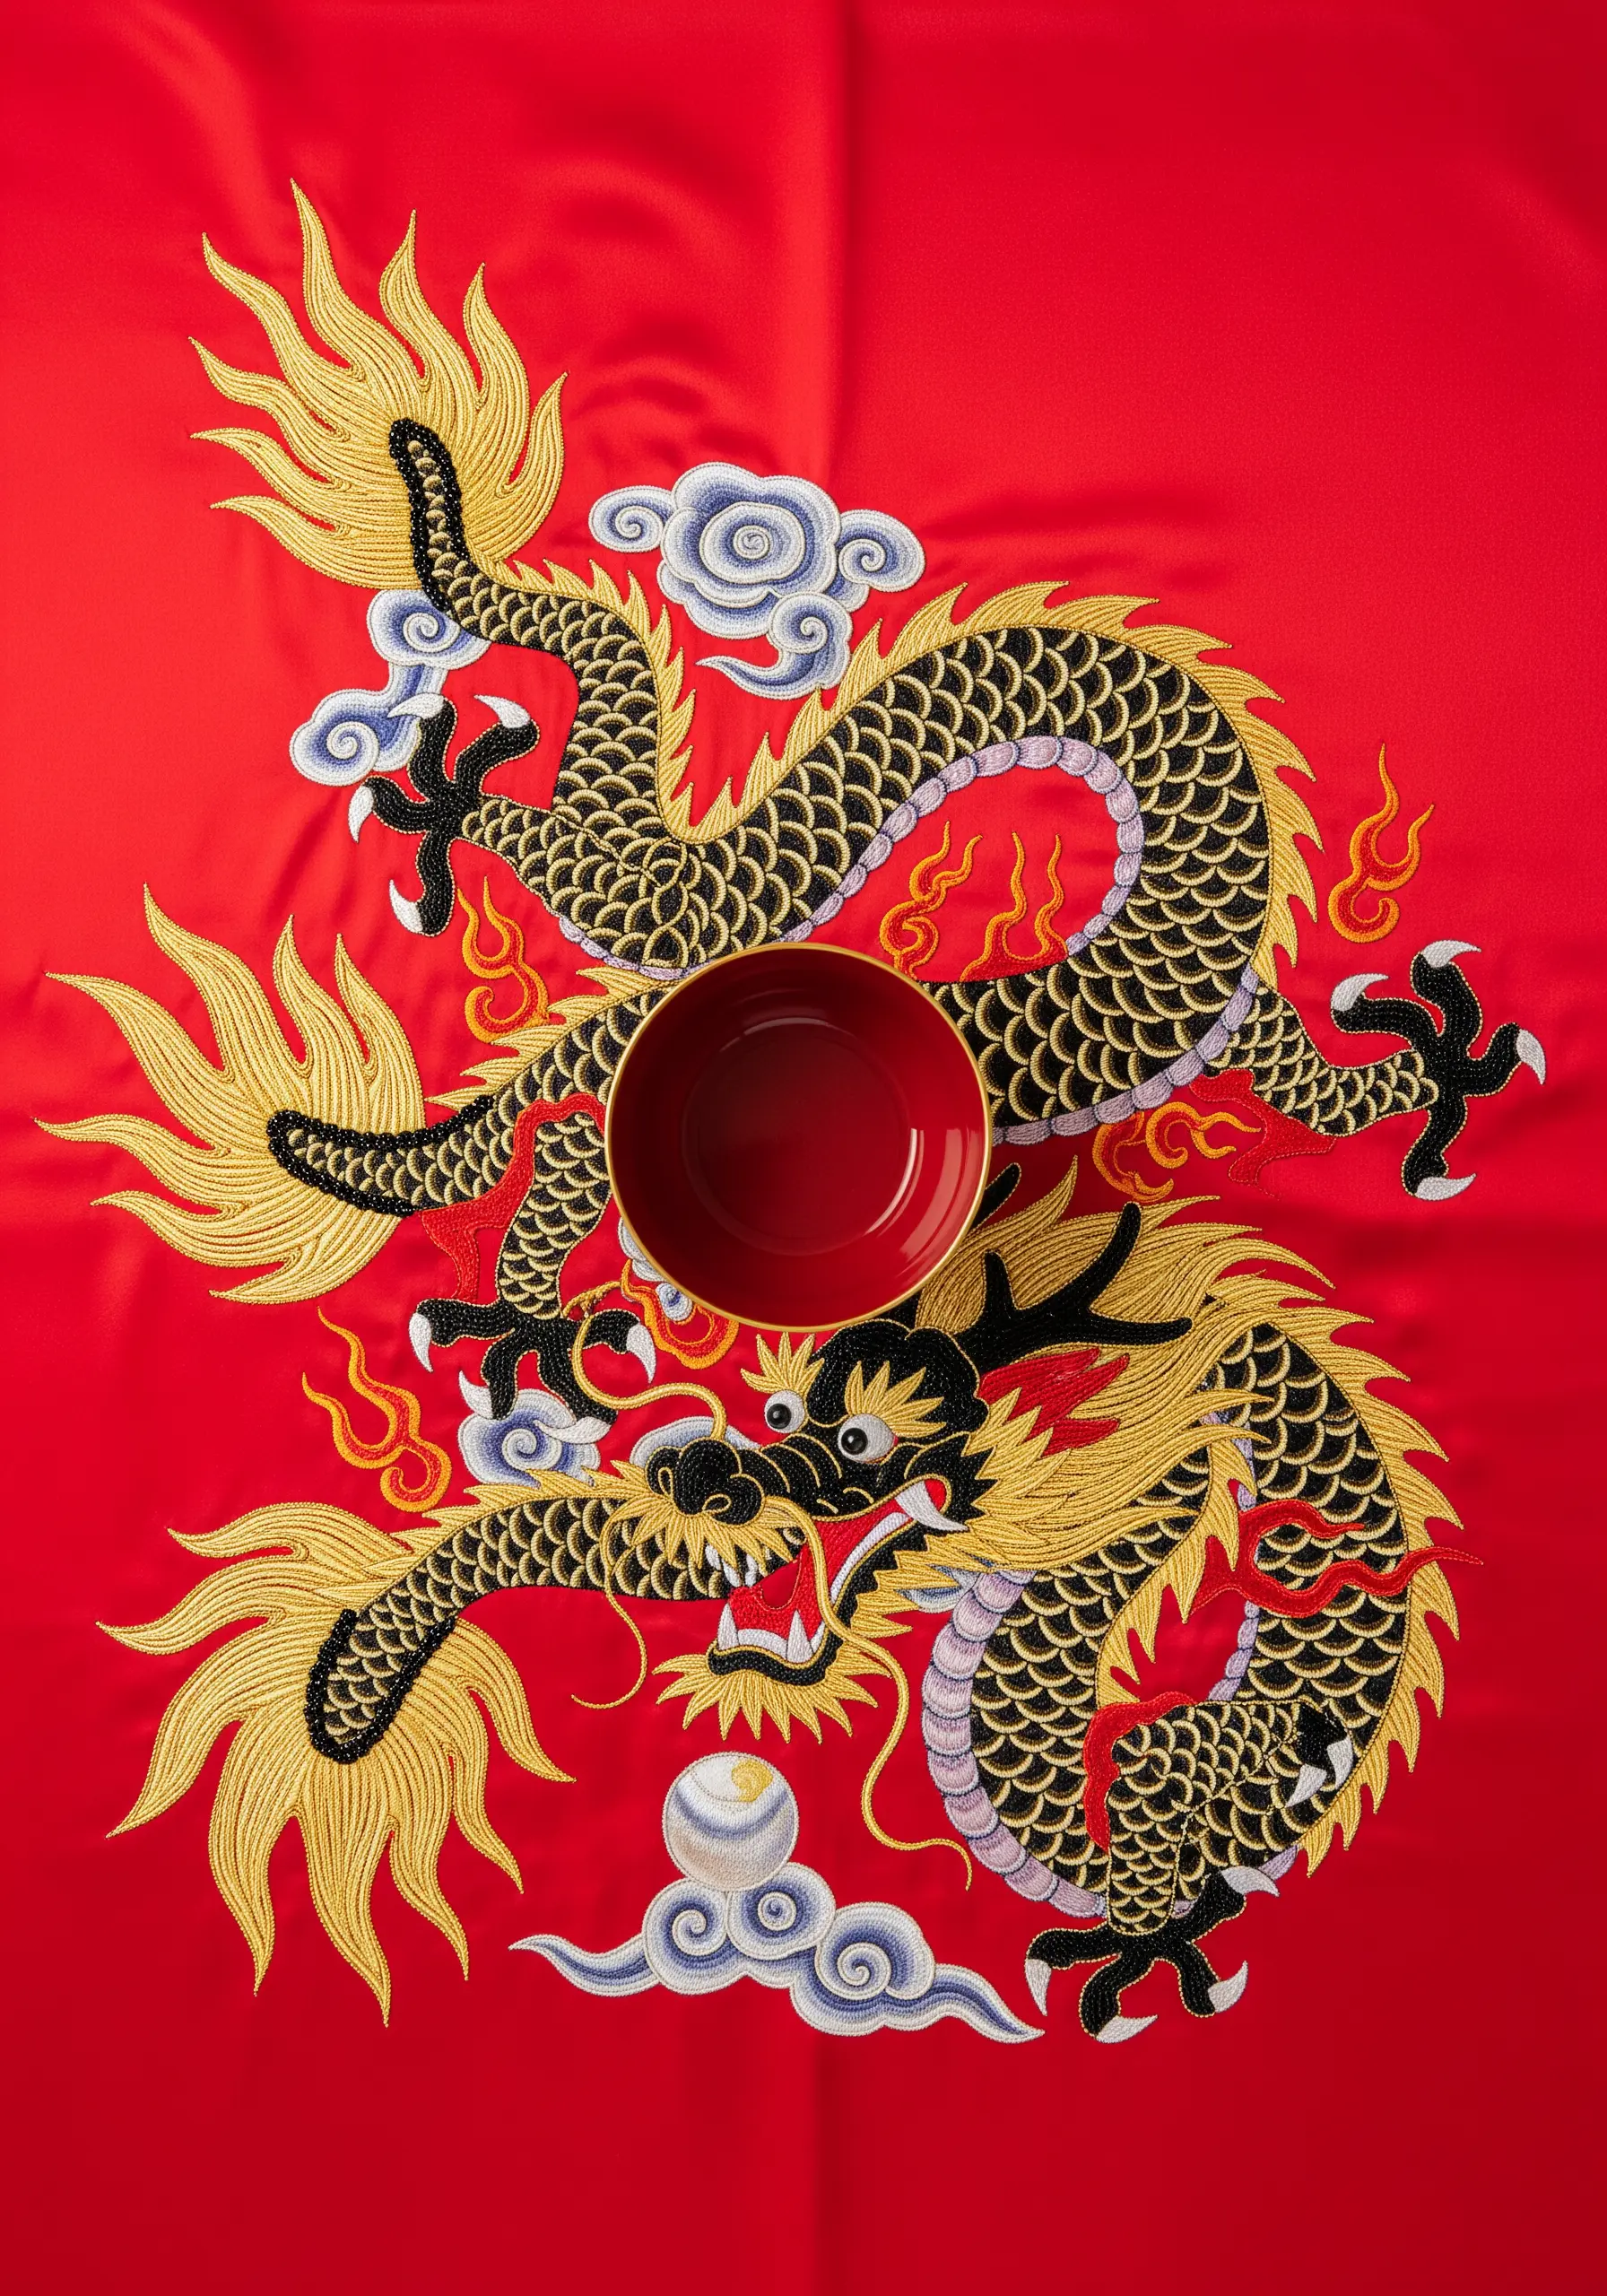
For a large, complex design like a dragon, breaking it down by texture is the key to success.
Use a couched gold cord for the strong outlines of the body and flames; this defines the shape and adds a touch of luxury.
For the scales, create a repeating pattern with fishbone stitch or overlapping short satin stitches.
Fill the clouds with soft French knots for a textural contrast.
This combination of techniques adds the depth and detail needed for such a majestic creature.
29. Minimalist Spiderwebs with Beaded Accents
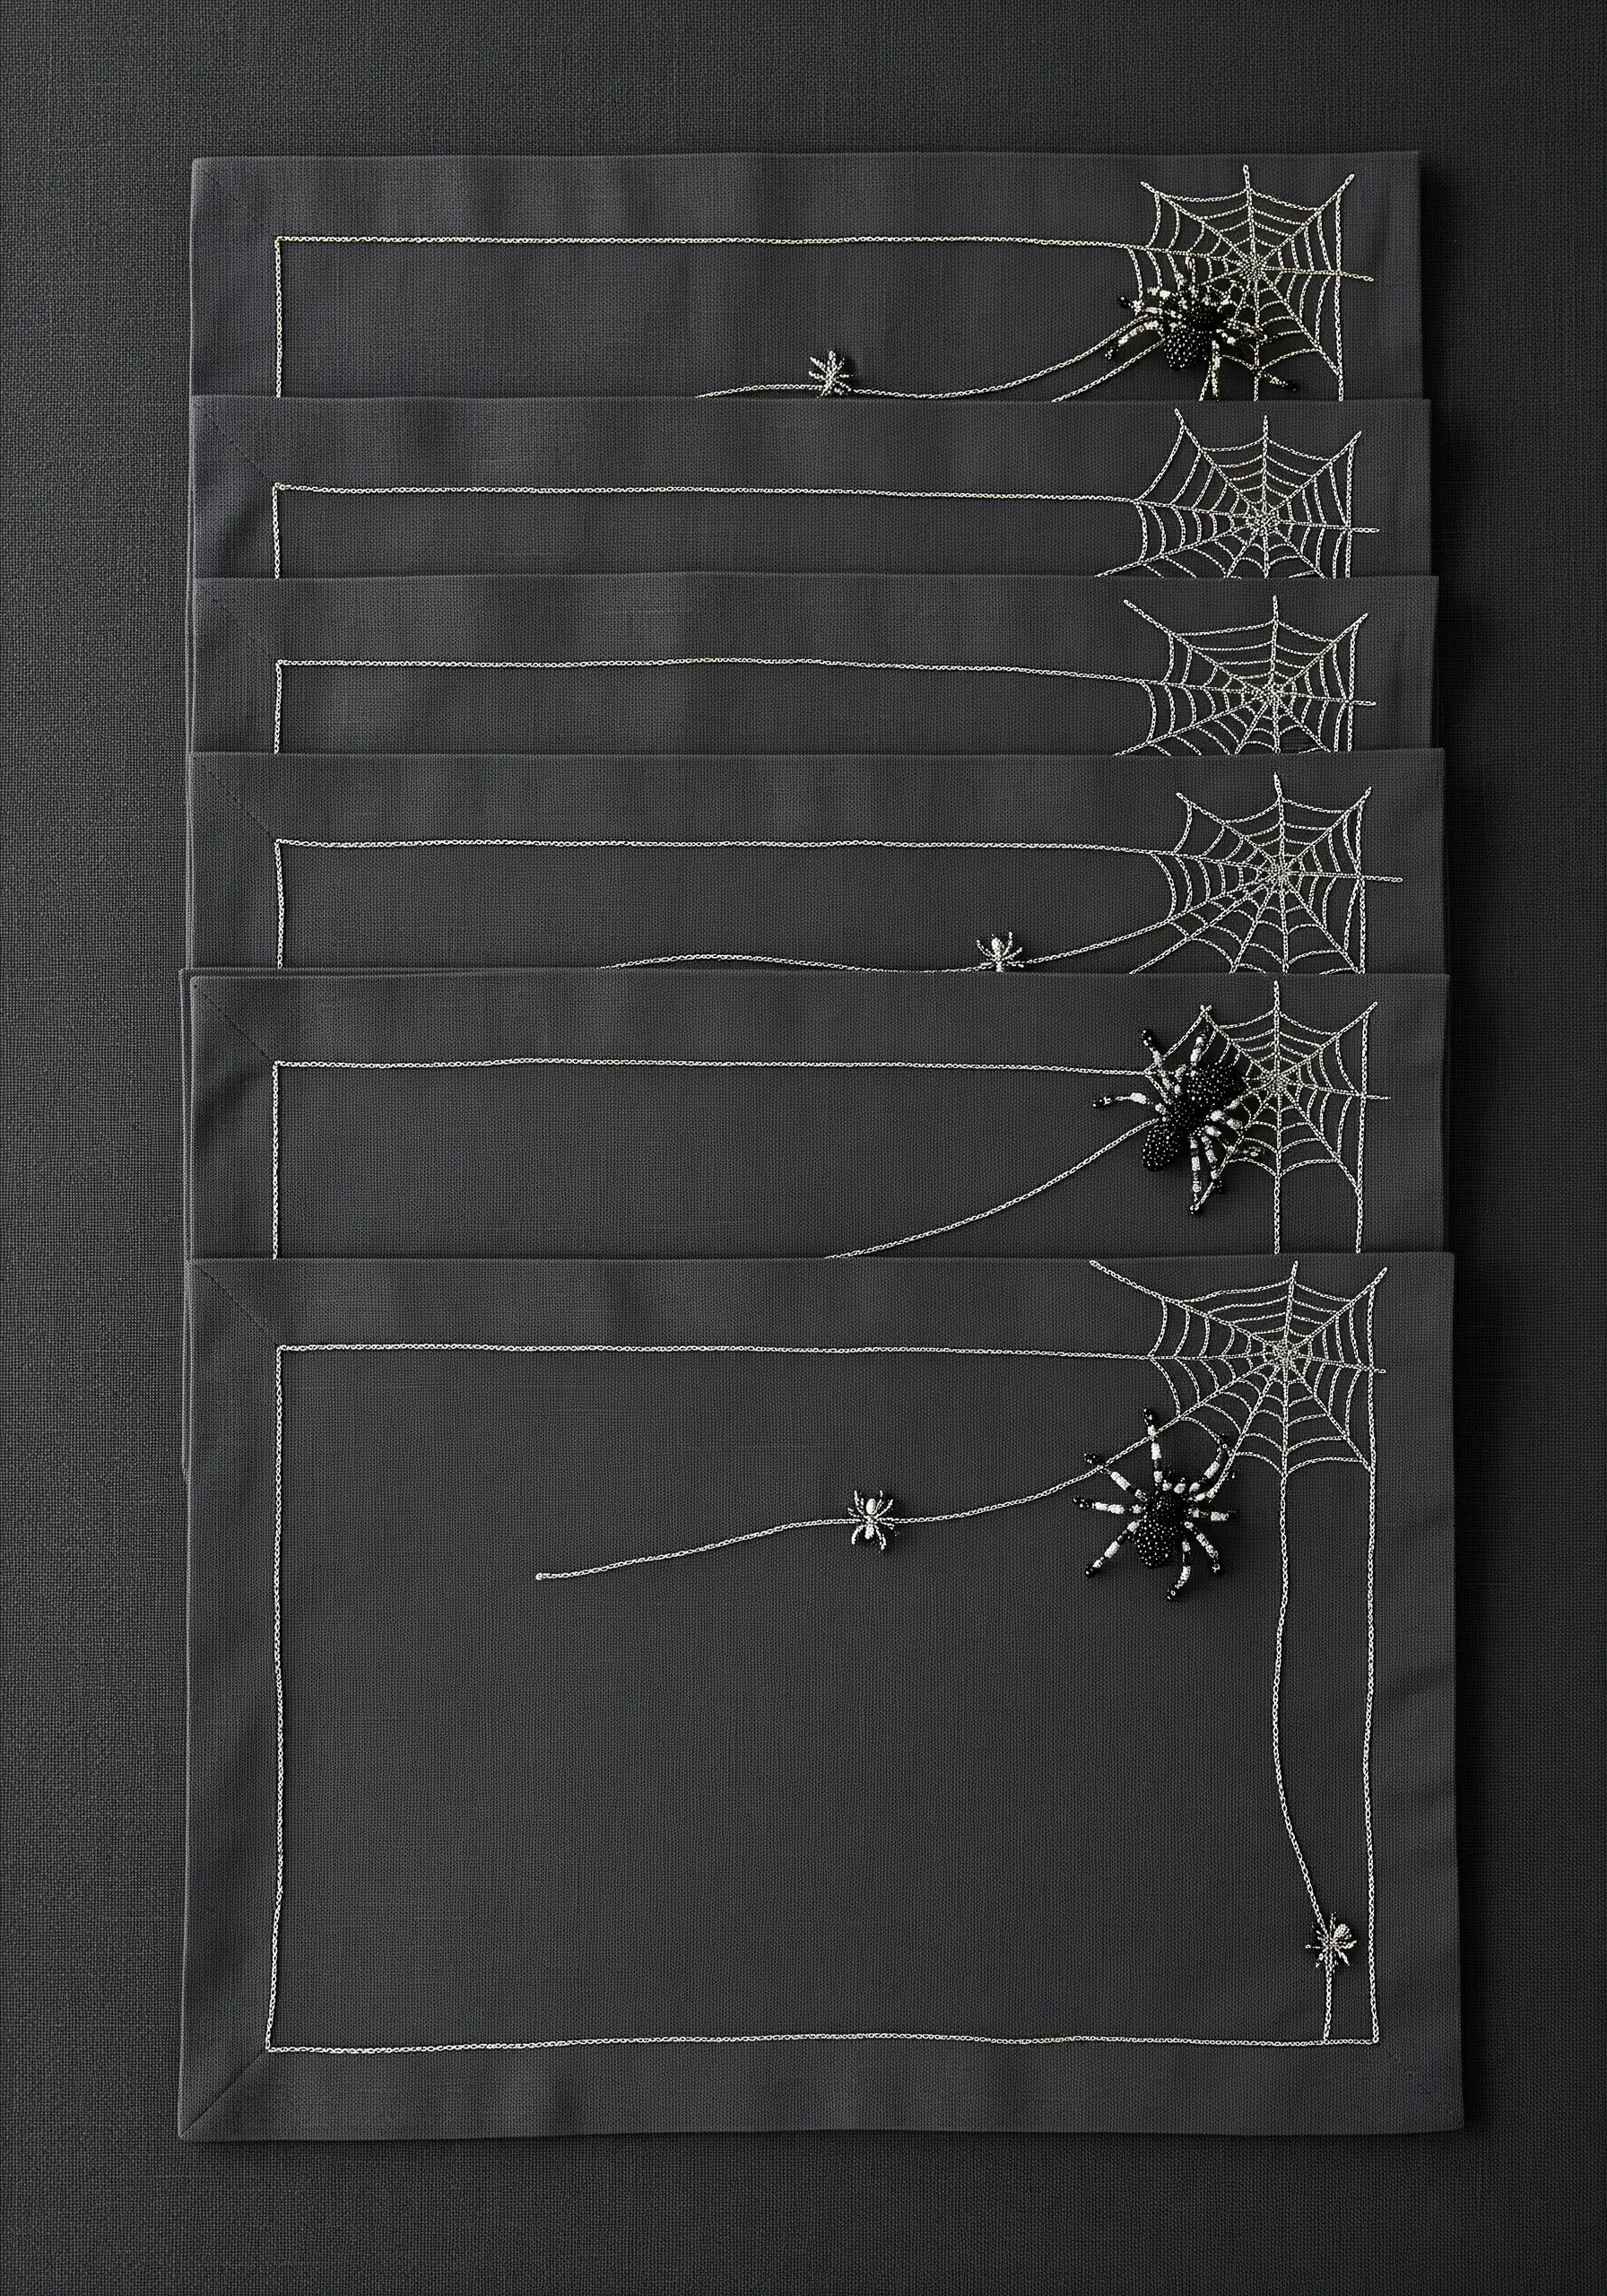
This design is a masterclass in sophisticated, minimalist Halloween decor.
Use a fine, silvery metallic thread to create the web with simple backstitch or straight stitches.
To create the spiders, stitch down a large black bead for the body and a smaller one for the head.
Add tiny straight stitches for the legs.
The subtle, three-dimensional beading adds a touch of elegance and visual interest without being overtly spooky.
30. Romantic Vine with Redwork and Woven Roses
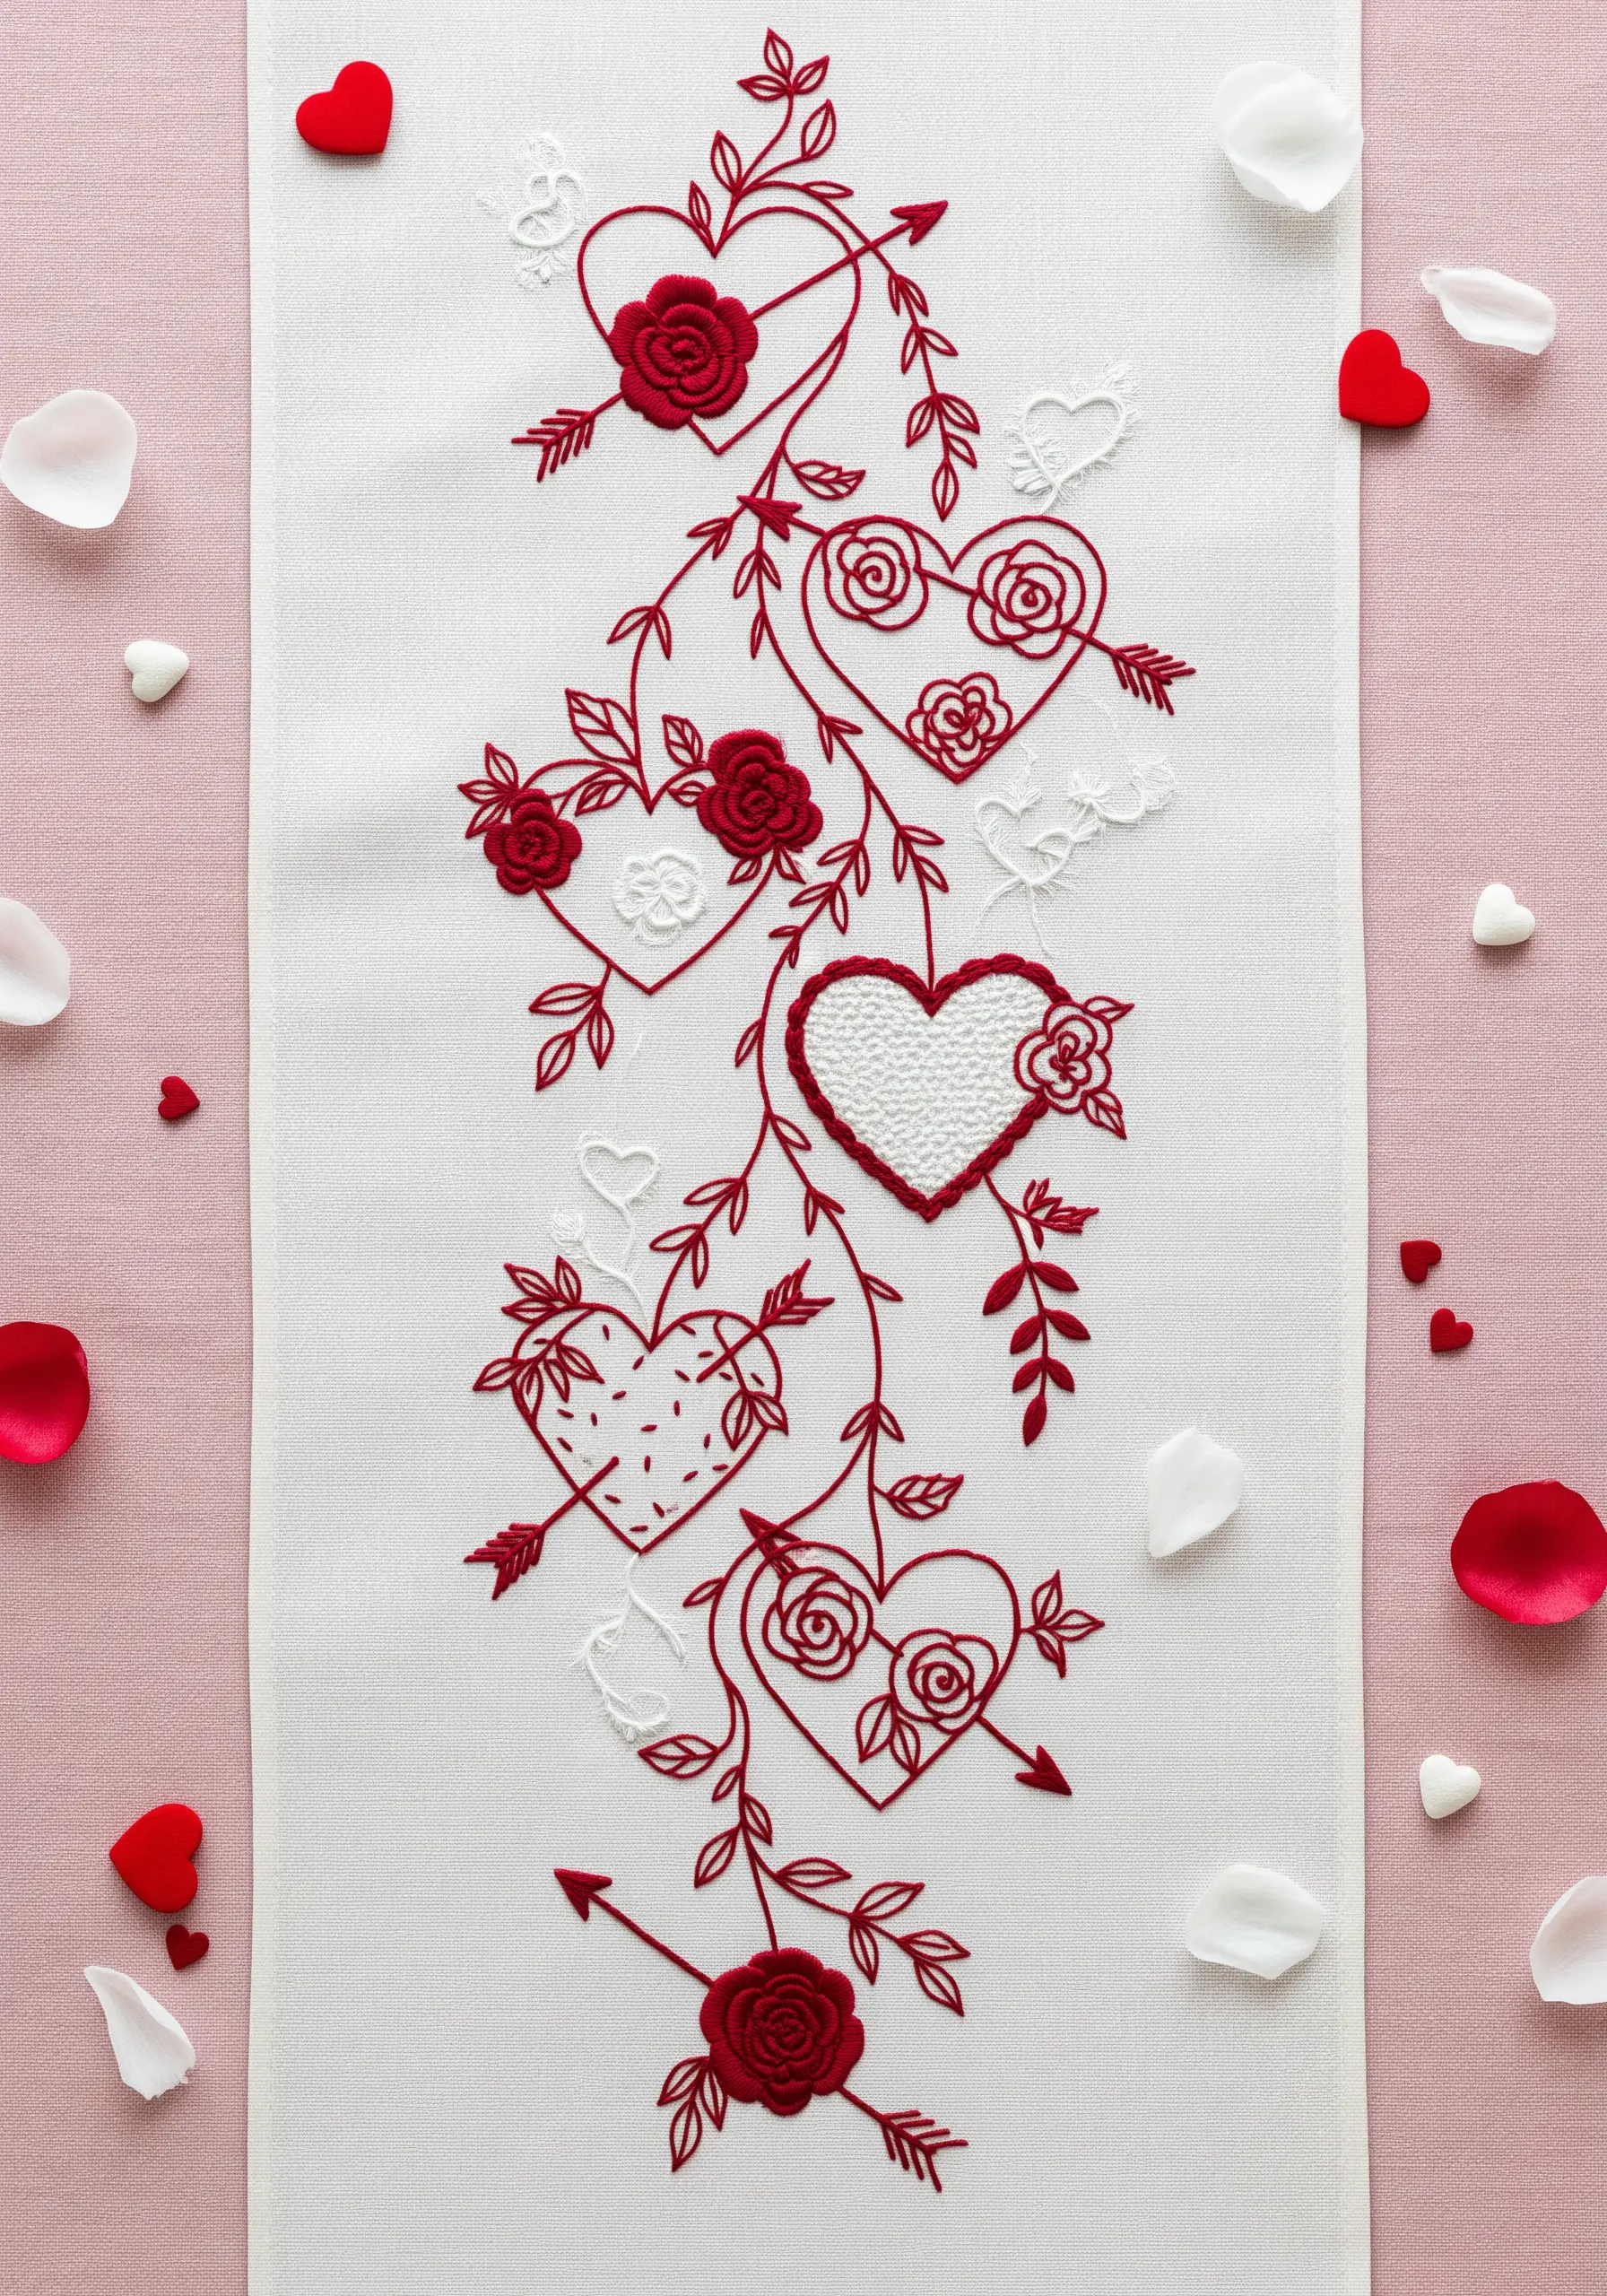
Create a design rich with romantic texture by mixing different techniques.
Use a simple backstitch in deep red for the main vine and heart outlines, giving it a classic Redwork feel.
For the dimensional roses, use a woven wheel stitch.
Create a small foundation of five straight stitches like spokes on a wheel, then weave your thread over and under them until a raised rose is formed.
The contrast between the flat lines and the plush roses is stunning.
31. Realistic Poinsettias with Directional Satin Stitch
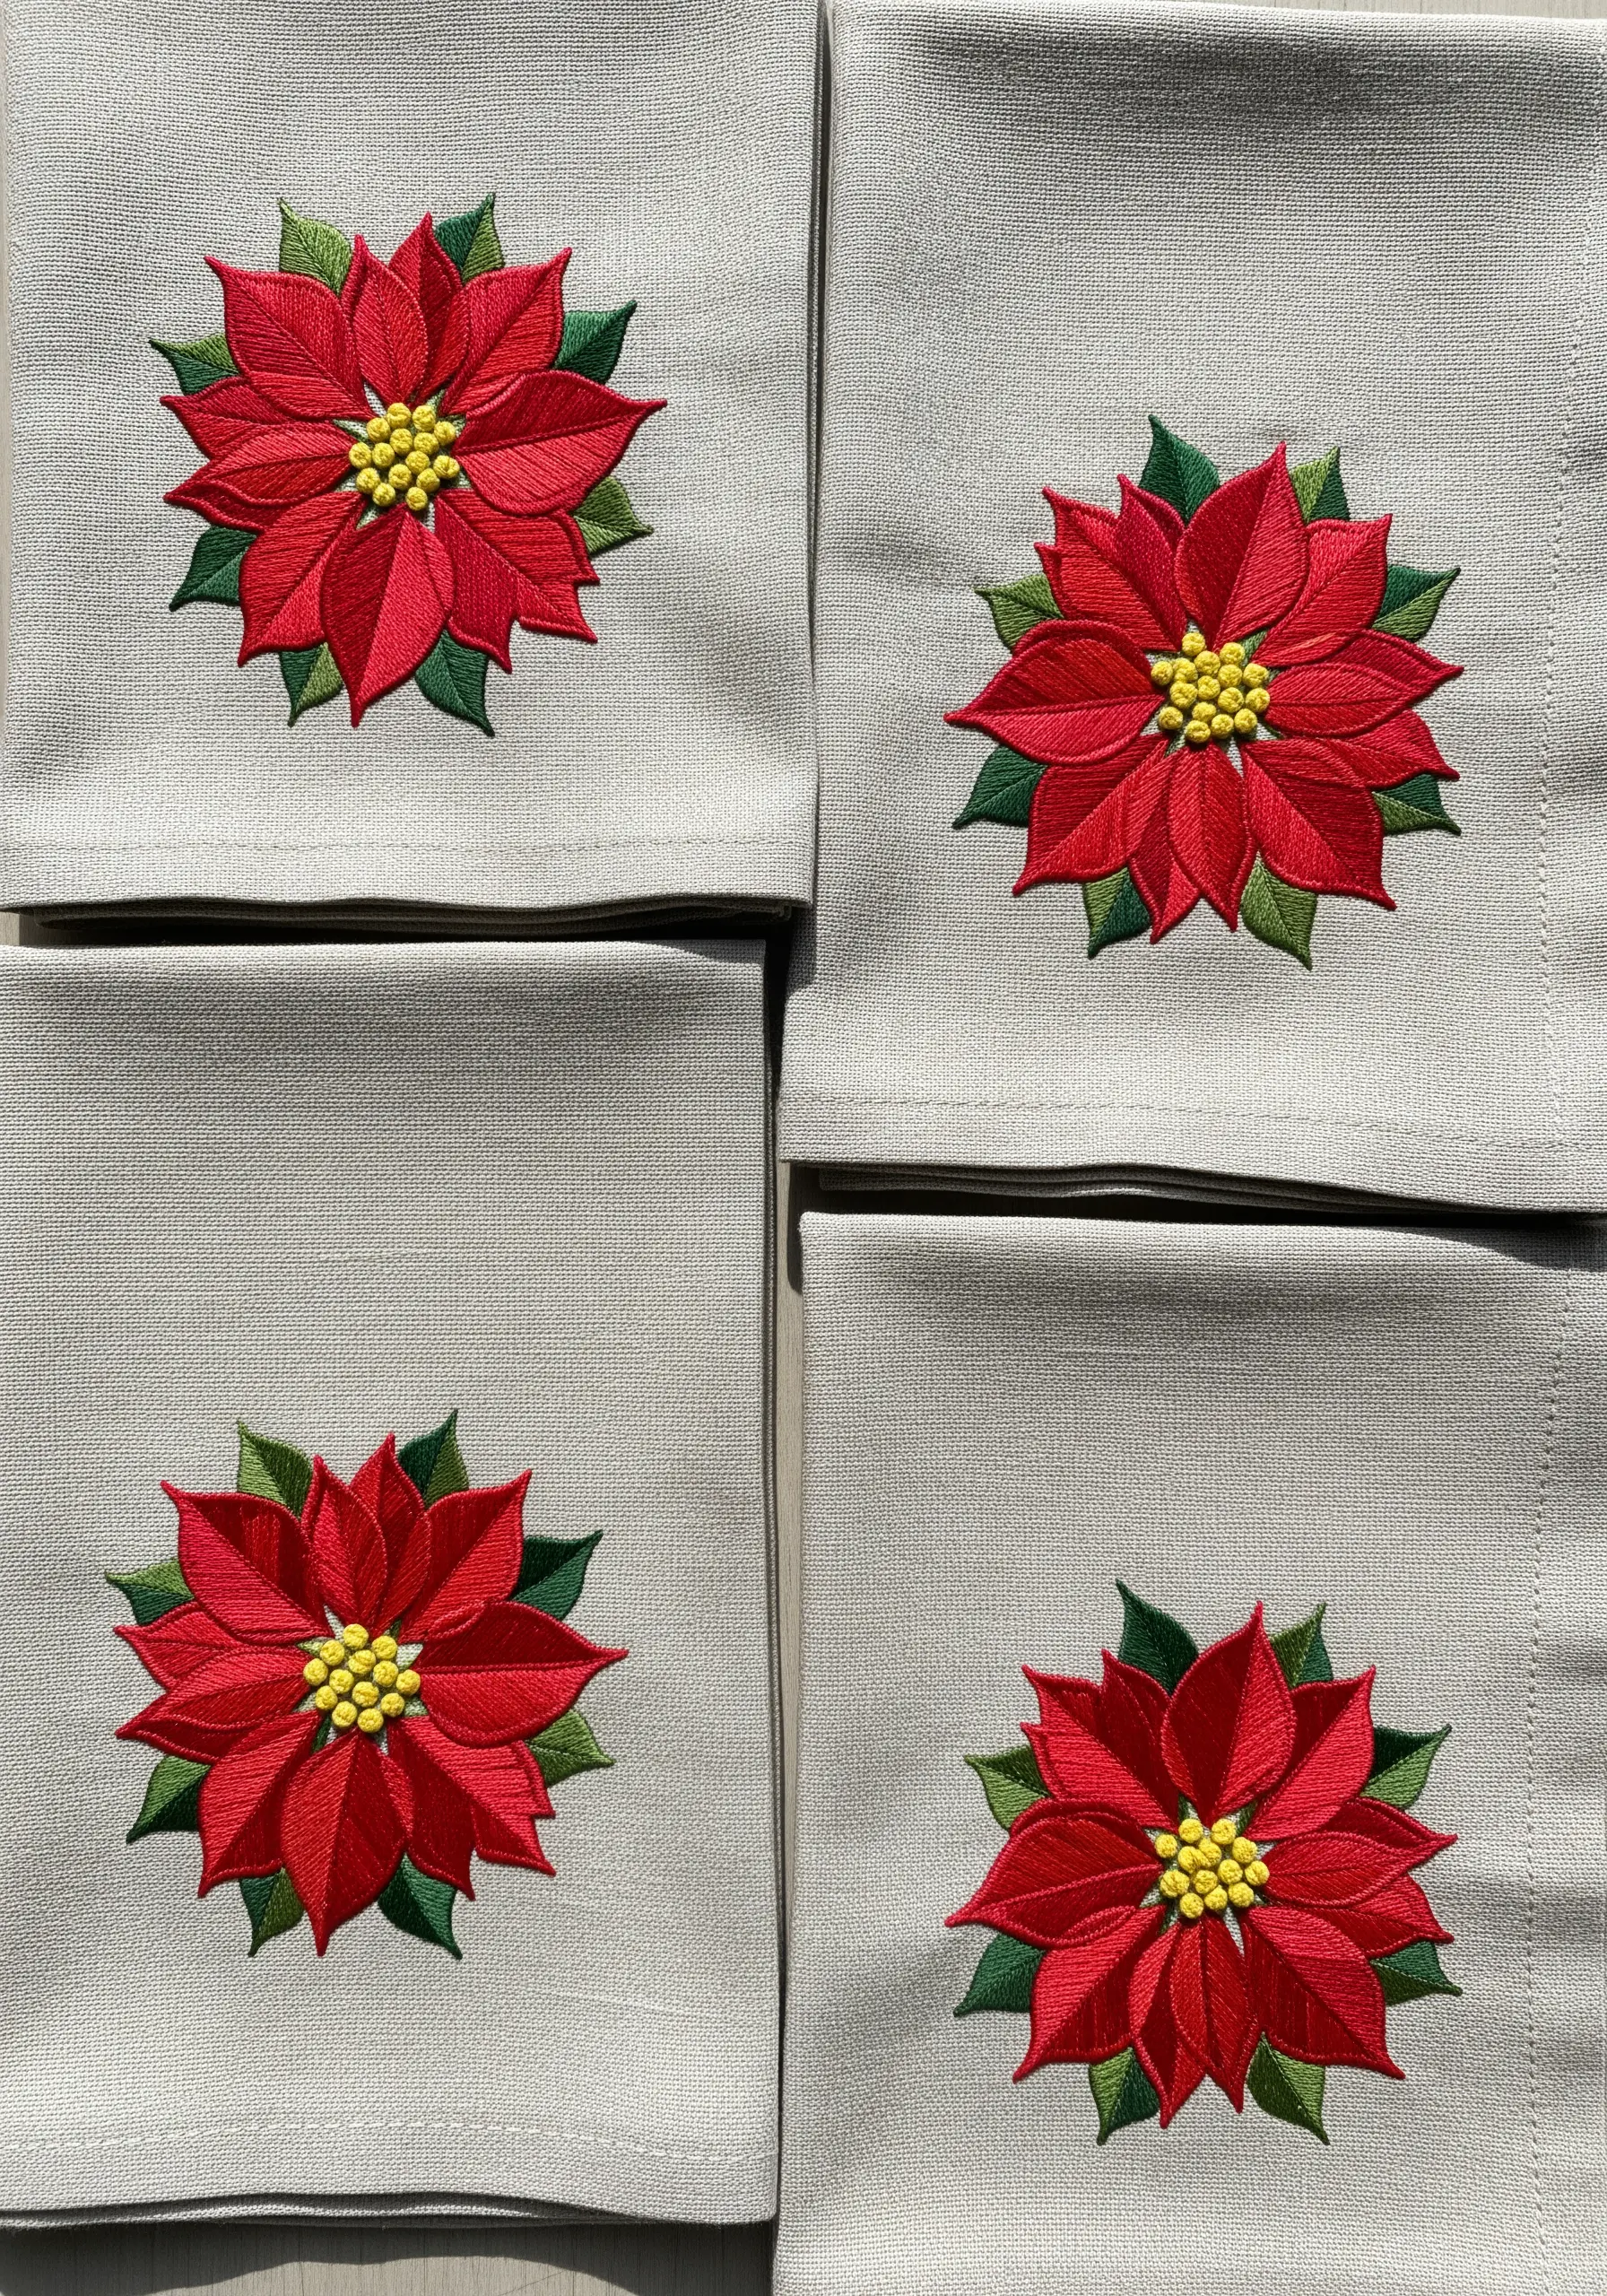
The secret to a lifelike embroidered flower is ensuring your stitches follow the object’s natural lines.
For these poinsettias, angle your satin stitches so they radiate from the center of each petal outwards, just as the veins would.
Avoid filling the petals with flat, uniform horizontal or vertical stitches.
This simple adjustment in direction creates a sense of movement and realism that makes the flowers feel alive.
A tight cluster of yellow French knots forms the perfect center.
32. Gilded Palm Border with Couching and Seed Stitch
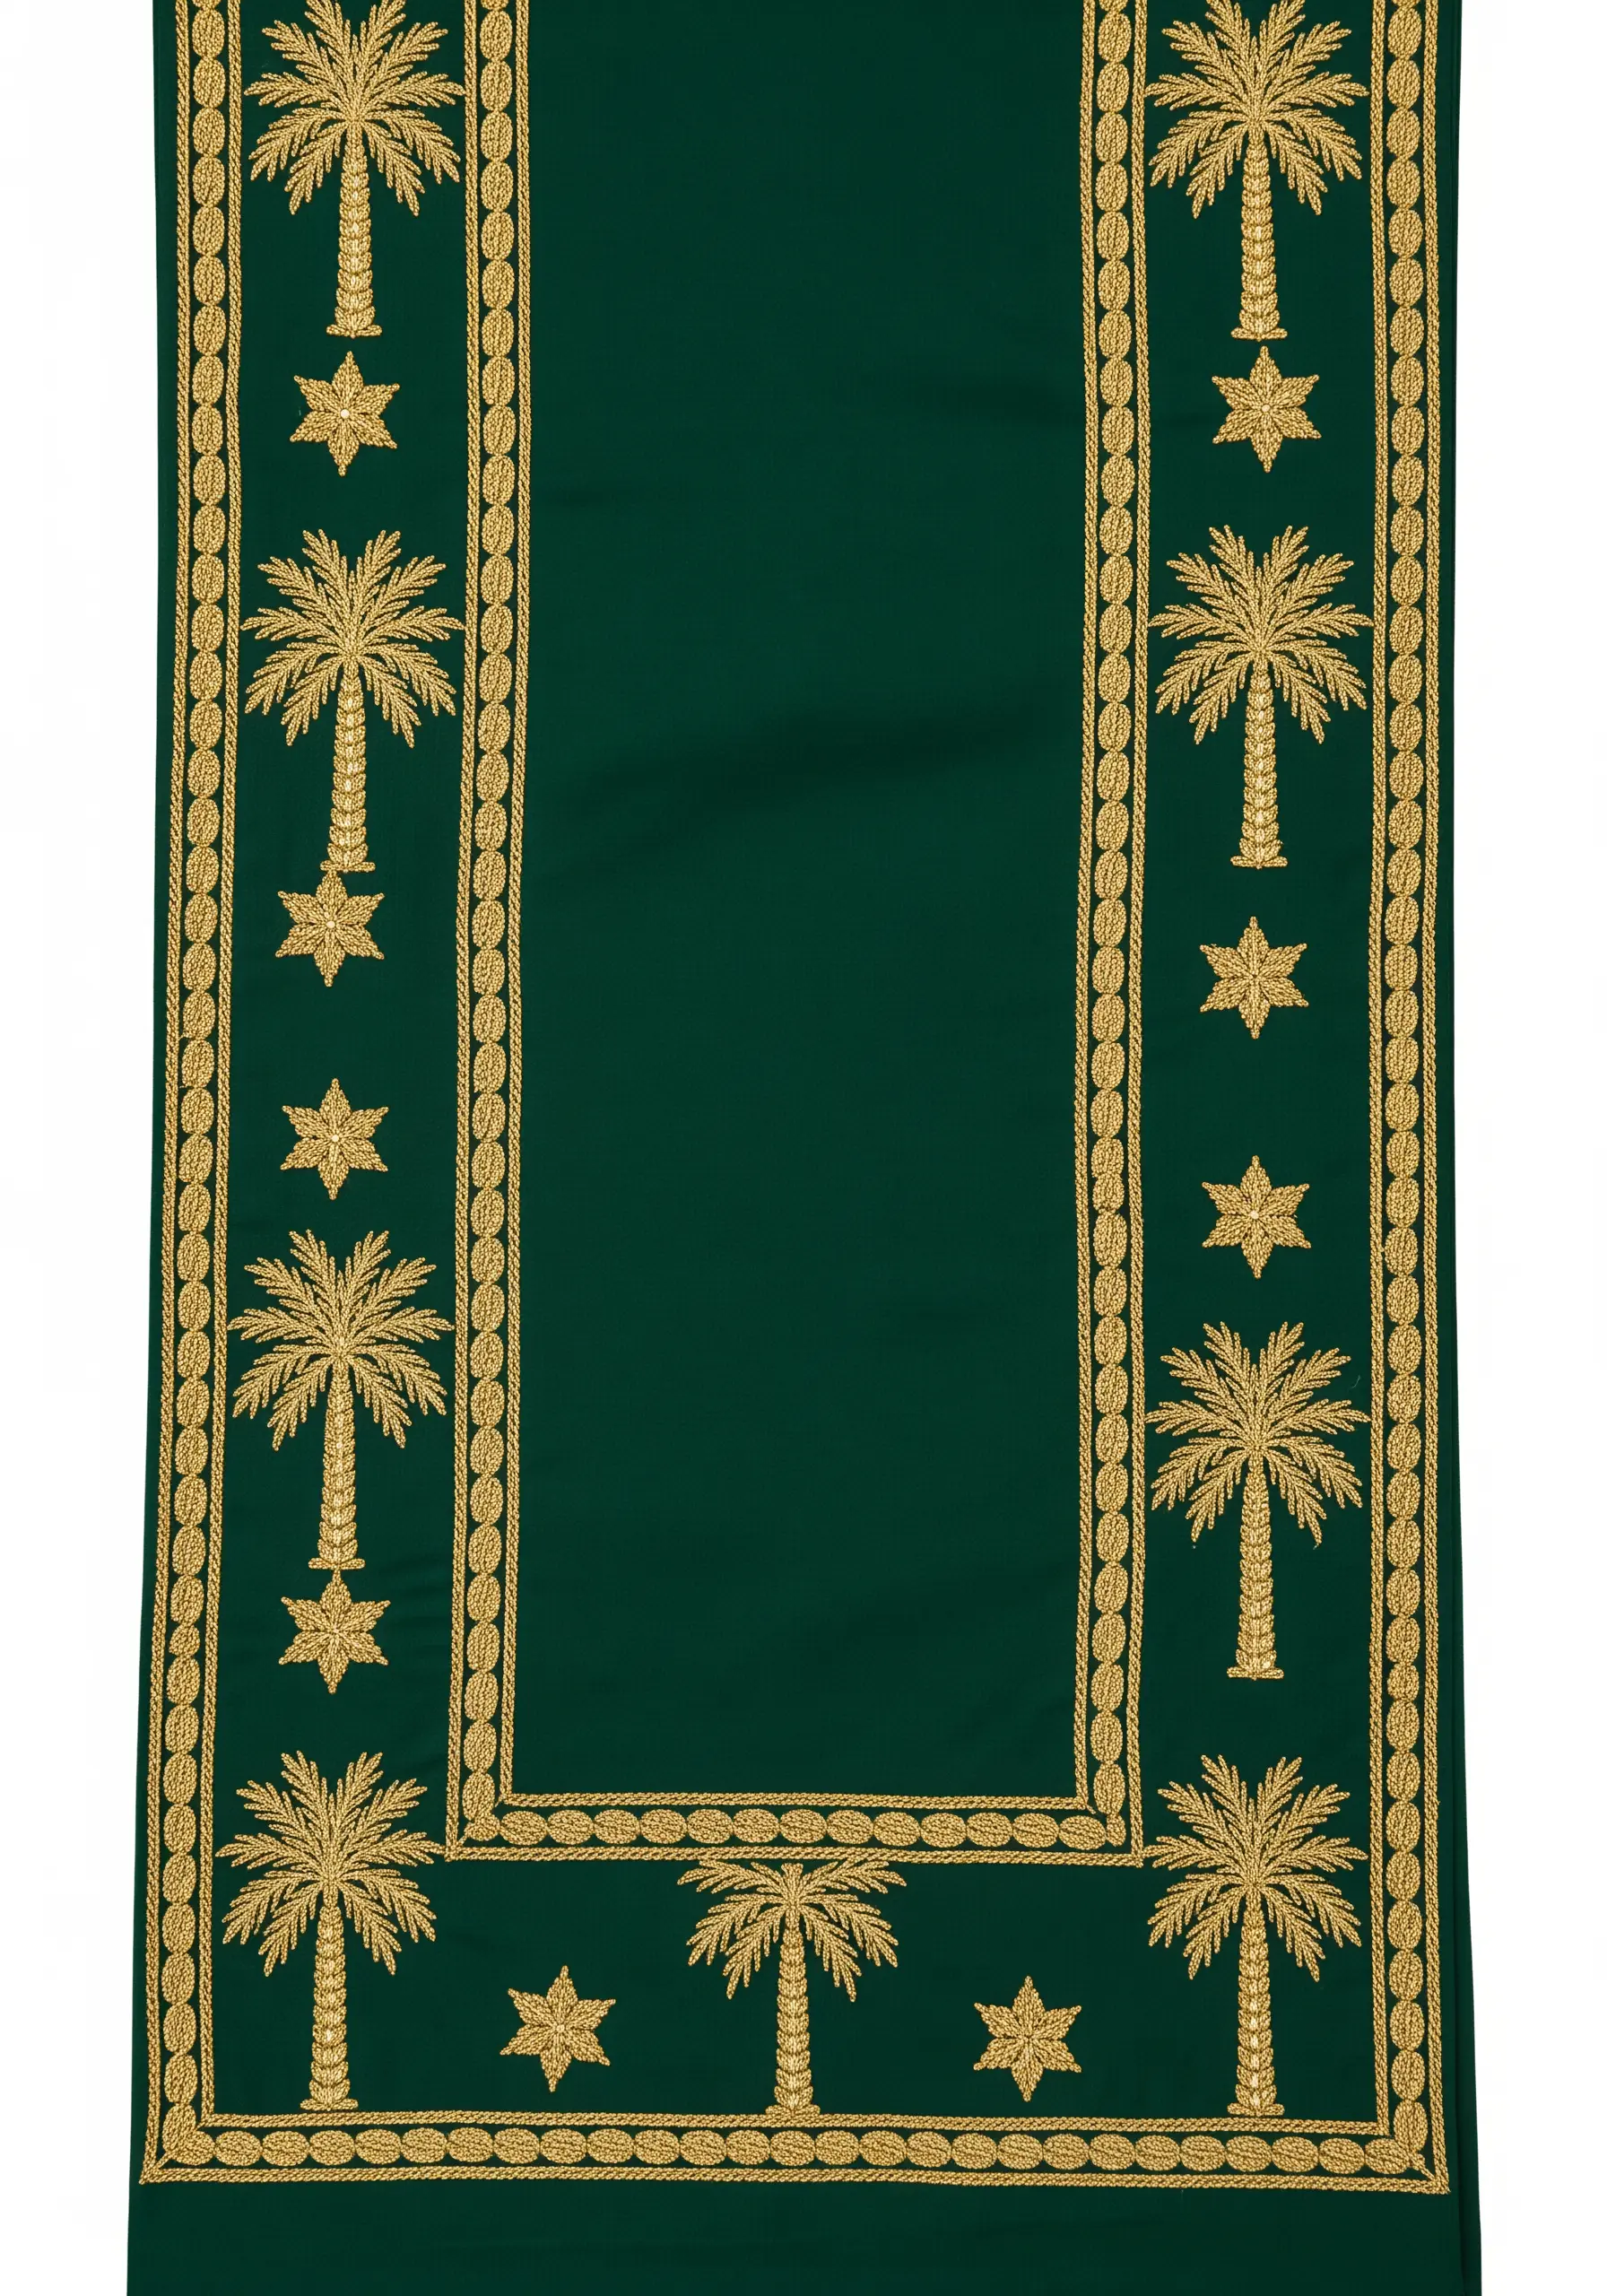
This opulent design relies on two simple but effective techniques for its luxurious feel.
The thick, rope-like borders are made by couching down a heavy gold cord with a matching, finer thread.
The palm trees and six-pointed stars are filled entirely with a simple seed stitch—tiny, randomly placed straight stitches.
Using a single, bold color like gold unifies the design and creates a look of effortless elegance perfect for Eid or a special dinner.
33. Textural Harvest Corn with Seed Bead Embroidery
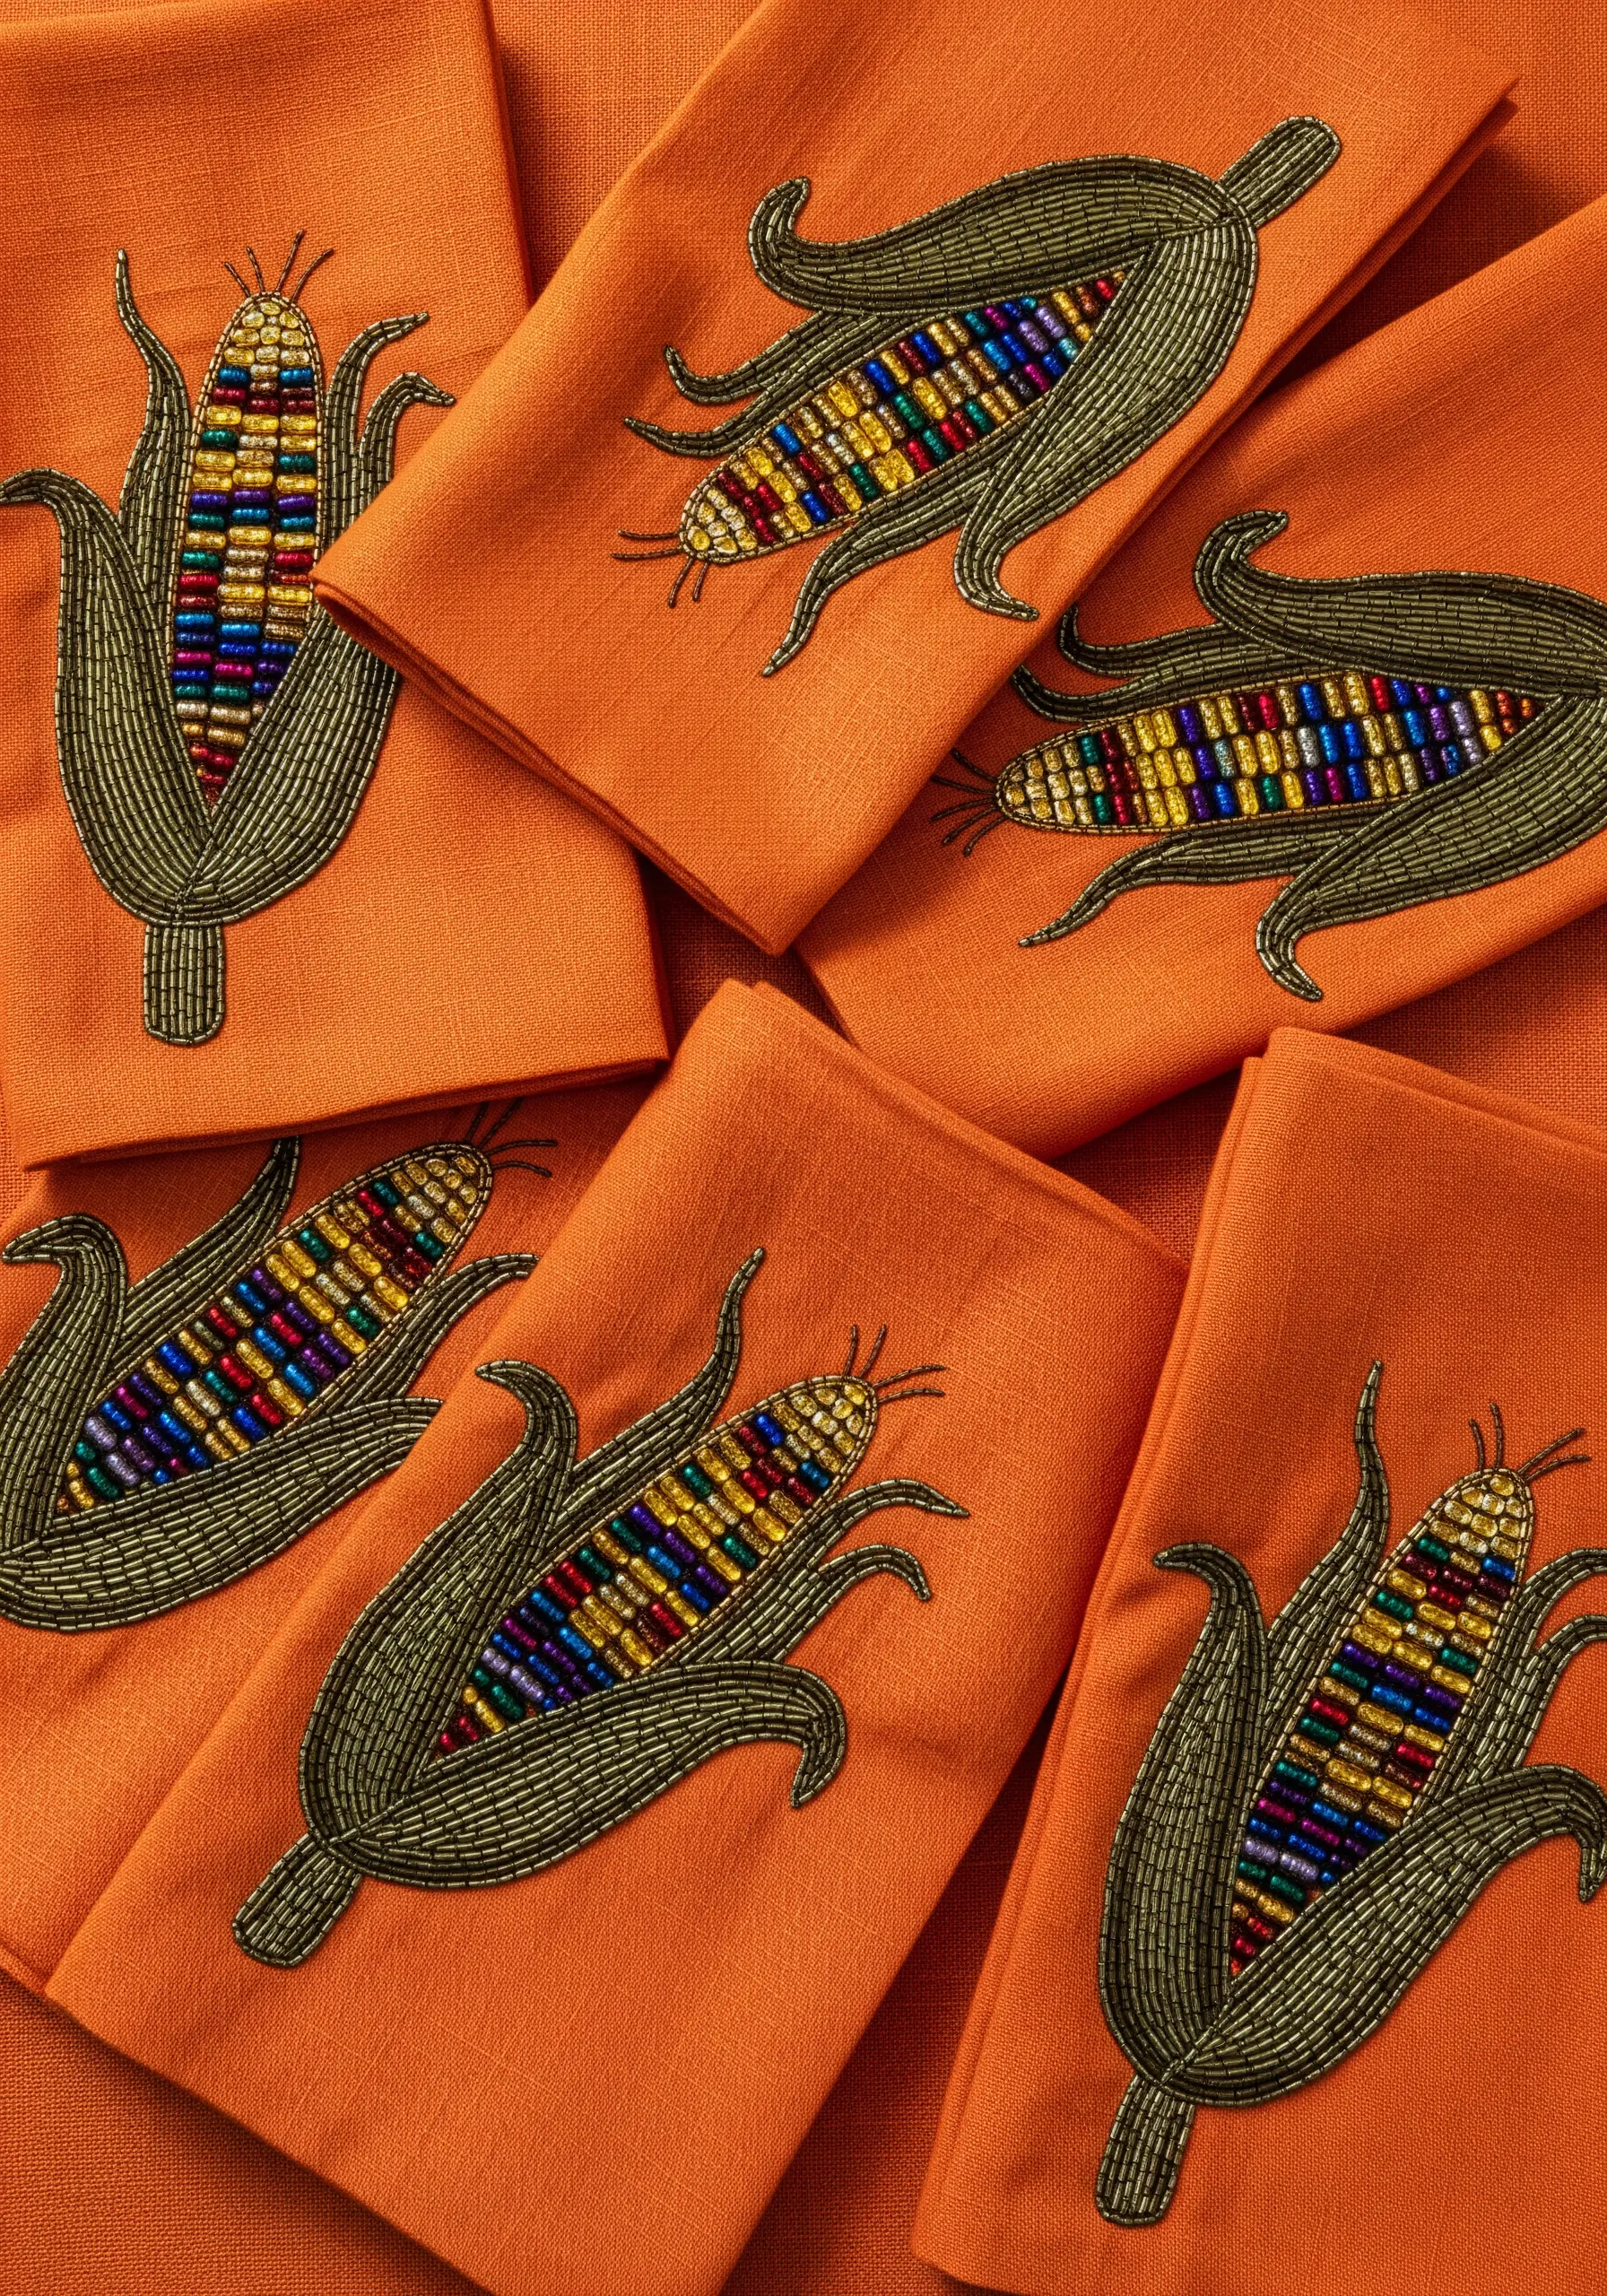
Move beyond thread and use colorful seed beads to create an incredibly tactile and visually stunning effect.
First, embroider the corn husks with a fishbone stitch using a muted gold or green floss.
Then, fill the area for the kernels by stitching down individual seed beads, one by one, in a variegated, mosaic-like pattern.
This bead embroidery technique perfectly captures the multi-colored shimmer of authentic Indian corn.
34. Abstract Diwali Flames with Variegated Thread
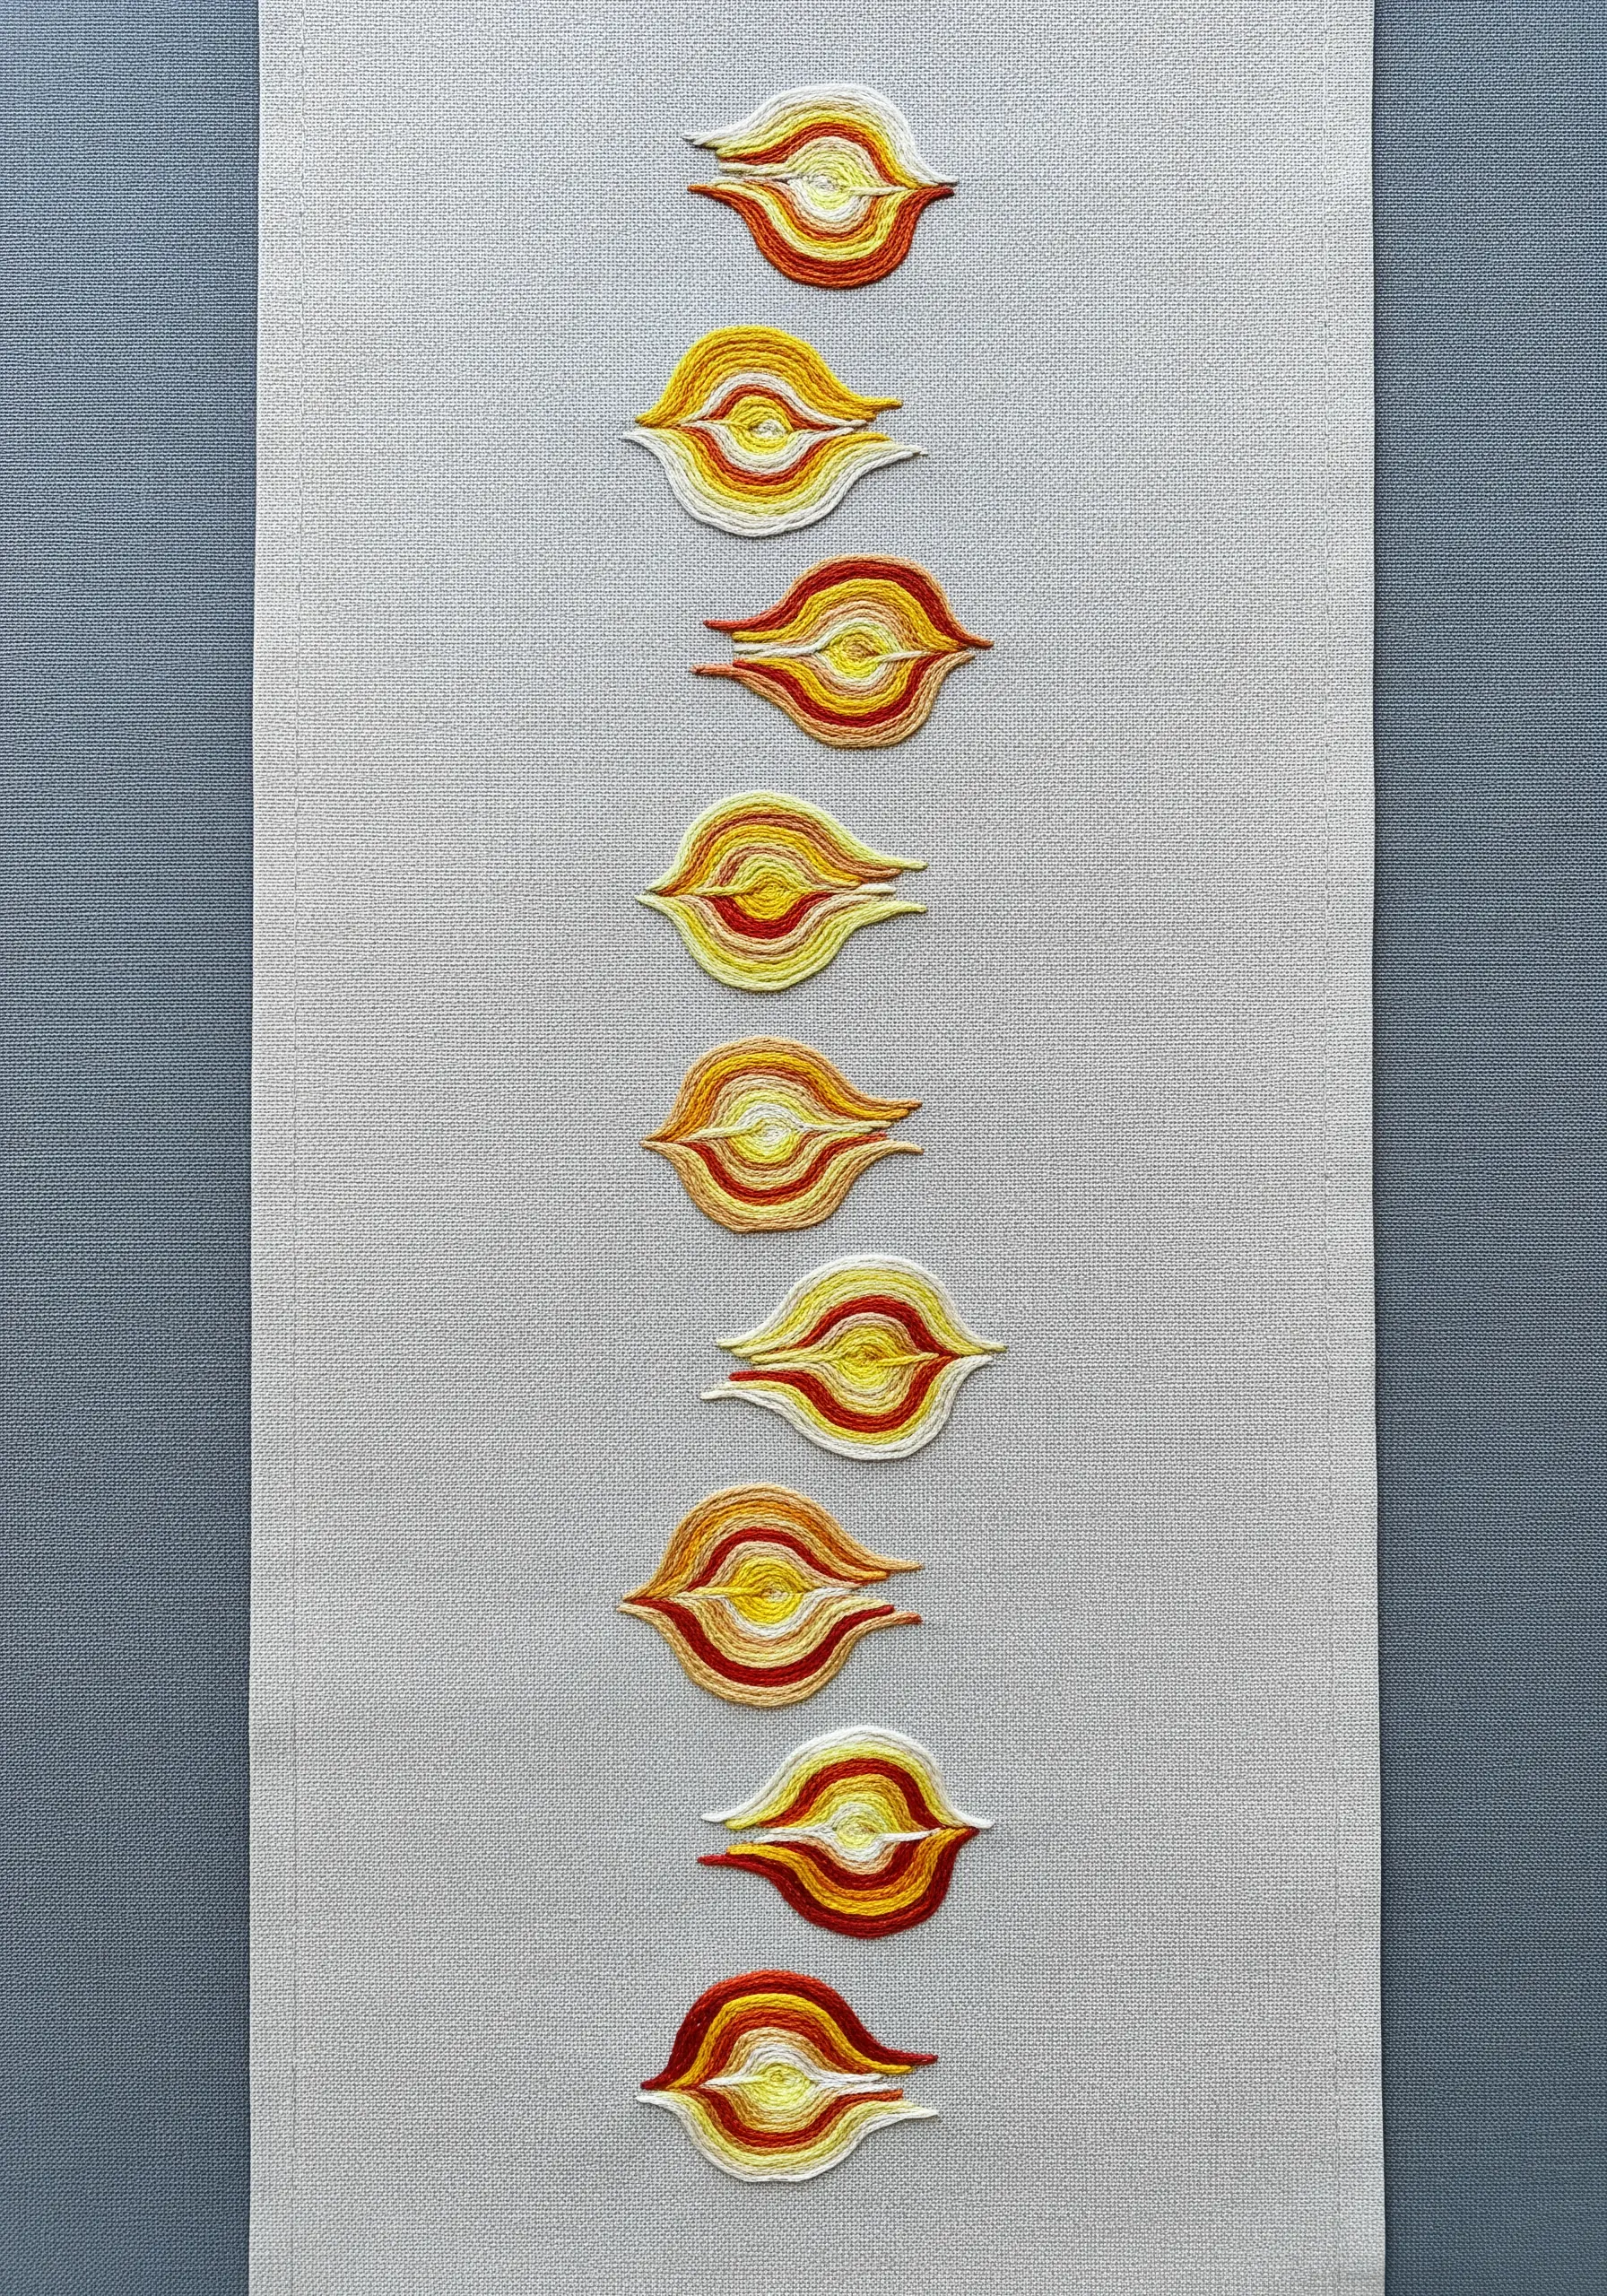
Create these beautiful, organic flame motifs with almost no effort by using variegated embroidery floss.
This type of thread contains multiple colors along a single strand, which means it does all the color-blending work for you.
Simply fill the flame shape with a smooth satin stitch, working from one side to the other.
As you stitch, the colors will shift naturally, creating a gorgeous gradient that mimics the flicker of a real flame.
35. Celestial Beadwork on Velvet for Festive Opulence
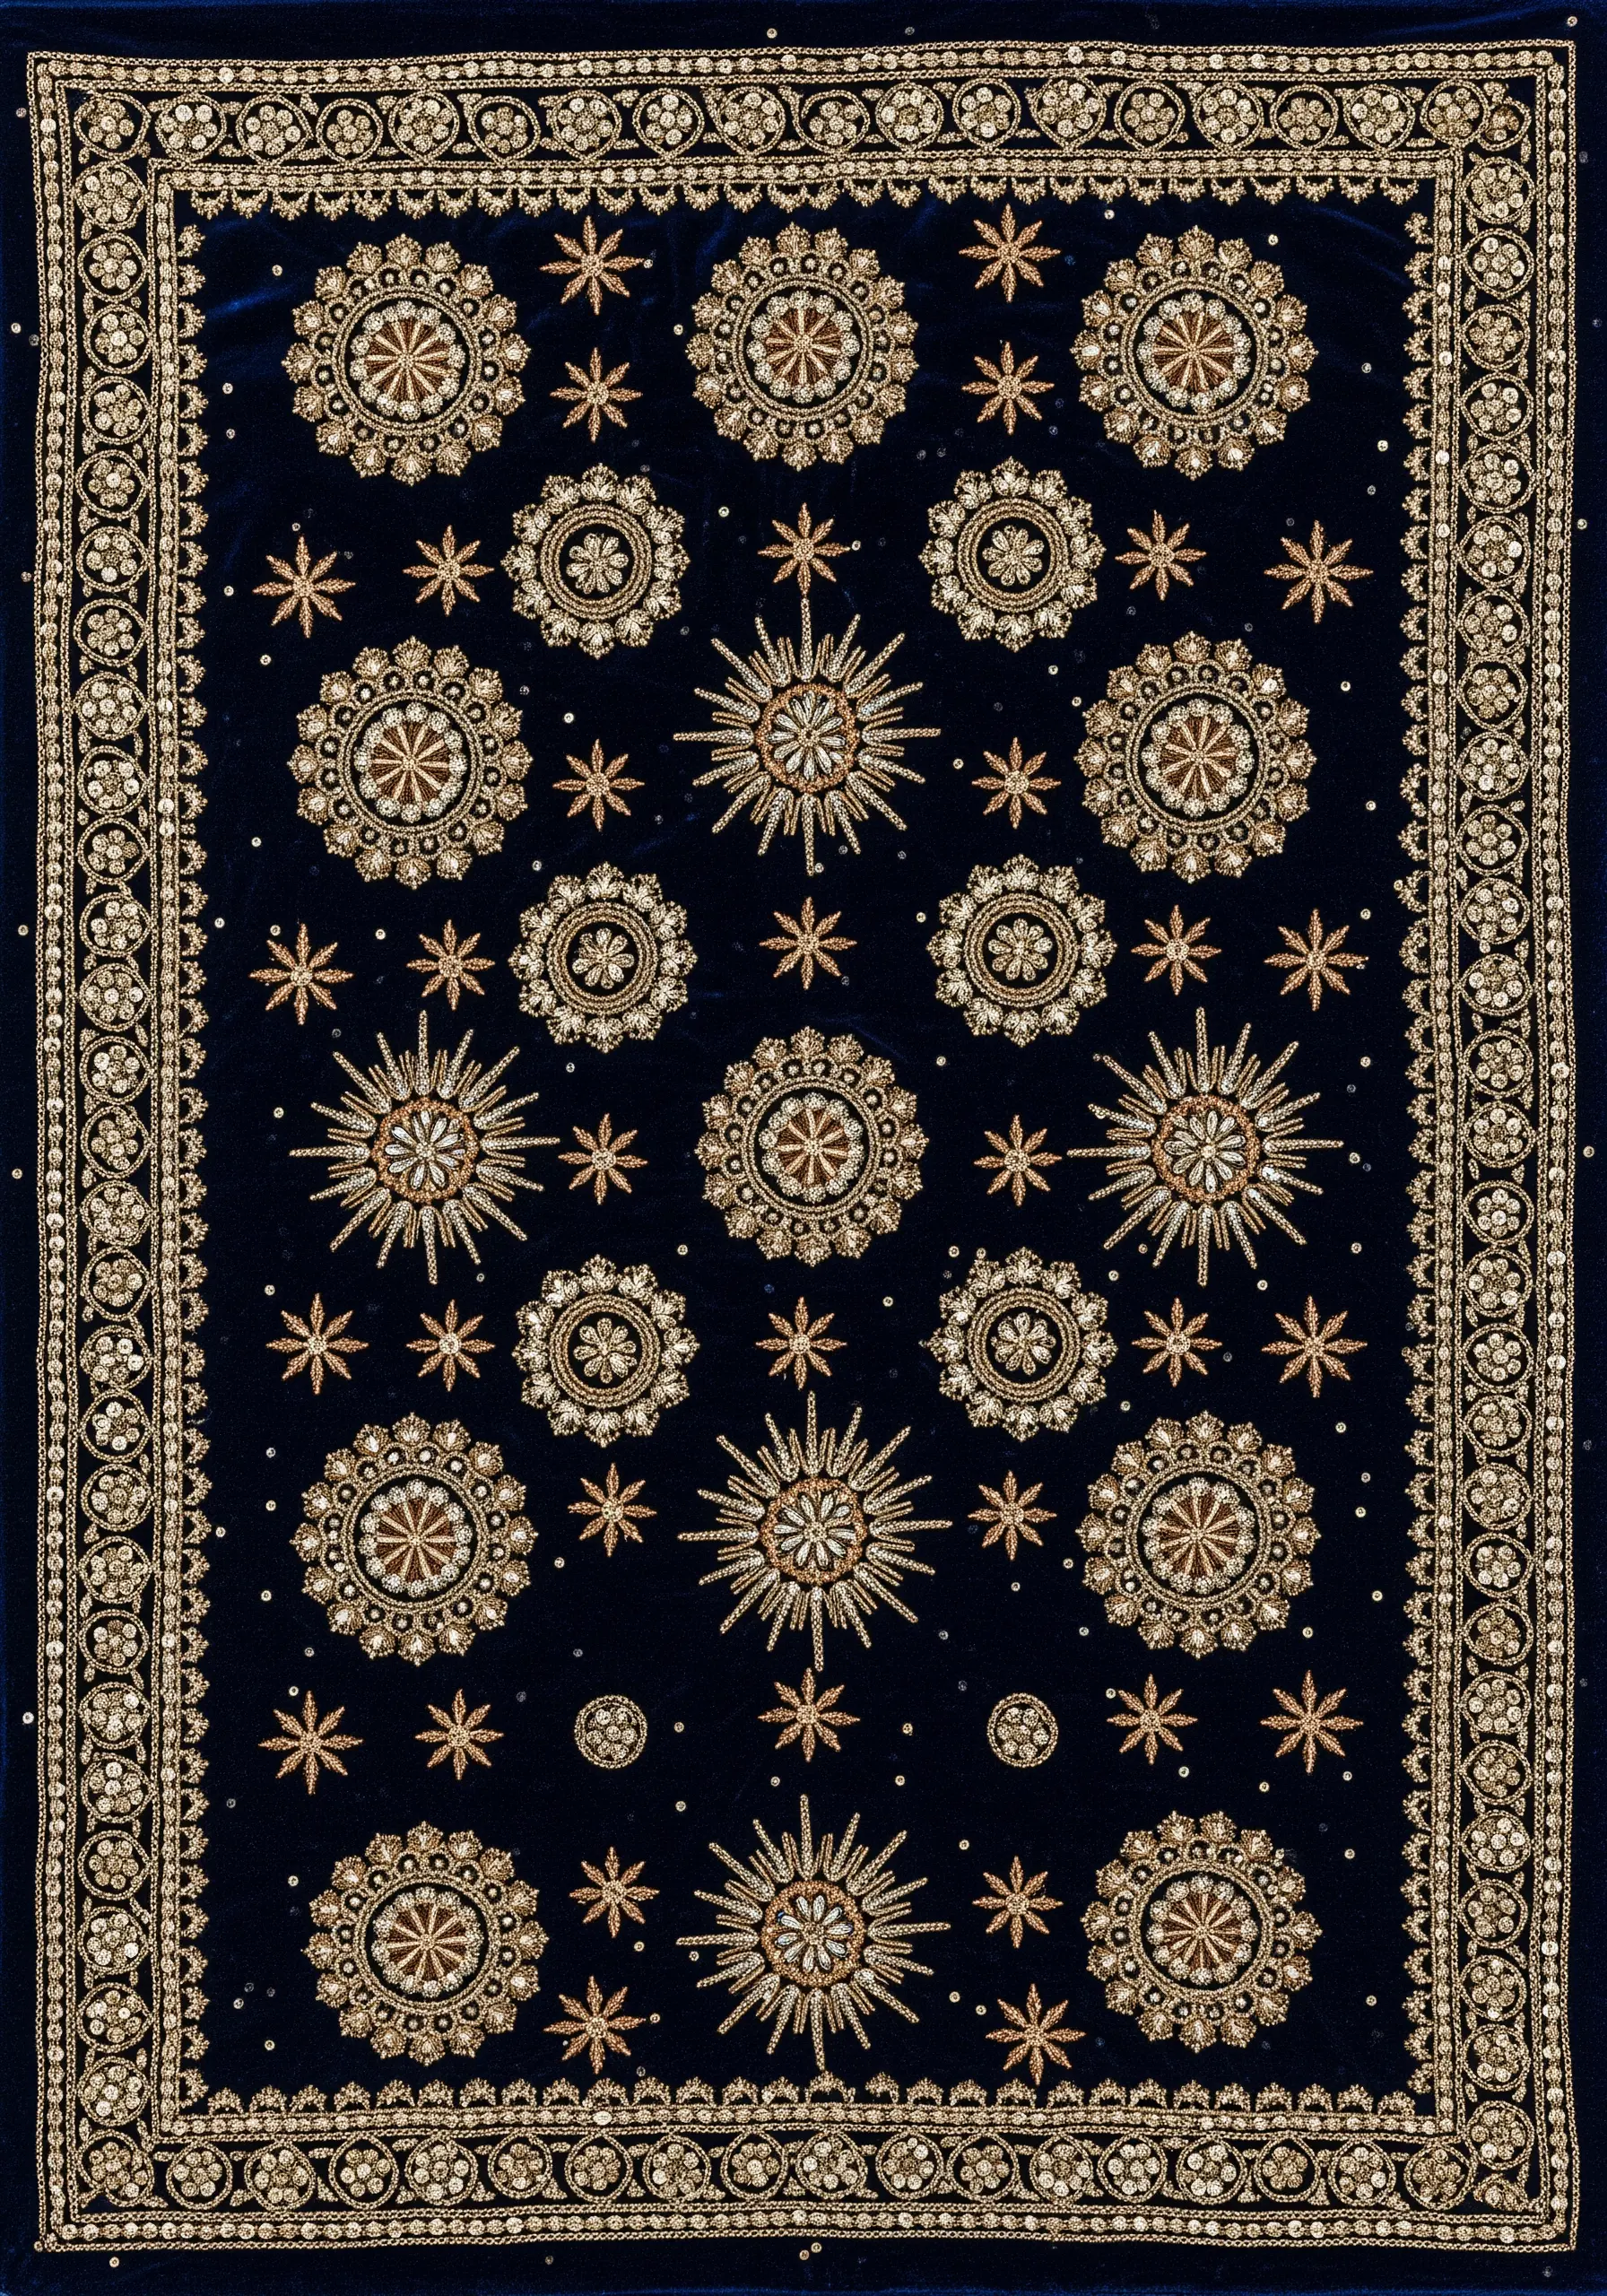
For an unapologetically luxurious holiday table, pair sparkling embellishments with the deep, rich texture of velvet.
The plush pile of the fabric provides the perfect dark canvas for light-catching beads and sequins.
Create starbursts by stitching radiating lines of long bugle beads, and build up the central medallions with intricate patterns of seed beads and sequins.
The contrast between the soft velvet and the sharp sparkle of the beadwork is simply breathtaking.