Sometimes the most profound creative satisfaction comes from the smallest details. Think of the crisp edge of a new journal, the familiar feel of a favorite book, or the quiet corner of your desk where ideas begin to take shape. These are the spaces where a tiny, thoughtful touch of embroidery can transform the ordinary into something deeply personal.
Forget grand, time-consuming projects for a moment. Instead, let’s focus on the quiet power of a single, well-placed leaf, a delicate vine, or a scattering of tiny sprigs. These motifs are more than just decoration; they are small acts of intention that infuse your everyday objects with beauty and care.
In this collection, you’ll discover how a simple stitch, a considered color choice, or a unique texture can elevate a humble bookmark into a treasured keepsake. You’ll learn to see your journals and study materials not just as tools, but as canvases for quiet expression. This is your invitation to slow down, take a breath, and make your mark, one tiny leaf at a time.
1. The Meandering Ivy Bookmark

To create a dynamic, flowing vine, use a whipped backstitch or stem stitch for the main branches; this adds thickness and a smooth curve that guides the eye.
For each ivy leaf, use a directional satin stitch, angling your stitches from the outer edges inward toward a central vein line.
This simple angling technique creates the illusion of a fold, giving each tiny leaf surprising depth.
Frame the entire design with a simple running stitch border to give your bookmark a clean, finished, and professional look.
2. The Gilded Ginkgo Motif

Elevate a simple journal cover by stitching directly onto the surface with a single, striking motif.
Choose a high-contrast metallic or silk thread to make the design stand out against a dark, textured background.
Use a split stitch to create the delicate branching veins of the ginkgo leaf; its fine, interlocking nature is perfect for sharp lines.
This design proves that a minimalist approach often has the greatest impact, relying on material quality rather than complexity.
3. The Layered Fern Frond
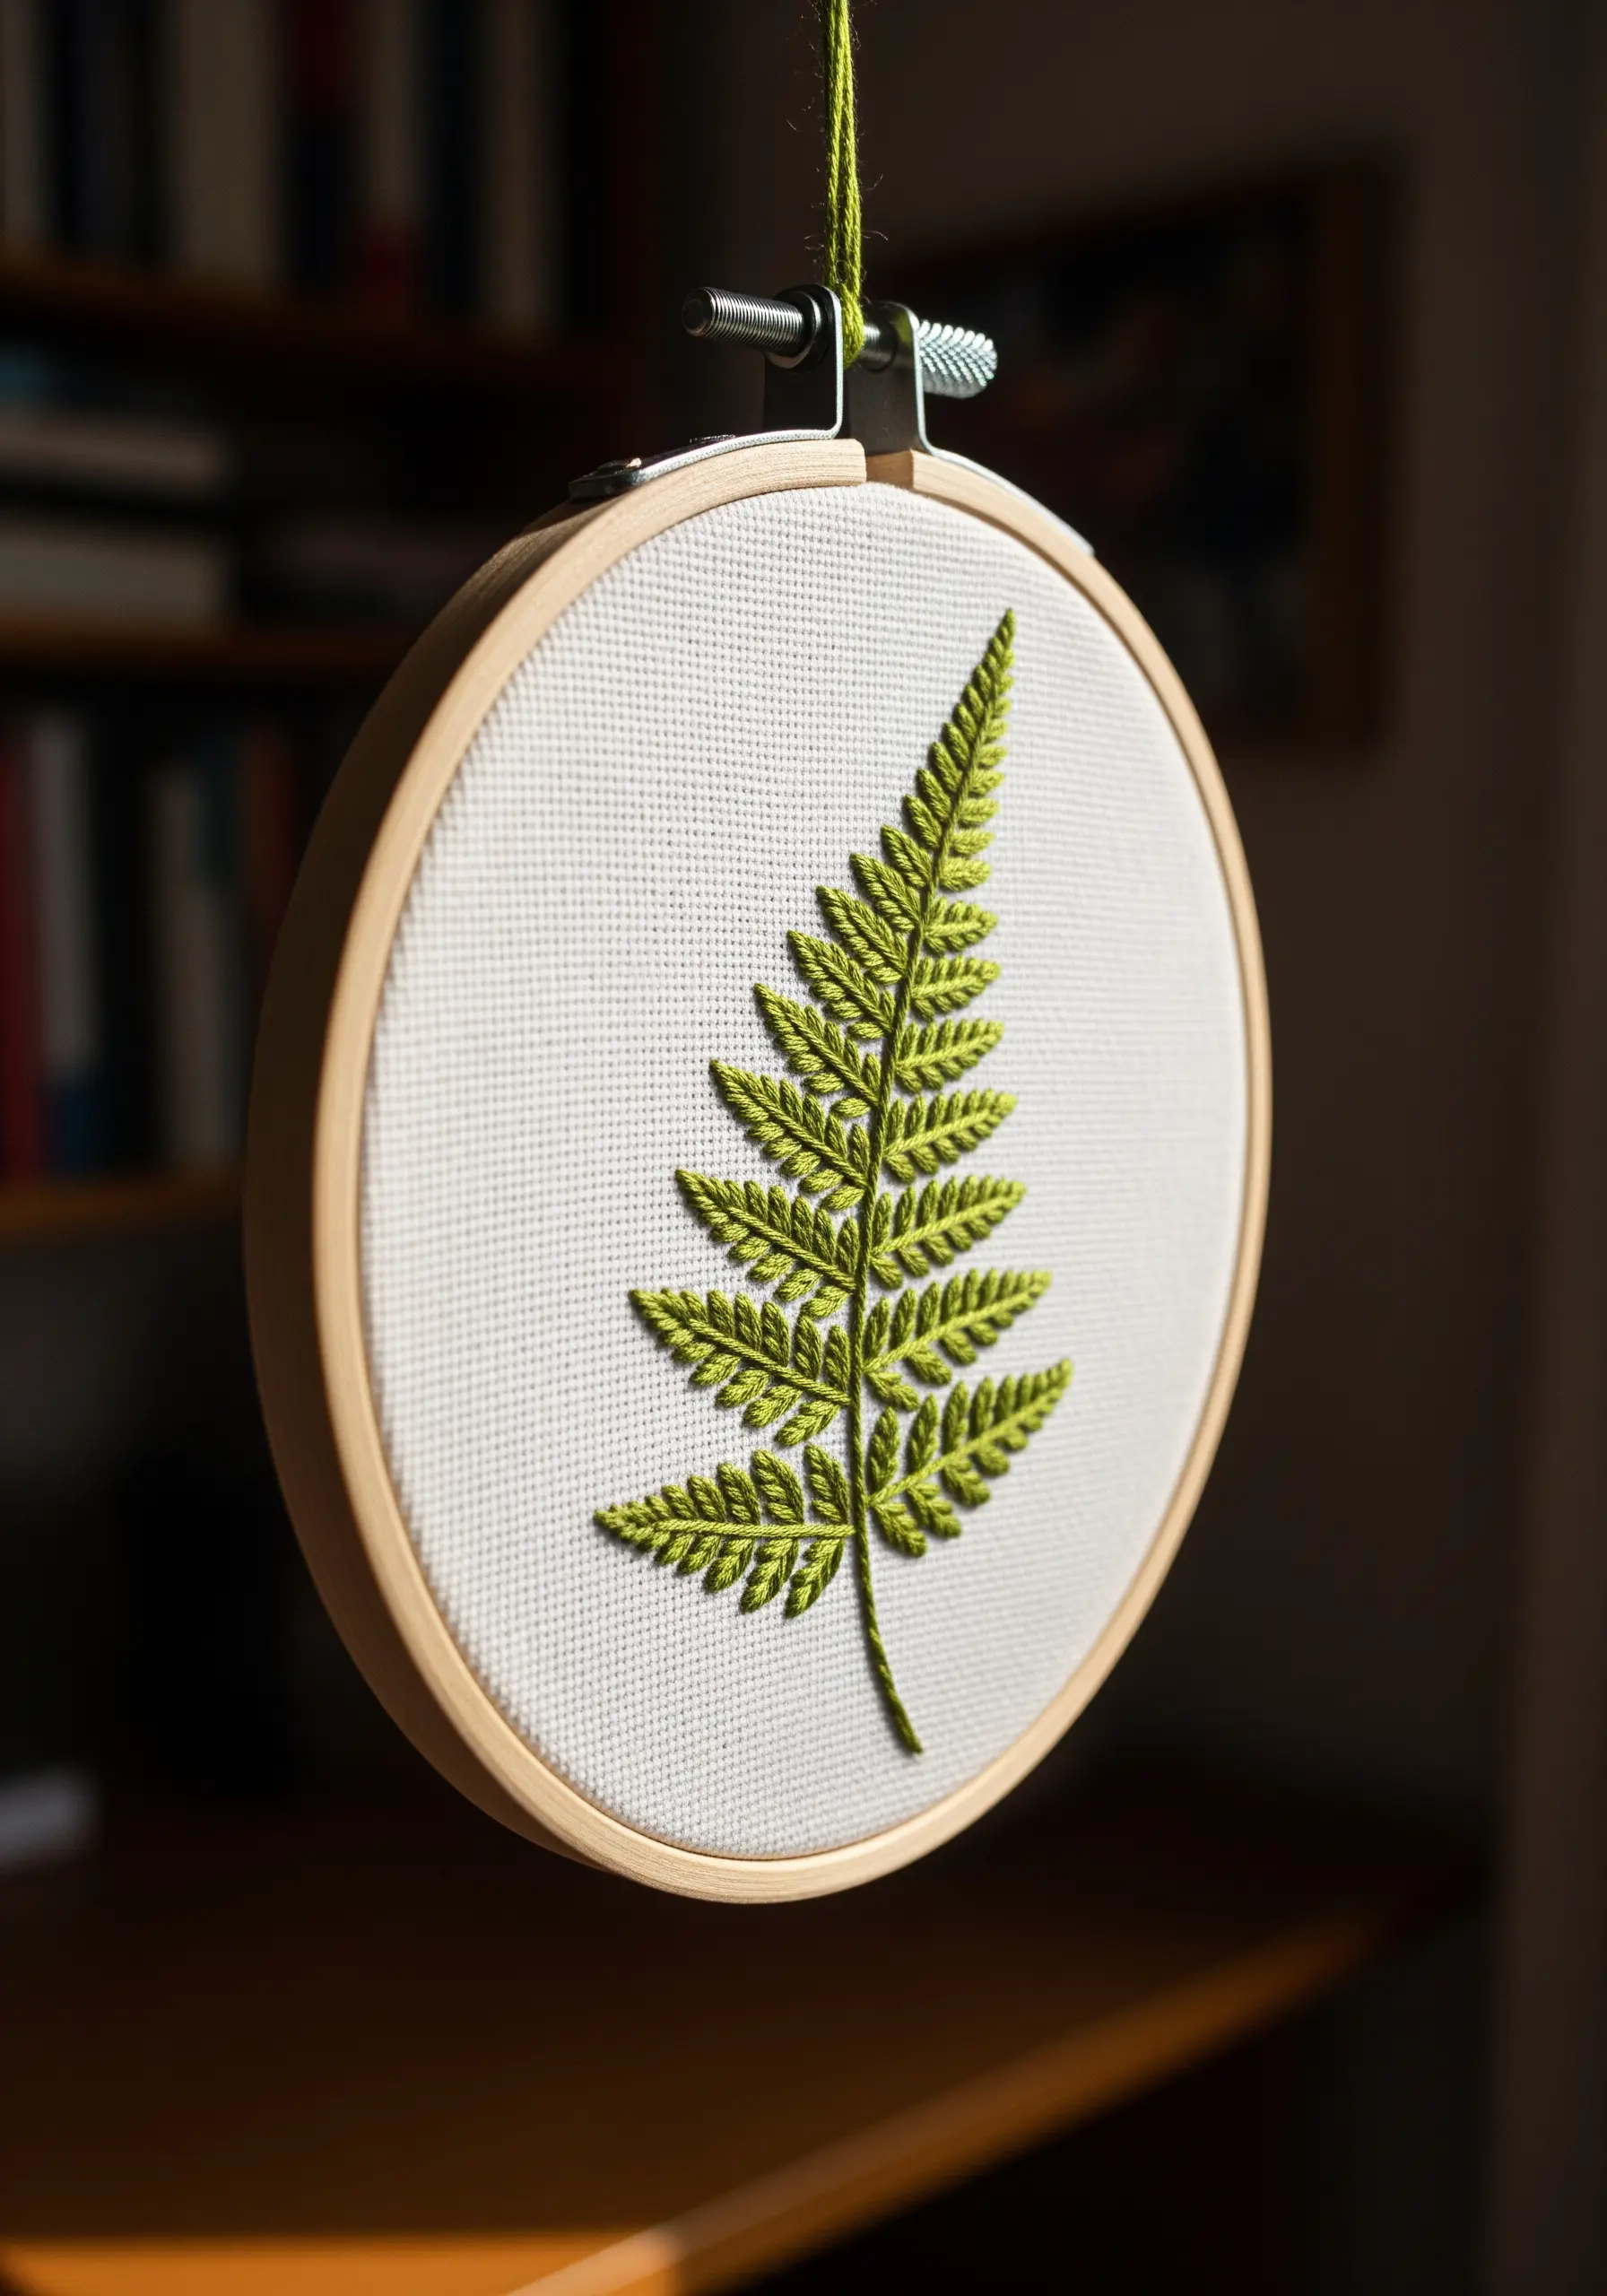
Capture the intricate structure of a fern by working with just one or two strands of floss, which allows for finer detail.
Build each frond using fly stitches or detached chain stitches arranged along a central stem stitch spine.
Slightly overlap each stitch to build density and create a lush, realistic texture that mimics the way fern leaves unfurl.
Using a slightly lighter shade of green for the topmost stitches will add a subtle highlight and enhance the three-dimensional effect.
4. The Autumn Gradient Trio
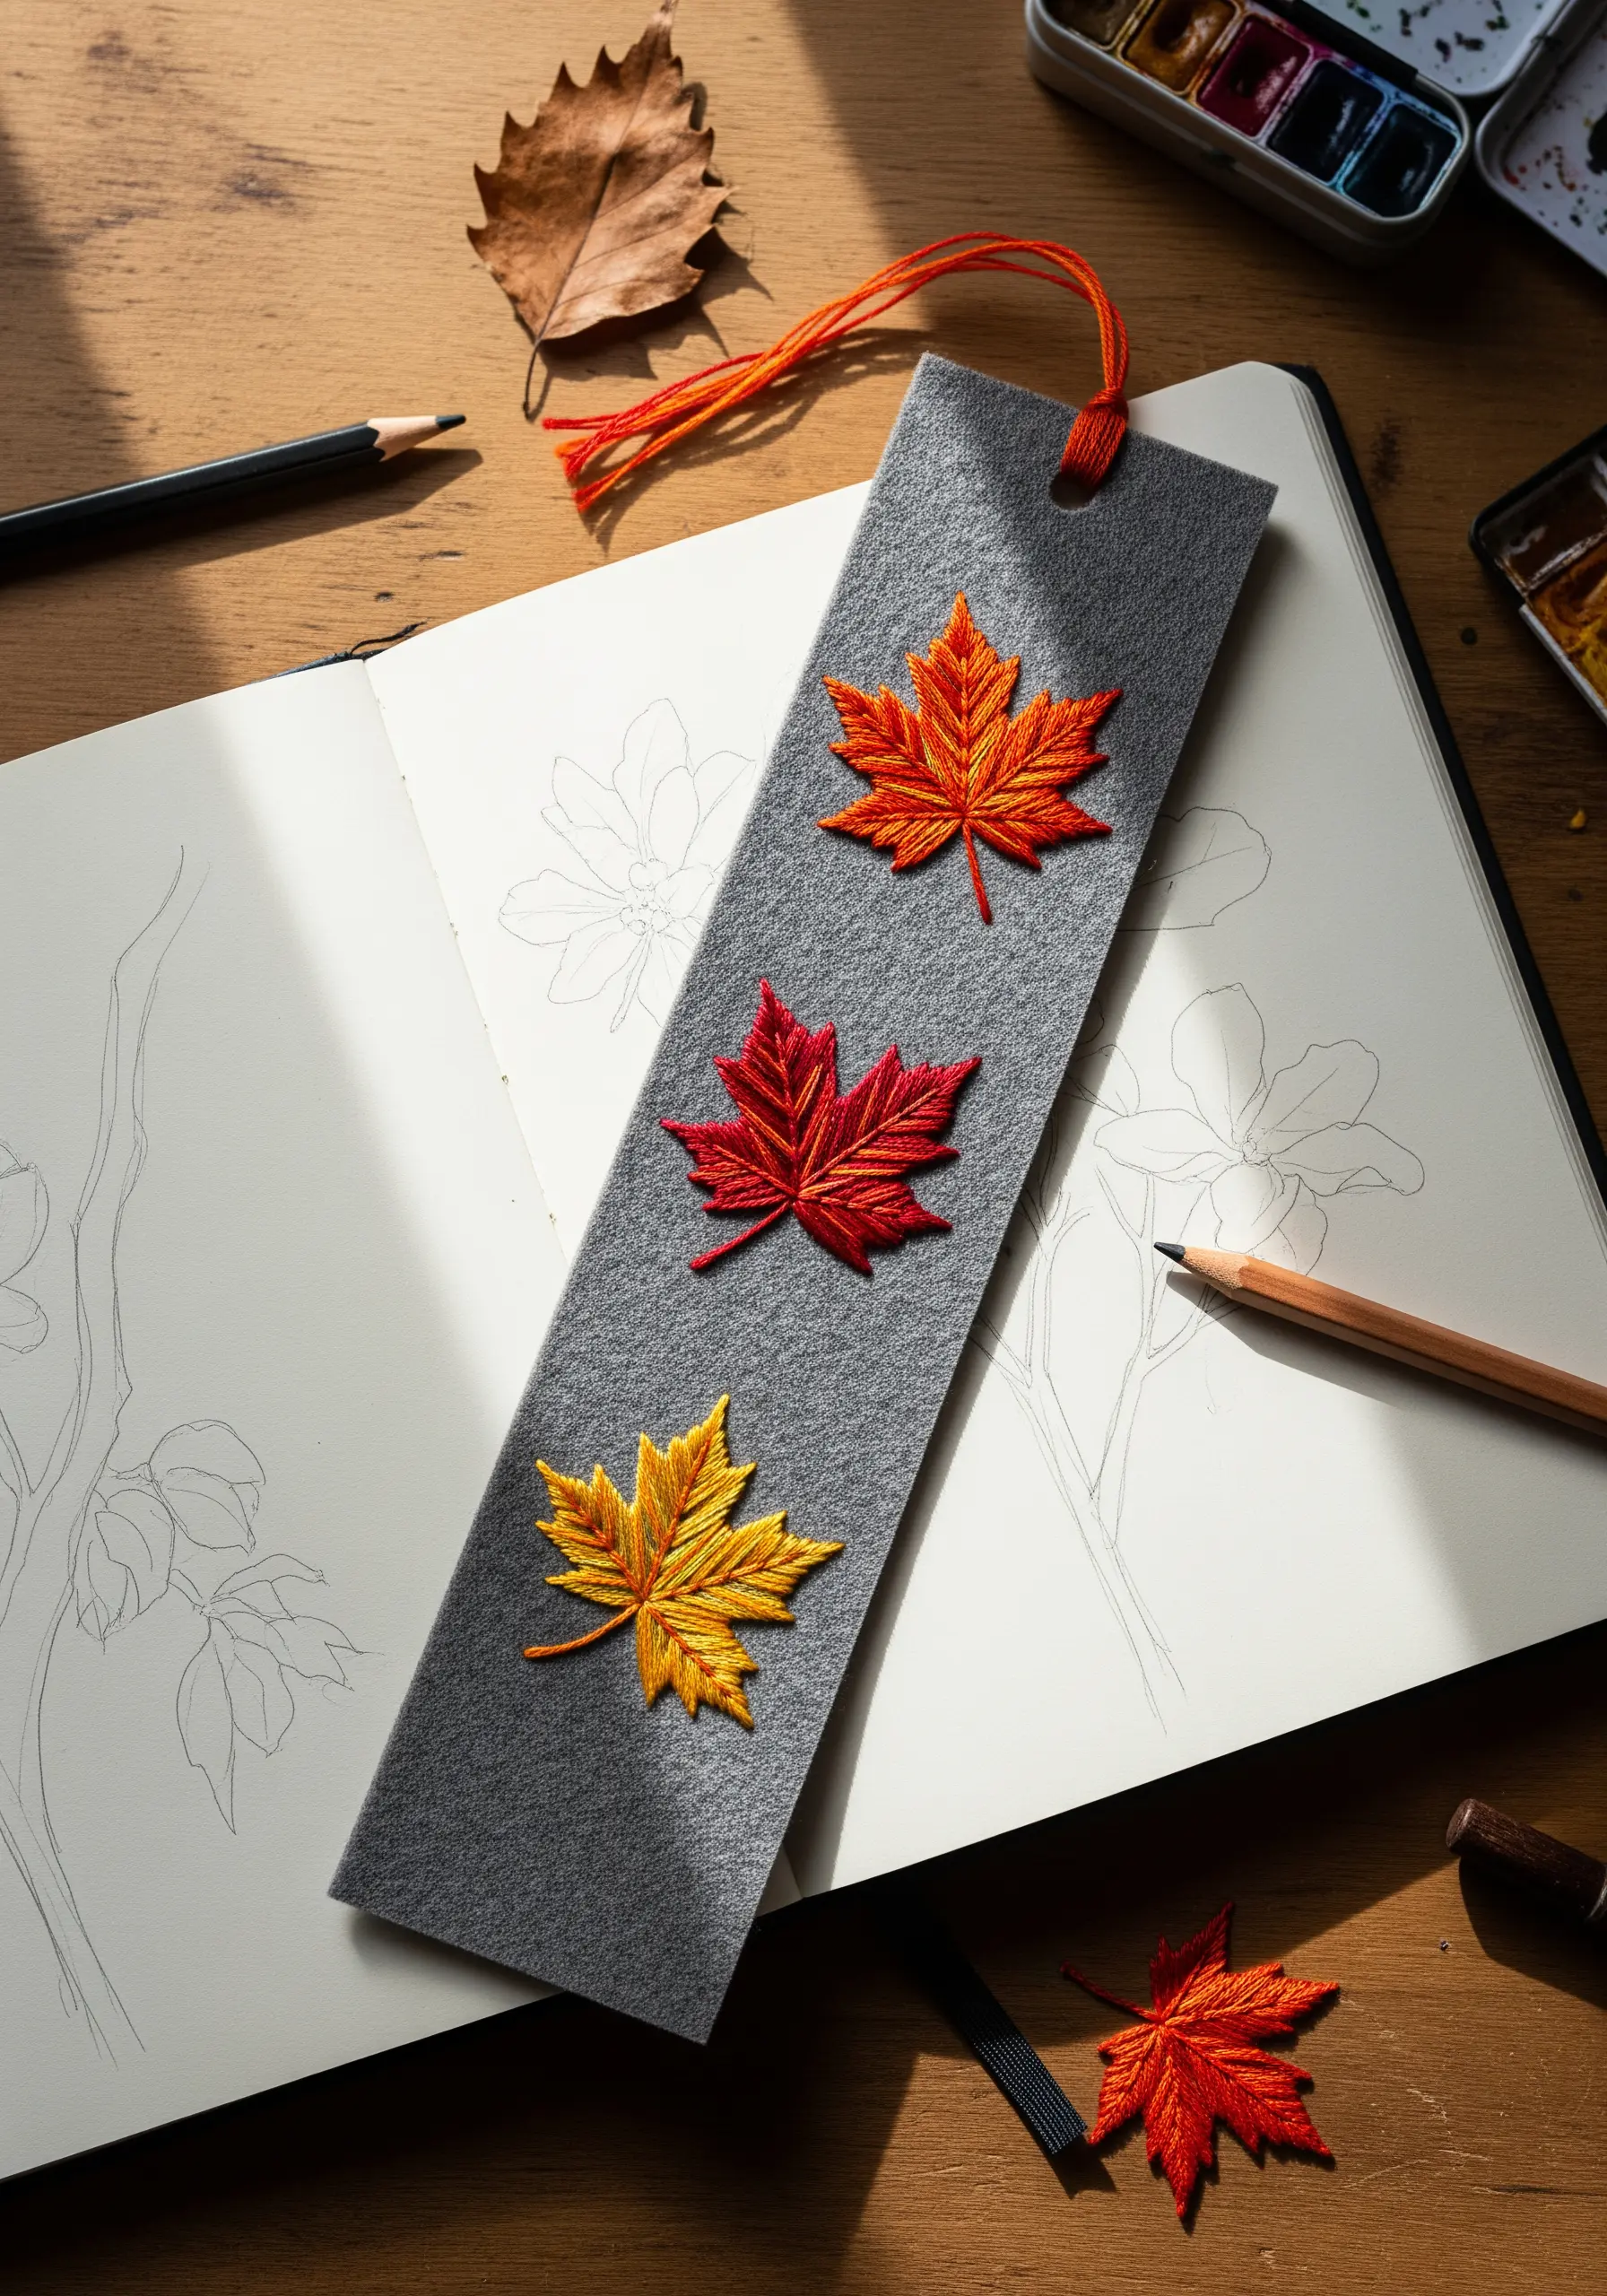
Mastering color blending is easy when you use long-and-short stitch to fill these maple leaves.
Work with two or three closely related shades (e.g., deep red, bright orange, golden yellow) and allow the stitches to interlock randomly to create a soft, painterly transition.
Stitching on felt is an excellent choice for bookmarks because it provides a sturdy, non-fraying canvas that makes your embroidery pop.
This technique is perfect for capturing the fleeting beauty of autumn in a tangible form.
5. The Eucalyptus Spine Accent
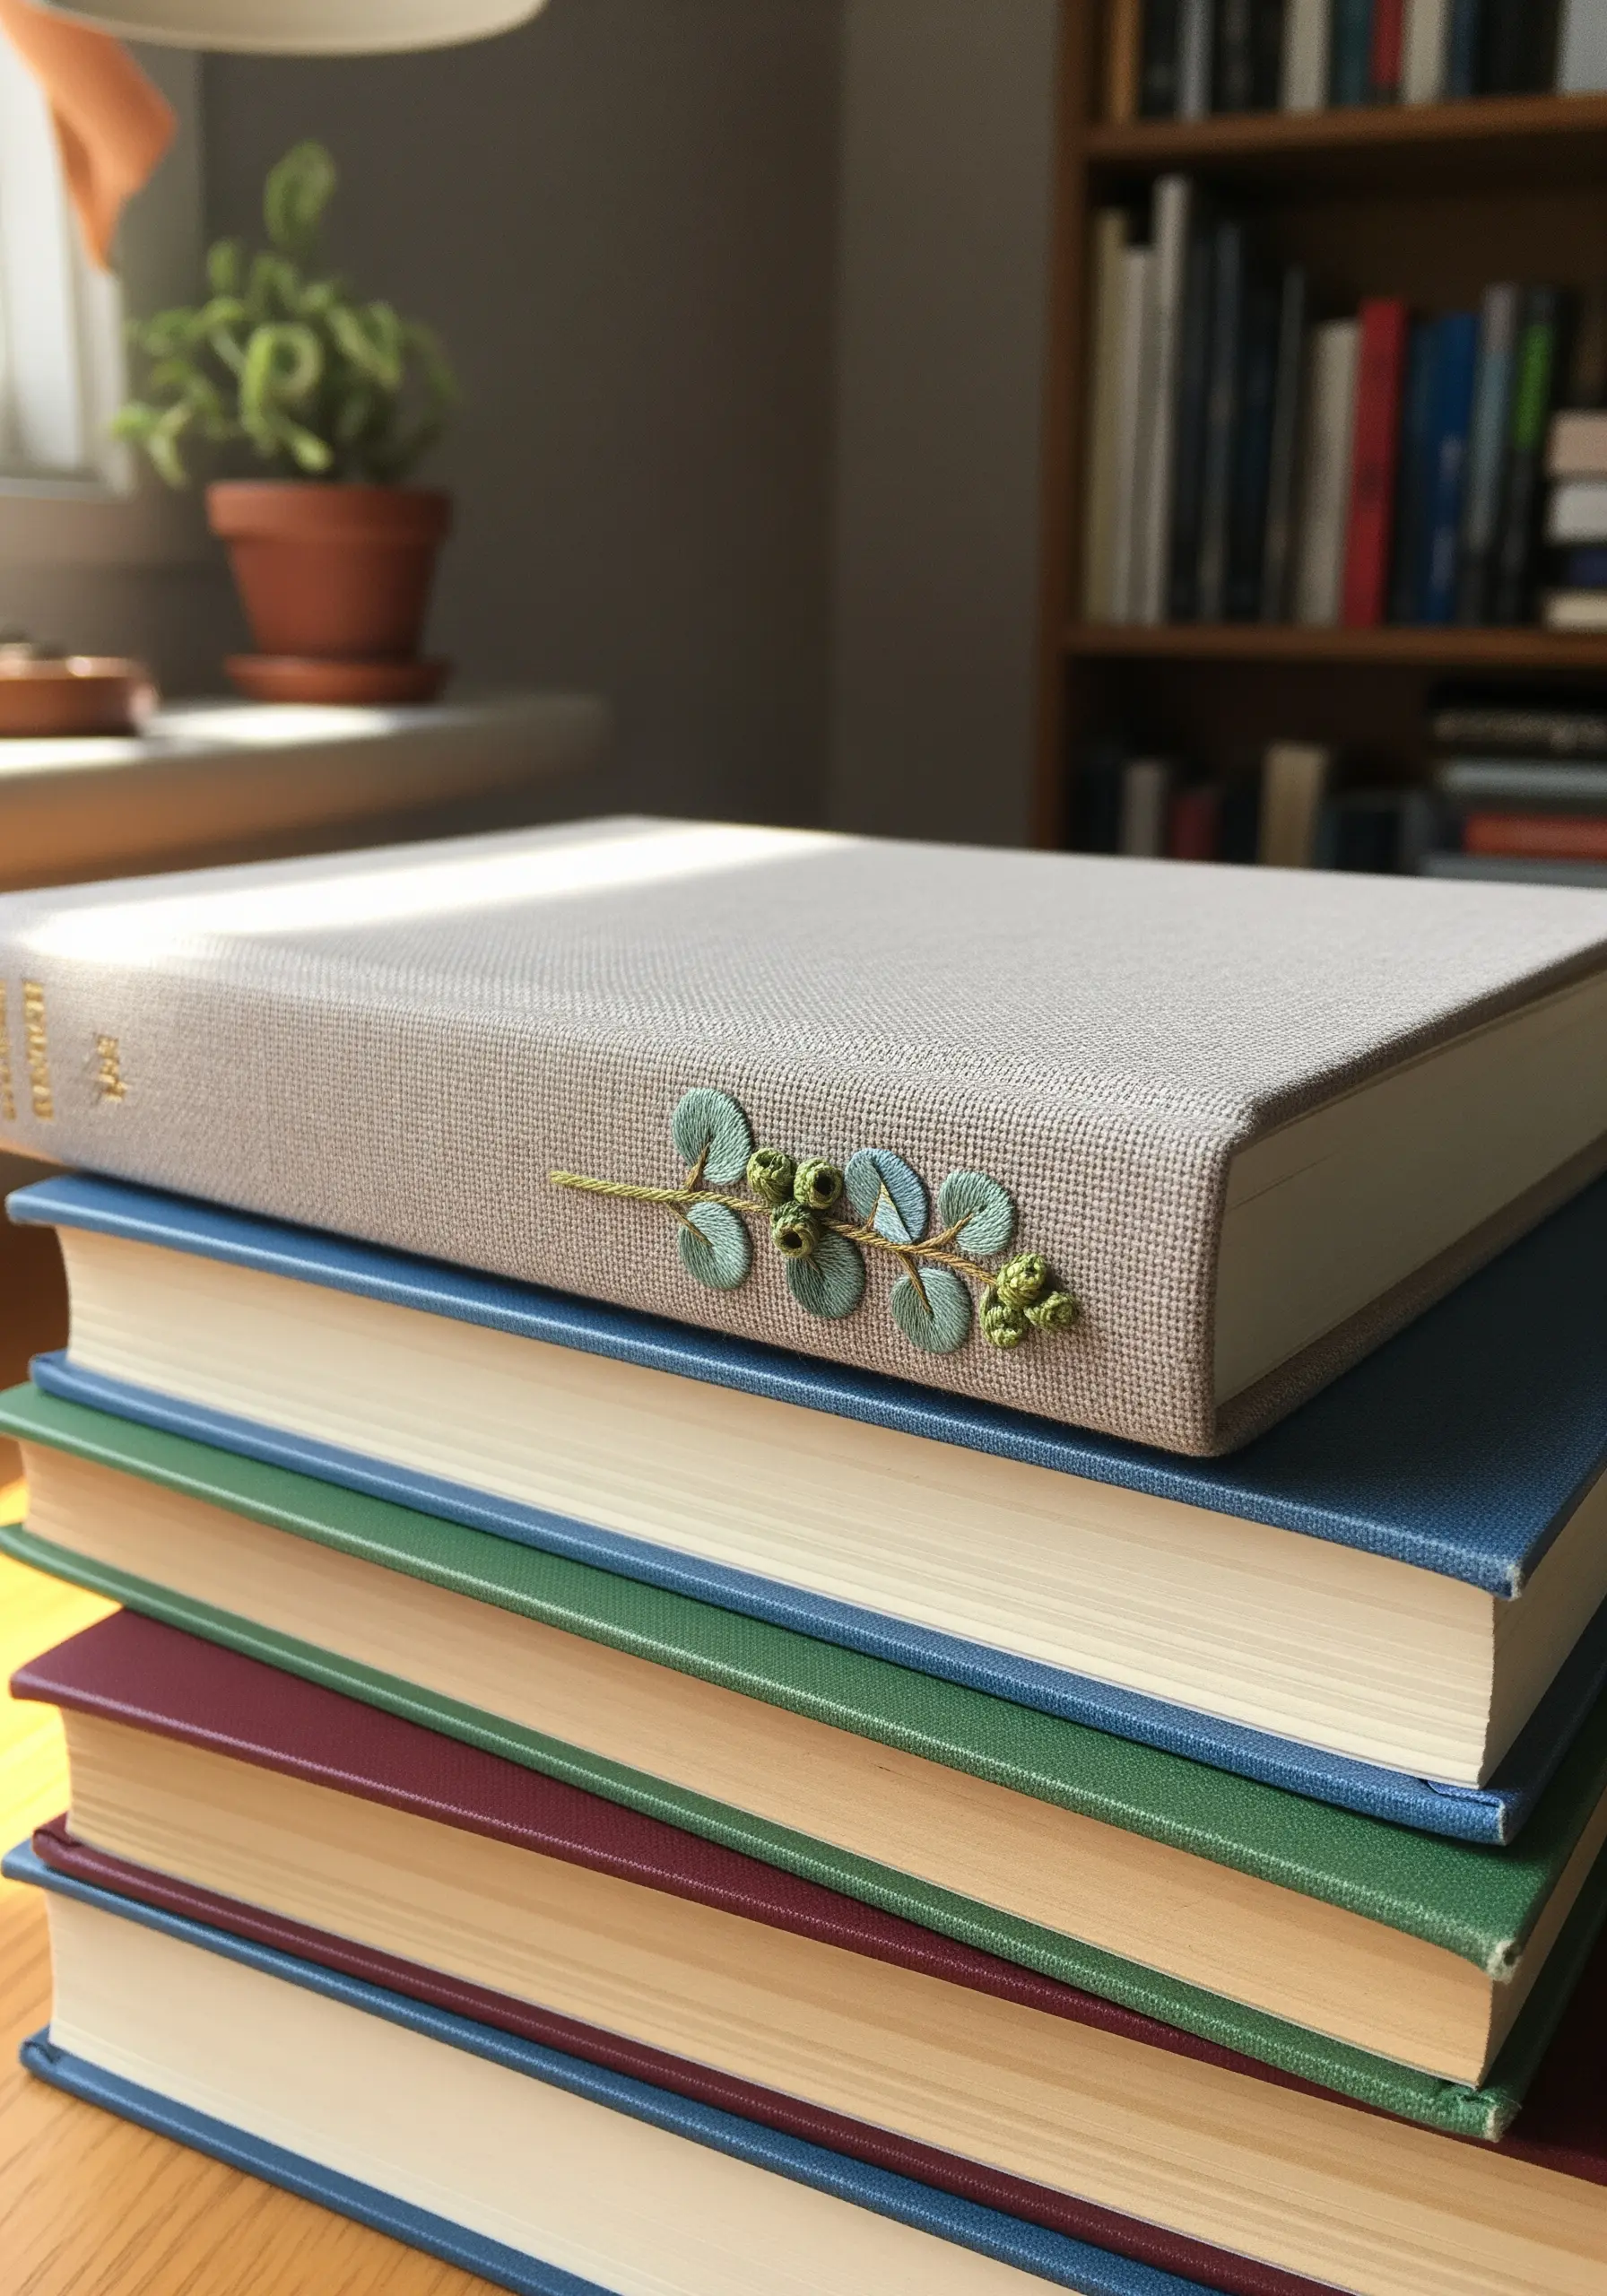
Combine textures to create a more engaging design by pairing smooth satin stitches for the leaves with plump French knots for the gumnuts.
To achieve the rounded shape of eucalyptus leaves, angle your satin stitches in a gentle fan shape, following the curve of the leaf.
Working on a fabric-bound book requires a sharp needle and careful tension control to avoid puckering the cover.
A muted, dusty green and blue color palette lends a soft, sophisticated feel to this botanical detail.
6. The Clover Grid Pattern
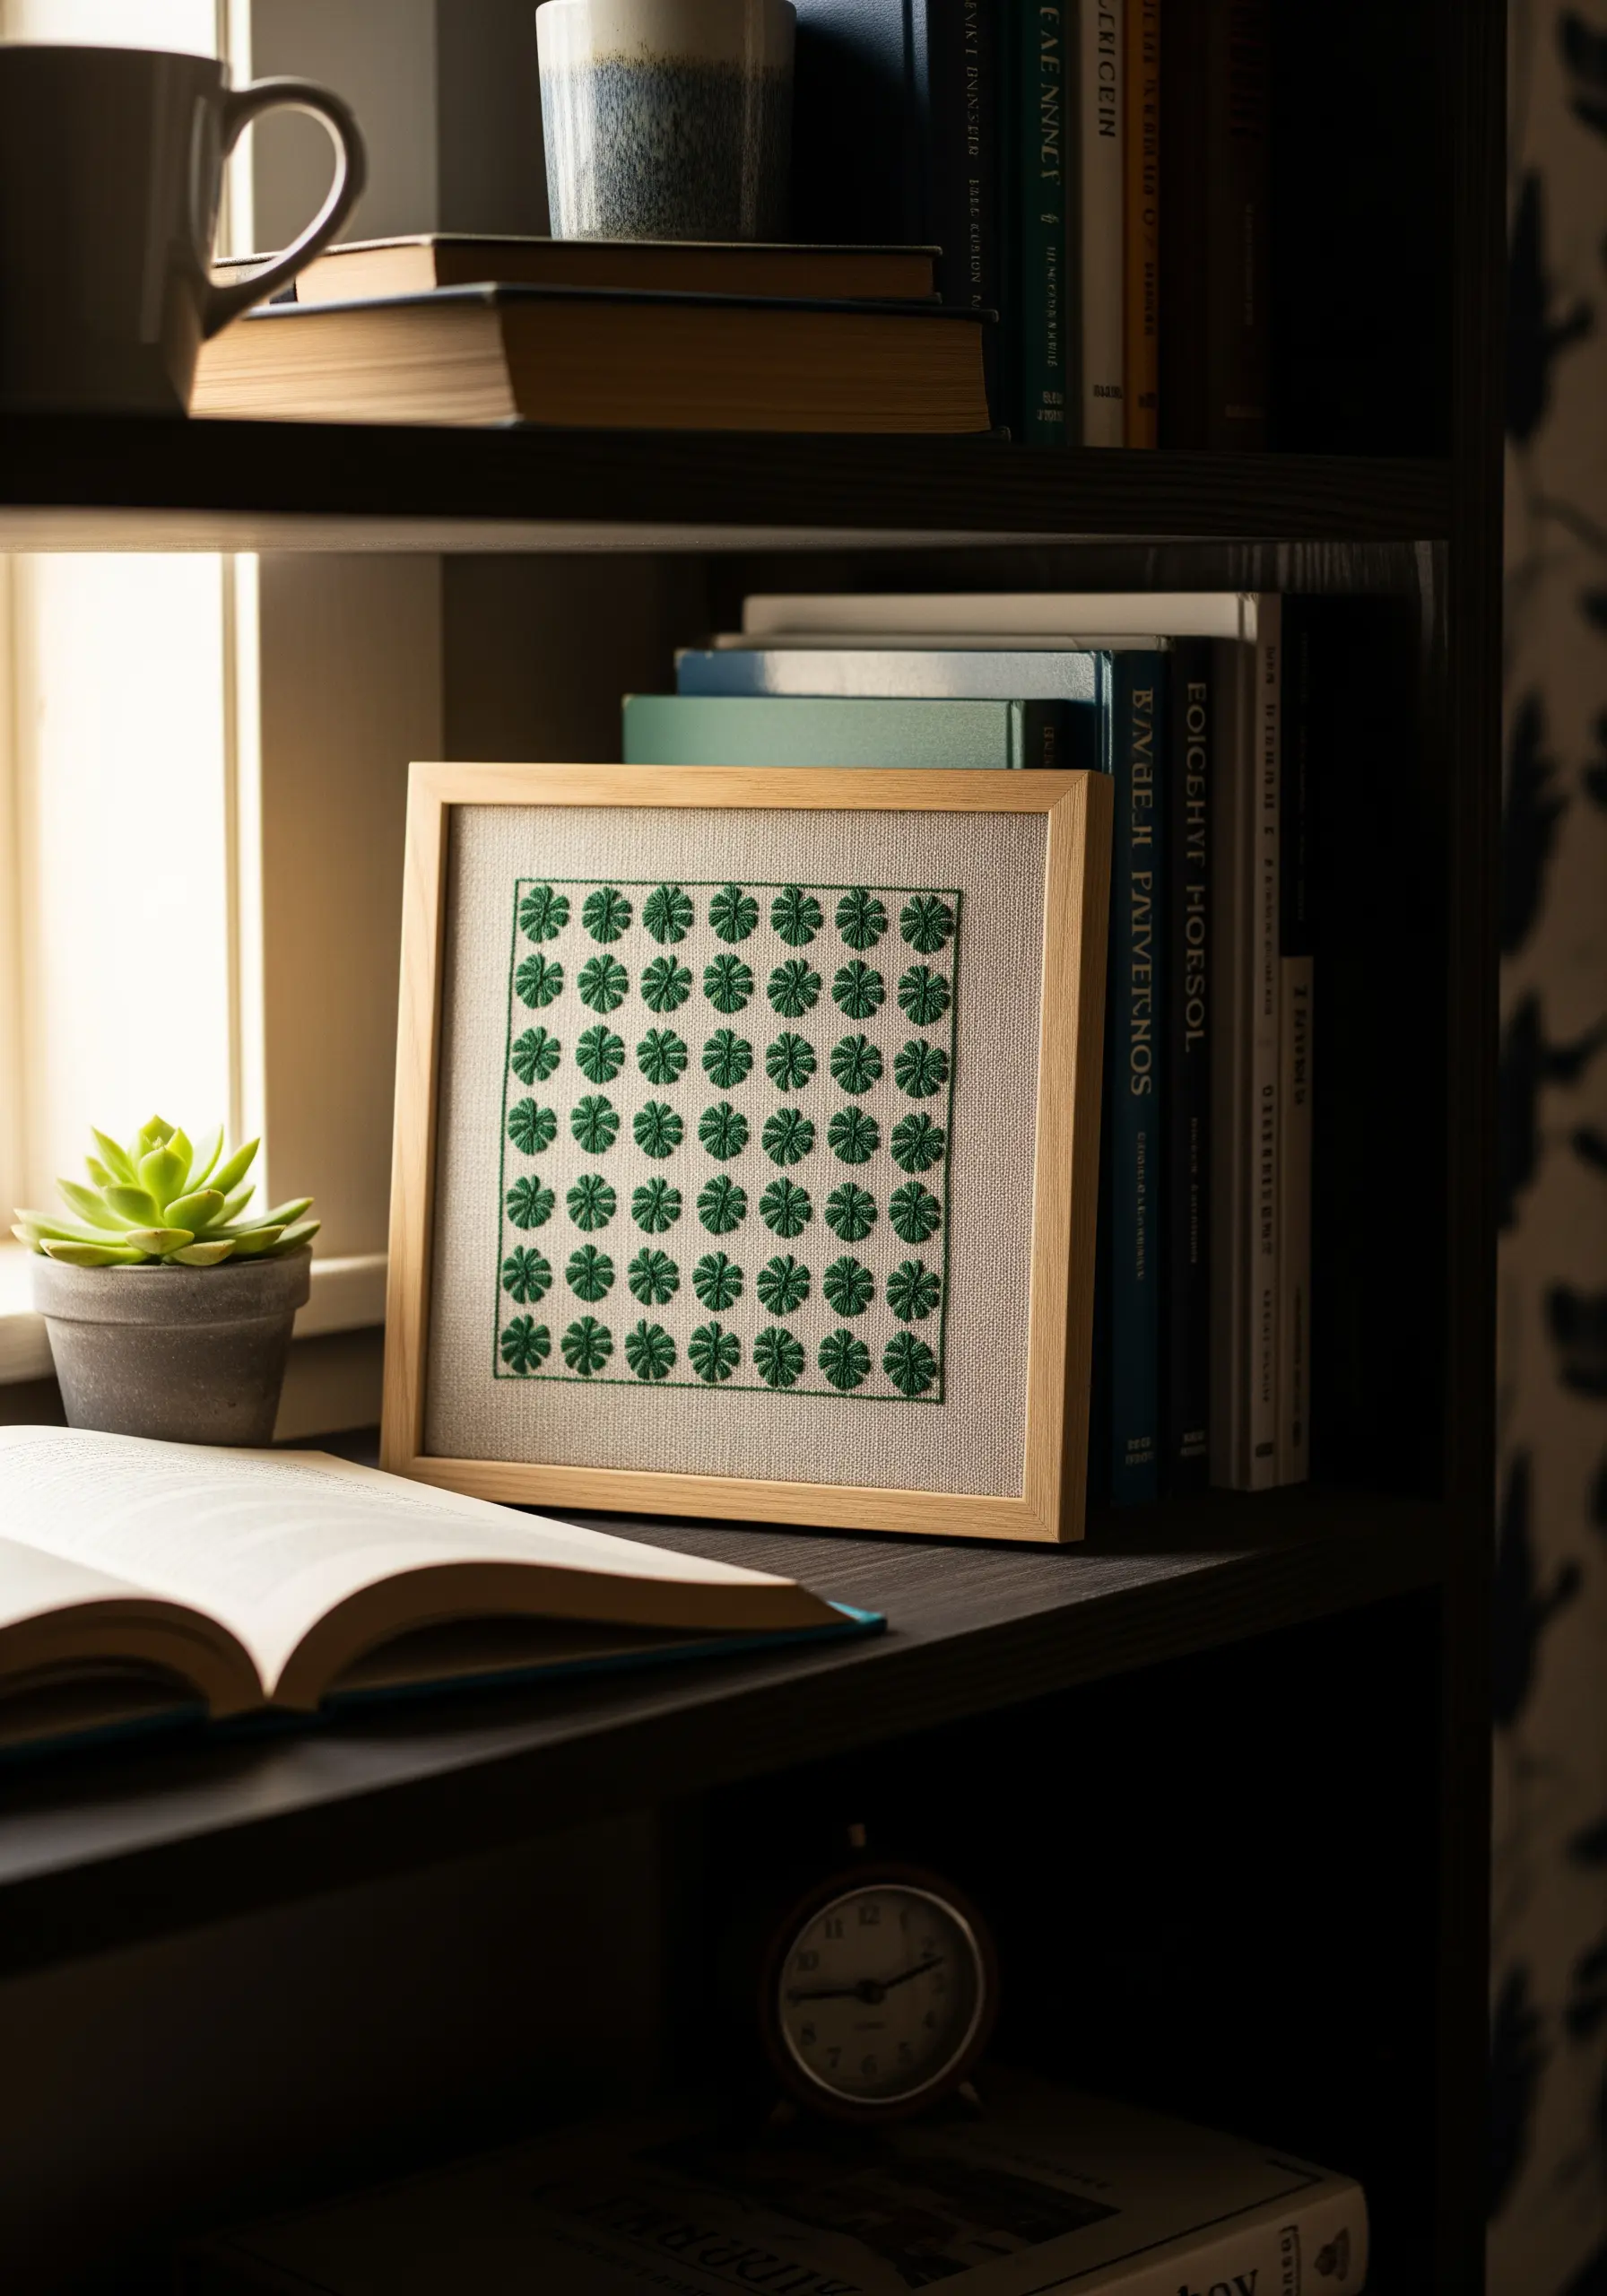
Create a stunning geometric effect by arranging a simple leaf motif in a repeating grid.
For each clover, use four detached chain stitches (lazy daisies) arranged in a cluster, which is a fast and effective way to create petal shapes.
The key to this design’s success is precise spacing and consistent stitch size, so consider using a water-soluble marker to draw a grid on your fabric before you begin.
This modern take on a classic sampler turns a simple shape into a piece of minimalist wall art.
7. The Olive Branch Bookmark
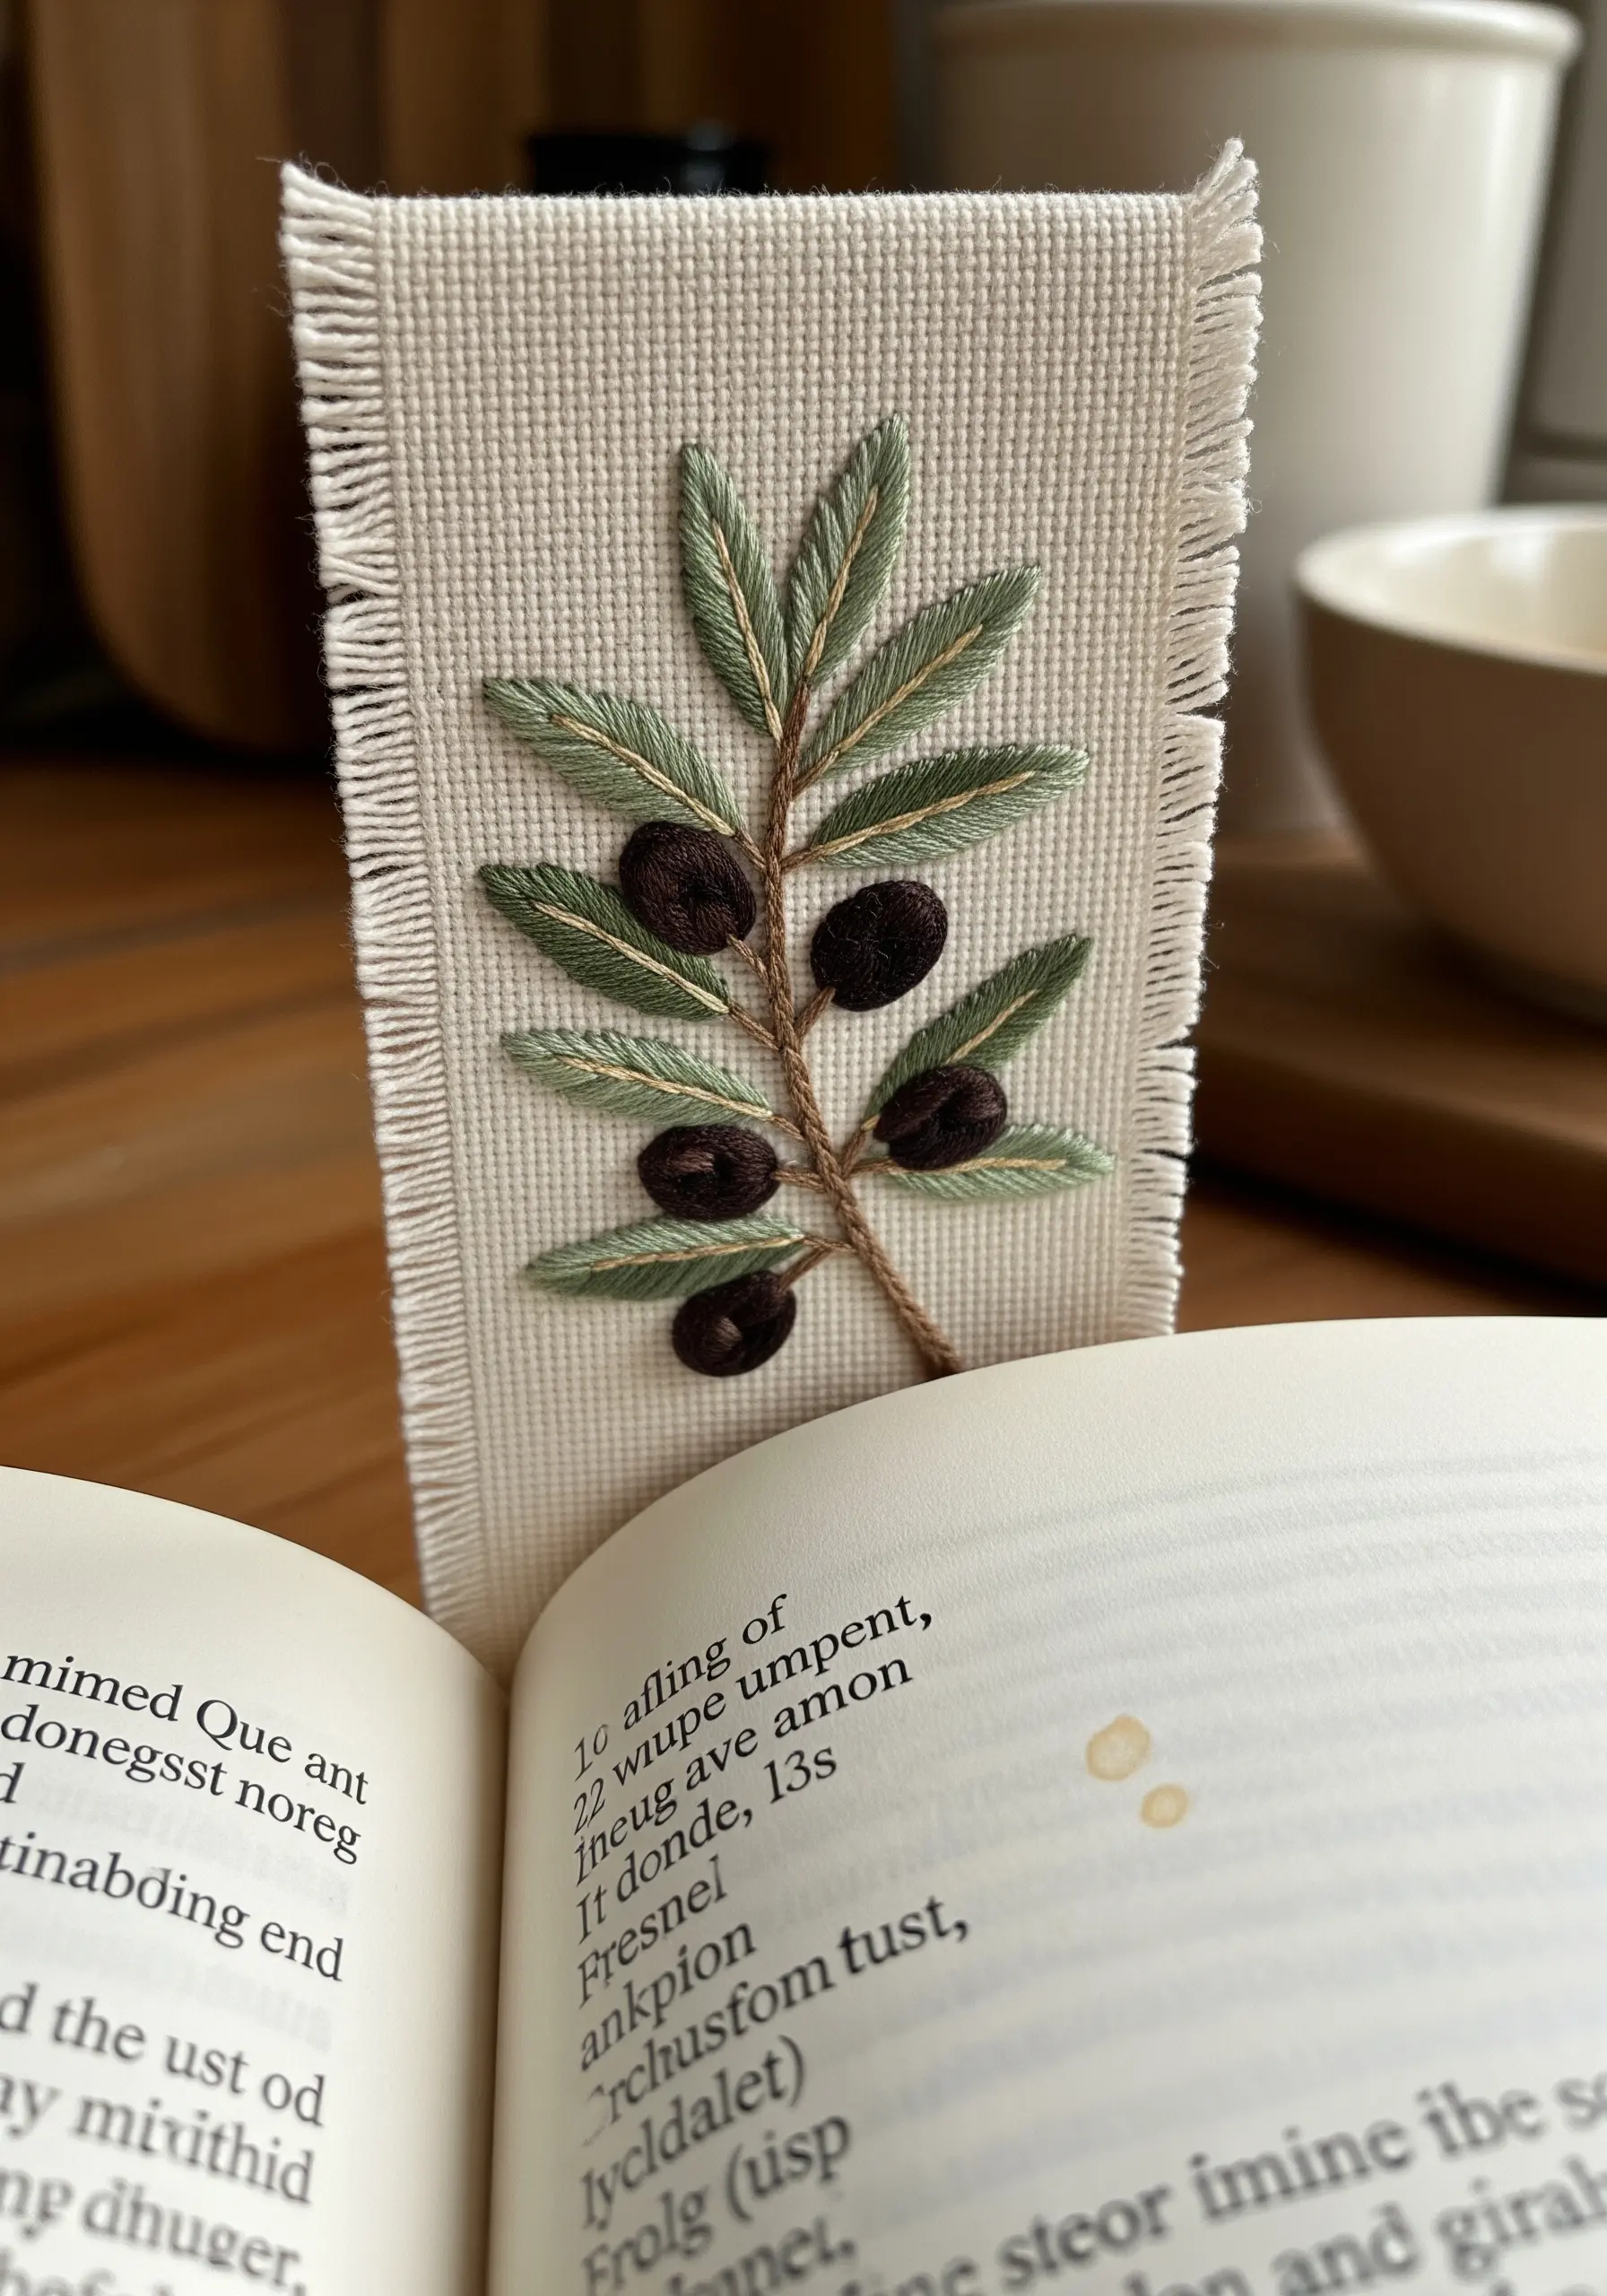
Give your leaves a realistic, three-dimensional look by using a fishbone stitch.
This stitch creates a central spine and angles the threads outward, perfectly mimicking the structure of an olive leaf.
For the olives, use a padded satin stitch—a few straight stitches underneath the final layer—to give them a raised, rounded shape.
Finishing the bookmark with a frayed edge adds a soft, organic texture that complements the natural motif.
8. The Lucky Clover Corner
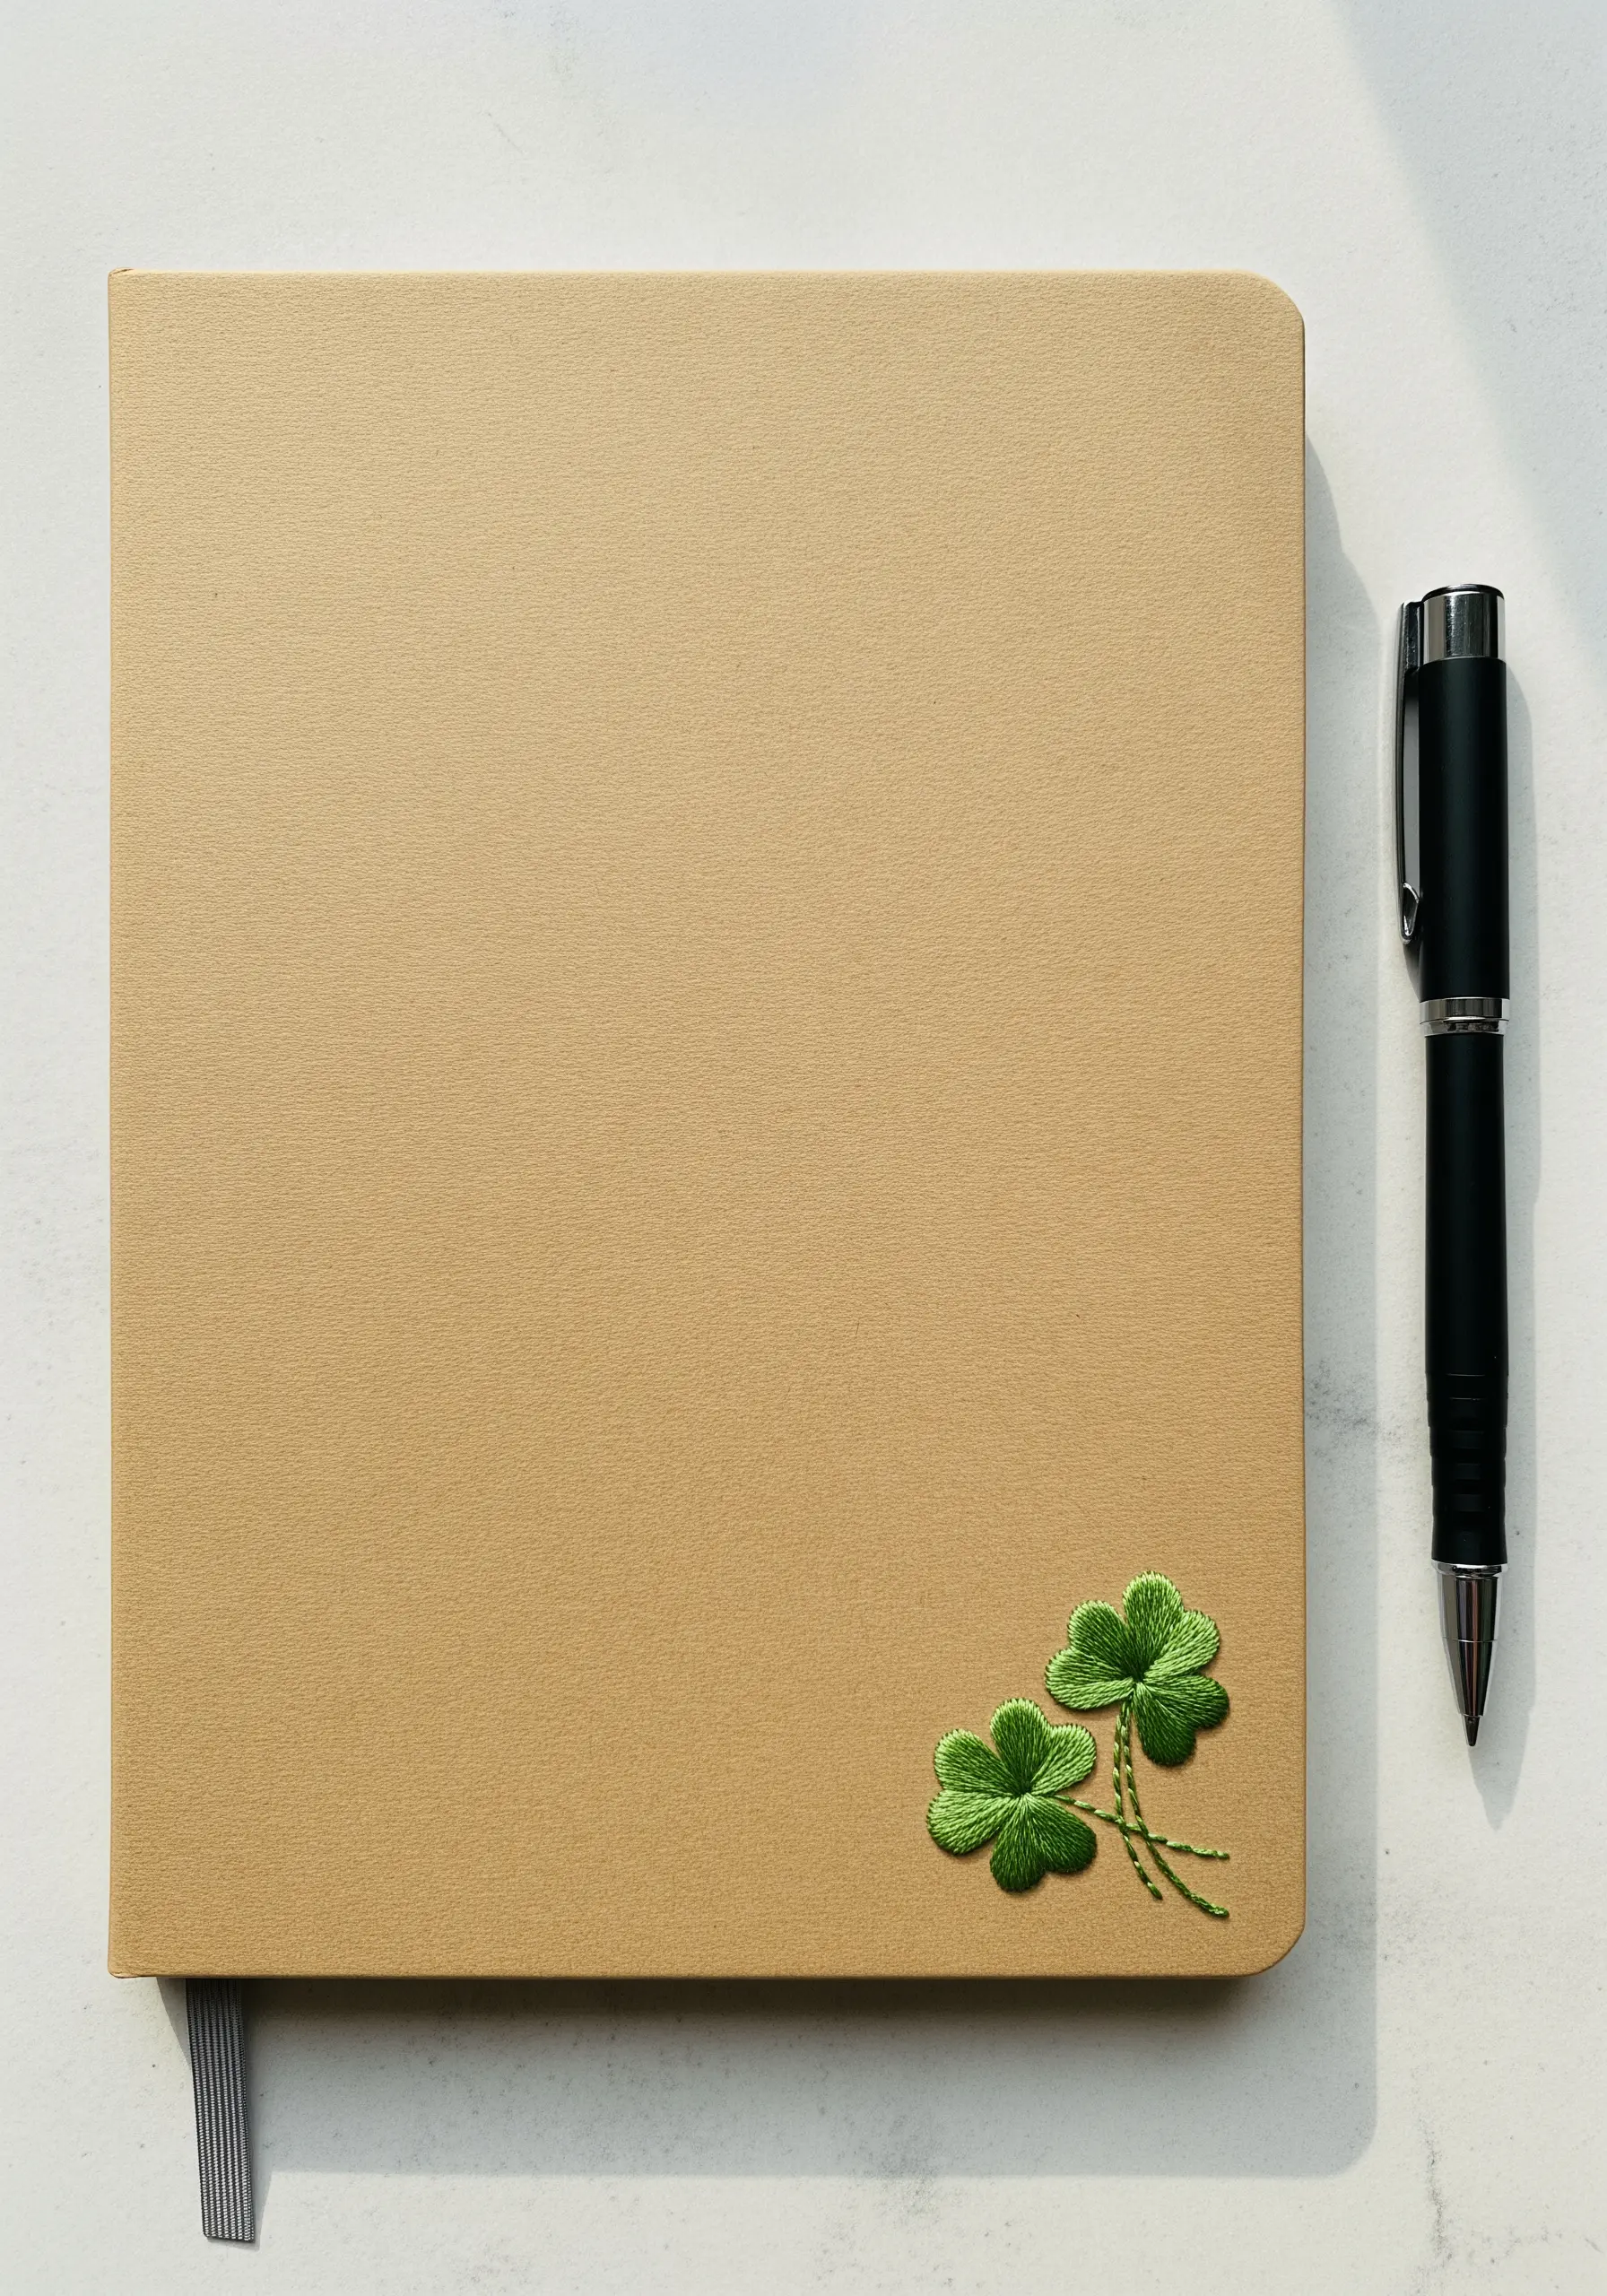
A tiny motif placed asymmetrically in a corner adds a subtle, personal touch to a journal without overwhelming the cover.
Use a split long-and-short stitch to blend two shades of green within each leaflet, giving it a gentle gradient and a touch of realism.
To ensure your clover appears full and smooth, keep your satin stitches close together and consistent in tension.
A delicate stem stitch for the stalks provides a graceful curve that connects the leaves.
9. The Aromatic Rosemary Patch
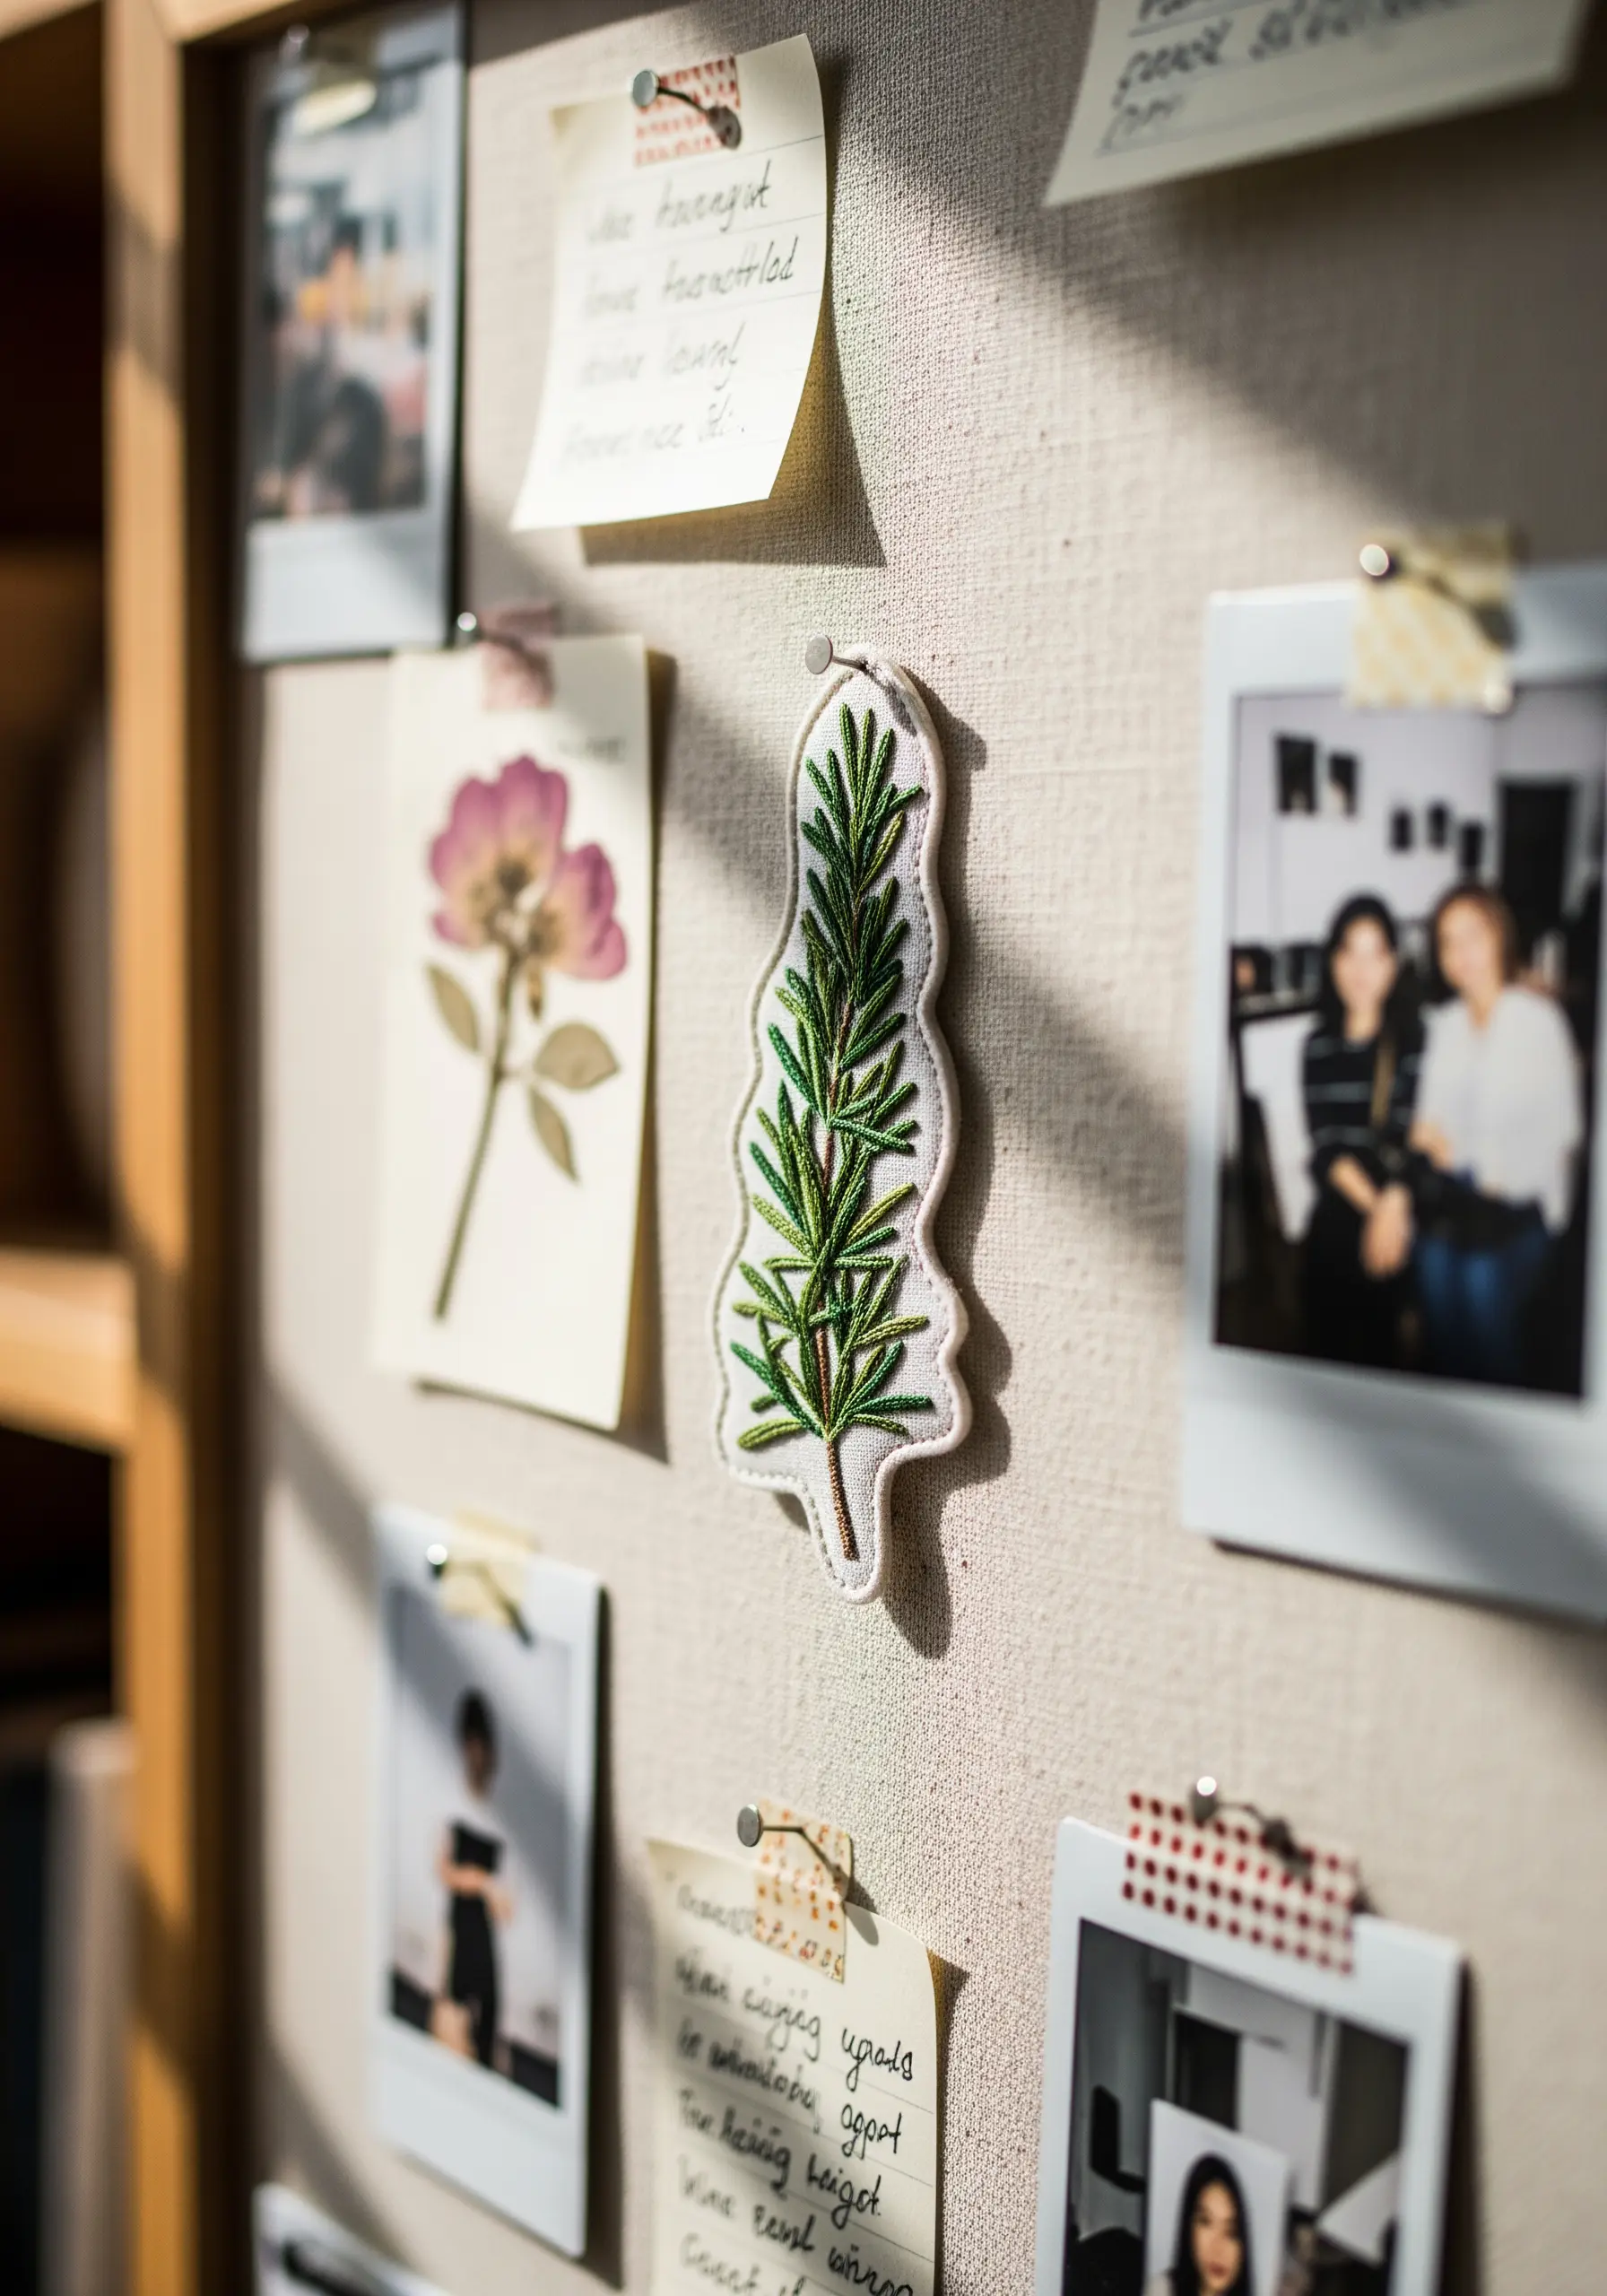
Create a freestanding embroidered patch you can add to a corkboard, jacket, or bag.
Stitch your design onto a piece of felt or sturdy fabric, then use a sharp pair of scissors to carefully cut around the shape, leaving a small border.
Use short, straight stitches for the rosemary needles, varying the angle slightly to create a bushy, natural texture.
A simple backstitch outline in a contrasting color defines the patch’s shape and gives it a clean, professional finish.
10. The Cascading Golden Birch
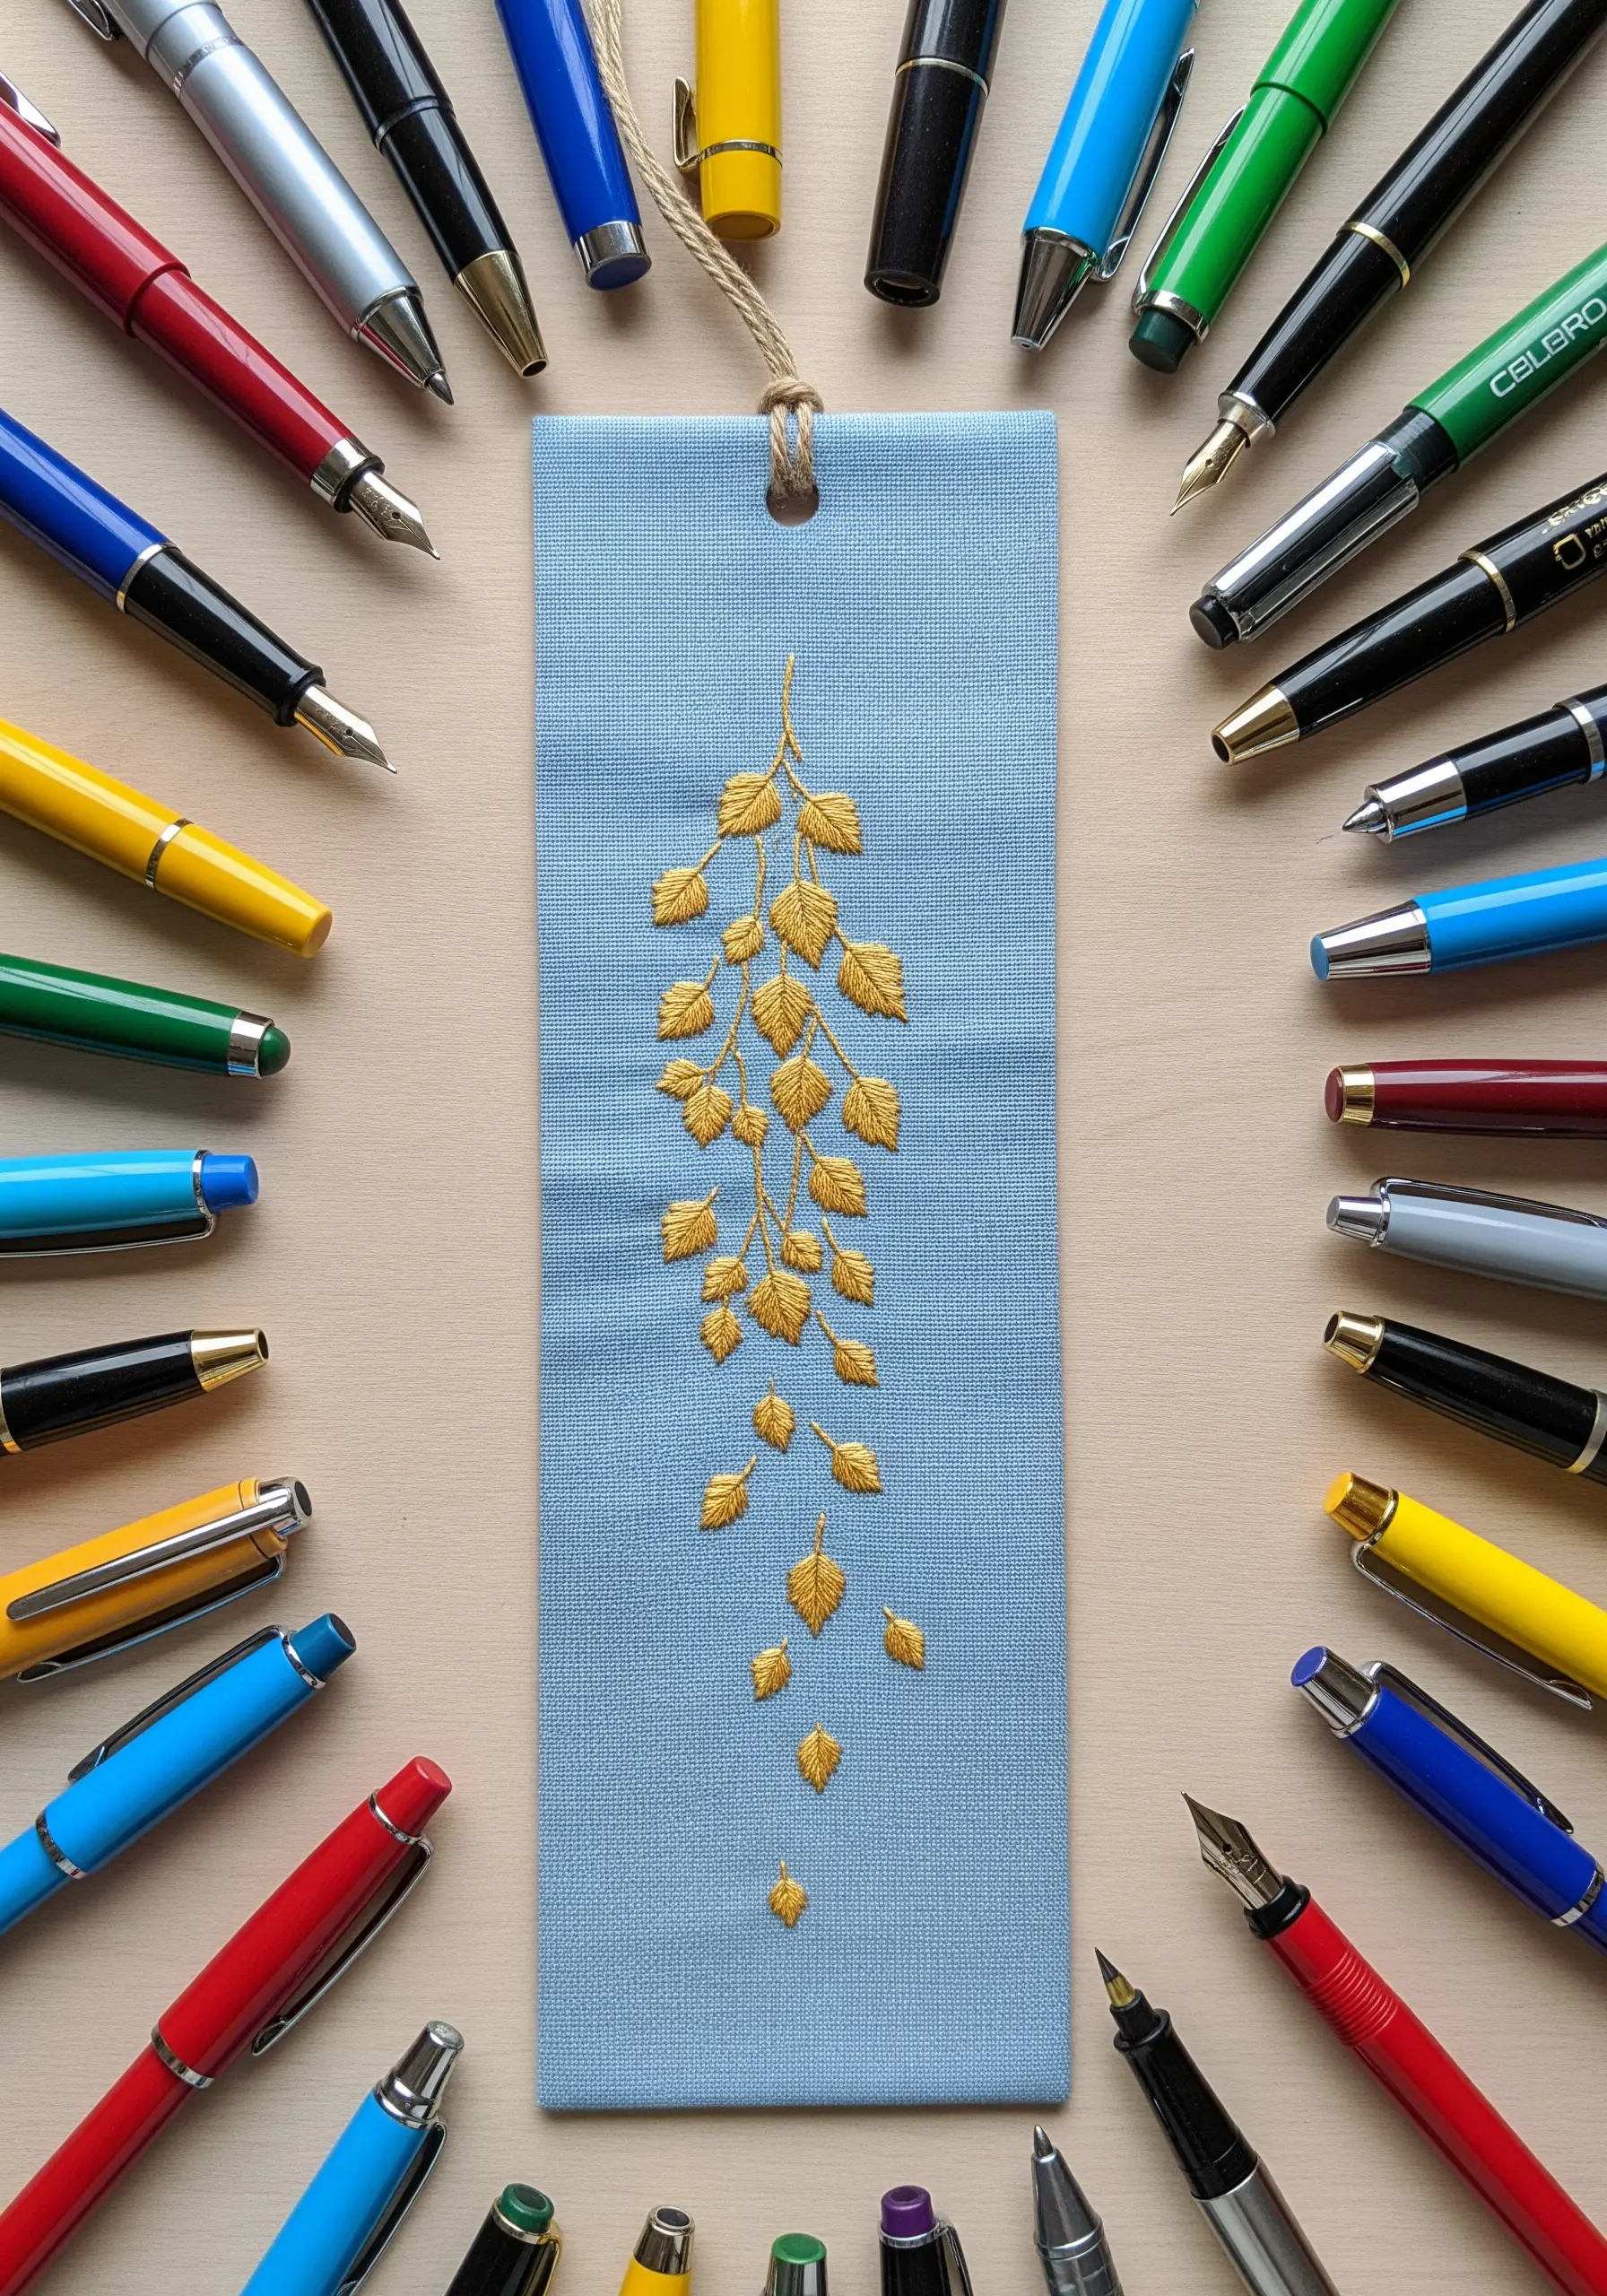
Create a sense of movement and elegance by stitching a cascading vine that flows down the length of a bookmark.
Use single detached chain stitches for each leaf and connect them with tiny straight stitches for the stems.
The beauty of this design lies in its delicate composition; allow the leaves to become sparser toward the bottom to create a natural, trailing effect.
Choosing a single, luminous thread color, like gold, against a solid background creates a sophisticated and cohesive look.
11. The Minimalist Seedling Vine
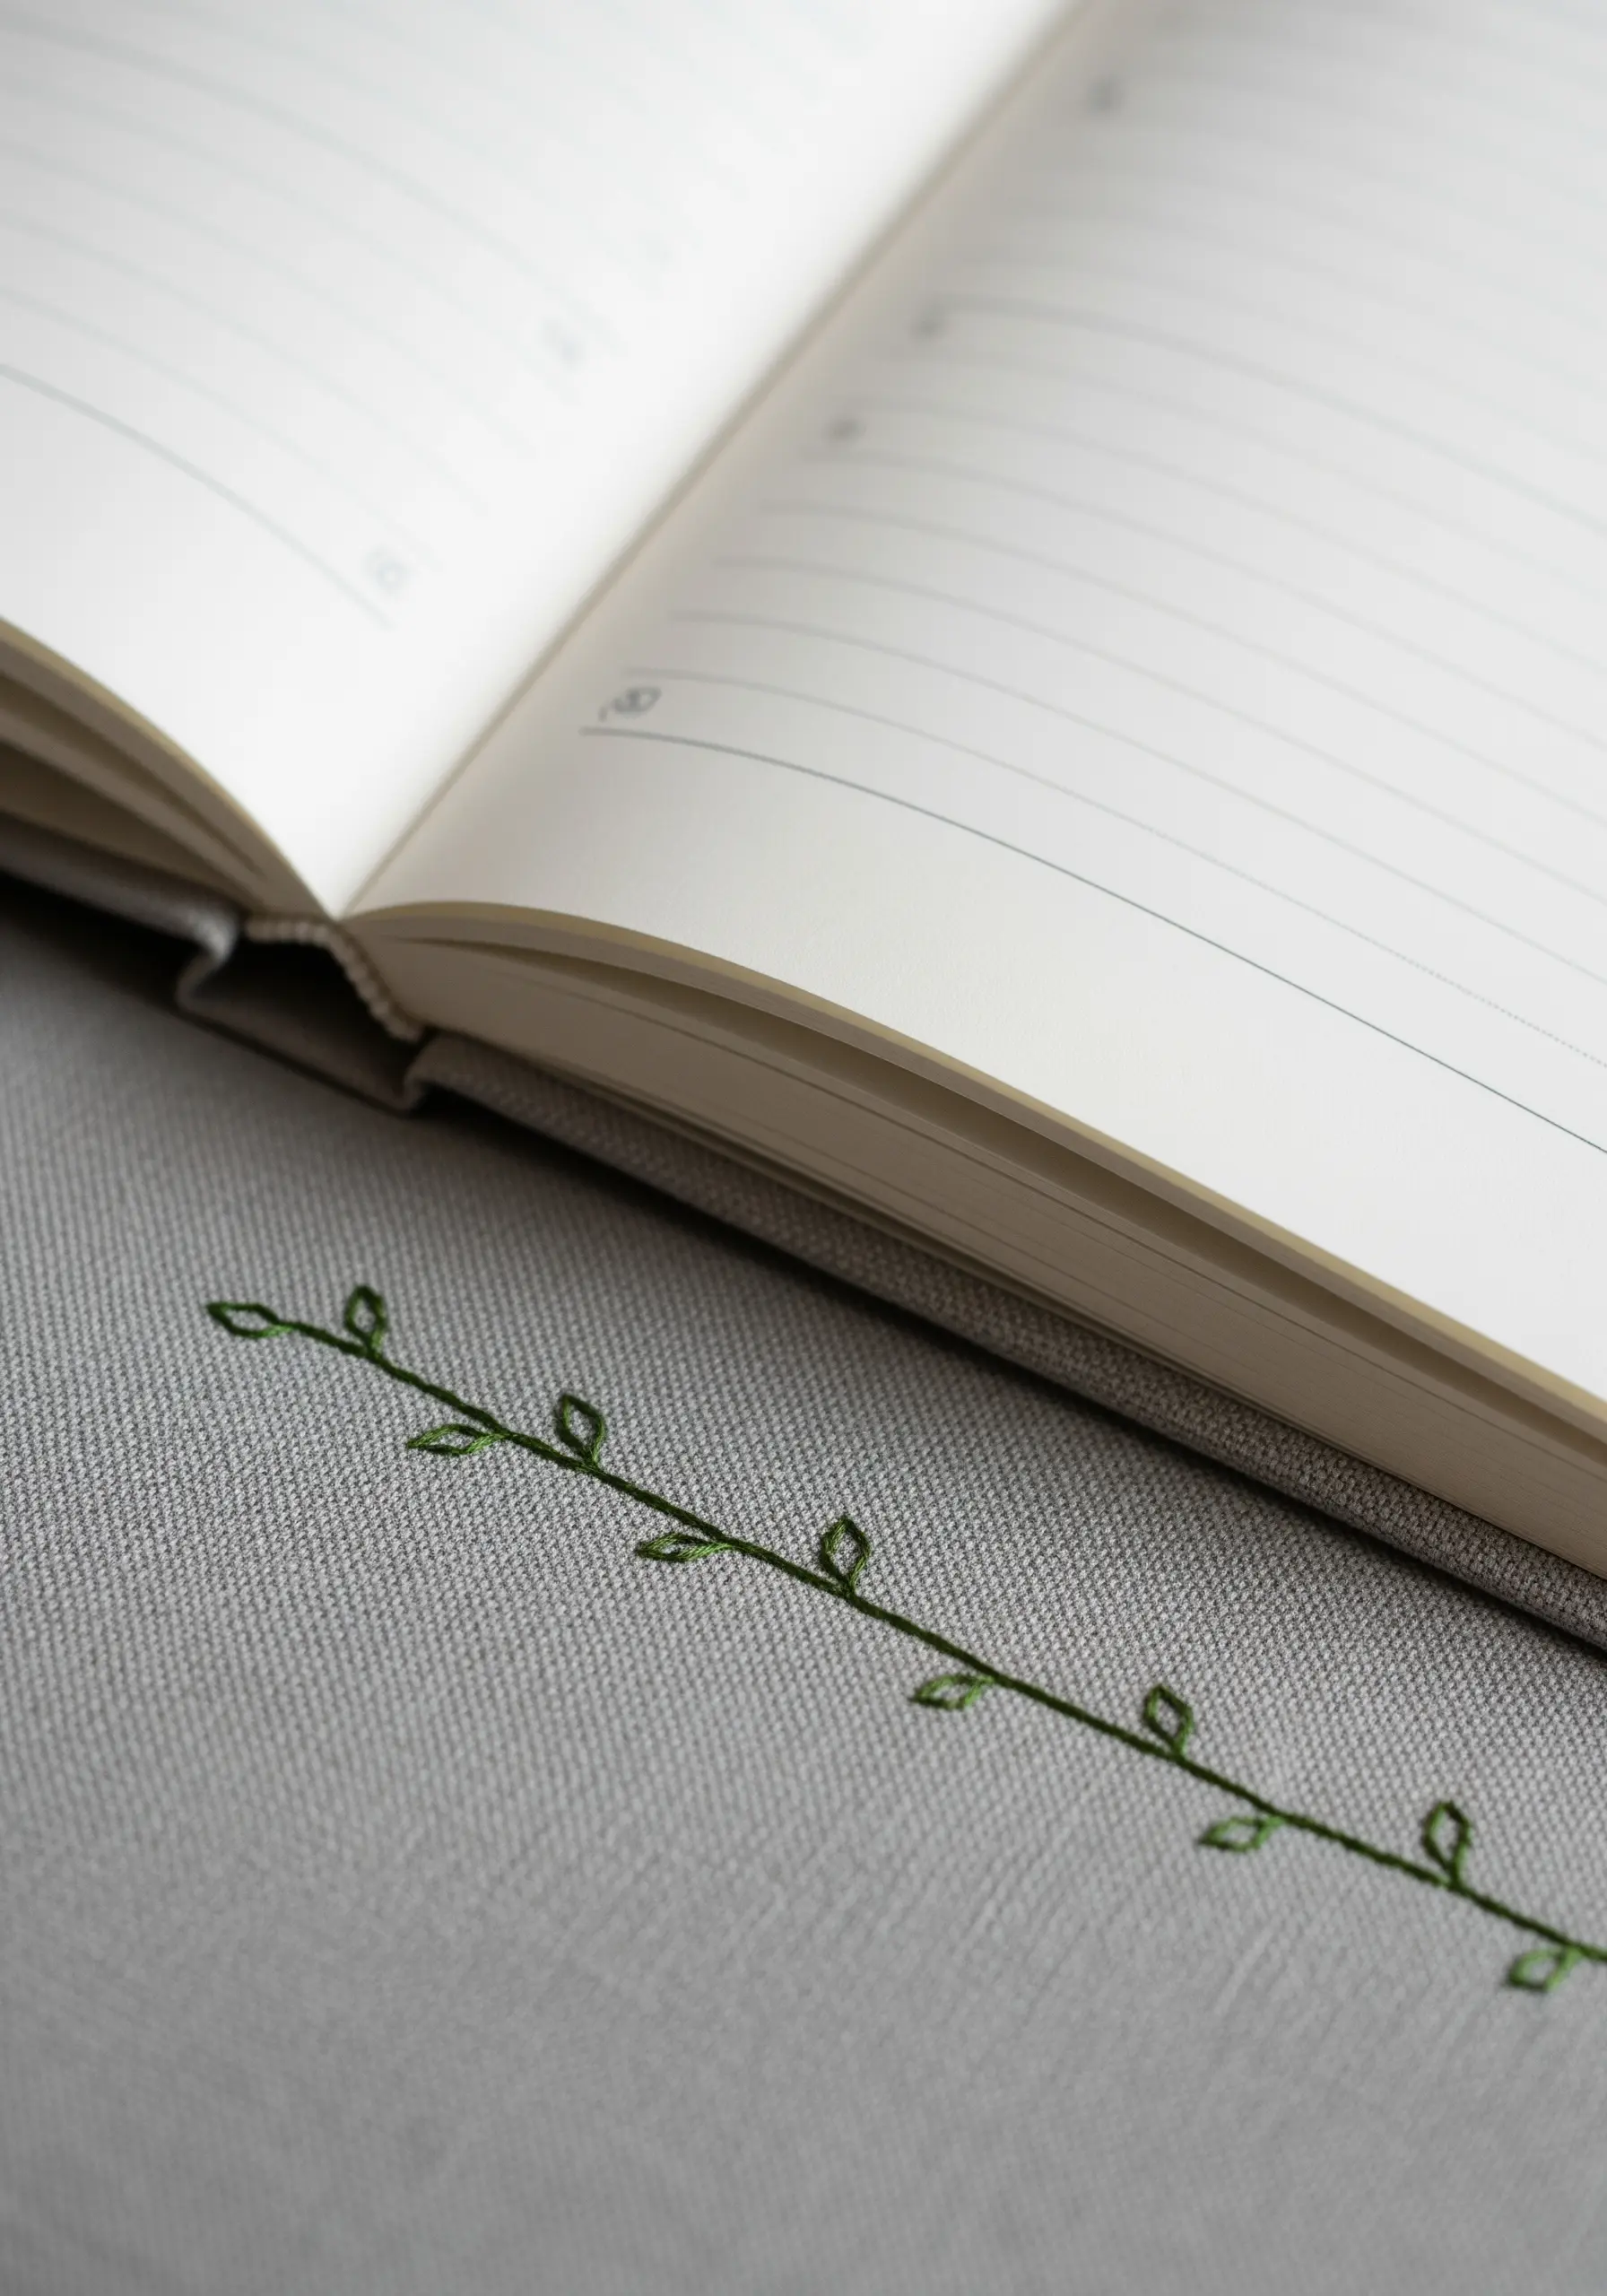
Embrace negative space with this ultra-minimalist vine, where simplicity is the focus.
Use a single strand of thread and a simple backstitch for the stem to keep the line crisp and delicate.
Form each leaf with just two straight stitches meeting at a point, creating an open, outlined shape.
This subtle accent is perfect for adding a touch of organic decor to journal covers or fabric corners without adding visual clutter.
12. The Geometric Leaf Tessellation
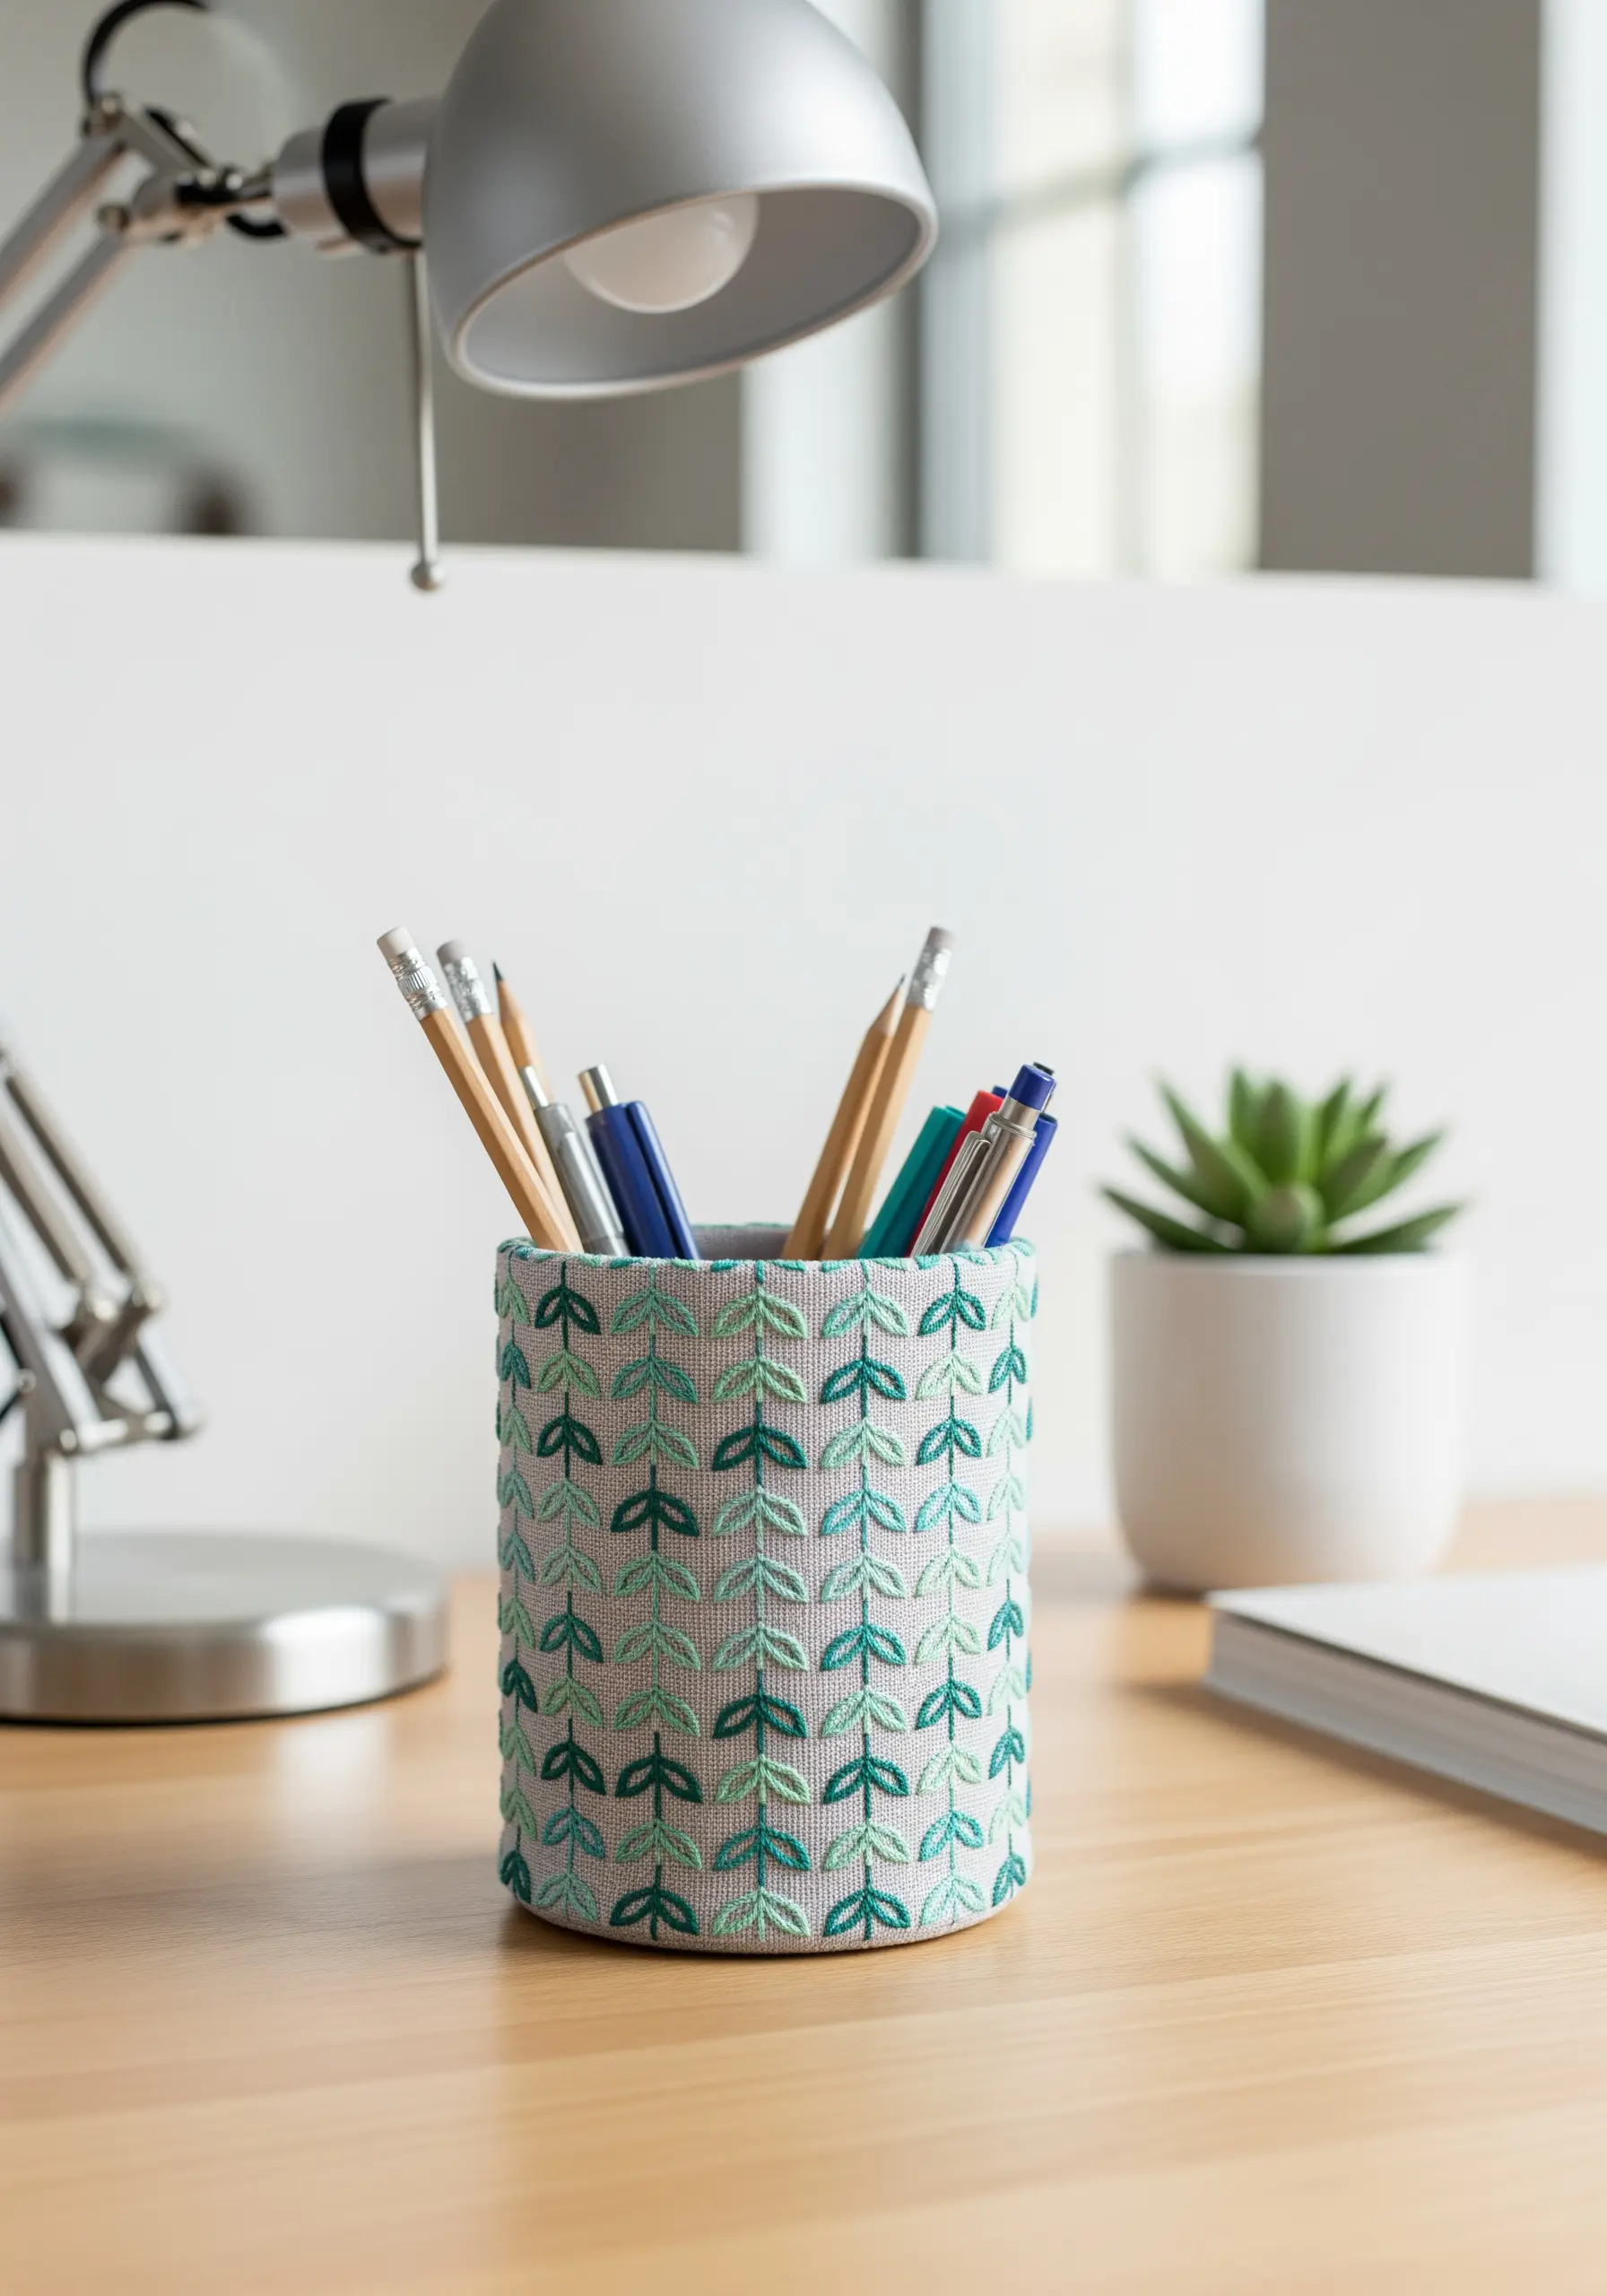
Cover a surface, like this pencil holder, with a repeating leaf pattern for a modern, graphic effect.
This design uses a basic fishbone stitch, but its power comes from the tessellation and color variation.
Alternate between two or three complementary colors in a regular pattern to create rhythm and visual interest.
This is a fantastic project for practicing stitch consistency, as the uniformity of the leaves is key to the overall design’s success.
13. The Rustic Burlap Oak Leaf
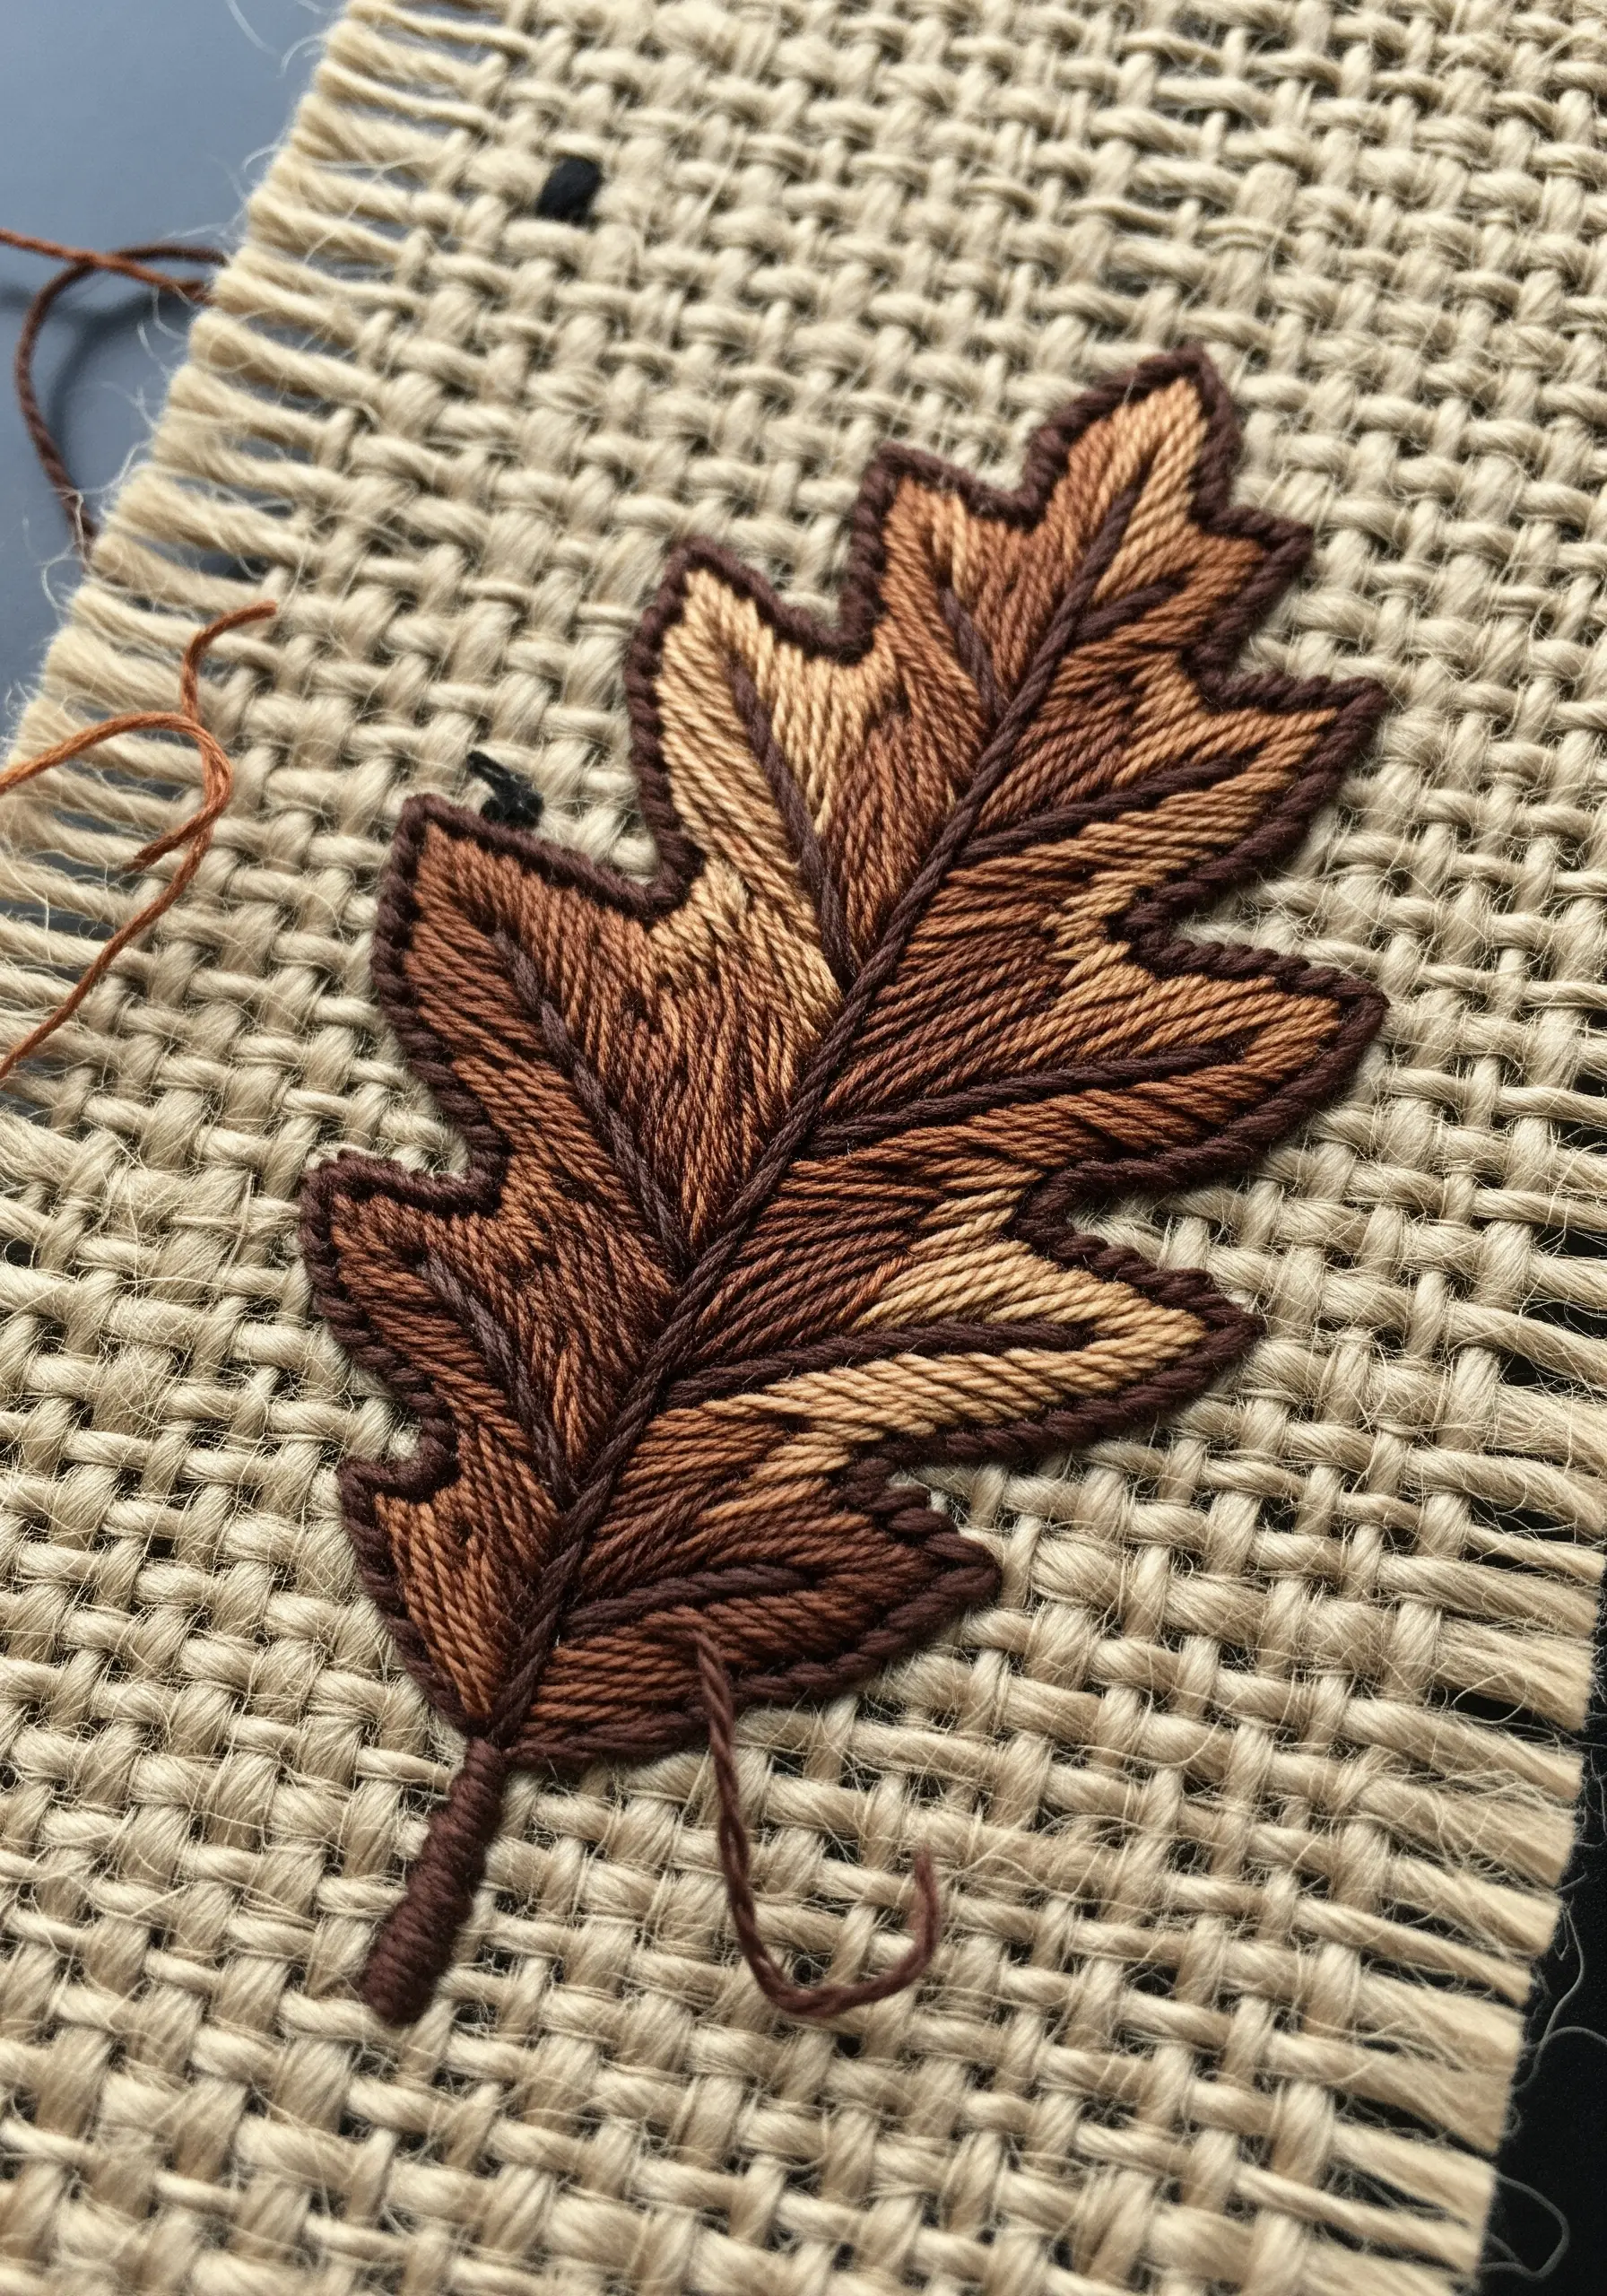
Embrace texture by stitching onto a coarse fabric like burlap or linen.
The open weave of burlap requires you to use more strands of floss (4-6) to get full coverage for your satin stitch.
Use a single, darker thread to outline the entire leaf with a stem stitch after filling it; this neatens the edges and defines the shape against the rough background.
The combination of smooth thread and rustic fabric creates a wonderful tactile contrast.
14. The Whispering Dandelion Seed
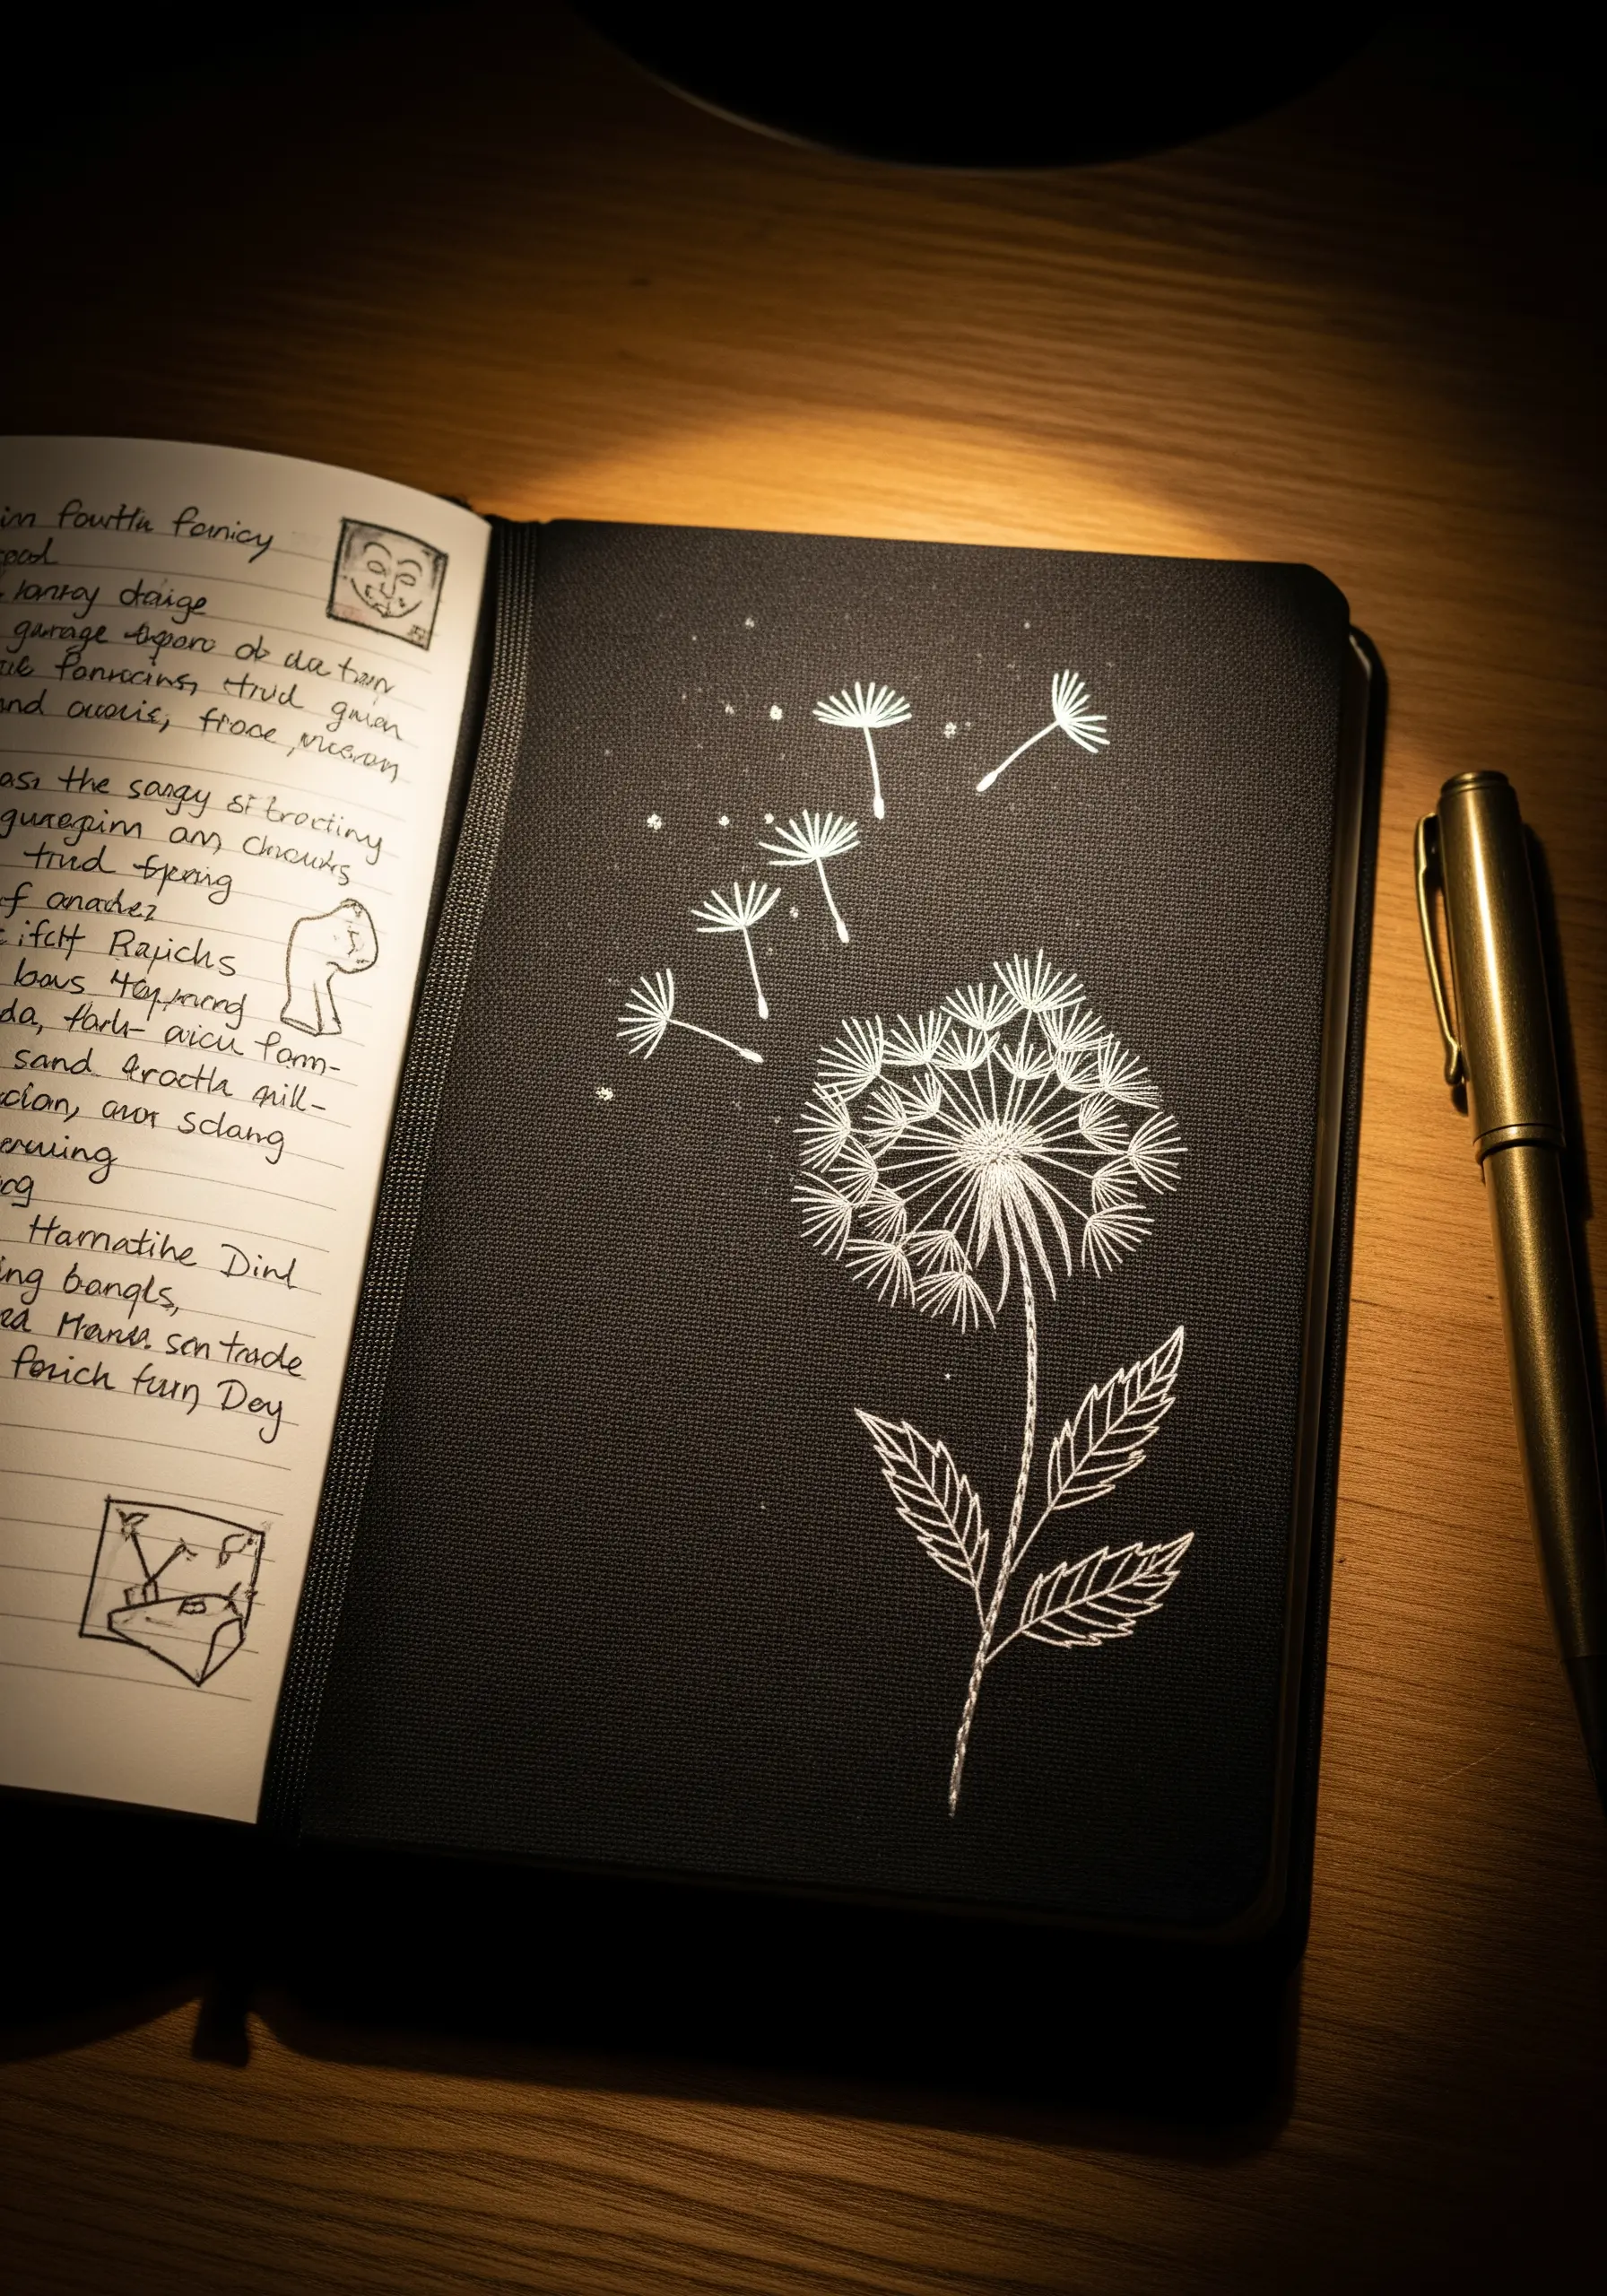
Create an ethereal, delicate effect by using a single strand of white or silver thread on a black journal cover.
For the dandelion head, use a combination of straight stitches and French knots to create a dense, fluffy center.
The floating seeds are made with just a few carefully placed stitches: a detached chain stitch for the parachute and a single straight stitch for the seed itself.
This design beautifully captures a sense of lightness and motion.
15. The Felt Leaf Garland
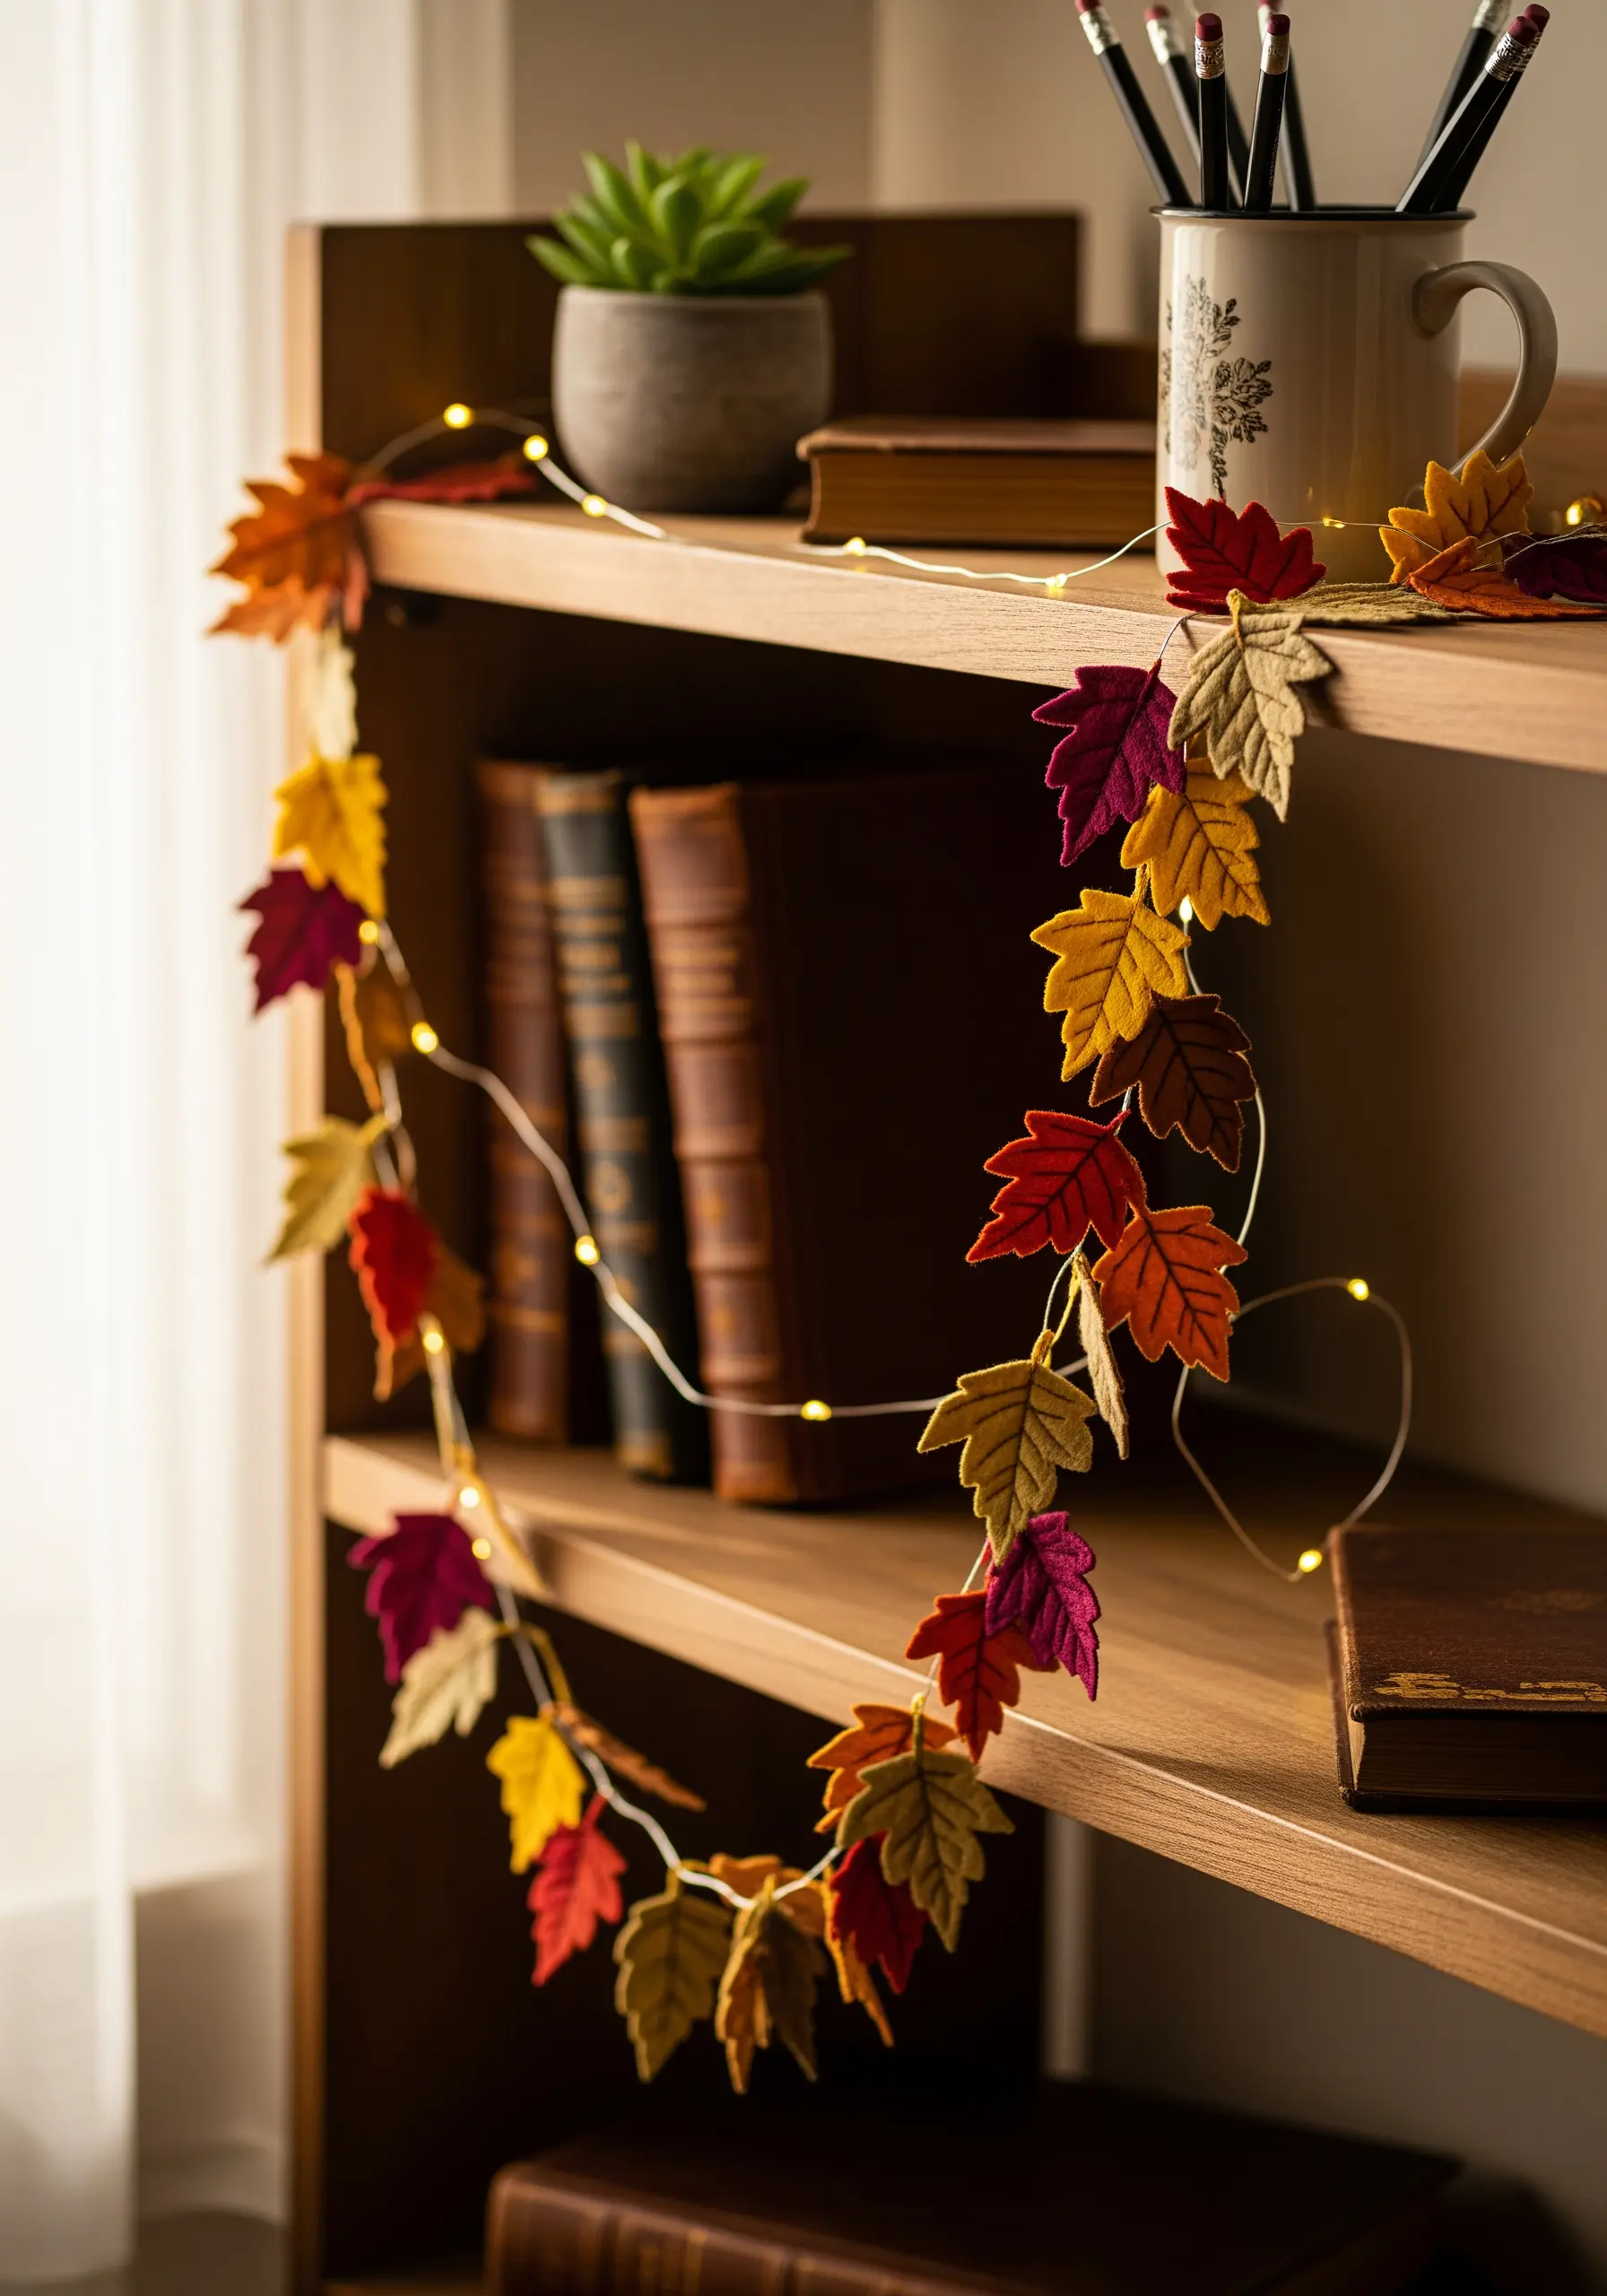
Move beyond the hoop by creating a three-dimensional garland for your study corner.
Cut leaf shapes from various colors of felt, which won’t fray and is easy to work with.
Add simple veins to each leaf using a contrasting thread and a basic backstitch or straight stitches—a little detail goes a long way.
You can then string the leaves onto thread or twine, or attach them to a set of fairy lights for a cozy, magical glow.
16. The Wisteria Blossom Bookmark
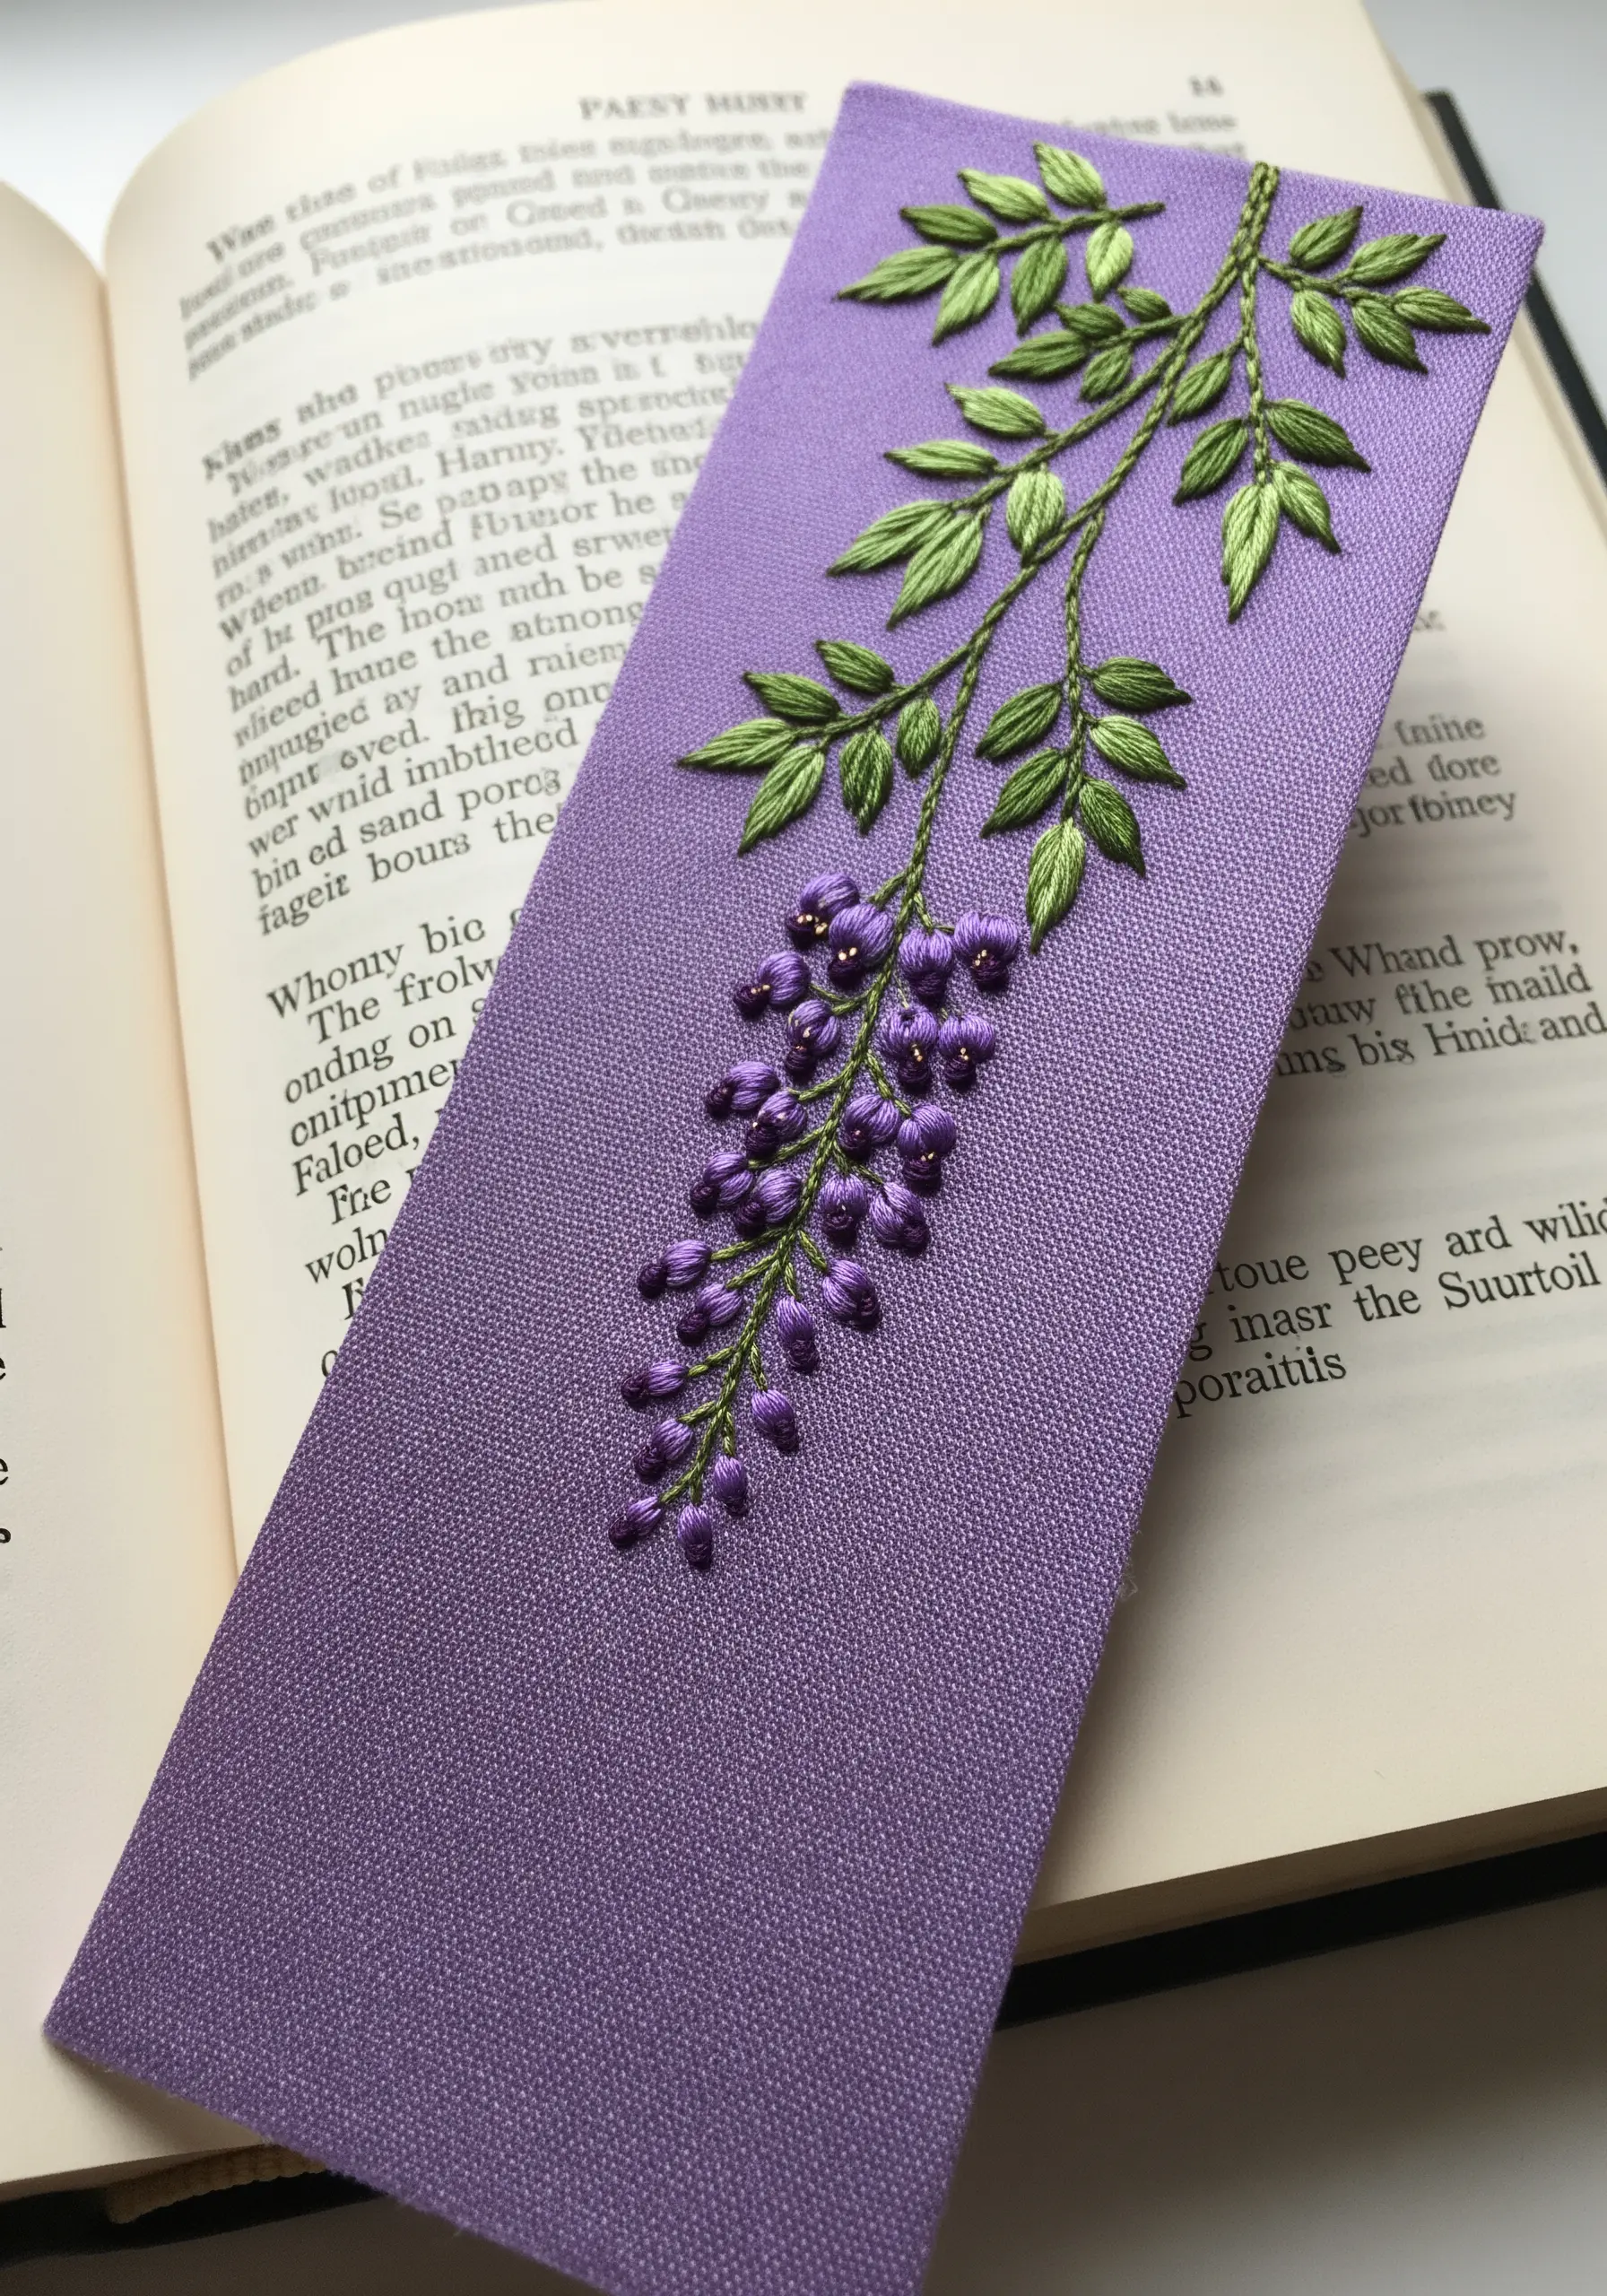
Achieve the beautiful drape of wisteria by using clusters of French knots for the blossoms.
Vary the shades of purple, using darker tones at the top of the cluster and lighter ones at the bottom to create a natural gradient.
For the leaves, a simple fishbone stitch in a vibrant green provides a lovely contrast to the soft texture of the knots.
A few tiny gold seed beads or French knots can be added among the blossoms for a hint of sparkle.
17. The Cheerful Sunflower Cluster
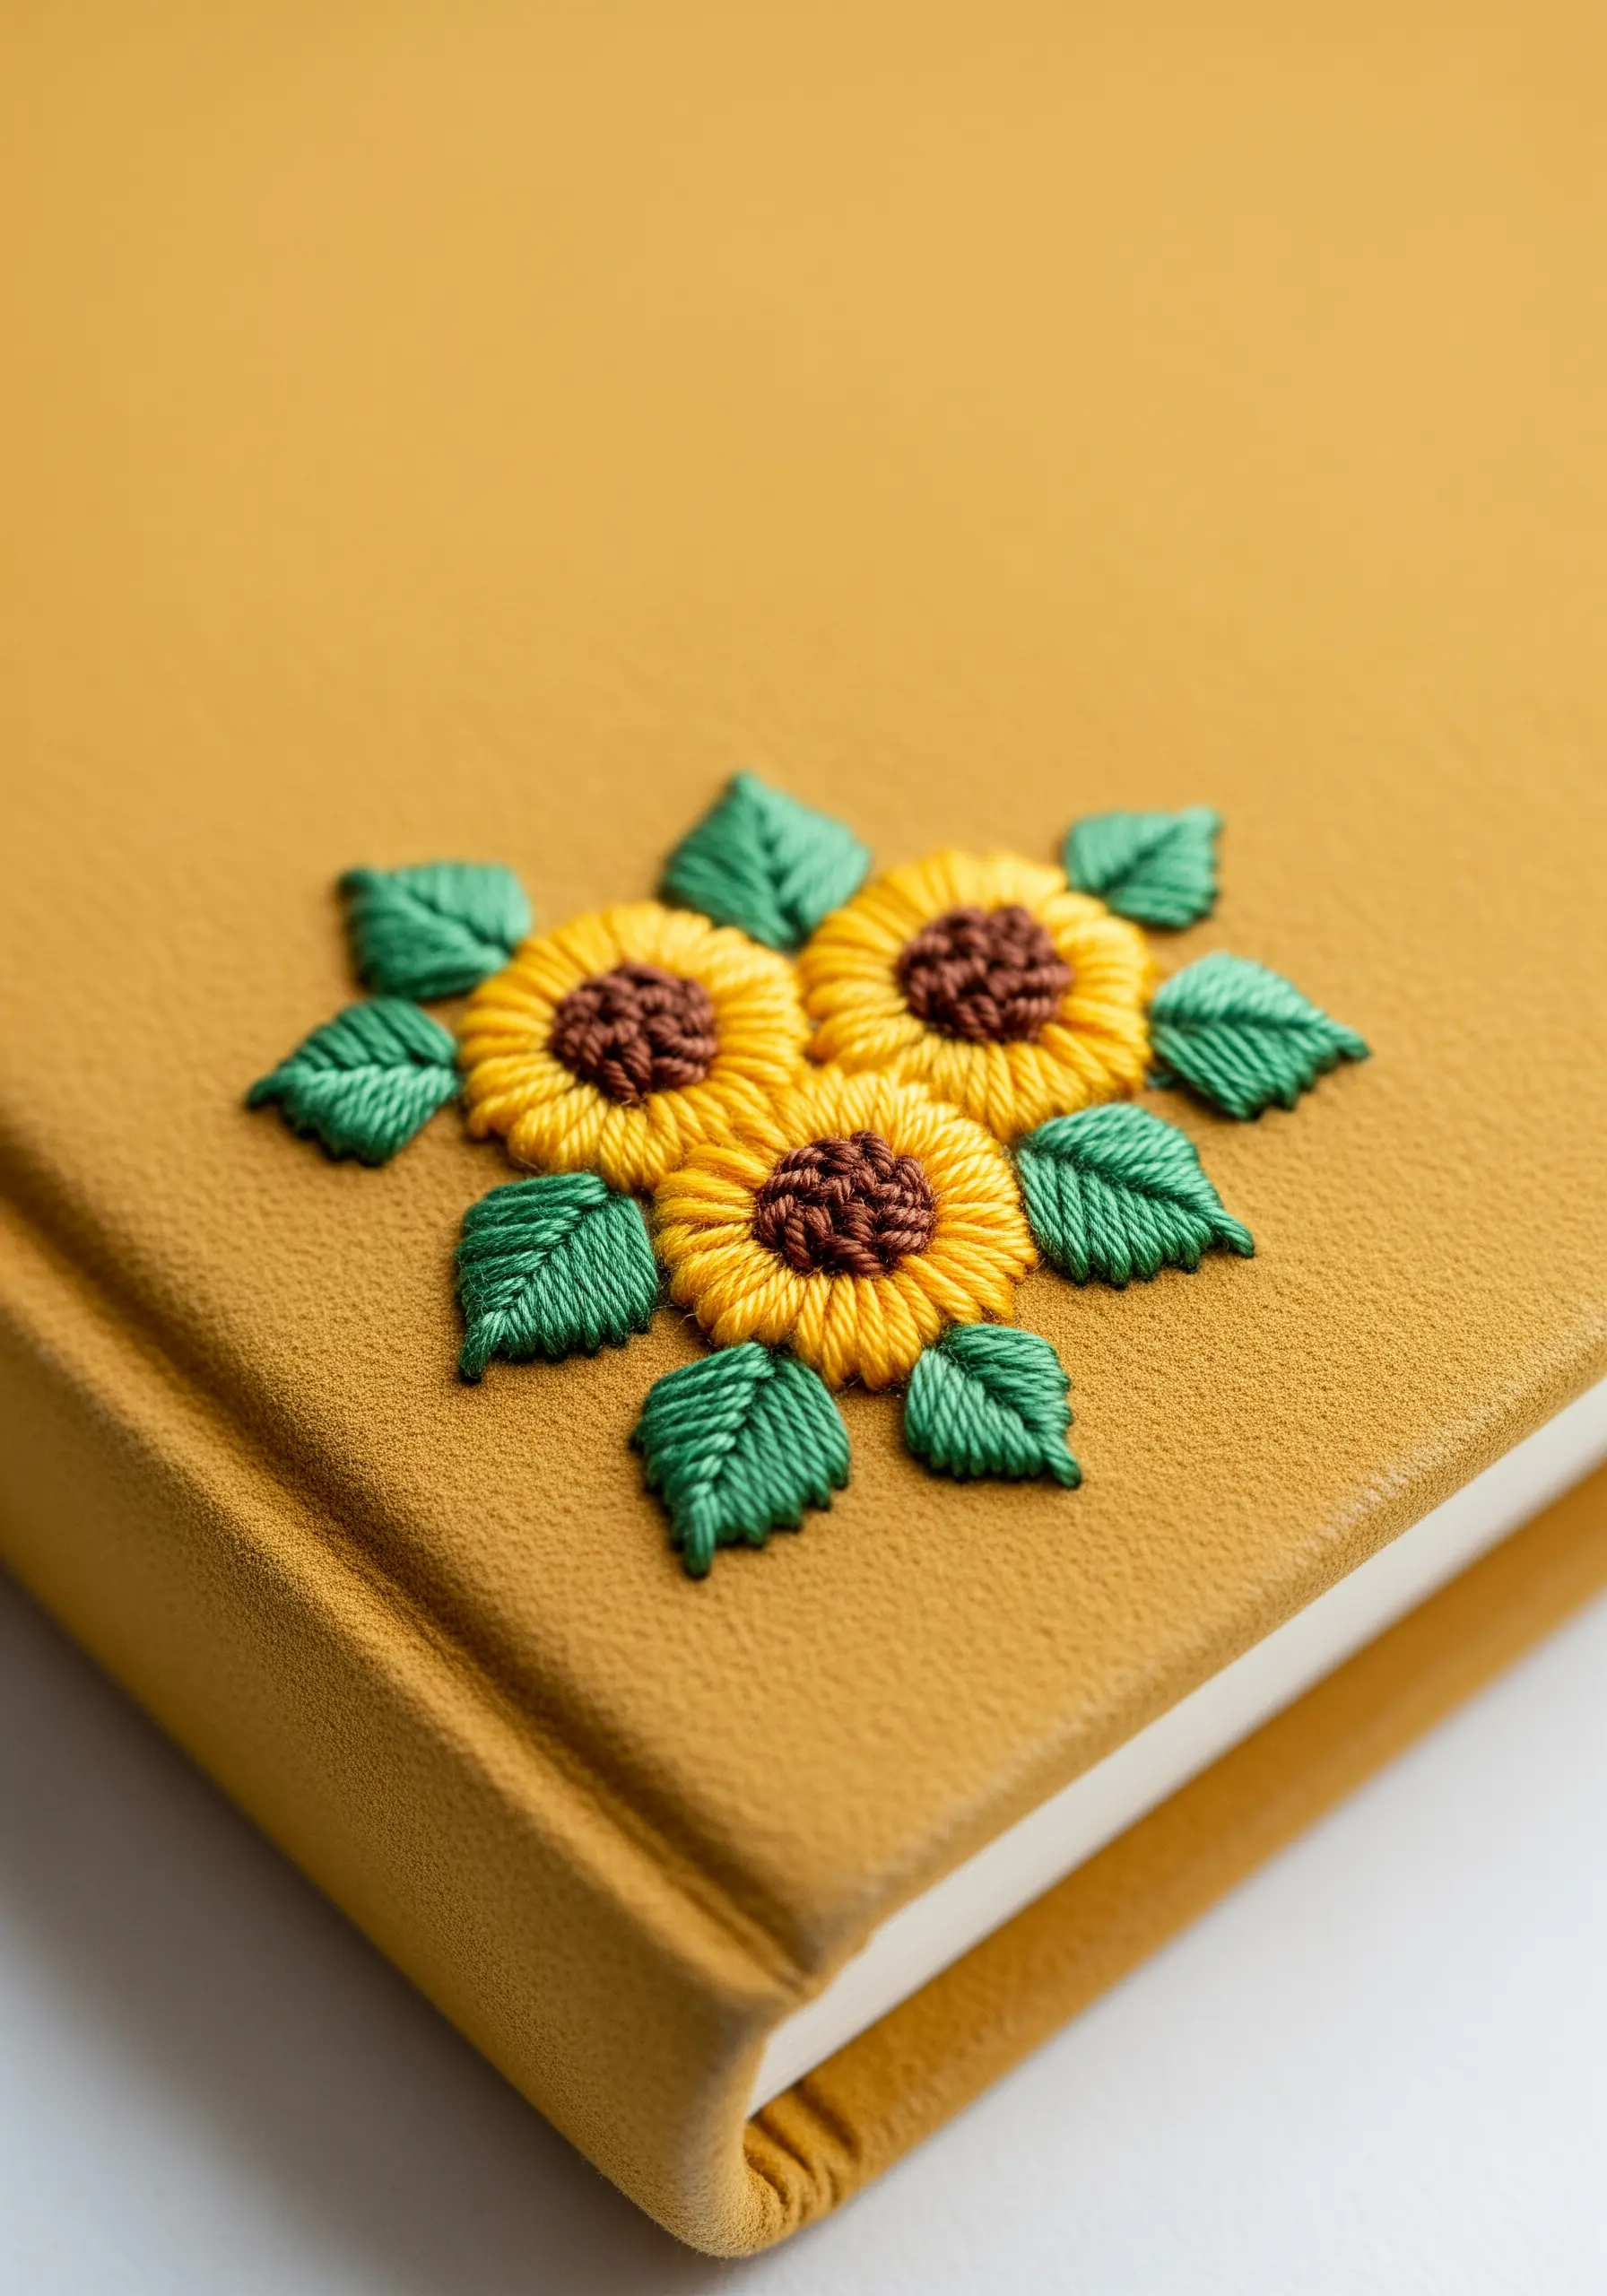
Create bright, cheerful sunflowers by arranging detached chain stitches in a circle for the petals.
Fill the center with a dense patch of French knots in a dark brown to mimic the texture of sunflower seeds.
For a more dynamic composition, slightly overlap the flowers and leaves to create a sense of depth.
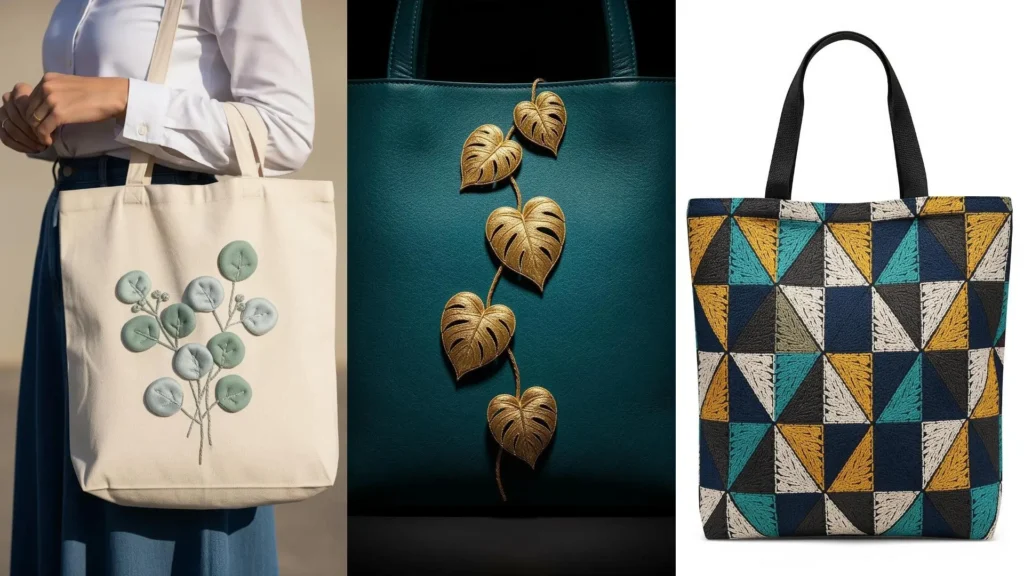
This vibrant motif is perfect for adding a pop of color to a plain journal or tote bag.
18. The Botanical Sampler Wall Hanging
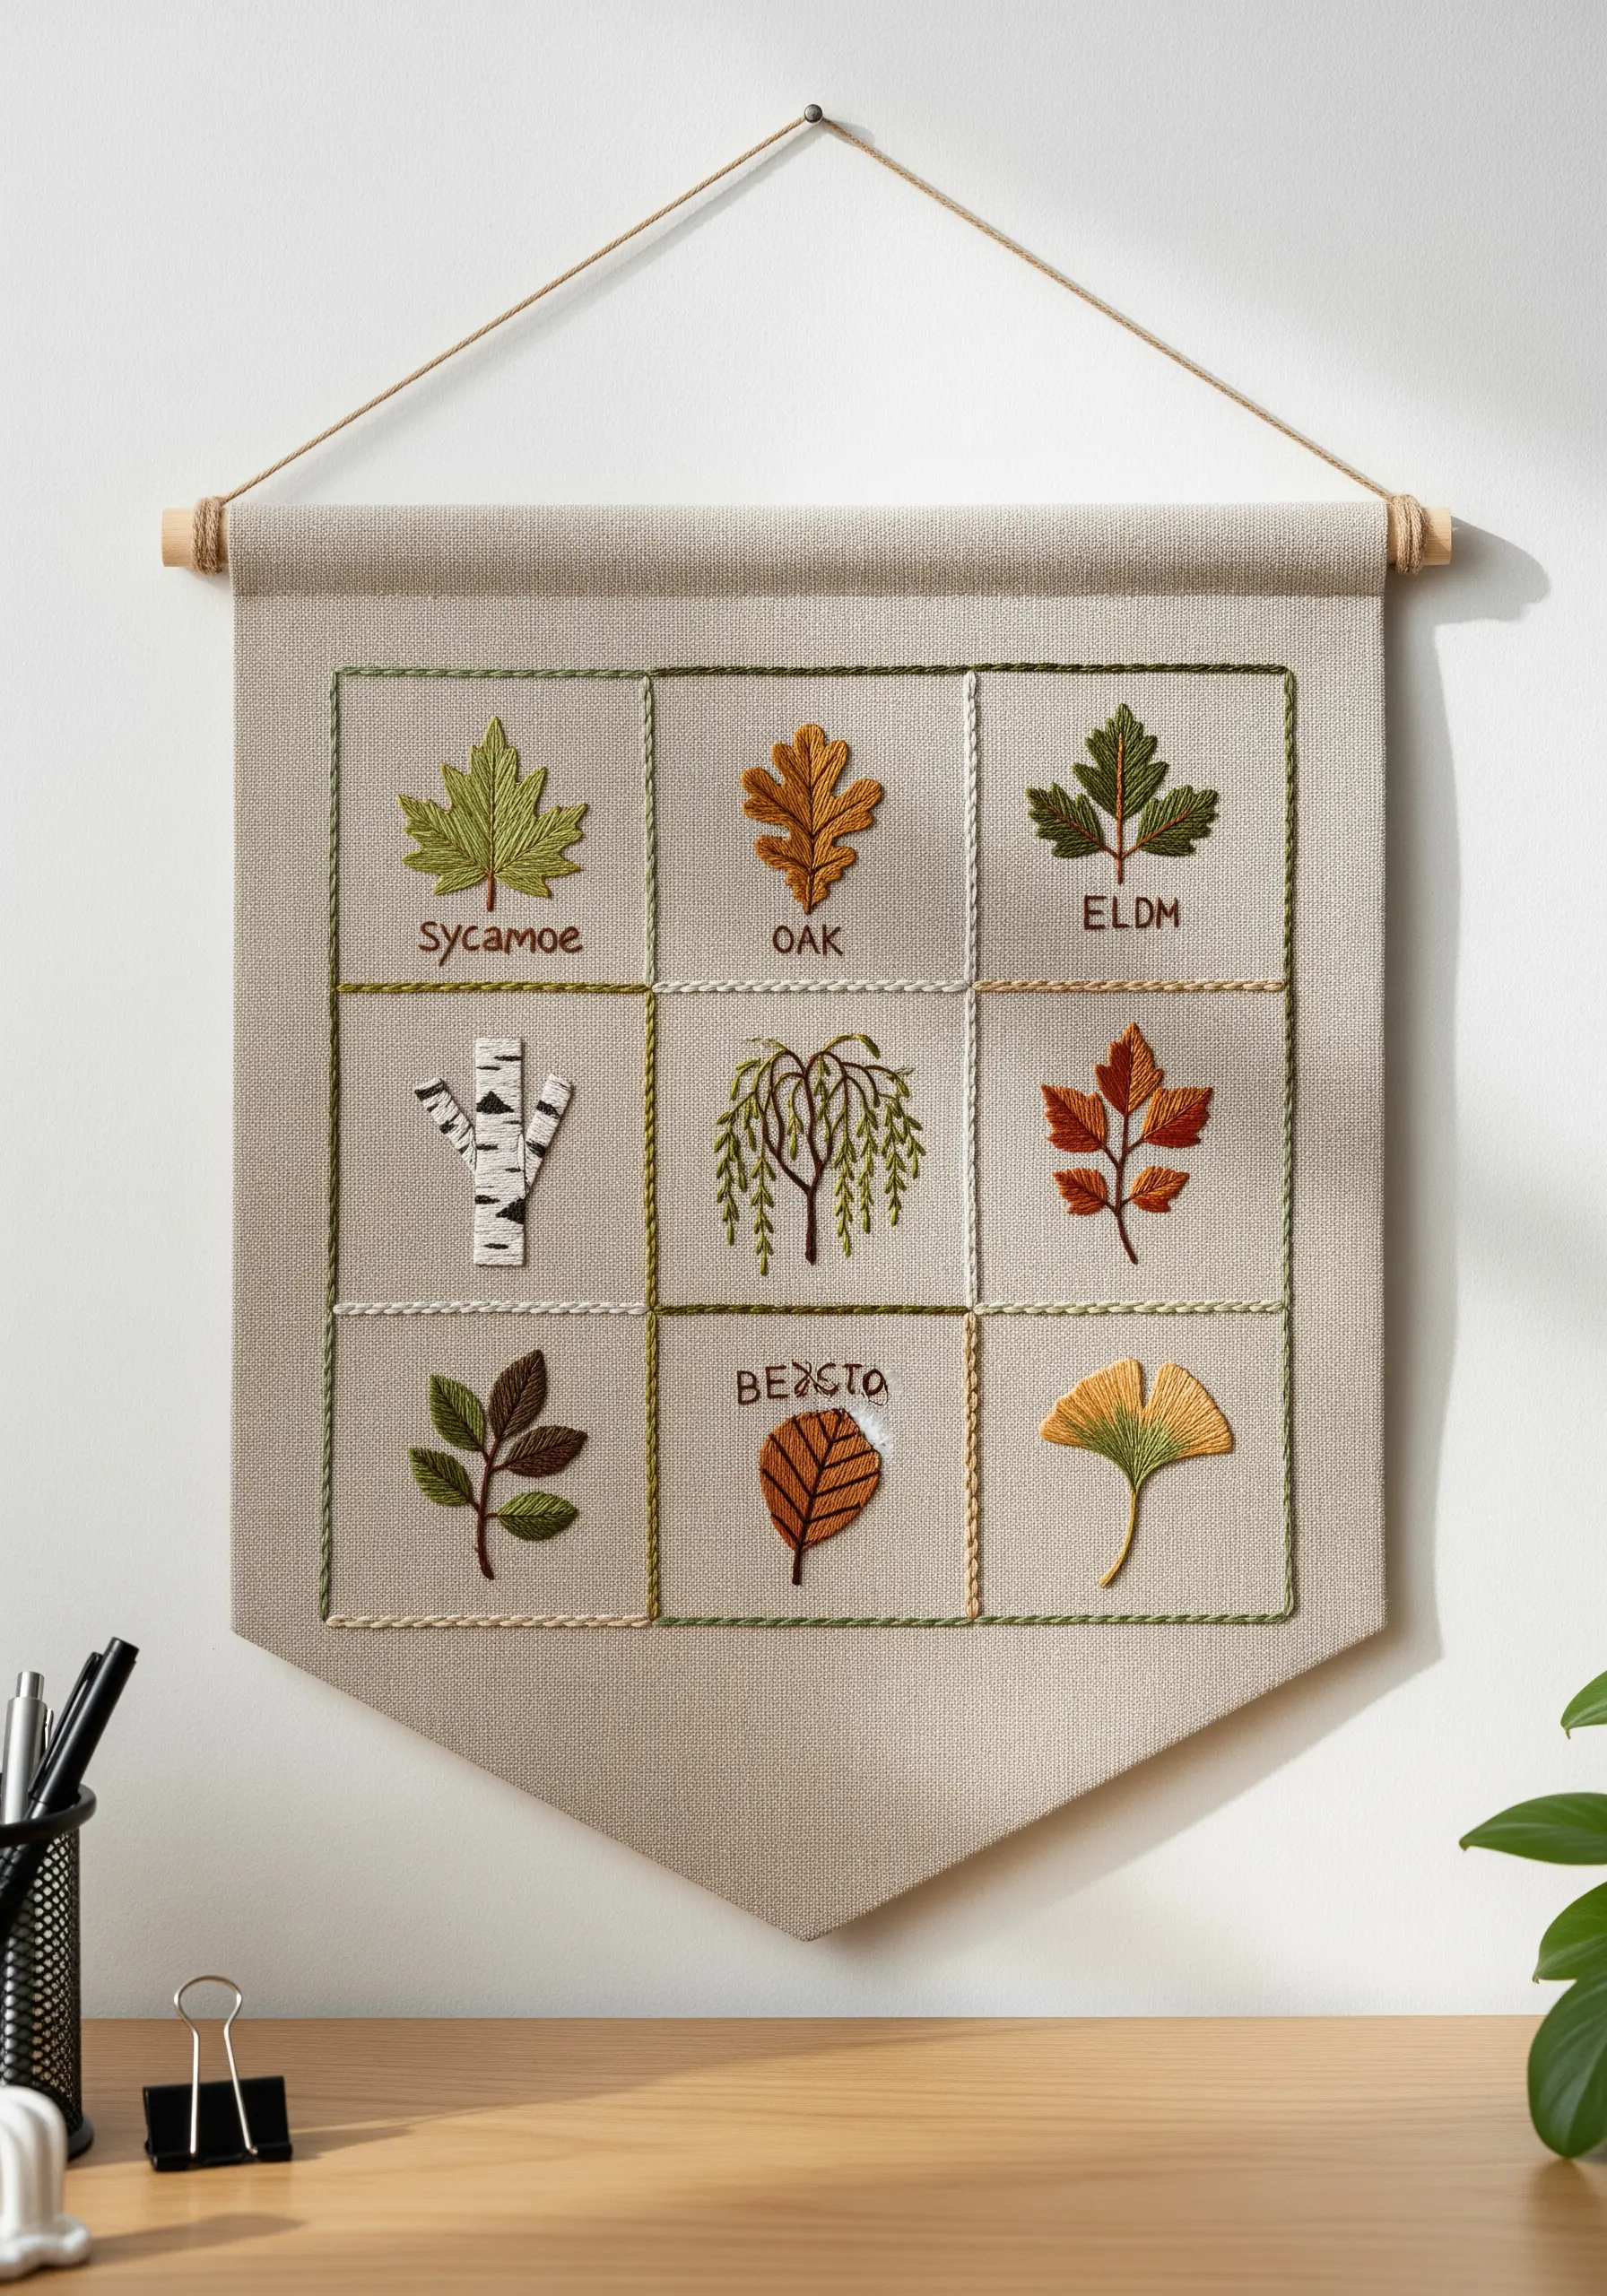
Design a modern sampler by dividing your fabric into a grid and dedicating each square to a different leaf or tree study.
This is a perfect opportunity to experiment with a variety of stitches: try satin stitch for a maple leaf, long-and-short stitch for a birch trunk, and French knots for a willow tree.
Use a simple backstitch for the grid lines and lettering to maintain a clean, organized look.
This project becomes a beautiful reference piece and a testament to your growing skills.
19. The Festive Holly Corner
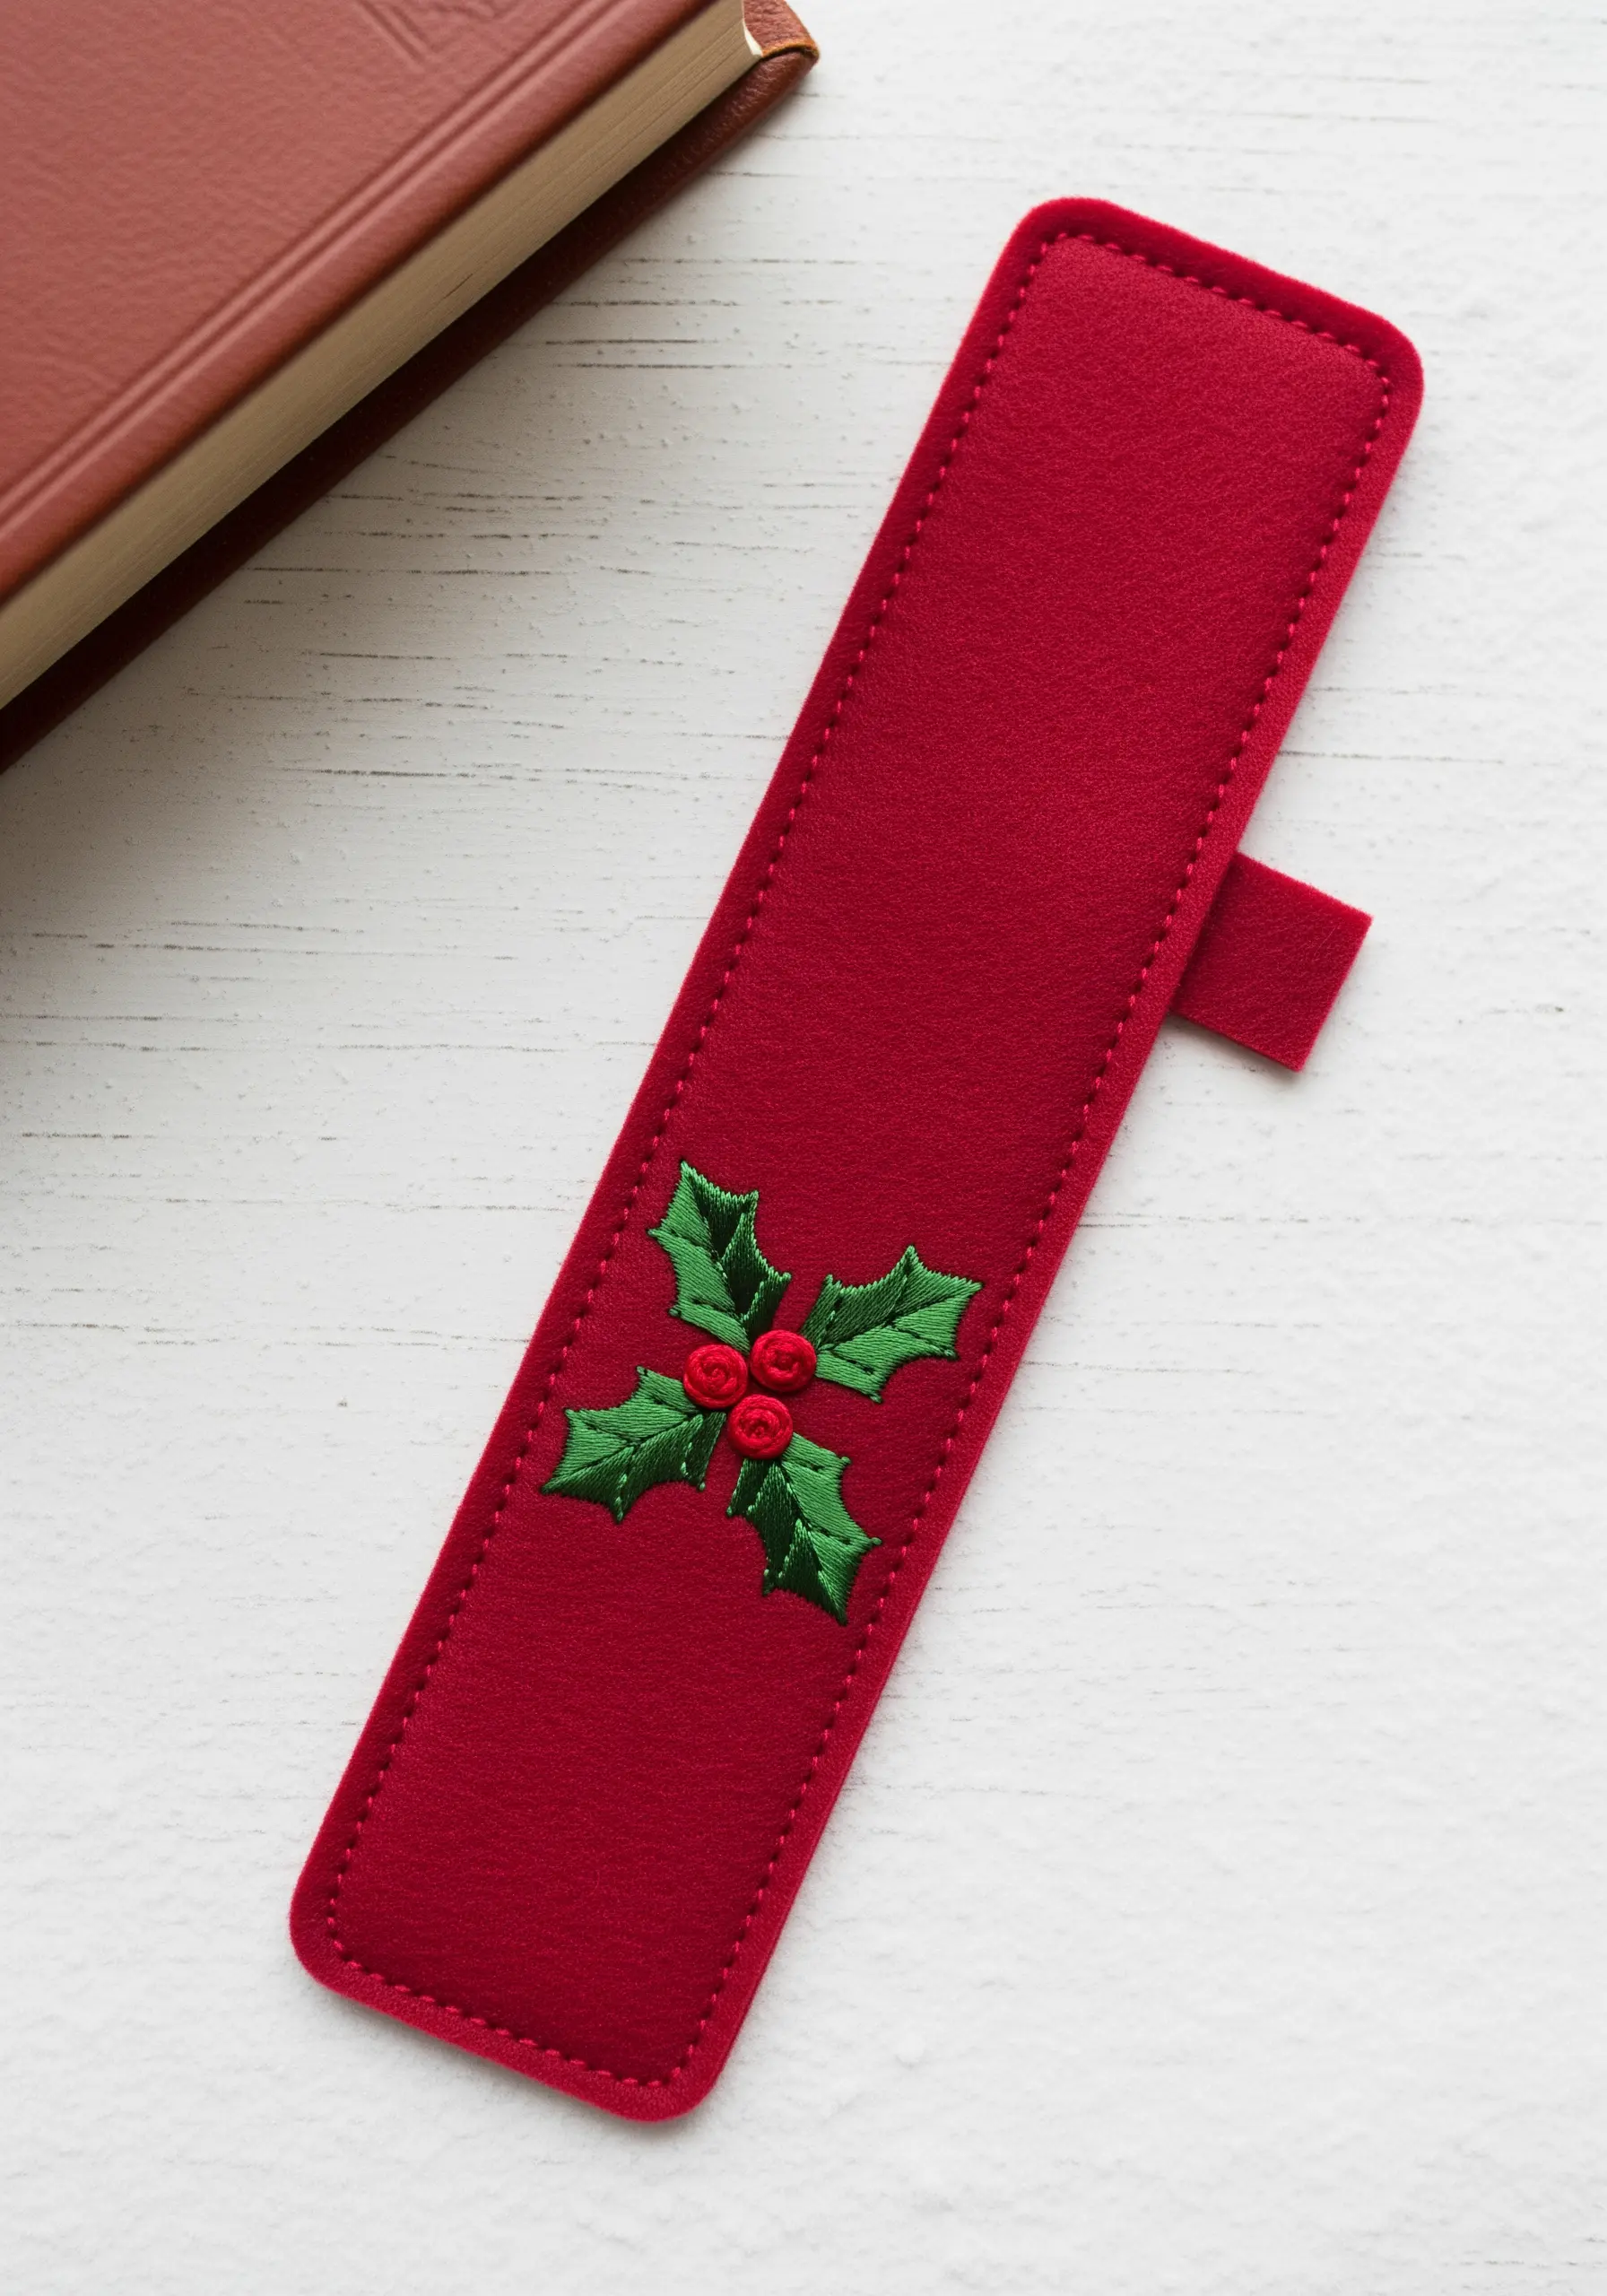
Add a touch of seasonal cheer with a classic holly motif on a felt bookmark sleeve.
Use a sharp, defined satin stitch for the leaves, making sure to create crisp points for the iconic holly shape.
Three bright red French knots or satin-stitched circles create the perfect cluster of berries.
Stitching the sleeve together with a simple running stitch along the edge adds a charming, handcrafted detail.
20. The Solitary Monstera Leaf
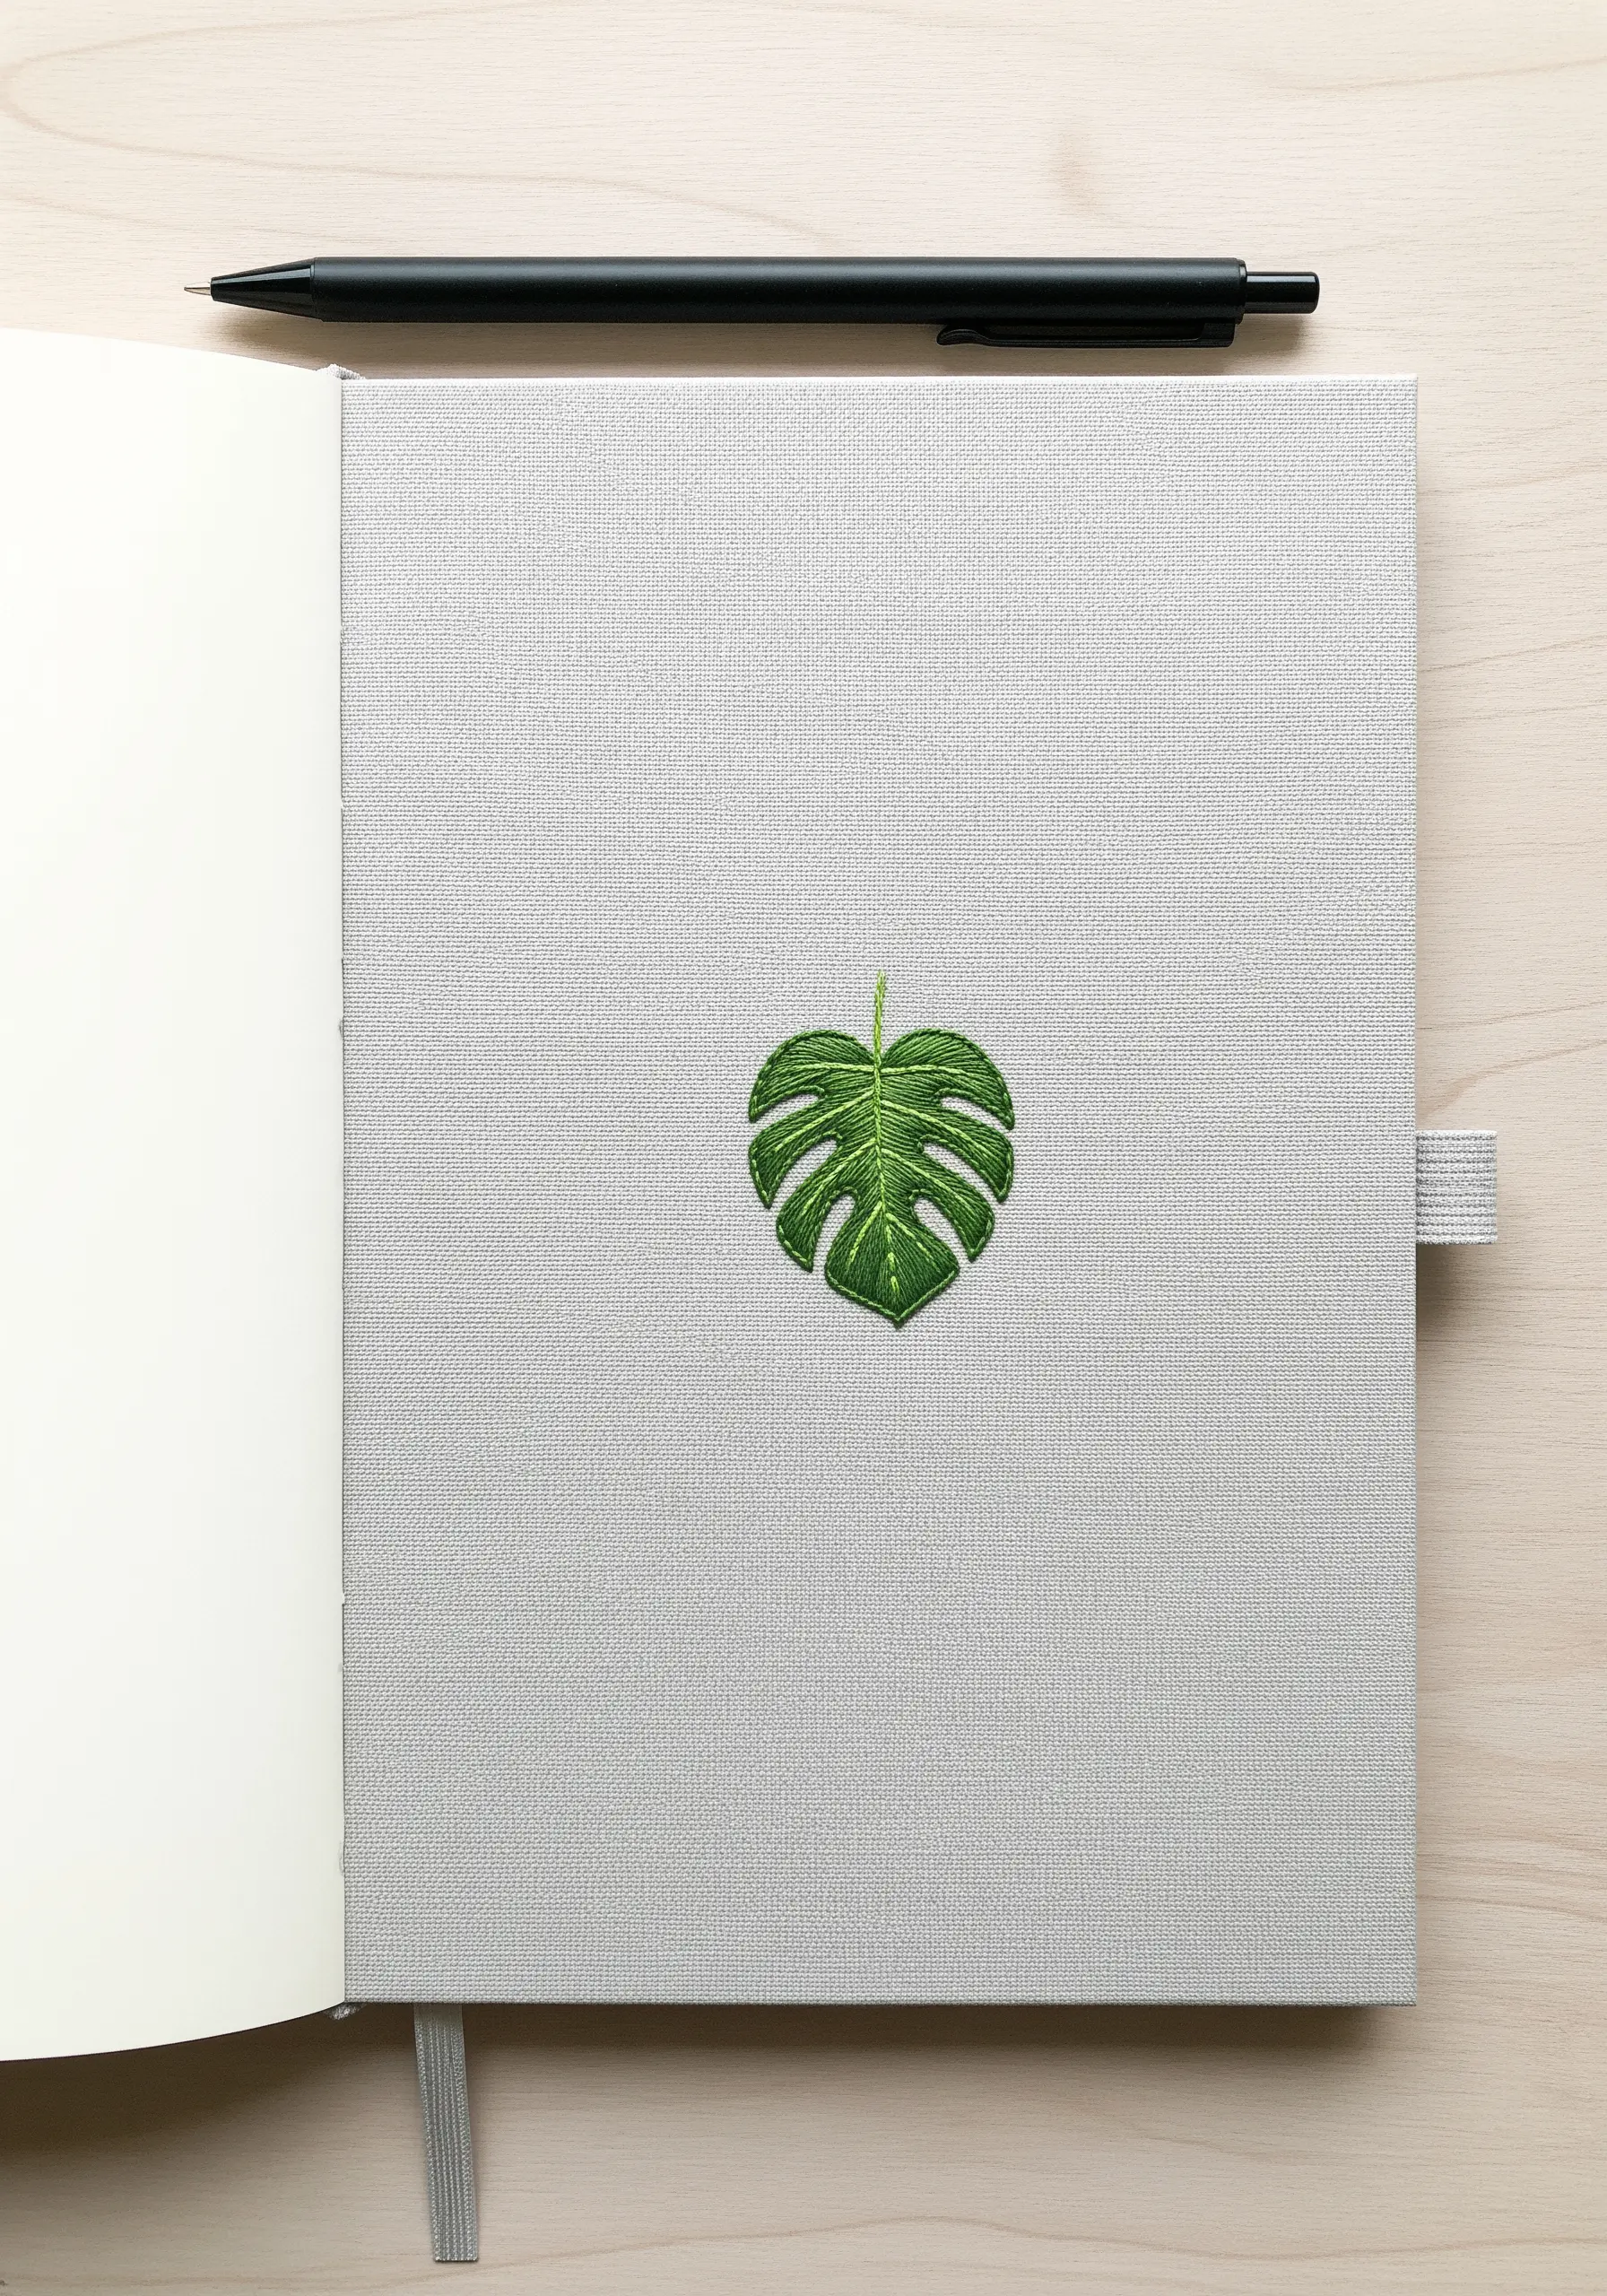
Capture the iconic shape of a Monstera leaf by focusing on the negative space within the design.
First, outline the leaf and its characteristic splits with a split stitch. Then, fill the shape with a long-and-short stitch, carefully working around the openings.
Use two or three shades of green to add subtle shading and highlight the veins, giving the leaf a more realistic appearance.
A single, beautifully executed motif like this makes a powerful modern statement.
21. The Delicate Wreath Placemat
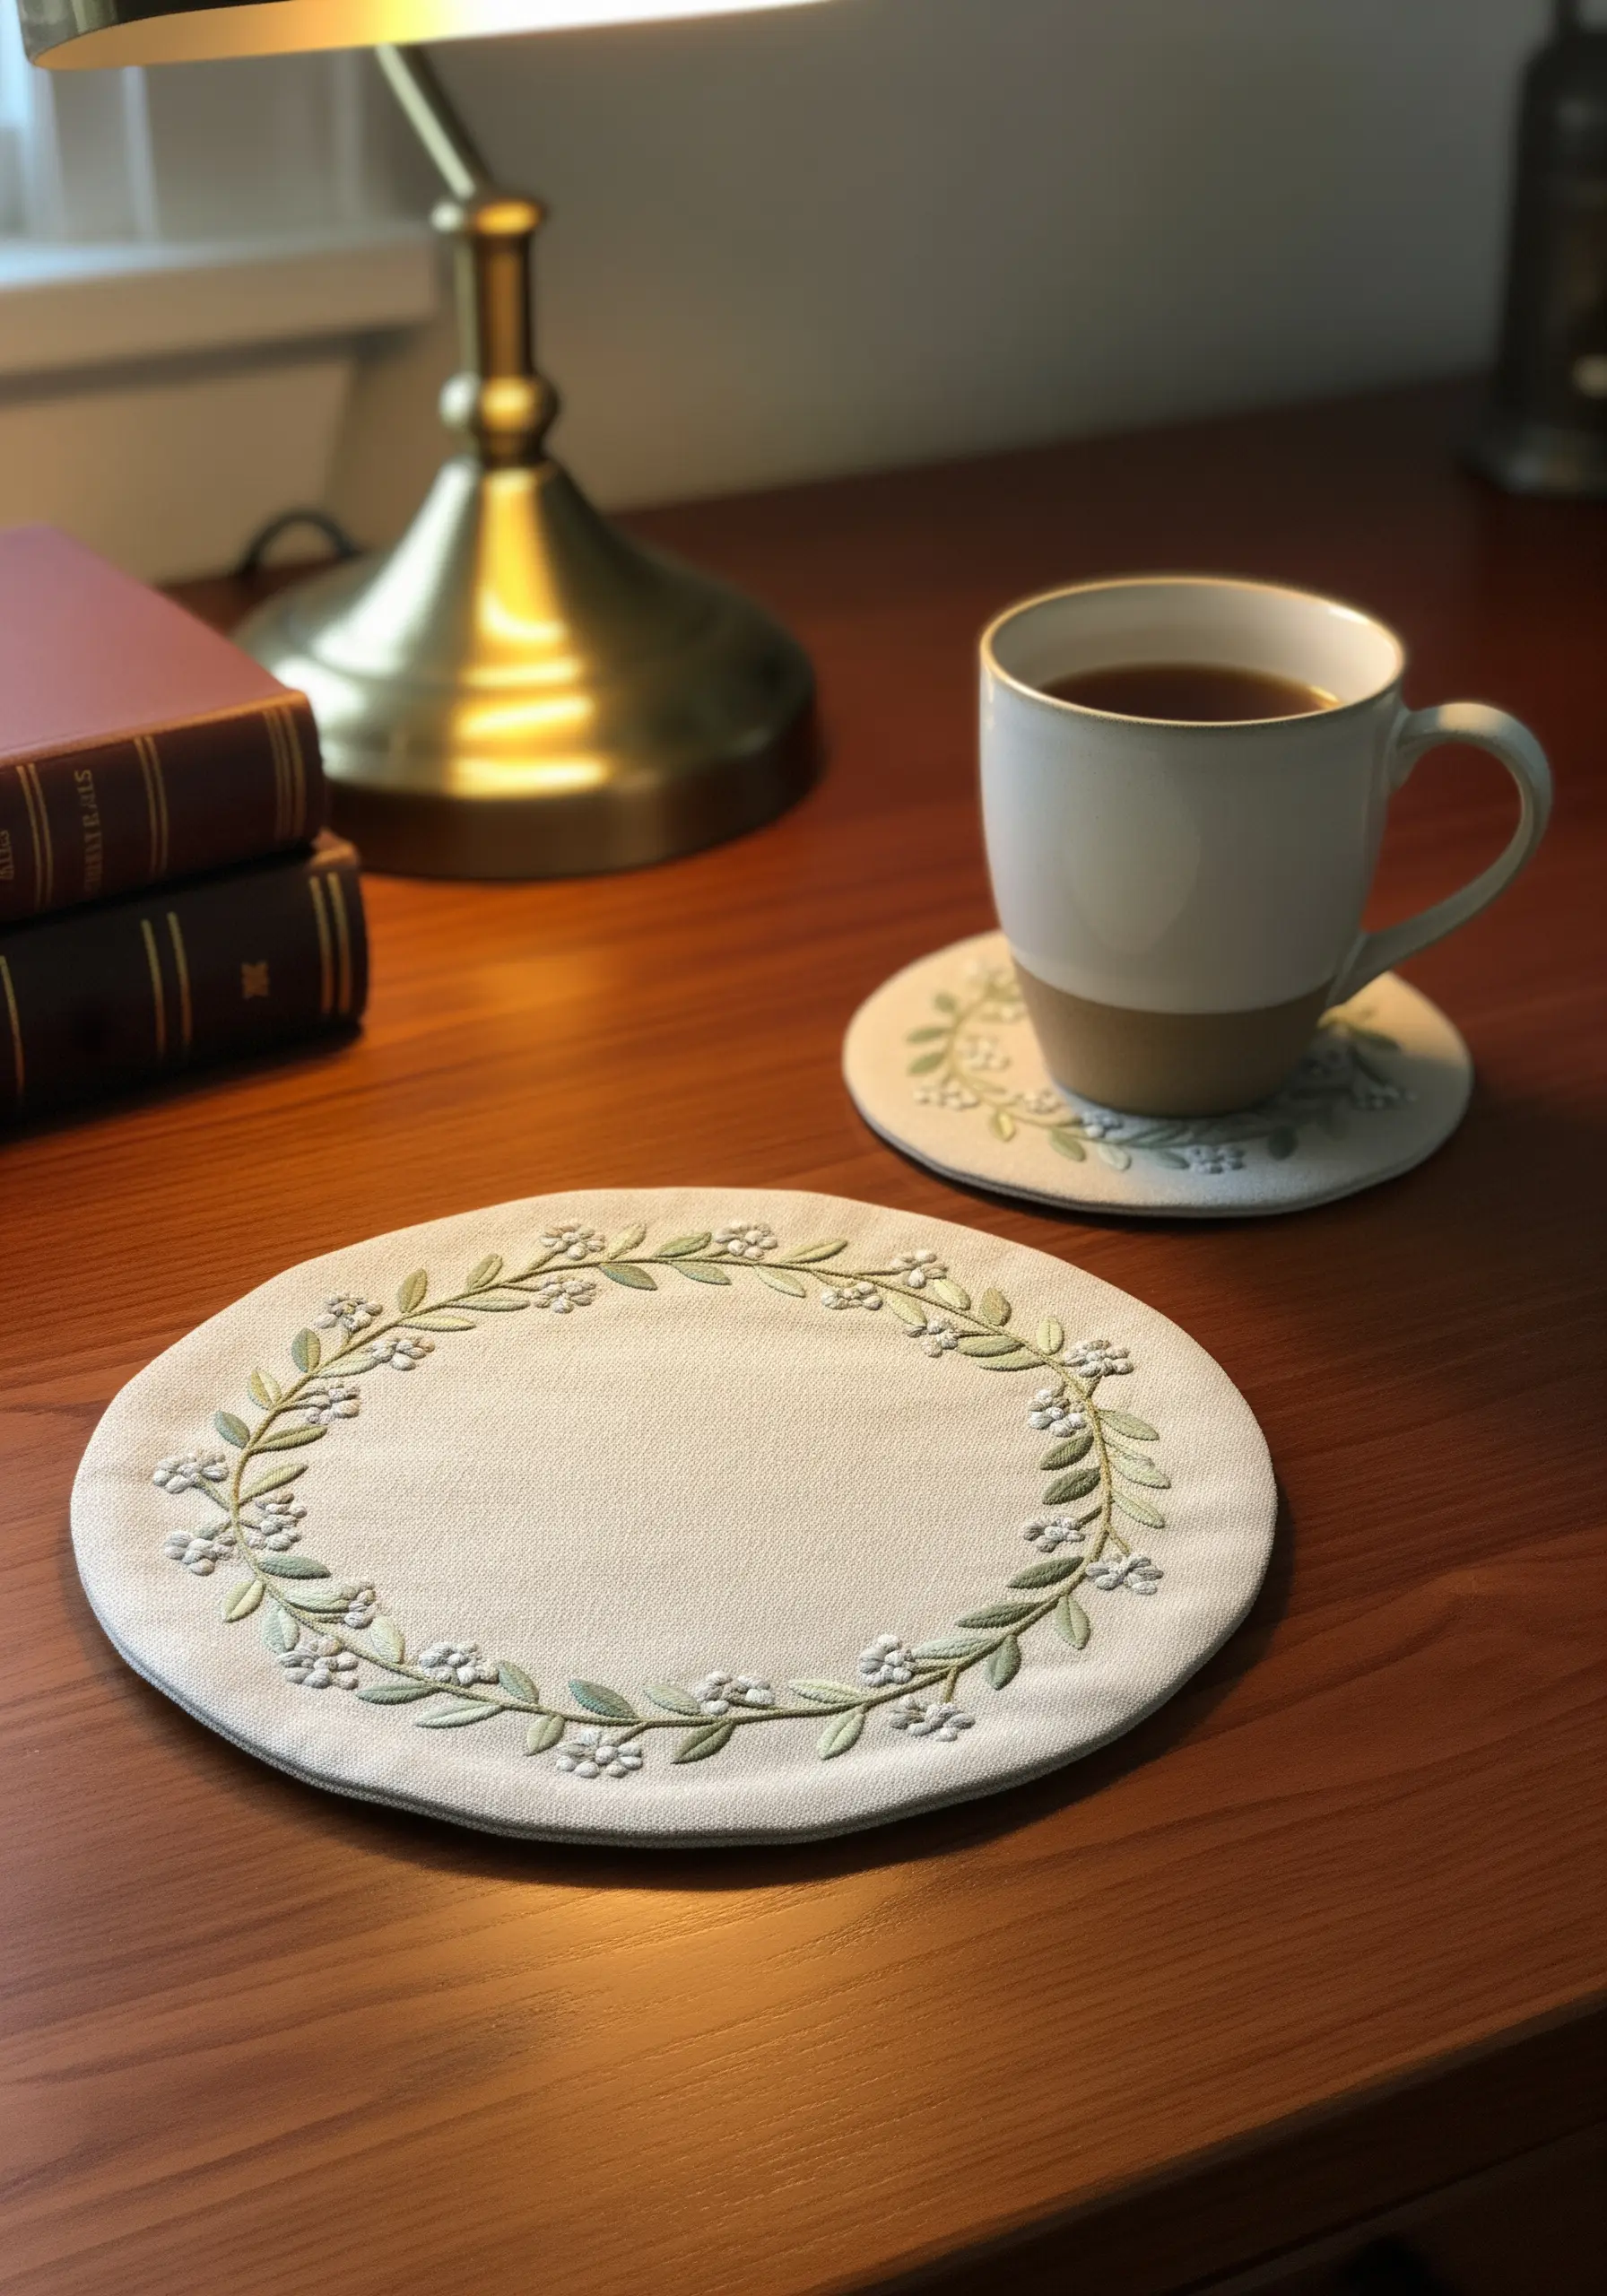
Frame a placemat or coaster with a delicate, continuous wreath of leaves and berries.
Use a simple stem stitch for the winding vine to ensure a smooth, unbroken line.
Alternate between small leaf shapes (made with two straight stitches) and tiny white French knots for the berries to create a light, airy pattern.
This understated elegance enhances your table setting without overwhelming it, perfect for a quiet study corner or tea time.
22. The Unfurling Fiddlehead Fern
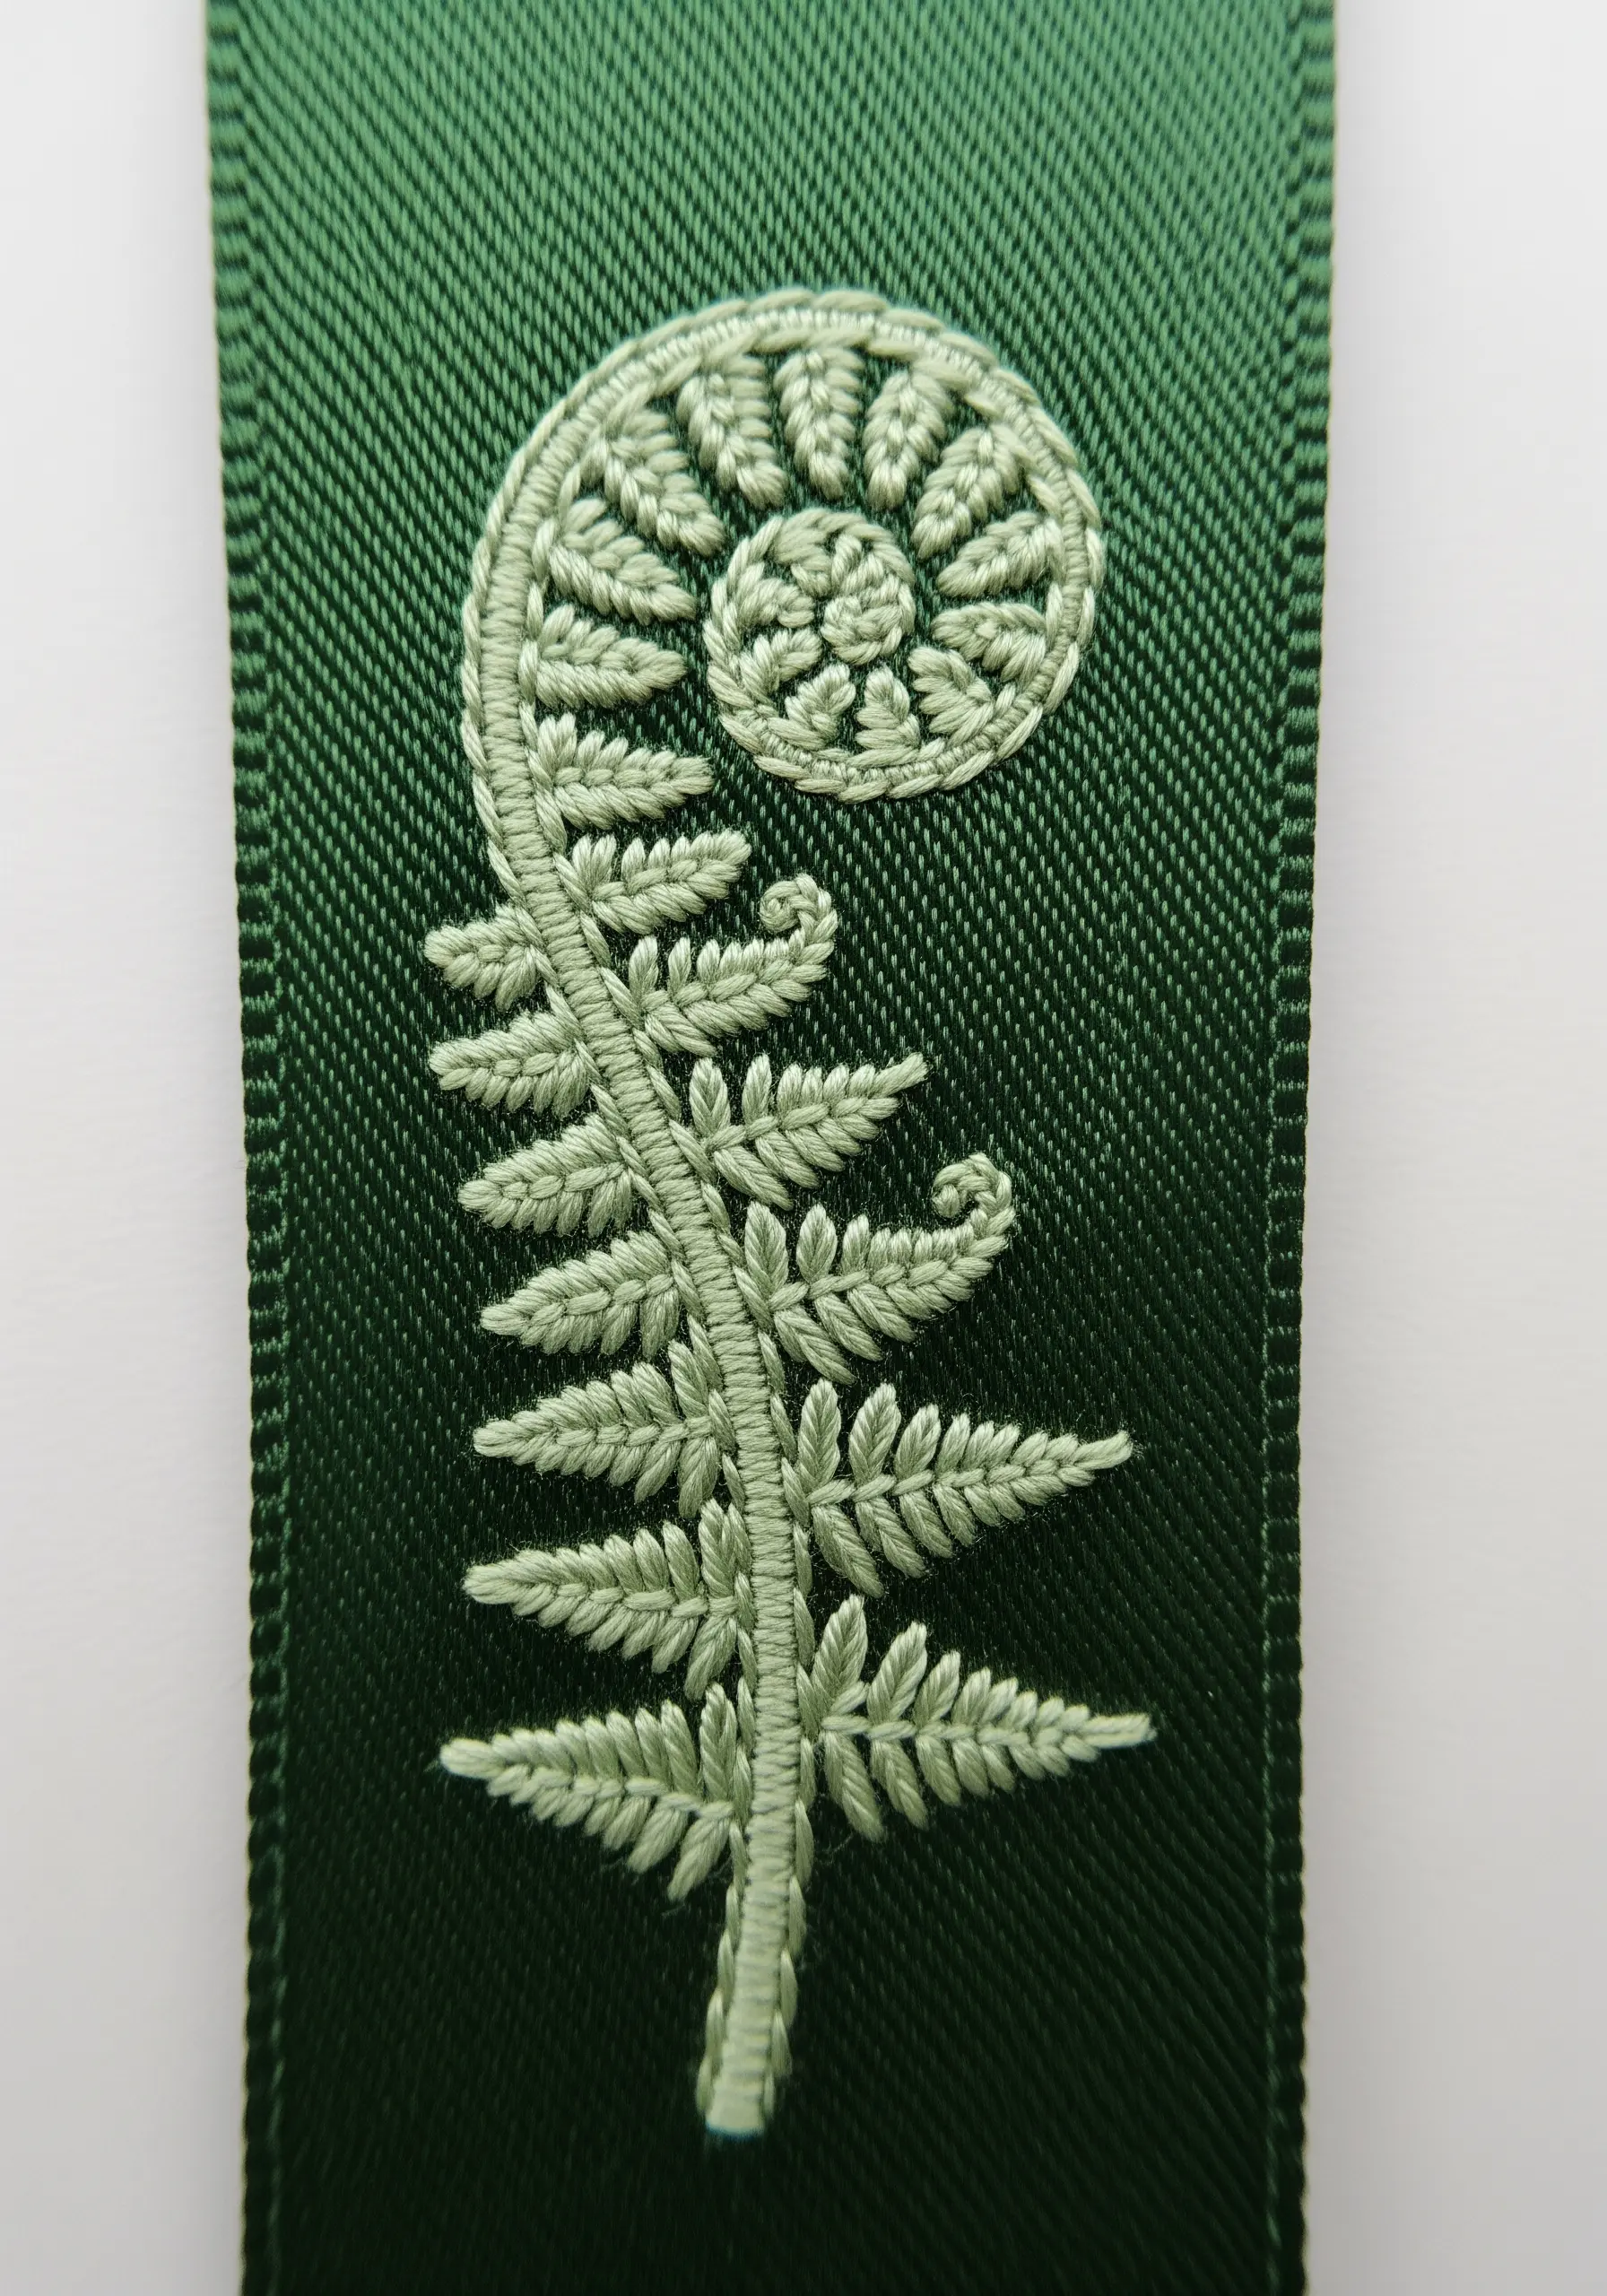
Stitch this intricate fiddlehead fern to practice precision and control with your satin stitch.
The key is to map out the direction of your stitches beforehand; they should radiate outwards from the center of the curl, following the spiral shape.
For the tiny leaflets, use single, angled straight stitches. This contrast in texture makes the smooth, coiled head of the fern stand out.
A monochrome color palette, using just two shades of green, creates a sophisticated, tonal effect.
23. The Hyperrealistic Autumn Leaf

Achieve a stunningly realistic, painted effect with a technique called thread painting, which uses long-and-short stitch.
Work with a single strand of floss and blend multiple shades of yellow, green, orange, and brown, allowing the colors to overlap and mix organically.
Pay close attention to the direction of your stitches, following the natural lines and veins of the leaf to create form and shadow.
Outline the finished leaf with a dark brown split stitch to give it a crisp edge that makes it appear to lift off the fabric.
24. The Vining Light Switch Cover

Turn a mundane object into a piece of art by creating an embroidered fabric cover for a light switch plate.
First, cover the plate with your chosen fabric, securing it on the back. Then, stitch your design directly onto the covered plate.
Use a delicate stem stitch to create a vine that appears to organically climb up the side.
Add tiny buds with French knots and small leaves with detached chain stitches for a whimsical, charming touch that brightens a room.
25. The Minimalist Button Bookmark

Create a functional and beautiful bookmark using just a ribbon and a single, embroidered button.
Stretch a small piece of fabric in a mini hoop, stitch your design—like this radial leaf pattern made with straight stitches—and then use a button-covering kit to finish it.
This method allows you to create a tiny, perfect circle of embroidery without worrying about finishing complex edges.
It’s a quick, clever project that makes a wonderful gift for any reader.
26. The Scattered Autumn Journal
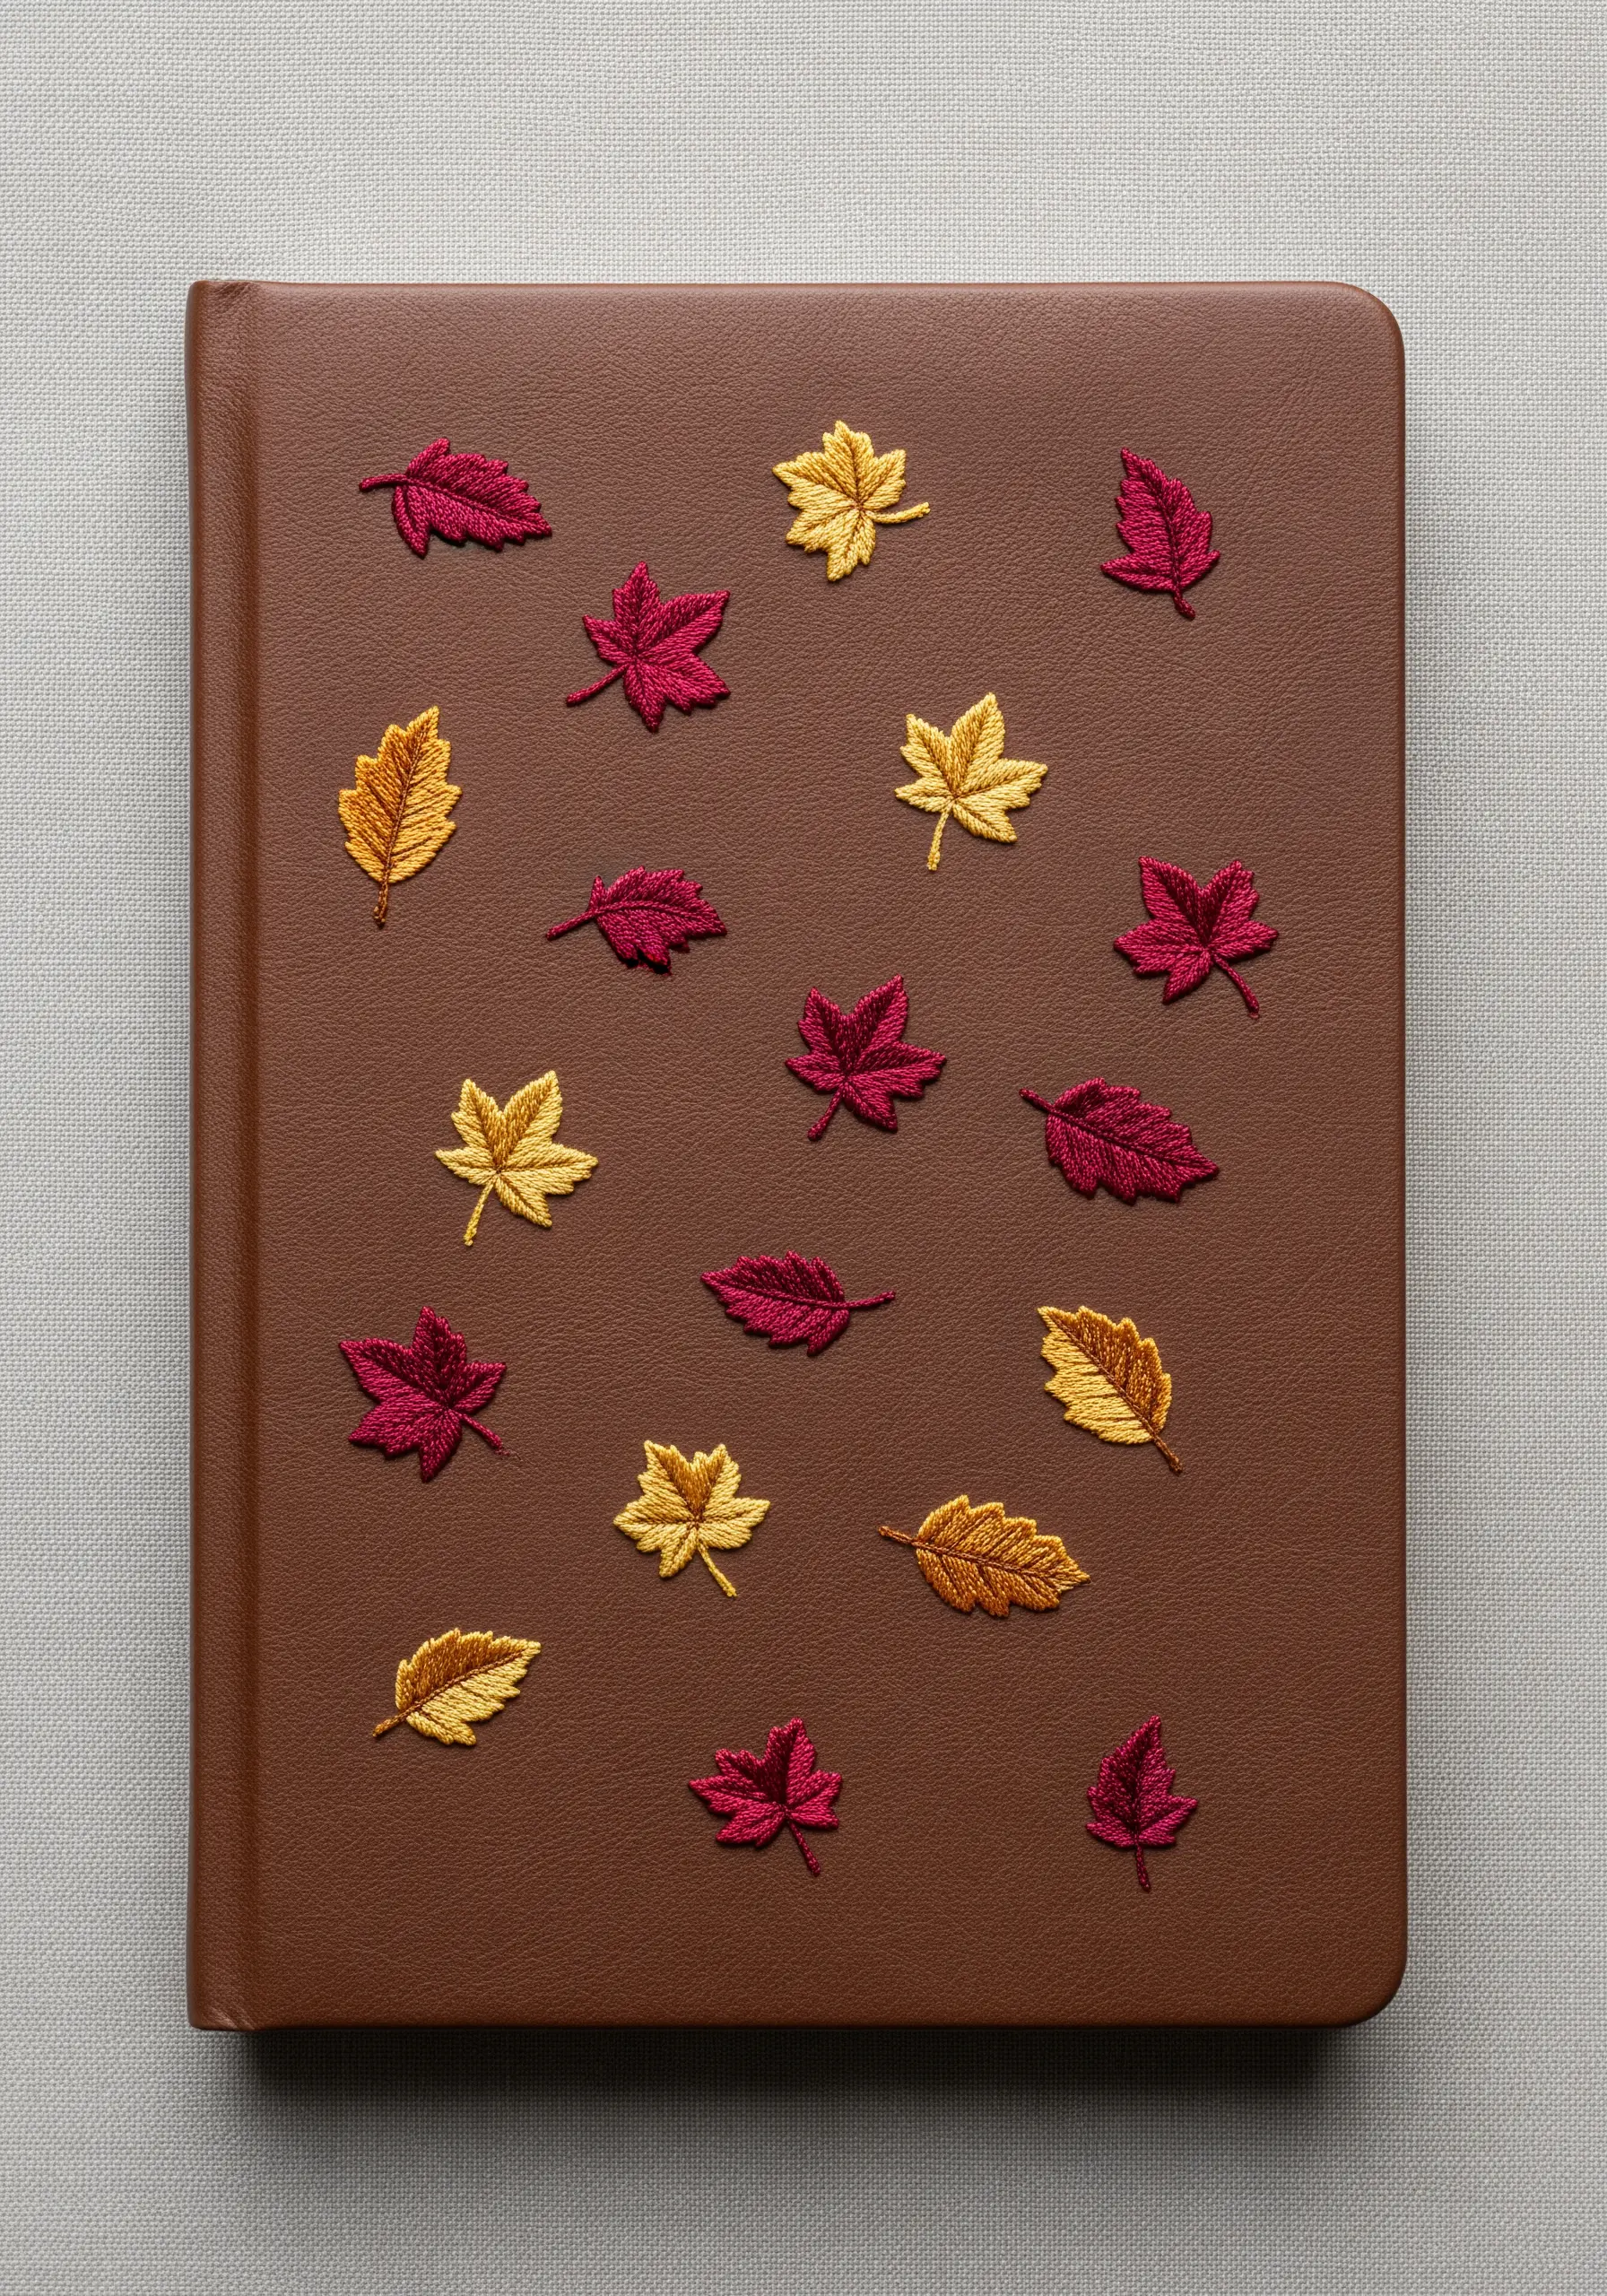
Create a playful, dynamic pattern by scattering tiny leaf motifs across a journal cover.
Stitch several different leaf shapes in a cohesive autumn color palette of reds, golds, and browns to create variety and interest.
Vary the orientation and spacing of each leaf to achieve a natural, ‘fallen leaves’ effect.
This is a great way to use up leftover thread from other projects while creating a completely unique and personalized design.
27. The Elegant Curtain Tie-Back

Add a bespoke, high-end touch to your study or reading nook with embroidered curtain borders and tie-backs.
A simple, repeating motif like this laurel branch is perfect for a border. Use a basic fly stitch for each leaf, arranged along a central line.
Stitching with a thread that is just a few shades darker than the fabric creates a subtle, tone-on-tone effect that is incredibly elegant.
Consistency in stitch size and spacing is crucial for making a border look polished and professional.
28. The Herb Study Bookmark
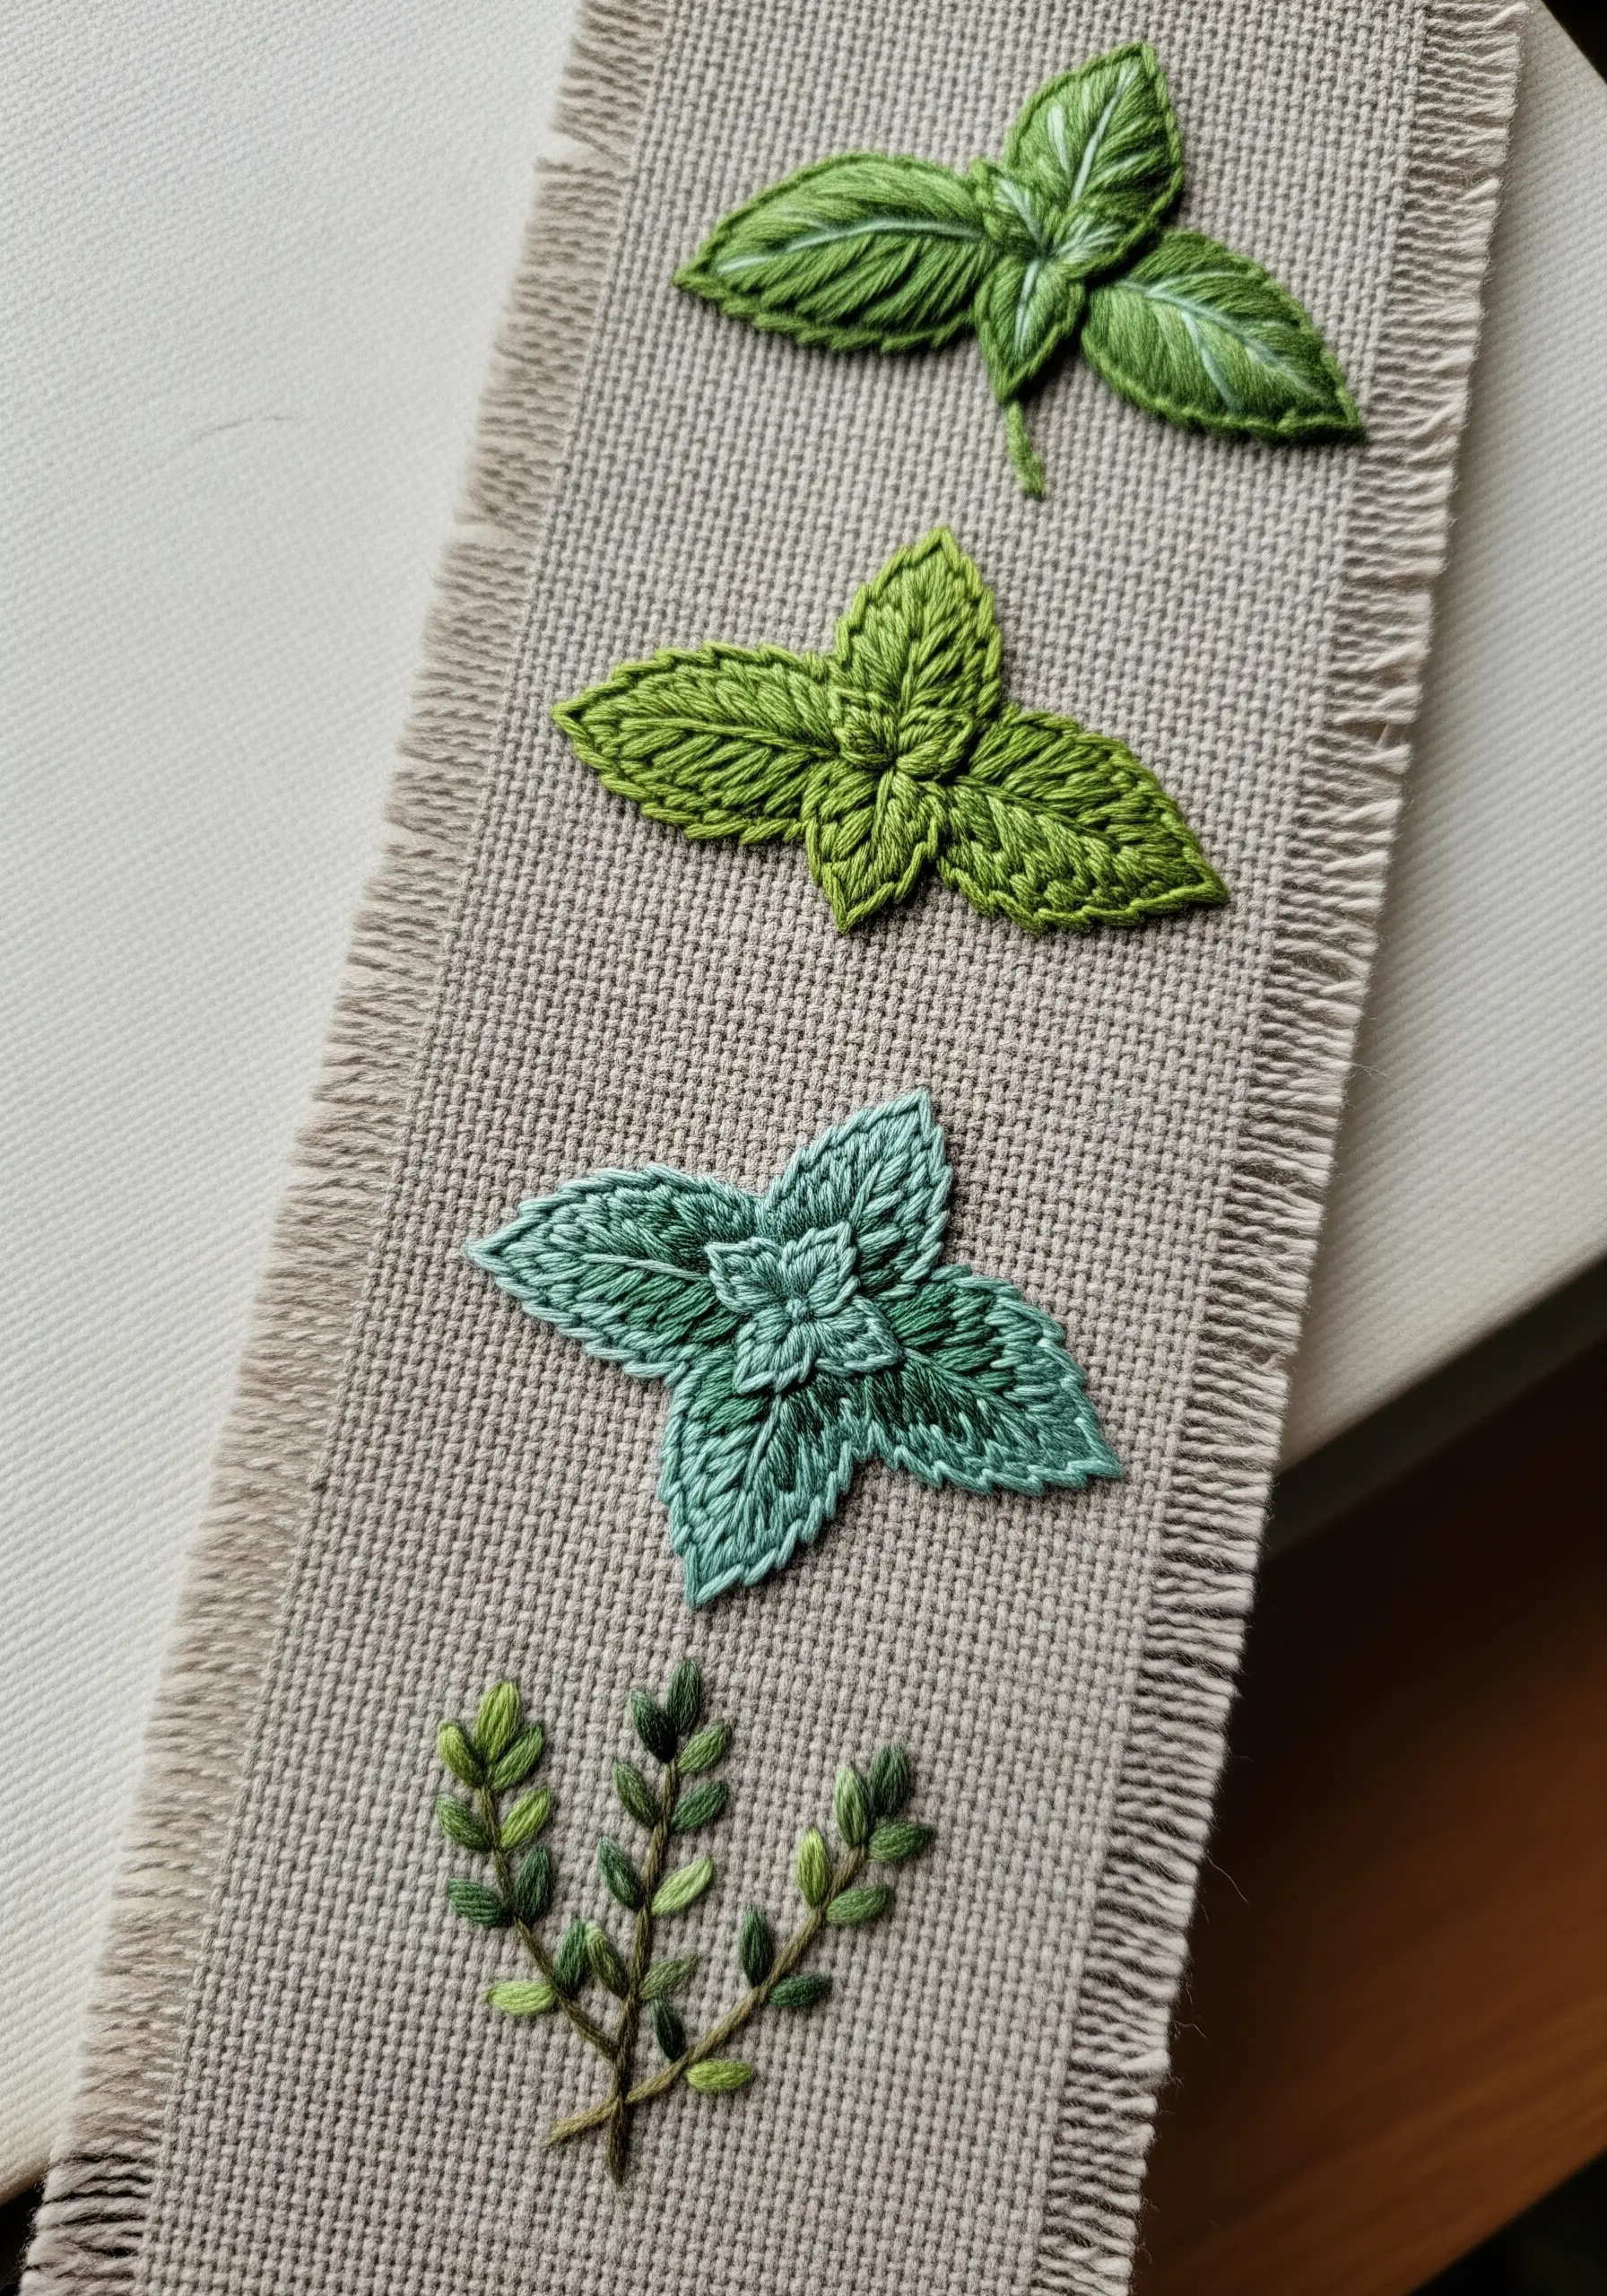
Use a single bookmark to showcase a variety of leaf shapes and stitching techniques in a themed collection.
For the basil, use long-and-short stitch to blend greens. For the mint, try a more textural fishbone stitch. For the thyme, use tiny detached chain stitches on a stem stitch branch.
This ‘sampler’ approach allows you to practice different methods on a small scale.
The frayed linen edge adds a rustic, organic feel that perfectly suits the herbal theme.
29. The Starlit Silver Branches
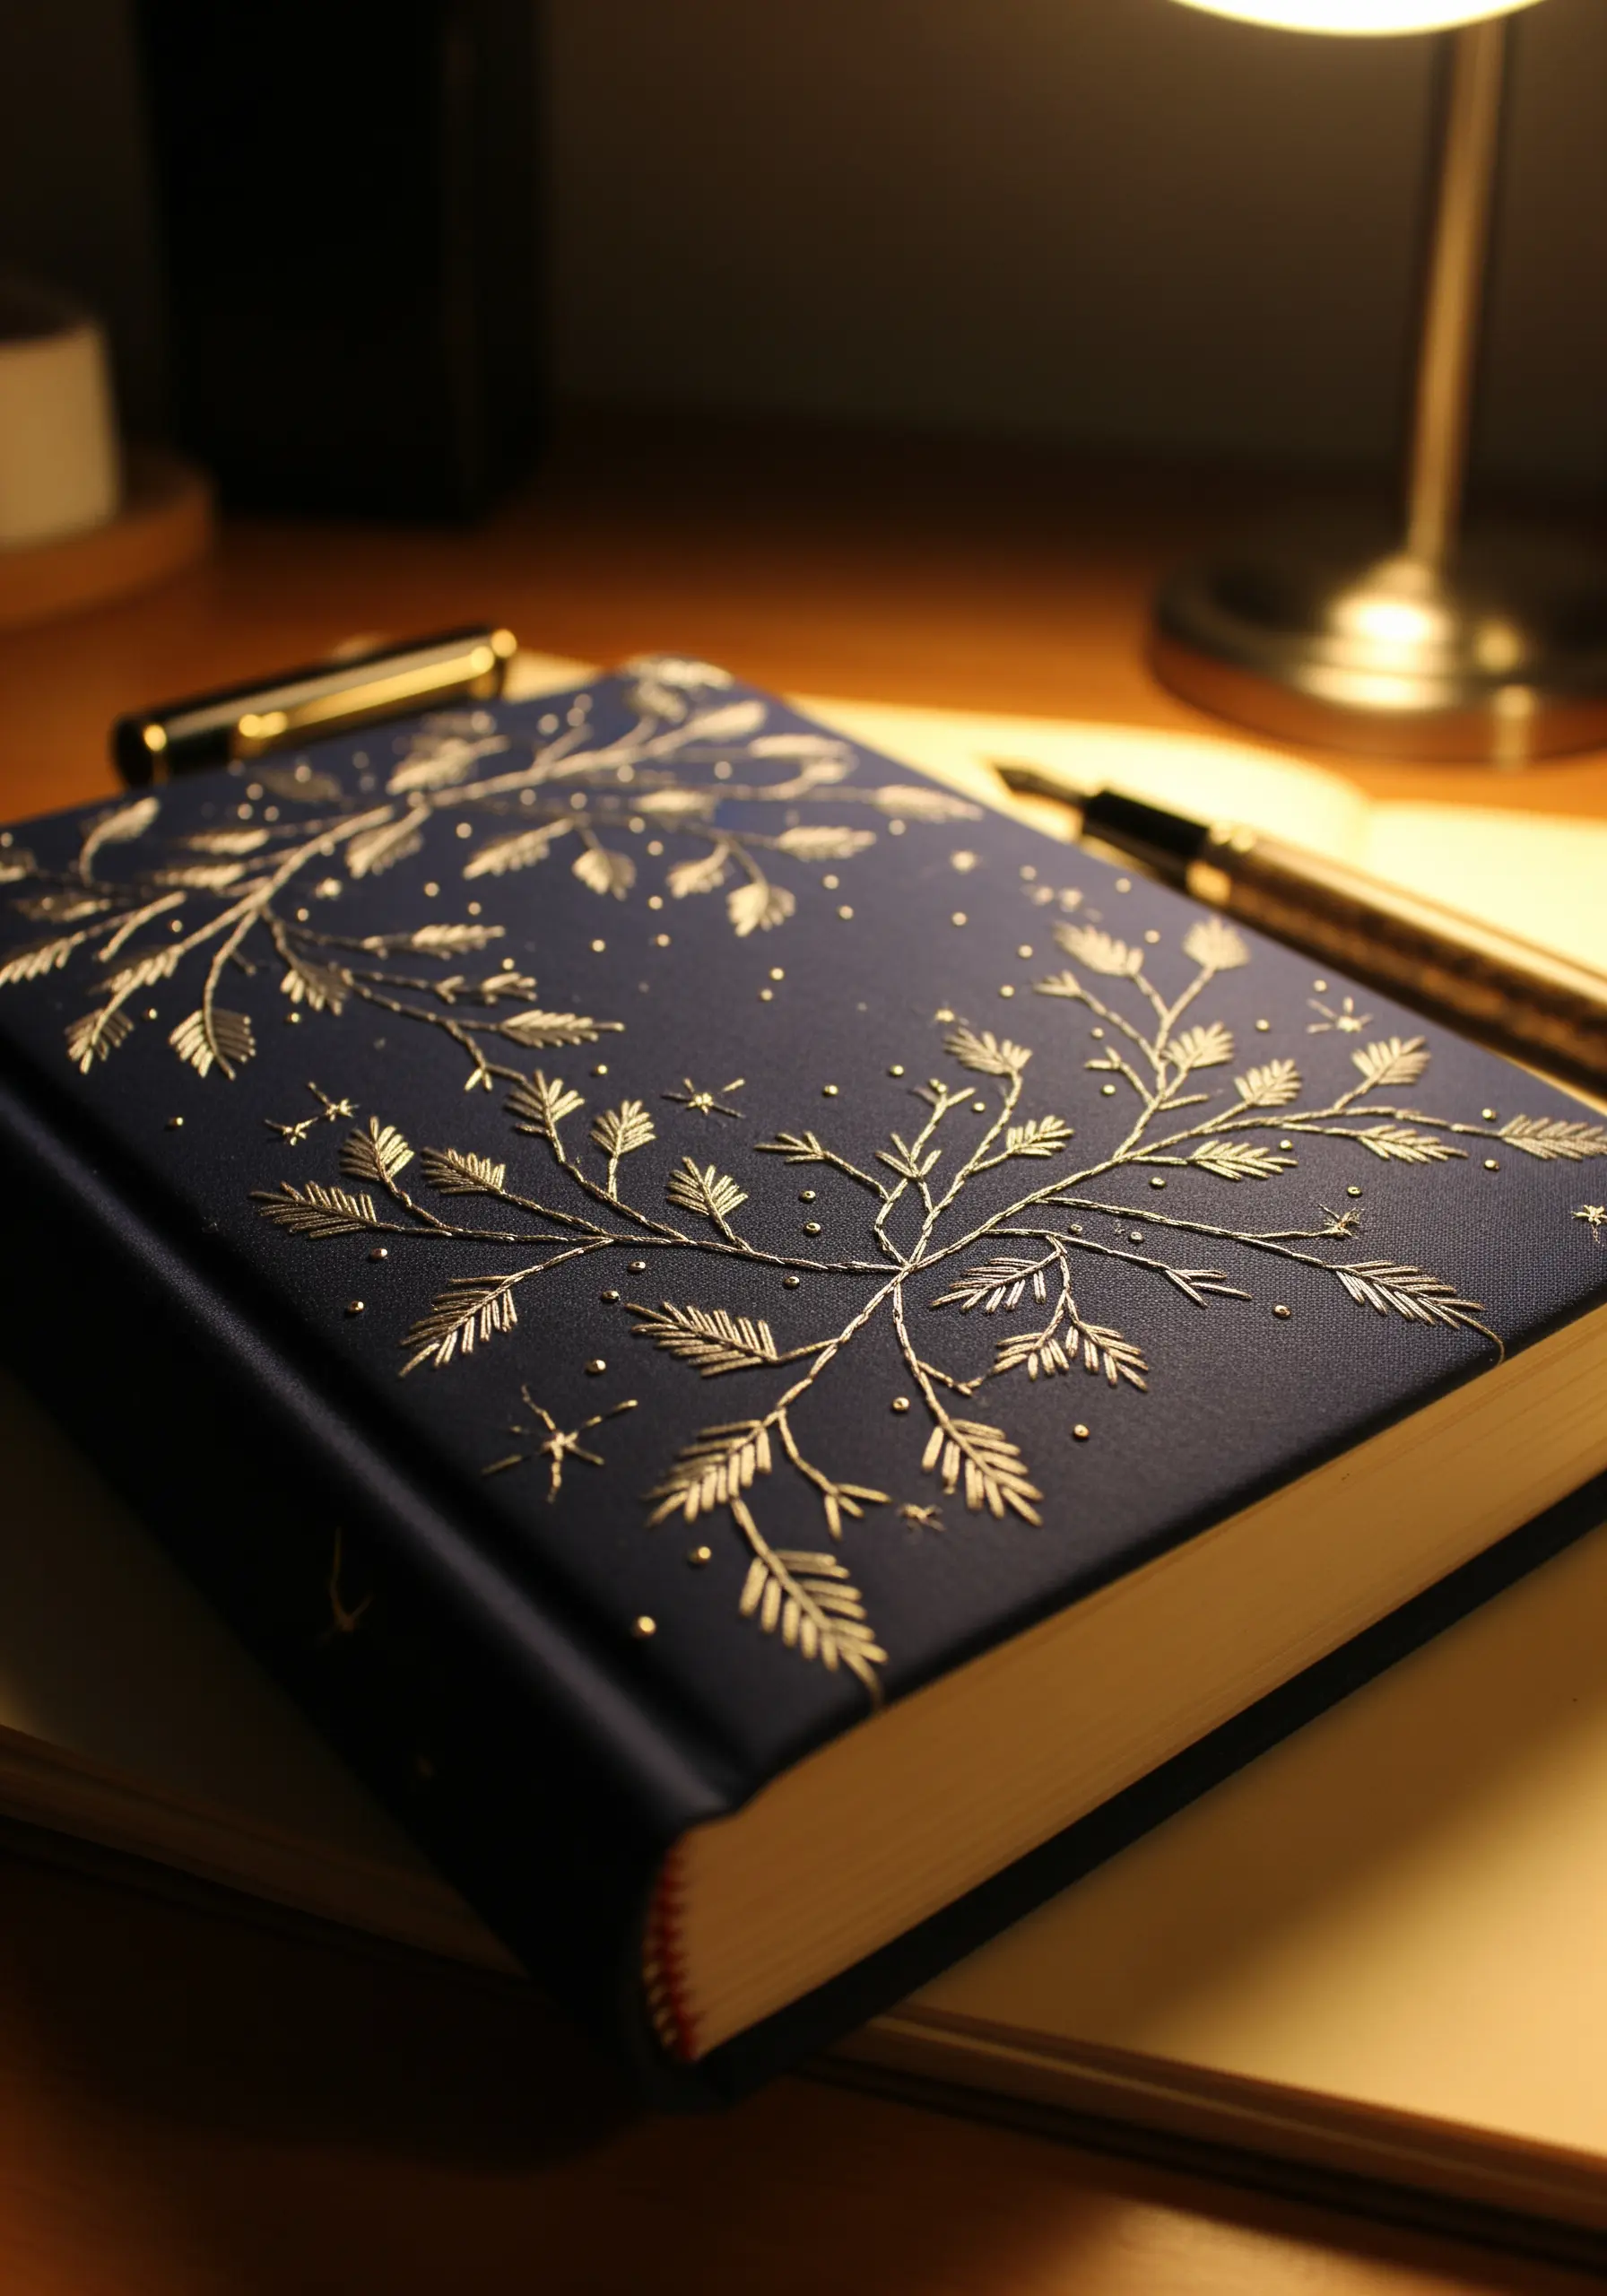
Combine metallic thread with tiny stitches to create a magical, celestial forest on a dark journal cover.
Use a single strand of silver thread for incredibly fine and delicate branches, created with a simple backstitch.
The leaves are just tiny straight stitches, angled to look like pine needles or delicate leaflets.
Add scattered French knots or tiny seed beads to represent stars, completing the enchanting, night-sky effect.
30. The Tonal Laurel Border
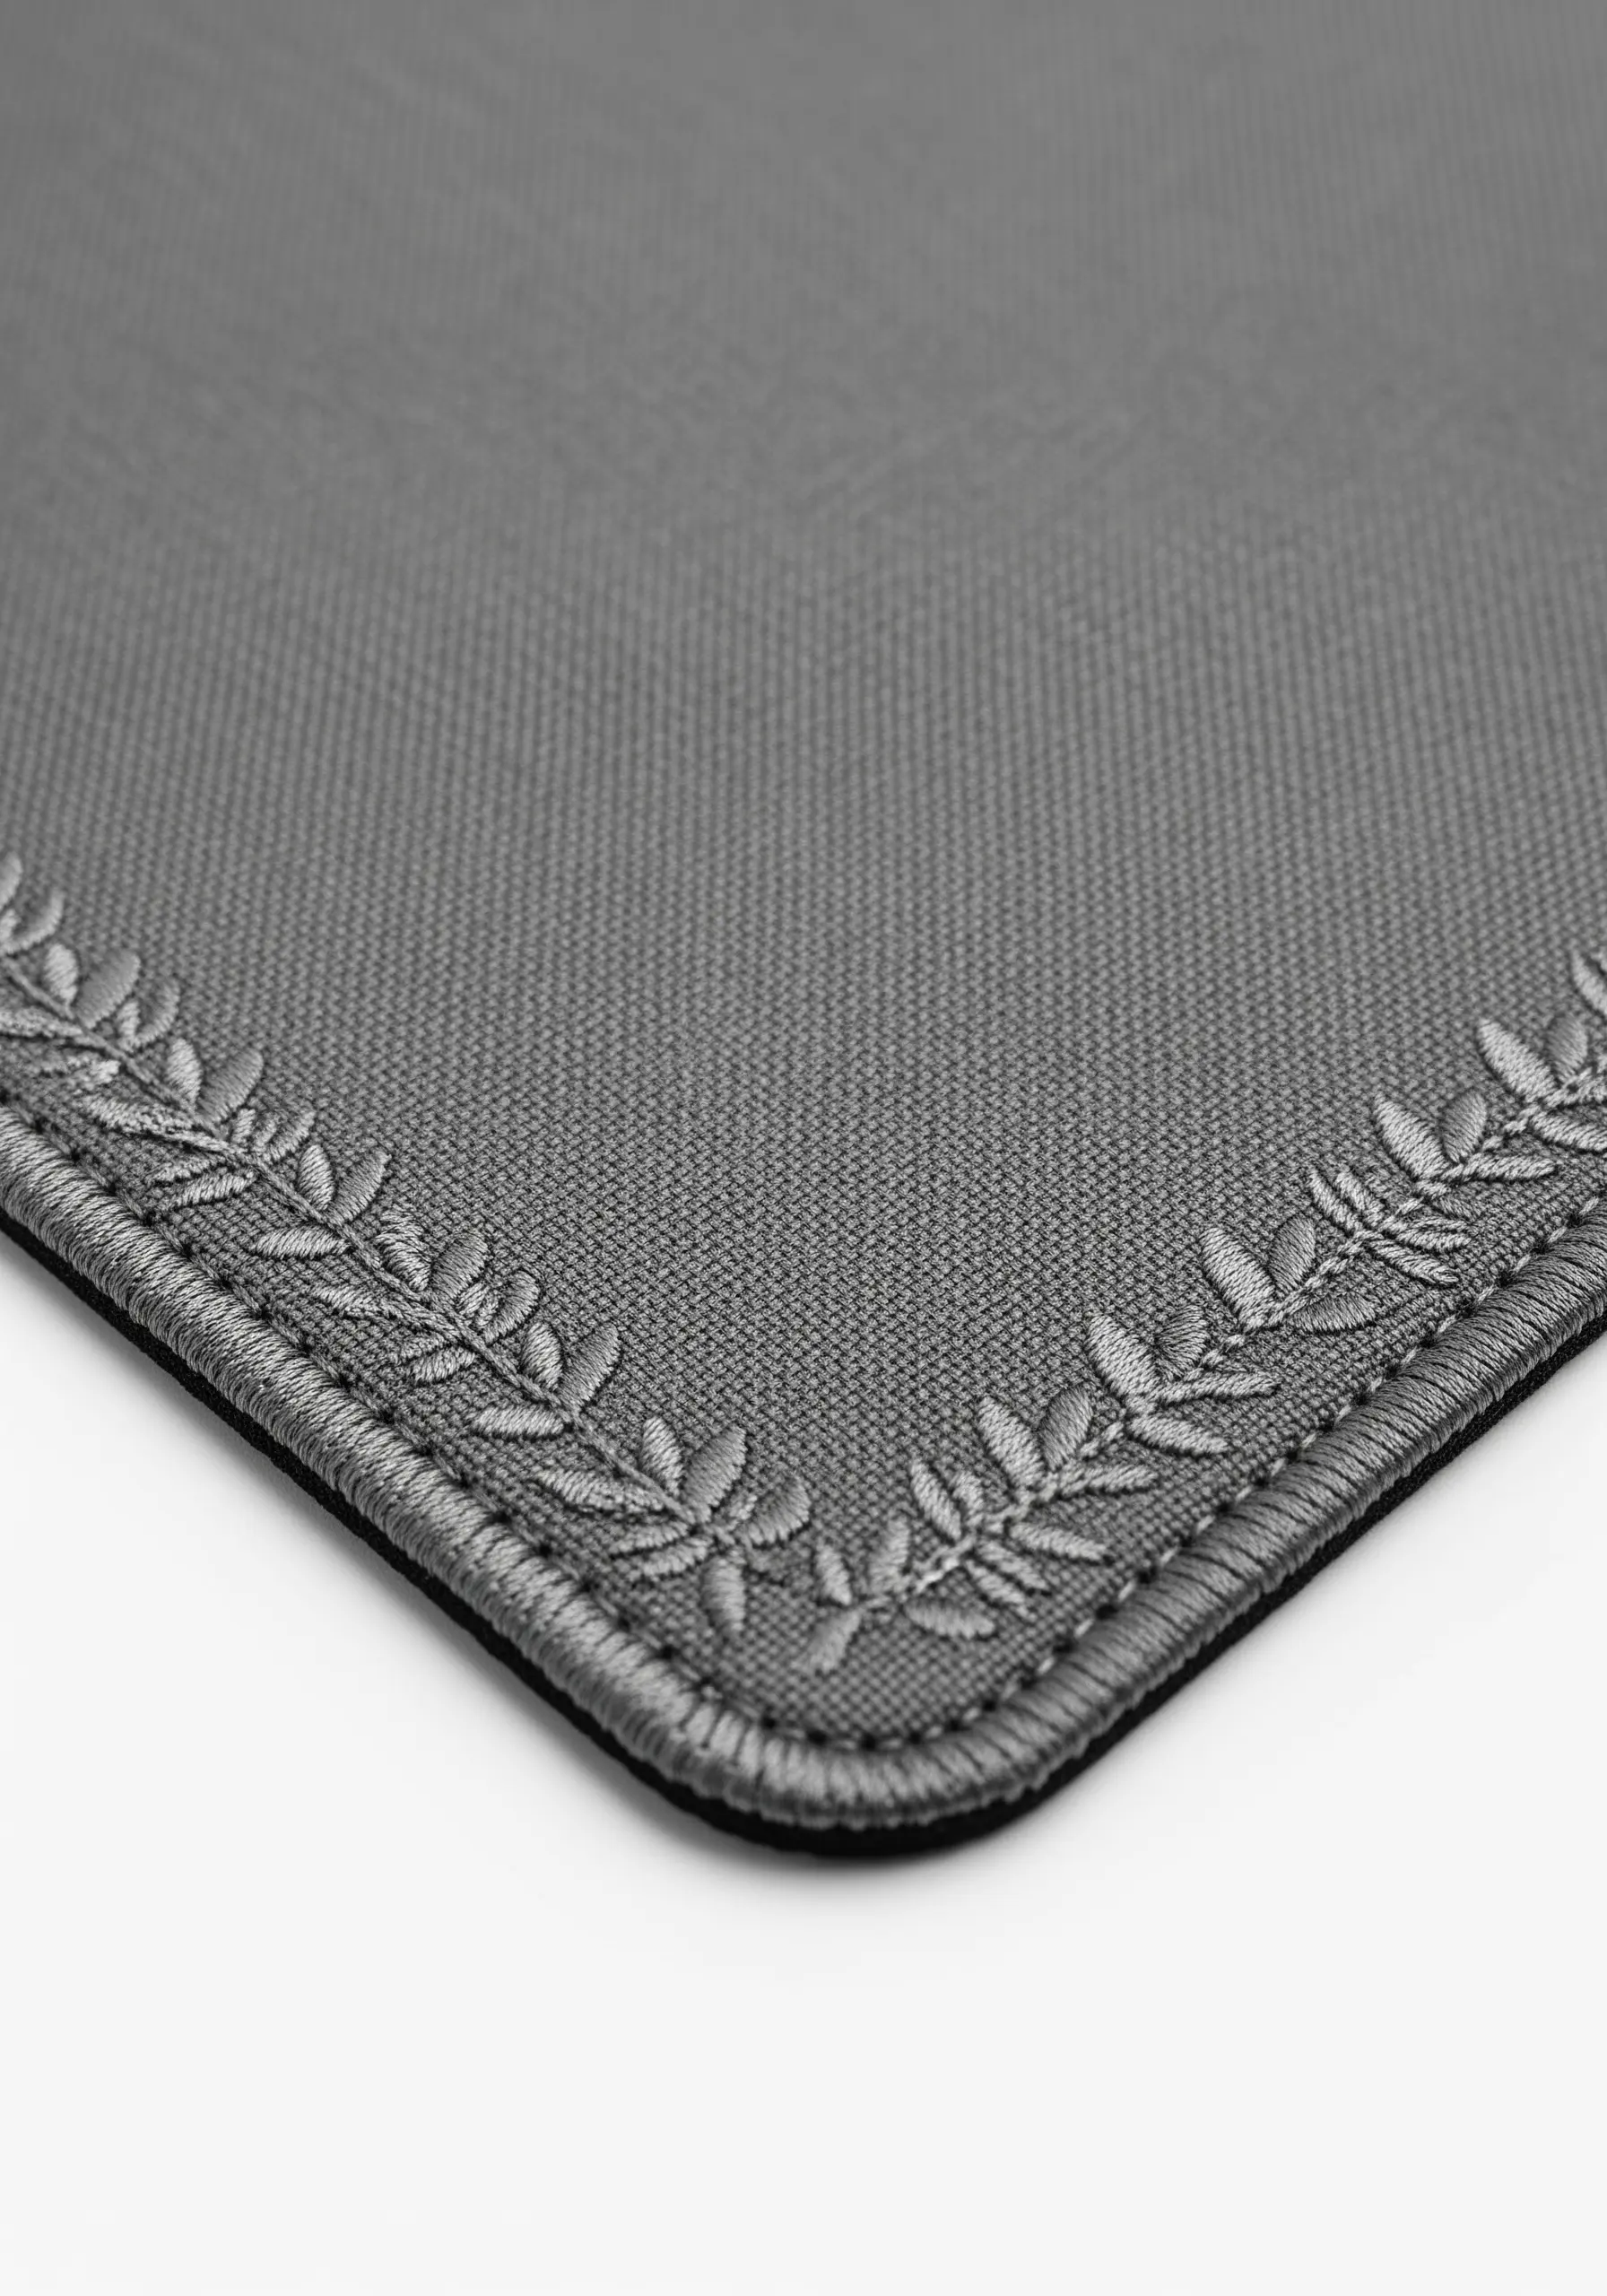
Add subtle sophistication to a desk mat or placemat with a tone-on-tone laurel border.
Choose a thread color that is only slightly lighter or darker than your fabric. This creates a textural design that reveals itself in the light without being overwhelming.
Use a closed fly stitch for each leaf, arranging them in pairs along an invisible center line to form the classic laurel wreath shape.
This technique is perfect for adding a touch of quiet luxury to everyday items.
31. The Tropical Palm Accent

A single, vibrant palm leaf is all you need to add a touch of tropical energy to a brightly colored bookmark.
Use a fishbone stitch to create the leaf, as it naturally forms the central vein and angled leaflets in one fluid motion.
The high contrast between the bright green thread and the turquoise fabric makes this simple design incredibly eye-catching.
This is a quick and satisfying stitch that’s perfect for beginners.
32. The Plump Satin-Stitch Clover
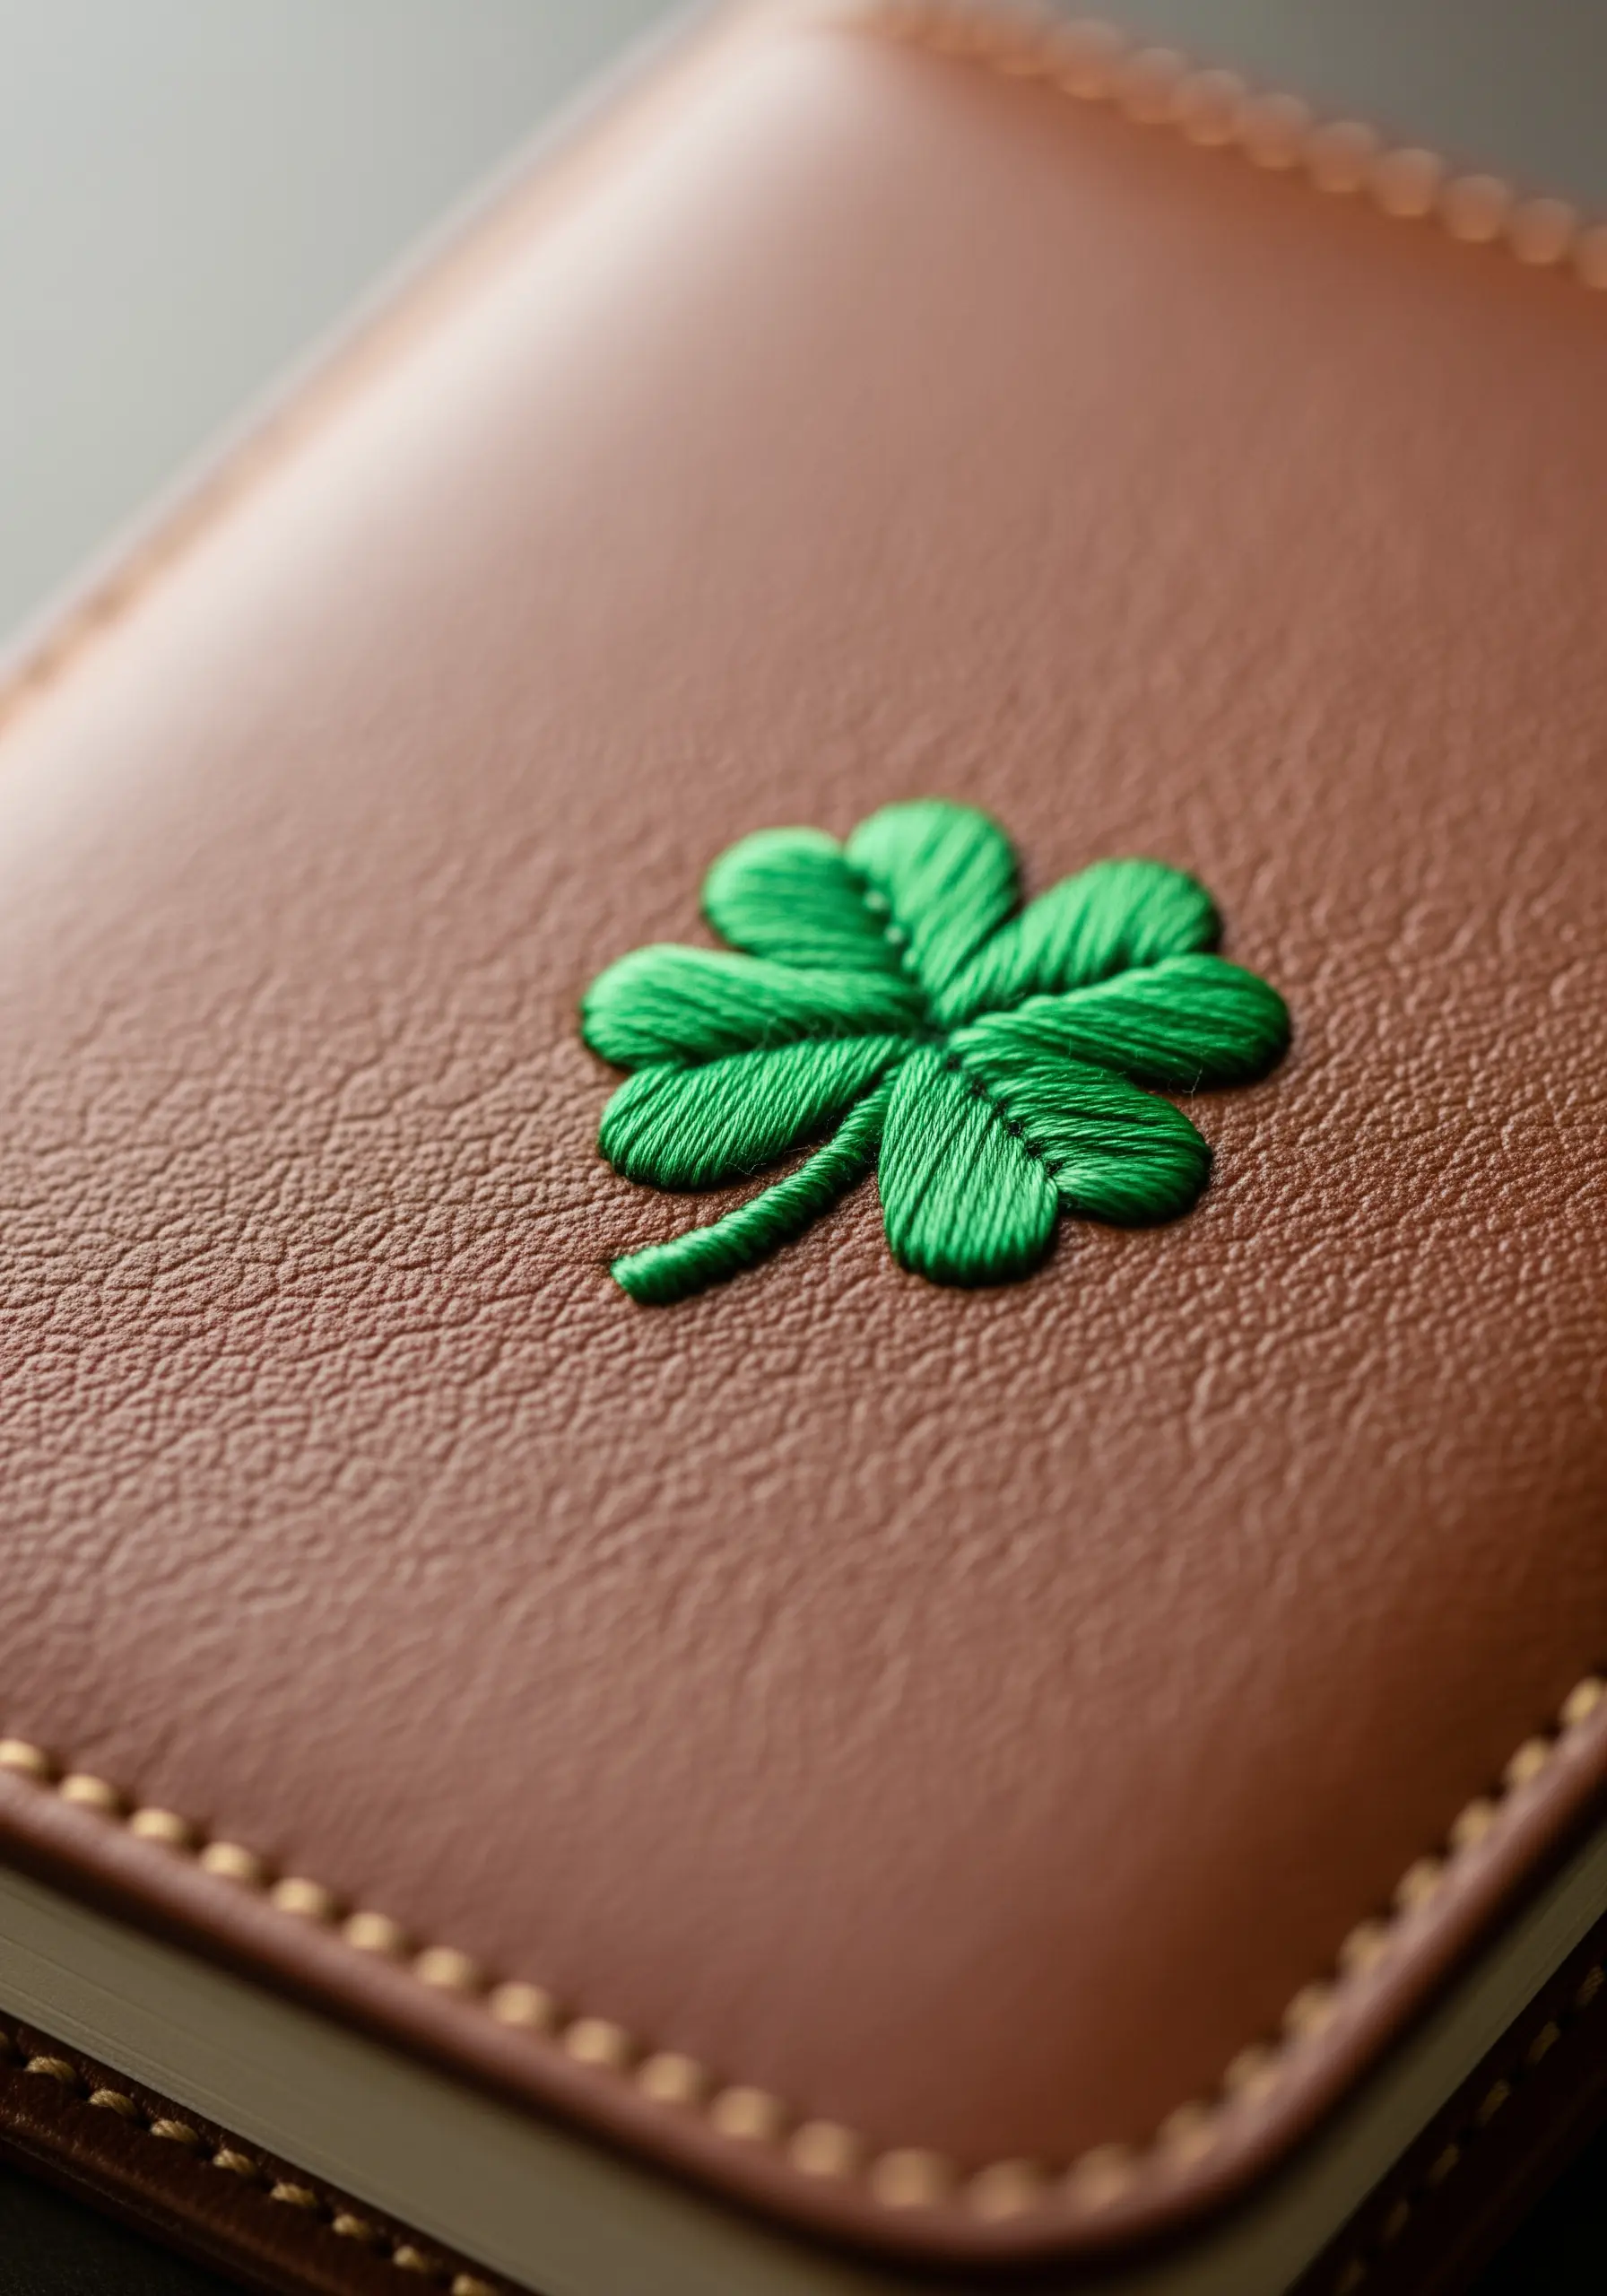
Achieve a perfectly smooth, plump, and dimensional clover by mastering satin stitch direction.
For each of the four leaflets, angle your stitches so they radiate from the center outwards, like a fan.
To create the subtle highlight in the middle of each leaf, switch to a slightly lighter shade of green for a few stitches in the center.
Stitching on a non-traditional surface like this faux leather journal requires a strong, sharp needle and good tension control to prevent tearing.
33. The Silhouette Ivy Lampshade
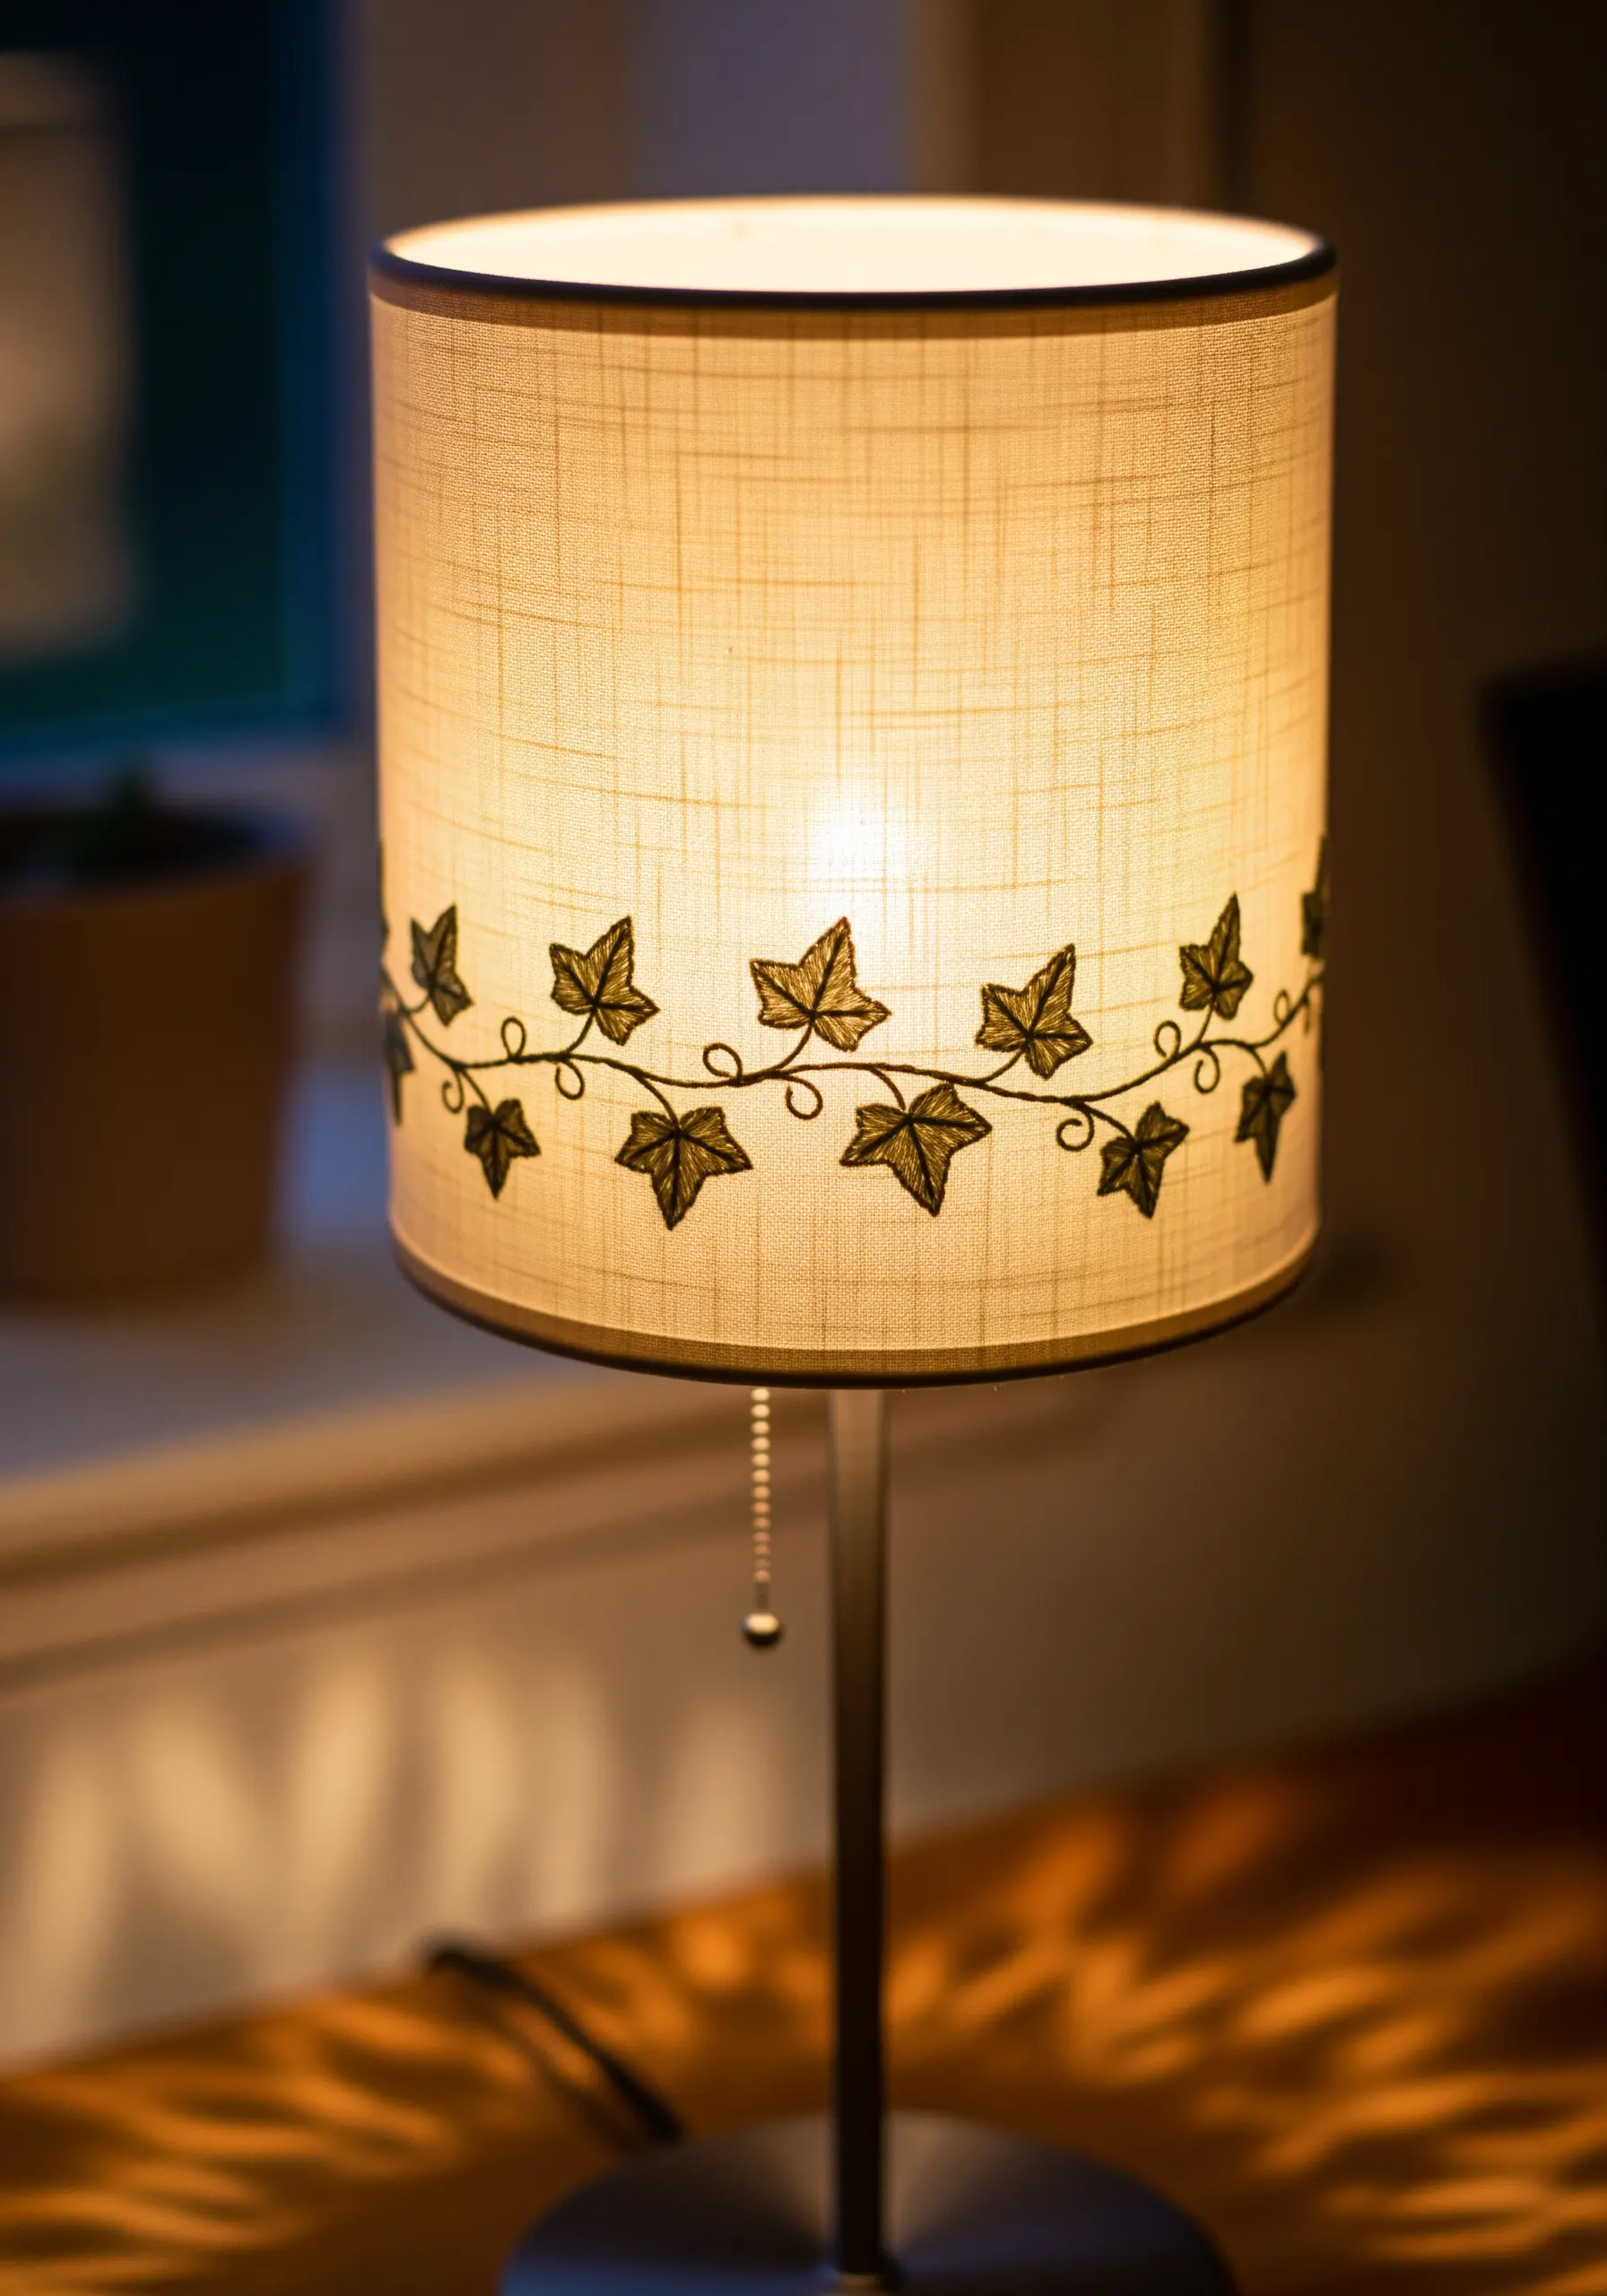
Play with light and shadow by embroidering a design on a lampshade.
Use a dark thread on a light-colored linen or cotton shade. When the lamp is turned on, the embroidered areas will appear as striking silhouettes.
Keep the design simple and graphic, like this continuous ivy vine, as intricate details may be lost in the shadow.
A simple stem stitch for the vine and an open satin stitch or outline for the leaves works perfectly for this effect.
34. The Fiddle-Leaf Fig Patch
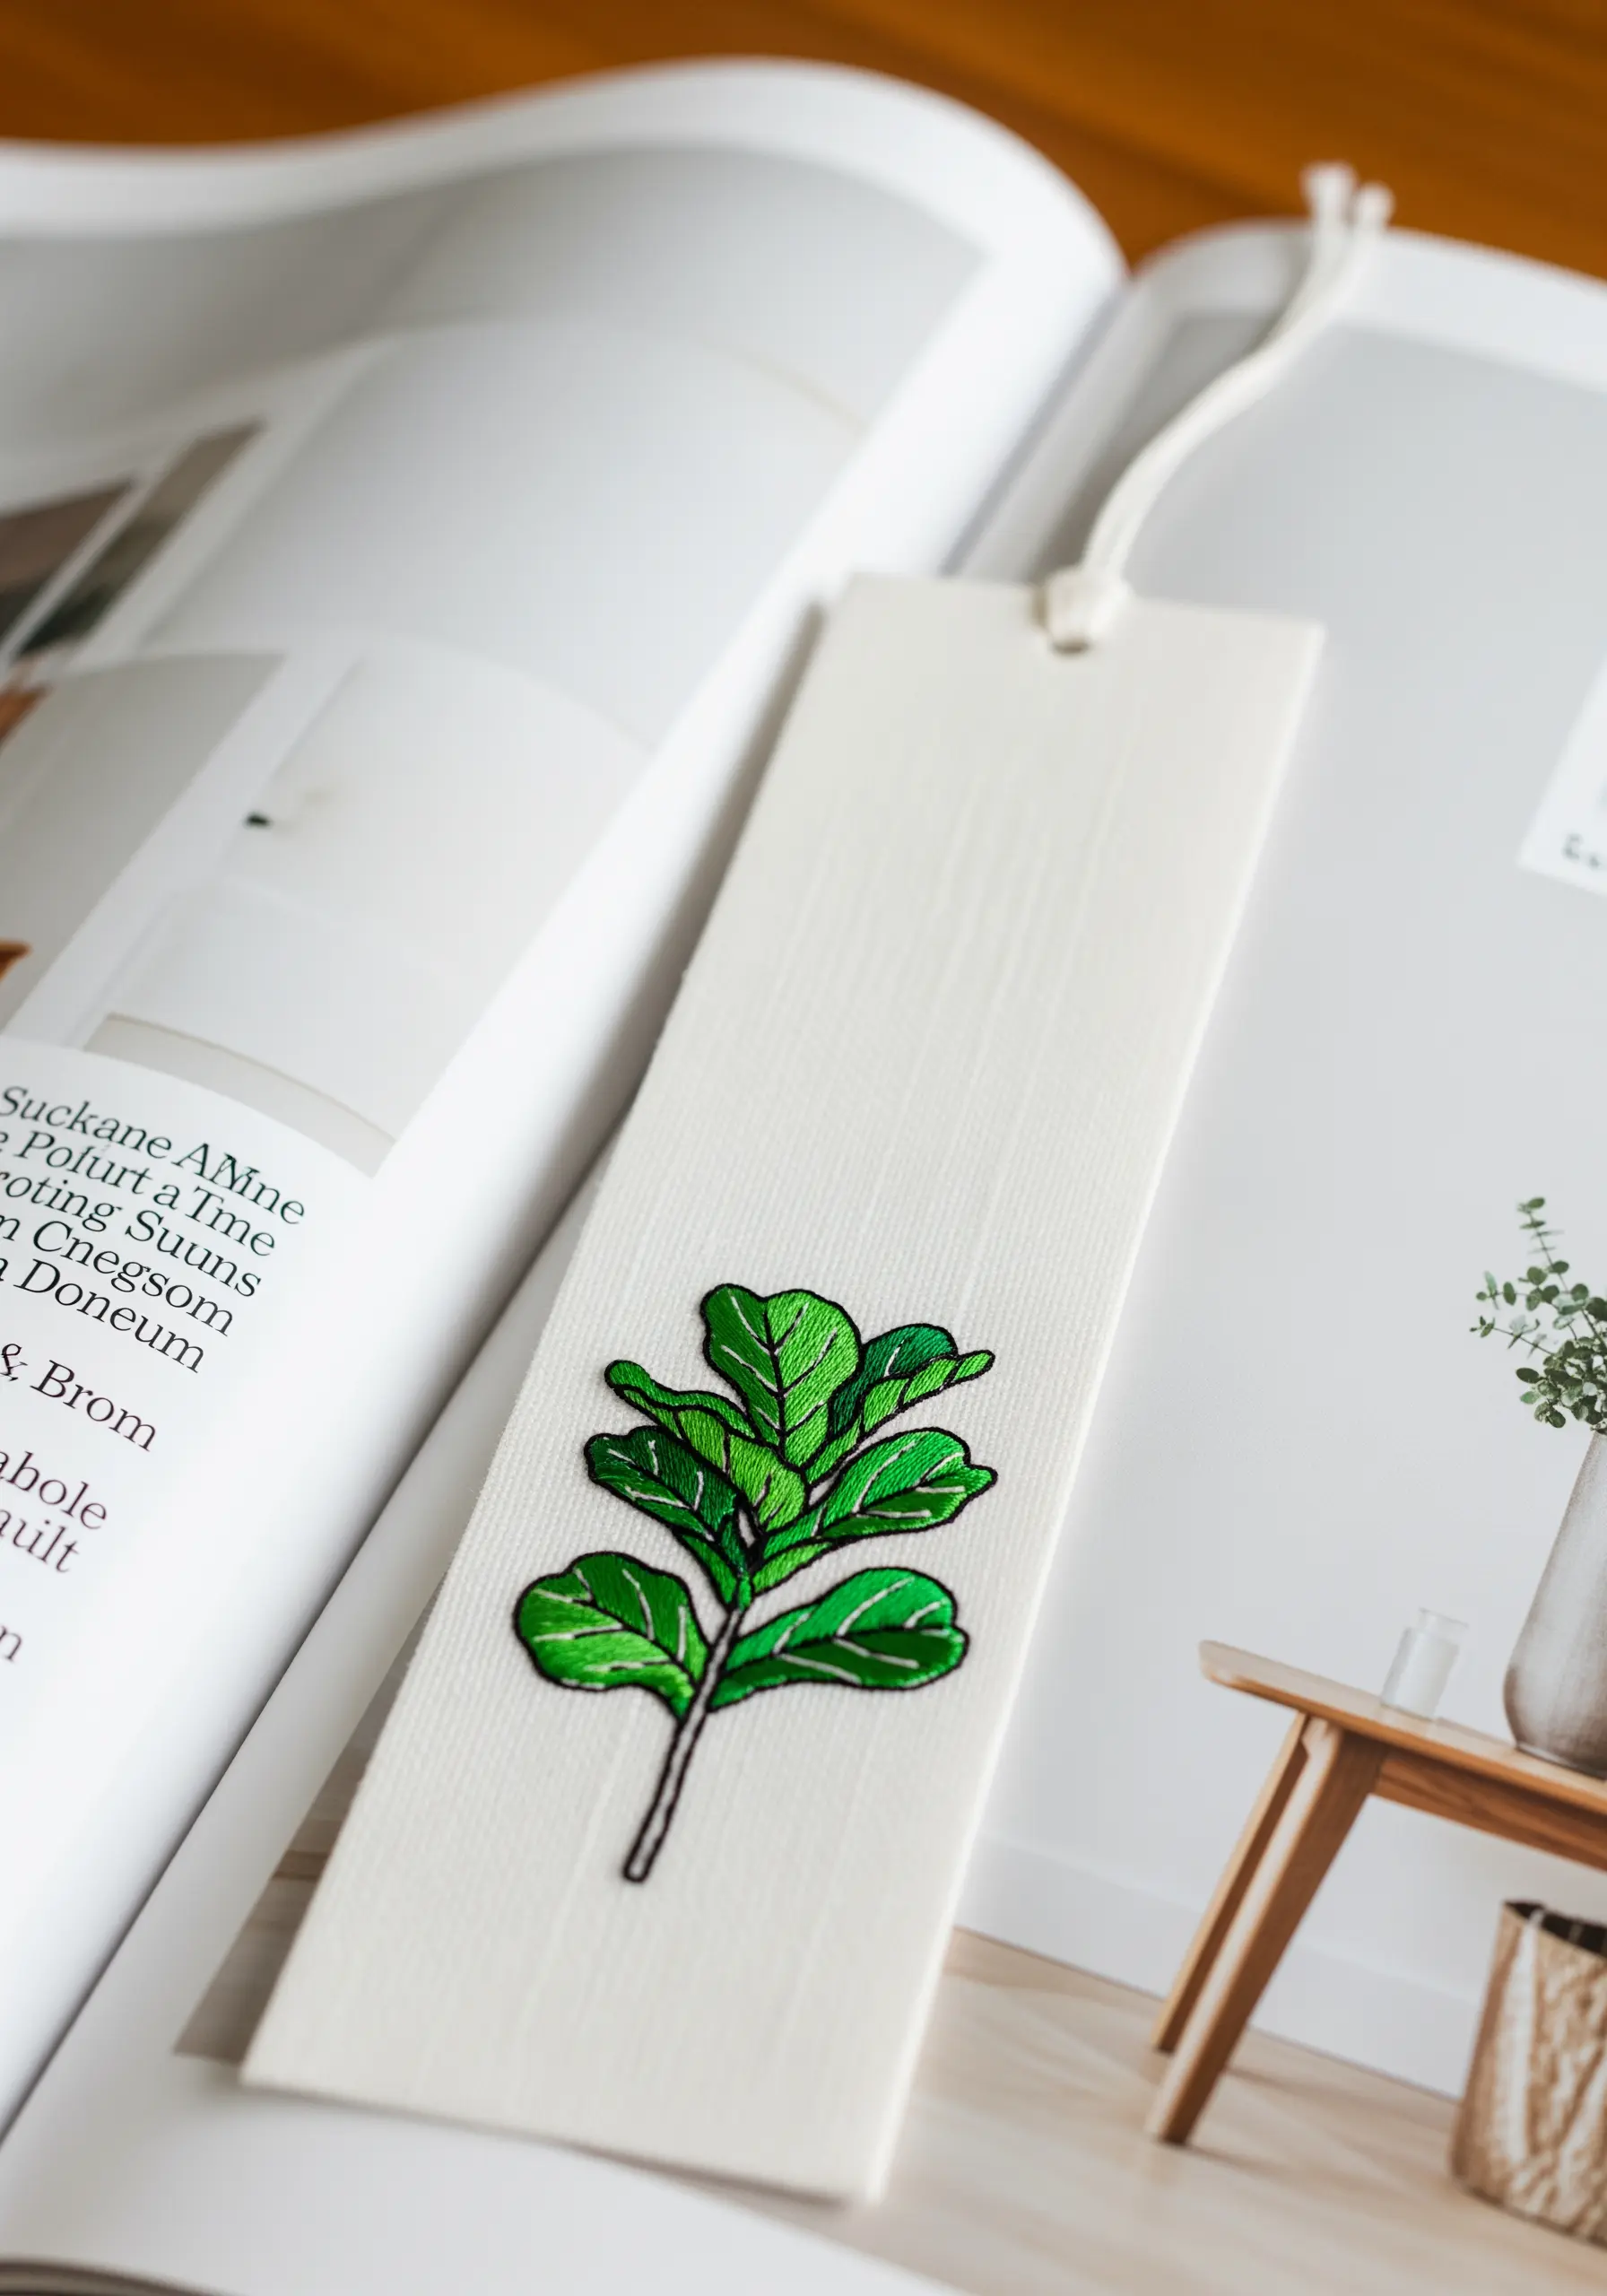
Capture the glossy, bold look of a fiddle-leaf fig with a combination of satin stitch and a defining outline.
Fill the leaf sections with a vibrant green satin stitch, changing the angle of your stitches slightly for each lobe to create shine.
Then, use a single strand of black or dark grey thread to add a crisp backstitch outline around the entire leaf and for the veins.
This outline technique gives the design a clean, graphic, and modern feel, perfect for a patch or bookmark.
35. The Frost-Kissed Journal Cover
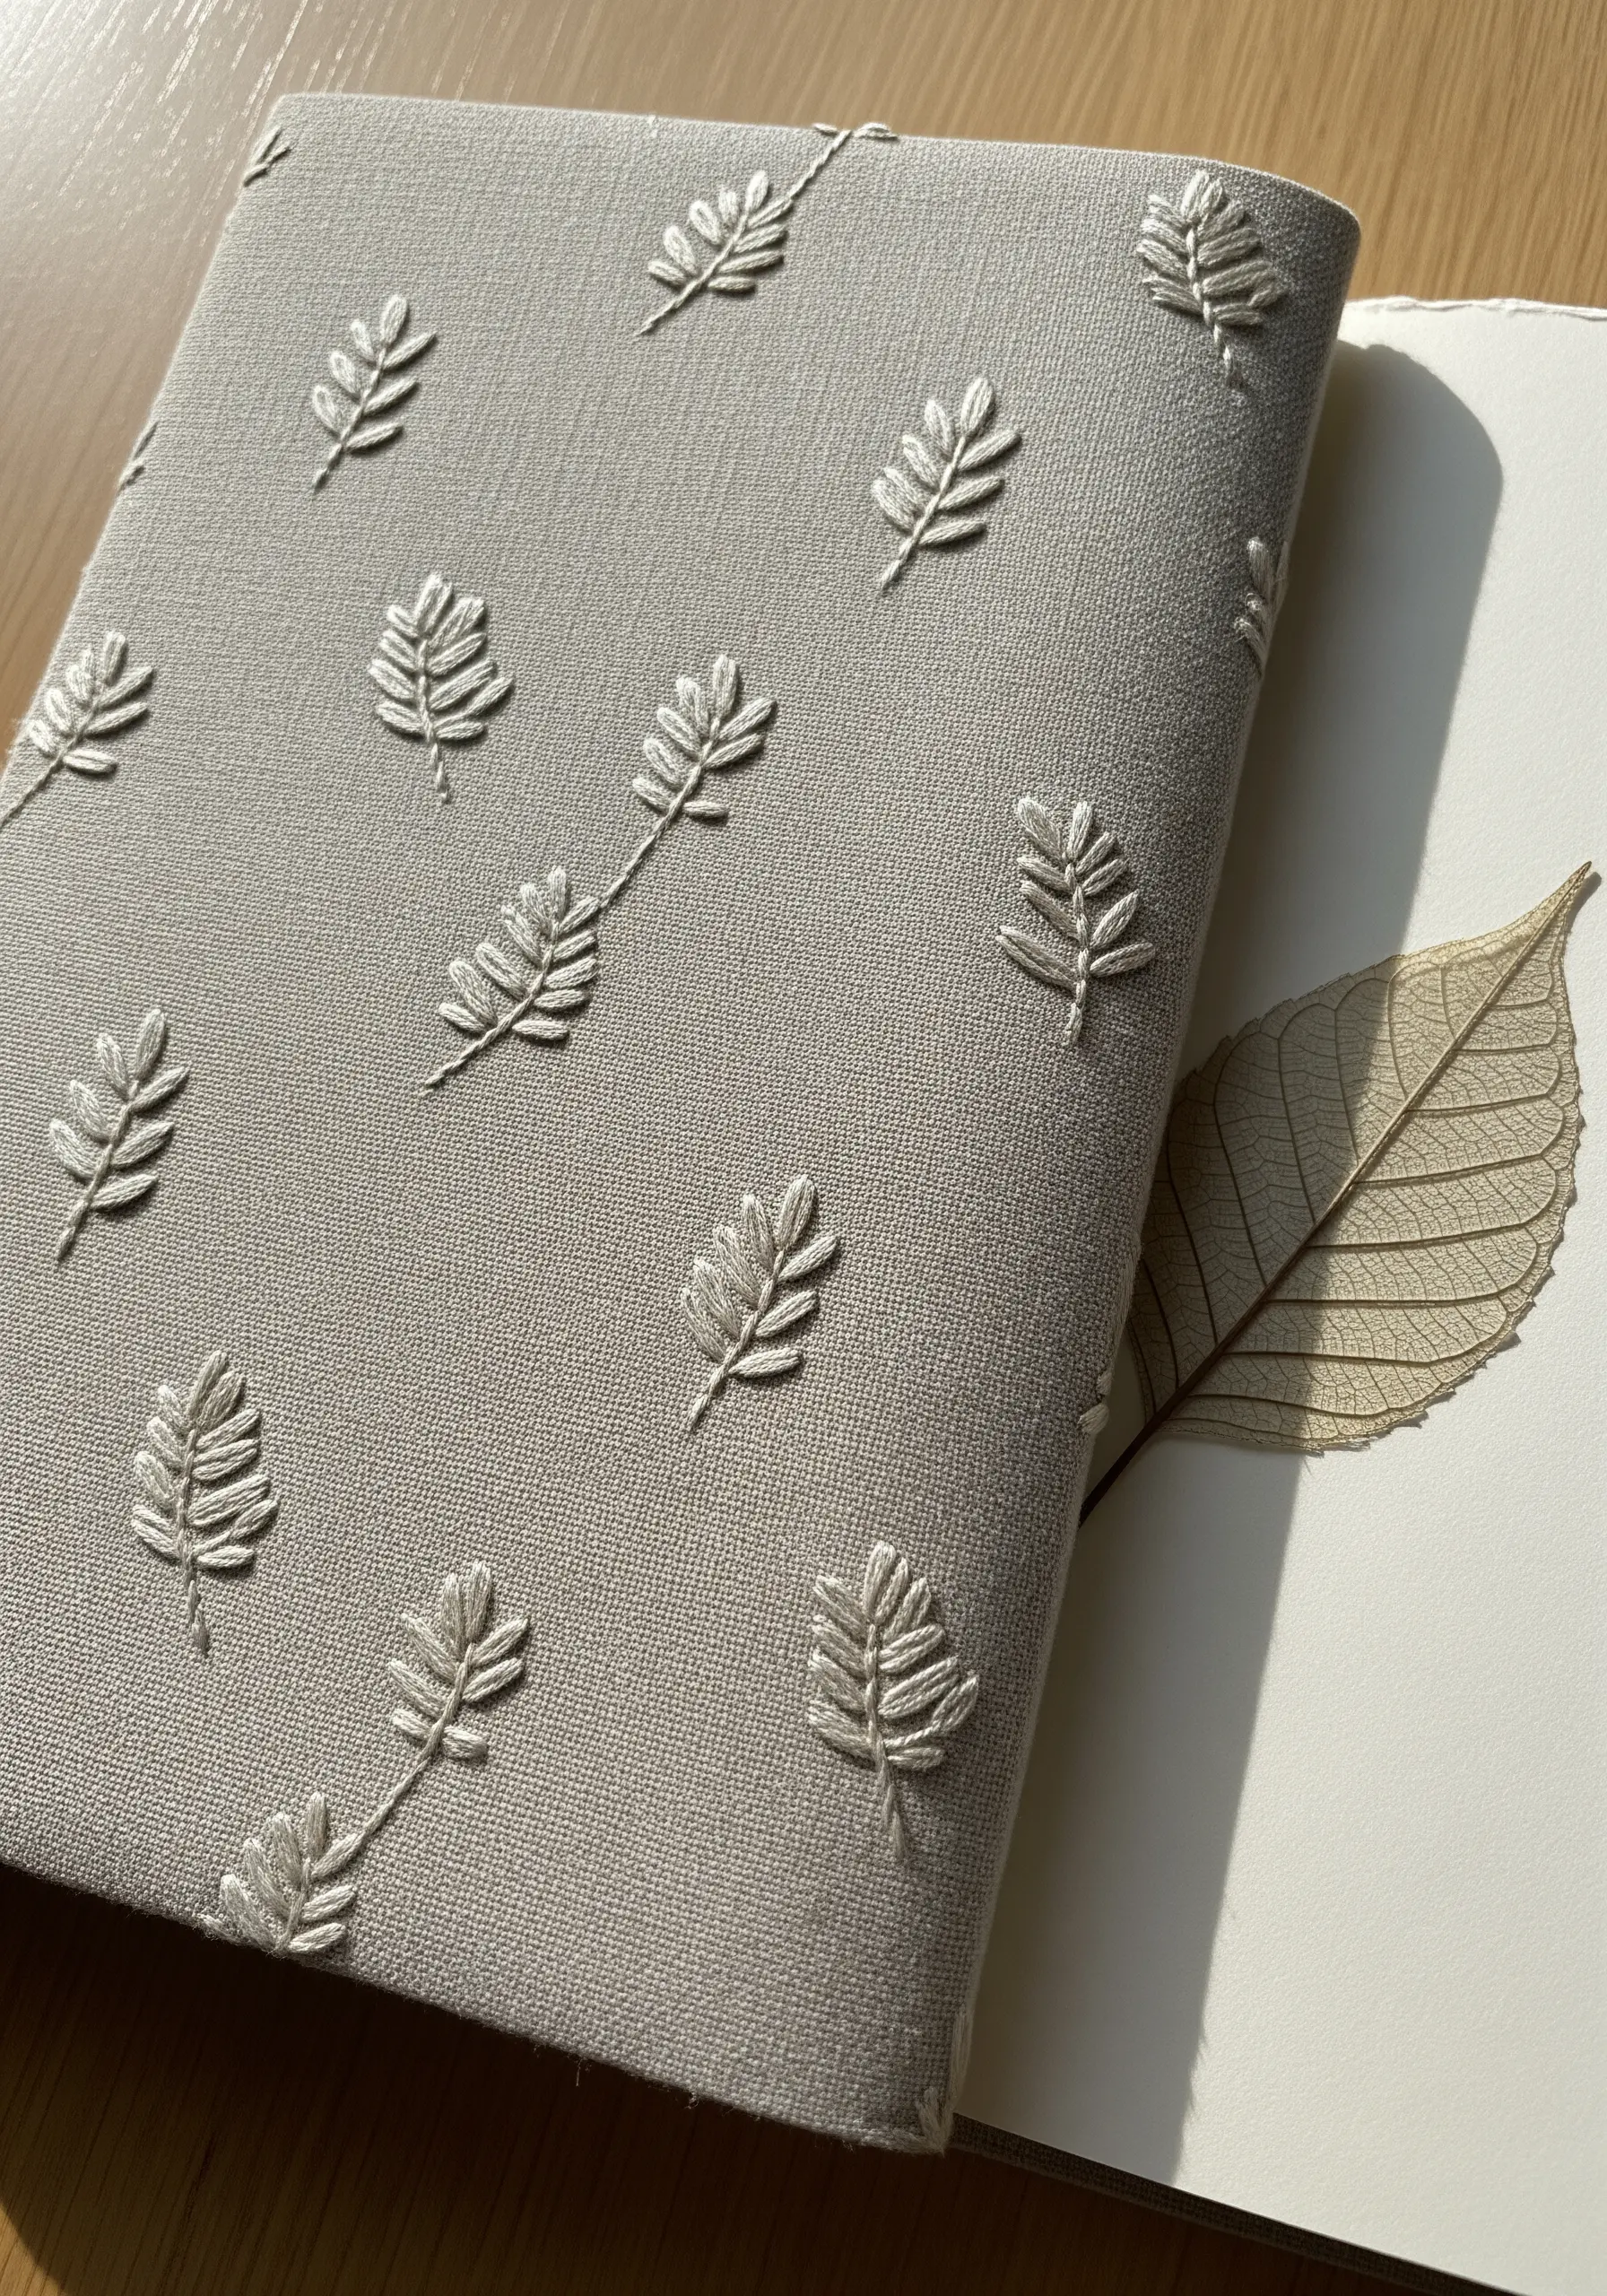
Create a delicate, frosted look by using a light, silvery-grey thread on a neutral-toned fabric cover.
The pattern is composed of tiny, repeating fern-like sprigs made from a central straight stitch with smaller straight stitches branching off.
By stitching the motifs in a randomly scattered but evenly distributed pattern, you create a texture that is both organic and cohesive.
This subtle, textural approach adds immense character without relying on bright colors.