A simple scarf holds so much potential. It’s a canvas you can wear, a small comfort you can carry with you. But how do you transform it from a mere accessory into a piece of personal art without feeling overwhelmed? You begin with a single leaf.
You don’t need dozens of complex stitches or a whole new set of supplies. Instead, you need intention. The ideas that follow are more than just patterns; they are lessons in texture, composition, and color. They show you how a padded satin stitch can make a leaf feel plump and alive, how a single strand of metallic thread can catch the light, or how combining different leaf shapes can tell a seasonal story.
Think of this as a new language for your needle and thread. Each design offers a technique you can learn, adapt, and apply to your own creations. Whether you stitch a trailing vine along an edge or a scatter of tiny buds, you are learning to see fabric not just as something to be covered, but as a space to be thoughtfully designed. Let’s begin.
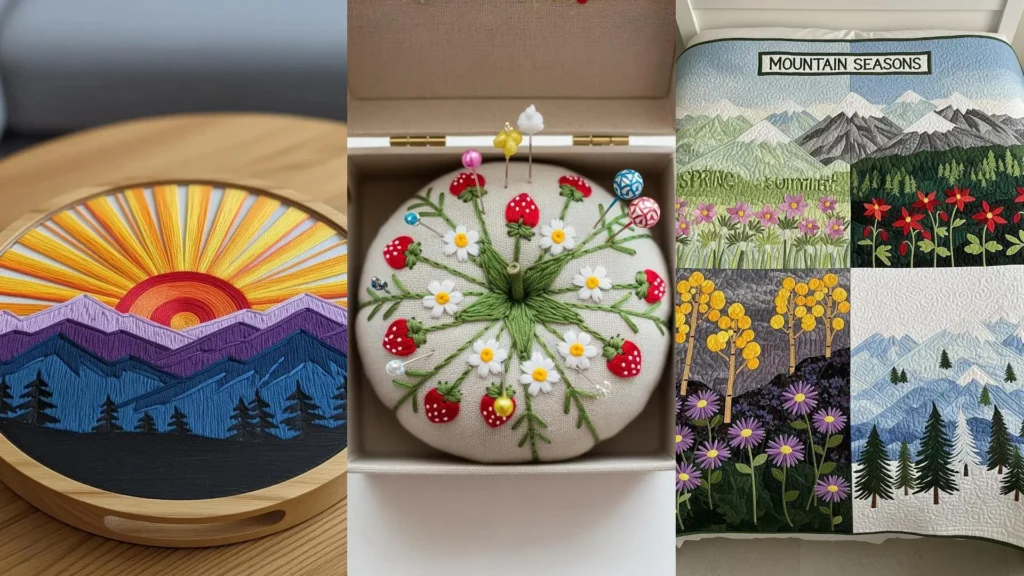
1. Combining Solid and Outline for Autumnal Depth
Create a dynamic composition by pairing solidly filled leaves with delicate outlined forms.
Use long-and-short stitch for the maple leaves to achieve a soft, painterly color blend that mimics nature.
For the ginkgo leaves, a classic satin stitch provides a smooth, lustrous contrast.
Intersperse these with simple backstitch outlines of other leaf shapes; this adds a skeletal, airy quality that prevents the design from feeling too heavy and creates visual depth.
This layering of fill density is a professional technique for adding richness to any botanical piece.
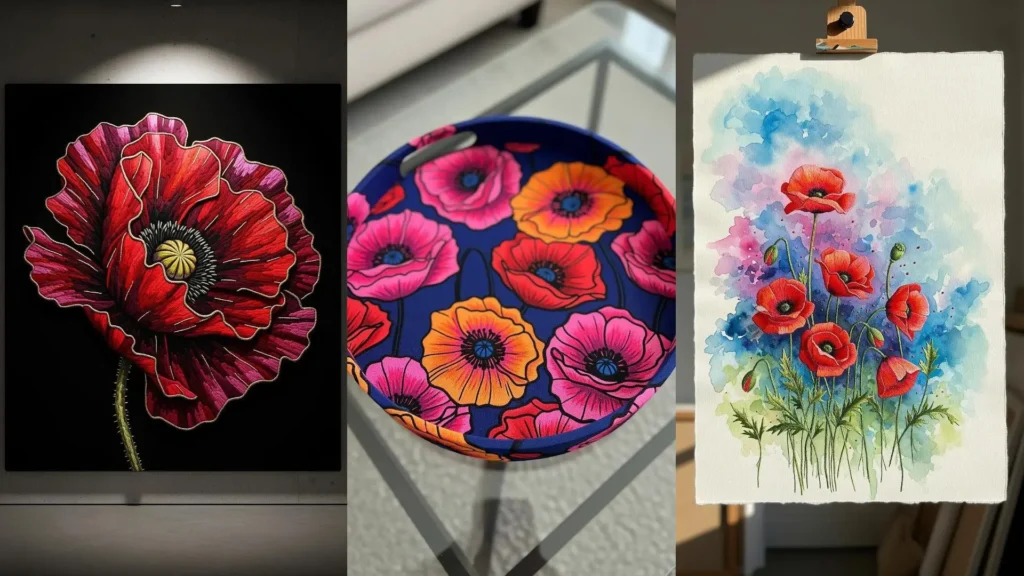
2. Crafting a Botanical Frame with Appliqué and Stitch
Transform the edges of your scarf into a lush botanical frame that draws the eye inward.
For the round eucalyptus leaves, use appliqué for quick, dimensional results.
Cut small circles from felt or a non-fraying fabric in muted greens and secure them with a simple stitch around the edge.
Contrast this texture with delicate, cascading willow leaves stitched using the fishbone stitch, which cleverly forms the center vein and fills the leaf shape in one fluid motion.
This mix of techniques offers a visible improvement in texture and form.
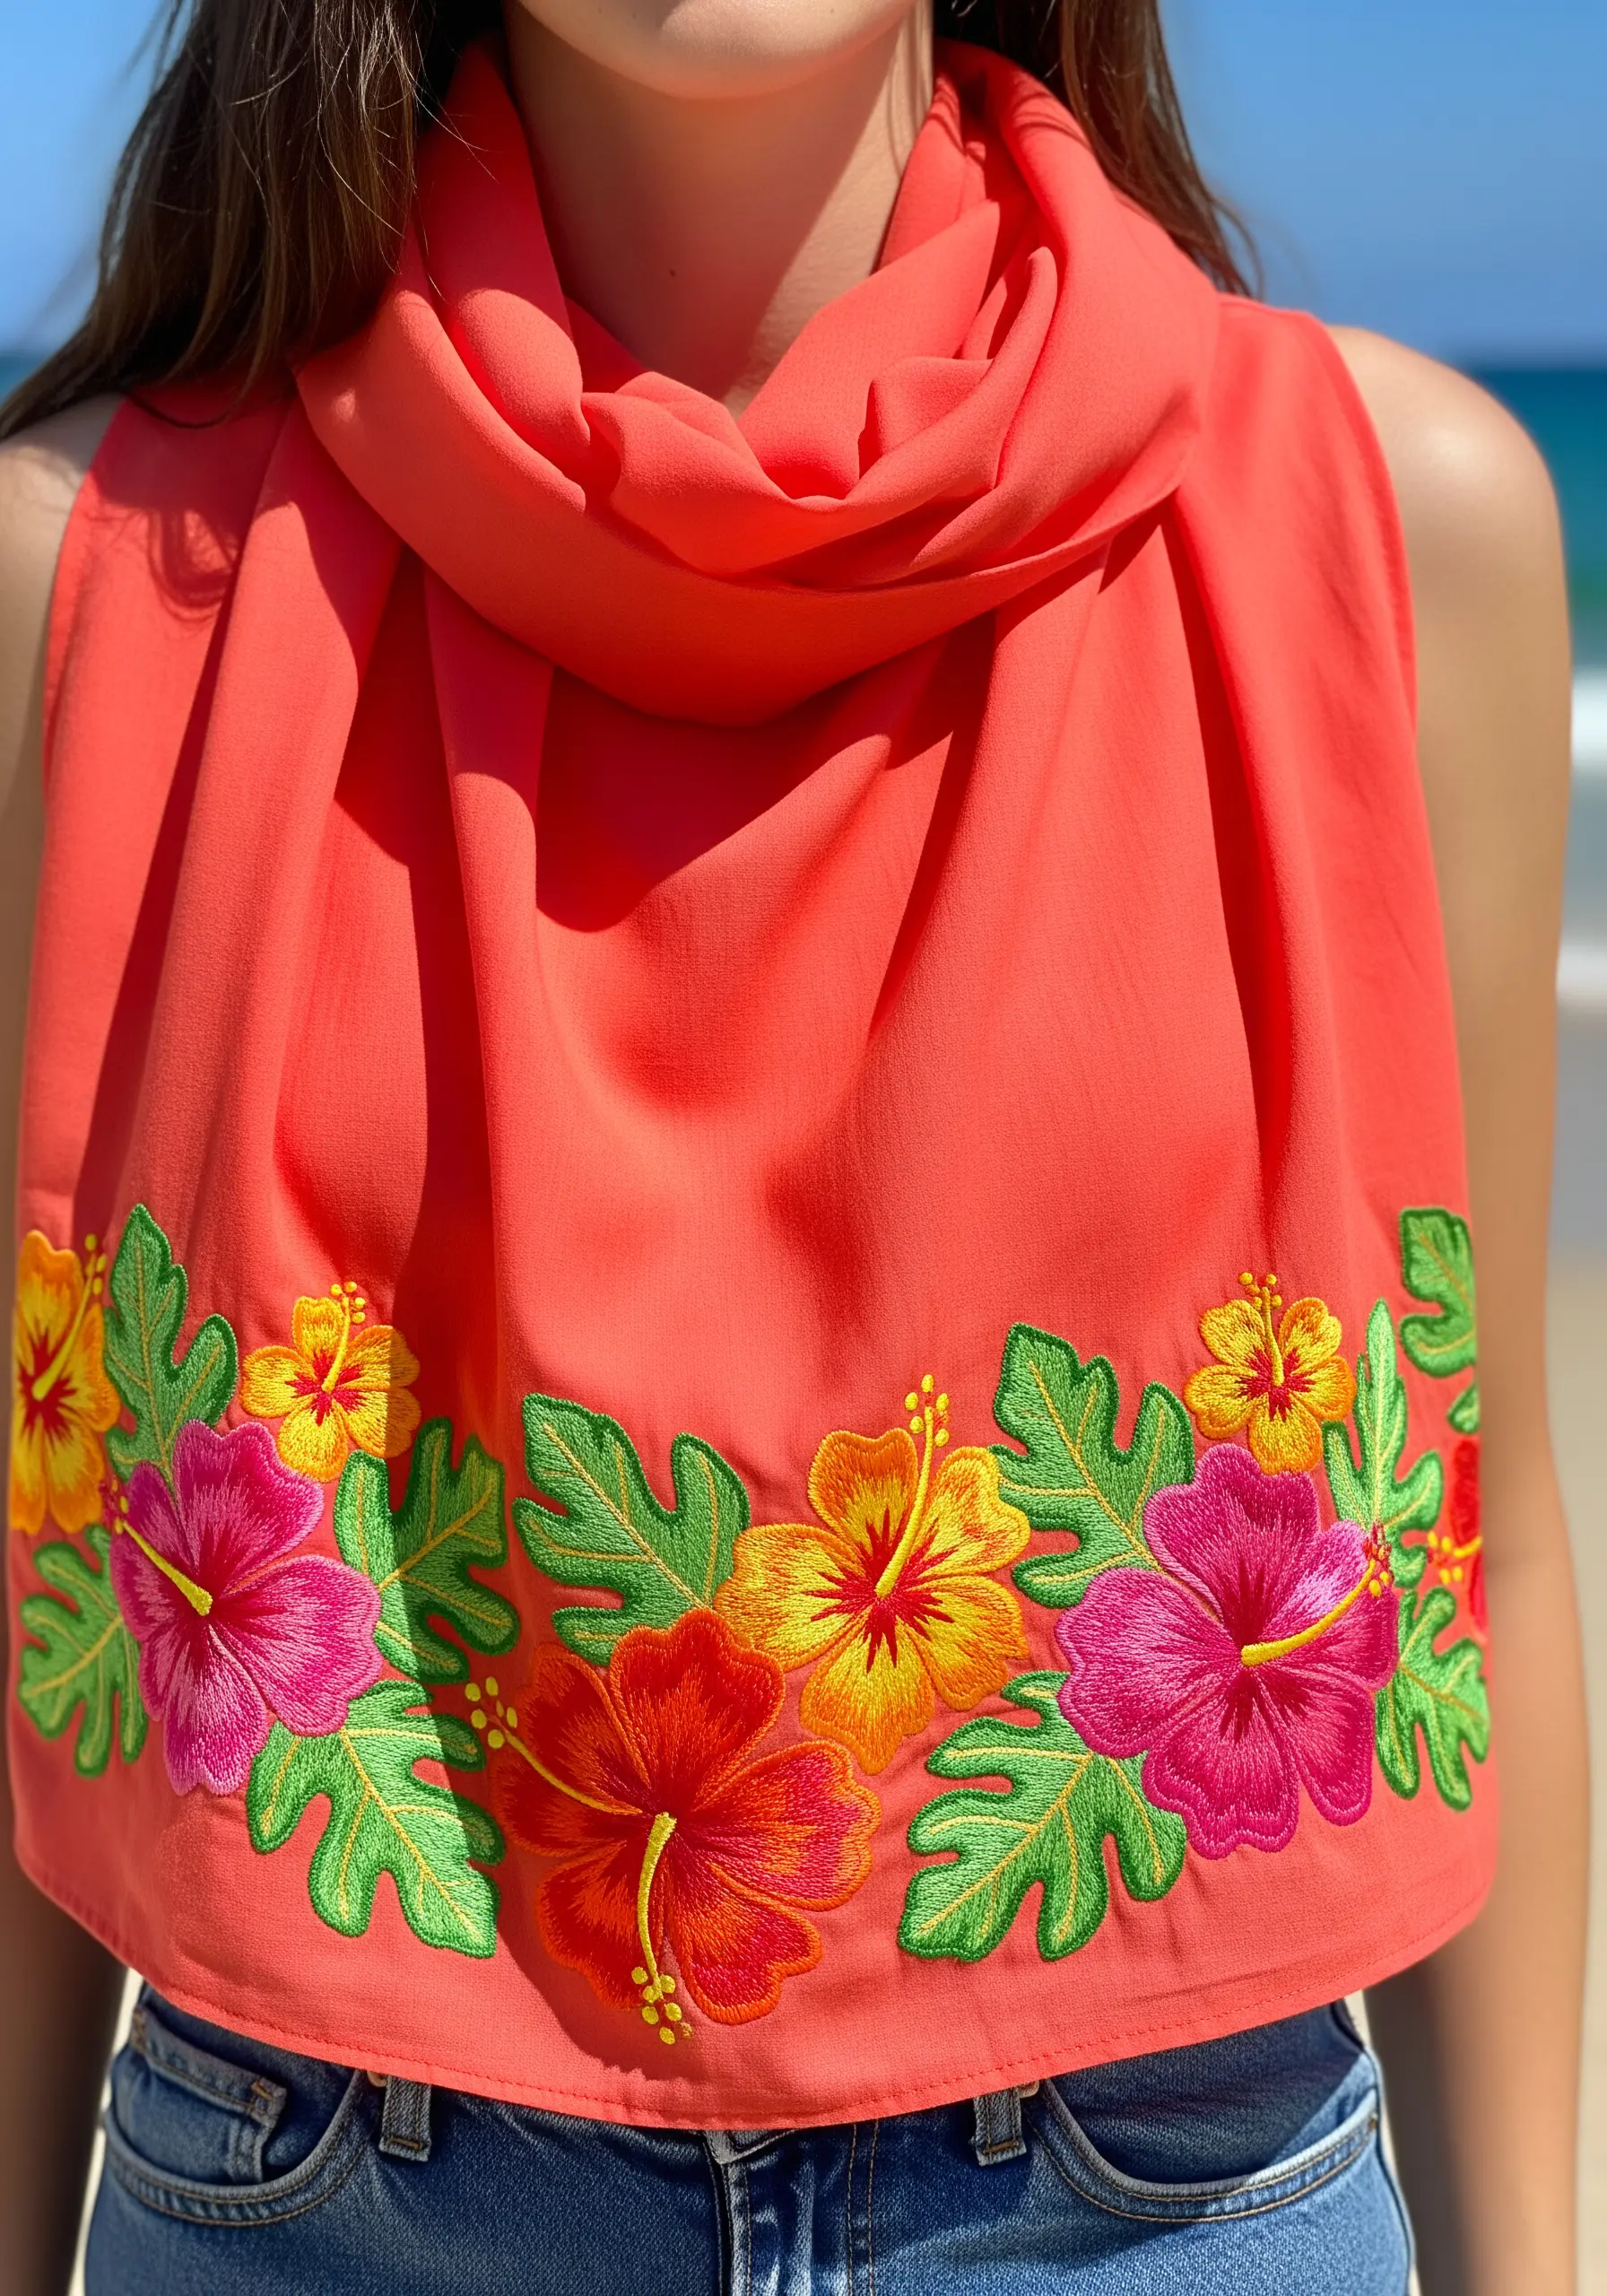
3. Achieving Graphic Tropicals with Crisp Color Blocking
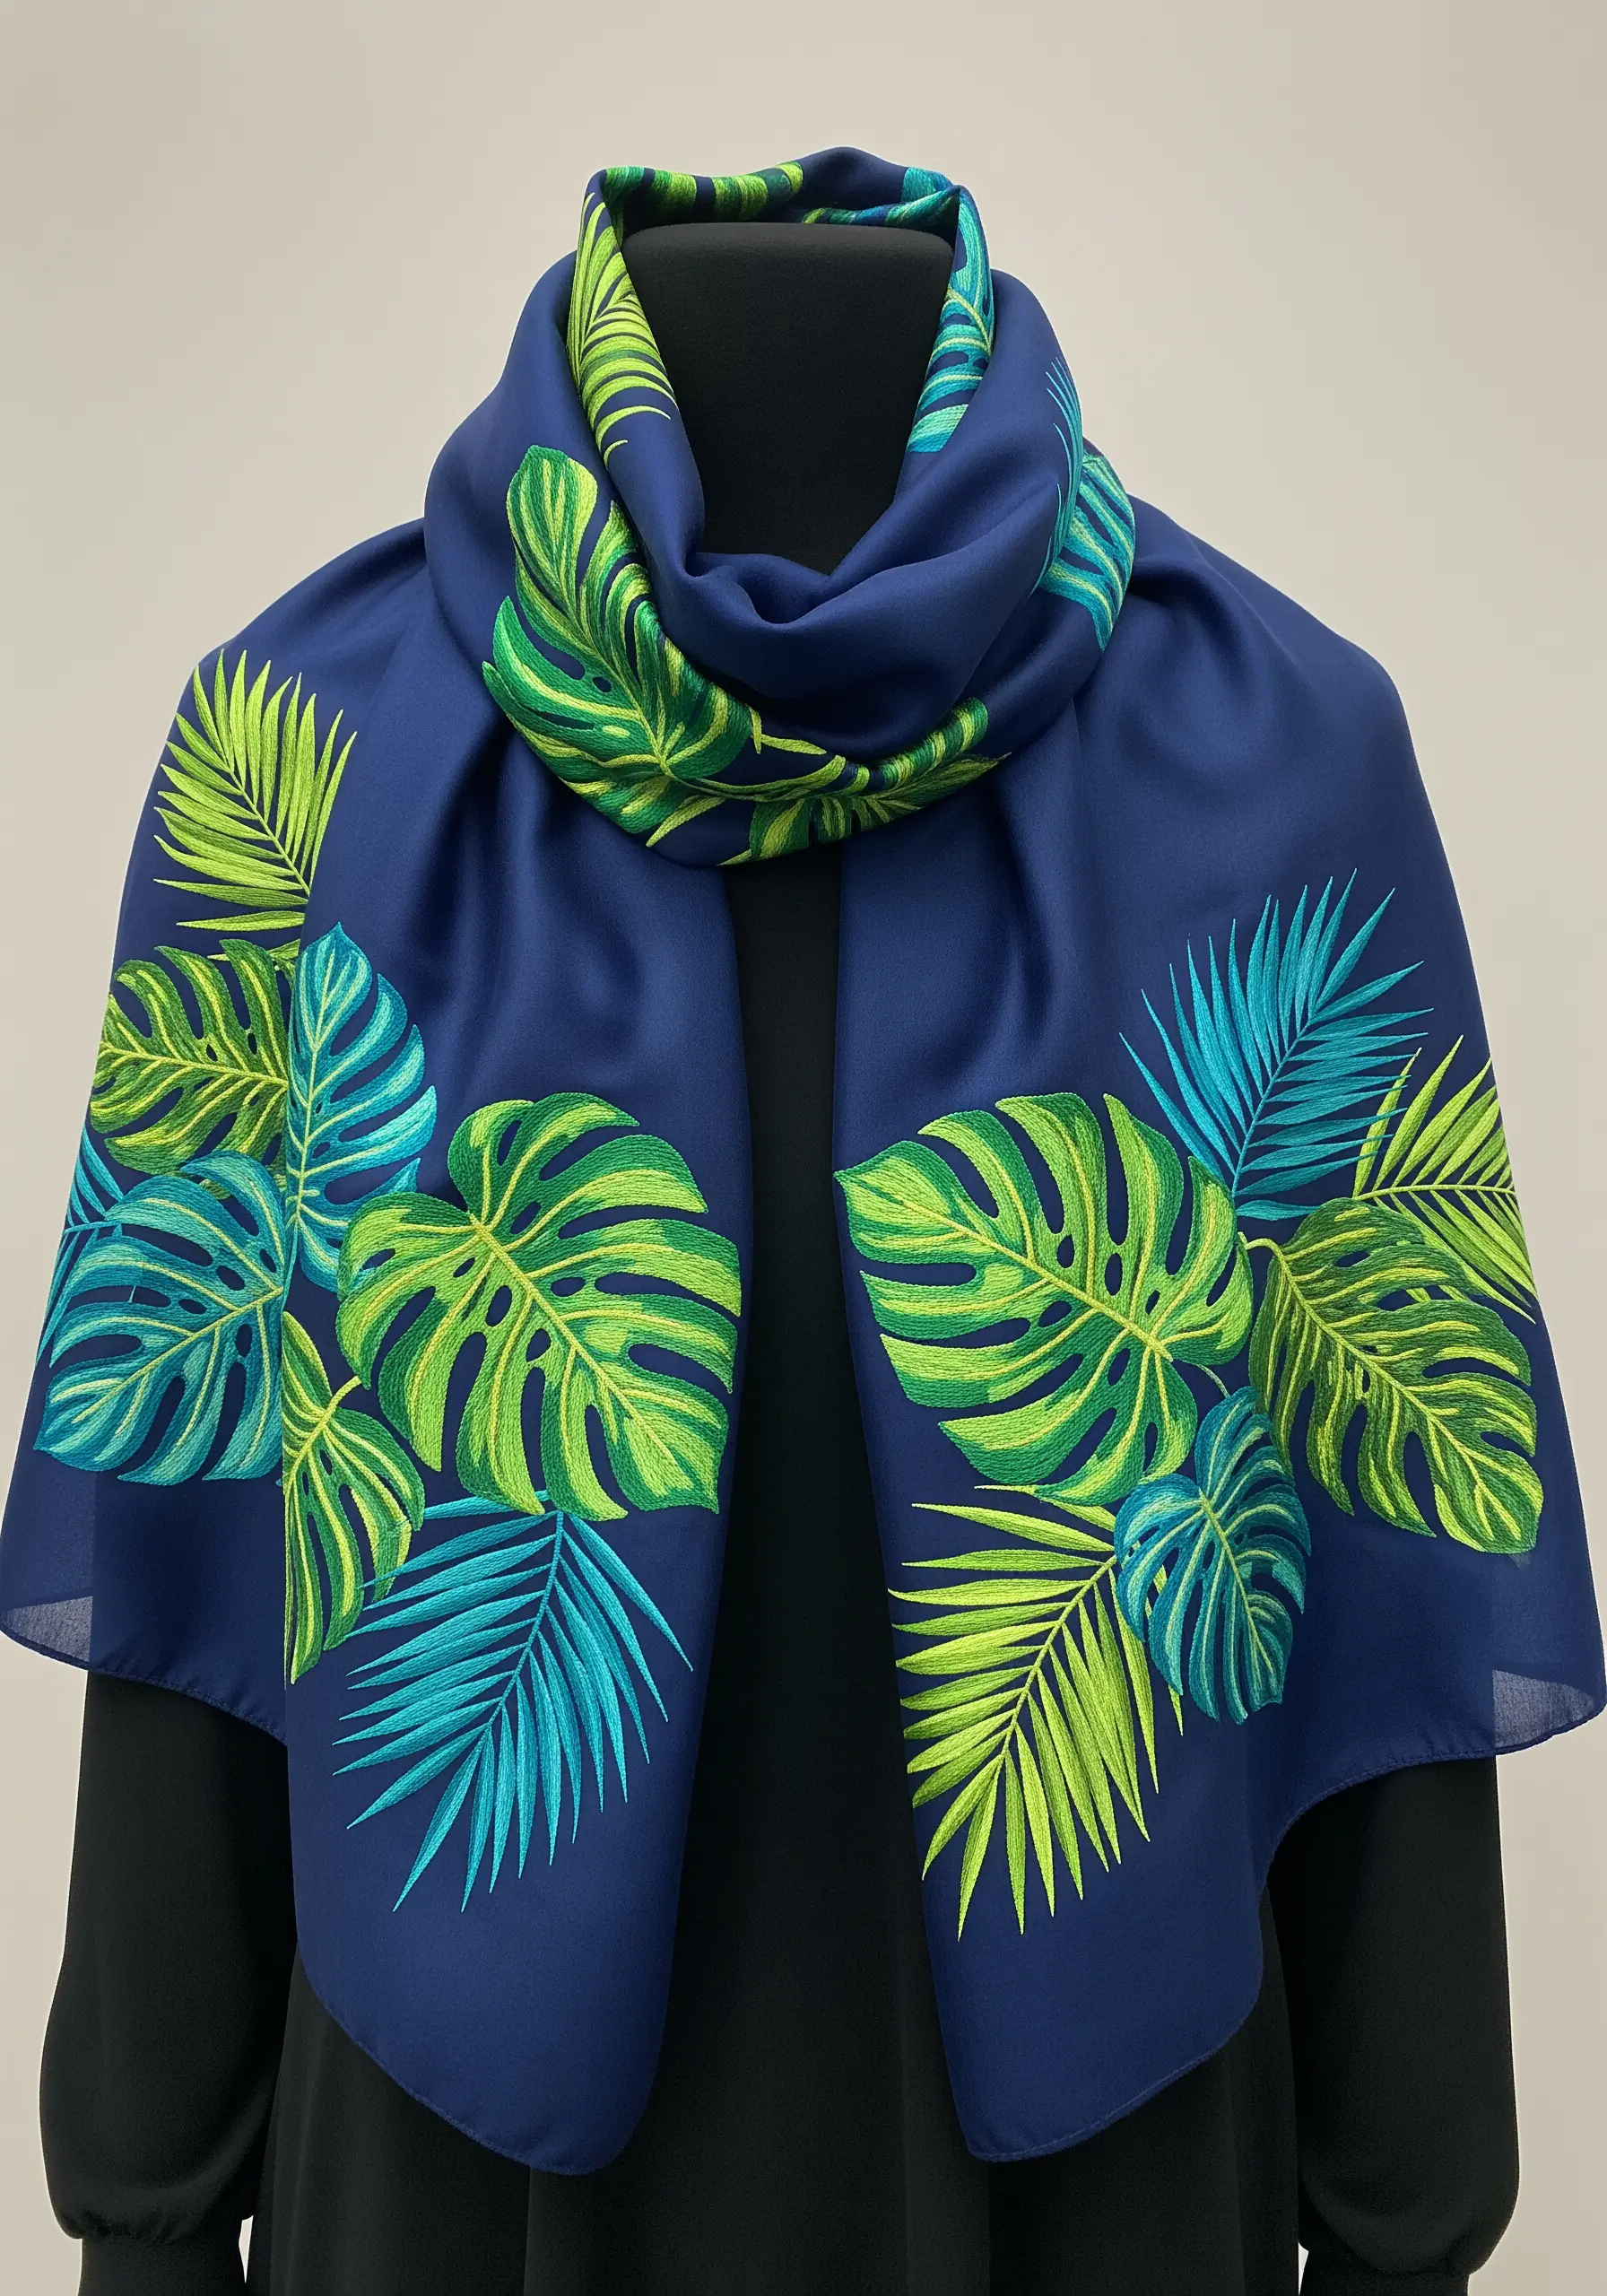
To achieve a bold, modern tropical look, treat each color segment as its own distinct shape.
First, outline every section with a split stitch; this creates a raised, stable edge for your fill stitches to sit against, guaranteeing a sharp, clean line.
Then, fill each shape with a dense satin stitch, ensuring every stitch lies perfectly parallel for a smooth, almost printed appearance.
This method prevents colors from bleeding into one another and gives your work a polished, professional finish.
4. Infusing Rustic Charm with Textured Outlines and Fills
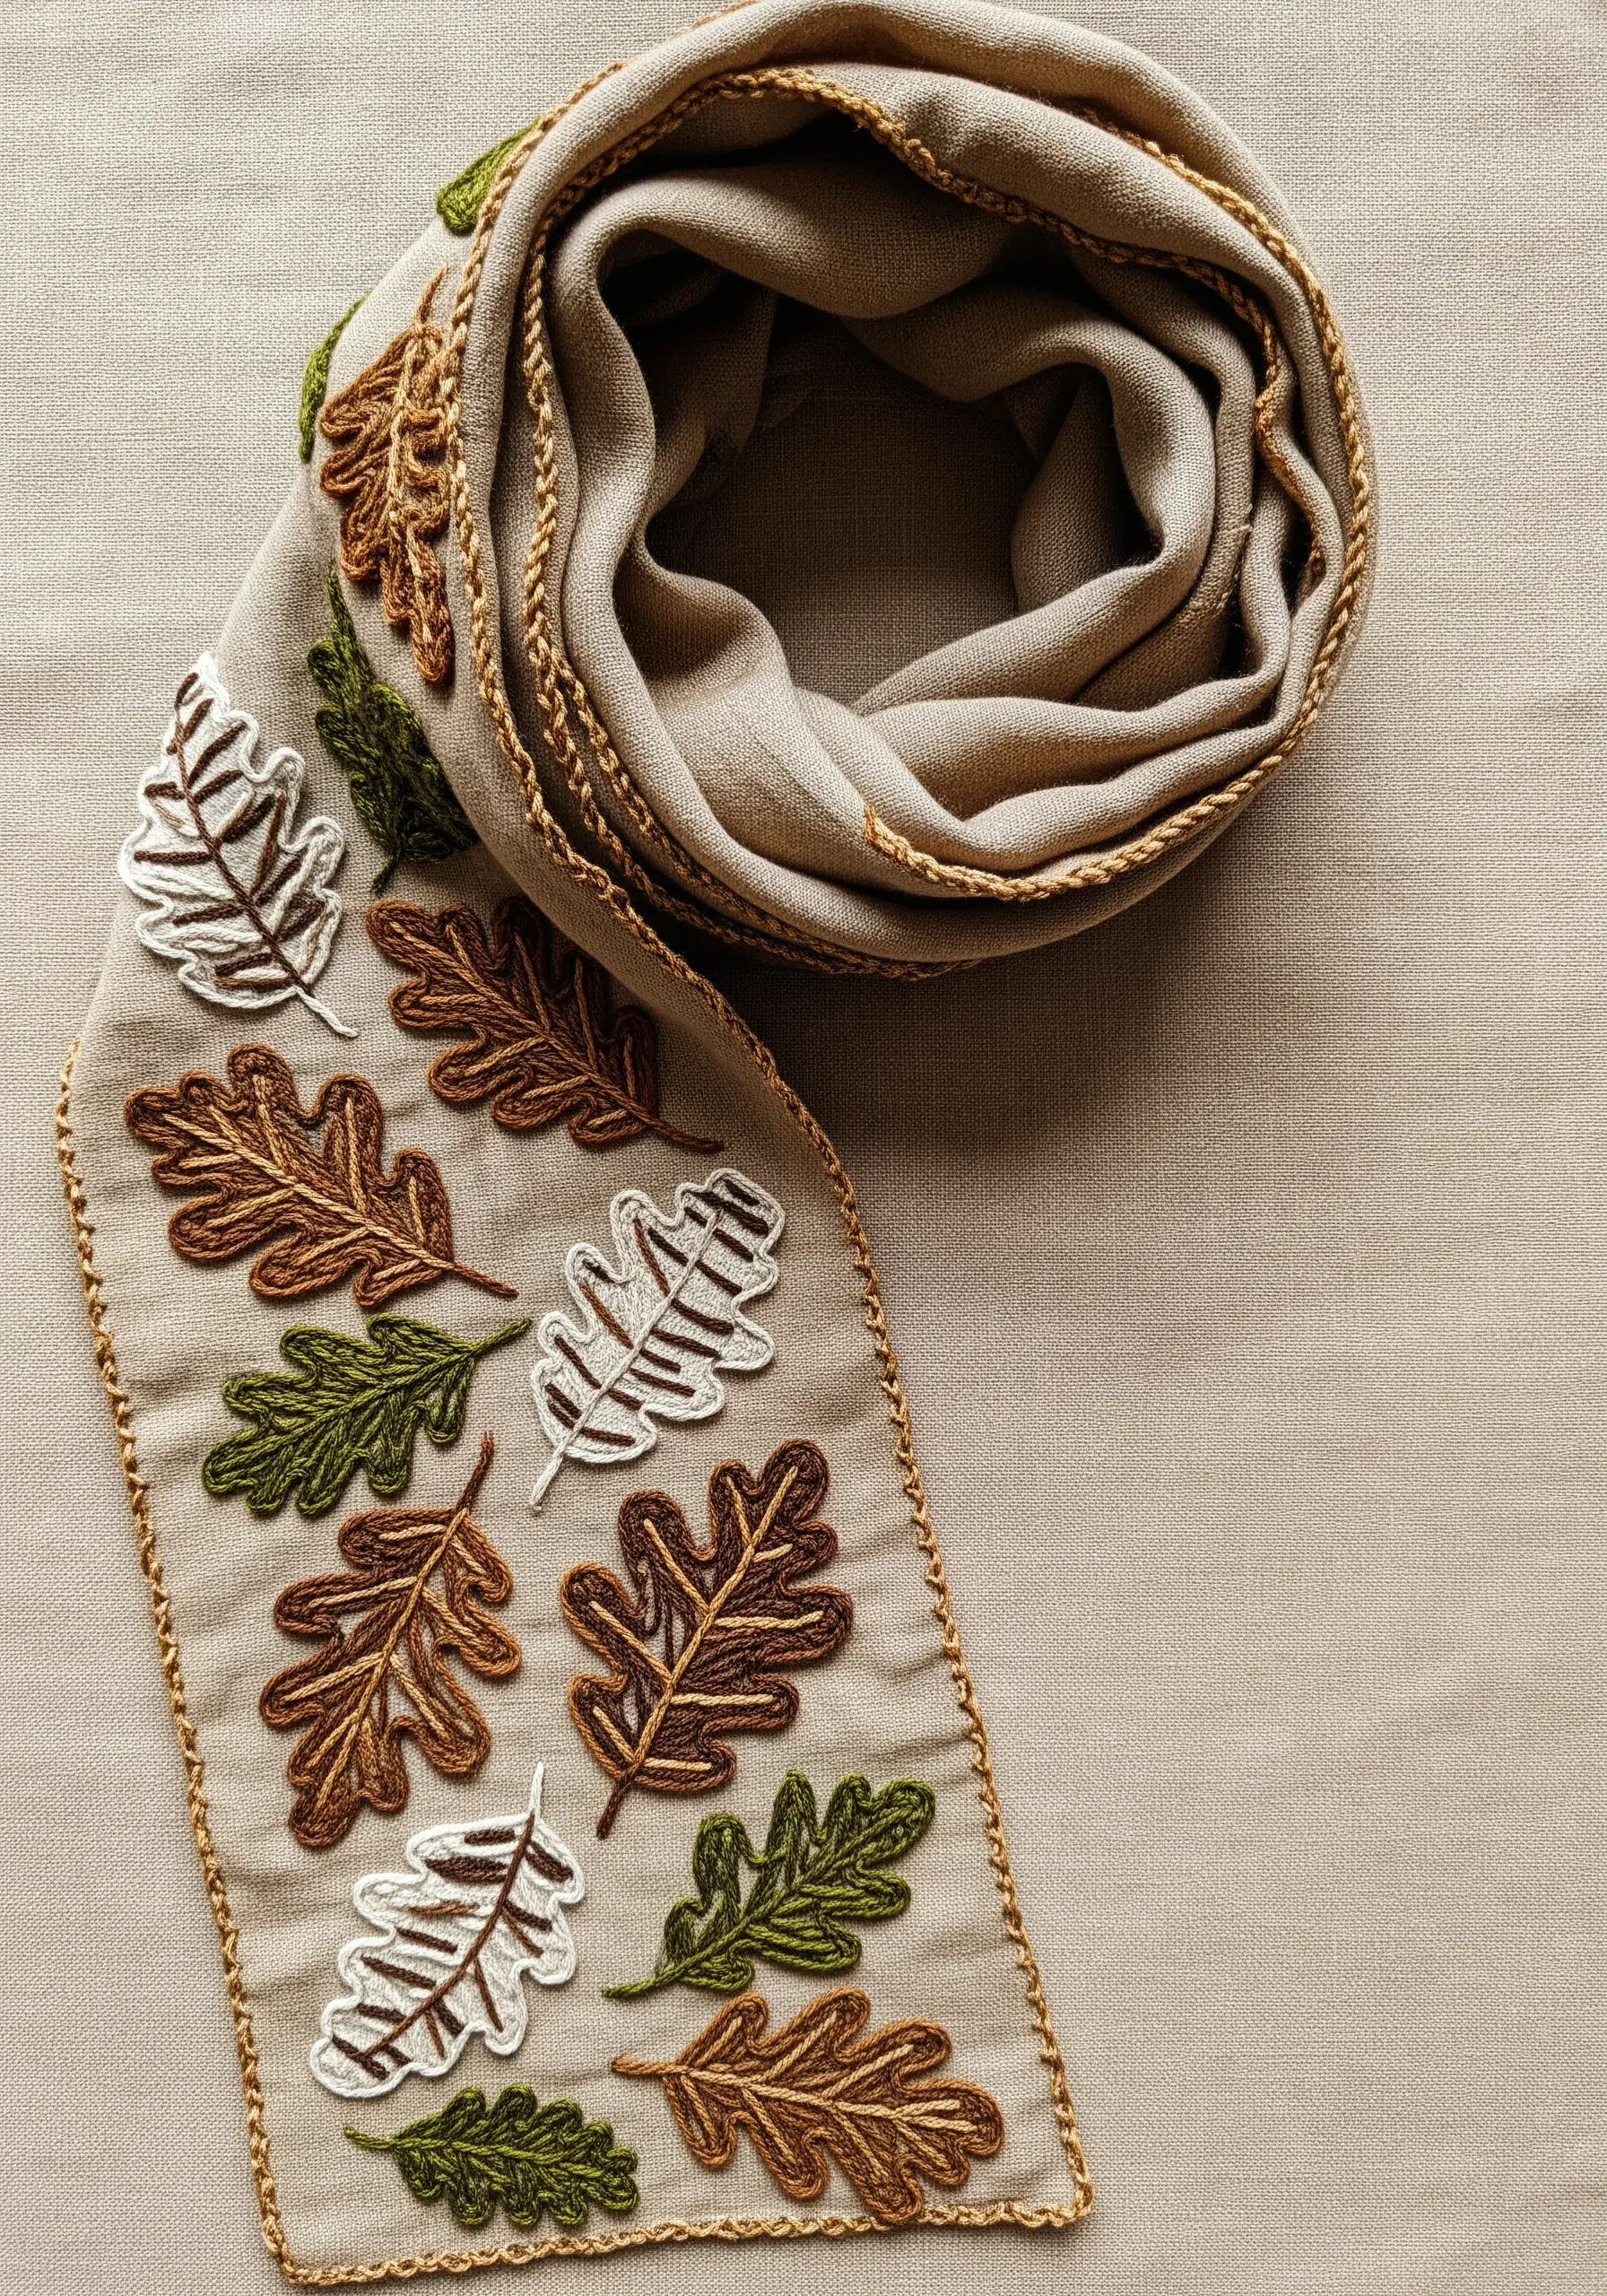
Give simple leaf shapes a wonderfully rustic and tactile quality by focusing on texture over solid color.
Use a thick chain stitch or whipped backstitch for the outlines to give them prominence and a handmade feel.
Instead of a dense satin fill, scatter seed stitches within the leaf; this creates a speckled, airy texture that beautifully complements natural fabrics like linen.
Finishing the scarf edge with a knotted stitch, like a Palestrina knot, ties the entire piece together cohesively.
5. Designing a Light, Airy Scatter Pattern
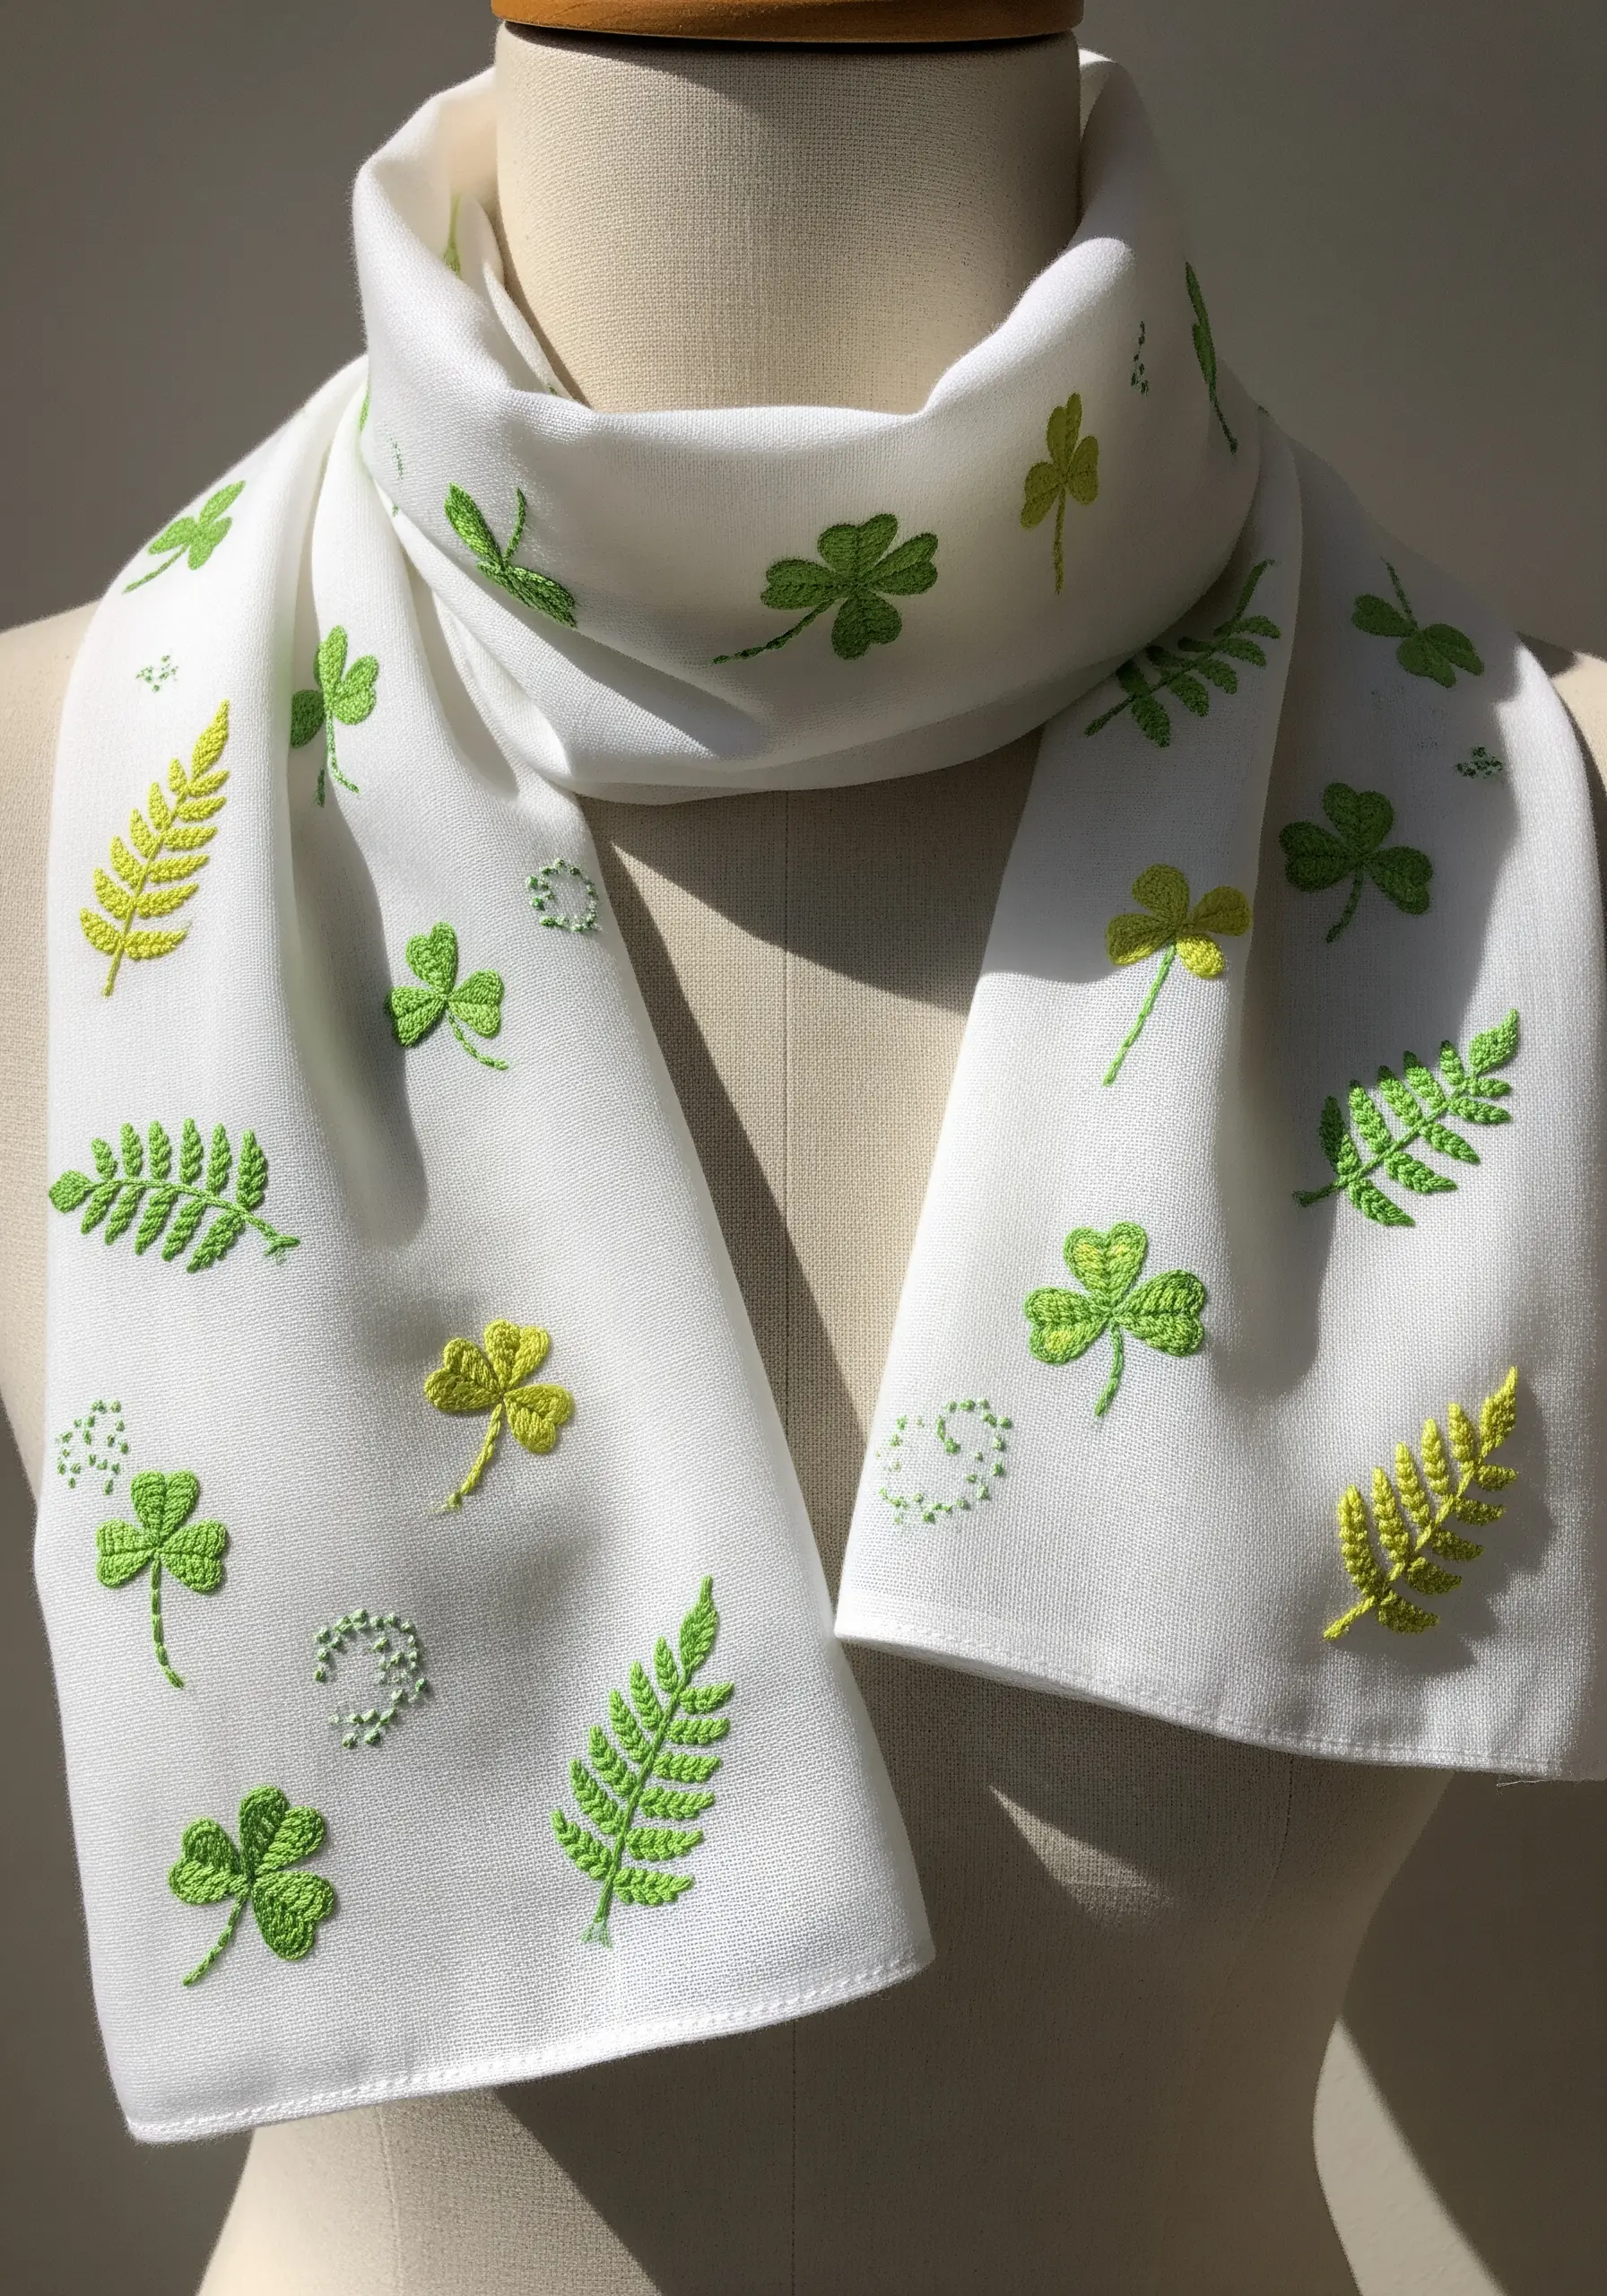
When scattering small motifs, the key to a sophisticated look is intentional randomness.
Vary the orientation and spacing of each fern and shamrock to create a natural, “windblown” effect across the fabric.
Use a simple satin stitch for the clover and a fishbone stitch for the ferns to introduce subtle textural differences.
To break up the repetition, add tiny clusters of French knots; this adds a touch of playful detail and makes the overall composition feel more organic and less rigid.
6. Mastering the Elegance of Monochrome Skeletal Leaves
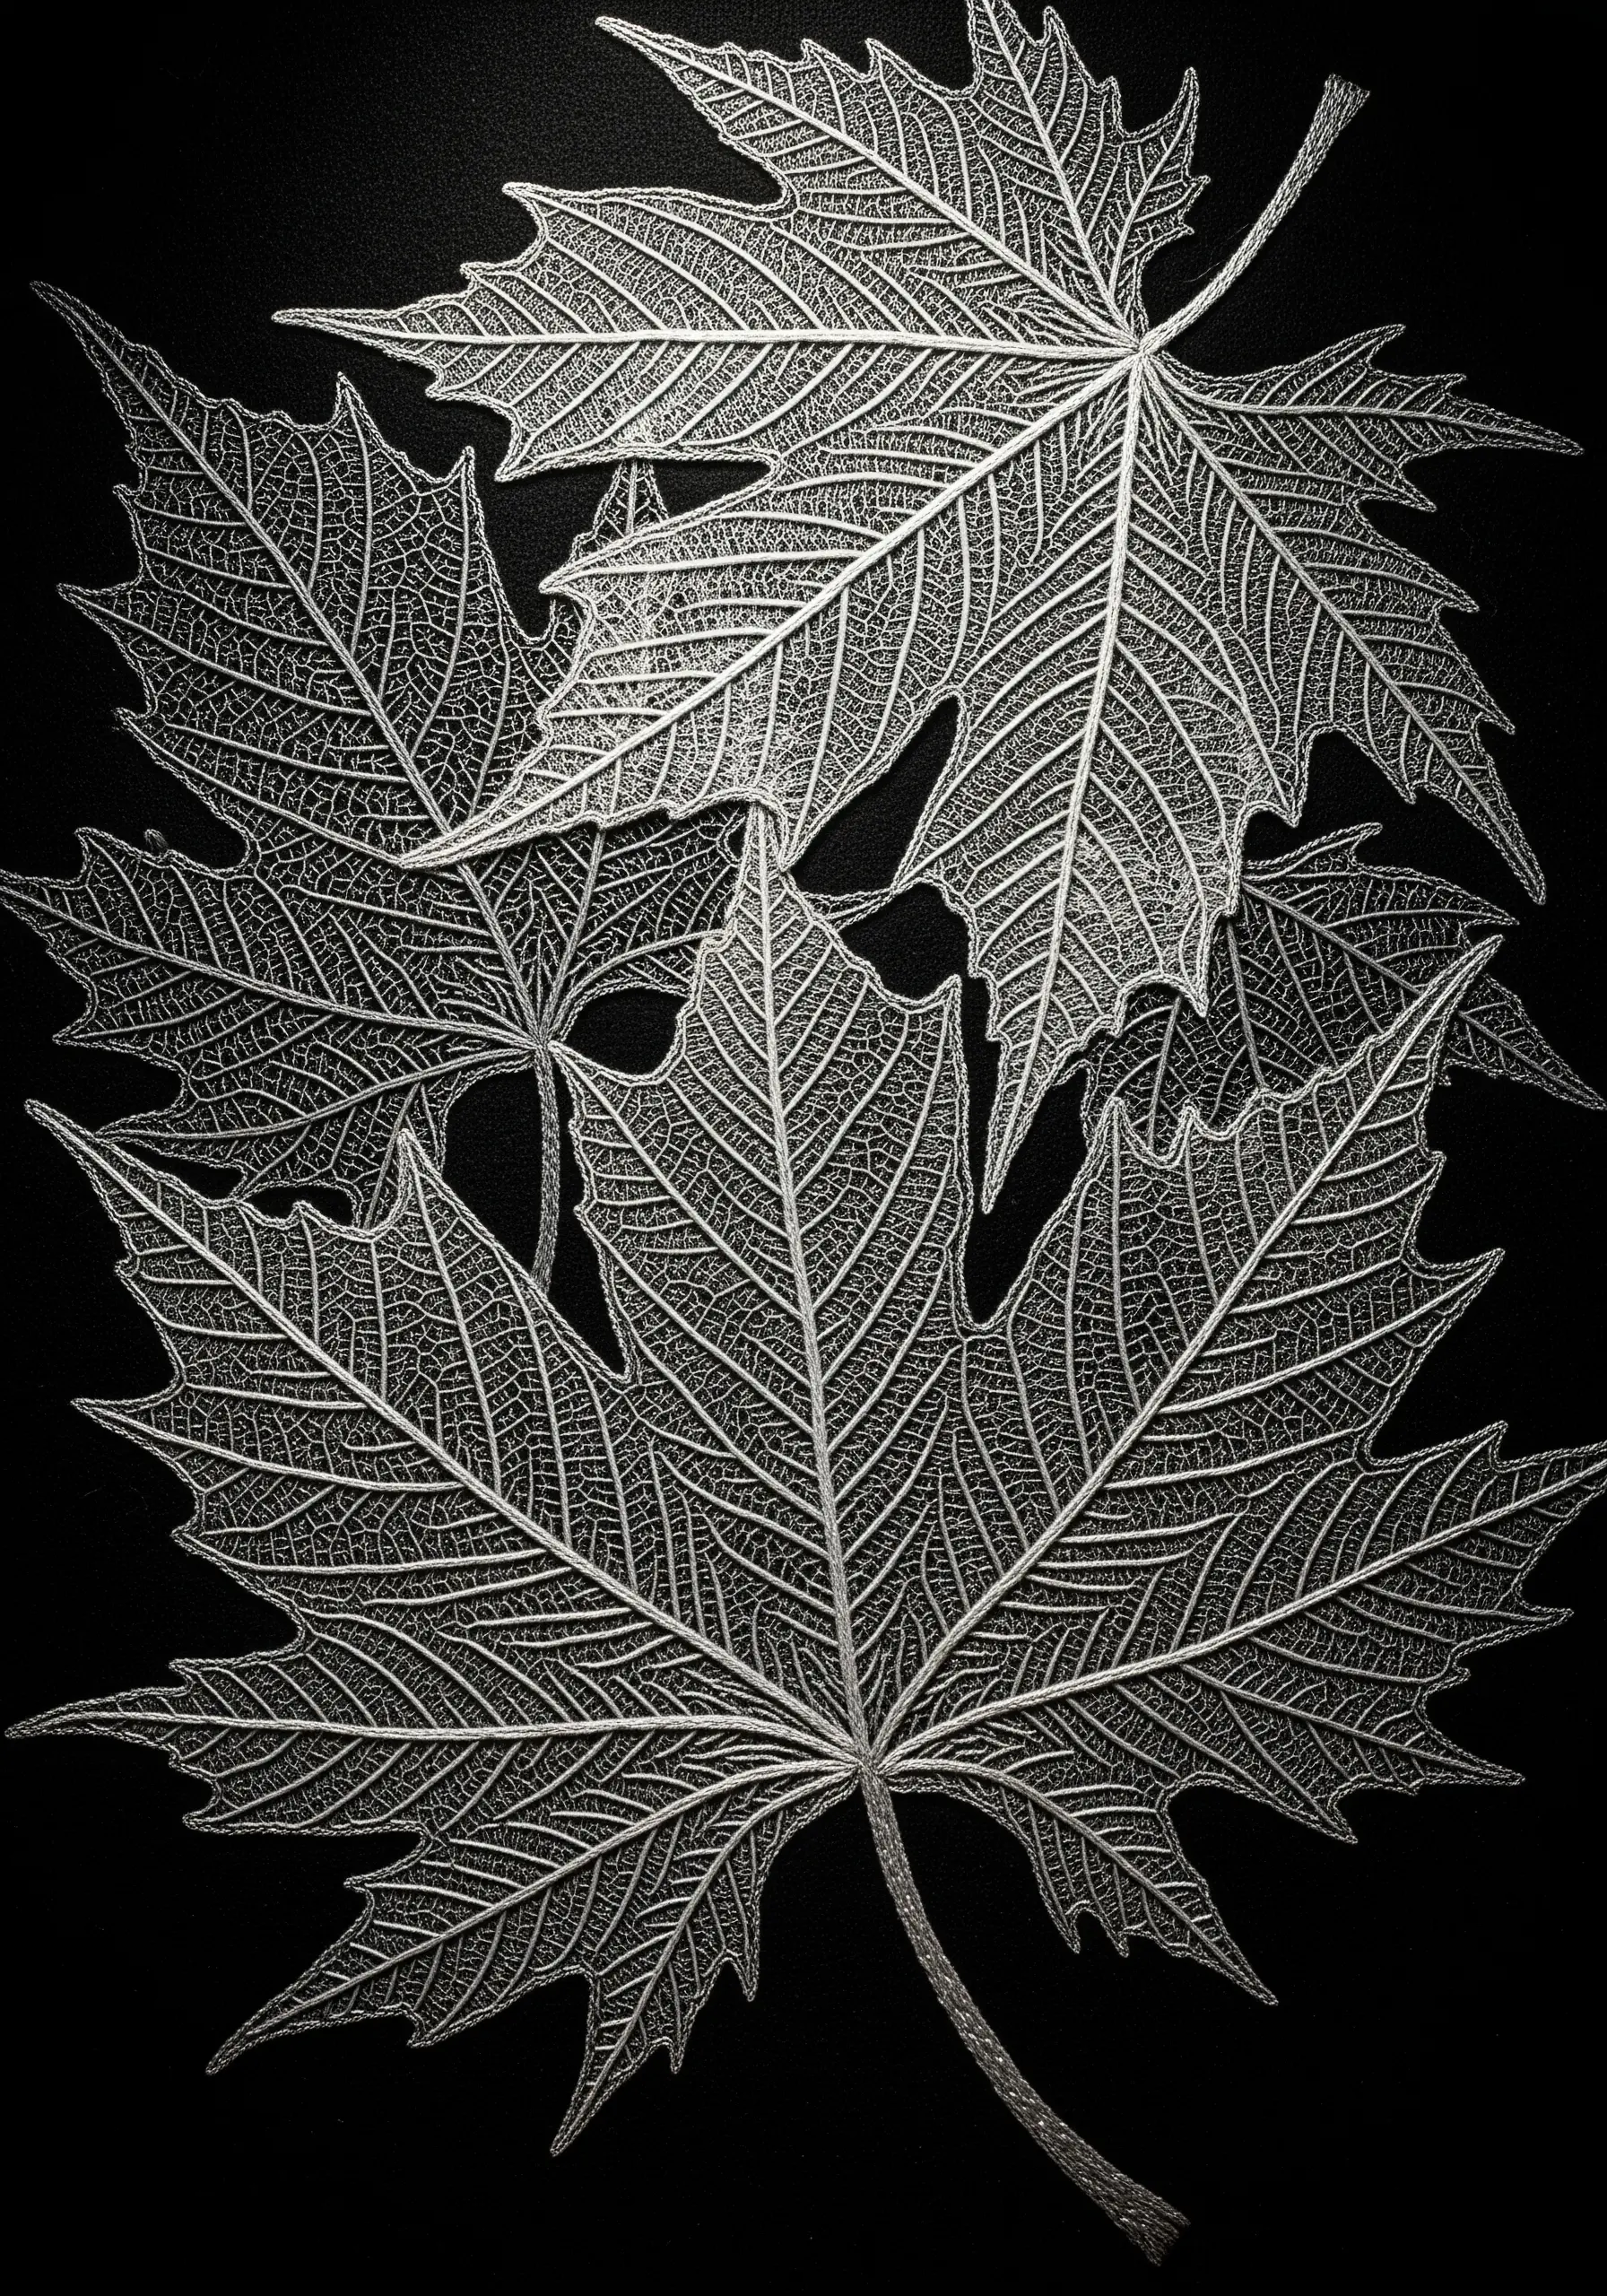
This powerfully minimalist effect is achieved by stitching only the intricate network of veins, leaving the body of the leaf to the imagination.
Use a single strand of a high-contrast thread—like silver metallic on black—for a delicate, web-like result.
A simple backstitch or stem stitch provides all the control you need for the fine lines.
To ensure your fabric doesn’t pucker under the tension of so many intersecting stitches, always use a firm stabilizer and remove it upon completion.
7. Building Richness with Padded Stitching and Knots
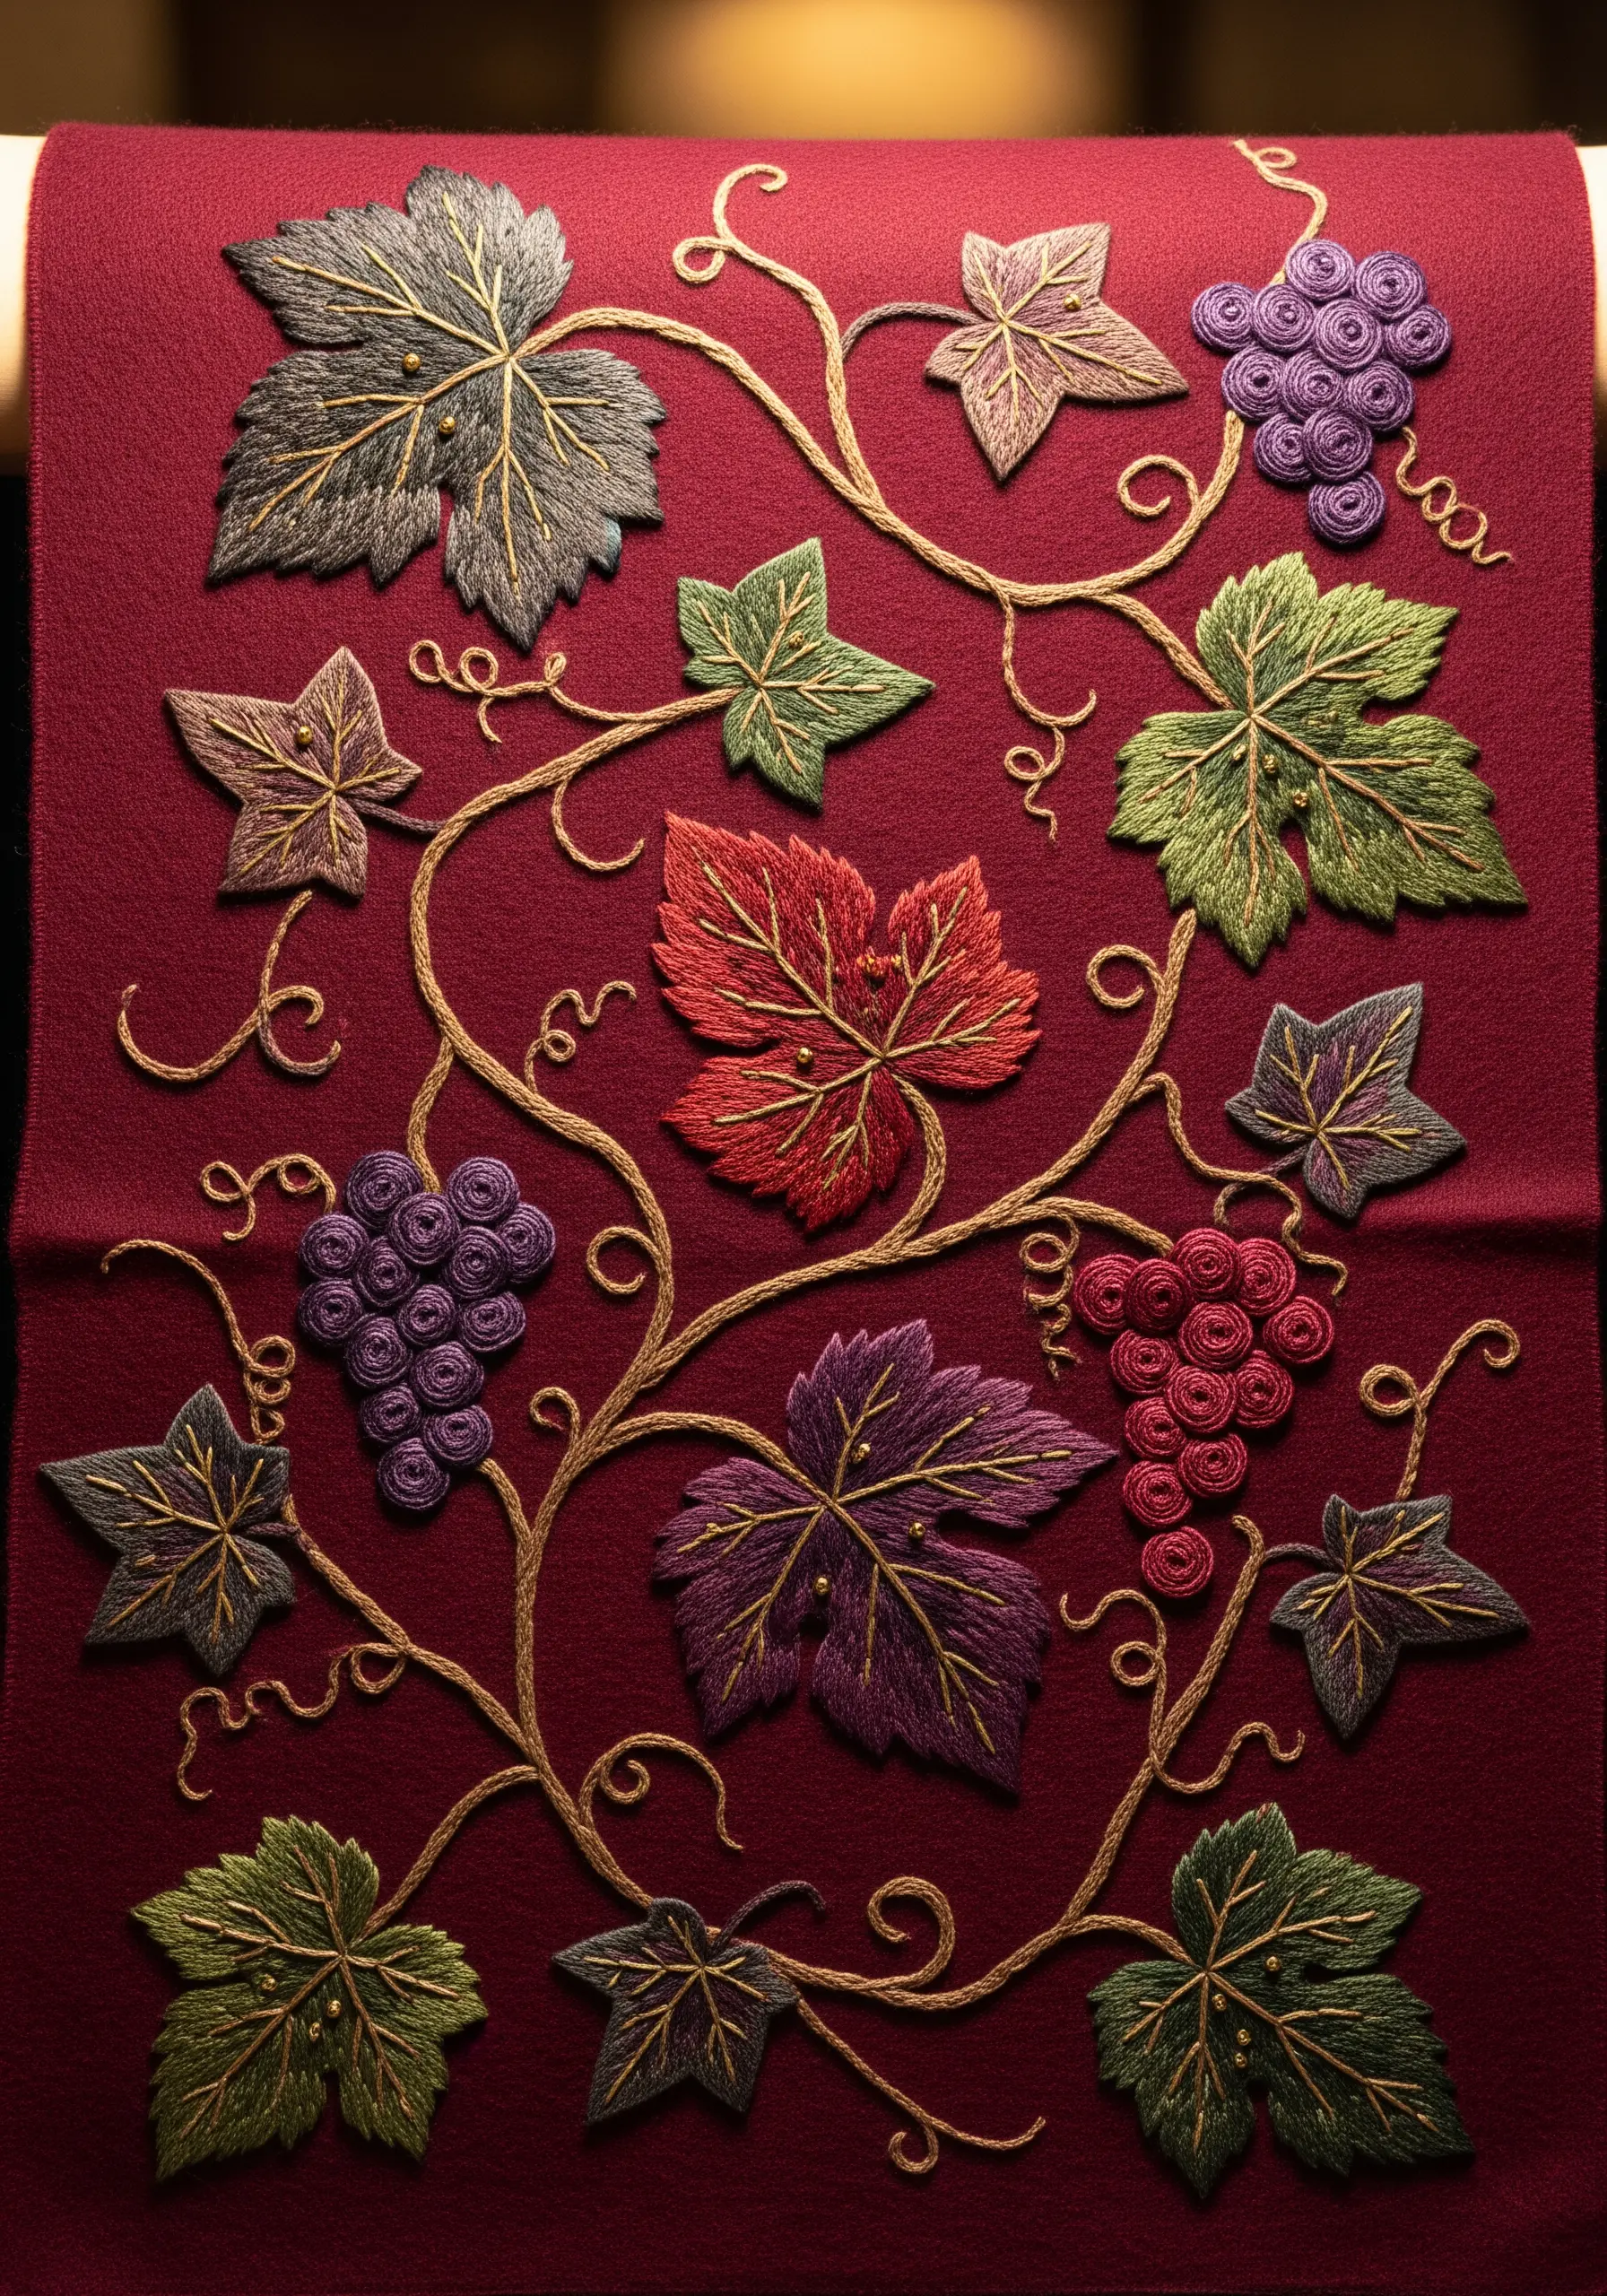
Give your leaves a raised, sculptural quality using padded satin stitch.
Create a foundation of small, dense running stitches within the leaf shape, then cover this padding with your final satin stitch; this physically lifts the embroidery off the fabric surface.
Pair this technique with tightly packed French knots for the grape clusters, using a variegated thread to add realistic dimension.
The combination of these raised, sculptural embroidery effects makes the entire piece feel luxurious and tactile.
8. Integrating Dimensional Flowers with Flat Foliage
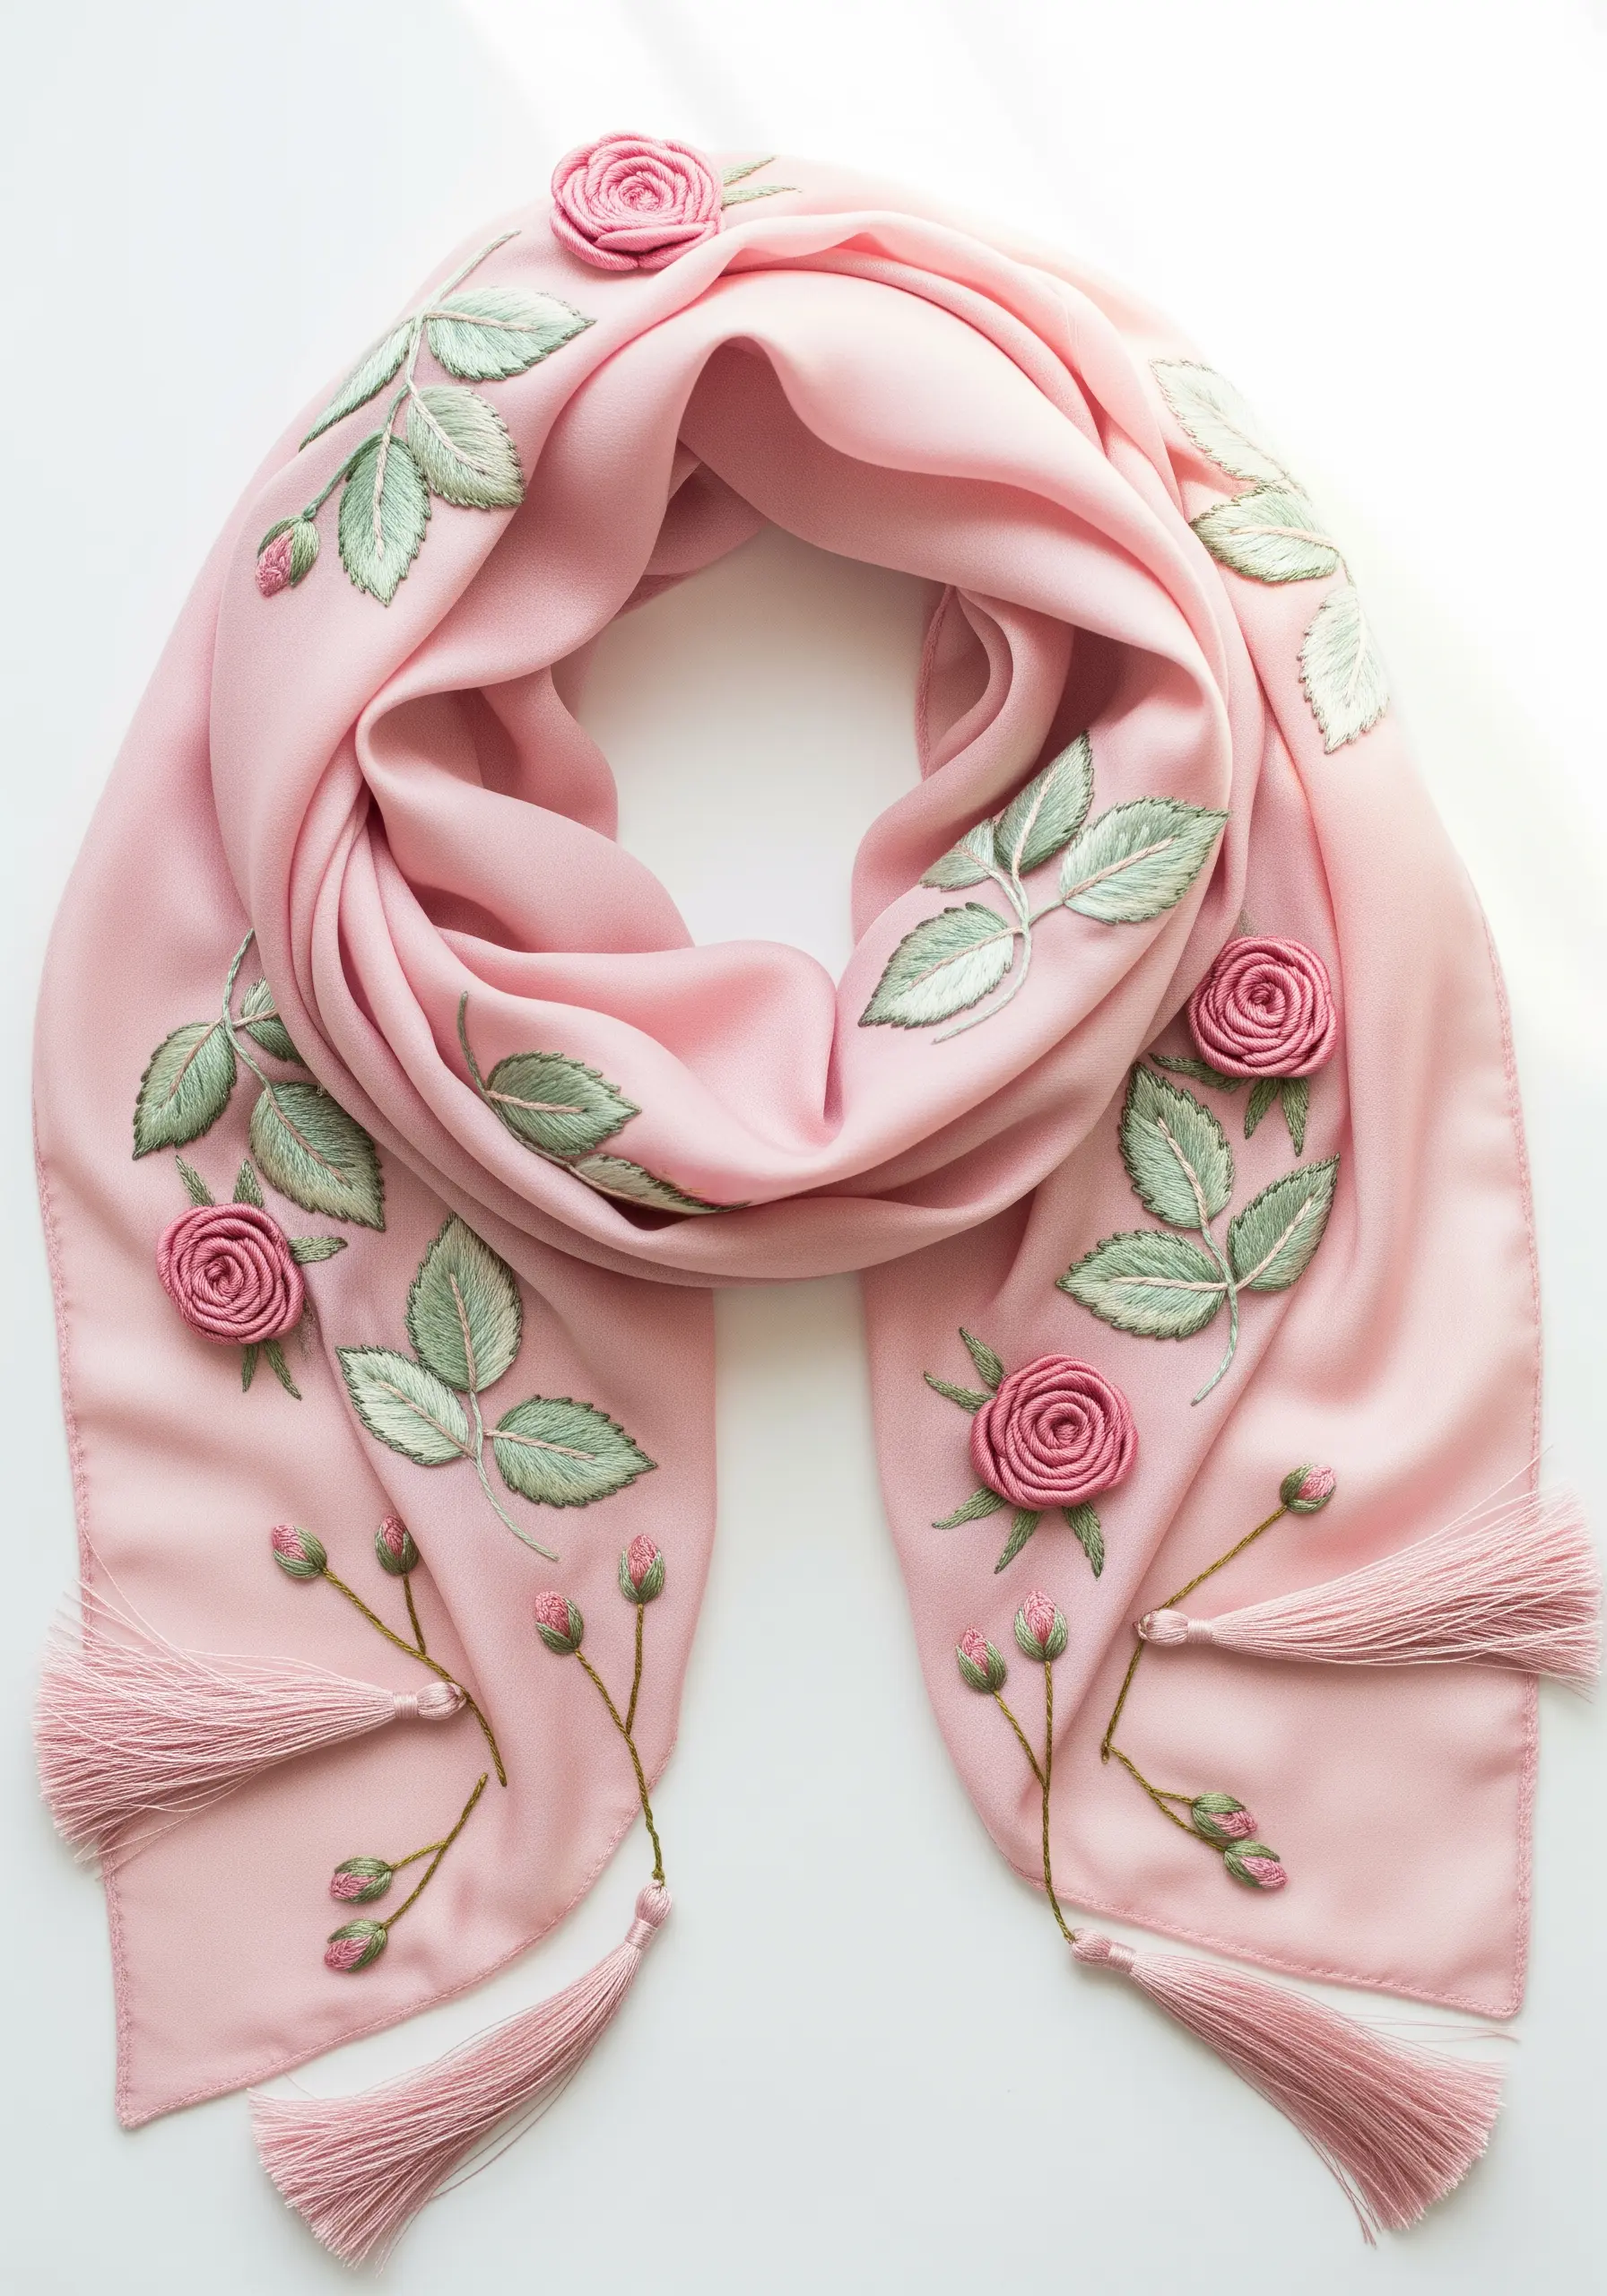
Create a stunning interplay of textures by combining flat leaf embroidery with three-dimensional floral elements.
Stitch the leaves using a shaded fishbone stitch to give them realistic veining and soft color gradients.
For the roses, use a woven wheel stitch (also known as a spider web rose), which builds up beautiful, spiraling petals that stand away from the fabric.
Adding tassels made from the same floss to the scarf’s corners creates a cohesive and professionally finished piece.
9. Capturing Graphic Botanicals with Intentional Color Bands
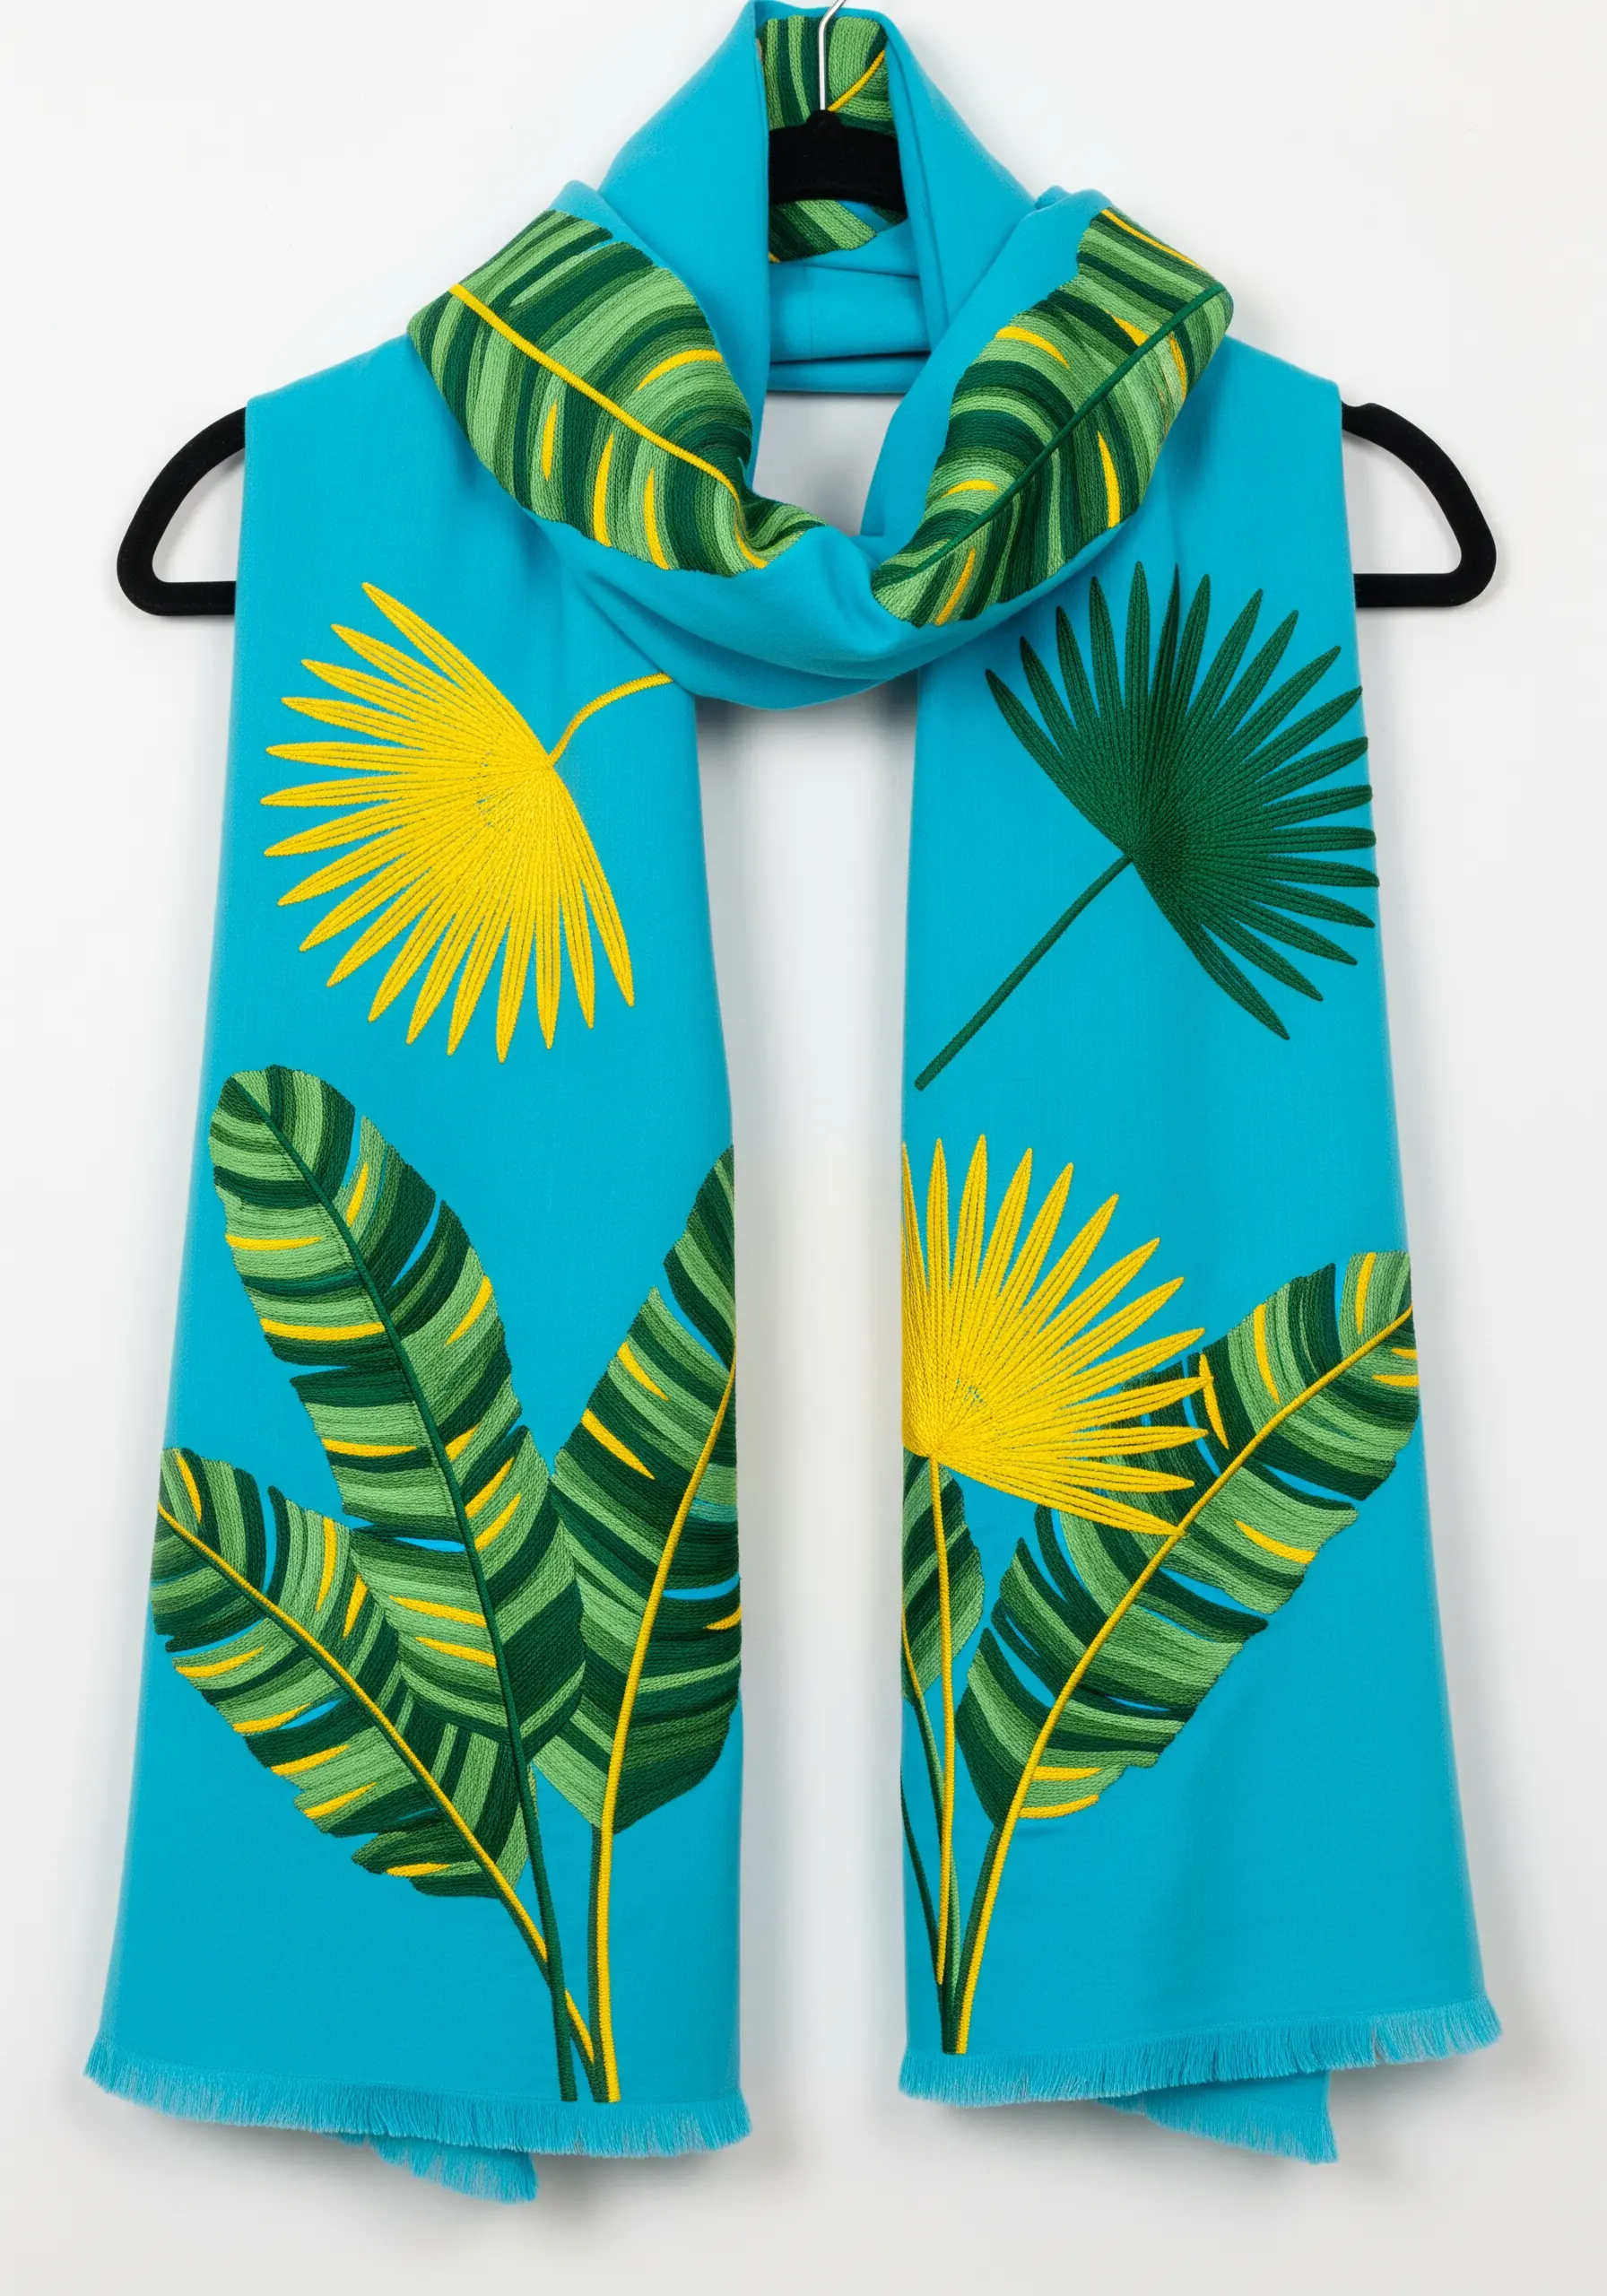
This design’s impact comes from its clean shapes and high-contrast color palette, not complex blending.
To achieve the sharp stripes on the banana leaves, work your long-and-short stitch in distinct blocks of color rather than feathering the edges together.
For the fan palms, a dense satin stitch radiating from a single point at the base is all you need to create that perfect, graphic fanning effect.
This is a perfect example of how color blocking embroidery patterns can create a powerful statement.
10. Rendering Delicate Herbs with Stitch Precision
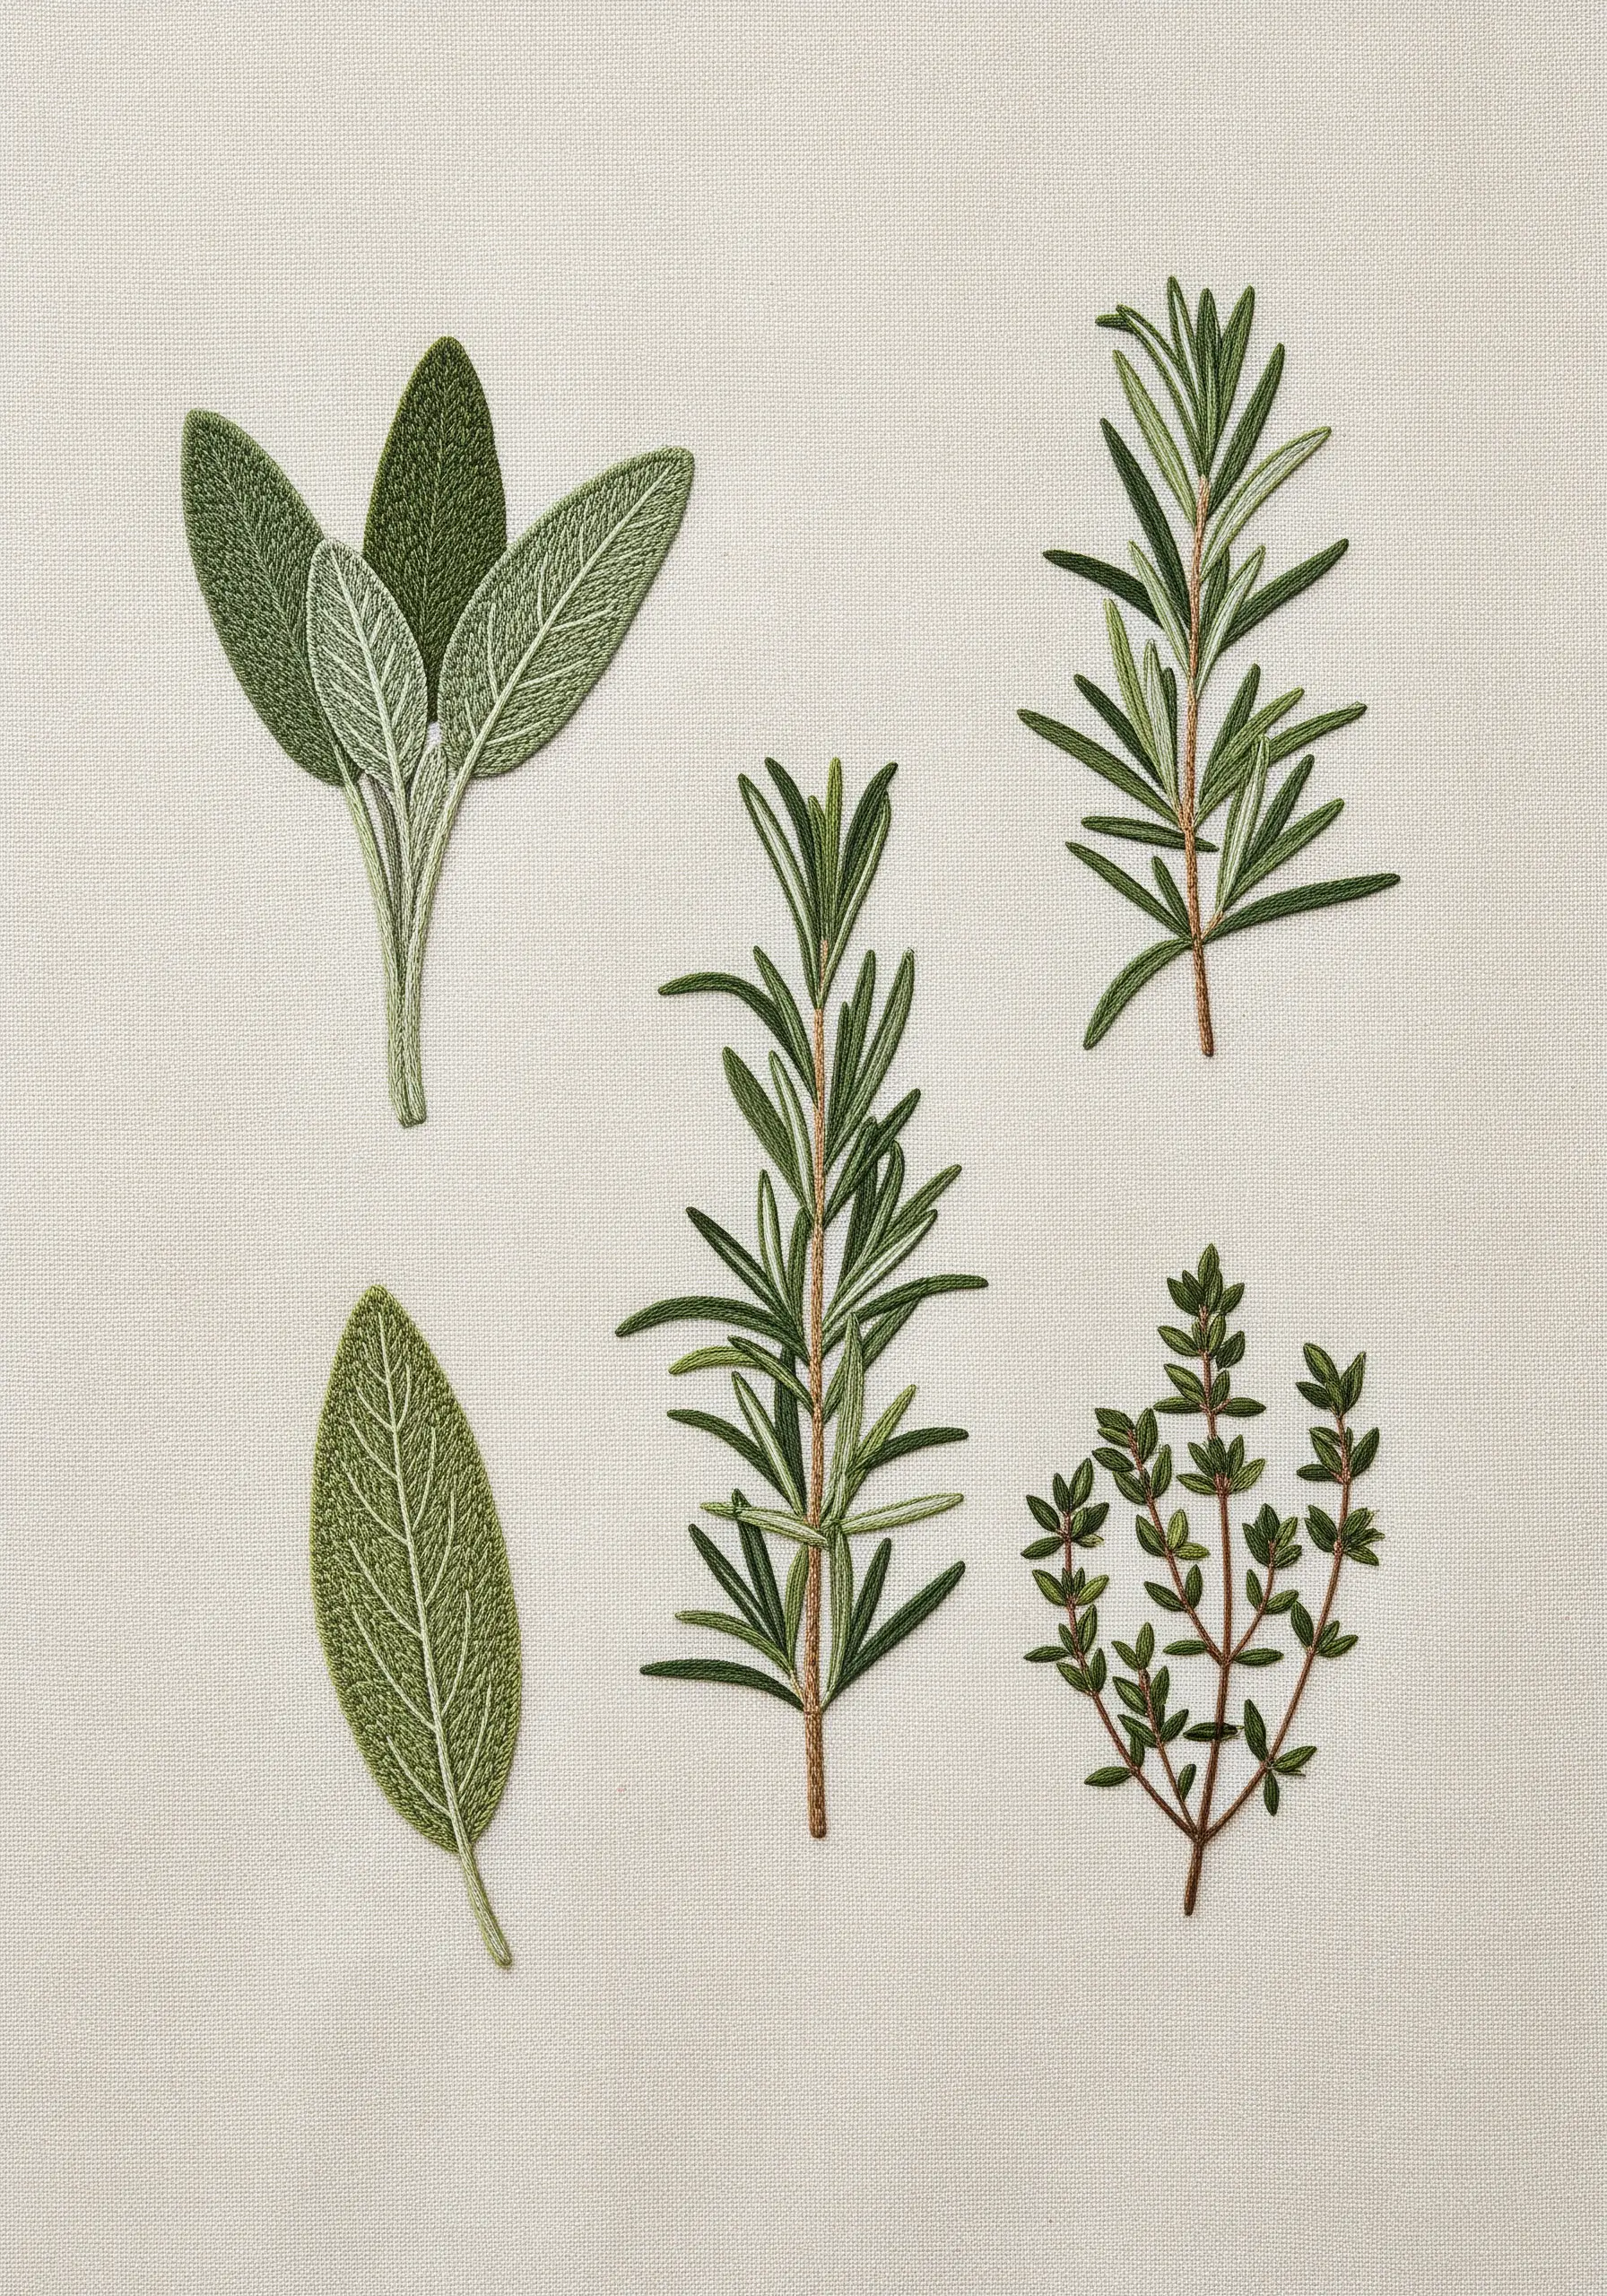
The beauty of embroidering culinary herbs lies in capturing their unique and subtle textures.
For the soft, fuzzy appearance of sage, use a long-and-short stitch with several closely related shades of grey-green thread to create a muted, realistic surface.
Replicate rosemary’s needles with individual straight stitches angled off a central stem stitch spine.
For thyme, single detached chain stitches (lazy daisies) perfectly mimic its tiny, clustered leaves, proving that the right stitch choice is everything.
11. Stitching Festive Foliage with Sharp Points and Soft Berries
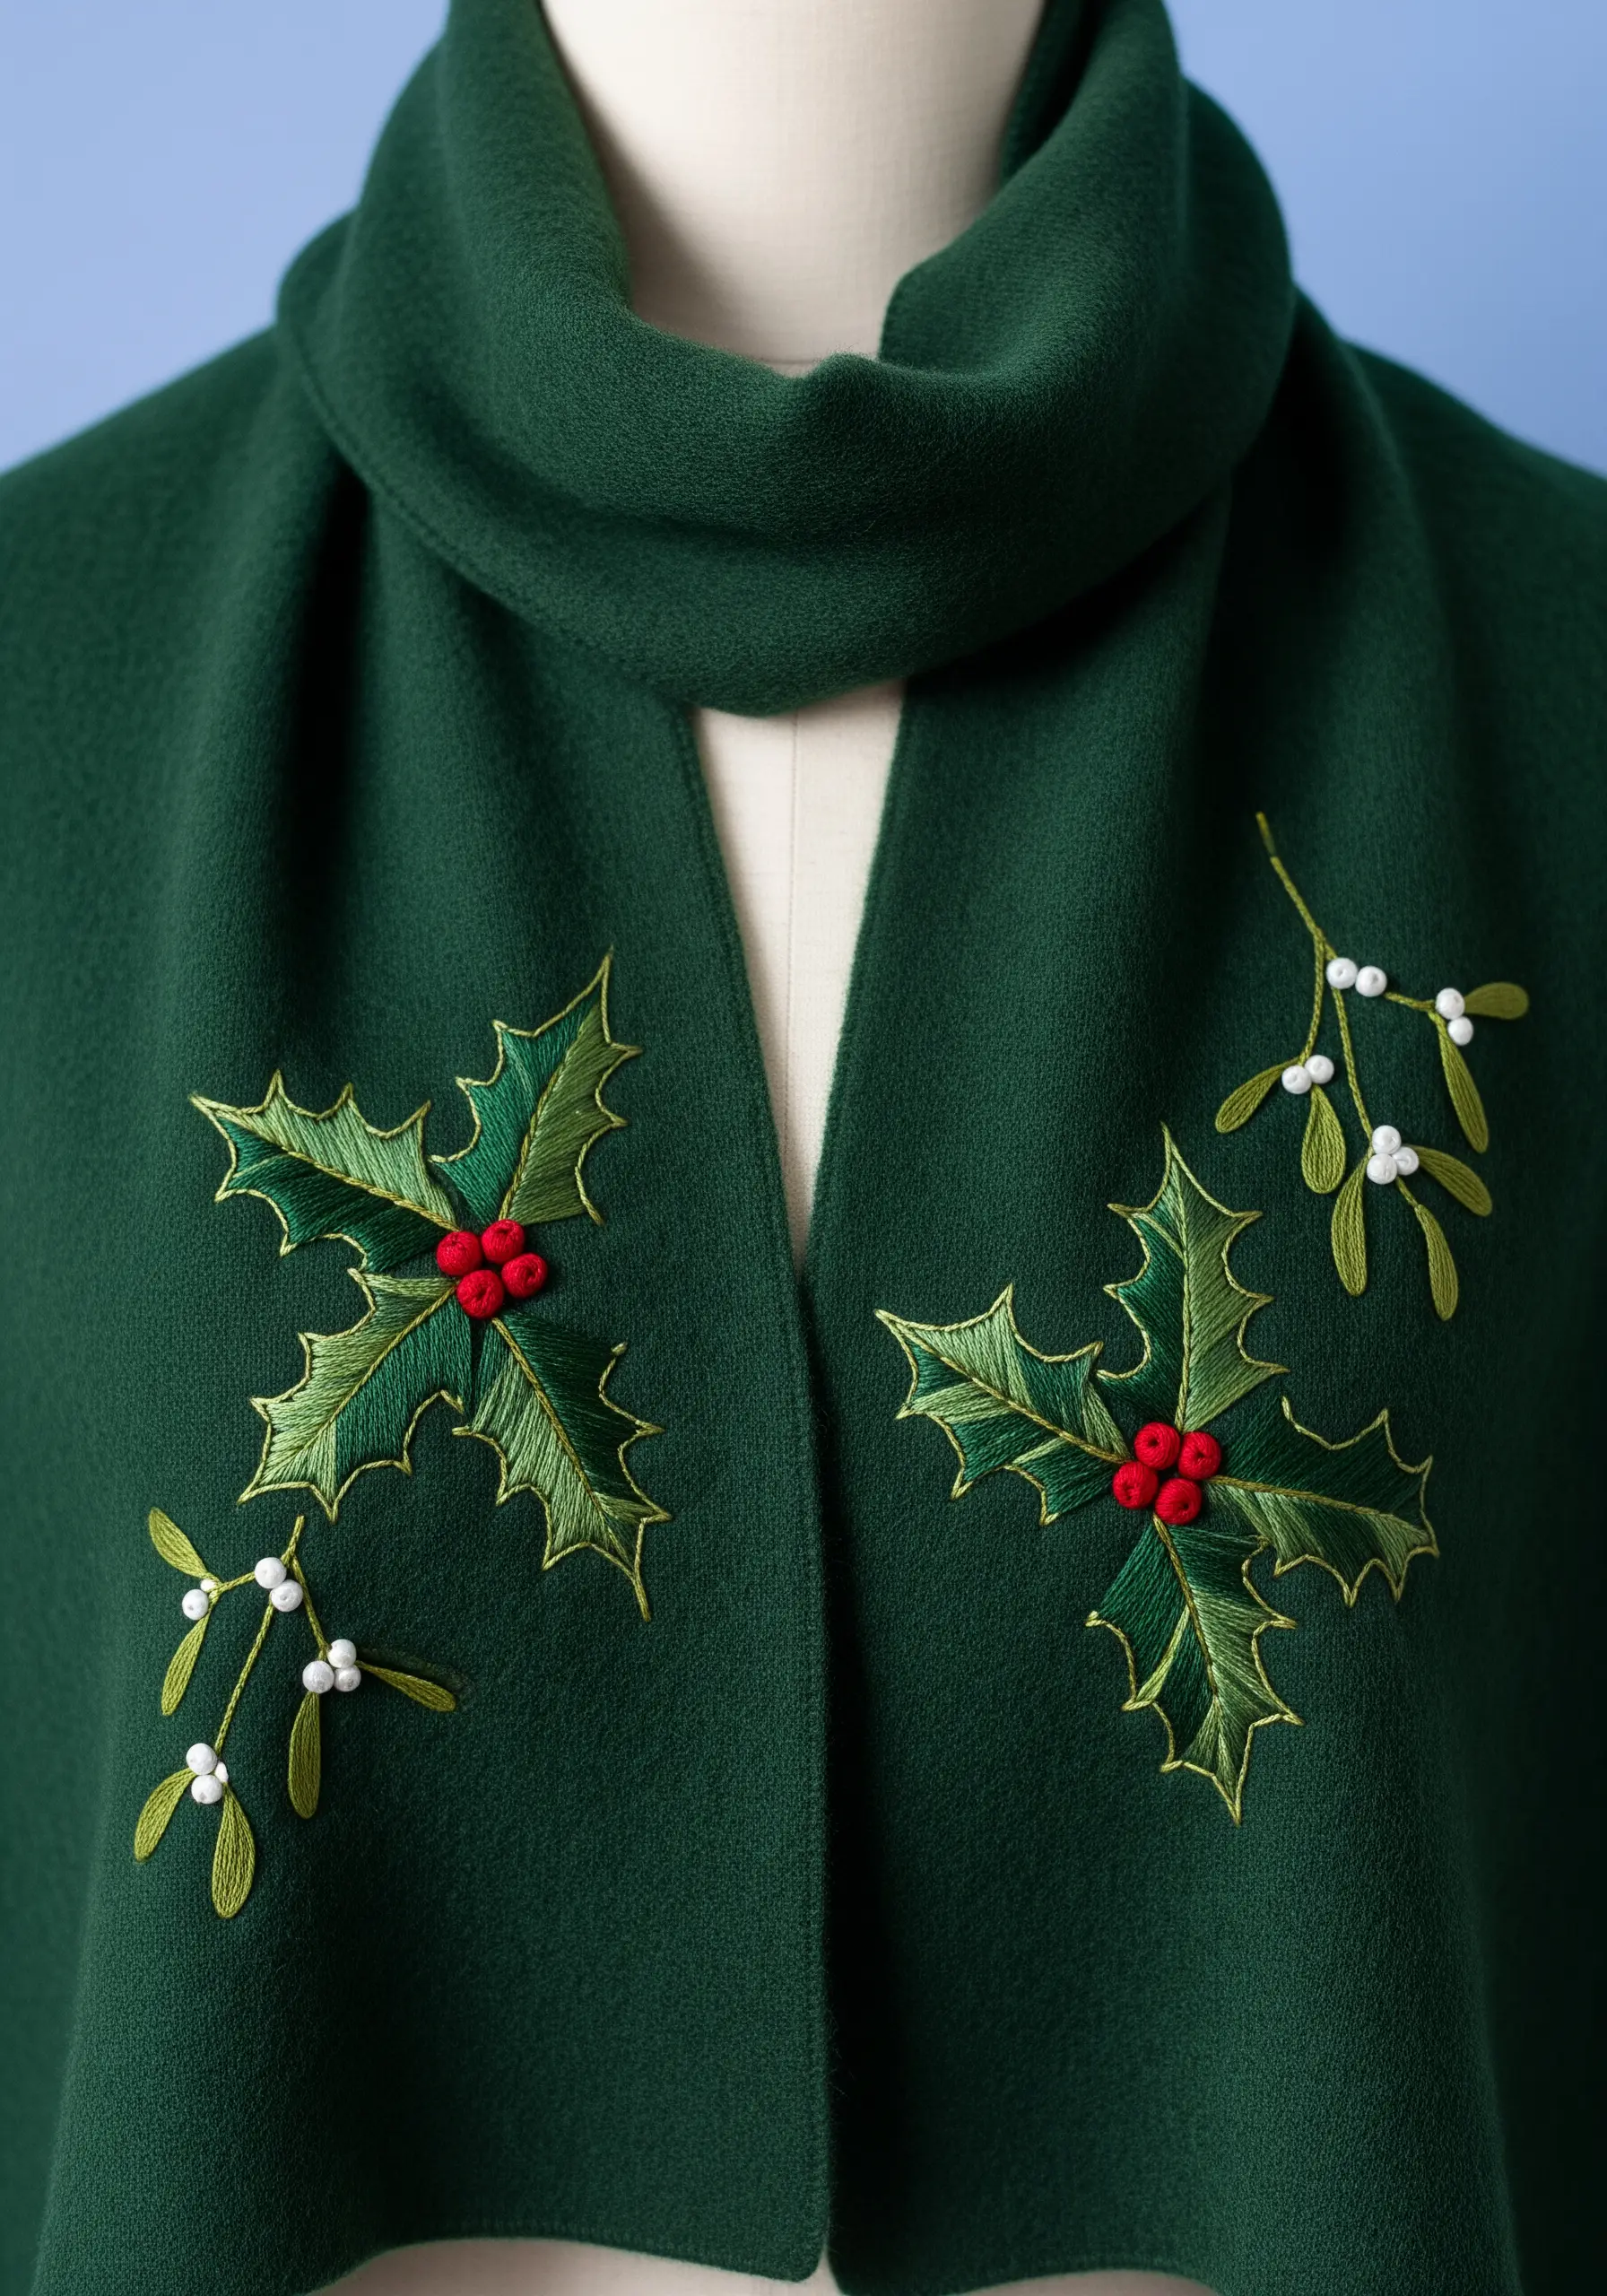
To achieve perfectly sharp holly leaf points, ensure your satin stitches terminate precisely at the very tip of each point.
For extra definition, first outline the entire leaf with a split stitch in a slightly darker green; this creates a subtle shadow and a contained edge.
Create plump holly berries with padded satin stitch circles or a dense cluster of French knots.
For the delicate mistletoe berries, single, elegant French knots made with a pearlescent white or cream thread provide a soft, gentle contrast.
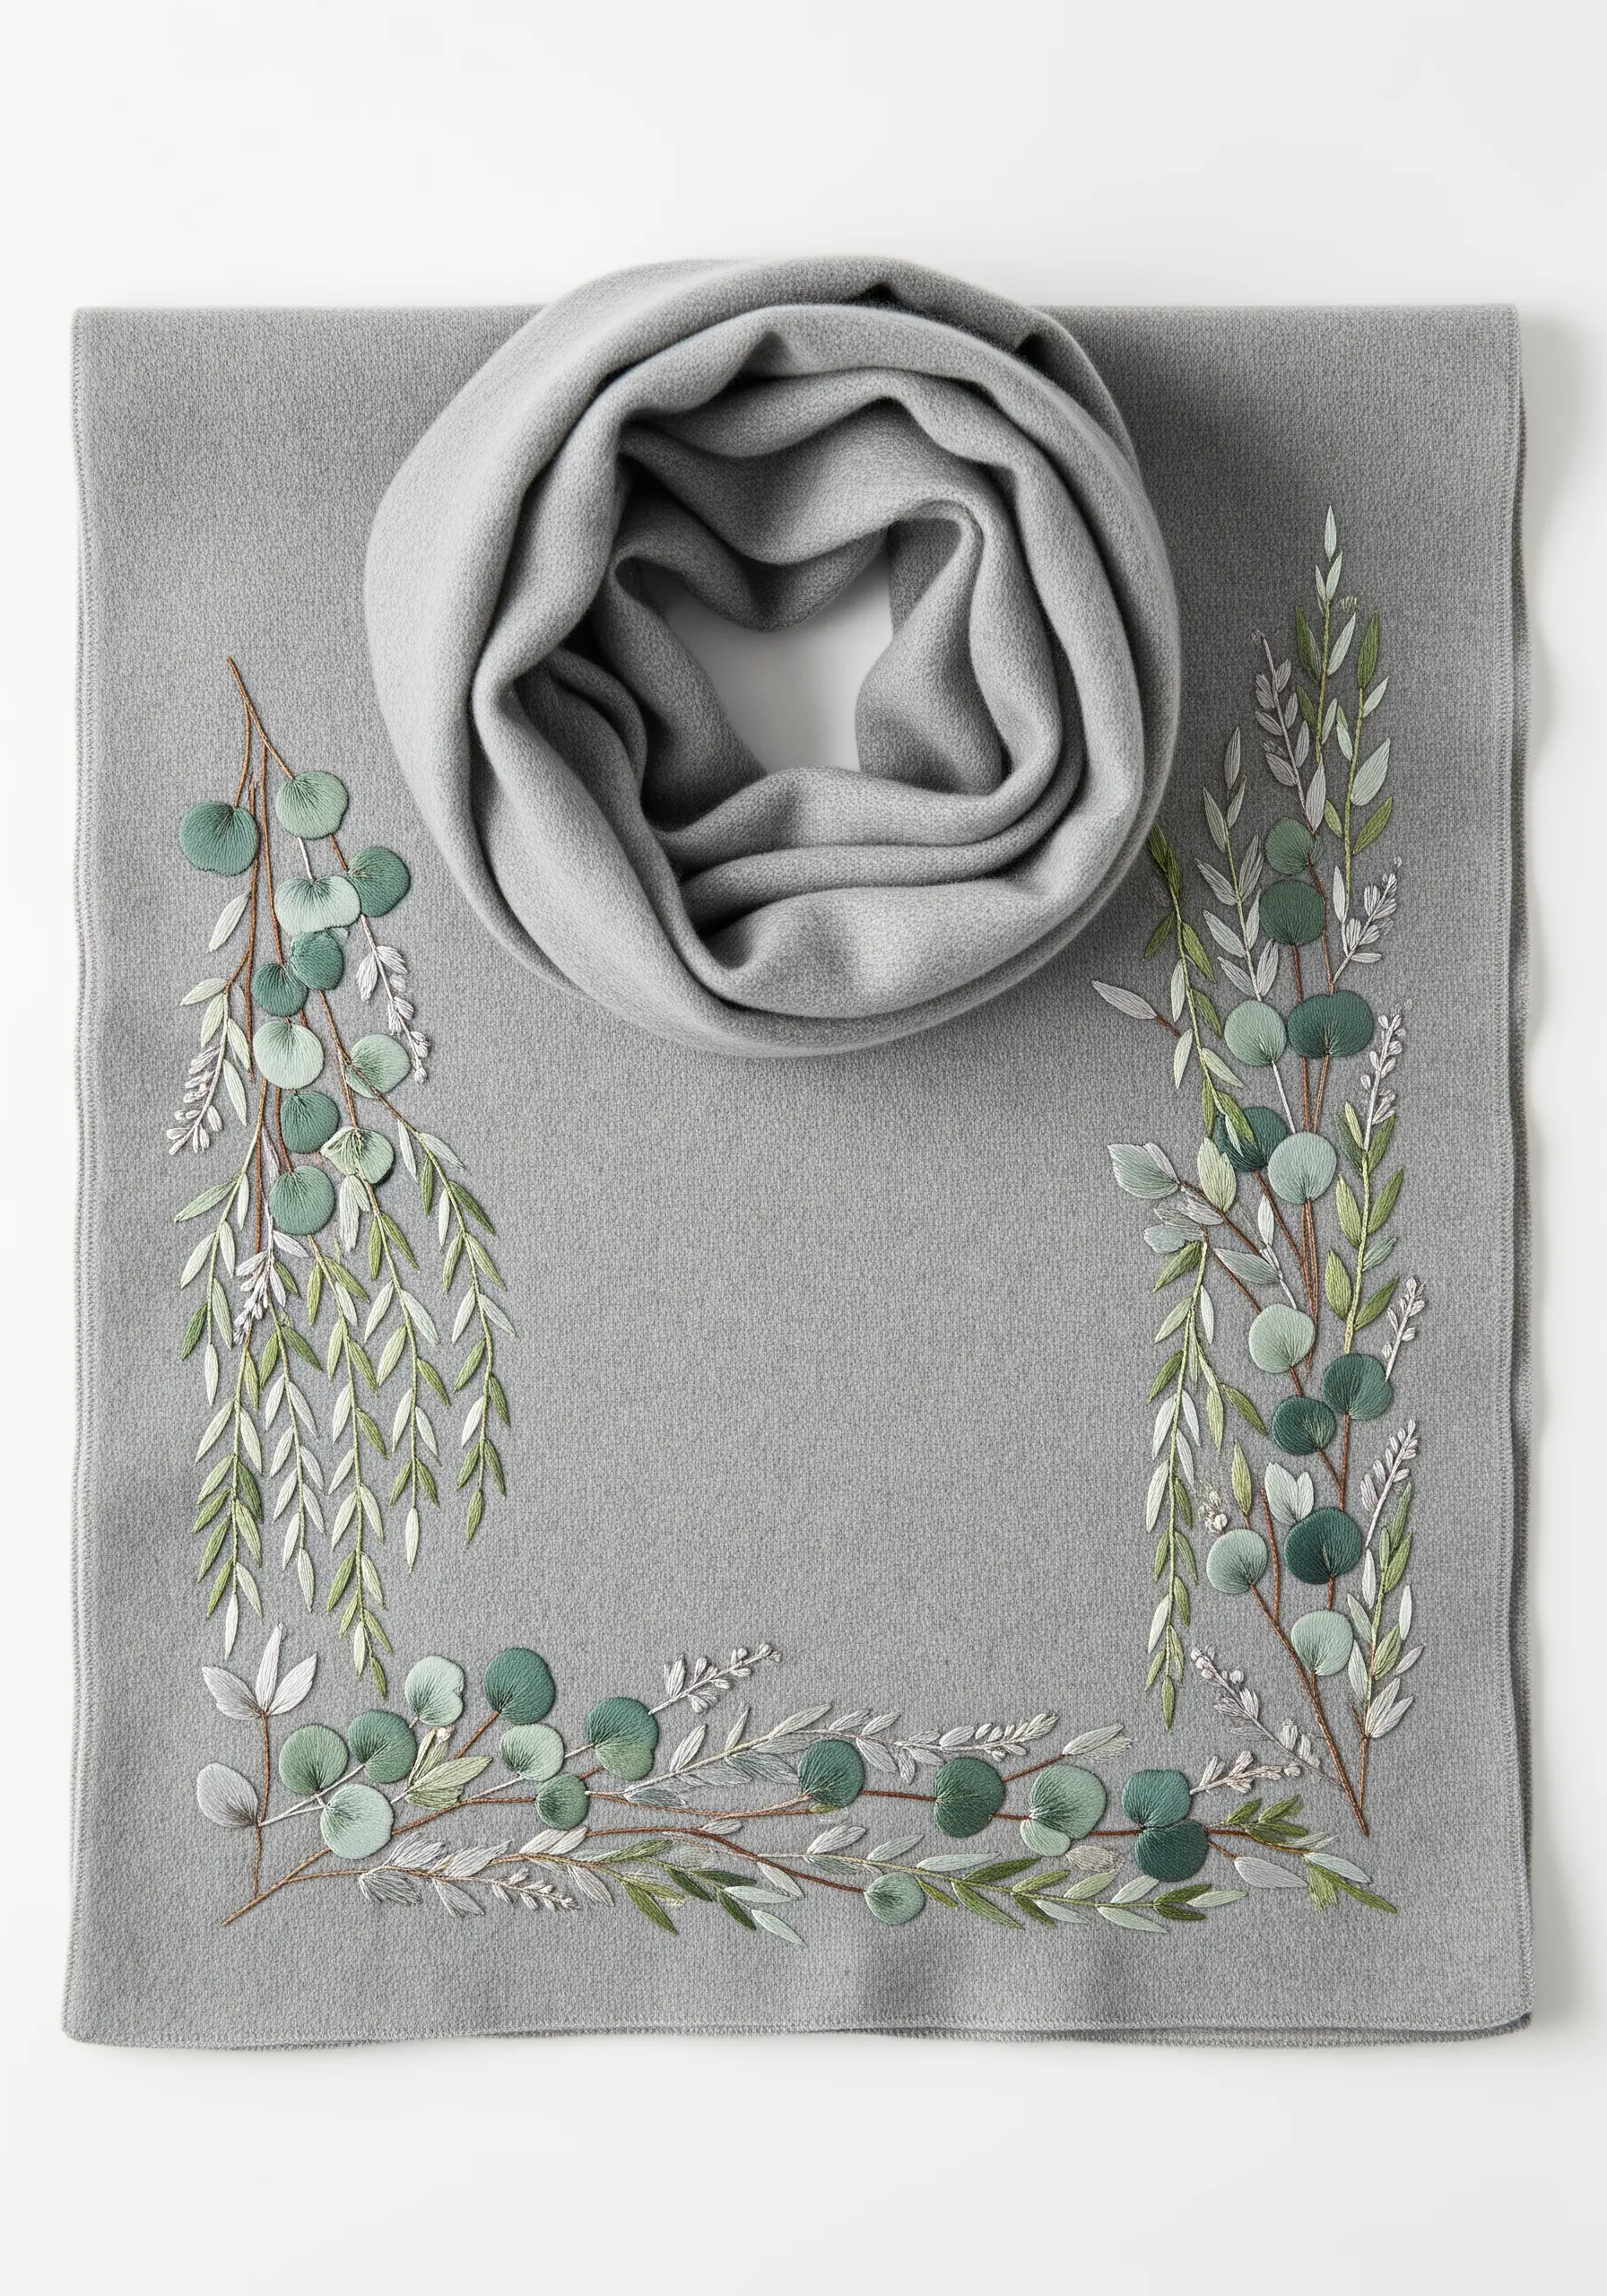
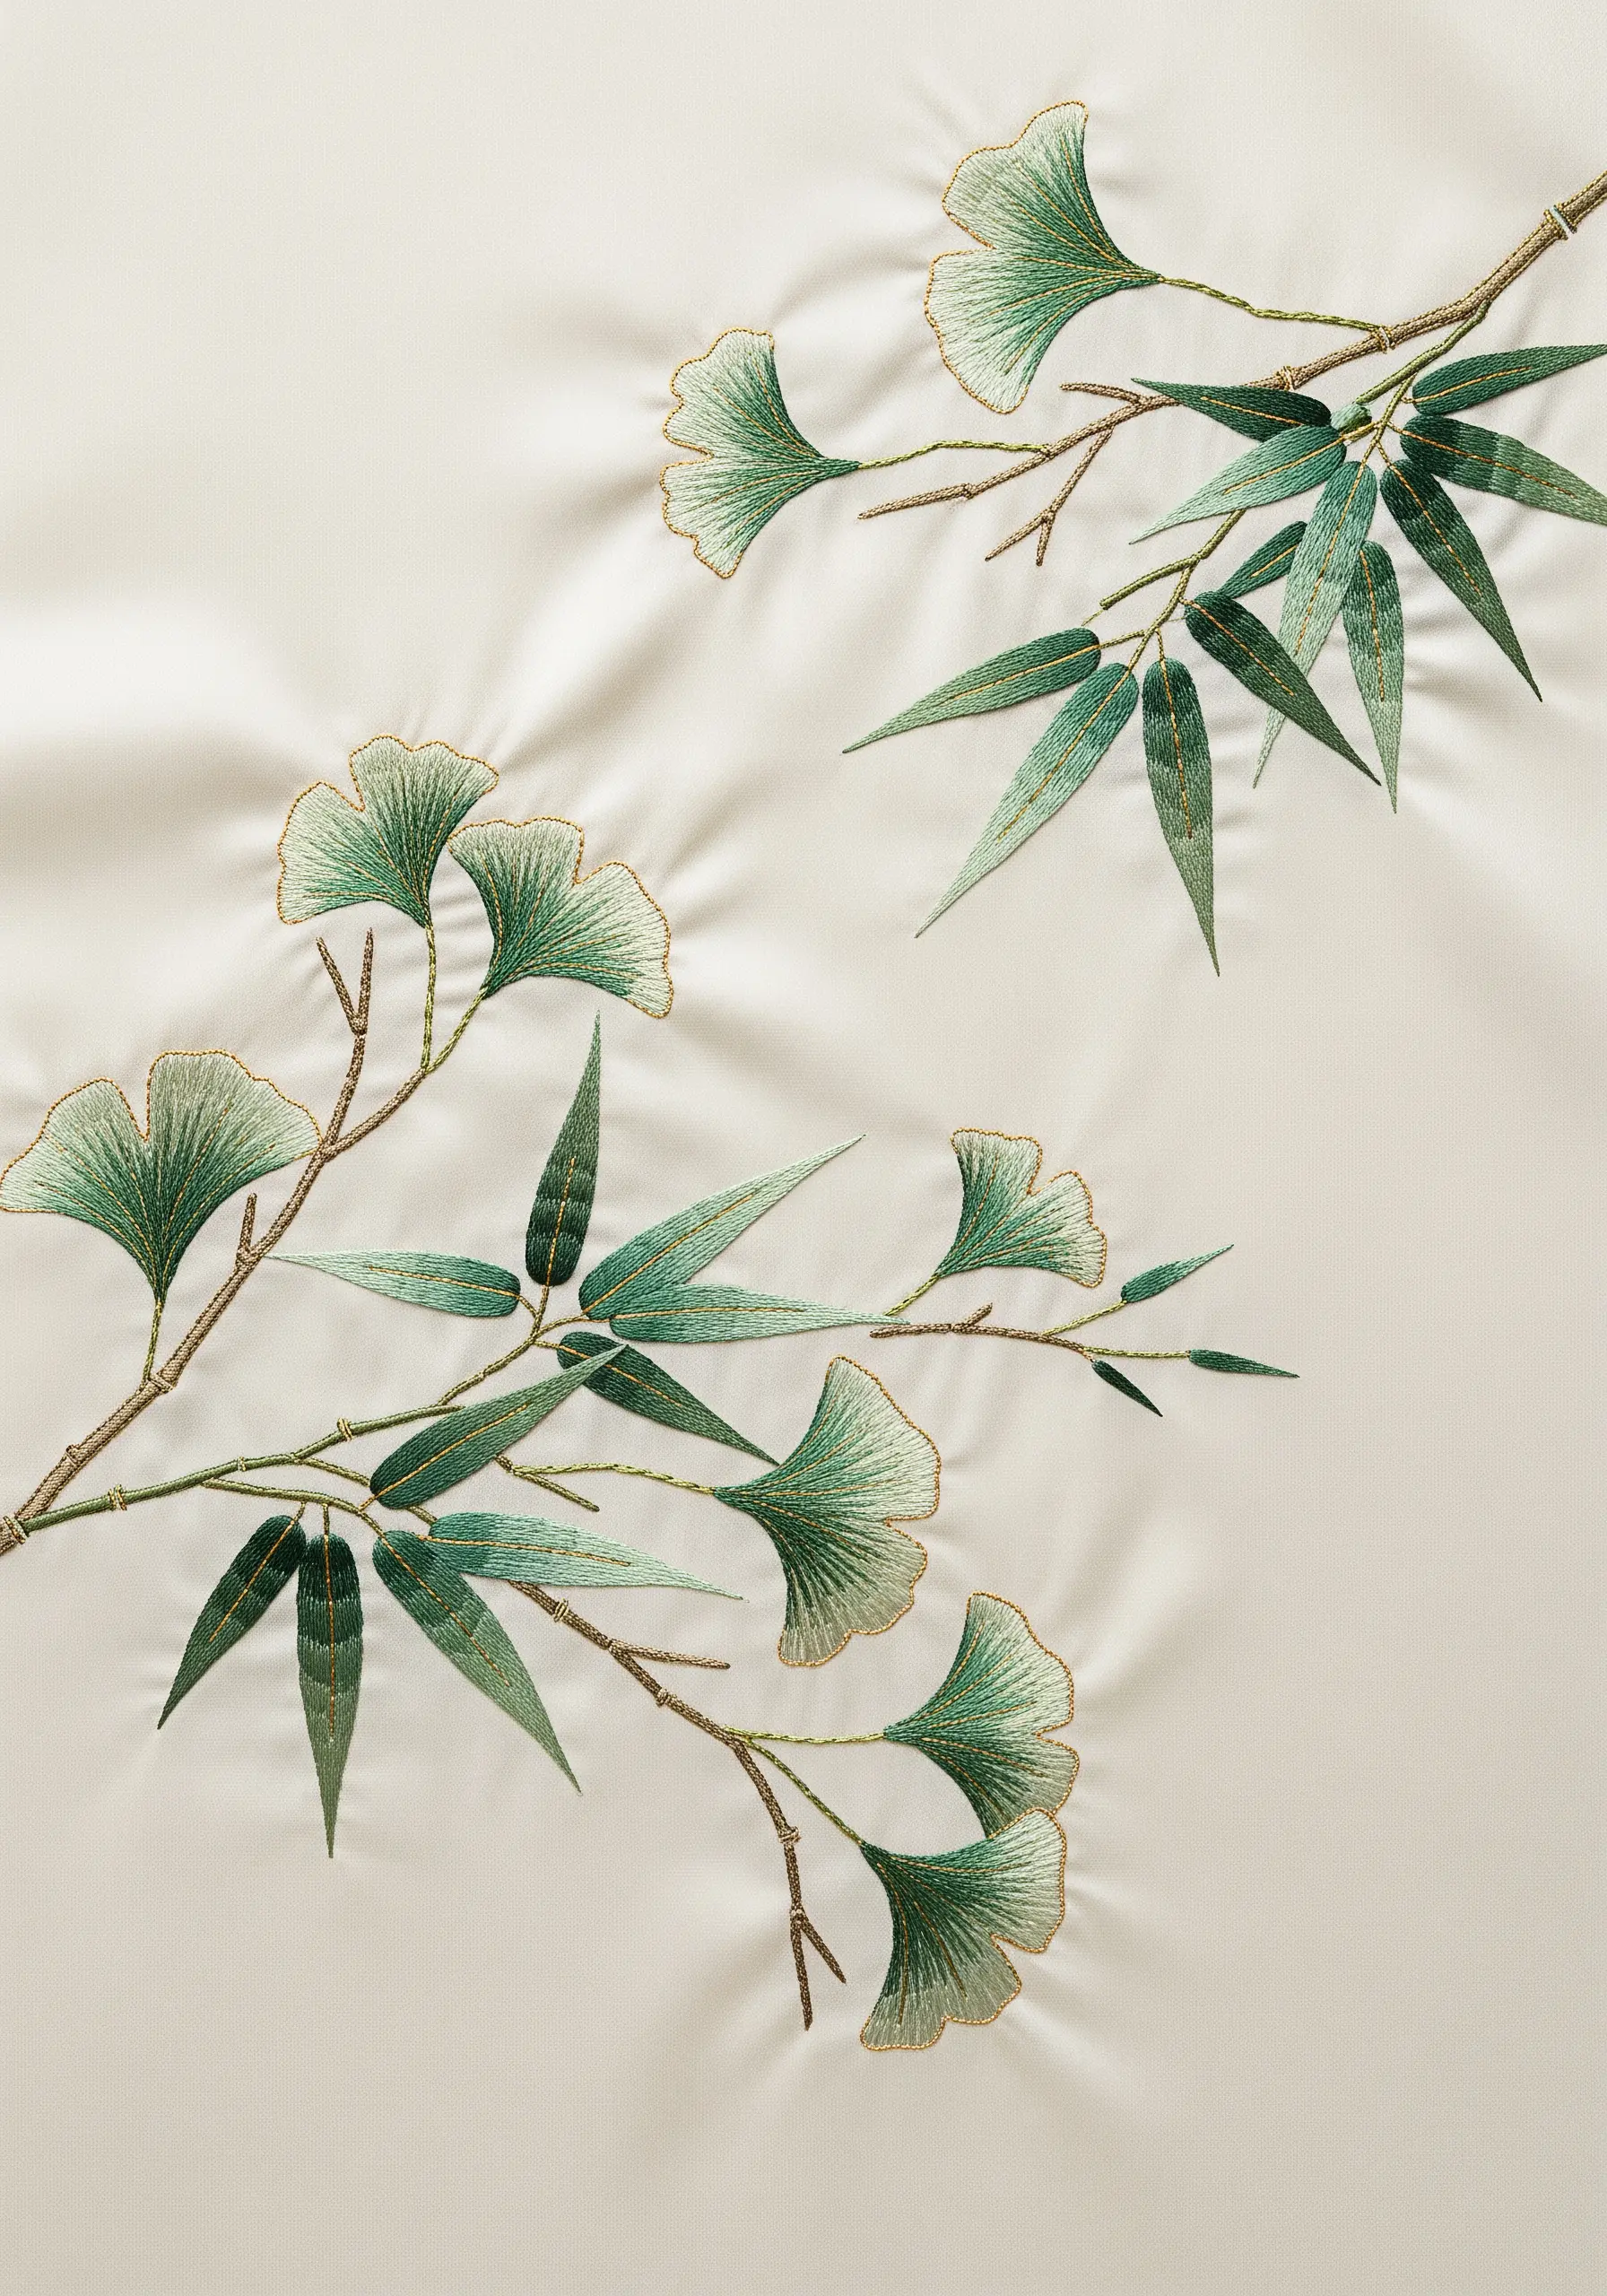
12. Creating a Luxe, Tone-on-Tone Effect
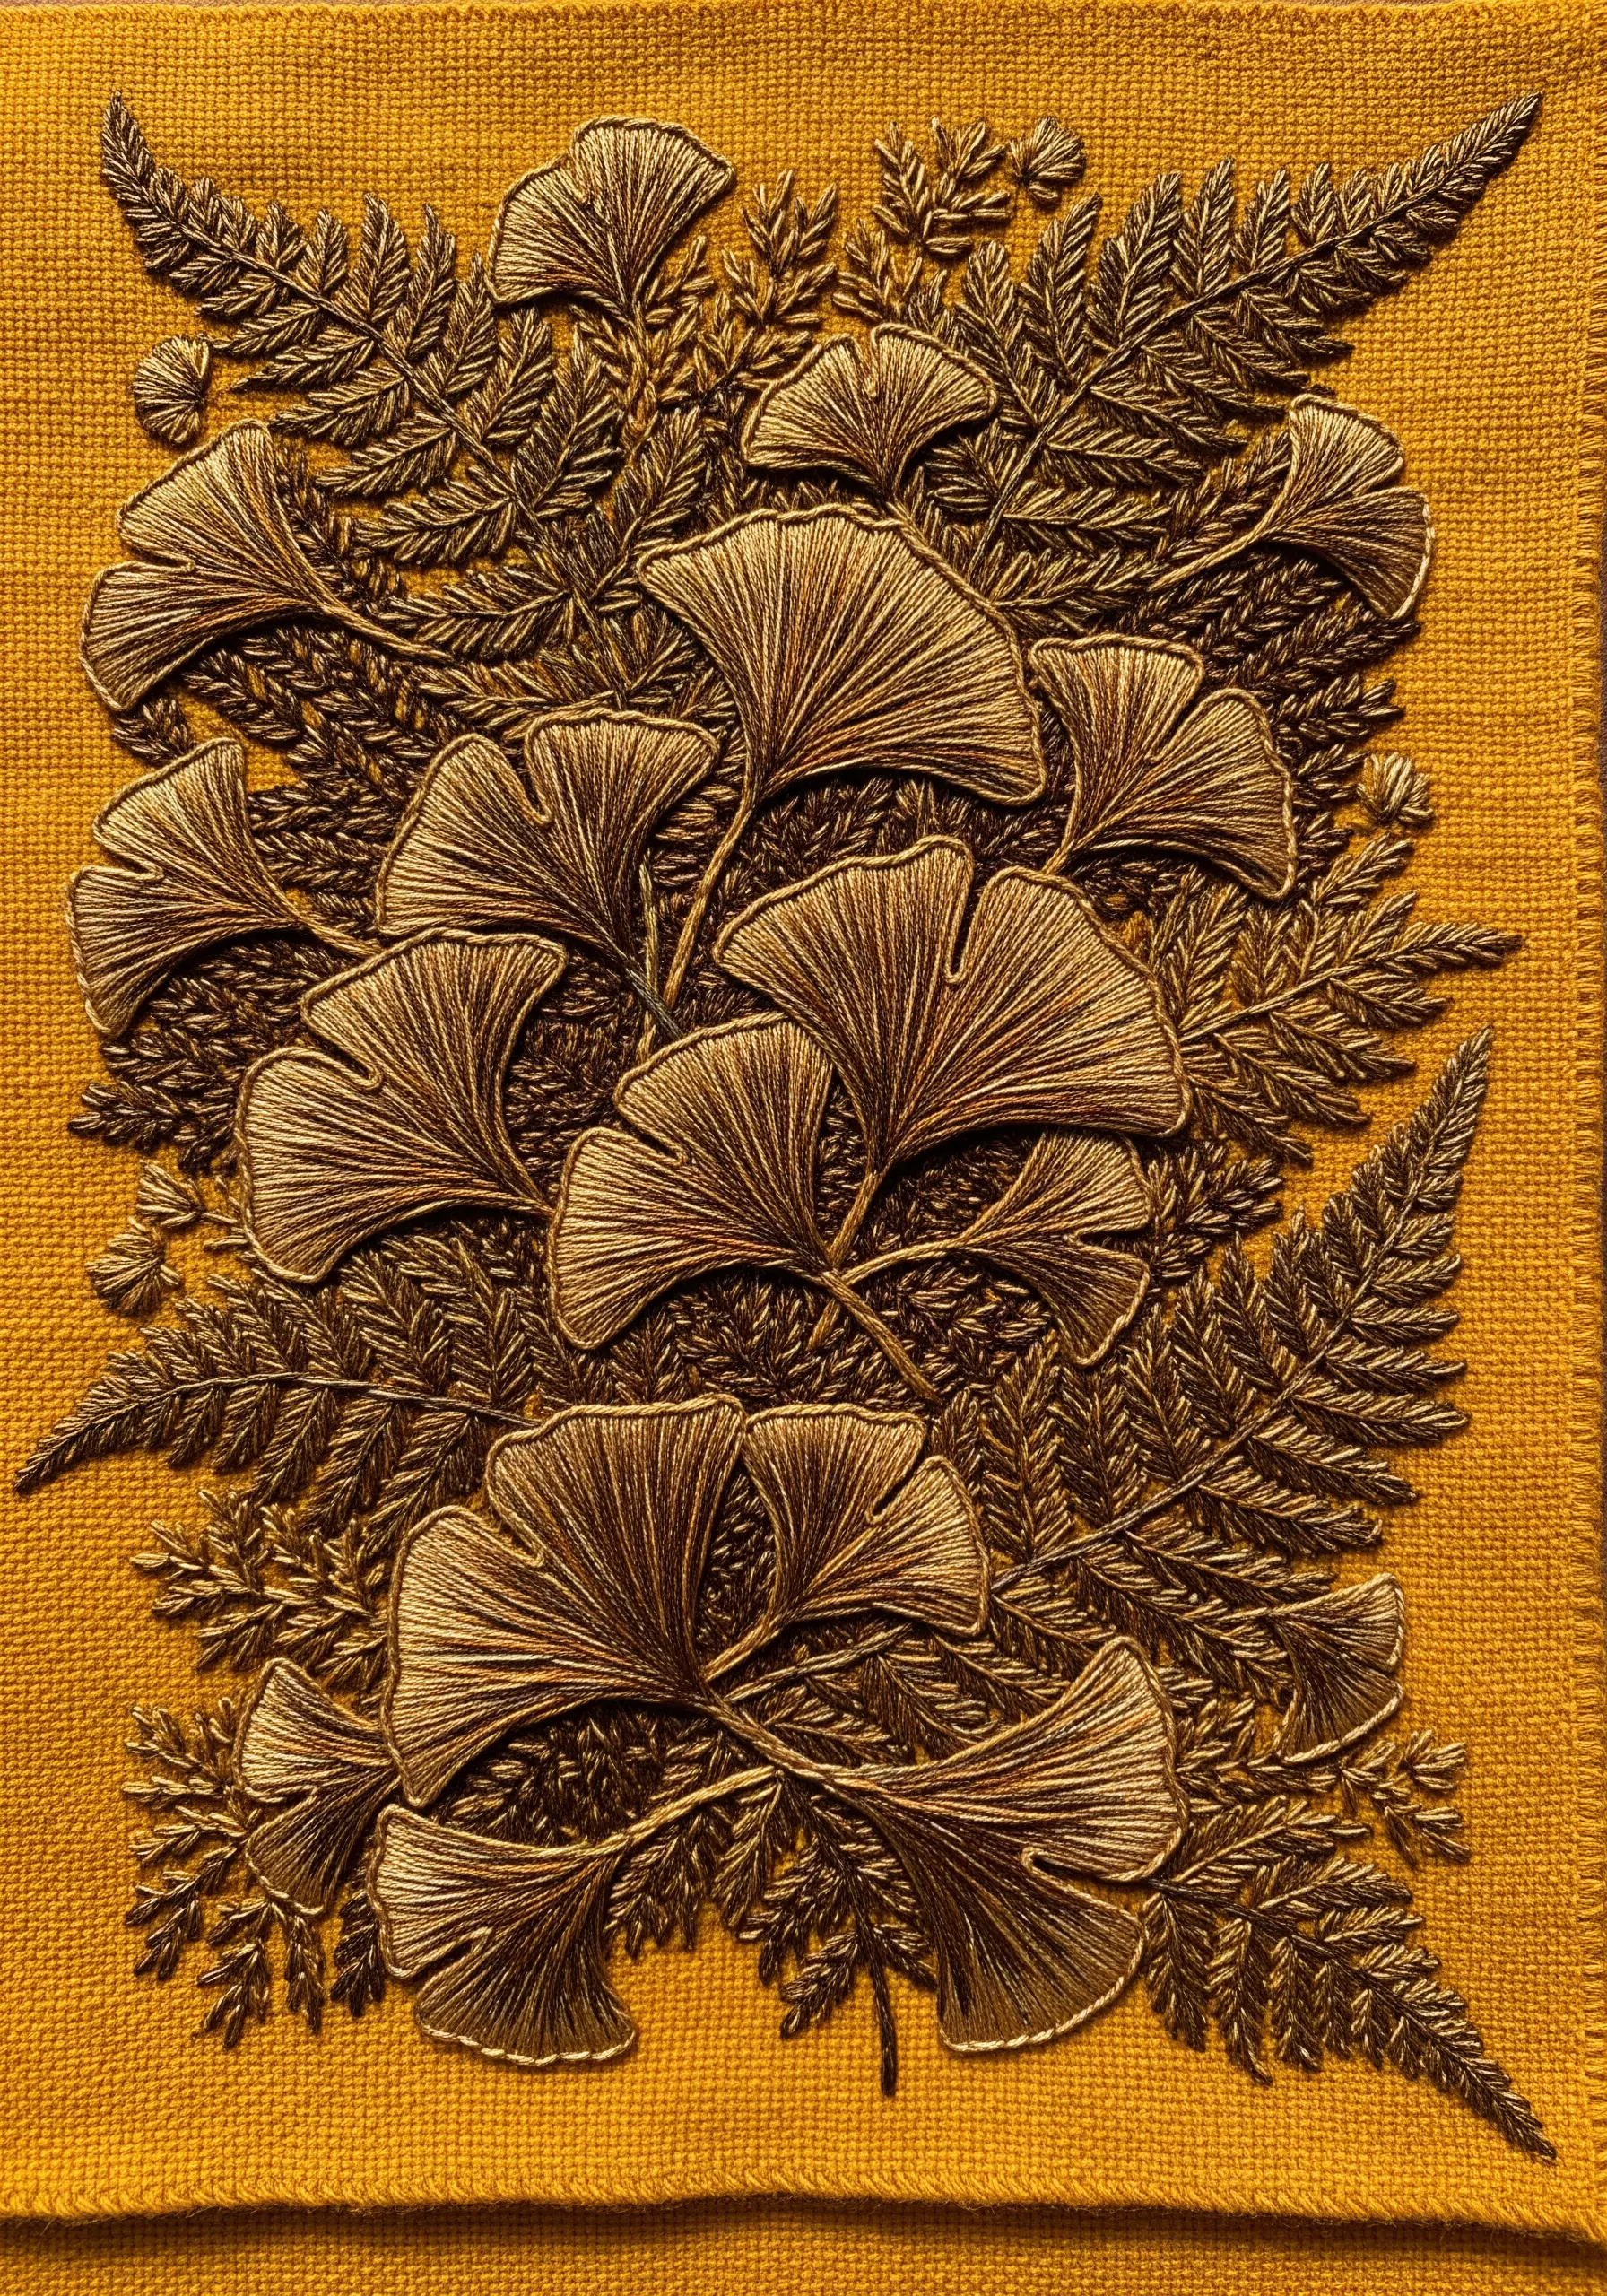
Develop a sophisticated, low-contrast design by choosing thread colors that are analogous to your fabric color.
The visual interest here comes not from color, but from texture and sheen.
Use a rayon or silk thread with a high luster that will catch and reflect light beautifully.
The long, directional satin stitches on the ginkgo leaves create a fan-like shimmer, while the densely packed fishbone stitches of the ferns provide a rich, matte counterpoint.
This technique elevates simple stitches into ultra-subtle, high-end neutral finishes.
13. Achieving Ethereal Effects on Sheer Fabric
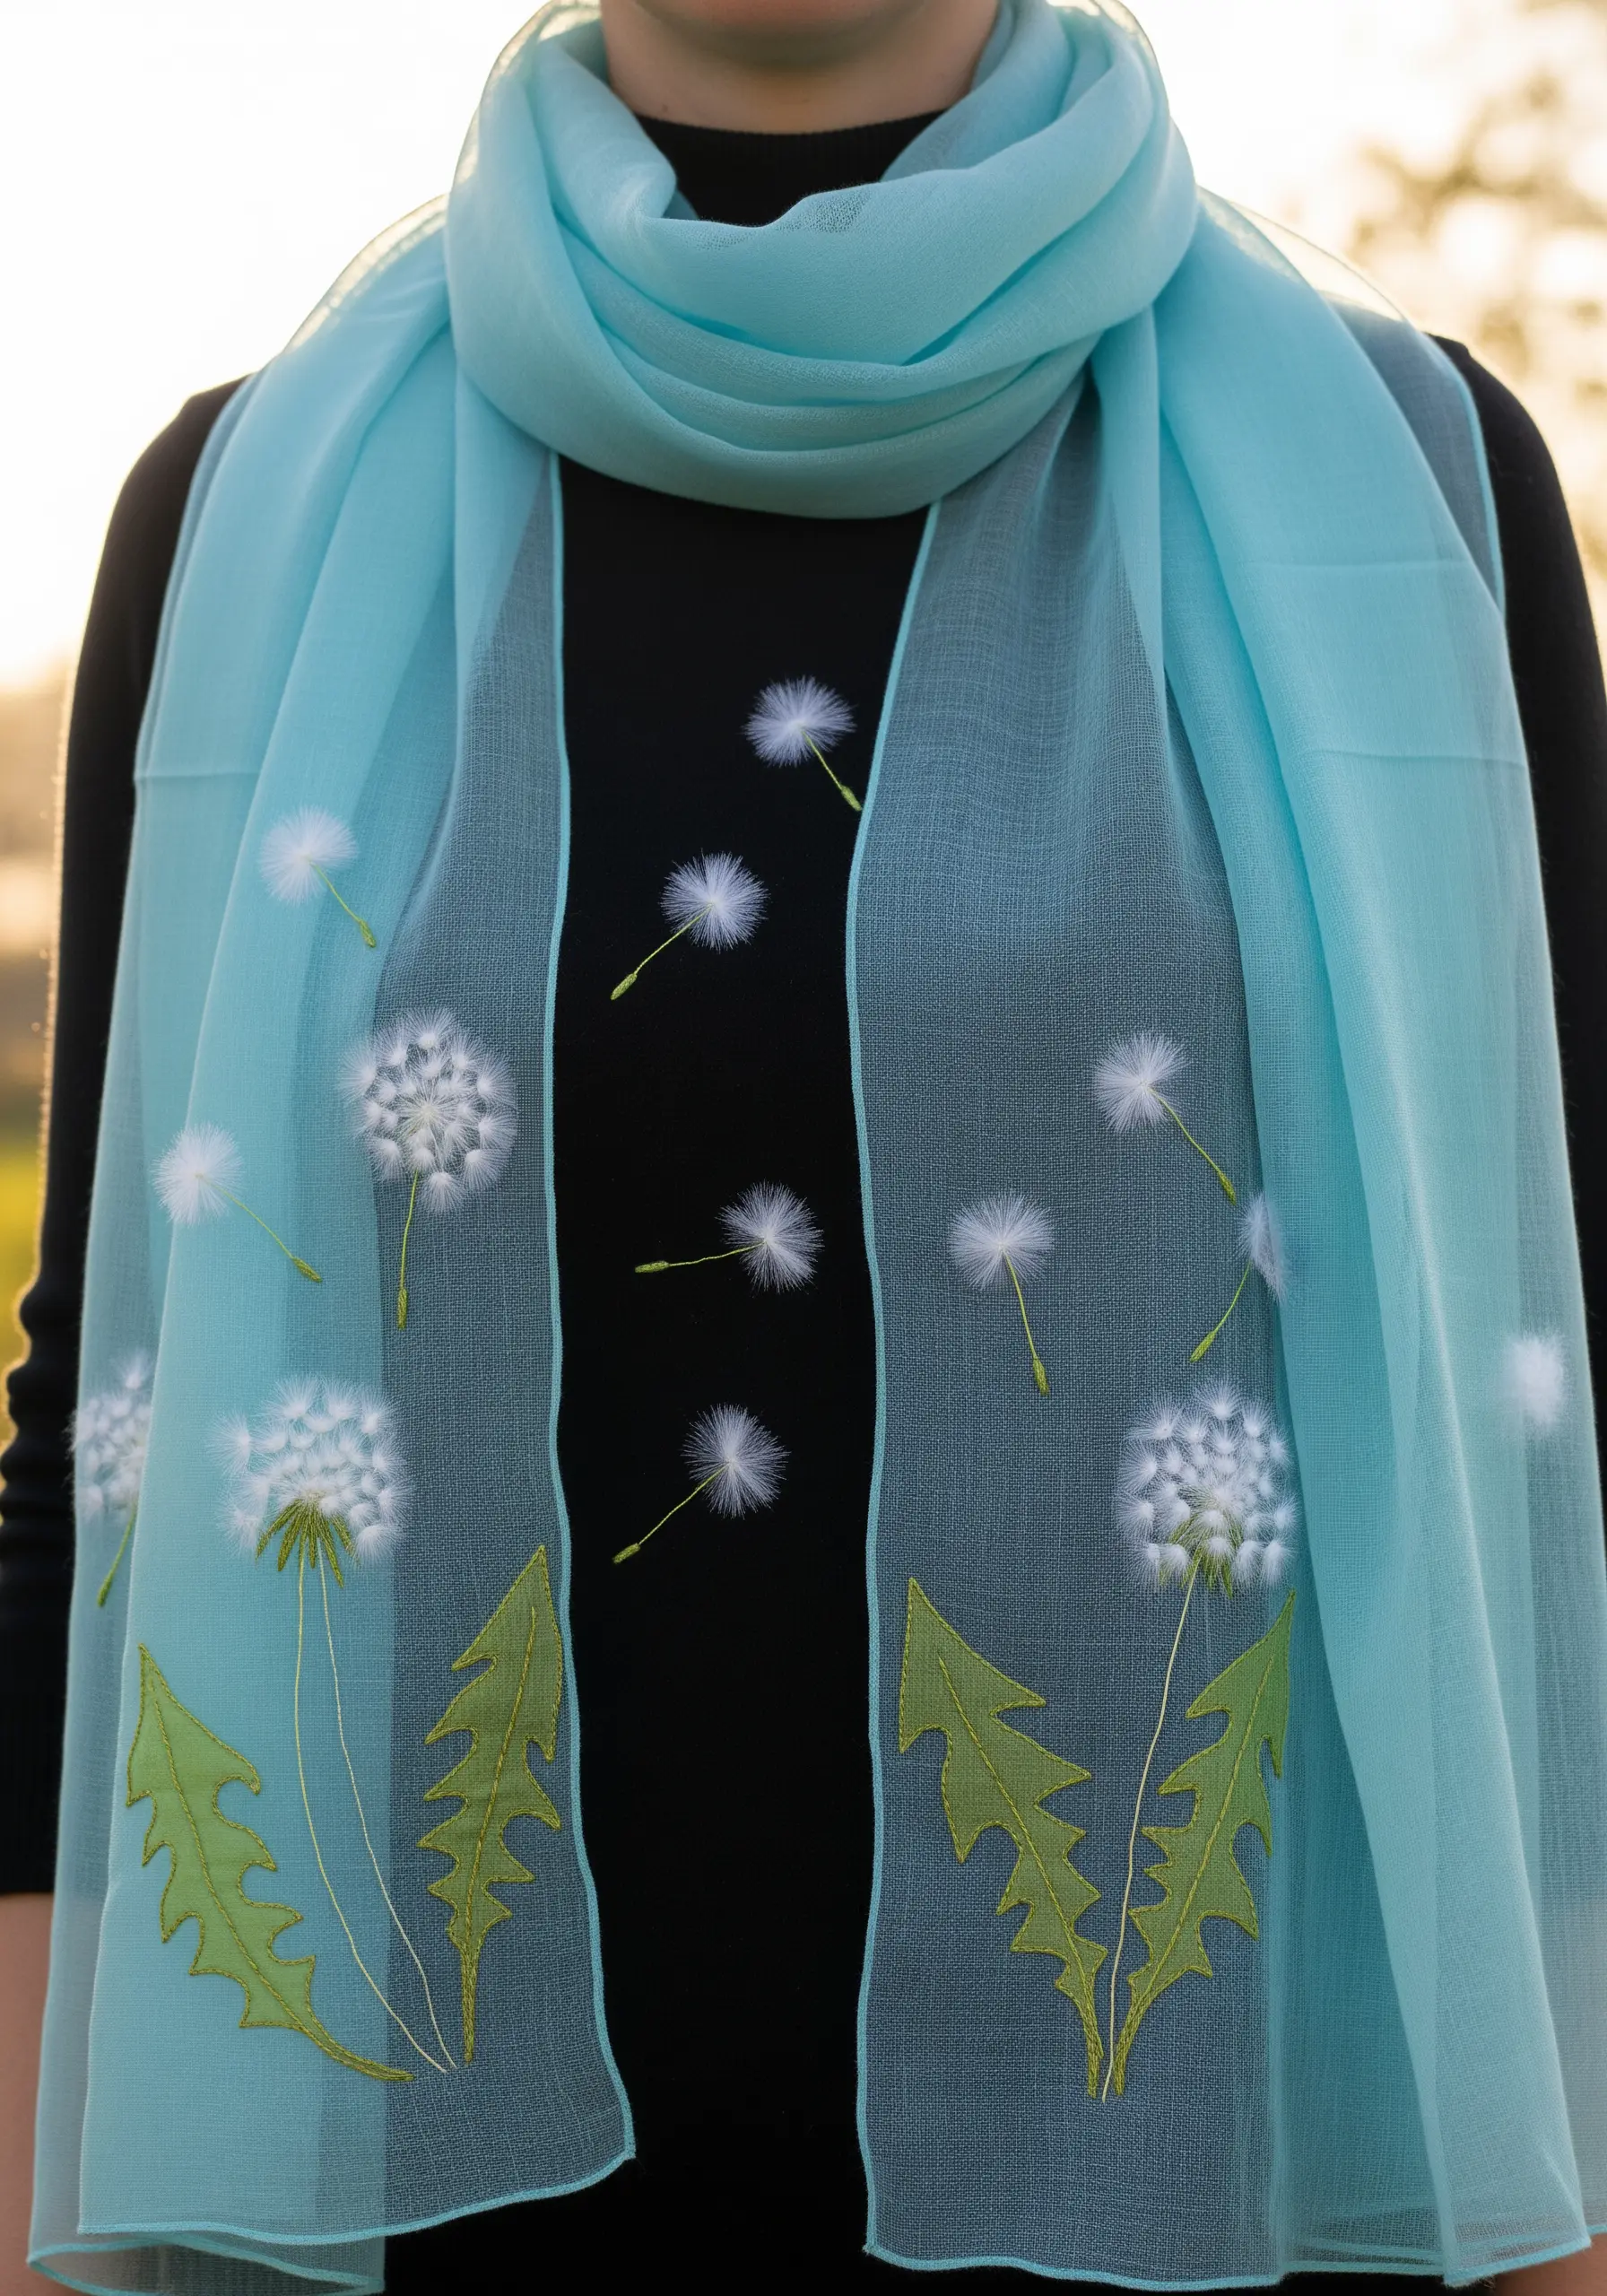
Working on delicate fabrics like organza or chiffon requires a gentle touch and the right tools.
Always use a water-soluble stabilizer; it provides necessary support during stitching and washes away completely, leaving no trace.
The fluffy dandelion seed heads are made with turkey stitch—leave the loops uncut and trim them carefully for that signature tuft.
Use appliqué for the leaves to ensure they remain opaque and visible against the transparent background.
14. Designing a Modern Botanical Grid
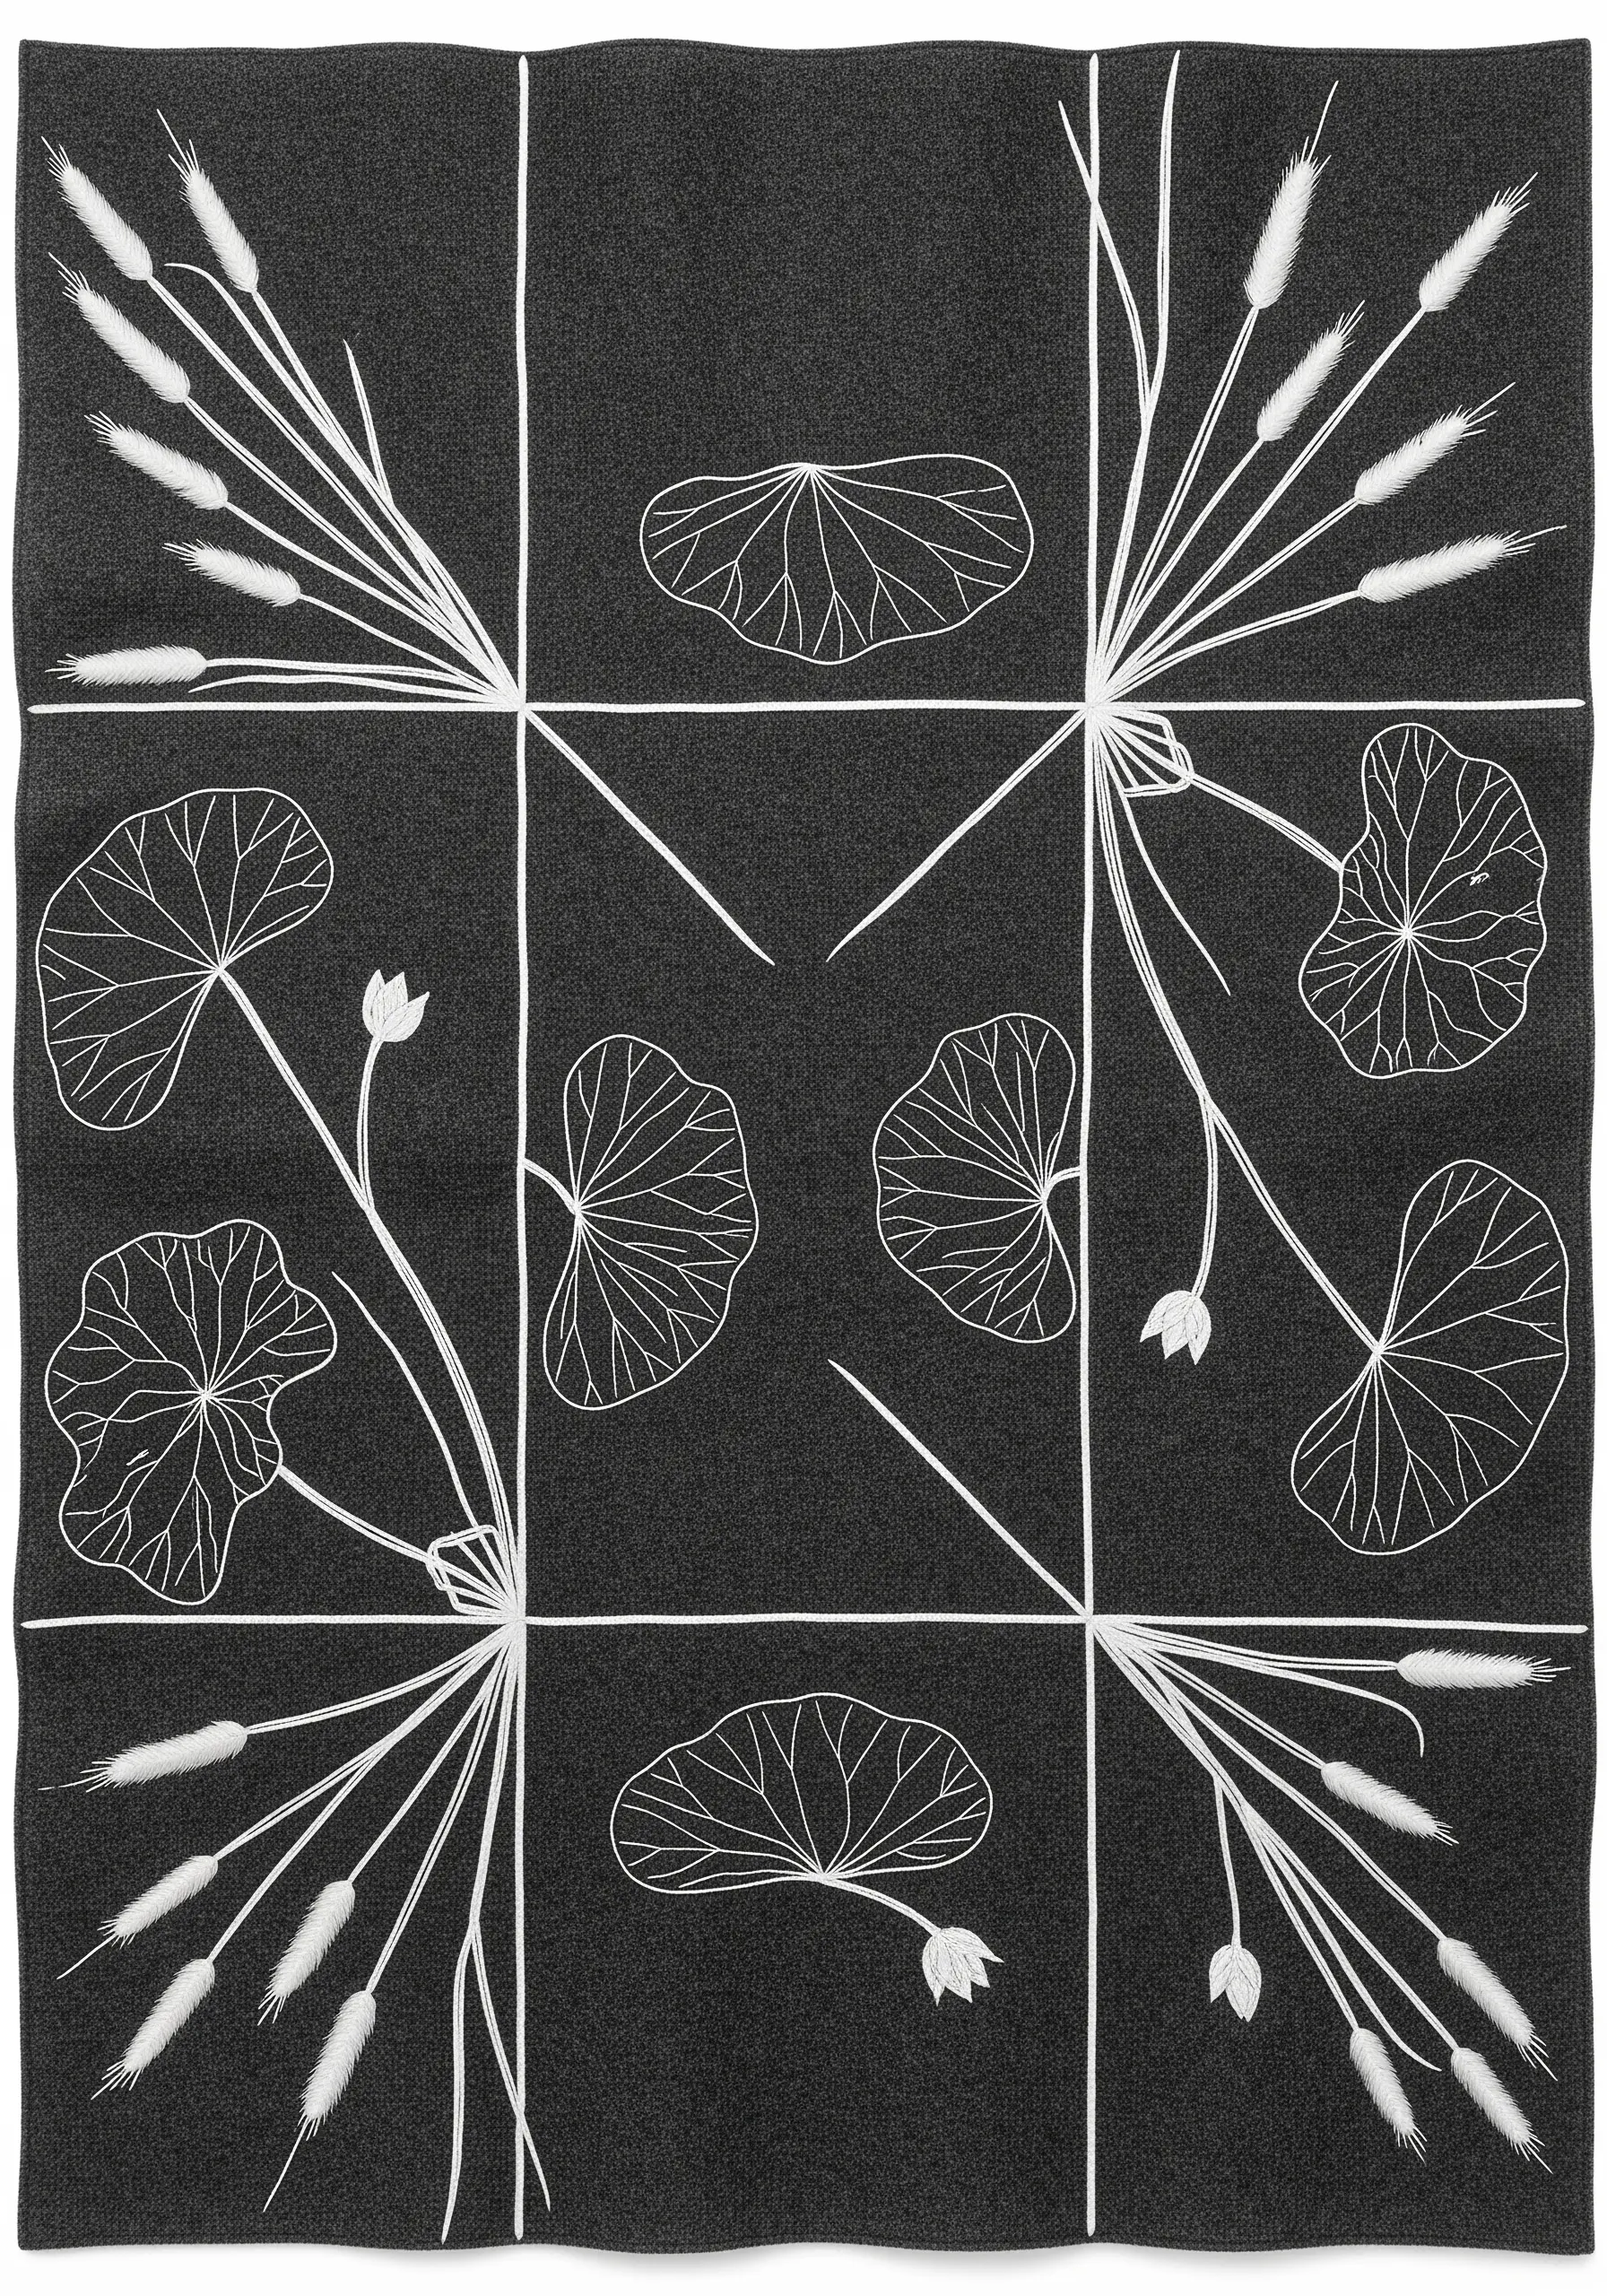
Elevate simple line work into a sophisticated, modern art piece through thoughtful composition.
Begin by planning and marking a grid on your fabric with a removable pen or chalk.
Then, using a single strand of high-contrast thread, stitch the grid and the botanical outlines with a neat backstitch or stem stitch.
This minimalist approach allows the negative space to become an active and essential part of the design, resulting in a clean and contemporary aesthetic.
15. Building Cascading Florals with Layered Knots
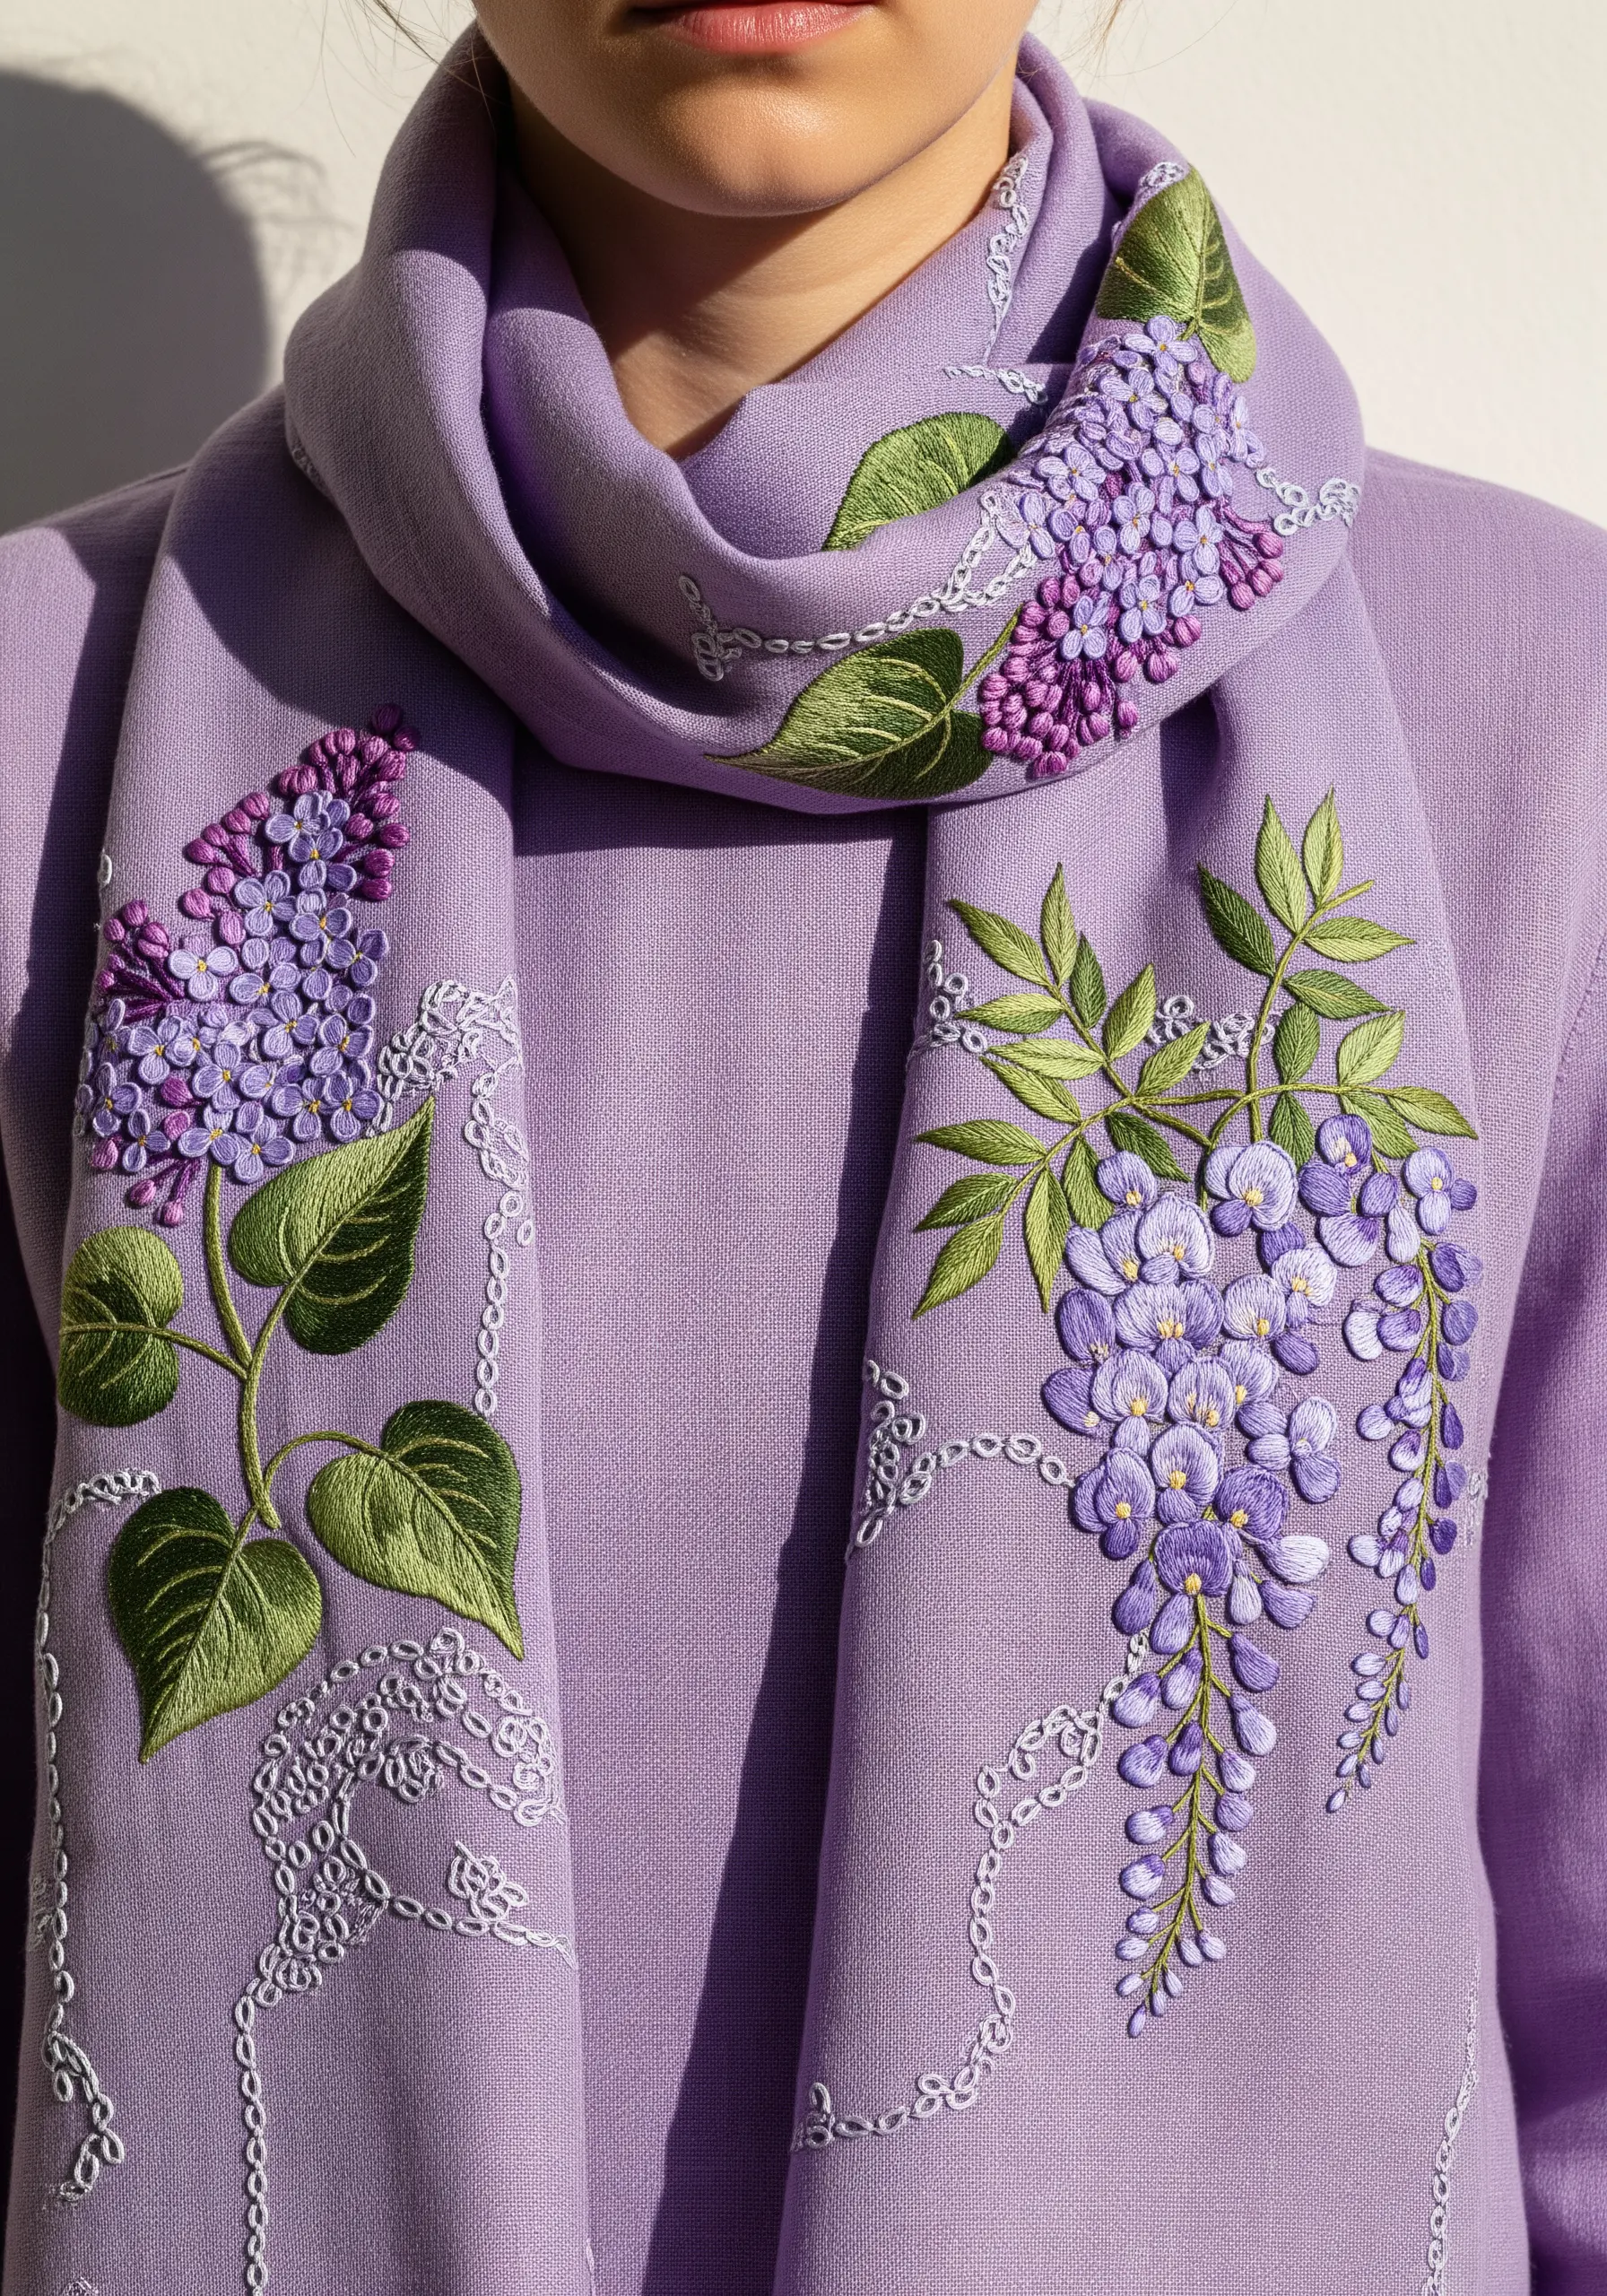
To create the dense, tumbling forms of lilac and wisteria, a combination of knotted stitches is essential.
Use French knots, clustered tightly in variegated shades of purple and violet, to build the main body of the blossoms.
Then, add longer bullion knots at the base of each cluster to suggest the drooping, trailing habit of the flowers.
This technique creates incredible texture and a highly realistic, three-dimensional effect that makes the design come alive.
16. Ornate Goldwork with Padding and Couching
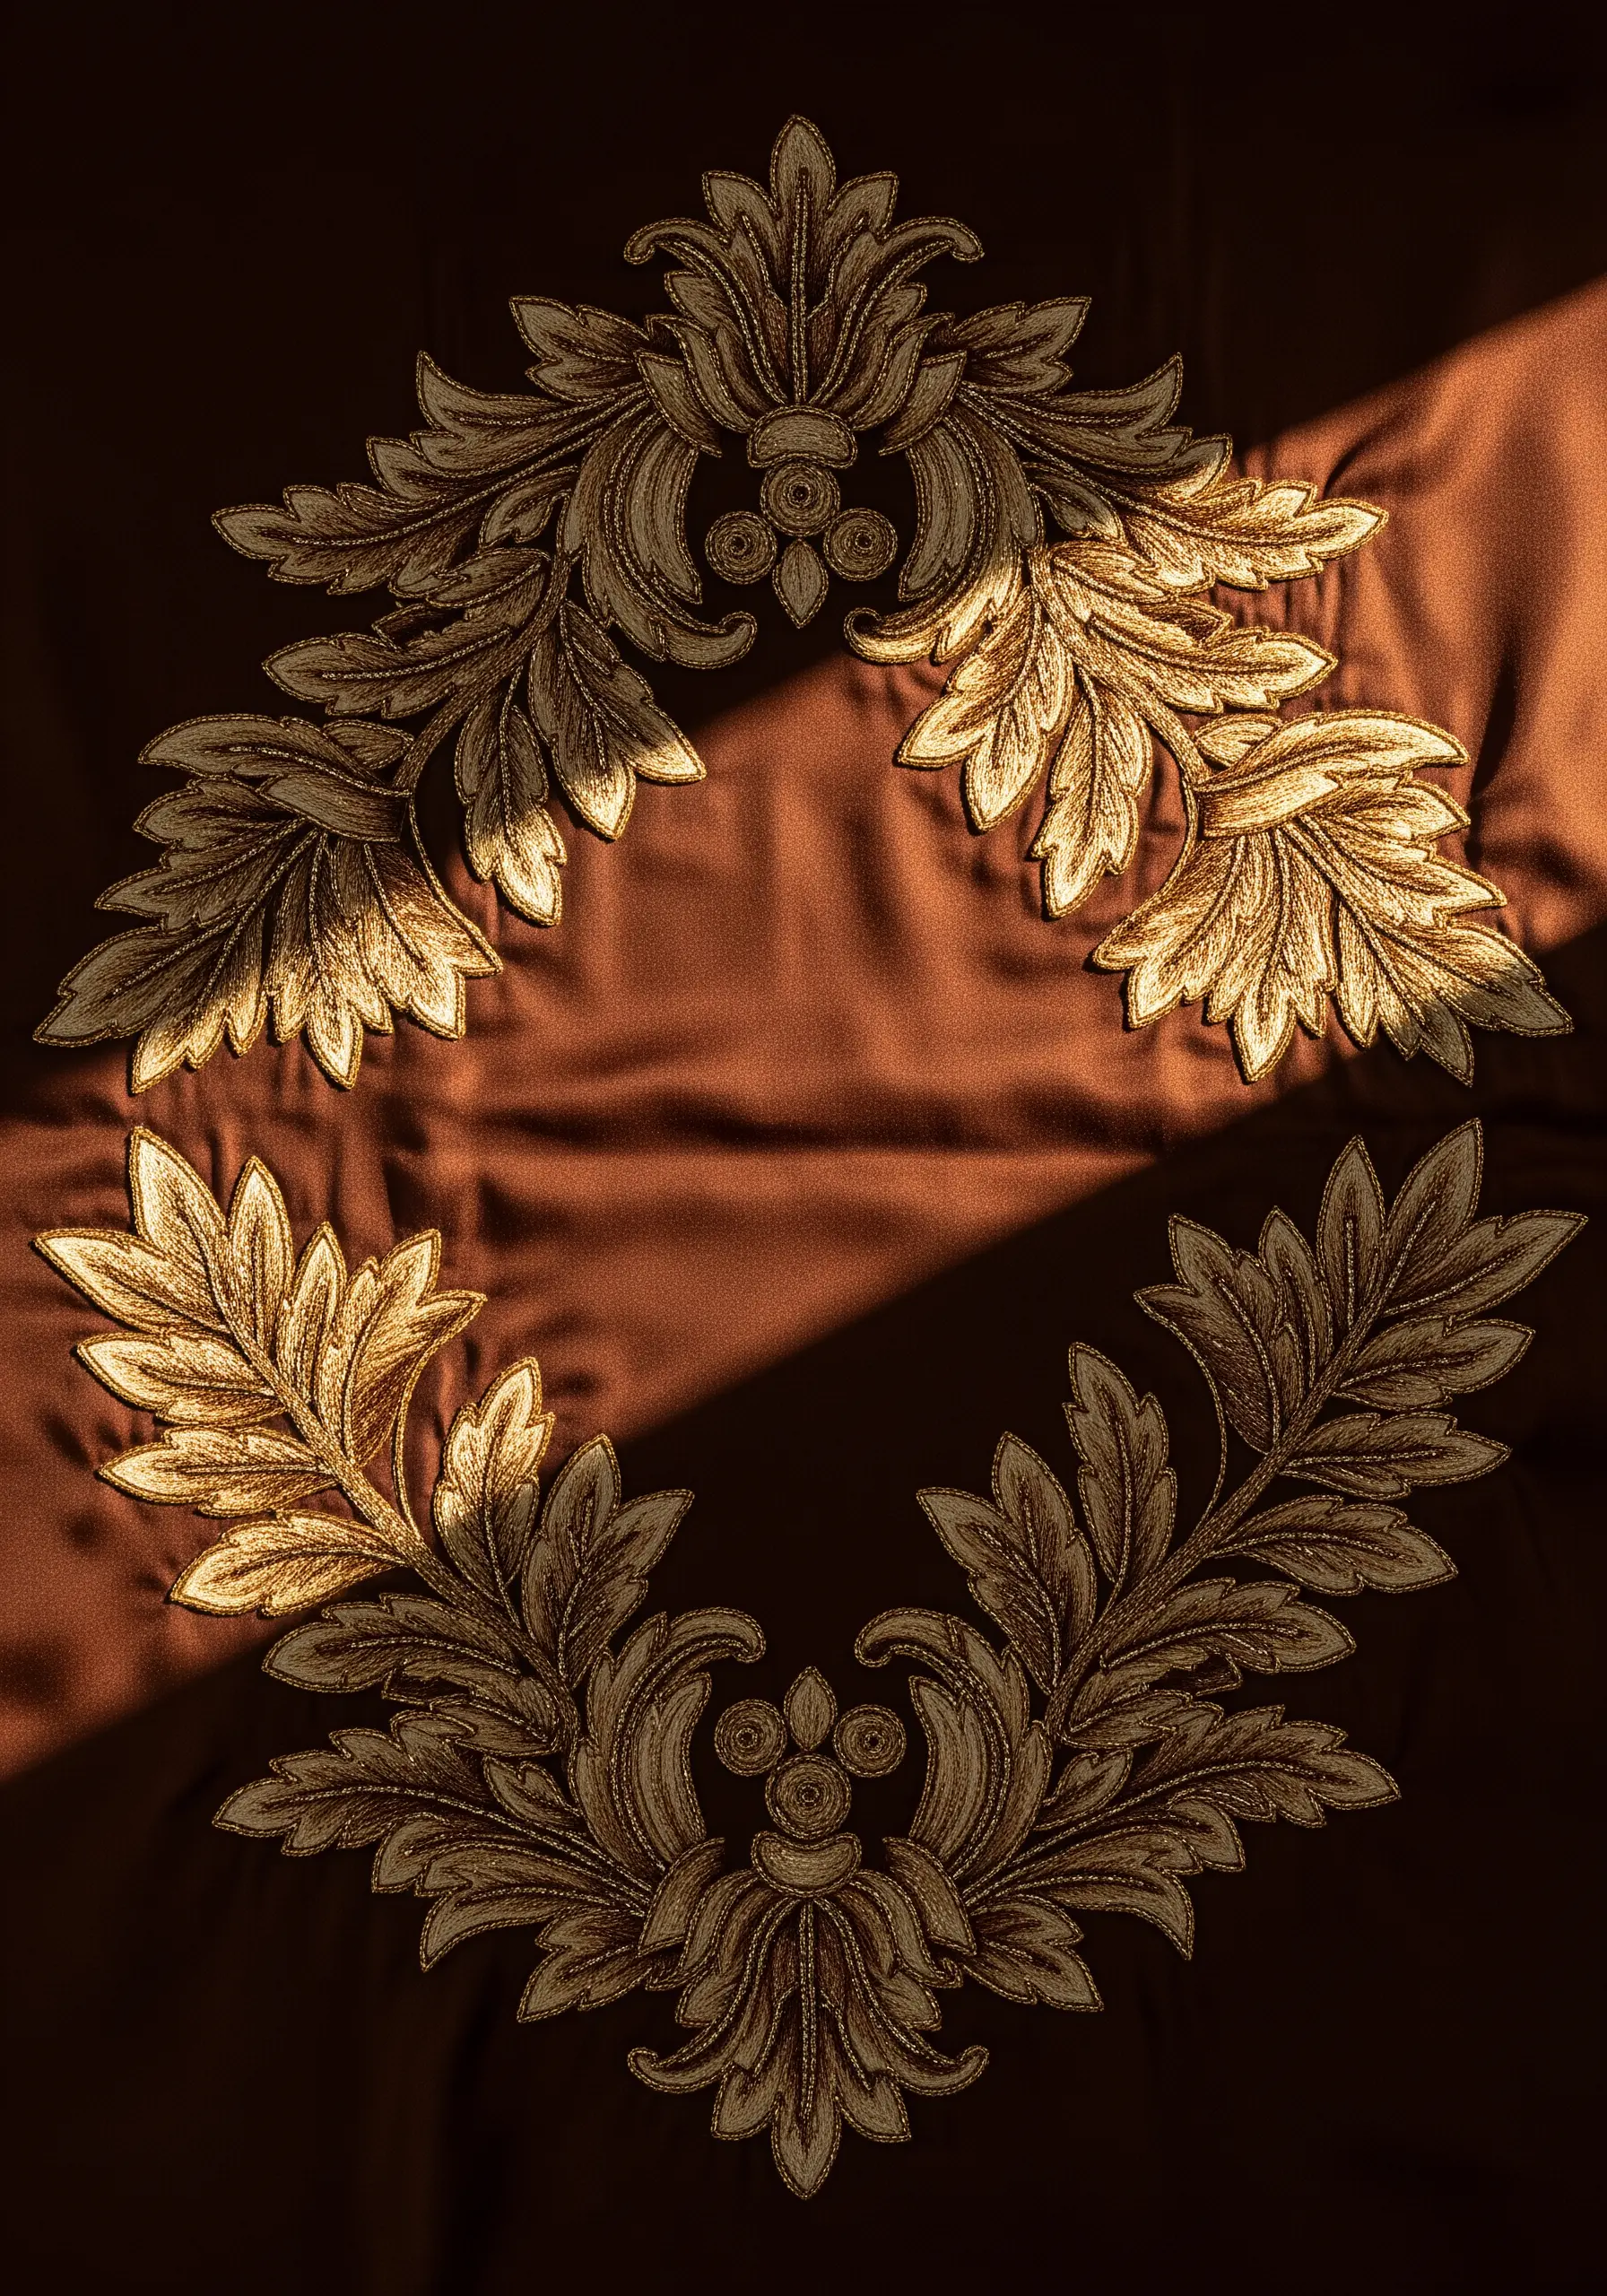
Achieve this regal, high-relief effect with foundational goldwork techniques that add dimension and light.
First, cut your leaf shapes from felt padding and secure them to the fabric.
Lay metallic passing threads over the padding, then couch them into place using a thinner, matching sewing thread and tiny, almost invisible stitches.
This sculptural method makes the metallic threads catch the light from every angle, creating a design that is unapologetically luxurious.
17. Capturing Desert Botanicals with Open Fills
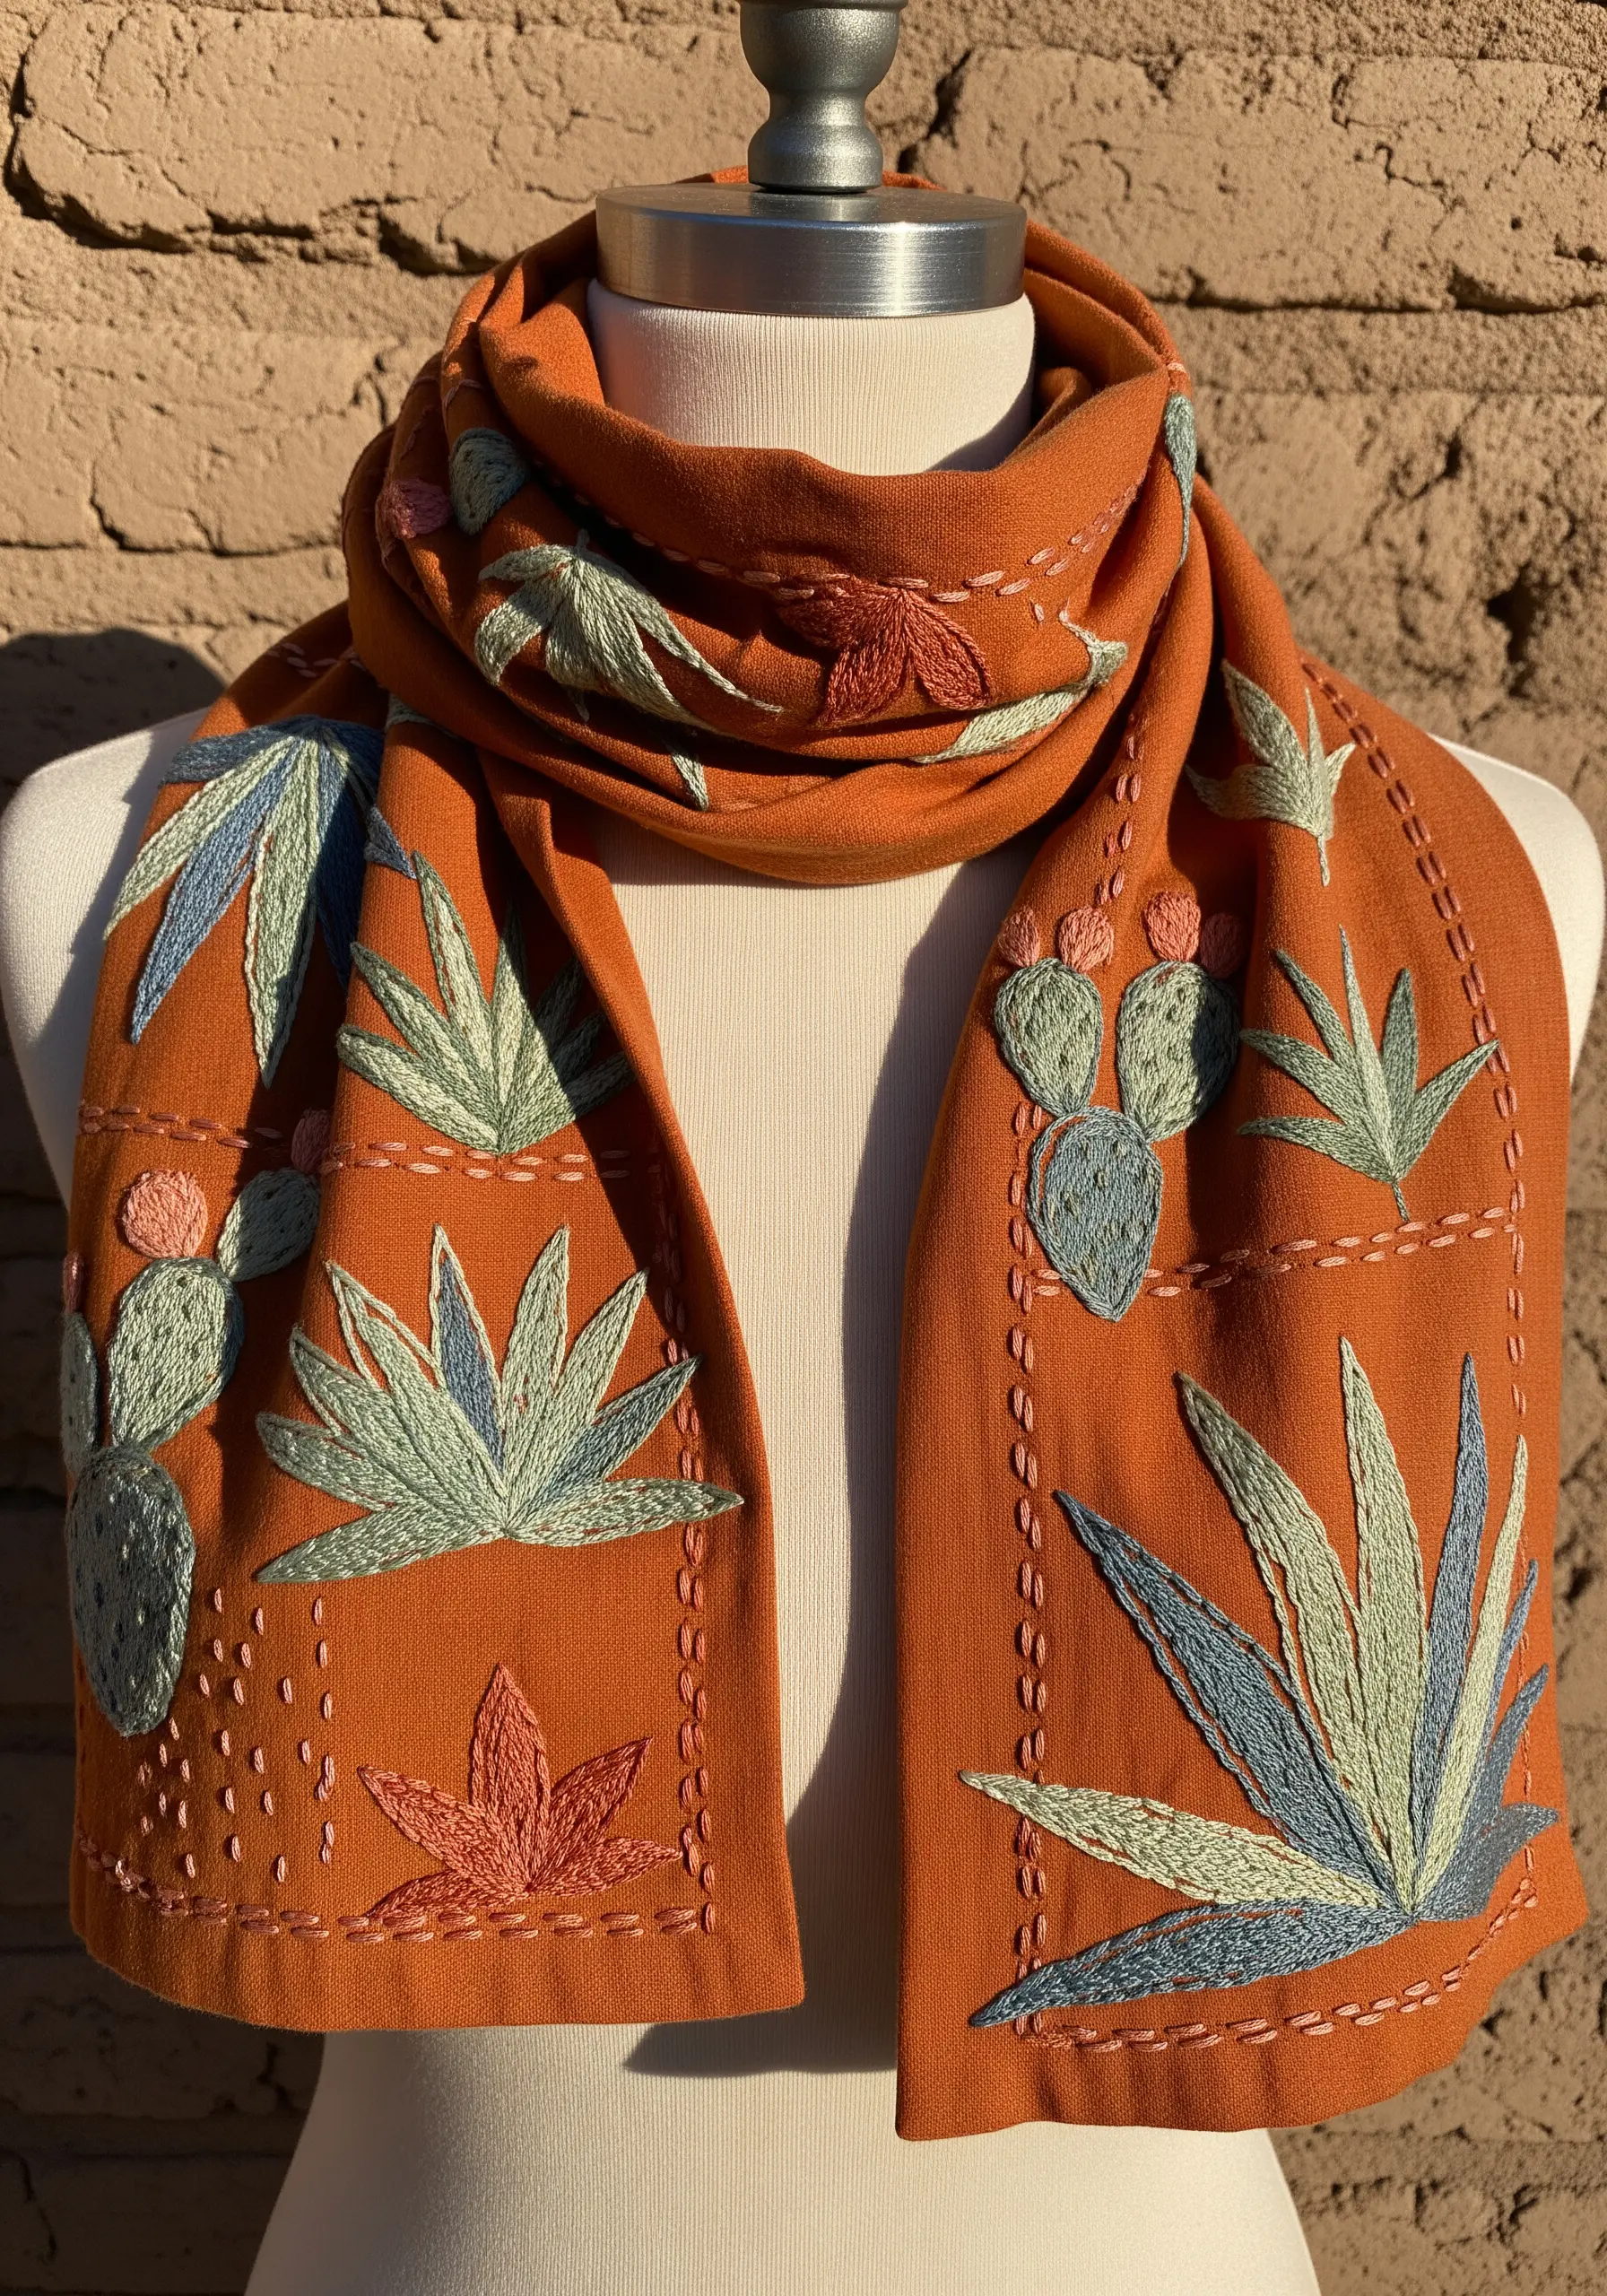
Evoke the unique beauty of the desert with stitches that feel as organic as the plants themselves.
Instead of a solid, dense fill, use an open long-and-short stitch for the agave leaves, allowing small gaps of fabric to show through.
This creates a lighter, more textural feel that suggests toughness and resilience.
Use small French knots for cactus blossoms and simple running stitches to create decorative borders that unify the scattered motifs with a charming, handmade touch.
18. Creating Celestial Foliage on Velvet
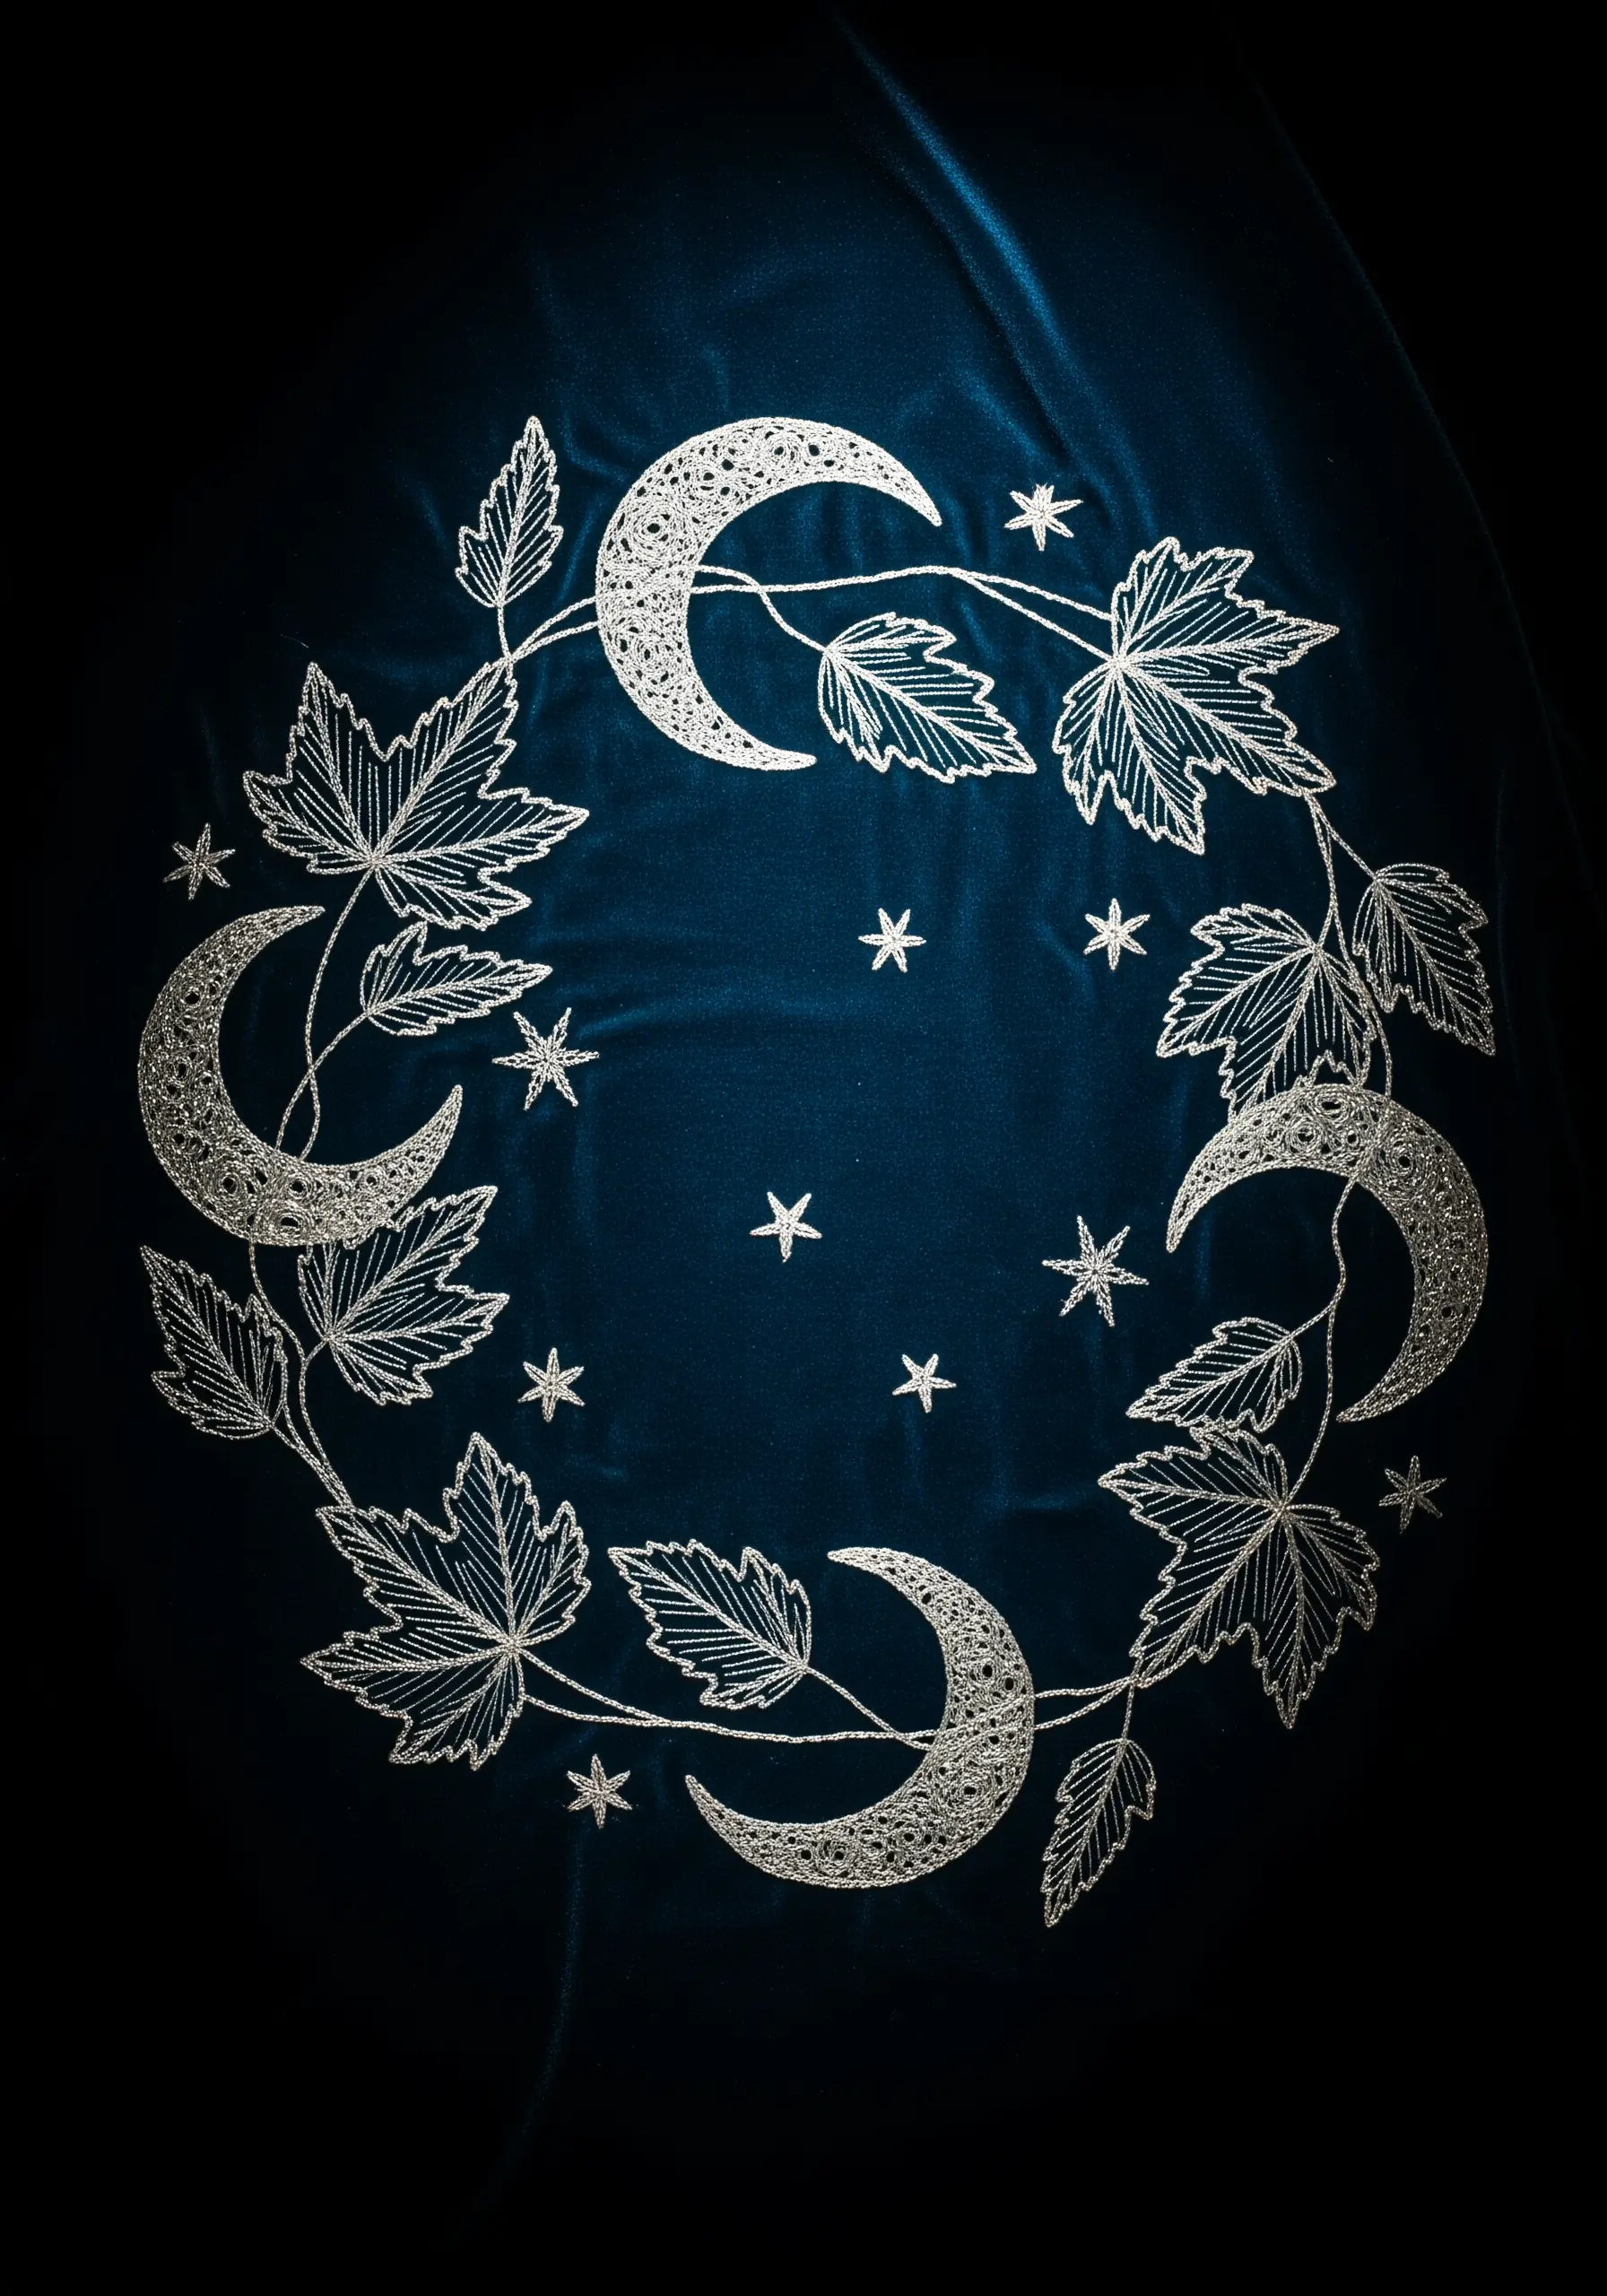
Stitching on a fabric with a deep pile like velvet requires a few adjustments for a perfect finish.
Use a sharp needle to part the fibers rather than crush them, and maintain gentle, even tension.
The beautiful, textured fill on the leaves and moons is a dense seed stitch, contained within a simple backstitch outline.
Using a bright metallic silver thread against the deep blue velvet creates a magical, night-sky effect that is both visually stunning and wonderfully tactile.
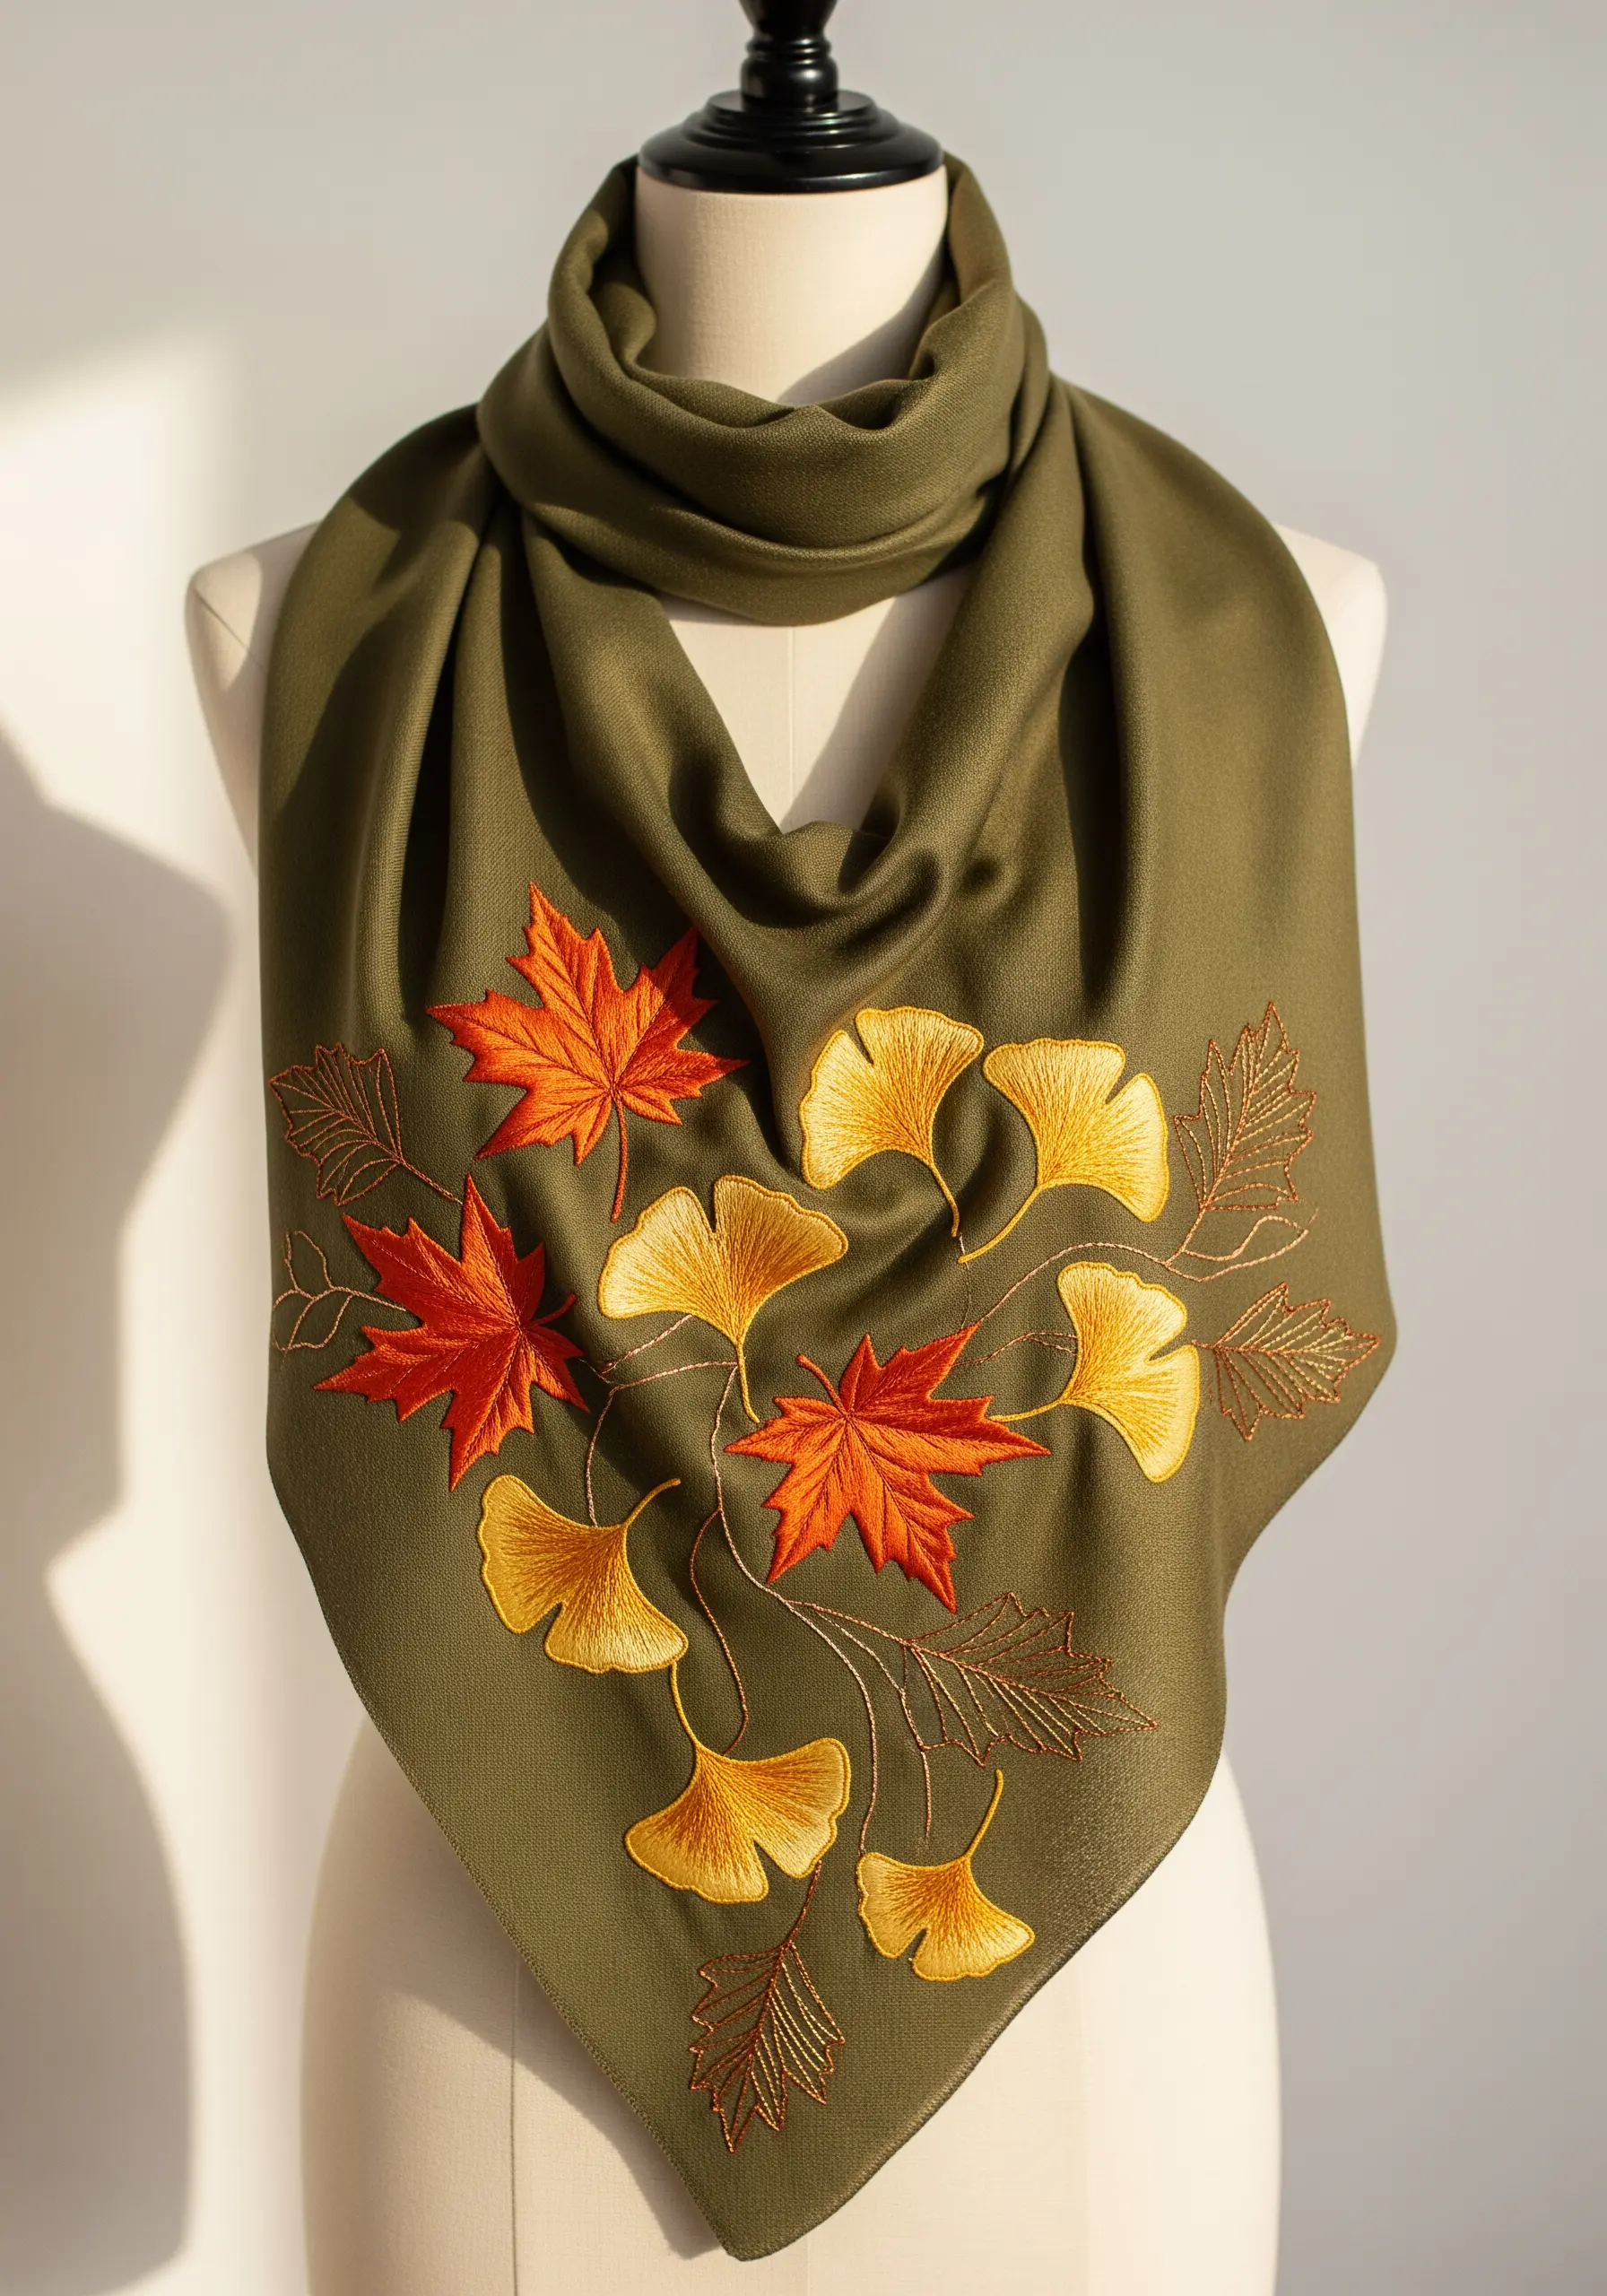
19. “Painting” Vibrant Blooms with Thread
Achieve photorealistic color blending in floral petals by mastering the long-and-short stitch, often called thread painting or needle painting.
Select at least three or four shades of a single color family (e.g., light pink, medium pink, magenta, and red).
Work in rows, staggering your stitch lengths and overlapping the colors to create seamless, soft gradients.
Outlining the accompanying leaves in a dark green stem stitch makes them pop and defines their shape against the vibrant flowers.
20. Evoking a Vintage Botanical Print with Monochrome
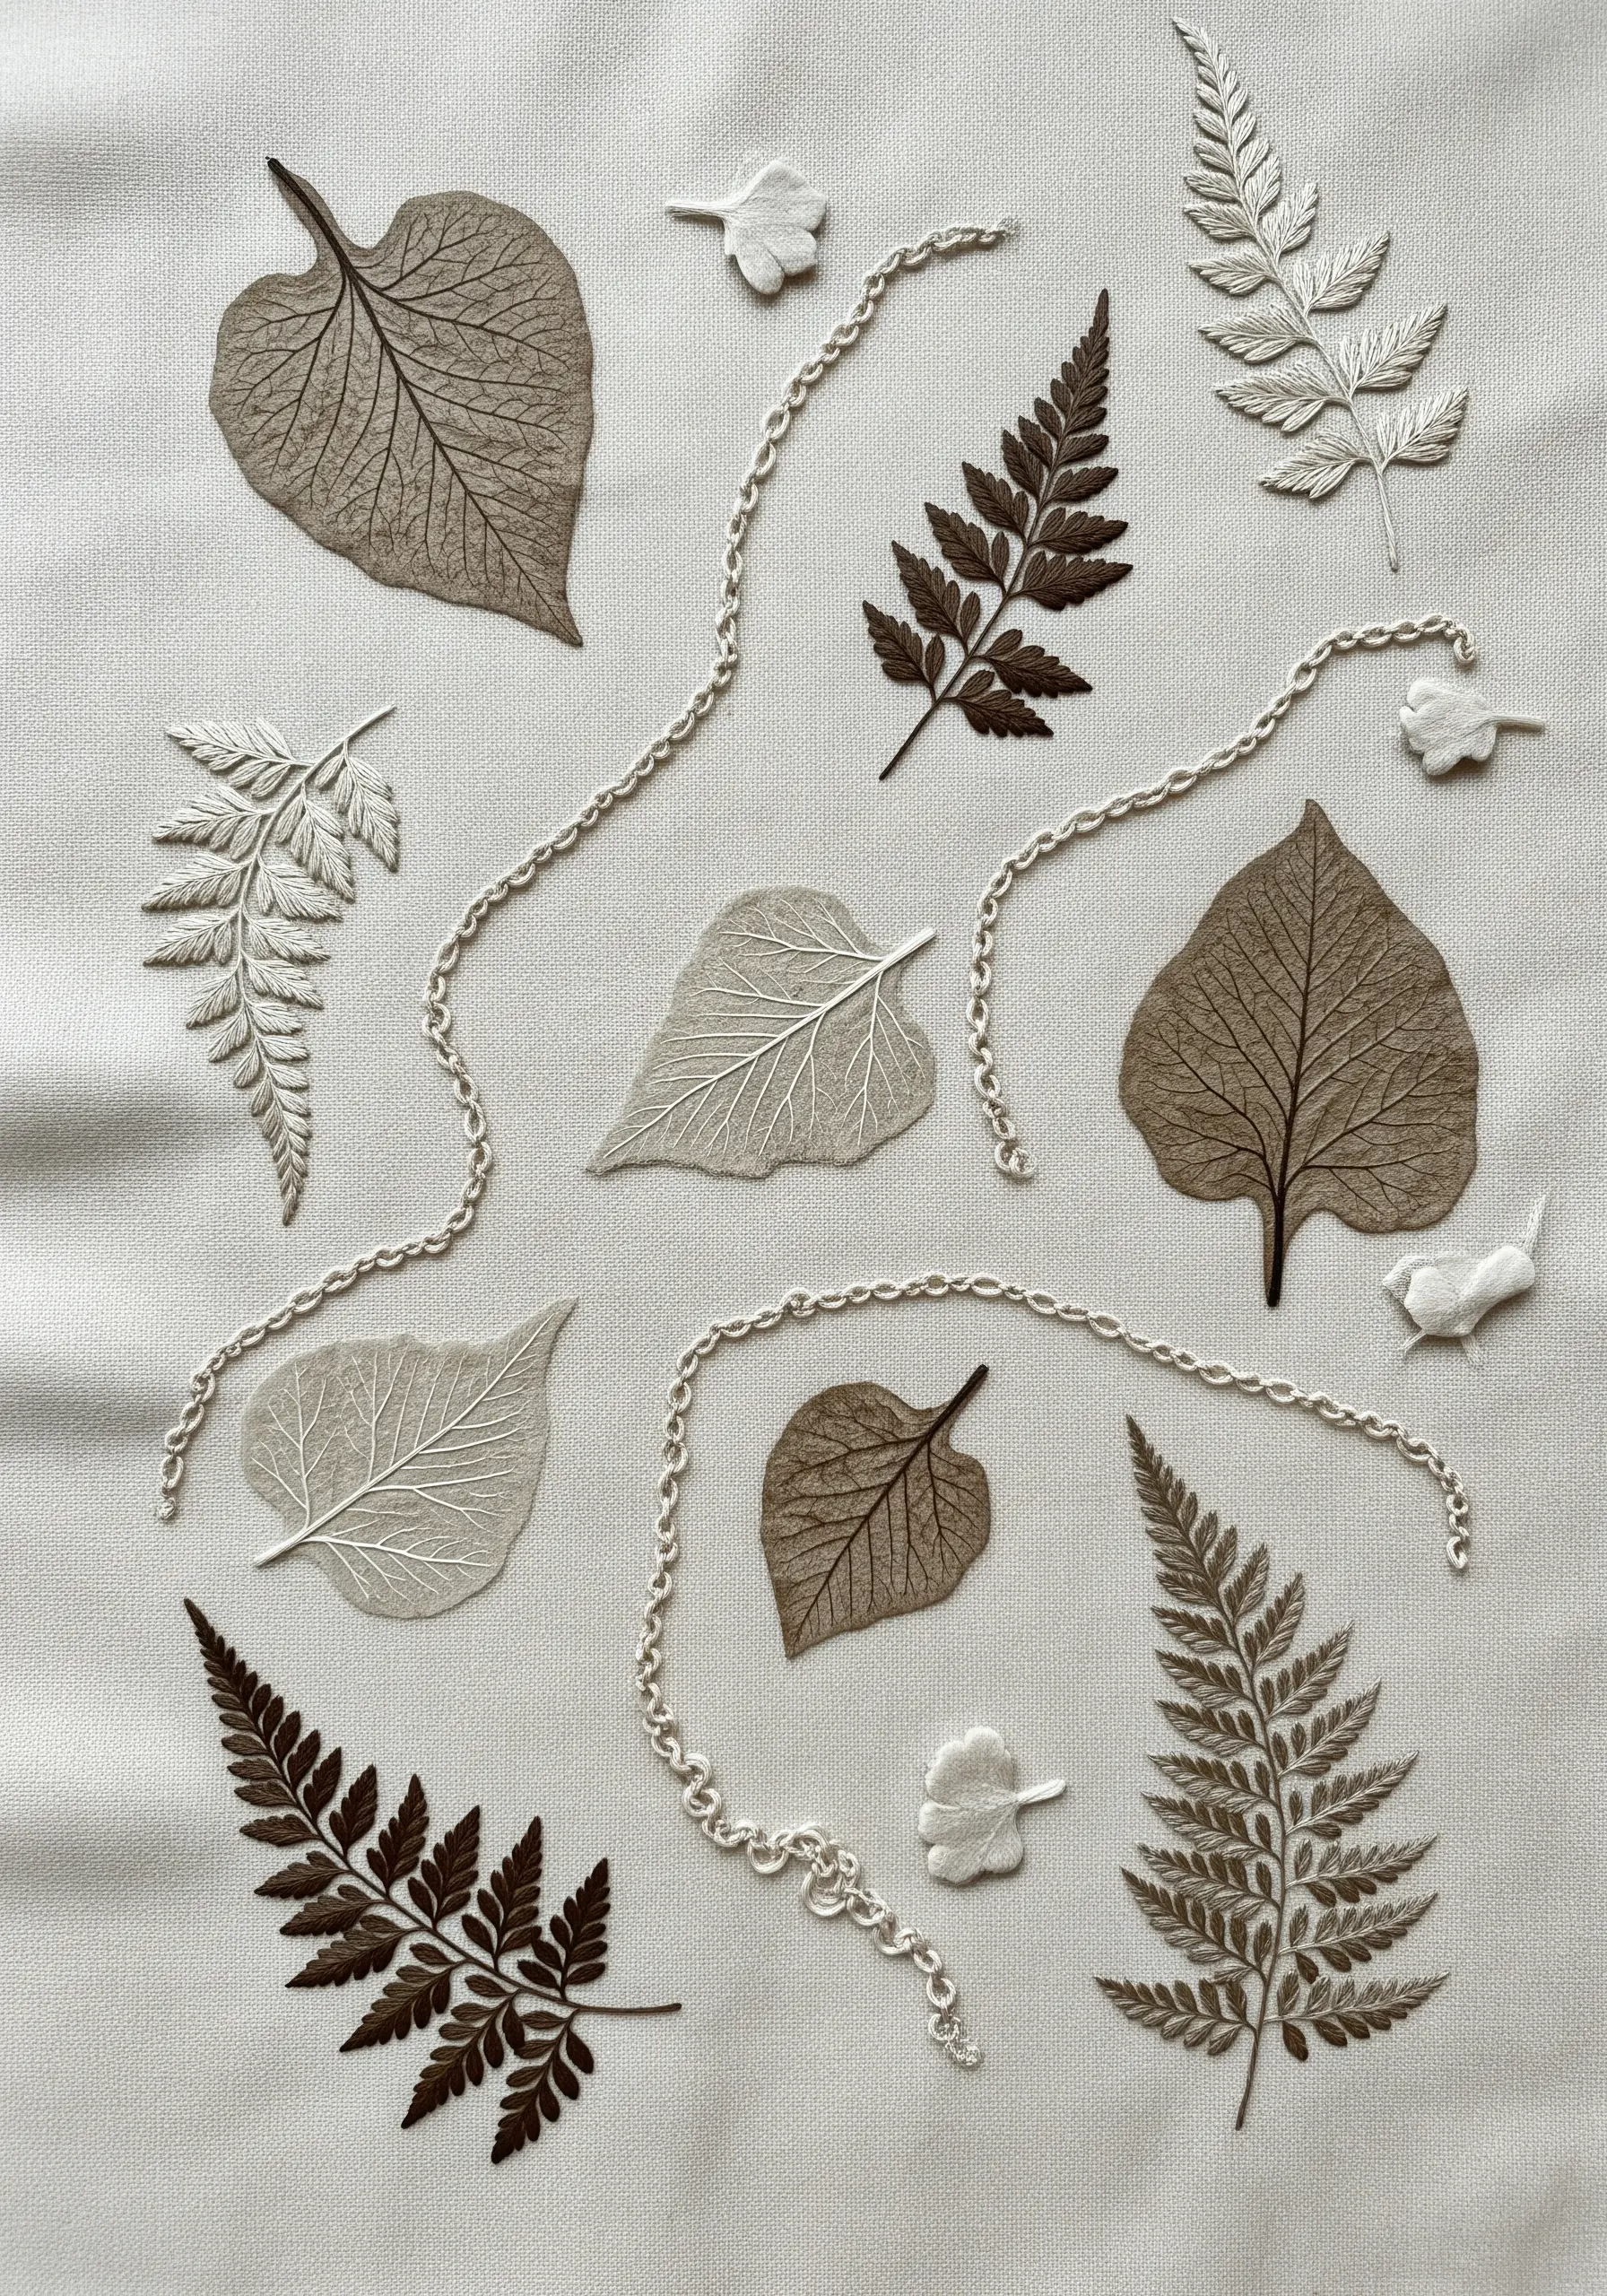
Replicate the delicate, scholarly look of a vintage botanical illustration by limiting your palette and focusing on fine detail.
Work with a monochrome selection of sepia, cream, and grey tones on a neutral background.
The key to the look is using a single, fine strand of thread for all the leaf vein details.
The addition of meandering chain stitch vines adds a sense of gentle movement, as if the leaves are tumbling across an old page.
21. Expressive Botanicals with Abstract Line Work
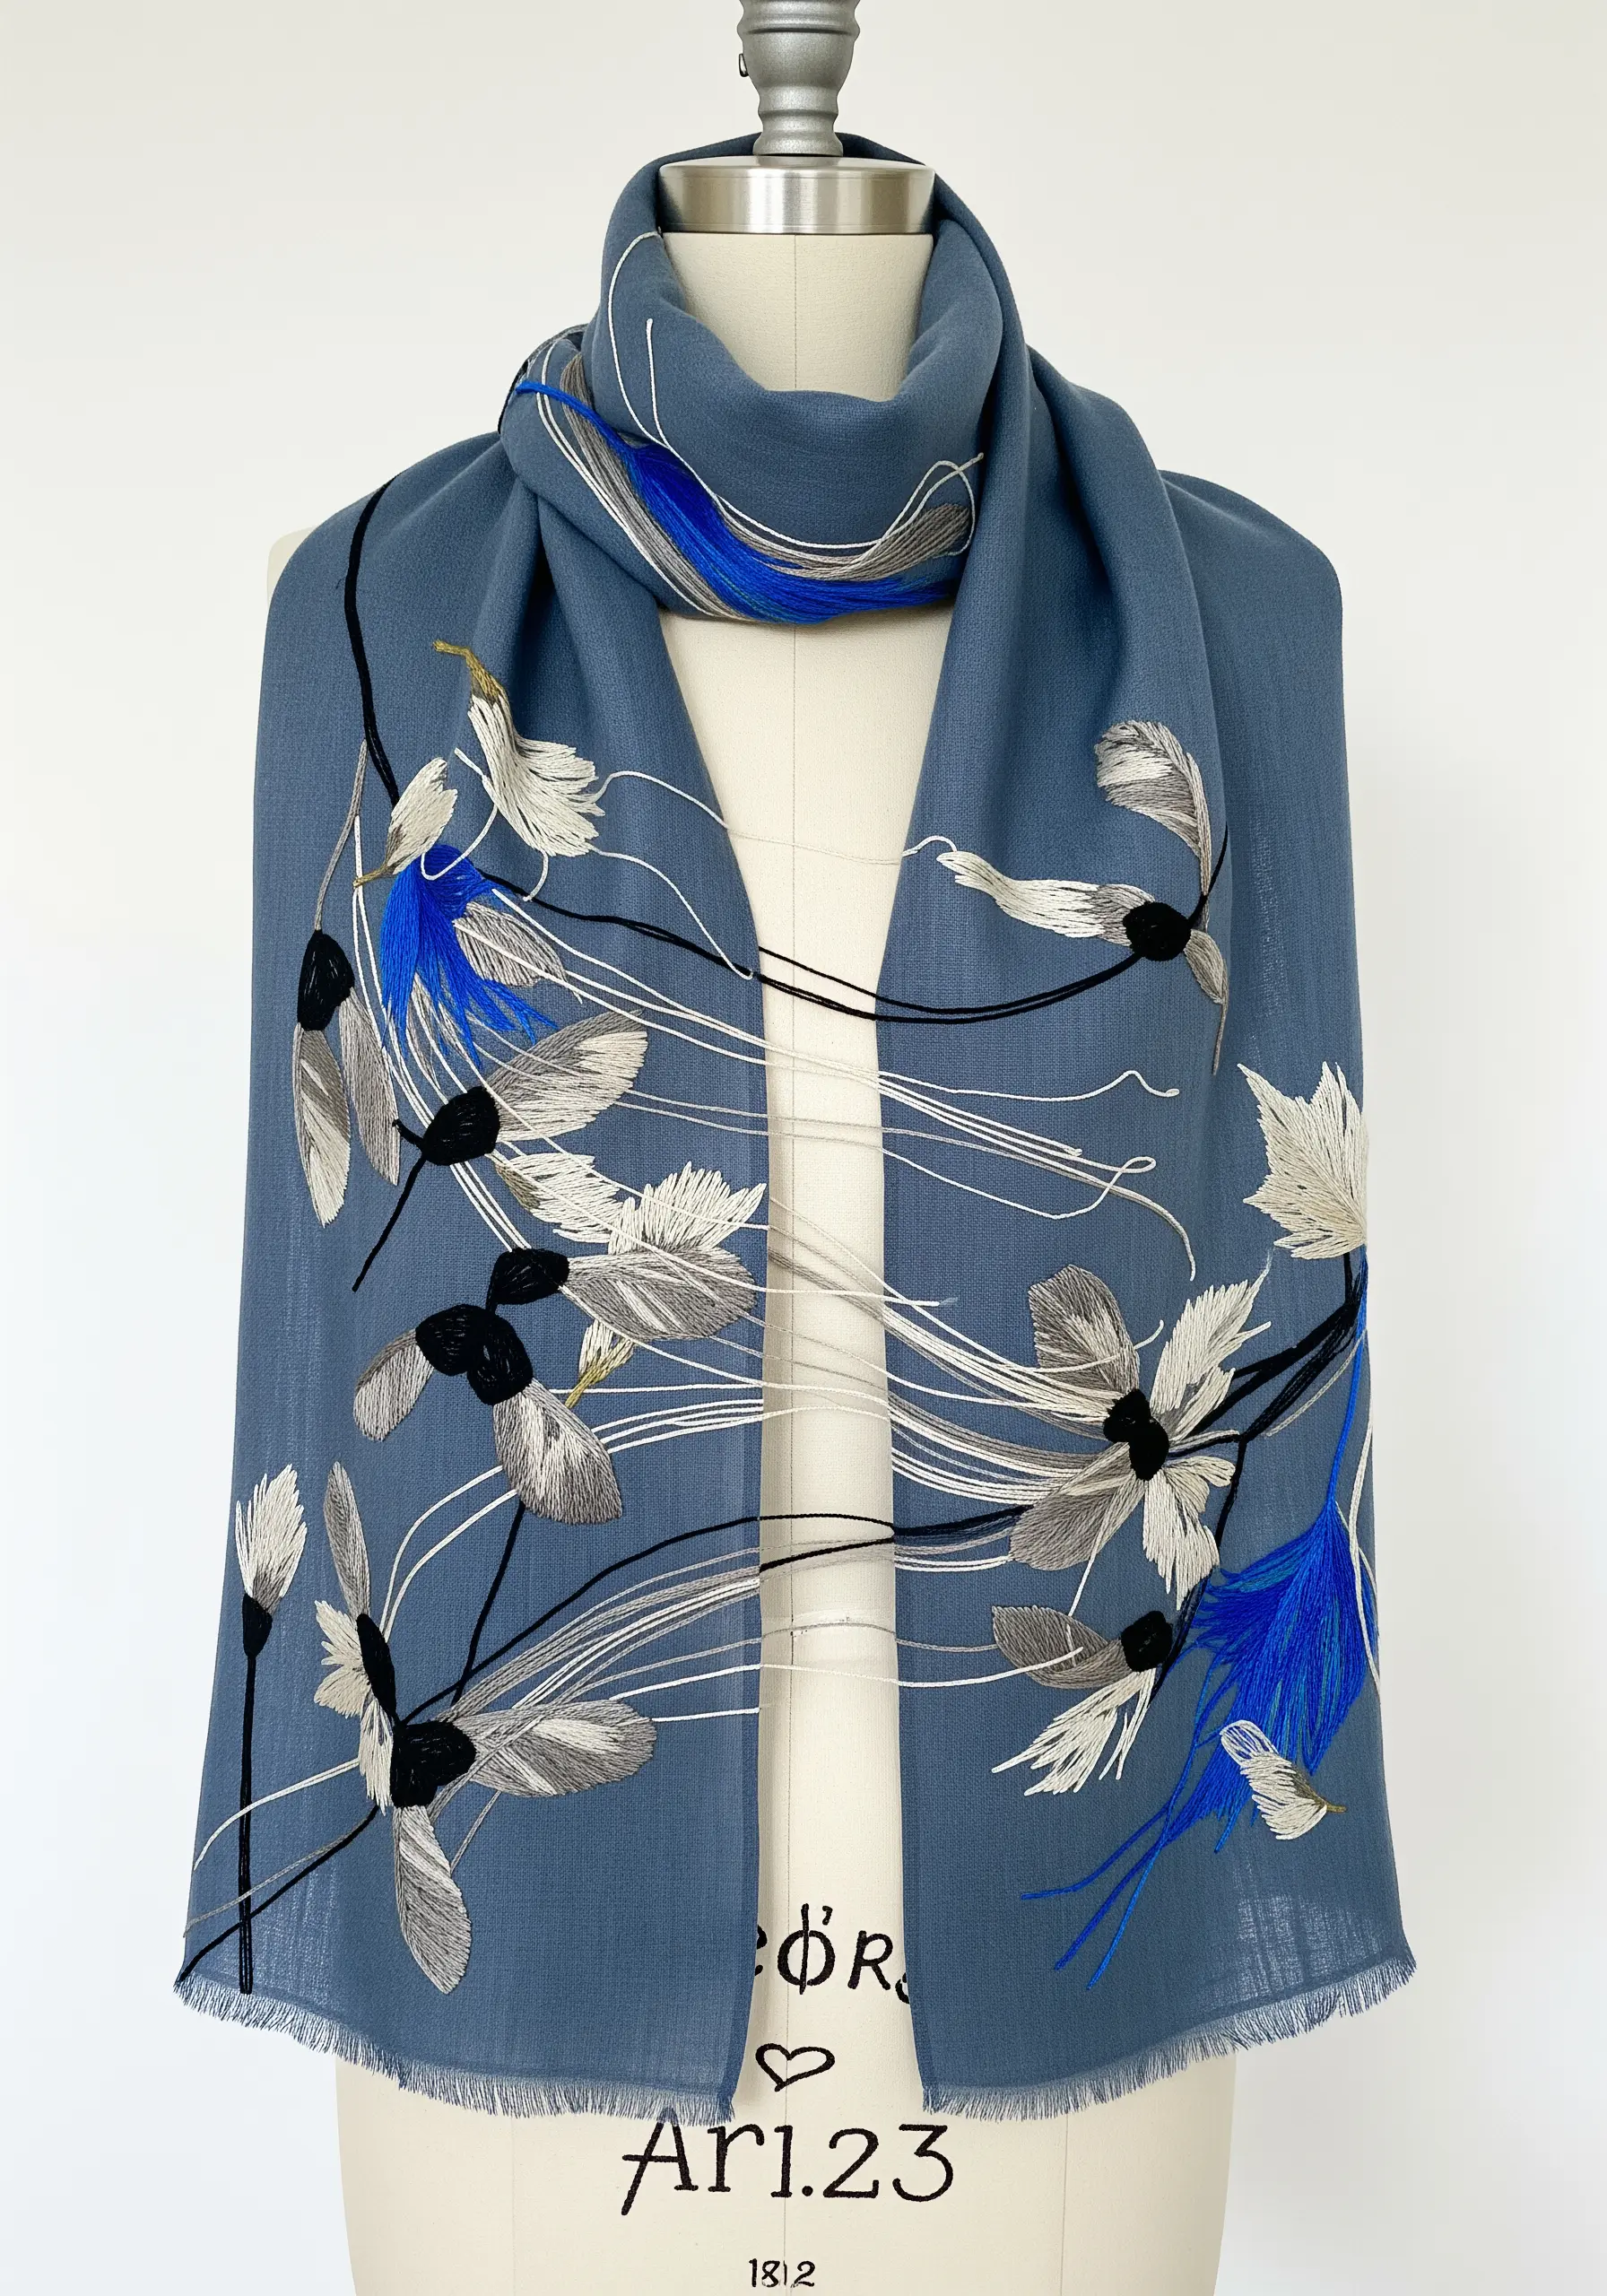
Move beyond literal representation and capture the essence and energy of a plant with an abstract approach.
Incorporate long, unsecured “floated” threads that span across parts of your design; this creates a sense of movement, fragility, and dynamism.
Combine these expressive lines with areas of traditional satin stitch and energetic straight stitches.
This technique is less about what a plant looks like and more about how it feels.
22. Pairing Chunky Yarn with a Patterned Base
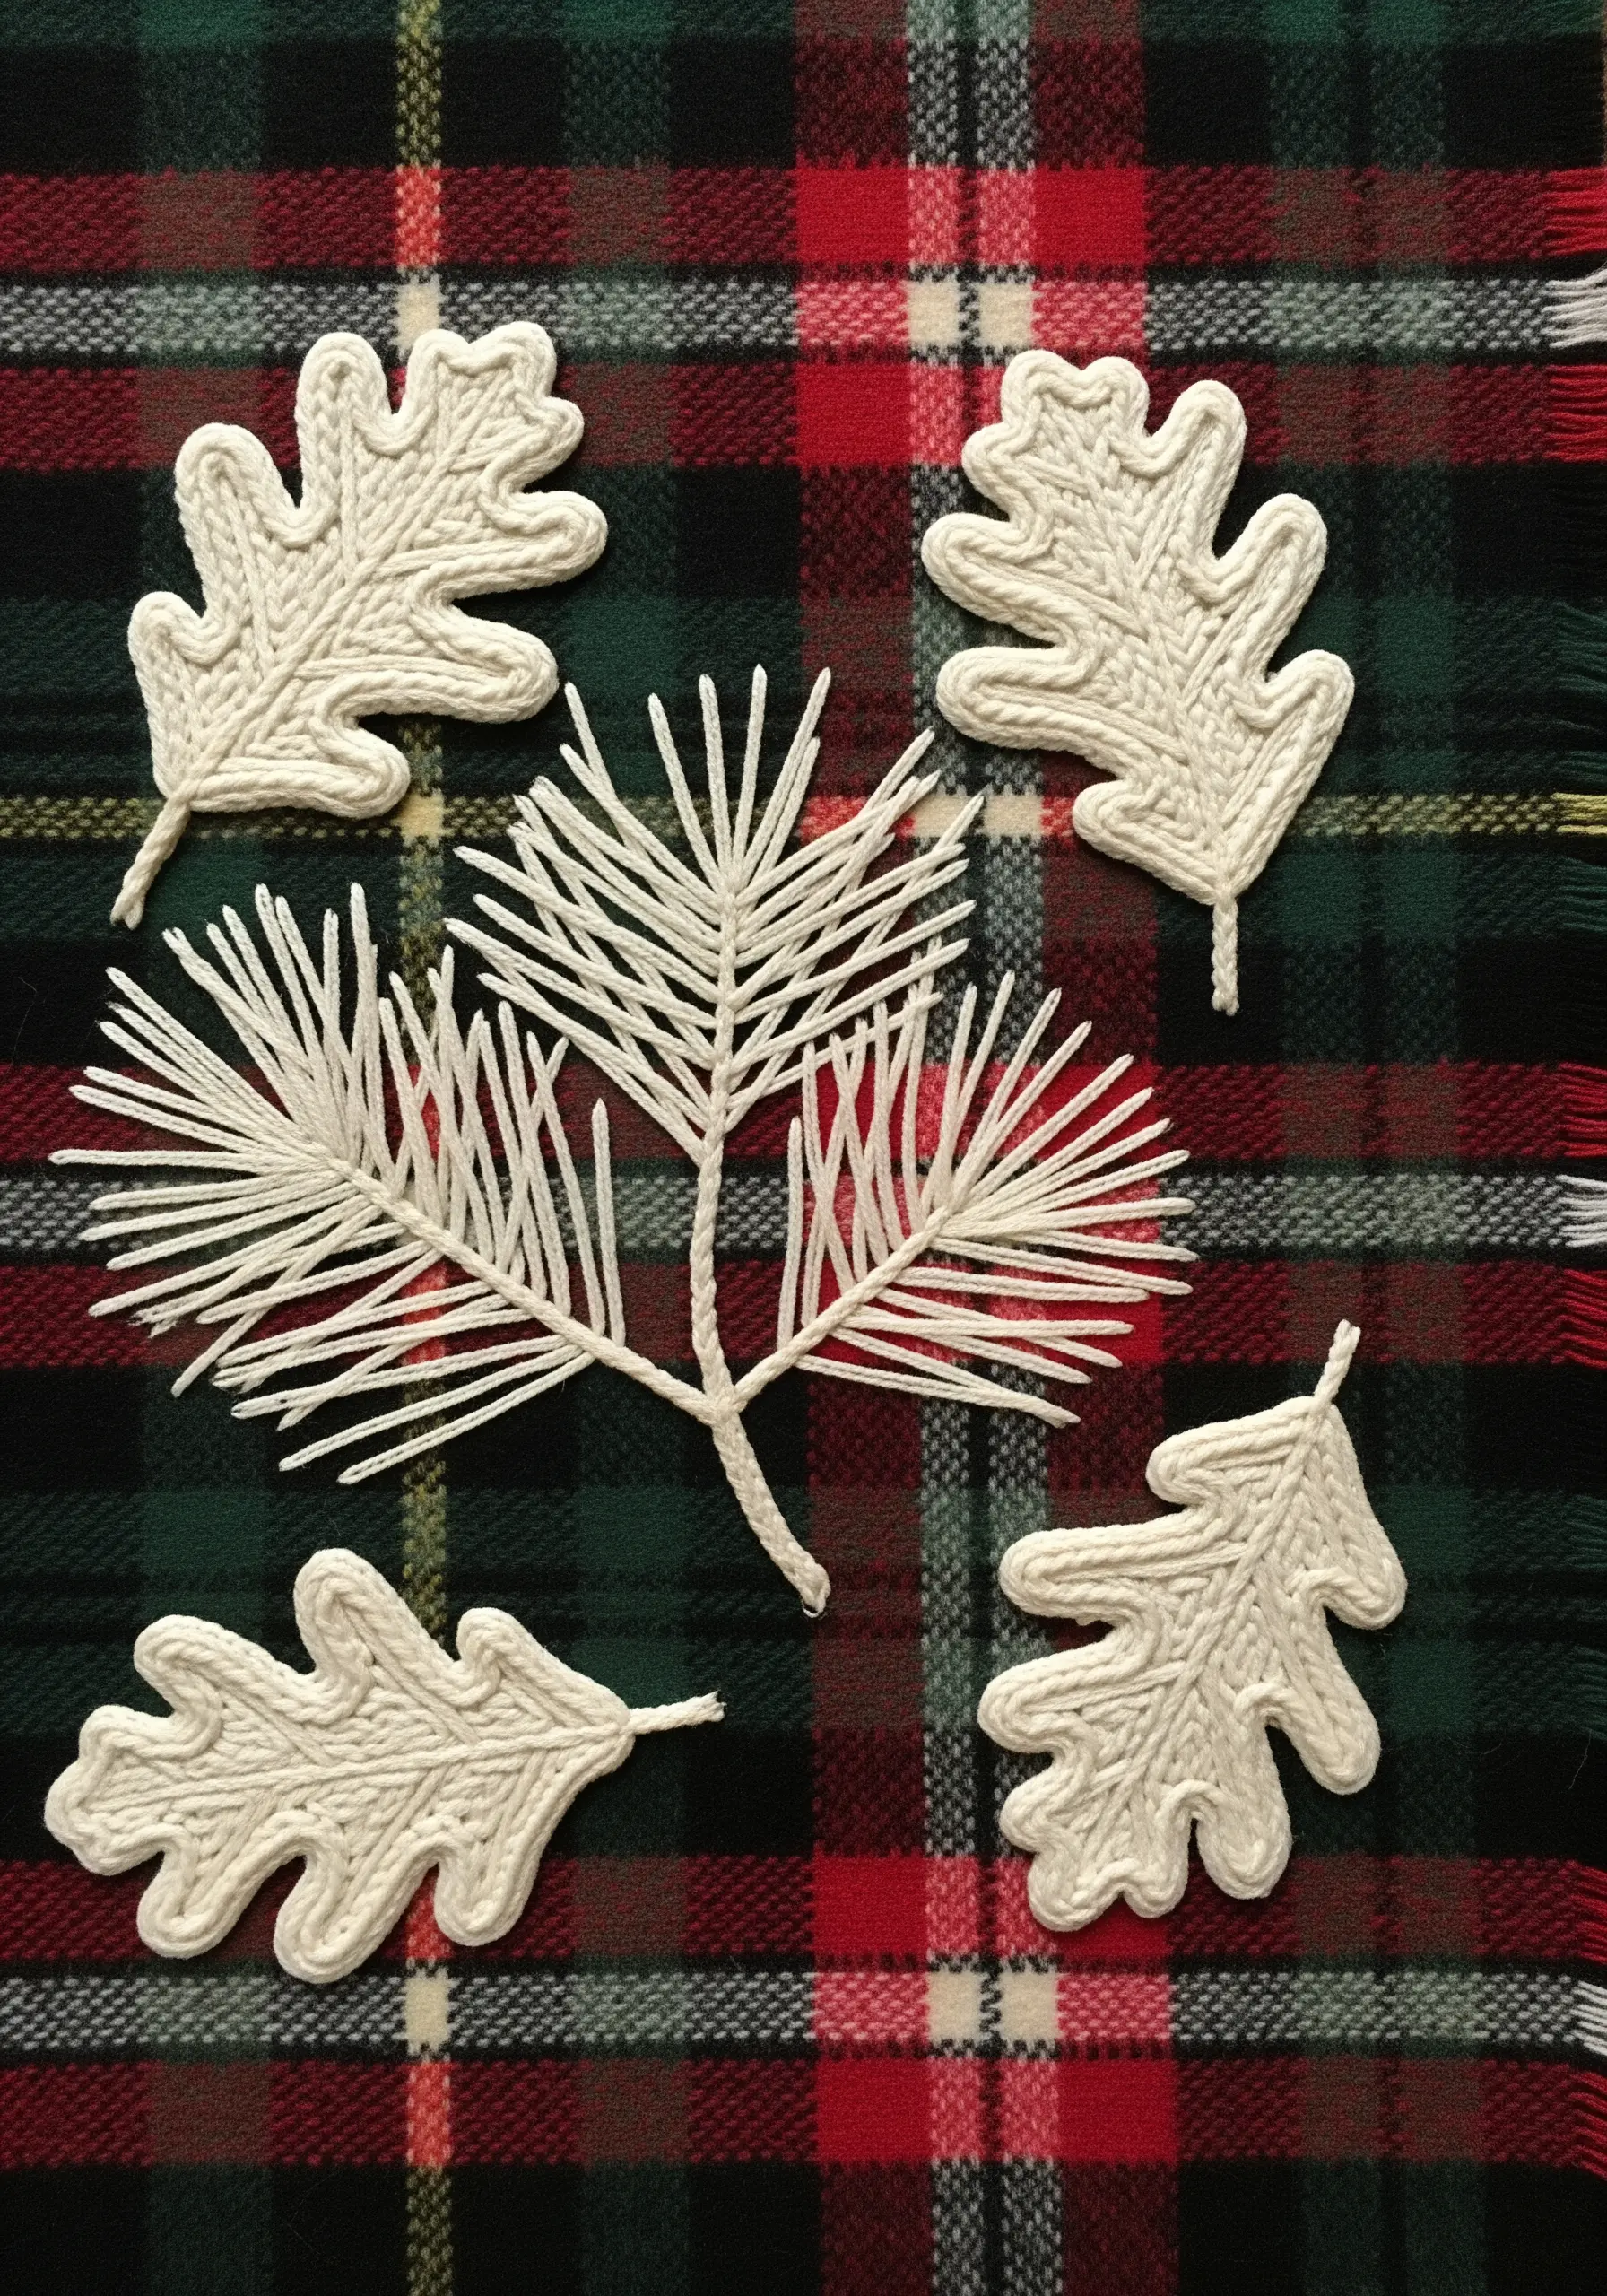
For a bold, highly tactile result, substitute standard embroidery floss with a fine-gauge yarn and use a large-eyed chenille needle.
The oak leaves are created using padded couching for a raised effect, while the pine needles are simple, effective long straight stitches.
Choosing to stitch onto an already patterned fabric, like this classic tartan, adds another layer of visual interest and creates a wonderfully cozy, rustic aesthetic perfect for autumn and winter wear.
23. Emulating Ink Wash Painting on Silk
Capture the serene elegance of traditional Asian ink wash paintings by working on a smooth, lustrous fabric like silk or satin.
Use only one or two strands of thread to maintain delicacy.
Employ a split long-and-short stitch to create exceptionally soft, watercolor-like fills within the leaves.
The sparing use of a fine metallic thread for outlines or tips adds a quiet touch of luxury without overwhelming the piece.
This technique is an exercise in elegant restraint.
24. Layering Woodland Appliqué on Textured Fabric
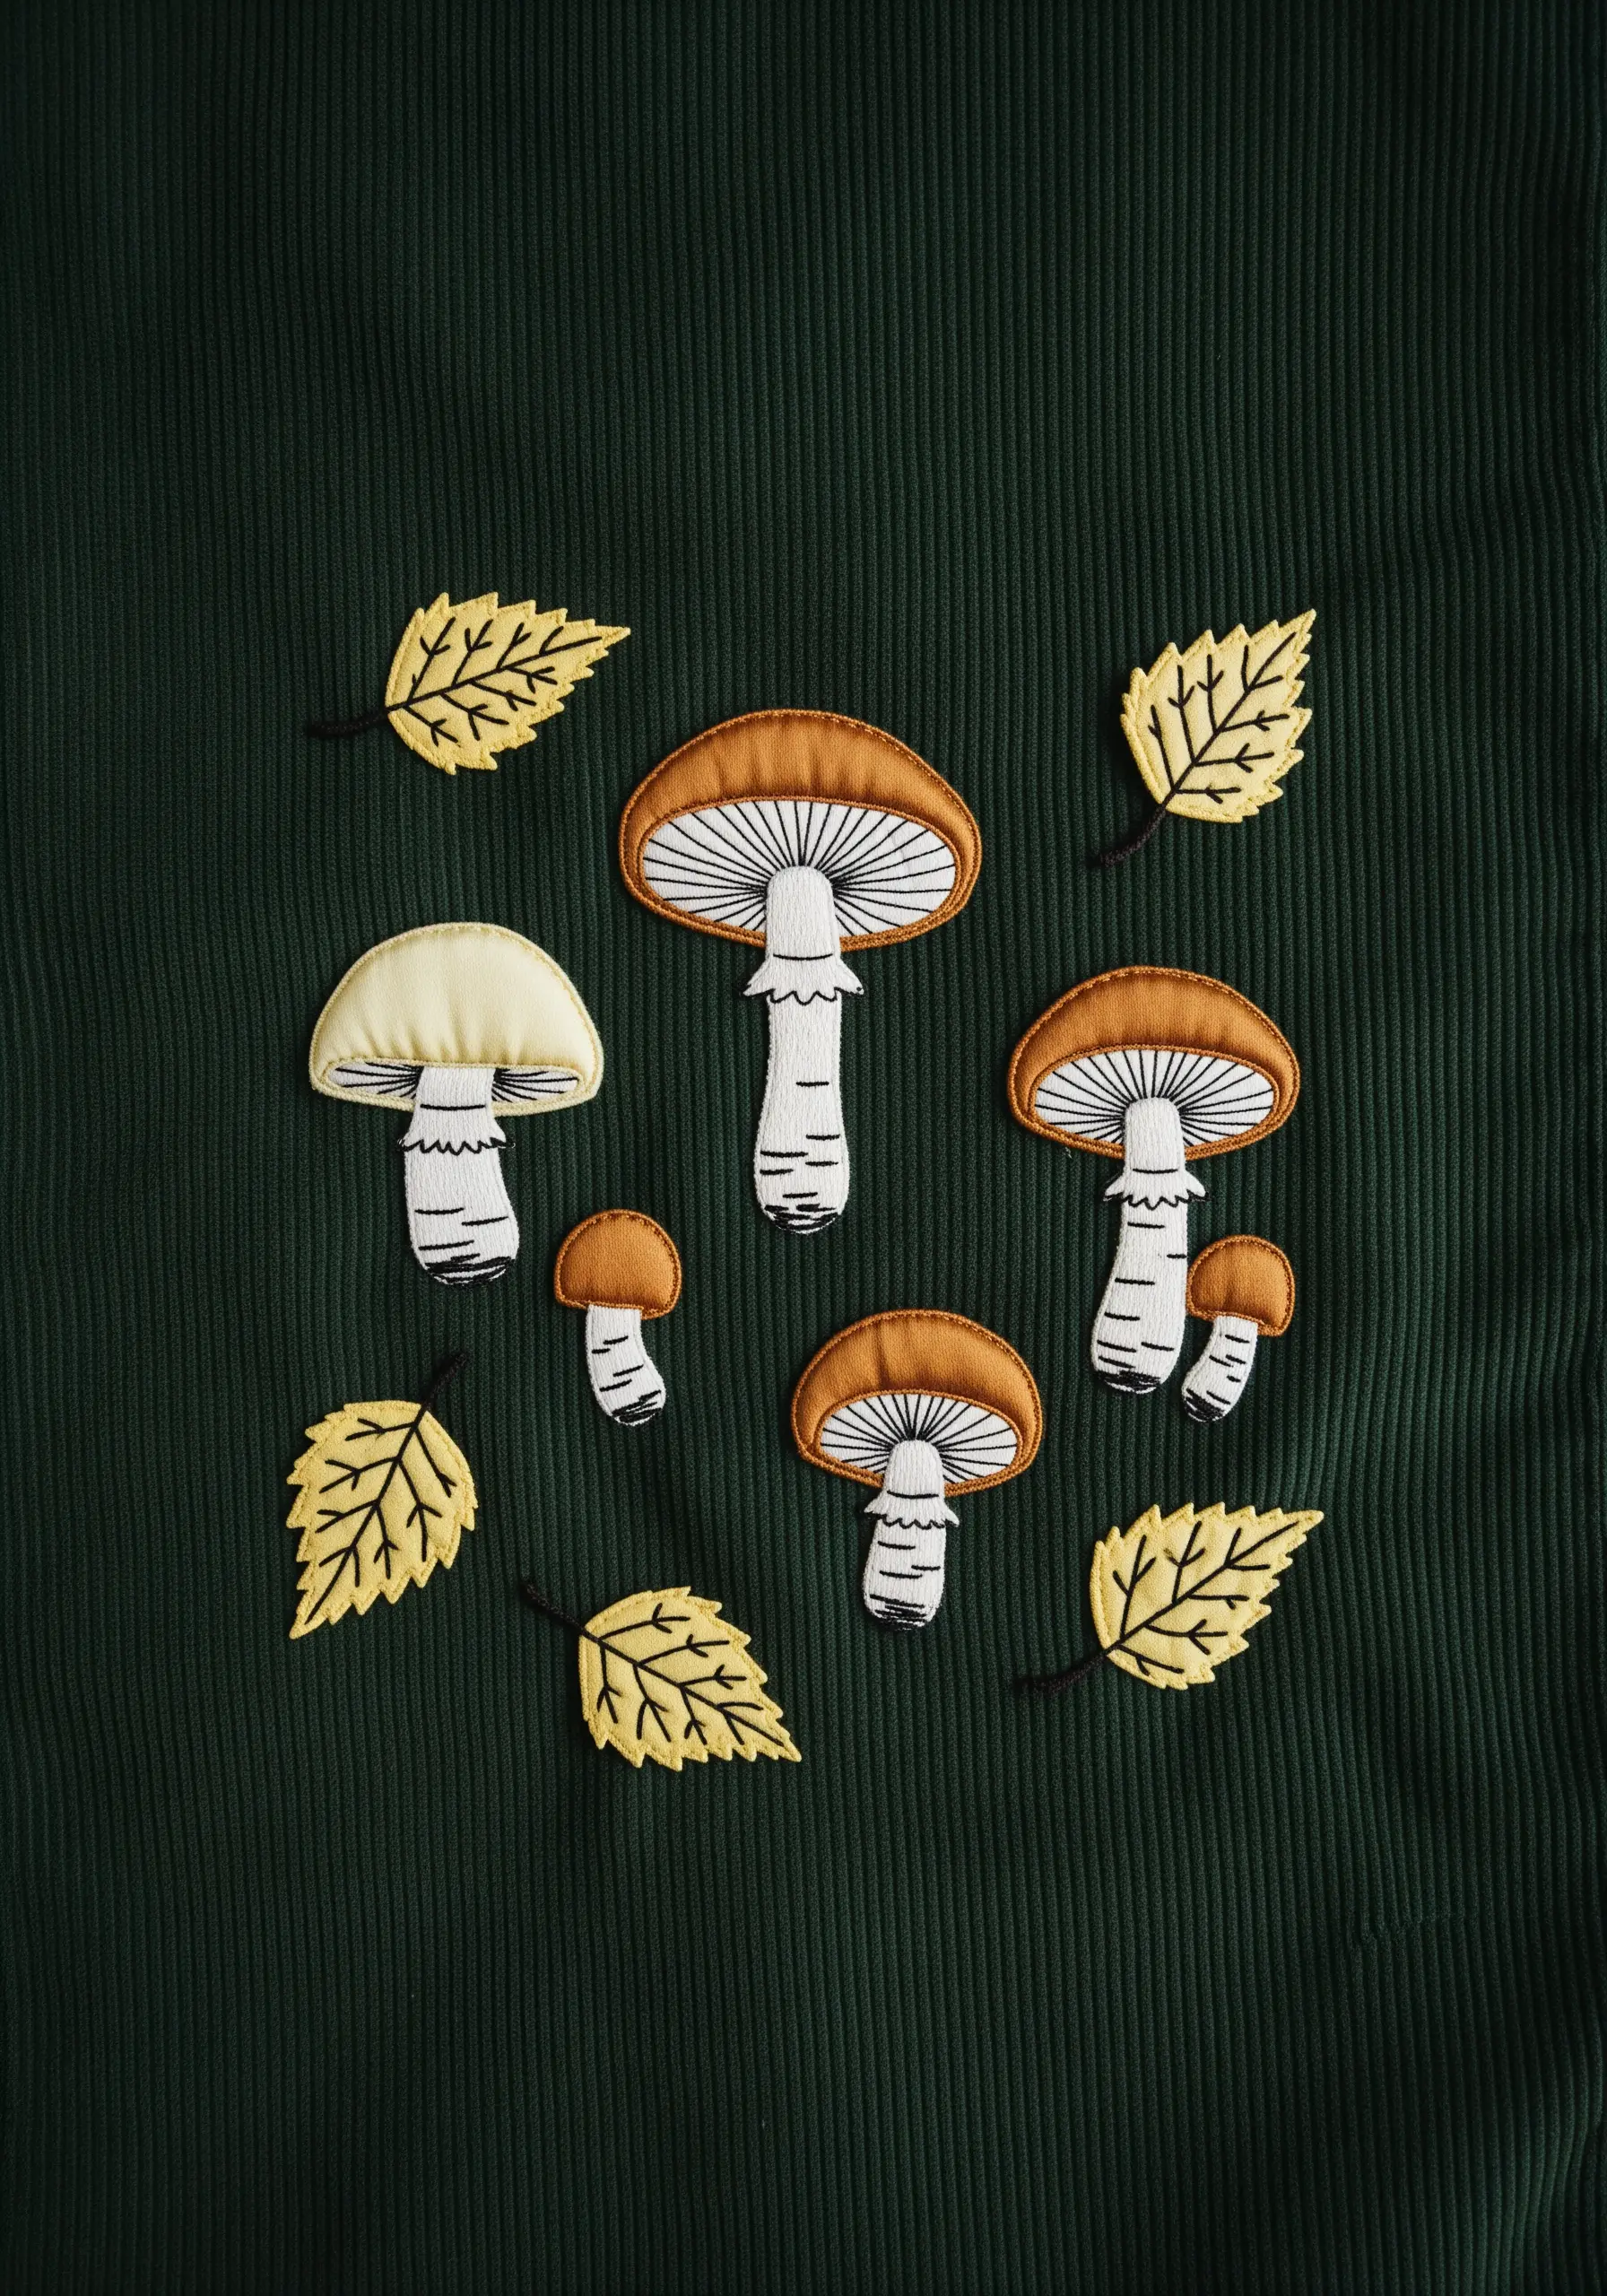
Combine the simplicity of appliqué with the detail of embroidery for a charming, storybook quality.
Cut your main mushroom and leaf shapes from felt or cotton, then secure them with a neat blanket stitch around the edges.
Add embroidered details, like the gills on the underside of the mushroom cap, with simple straight stitches.
Using a textured base fabric like corduroy enhances the woodland theme and adds to the overall tactile appeal of these adorable forest motifs.
25. Designing Pop-Art Leaves with Bold Outlines
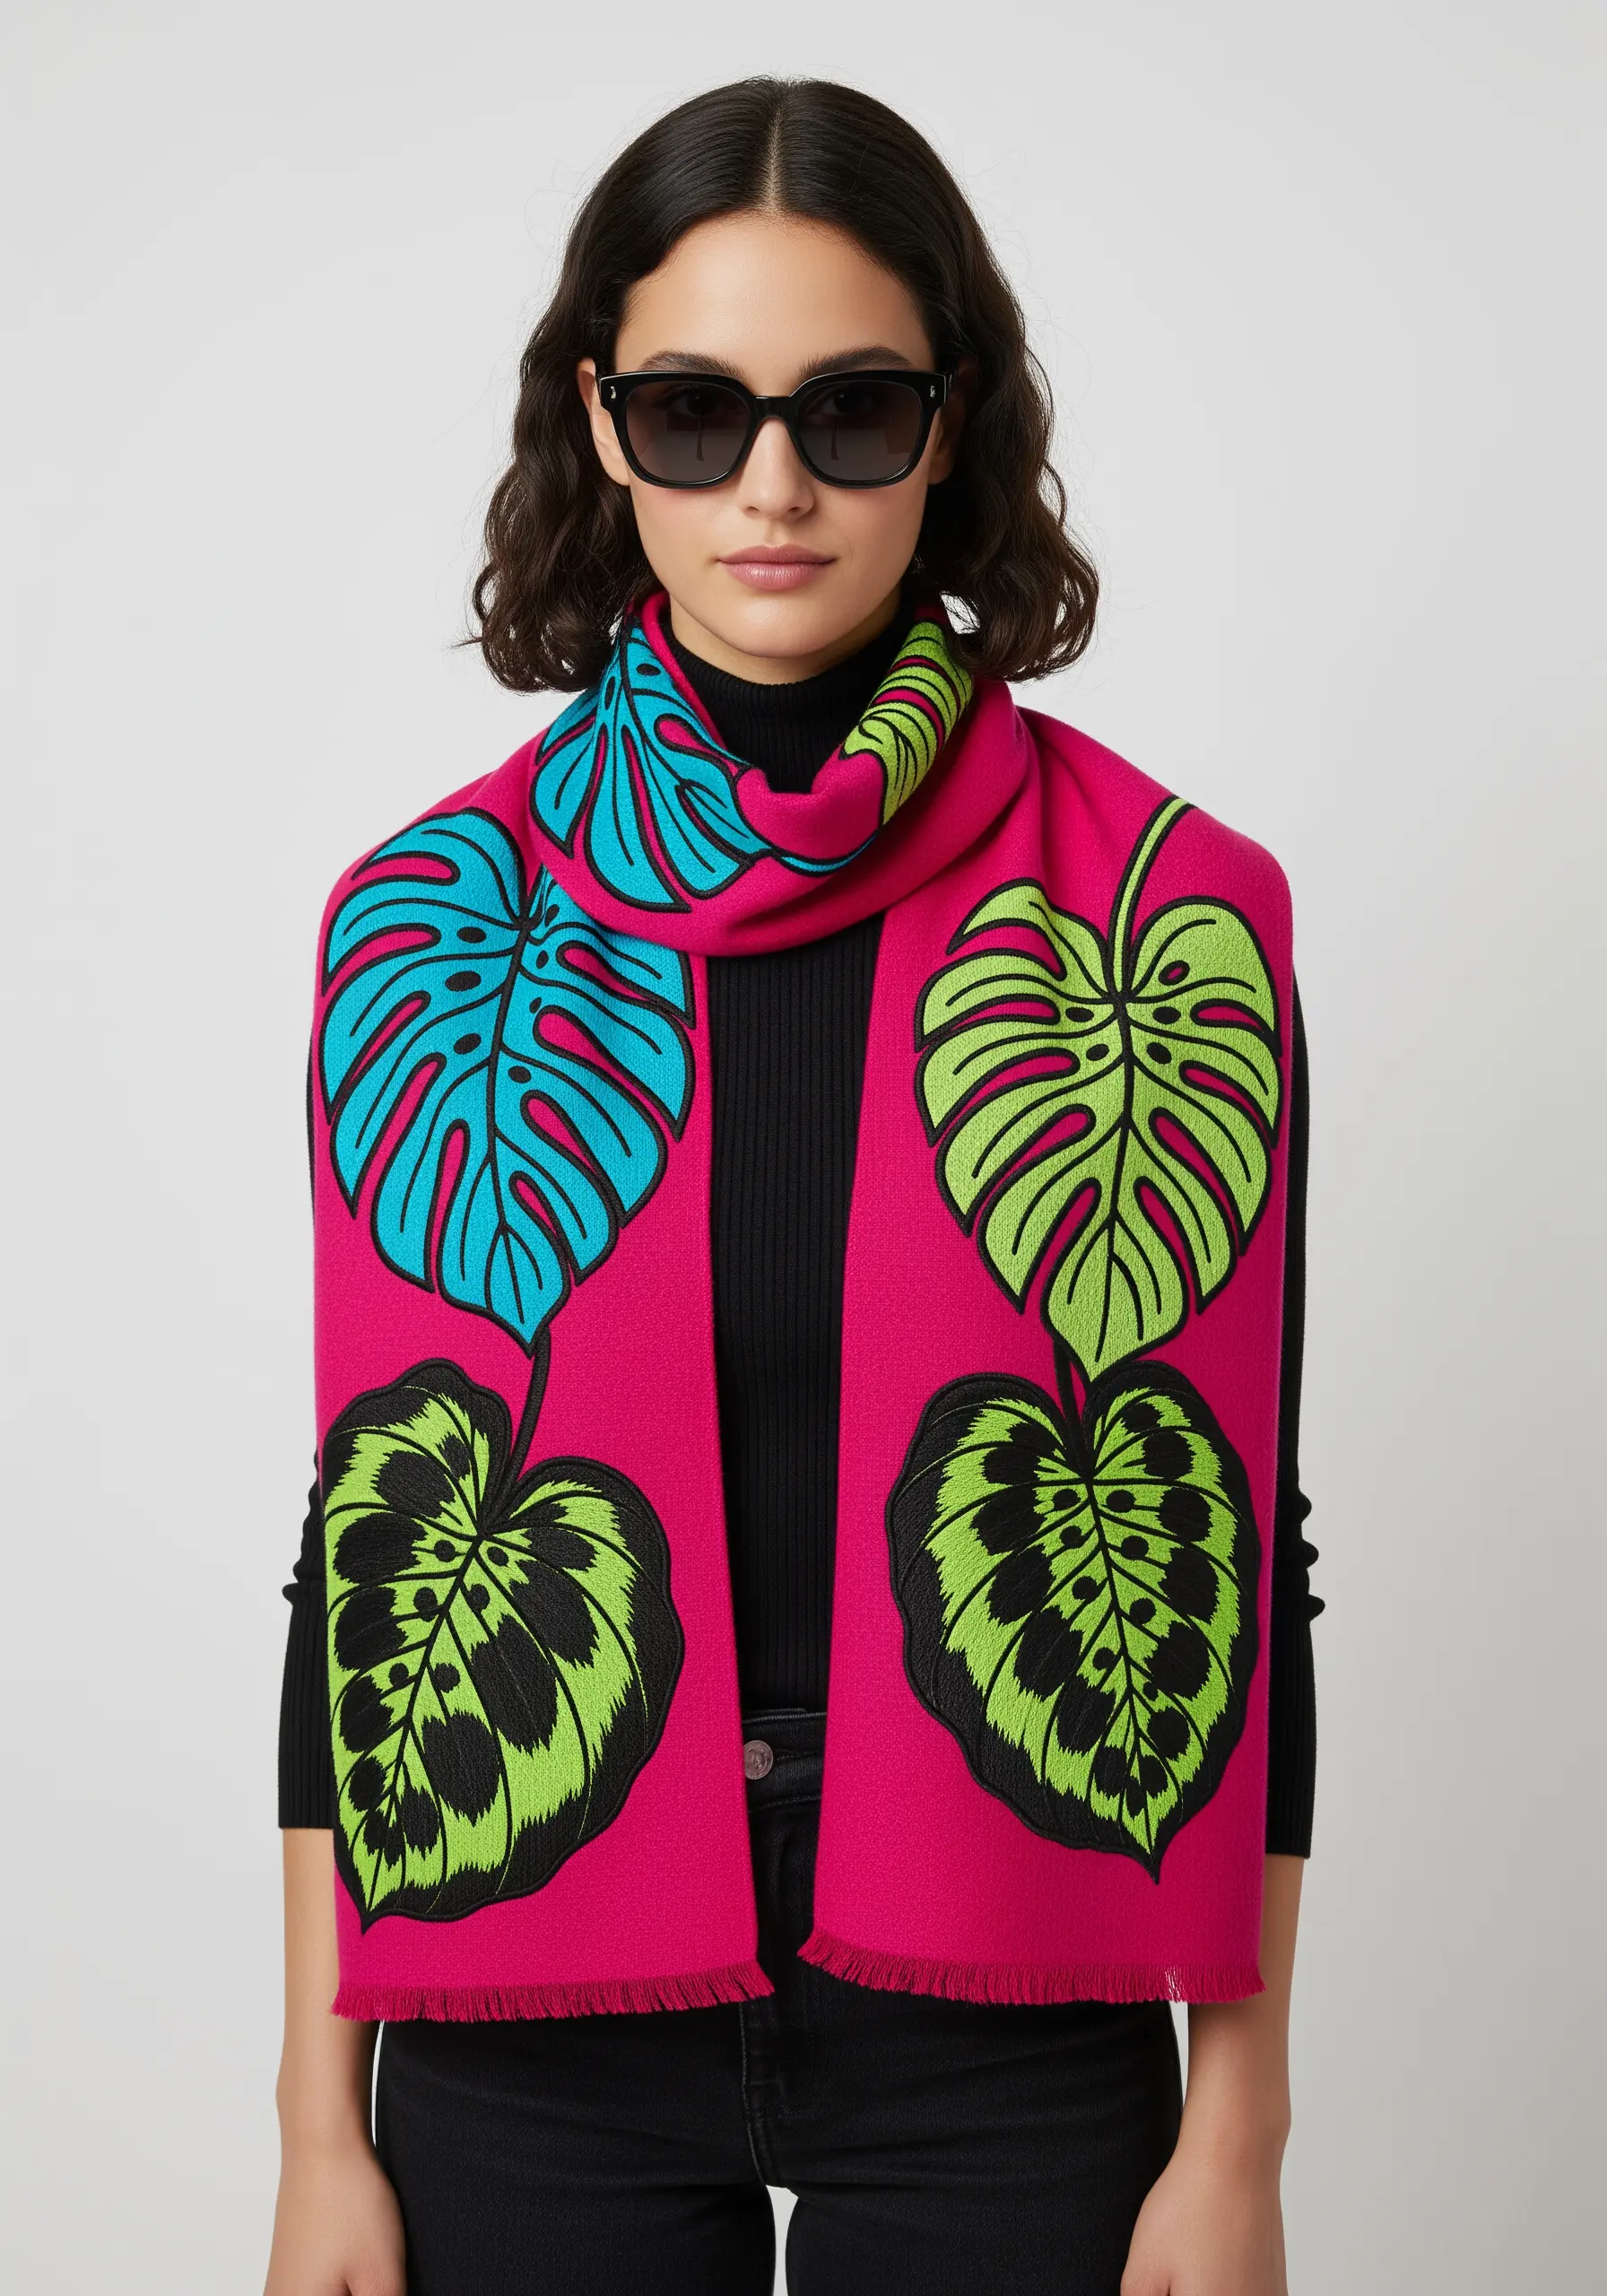
Create a high-impact, pop-art style using the two key elements of the genre: thick, black outlines and vibrant, flat color fills.
Use a multi-strand chain stitch or a thick stem stitch to make the outlines bold and graphic, like a comic book.
Fill the areas with a dense, perfectly smooth satin stitch, using unblended, high-contrast colors.
The success of this modern, energetic look depends on the crispness of your lines and the unapologetic boldness of your color choices.
26. Building Symmetrical Designs with Layered Textures
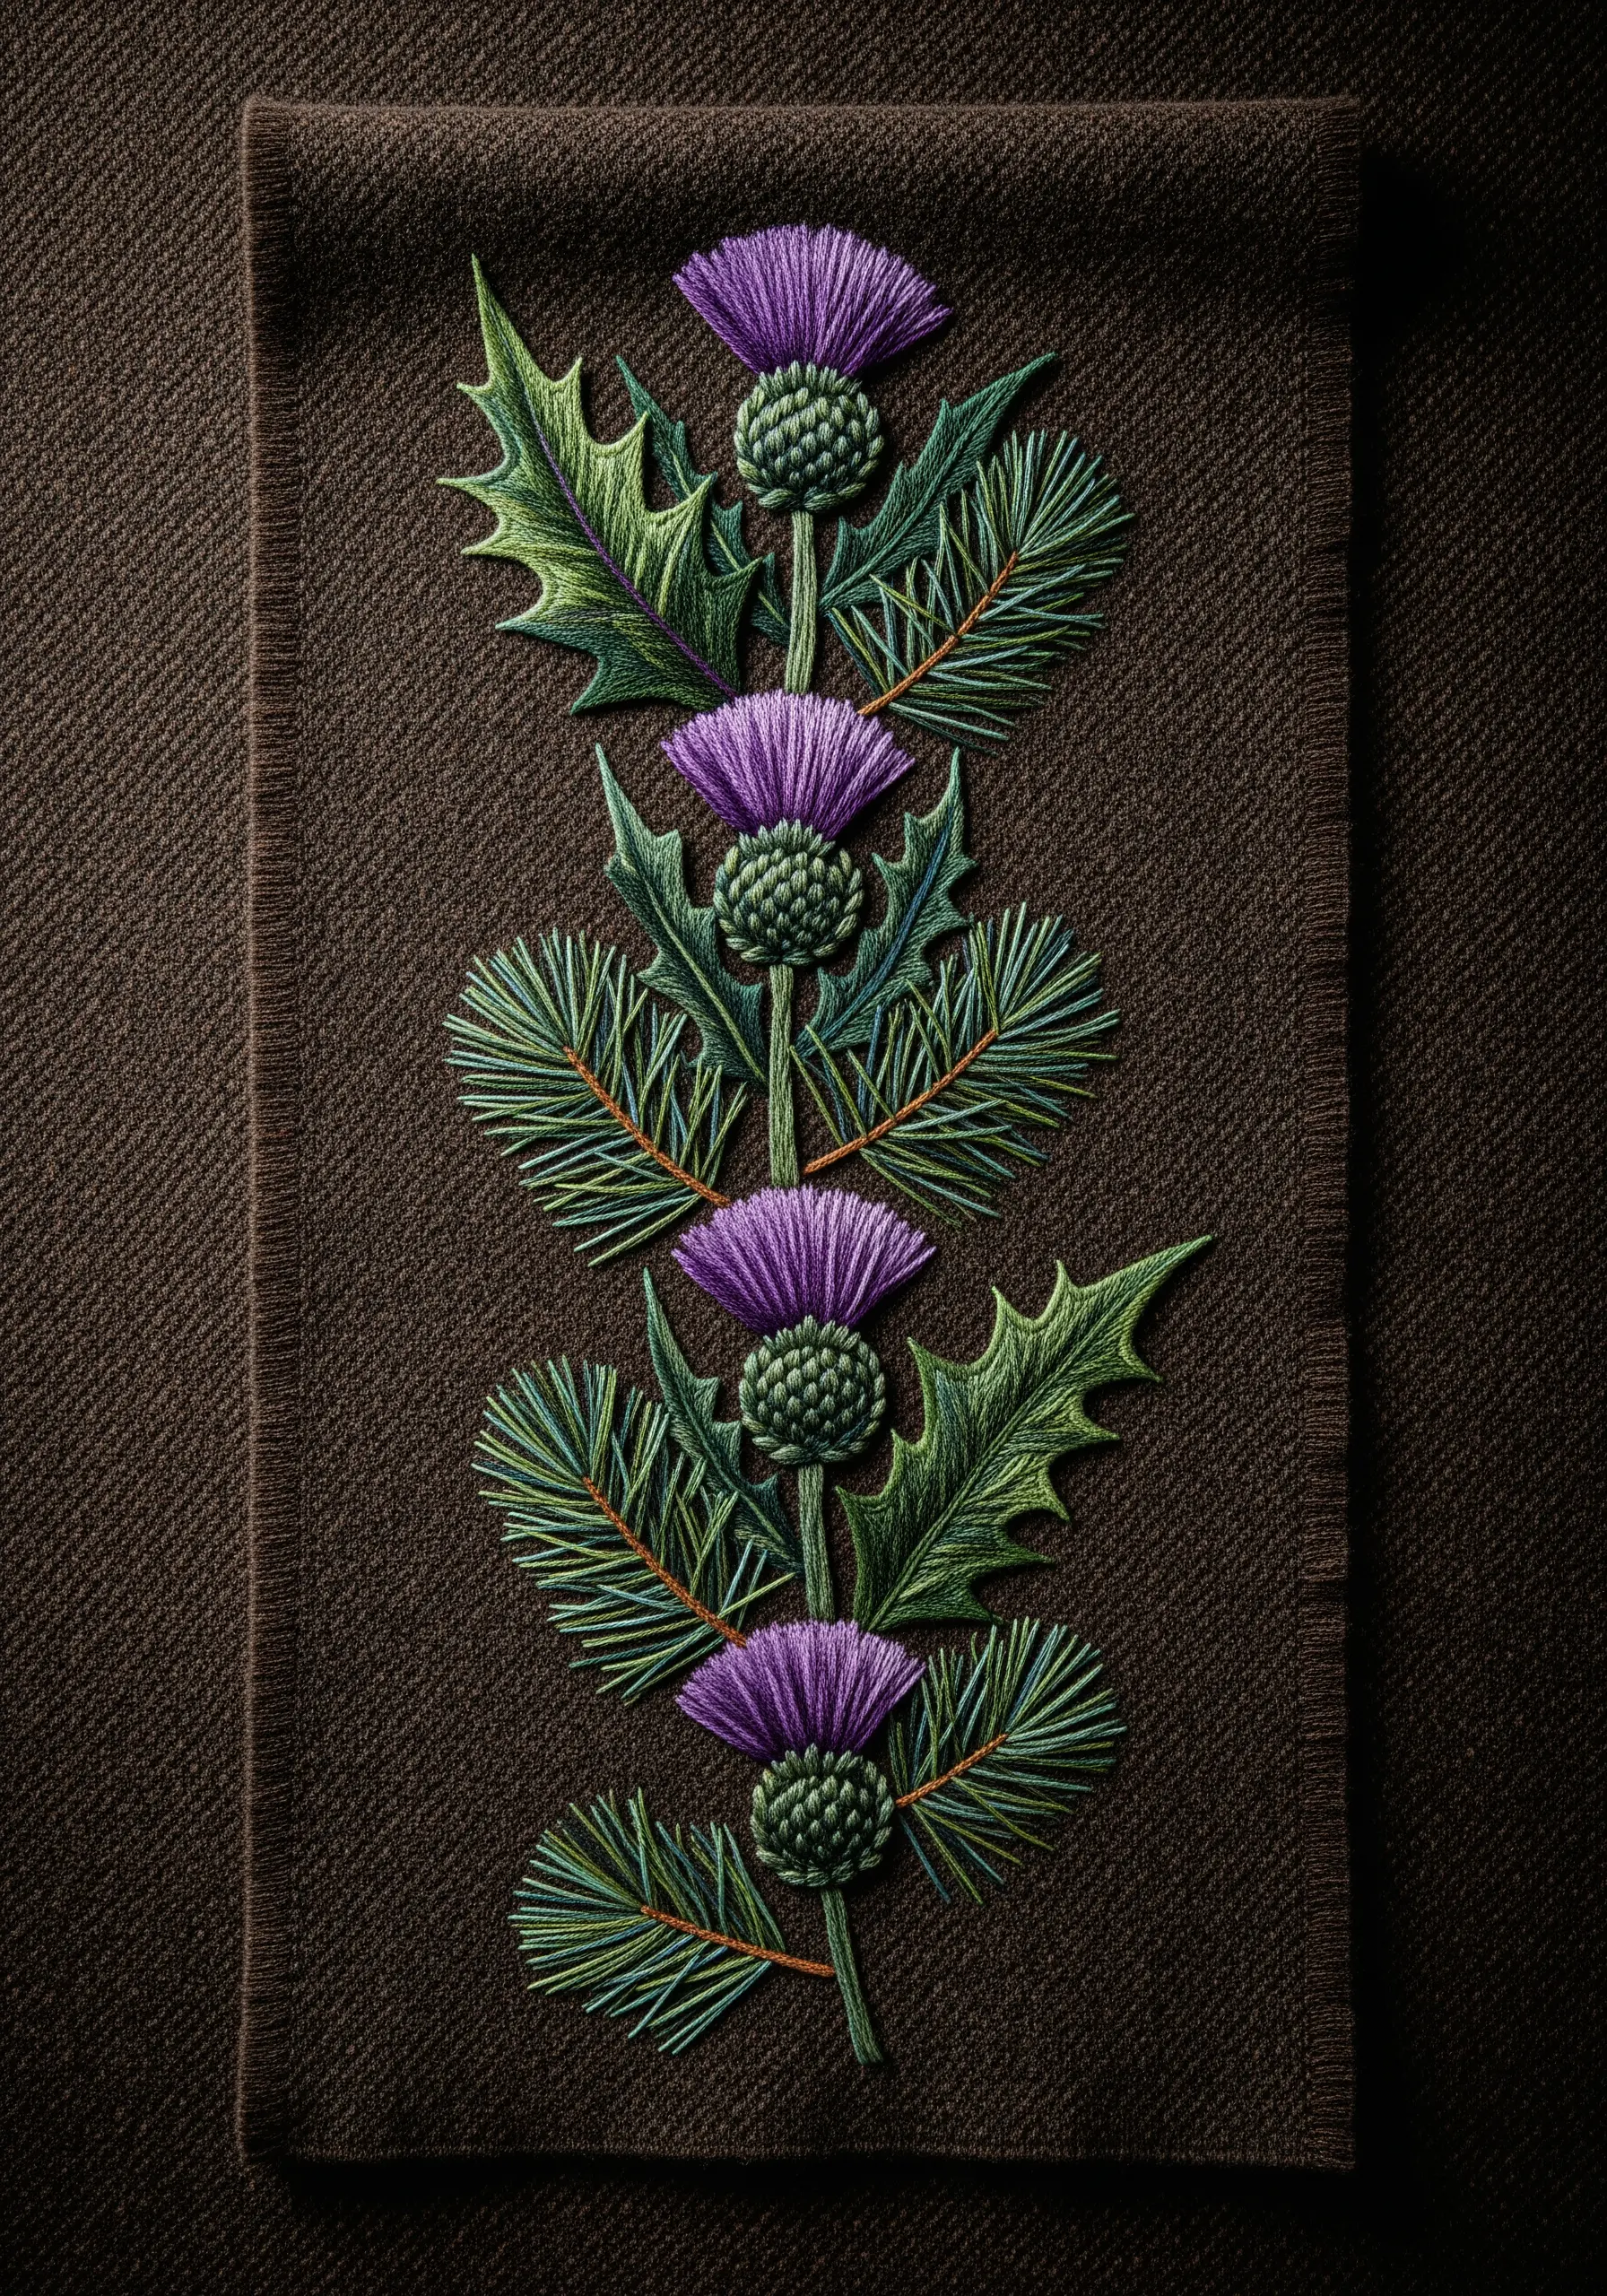
A formal, symmetrical composition gains its power and sophistication from a masterful combination of layered textures.
For the thistle flower, use a turkey stitch that is trimmed short and dense to create the characteristic bristly top.
The base of the flower head is formed with satin stitches radiating outwards.
For the spiky leaves, combine a fishbone stitch for the main body with sharp, individual straight stitches for the points, creating a design that is visually complex and deeply textural.
27. Capturing Flowing Forms on Transparent Fabric
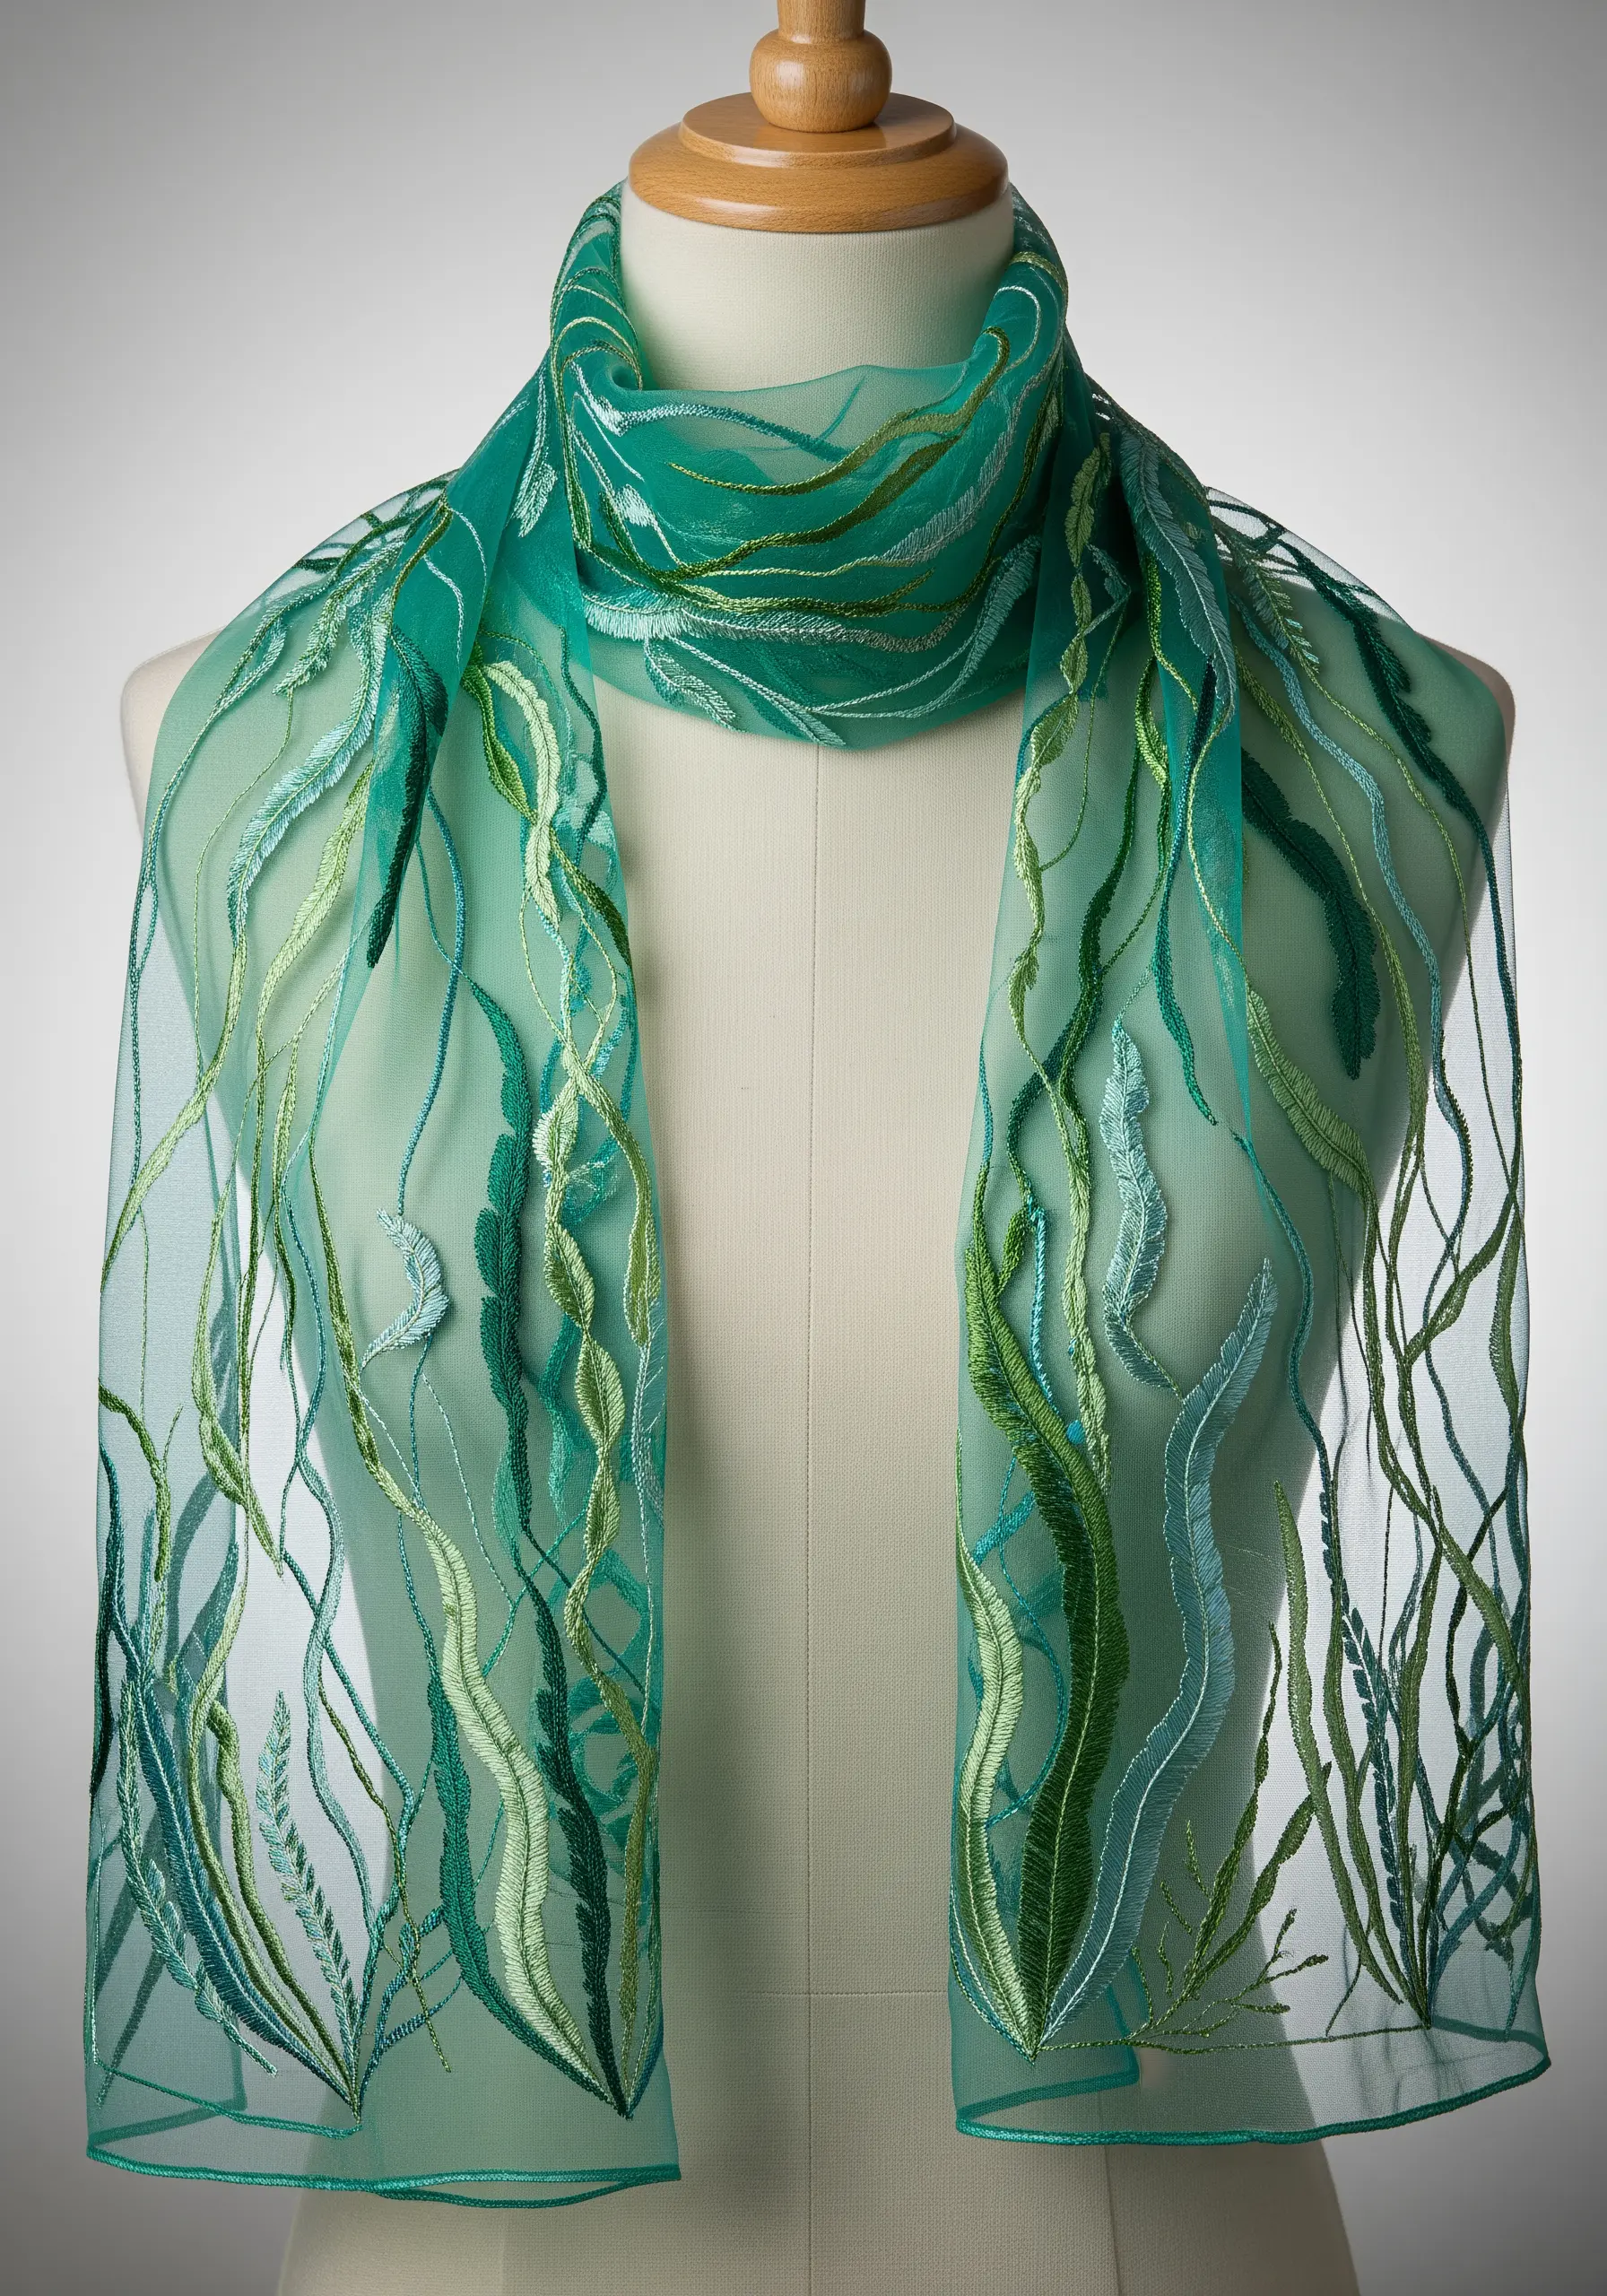
Evoke the graceful, undulating movement of seaweed by using a flowing stitch on a sheer fabric like organza.
If stitching by hand, a sweeping stem stitch or whipped backstitch in variegated green and blue threads will create an organic sense of motion.
Allow your lines of stitching to curve, cross, and overlap naturally.
A water-soluble stabilizer is absolutely essential here to support the delicate fabric and prevent any puckering or distortion as you work.