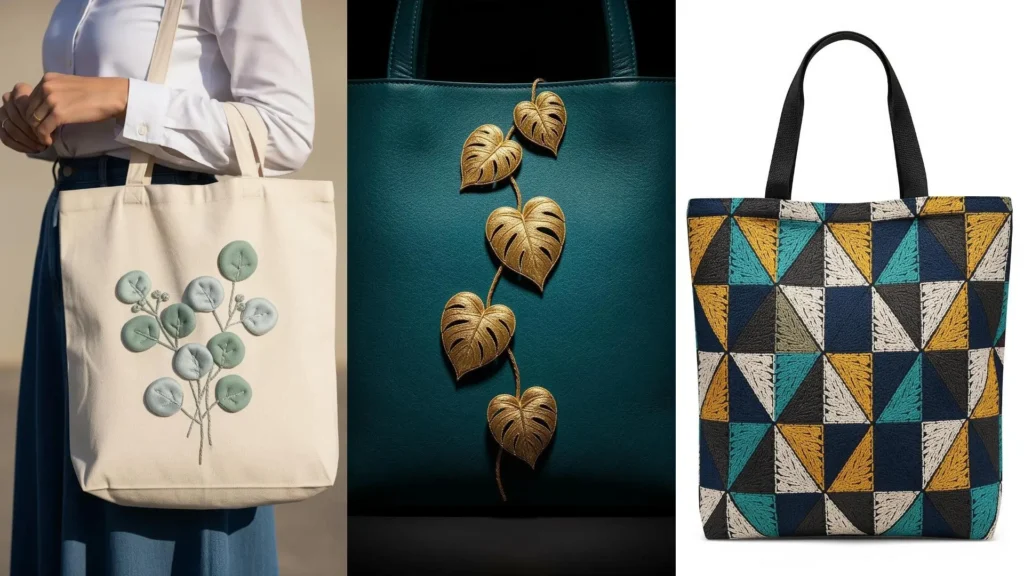
Your kitchen is more than a place for cooking; it’s a space for warmth, connection, and comfort. The things you fill it with should reflect that. Embroidery offers a way to transform everyday items—a simple towel, a plain apron, a set of napkins—into personal expressions of that warmth.
But making your work look polished and intentional isn’t about mastering dozens of complex stitches. It’s about making thoughtful choices. It’s in the way you blend three shades of yellow to capture the sun on a petal, the decision to use a bold line on a simple placemat, or the texture you build with French knots to bring a flower’s center to life.
Here, you’ll find not just ideas, but the techniques behind them. Think of this as a quiet conversation about how a simple shift in your approach can make all the difference. Let these projects be a starting point for infusing your kitchen with rustic charm and a story that is uniquely, beautifully yours.
1. Achieve Lifelike Depth with Gradient Petals
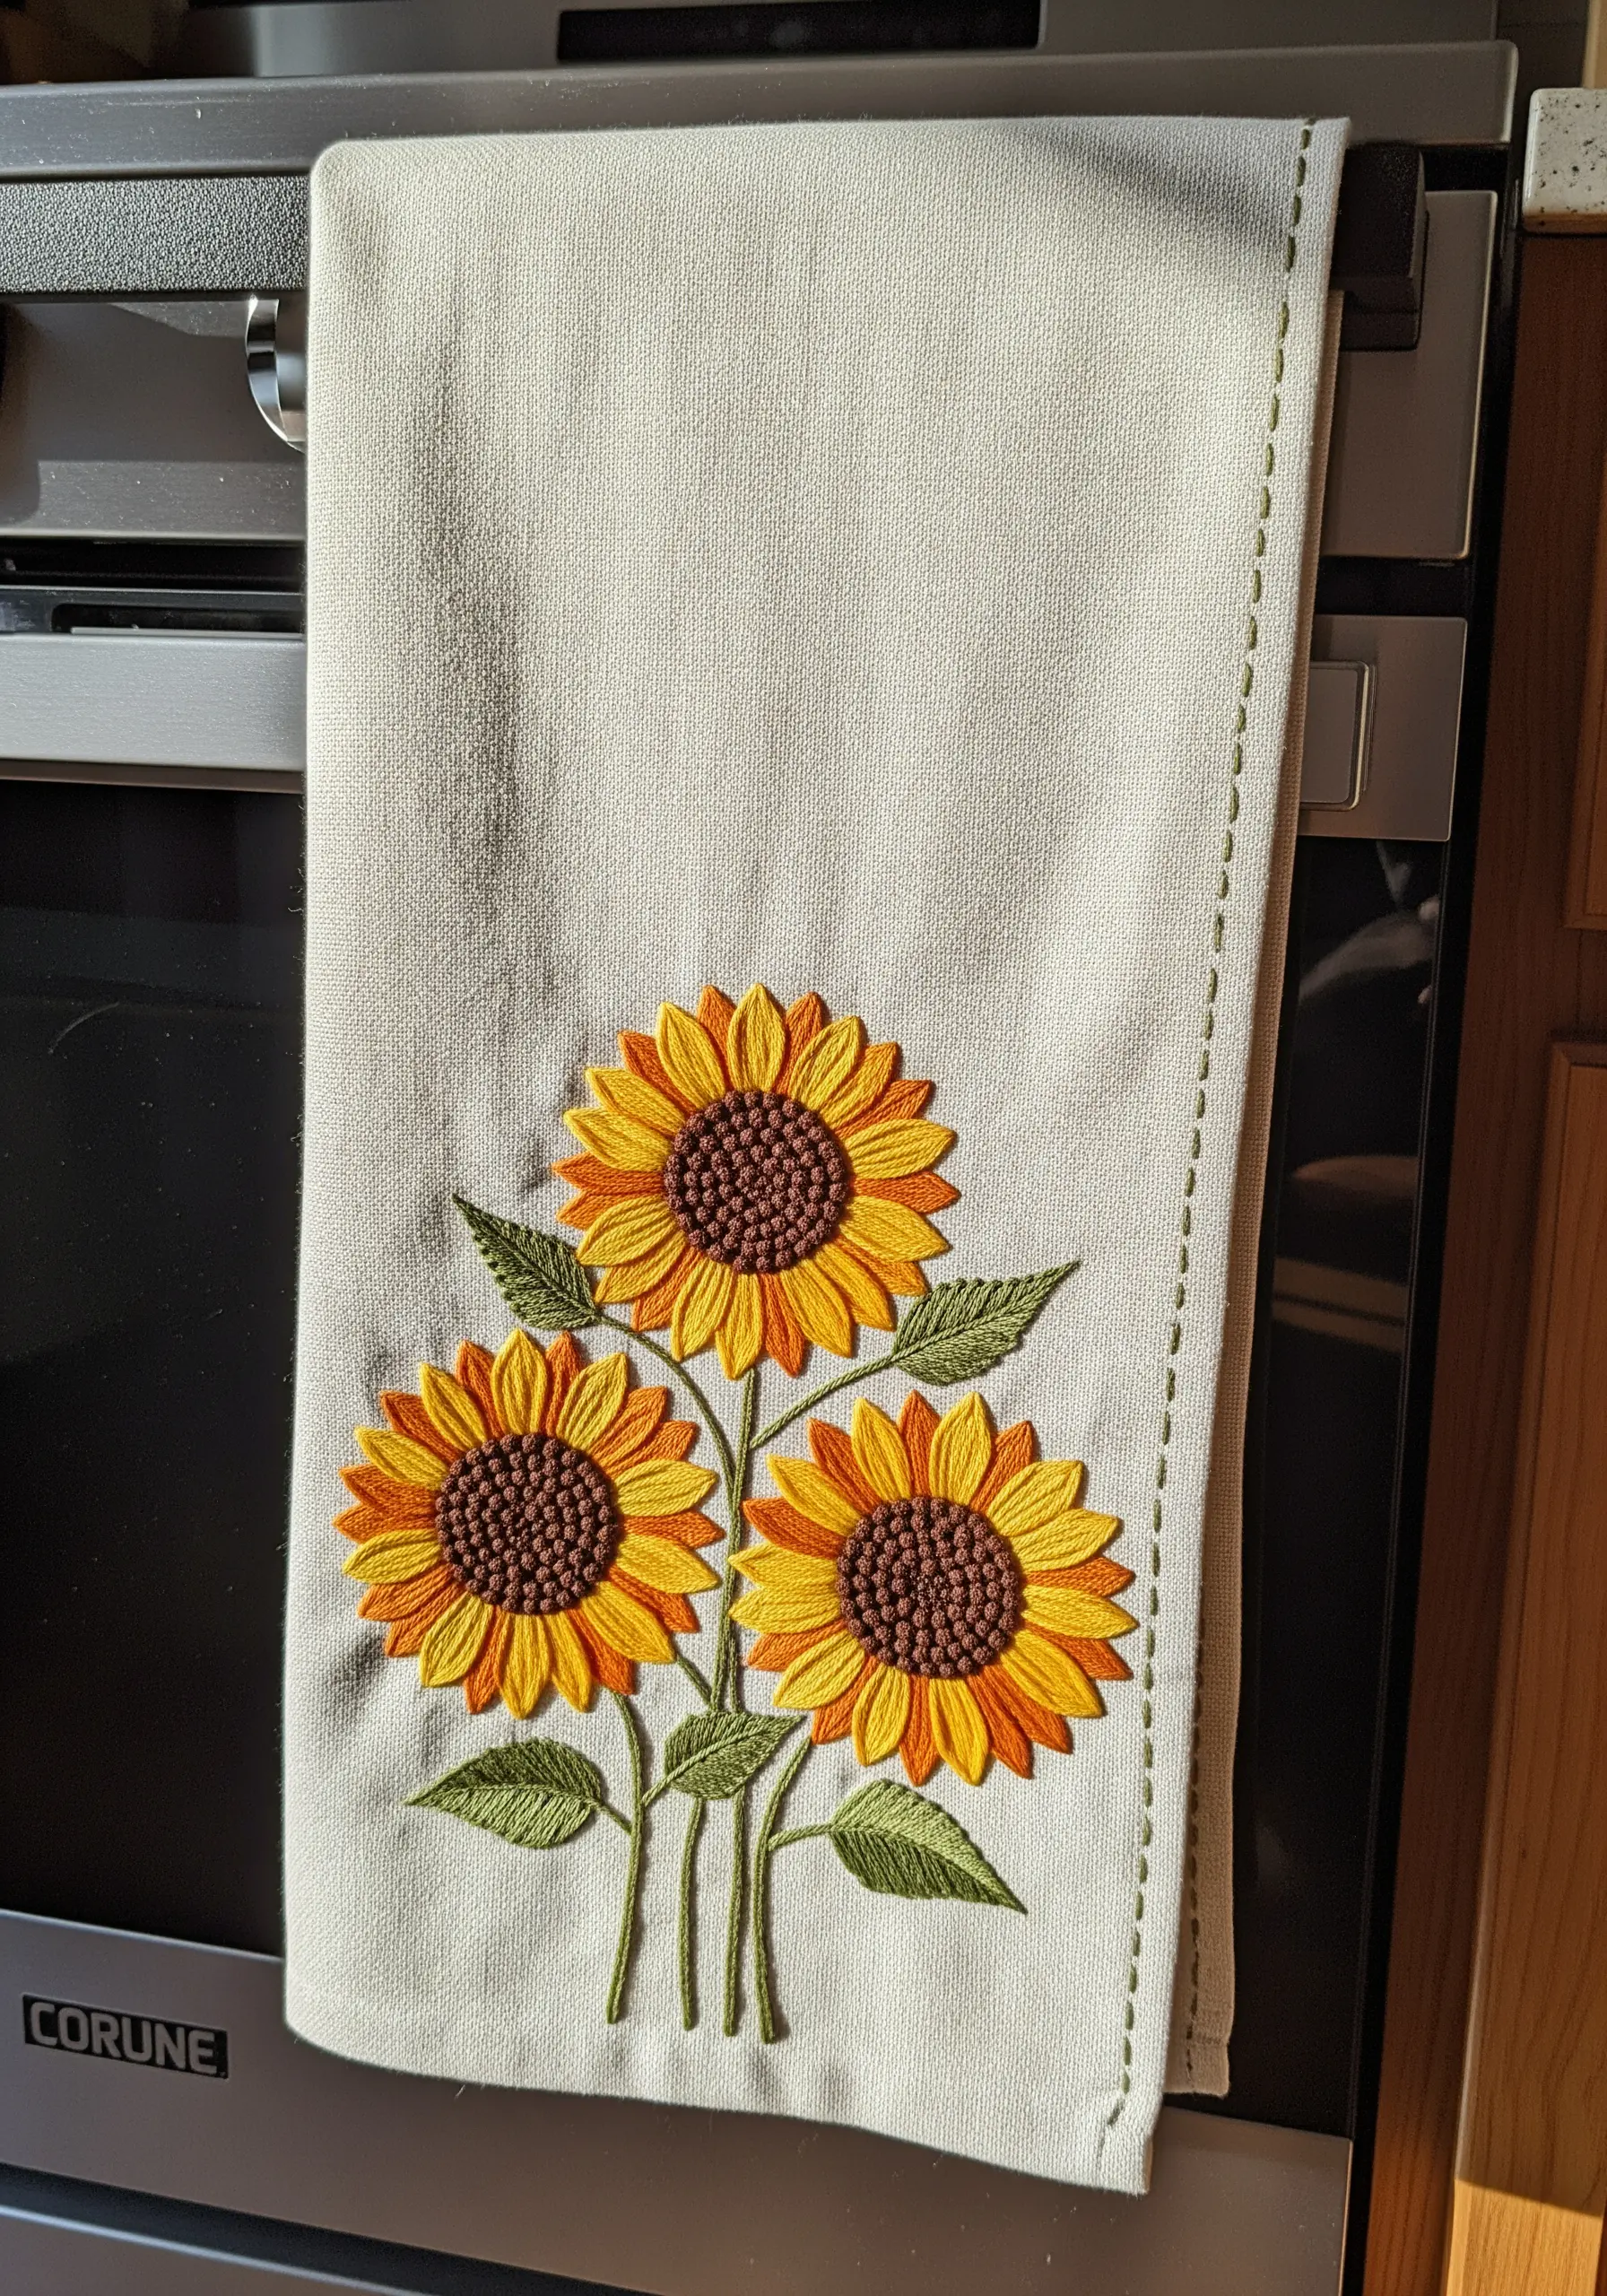
To create the illusion of sun-drenched petals, move beyond a single shade of yellow.
Use a long-and-short stitch with three distinct tones—a pale lemon, a golden yellow, and a burnt orange—to blend a seamless gradient from the tip to the base of each petal.
For the sunflower’s center, build a dense texture with French knots or colonial knots, using two shades of brown to add dimension.
When embroidering on absorbent kitchen towels, always use a tear-away stabilizer on the back to prevent the fabric from puckering under the dense stitching.
2. Elevate Printed Fabric with Selective Stitching
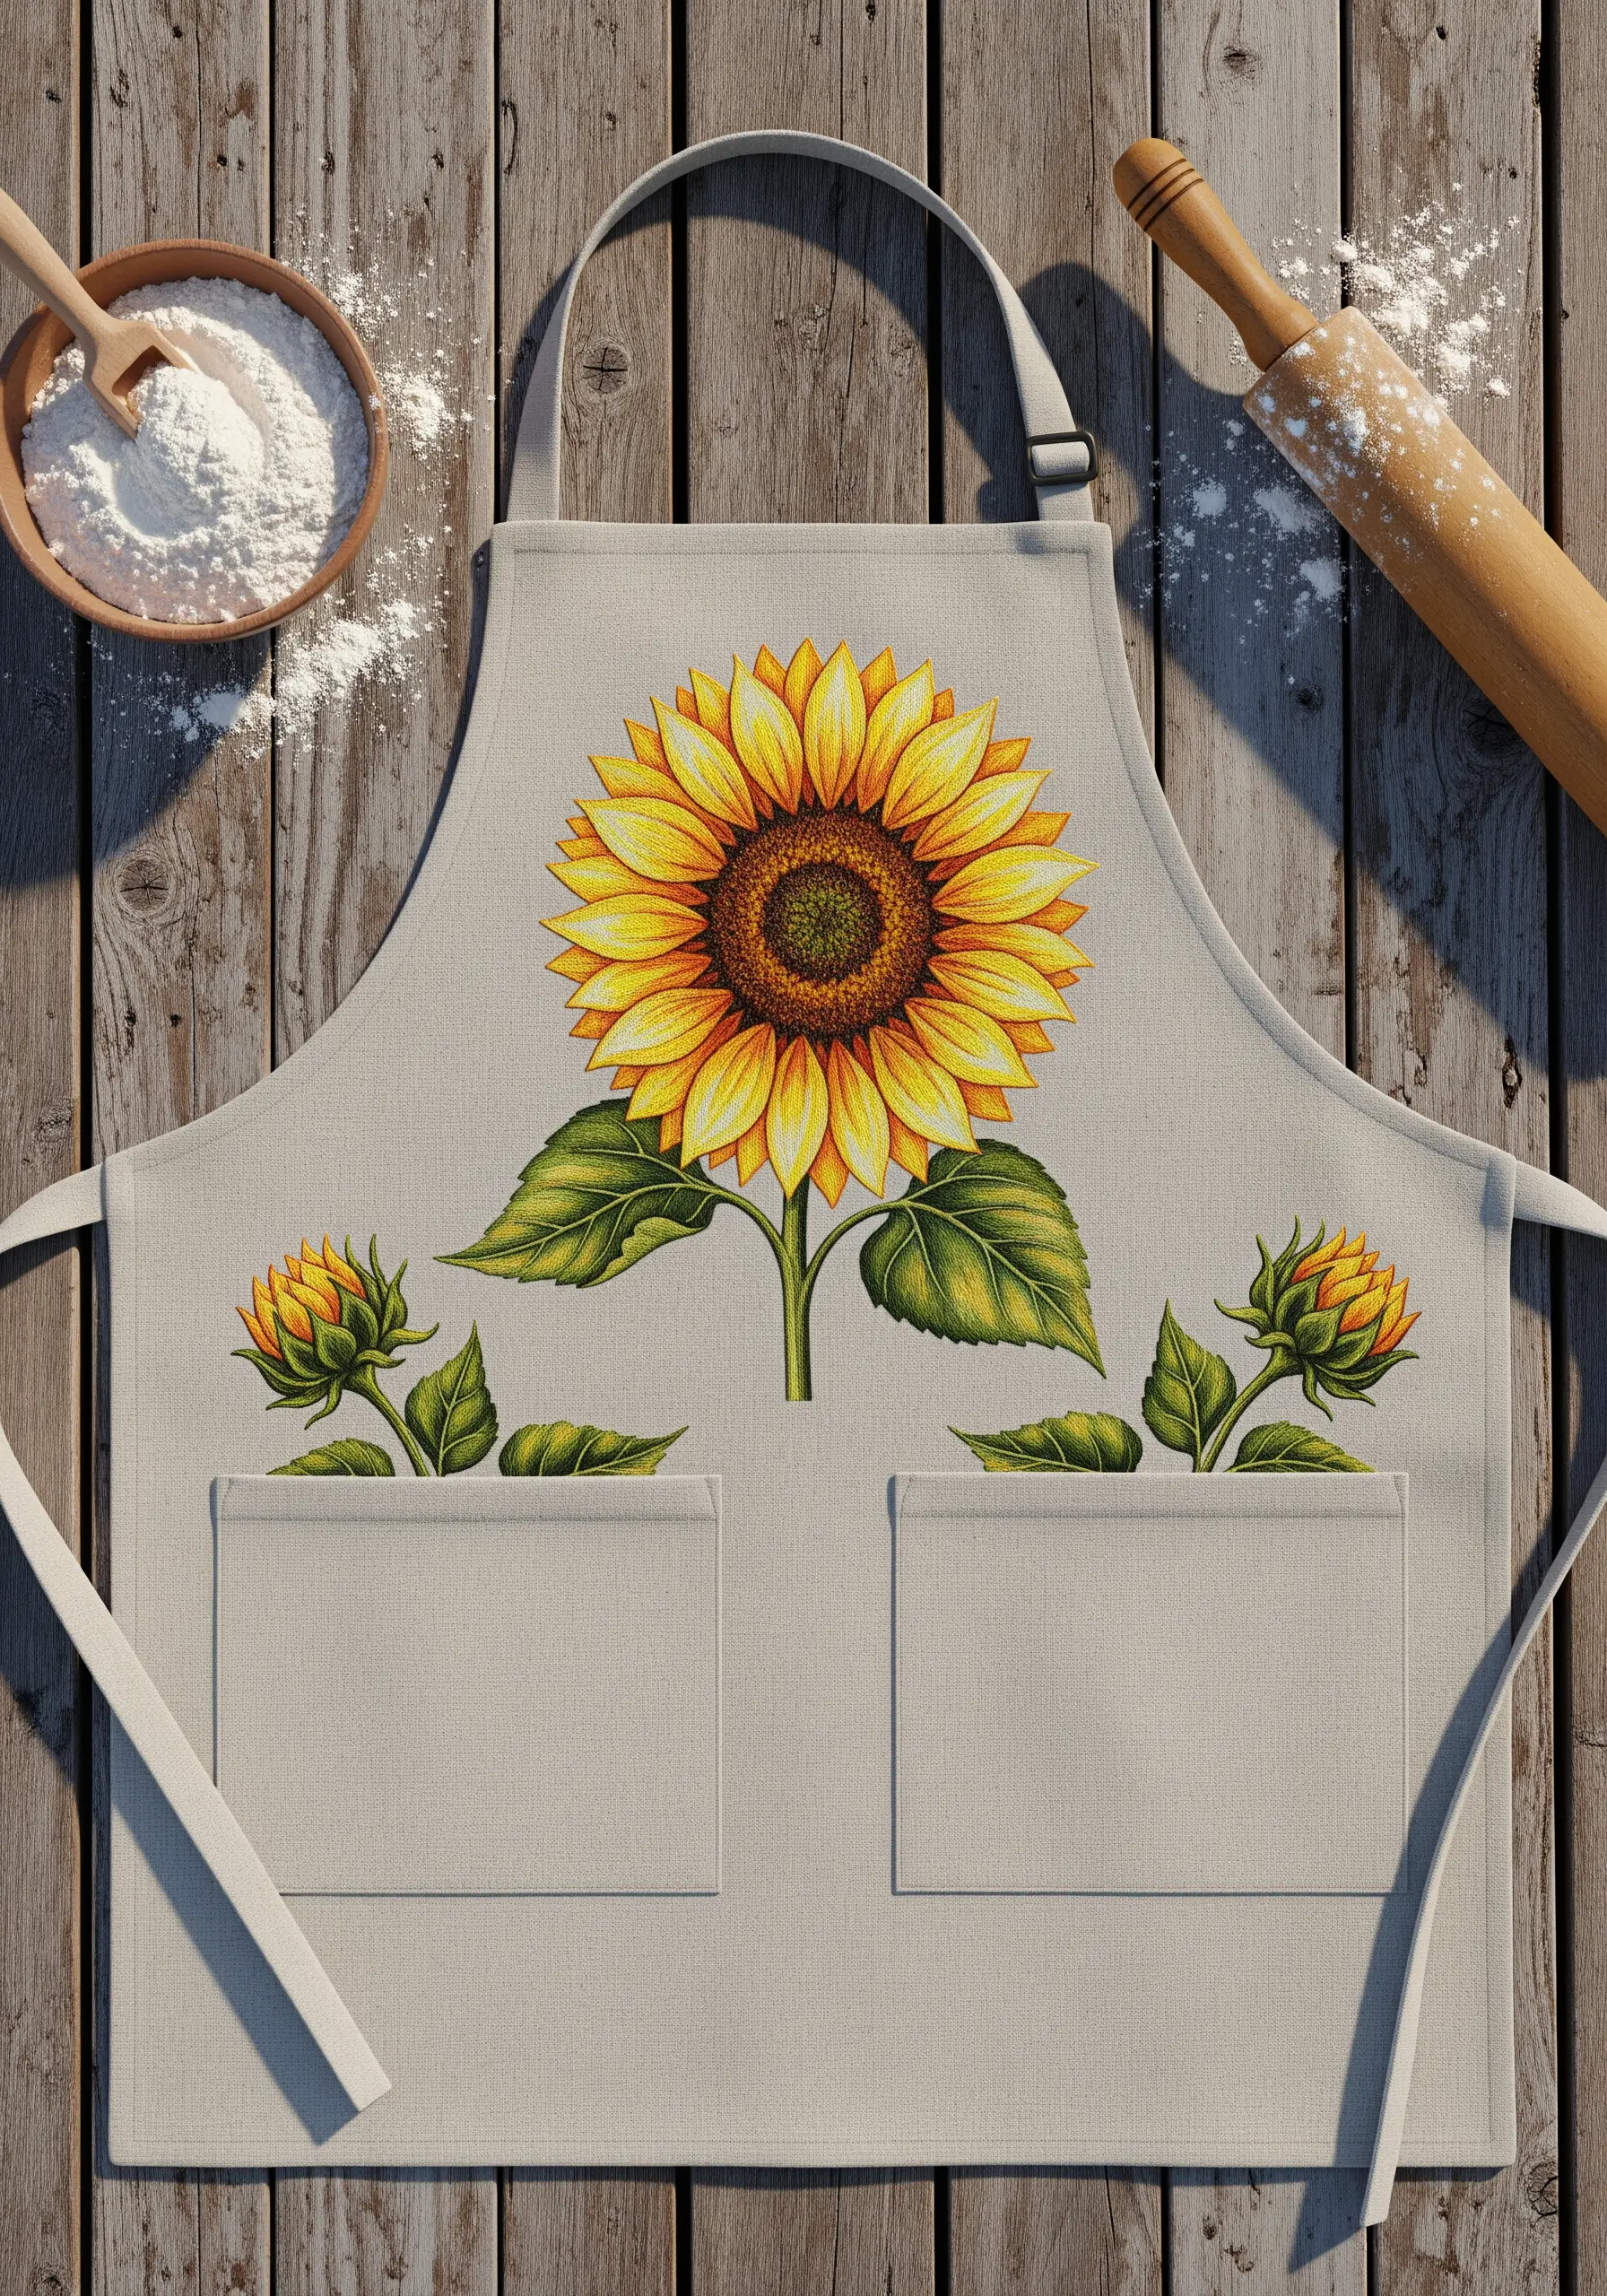
You don’t need to stitch a large design from scratch to create a custom piece.
Start with a pre-printed apron and add your own embroidered accents to give it dimension and a handmade touch.
Use a single strand of dark brown floss to backstitch the outlines of a few petals, instantly making them pop.
Add a scattering of French knots over the printed center to introduce tactile texture, transforming the flat image into a multi-sensory design.
This technique allows you to create an impactful piece without the time commitment of a fully embroidered motif.
3. Create Bold Texture with Yarn on Burlap
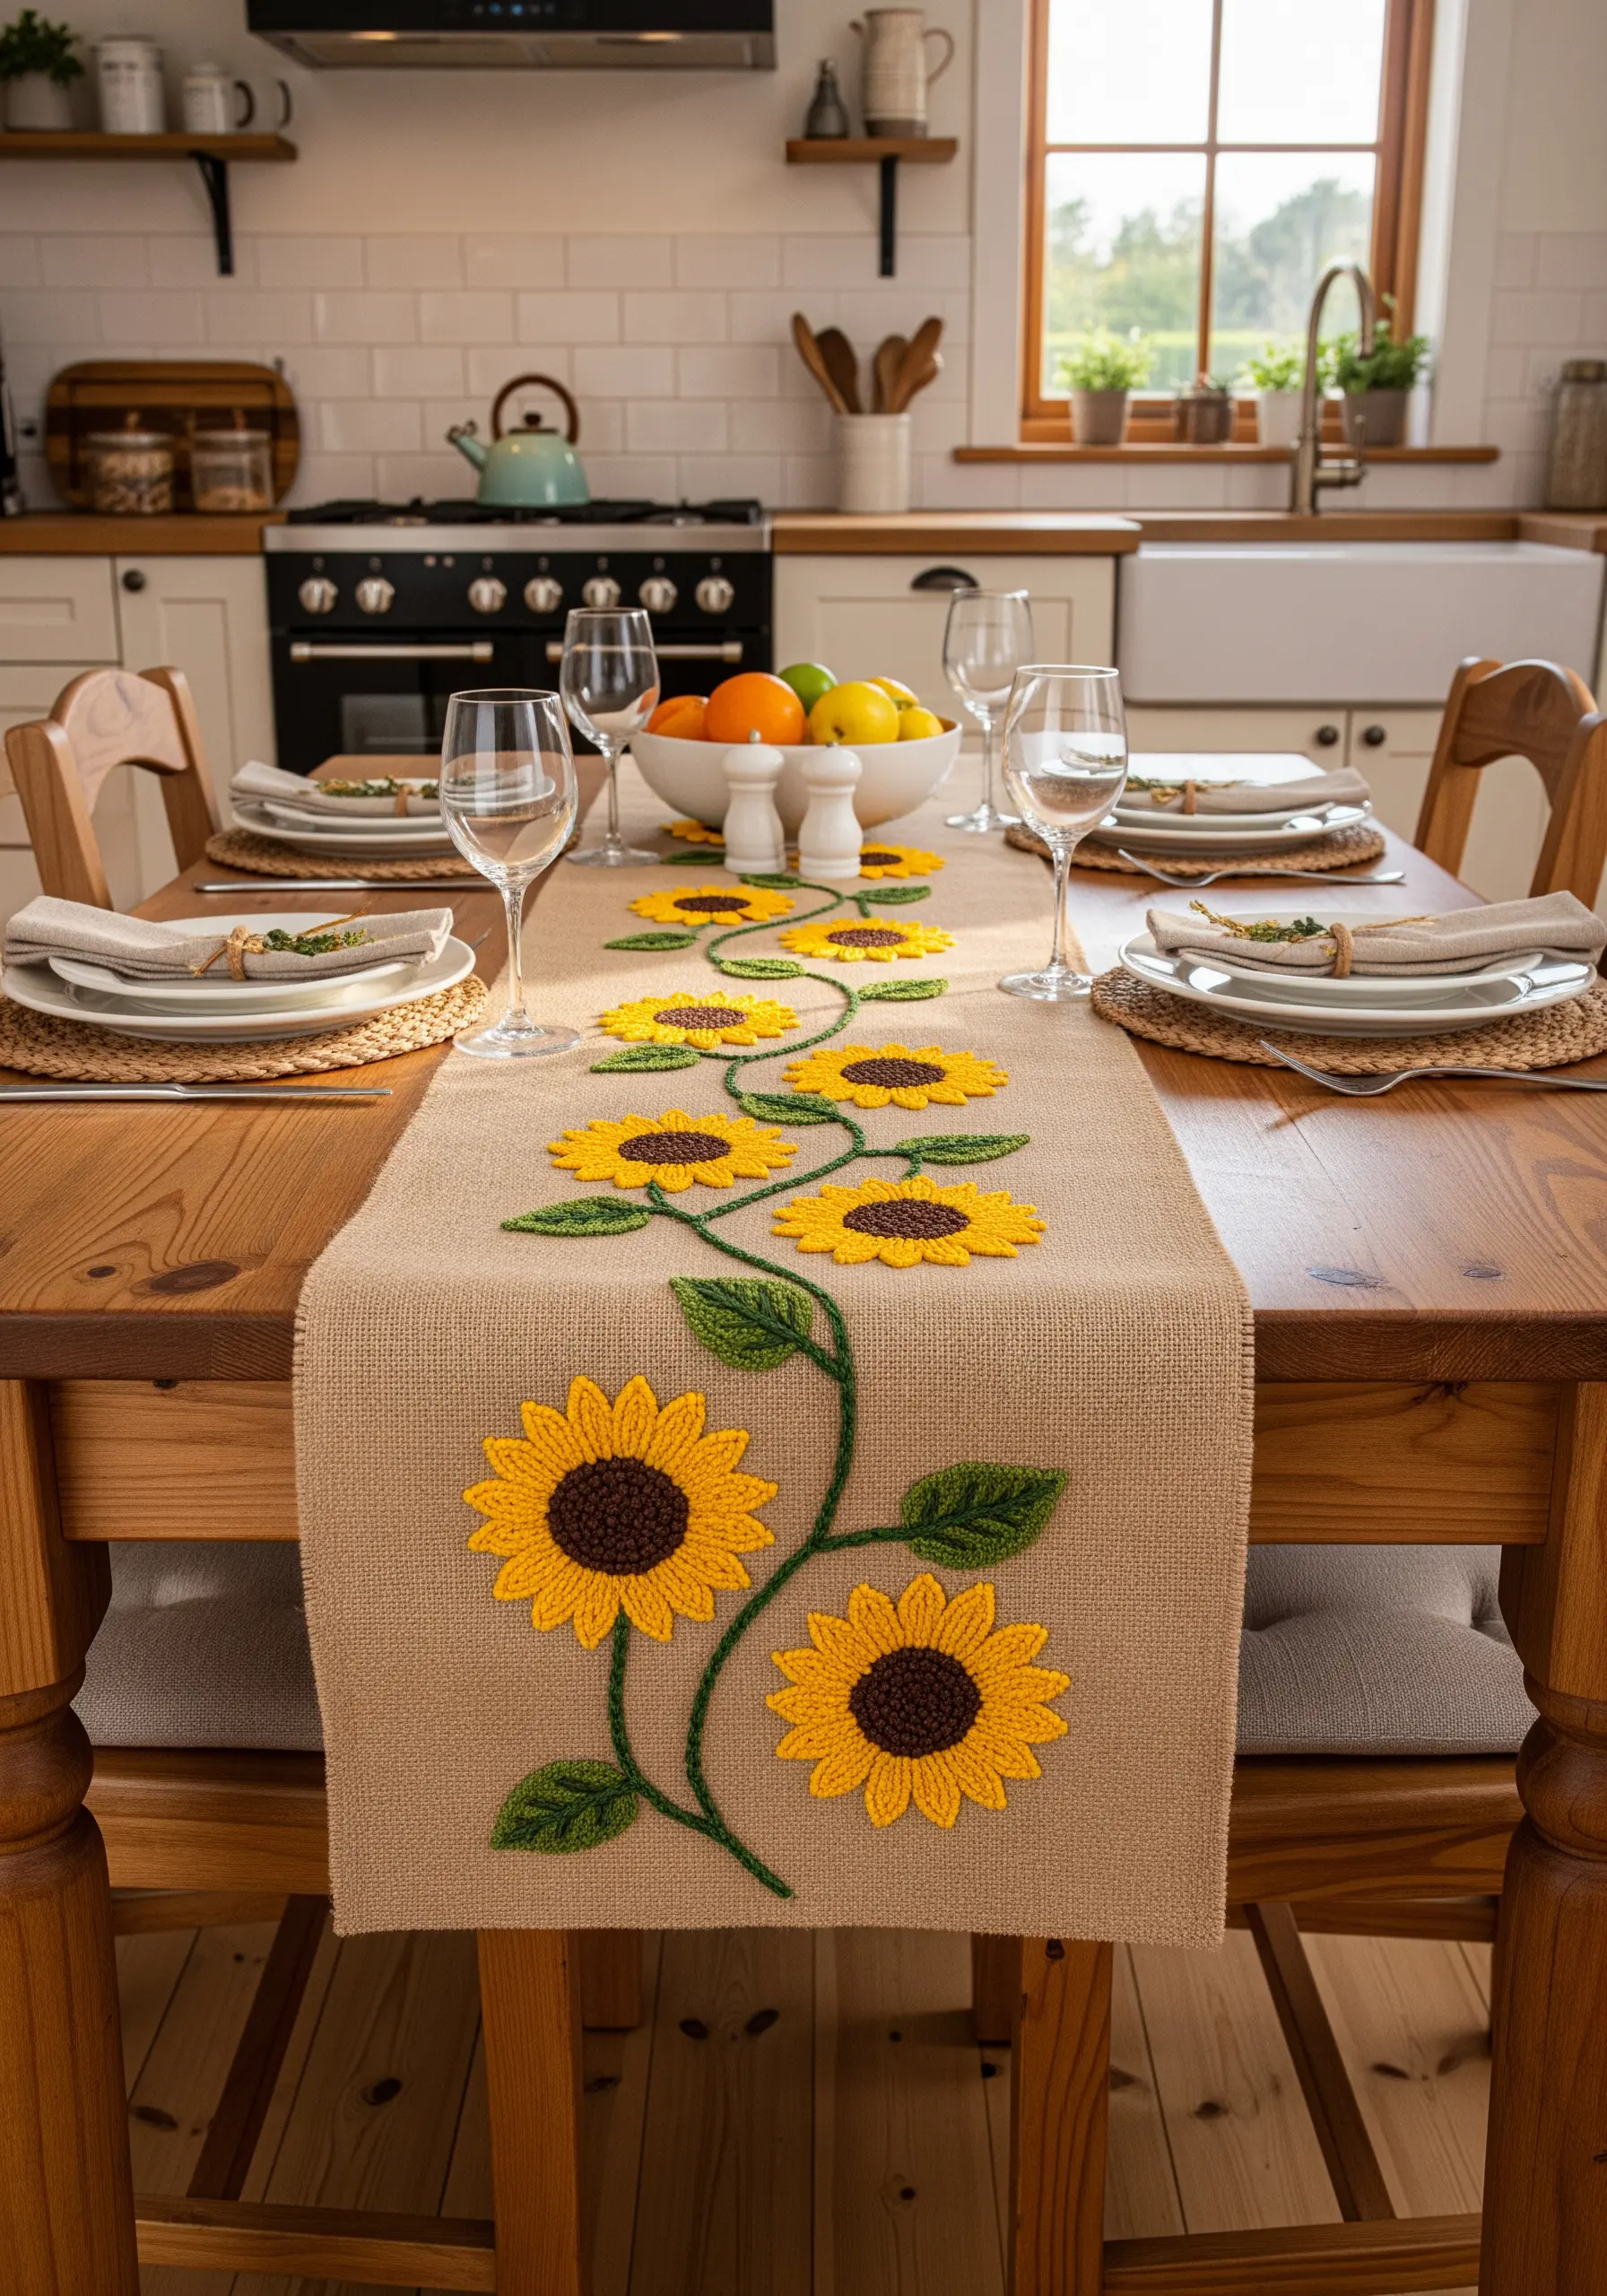
For a truly rustic and high-impact design on a table runner, switch from embroidery floss to a fine yarn or thick cotton perle.
Use a chain stitch to create the bold, winding vine and leaf outlines; its looped structure adds a lovely textural quality that complements the coarse weave of burlap.
Form the sunflower petals with detached chain stitches (lazy daisies), pulling each loop into a pointed shape before tacking it down.
Fill the center with a spiral of couched yarn for a dense, coiled finish that stands out dramatically from the fabric.
4. Design a Light and Airy Repeating Border
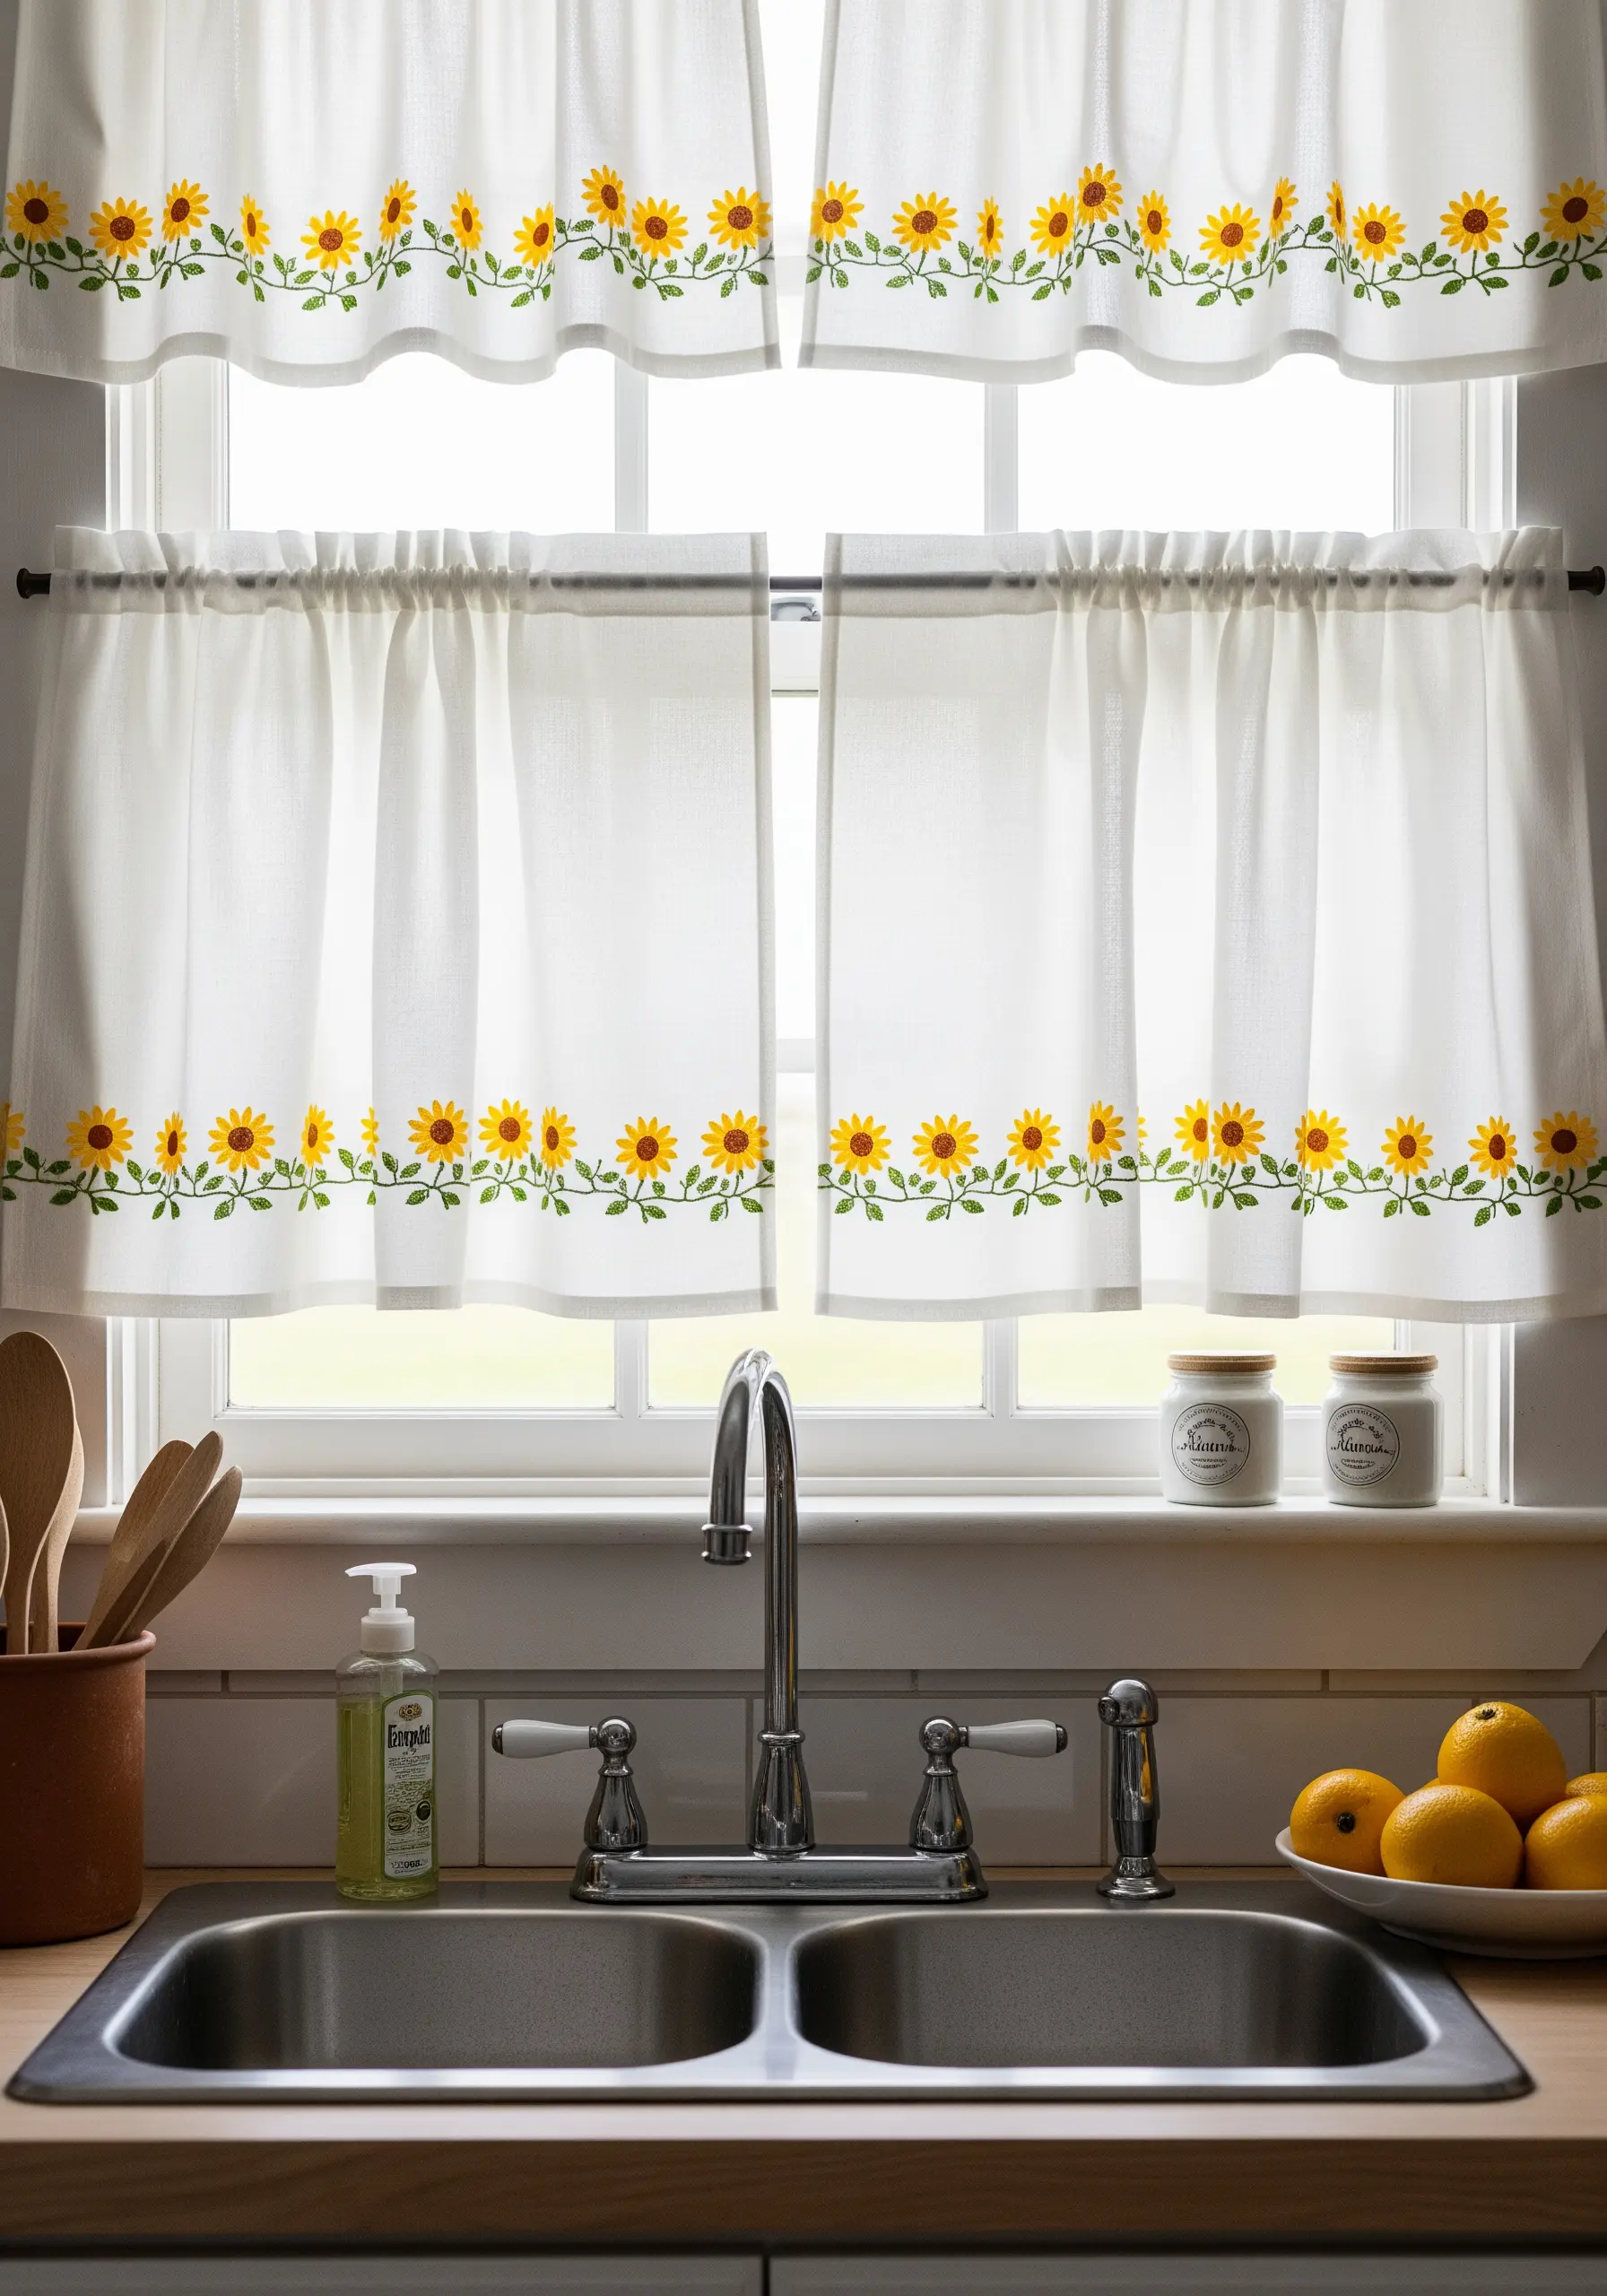
When embroidering on lightweight café curtains, the key is to keep the design from overpowering the fabric.
Create a simple, repeating border using a minimalist sunflower motif. Use a water-soluble pen and a template to ensure your spacing is perfectly even across the entire length.
Keep your stitches delicate: lazy daisy stitches for petals, two or three French knots for the center, and a simple stem stitch for the greenery.
Using just two or three strands of floss will prevent the design from feeling heavy and ensure your curtains continue to drape beautifully.
5. Embrace Modern Elegance with Monochrome Line Art
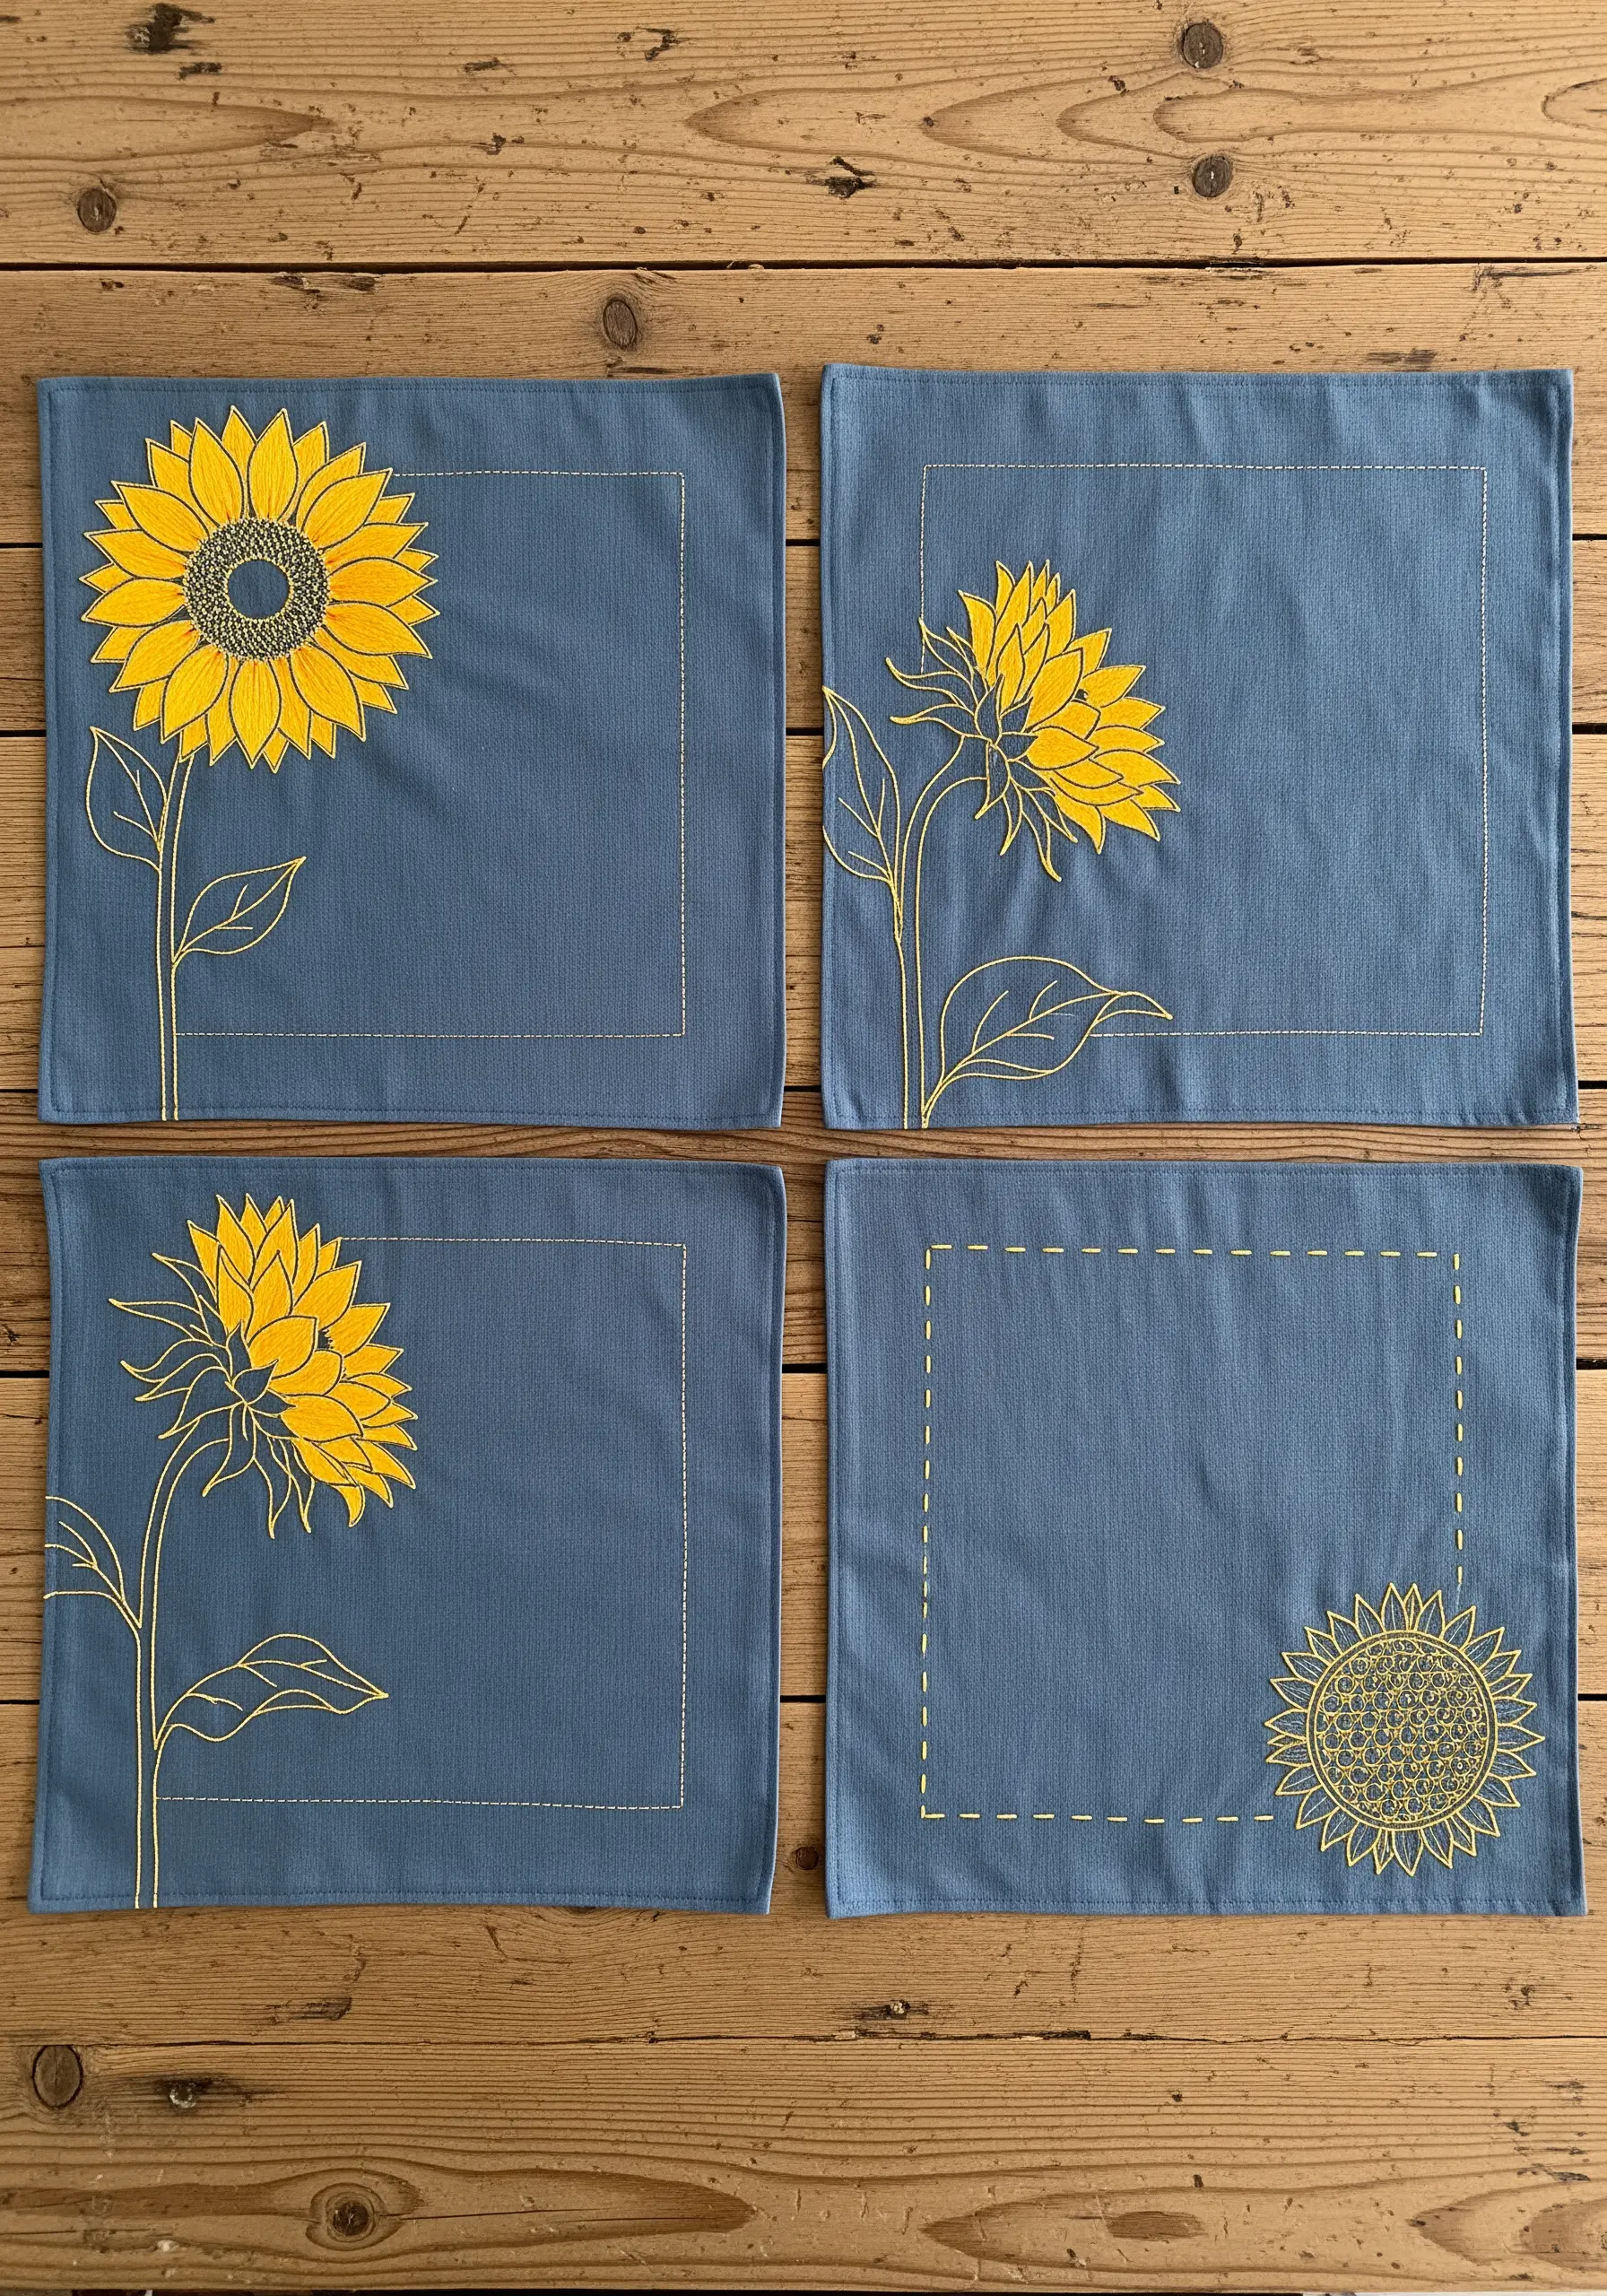
Transform simple placemats into a coordinated set with graphic, single-color embroidery.
This style relies on the power of negative space, where the fabric color becomes part of the design itself. Use a consistent whipped backstitch for clean, raised outlines that have a cord-like finish.
For the filled sections, a perfectly executed satin stitch provides a block of smooth, solid color that contrasts beautifully with the open line art.
The subtle, dashed running stitch border adds a final handmade detail without distracting from the main motif.
6. Master Photorealistic Petal Blending in Hoop Art

To achieve a truly realistic sunflower, think like a painter and use thread to blend colors.
Work each petal with a long-and-short stitch, using at least four shades of floss—from bright yellow to deep red-orange—to create a seamless gradient.
Build the center with layers of French knots in varying sizes and shades of brown and black. Smaller, darker knots in the middle will create the illusion of deep shadows.
Stitching on a dark navy or black fabric will make your vibrant colors appear even more luminous and dramatic.
7. Refine Everyday Linens with Delicate Corner Motifs
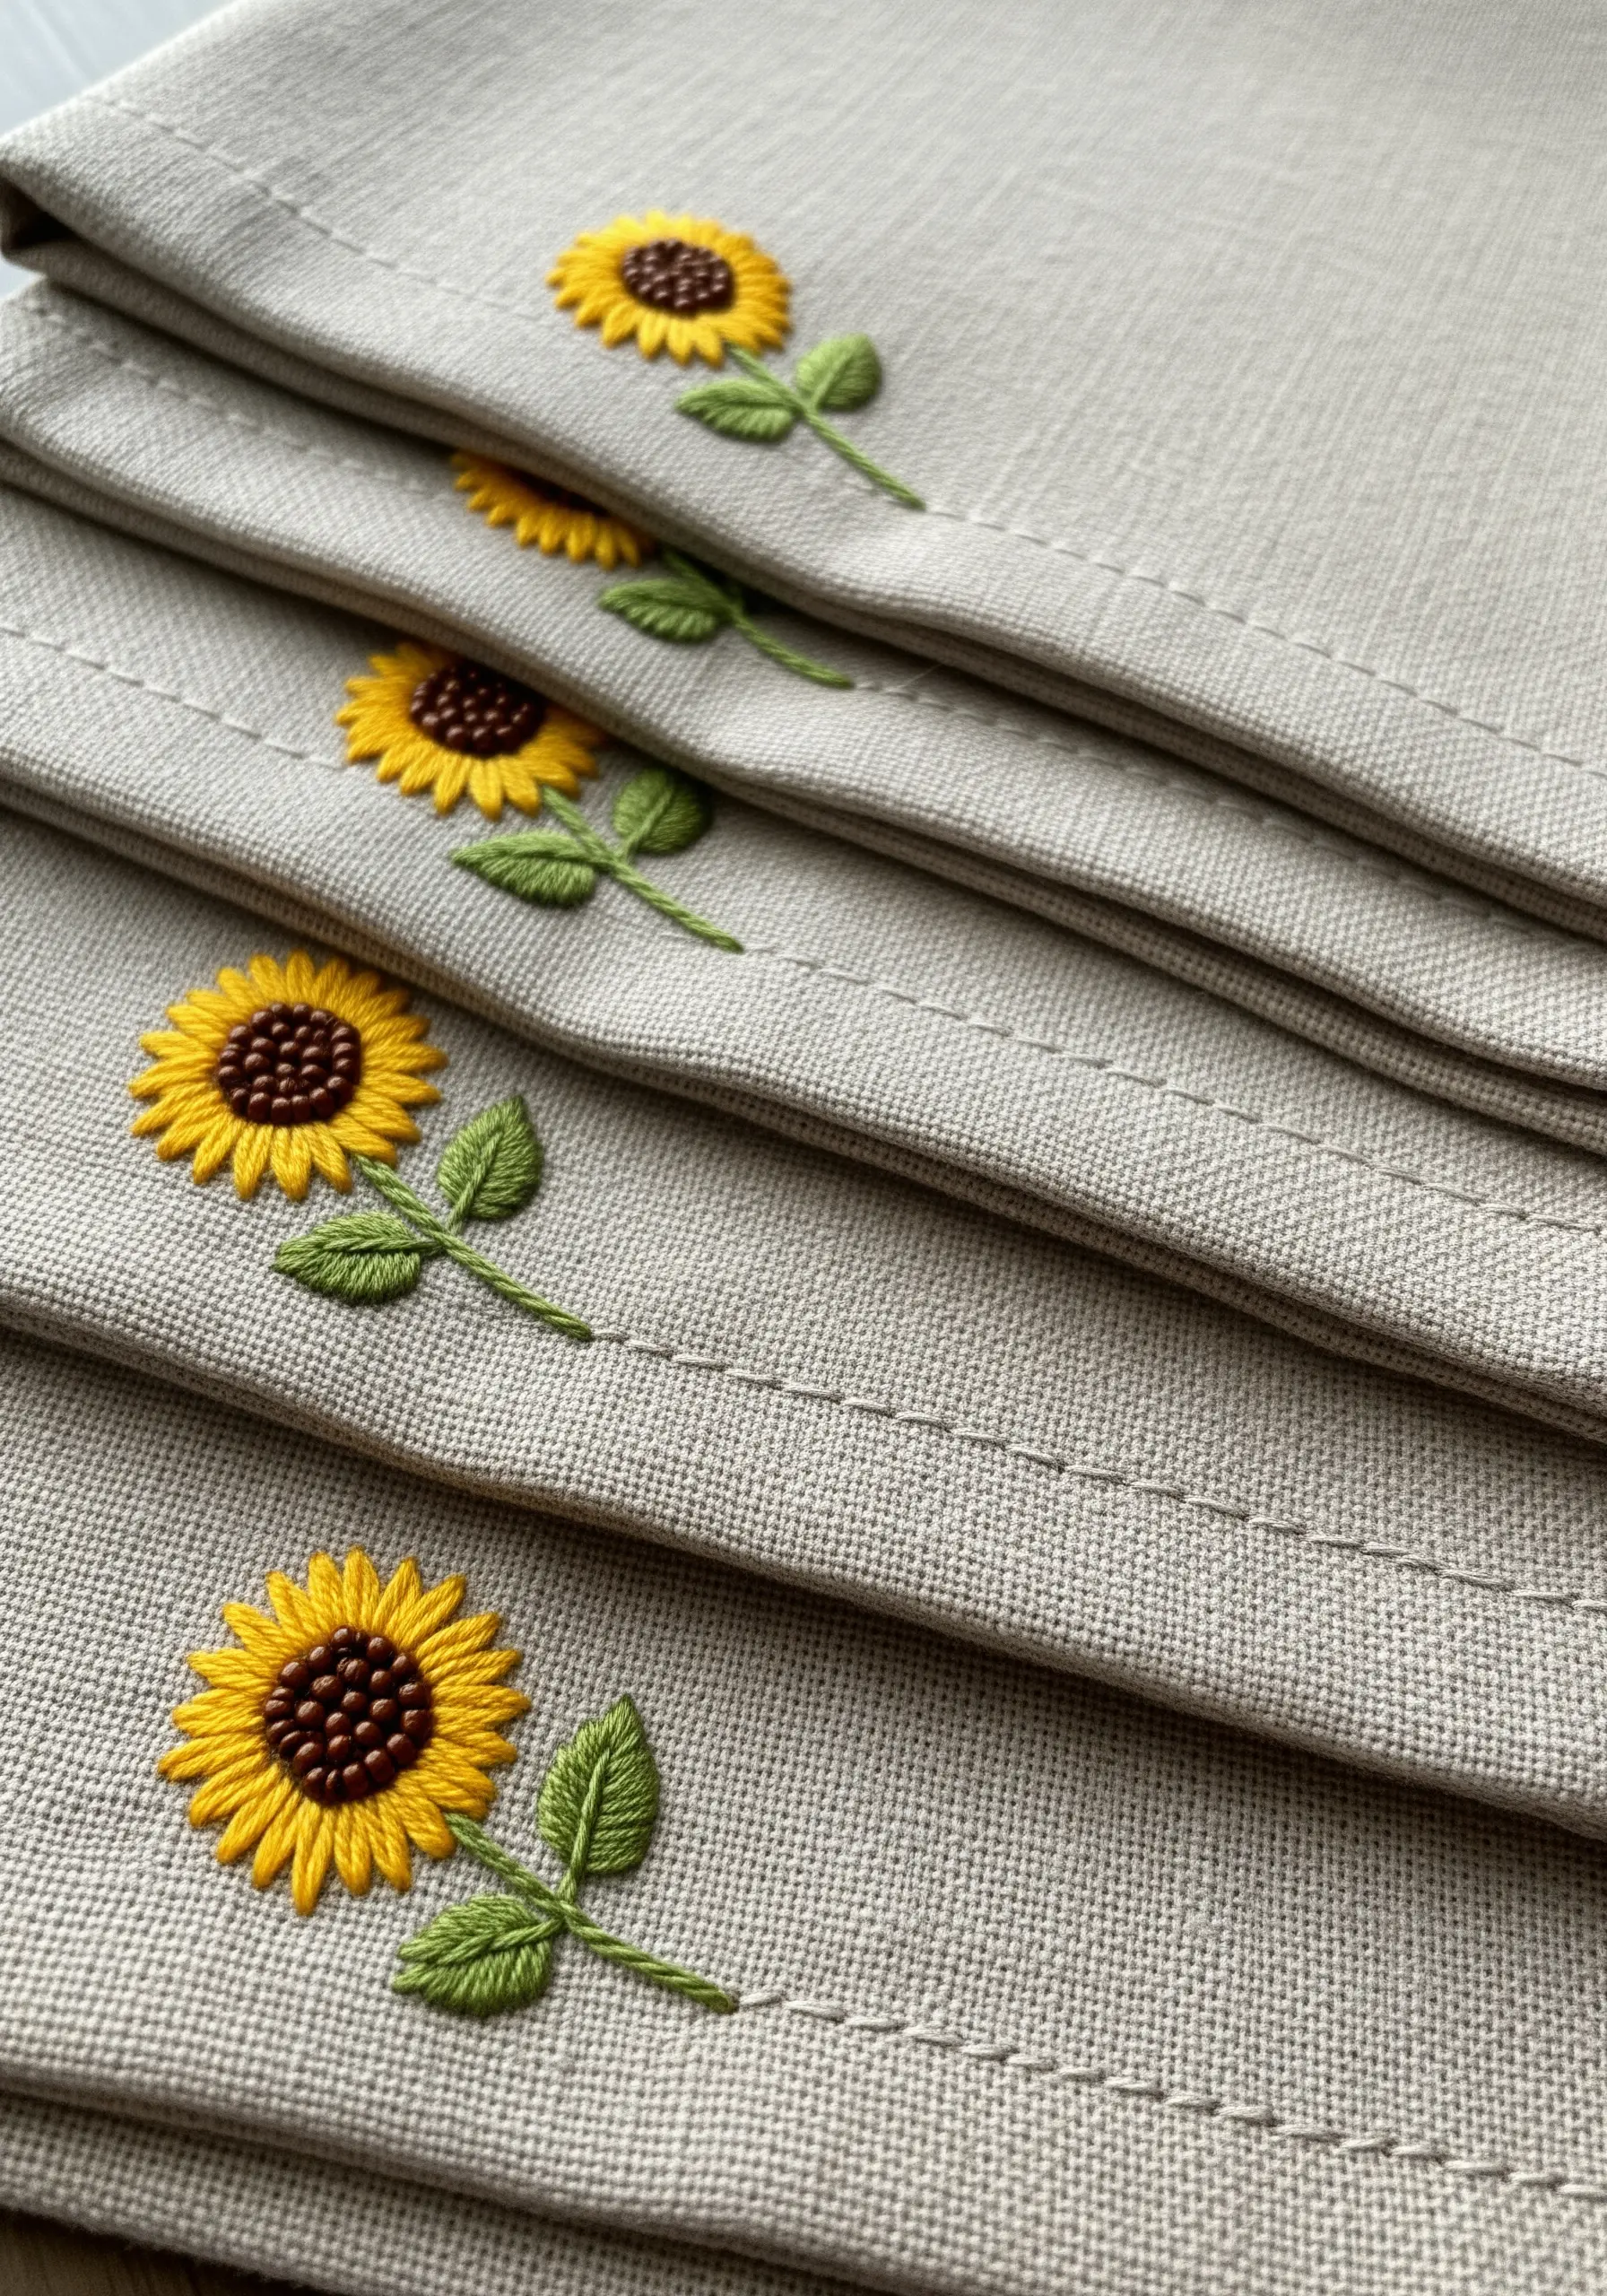
A small, well-executed motif can elevate a simple set of napkins into something truly special.
When working on a small scale, simplify the design to its most essential forms. A ring of lazy daisy stitches creates perfect petals instantly.
Suggest a center with a tight cluster of just three to five French knots in a contrasting brown.
Use a fishbone stitch for the leaves, as it creates a beautiful tapered shape with a built-in central vein. Sticking to two strands of floss keeps the entire design light and graceful.
8. Add Tactile Dimension with Raised Stitches
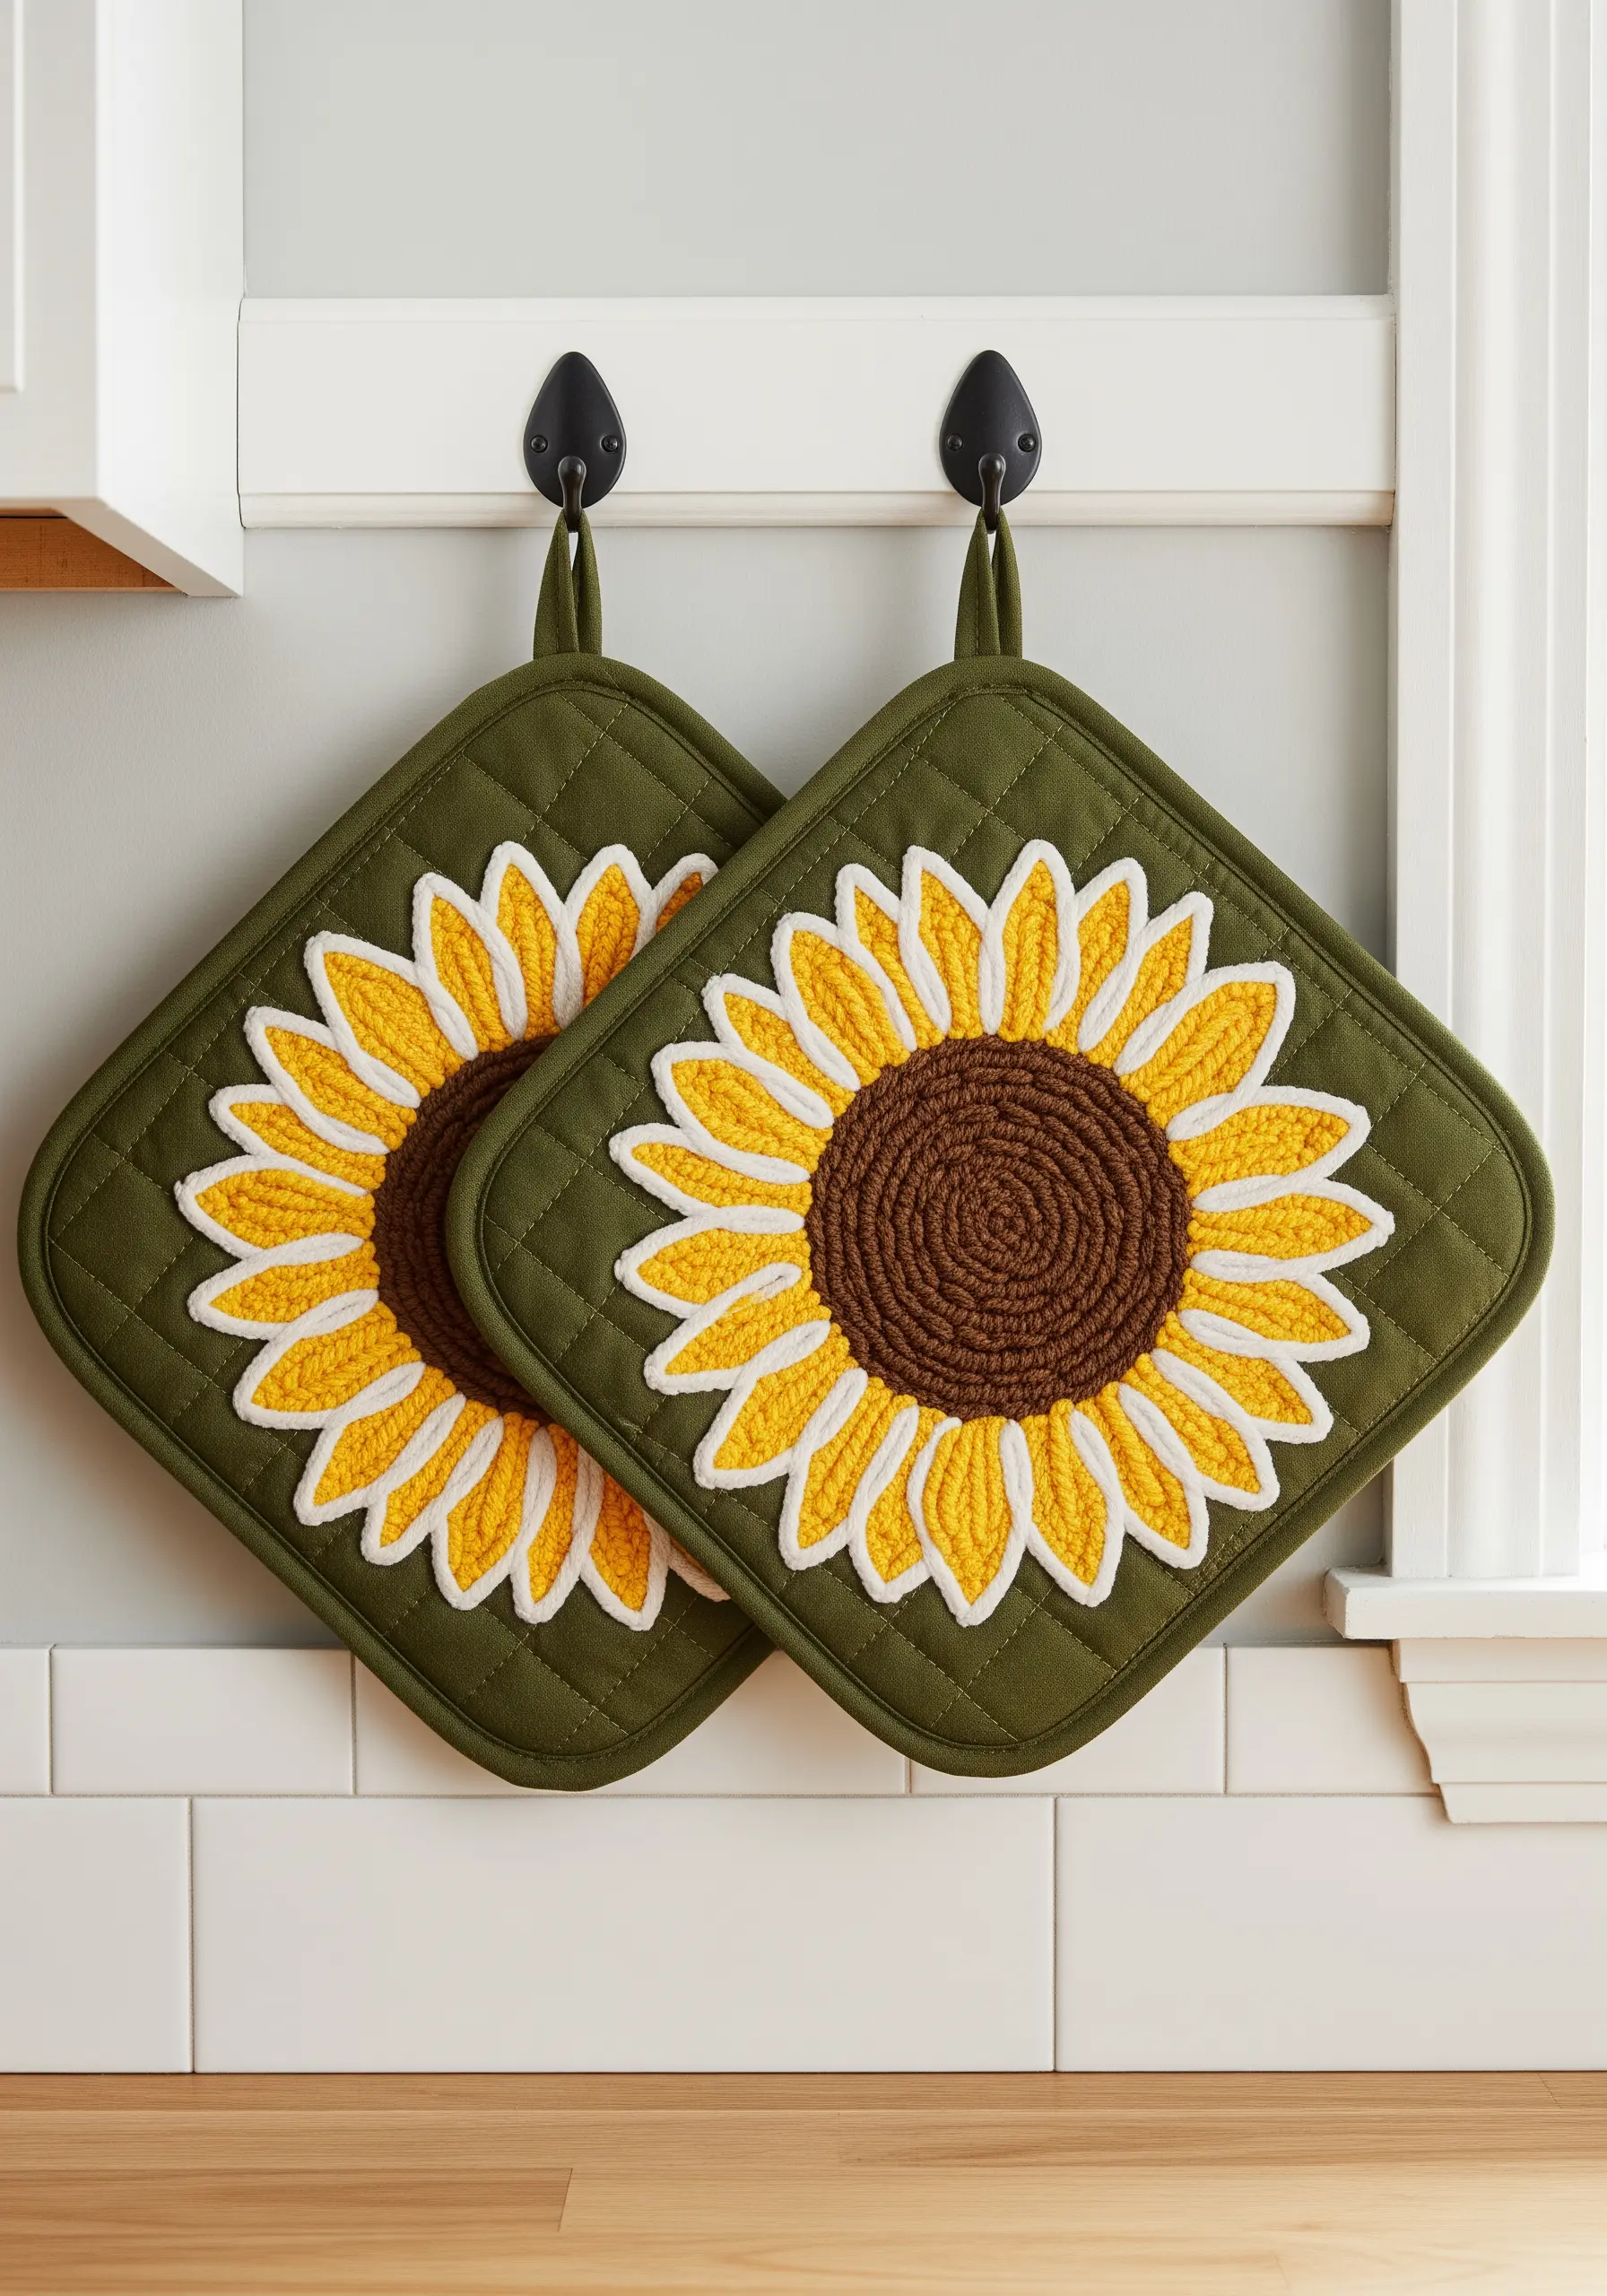
Give your sunflowers a bold, three-dimensional quality by using padded satin stitch for the petals.
First, lay down a foundation of straight stitches or seed stitches within the petal shape. Then, cover this padding with satin stitches worked in the opposite direction.
This simple technique physically lifts the stitches from the fabric surface, creating a plush, raised effect that begs to be touched.
On a practical item like a potholder, this textural quality not only looks good but also adds to its sturdy, functional feel.
9. Compose a Balanced Botanical Wreath
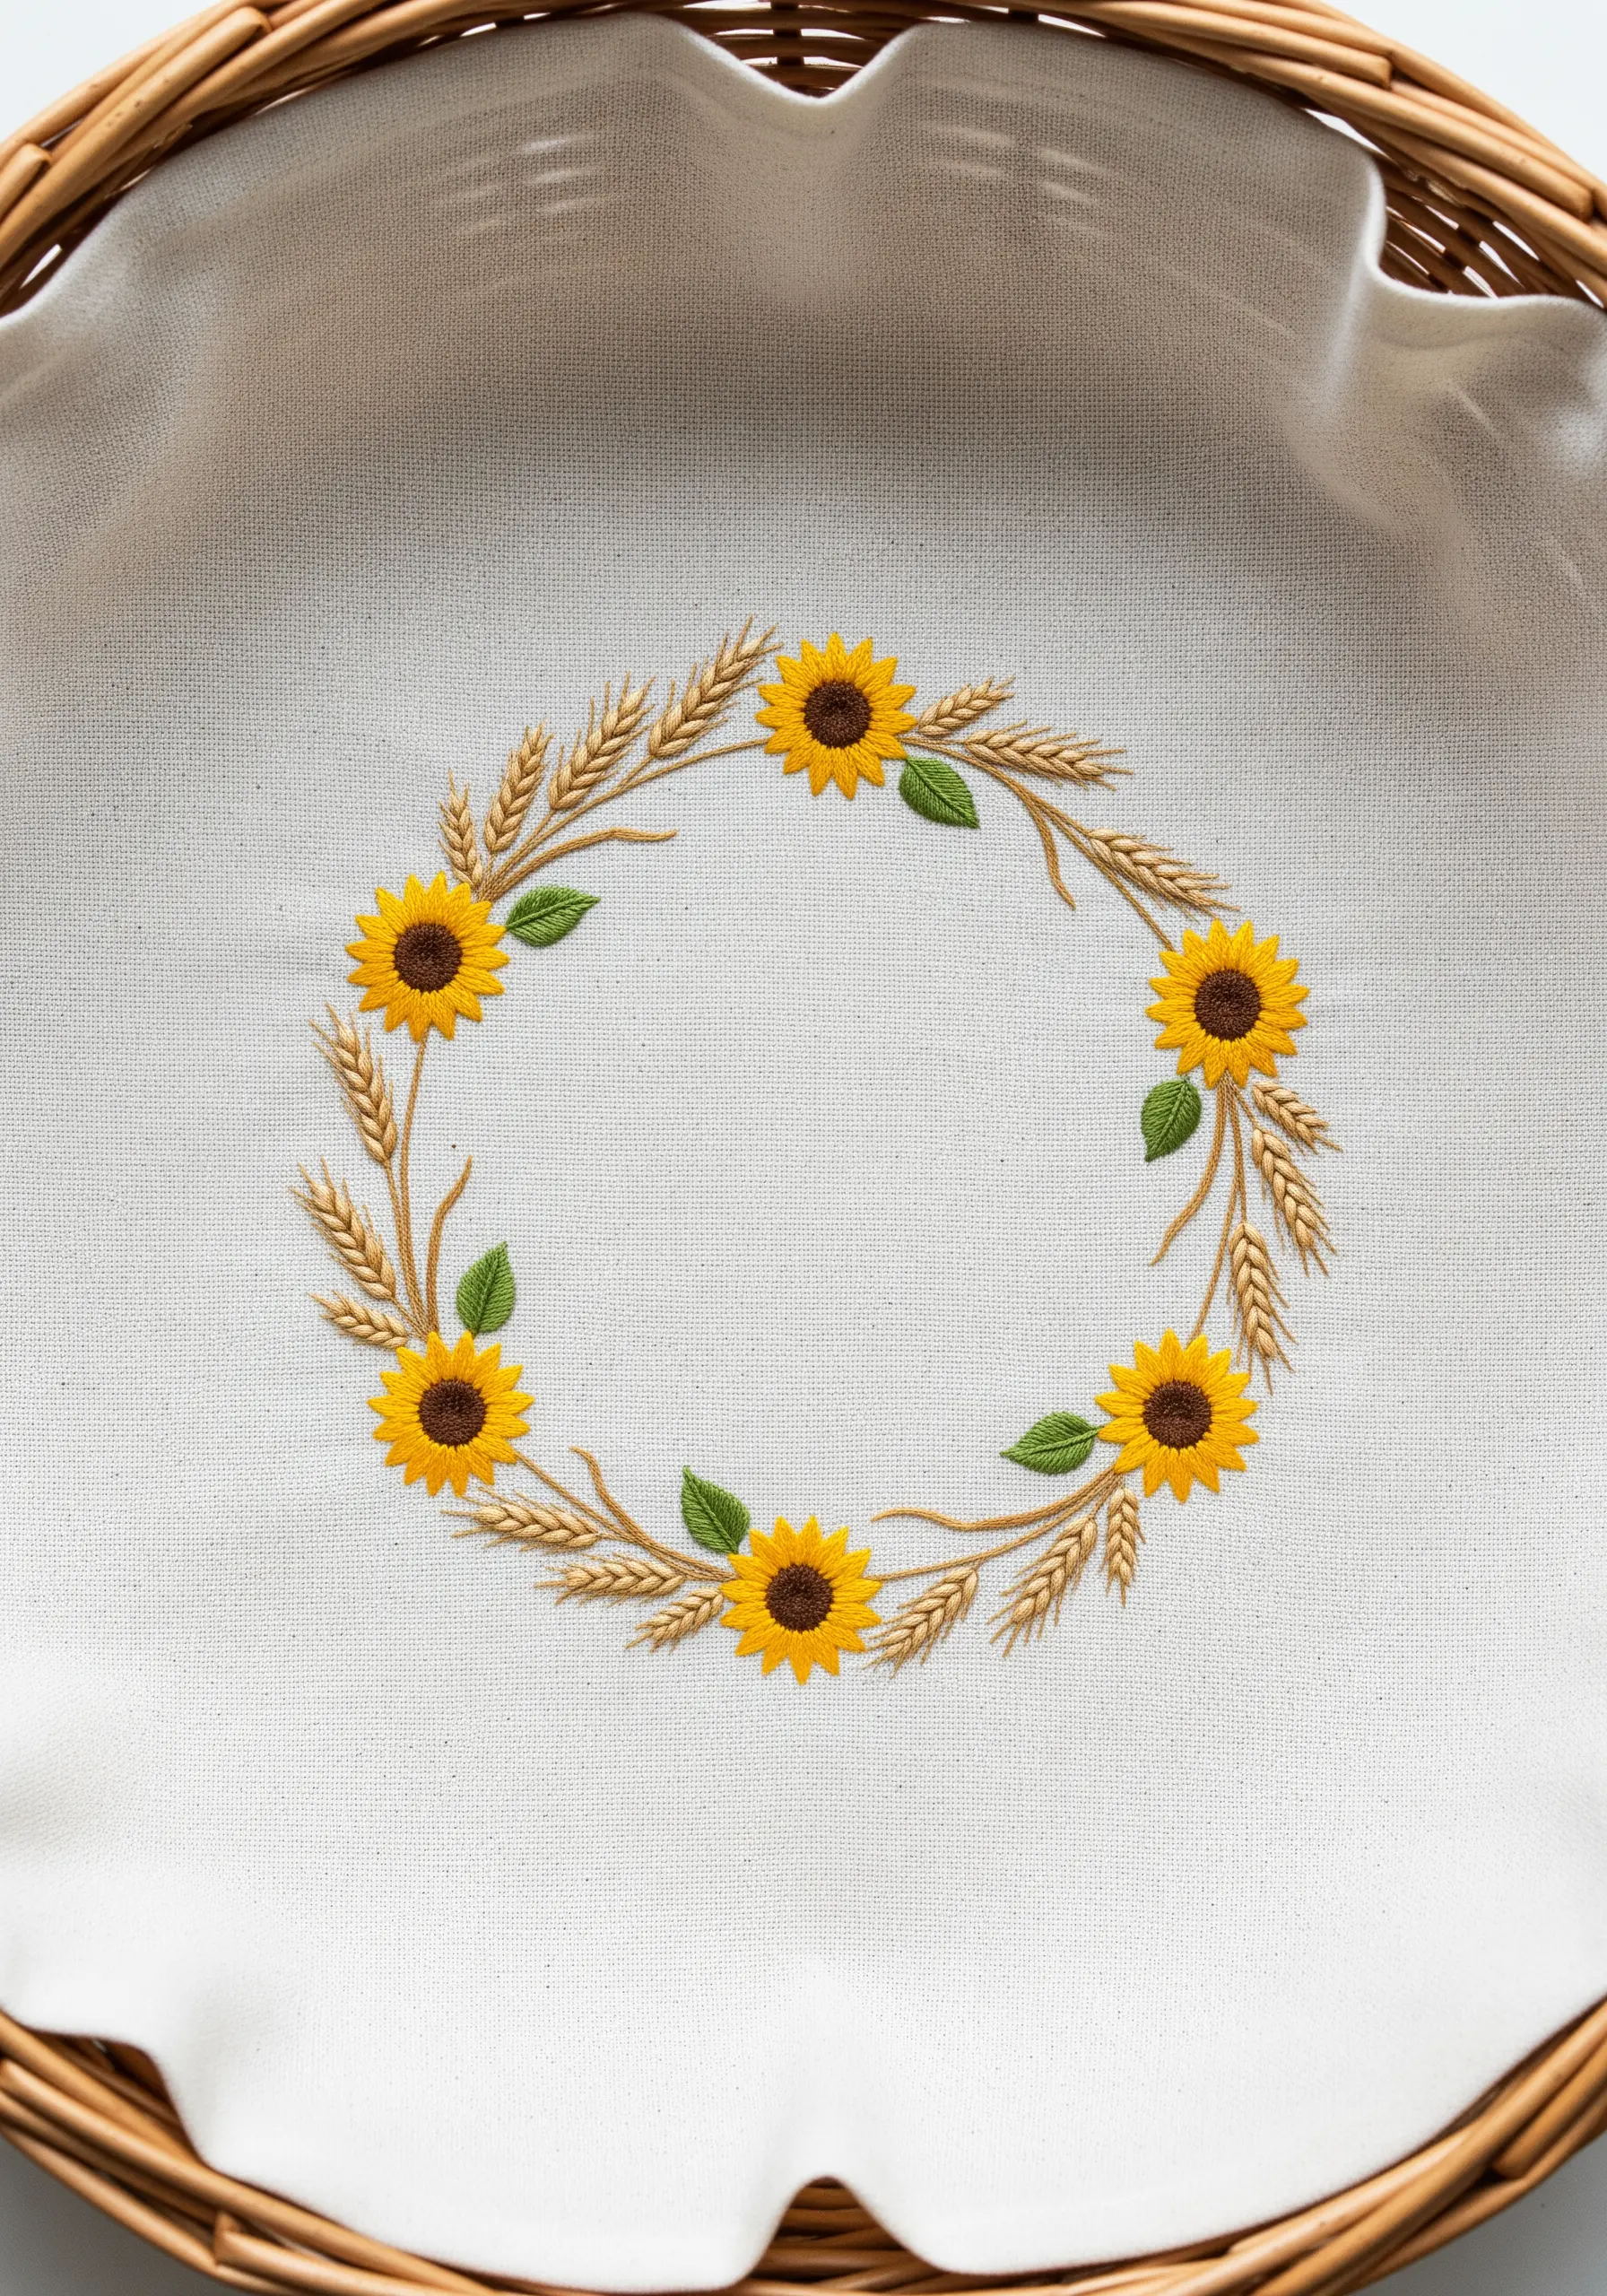
When combining different botanical elements, create visual harmony by varying your stitch textures.
Allow the satin-stitched sunflowers to be the bold focal points of your wreath. For the delicate wheat stalks, use a lighter touch.
A simple fly stitch is perfect for forming the husks, while a few straight stitches create the awns and stem.
This contrast in stitch density ensures the wheat complements the sunflowers rather than competing with them, resulting in an airy and balanced composition.
10. Integrate Florals with Elegant Lettering
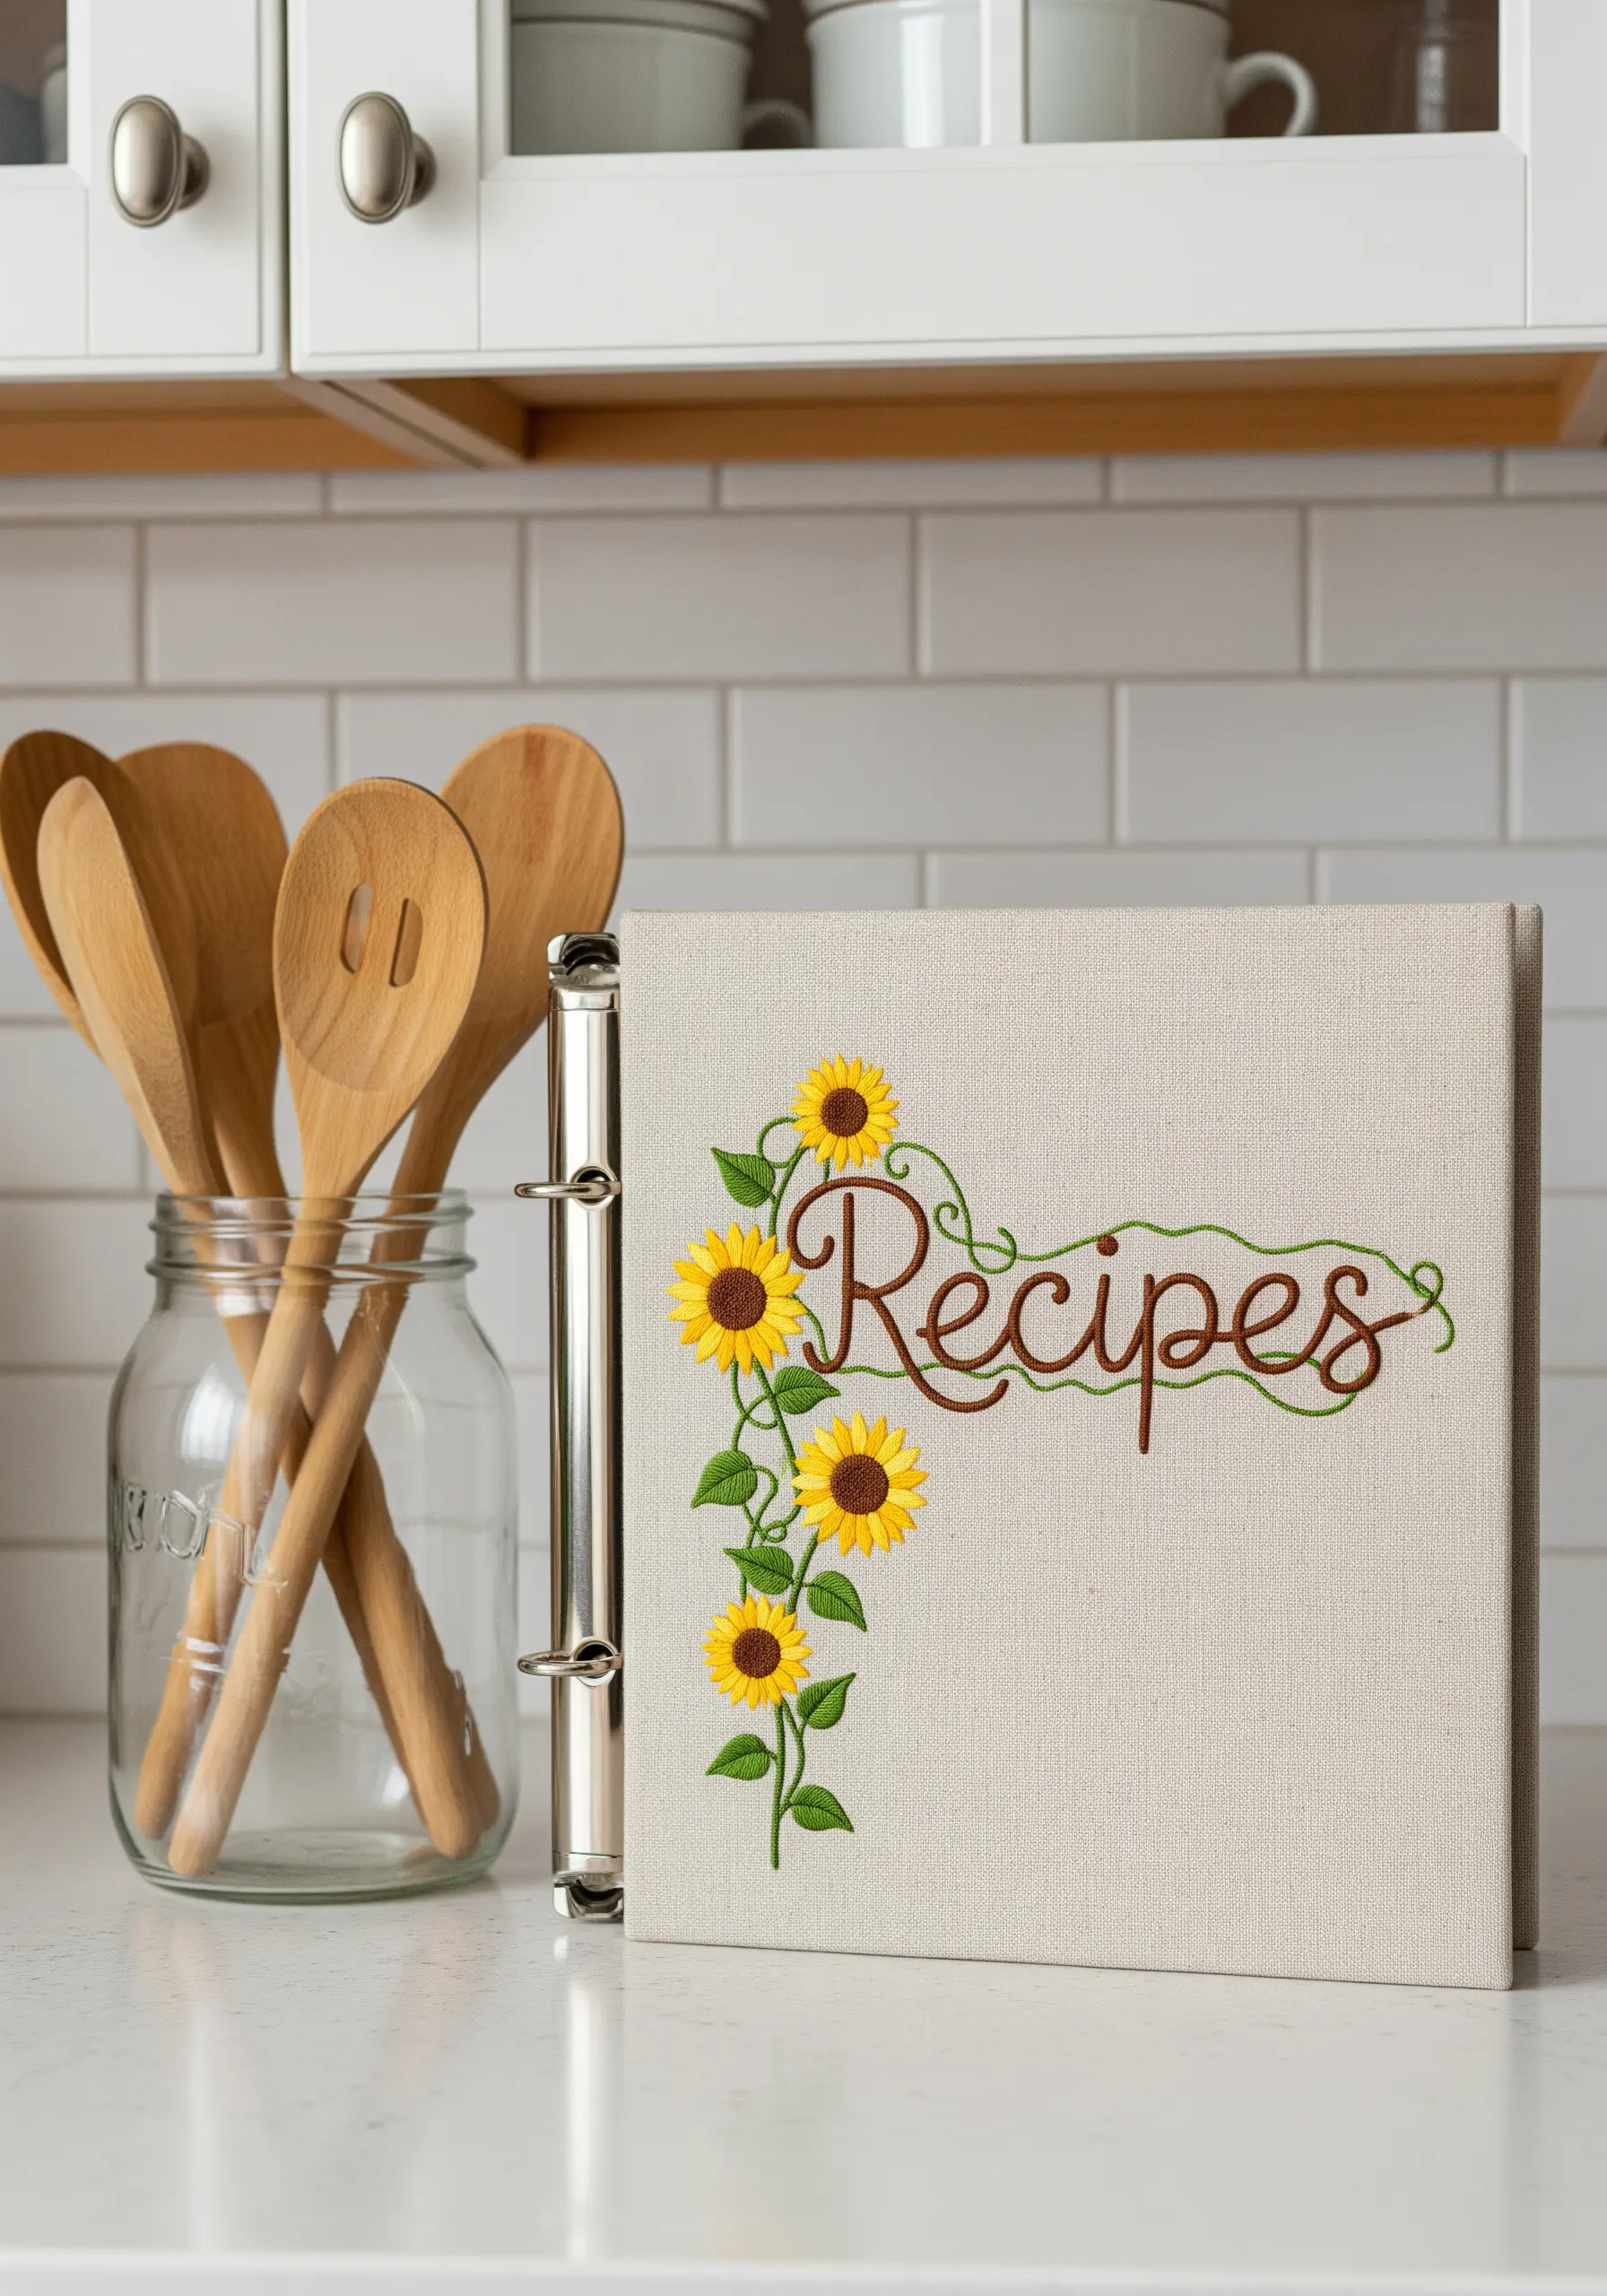
To create a cohesive design that combines text and imagery, make the elements feel intentionally woven together.
Stitch your floral motifs first, then carefully plan the path of your lettering. A whipped backstitch or a tight stem stitch will give your cursive text a smooth, readable line.
Use a single strand of floss to stitch a delicate vine that weaves in front of and behind the letters, physically connecting the text and the flowers into a single, graceful composition.
This small detail is what elevates the design from simple decoration to thoughtful art.
11. Make Your Stitches Pop on Patterned Fabric
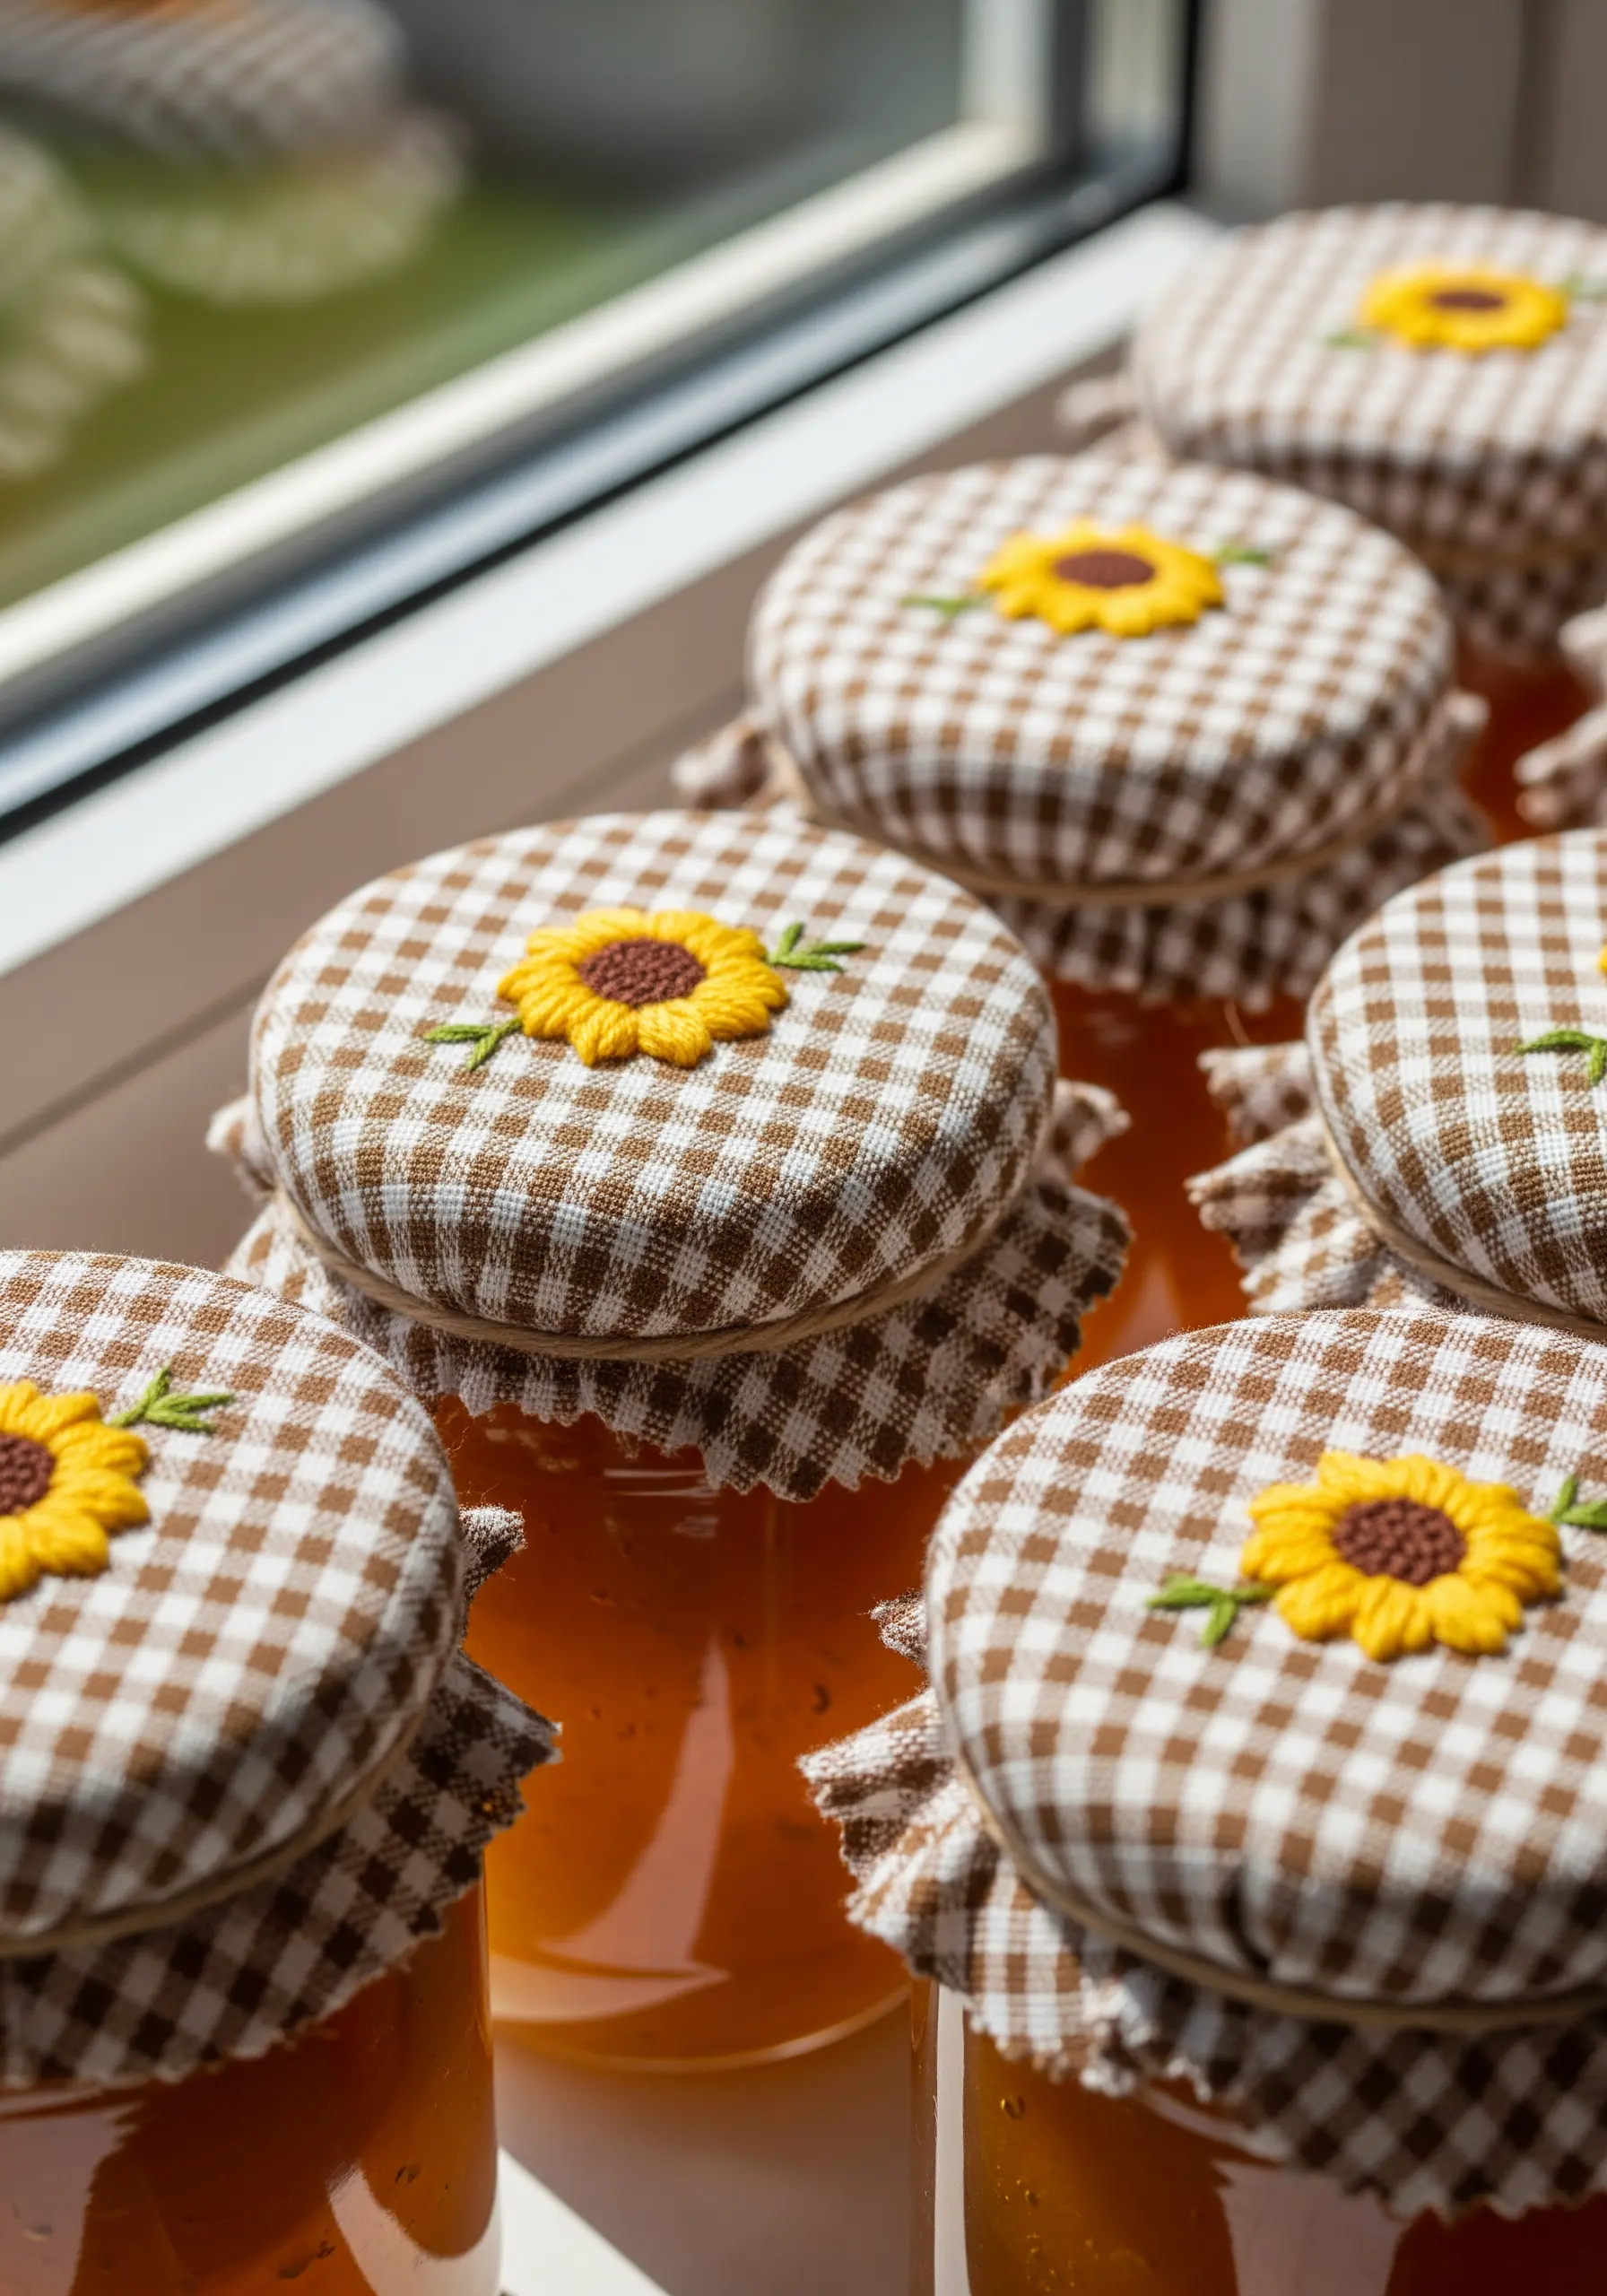
Embroidering on a patterned fabric like gingham requires a bold, simple approach to ensure your work is visible.
Choose a simple design that won’t compete with the background checks. A ring of lazy daisy stitches for petals is clear and graphic.
Use all six strands of your embroidery floss, or even a thicker perle cotton, to give your stitches the weight they need to stand out.
A dense cluster of French knots in a high-contrast color for the center will anchor the design and prevent it from getting lost in the pattern.
12. Create a Durable Focal Point for Chair Cushions
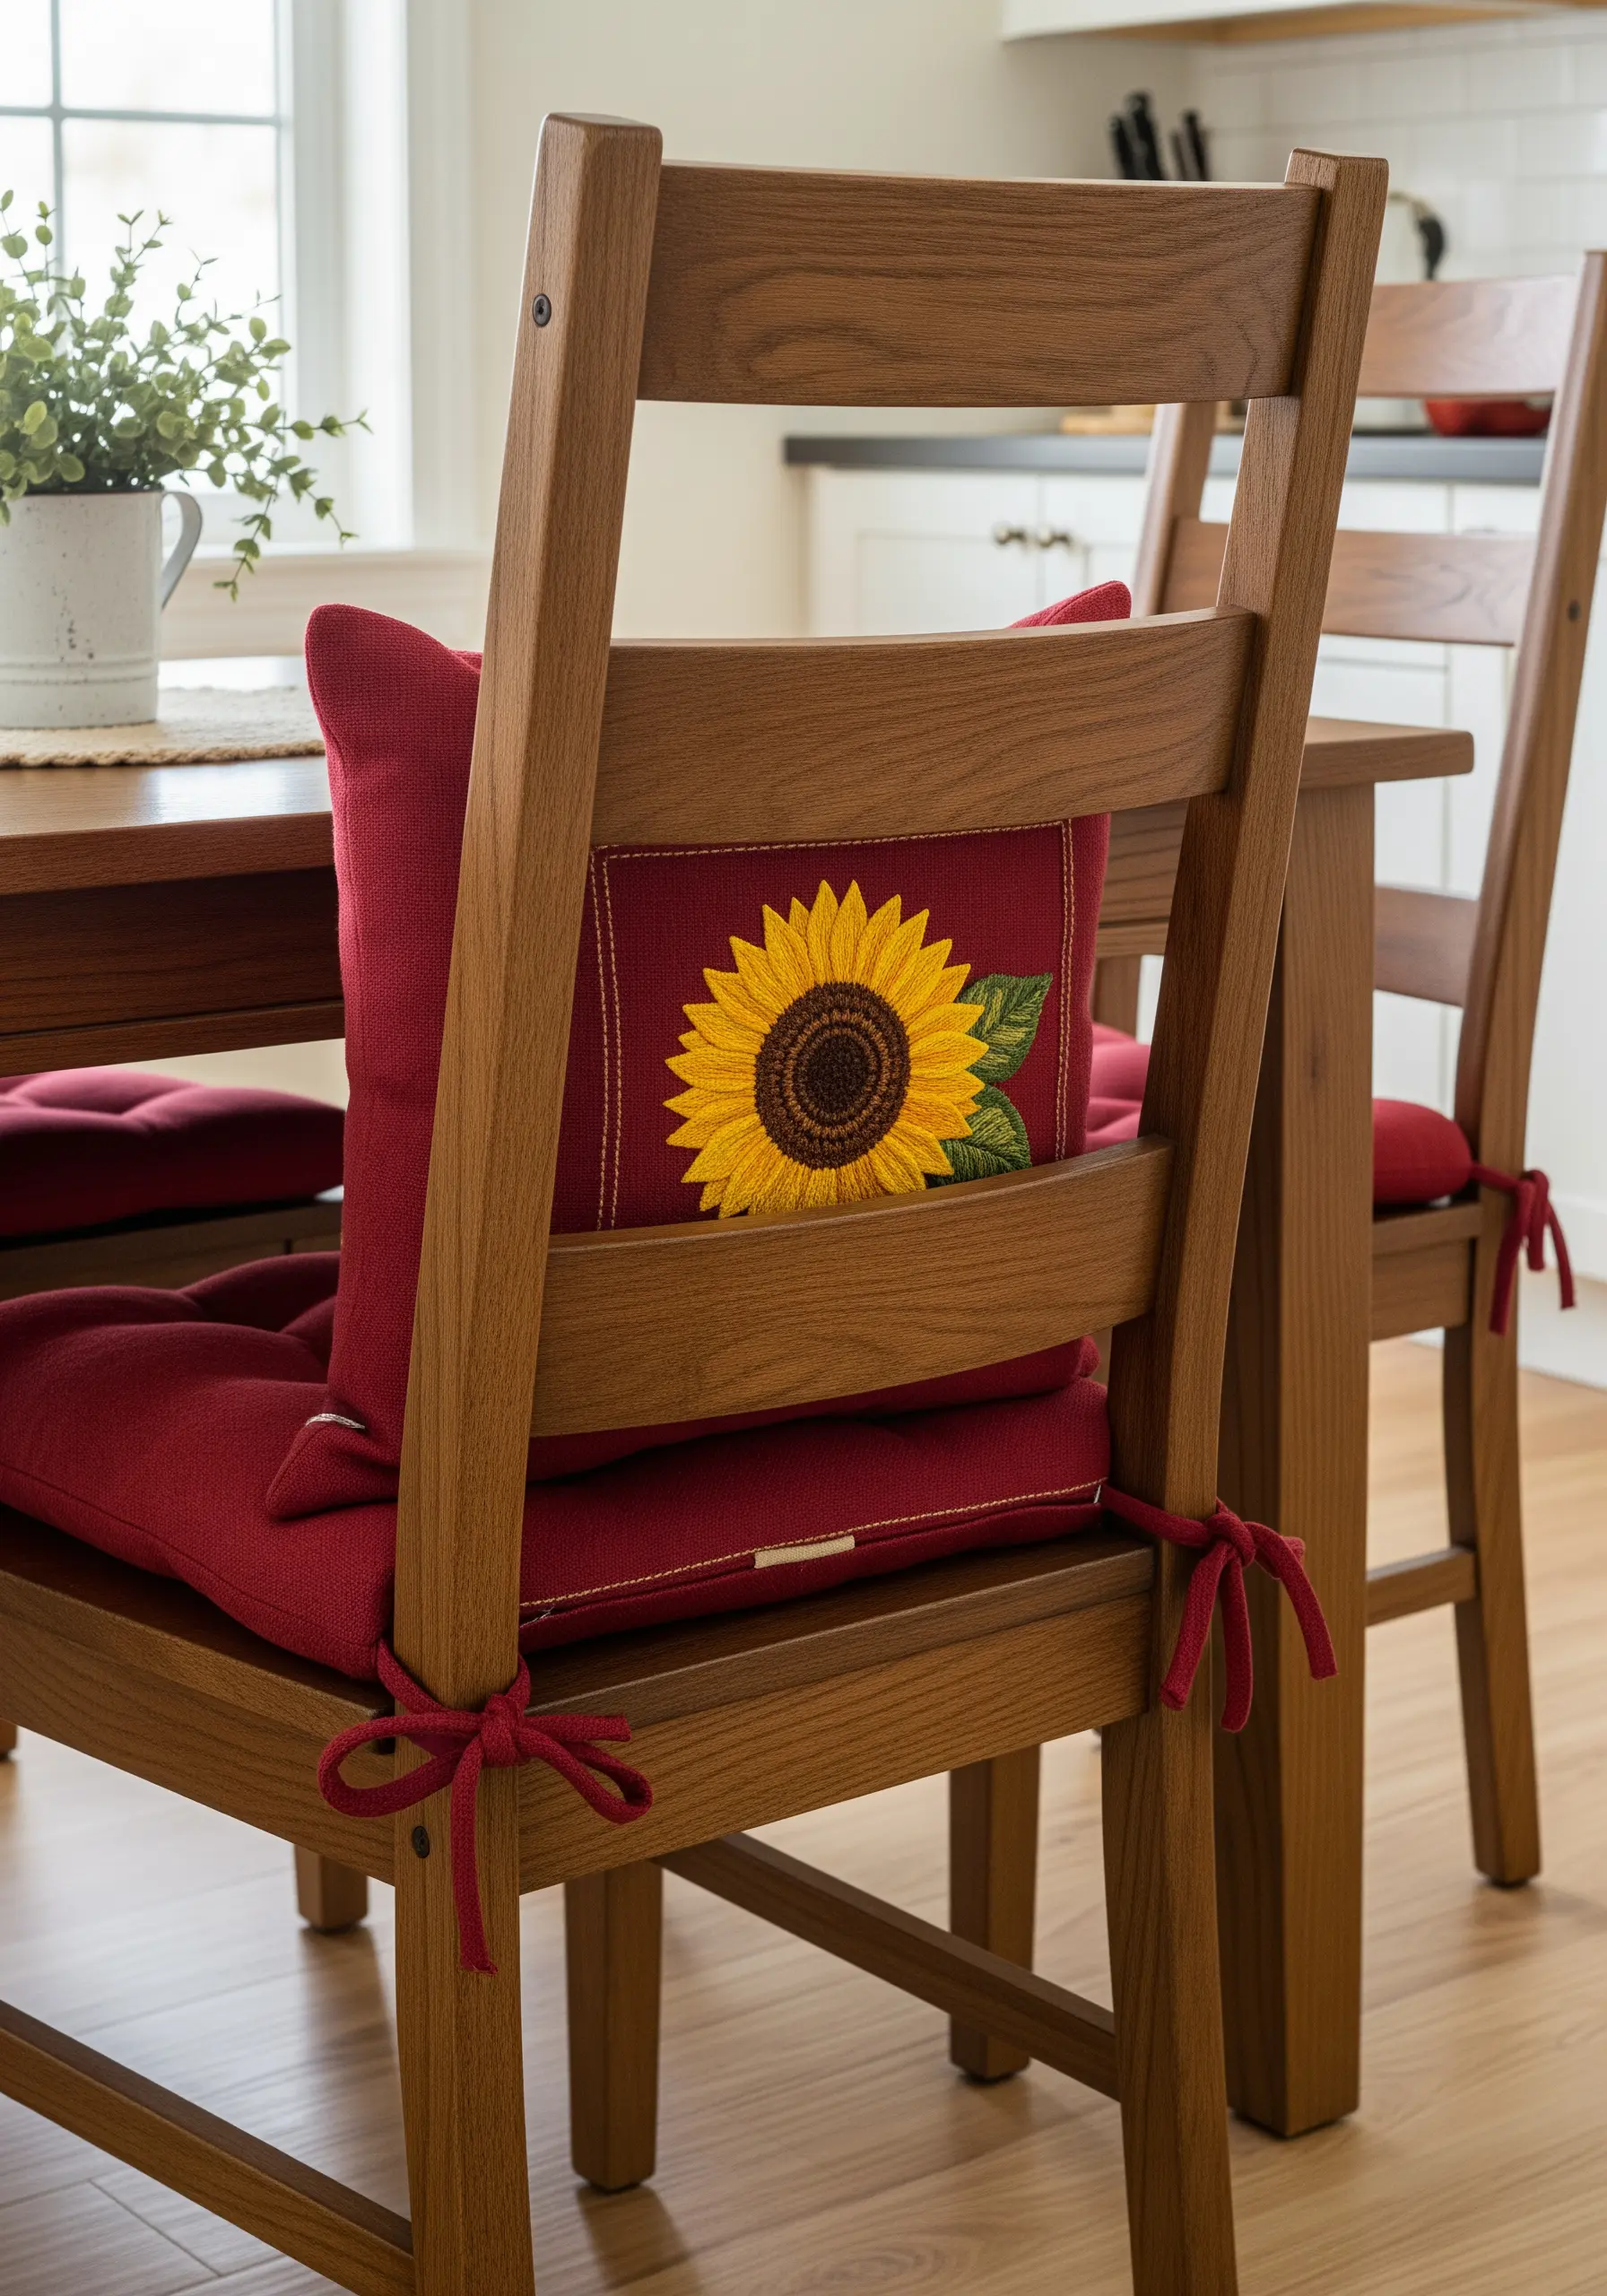
For high-use items like chair cushions, durability is as important as beauty.
Instead of stitching directly onto the cushion cover, create an embroidered panel on a separate piece of sturdy canvas. This makes the stitching process easier and protects your work.
Use a dense, hard-wearing stitch like the long-and-short stitch, which has no long floats to snag.
Appliqué the finished panel onto the cushion, turning the raw edges under for a clean, professional finish that is built to last.
13. Design a Dynamic, Cascading Composition
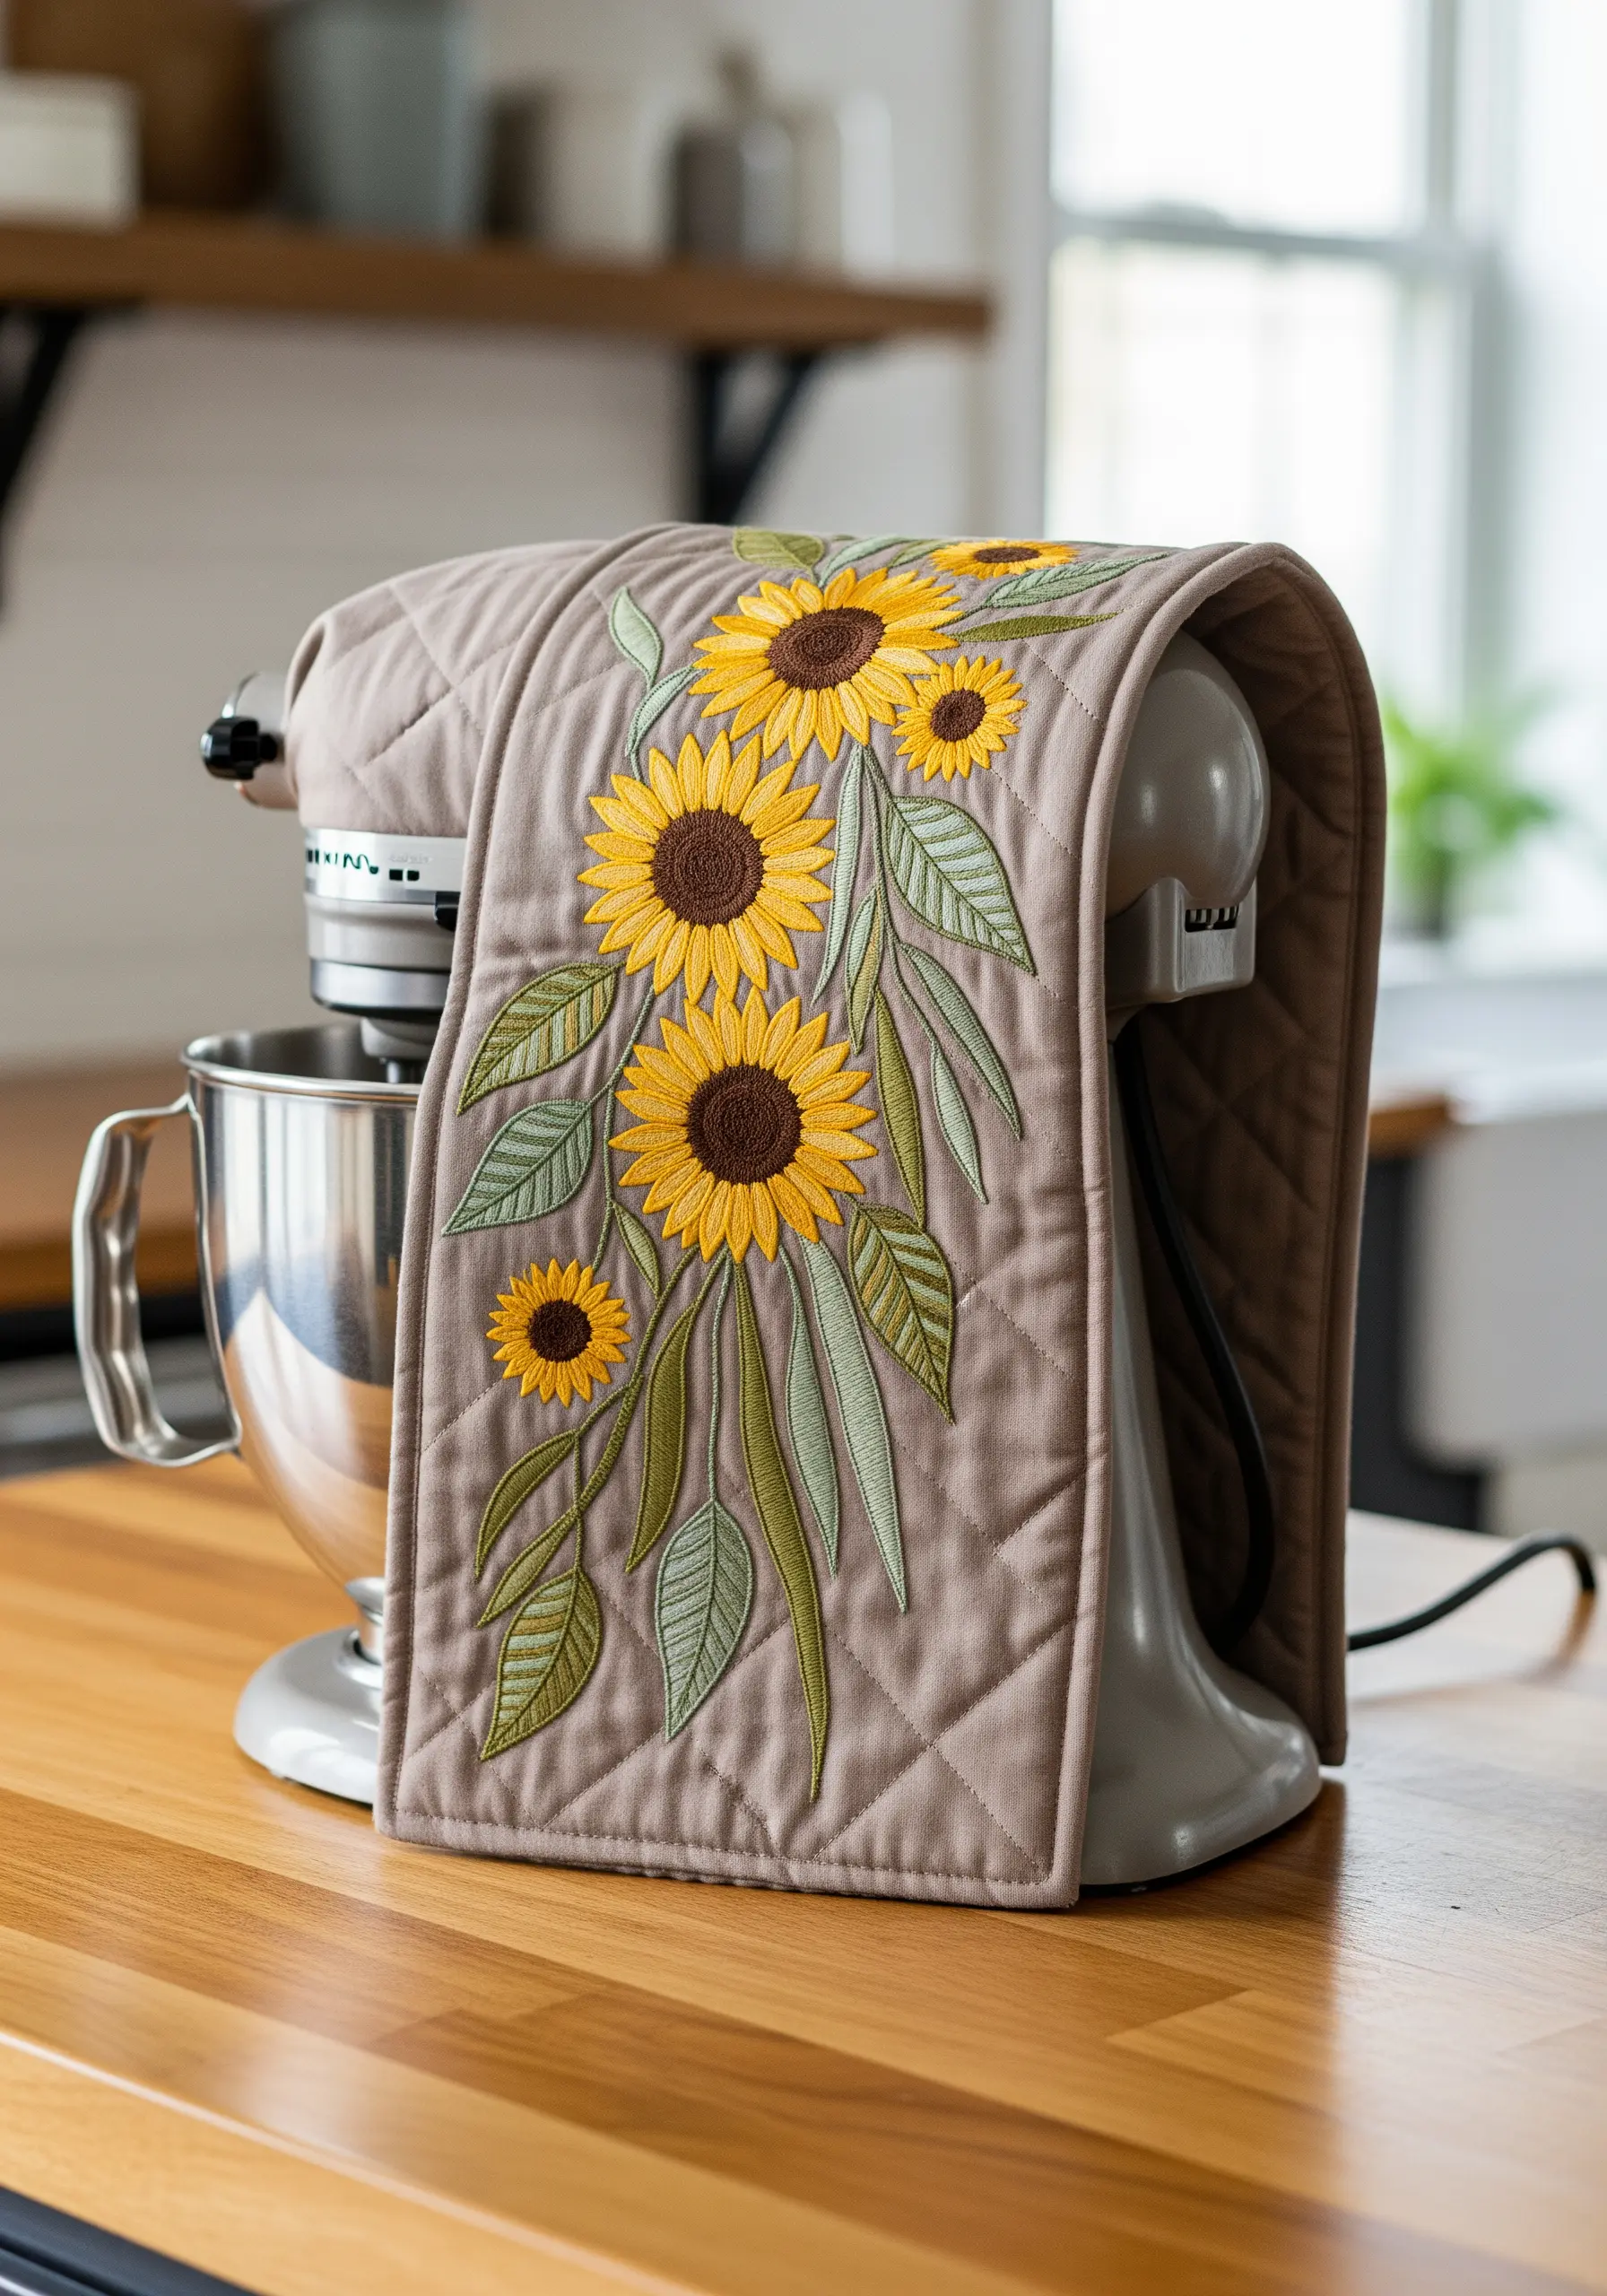
When covering a large or unconventionally shaped surface like a mixer cover, a dynamic composition is key.
Create a sense of natural, downward movement by arranging your sunflowers in a gentle S-curve. Vary the size and orientation of the flowers, and allow leaves to overlap the blooms to build realistic depth.
Incorporate a mix of techniques—such as combining satin-stitched flowers with appliqué leaves—to add visual interest and textural variety to the large-scale design.
14. Paint a Vibrant Landscape with Thread
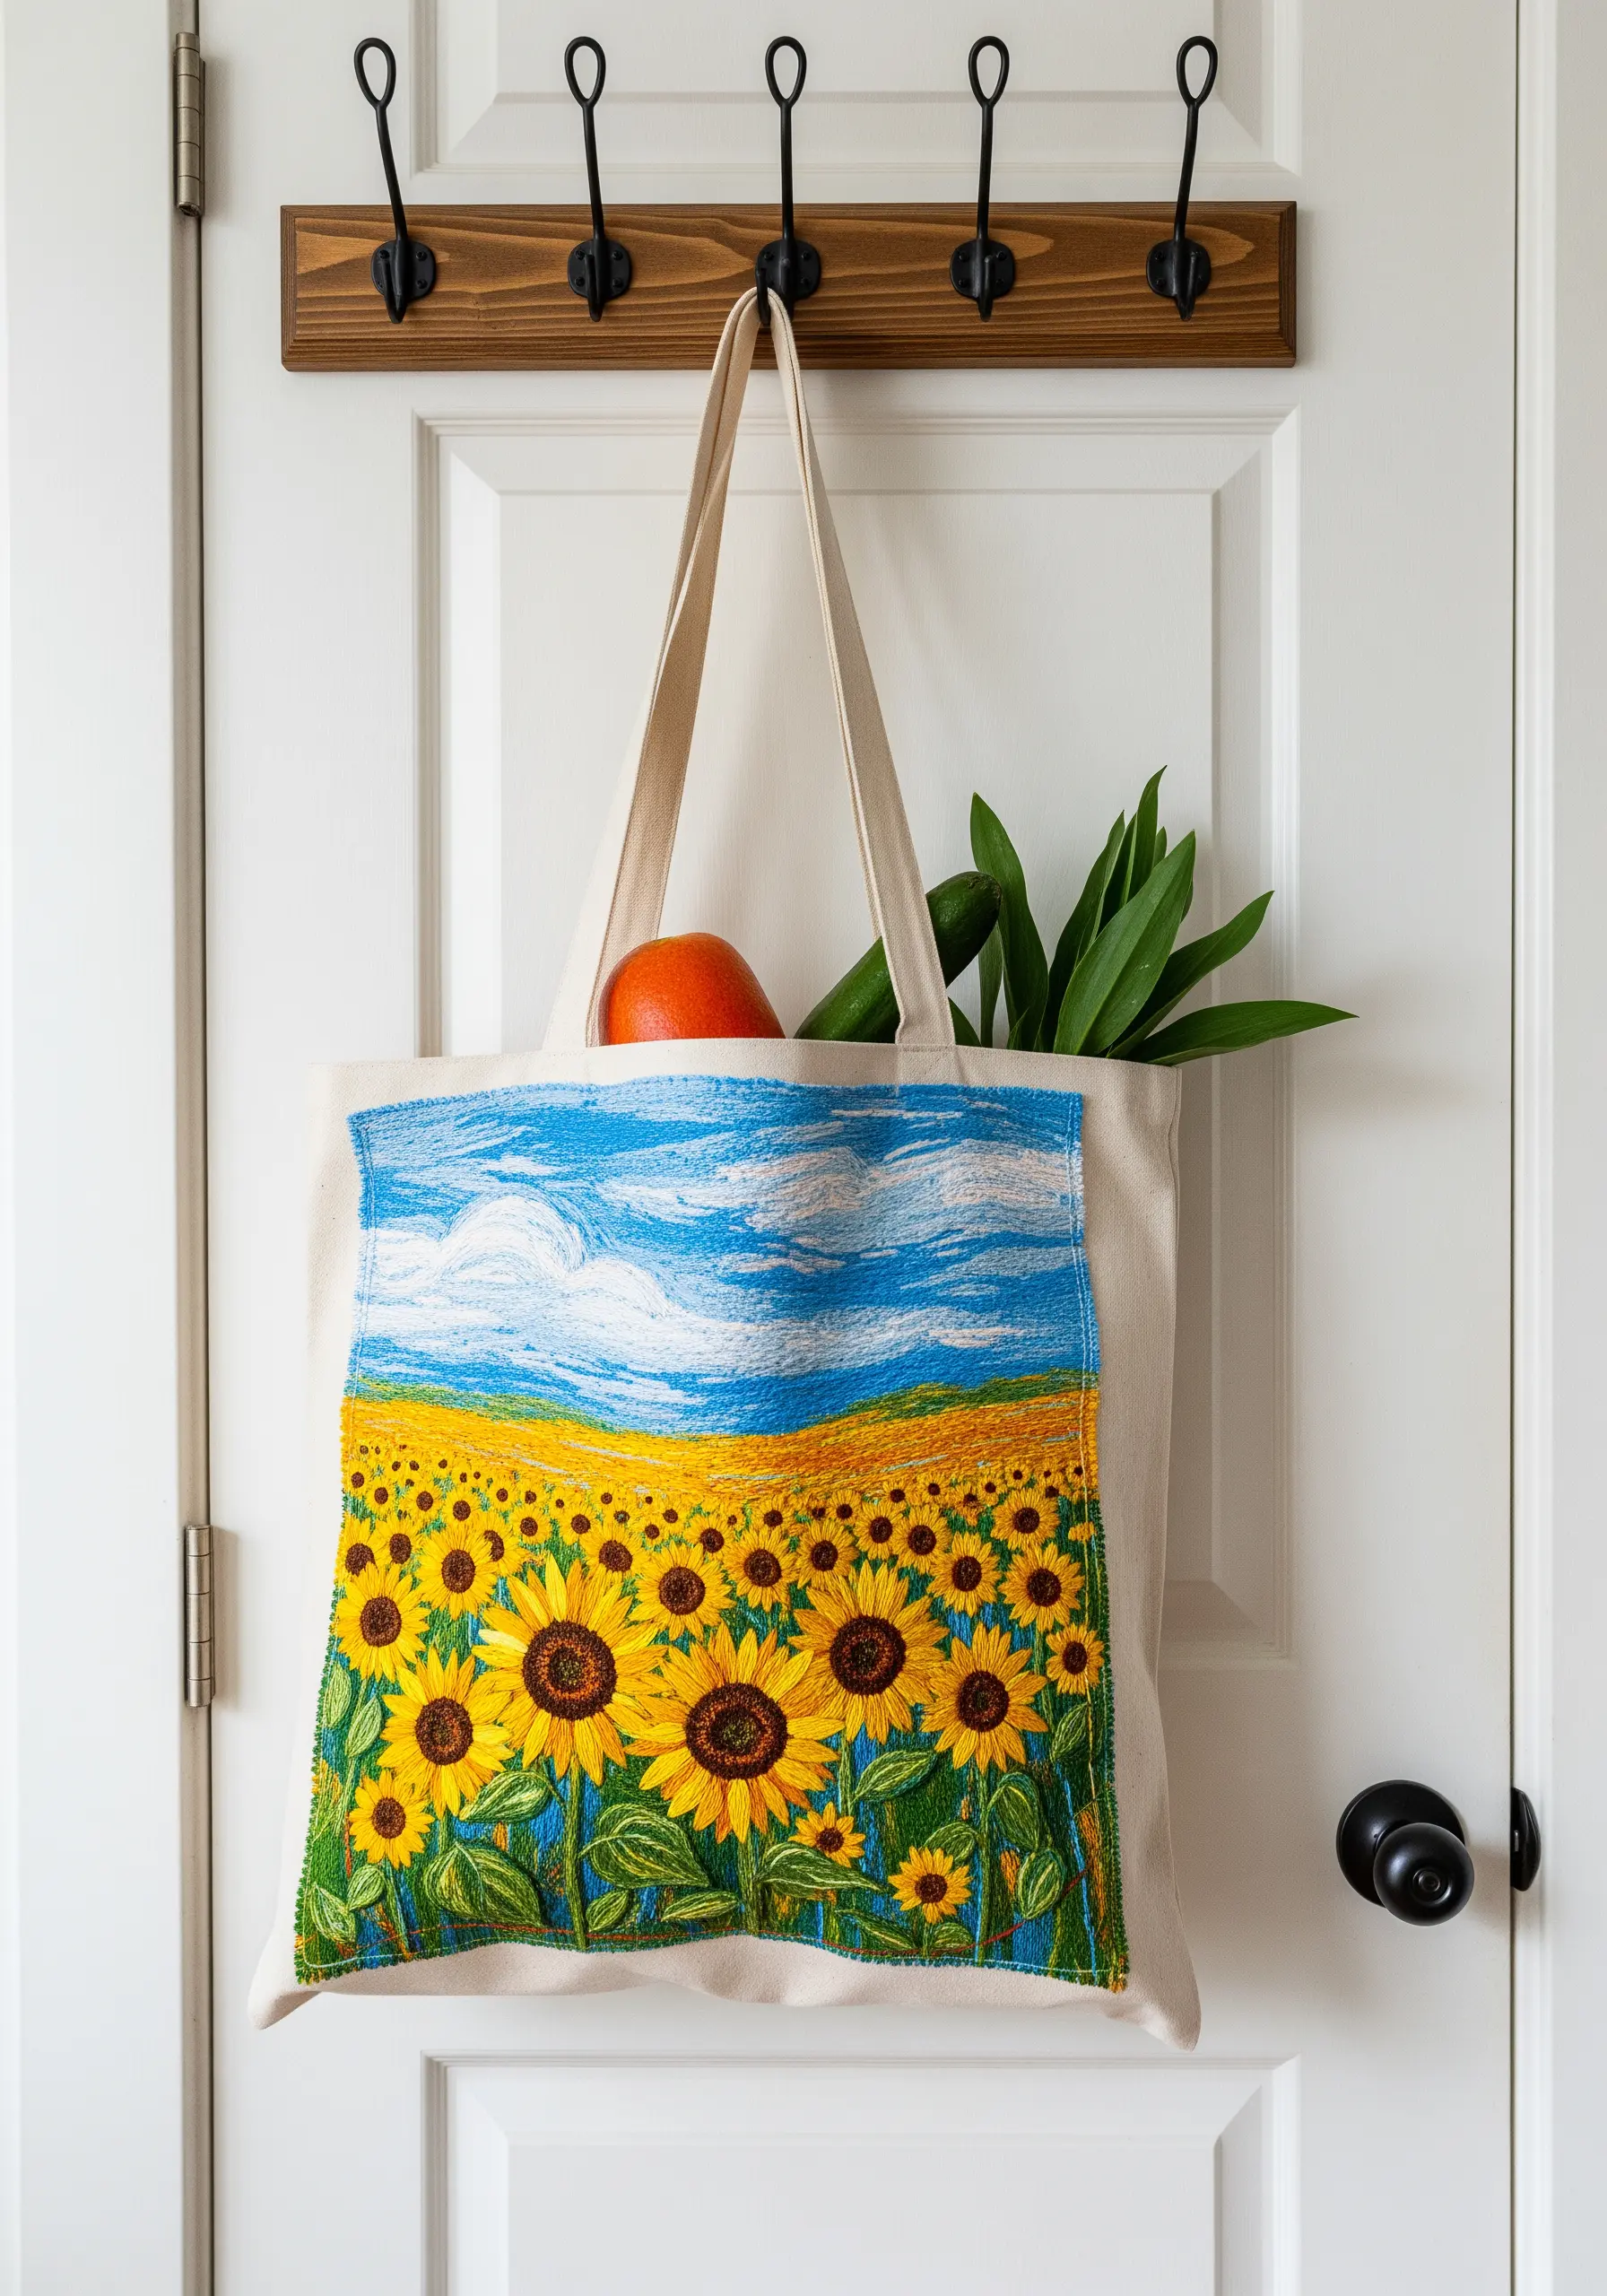
Capture the feeling of a vast sunflower field by using thread painting techniques that prioritize texture and color over precise detail.
Use long, directional straight stitches for the sky to evoke a sense of sweeping clouds and light. For the field itself, create an impressionistic texture with a dense mix of French knots, short straight stitches, and lazy daisies in various yellows, golds, and browns.
Focus on creating sharp detail only in the foreground flowers; allow the background to blur into a beautiful tapestry of color and texture to create a convincing sense of perspective.
15. Create Graphic Impact with Stark Lines on Felt
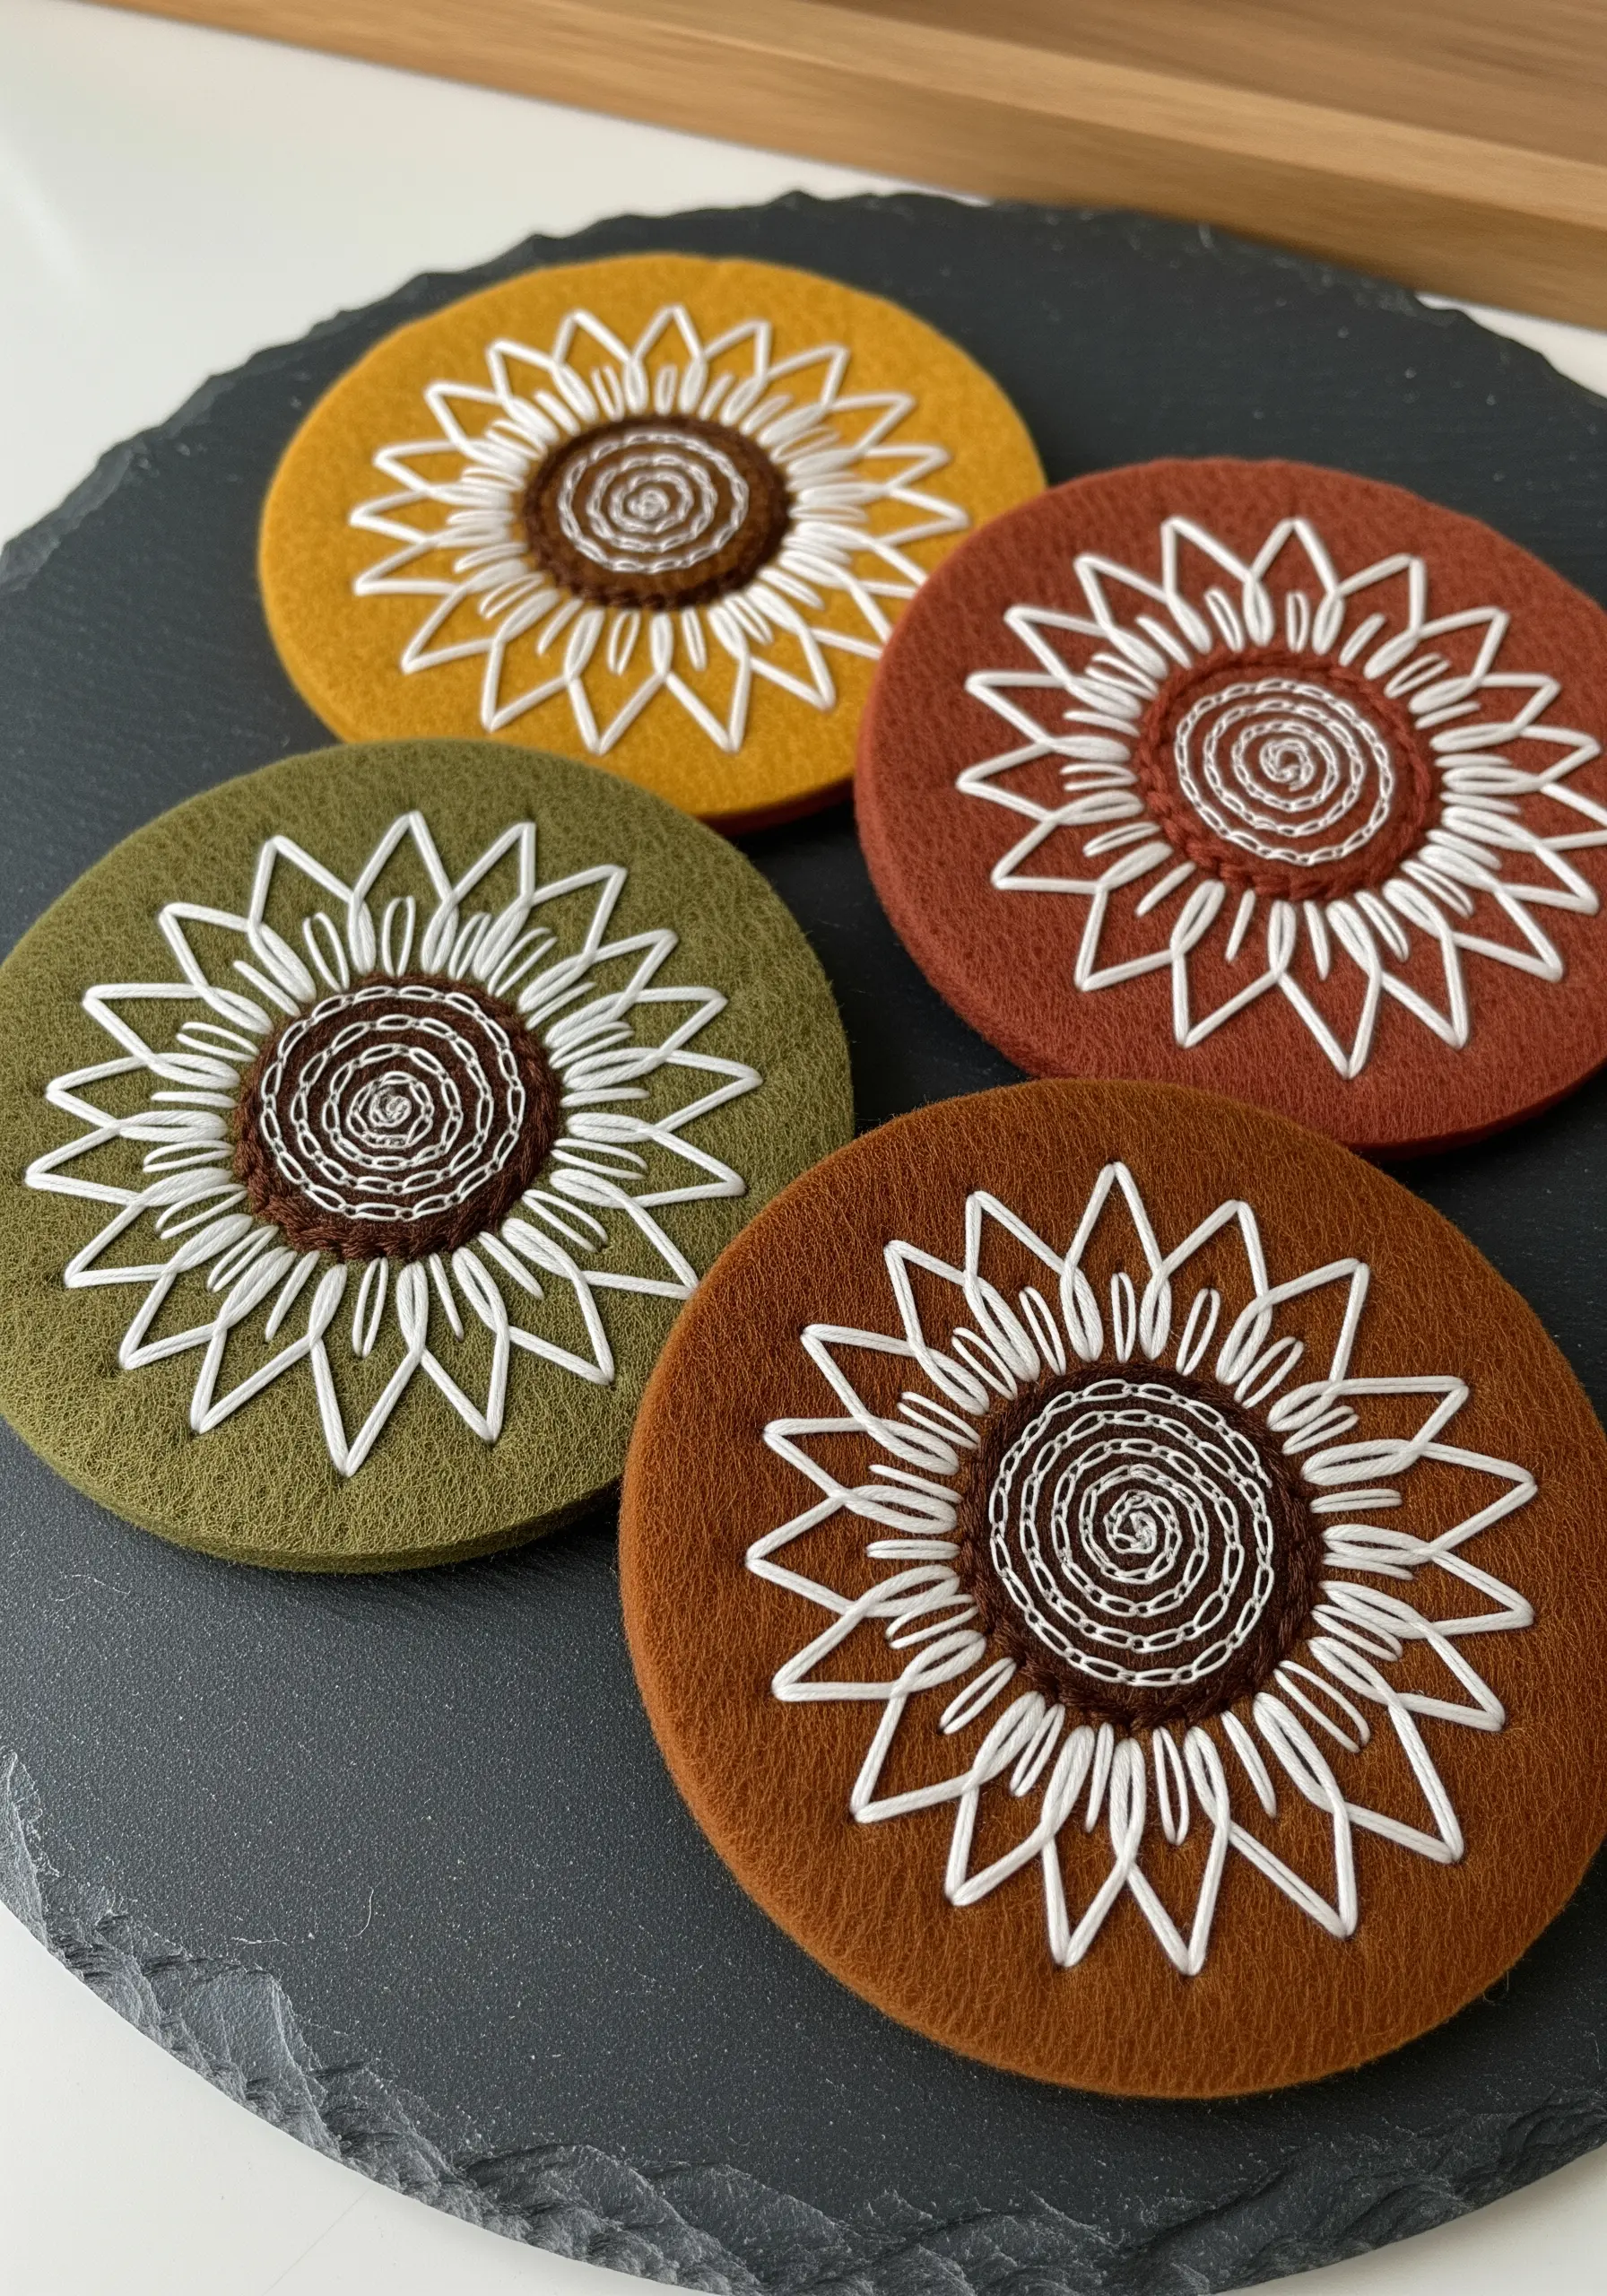
Felt is the perfect canvas for modern, graphic embroidery because its stable, non-fraying nature allows clean lines to take center stage.
Use a thick, contrasting thread, like white perle cotton on earthy-toned felt, to make every stitch count. A simple backstitch or stem stitch is all you need to create the bold, geometric petals.
For the center, a spiral of chain stitch or couched yarn adds a focal point of texture that complements the stark simplicity of the outlines.
This minimalist approach celebrates the beauty of the line itself.
16. Master the Elegance of Single-Color Botanical Art
You can achieve a remarkably sophisticated look by stripping your design down to a single color of thread on a contrasting fabric.
This technique elevates the importance of your stitch quality. Use a meticulous backstitch to create flawless, clean outlines for your botanical line art.
Instead of a solid satin stitch, use a scattered seed stitch to fill the petals. This adds a light, hand-drawn texture that feels more delicate and modern than a dense fill, maintaining the design’s airy quality.
17. Frame a Functional Board with Embroidered Fabric
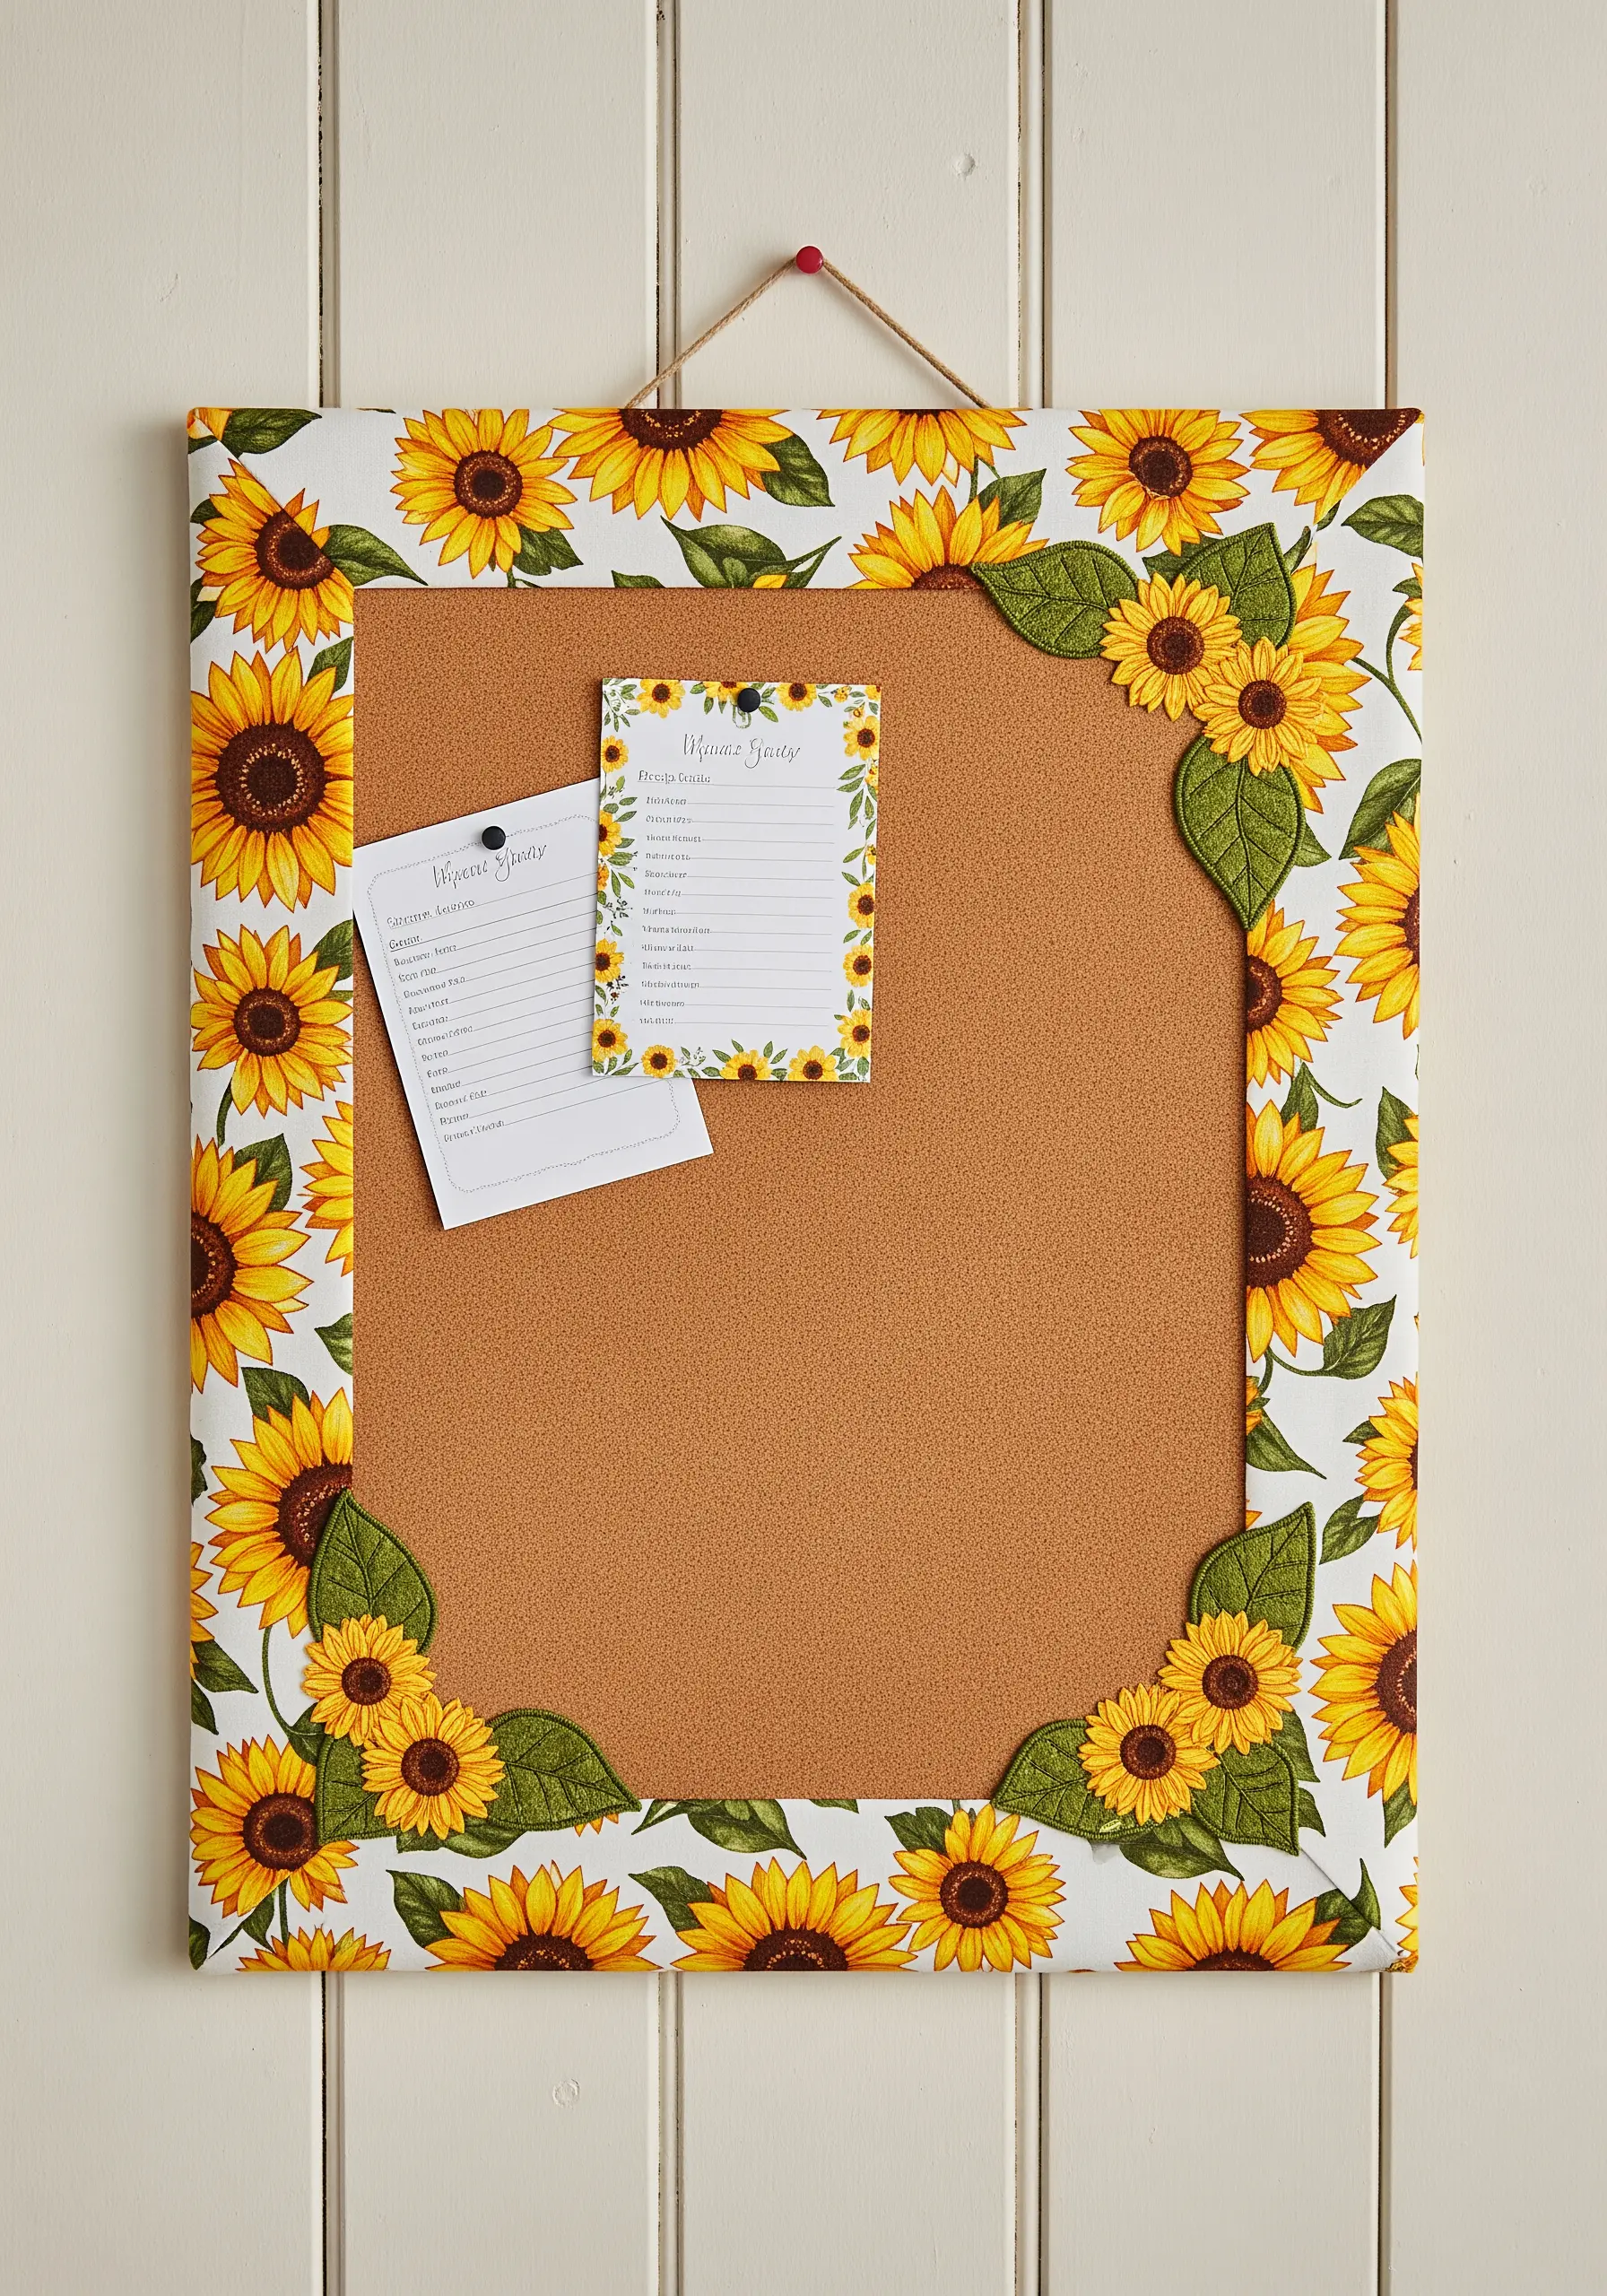
Elevate a plain kitchen corkboard into a piece of custom décor.
Instead of using pre-printed fabric, create your own by embroidering a repeating sunflower pattern onto strips of durable cotton or linen. A simple satin stitch motif is perfect for this.
Carefully wrap and secure these embroidered strips around the board’s frame. To add a final touch of dimension, stitch larger leaves onto felt, cut them out, and appliqué them onto the corners where the frame meets.
This layered approach turns a basic office supply into a charming and functional piece of kitchen art.
18. Engineer a Delicate and Durable Bookmark
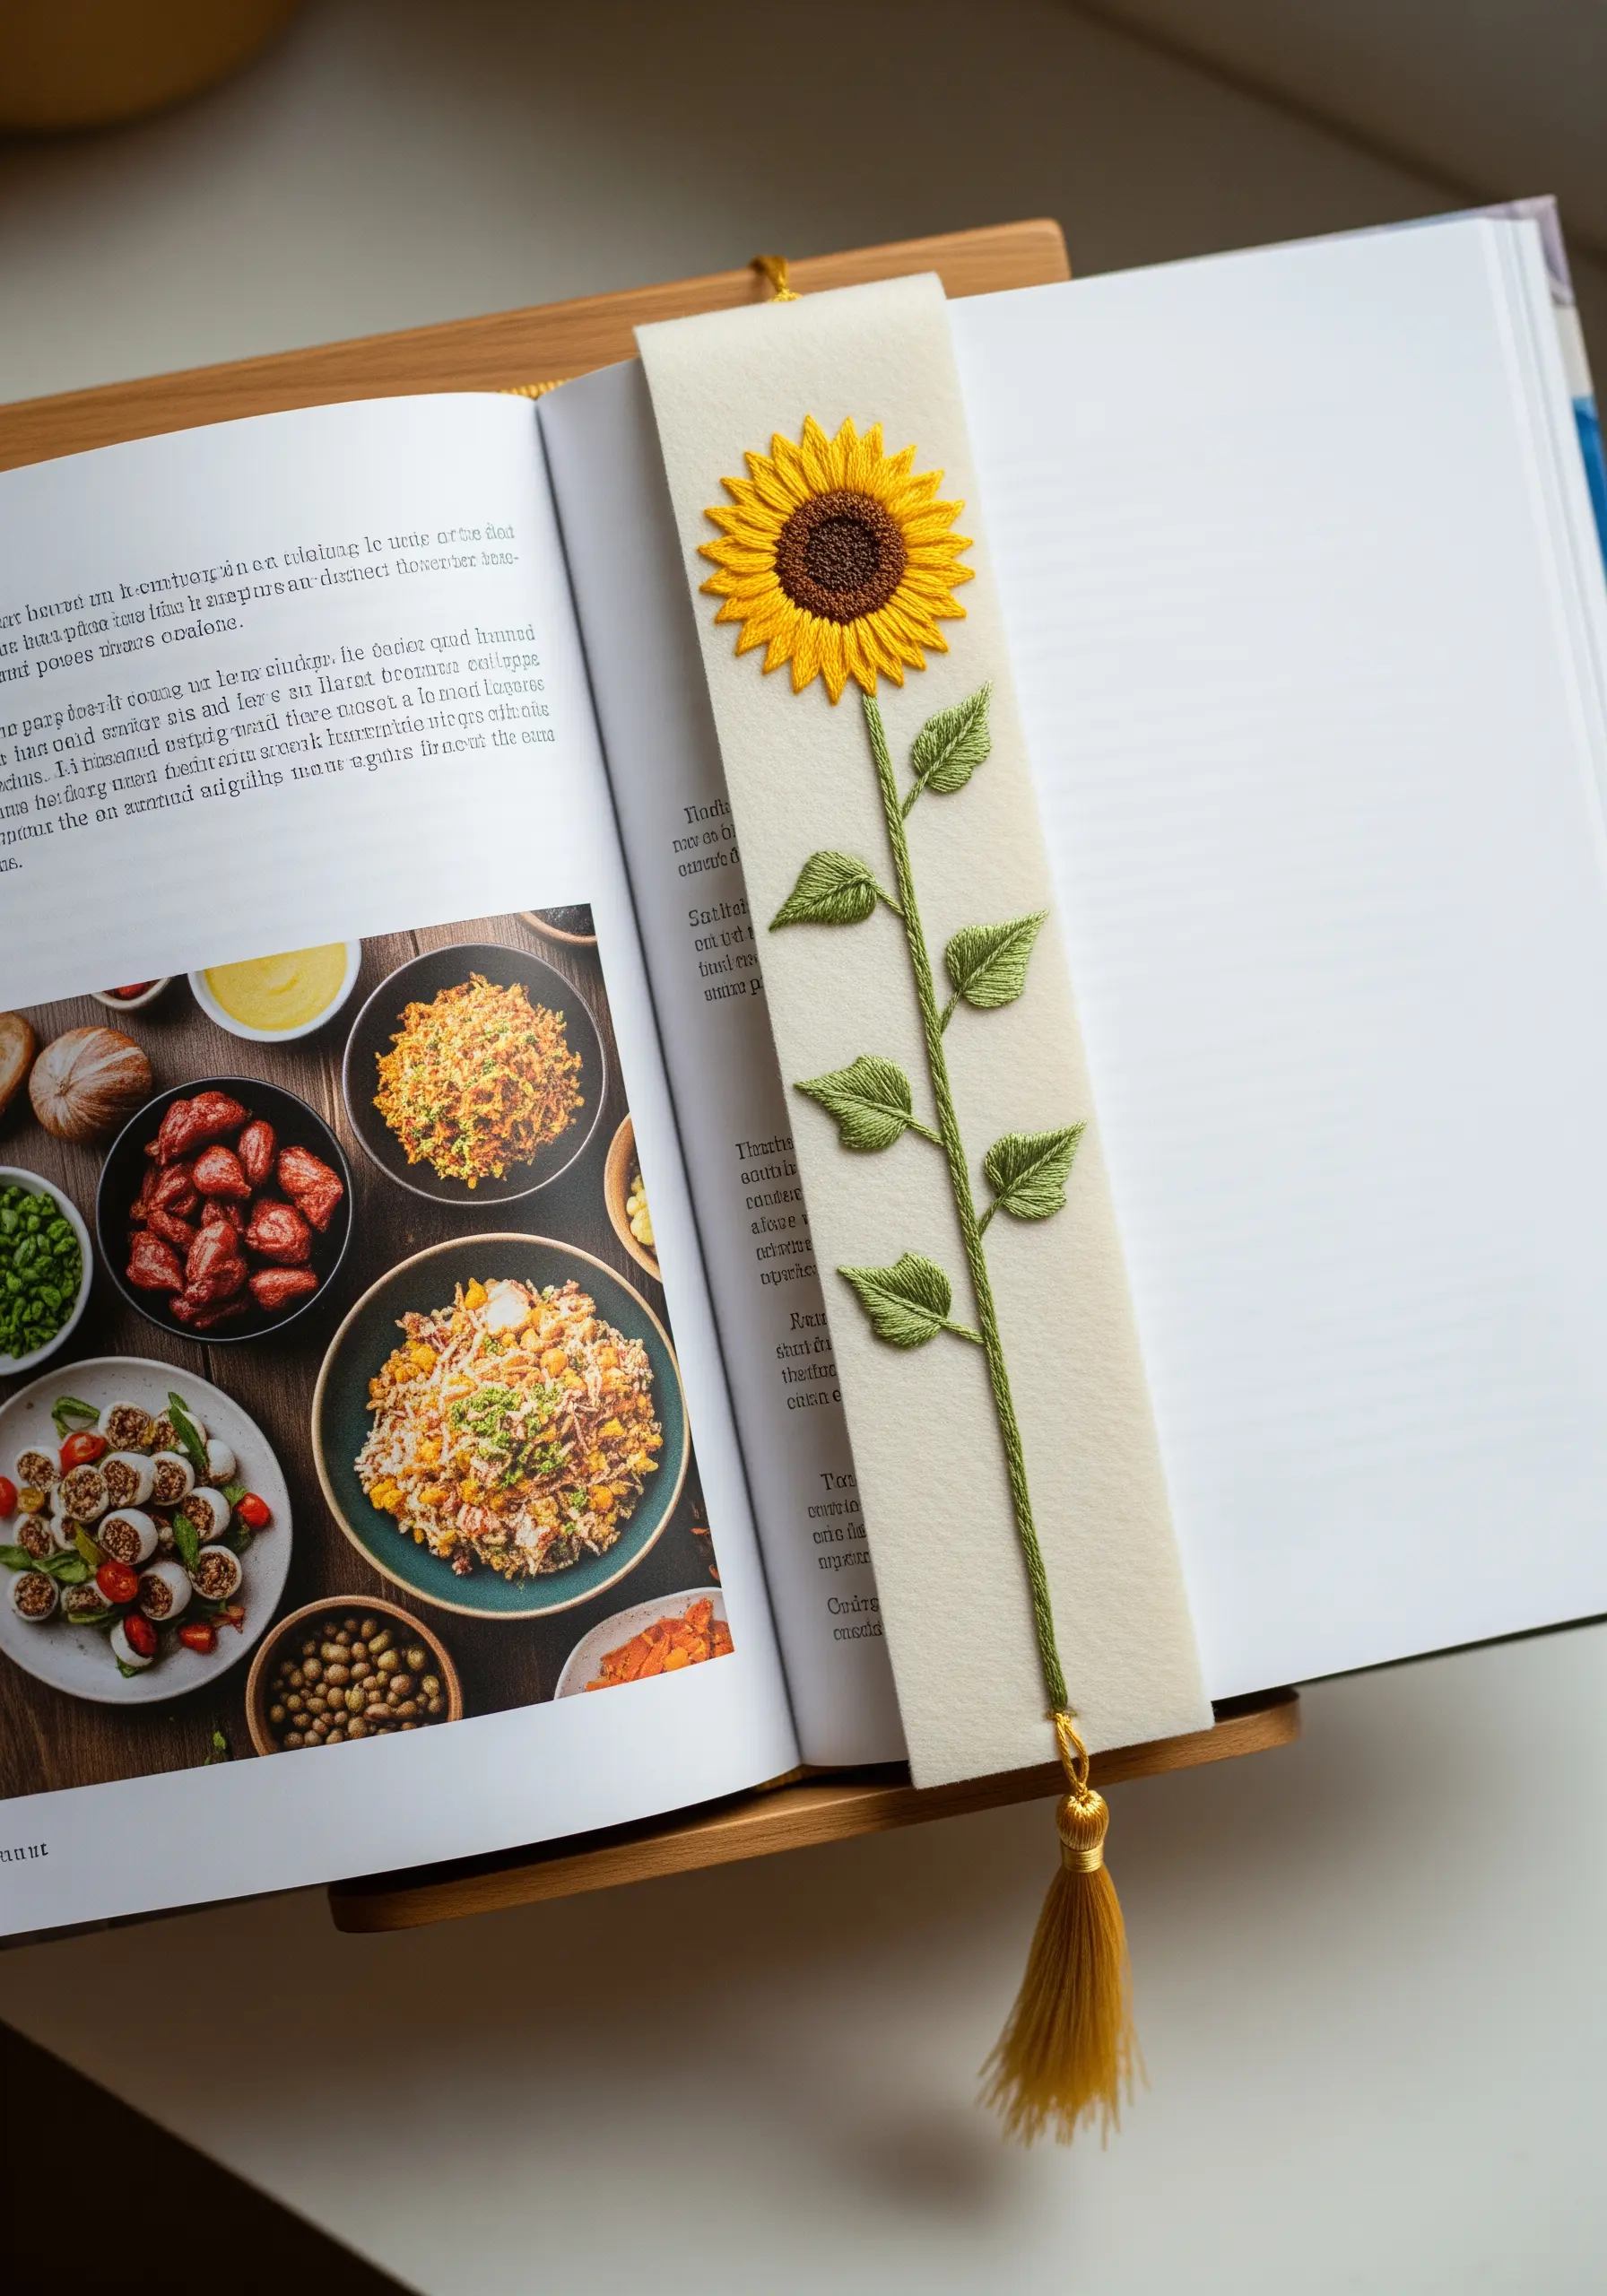
A successful bookmark must be both beautiful and sturdy. Achieve this by stitching your design on a top layer of felt, then backing it with a second layer for stability.
For the long, slender stem, use a whipped backstitch. This technique covers the segmented look of a basic backstitch, creating a smooth, solid line that resembles a delicate cord.
Use a fishbone stitch for the leaves to create a clean, central vein and a natural shape. A neat blanket stitch around the entire bookmark’s edge is the perfect way to join the layers and provide a professional finish.
19. Build a Textured Border with Appliqué and Knots
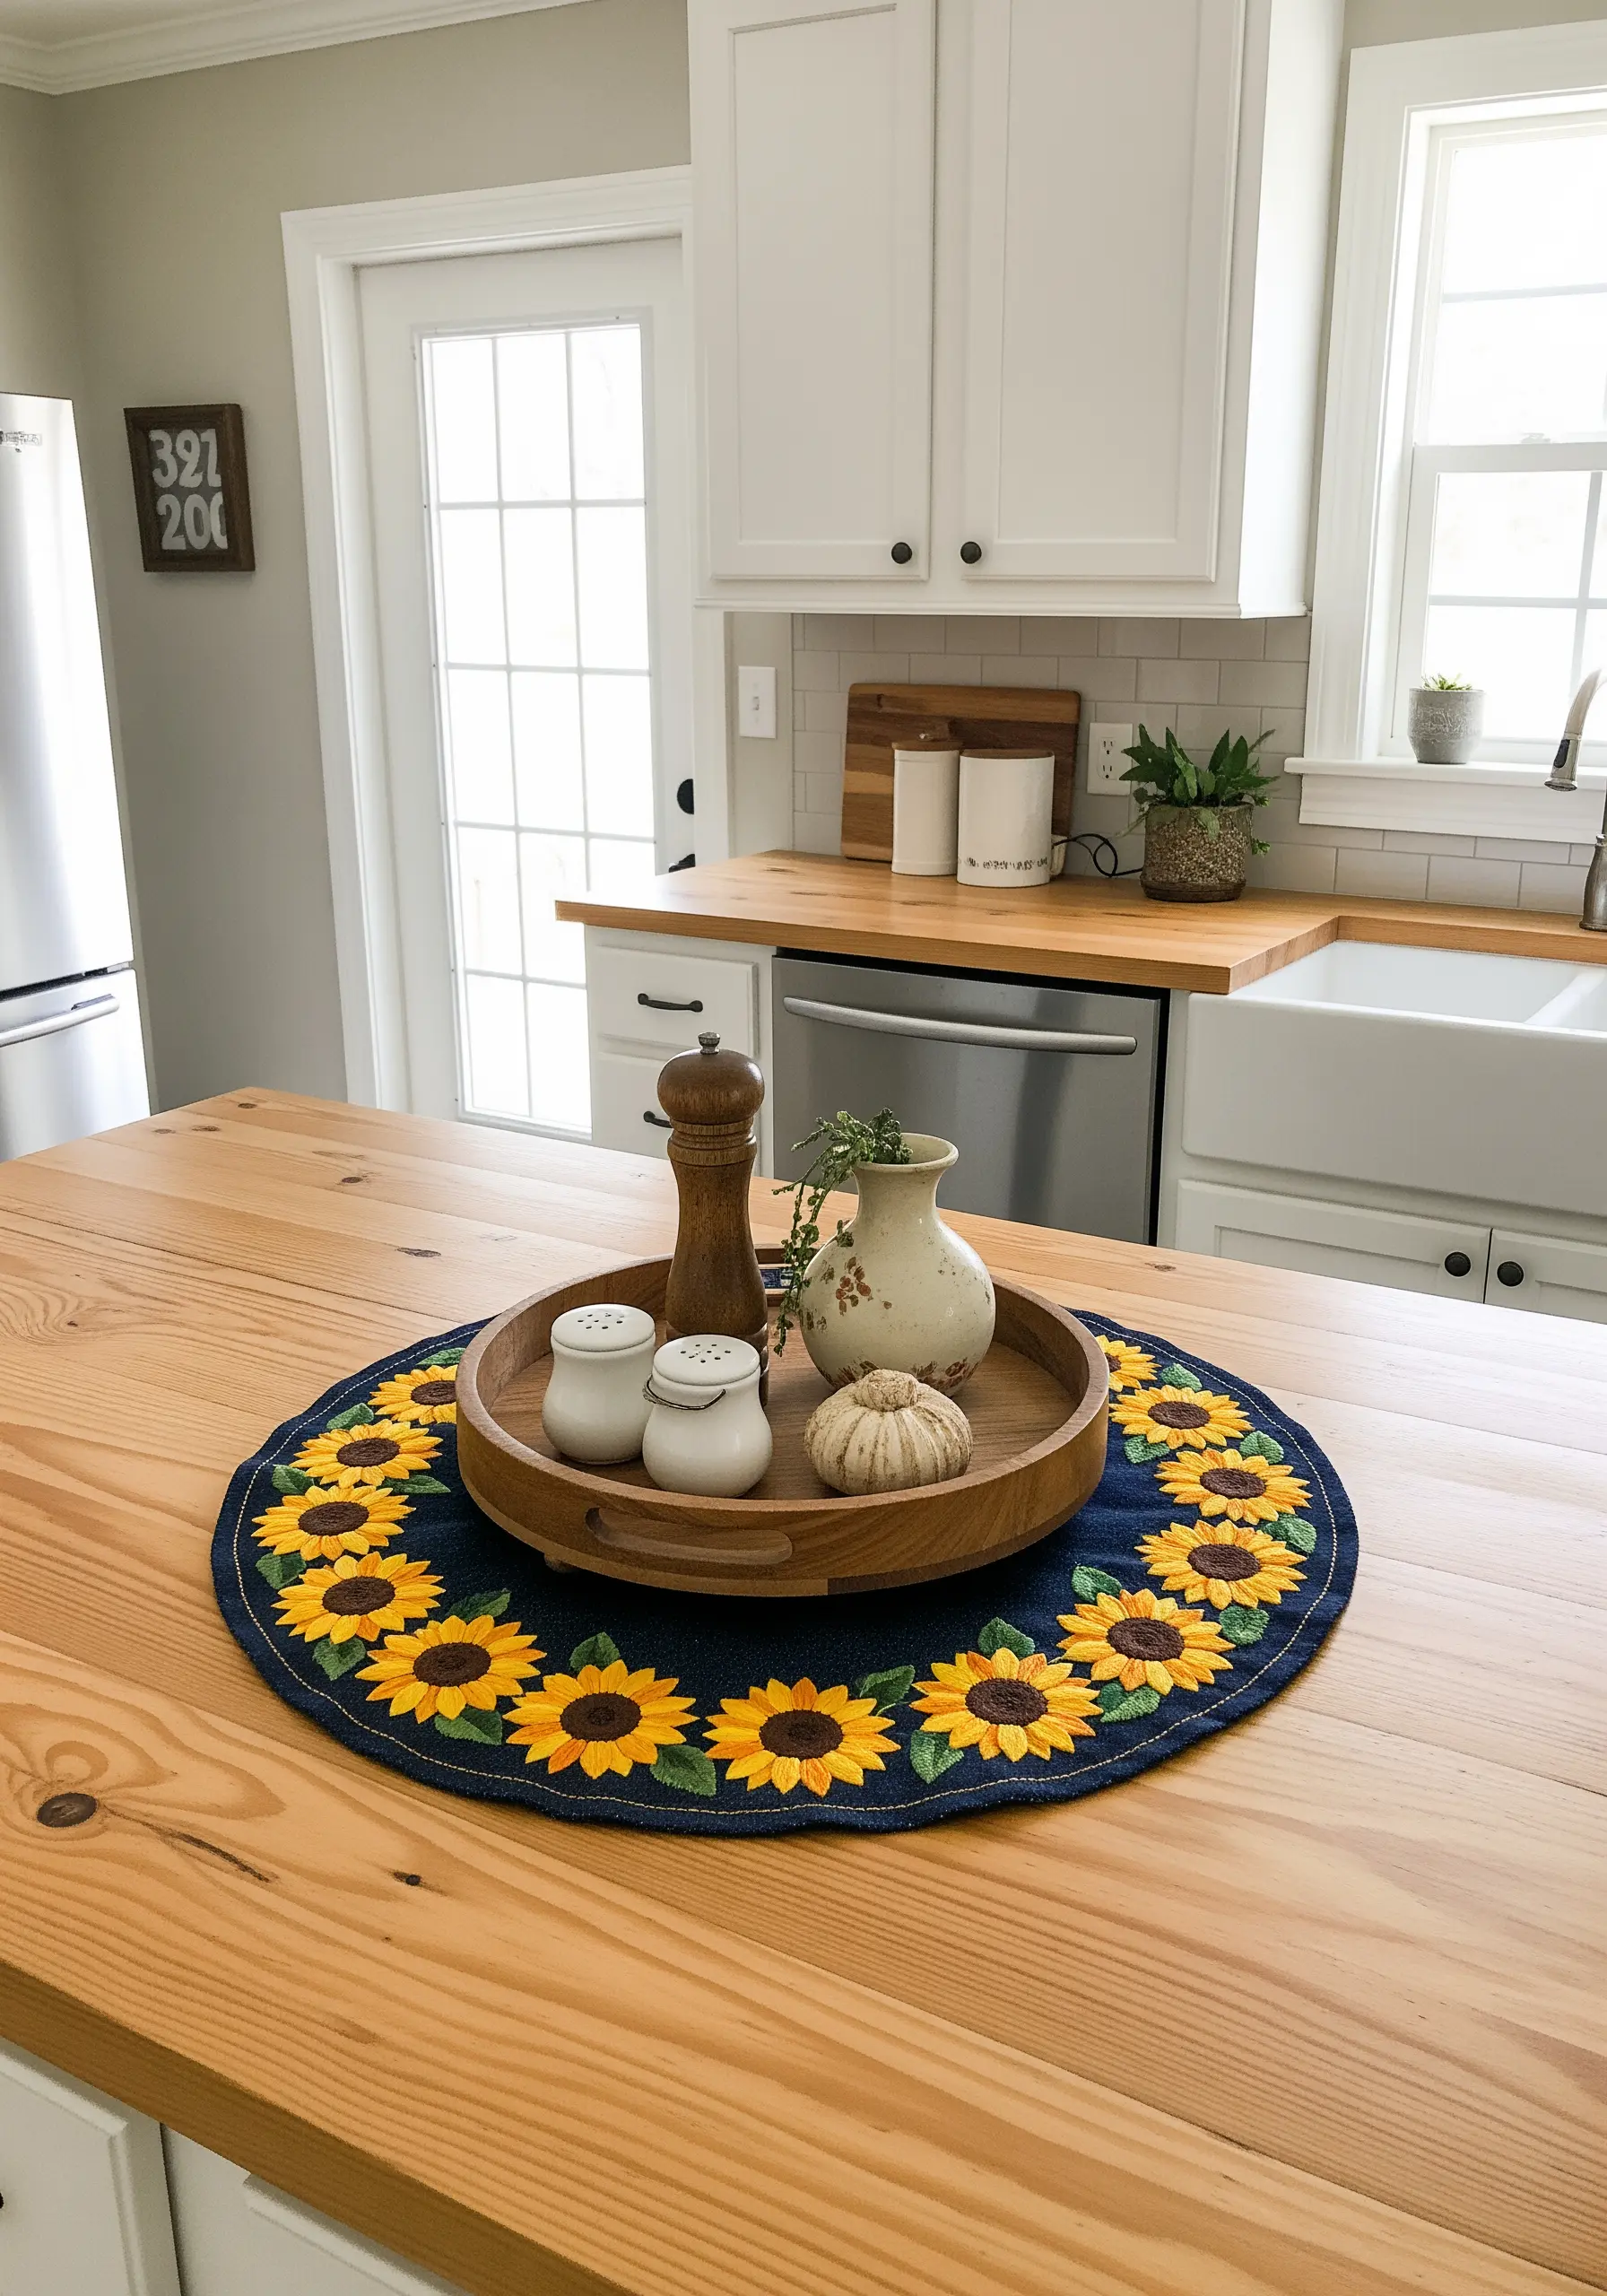
Create a vibrant, dimensional border for a centerpiece mat by combining appliqué with embroidery.
Cut your petal shapes from yellow felt or non-fraying cotton and attach them to the base fabric with a simple running stitch. This method is much faster than filling each petal with satin stitch and creates instant height.
Directly onto the navy base, stitch a dense circle of brown French knots to form the flower’s center. The contrast between the flat fabric, raised appliqué, and knotted texture creates a visually dynamic and engaging design.