You already know the intimate language of thread on fabric—the steady rhythm of the needle, the gradual bloom of color with each stitch. But what happens when you invite a new texture, a new surface, into that conversation?
Think of paper not as a replacement for fabric, but as its creative partner. It offers structure where fabric is soft, crispness where thread is yielding, and a new ground for your stitches to explore. From the delicate surface of handmade paper to the rigid plane of cardstock, each sheet presents a unique opportunity.
These techniques are not about mere novelty; they are about expanding your artistic vocabulary. You will learn how to use paper to create dimensional forms, build narrative layers, and frame your work with intention. It’s time to transform your embroidery into captivating mixed-media art.
1. Combine Paper Quilling with Stitched Foliage

Move beyond flat florals by introducing paper quilling for your main blossoms and reserving thread for the delicate leaves and stems.
Use a slotted quilling tool to roll thin paper strips into tight coils for flower centers and looser coils for petals, securing each with a dab of PVA glue.
This technique creates a stunning dimensional contrast: the sculptural, solid paper flowers pop against the softer, textural quality of stitched greenery.
Anchor your quilled shapes directly onto the fabric with a strong craft glue before you begin stitching the surrounding elements, ensuring your composition feels integrated and secure.
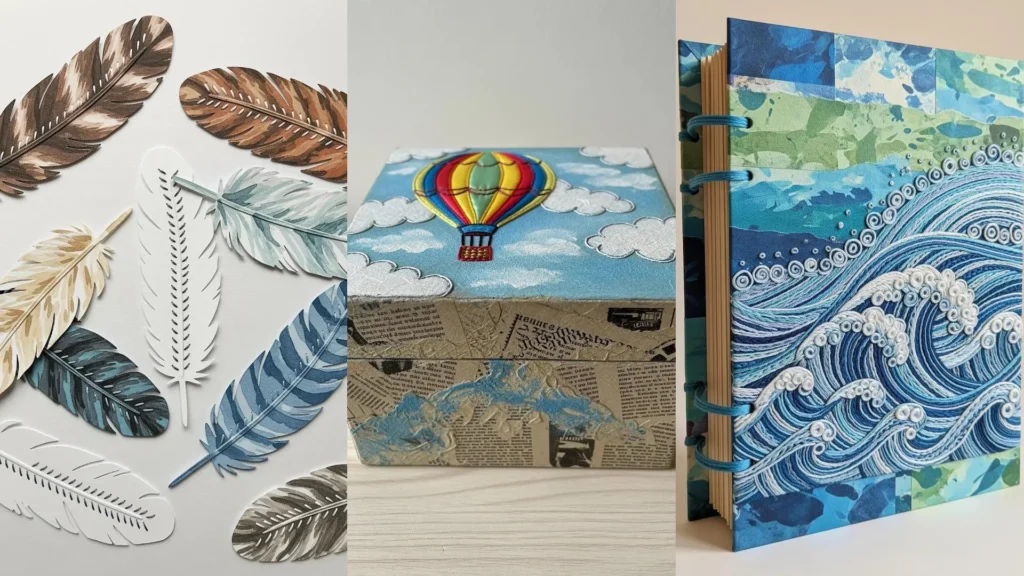
The result elevates standard abstract floral embroidery hoops into captivating mixed-media pieces.
2. Use Cardstock as a Canvas for Geometric String Art

Swap your fabric for a grid of colored cardstock to explore the clean, architectural lines of string art.
Mount textured paper squares onto a sturdy board, then pierce guide holes along the edges of each square with an awl or a thick needle.
Stretch thread between these points to create fans, lines, and geometric shapes. The tension of the thread against the rigid paper is what creates those impeccably straight lines that are difficult to achieve on soft fabric.
This method allows you to build complex, layered architectural string art designs with a graphic, modern finish.
3. Frame Stitched Motifs with Paper Decoupage

Isolate and elevate a single embroidered motif by stitching it onto a central piece of high-quality cardstock.
Instead of a traditional hoop, create a border using decoupage techniques with patterned paper napkins or delicate floral paper.
This turns your embroidery into a finished art piece, reminiscent of a Victorian-era specimen card, giving it immediate presence and polish.
The contrast between the lustrous, dimensional thread and the flat, printed paper frame makes the stitched texture the undeniable focal point.
These become elegant framed embroidery artworks that feel both classic and unique.
4. Create Narrative Scenes with Origami and Thread

Tell a story by combining the delicate art of origami with the subtle power of a stitched line.
Fold small origami shapes from decorative paper and arrange them on a dark paper or fabric-covered canvas to create a sense of movement.
Use a simple backstitch or running stitch with a metallic or contrasting thread to add flight paths, wind currents, or cloud outlines.
Secure the origami pieces with a hidden stitch or a tiny dot of archival glue. This technique is one of the most effective paper art DIYs to display embroidery with dynamic, three-dimensional energy.
5. Add Stitched Accents to Intricate Papercuts

Integrate embroidery into delicate papercutting (Scherenschnitte) to add focal points of light and texture.
After cutting your design from a single sheet of paper with a craft knife, use a fine needle to add tiny details like French knots for stars or seed stitches for floral centers.
Work carefully to avoid tearing the paper. Use just one or two strands of metallic or light-colored floss to create a subtle shimmer against the stark silhouette.
This thoughtful combination transforms a papercut into a piece of enchanting mixed-media art, perfect for rustic woodland cottage themes.
6. Construct Sculptural Forms with Paper and Thread

Use thread not as a decorative element, but as a structural component to connect and suspend folded paper sculptures.
Create several geometric shapes from heavy cardstock, known as polyhedra, and pierce small holes at their vertices.
Weave a bold, contrasting thread between the forms, pulling it taut to create a tense, web-like structure that holds the entire piece together.
This shifts your work from a 2D surface into a 3D installation, exploring how thread can create volume, tension, and connection in physical space.
It’s one of the more advanced modern thread art techniques that blurs the line between craft and sculpture.
7. Weave Chunky Yarn into Paper Collage Portraits
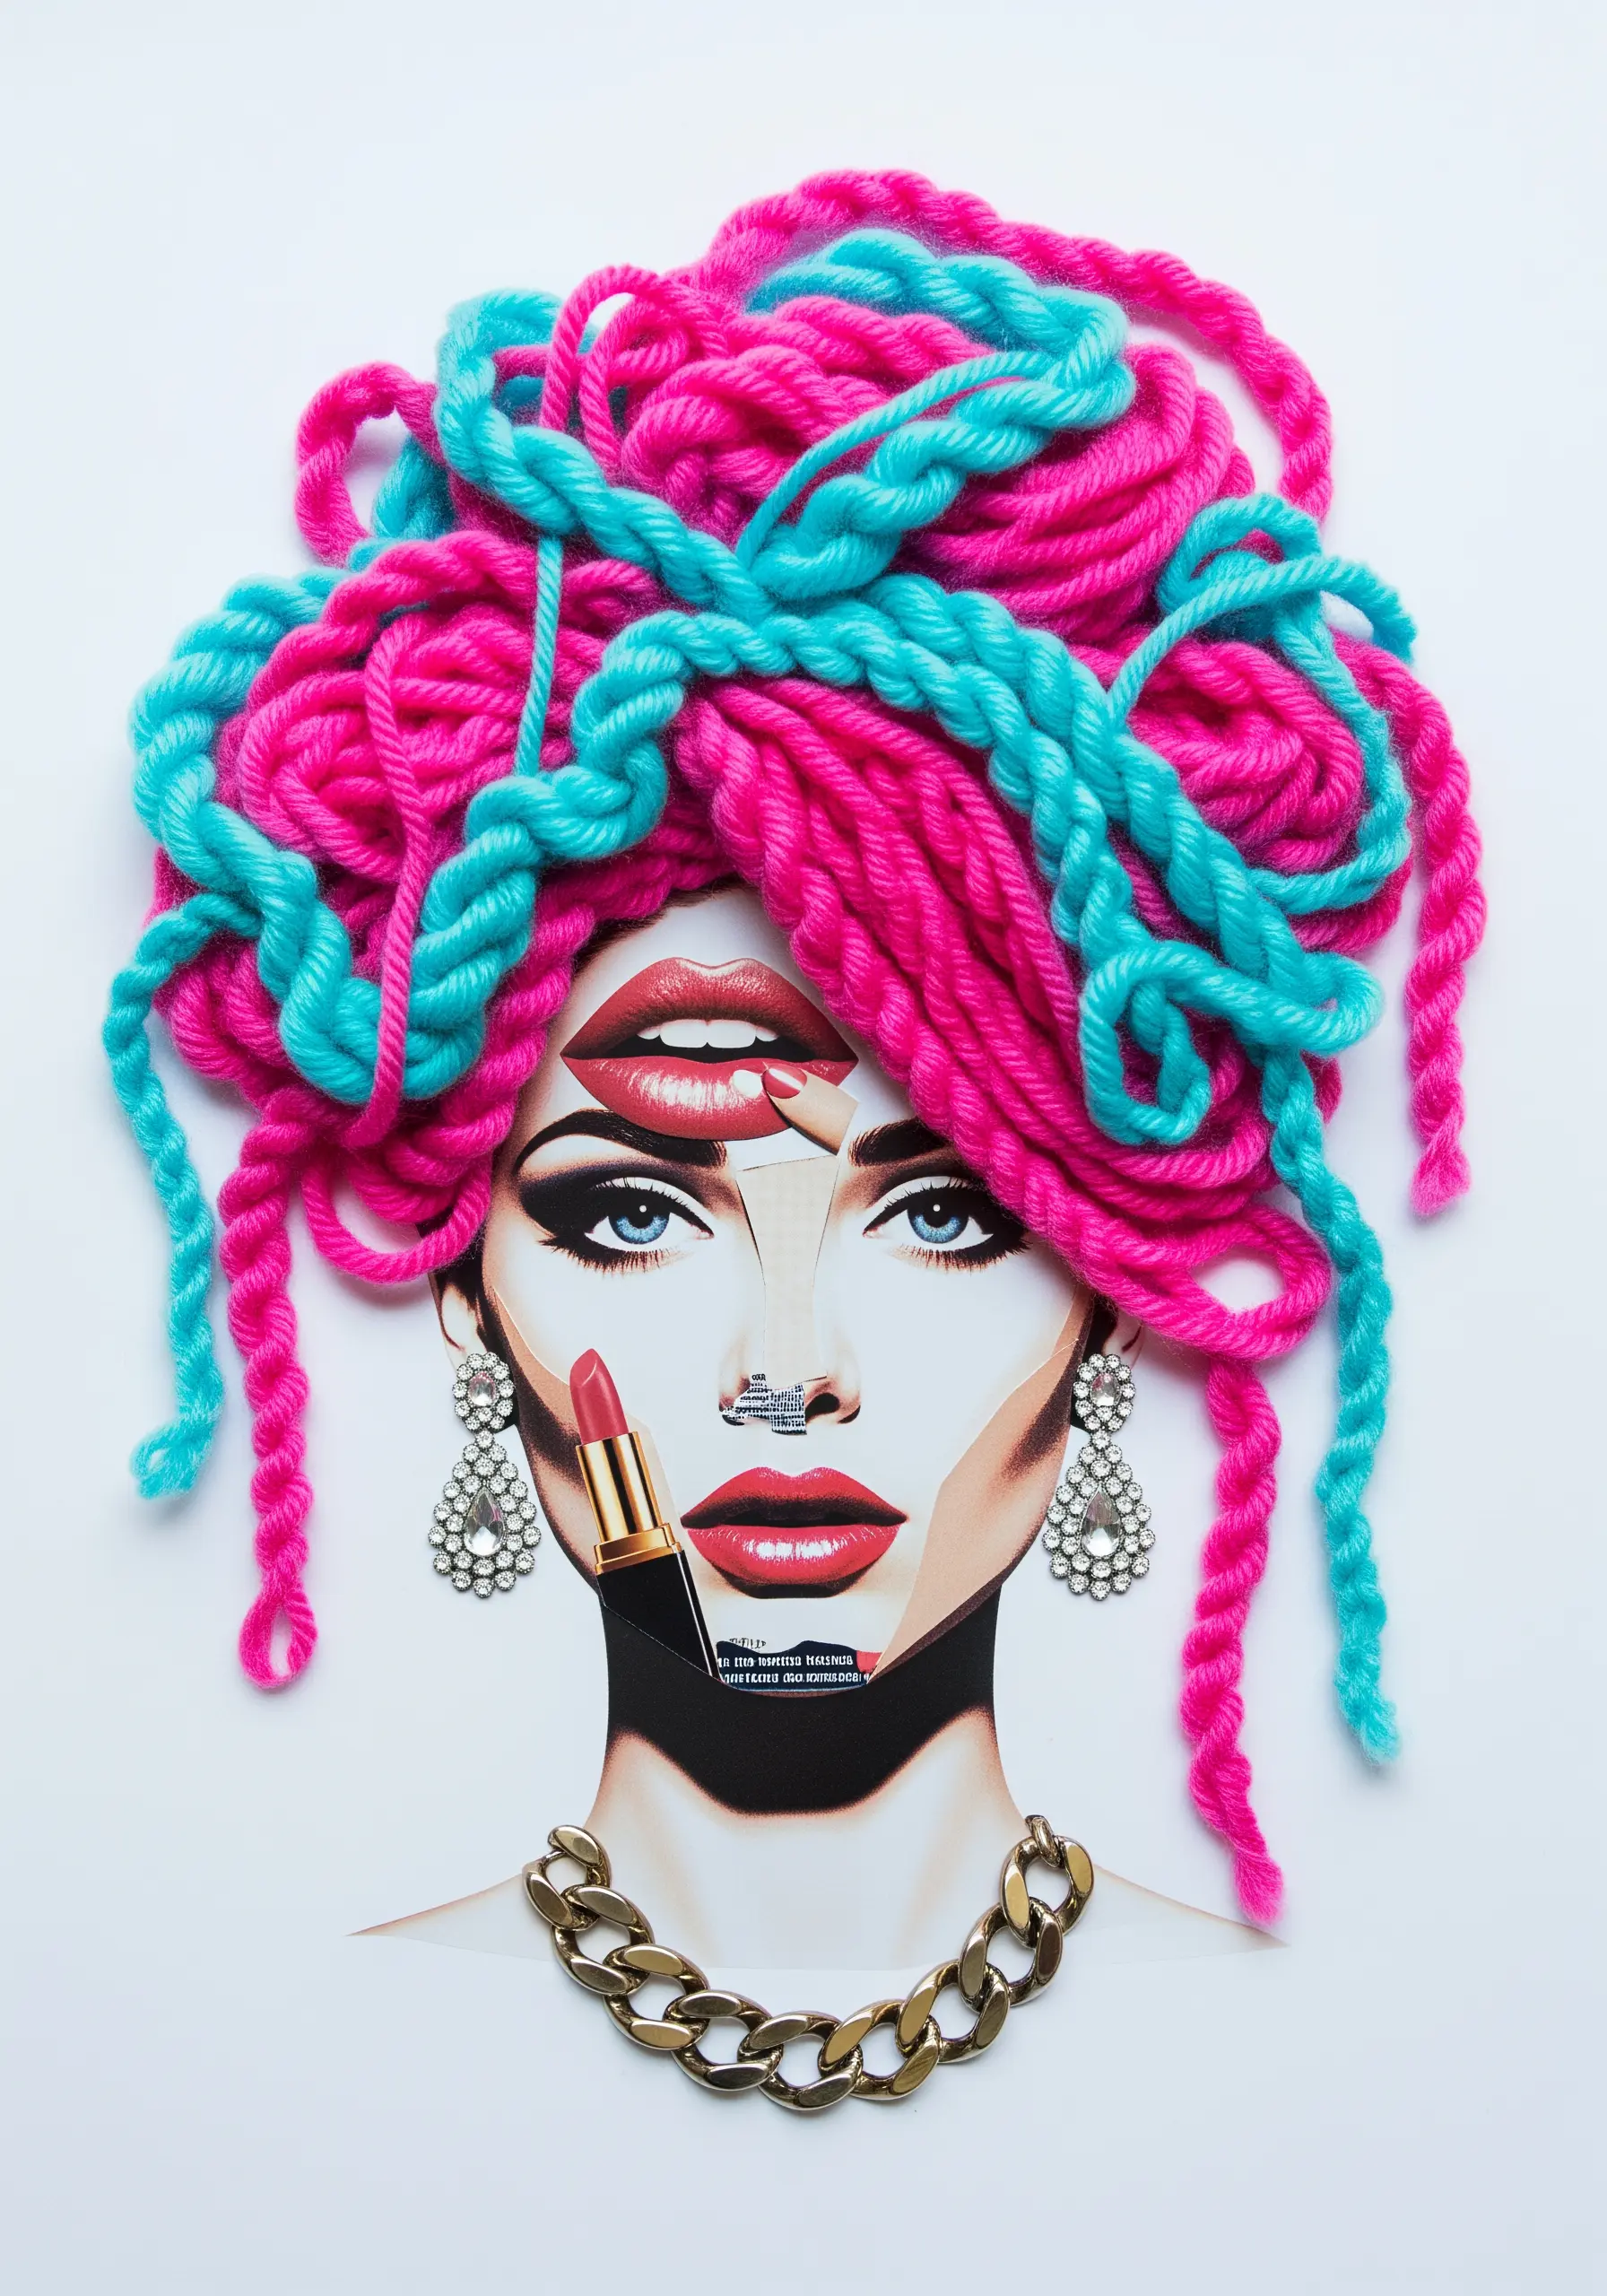
Introduce radical texture to your paper collages by incorporating thick, plush yarn.
Construct a portrait using magazine cutouts, then replace an element—like the hair—with couched or woven yarn.
Attach the yarn by stitching it down with a finer, matching thread or by carefully applying fabric glue to the back of the paper base.
The extreme contrast between the flat, glossy paper and the soft, bulky yarn creates a visually arresting piece that demands to be touched.
It’s a fantastic way to start DIY collage projects that feel vibrant, playful, and expressive.
8. Stitch Constellations onto Handmade Paper

Let the paper itself set the scene by choosing a beautifully textured, handmade sheet as your canvas.
A dark, mottled paper that evokes a night sky is the perfect backdrop for simple, stitched constellations.
Use a fine, light-colored thread and a simple backstitch to trace the star patterns. Add tiny French knots or seed stitches for the stars themselves.
The texture of the paper provides all the depth and atmosphere your piece needs, allowing the minimalist stitching to shine. It’s an ideal way to create minimal sky designs with a rich, organic feel.
9. Embroider a River Through a Paper Landscape

Build a topographical scene using layers of torn or cut colored paper, then introduce thread to represent a single, dynamic element like a river or path.
Use a satin stitch or long-and-short stitch with variegated blue thread to create the impression of flowing water, adding direction and life to the static paper hills.
The thread’s texture and sheen will naturally draw the eye, making it the focal point of your composition.
This technique is one of the best ways to capture nature’s textures by assigning different materials to different natural elements.
10. Trace Embossed Patterns with Delicate Stitches
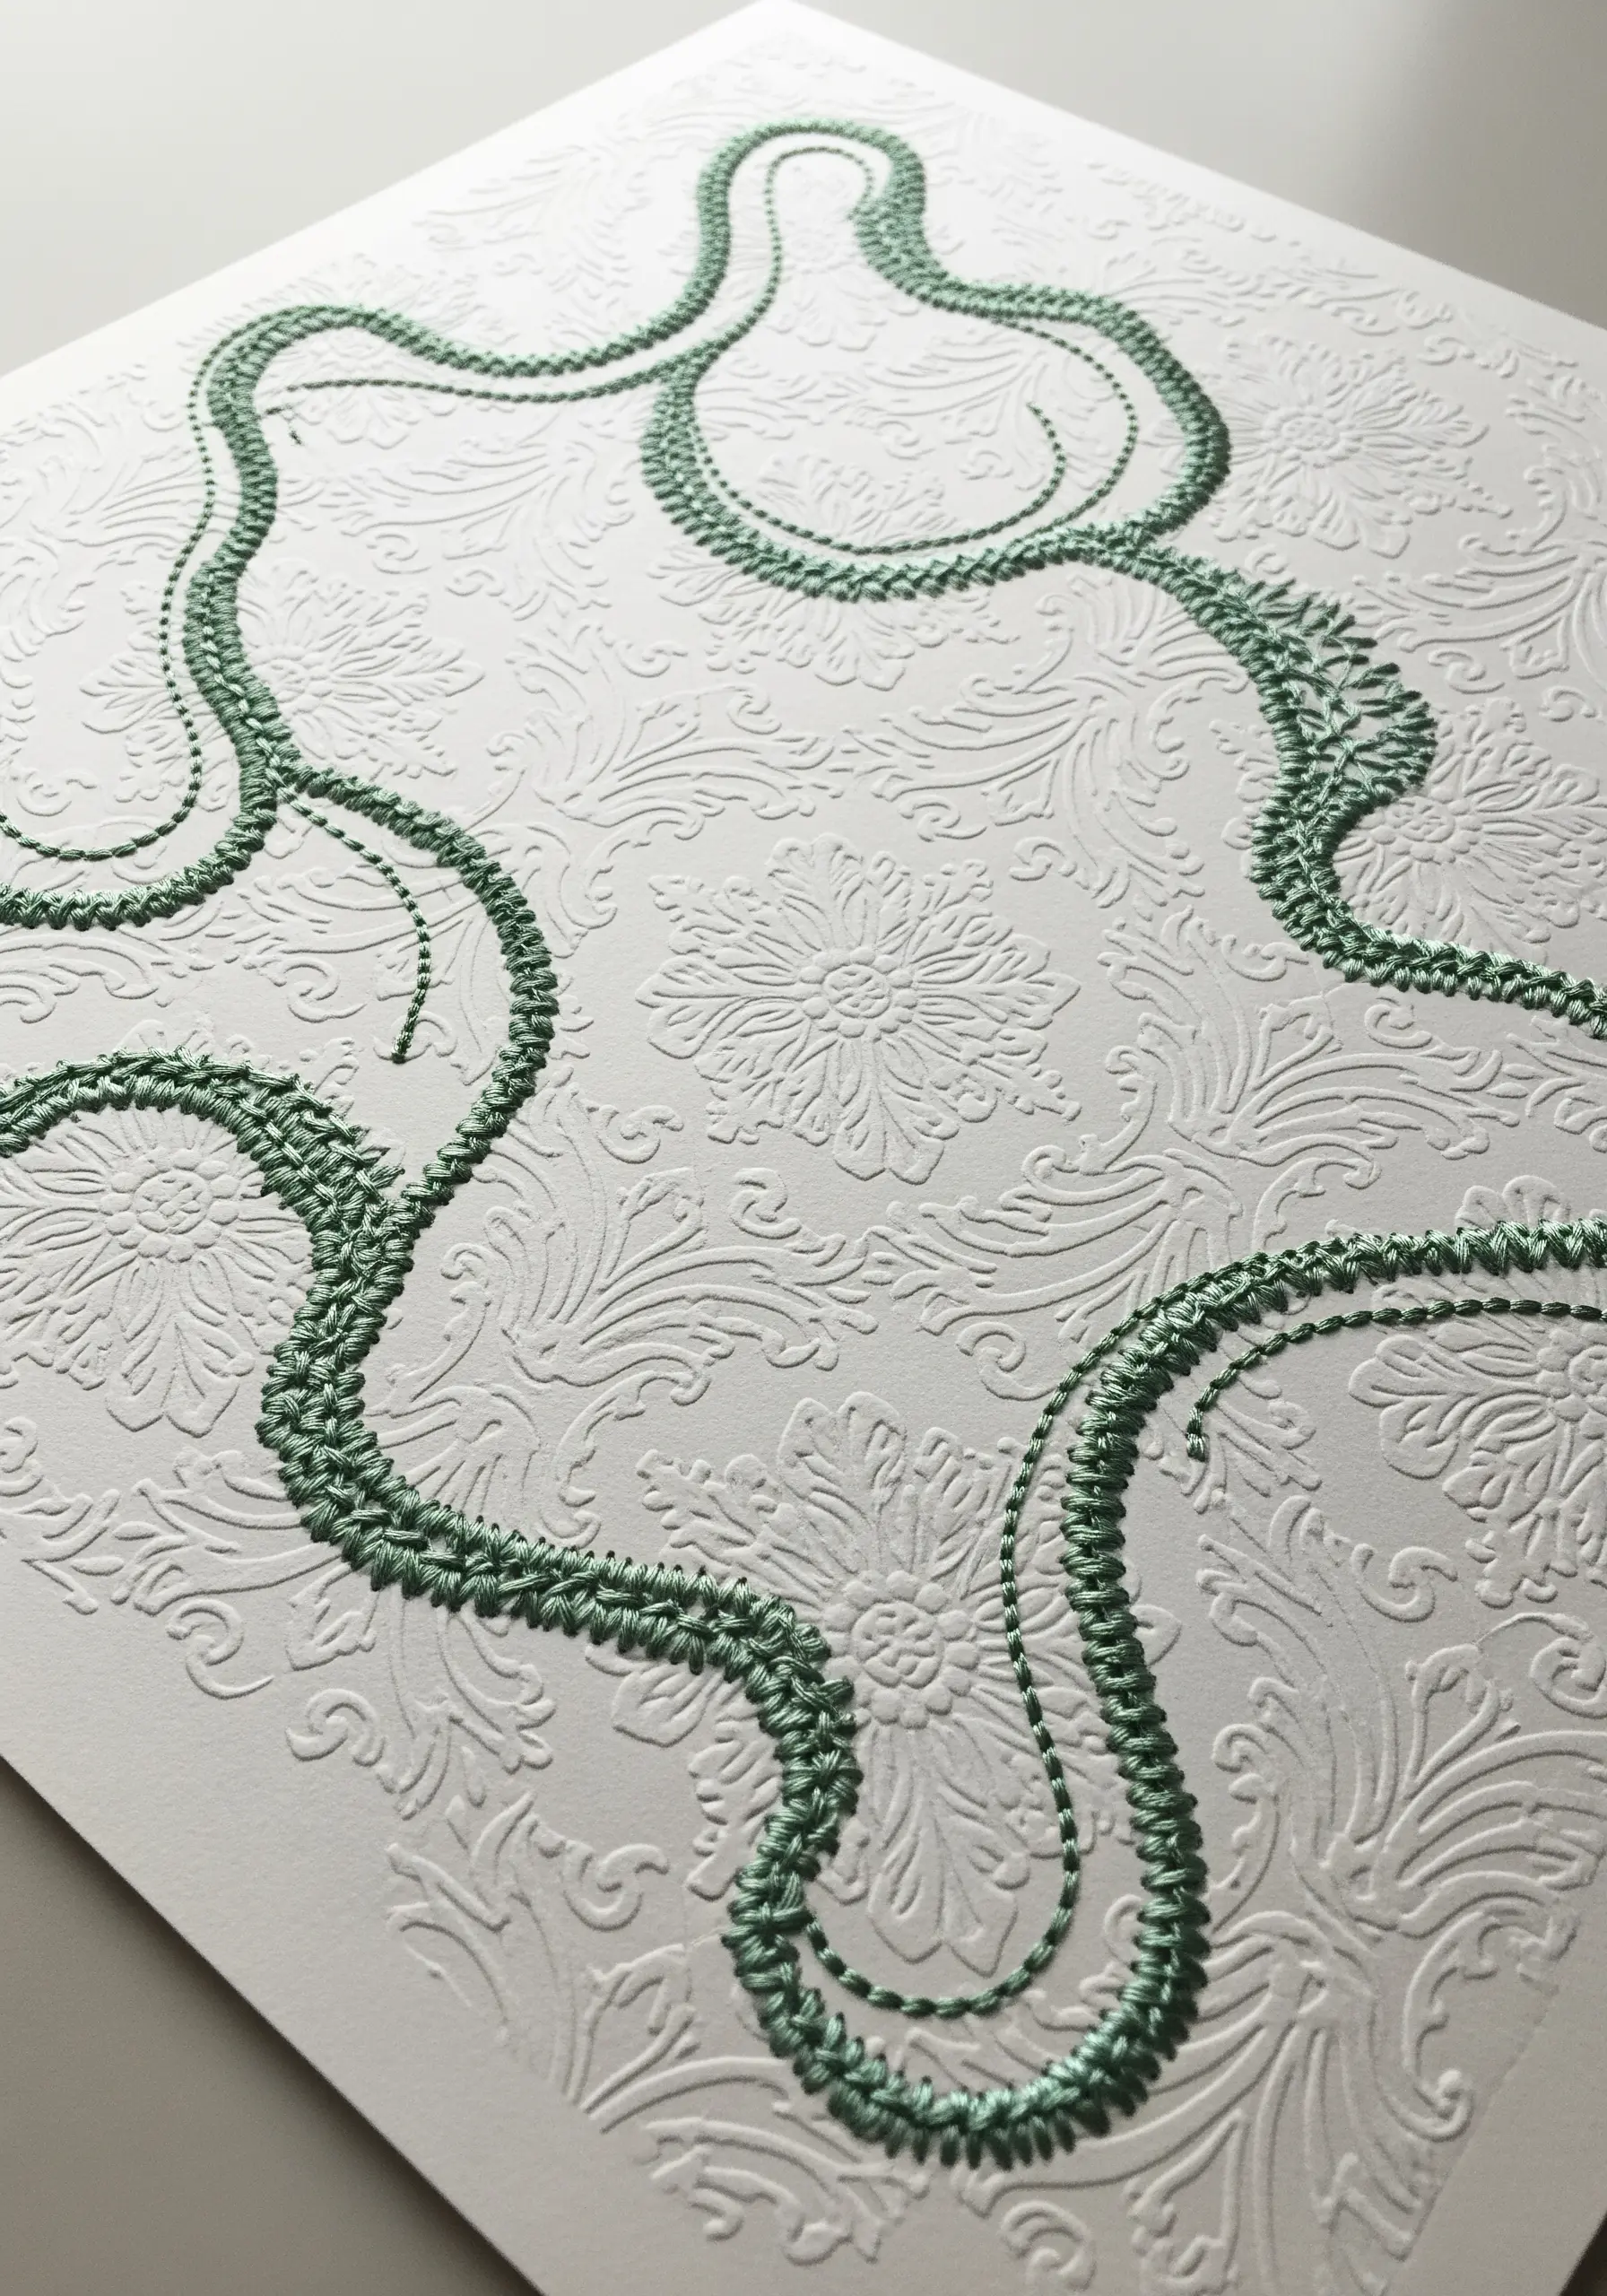
Use embossed paper as a subtle, built-in pattern for your embroidery.
Instead of drawing a design, allow the raised floral or damask pattern of the paper to guide your needle.
Trace the elegant curves with a simple backstitch, chain stitch, or couched thread. Use a thread color that complements the paper for a quiet, tone-on-tone effect that rewards close viewing.
This method produces incredibly refined results, perfect for creating subtle embroidery touches on stationery or framed art.
Always use a sharp, fine needle to pierce the paper cleanly without crushing the embossing.
11. Echo Marbled Paper Forms with Coiled Thread

Combine two ancient art forms by embroidering onto marbled or Suminagashi paper.
Identify the organic, flowing shapes created by the marbling process and use them as the foundation for your design.
Fill these shapes with tightly coiled threads, using a circular satin stitch or couching technique to mimic the pooling of ink on water.
A high-sheen or metallic thread works exceptionally well, creating a jewel-like effect against the matte paper. This approach allows you to create abstract thread embroidery that feels both spontaneous and controlled.
12. Personalize a Map with a Stitched Journey

Turn a map into a personal artifact by stitching a significant route directly onto its surface.
Choose a map printed on sturdy paper or fabric-backed paper. Use a vibrant red or gold thread and a simple running stitch or backstitch to trace a past trip, a future dream, or a meaningful connection between two places.
This technique transforms a generic object into a deeply personal narrative. These unique travel-inspired string art maps become cherished keepsakes or thoughtful gifts.
If using thin paper, reinforce the back with iron-on interfacing before stitching to prevent tearing.
13. Combine Thread Painting with Gilded Kintsugi Paper

Create a dramatic backdrop for a detailed embroidered subject by preparing your paper with a Kintsugi-inspired effect.
Adhere gold leaf or metallic foil to black cardstock in fractured, vein-like patterns, mimicking the Japanese art of repairing broken pottery.
On a separate piece of fabric, stitch your central motif using detailed thread painting techniques. Carefully cut it out and appliqué it onto the gilded paper for a stunning, gallery-worthy presentation.
This is perfect for high-impact metallic thread wall art projects where contrast is key.
14. Stitch Over a Pointillist Paper Collage

Create a vibrant, pixelated background for your line embroidery by crafting a collage from tiny paper dots.
Use a hole punch on colored paper to create your ‘pixels,’ then arrange them in a gradient on a backing board, securing them with a glue stick.
Once the background is complete, stitch your design—like a simple constellation or line-art figure—directly through the paper dots and board.
The texture of the layered dots adds unexpected depth and a playful, modern feel, turning simple stitches into dynamic pieces that explore how rainbow blend stitches can be reinterpreted with paper.
15. Embroider from Found Patterns like Coffee Stains
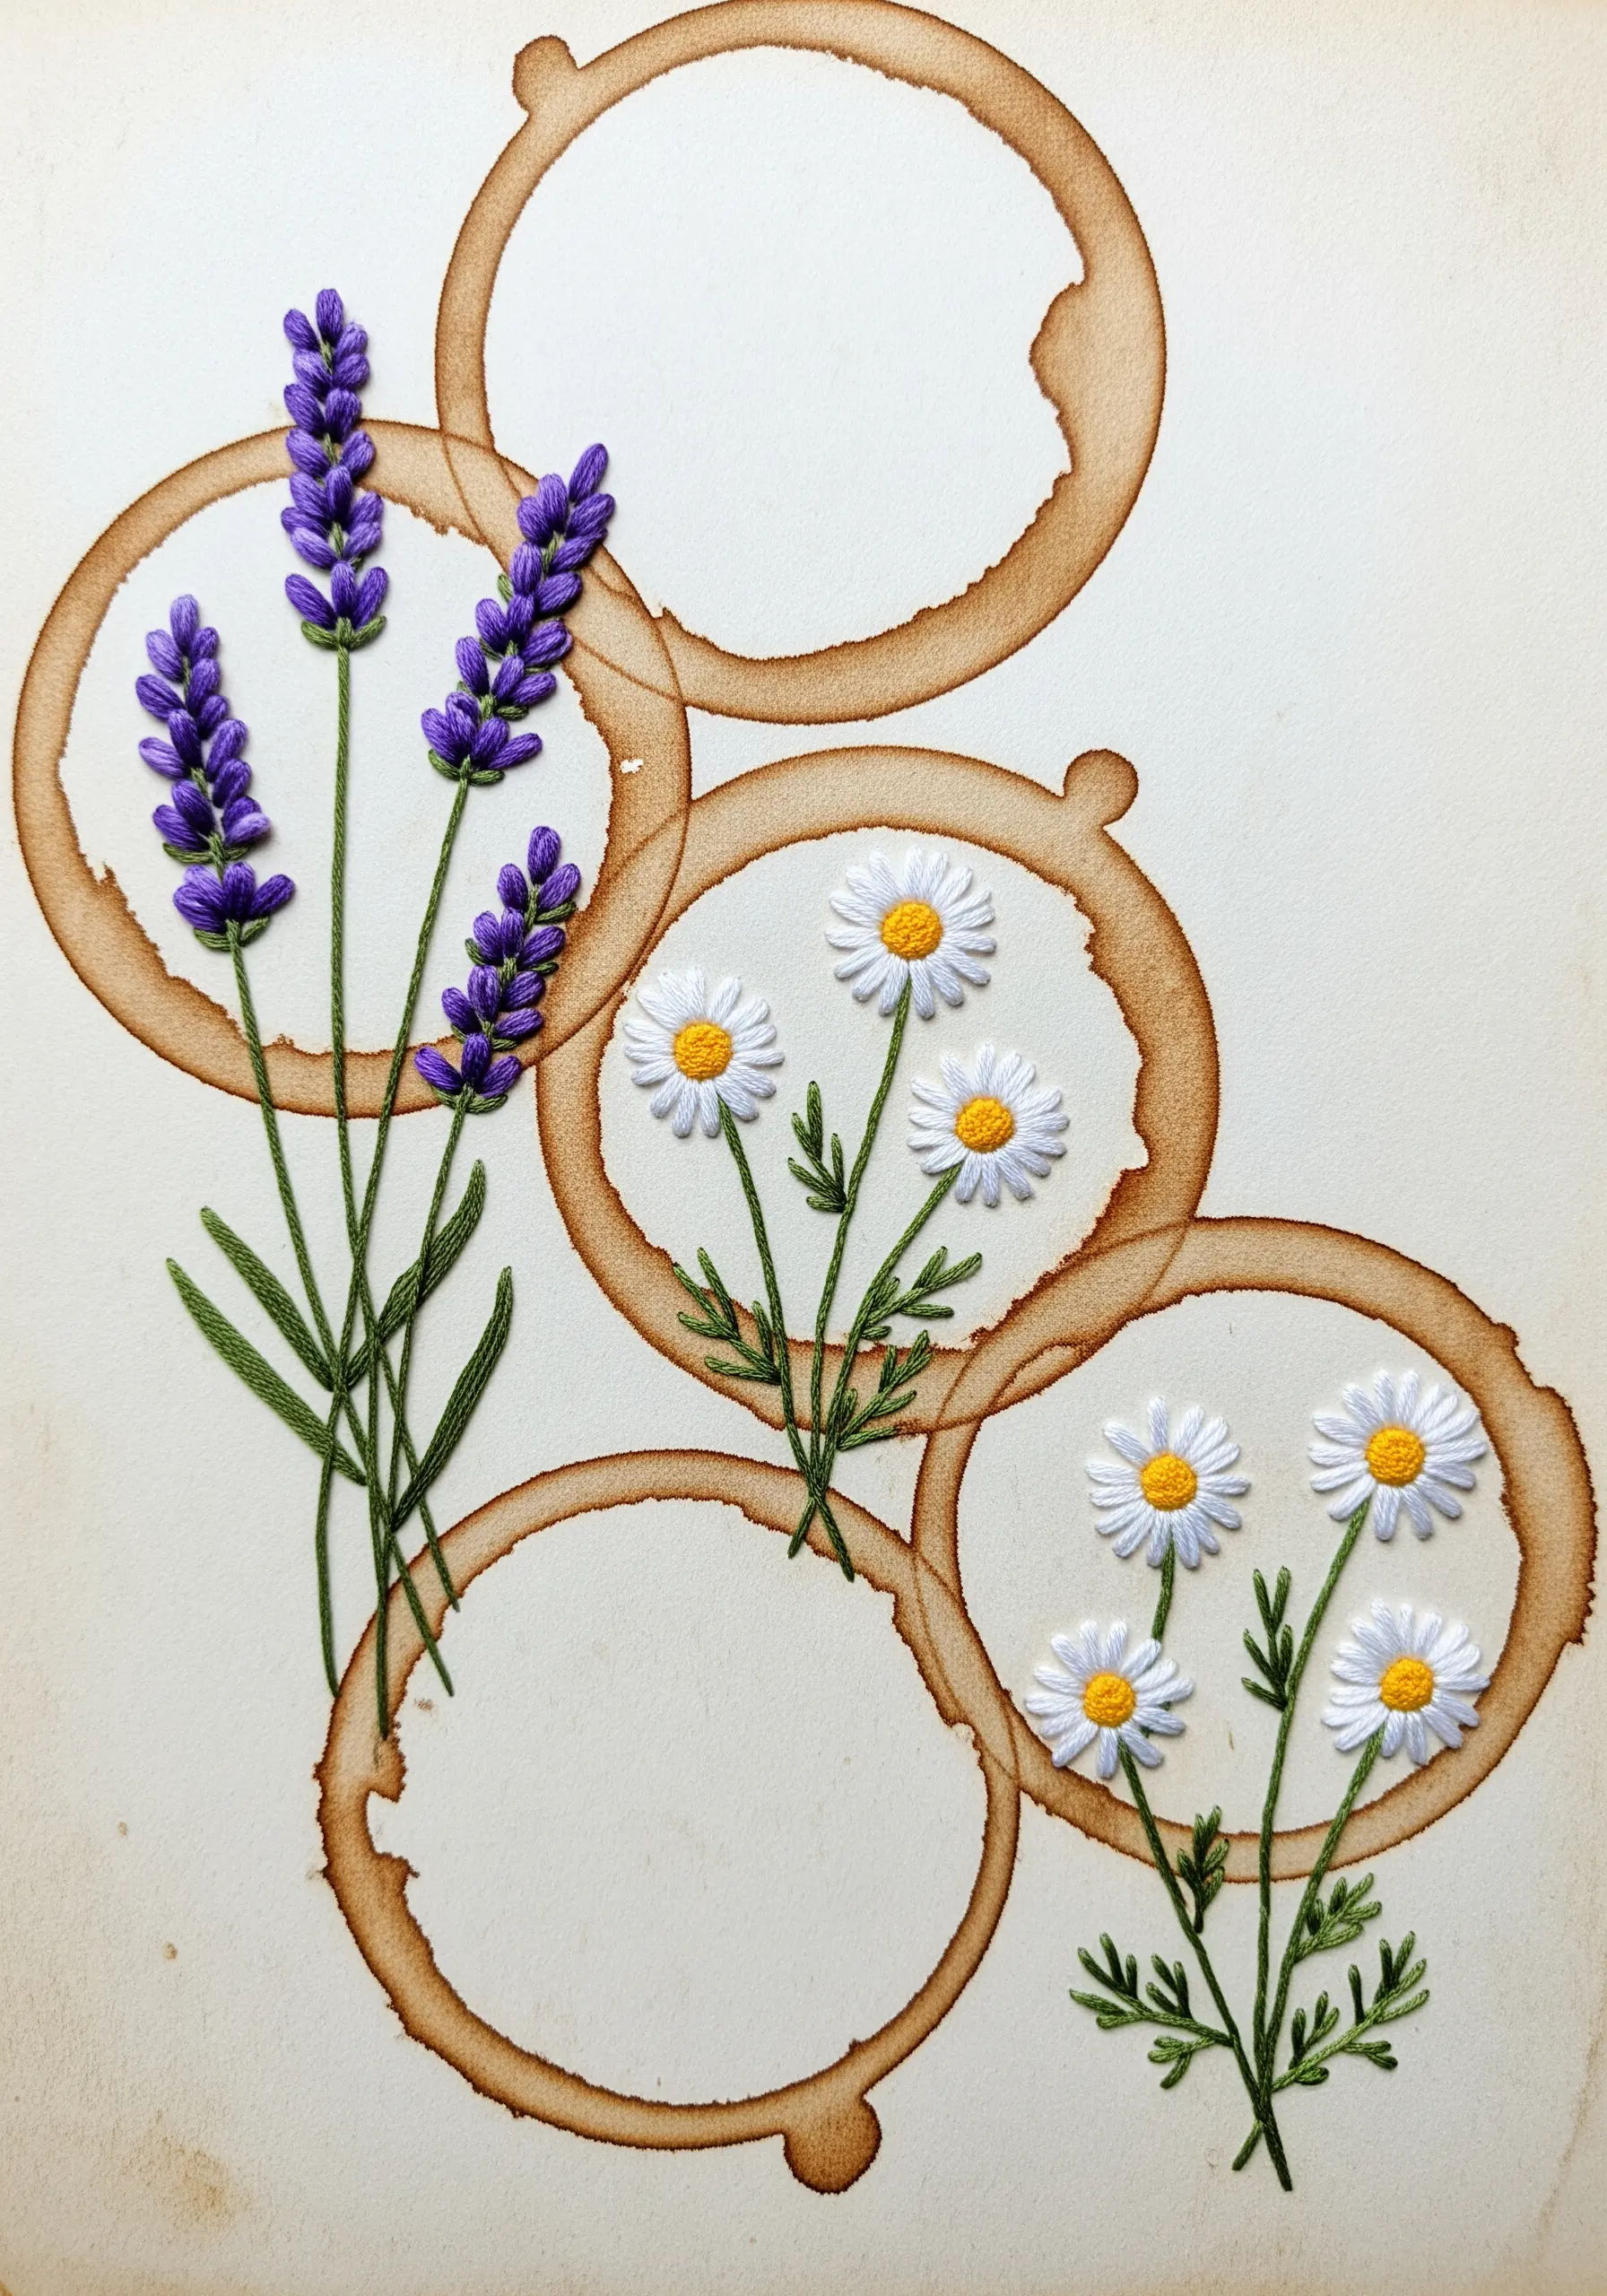
Use accidental marks on paper as the starting point for a creative composition.
Allow coffee or tea to dry in overlapping rings on a sheet of watercolor paper, then use these organic shapes as frames or foundations for your embroidery.
Stitch delicate botanicals that appear to grow from within the stains, turning a happy accident into an intentional part of the artwork.
This technique trains your eye to see design potential everywhere and is a beautiful example of how to create modern thread art inspired by everyday objects.
16. Pair Chunky Wool with Corrugated Cardboard

Explore extreme texture by using corrugated cardboard as your embroidery base and chunky wool as your thread.
The rigid, linear structure of the cardboard provides a fantastic contrast to the soft, voluminous wool.
Use a large darning needle to stitch bold shapes. Create fluffy sheep with French knots or tufted clouds with a loop stitch, allowing the cardboard’s texture to represent ploughed fields or wooden fences.
This is one of the most accessible high-texture fabric collage projects, using humble materials to create something wonderfully tactile and charming.
17. Mix Crepe Paper Flowers with Embroidered Stems

Play to the strengths of each material by crafting your main flowers from delicate crepe paper and stitching their stems and leaves directly onto the background.
Crepe paper allows you to create incredibly realistic, ruffled petals with natural volume that thread alone cannot replicate.
Once your paper flowers are made, attach them to your fabric or paper base and use simple stem stitches and lazy daisies to embroider the complementary foliage.
This mixed-media approach results in stunningly lifelike floral framed embroidery where each element is rendered in its ideal texture.
18. Stitch onto Handmade Seeded Paper
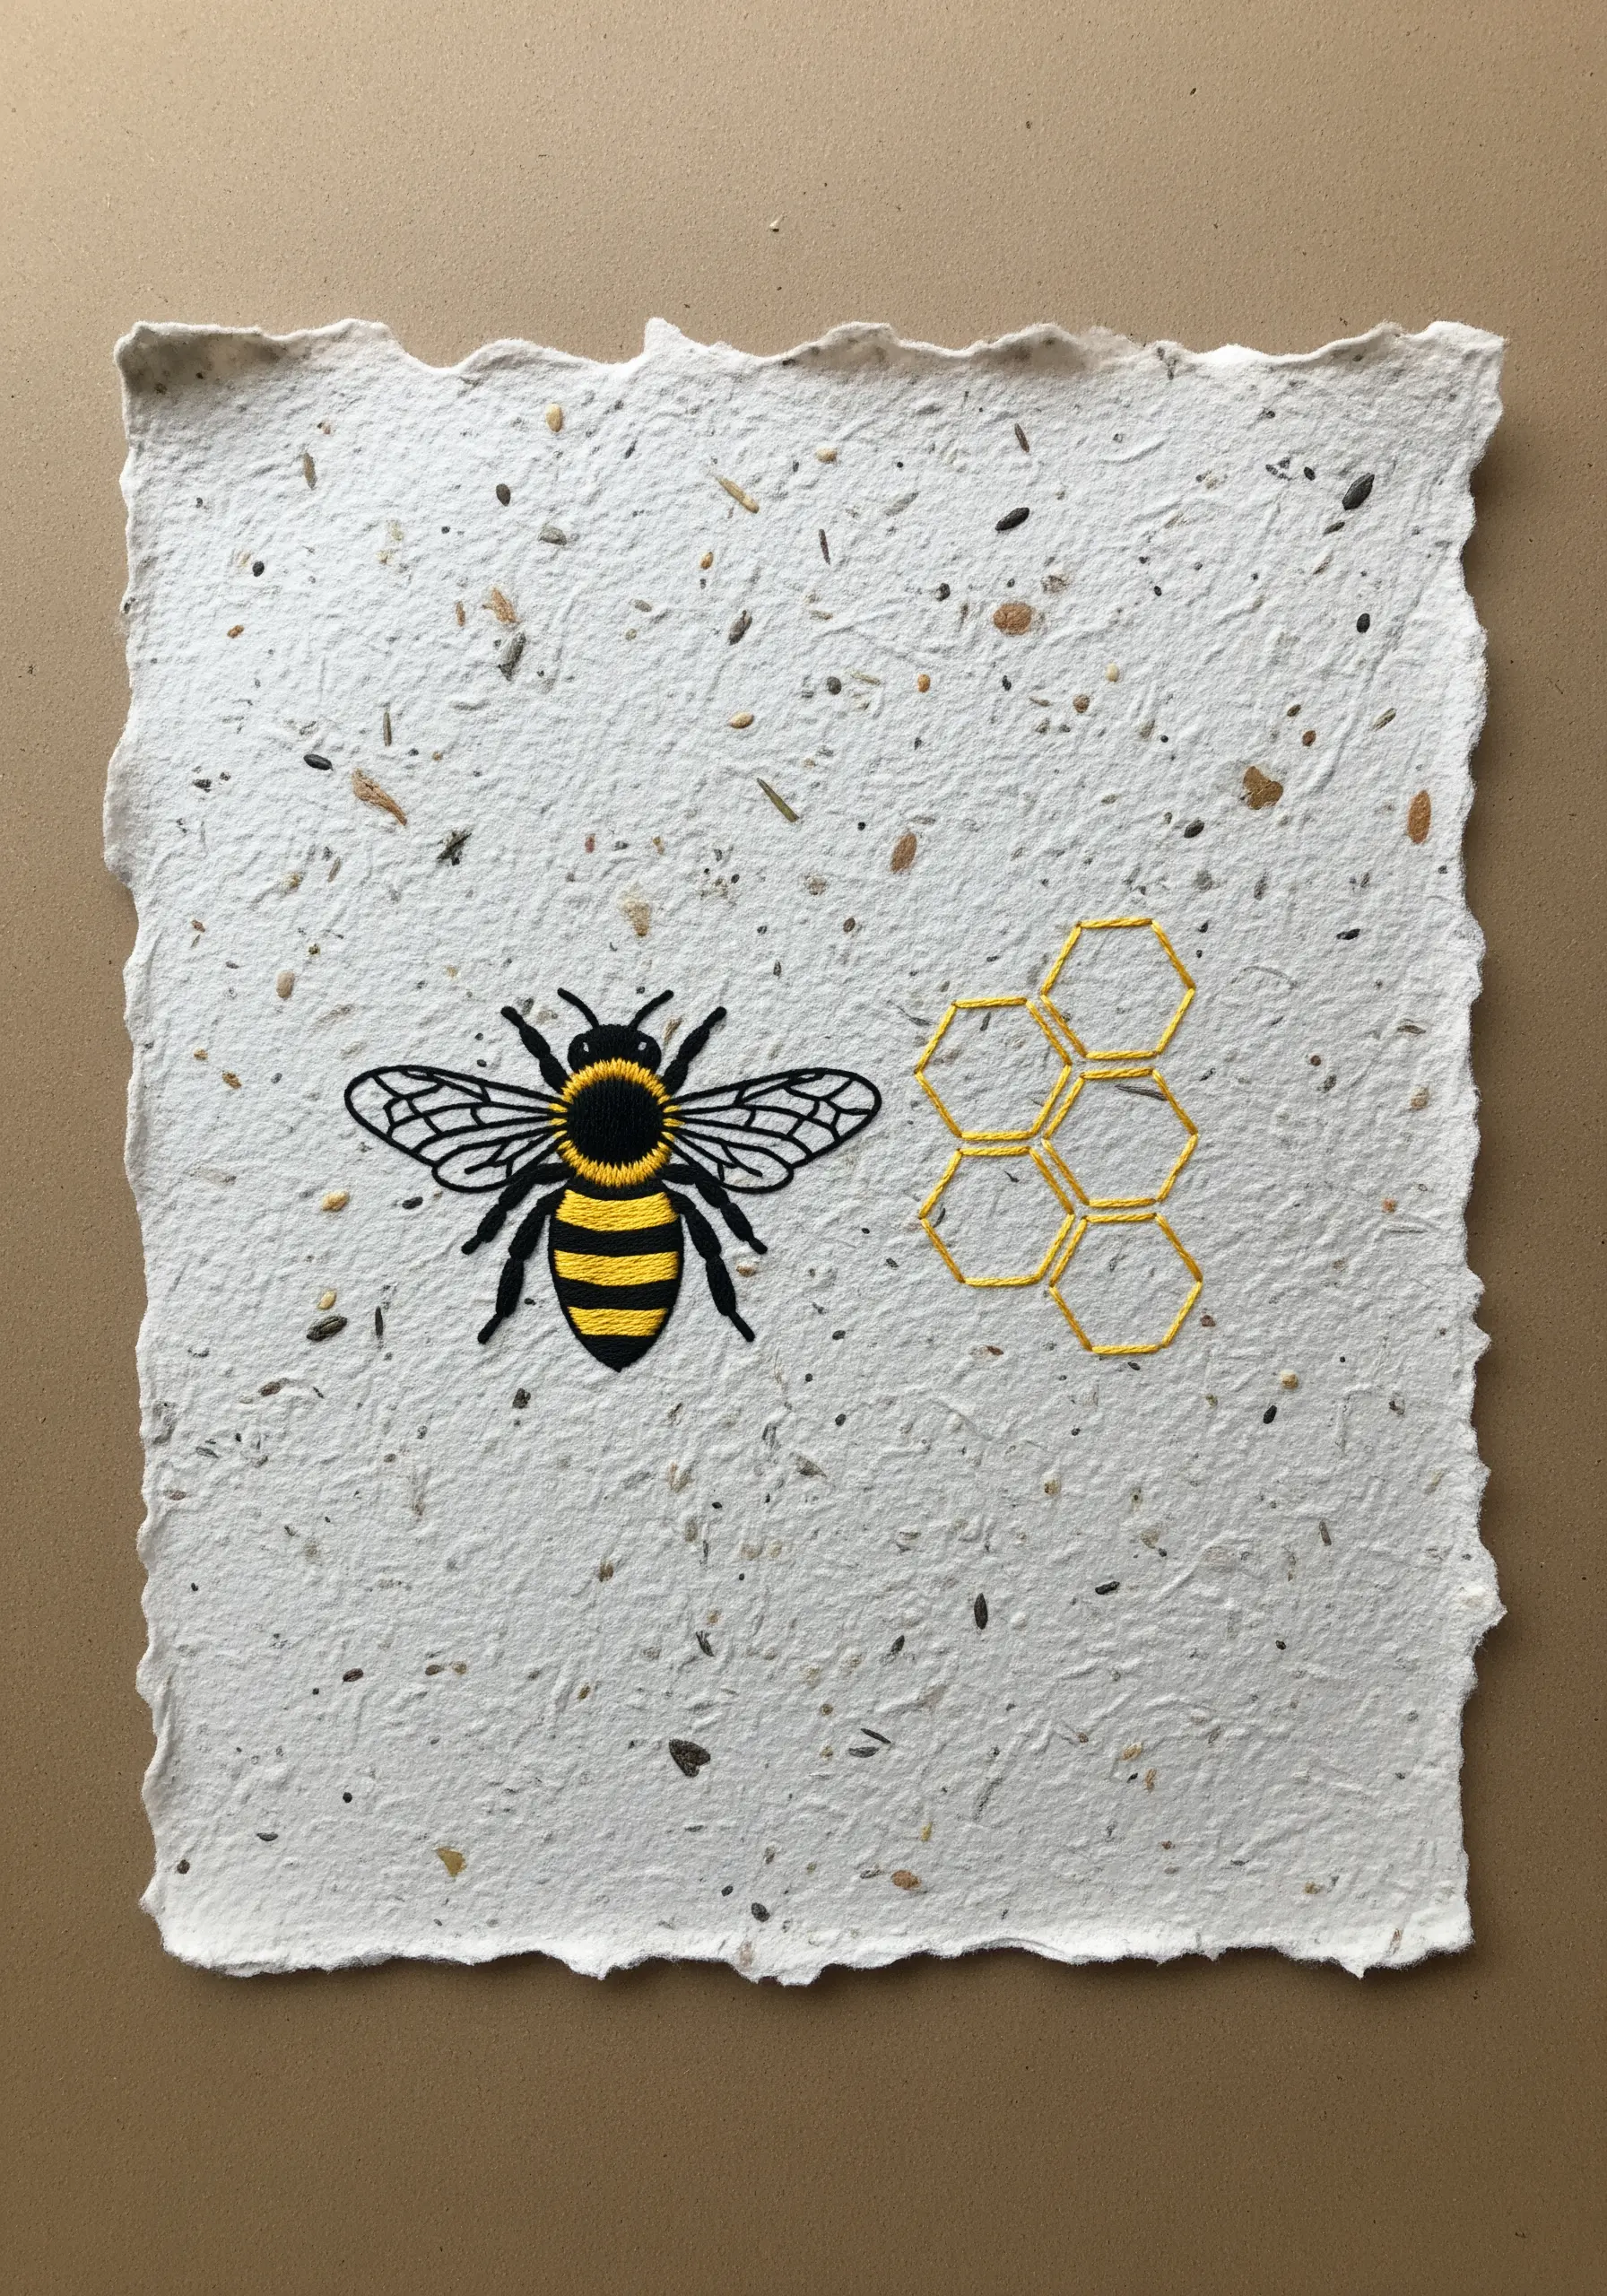
Choose a paper that contributes to the story of your piece. Handmade paper embedded with seeds, petals, or plant fibers adds an organic, earthy texture that perfectly complements nature-themed motifs.
Embroider a simple bee, leaf, or flower onto the paper, allowing the natural flecks in the paper to become part of the environment.
Use a very sharp, fine needle (like a beading needle) and maintain gentle, even tension to avoid tearing the delicate paper surface.
These are the kinds of nature texture embroidery hacks that add depth with minimal effort.
19. Embellish Vintage Photographs with Thread

Breathe new life into old photographs by adding selective, colorful embroidery.
Choose a high-quality print or postcard and carefully pierce the surface with a needle. Add a floral necklace, a colorful pattern on a dress, or a bright detail in the background.
The contrast between the monochrome photograph and the vibrant, dimensional thread creates a powerful focal point and adds a layer of contemporary artistry to a historical artifact.
This thoughtful intervention is one of the most compelling aesthetic embroidery ideas for transforming found objects into personal art.