

There is a special kind of magic in a child’s drawing—a direct line to their imagination, captured with an uninhibited honesty that’s impossible to replicate. You save these precious scraps of paper, but what if you could transform that fleeting moment into a lasting, tactile piece of art?
Embroidery offers you that bridge. It’s a way to honor the original creation not by perfectly copying it, but by translating its essence into thread. With every stitch, you add a new layer of meaning—your time, your care, and the rich textures of fiber and color.
This isn’t about becoming a master artist overnight. It’s about making thoughtful choices. It’s knowing when to use a chunky yarn to make a monster feel soft and huggable, or how a single pop of color can bring a simple house drawing to life. Here, you’ll find the techniques to elevate those beloved drawings into meaningful art that your family will treasure forever.
1. Embrace Volumetric Texture with Chunky Yarn
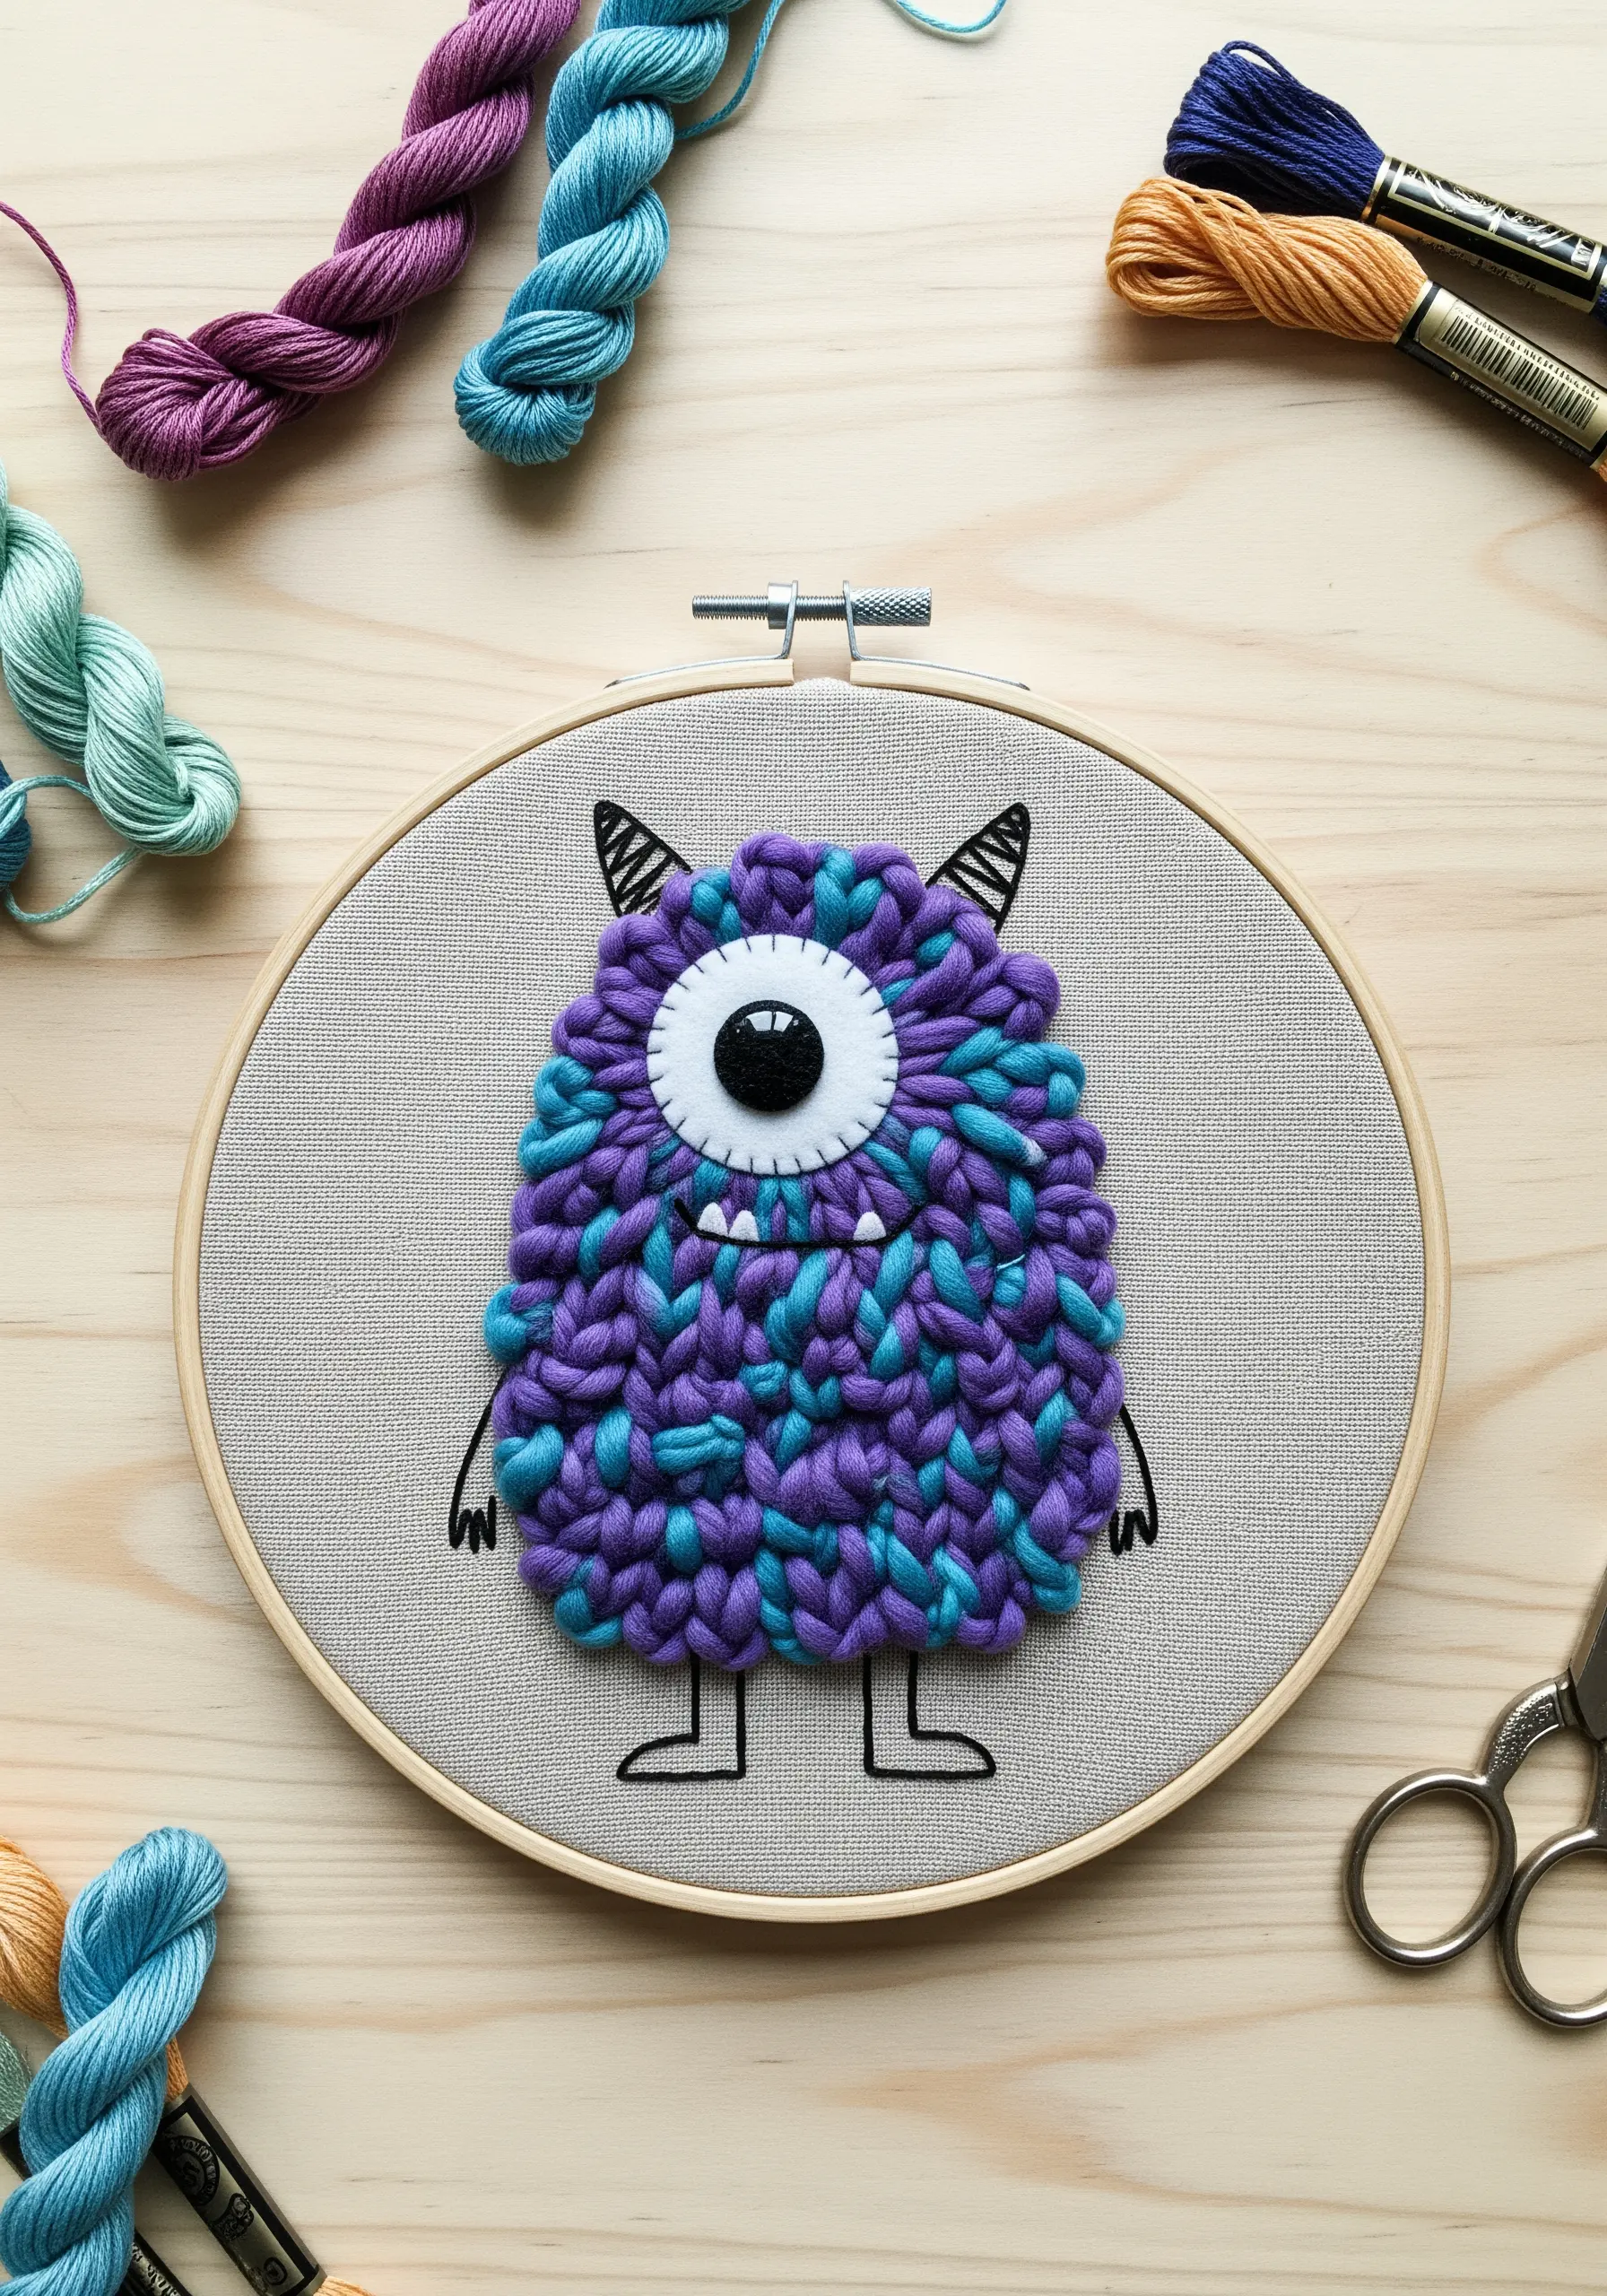
To capture the playful spirit of a monster drawing, move beyond standard floss and use thick, chunky yarn.
This technique, similar to punch needle, involves creating dense loops that give the design a plush, three-dimensional quality you can actually touch.
Use a couching stitch to tack down the thick yarn if you don’t have a punch needle—it creates a similar raised effect.
Contrast the soft body with crisp, fine-thread backstitching for the limbs and mouth, and add felt appliqué for details like eyes and horns to introduce a smooth, solid texture.
2. Isolate Details with a Single Pop of Color

You can honor the charming simplicity of a child’s line drawing by focusing on a single, impactful detail.
Stitch the main structure—the house, the car, the person—using a clean backstitch in a neutral color like black or grey.
Then, select one element, like a door or a flower, and fill it with a block of vibrant satin stitch.
This intentional use of color draws the eye and transforms a simple sketch into a sophisticated piece of minimalist art, proving that restraint is often more powerful than complexity.
3. Create Dynamic Motion with Directional Stitching

To make a drawing of a rocket or a speeding car feel like it’s moving, use the direction of your stitches to create energy.
For the rocket’s flame, fill the area with long and short stitches that flow outward and downward, blending fiery reds, oranges, and yellows.
This creates a visual trail of energy and heat.
For the rocket itself, use a metallic silver thread in a tight, uniform satin stitch to give it a sleek, solid feel that contrasts beautifully with the chaotic motion of the flame.
Always use a stabilizer when stitching on heavy fabric like denim to prevent puckering.
4. Combine Fabric Appliqué with Stitched Outlines

Children’s drawings of people are often wonderfully graphic, making them perfect candidates for fabric appliqué.
Instead of stitching the clothes, cut the shapes from patterned fabric scraps that reflect a child’s personality.
Iron on a fusible webbing to the back of the scraps for easy, no-slip placement, then secure the edges with a simple running stitch.
Frame these fabric shapes with crisp backstitched outlines for the bodies, preserving the drawing’s original charm while adding a layer of pattern and texture.
5. Translate Scribbles with Expressive Thread Sketching

Resist the urge to neaten a child’s wonderfully chaotic scribble—instead, celebrate its raw energy.
Treat your needle like a crayon and fill the hoop with long, overlapping straight stitches that mimic the original drawing’s freedom.
Use multiple strands of floss in vibrant, contrasting colors and allow them to build up in layers.
This technique isn’t about precision; it’s about translating pure, uninhibited motion into thread, creating a piece of abstract art that feels alive.
6. Assign a Unique Texture to Each Motif
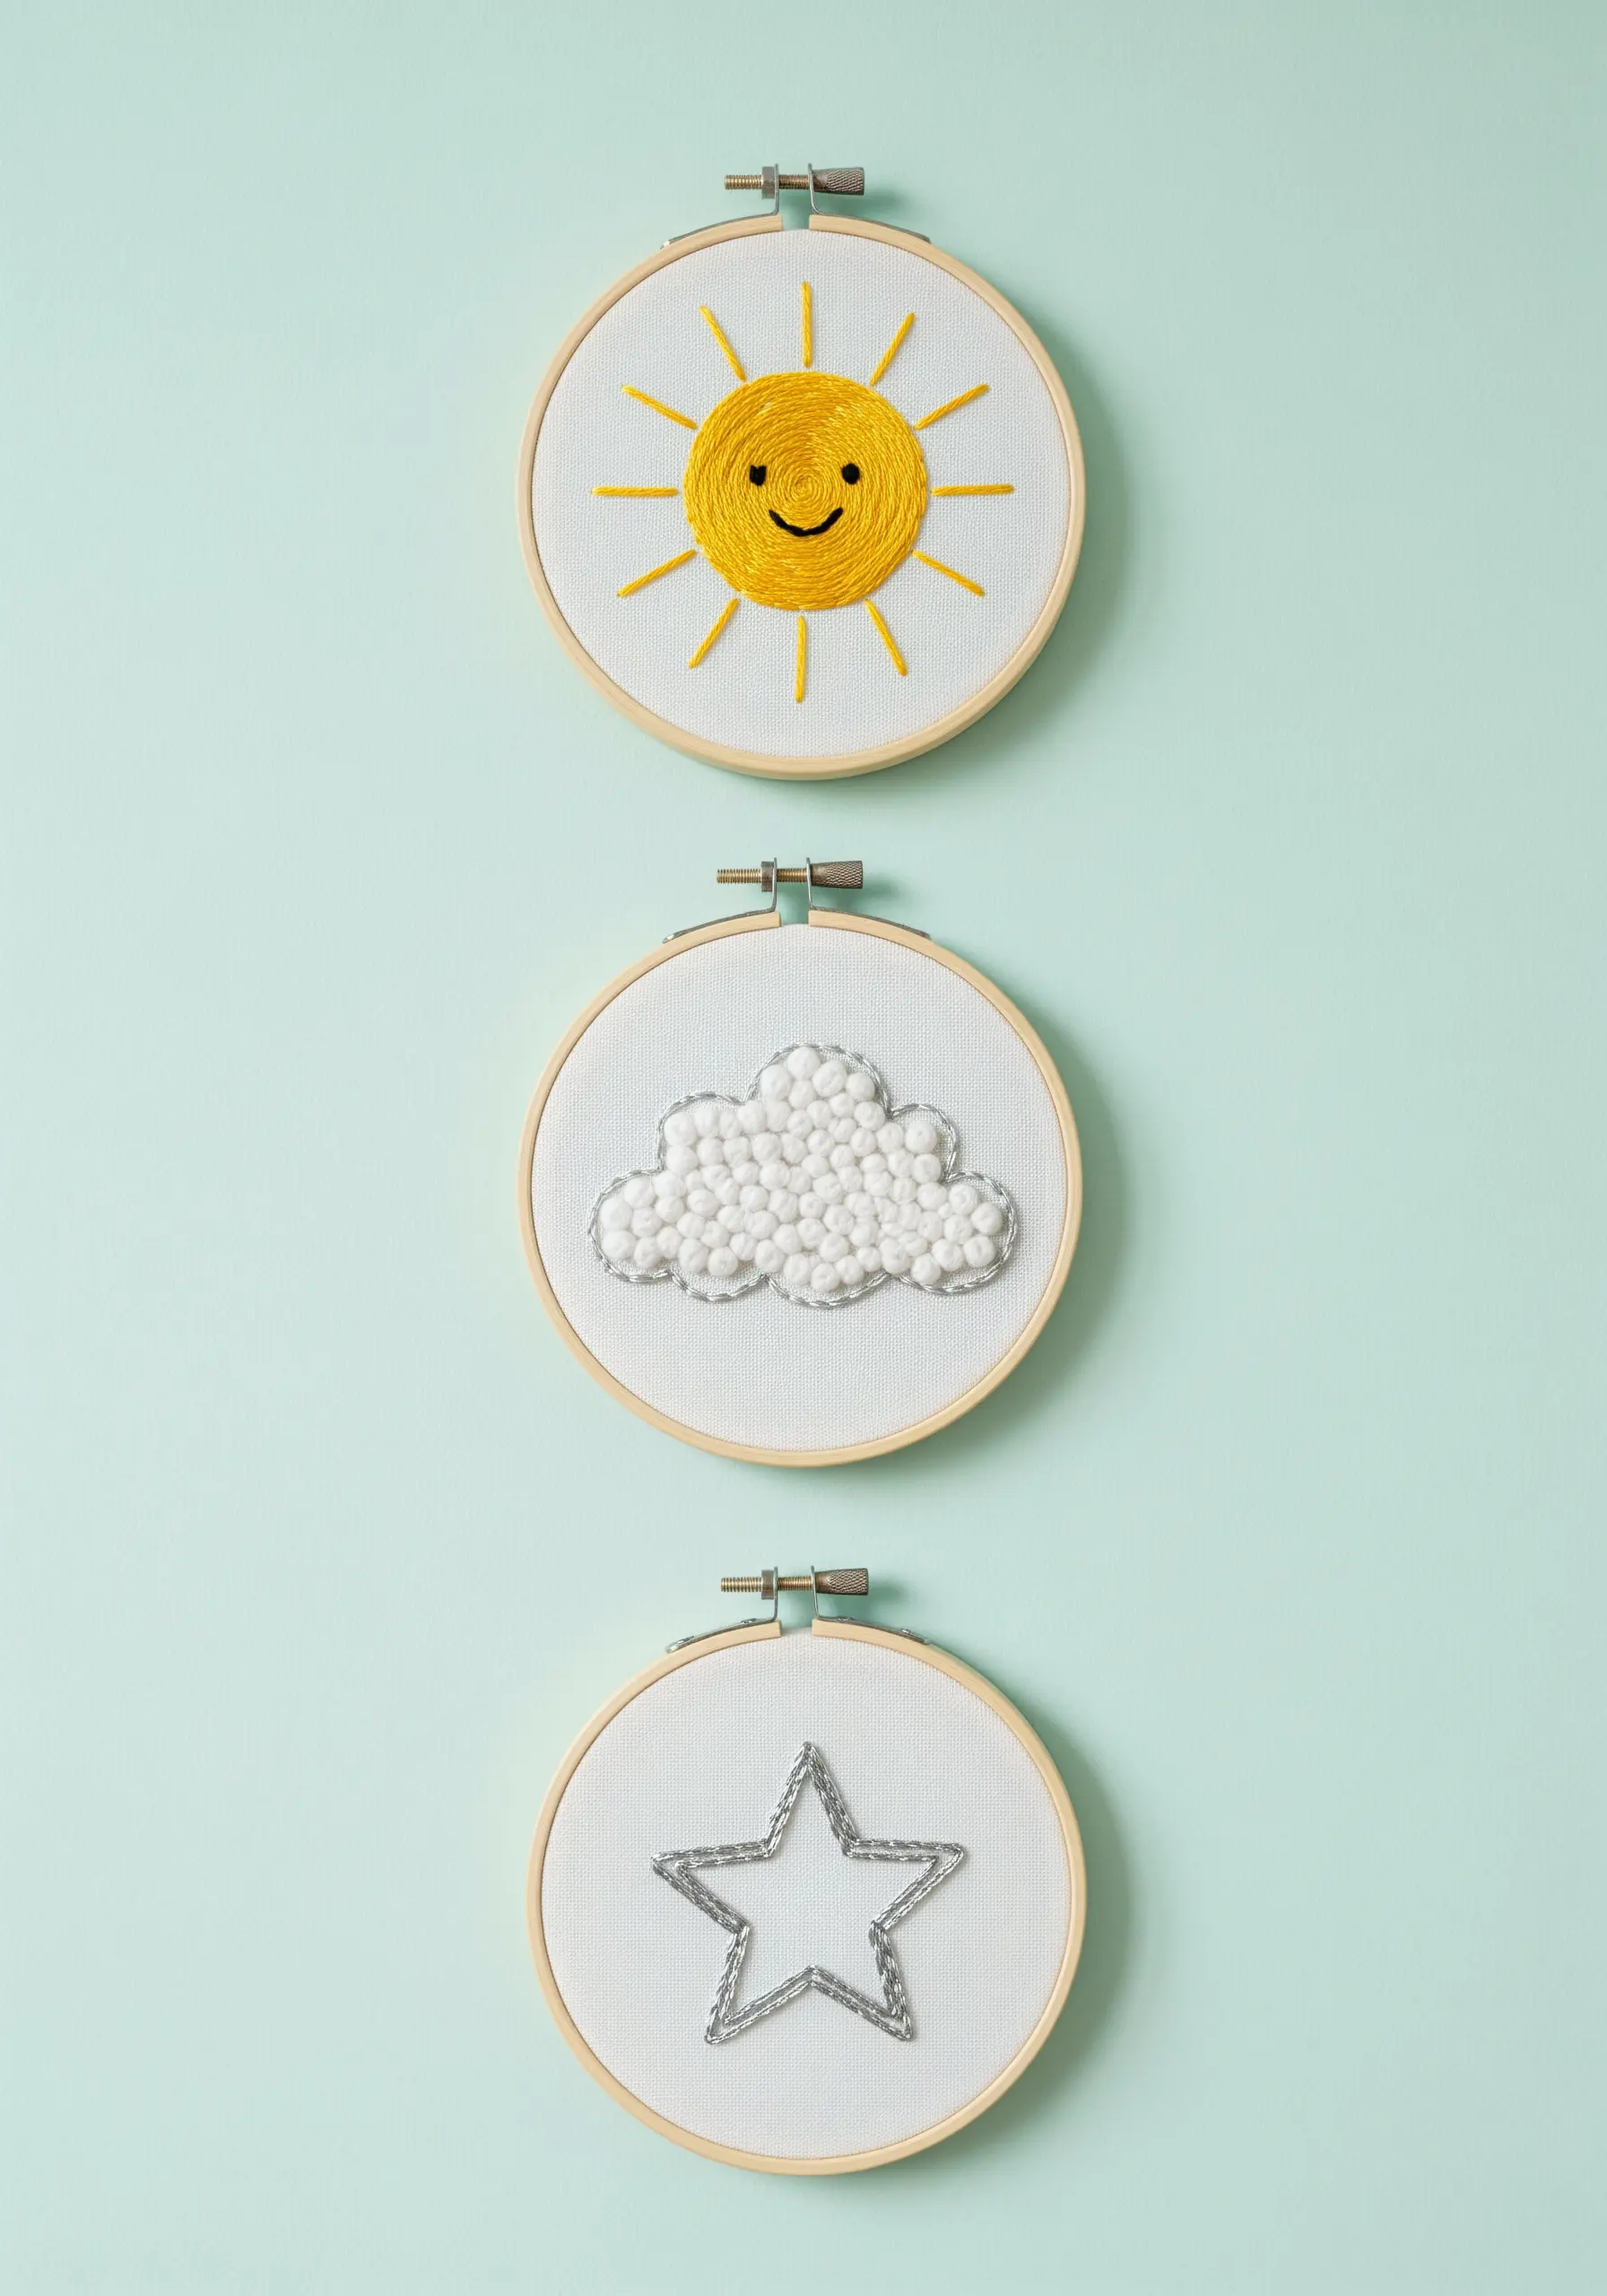
When a drawing features multiple simple elements, give each one a distinct tactile identity.
Instead of using the same fill stitch for everything, create a small, sensory collection.
Render a sun with smooth satin stitch rays, craft a cloud from a dense cluster of French knots for a fluffy feel, and outline a star with a shimmering metallic thread.
Displaying them together as a triptych emphasizes the textural variety and turns simple doodles into a cohesive, thoughtful art installation.
7. Build Dimension with Layered Felt Appliqué

To recreate the full, leafy canopy of a drawn tree, use layered felt for instant volume and depth.
Cut out dozens of leaf shapes from several shades of green felt to create natural variation.
Arrange them in overlapping layers on your fabric, then secure each leaf with a single French knot or a small straight stitch in the center.
This not only attaches the leaves but also adds a decorative, seed-like detail. For the trunk, a tightly worked chain stitch provides a bark-like texture that grounds the design.
8. Mimic Fur with Directional Short Stitches

Translating a beloved pet’s portrait from a drawing requires capturing their texture, not just their shape.
Use the long and short stitch, always angling your needle in the direction of the fur’s natural growth—out from the nose, down the back, and flicking upward at the ears.
Blend several shades of floss within the same stitch area to create realistic depth and highlights.
A strong backstitch outline contains the fuzzy texture and gives the final portrait a clean, defined edge that makes it pop.
9. Translate a Sketch with Thread-Painted Gradients

Elevate a simple butterfly or bird drawing by transforming its wings into a canvas for color blending.
Using the long and short stitch, you can create seamless gradients that flow from one hue to another, much like a watercolor painting.
Choose colors that sit next to each other on the color wheel—like yellow, orange, and pink—for a smooth, harmonious transition.
This technique, a form of abstract thread painting, turns a simple outline into a breathtaking piece of art.
10. Explore Geometric Fill Patterns for a Modern Look

When your child draws geometric shapes, robots, or buildings, skip the solid satin stitch fill.
Instead, fill each shape with a different repeating pattern to create visual interest and a modern aesthetic.
Try a grid of seed stitches, radiating straight stitches from a central point, or neatly spaced rows of running stitches.
Using a dark background fabric makes the negative space a crucial design element and allows the clean, graphic patterns to stand out as sophisticated textural studies.
11. Master the Satin Stitch for Bold, Graphic Shapes

A child’s drawing of a simple vegetable or fruit is the perfect opportunity to perfect your satin stitch.
The secret to achieving a flawlessly smooth, solid fill is to first outline the shape with a split stitch.
This raised border acts as a guide and gives you a clean edge to tuck your satin stitches against, preventing gaps and unevenness.
The result is a clean, bold, and graphic motif that looks incredibly polished and professional, perfect for embellishing kitchen towels or tote bags.
12. Weave in Mixed Media for Underwater Scenes

Bring a drawn underwater world to life by incorporating different materials that evoke the ocean’s magic.
Use scraps of sheer blue or green organza for translucent, flowing seaweed, tacking it down with a few hidden stitches.
Work the fish scales in a woven wheel stitch using variegated thread for an iridescent, rainbow effect.
Finally, add a trail of tiny, clear seed beads to represent air bubbles, adding a delicate sparkle that completes the enchanting scene.
13. Create 3D Texture with Unattached Thread Loops

To capture the wild volume of scribbled hair or a lion’s mane, let your thread escape the two-dimensional surface.
Instead of stitching threads flat, create loose loops and tack them down at the base with a small couching stitch, leaving the ends free.
Alternatively, the turkey stitch allows you to create dense, brush-like pile.
This sculptural approach is wonderfully tactile and transforms a simple line drawing into an interactive, mixed-media piece that begs to be touched.
14. Add a Touch of Magic with Sequin Embellishments

A simple line drawing of a castle or crown offers the perfect chance to add a touch of restrained sparkle.
Stitch the entire design in a clean backstitch using a single color of thread, like white on a rich, dark fabric like velvet.
Then, choose just one or two small areas—like the tips of the turrets or the windows—and fill them with iridescent sequins.
This selective embellishment adds a surprising hint of magic and light without distracting from the elegance of the original drawing.
15. Define Shapes with Internal Color Blocking

Give a simple dinosaur or animal drawing a modern, graphic twist by dividing its body into patchwork-style sections.
Fill each block with a different solid color of satin stitch for a bold, playful effect.
For an even crisper definition between the blocks, vary the direction of your satin stitch in each adjacent section (horizontal next to vertical, vertical next to diagonal).
A clean, black backstitch outline around the entire creature unifies the design and makes the colors pop.
16. Craft Personalized Banners with Padded Appliqué

Transform a child’s handwriting or favorite letters into a soft, tactile banner that’s perfect for their room.
Trace and cut the letters from colorful felt, then place a thin piece of quilt batting behind each one before you stitch it onto the banner fabric.
Secure the letters with a decorative blanket stitch around the edges.
The padding gives the letters a plush, three-dimensional feel, turning a simple name into a cherished and personal piece of decor.
17. Sculpt Flowers with Silk Ribbon Embroidery

If a child’s drawing includes a bouquet of flowers, silk ribbon is a beautiful alternative to standard floss.
The width and sheen of the ribbon allow you to create dimensional, realistic petals with just a few simple stitches.
Use a woven wheel stitch for lush roses and the lazy daisy stitch for smaller blossoms.
Because the ribbon does most of the work for you, you can create a stunning, textural bouquet that looks far more complex than it actually is to stitch.
18. Find Order in Chaos by Translating Scribbles into Pattern
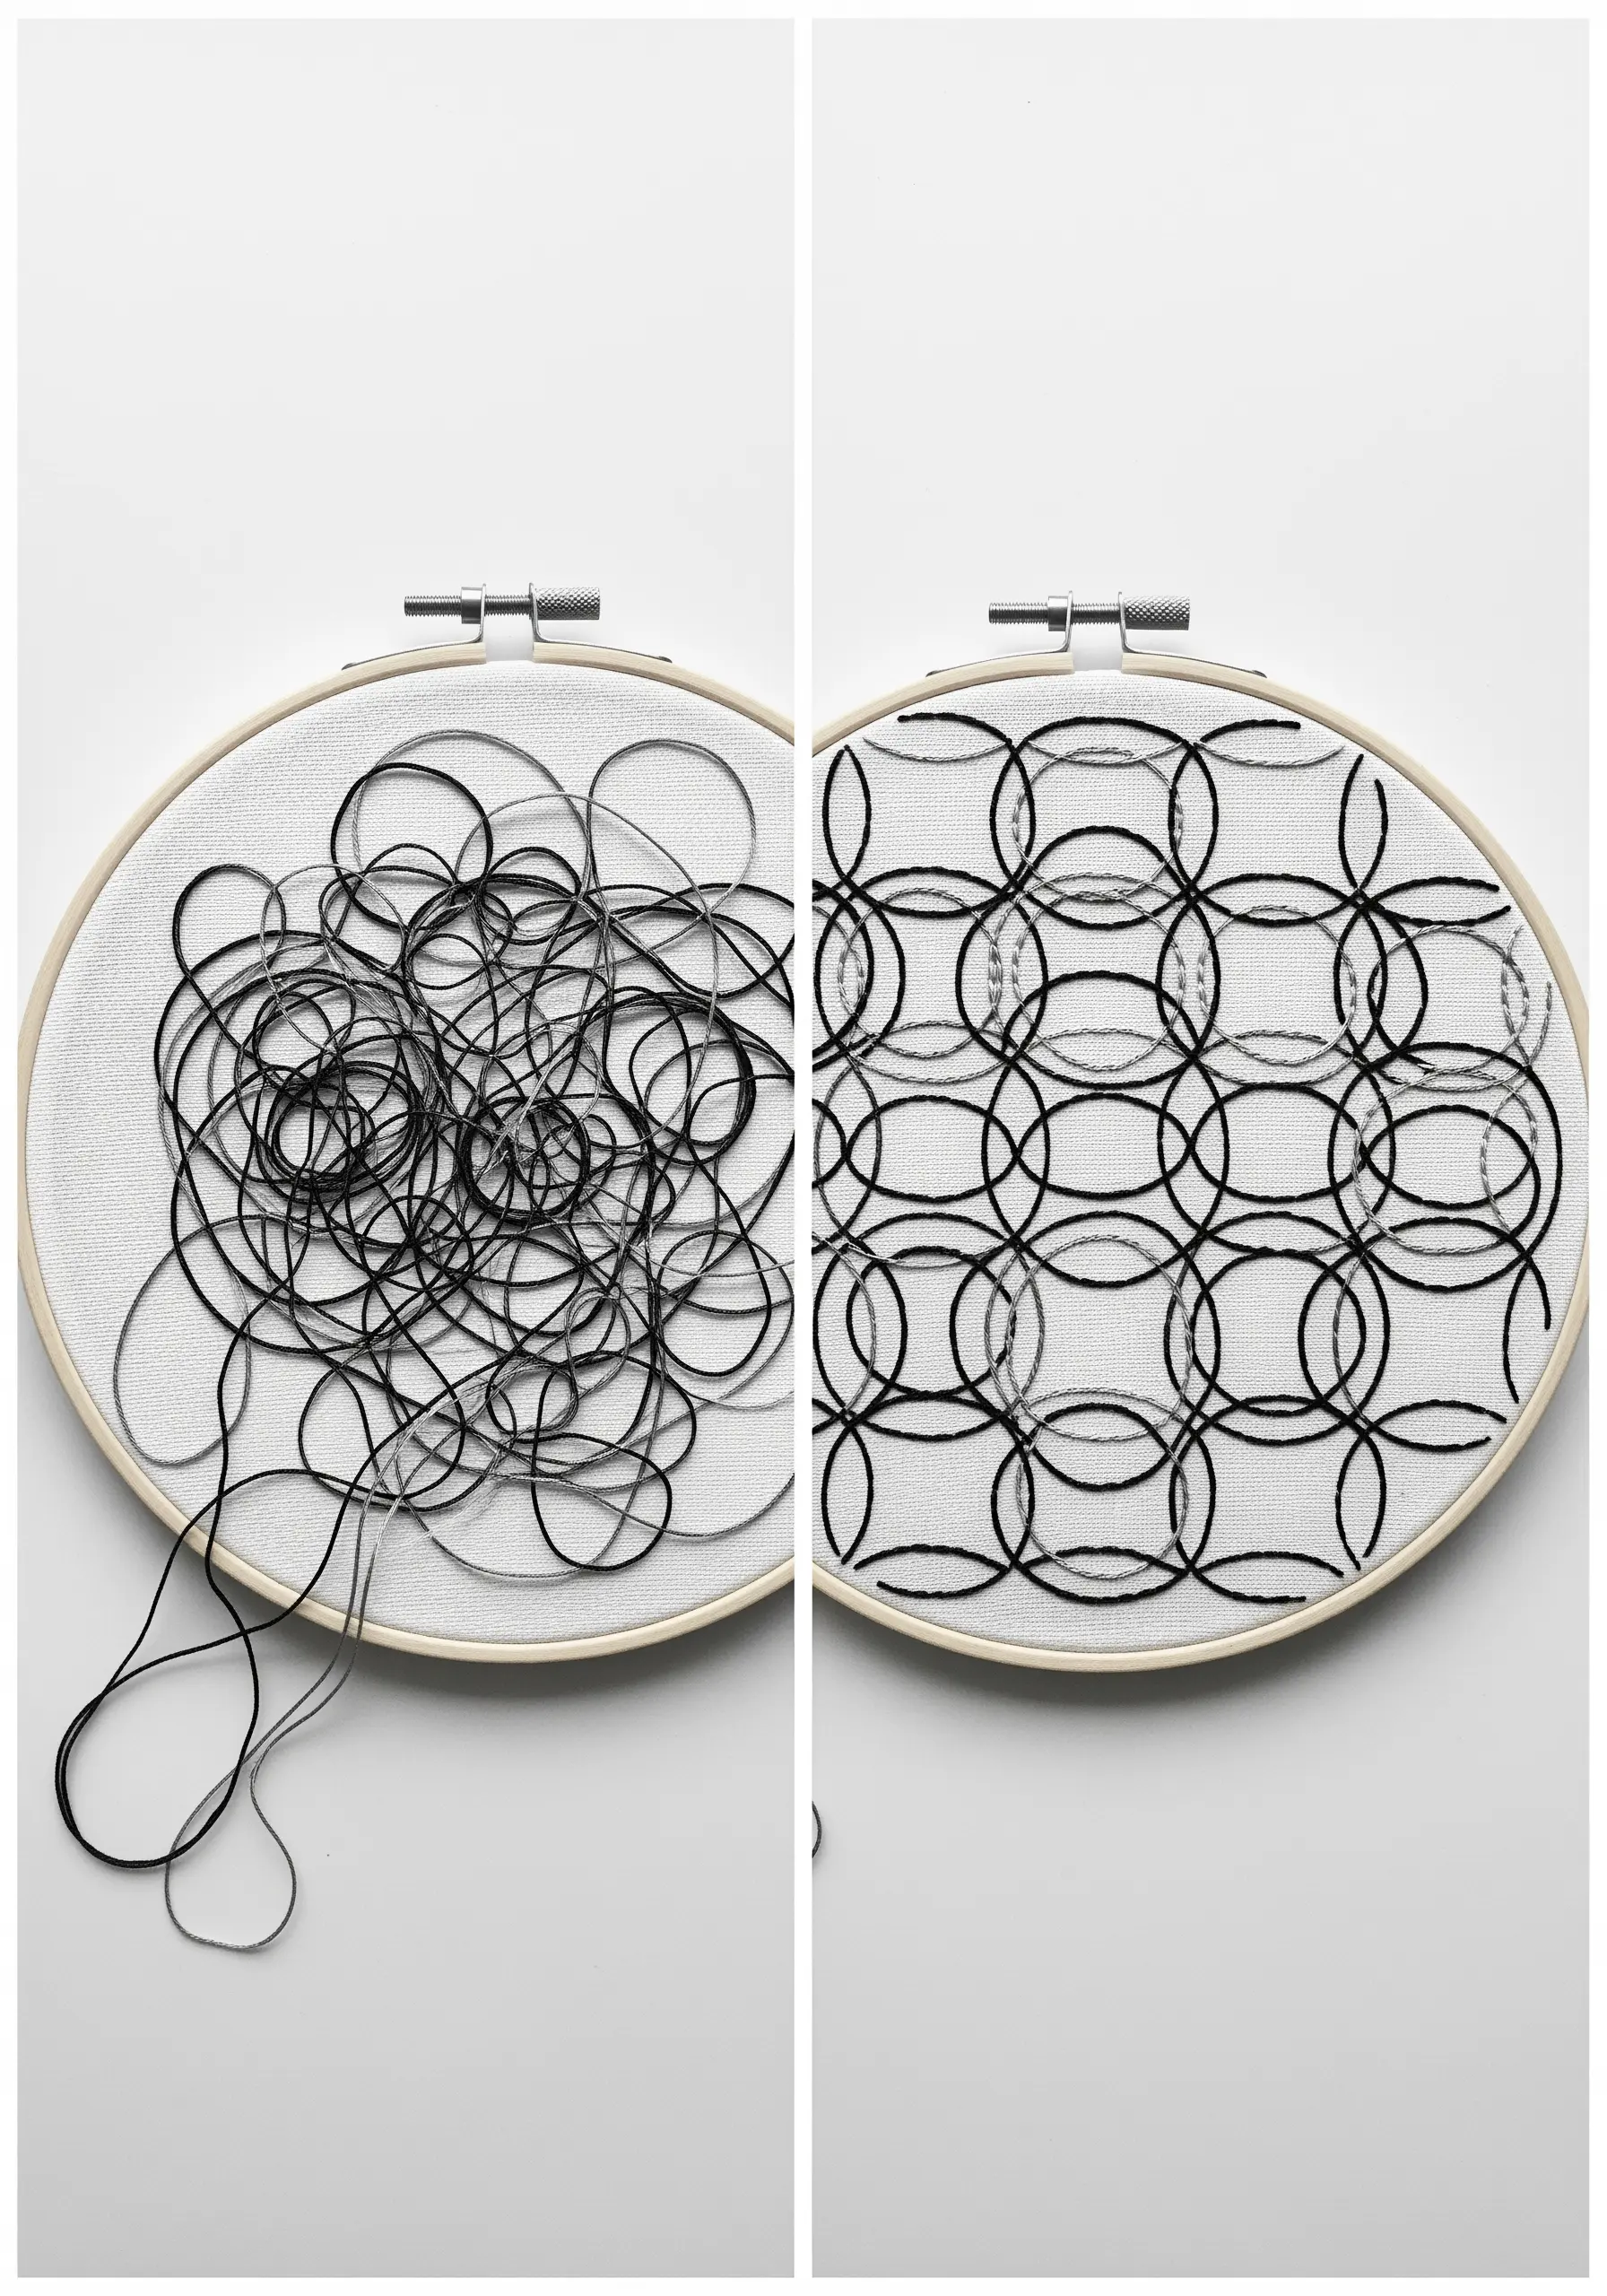
This is a conceptual approach that transforms the essence of a child’s art.
First, honor the child’s free-form scribble by recreating it with loose, chaotic threads.
Then, in a second hoop, analyze the scribble to find repeating shapes or intersecting lines and translate that into an ordered, geometric pattern.
Stitching both versions side-by-side tells a powerful story of creative transformation, showing how wild energy can be interpreted into beautiful, structured design.
19. Create Landscapes with Directional Thread Painting

When embroidering a landscape drawn by a child, use your stitches to build the topography of the land.
Use long, flowing horizontal stitches for flat fields or calm water, and shorter, angled satin stitches to create the gentle slopes of rolling hills.
By varying the direction and length of your stitches, you can create a sense of perspective and depth.
Applying this technique to an unconventional surface, like a lampshade, turns the artwork into a functional piece that glows with warmth.
20. Form Textured Curls with Pekinese Stitch Loops

For drawings that feature curly hair, you can create perfectly uniform, textured loops with a modified Pekinese stitch.
First, lay down a foundation of backstitched circles or swirls where you want the curls to be.
Then, weave a second thread through the backstitches, but instead of pulling it taut against the fabric, leave it as a raised, decorative loop.
This method offers incredible control and results in a head of neat, dimensional curls that beautifully captures the drawing’s character.
21. Stitch a Universe with Varied Textures and French Knots

A child’s drawing of the solar system is a fantastic prompt for textural exploration.
Give each planet a unique personality: use swirling long and short stitches for gaseous giants, a smooth satin stitch for Saturn’s rings, and tiny seed stitches for rocky surfaces.
Then, bring the vastness of space to life by filling the dark background fabric with a dense scattering of French knots in white, off-white, and silver metallic threads to represent a galaxy of distant stars.
22. Achieve Bold, Clean Lines with Yarn Couching
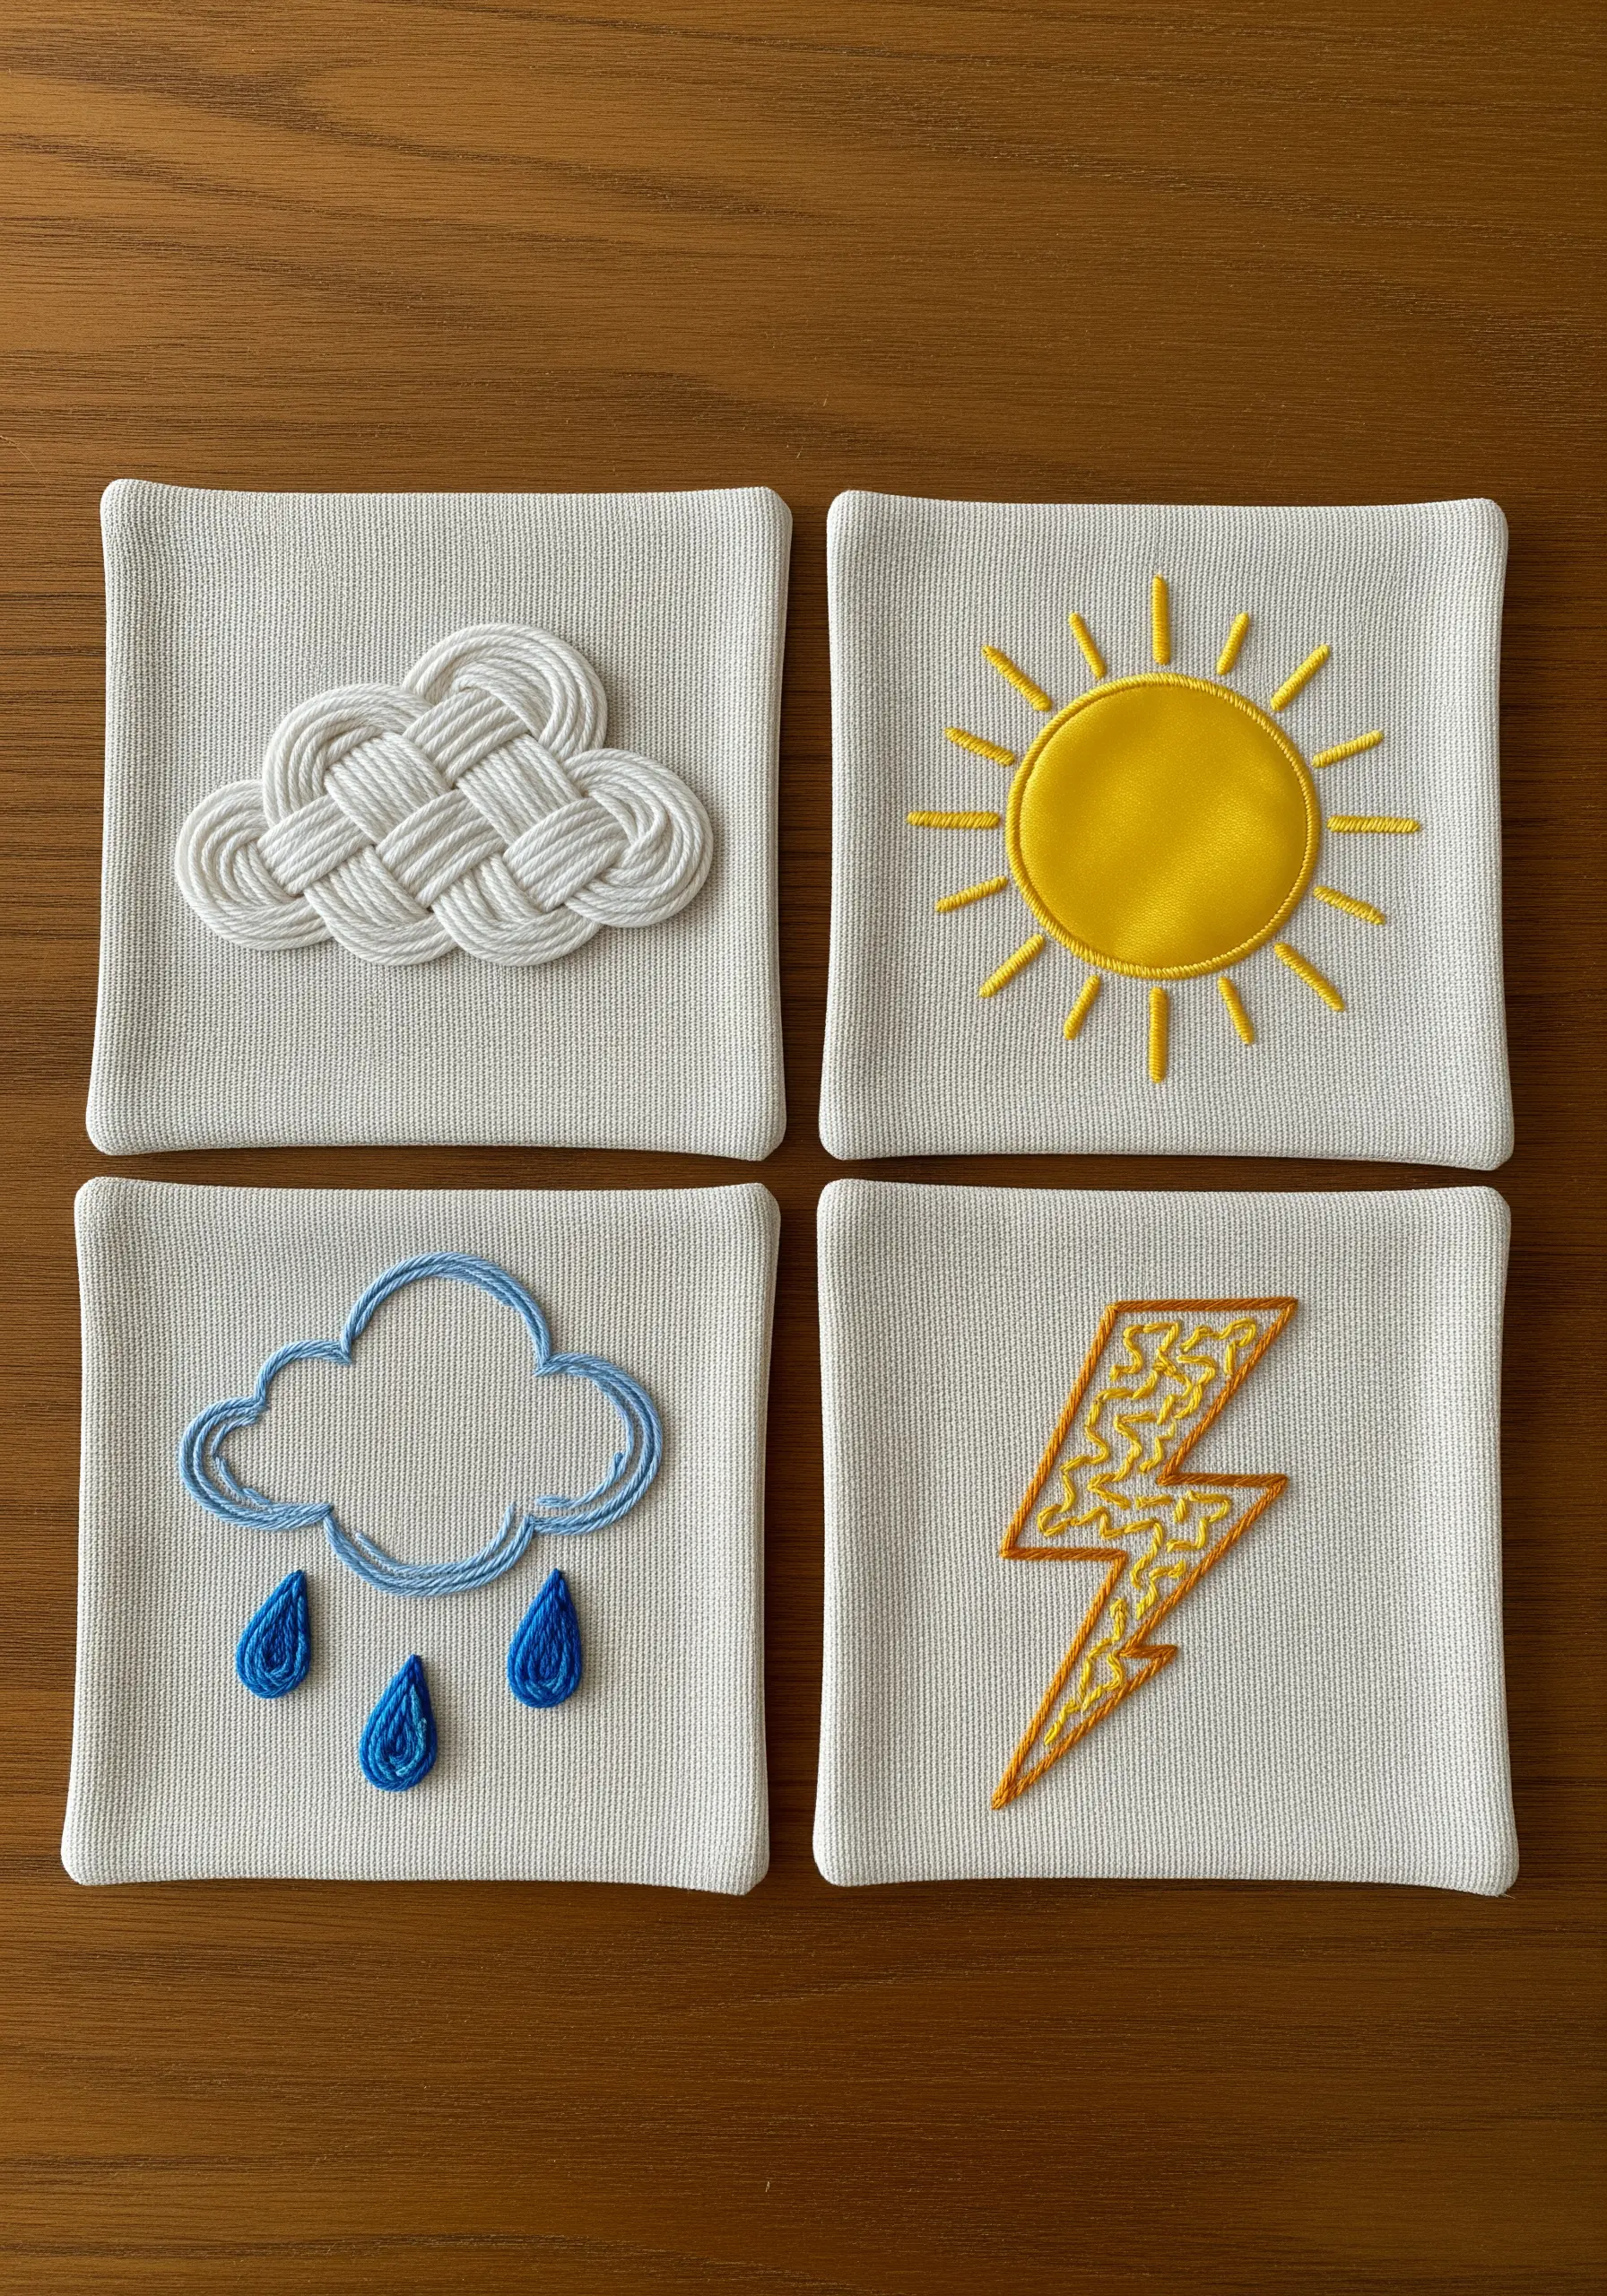
To replicate the bold, simple outlines of a weather chart or other graphic drawings, couching is a perfect technique.
Lay a thick piece of yarn or cotton cord along the lines of the drawing.
Then, using a single strand of matching embroidery floss, secure the yarn to the fabric with small, evenly spaced perpendicular stitches.
This method is much faster than a satin stitch outline and produces a wonderfully clean, raised line that makes the simple icons feel substantial and modern.
23. Personalize Apparel with Scattered Mini-Motifs
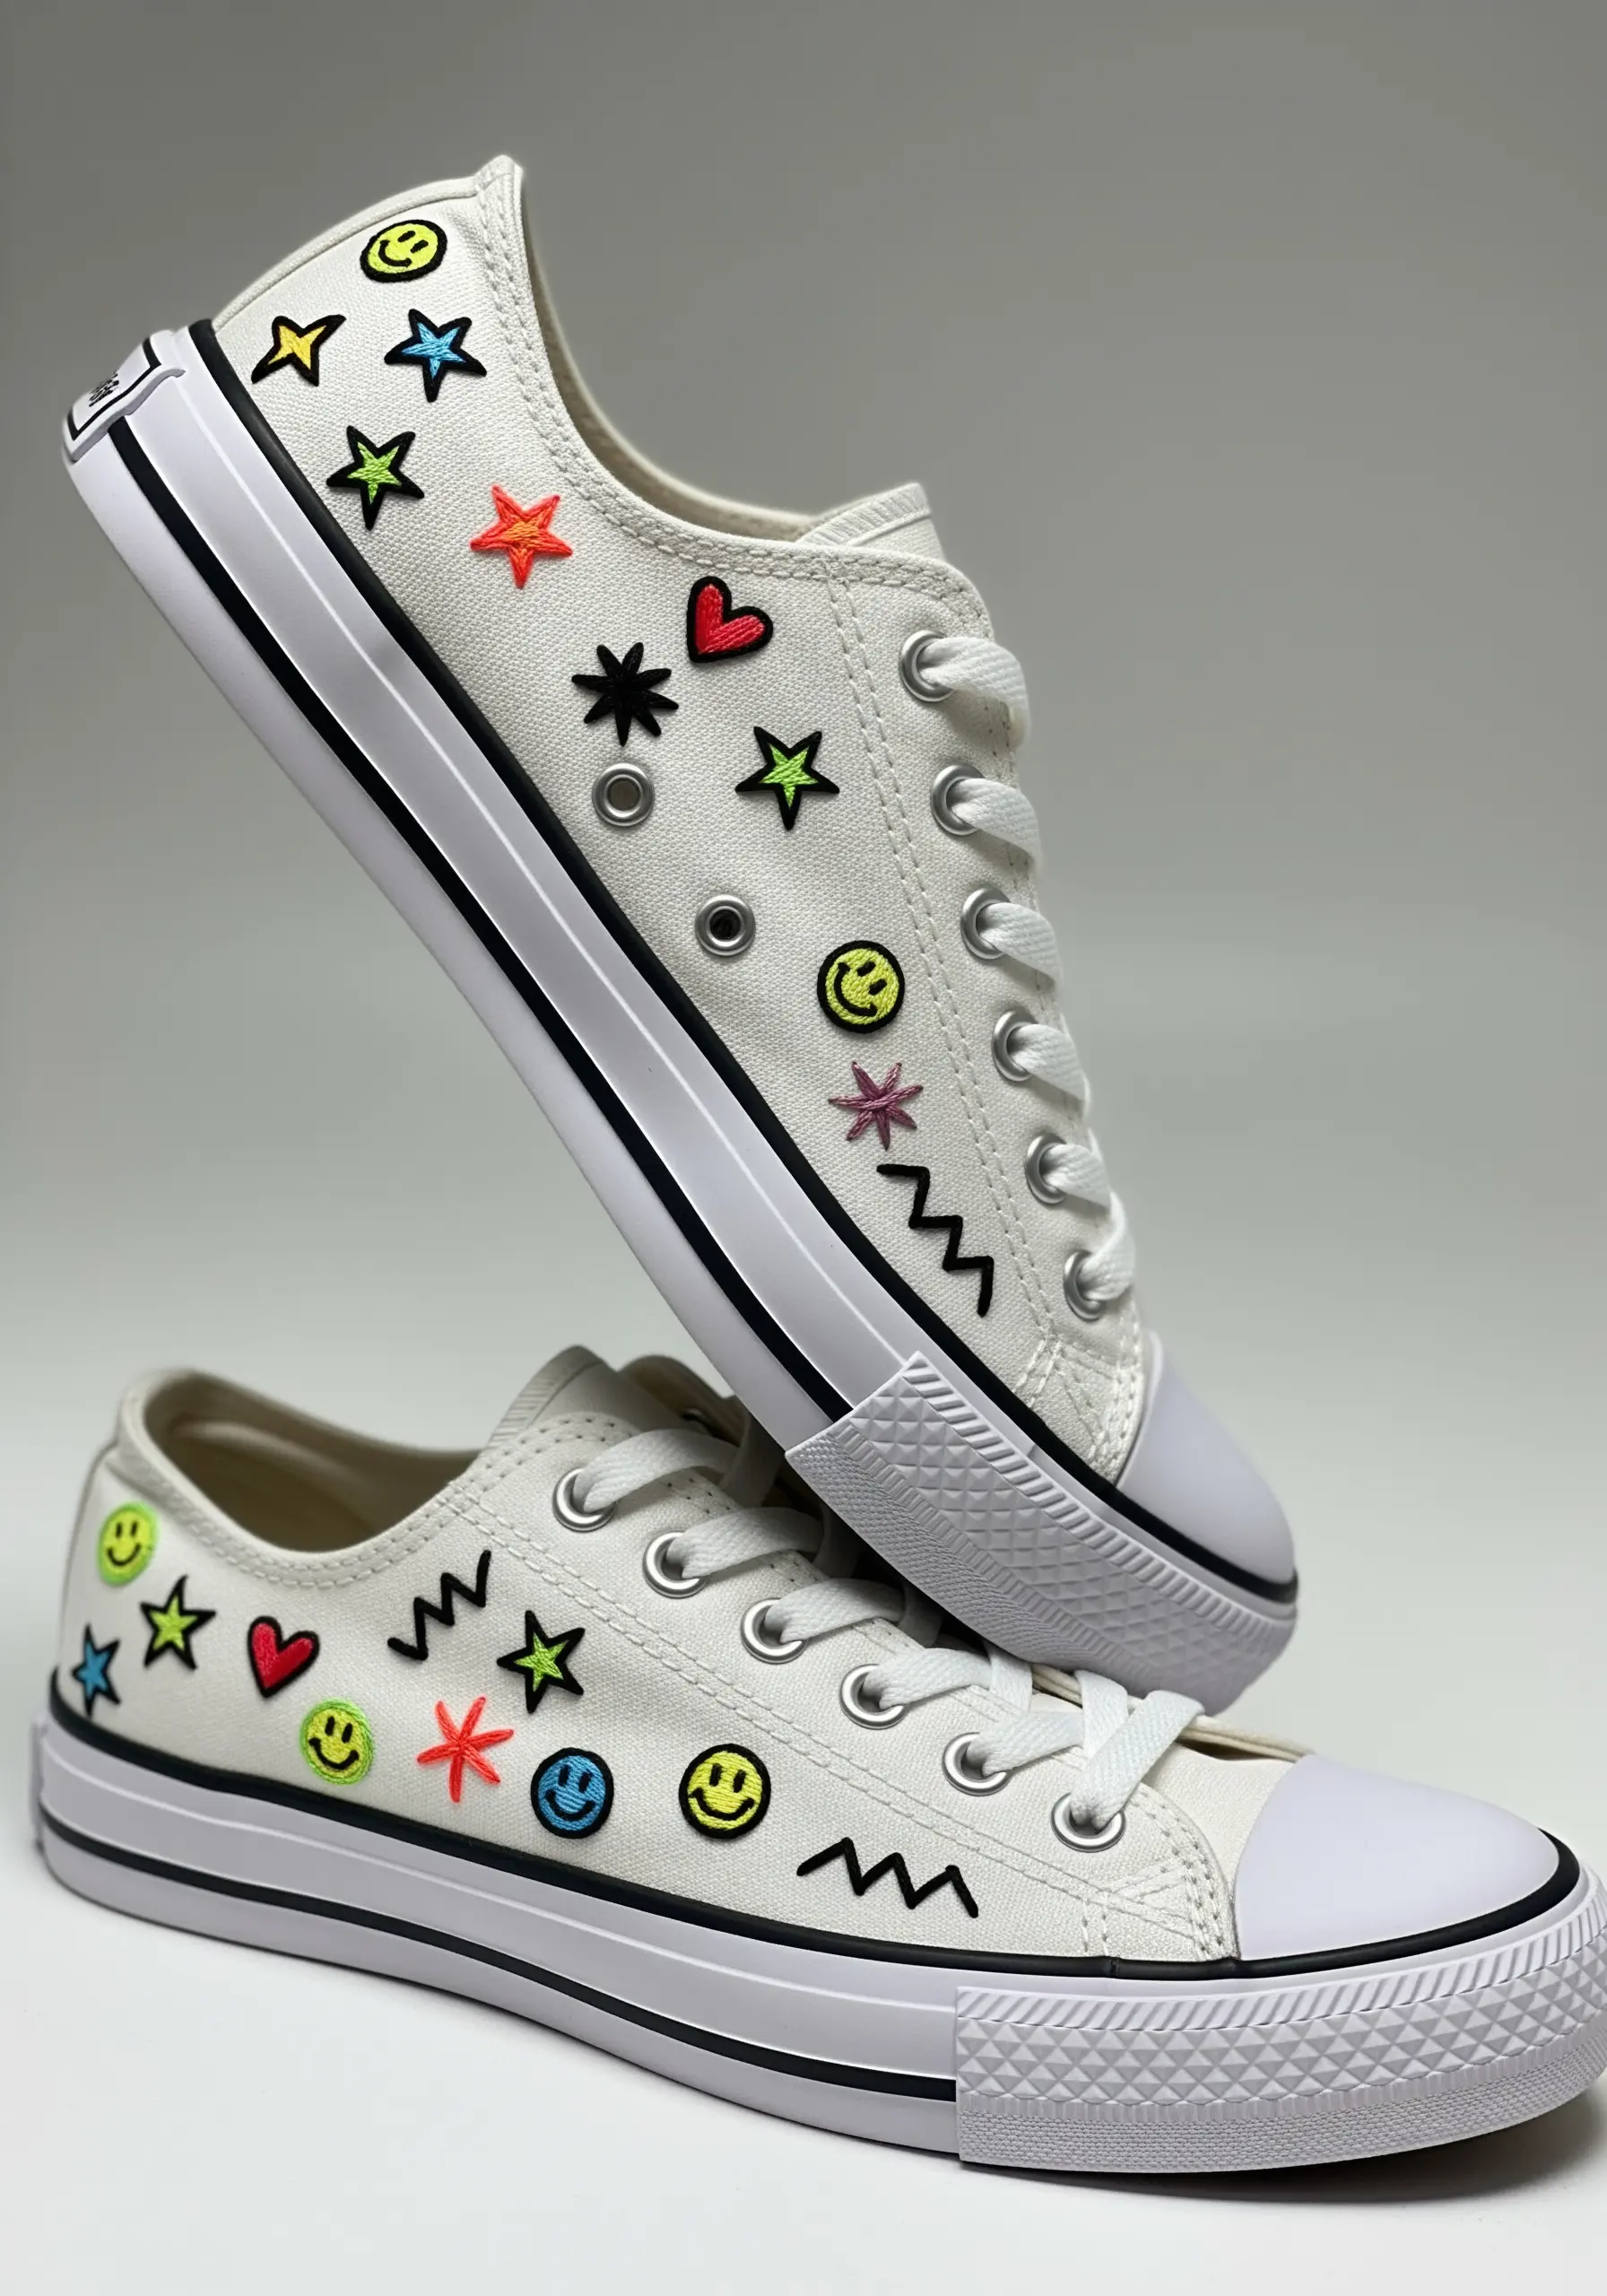
Collect a child’s favorite doodles—stars, hearts, zigzags, and smiley faces—and treat them like a sheet of stickers.
Embroider each tiny motif individually using simple satin stitches and backstitch outlines.
Then, scatter them artfully across a pair of canvas shoes, a backpack, or the pocket of a denim jacket.
This approach turns a collection of small drawings into a curated, personalized design that feels both playful and stylishly intentional.


