

You’ve mastered the basic stitches, and now you find yourself looking at your work, wondering how to make it feel more… complete. More intentional. How do you move from simply following a pattern to creating a piece of art that truly resonates?
The answer isn’t about learning dozens of complex new stitches. It’s about understanding how to use the stitches you know with purpose—how to choose the right thread for a specific texture, how to use color to create depth, and how to combine techniques to tell a story.
Here, we’ll explore ideas rooted in rich global traditions, but adapted for your modern hand. These are not just projects, but principles you can apply to anything you create, helping you to stitch with more confidence, clarity, and personal artistry.
1. Elevate Decor with Rhythmic Sashiko Stitching
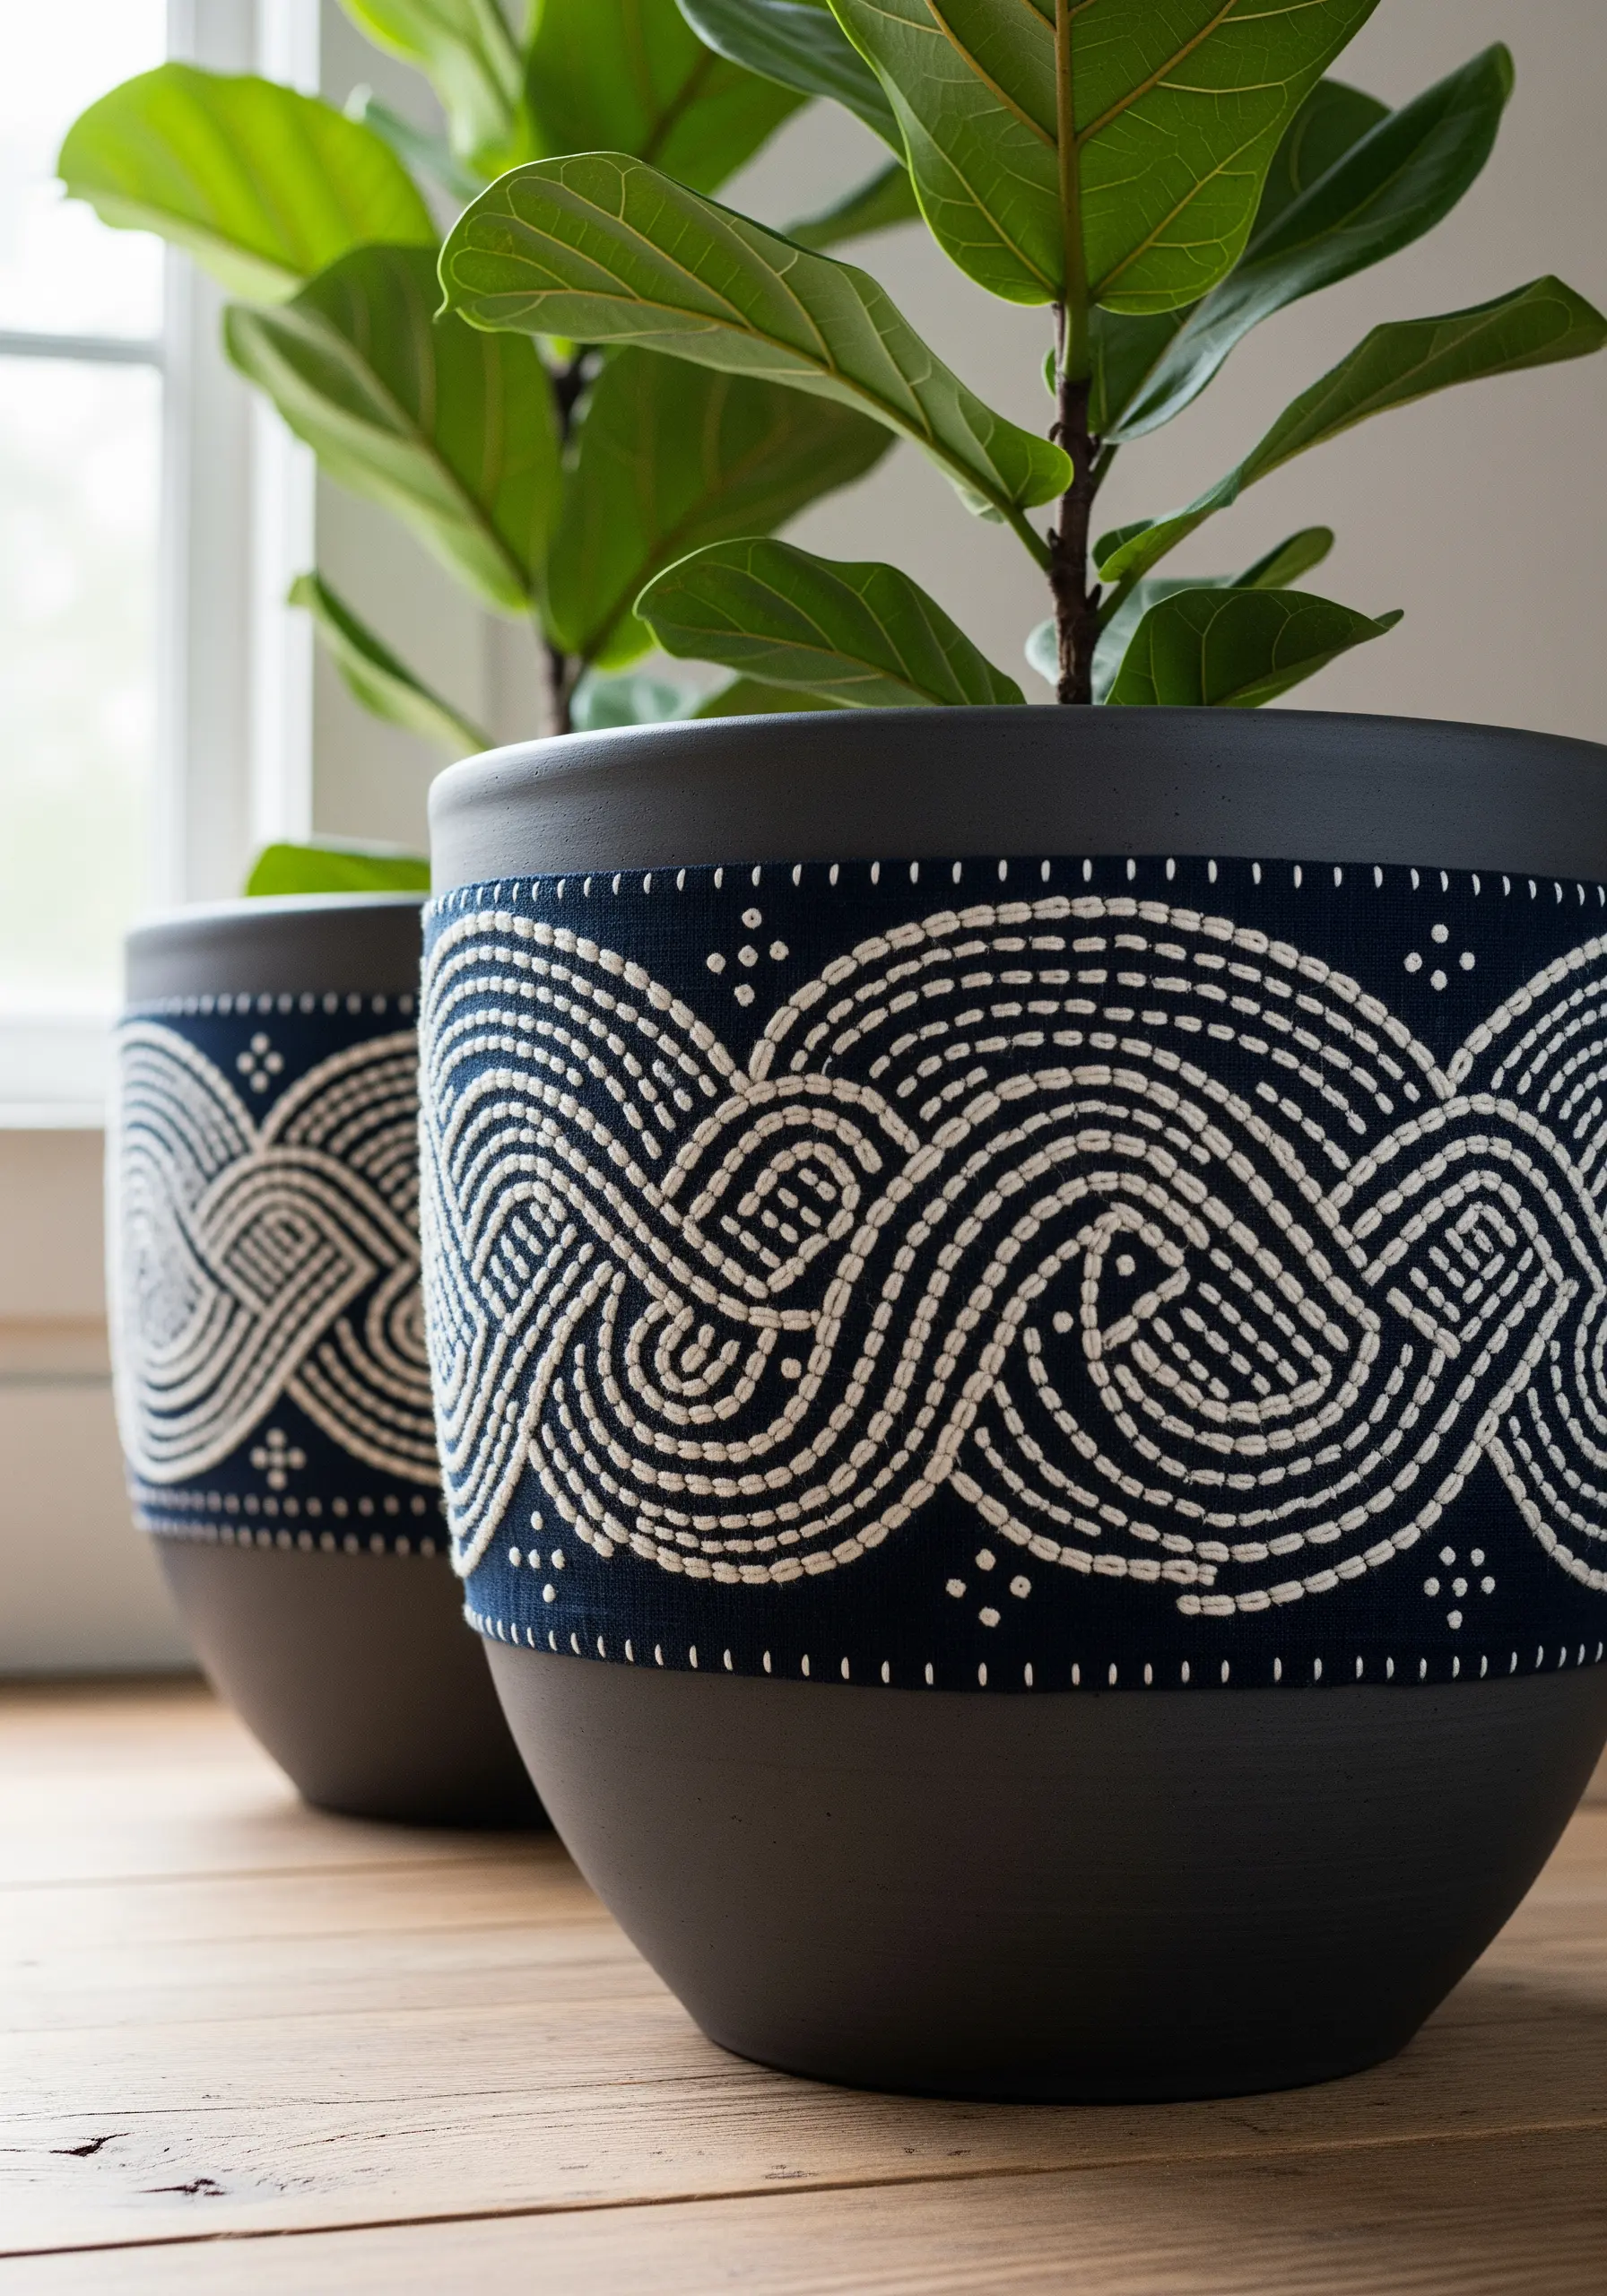
You can instantly upgrade a simple object by wrapping it in fabric embellished with traditional Japanese Sashiko.
Use a simple running stitch on a high-contrast fabric, like white thread on indigo cotton, to make the pattern prominent.
The key to the signature Sashiko look is the consistency of your stitches and the small, even gaps between them.
Use a thicker thread, such as specialized Sashiko cotton or 2-3 strands of standard embroidery floss, to ensure your rhythmic lines have visual weight and texture.
2. Create Luminous Folk Art with Bold Color Blocking
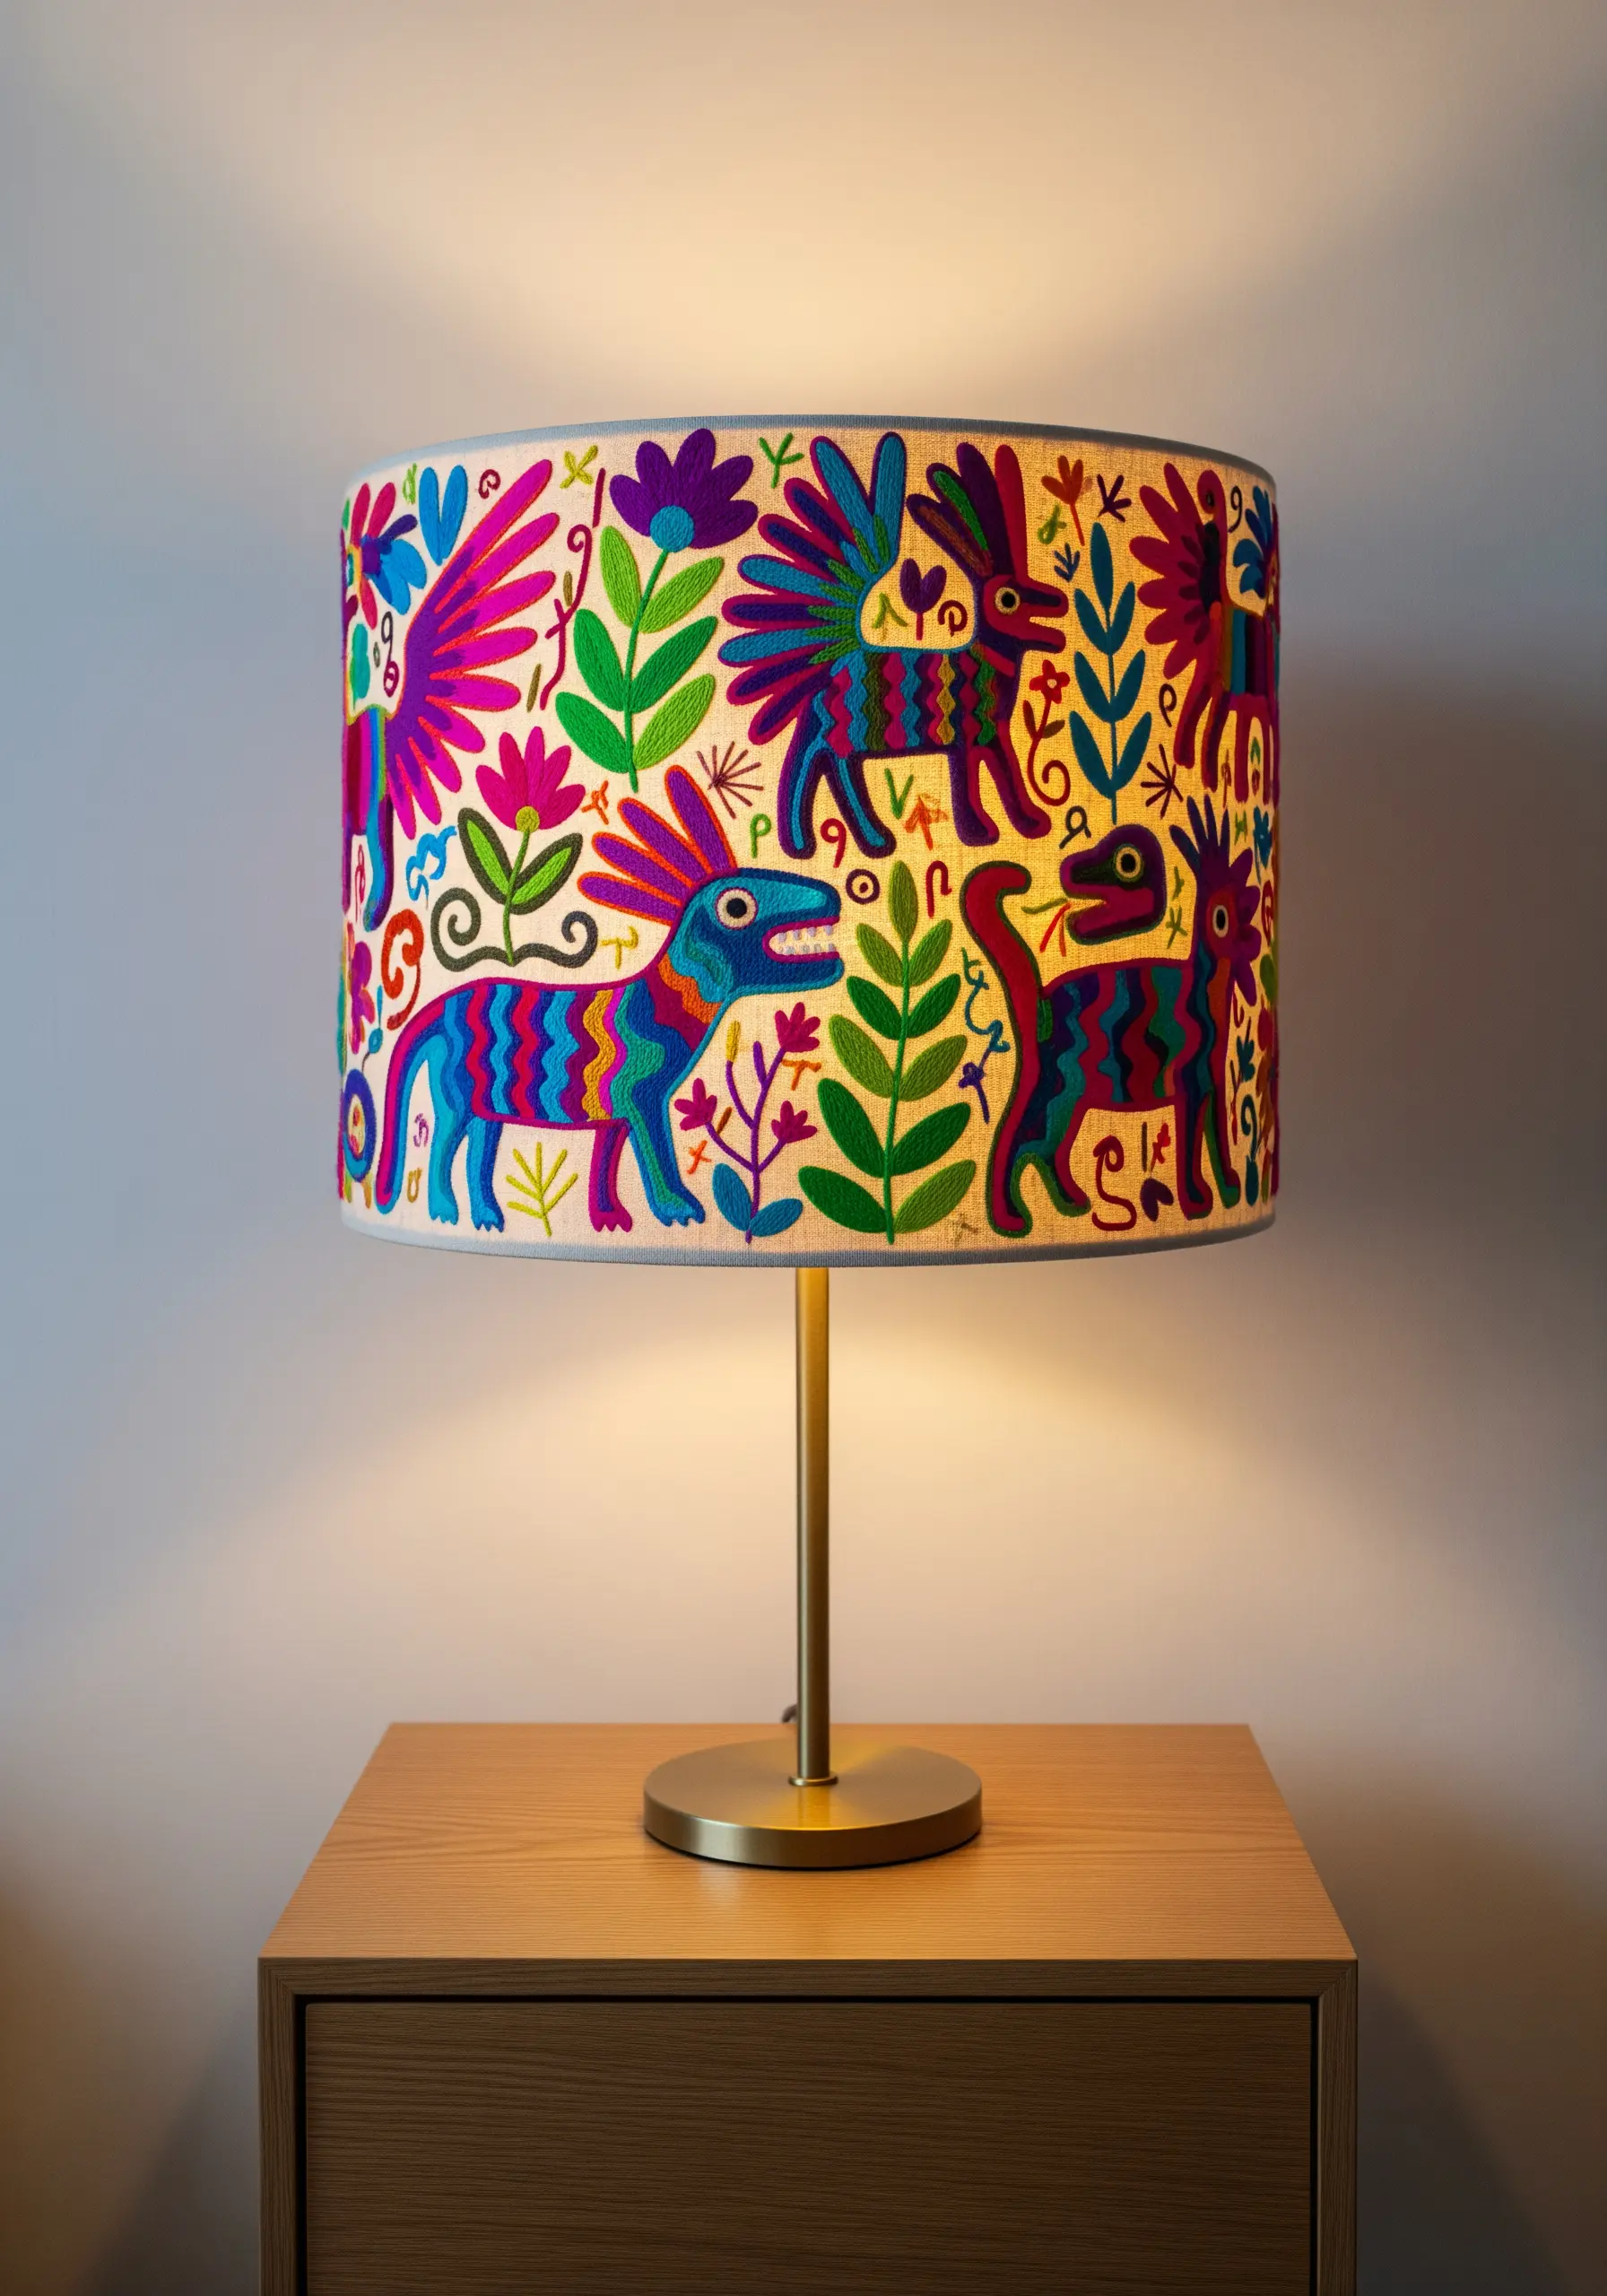
To achieve this vibrant, illustrative style inspired by Otomi embroidery, focus on filling your motifs with solid, dense color.
Use a closed herringbone stitch or a compact satin stitch to completely cover the fabric within your outlines.
For the cleanest edges, first outline each shape with a split stitch or backstitch before filling it in.
This technique makes the colors incredibly vibrant and ensures the design pops, especially when used on a lampshade where light will shine through.
3. Frame Your Stitches with Integrated Folk Painting
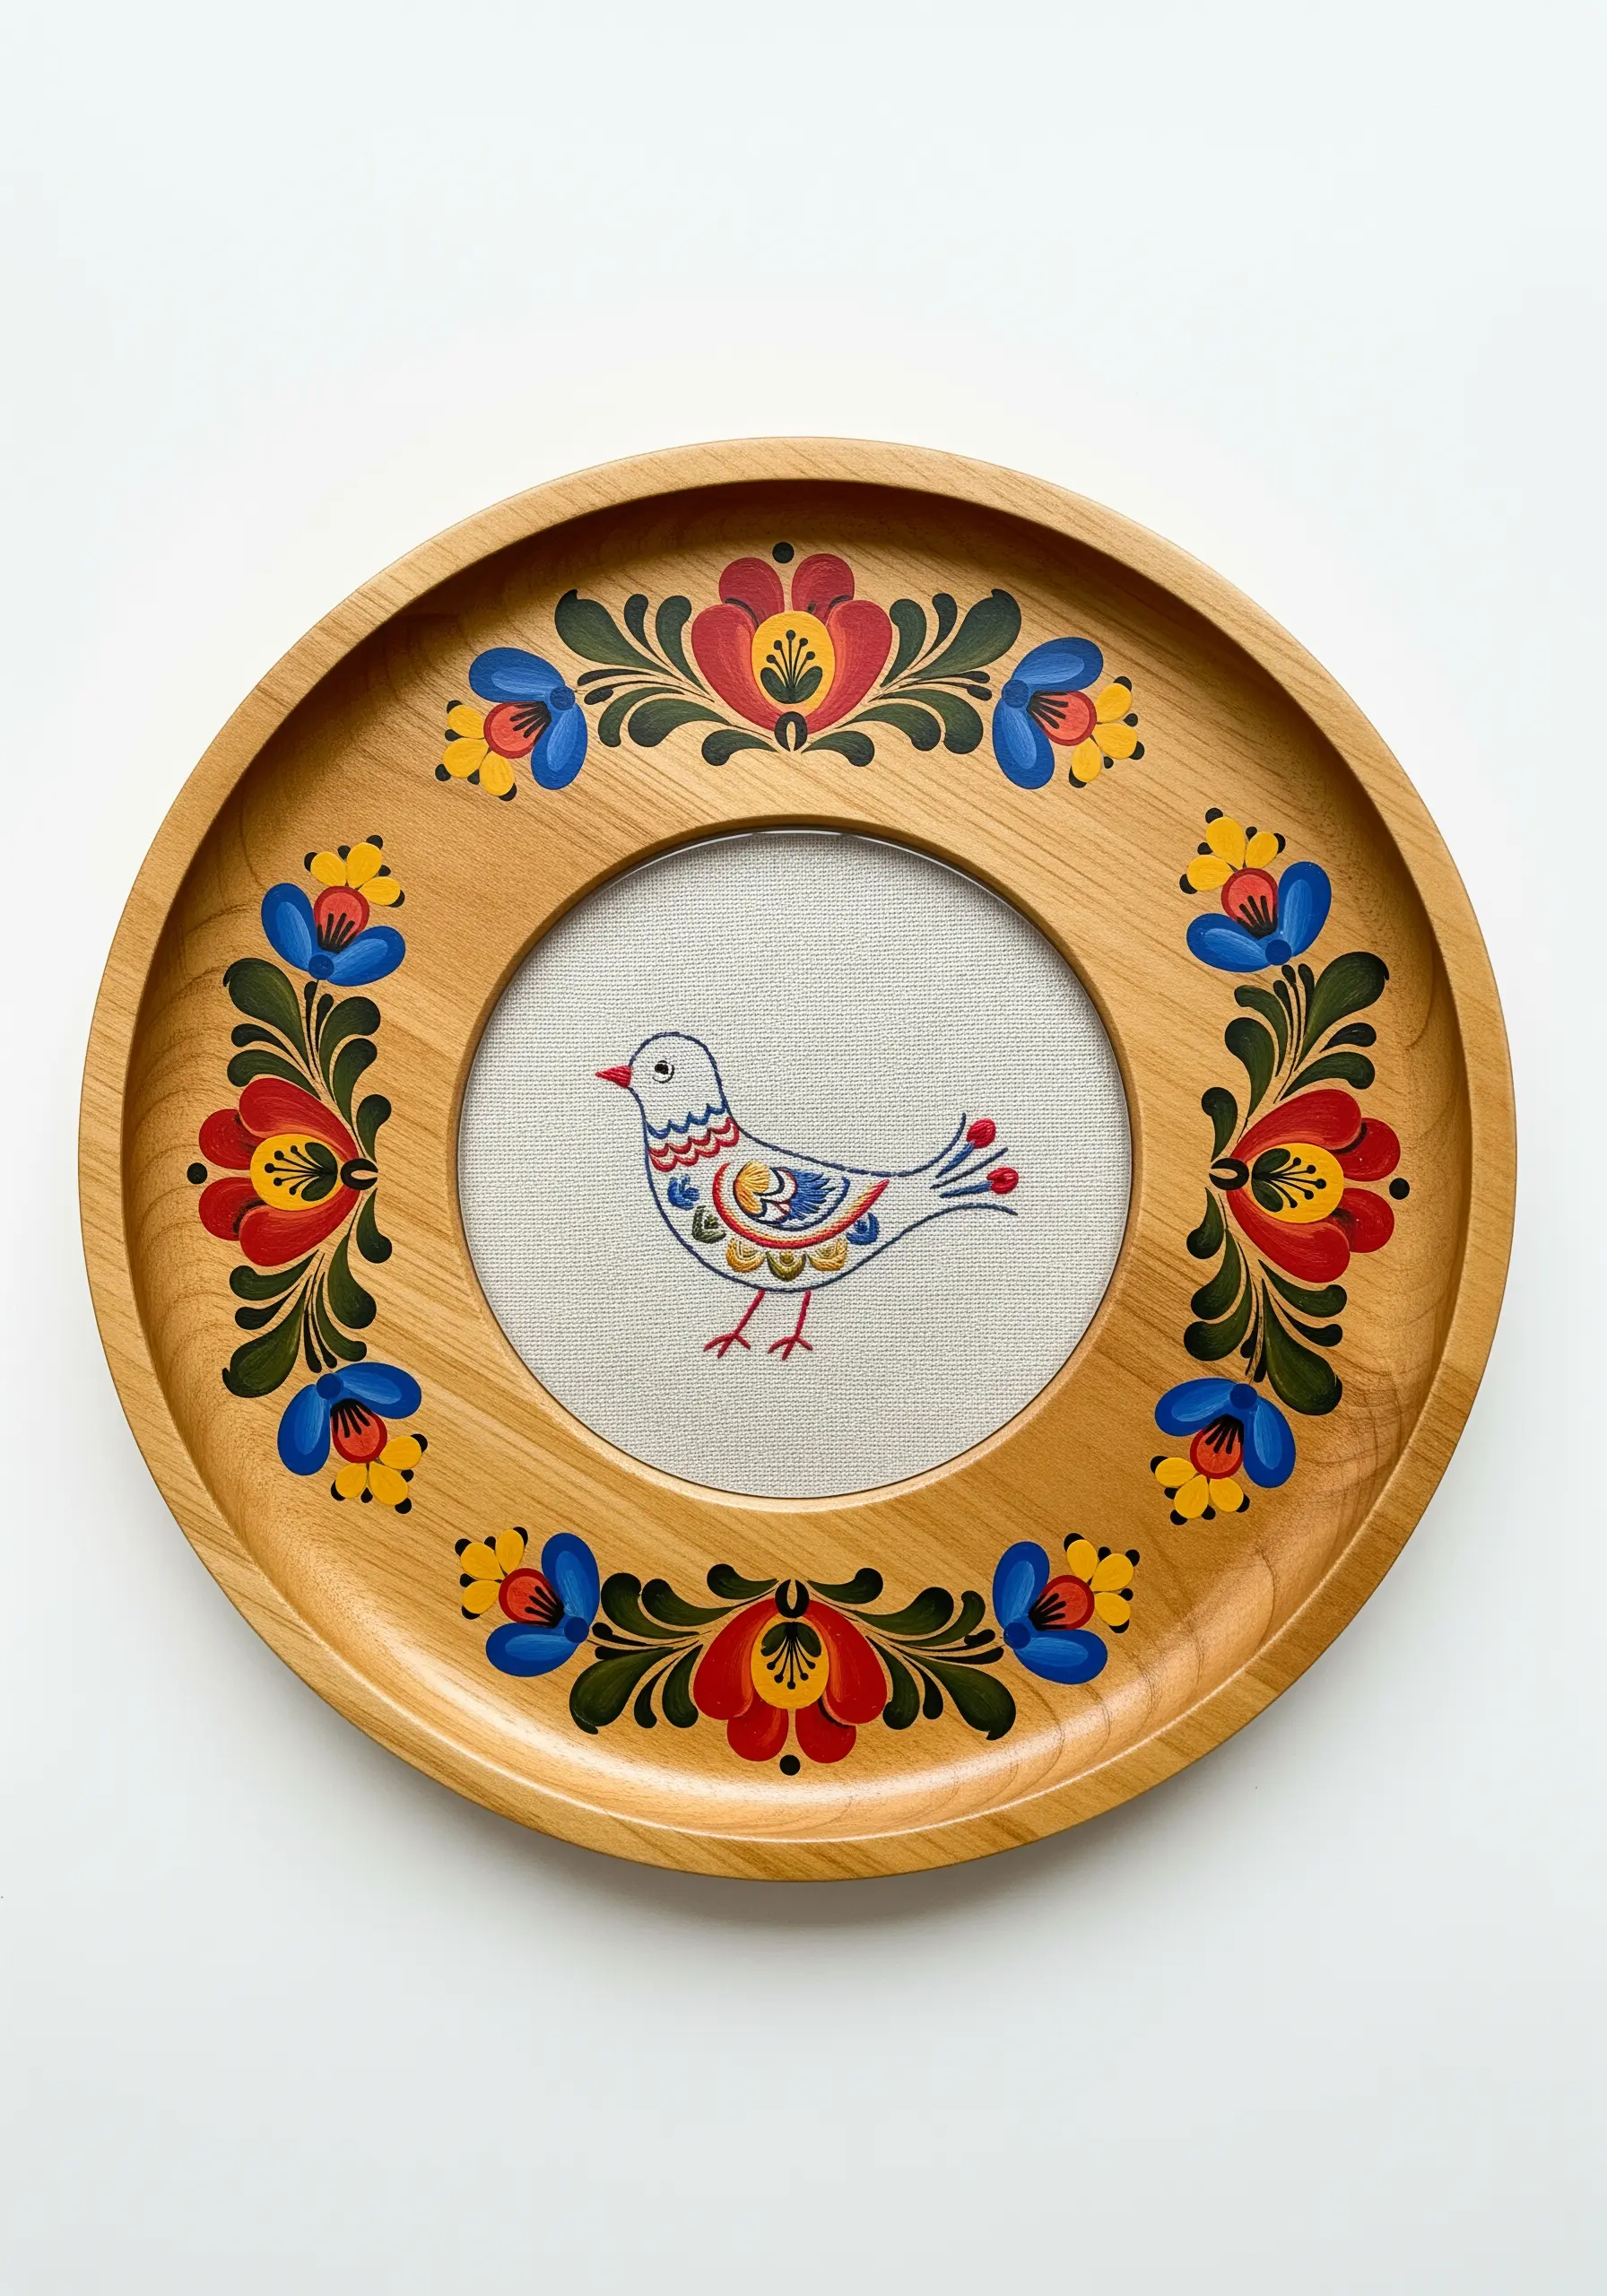
You can create a fully cohesive art piece by extending your design from the fabric onto the frame itself.
After completing your embroidery—here, a simple bird with satin stitch fills—paint the wooden hoop or frame with acrylics to match.
Echo the colors and folk-art motifs from your stitching onto the wood.
This simple step integrates the frame as part of the artwork, making the entire object feel more intentional, complete, and heirloom-quality.
4. Build Meditative Texture with Kantha-Inspired Running Stitch
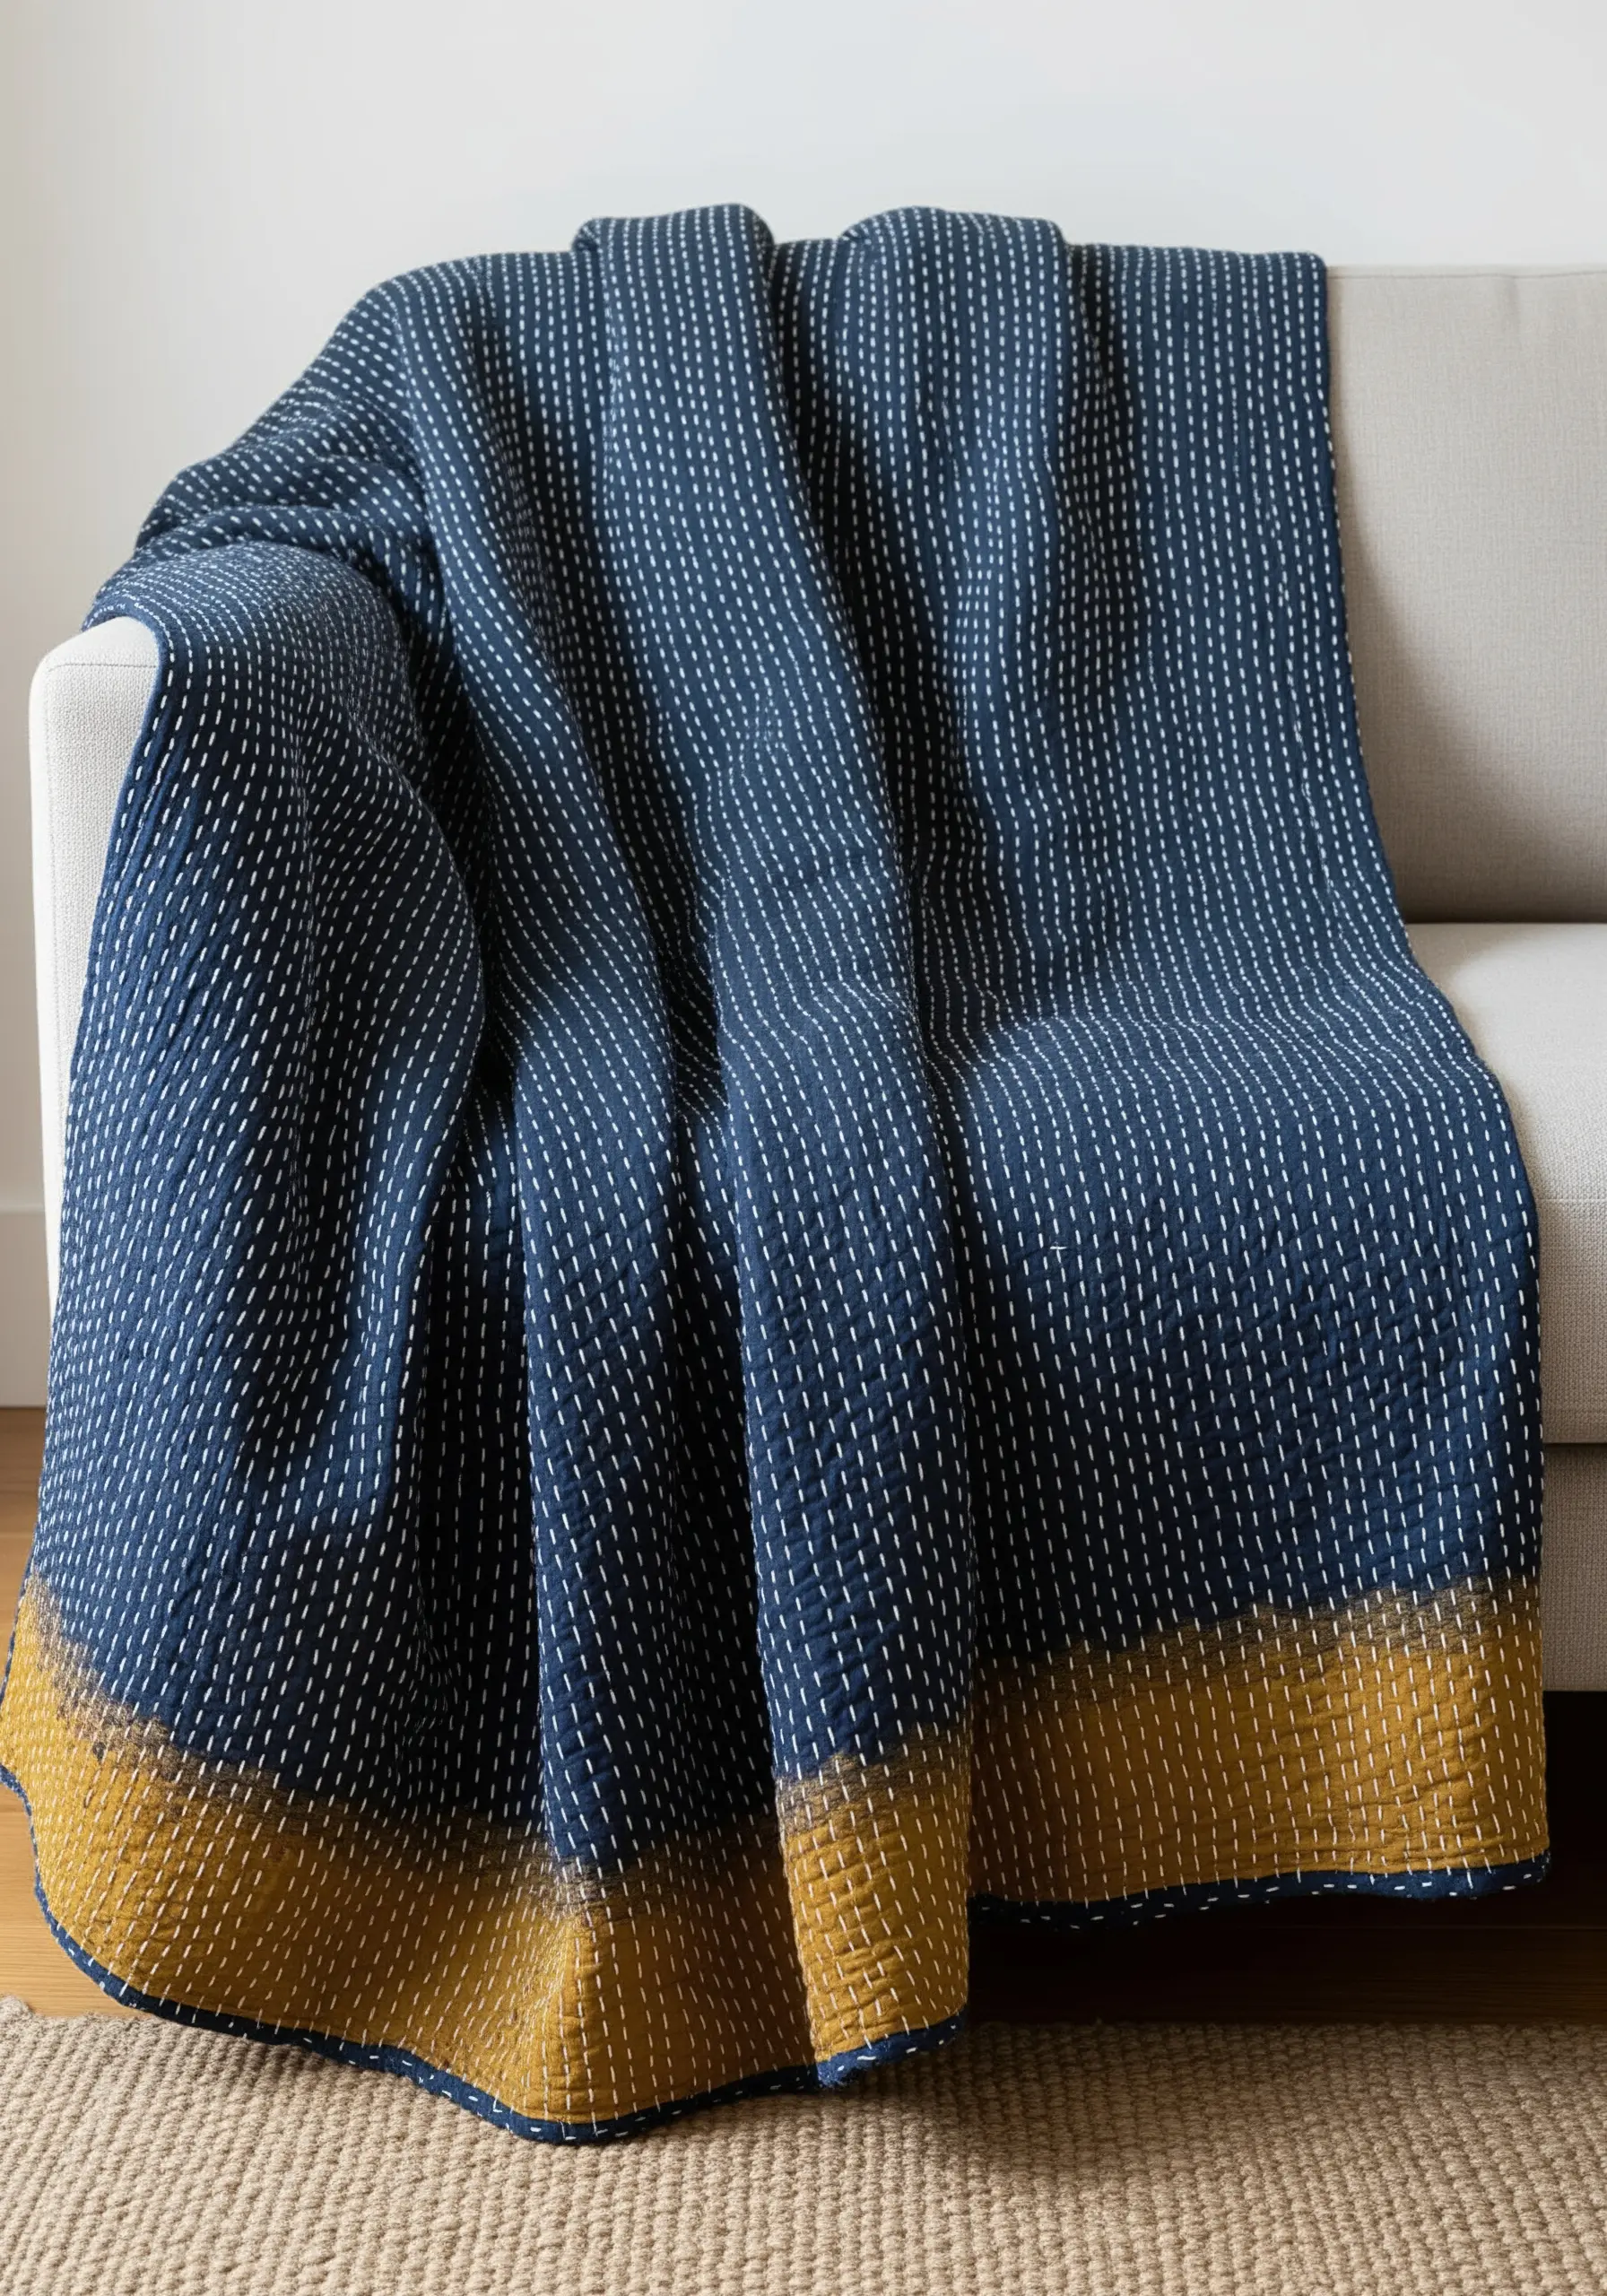
Transform a simple blanket or wall hanging by adding all-over texture with rows of running stitches, a technique central to Kantha quilting.
The beauty of this method is its simplicity; the visual impact comes from the repetition and rhythm of the lines.
Use a thick, contrasting thread like pearl cotton to ensure the stitches stand out and create a tangible, tactile surface.
Don’t worry about perfect uniformity—slight variations in stitch length add character and a distinct handmade quality.
5. Sculptural Storytelling with Layered Felt and Appliqué
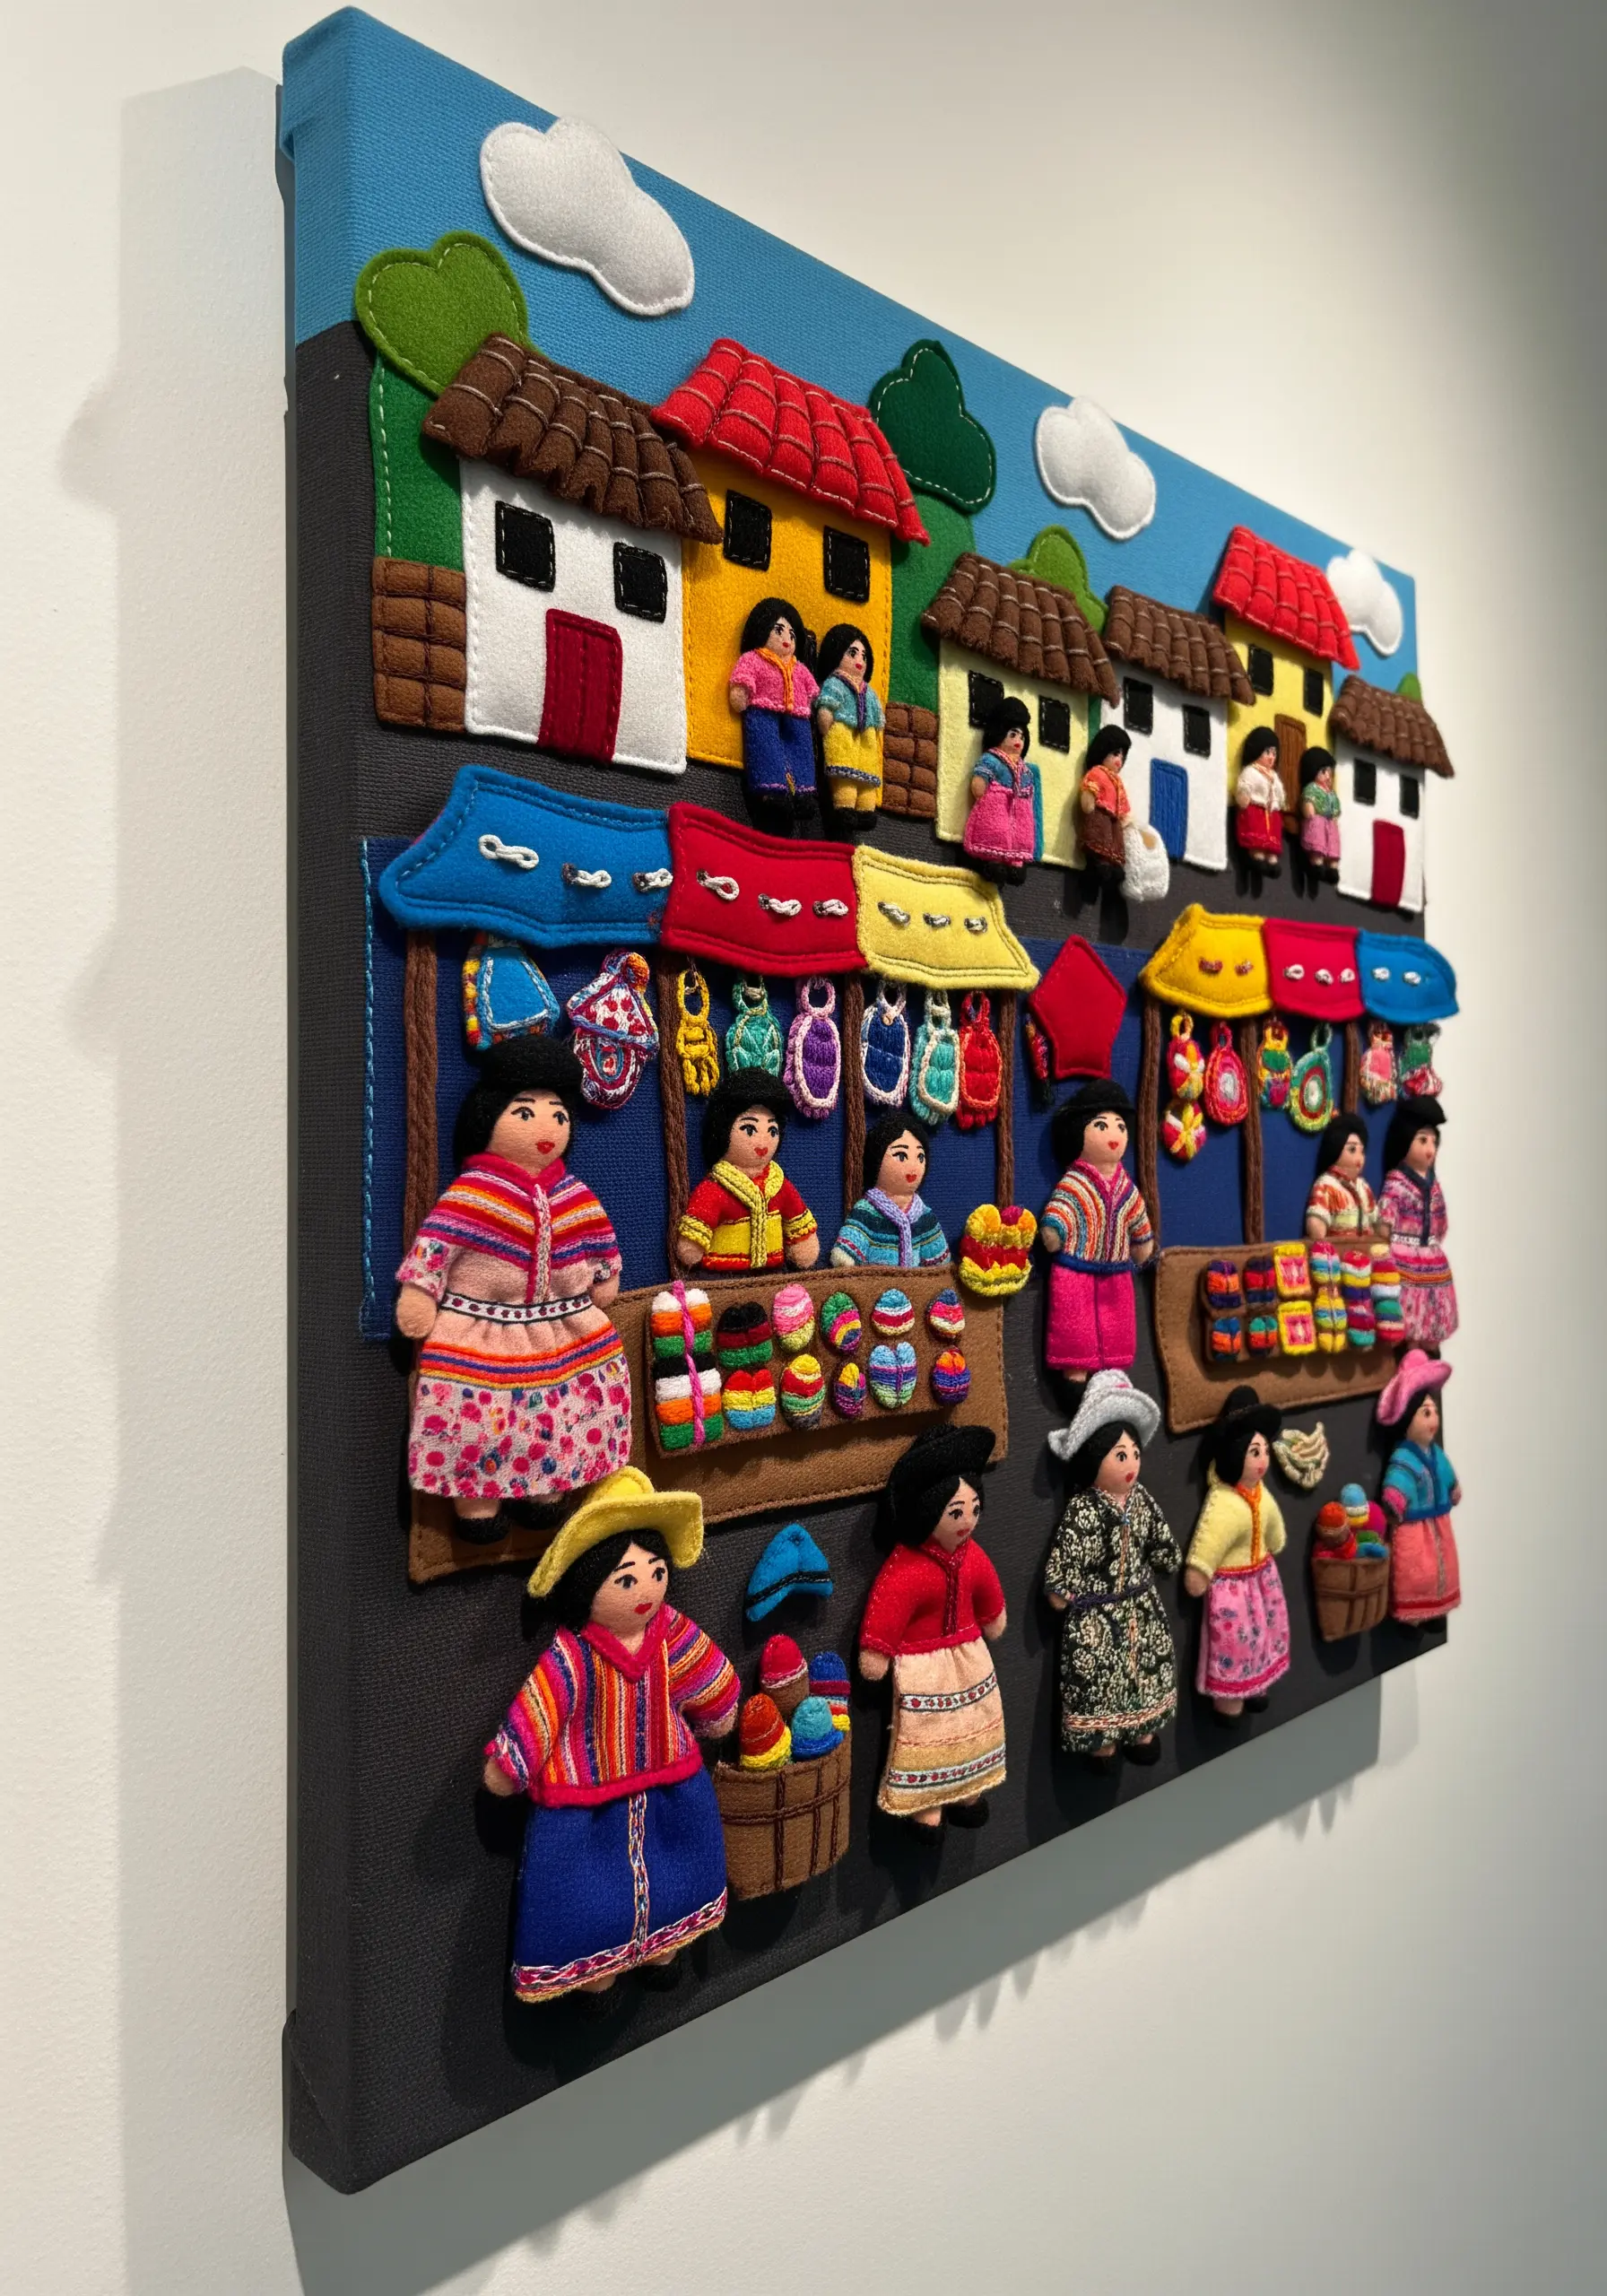
You can build a three-dimensional narrative scene, inspired by Peruvian *arpilleras*, by layering pieces of felt and fabric.
Start by cutting basic shapes for your background, buildings, and figures, then arrange them on a canvas to create depth.
Use simple embroidery like blanket stitch for edges and French knots for details to secure the pieces and add character.
This technique turns flat fabric scraps into a vibrant, textural diorama that tells a story.
6. Achieve Dramatic Depth on High-Contrast Velvet
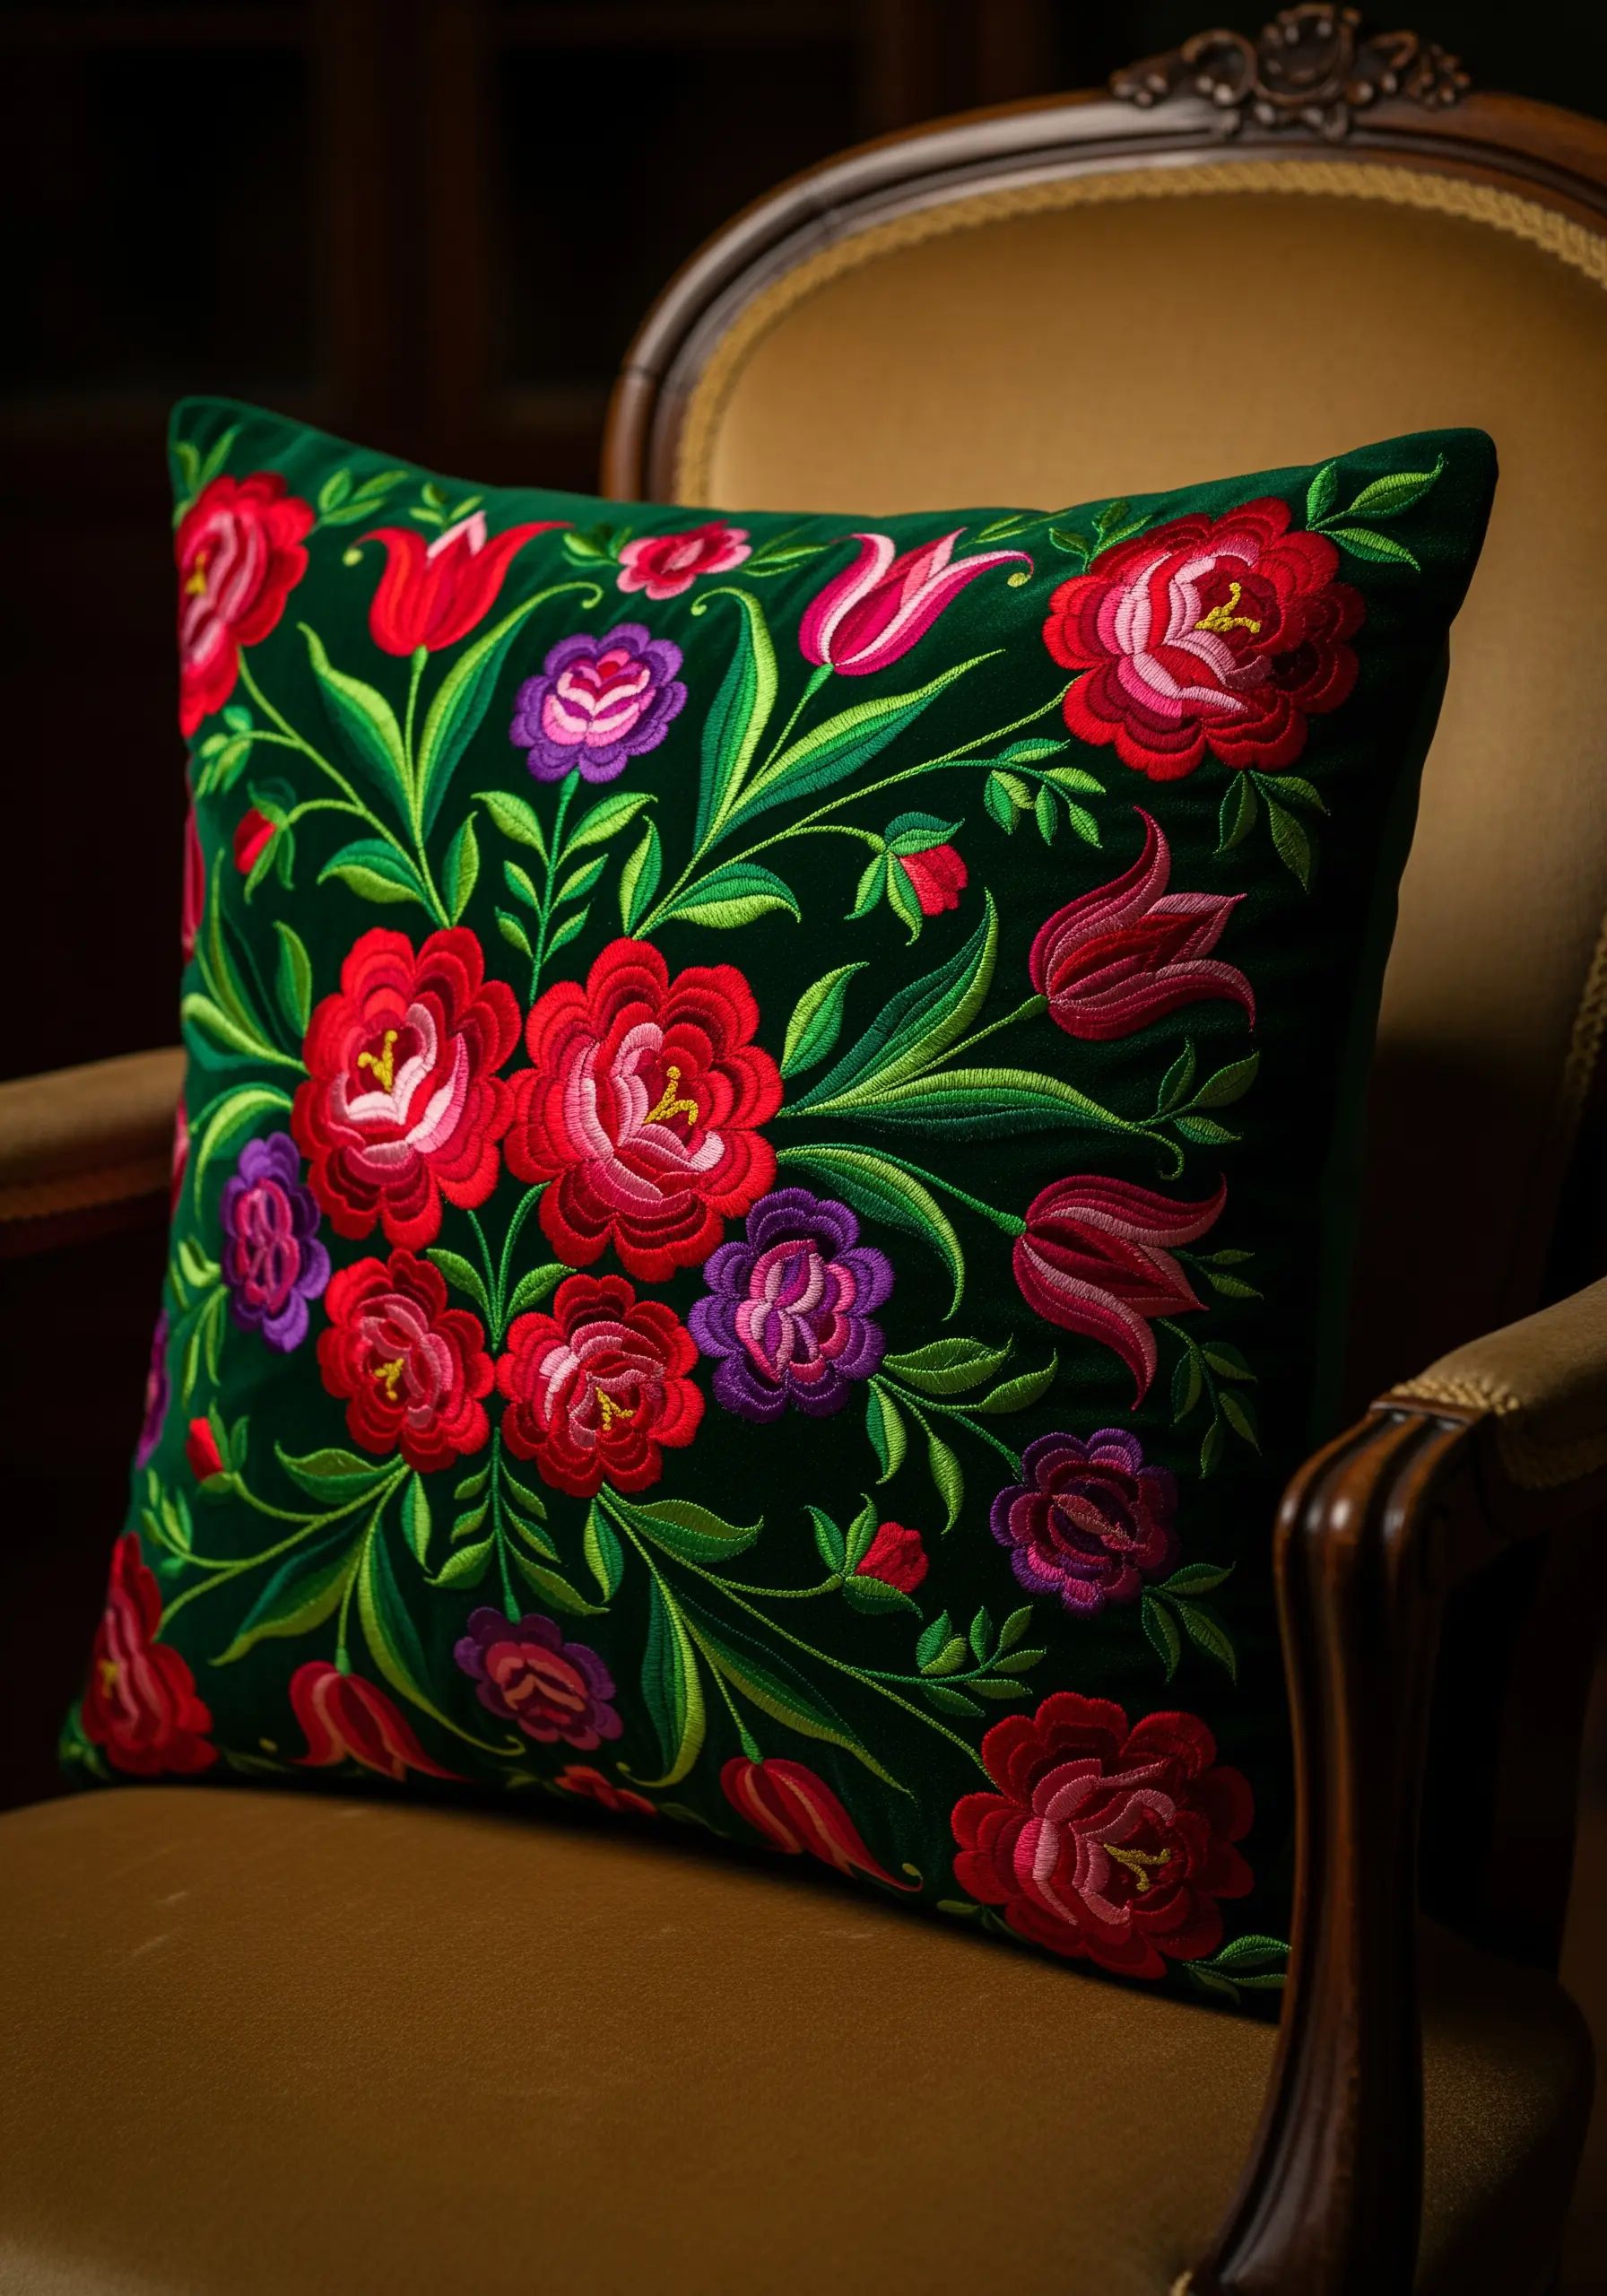
Stitching on a dark, plush fabric like velvet instantly elevates your work by creating a sense of luxury and depth.
Choose vibrant, saturated thread colors—like the reds and purples here—that will pop against the deep green background.
The velvet’s pile catches the light differently from various angles, adding its own shimmer and making your satin stitches look exceptionally rich and luminous.
Use long-and-short stitch to blend colors for a smooth, painterly effect on the petals.
7. Mimic Carved Wood with Raised Embroidery
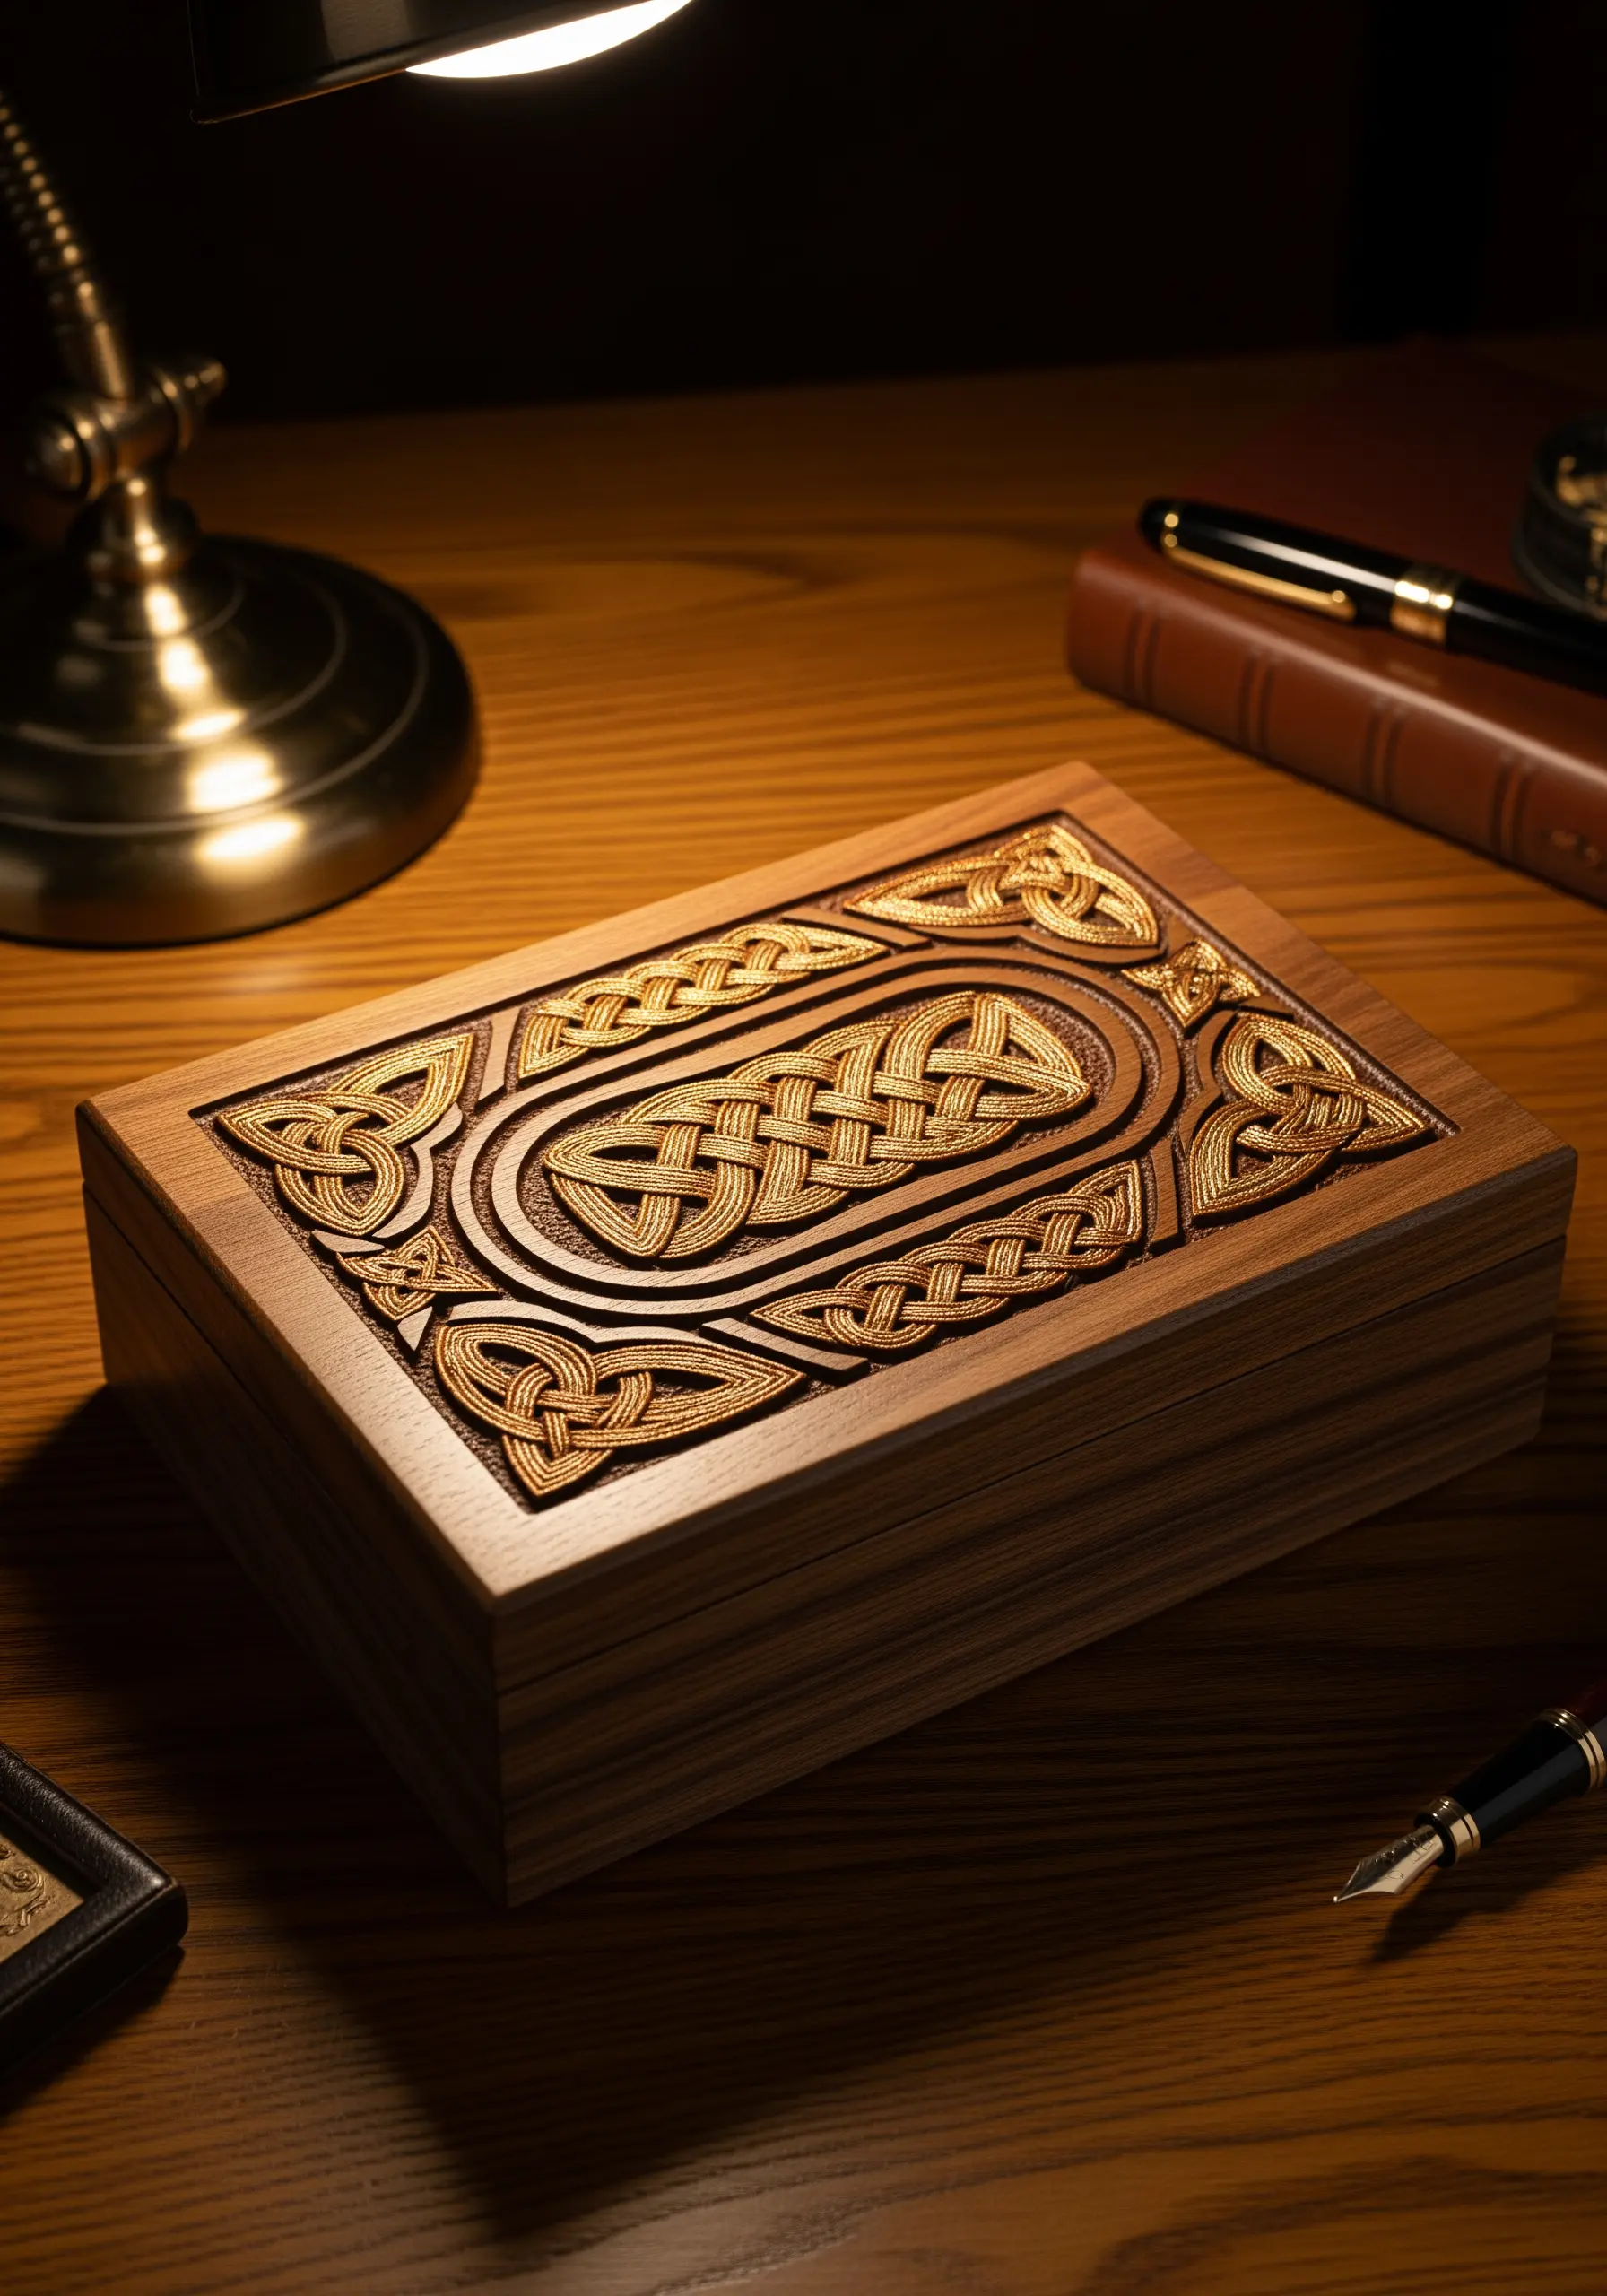
To replicate the sculptural relief of carved wood or inlay, you can use a technique called padded satin stitch.
First, create a foundation of underlying stitches (or a small piece of felt) in the shape you want to raise.
Then, cover this padding with smooth satin stitches, worked in the opposite direction, to create a rounded, three-dimensional form.
Using a silk or high-sheen thread will enhance the effect, mimicking the way light catches on a polished, carved surface.
8. Modernize Cross-Stitch with Geometric Repetition
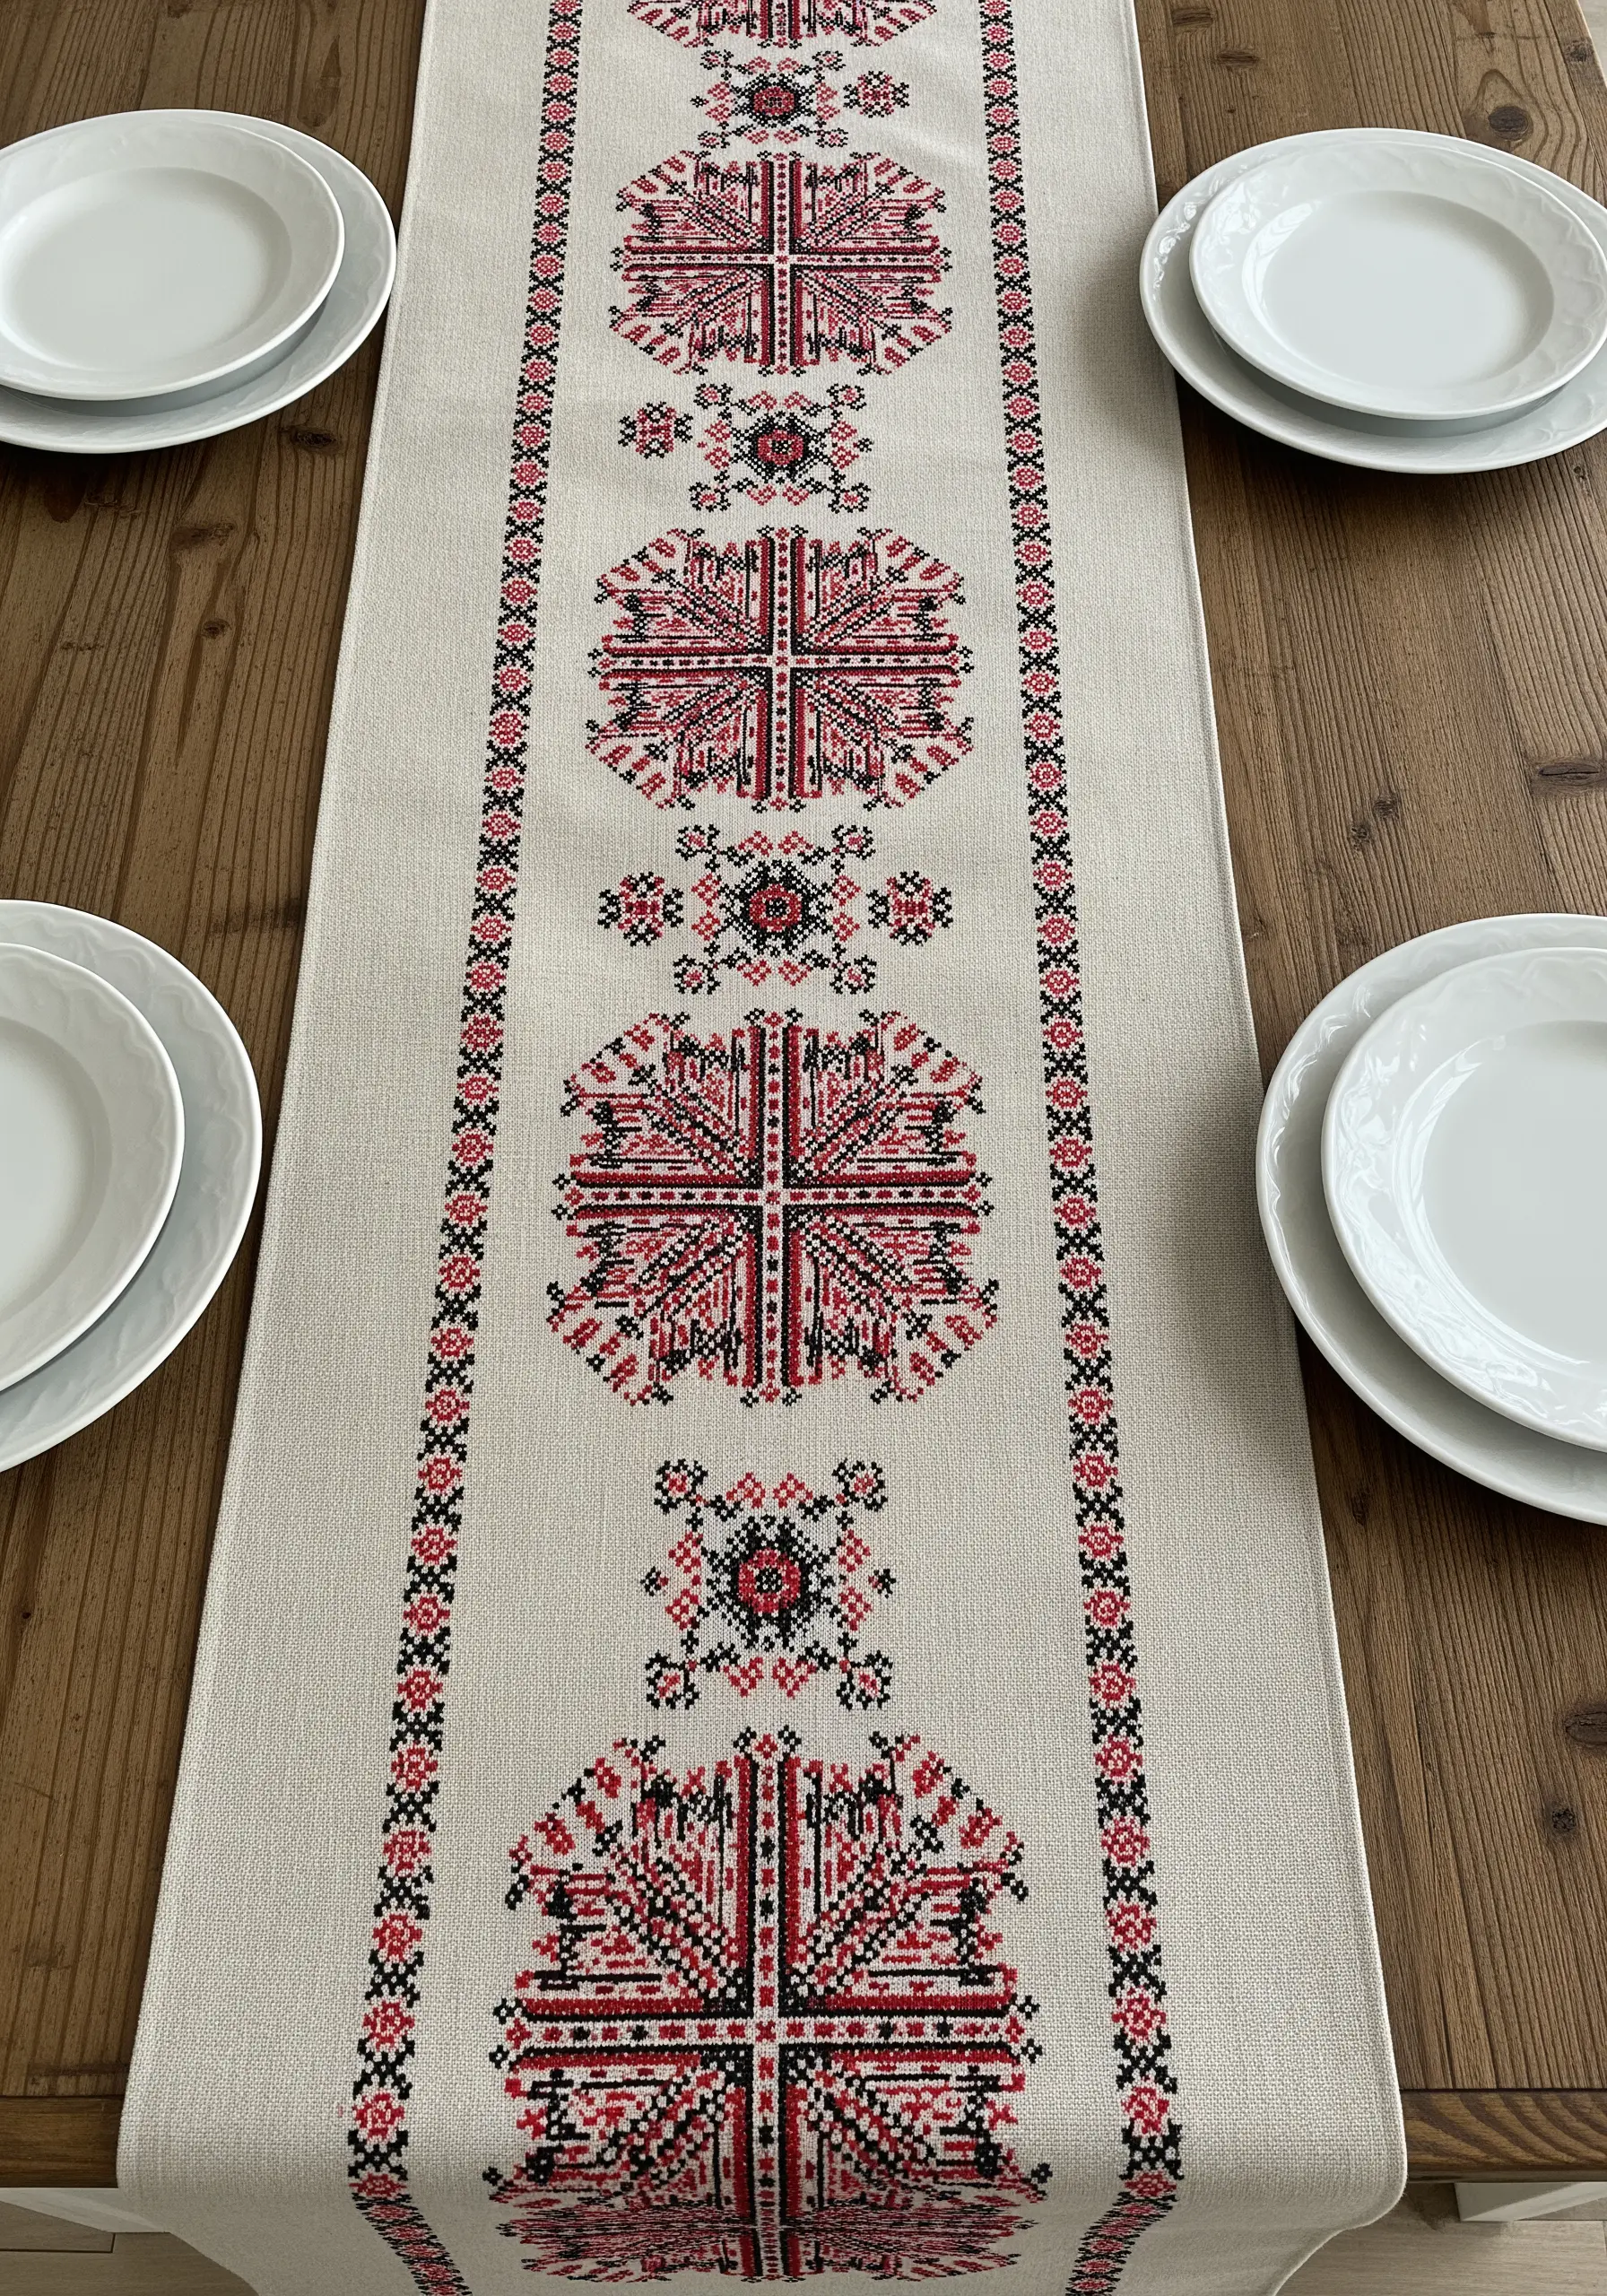
You can give traditional cross-stitch a contemporary, graphic feel by focusing on bold, symmetrical patterns.
Working with a limited color palette, such as red and black on a neutral linen, emphasizes the clean lines and precision of the design.
The negative space becomes just as important as the stitched areas, creating a balanced and striking composition.
This approach is perfect for modern home décor like table runners, transforming a classic craft into sharp, elegant design.
9. Stitching Scars: Kintsugi-Inspired Mending on Fabric
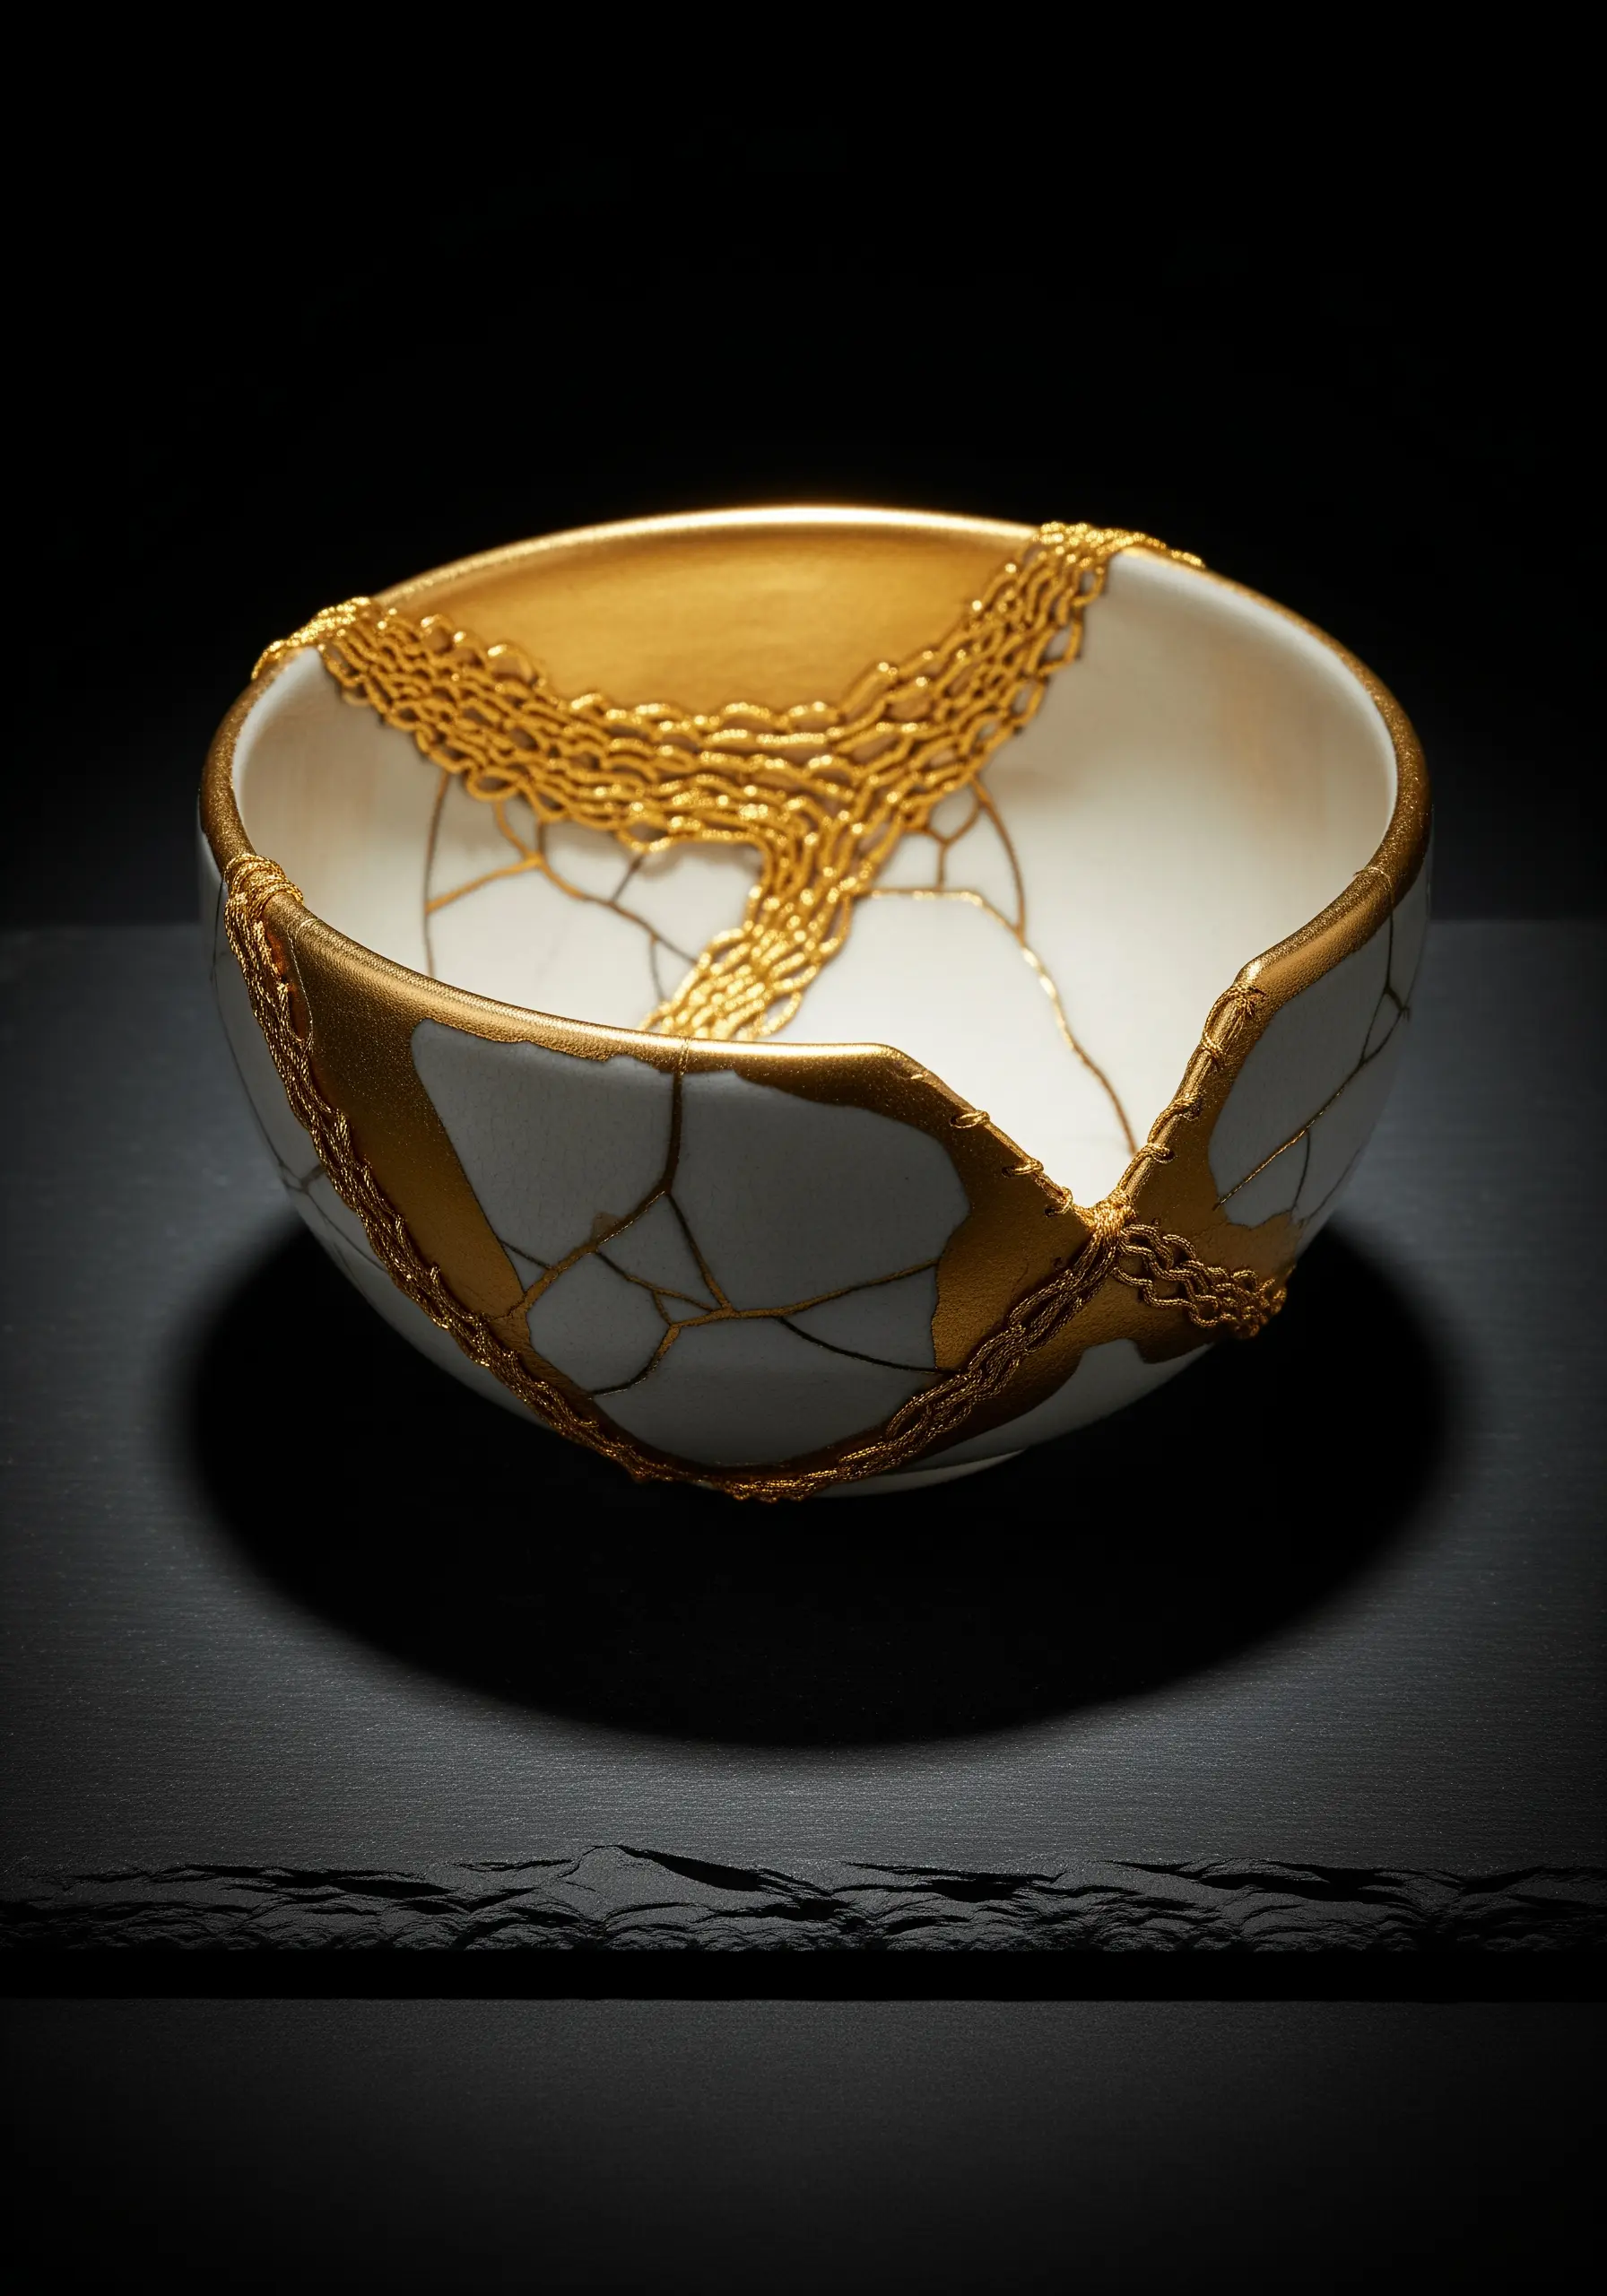
Translate the Japanese art of Kintsugi—repairing broken pottery with gold—to your textiles.
Instead of trying to hide a tear or worn spot on fabric, you can celebrate it as part of the object’s history.
Use a shimmering gold metallic thread to stitch over the “cracks” with couching, running stitch, or other decorative lines.
This transforms the act of mending into a beautiful and meaningful artistic statement.
10. Frame Your Fabrics with Echo Quilting
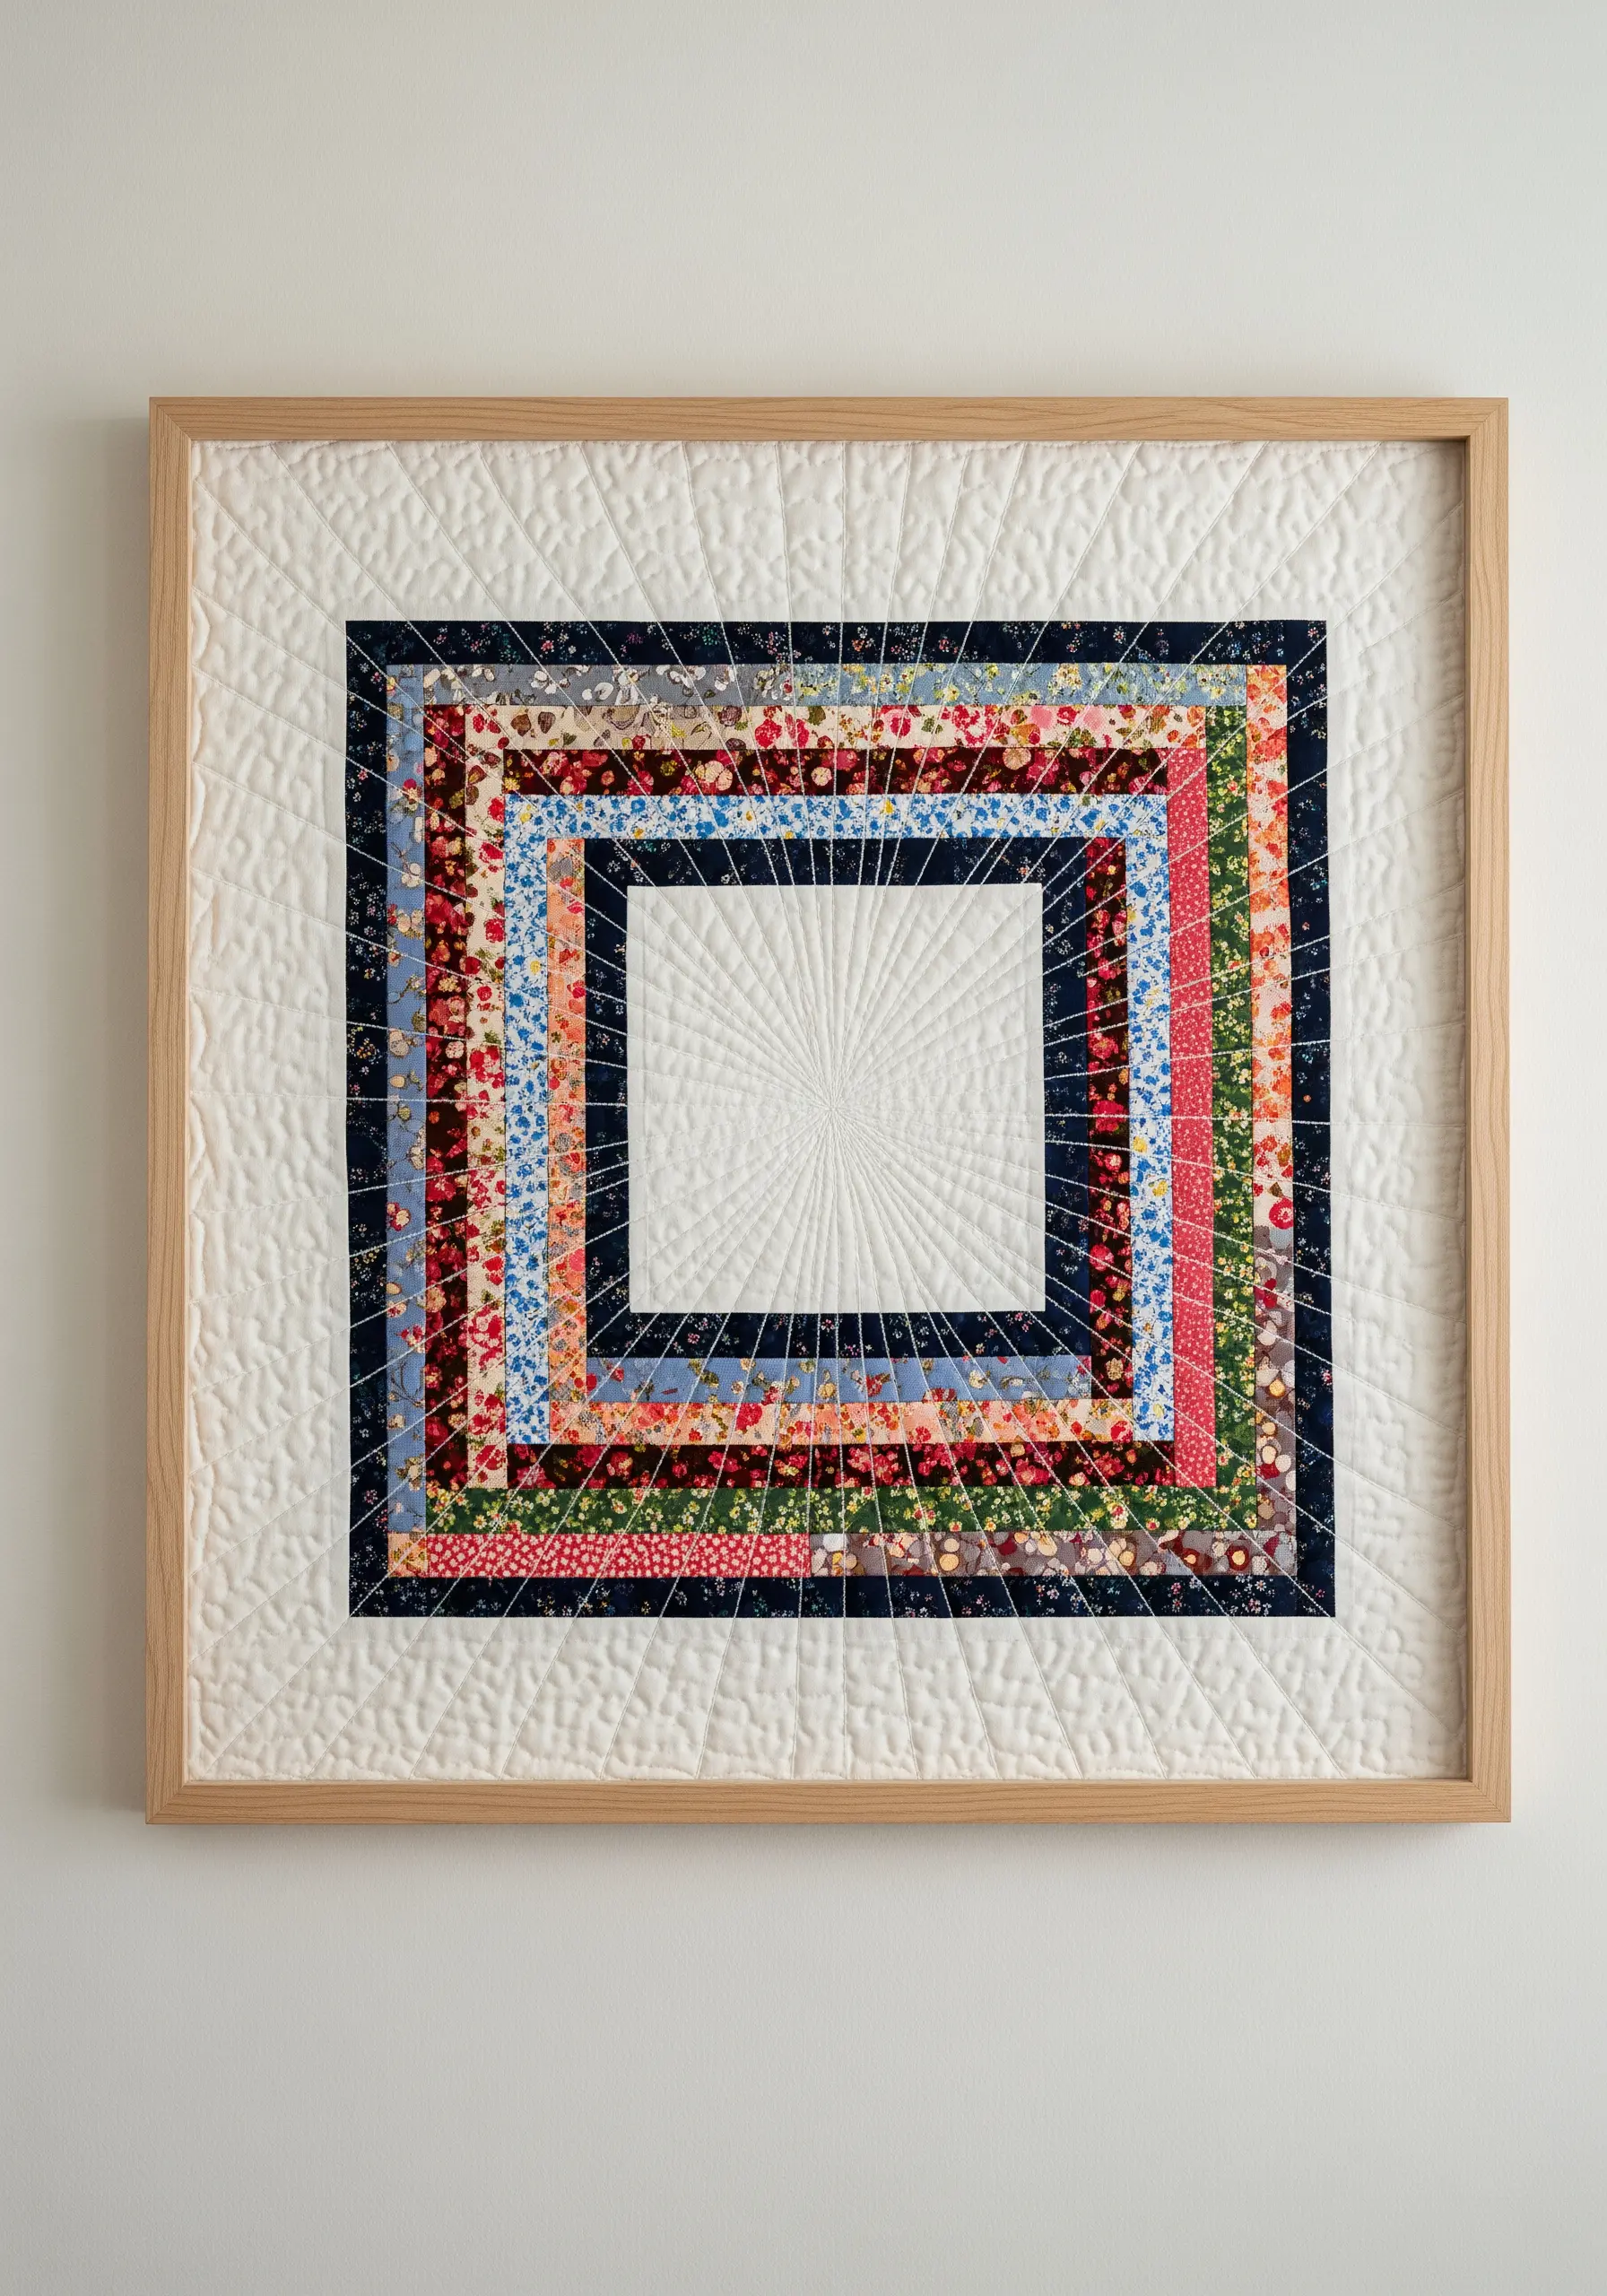
Add sophisticated texture and draw the eye to your central design by using echo quilting in the negative space.
This technique involves stitching lines that radiate out from or echo the shape of your main patchwork or appliqué.
You can achieve this effect by hand with a simple running stitch, creating soft, radiating lines that add a beautiful, subtle dimension.
It’s an elegant way to turn a simple quilt block into a finished piece of handmade wall art.
11. Create Mosaic Effects with Dense Fill Stitches
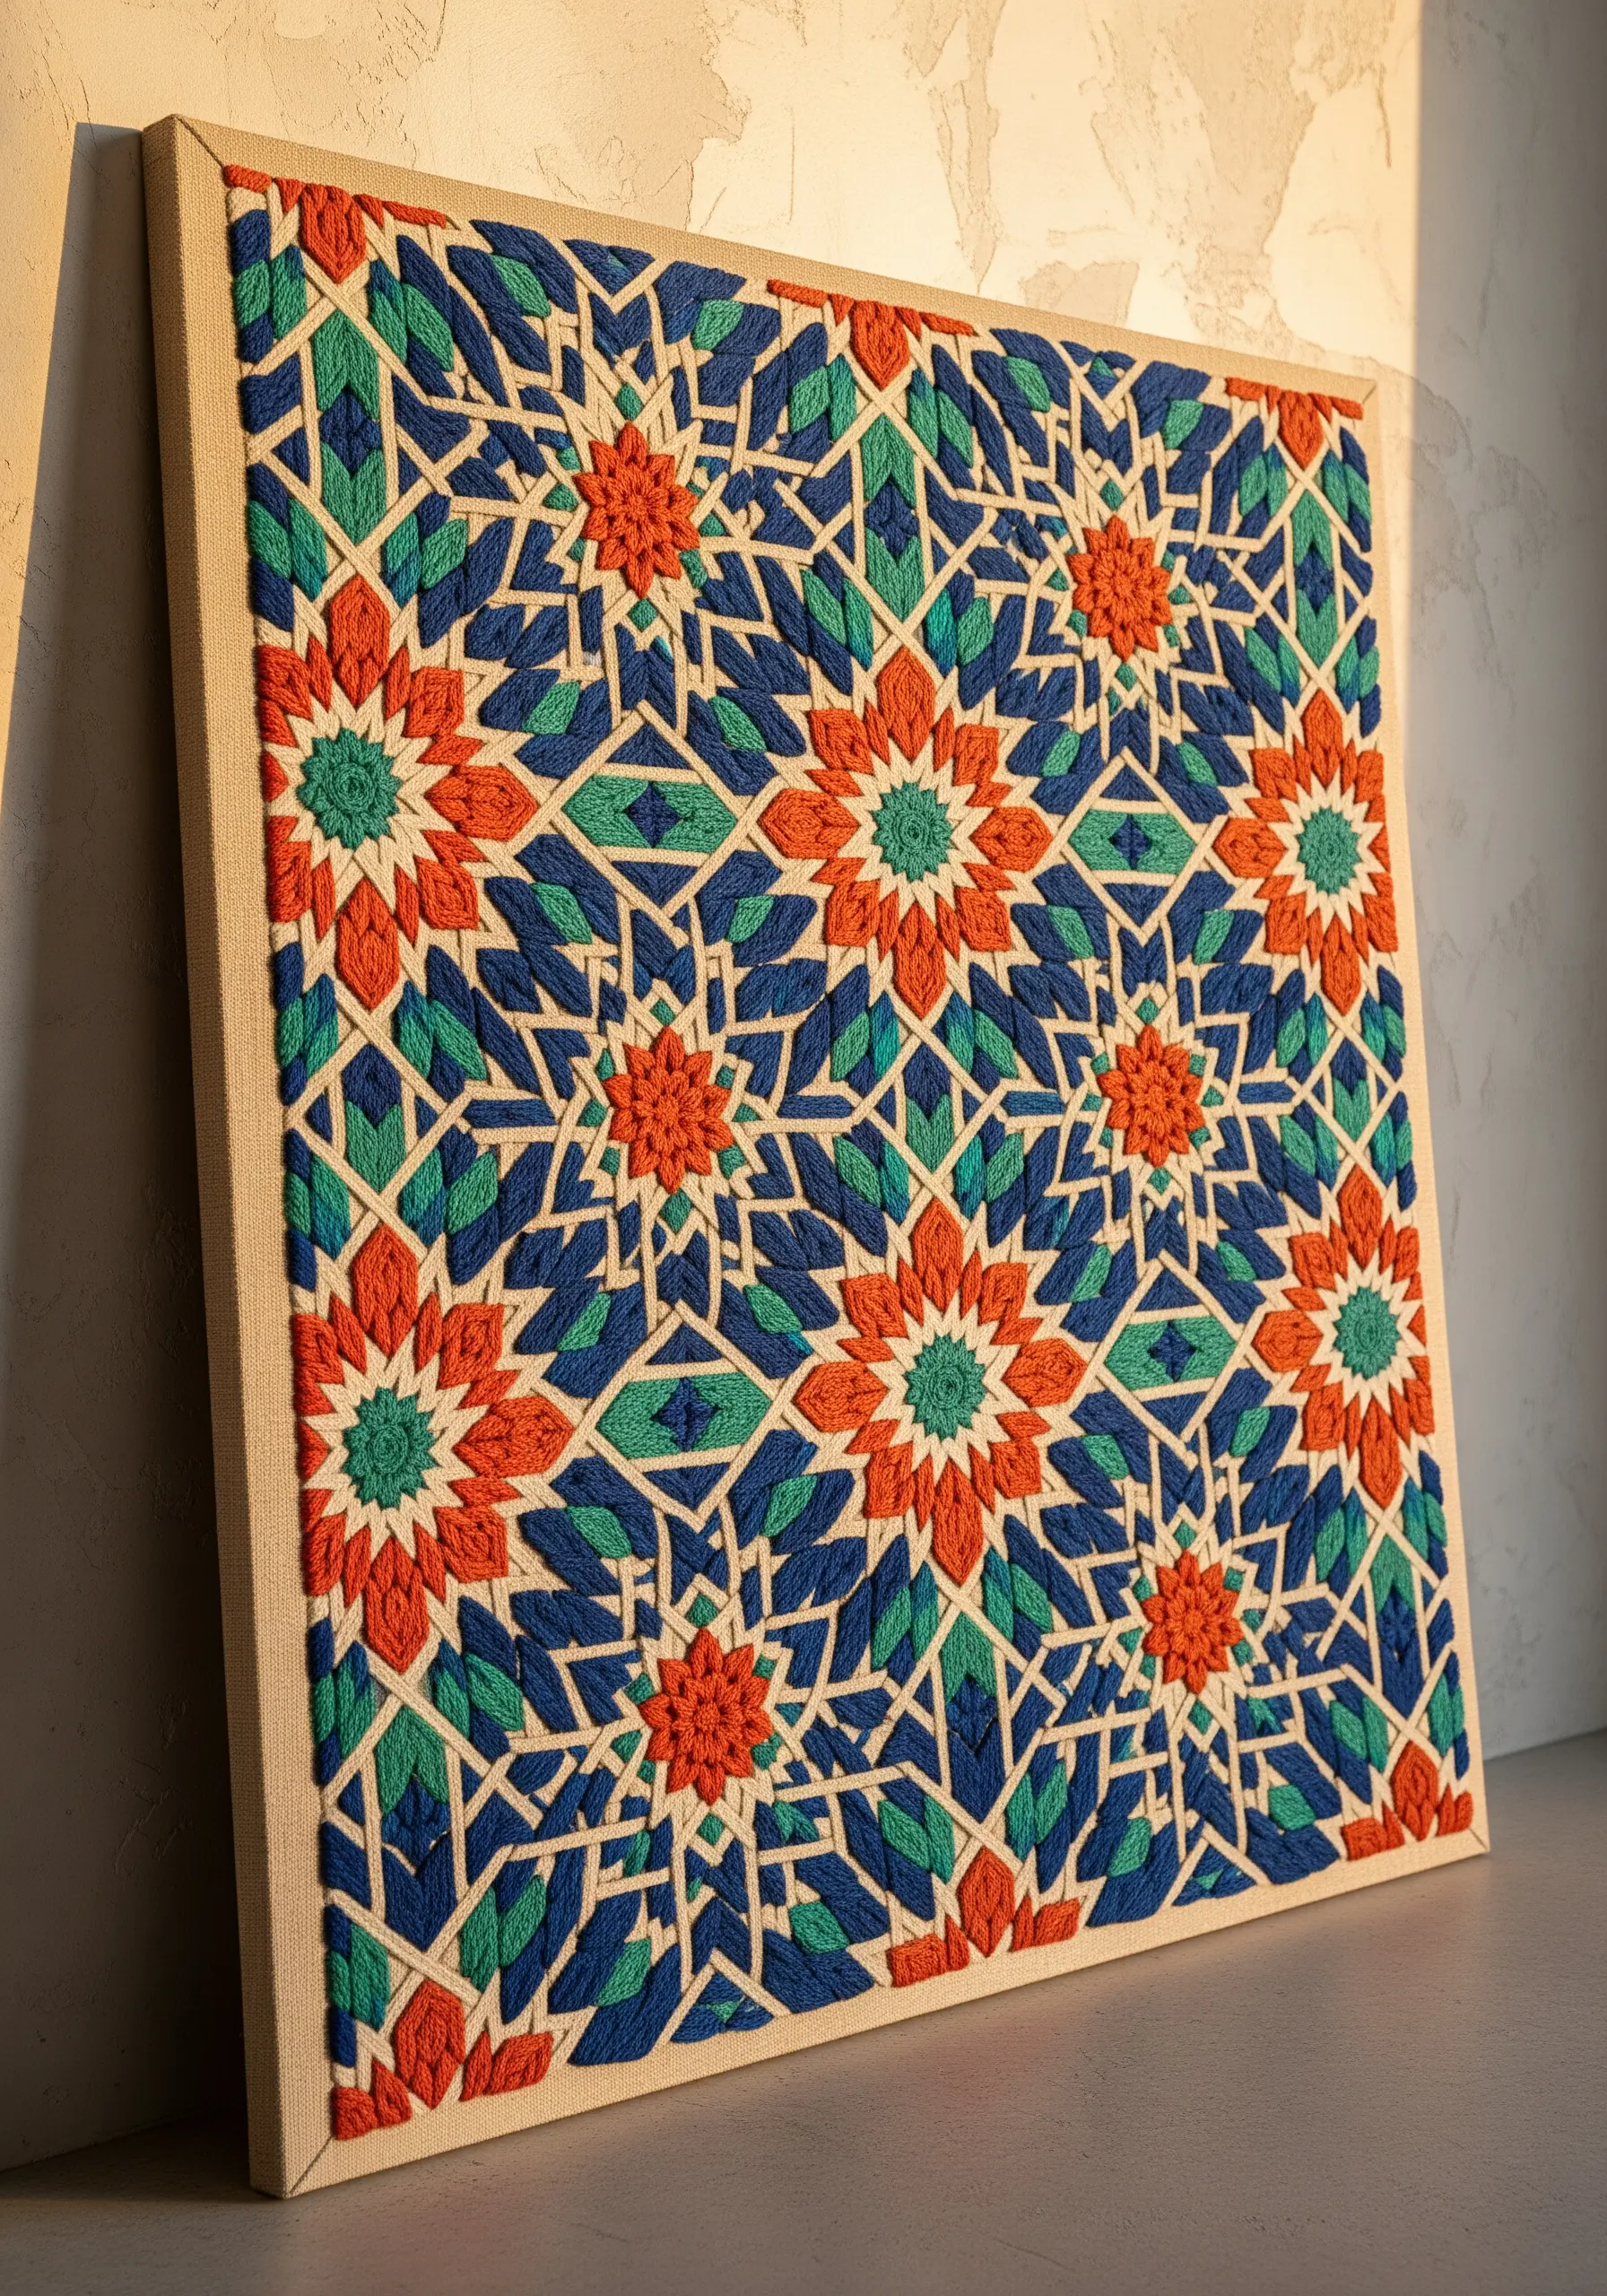
You can achieve a graphic, tile-like effect by completely covering your fabric with dense, tightly packed stitches.
Use long, flat stitches like satin stitch or brick stitch, ensuring there are no gaps between the color blocks.
To maintain crisp, clean edges between shapes, outline each section with a split stitch before you begin filling it in.
This technique transforms thread into solid planes of color, perfect for geometric patterns and abstract wall art.
12. Integrate Seed Beads for Glimmering Detail
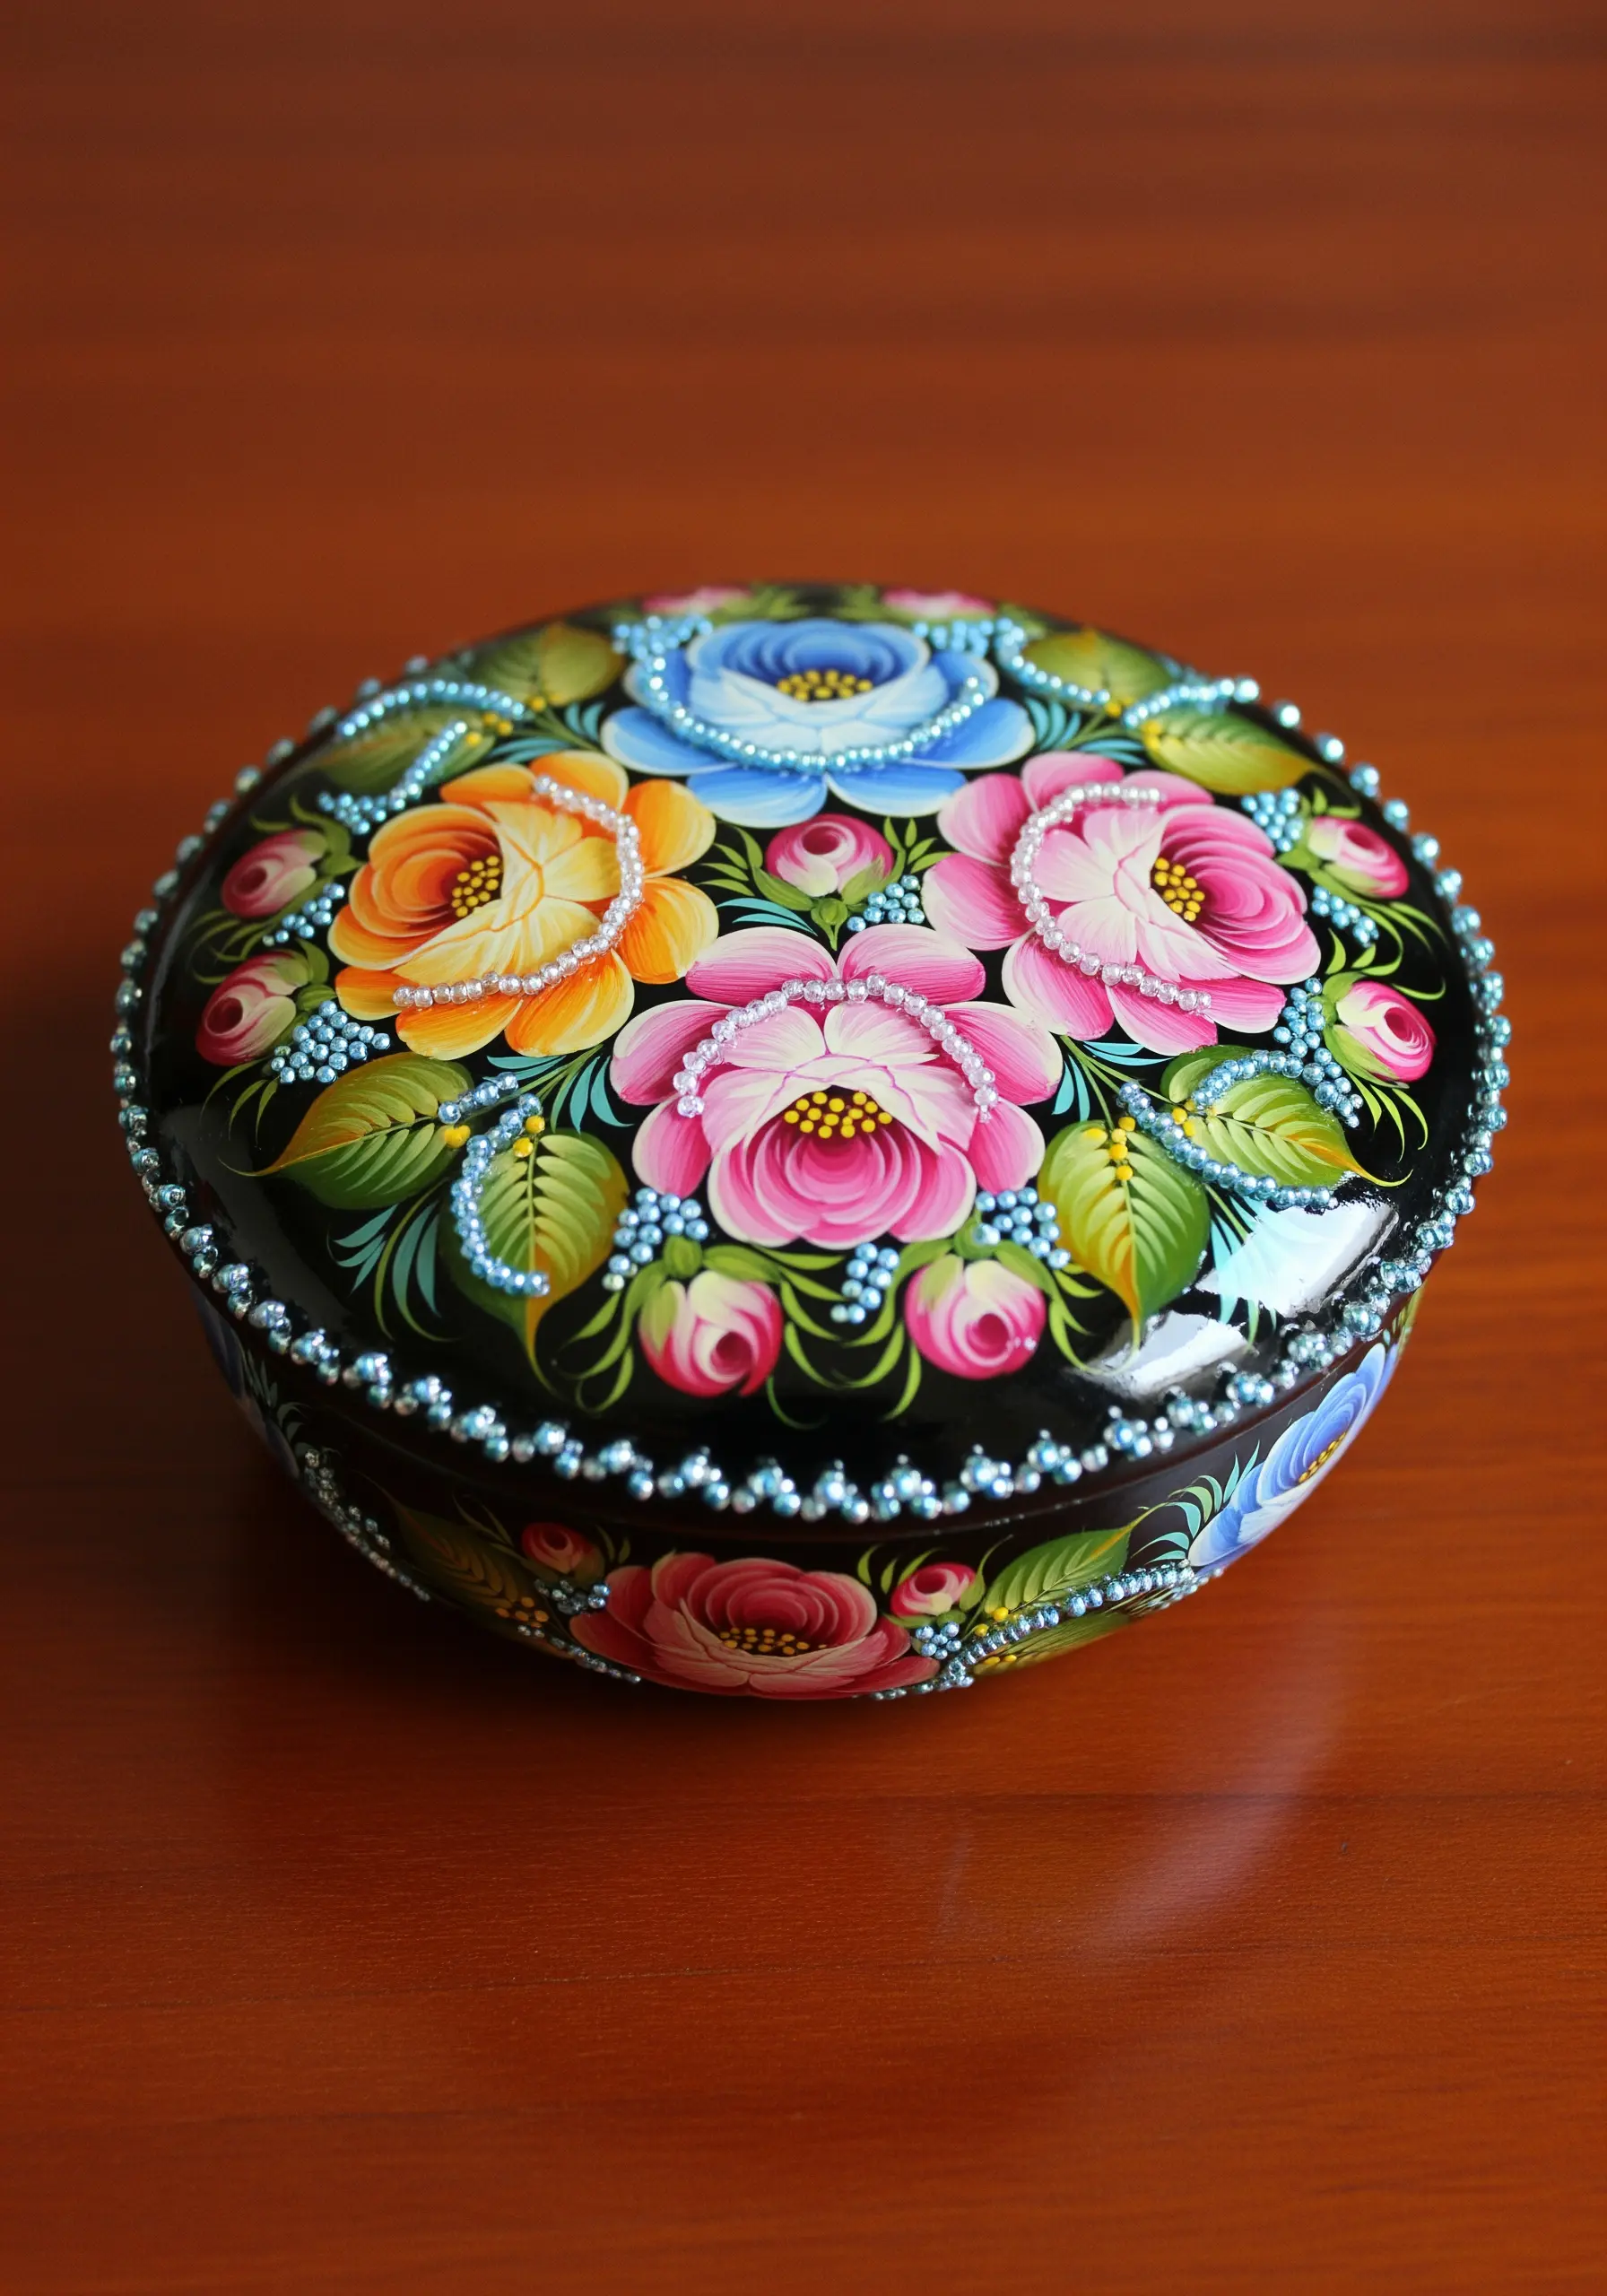
You can add a delicate, jewel-like quality to your embroidery by incorporating fine seed beads as accents.
Secure them with a single strand of matching thread, either individually or in small clusters.
Try stitching them over satin-stitched areas to add texture, outlining a shape to catch the light, or filling the center of a flower.
This small addition provides a subtle glimmer and a touch of refined elegance to any project.
13. Achieve Elegant Symmetry with Stylized Botanicals
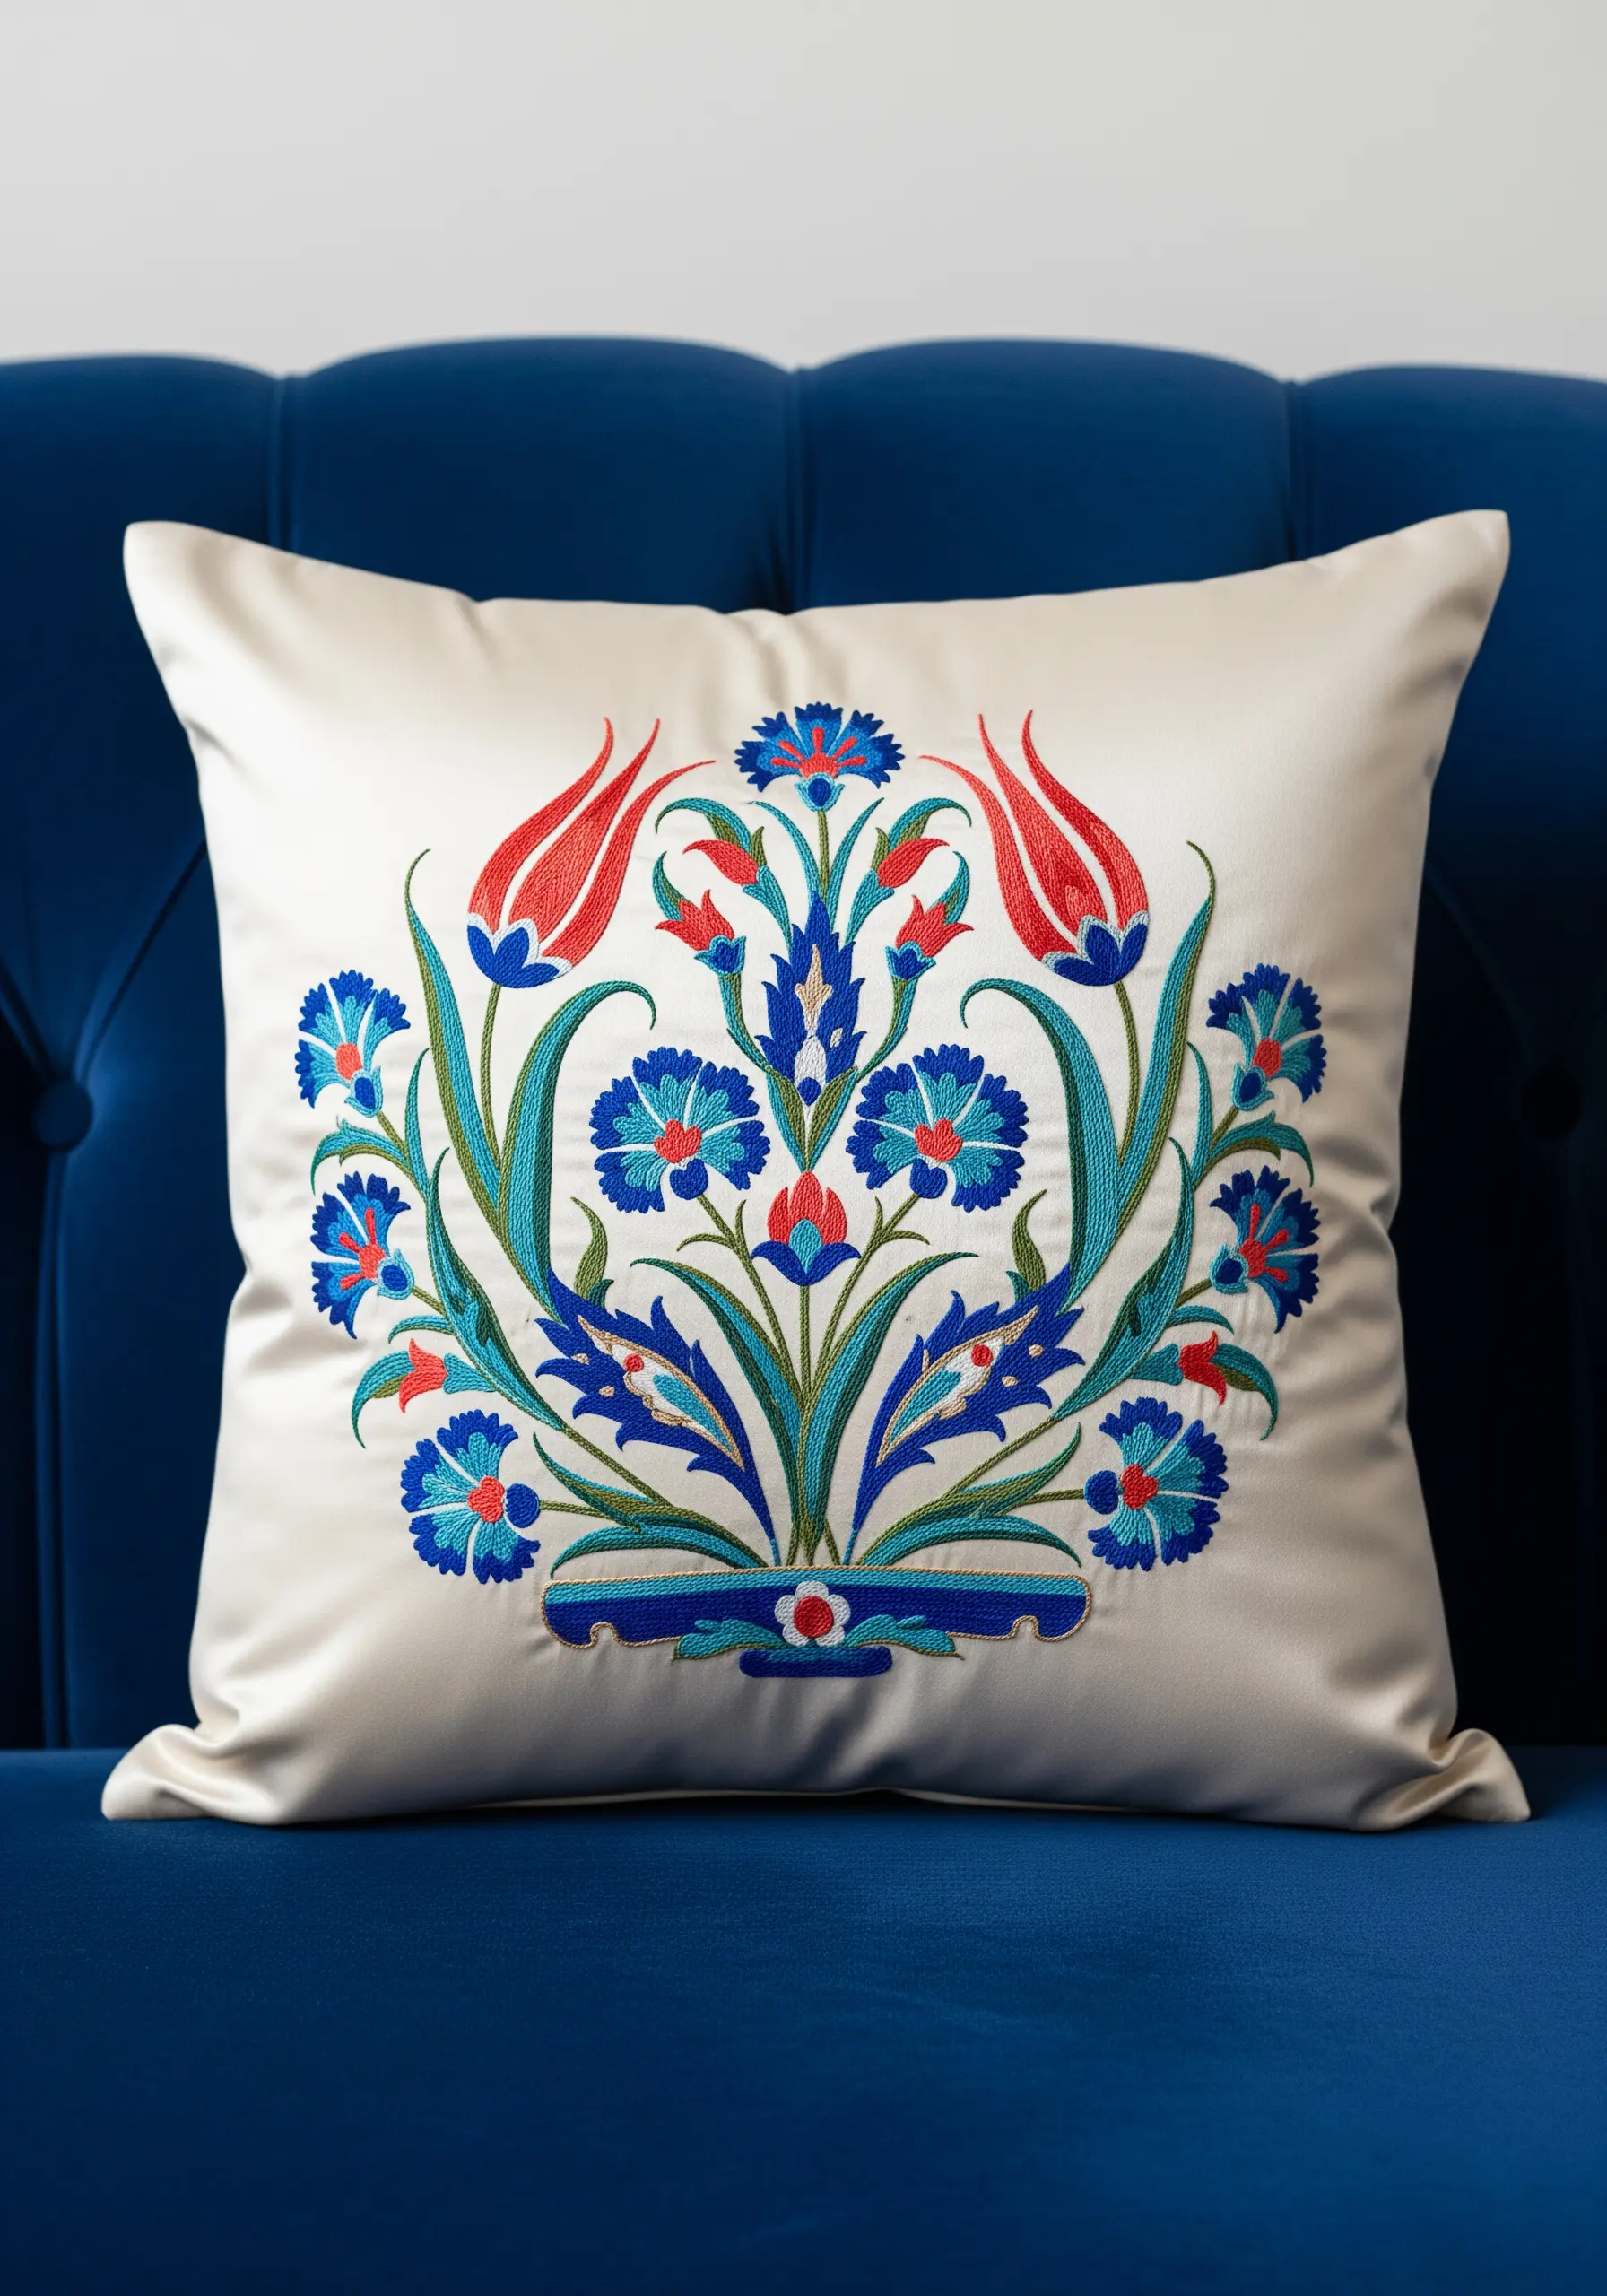
The power of this design lies in its perfect, balanced symmetry, inspired by traditional Turkish motifs.
To create a similar look, start your design with a central vertical axis and mirror your floral elements on each side.
Using a classic color palette of cobalt blue, turquoise, and coral red against a neutral background creates a timeless, elegant feel.
Combine smooth satin stitch for petals with fine backstitch for stems to achieve a clean and sophisticated finish.
14. Paint Atmospheric Landscapes with Silk Thread
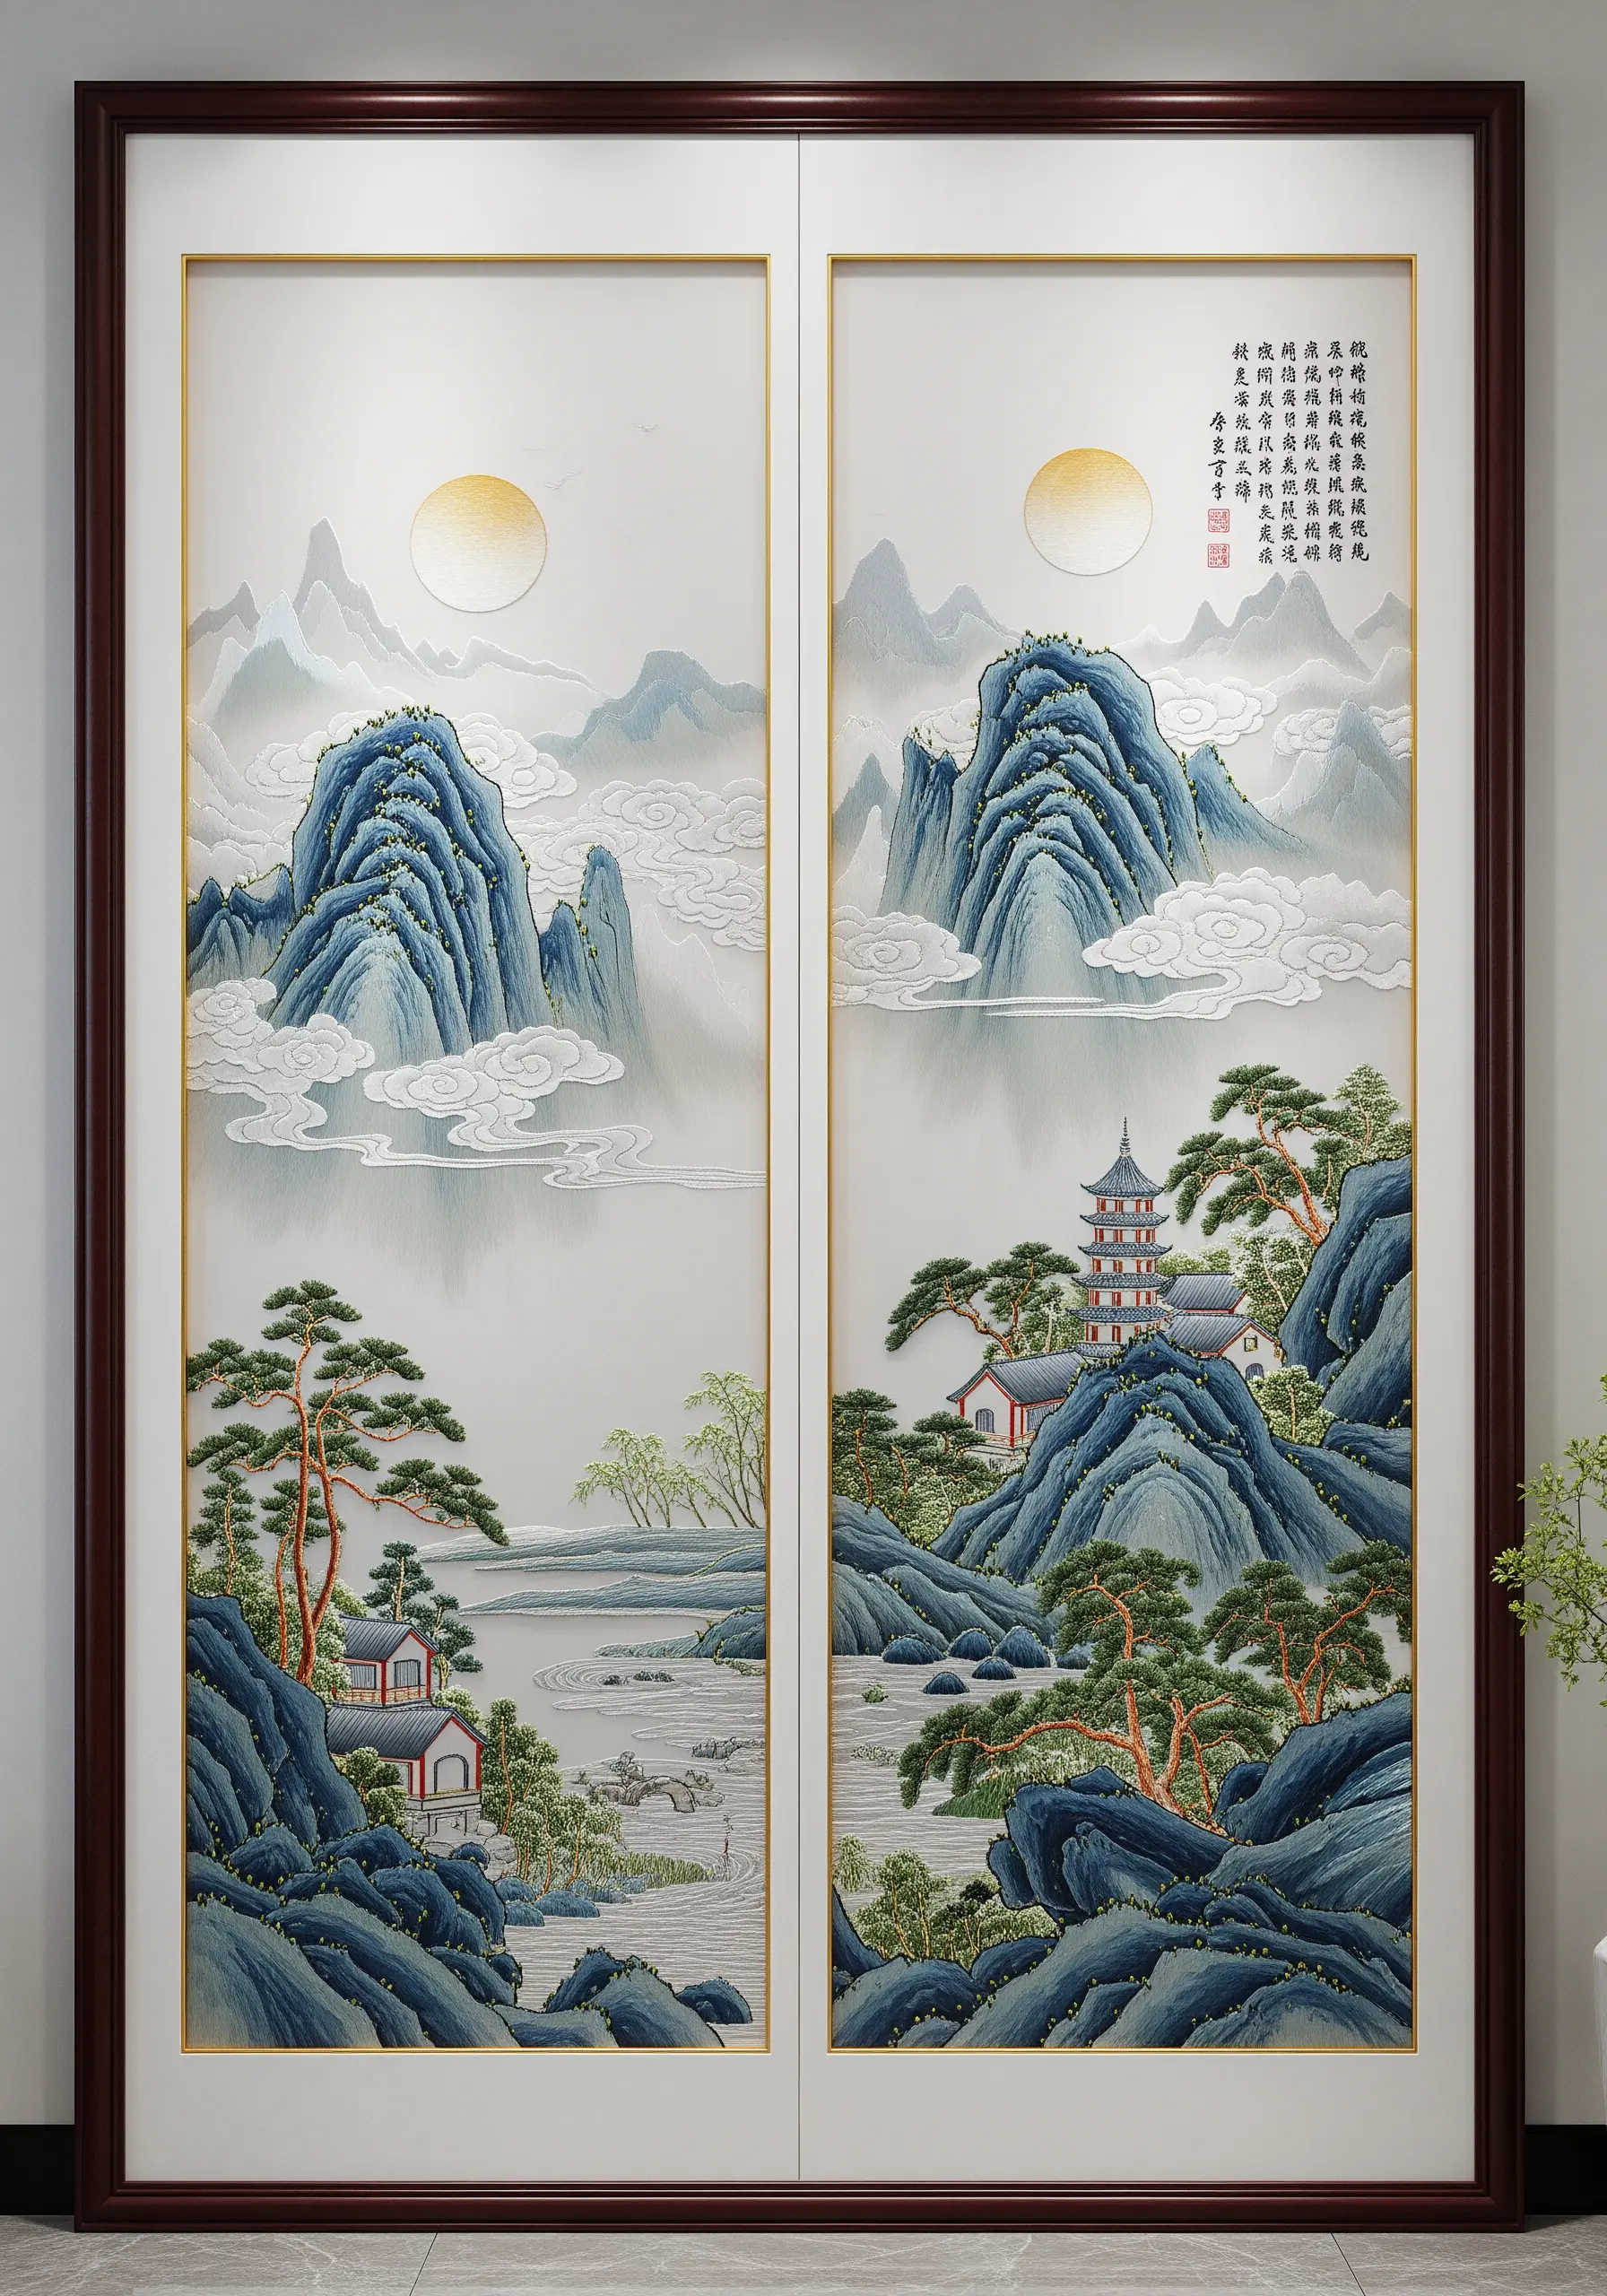
To achieve the depth and realism of traditional silk embroidery, you must think of your needle as a paintbrush.
Use single strands of silk floss, as its natural luster beautifully captures the effect of light on water, clouds, and mountains.
Employ the long-and-short stitch, and pay close attention to the direction of your stitches, following the contours of the landscape to create movement and a painterly quality.
15. Weave Stories with Geometric Color-Blocked Patterns
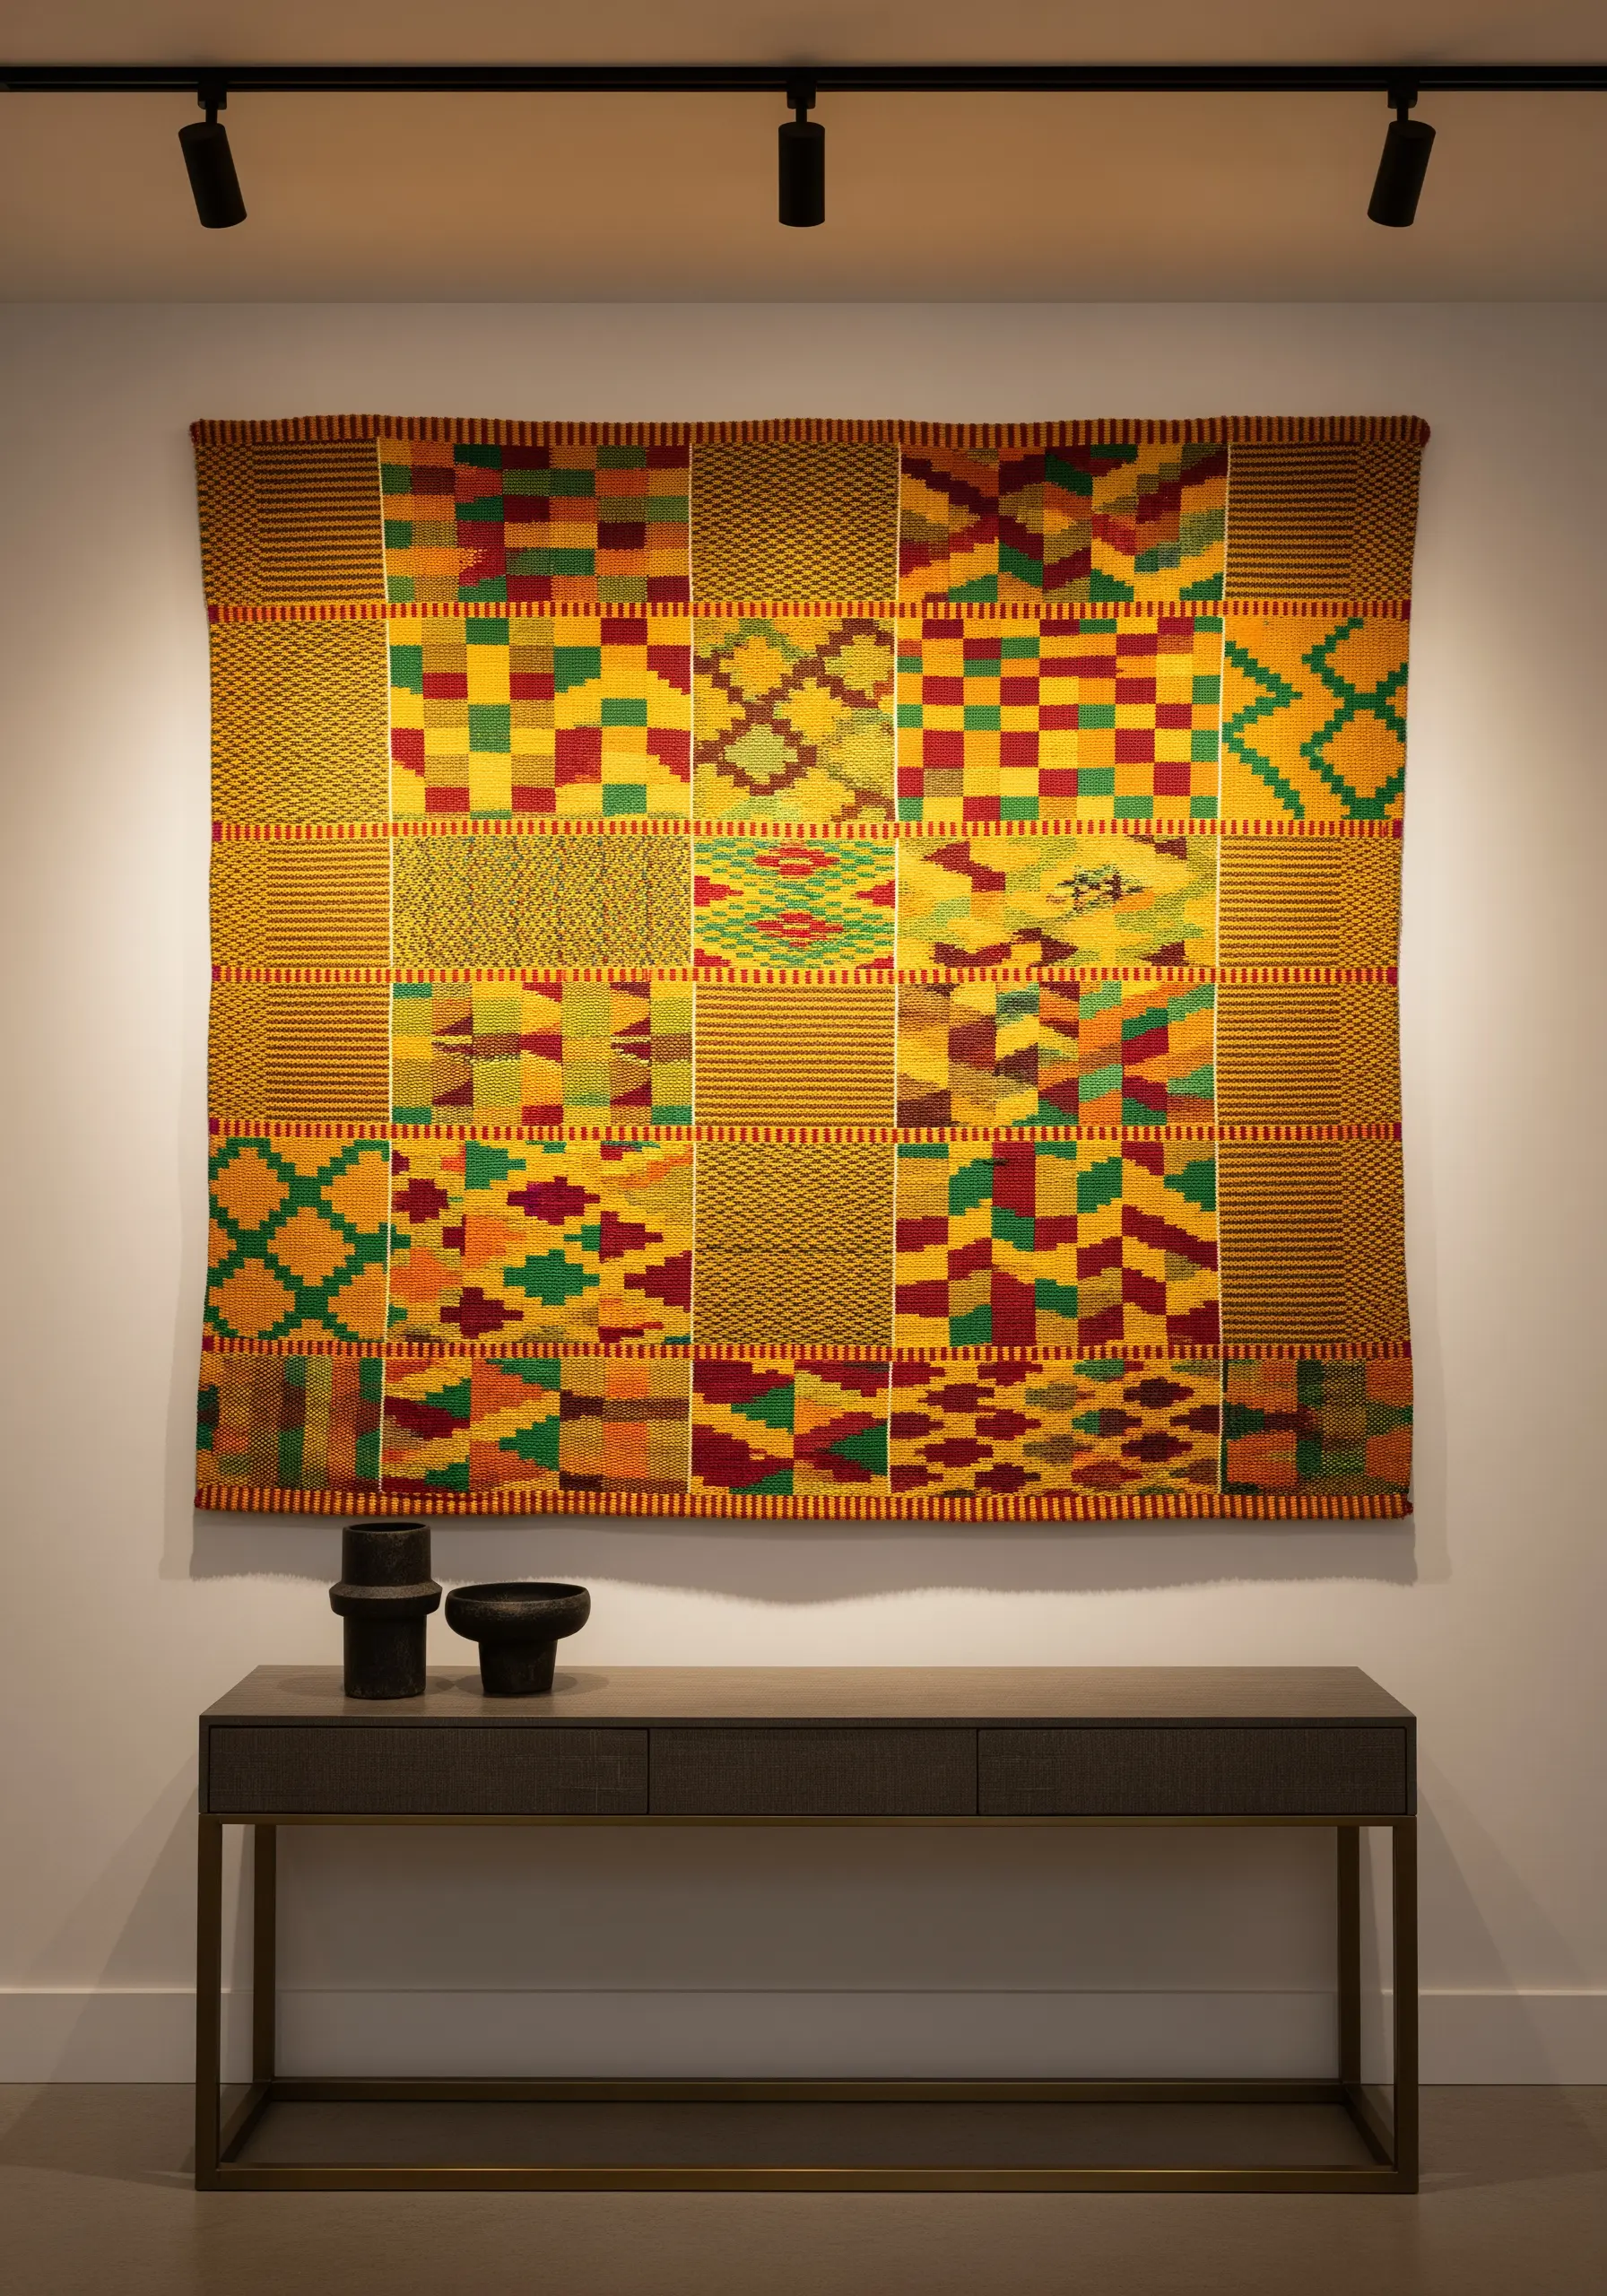
While Kente cloth is woven, you can capture its vibrant, graphic spirit through embroidery.
Plan your design on a grid and fill each block with dense, textural stitches like darning stitch, brick stitch, or satin stitch.
The key is to use a bold and symbolic color palette, allowing the geometric shapes and their repetition to create a powerful rhythm.
This approach allows you to build a textile that feels as rich and storied as a traditional weaving.
16. Add Tactile Details to Painted Objects
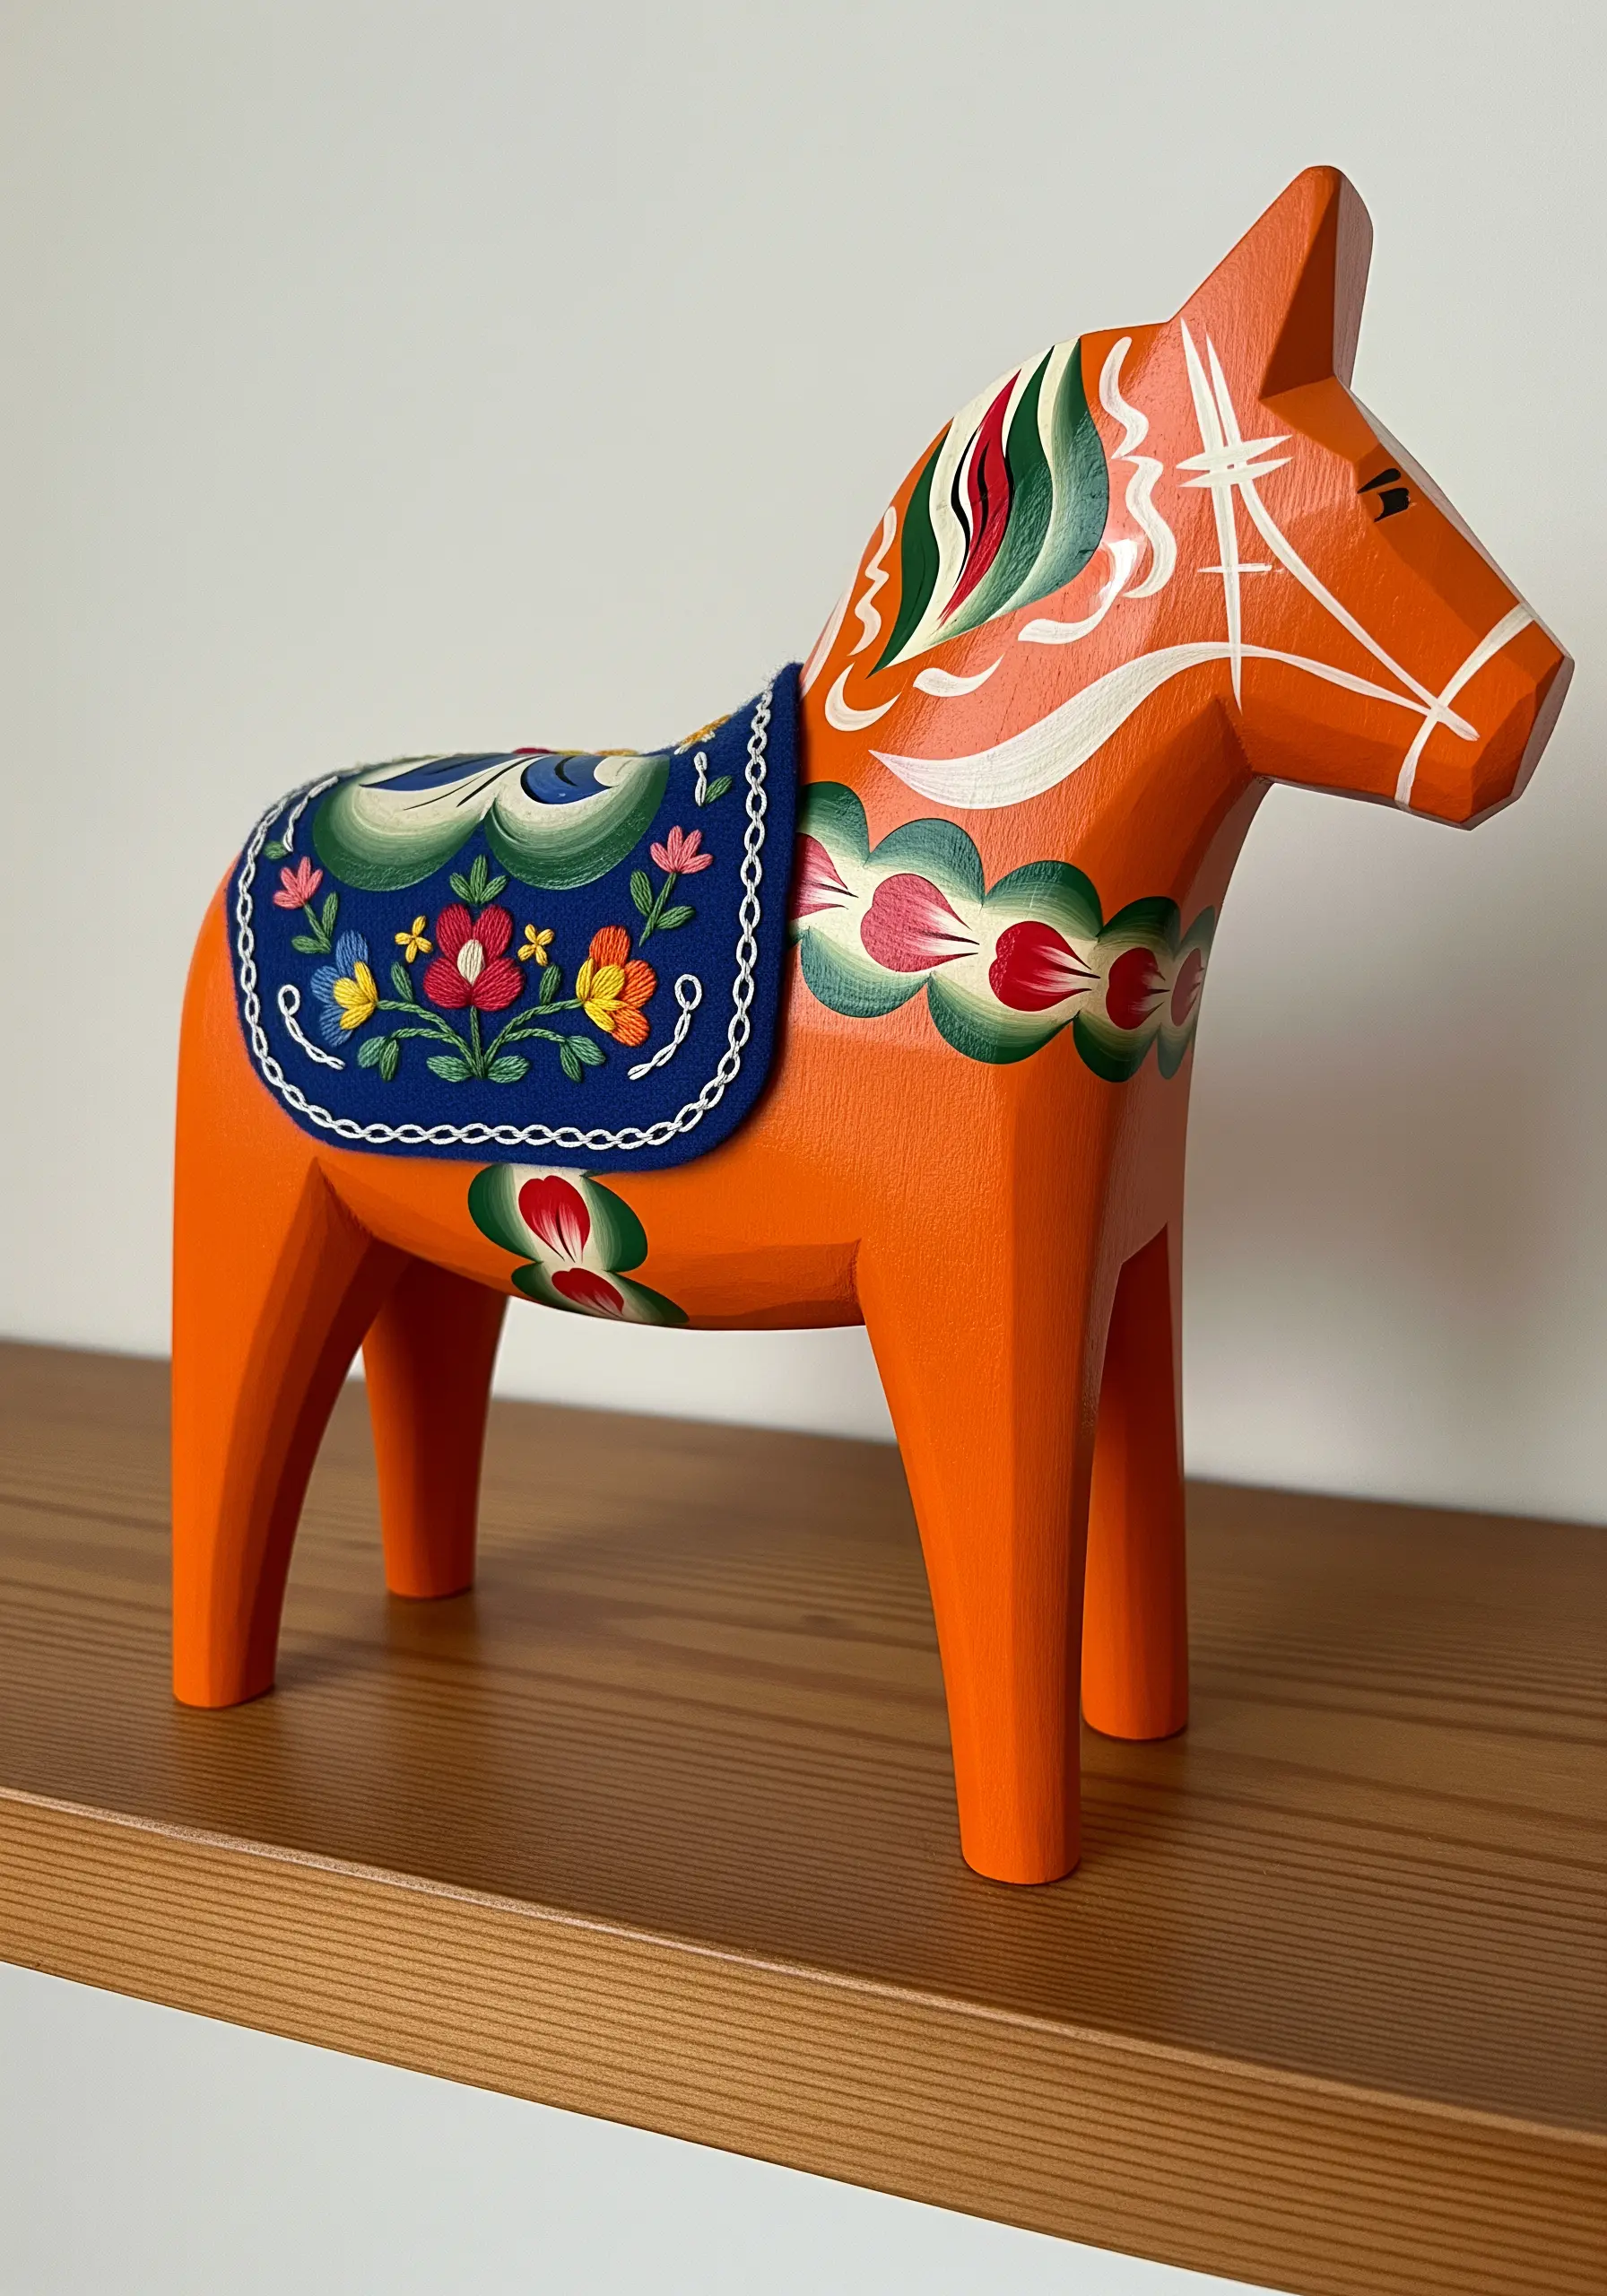
You can create a delightful contrast of textures by combining needlework with other crafts, like wood painting.
After painting a wooden object, add a small, custom-fit embroidered element—like the tiny floral ‘saddle’ on this Dala horse.
This juxtaposition of hard and soft, painted and stitched, adds an unexpected layer of detail and personality.
It’s a wonderful way to merge different artistic traditions into one unique piece.
17. Create Intricate Mosaics with Bead Embroidery
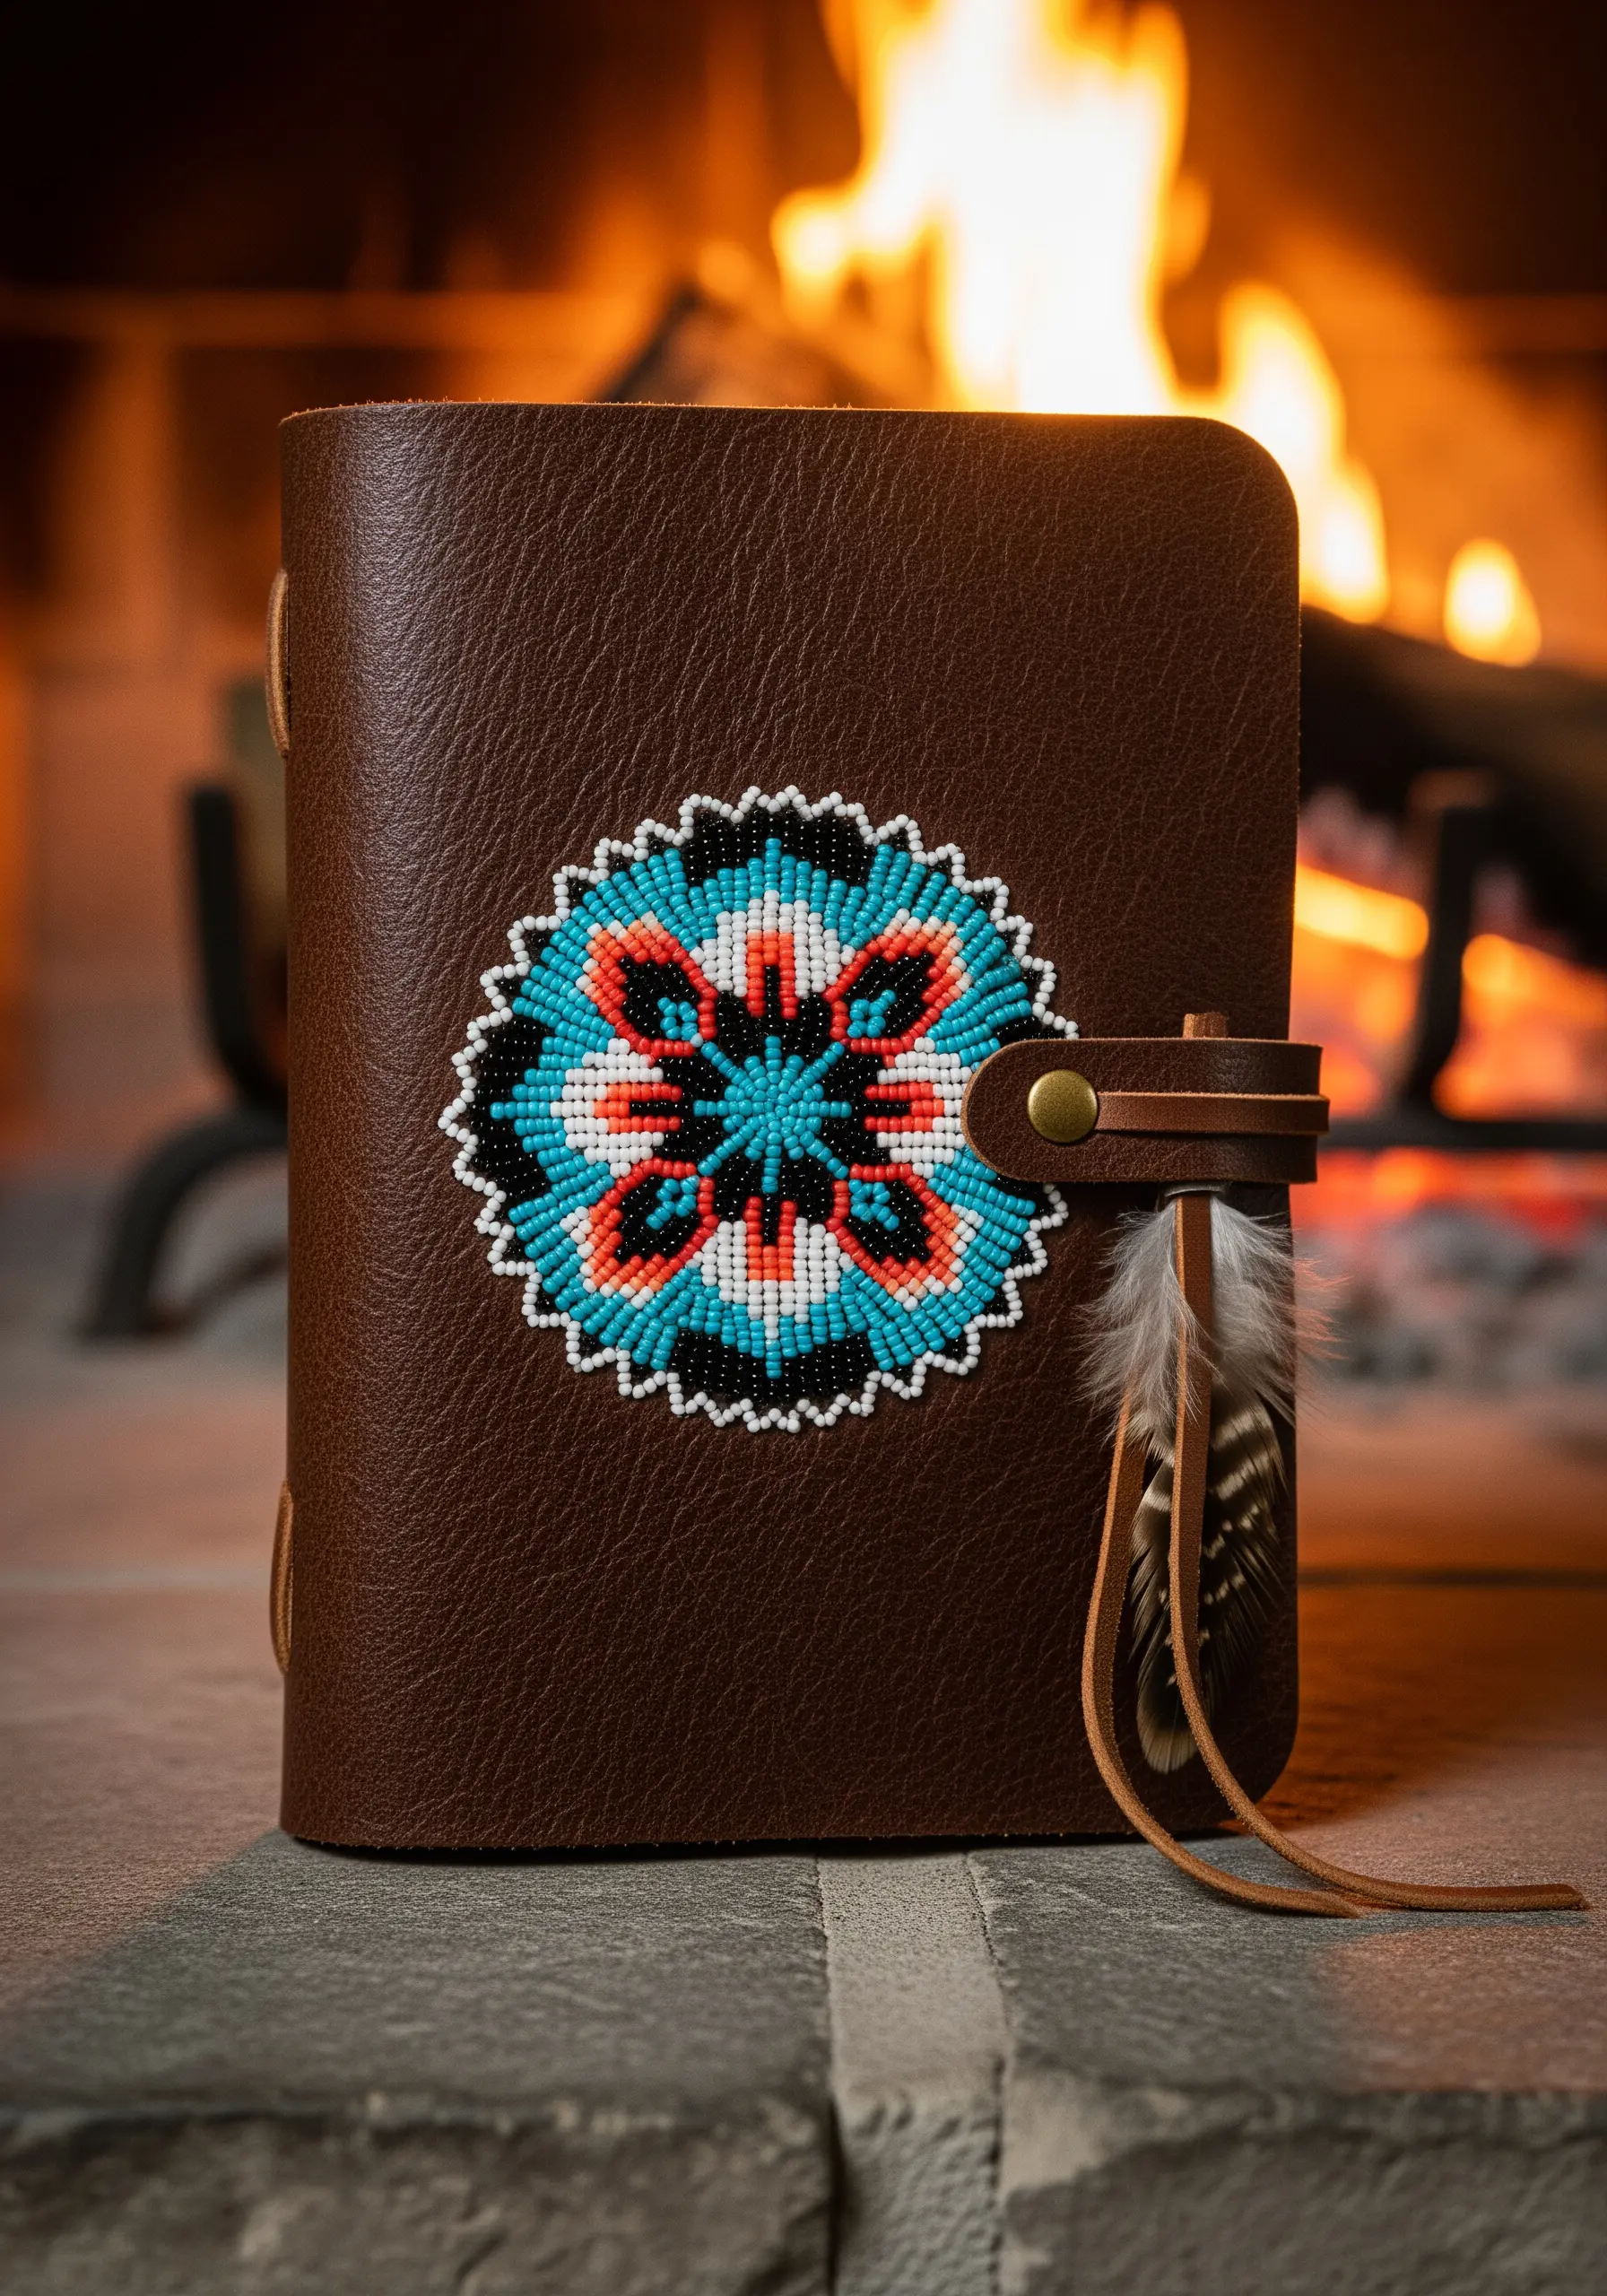
For incredibly precise and decorative embellishments, explore the art of bead embroidery.
Draw your design onto a stiff foundation fabric, like felt, then stitch your beads down one or two at a time using a strong, fine thread.
For perfect circles and lines, a backstitch couching technique works beautifully.
Once finished, you can cut out the beaded motif and apply it to another surface, such as a leather journal or a denim jacket, for a stunning, high-impact detail.
18. Master Textured Florals with Crewelwork Stitches
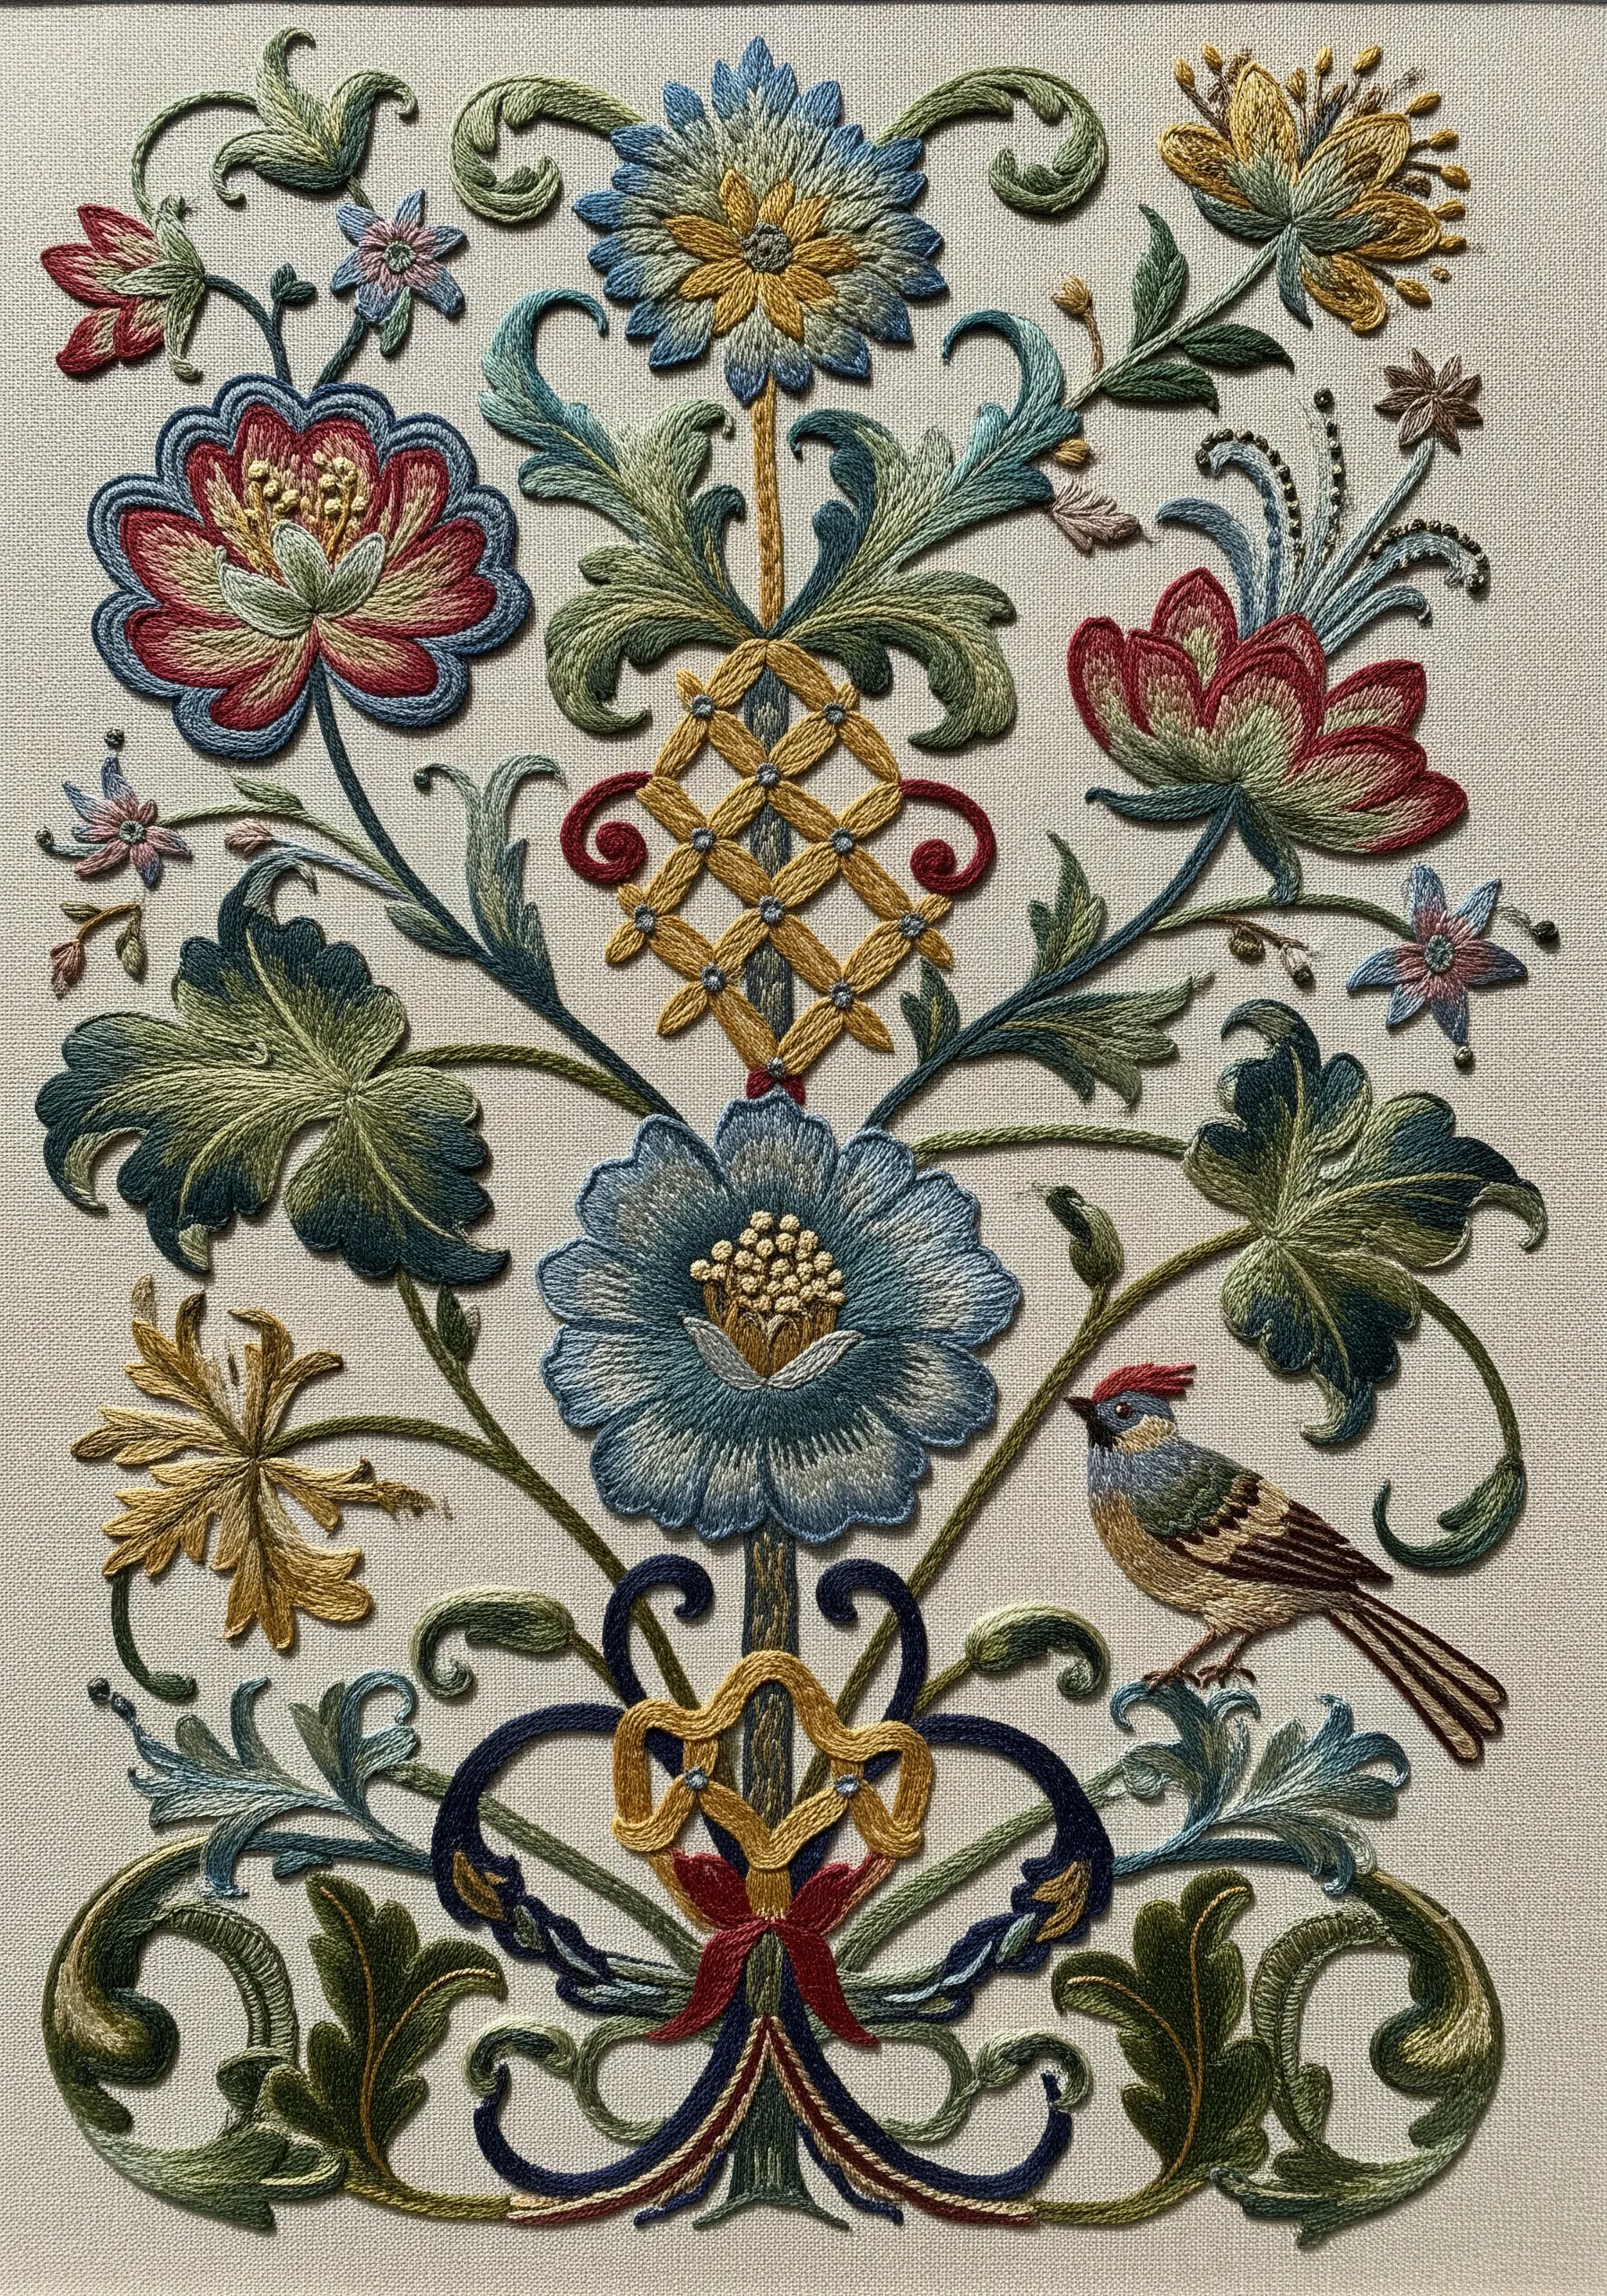
To achieve the rich, dimensional quality of Jacobean embroidery, you need to use a diverse vocabulary of stitches within a single design.
Combine padded satin stitch for raised petals, trellis stitch for a woven, latticed effect, and French knots for dense, tactile centers.
Working with wool thread (crewel) on a sturdy linen ground fabric is traditional for this style and enhances the sculptural, textured appearance of the botanicals.
19. Capture Light with Shisha Mirror Embroidery
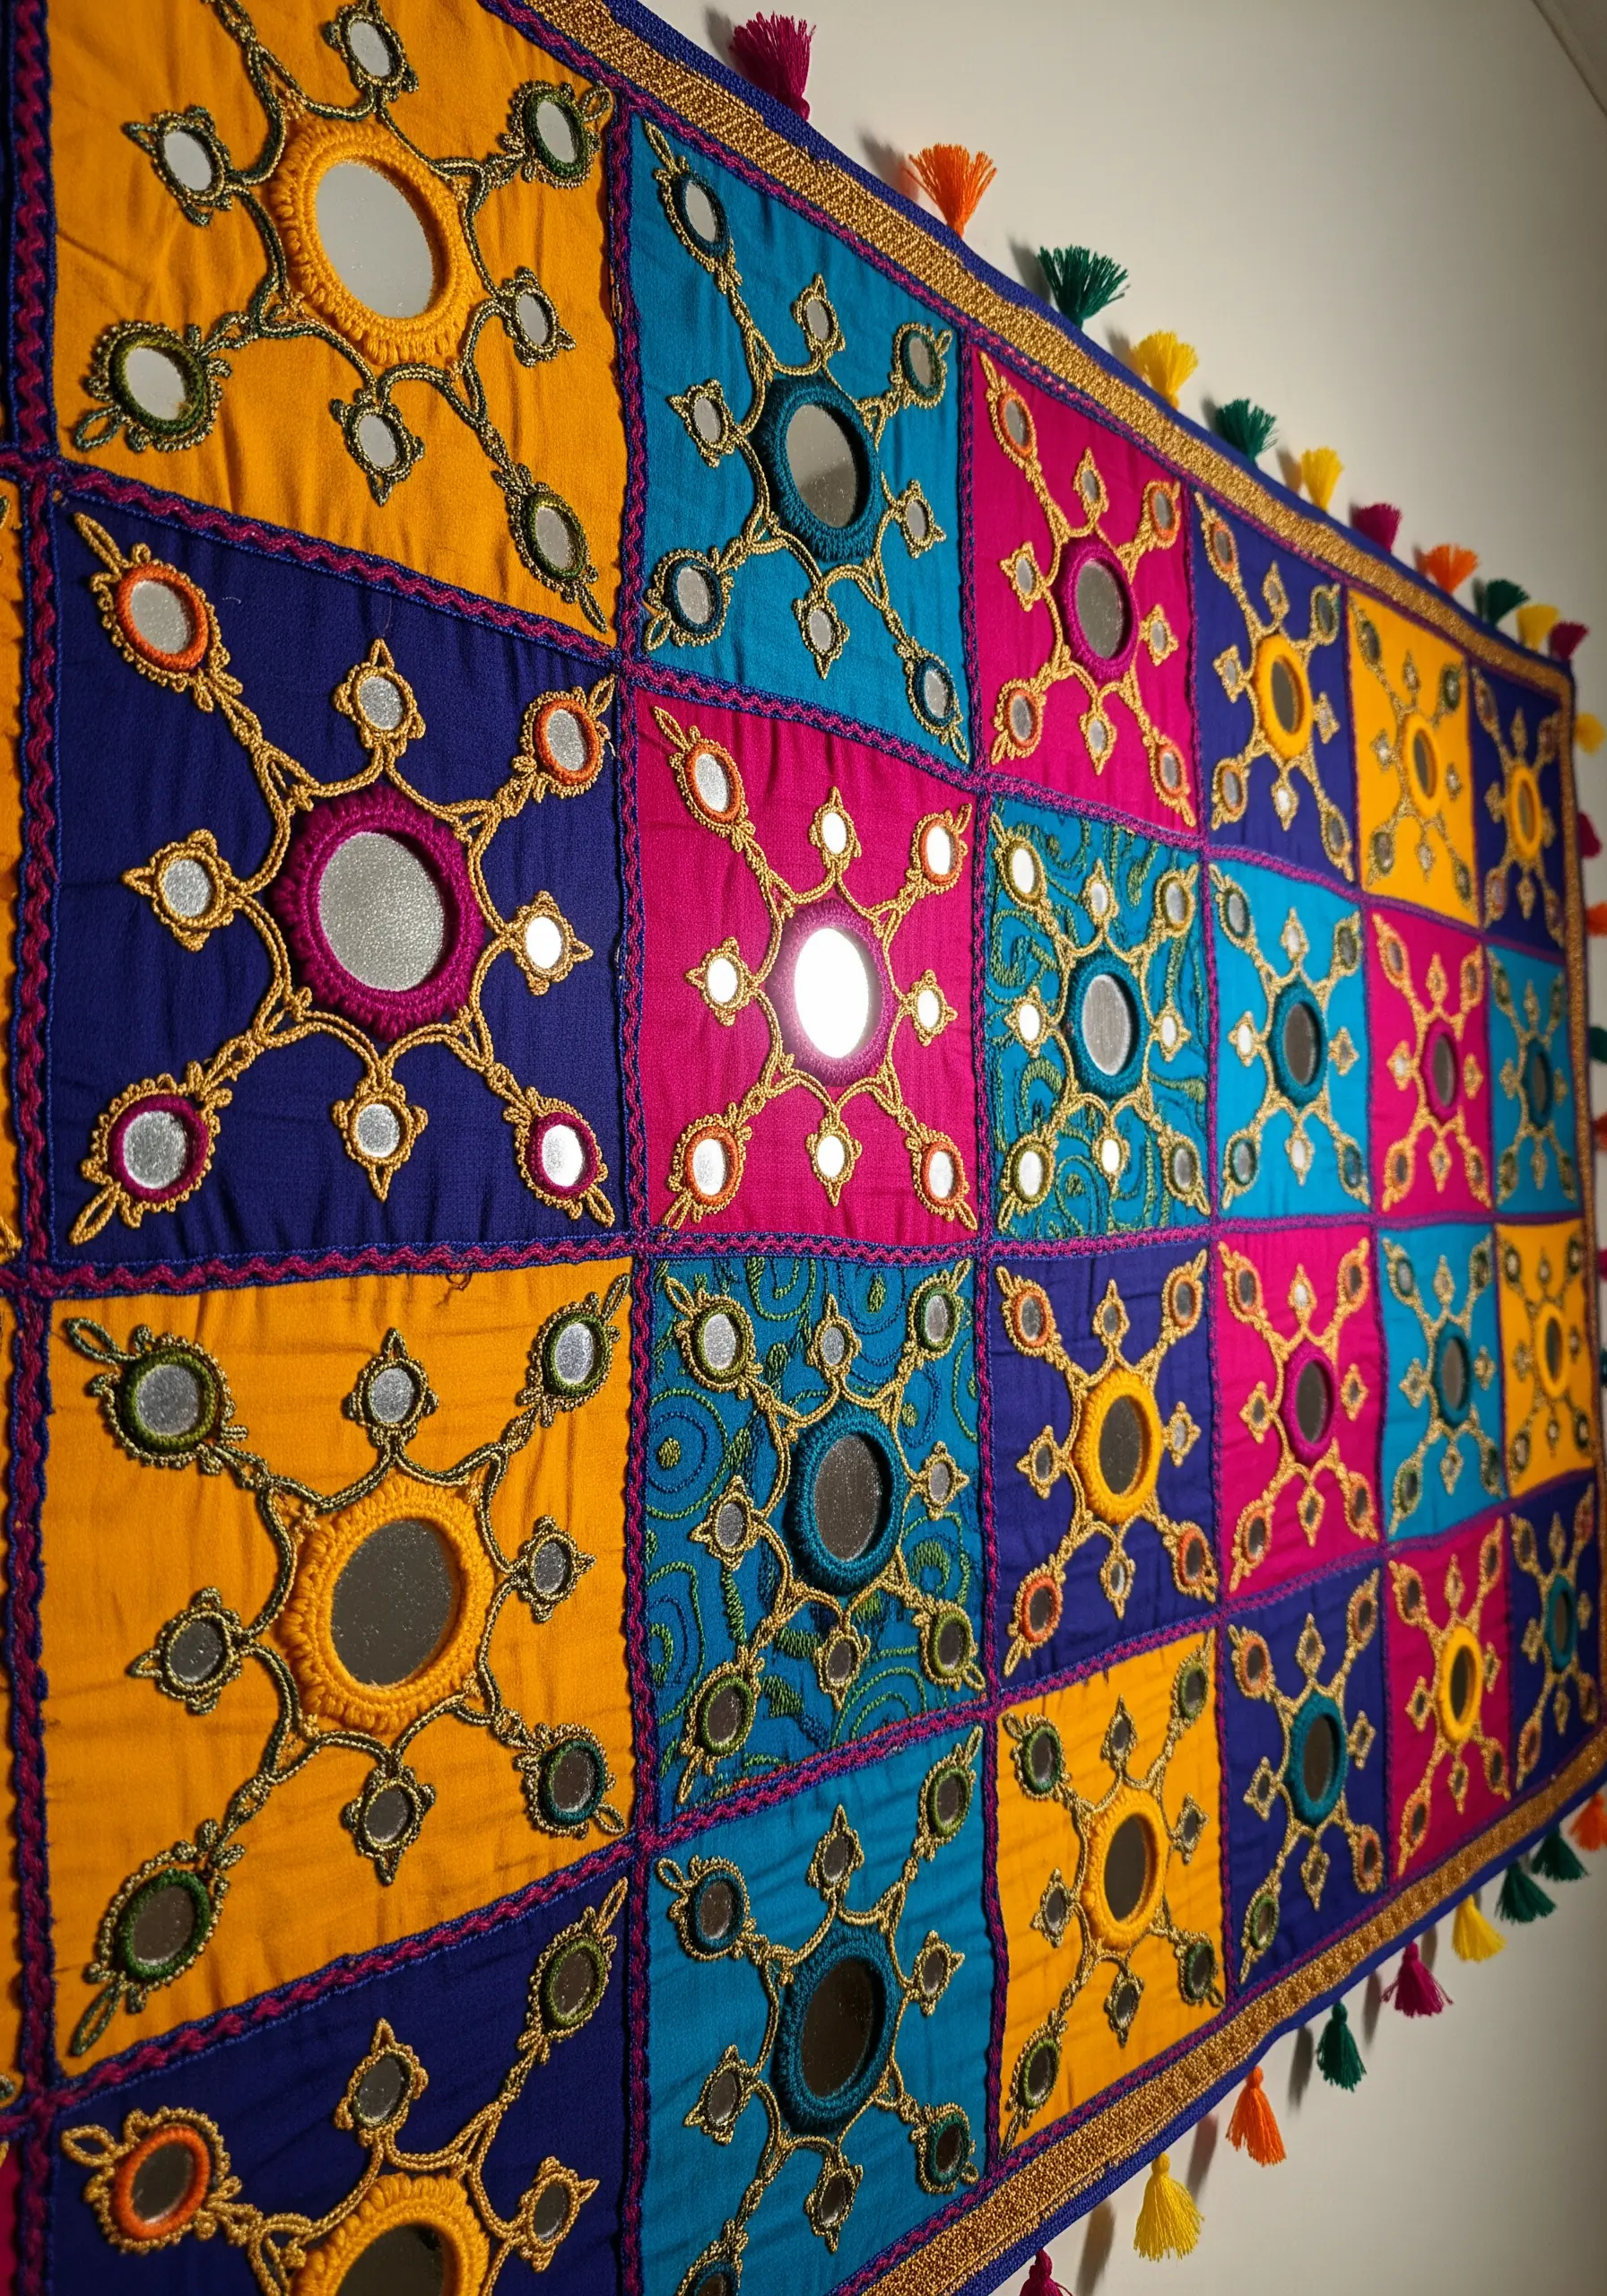
You can add a joyful, light-catching element to your work by incorporating Shisha, or mirror, embroidery.
To attach the small mirrors, first create a foundation of anchoring stitches across the surface, then use a tight blanket or buttonhole stitch to form a neat, secure frame around the edge.
This technique is especially effective when paired with vibrant thread colors and bold patchwork, creating a textile that sparkles and reflects light.
20. Embrace Joyful Symmetry with Papercut-Inspired Motifs
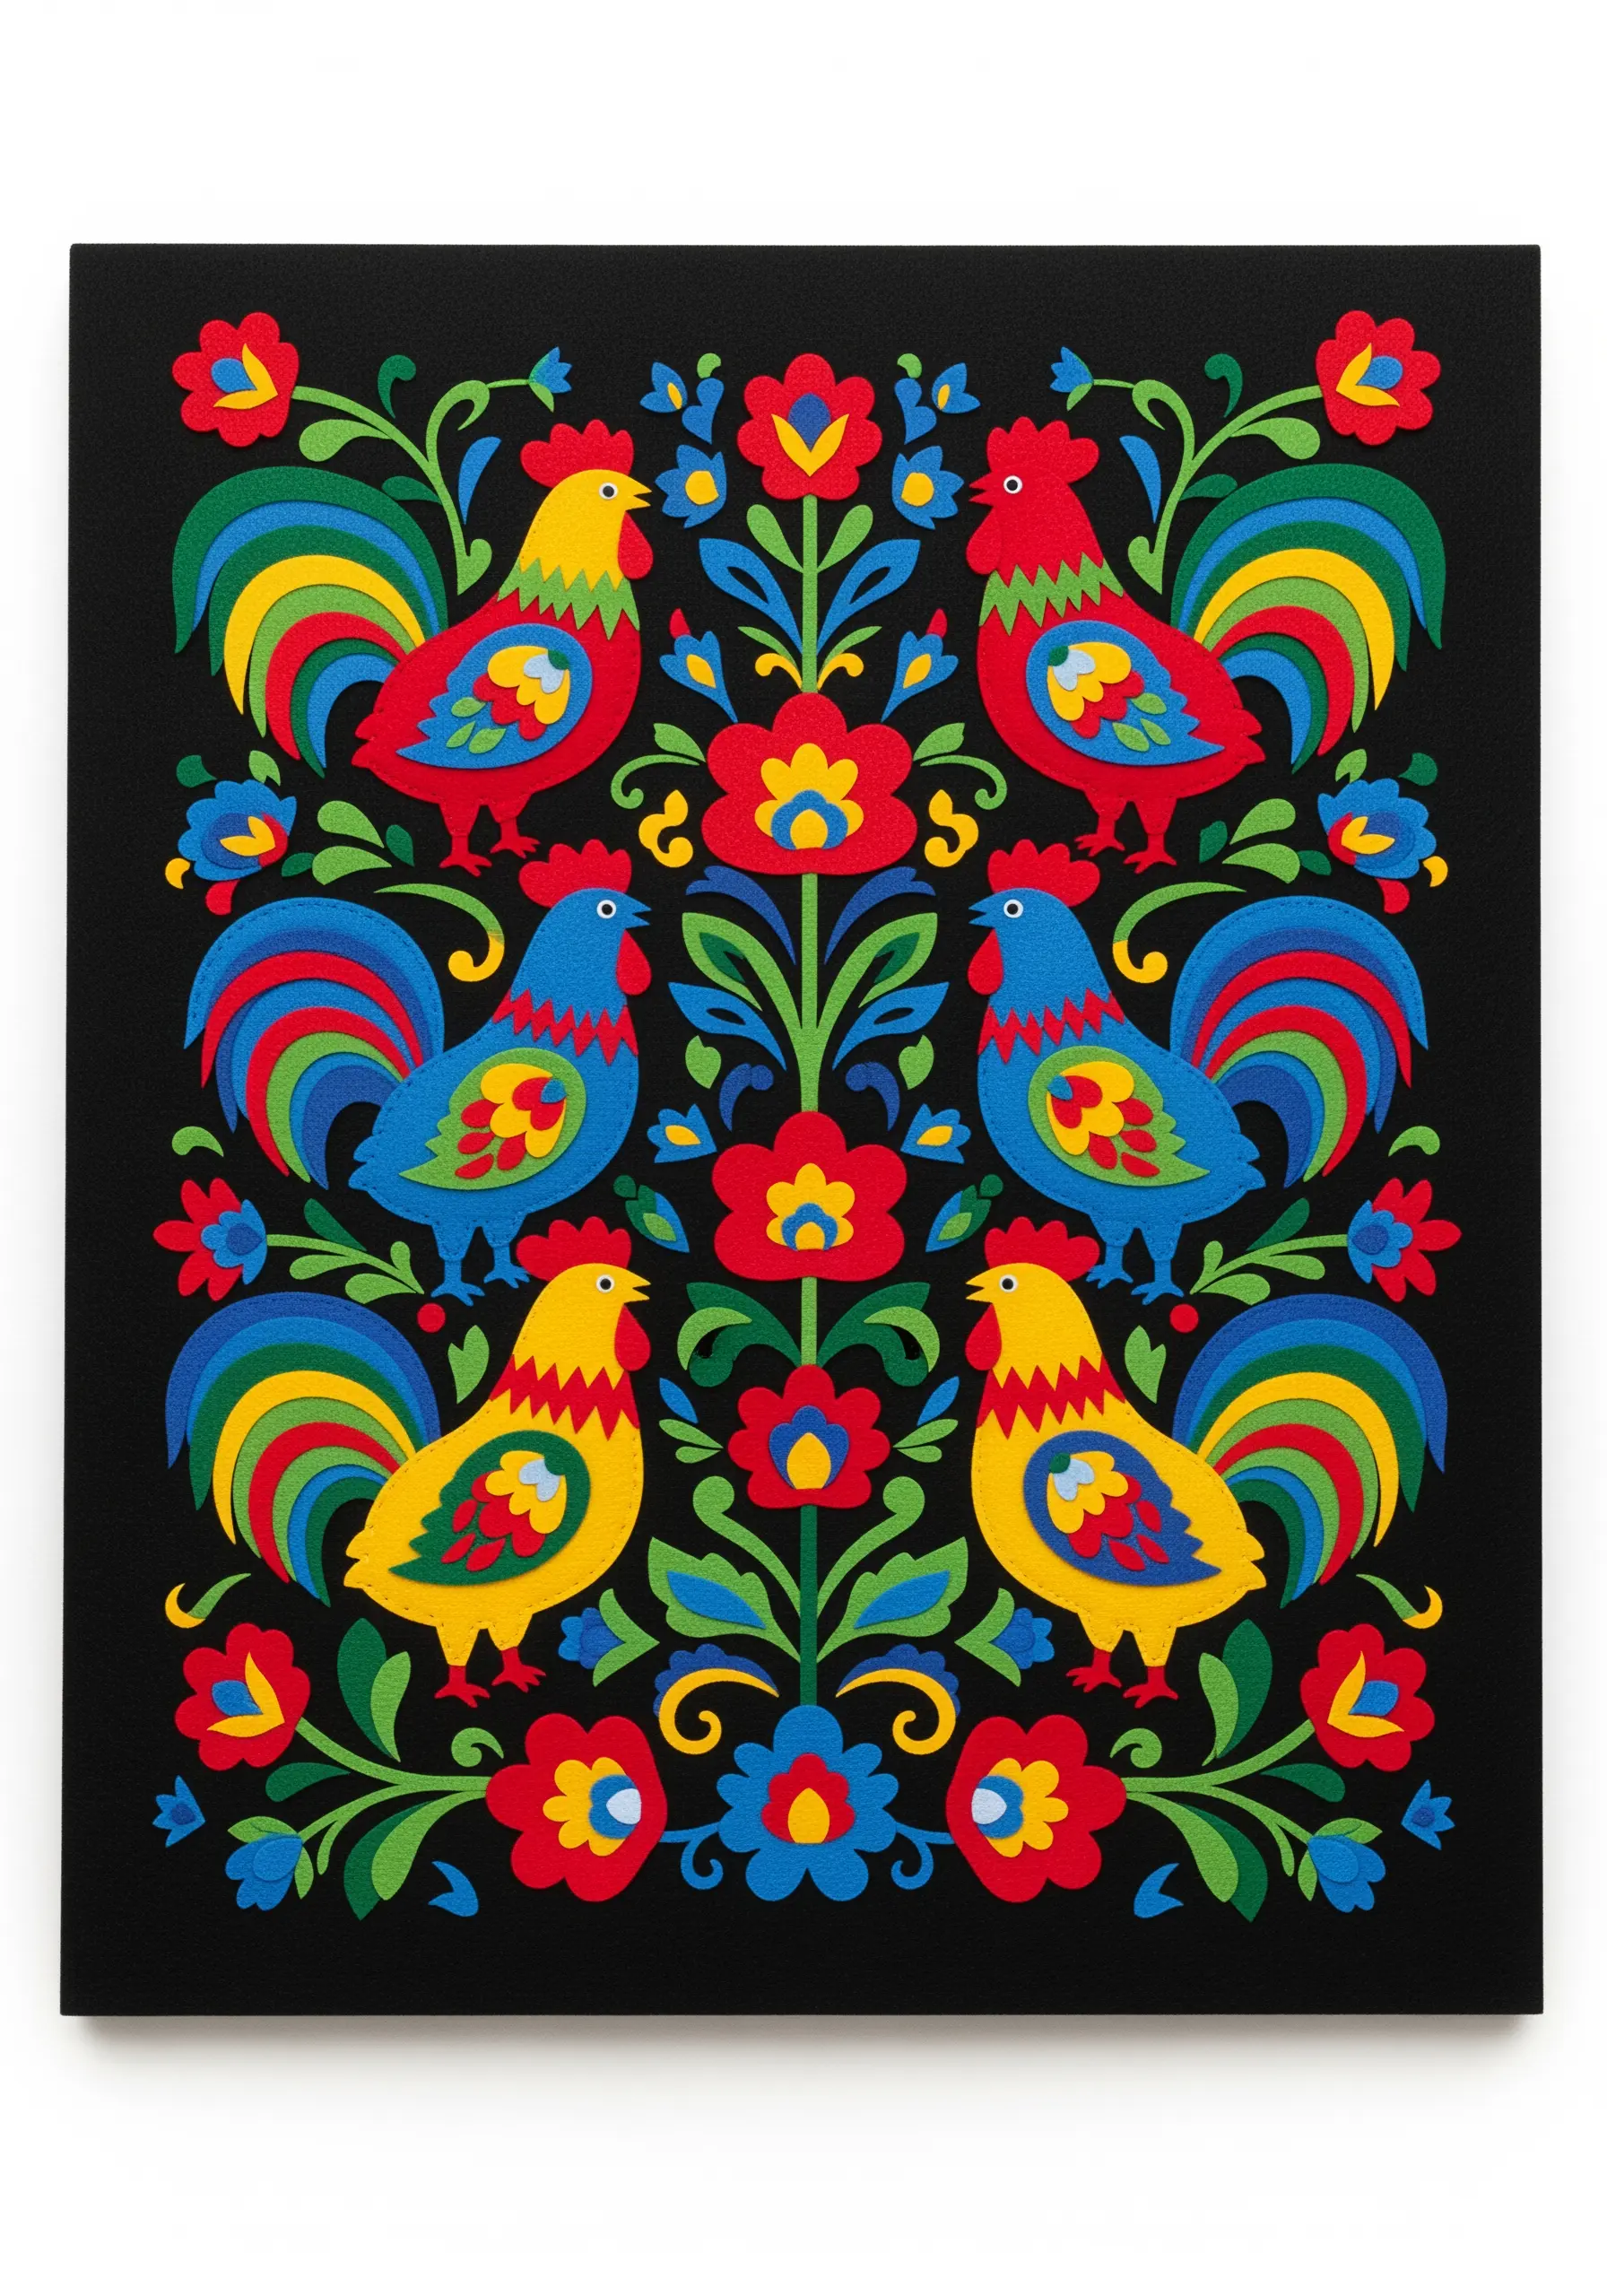
You can replicate the clean, graphic look of Polish paper-cutting (Wycinanki) in your embroidery by focusing on bold shapes and symmetry.
Use a dense, perfectly smooth satin stitch and outline your motifs for crisp definition.
A high-contrast palette of primary colors on a black background makes the design pop.
The key is the mirrored composition—design one half of your pattern, then flip it to create a perfectly balanced and dynamic piece.
21. Evoke Classic Porcelain with Monochromatic Stitching
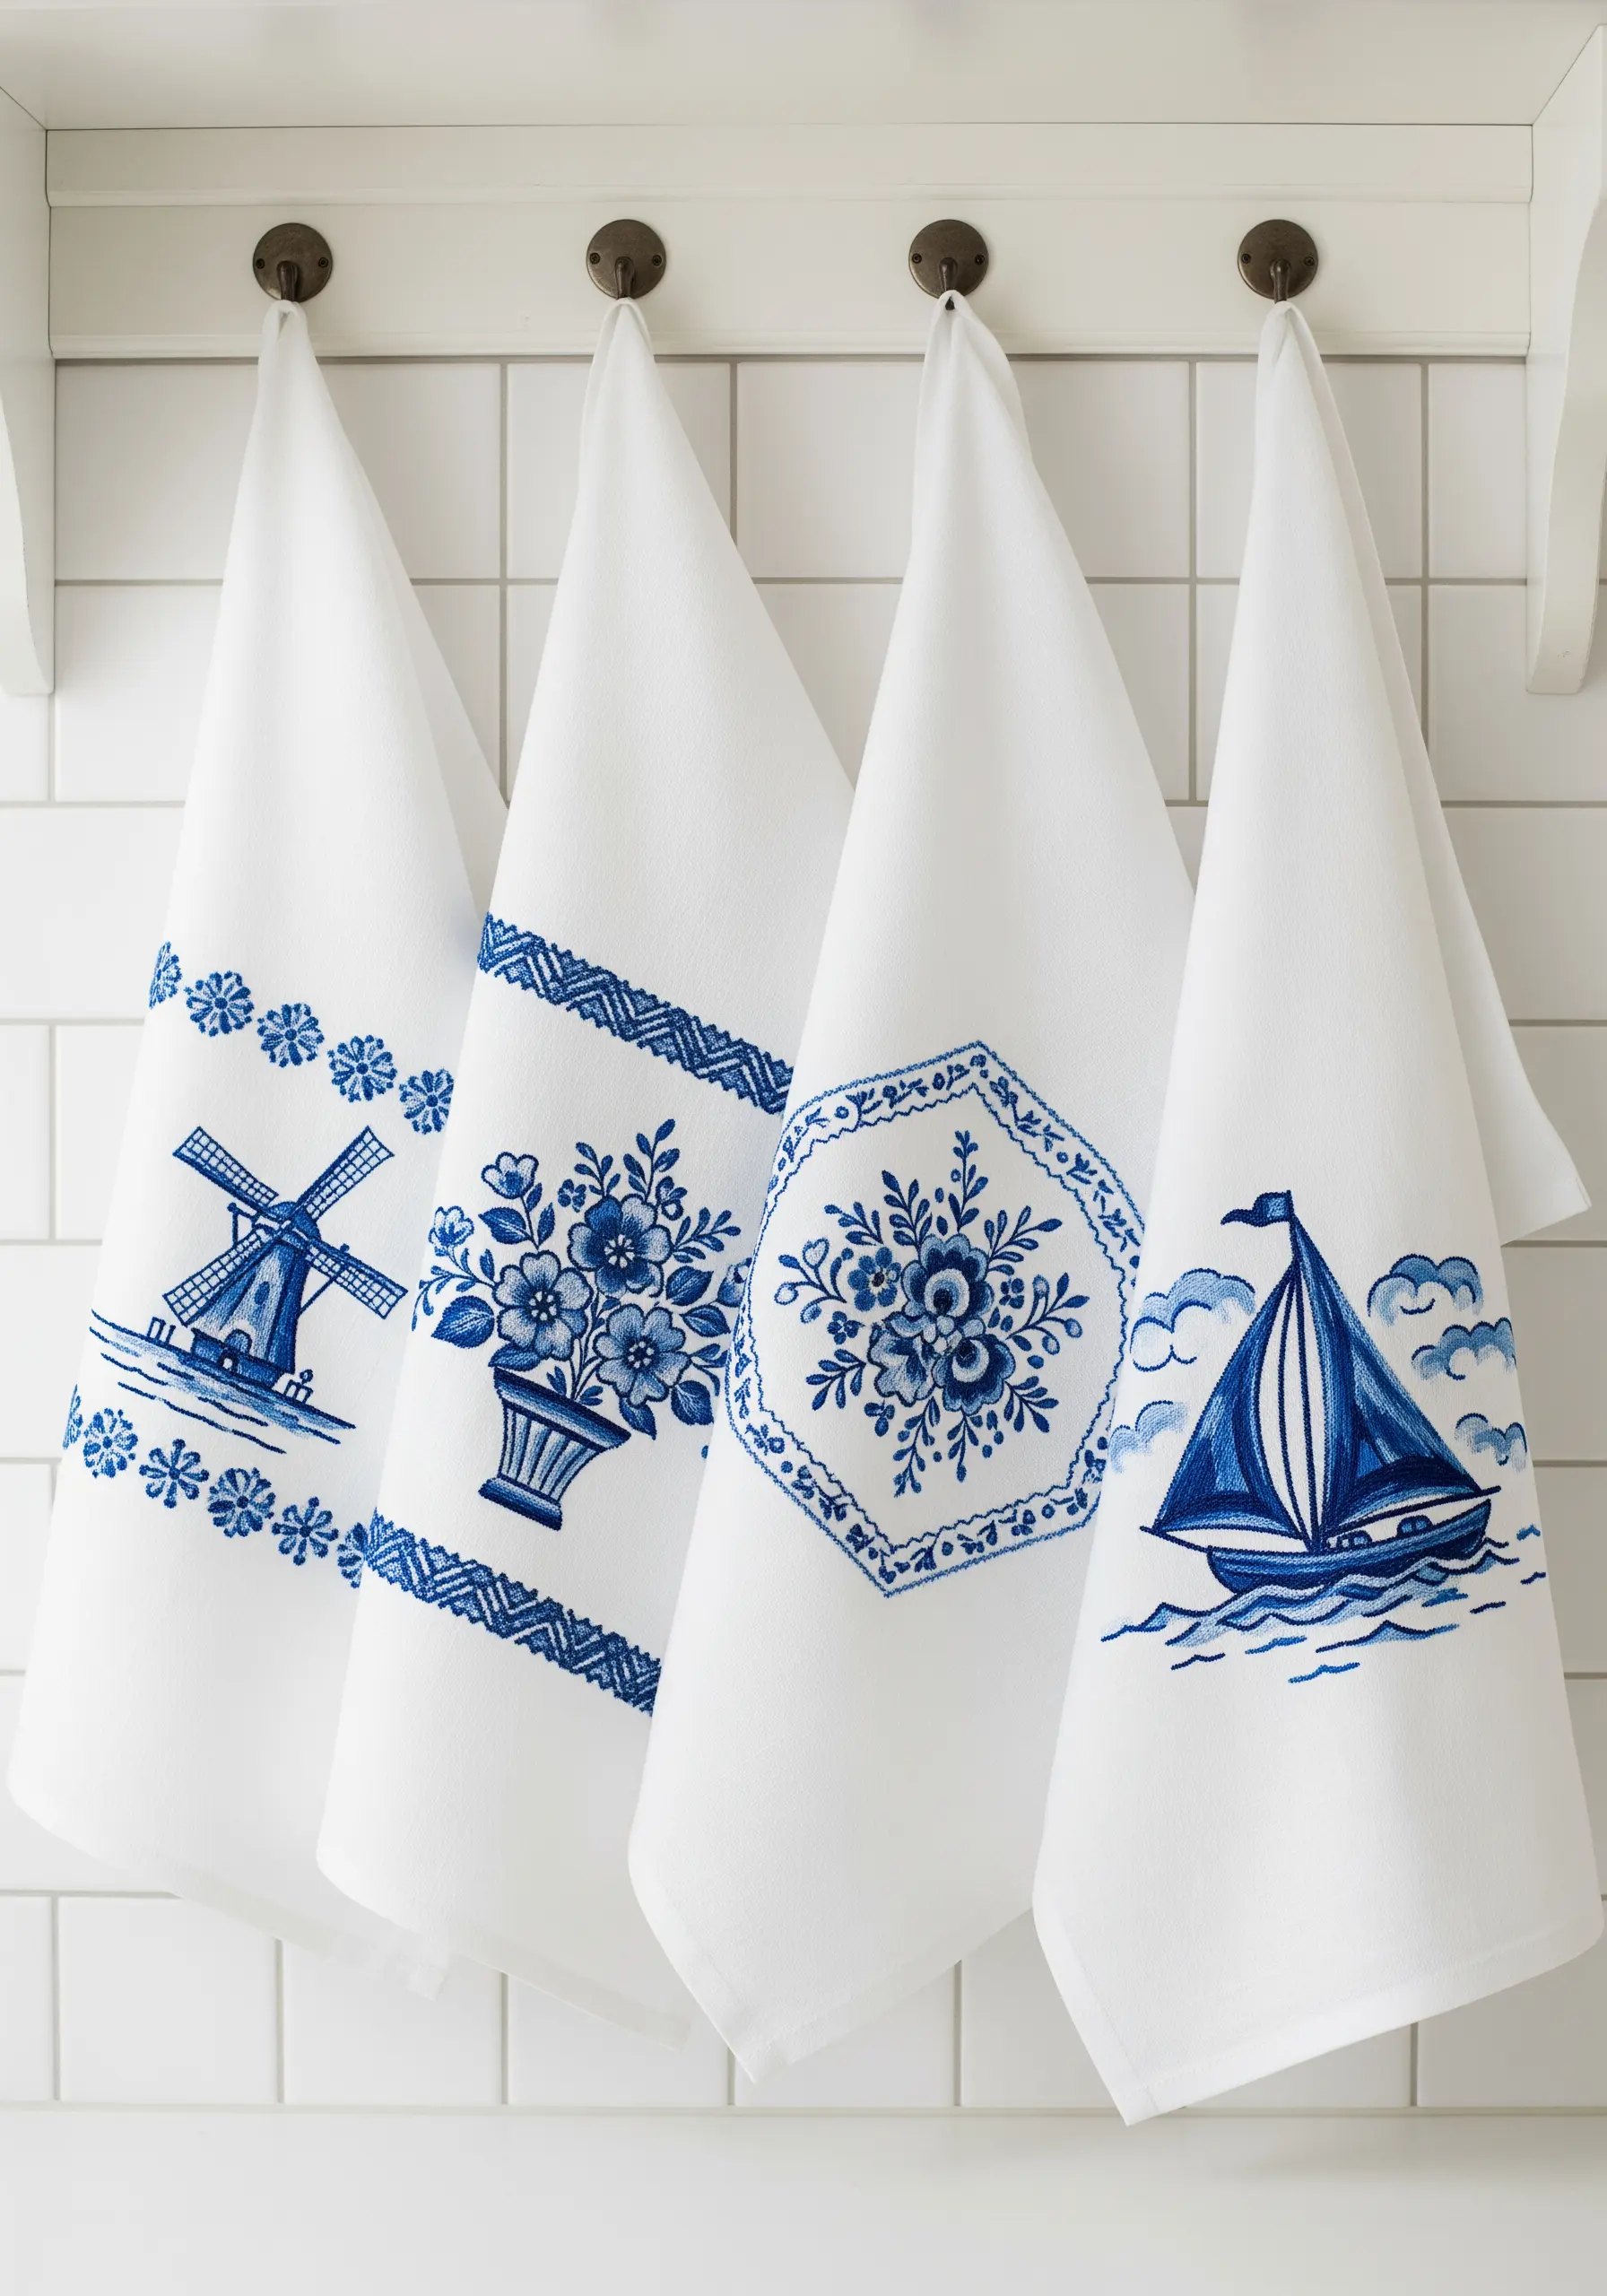
You can capture the classic, elegant look of Delft Blue pottery using just a single color of thread on white fabric.
The key to creating depth is to vary your stitches: use satin stitch for solid areas, backstitch for fine lines, and French knots for textural details, all in the same shade of blue.
This tonal variation within one color proves you don’t need a complex palette for a sophisticated and timeless design. These motifs add instant charm to simple textiles.
22. Sculpt with Yarn Using Punch Needle Techniques
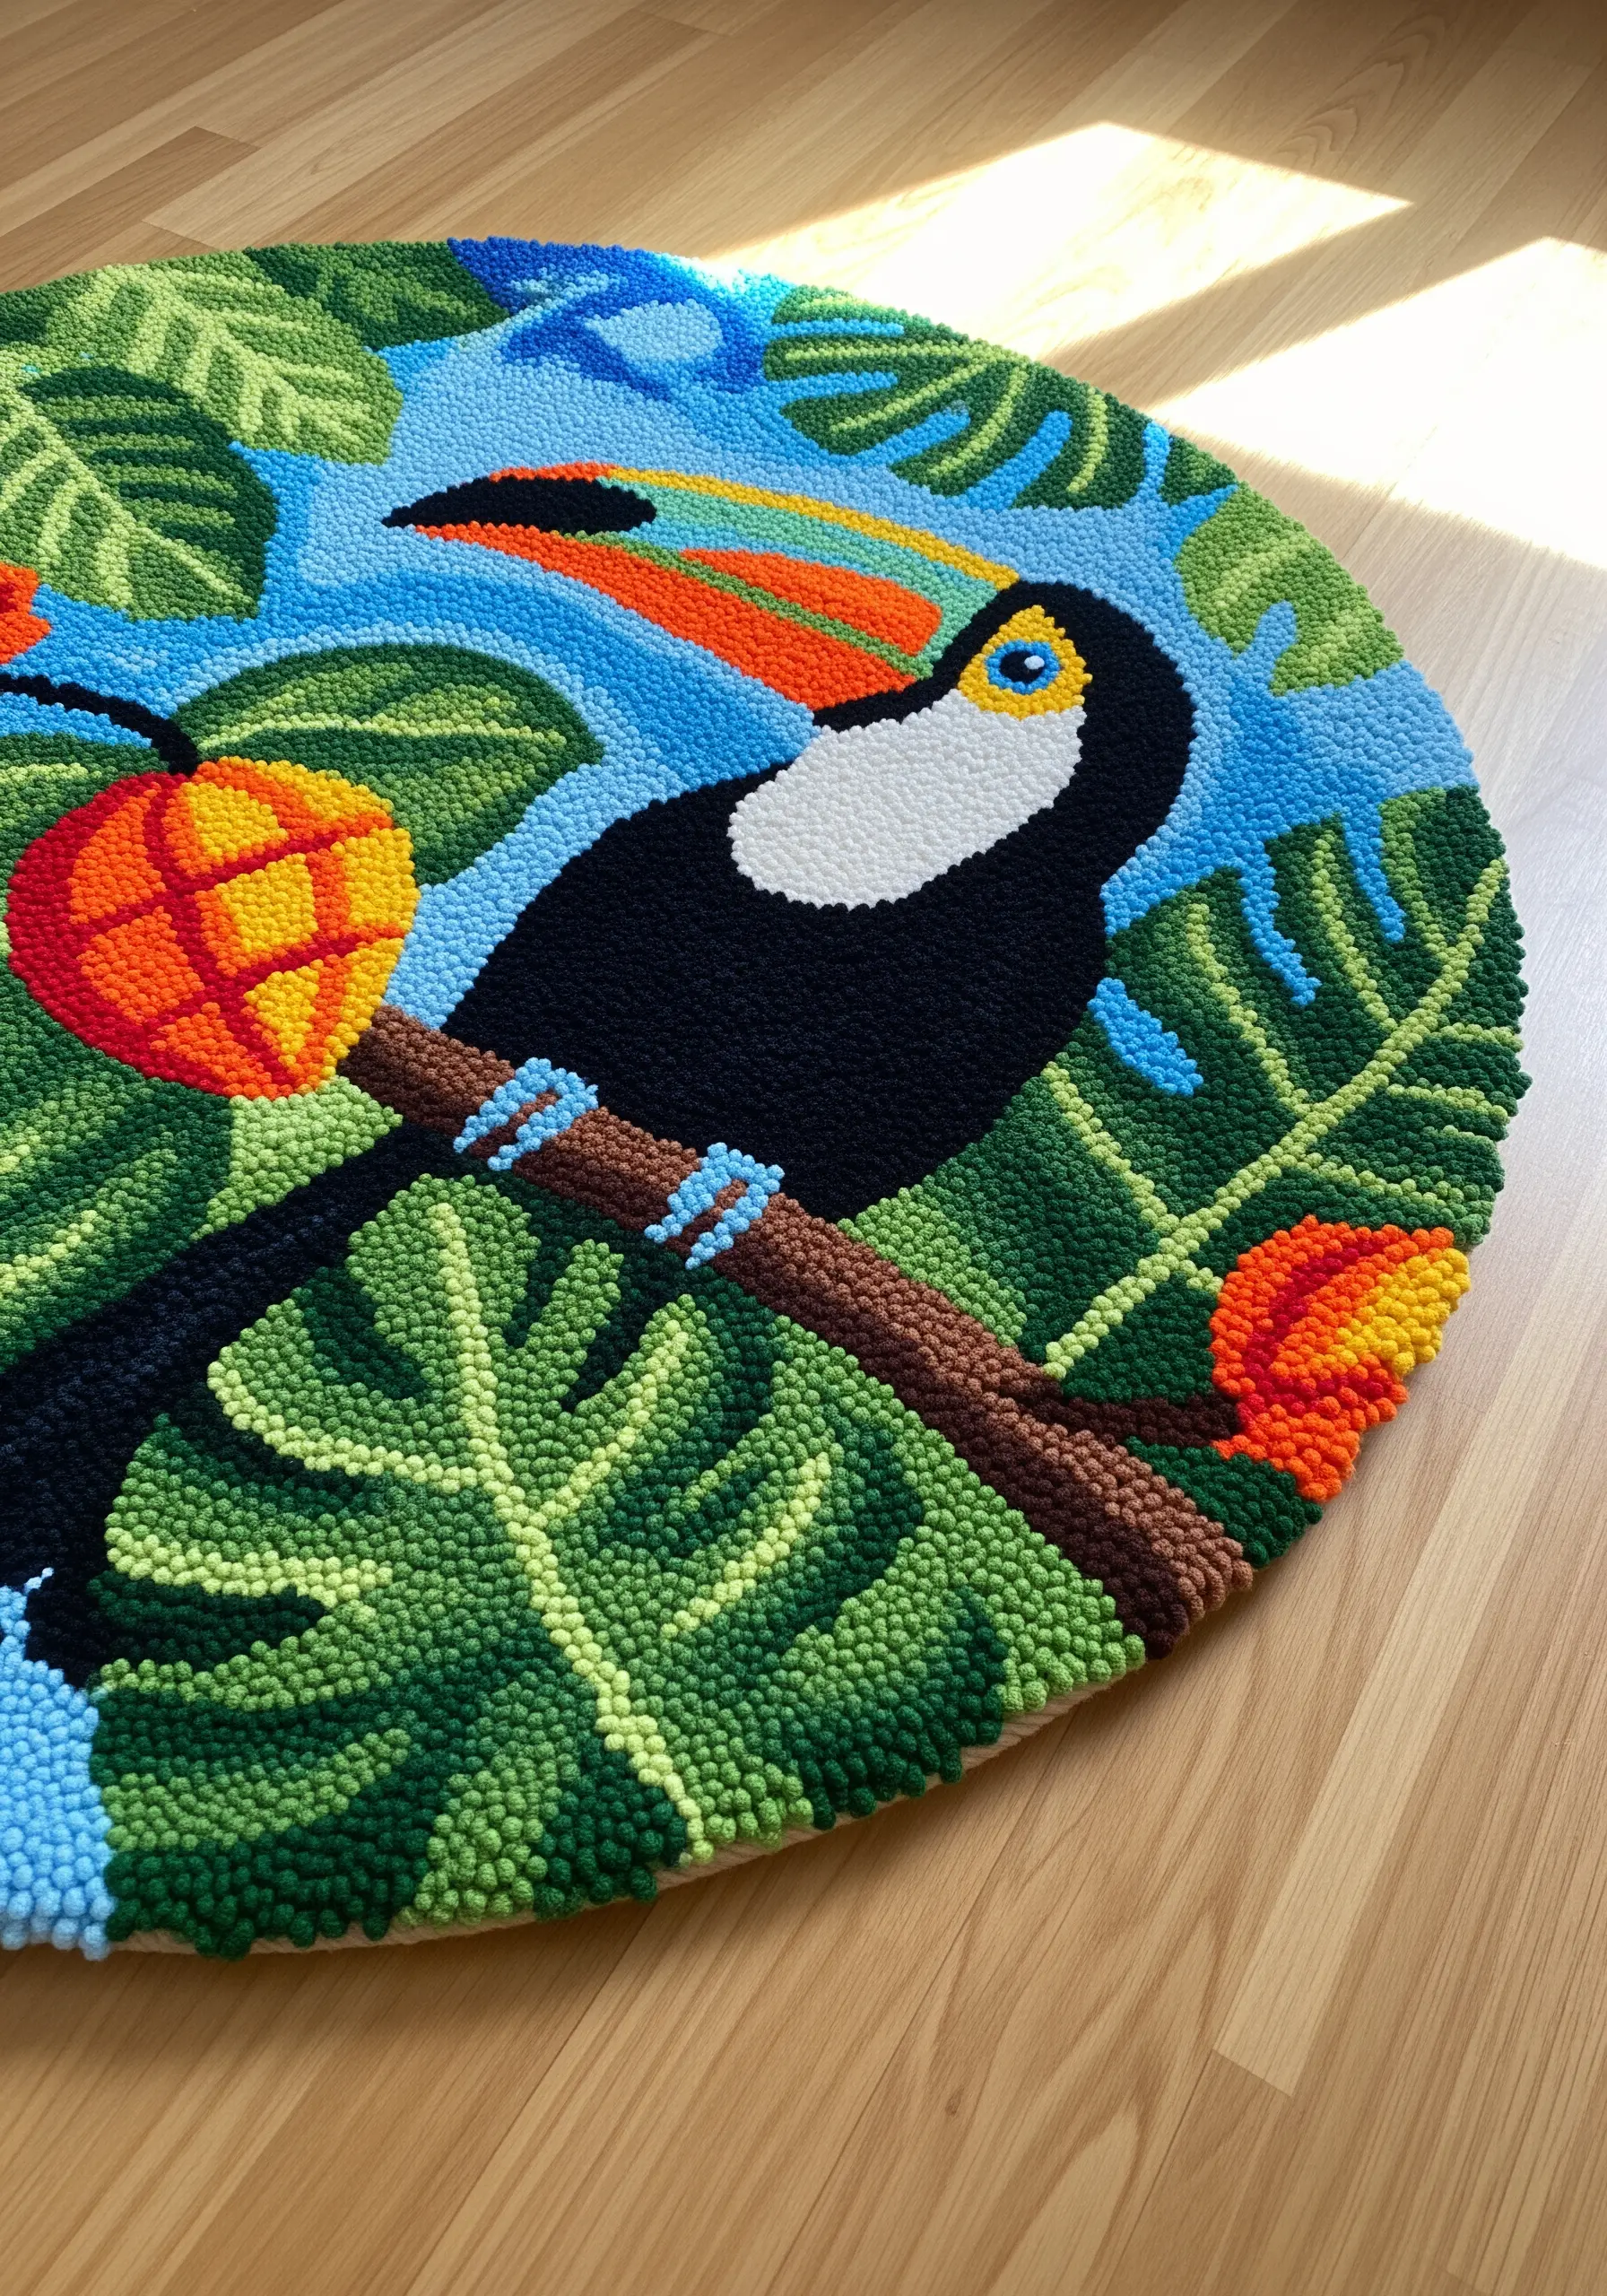
Punch needle allows you to create dense, plush textures that are almost sculptural.
To create variation and definition, you can adjust your needle’s loop height for different sections of your design, making some elements recede and others stand out.
For crisp edges between colors, work your outlines first and then fill in the shapes, packing the loops tightly together.
This results in a durable, highly tactile surface perfect for rugs, cushions, and statement wall art.
23. Illustrate Narratives with Simple Figurative Stitches
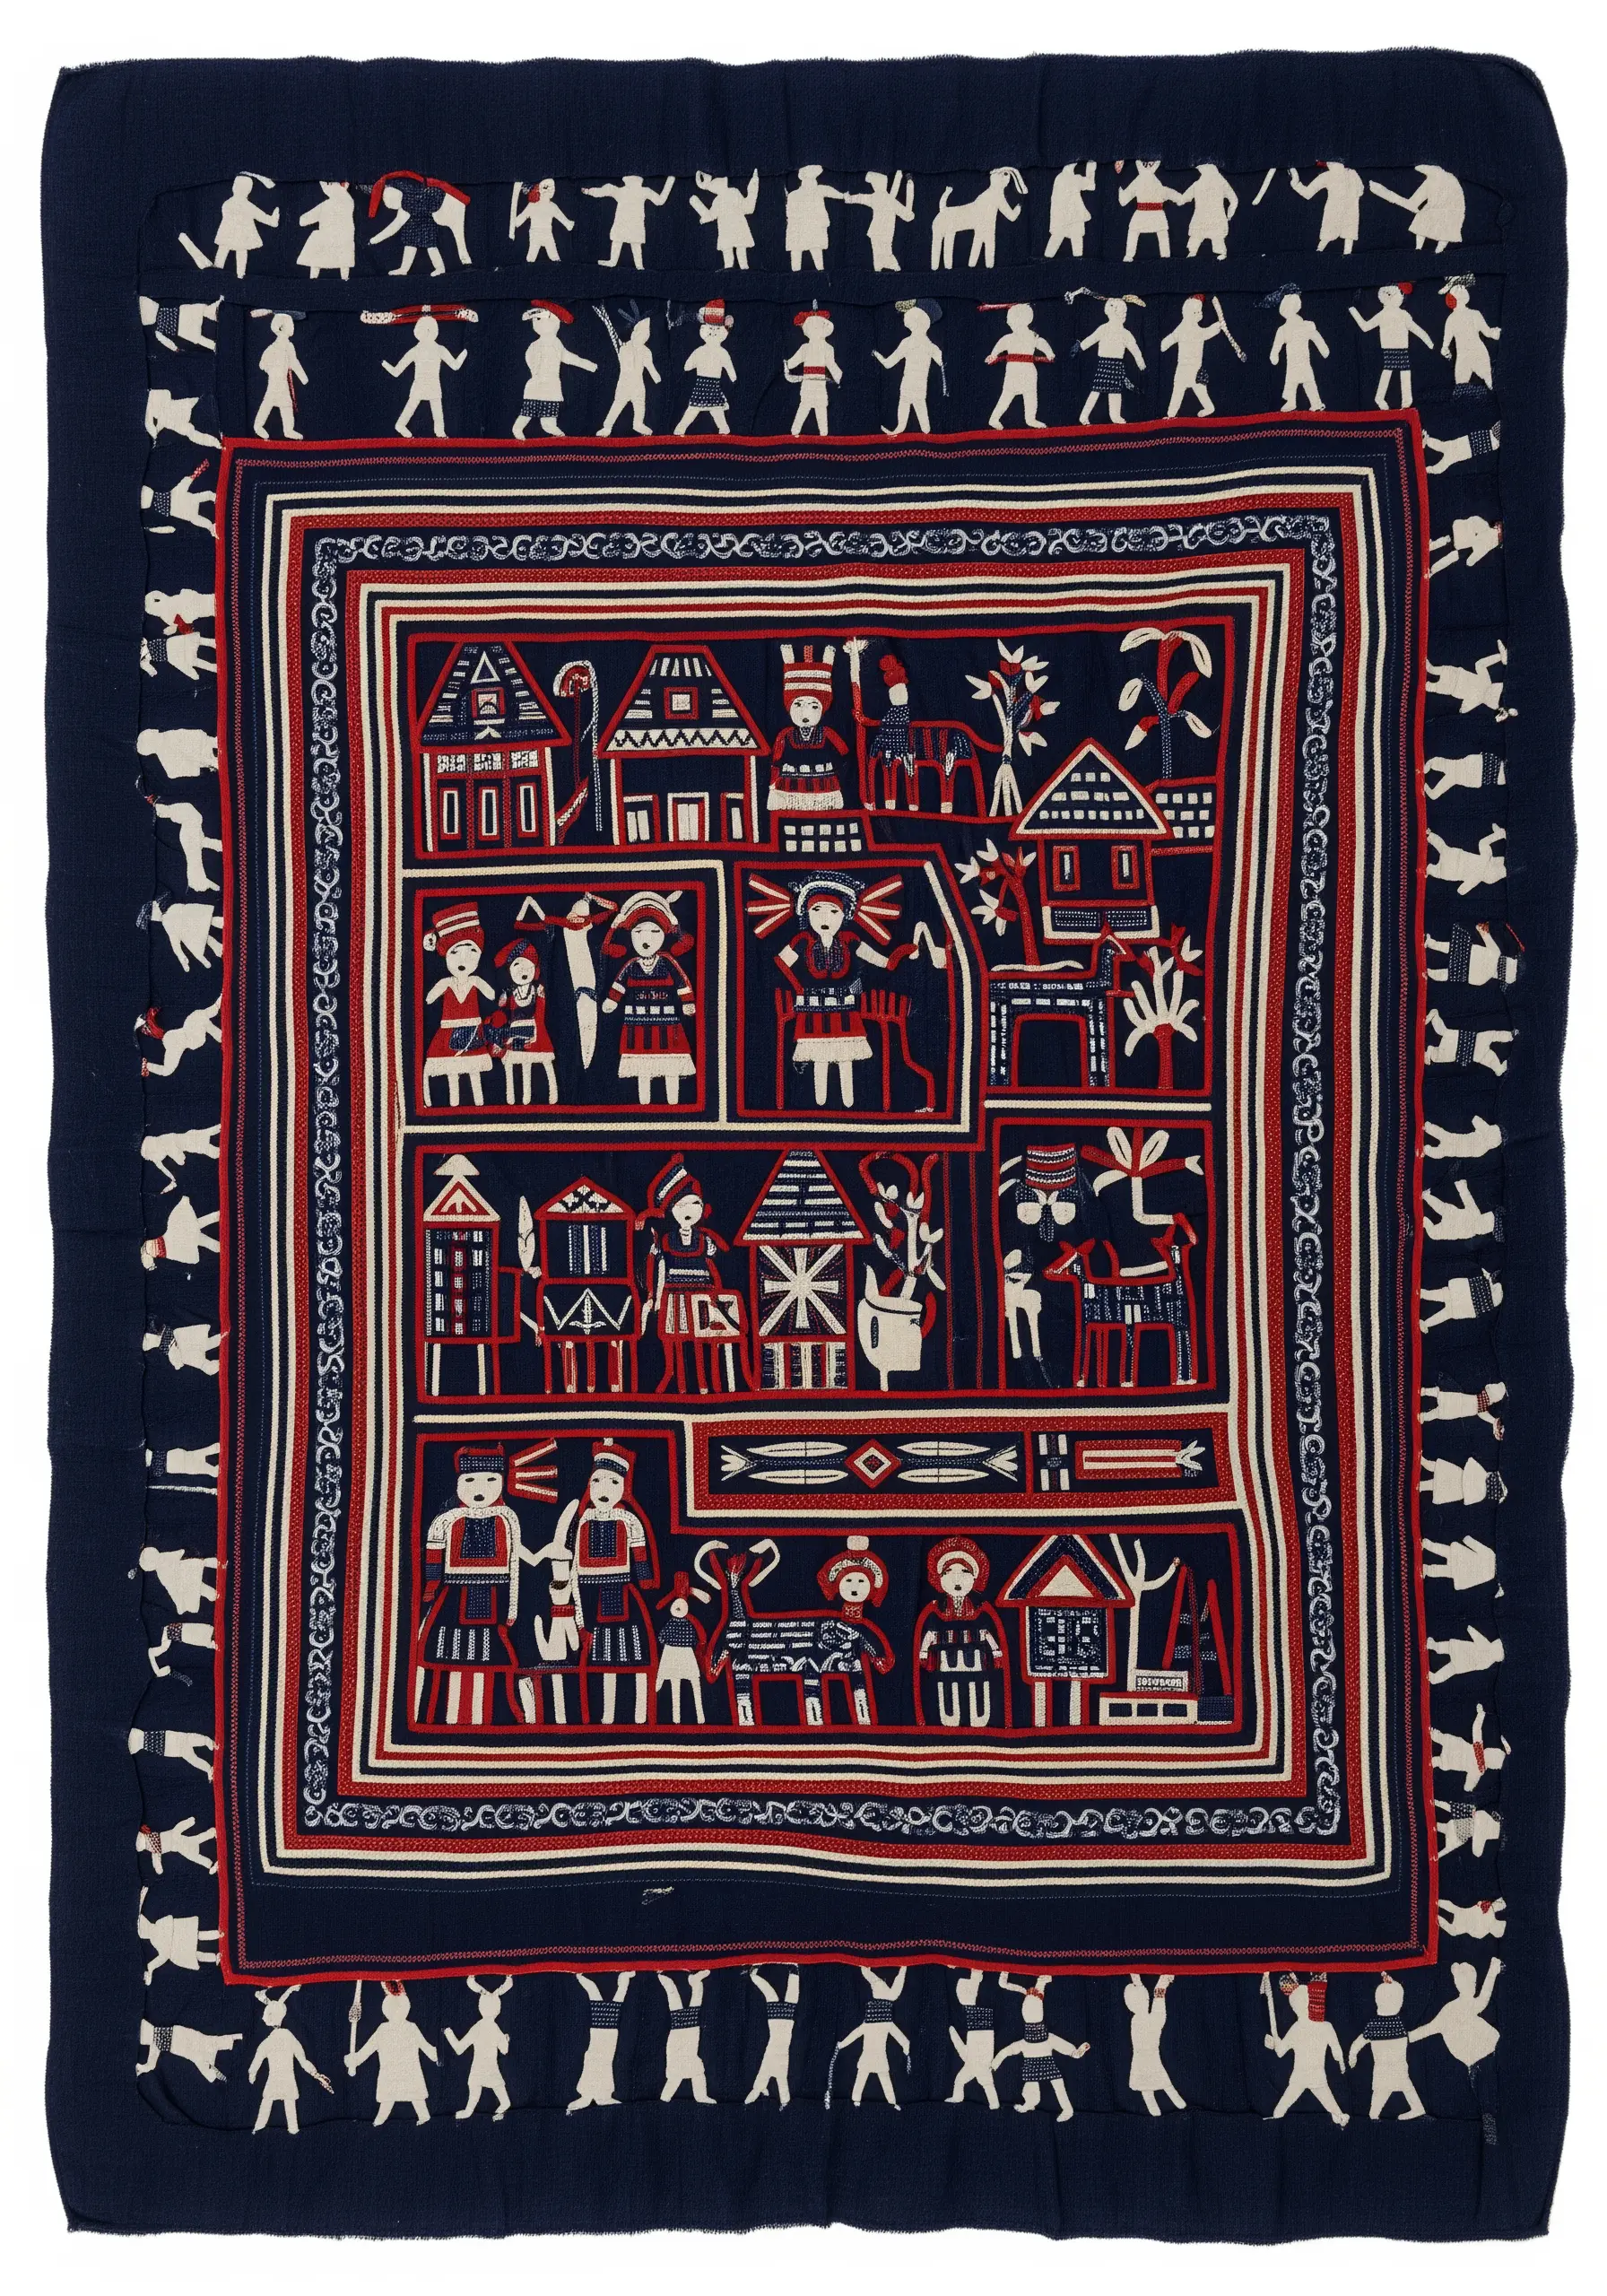
You don’t need complex, realistic stitches to tell a powerful story in thread, as demonstrated by Hmong story cloths.
Use simple outline stitches like backstitch or stem stitch to create minimalist figures, animals, and buildings.
The narrative power comes from the composition—the arrangement and repetition of these simple forms to build a detailed scene.
This is a wonderful way to document memories, traditions, or folklore with just a needle and thread.
24. Recreate Wax-Resist Patterns with Negative Space
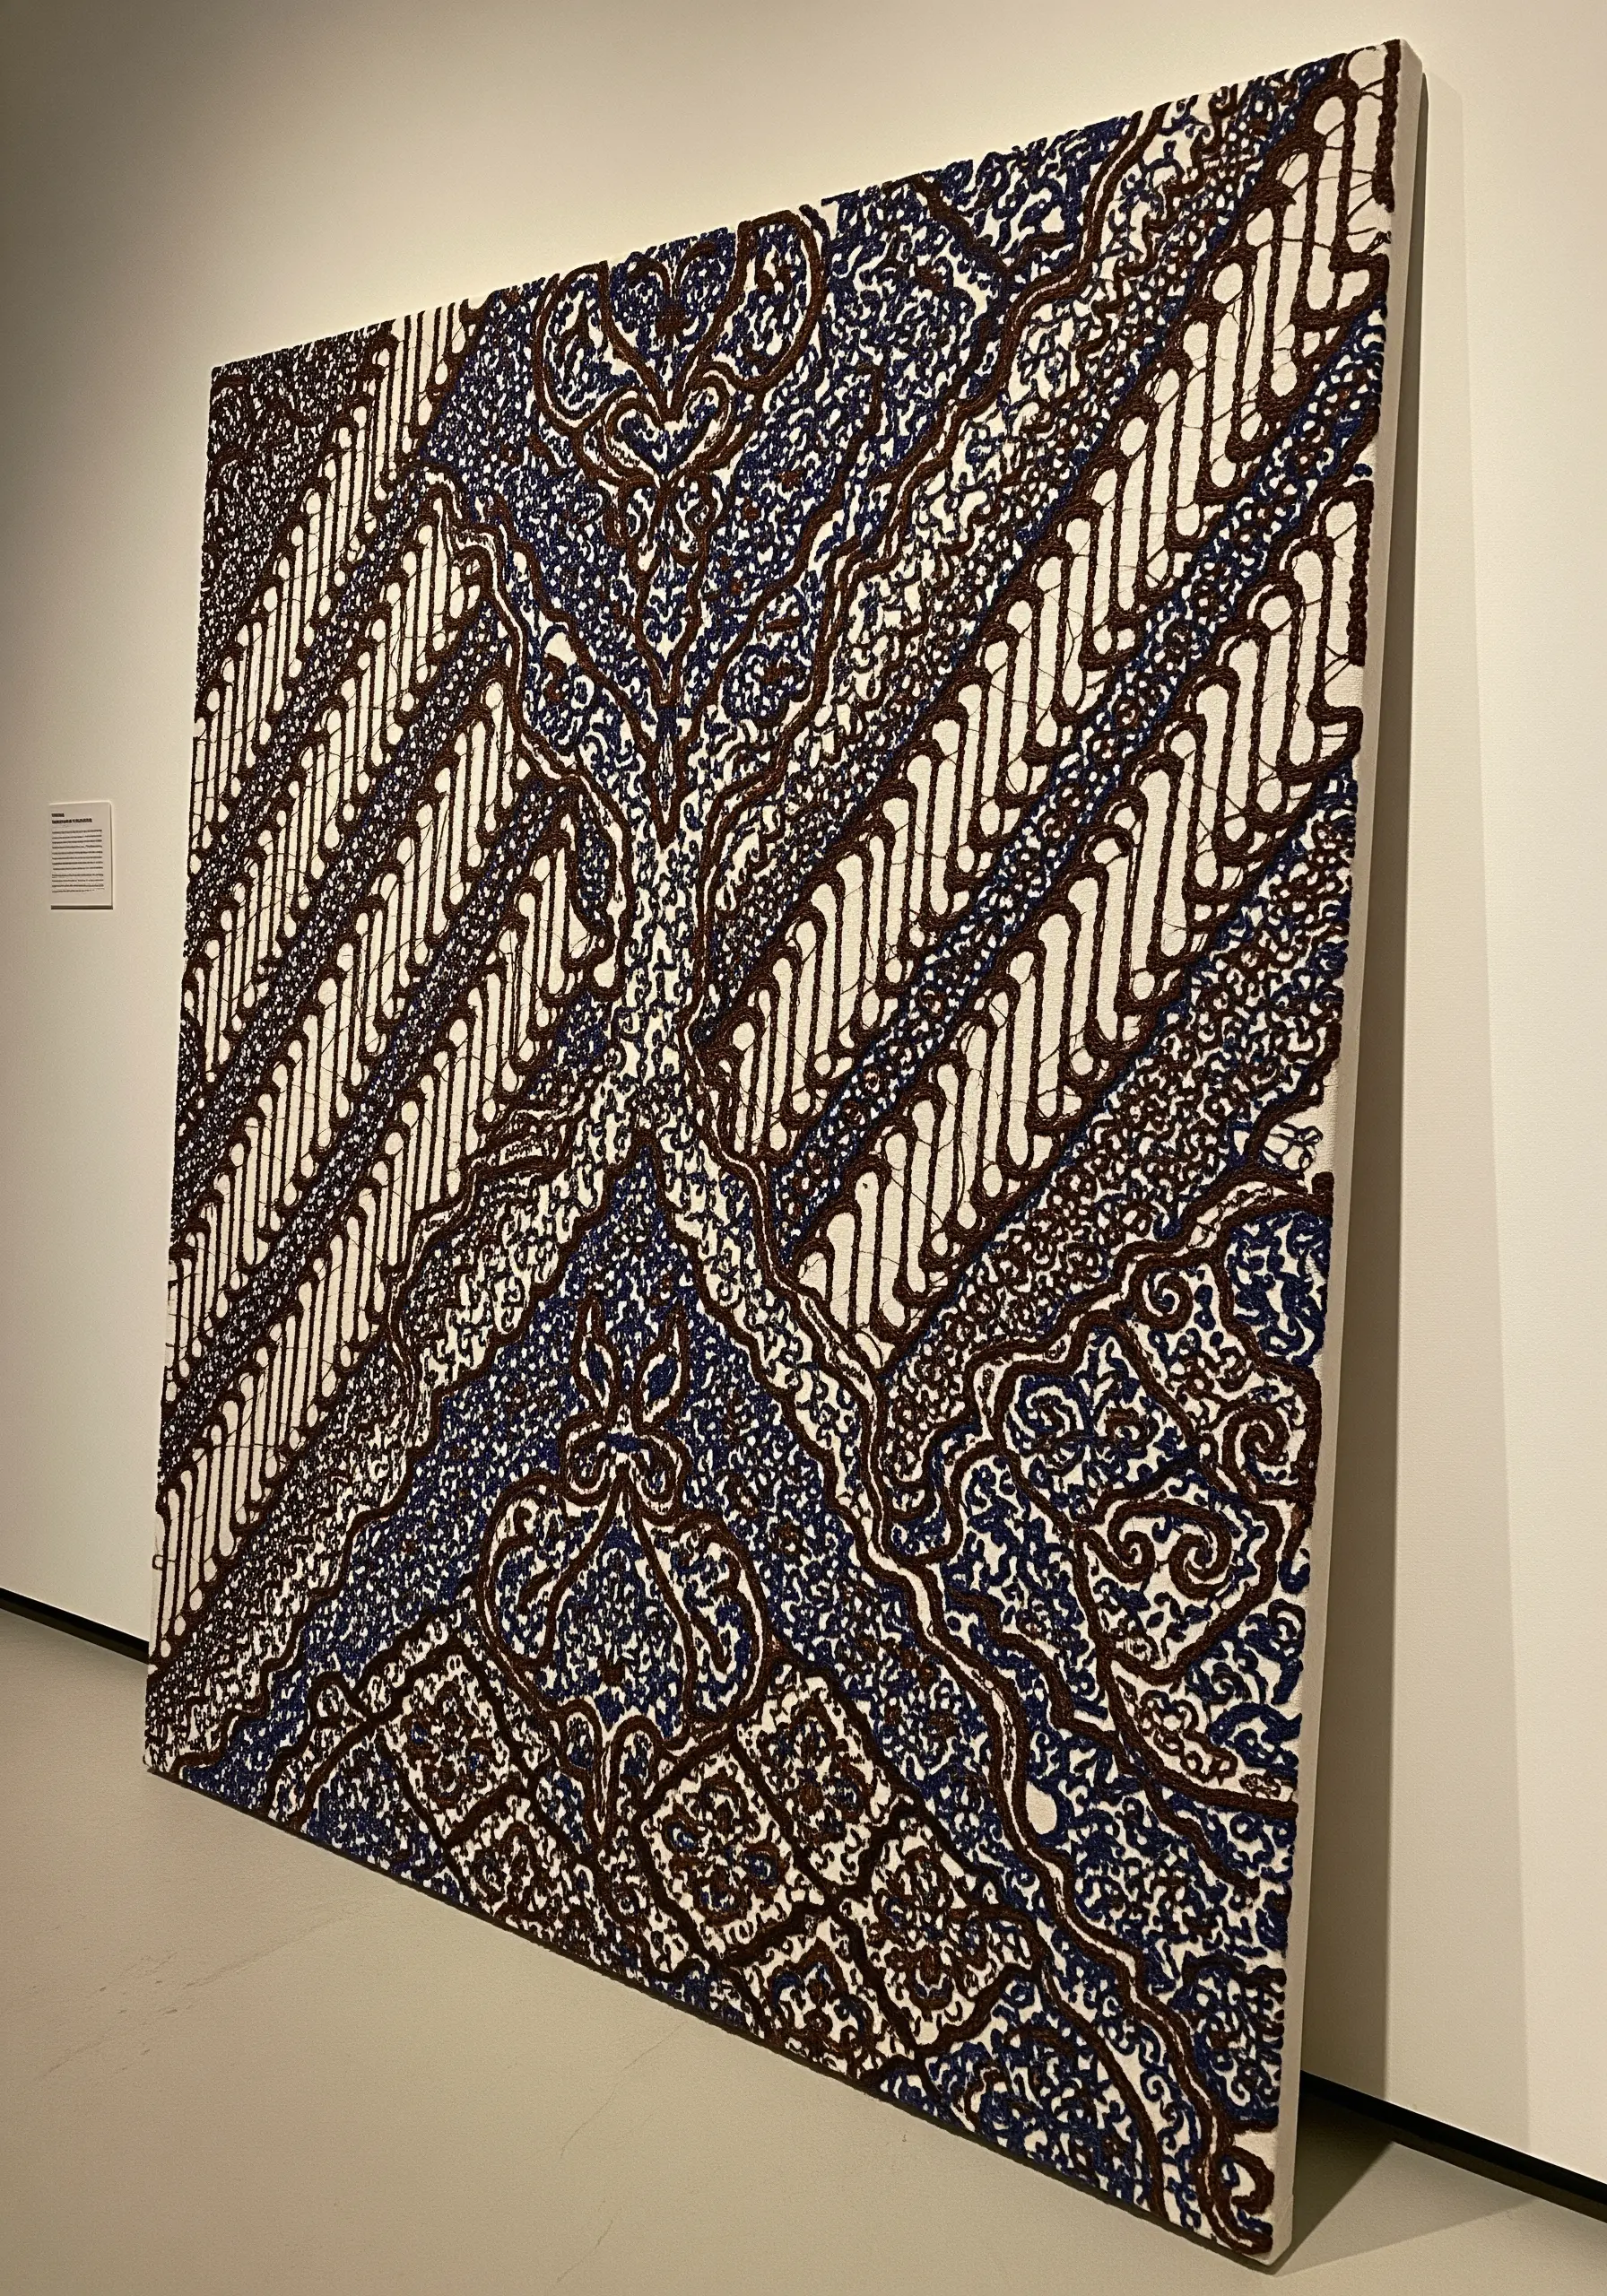
You can mimic the beautiful effect of Batik, a wax-resist dyeing technique, by using negative space in your embroidery.
Instead of stitching the main motif, you stitch the background around it with a dense, textural fill like seed stitch or darning stitch.
This clever reversal makes the un-stitched fabric the focal point of the design.
It’s a sophisticated technique that creates an intricate, layered look by defining shapes through their absence.
25. Master Elegance with Architectural Cutwork
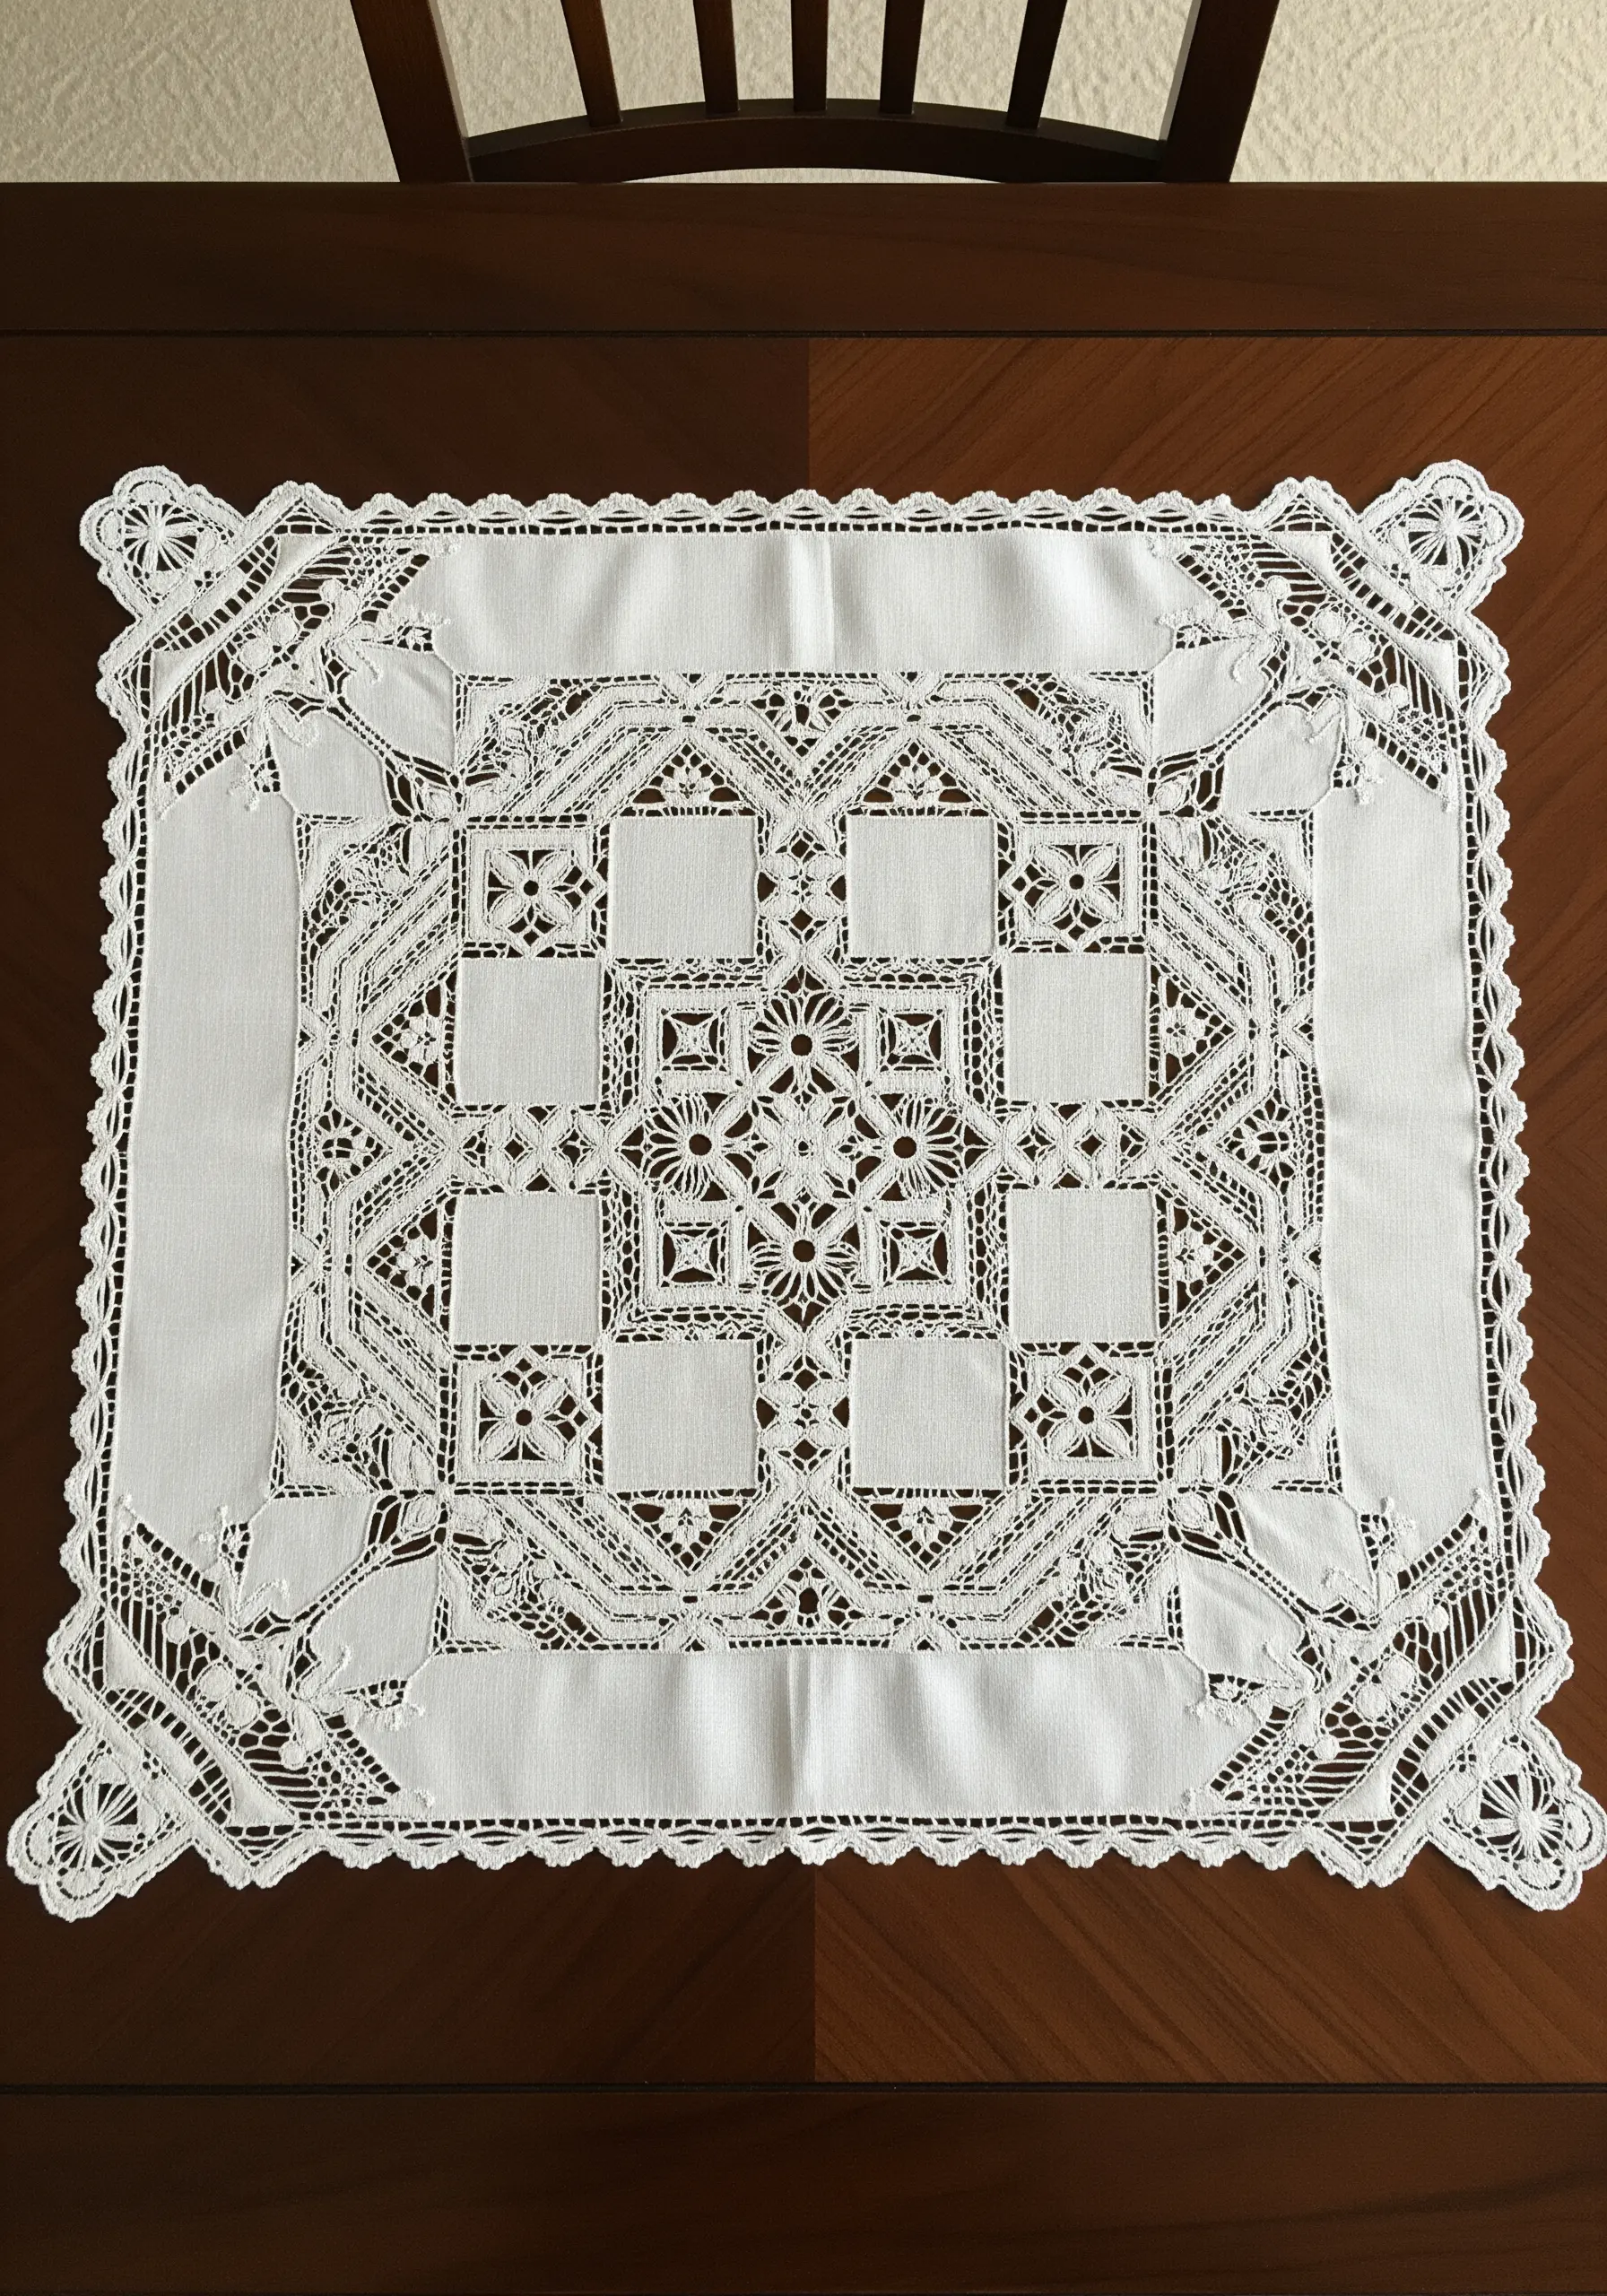
Cutwork techniques like Hardanger embroidery transform solid fabric into delicate, geometric lace.
This is achieved by first creating structured blocks of satin stitch on an even-weave linen, then carefully cutting and withdrawing threads from the fabric within those blocks.
The remaining threads are then secured with decorative wrapping or weaving stitches, creating an intricate, light-filled grid.
It’s a precise and rewarding technique that results in breathtaking heirloom pieces.
26. Apply Counted-Thread Designs to Any Accessory
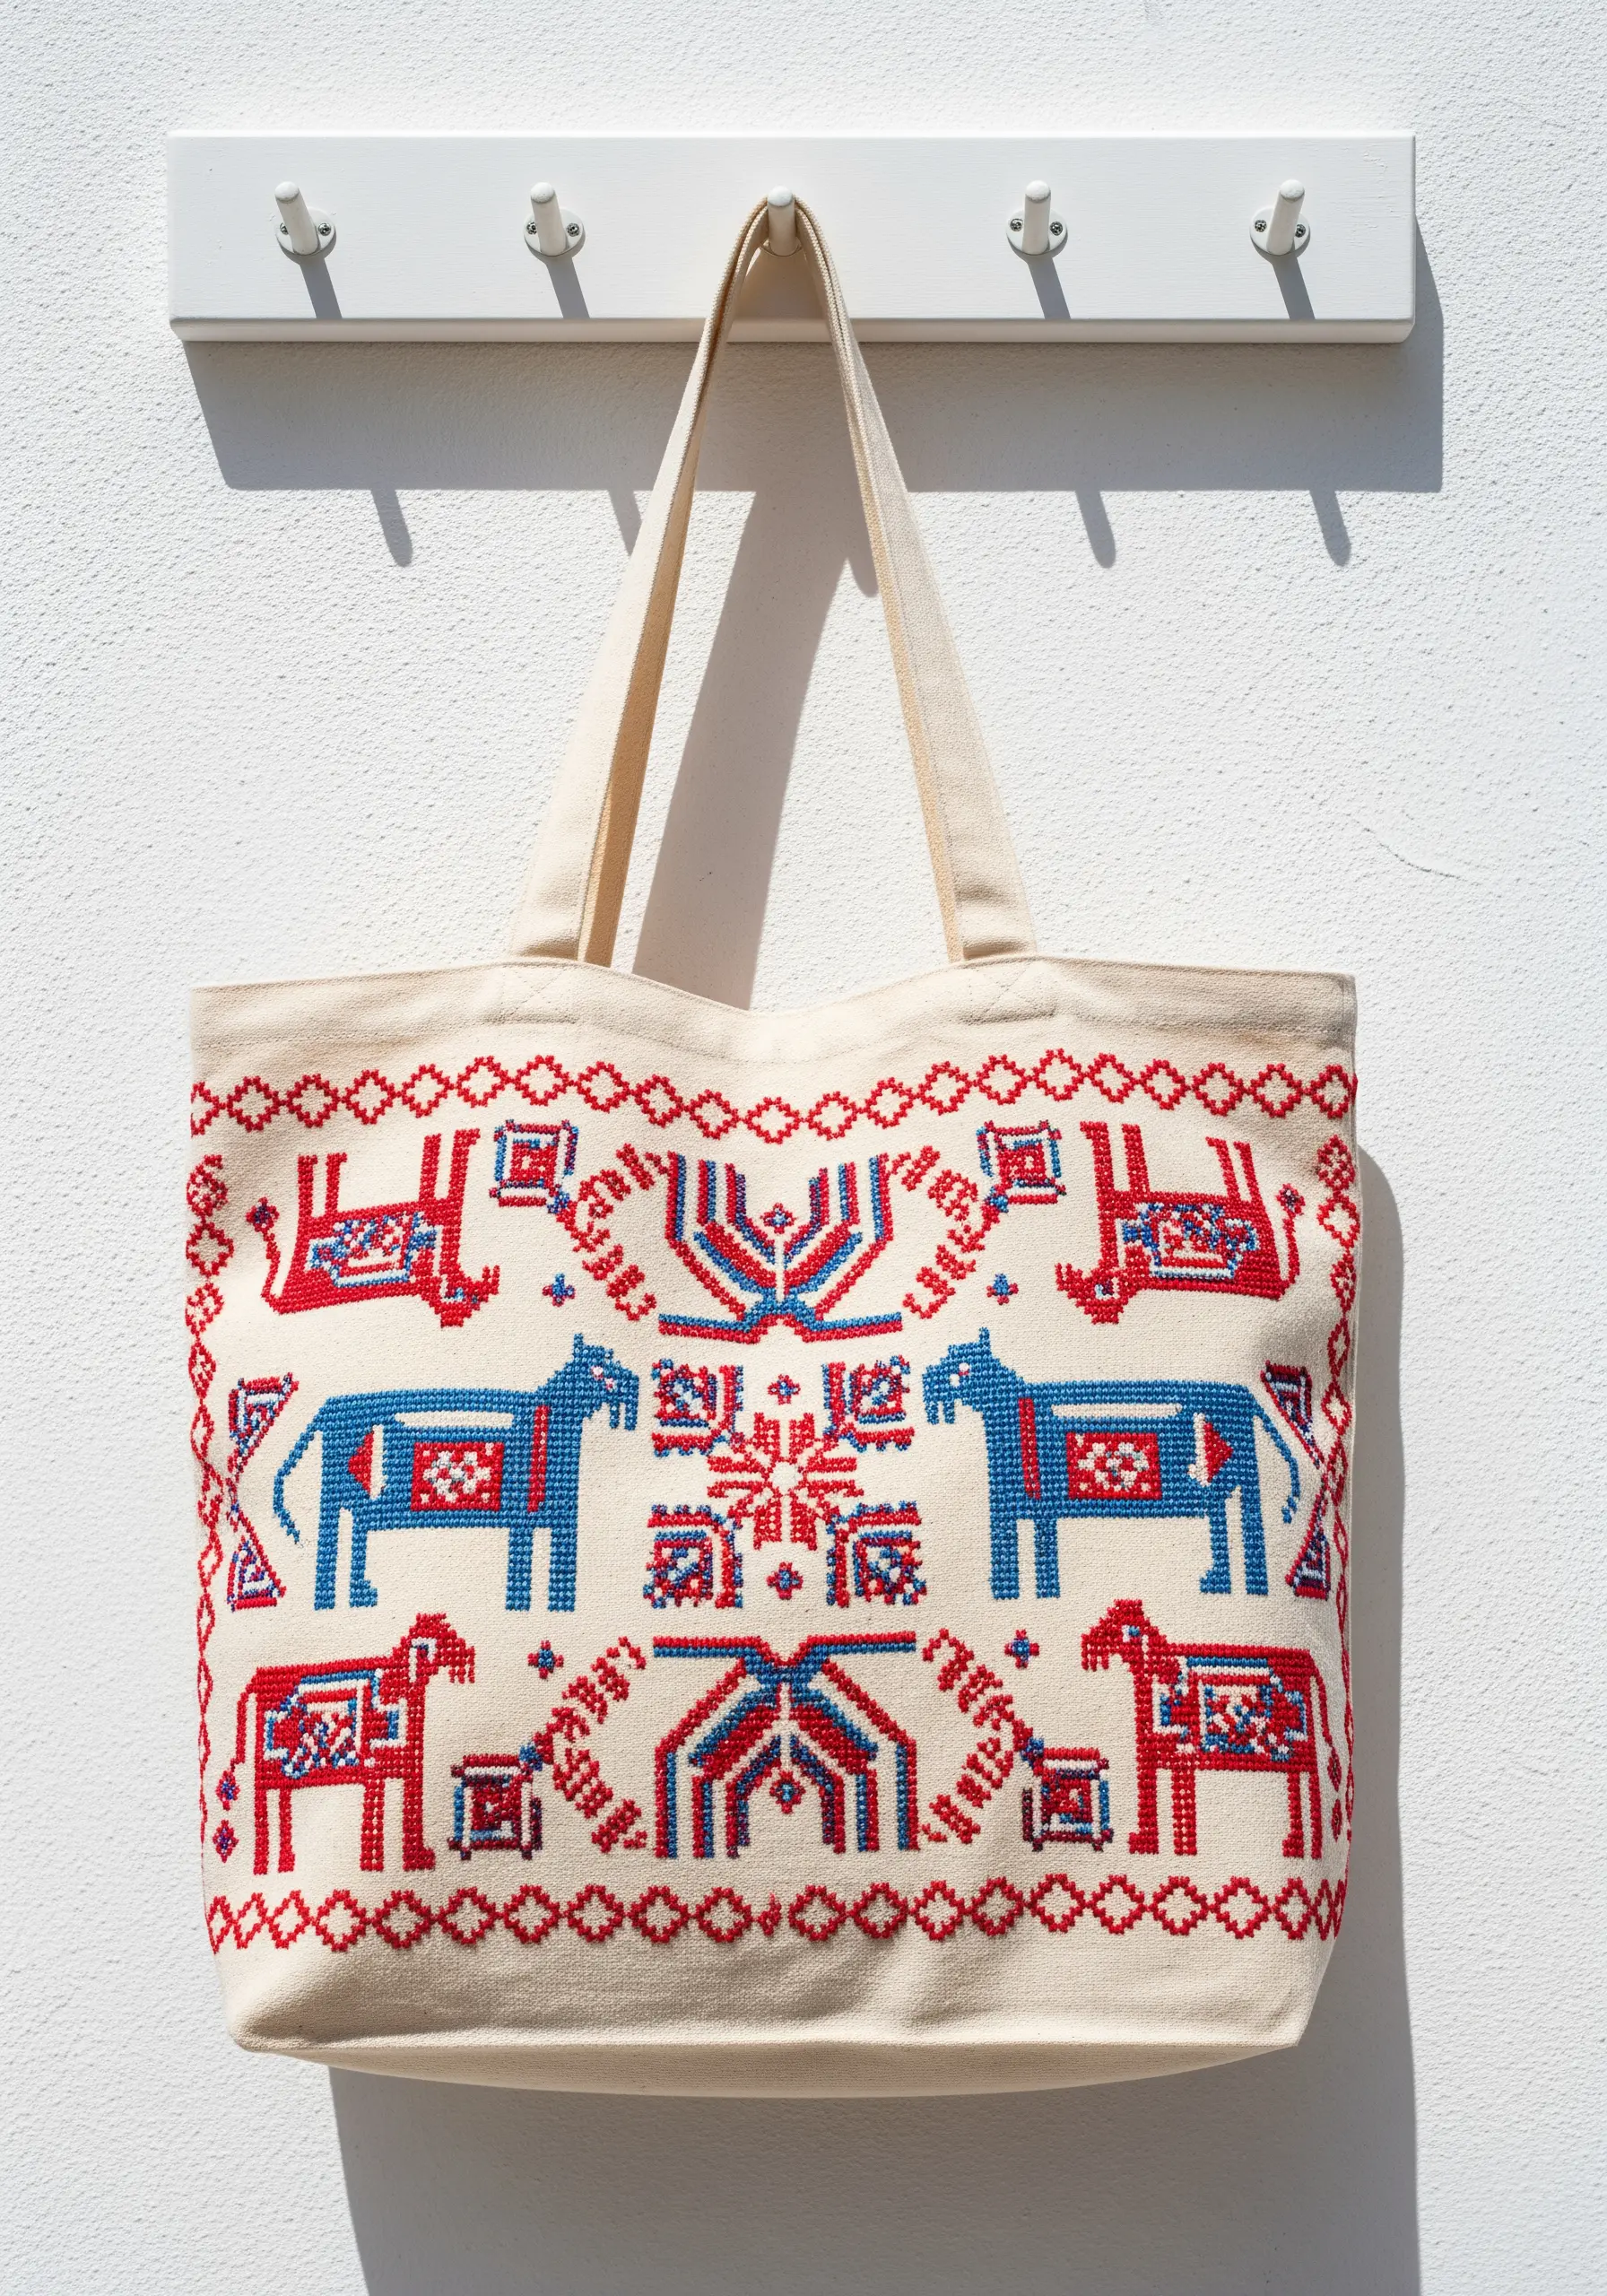
Take precise cross-stitch patterns off the grid and onto everyday items like a canvas tote bag by using a waste canvas.
You simply tack this removable grid onto your fabric, stitch your design as you normally would, and then carefully pull out the waste canvas threads one by one when you’re done.
A water-soluble version works similarly, dissolving away when washed. This is the secret to applying any counted-thread design to non-grid fabrics and is one of the best tote bag embroidery stitch combos.
27. Build Rhythmic Patterns with French Knot Pointillism
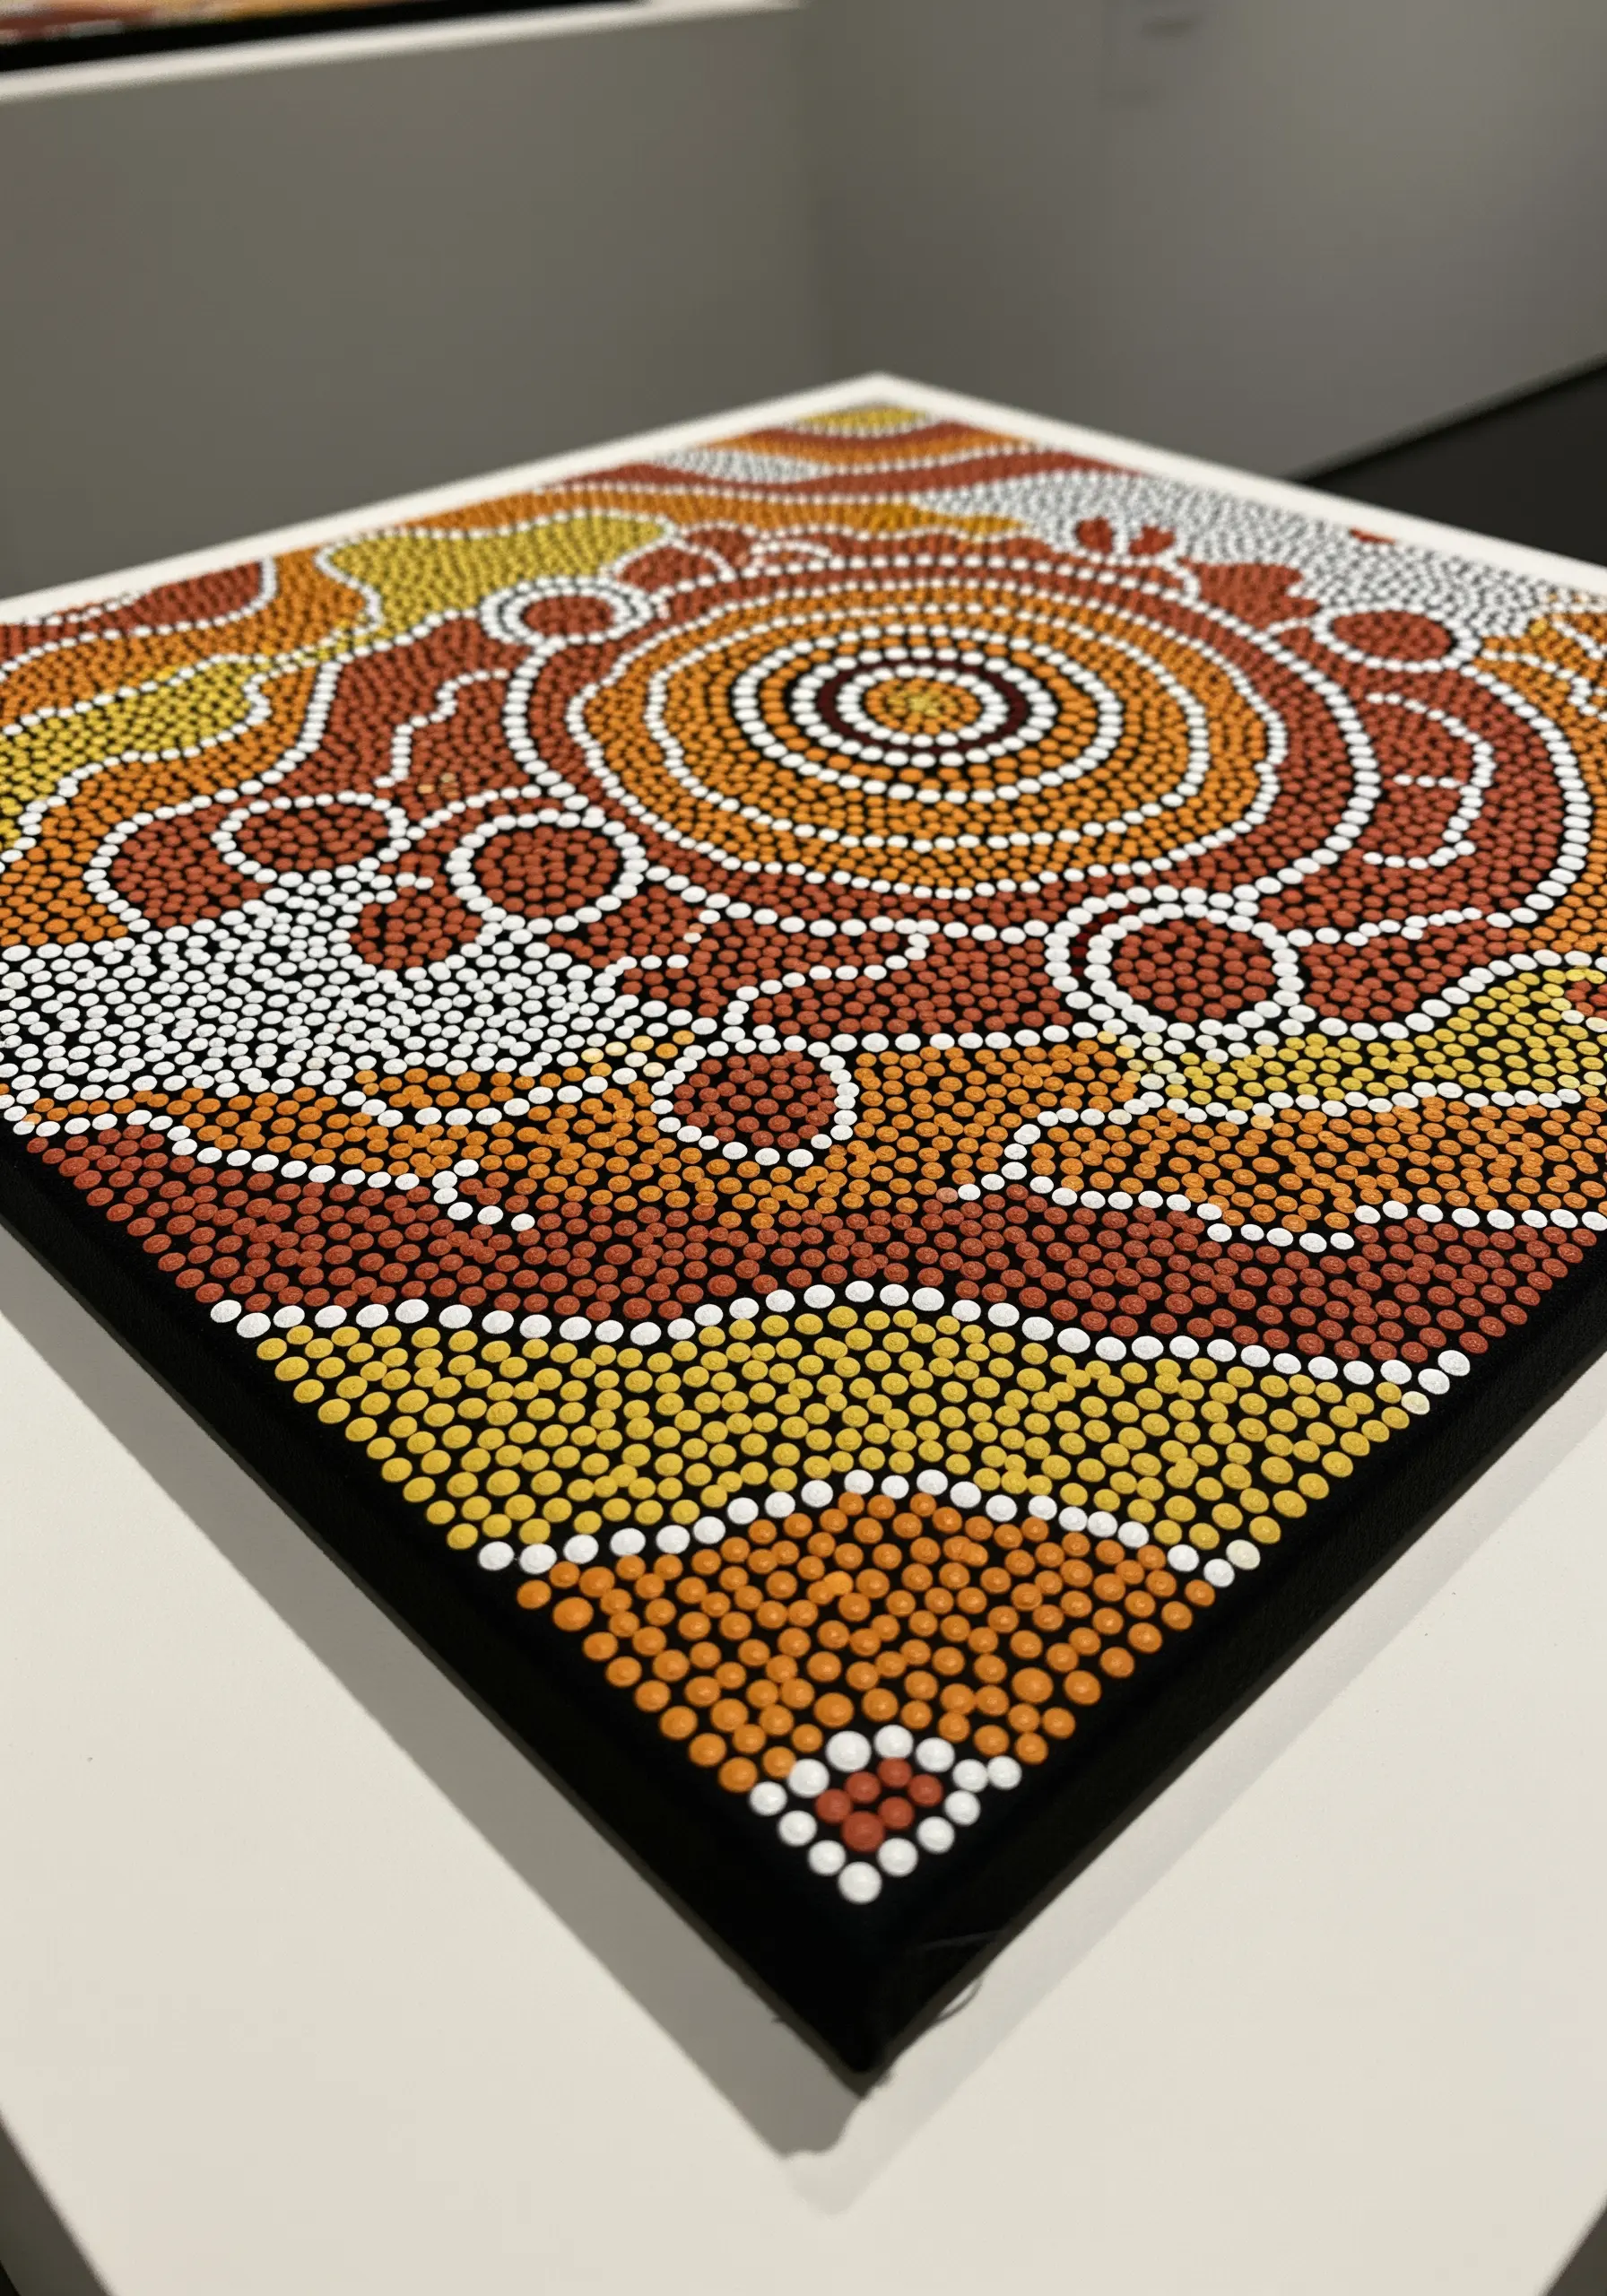
You can create a highly tactile and visually mesmerizing effect, similar to Aboriginal dot painting, by using French knots as your primary stitch.
Fill shapes and create flowing lines with hundreds of tightly packed knots in different colors.
Vary the size of your knots by changing the number of times you wrap the thread around the needle—once for small dots, twice for larger ones.
This pointillist approach transforms your surface into a rich tapestry of color and texture.
28. Replicate Azulejo Tiles with Thread-Painted Squares
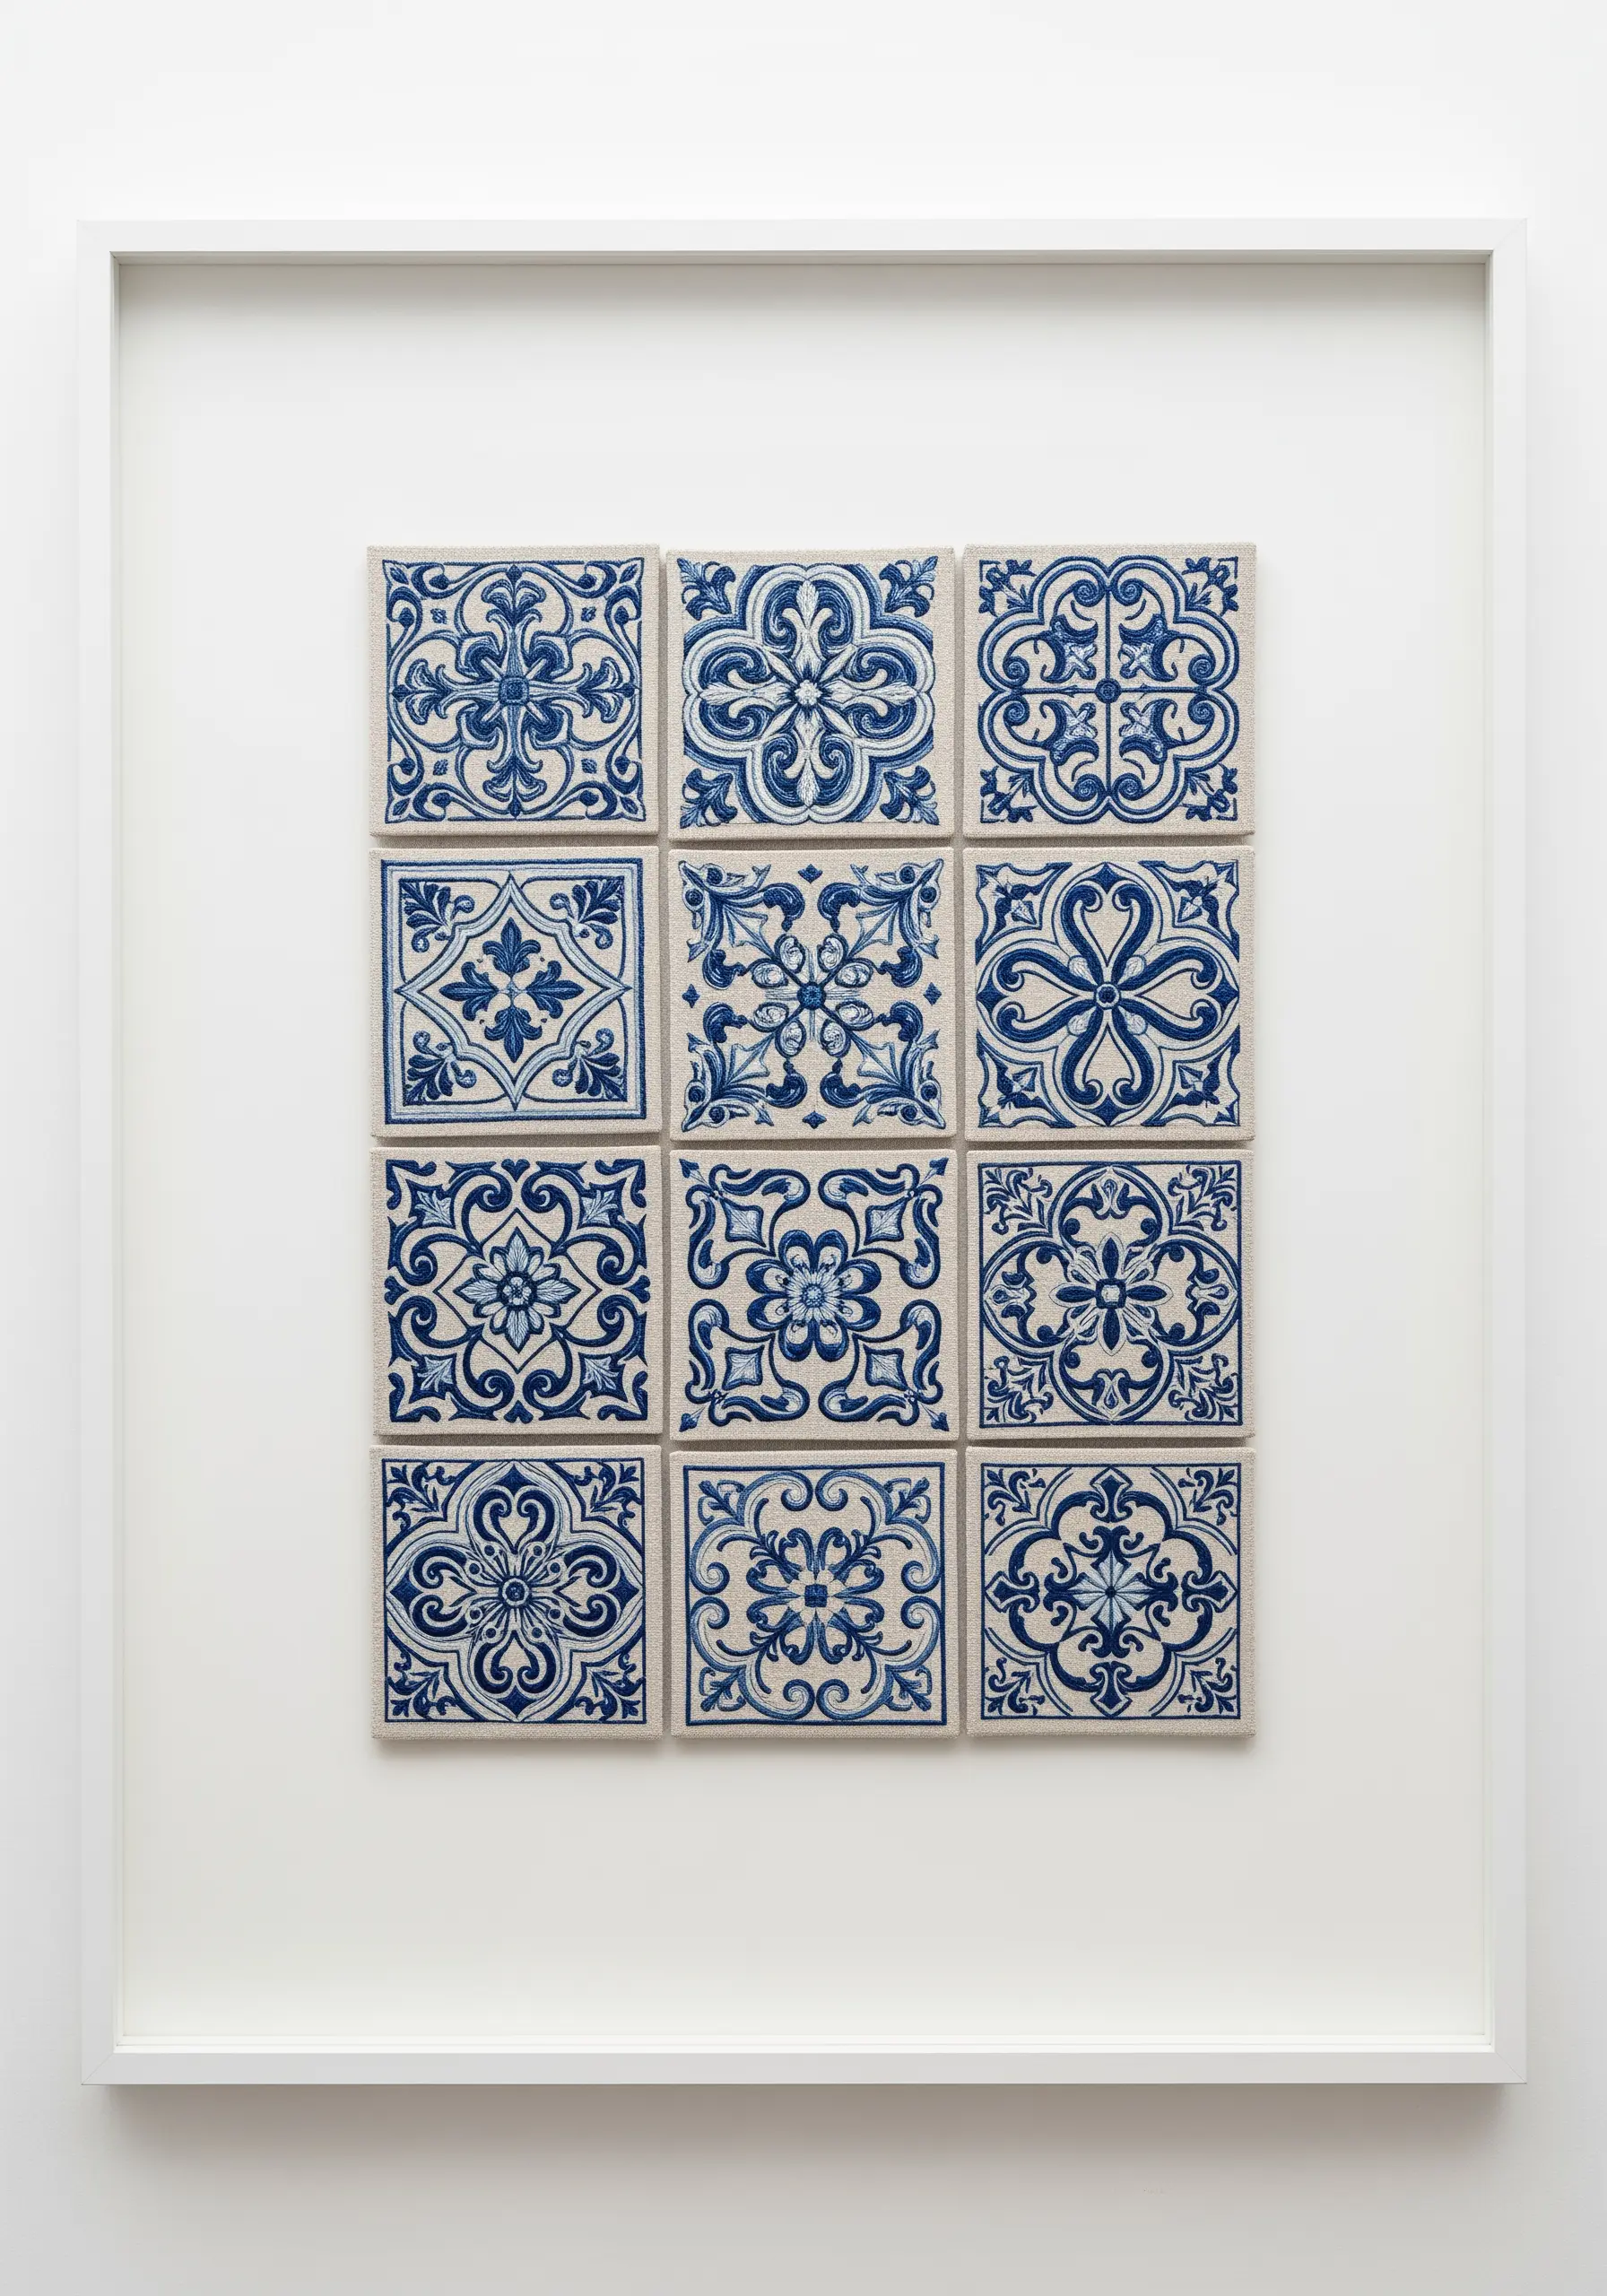
You can capture the beauty of Portuguese azulejo tiles by embroidering individual fabric squares and arranging them in a grid.
Work on light linen or cotton using various shades of blue thread to mimic the hand-painted glaze.
Use long-and-short stitch to blend the colors softly, giving them a painterly quality.
Mounting the finished squares together in a single frame creates a stunning piece of modern framed embroidery.
29. Create Delicate Botanicals with Ribbon Embroidery
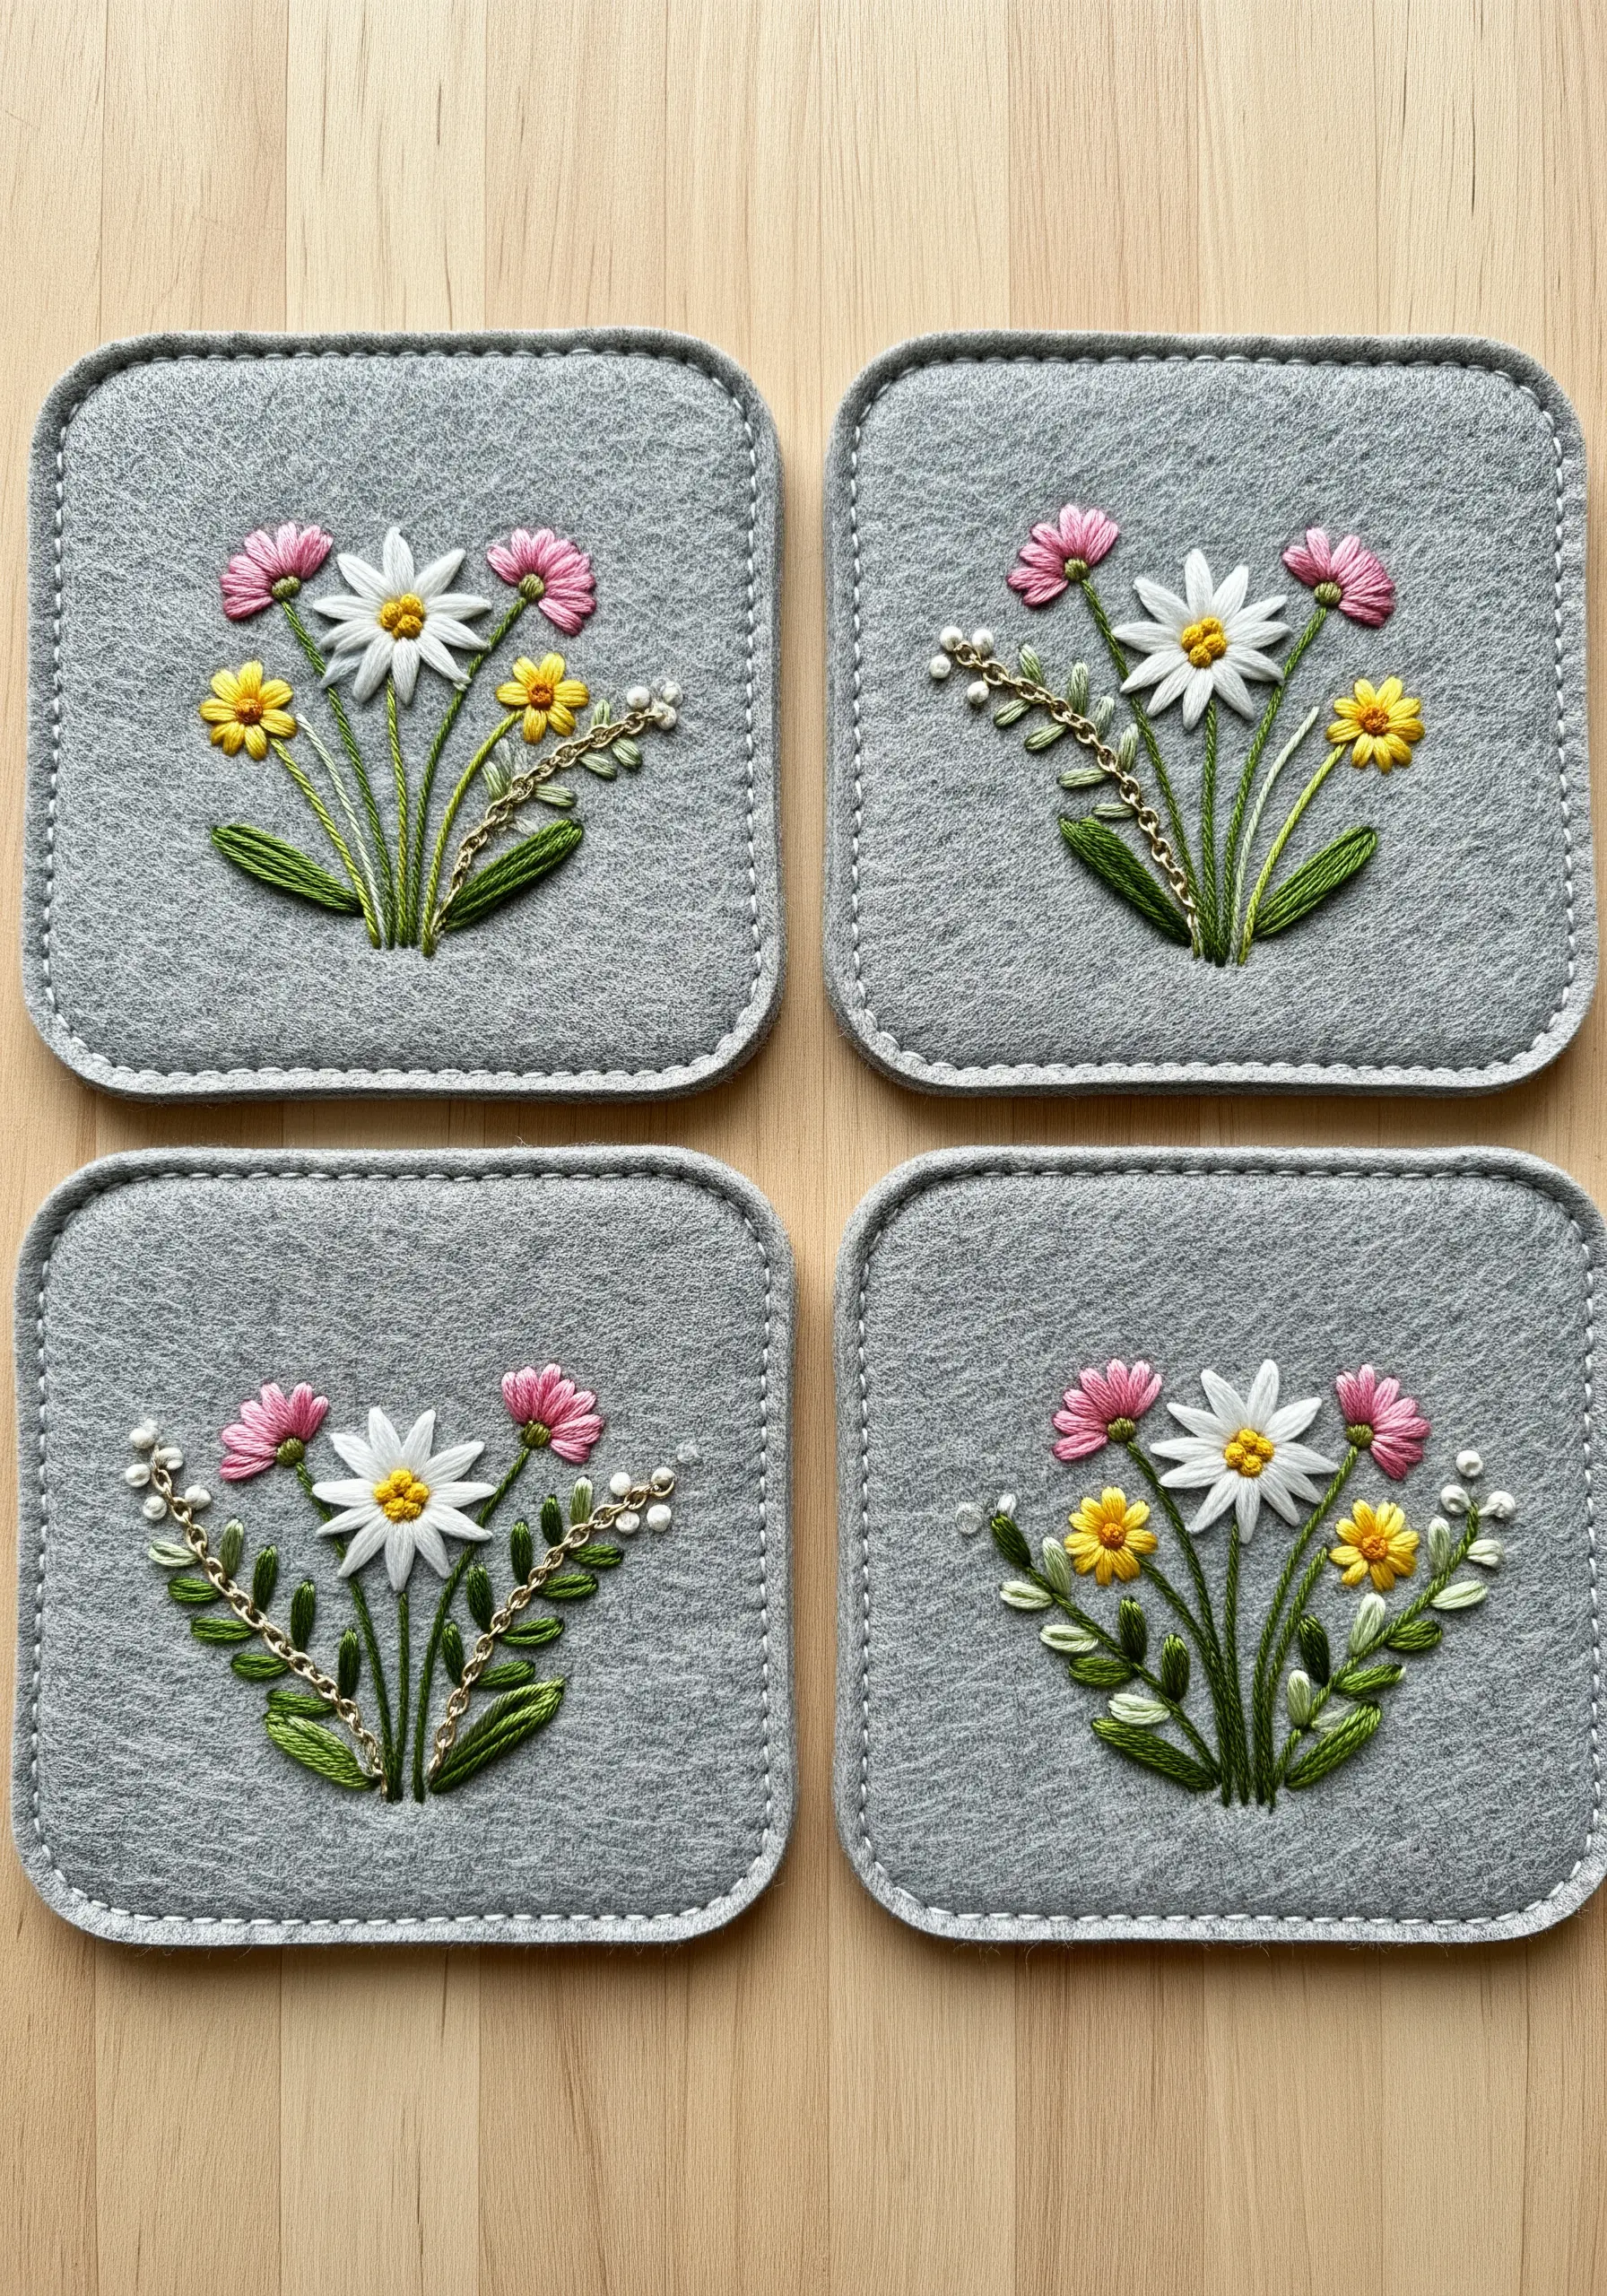
For lush, three-dimensional flowers that seem to lift off the fabric, swap your embroidery floss for fine silk ribbon.
Use the ribbon stitch for petals; the ribbon naturally twists as you pull it through the fabric, creating realistic, organic shapes.
You can then add French knots with standard floss for textured flower centers and use thin ribbon or thread for delicate stems and leaves.
This technique is perfect for creating soft, romantic floral designs on felt or linen.
30. Master Linework on Delicate, Sheer Fabrics
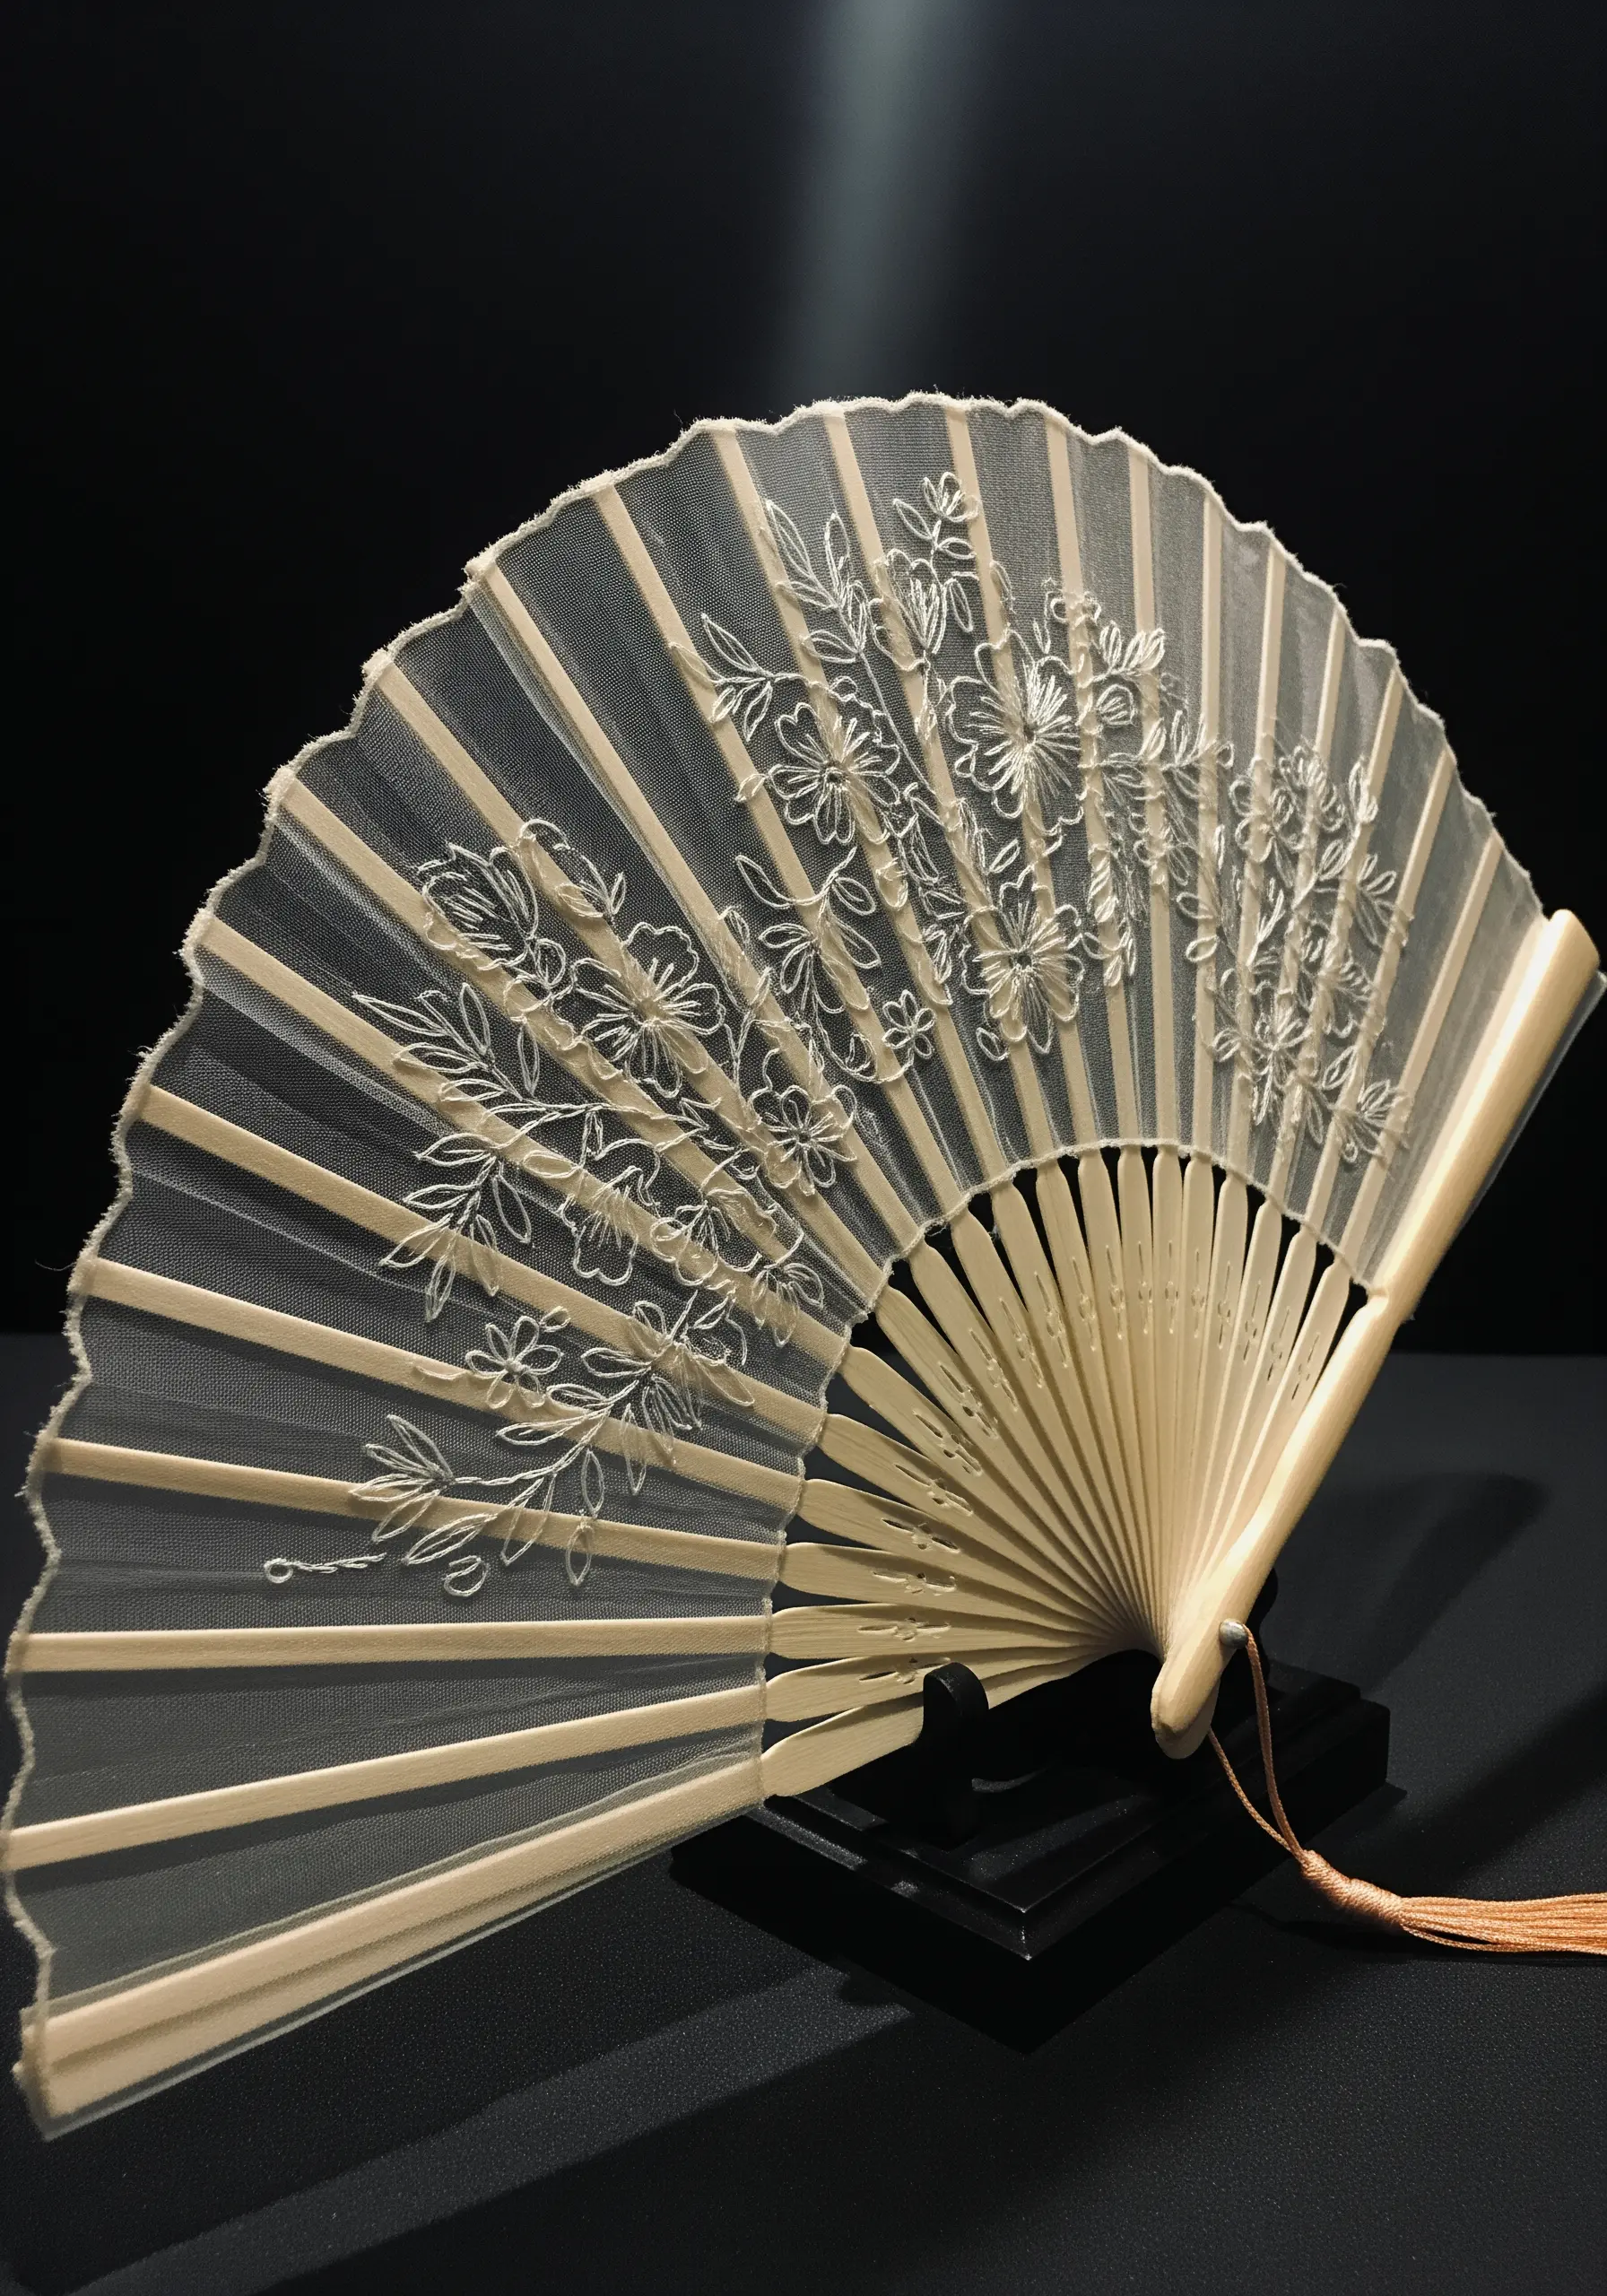
Stitching on transparent fabrics like organza or tulle requires a light hand and the right preparation.
To prevent the delicate material from puckering, you must use a stabilizer—a tear-away or water-soluble version is best.
Use a fine, sharp needle and lightweight thread, like a single strand of floss, to create elegant linework with simple stitches like backstitch or stem stitch.
The result is a design that appears to float magically on the transparent ground.
31. Accent Tie-Dye Patterns with Minimalist Stitching
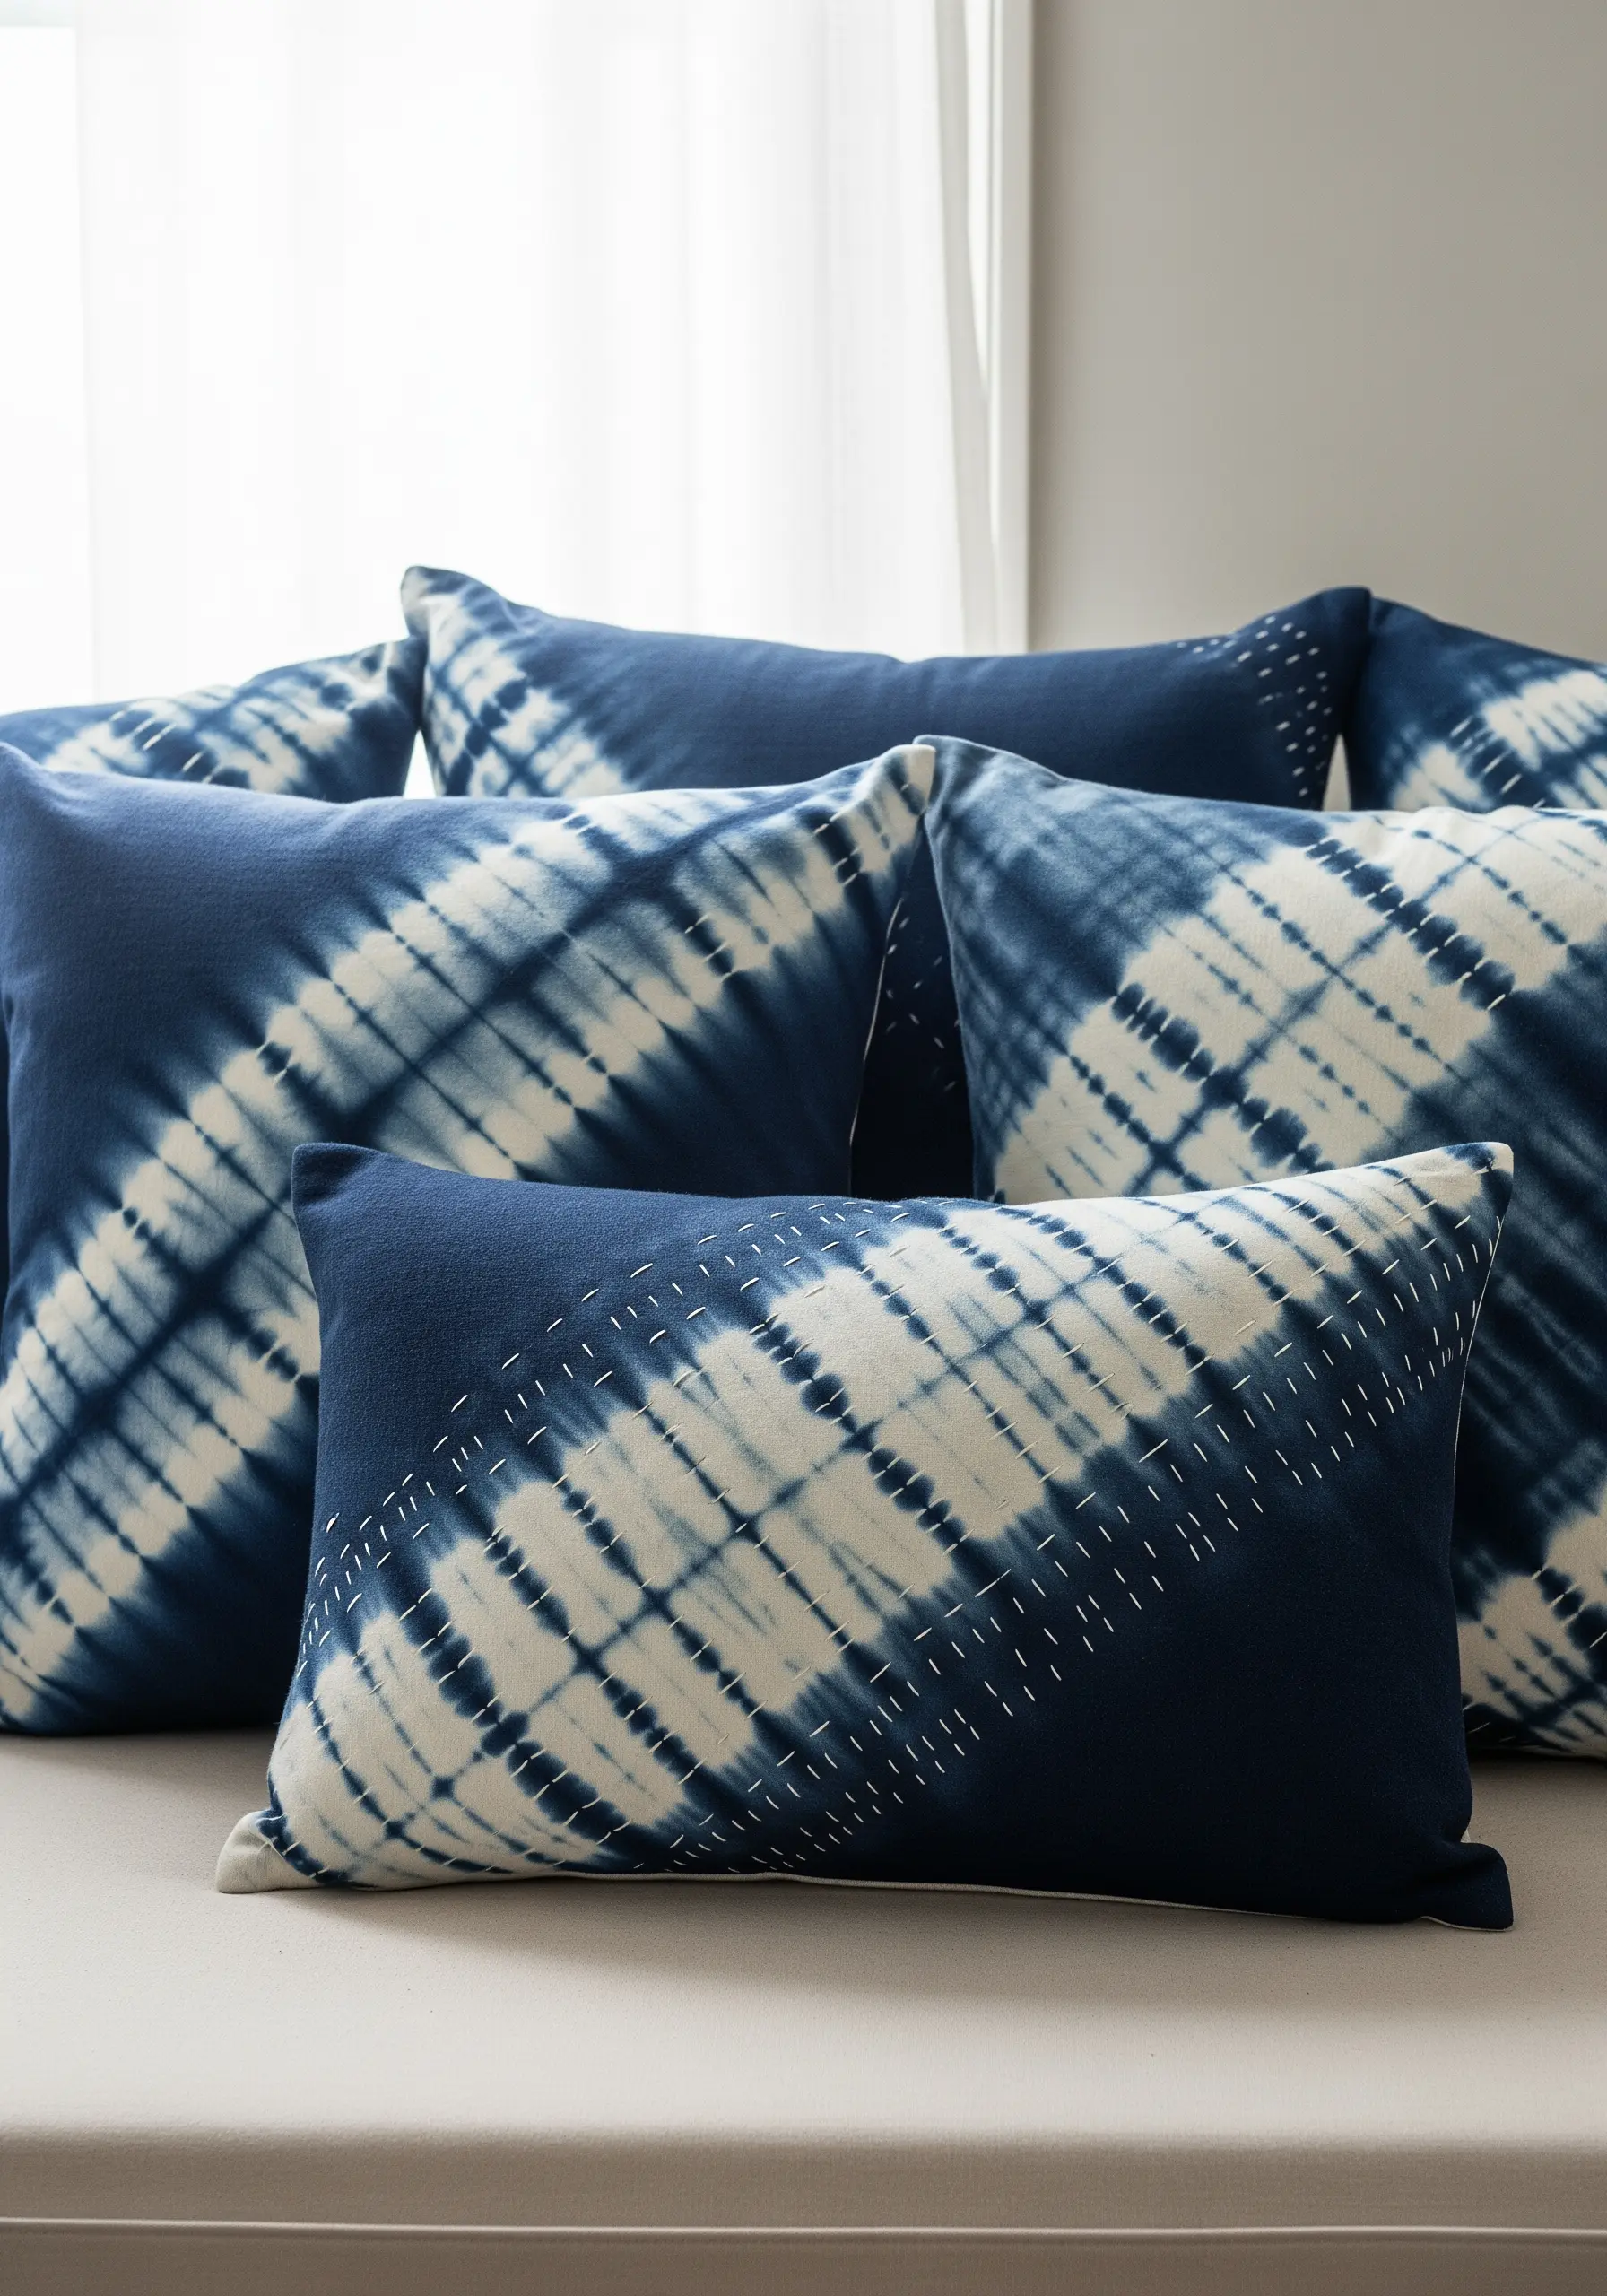
You can enhance the organic beauty of Shibori or tie-dyed fabrics by adding a layer of simple, structured hand stitching.
Use a contrasting thread color to add rows of quiet running stitches that either follow or cut across the lines created by the dye.
This thoughtful addition of texture provides a grounding counterpoint to the free-flowing pattern, creating a beautiful harmony between two distinct textile traditions.
32. Construct Sculptural Forms with Freestanding Lace
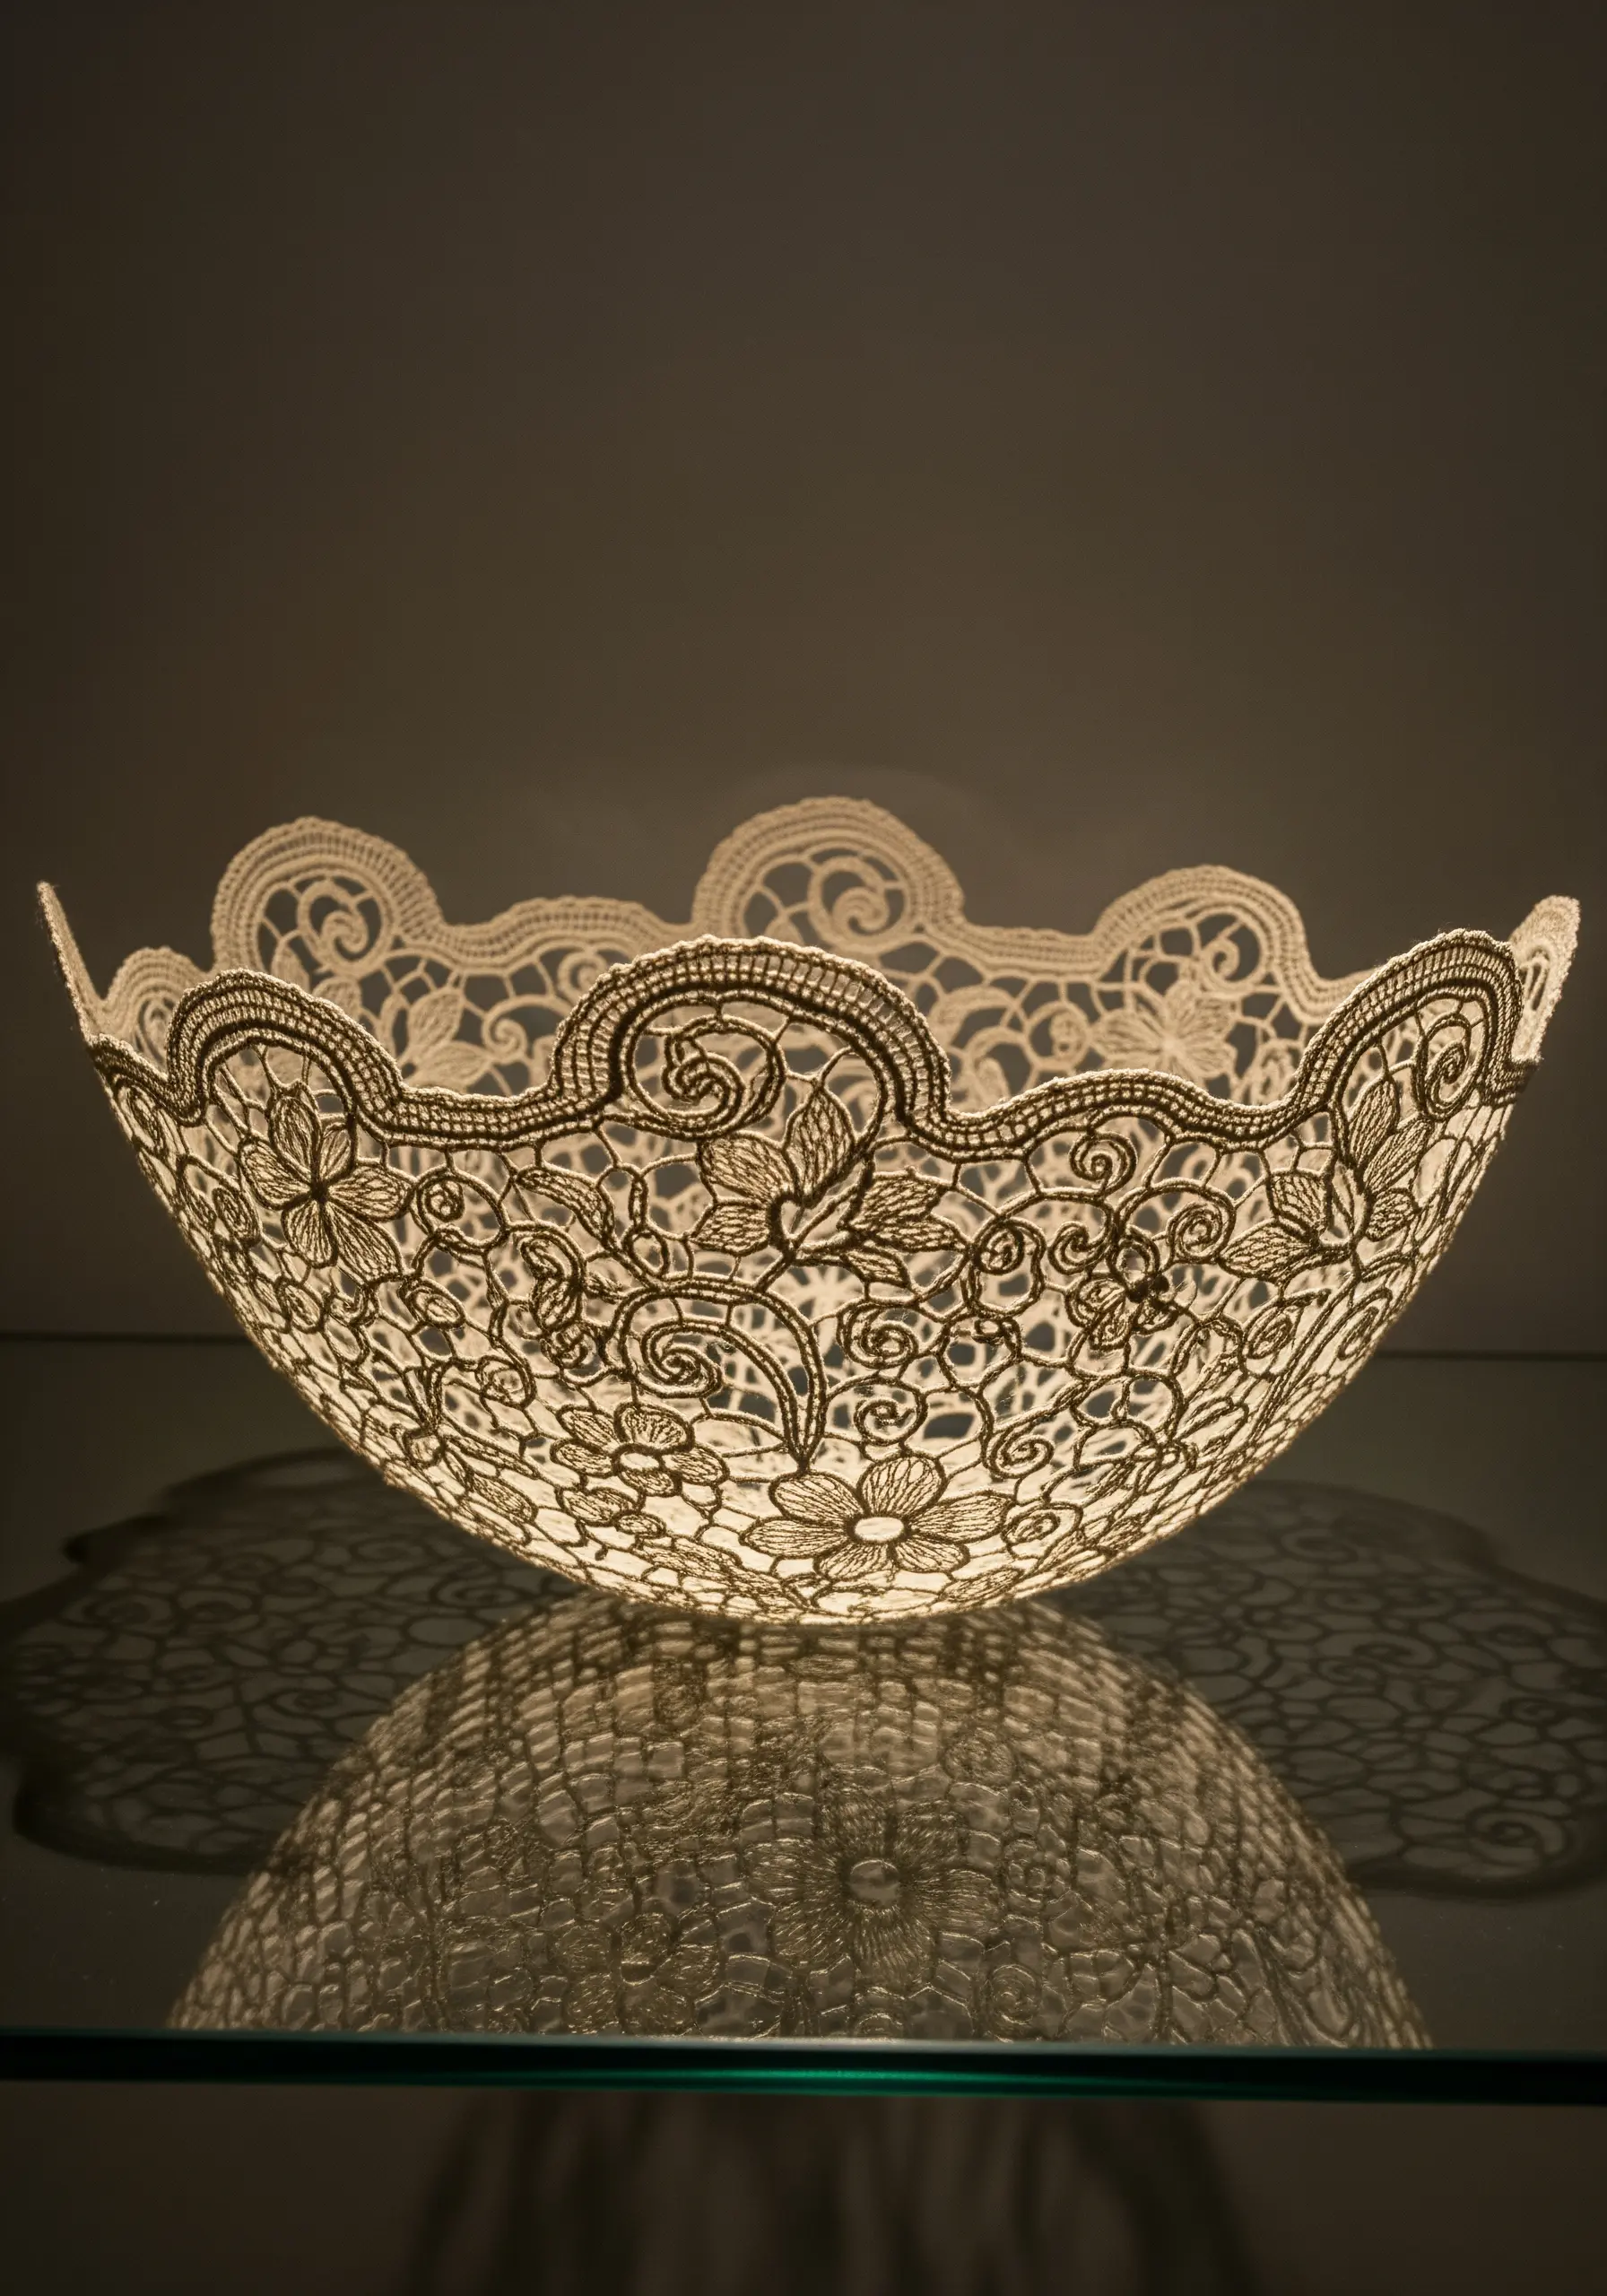
You can create three-dimensional objects entirely from thread using a technique known as freestanding lace.
The method involves stitching a dense, interconnected design onto a heavy-duty water-soluble stabilizer.
Every part of the design must be stitched to another, forming a self-supporting thread structure.
Once you dissolve the stabilizer in water, only the rigid lace remains, which you can then shape into a sculptural bowl or other decorative form.


