A romantic dinner is more than just food; it’s a shared moment, set apart from the everyday. The soft glow of candlelight, the clink of glasses—these details create an atmosphere of intention and care. Your table linens can be a part of that story.
Embroidery transforms a simple piece of cloth into a canvas for connection. Each stitch is a quiet decision, a touch of personality that makes the evening uniquely yours. It’s not about perfection, but about infusing your space with a warmth that can only come from something made by hand.
Here, you’ll find ideas that focus on the details that truly elevate your work. We’ll explore how stitch direction can create movement, how a change in thread texture can mimic light, and how simple, classic techniques can produce breathtakingly elegant results. Let’s create something beautiful together.
1. Dramatic Rose Borders on Dark Linen
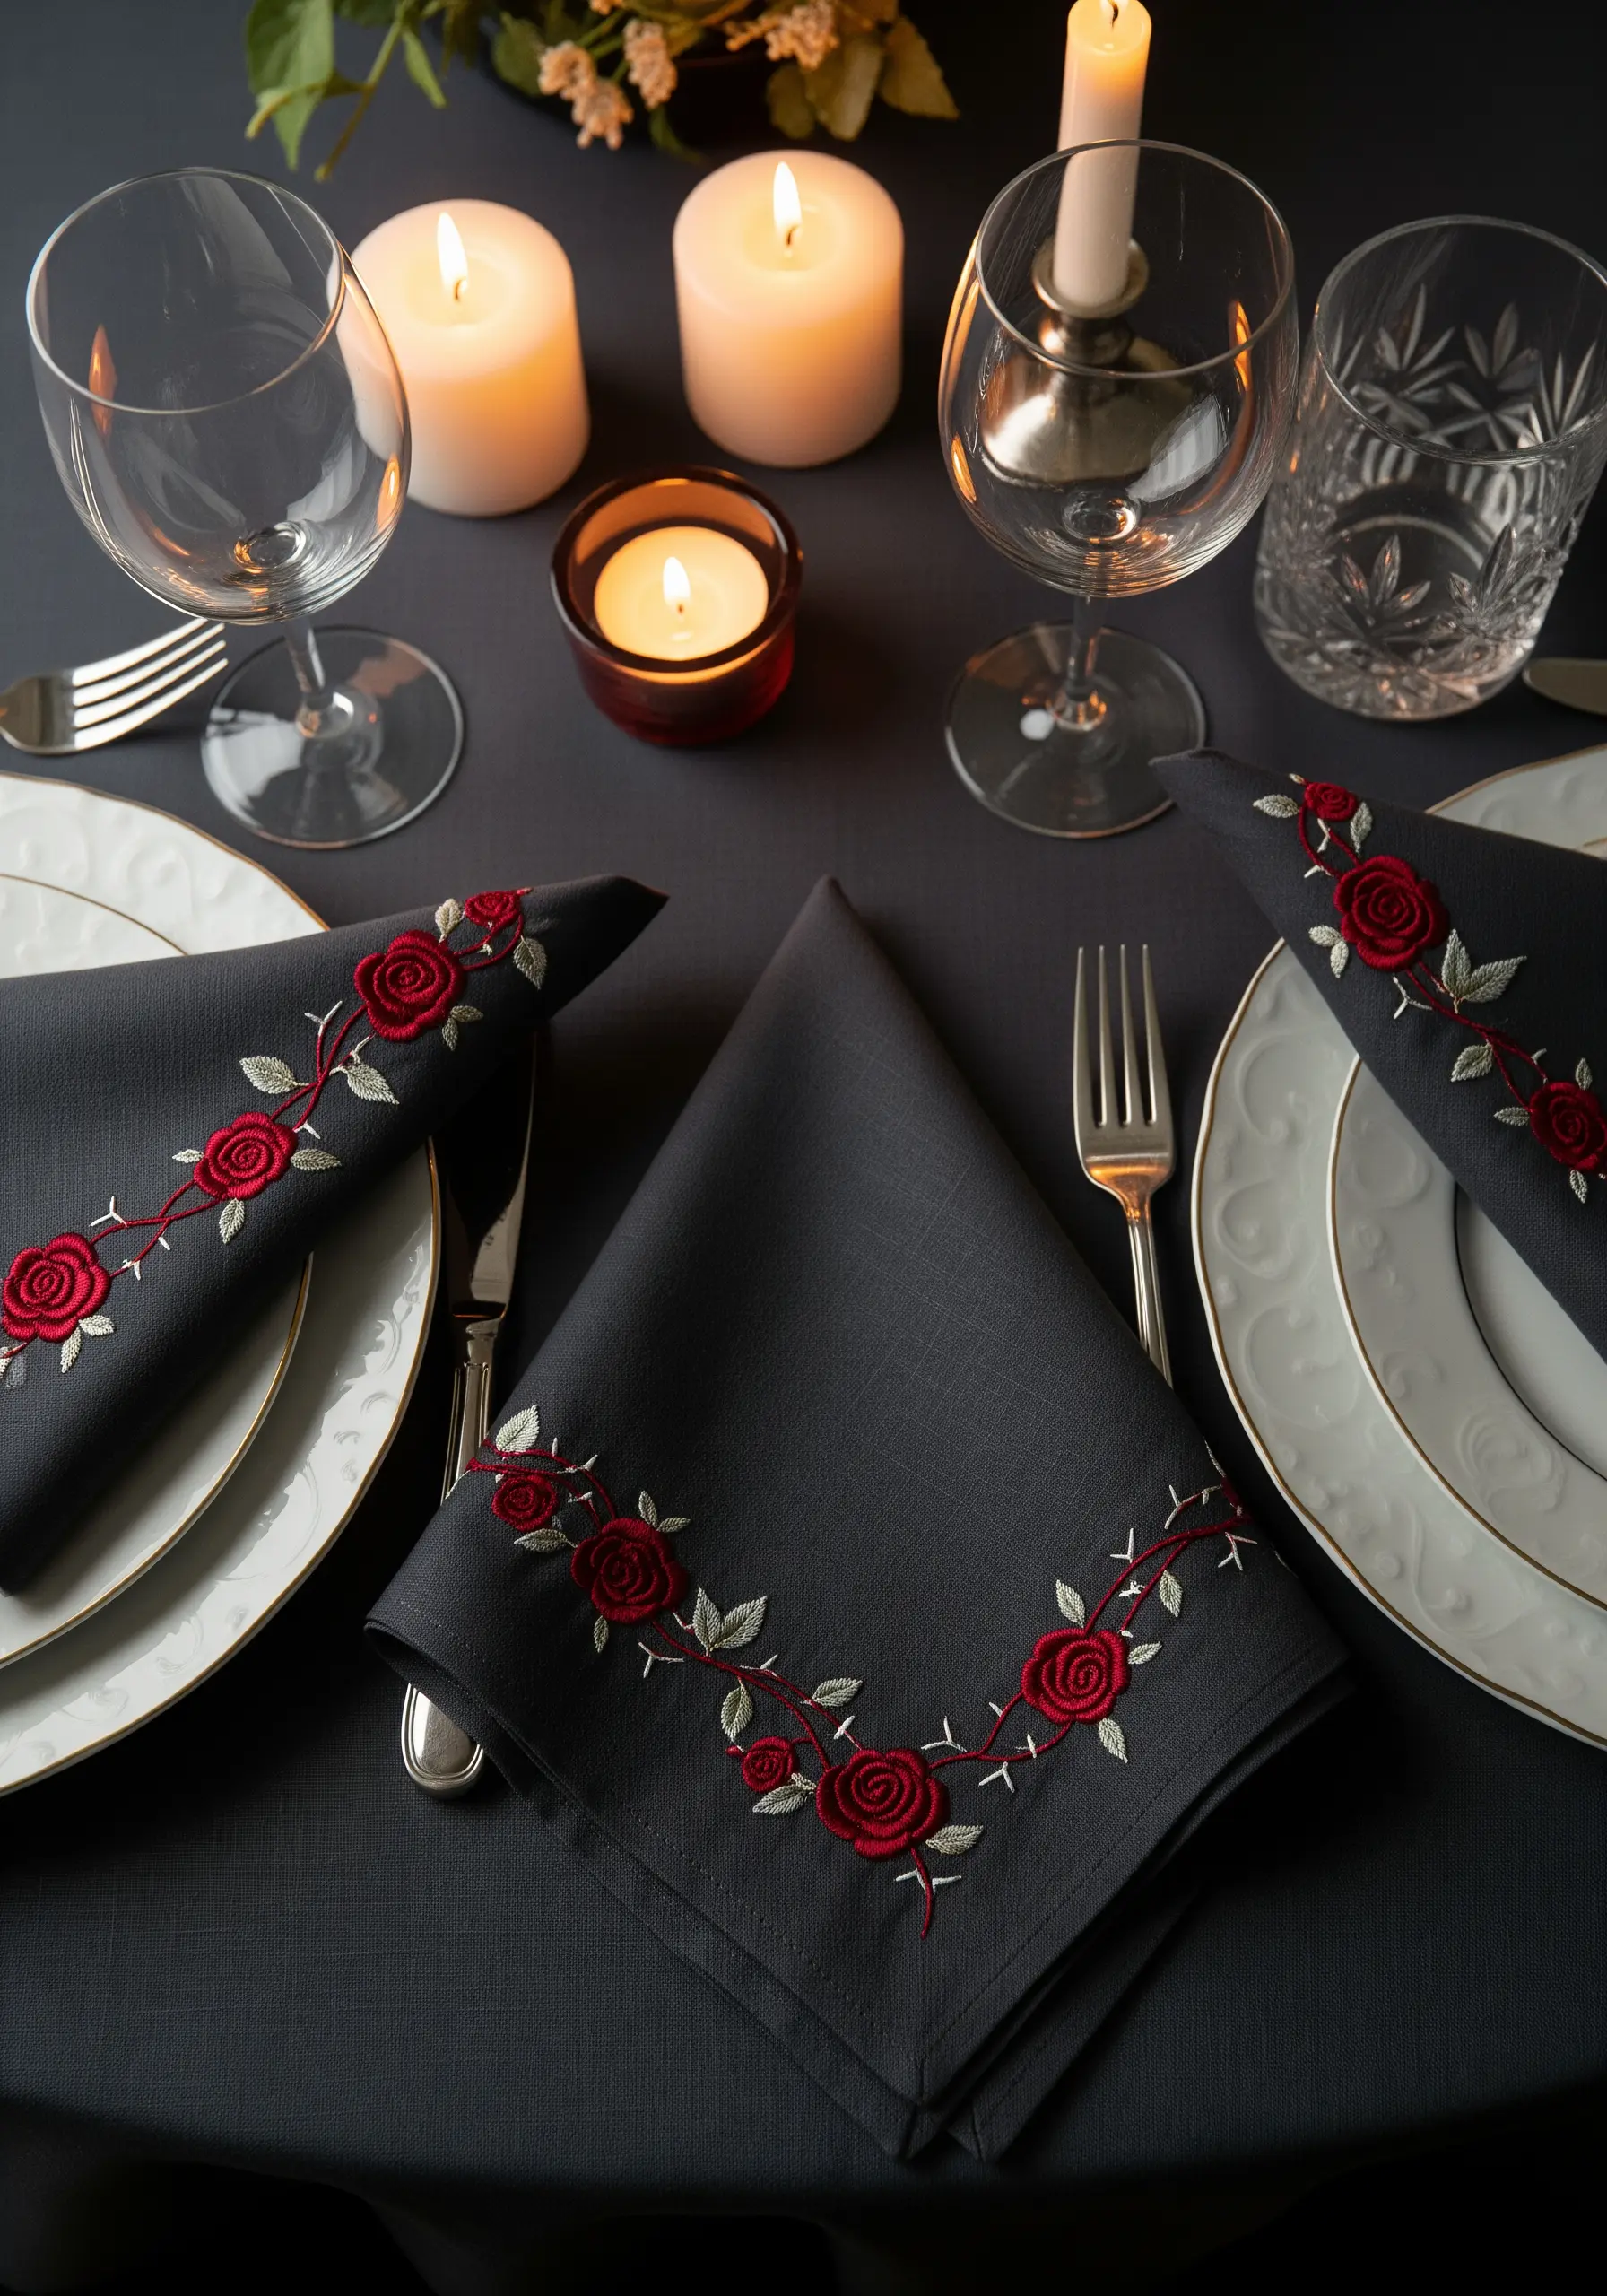
Create a powerful visual statement by stitching vibrant red roses on a dark charcoal or black linen.
The high contrast makes every stitch pop, especially under soft candlelight.
Use a high-sheen rayon or silk thread for the rose petals, stitched in a dense satin stitch, to create a subtle glow that catches the light.
For the thorny vines, a whipped backstitch in a silvery-green will give them a defined, cord-like appearance that stands out against the dark fabric.
2. Celestial Phases with Metallic and Matte Threads
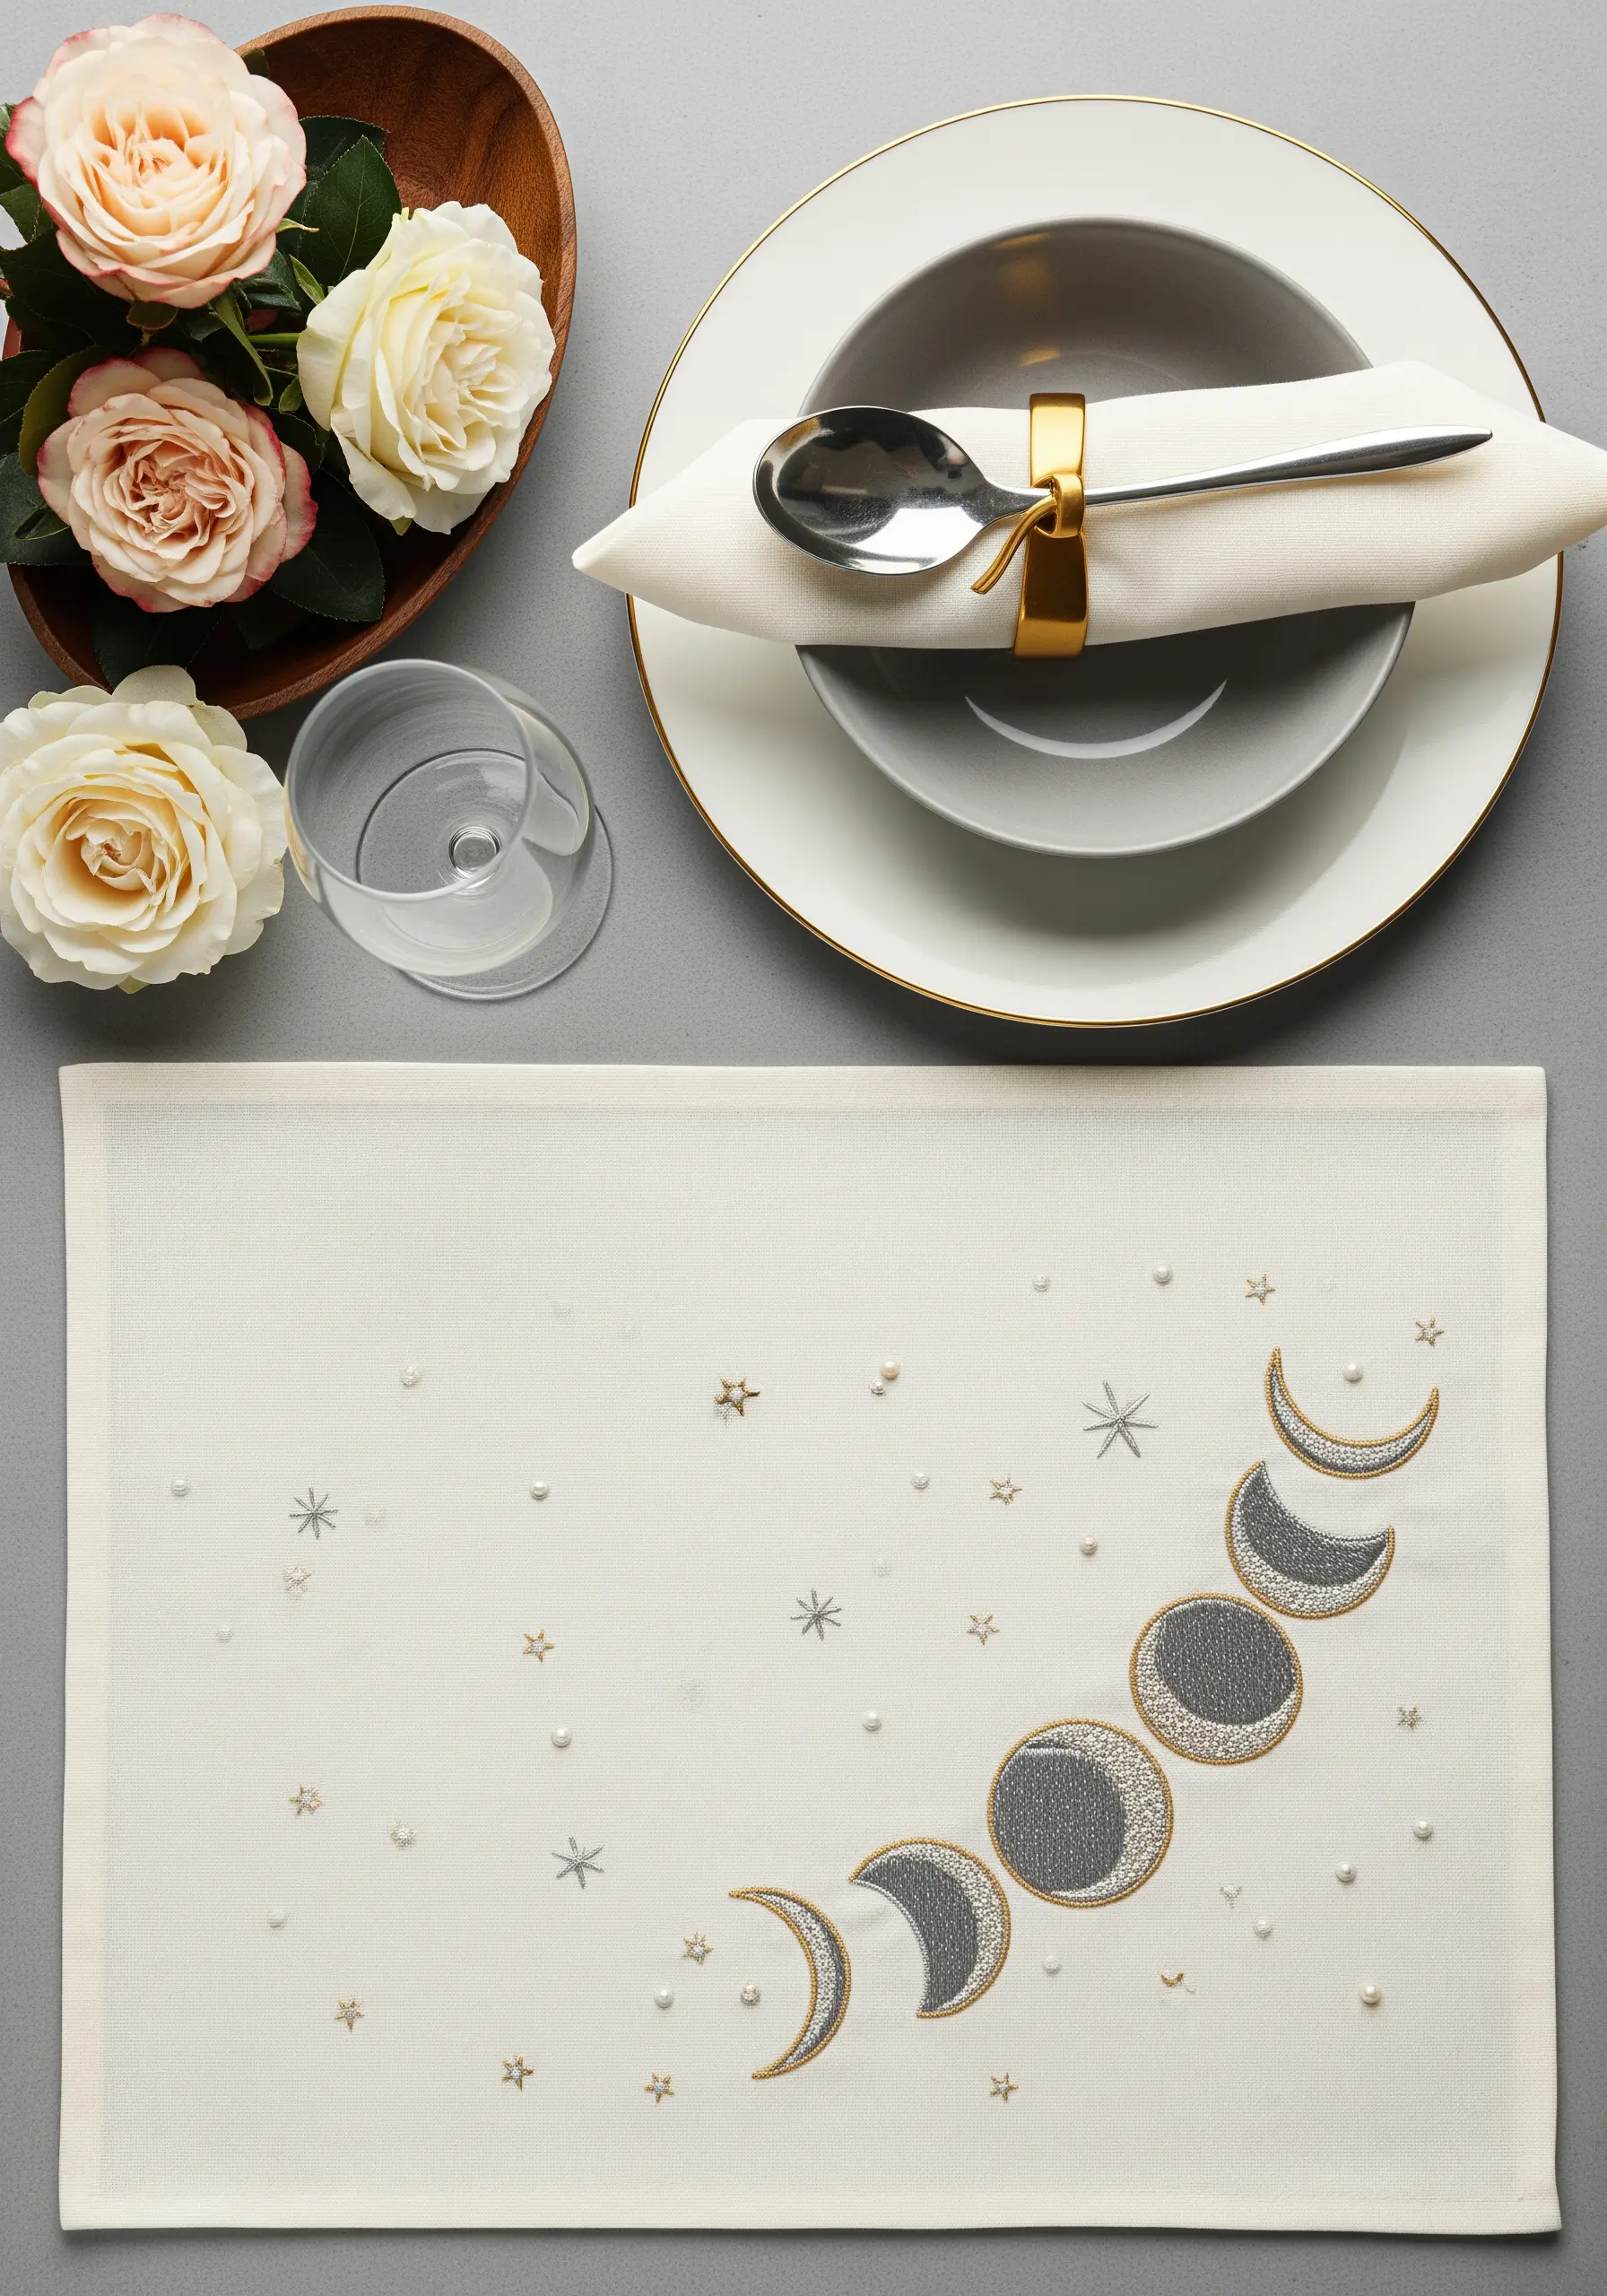
This design is an exercise in texture and restraint.
To capture the moon’s glow, combine a matte grey thread for the shadowed areas with a shimmering silver metallic thread for the illuminated crescents.
Use a dense satin or parallel fill stitch to ensure full coverage.
The tiny stars can be simple straight stitches, while scattered pearl beads, secured with a single, tiny stitch, add a touch of three-dimensional magic, turning your placemat into cosmic embroidery art.
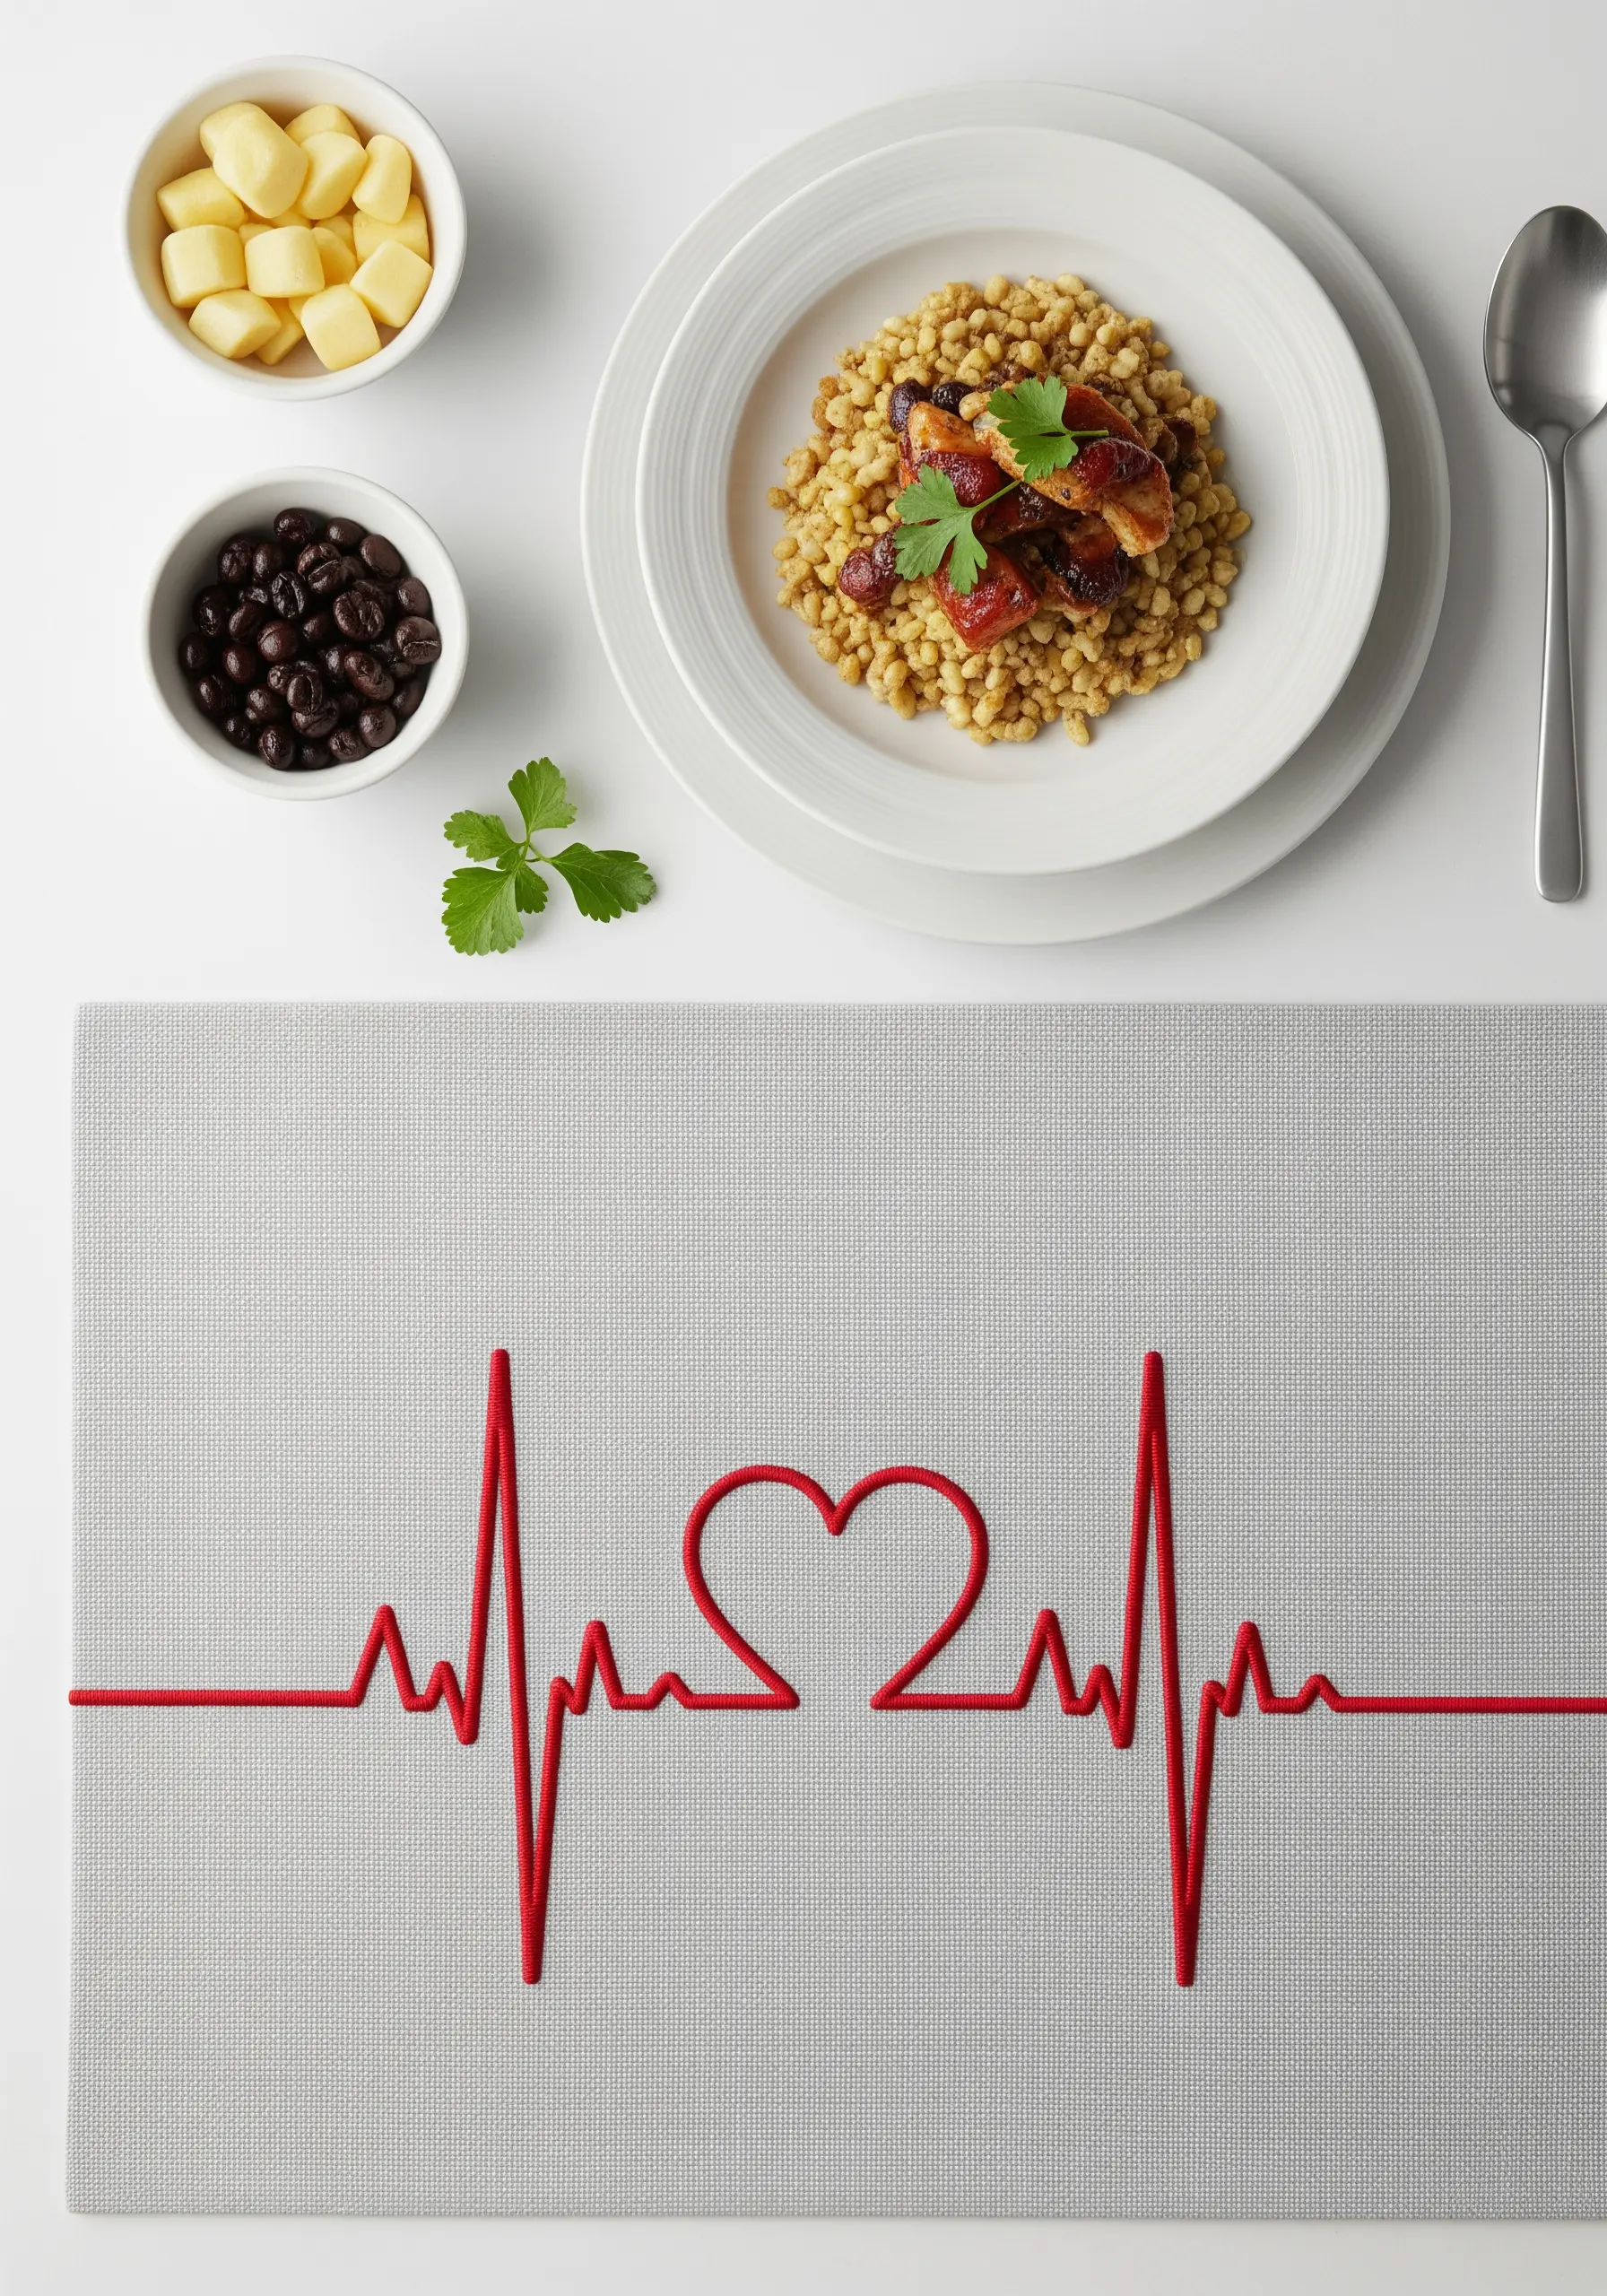
3. Geometric Heart Sampler with a Single Metallic Thread

Explore the beauty of texture over color by using a single metallic thread for this entire design.
Instead of filling each heart with a solid satin stitch, experiment with different geometric fill patterns like cross-hatching, diagonal lines, or basketweave stitches.
This technique adds incredible visual interest and sophistication without requiring multiple colors.
The result is a modern, cohesive look where the play of light on the varied textures becomes the main attraction.
4. Lifelike Aviary Scenes with Thread Painting

Bring delicate birds to life using the thread painting technique, which involves blending colors with long-and-short stitches.
Use a single strand of floss and at least three shades of blue to create realistic depth and shadow on the birds’ feathers.
Keep the cherry blossoms simple with satin-stitched petals and French knot centers; this contrast in detail ensures your birds remain the focal point.
The key is to make your stitches follow the direction of the feathers for maximum realism.
5. Delicate Forget-Me-Not Meandering Borders

Create a light, organic border that feels like it grew right onto the fabric.
Use the lazy daisy stitch for the blue petals—it’s fast, efficient, and creates a perfect, delicate petal shape with a single motion.
A tiny yellow French knot in the center completes each blossom.
Connect the flowers with a wandering stem stitch, varying the spacing and direction of the sprigs to give the border a natural, hand-drawn feel.
6. Symbolic Botanicals with Dimensional Stitches
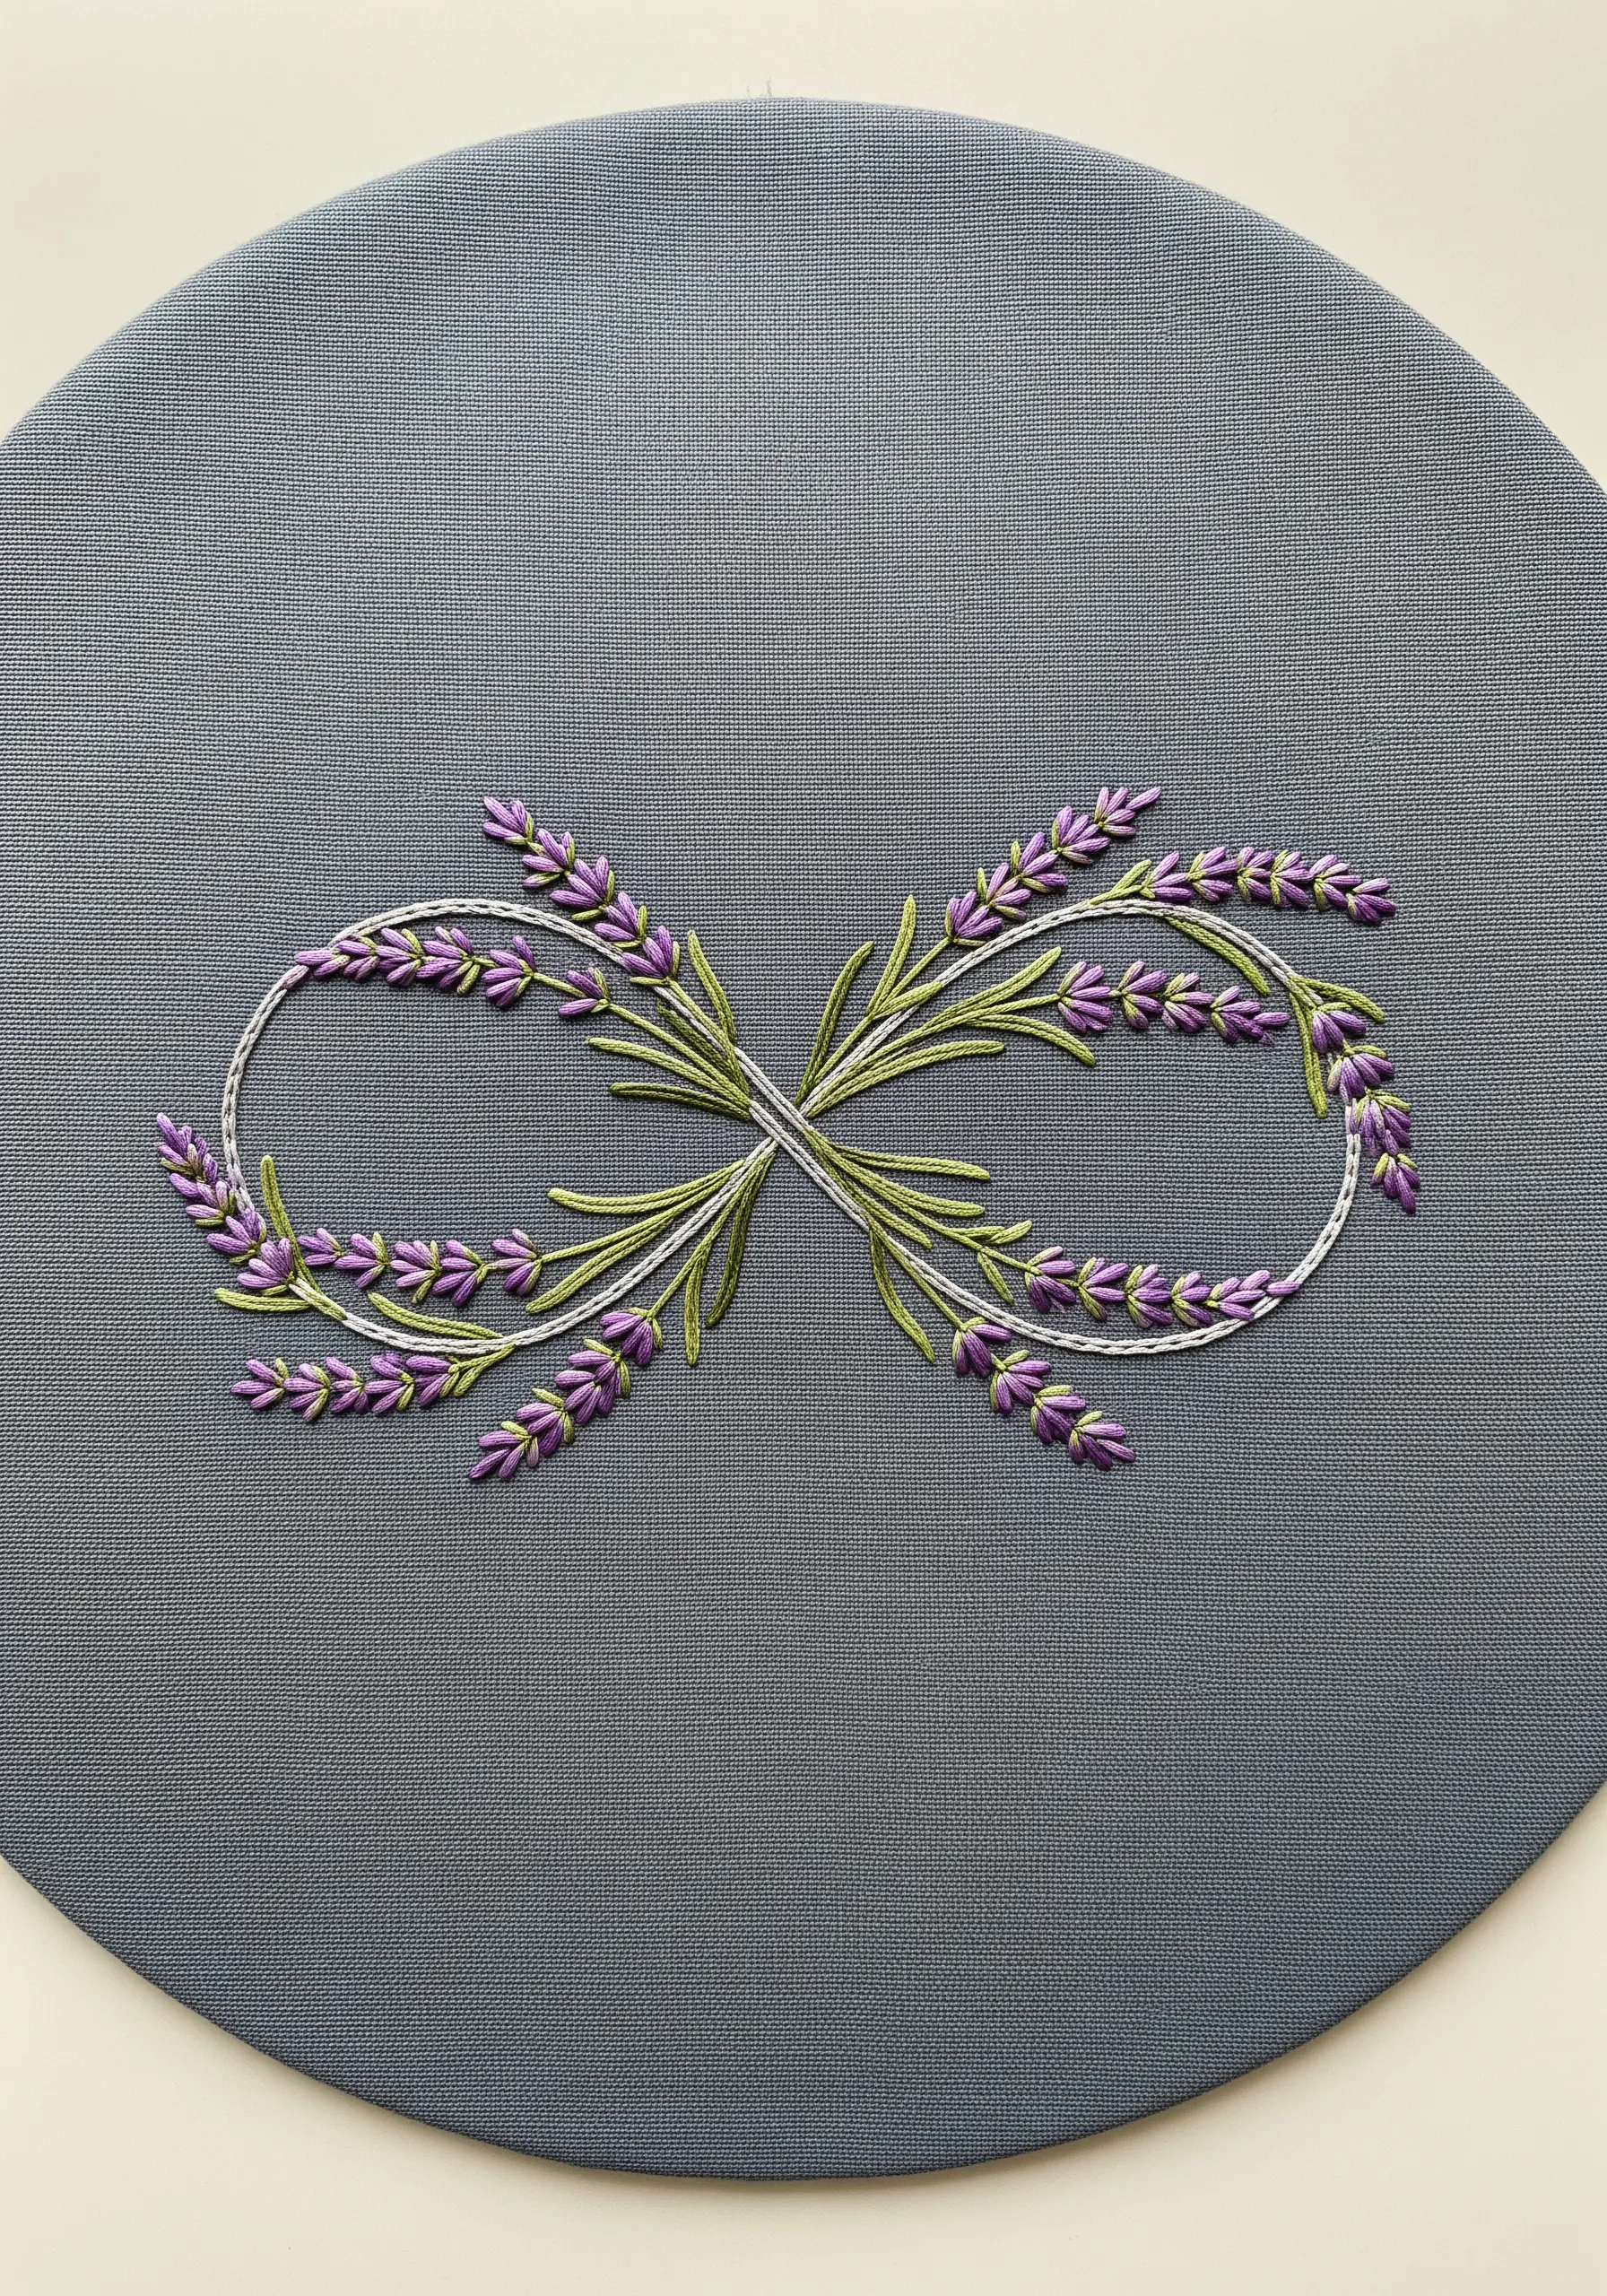
This design beautifully combines meaningful symbolism with rich texture.
Use fishbone stitch for the individual lavender leaves to create a realistic central vein and natural shape.
For the purple blossoms, use dense clusters of small French knots to mimic the texture of a lavender sprig.
Outline the infinity symbol with a whipped backstitch in a contrasting white or silver thread to create a smooth, raised line that defines the shape with elegance.
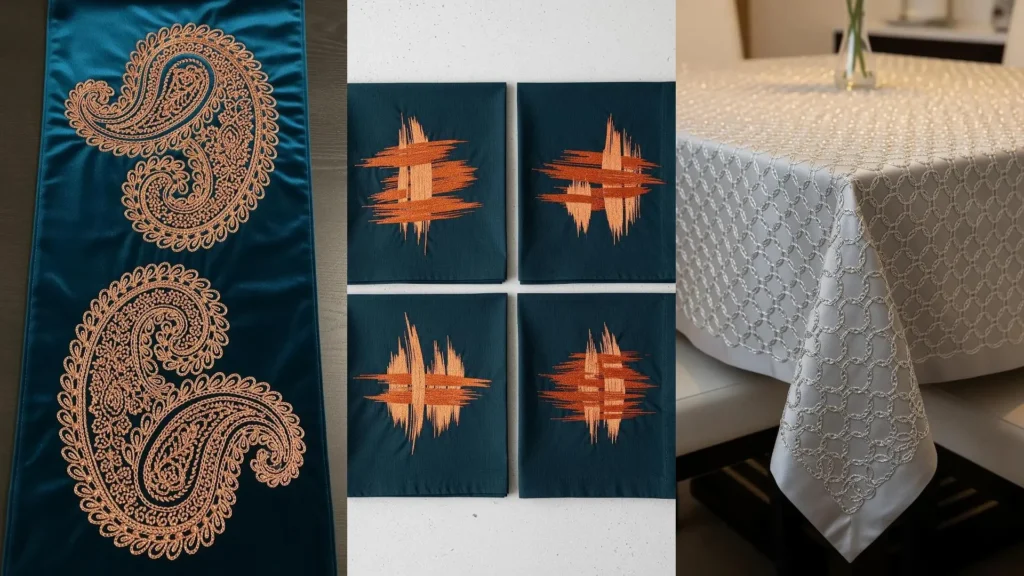
7. Art Deco Glamour with Precise Satin Stitch
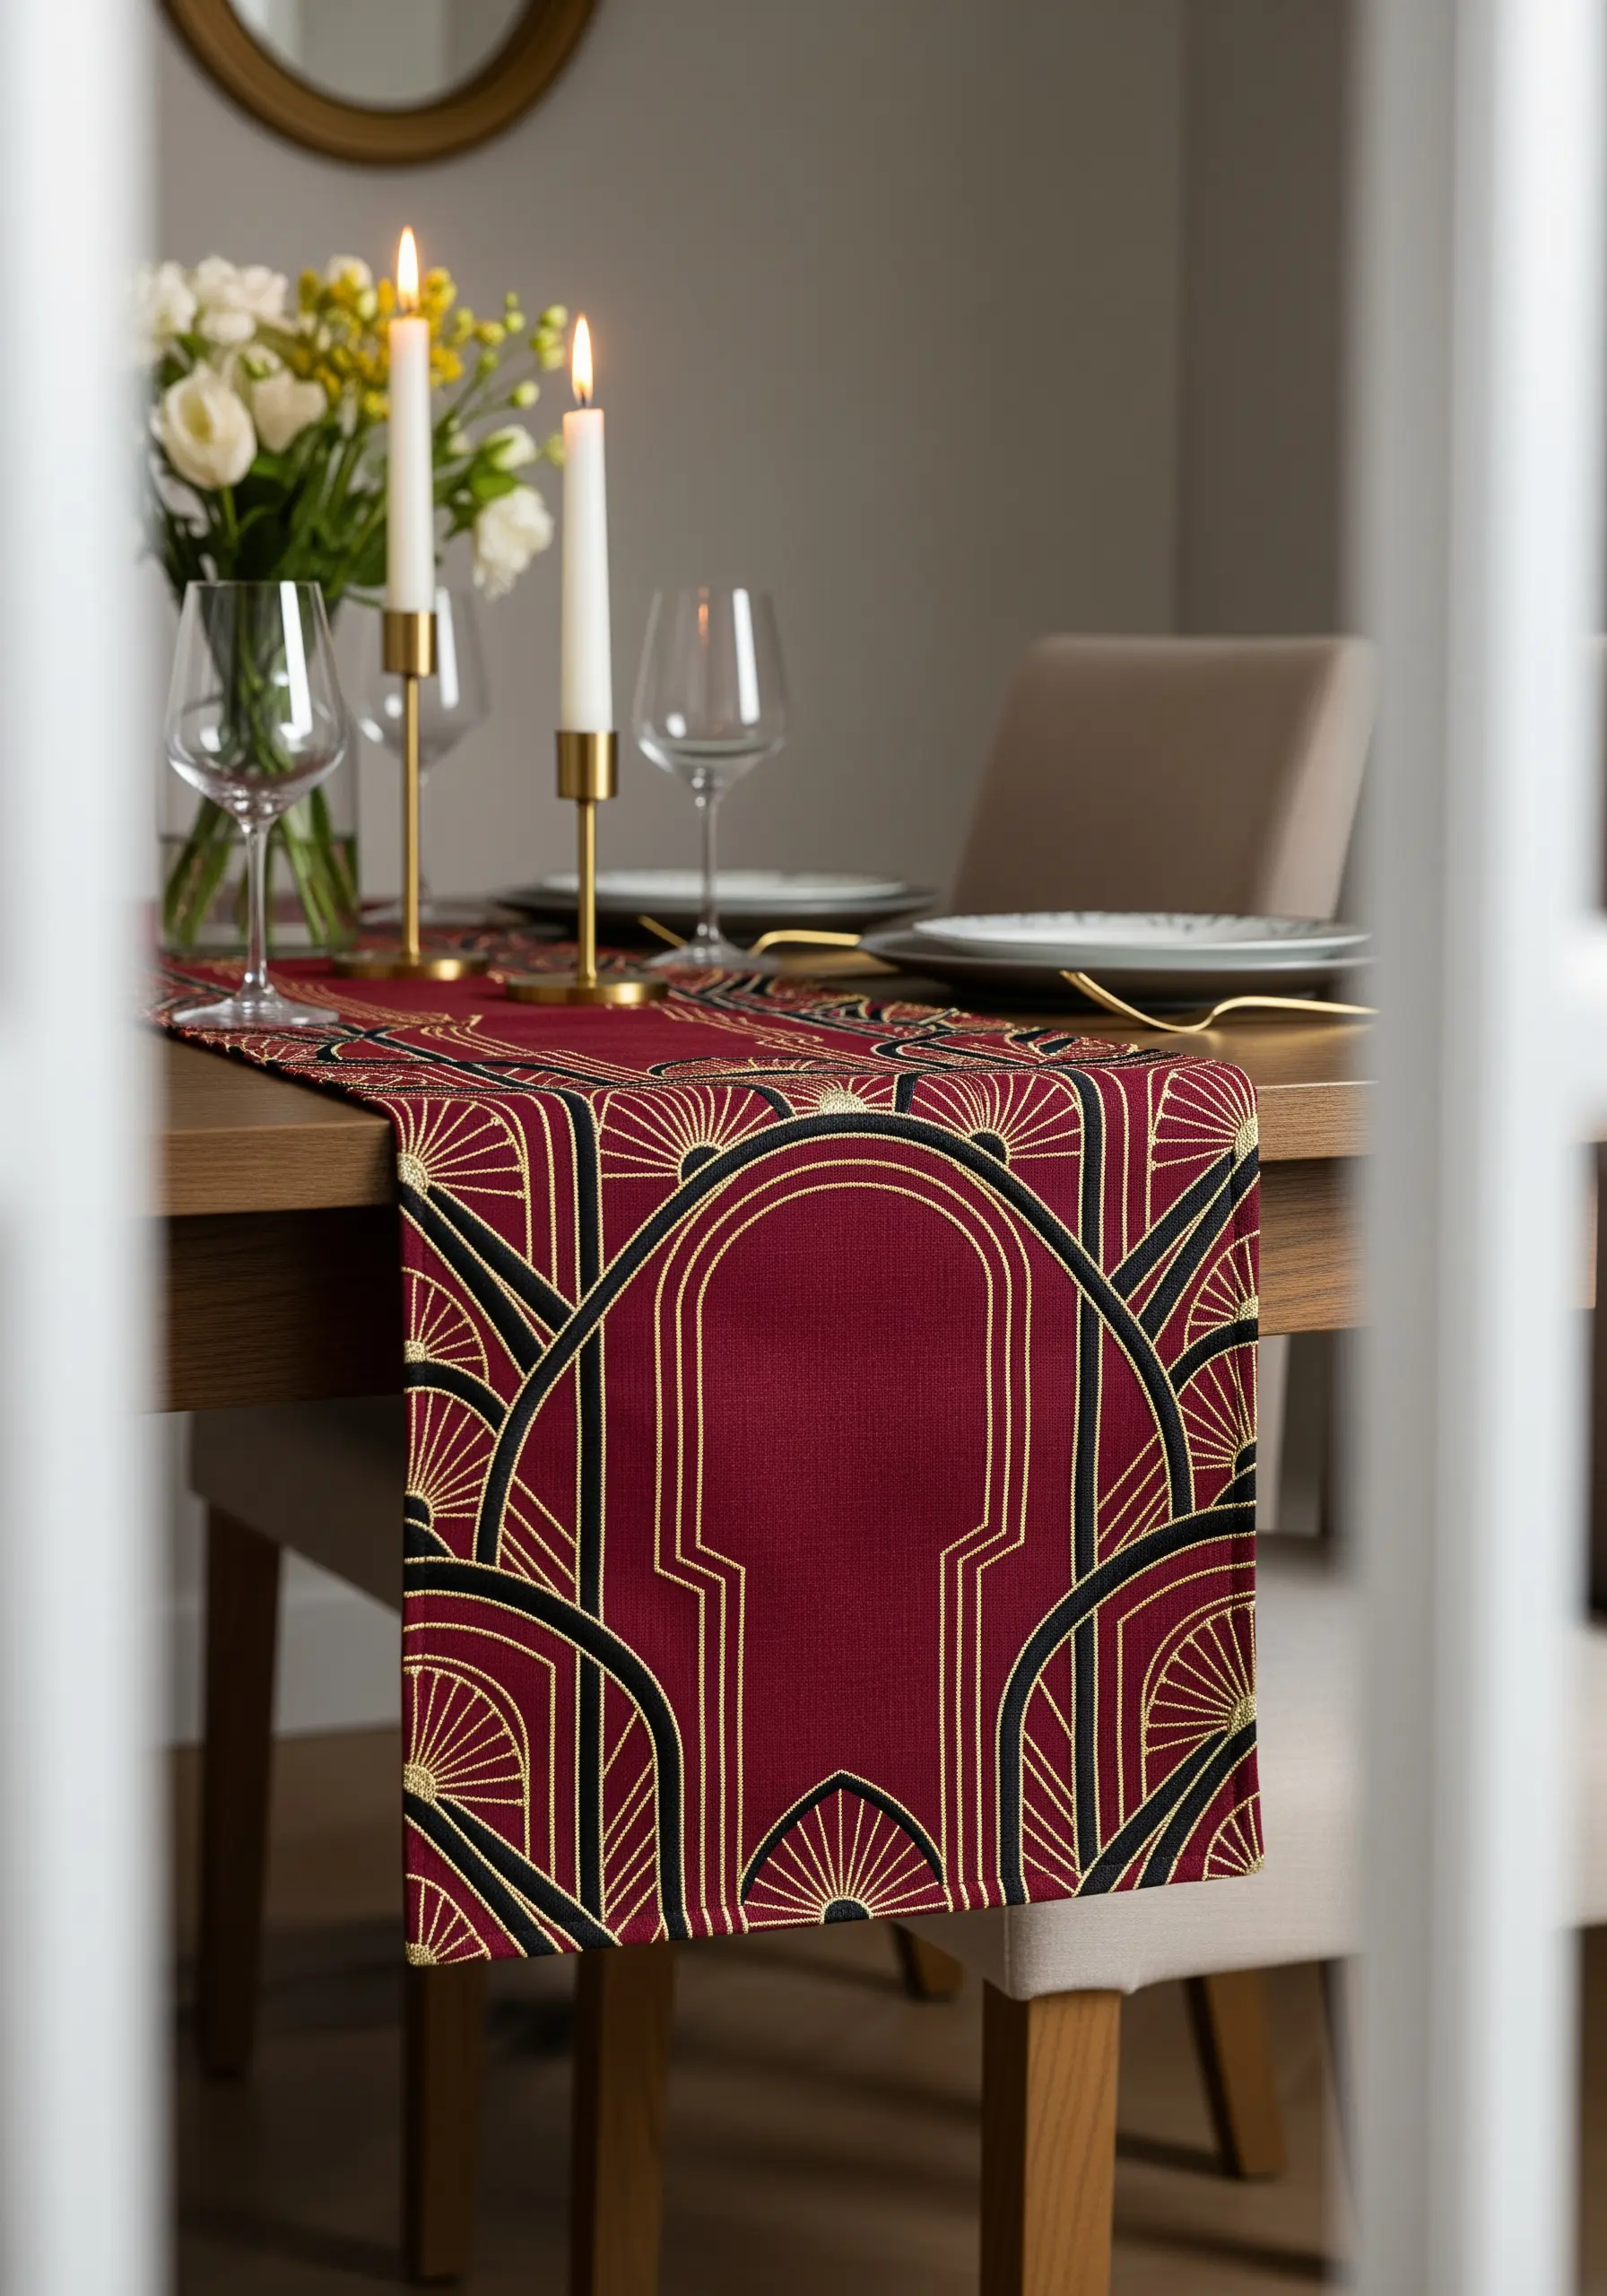
The success of an Art Deco pattern lies in its flawless precision and bold contrast.
Use a high-sheen gold metallic thread against a deep jewel-toned fabric like burgundy or emerald for maximum impact.
To achieve those perfectly smooth, reflective lines, a meticulous satin stitch is essential.
For larger projects like a table runner, always use a stabilizer on the back of your fabric to prevent puckering and keep your geometric lines crisp.
8. Realistic Metallics Through Thoughtful Shading
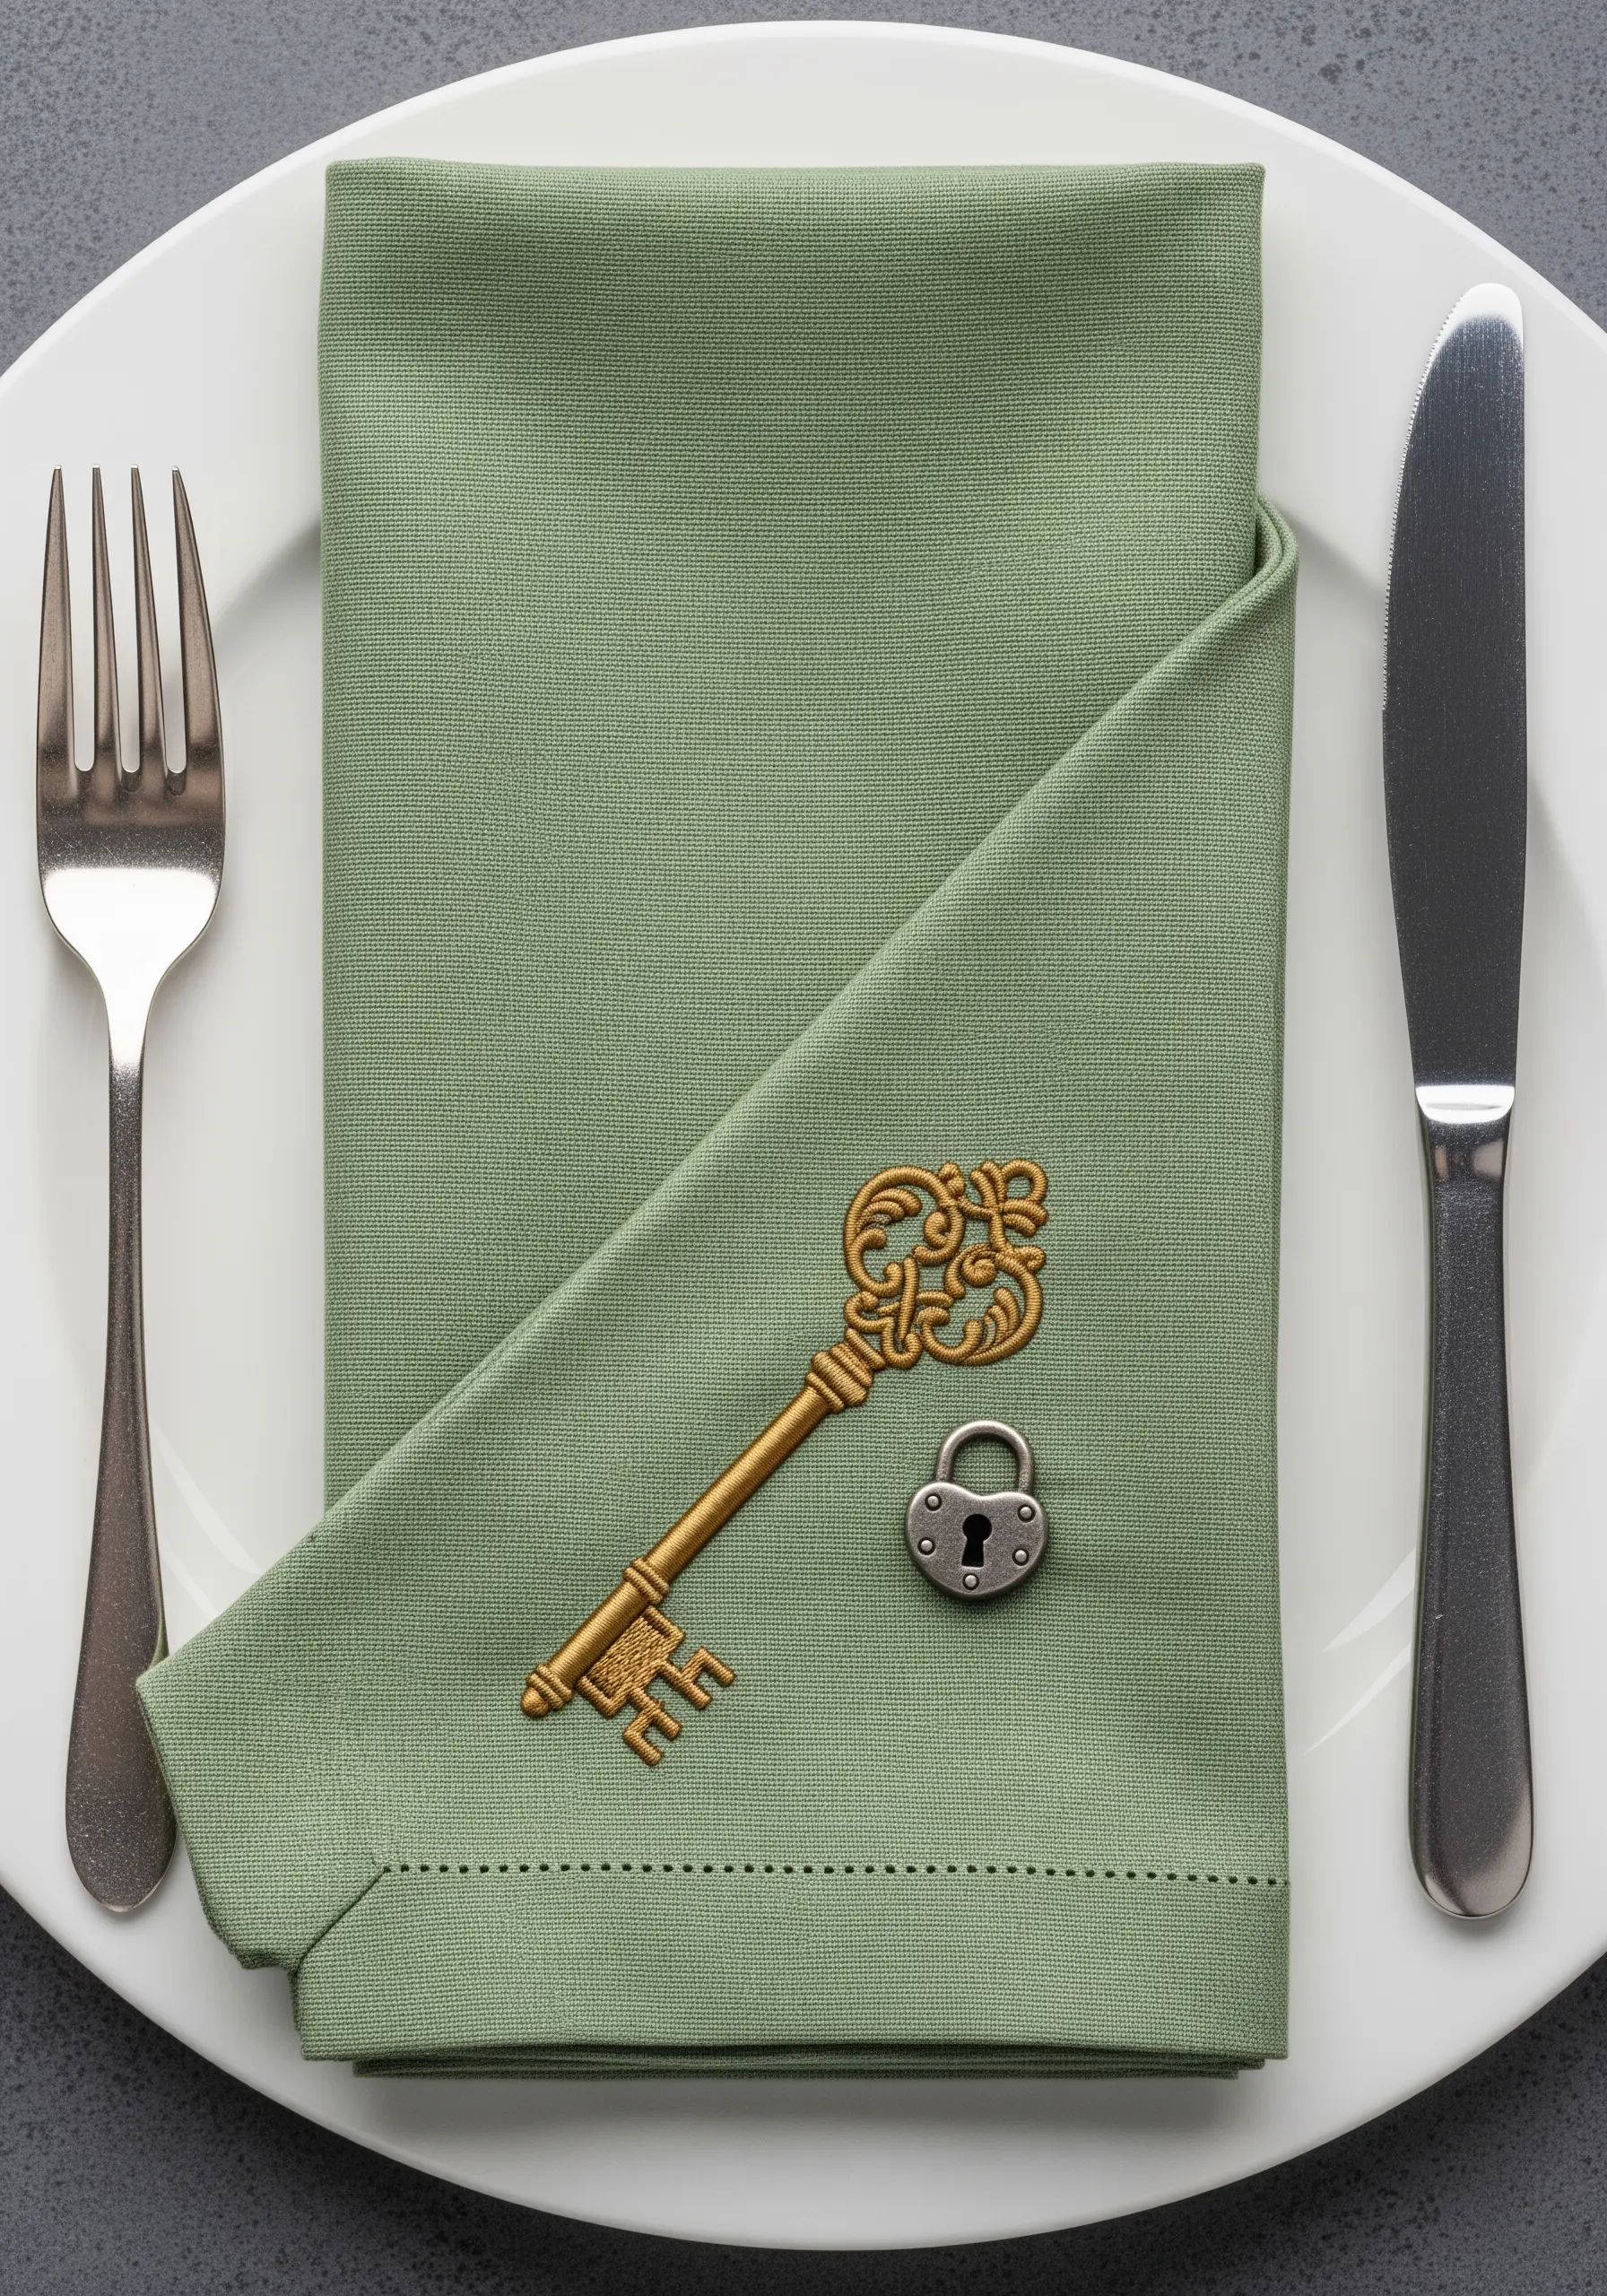
To create the convincing illusion of polished metal, you need to think like a painter.
Use at least three shades of thread for each element—for the gold key, blend pale yellow, warm gold, and a deep old gold using long-and-short stitch.
Place the lightest shade where light would naturally create a highlight.
For the silver lock, use light grey, silver, and a touch of black to define the shadows, giving it a tangible, three-dimensional quality.
9. Organic Movement with Directional Leaf Stitches
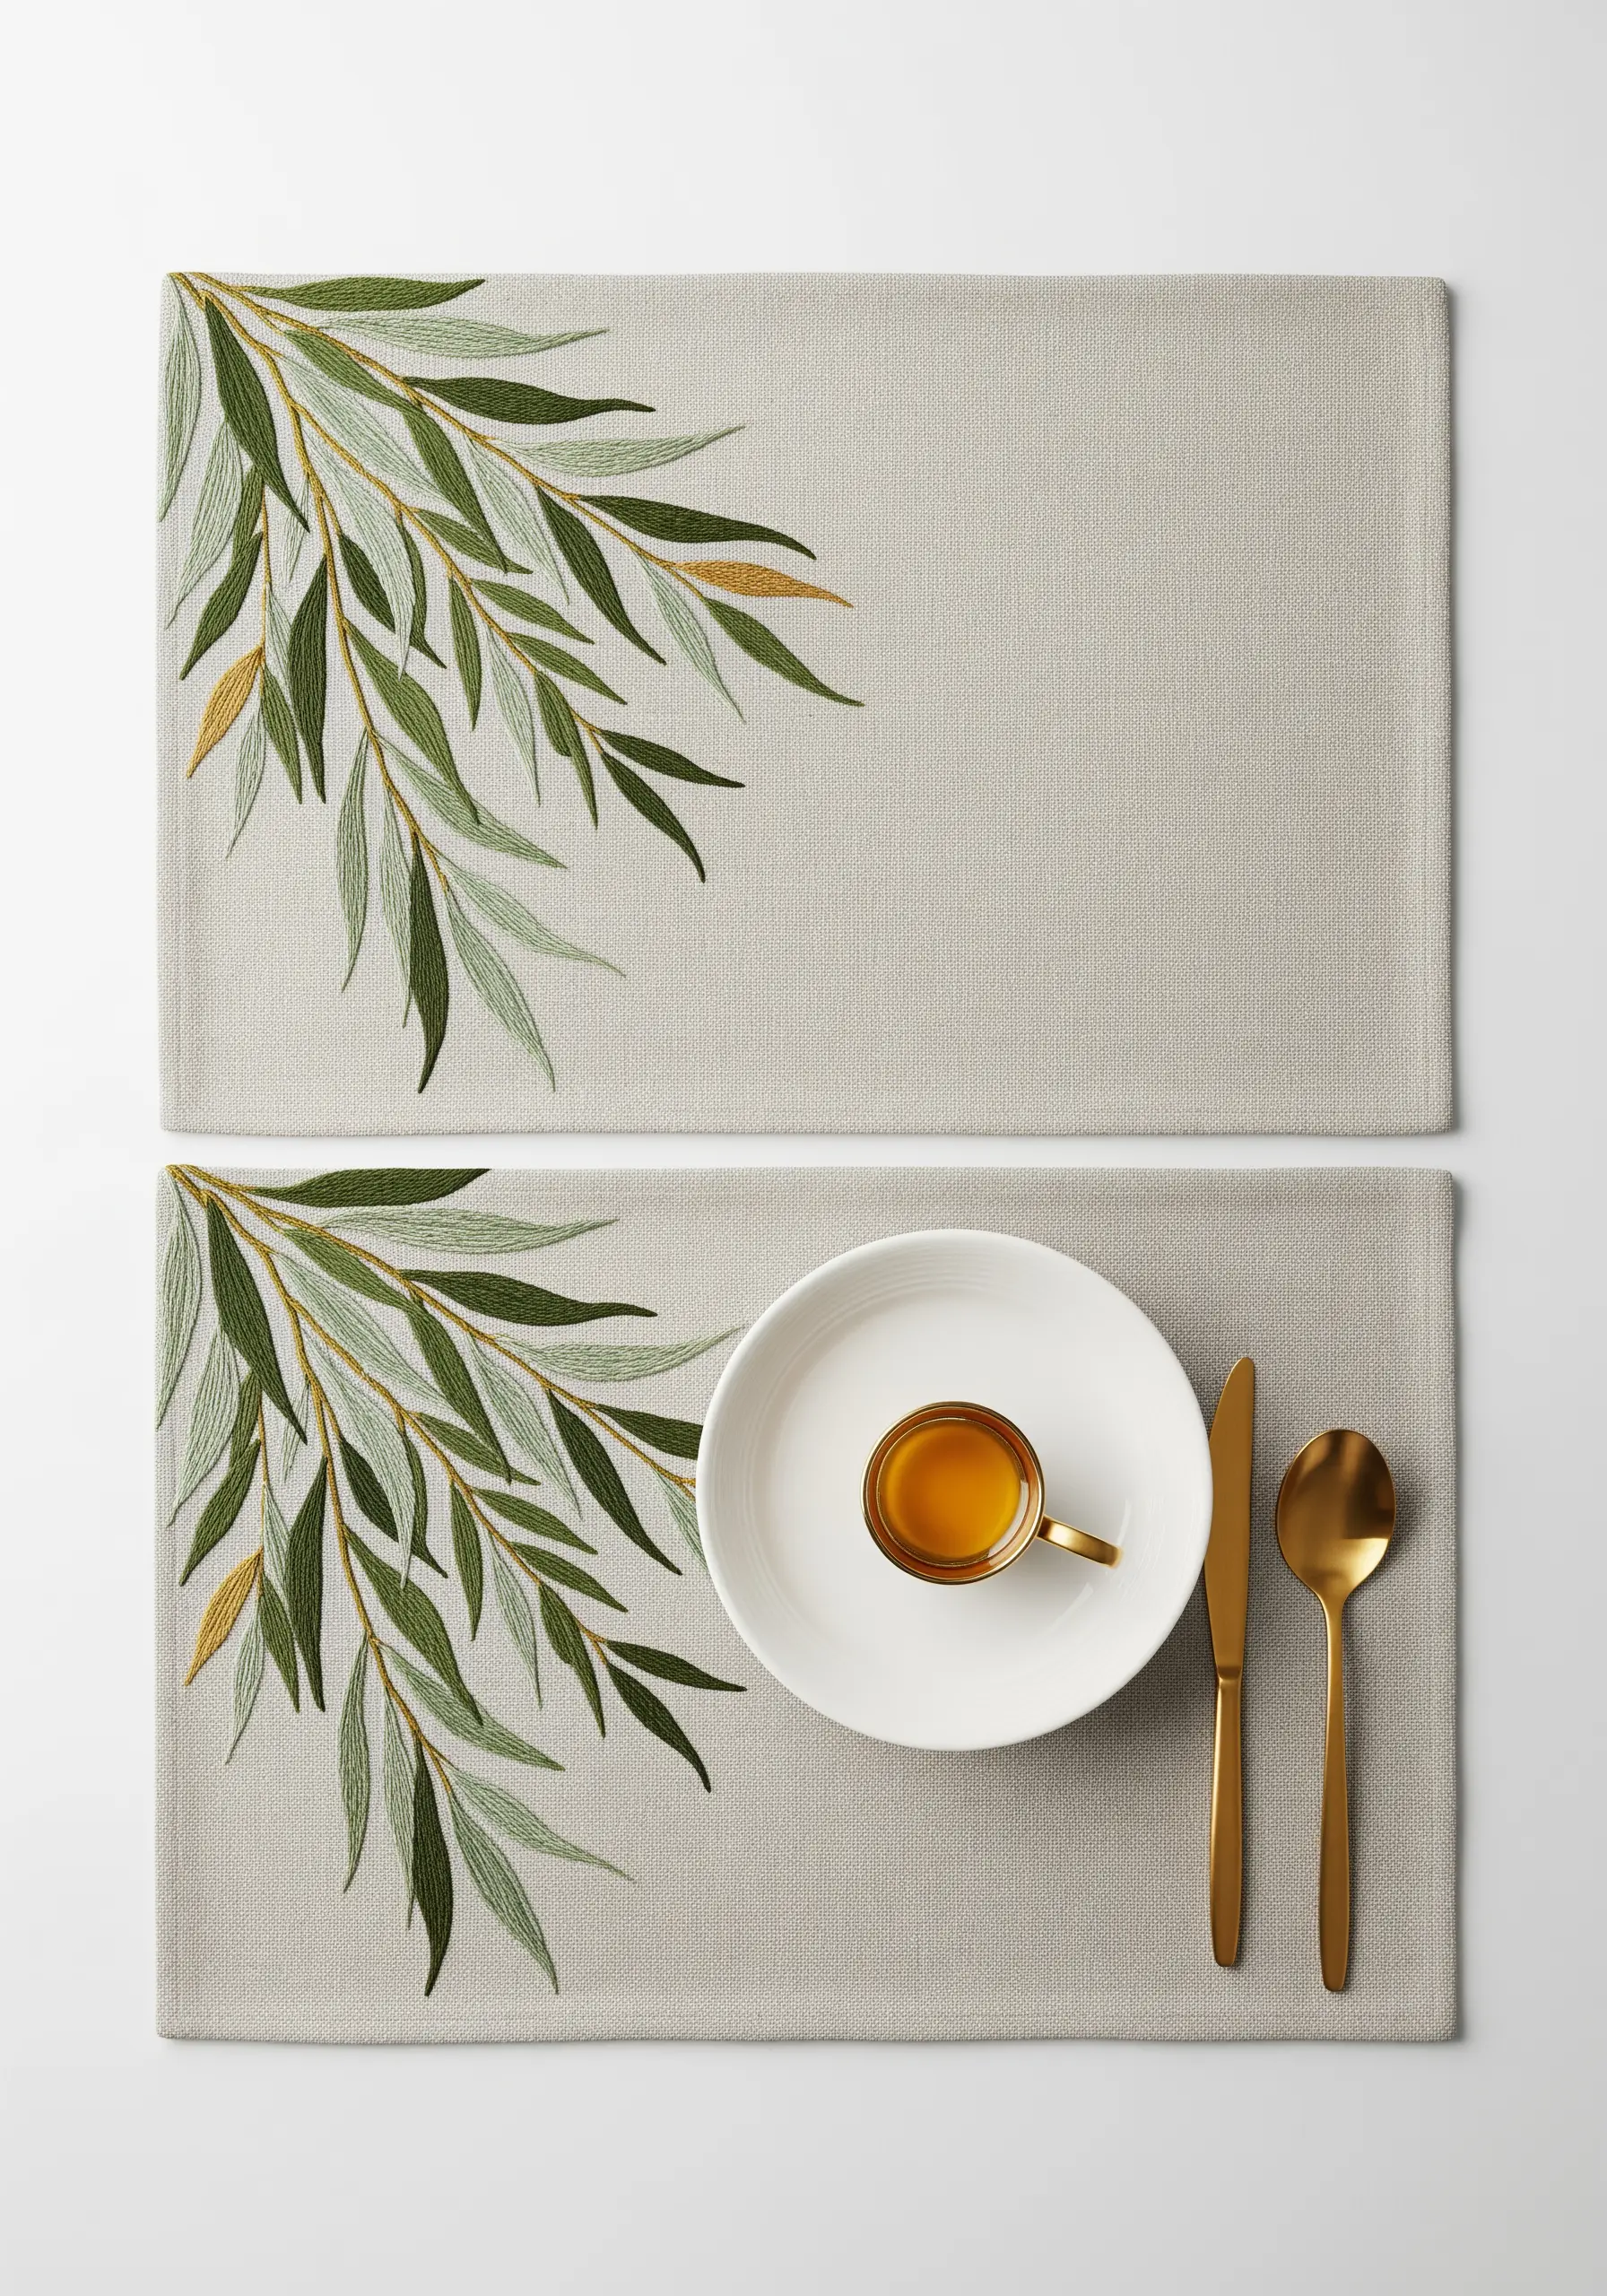
Make botanical designs feel less static by paying close attention to the direction of your stitches.
Use a fishbone or slanted satin stitch for the leaves, ensuring the angle of your stitches follows the natural curve and growth pattern of each leaf.
Incorporate several shades of green, and even a touch of gold, to represent leaves catching the light.
This is one of the most effective ways to use neutrals in leaf embroidery for a sophisticated, natural look.
10. Celestial Storytelling on Rich Velvet
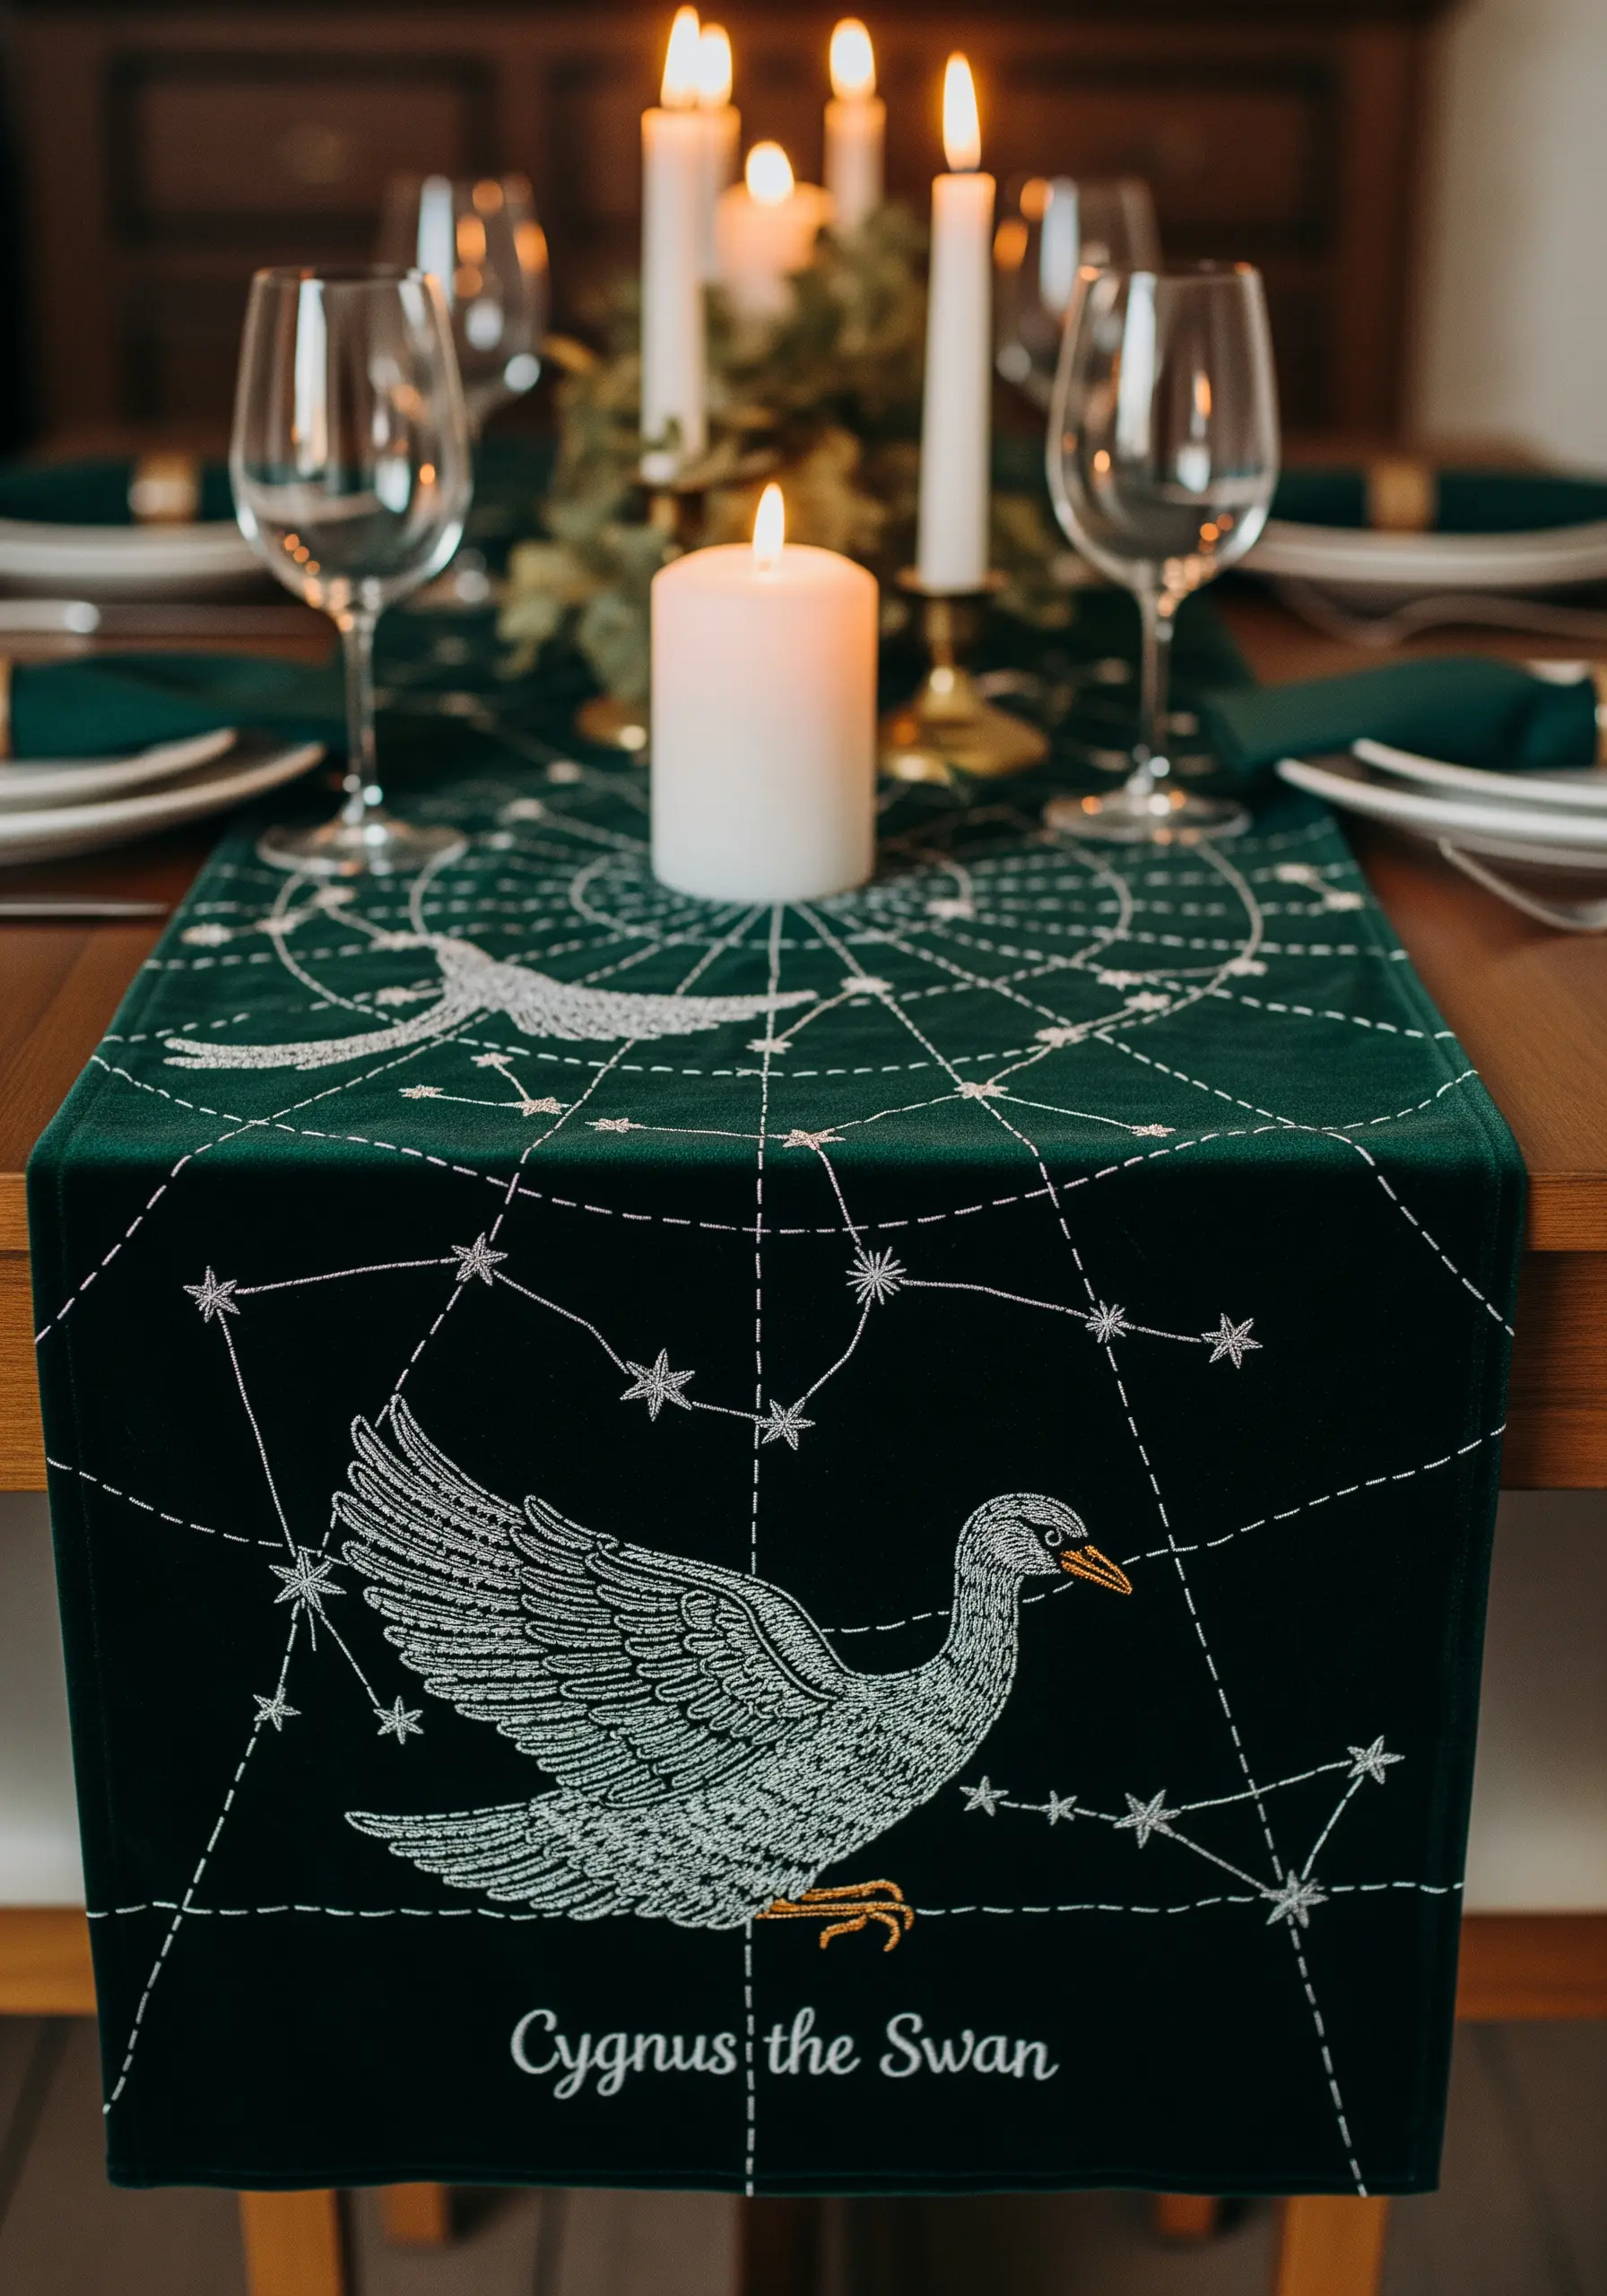
Stitching on a high-pile fabric like velvet adds instant luxury and depth.
Use a sharp, fine needle to part the fibers rather than pierce them, and keep your tension slightly looser than usual to avoid crushing the pile.
A simple backstitch with a silver metallic thread is all you need for the delicate constellation lines.
For the swan, use a dense fill stitch to create a bold, opaque shape that appears to float on the fabric’s surface.
11. Elegant Script with a Polished Whipped Stitch
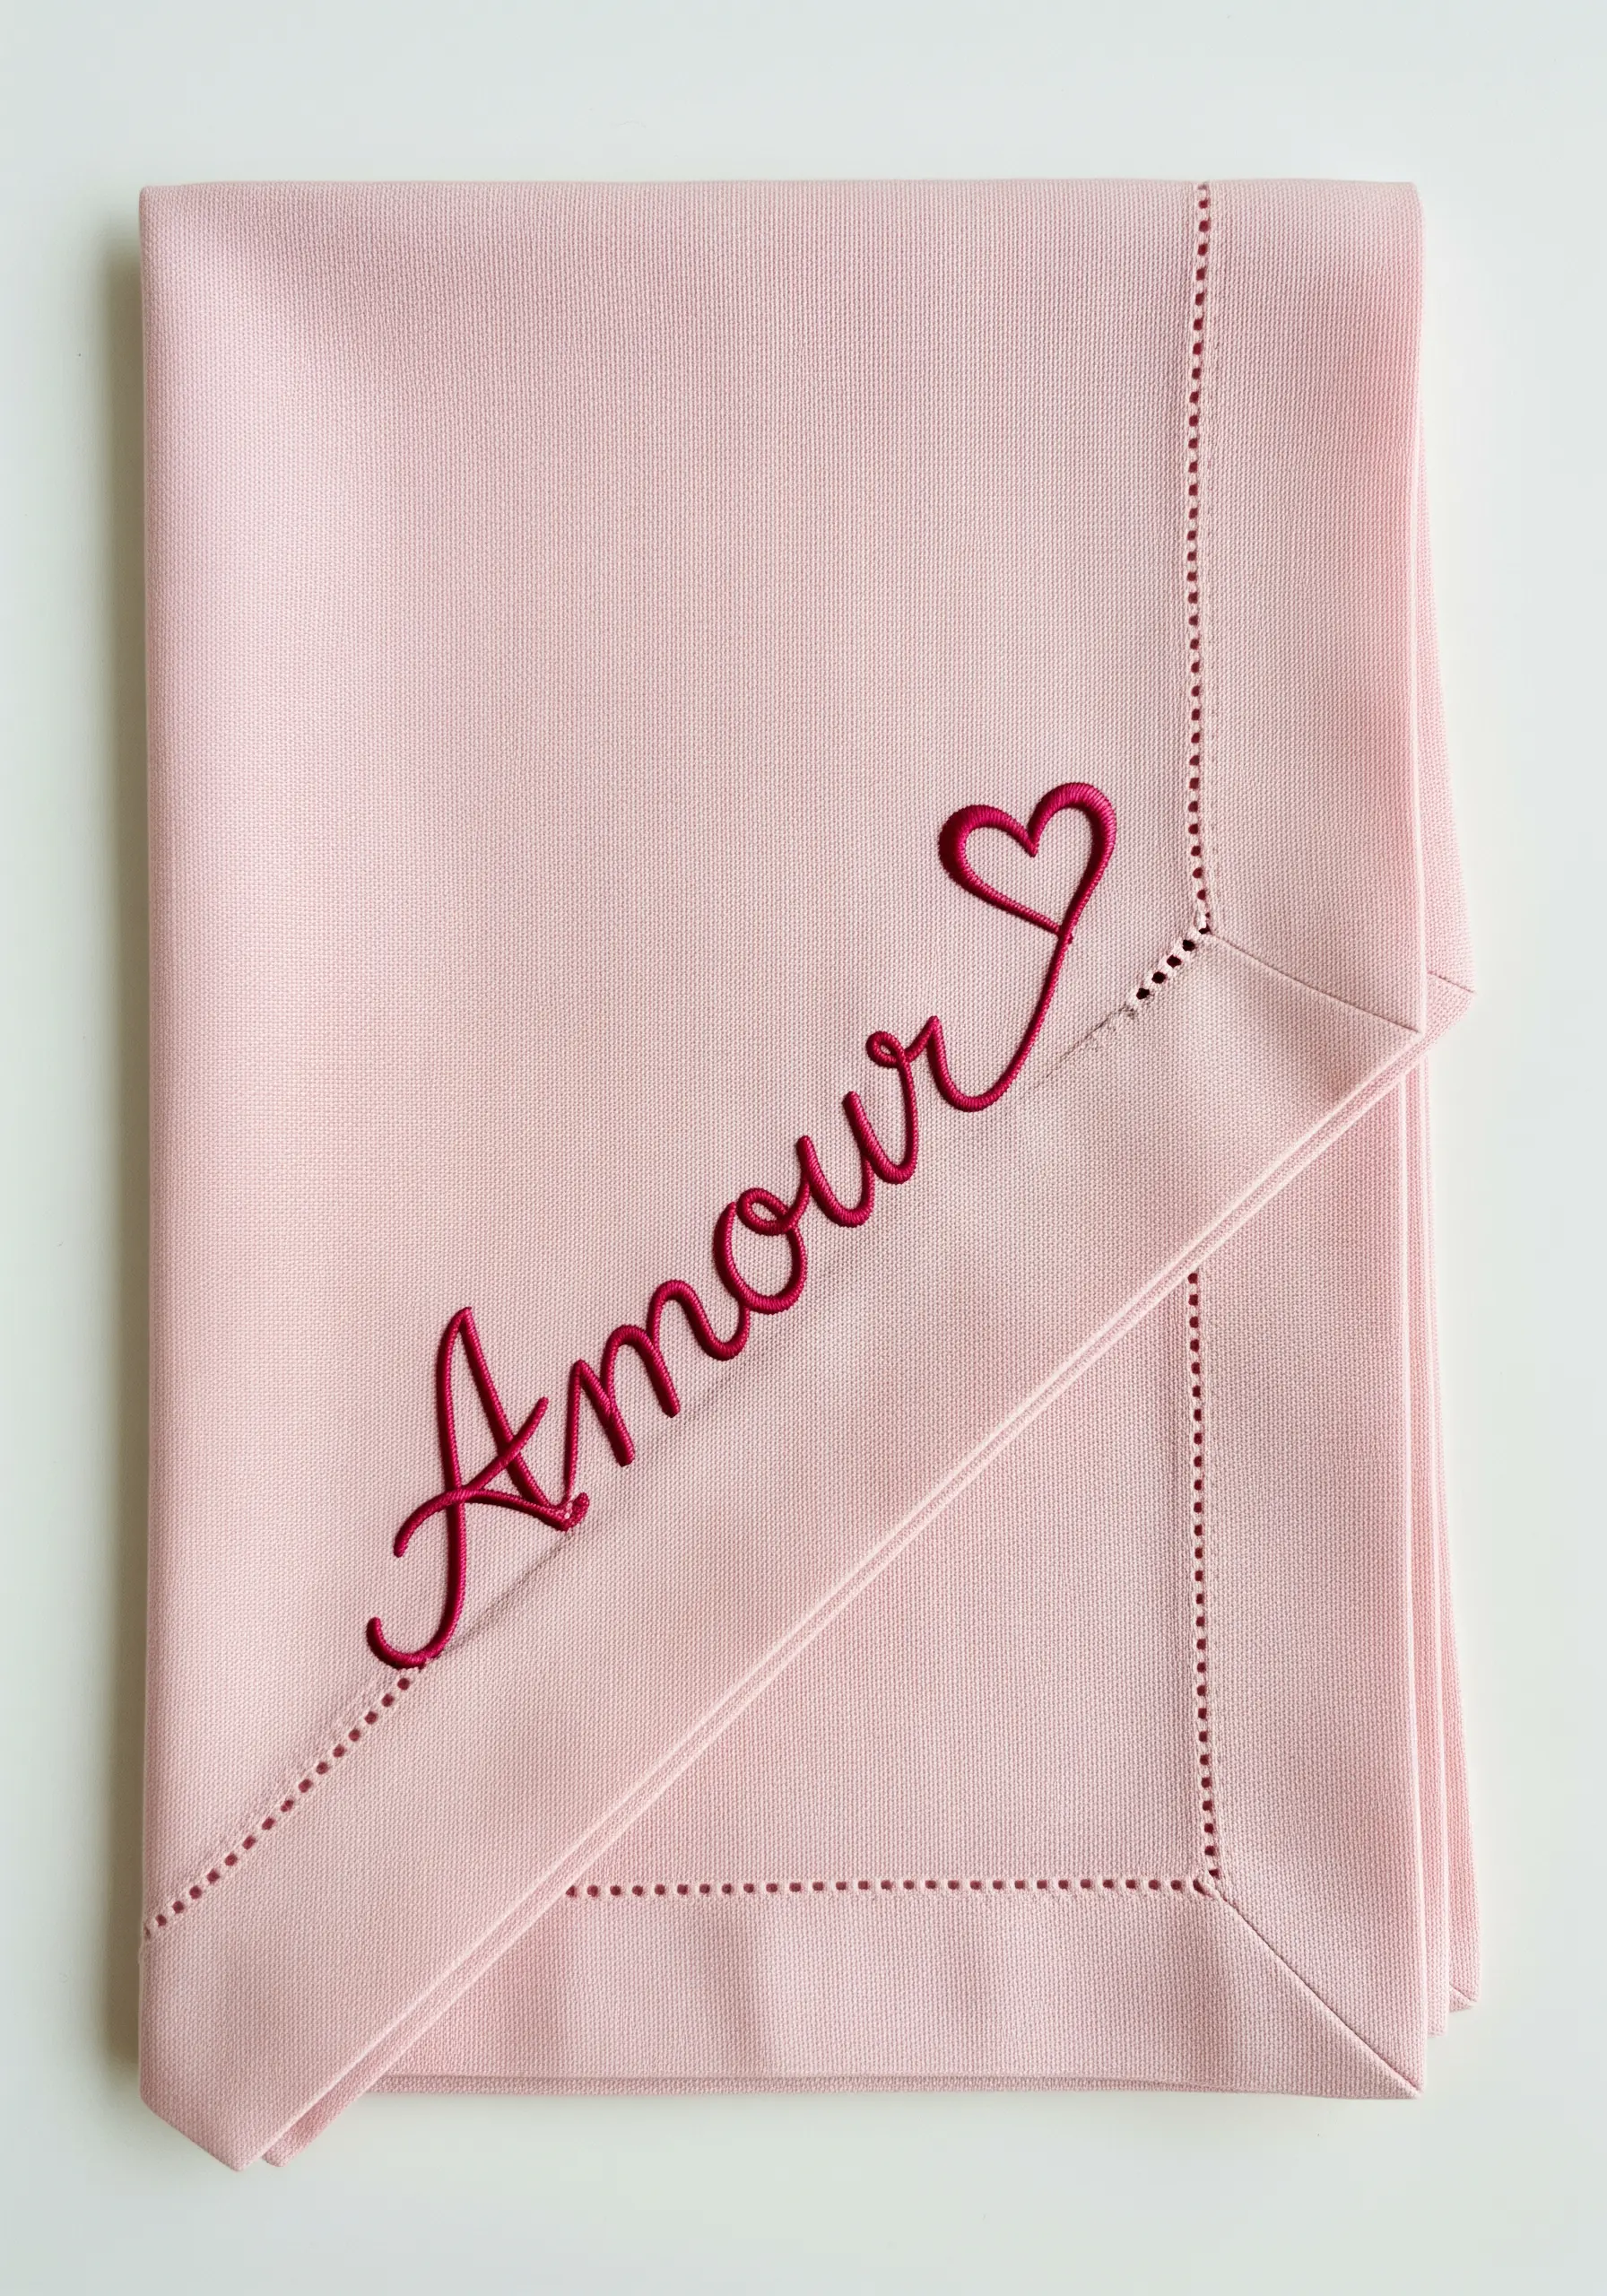
For flawless embroidered lettering that mimics fine calligraphy, a whipped backstitch is the perfect choice.
First, lay down a foundation of simple backstitches along your script line.
Then, using the same thread, pass your needle under each backstitch without piercing the fabric. This wraps the base stitches, creating a smooth, continuous, and slightly raised line with no visible gaps.
It’s an ideal technique for personalized monogram table linen.
12. Textured Pomegranate Border with French Knots
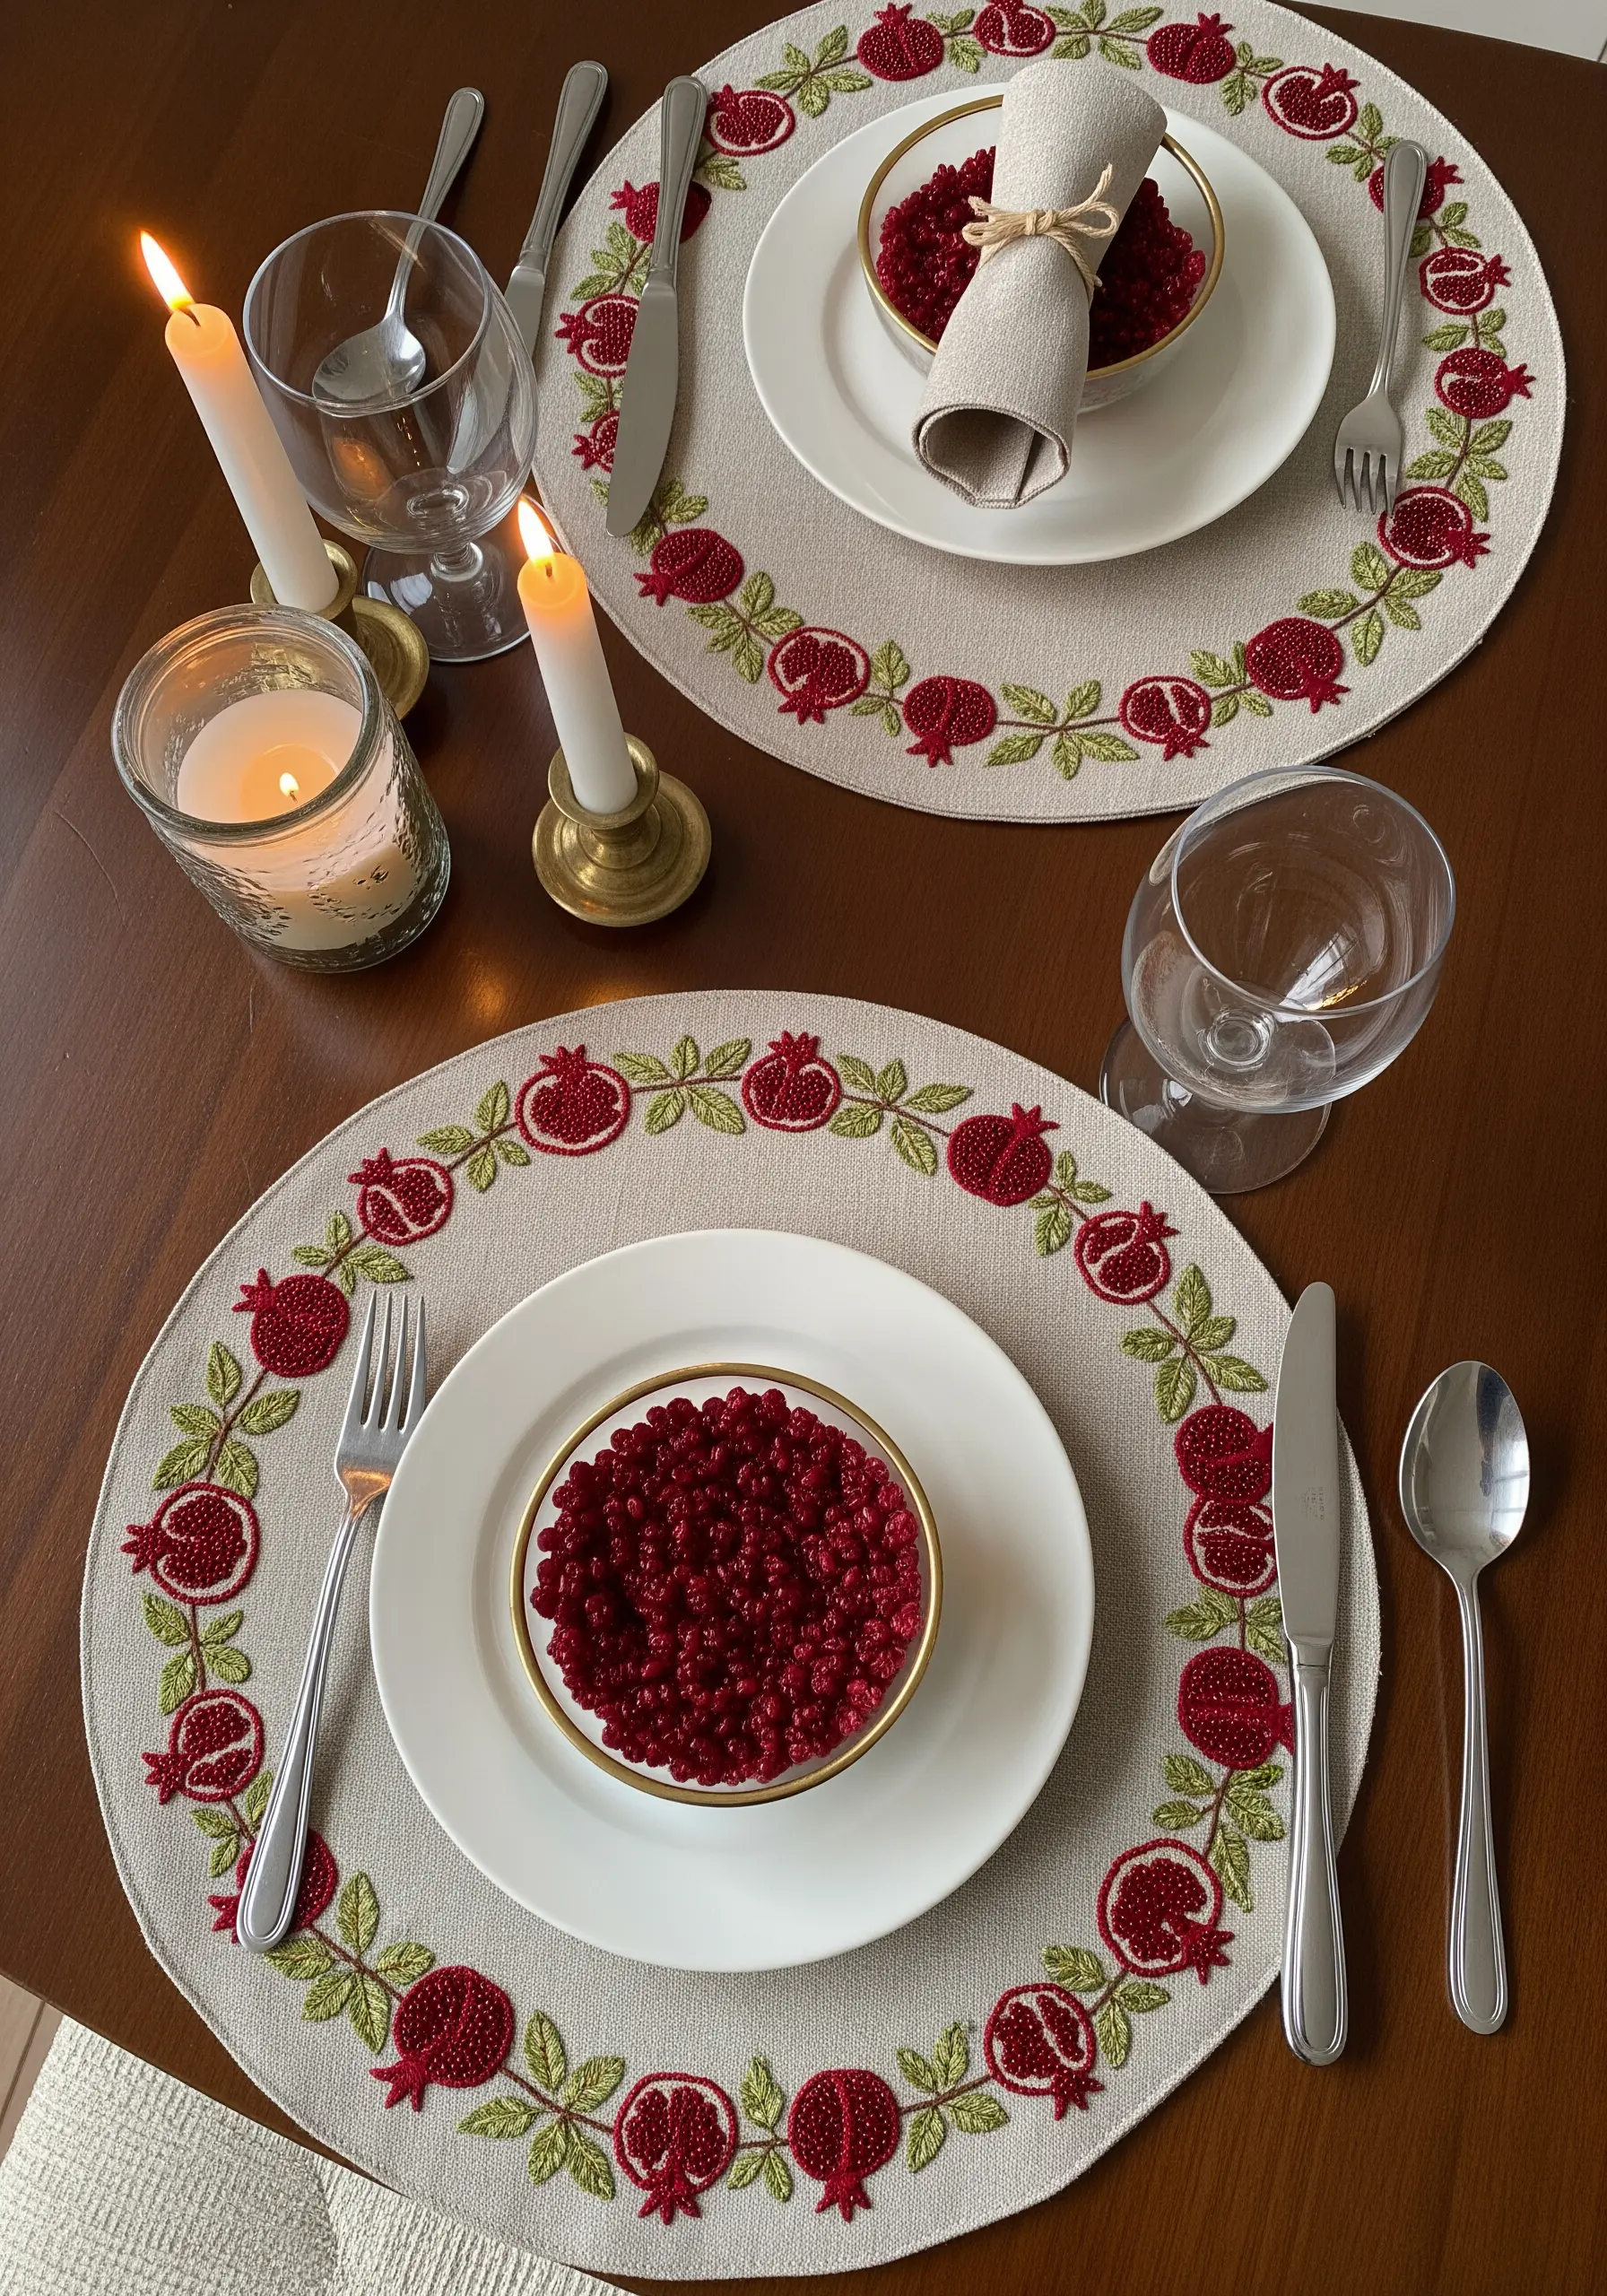
Capture the unique texture of pomegranate seeds by filling the fruit’s interior with dense clusters of French knots.
Using two or three closely related shades of red will give the seeds a realistic, jewel-like depth.
Contrast this intricate texture with a smooth, clean satin stitch for the outer skin of the fruit.
This juxtaposition of smooth and bumpy textures makes the design visually and tactilely captivating.
13. Building a Dimensional Wreath with Layered Leaves
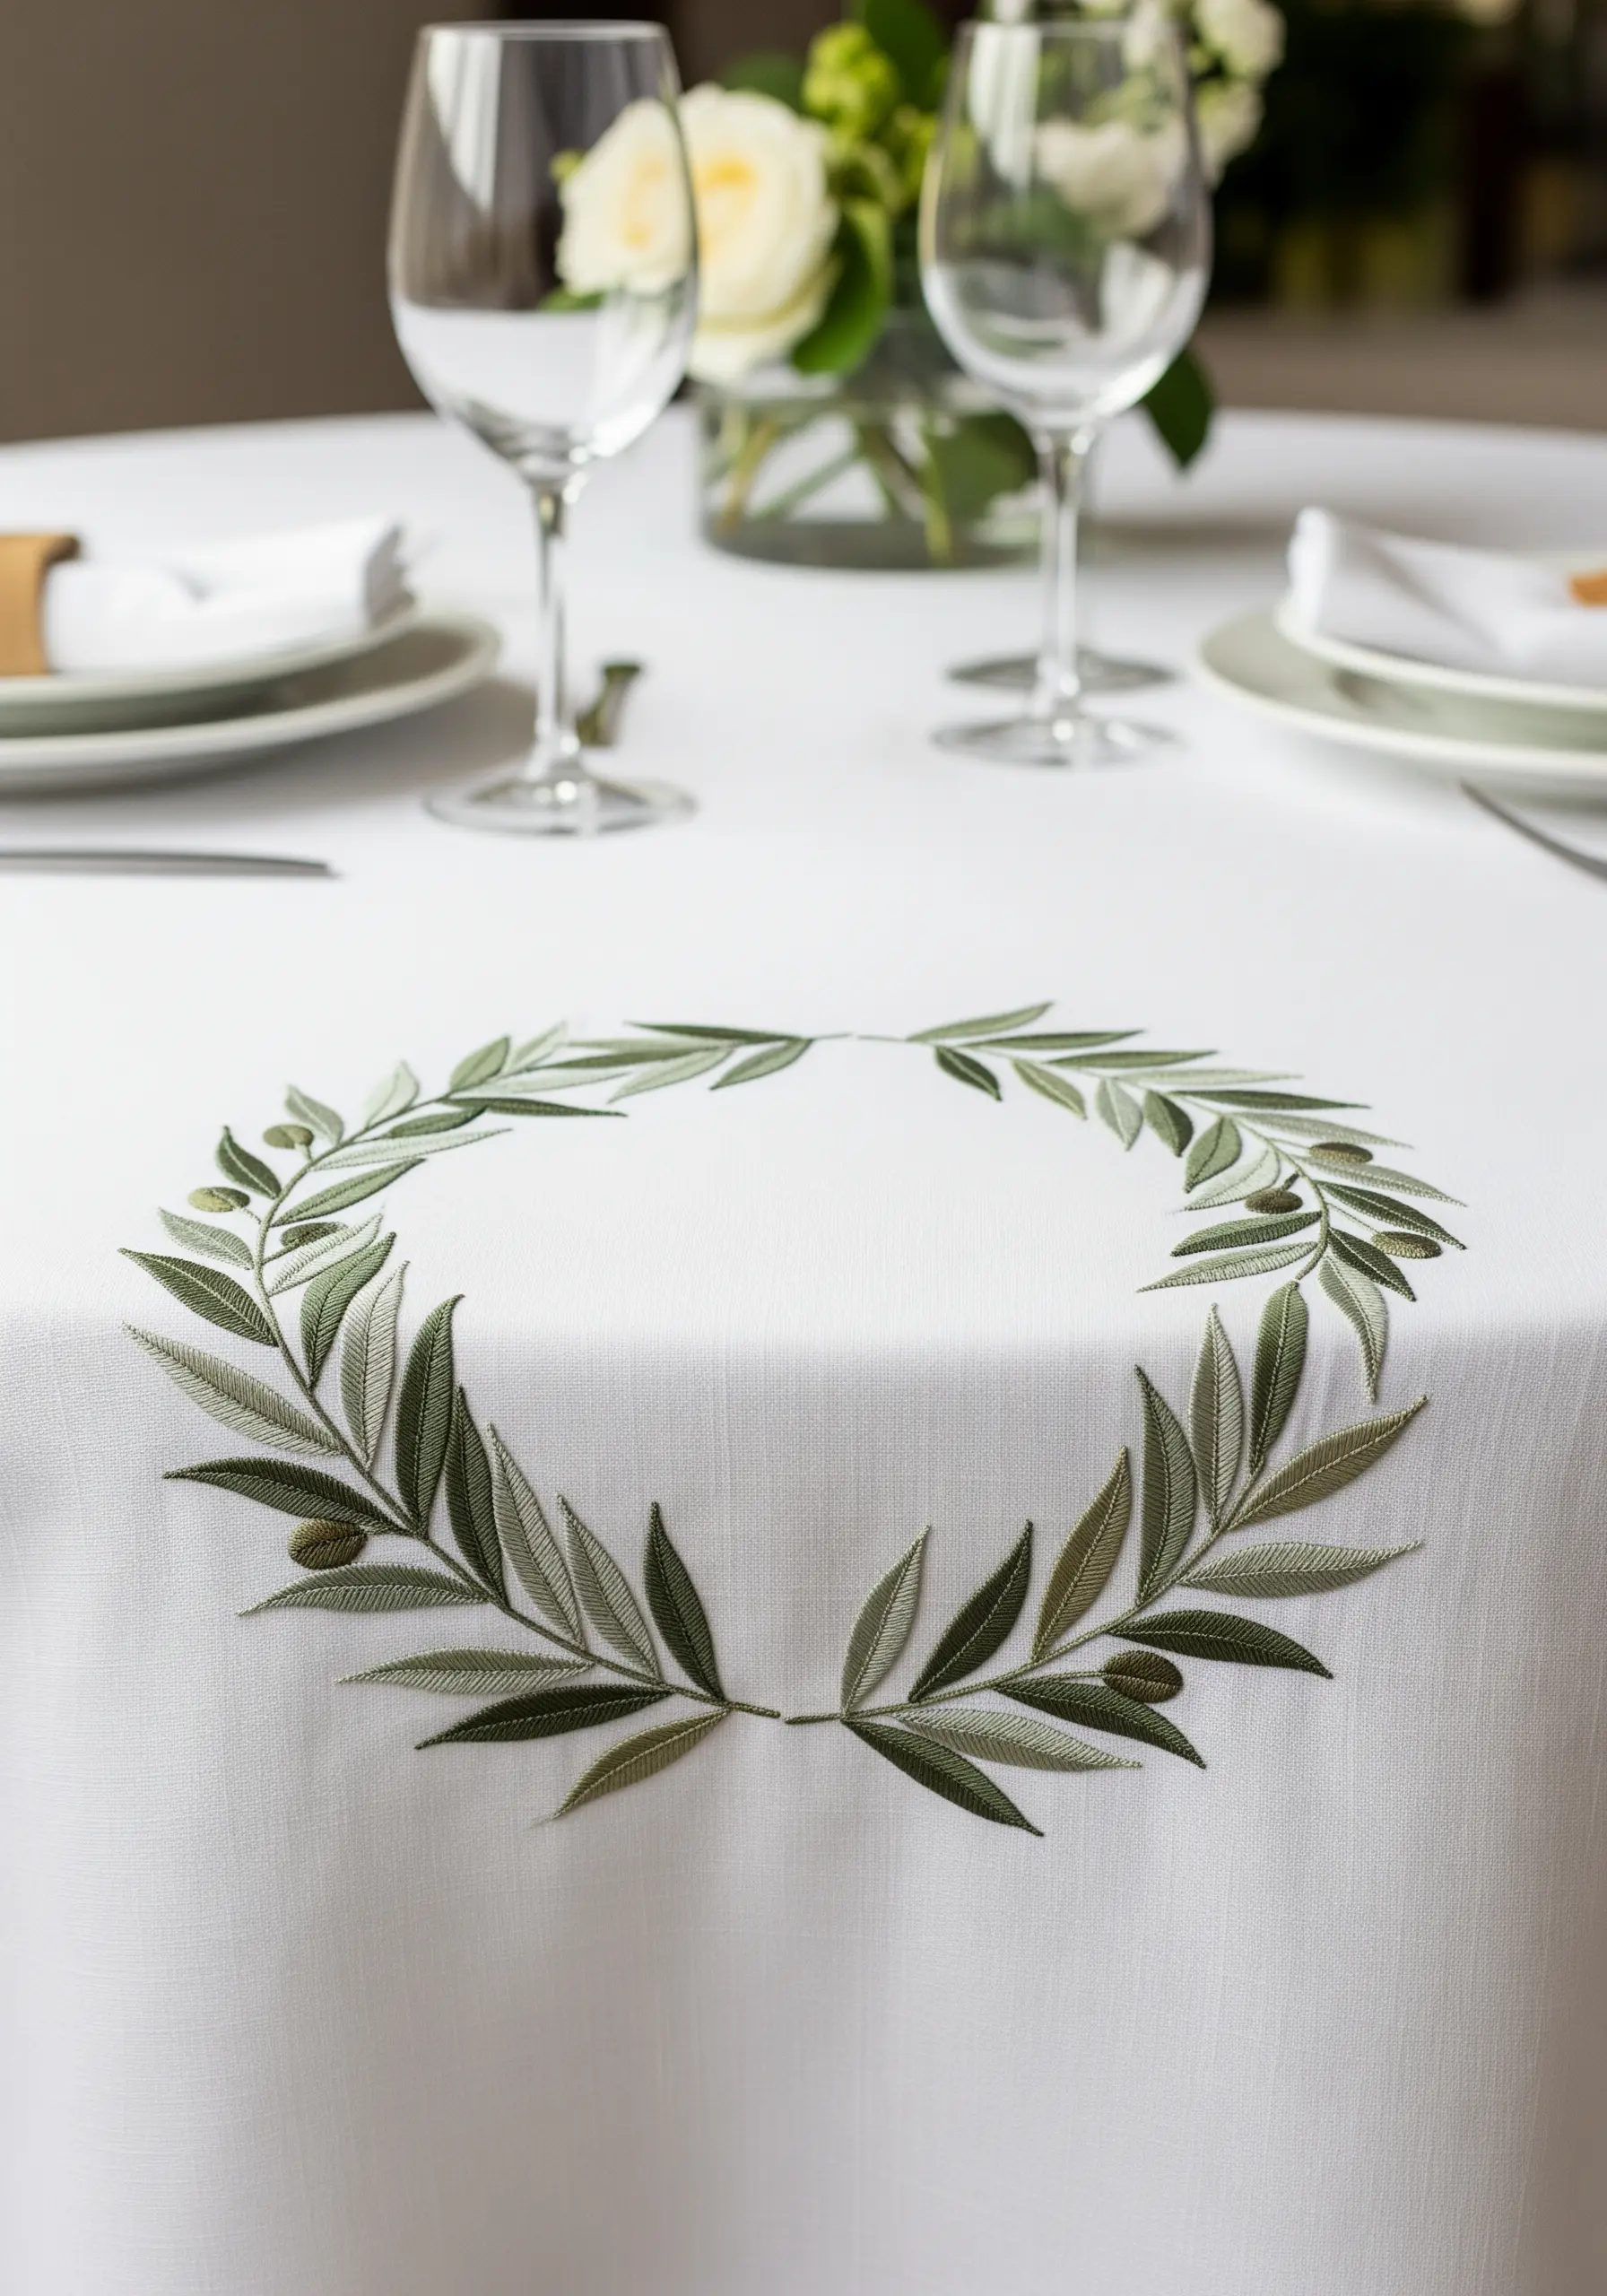
Create a natural-looking, dimensional wreath by strategically layering your stitches.
Begin by stitching the leaves that appear to be in the background, using a slightly darker shade of green.
Next, stitch the foreground leaves in lighter shades, allowing them to slightly overlap the first layer.
This simple technique instantly creates a sense of depth and realism, making your wreath look lush and full.
14. Iridescent Effects with Optical Blending
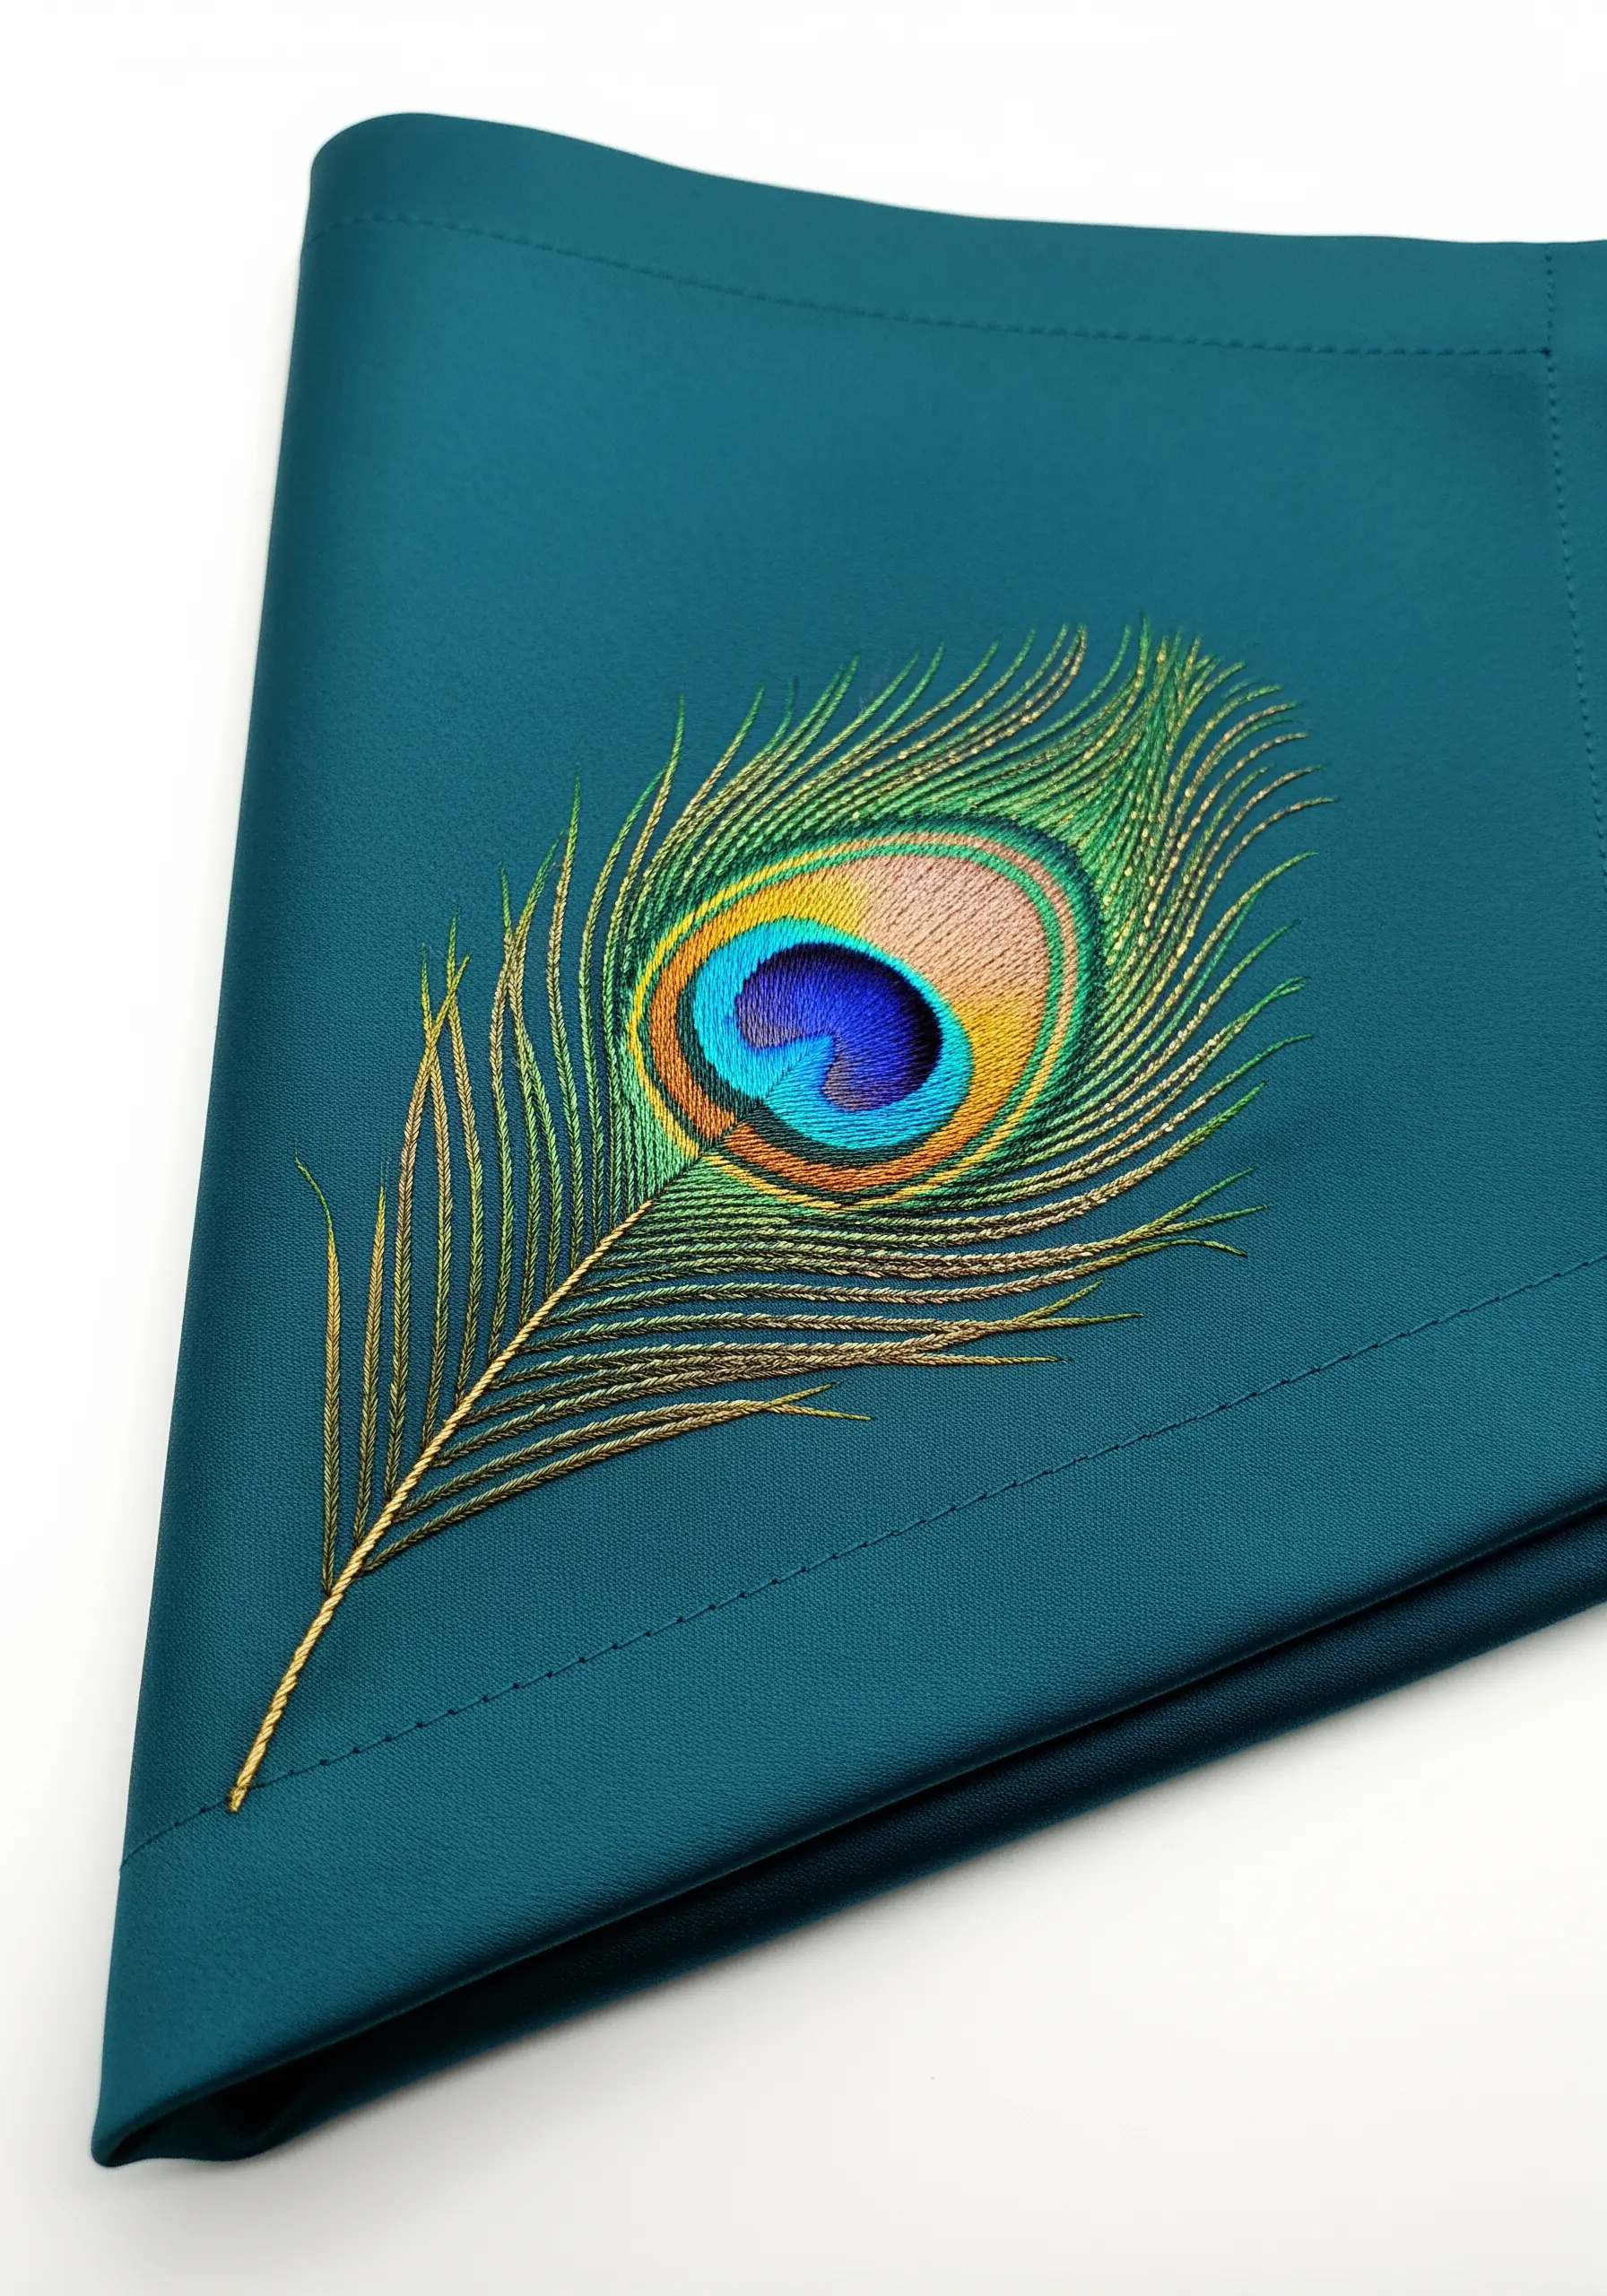
To mimic the shimmering, color-shifting quality of a peacock feather, use a technique called optical blending.
Instead of blending colors with long-and-short stitch, lay single, long stitches of different colors (blue, green, gold, teal) right next to each other.
Your eye will naturally blend the distinct colors from a distance, creating an iridescent effect.
Using a high-sheen rayon or silk thread will amplify this stunning, light-catching quality.
15. Creating a Subtle Glow with Thread and Paint

This charming design cleverly combines simple embroidery with a touch of fabric paint for a magical effect.
Stitch the fireflies’ bodies in black and their wings in a delicate white outline stitch.
For the magic touch, apply a small, neat dot of glow-in-the-dark or neon yellow fabric paint for the glowing abdomen.
The dashed flight paths, created with a simple running stitch, add a perfect sense of whimsical movement.
16. Expressive Minimalism with a Single Continuous Line

The elegance of this design lies in its unbroken, continuous line.
To achieve this fluid look, use a stem stitch or a whipped backstitch, which are perfect for creating smooth curves.
Use a single strand of black floss for a delicate, ink-like quality.
The most important factor is consistent tension—too tight and the fabric will pucker; too loose and your lines will lose their crispness. This style proves that minimalist line art can be incredibly powerful.
17. Art Nouveau Florals with Painterly Stitches
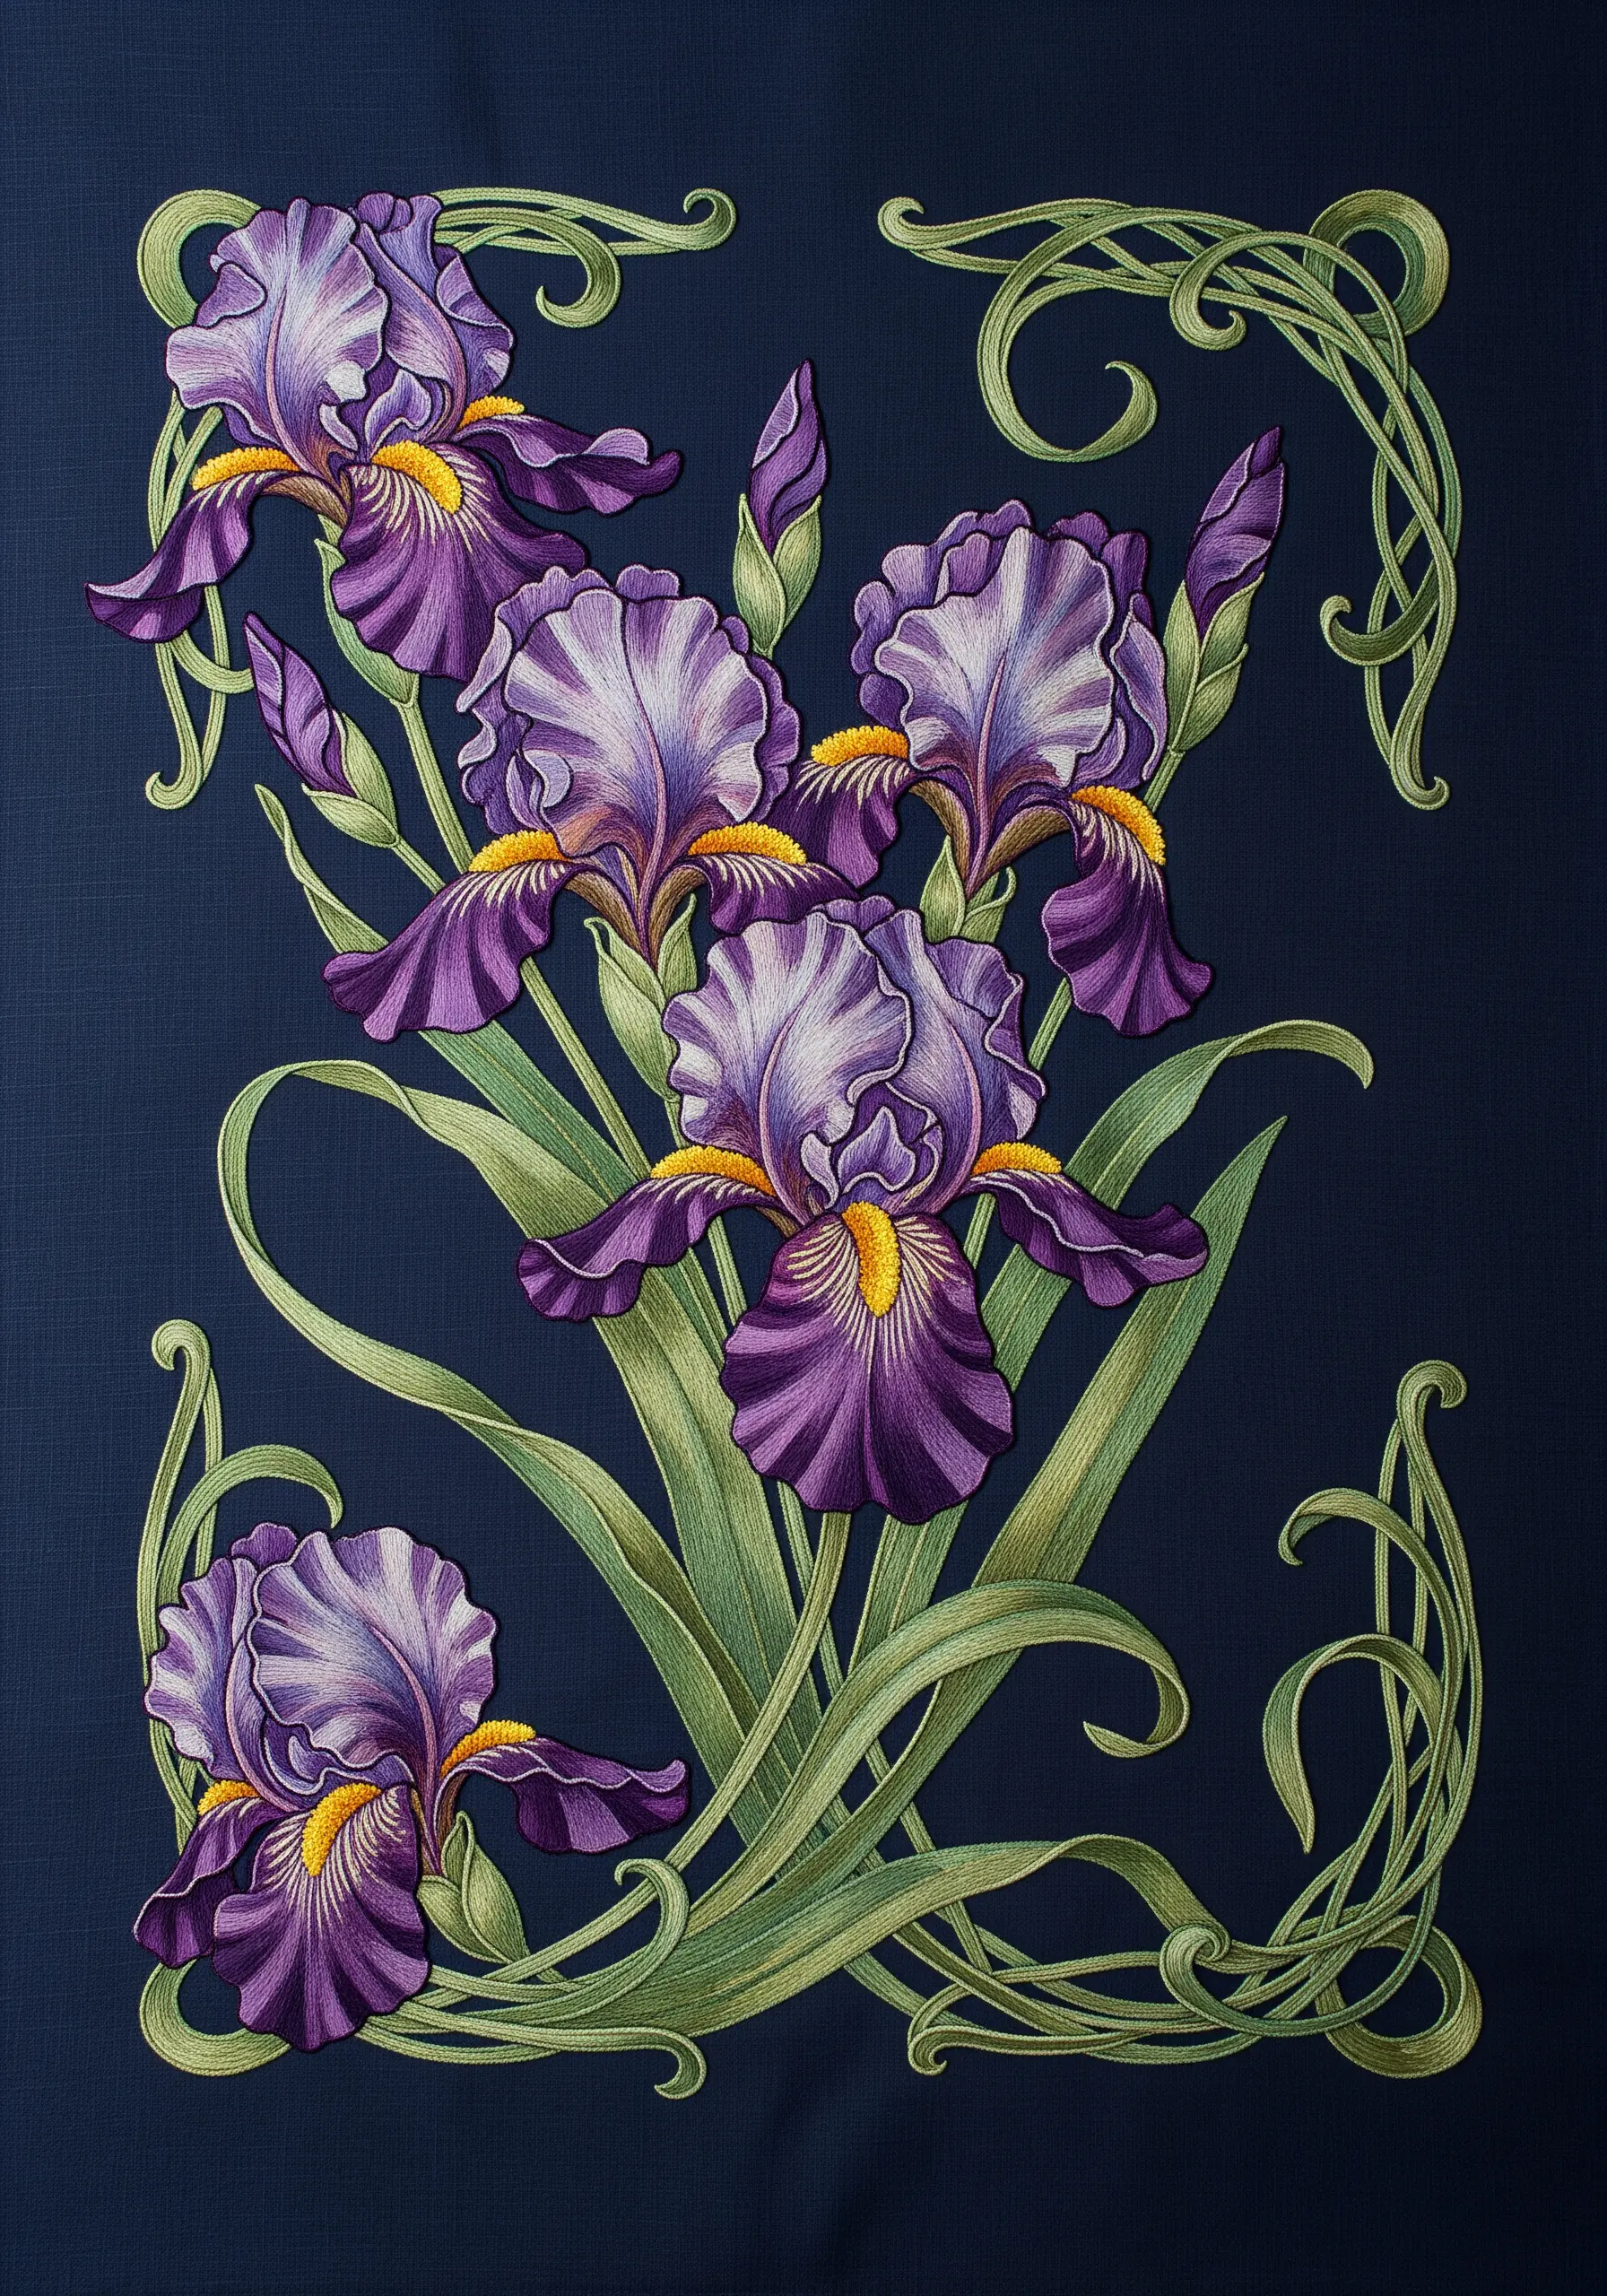
Capture the graceful, organic feel of the Art Nouveau style by using long-and-short stitch to create soft gradients on the iris petals.
The key is to ensure your stitch direction follows the natural, flowing curves of each petal, enhancing its form.
Use single strands of floss for the most seamless blending.
The iconic ‘whiplash’ curves of the stems can be rendered beautifully with a smooth, disciplined satin stitch.
18. Classic Monograms with a Raised, Padded Finish

Give your monograms a luxurious, three-dimensional effect by using padding before you stitch the final layer.
First, fill the shape of the letters with a base of small running stitches or a layer of satin stitches.
Then, work your final satin stitch layer perpendicular to the padding stitches.
This simple preparation lifts the embroidery from the surface of the fabric, creating a professional, tactile finish perfect for meaningful keepsakes.
19. Bold Graphic Lines Using the Couching Technique
For a perfectly clean and continuous graphic line, the couching technique is superior to a standard backstitch.
Lay down a thicker cord or several strands of floss along your design line.
Then, using a single, thinner strand of a matching color, tack the thicker cord to the fabric with small, evenly spaced perpendicular stitches.
This method creates a bold, unbroken line that is ideal for modern, graphic designs.
20. Dynamic Composition with Scattered Metallic Motifs
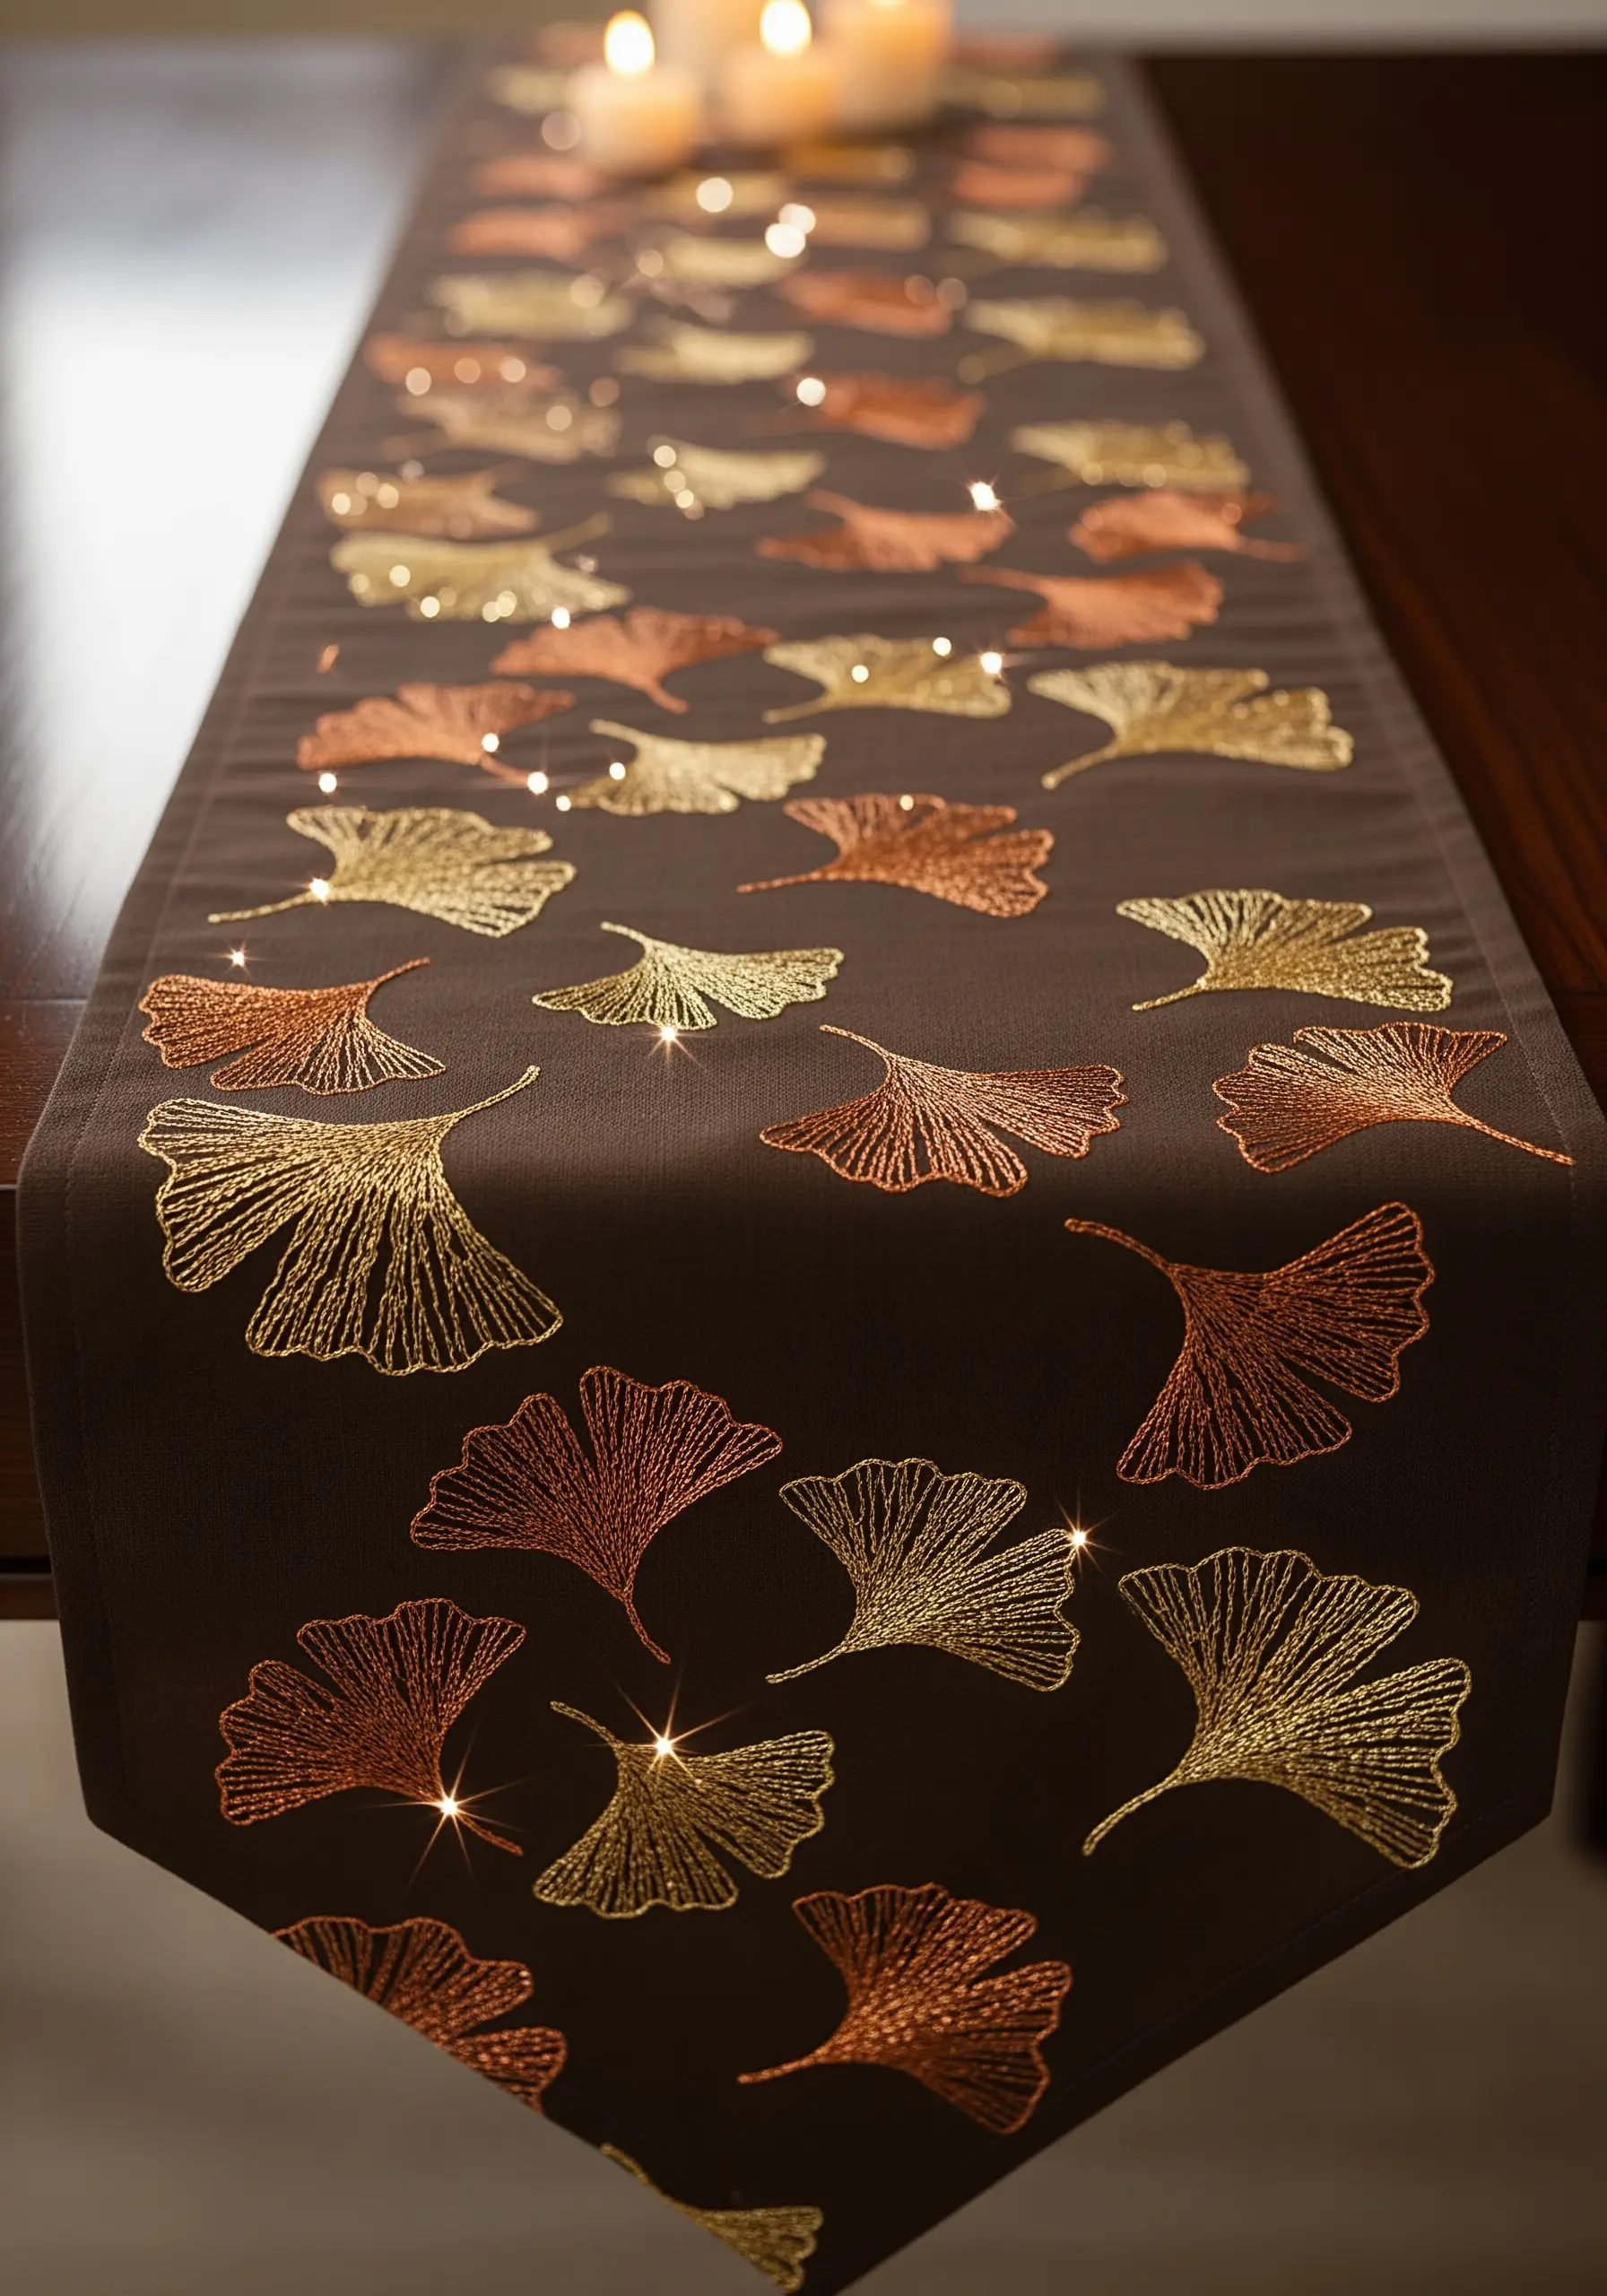
Create a sense of gentle, floating movement by scattering a single motif, like this ginkgo leaf, across the fabric.
Use a mix of metallic threads in a warm palette—gold, copper, and bronze—to add richness and visual variety.
To enhance the natural feel, rotate each leaf to a slightly different angle.
An open, fanned satin stitch allows the individual threads to catch the light, adding to the shimmering effect.
21. Adding Celebratory Sparkle with Seed Beads

Elevate a simple line-art design from charming to celebratory with the addition of a few beads.
First, complete the outline of the wine glasses using a clean backstitch or stem stitch.
Then, using a fine beading needle and matching thread, attach a small cluster of tiny silver or crystal seed beads at the point of impact.
This tiny detail catches the light beautifully, adding a touch of sparkle and dimension to an otherwise minimal design.
22. Defining Form with Outline and Contrasting Fill
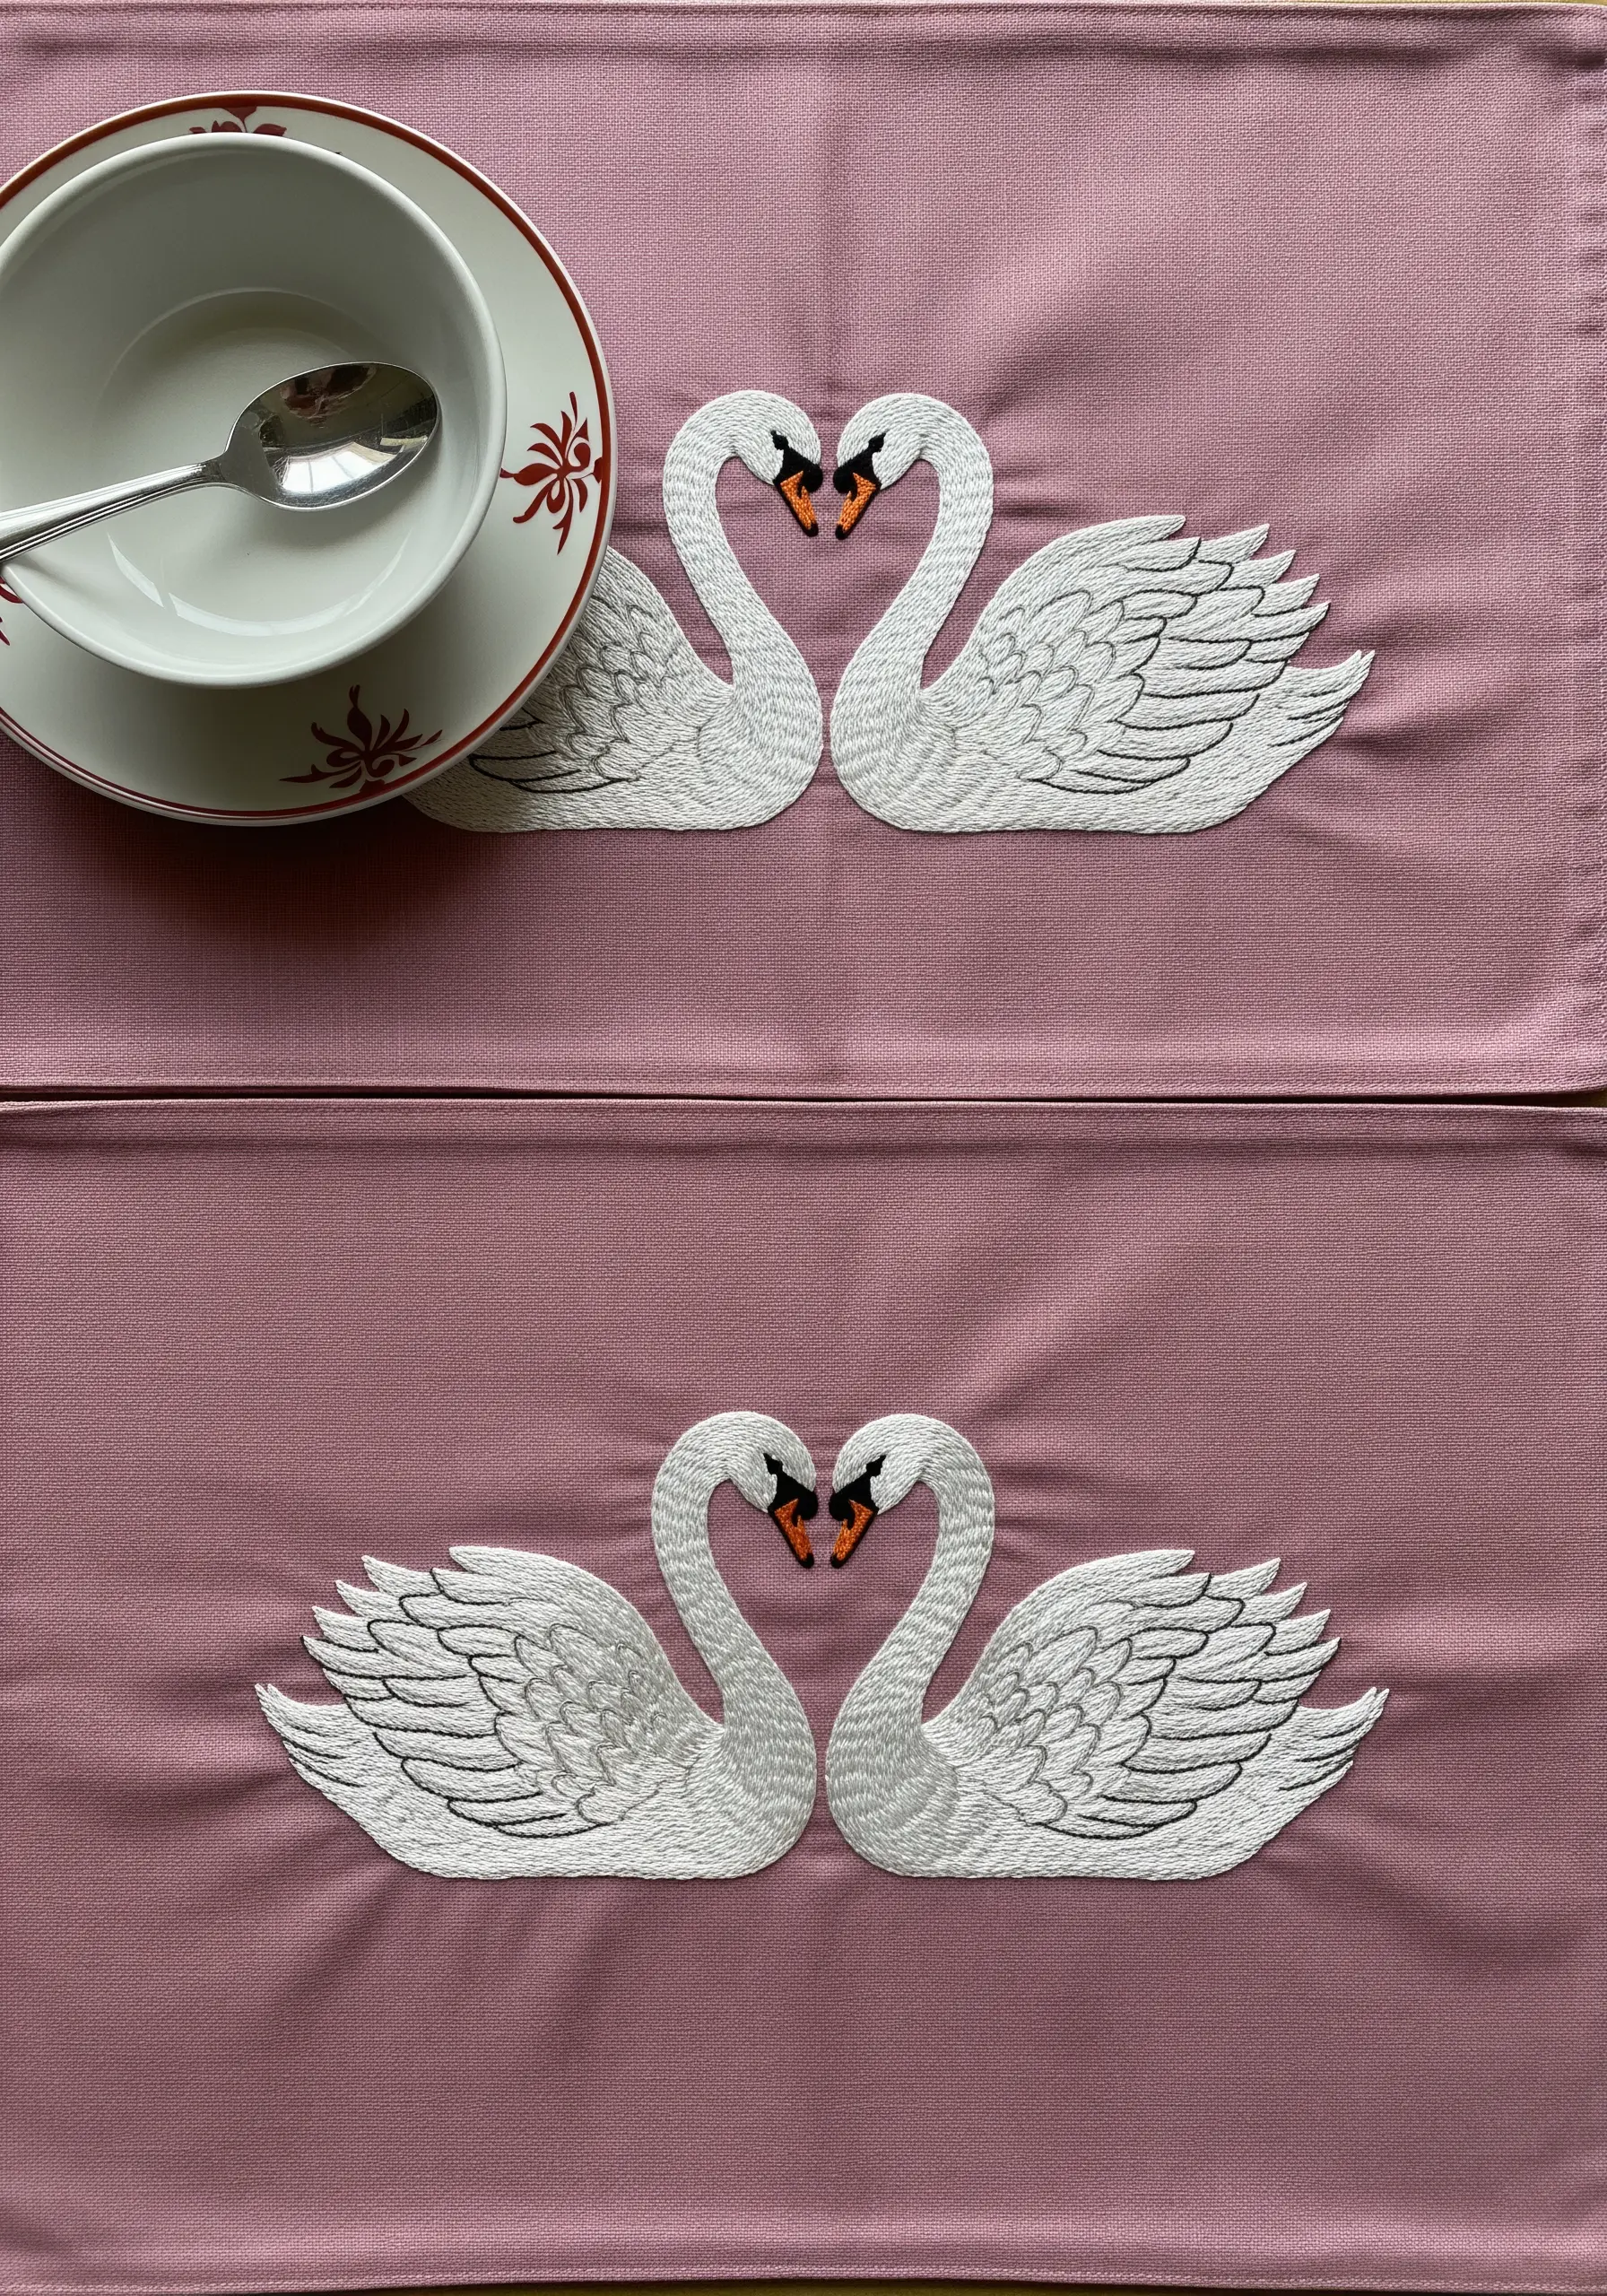
This design achieves its classic elegance through the smart use of contrast.
The swans’ bodies are filled with long, smooth satin stitches in pure white, creating a serene, uniform surface.
All the definition and detail—the feathers, the eyes, the beak—are added with a crisp black backstitch outline.
This technique is proof that you can create a detailed and impactful image with just two colors, making it a perfect motif for romantic decor.
23. Creating Delicate Texture on a Rustic Fabric Base
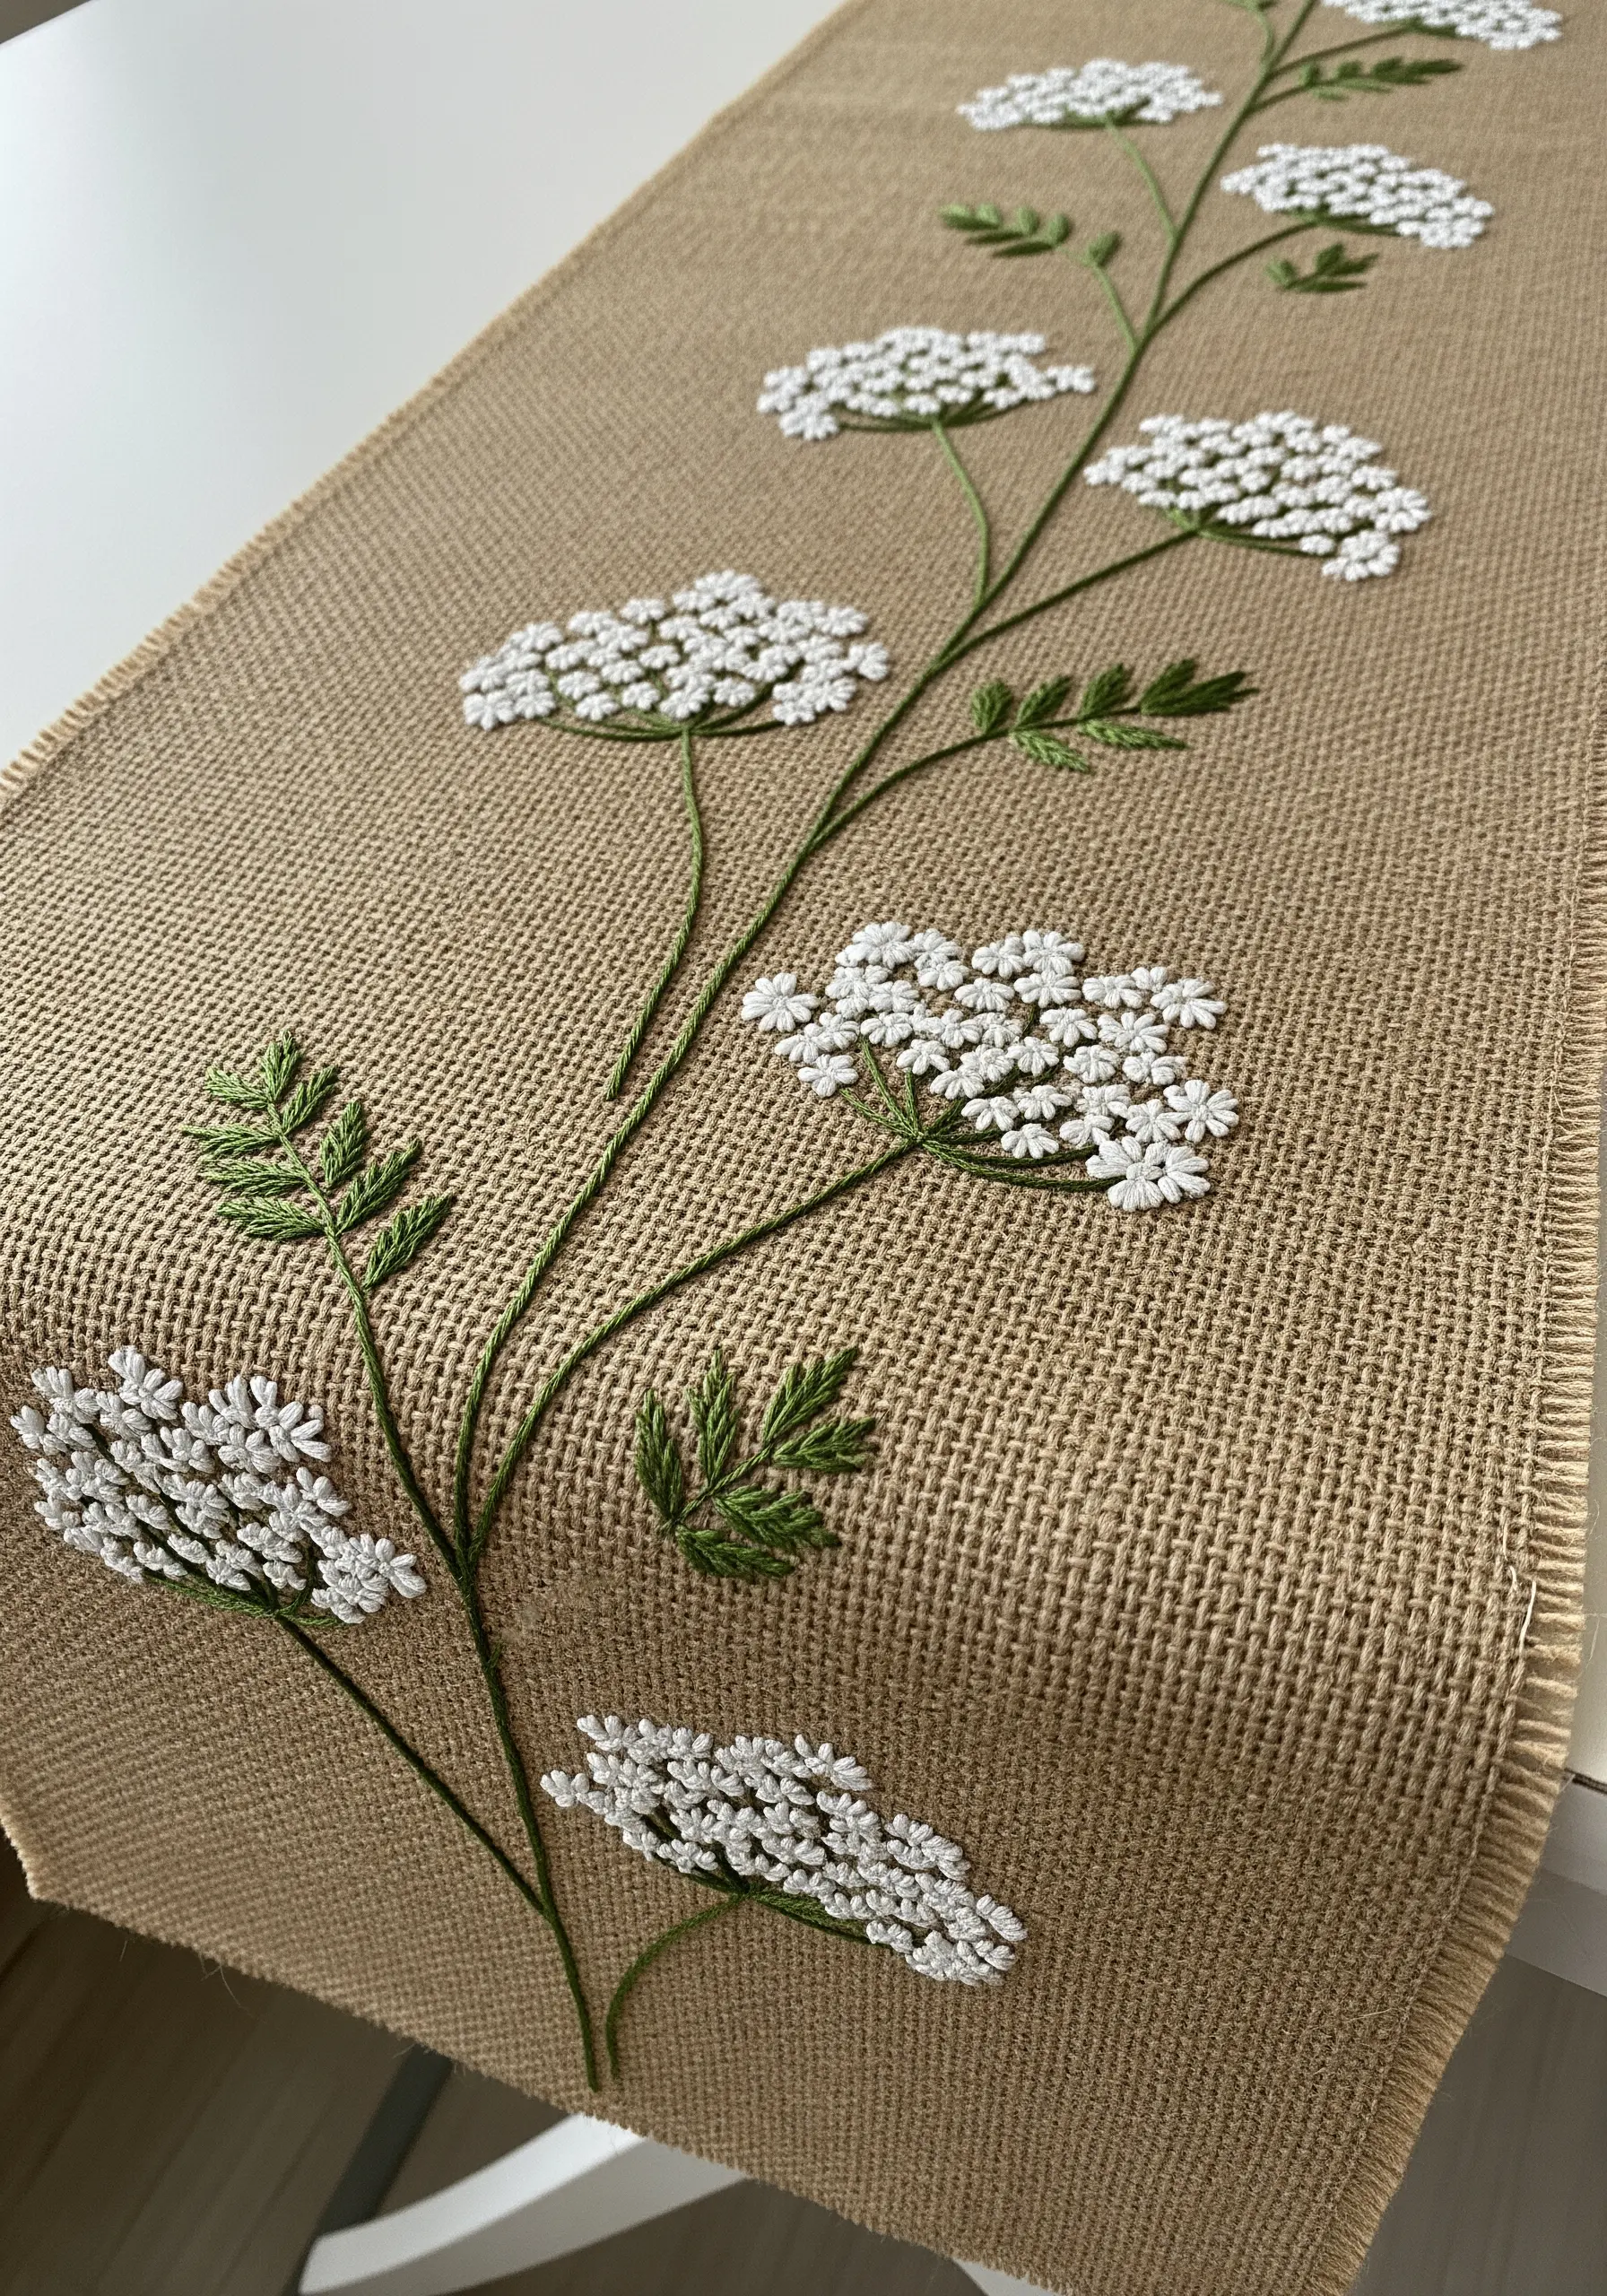
The magic of this piece comes from the contrast between the delicate subject and the rustic fabric.
To capture the airy, fluffy texture of Queen Anne’s Lace on a coarse material like burlap, use dense clusters of tiny white French knots for the flower heads.
This creates a cloud-like effect that feels light and ethereal.
A simple stem stitch in green for the stalks provides just enough structure without weighing down the design.
24. Achieving Crisp Symbols on High-Contrast Fabric

When stitching a light color on a dark background, every imperfection can show, so precision is key.
Use a tightly woven fabric to prevent your stitches from sinking in.
Opt for a fine, sharp needle and fewer strands of floss (one or two at most) to achieve sharp, delicate lines.
A simple backstitch works well for the staff lines, while a tiny, dense satin stitch will make the notes and lettering appear solid and clear.
25. Painterly Florals Through Long-and-Short Stitch
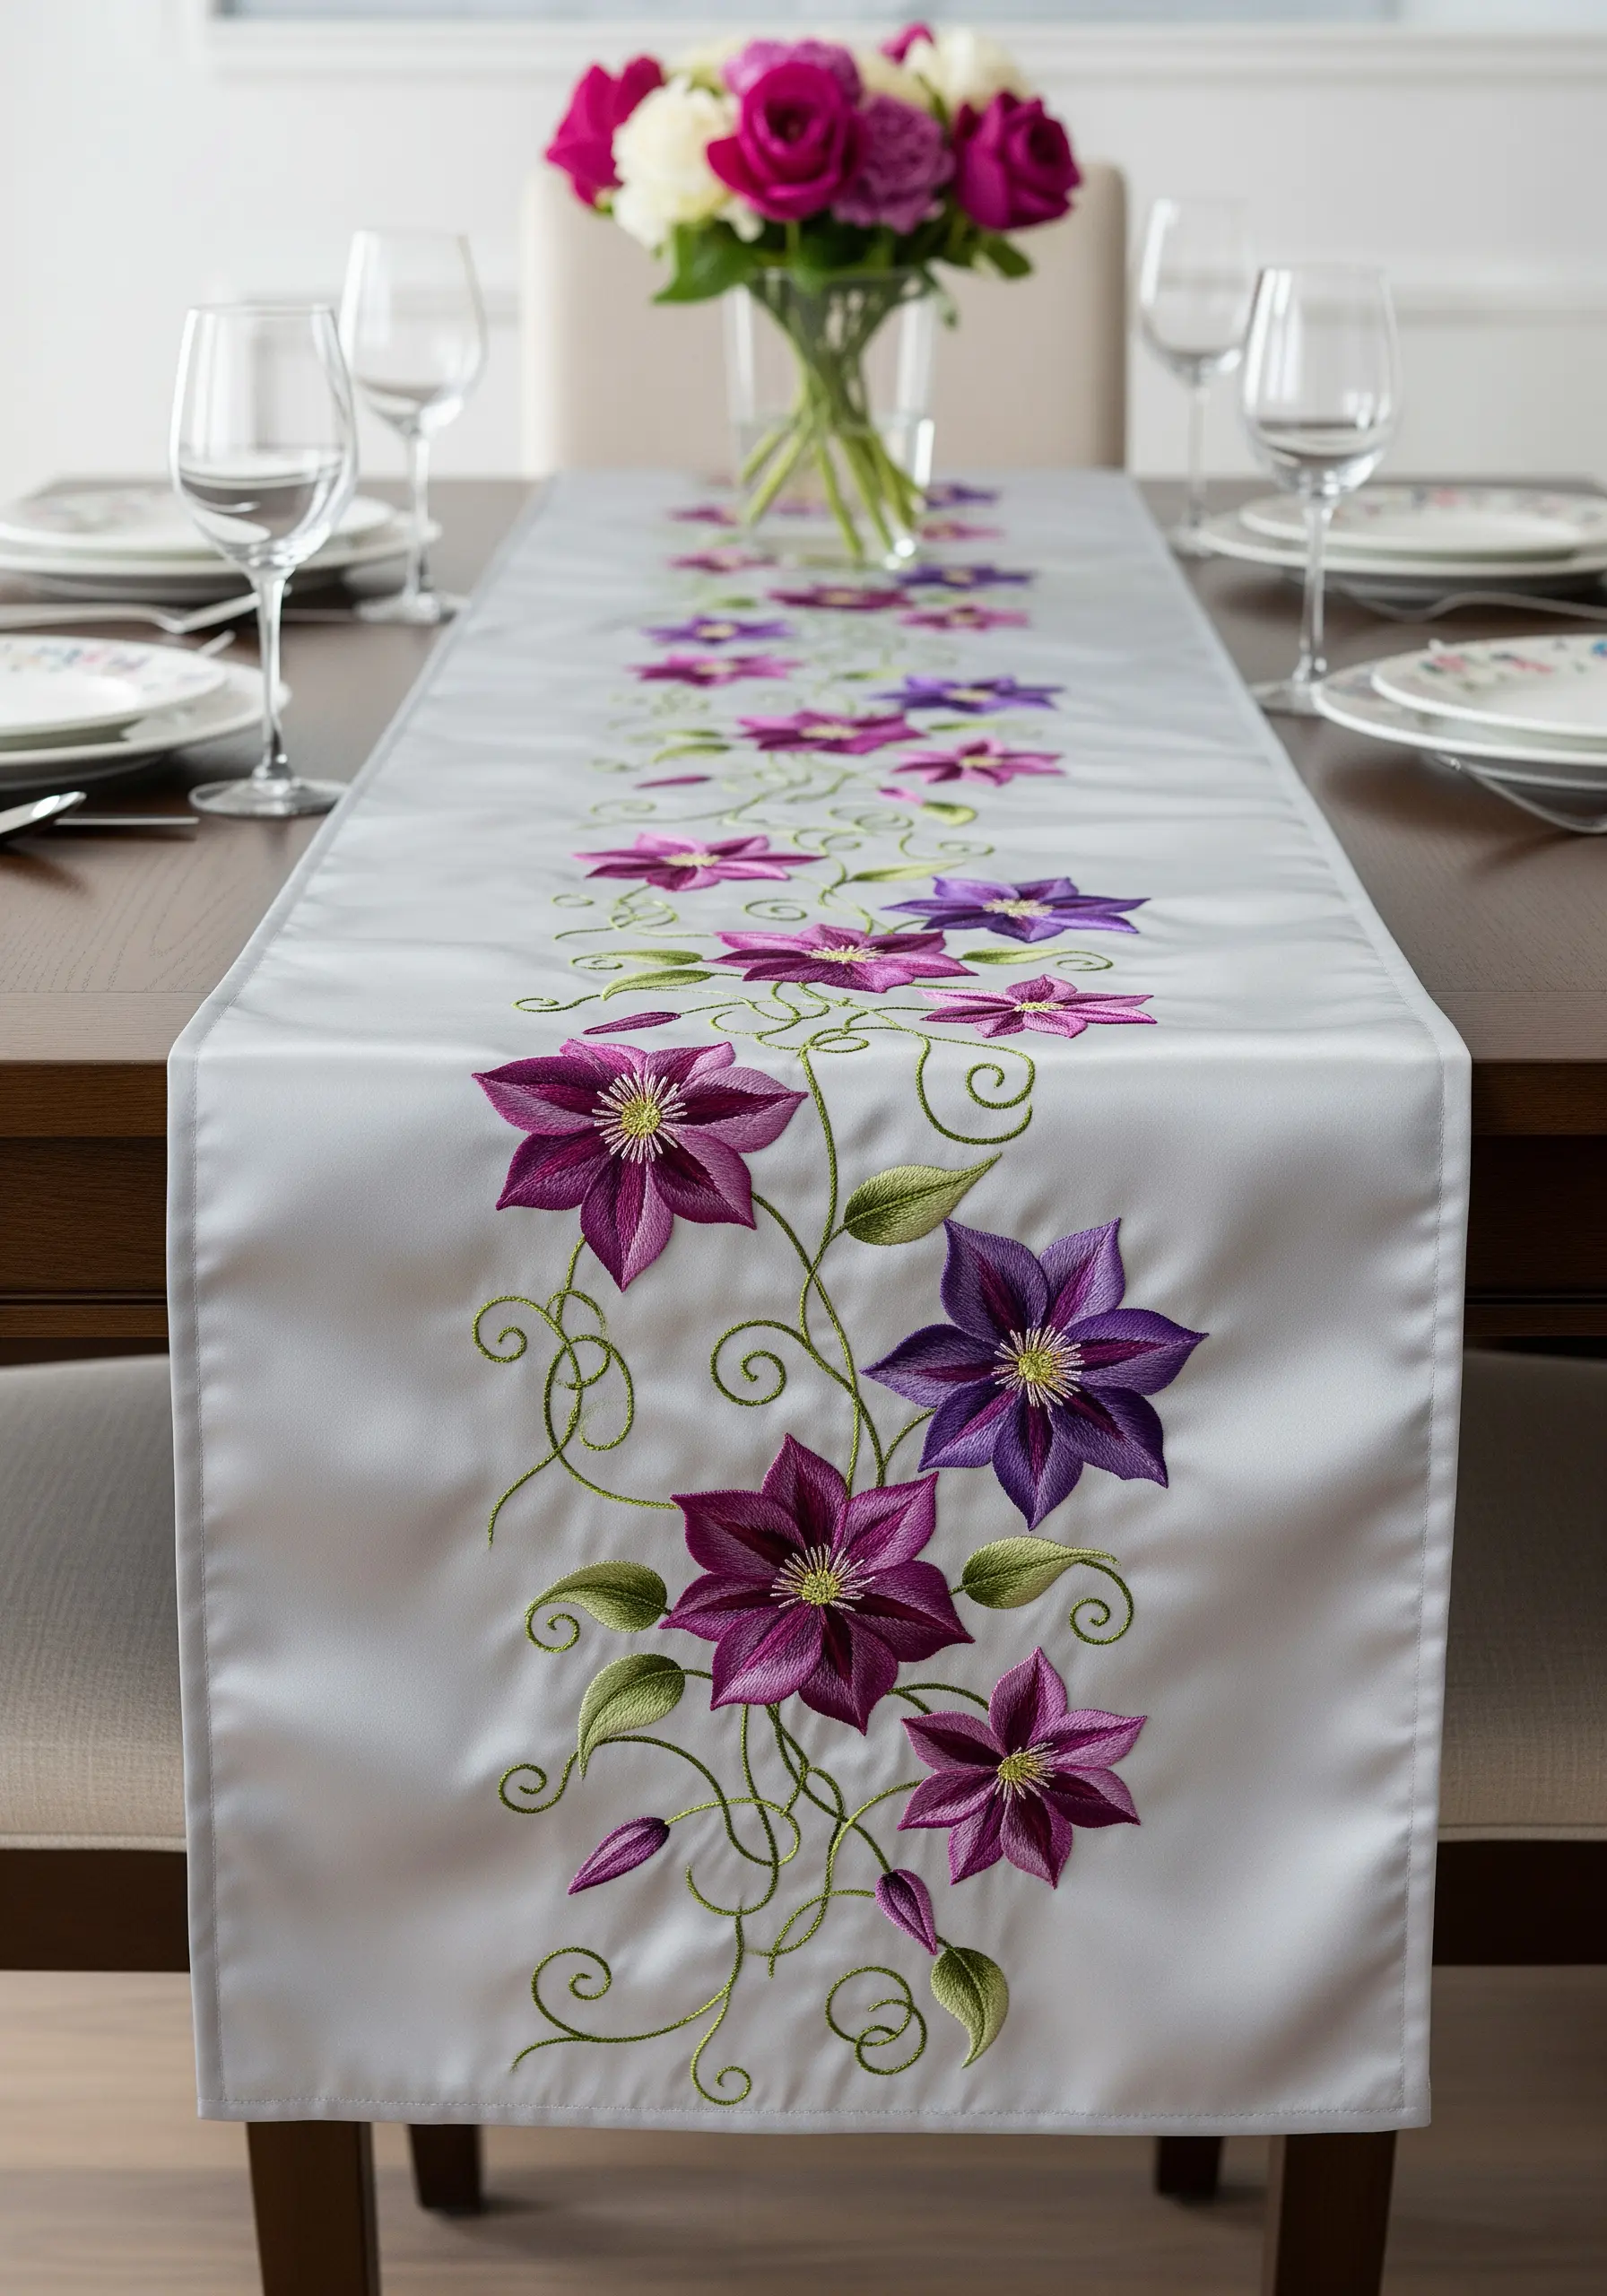
To give these clematis flowers their stunning, painterly appearance, the long-and-short stitch is your essential tool.
Seamlessly blend different shades of purple and magenta within a single petal to create realistic gradients and highlights.
Ensure your stitches radiate from the flower’s center to mimic its natural growth, which enhances the illusion of depth.
A cluster of bright yellow French knots provides the perfect textural counterpoint in the center.
26. Conveying Whimsical Movement with Scattered Stitches
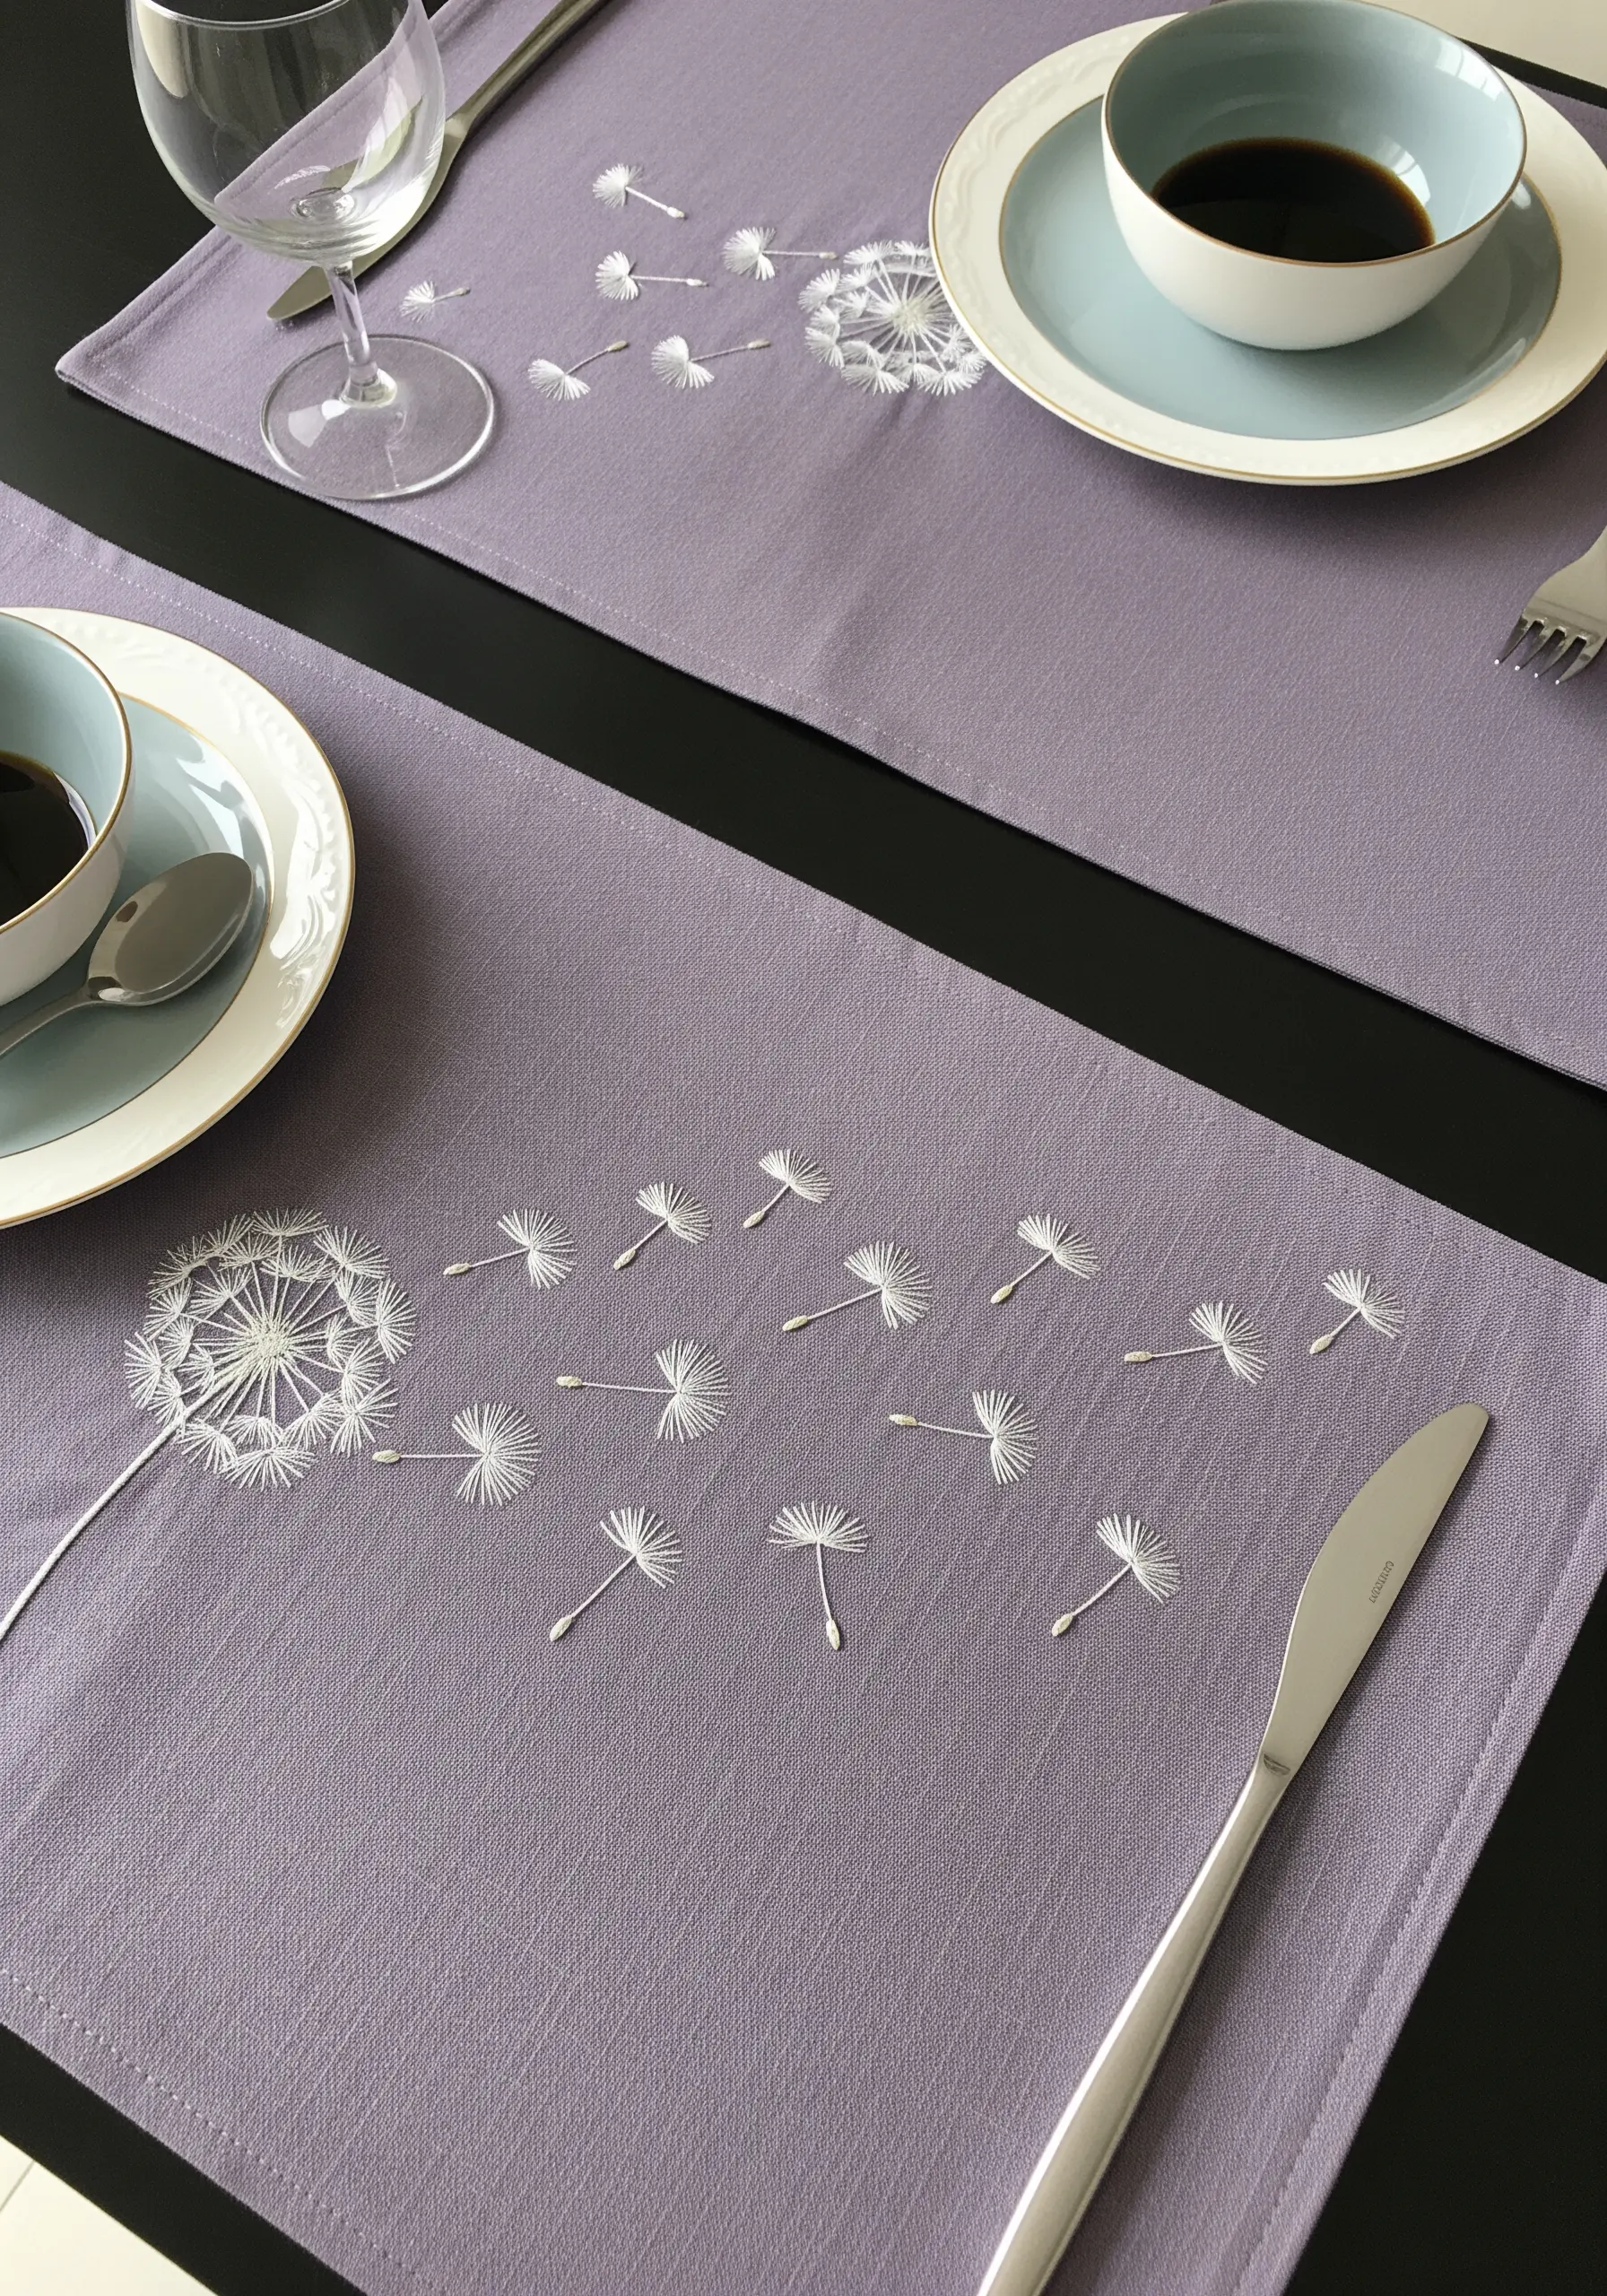
This design masterfully captures the feeling of a dandelion seed head being carried on the wind.
Create the main head with straight stitches radiating from a central point.
For the floating seeds, use detached stitches: a single straight stitch for the seed, capped with a small fly stitch or lazy daisy for the parachute.
Scatter these seeds in an organic, flowing pattern across the fabric to create a convincing illusion of movement.
27. Interwoven Celtic Knots with a Padded 3D Effect
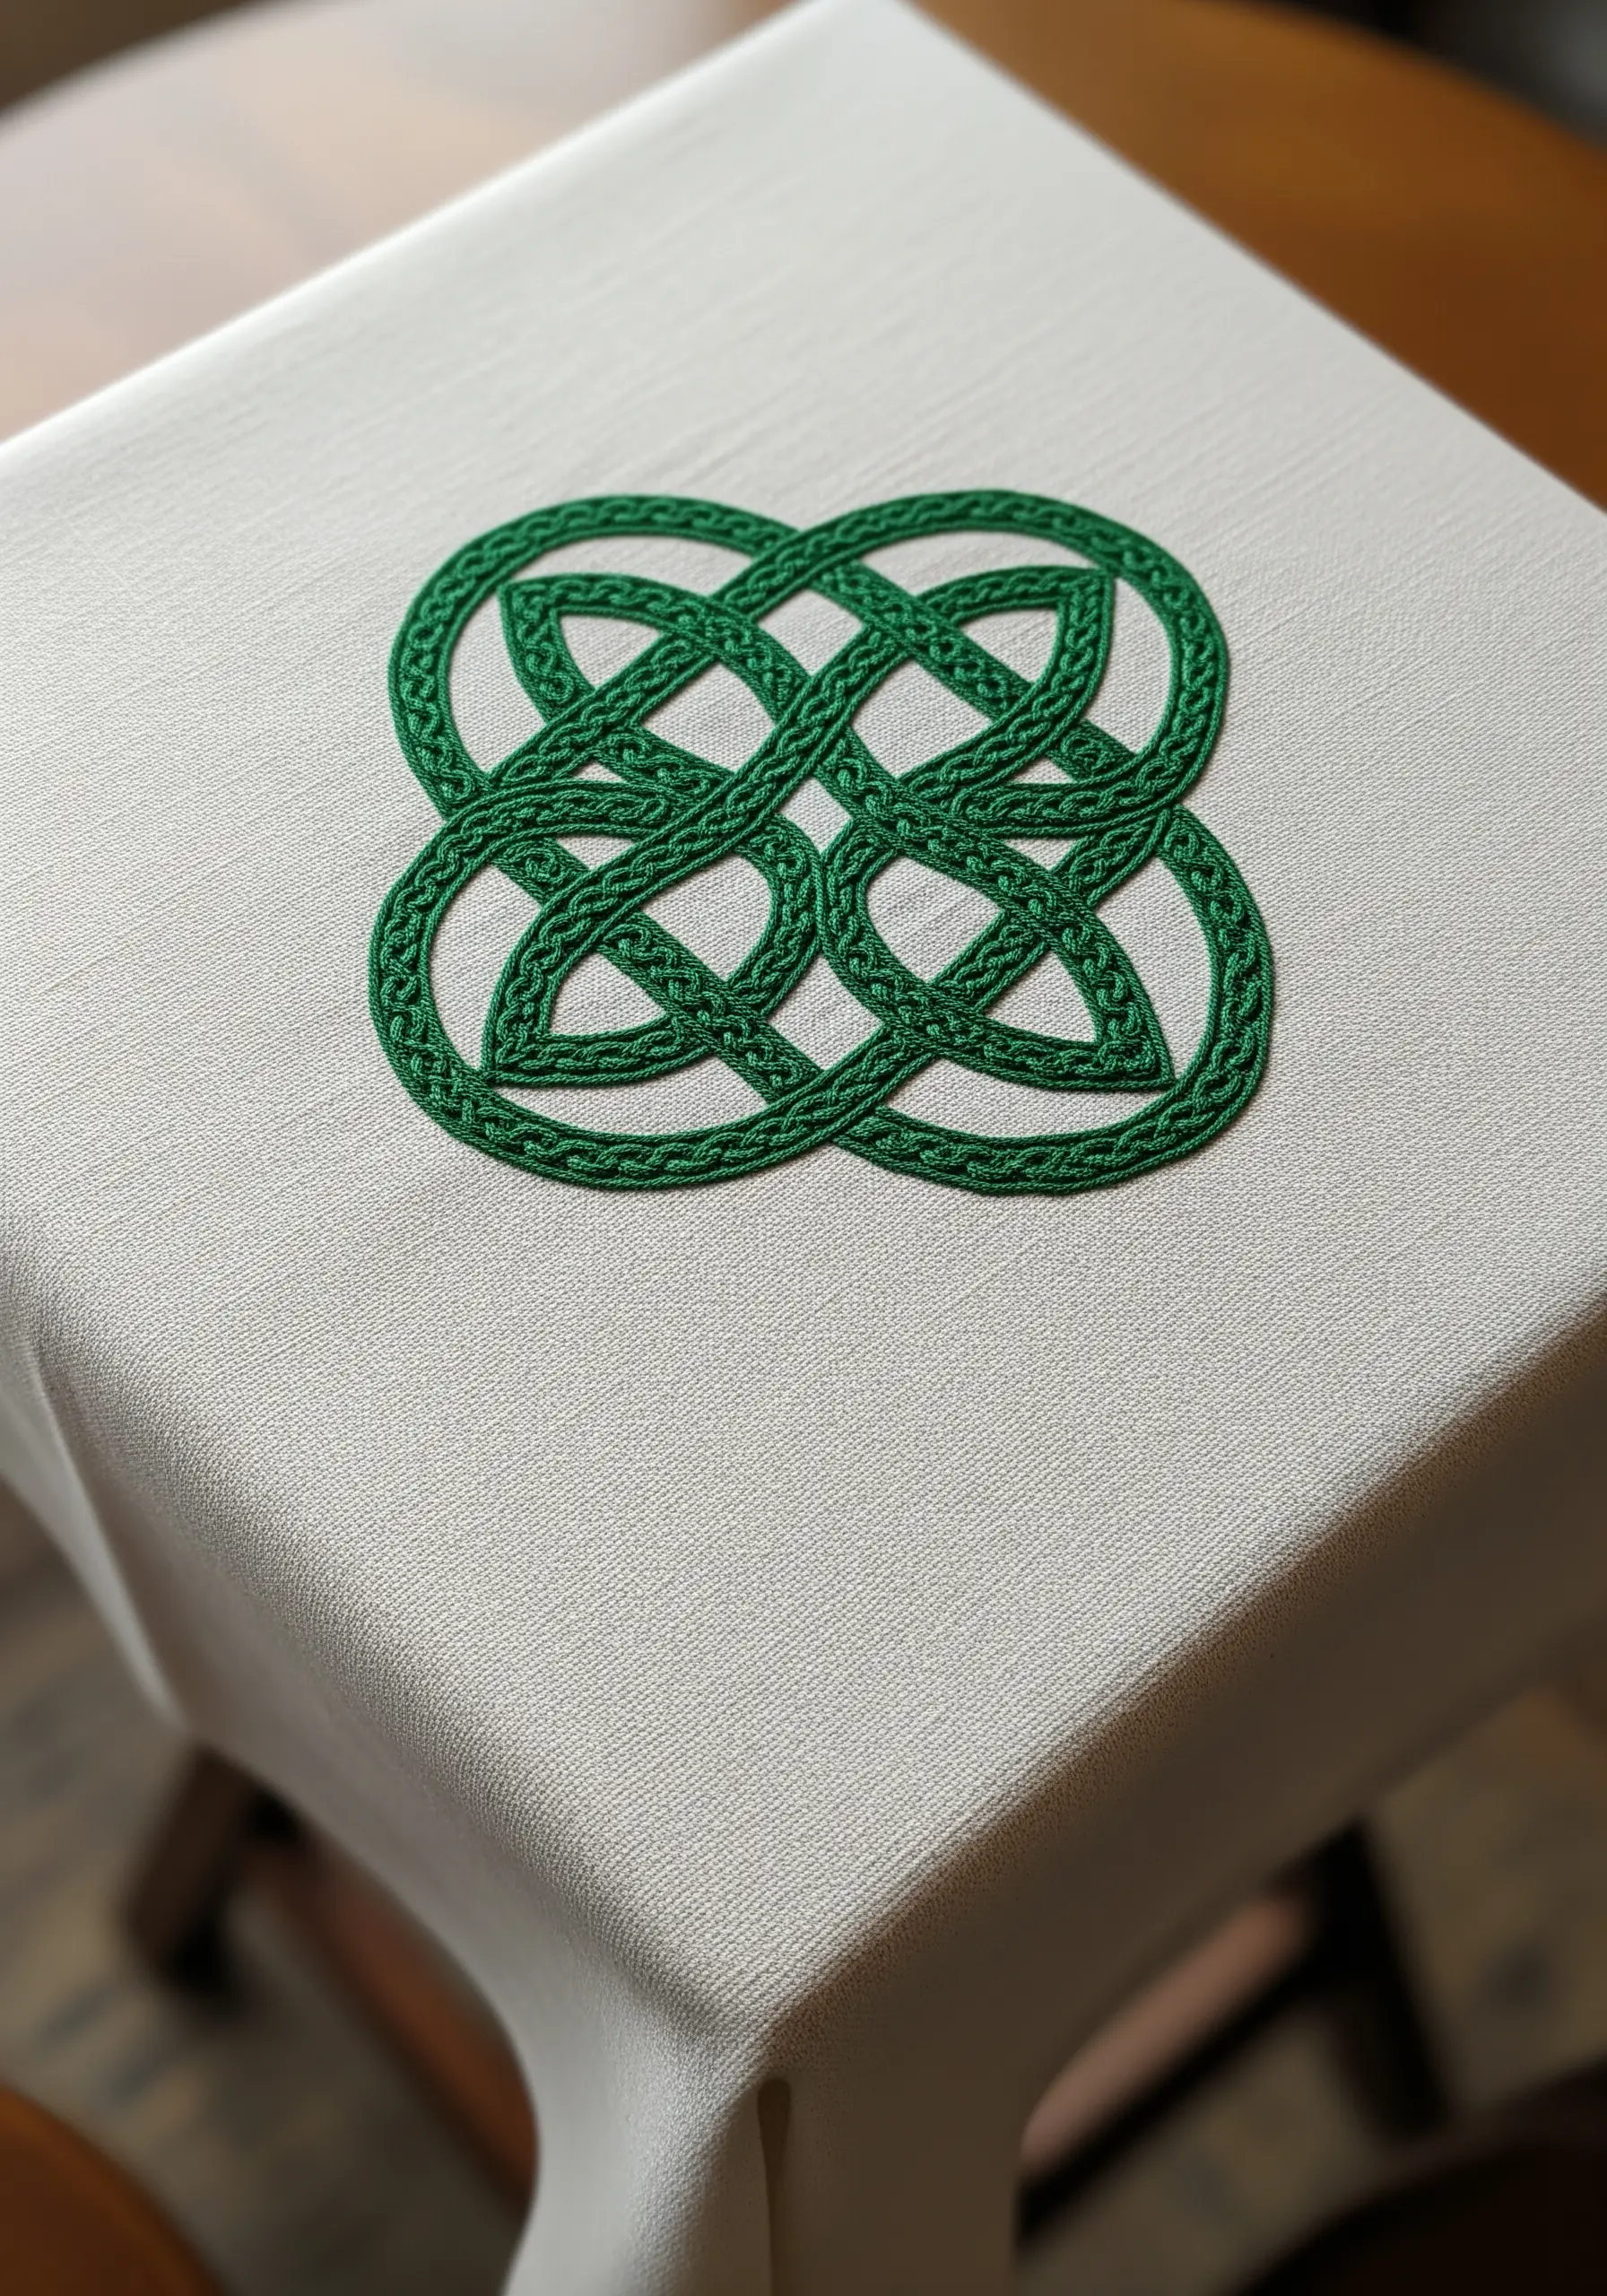
The key to a convincing Celtic knot is creating the illusion that the strands are genuinely weaving over and under each other.
Achieve this three-dimensional effect by padding the sections that are meant to be on top.
Before you begin your final layer, stitch a small satin stitch base on all the “over” sections of the pattern.
Then, when you cover the entire design in a smooth, final satin stitch, these padded areas will be subtly raised, creating a perfect interwoven look.
28. Capturing Vibrancy with Fearless Color Blending
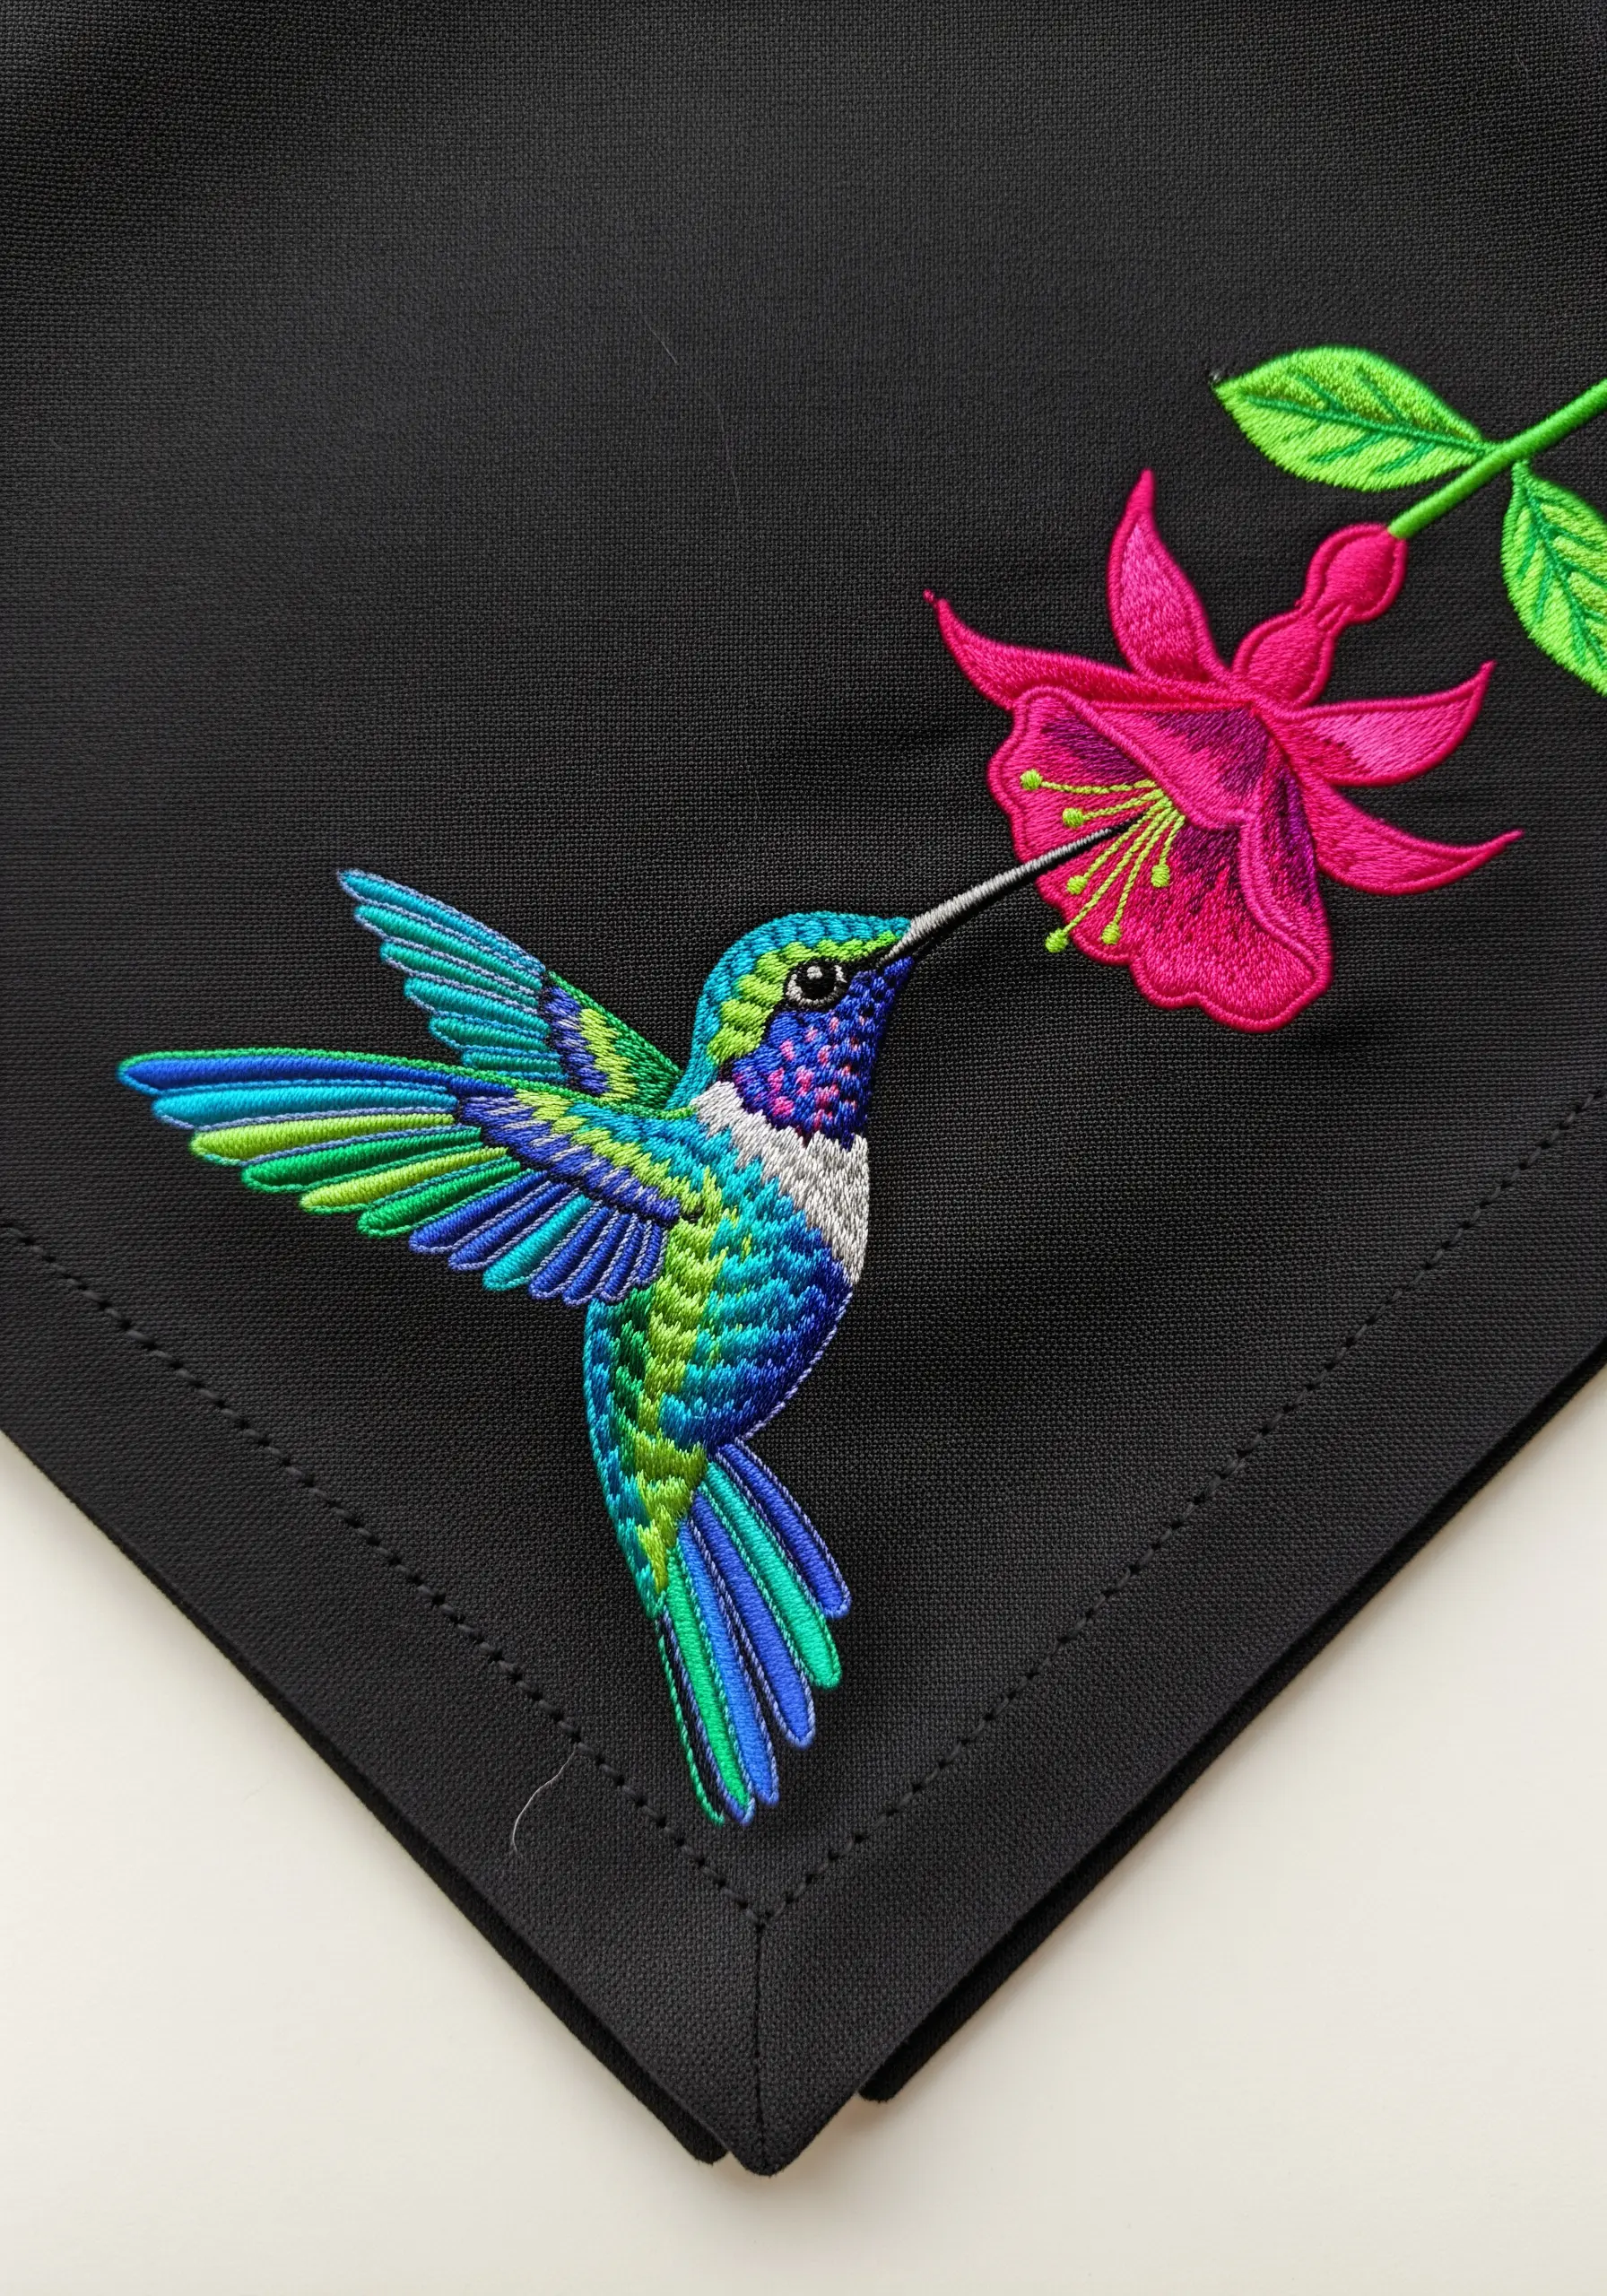
This design celebrates the power of bold color against a dark canvas.
To capture the hummingbird’s energetic beauty, use the long-and-short stitch technique to blend bright, saturated shades of blue, green, and turquoise side-by-side.
Don’t over-blend; let the distinct colors create a shimmering, jewel-toned effect.
The vibrant magenta of the fuchsia makes the entire composition electric, proving how bird and butterfly embroidery patterns make fabric come alive.
29. Building Rich Texture with Foundational Stitches

You can create the satisfyingly rich texture of a wheat sheaf using the simplest of stitches.
Use a slightly angled satin stitch for each grain of wheat, which gives them shape and dimension.
Simple stem stitches are perfect for the long, bundled stalks.
To make the ribbon look authentic, use a wider, flatter satin stitch—this will give it the smooth, slightly shiny appearance of a real ribbon, providing a lovely textural contrast to the wheat.
30. Playful Dimension with 3D Stumpwork Elements

Surprise and delight your dinner guests with a touch of stumpwork, or raised embroidery.
While the bees’ bodies and the lavender are stitched directly onto the tablecloth, the wings are created separately.
Stitch them onto a piece of sheer organza with a thin wire outline, then carefully cut them out and attach them just at the base.
This allows the wings to stand free from the fabric, creating a whimsical and unexpected 3D effect.
31. Winter Glamour with Elegant Bead Embroidery
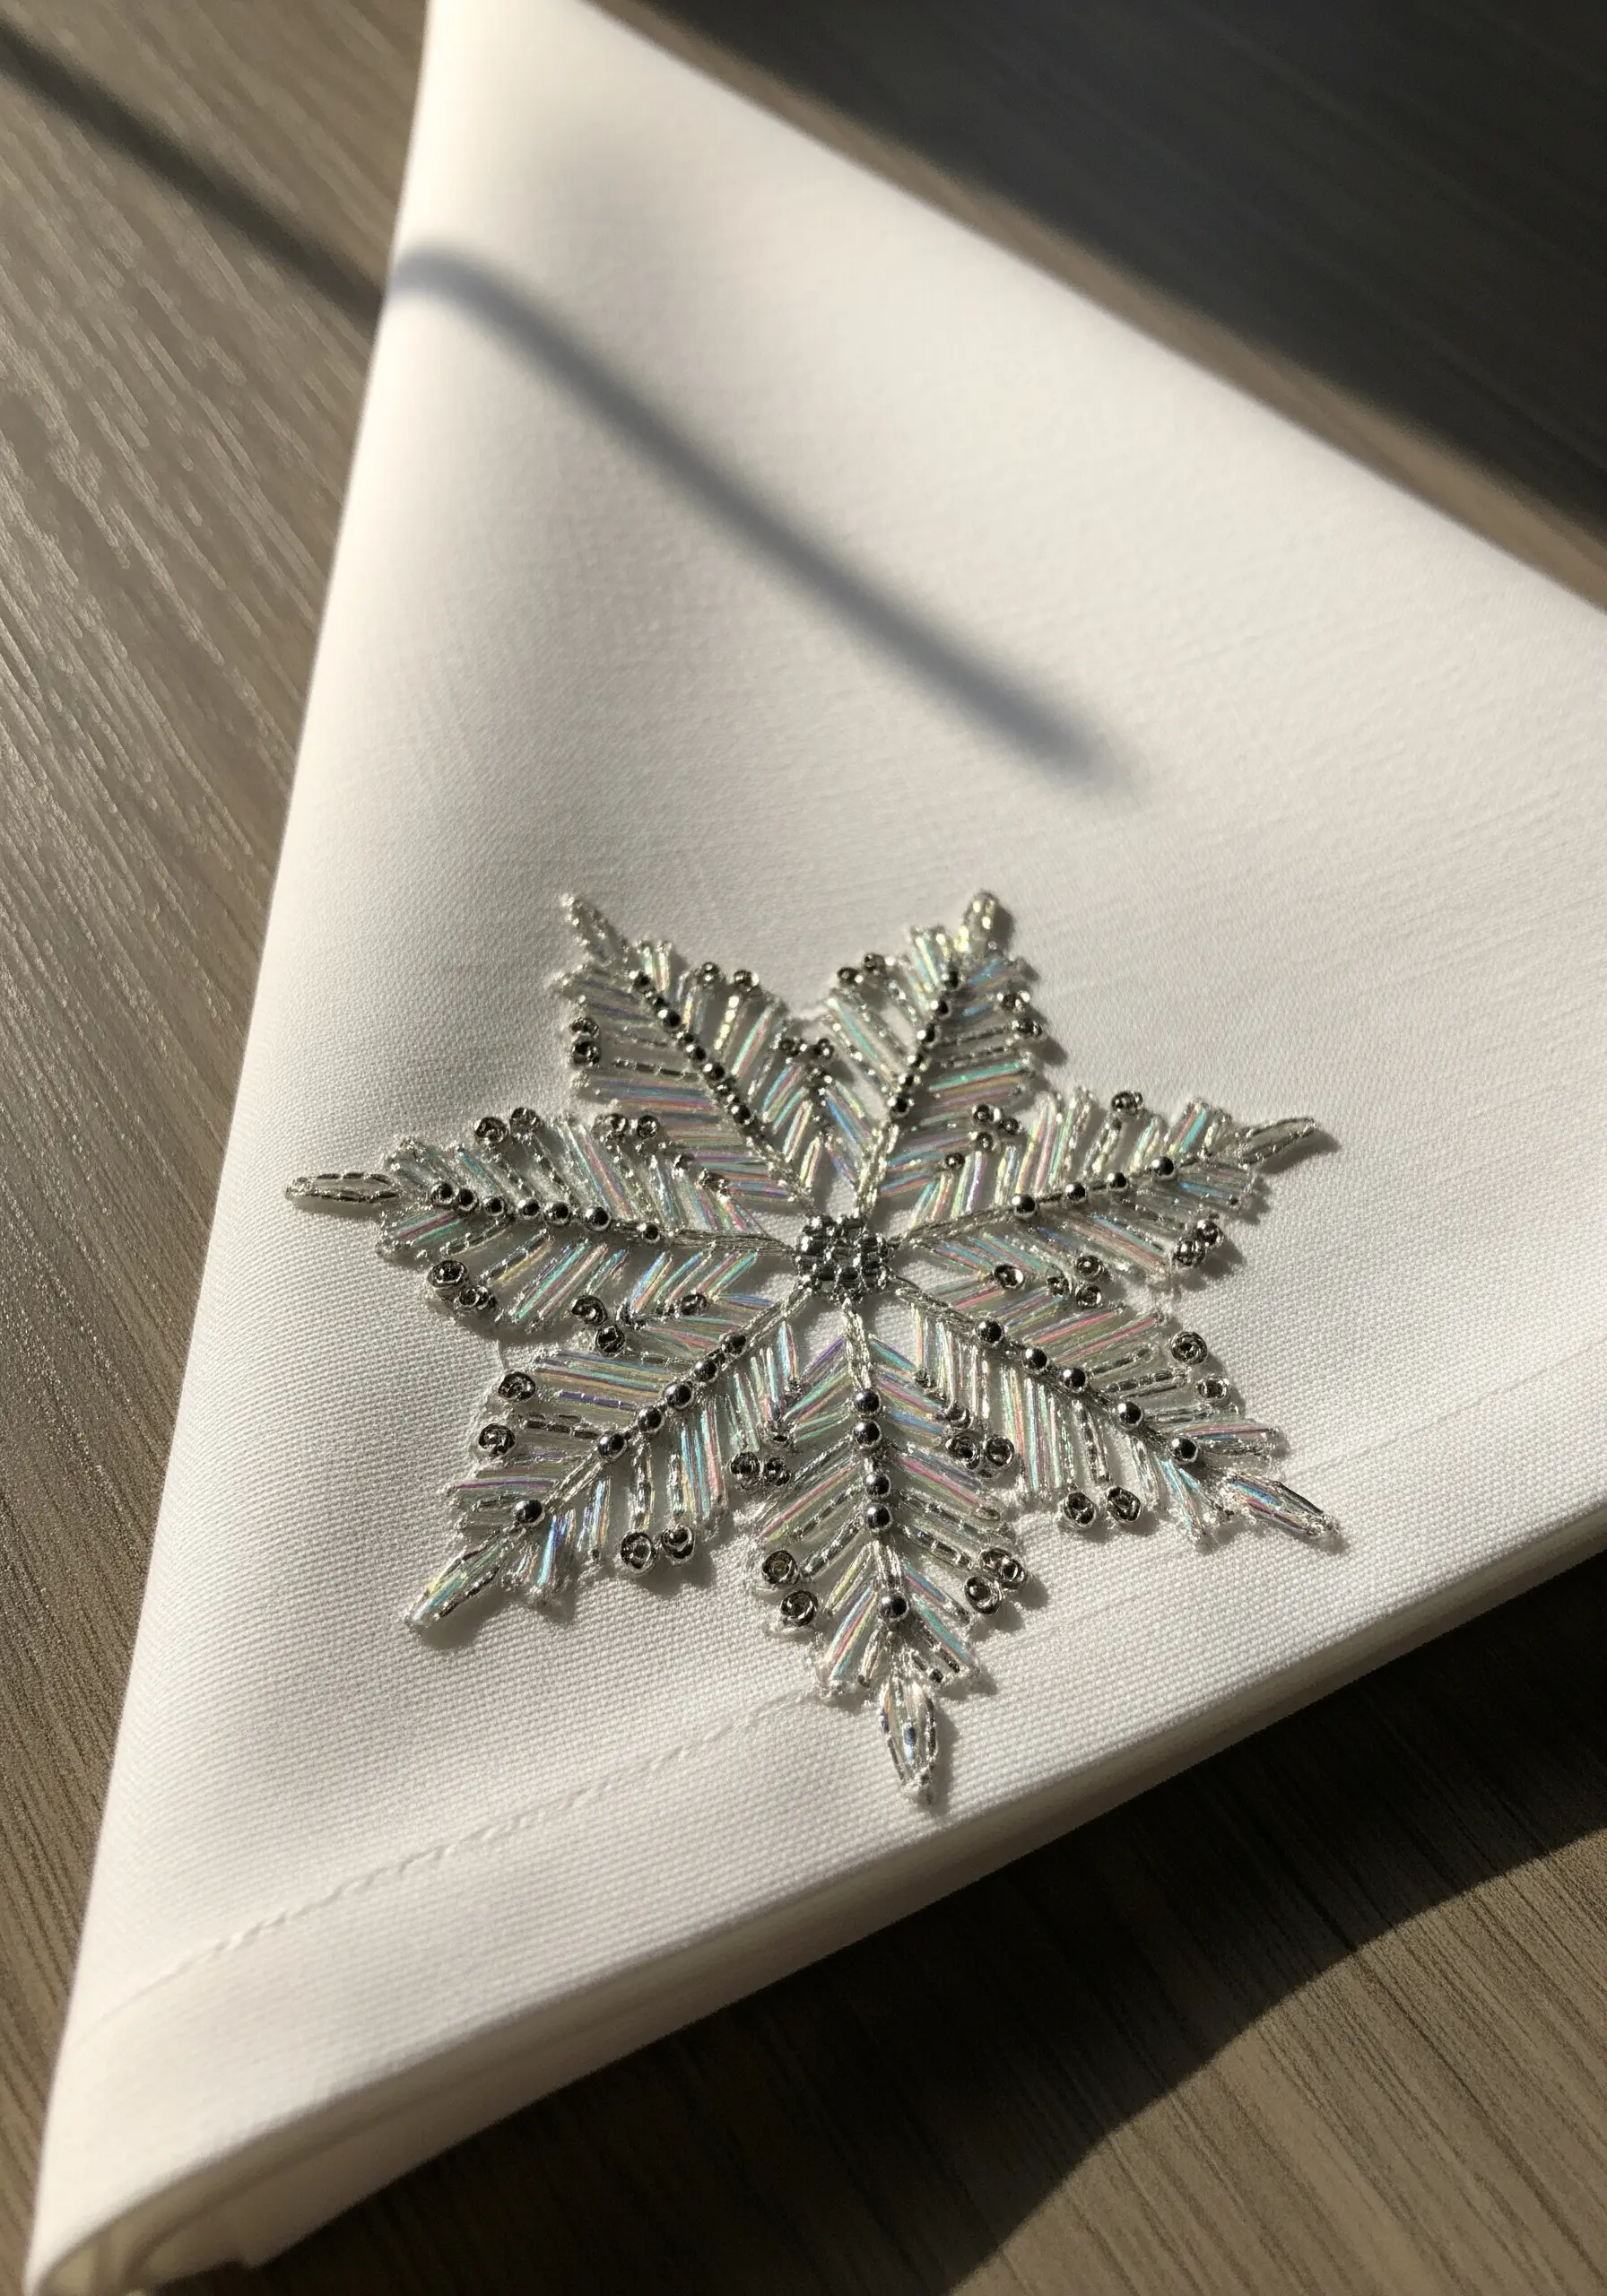
Create a sophisticated, light-catching snowflake without a single stitch of thread.
After transferring your snowflake pattern, use a fine beading needle and a strong, translucent thread.
Stitch lines of long bugle beads for the main arms of the snowflake and use tiny seed beads for the delicate, frosty details.
The combination of iridescent and metallic beads creates a complex sparkle that will elevate any winter table setting and transform a plain dining table.
32. Capturing Graceful Movement in a Continuous Line

This design evokes the elegance of dance through the use of a single, unbroken line.
A whipped backstitch or a careful stem stitch is the ideal choice for creating this smooth, fluid effect.
The technical challenge is to maintain perfectly consistent stitch length and tension, especially around the sharp curves of the figures.
Focus on the overall flow of the design to beautifully capture the couple’s graceful movement.
33. Building Cosmic Texture with Sequins and Knots
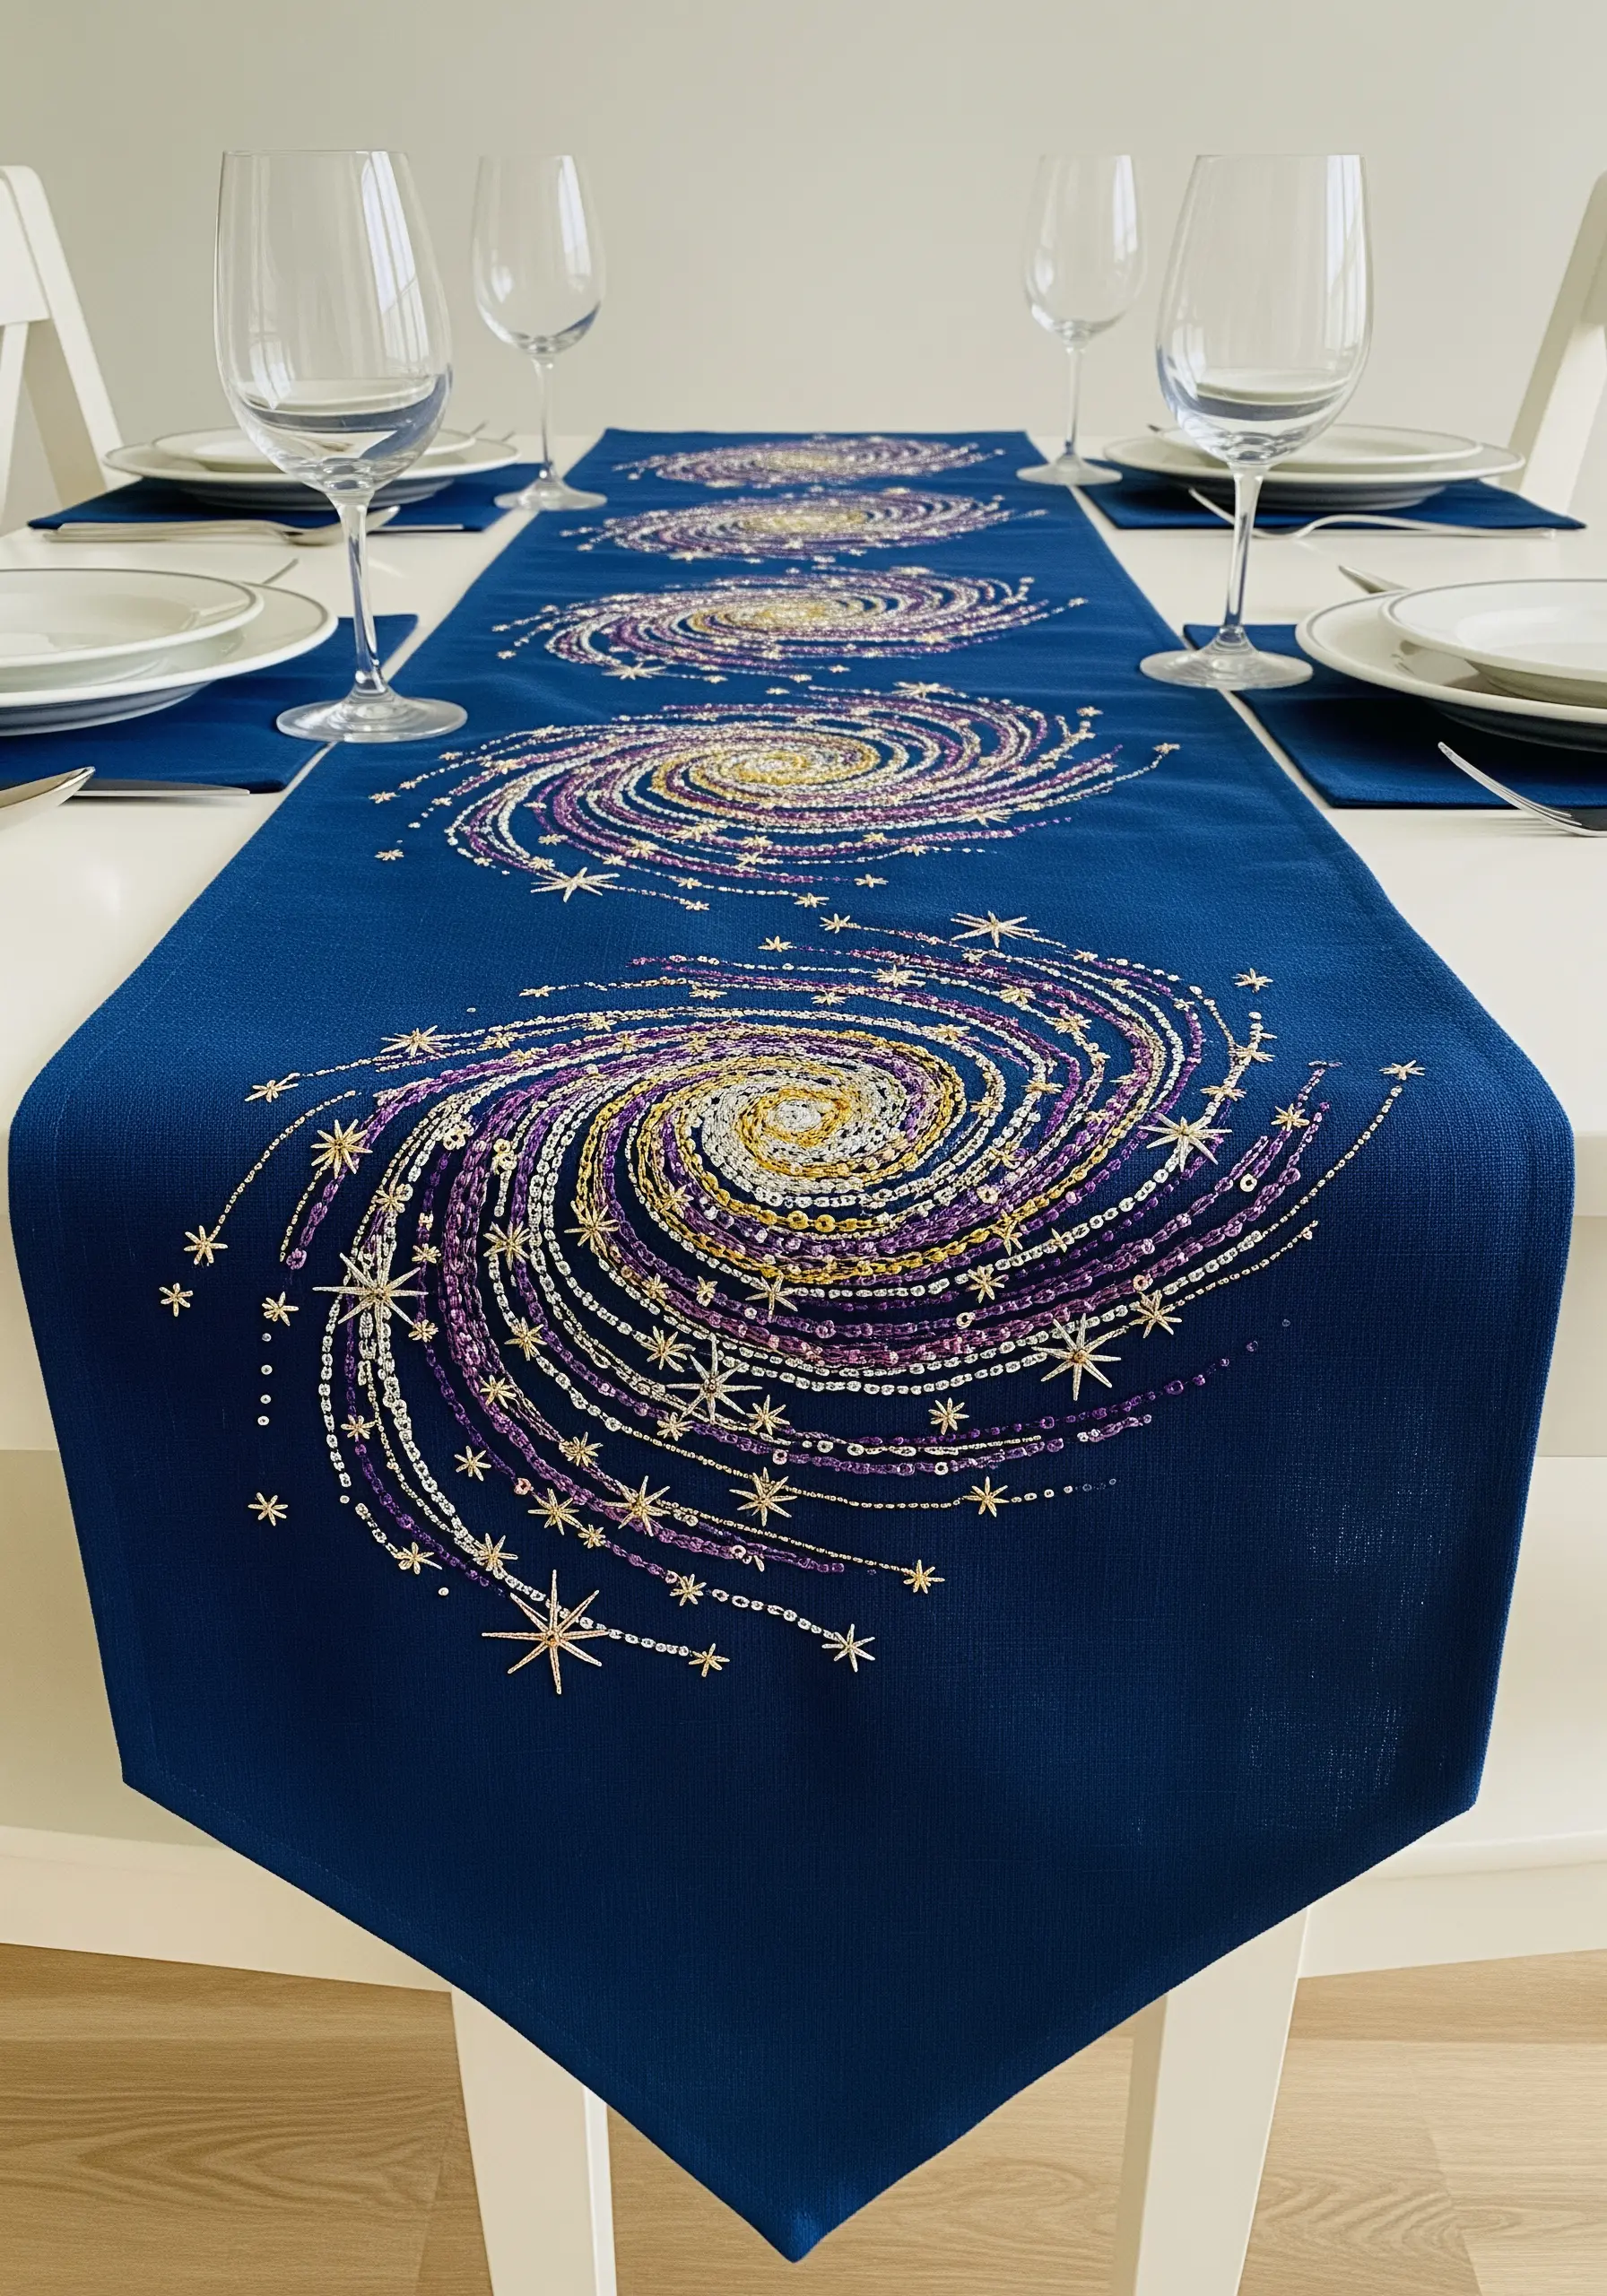
Recreate the dazzling depth of a galaxy by layering different textures and reflective materials.
Use swirling satin stitches with metallic threads to form the base of the spiral.
Then, build upon it by sewing on individual sequins to represent bright, distant stars and adding dense clusters of French knots for soft, cloudy nebulae.
This is a stunning example of abstract thread layering that feels both chaotic and harmonious.
34. Effortless Shading with Variegated Thread
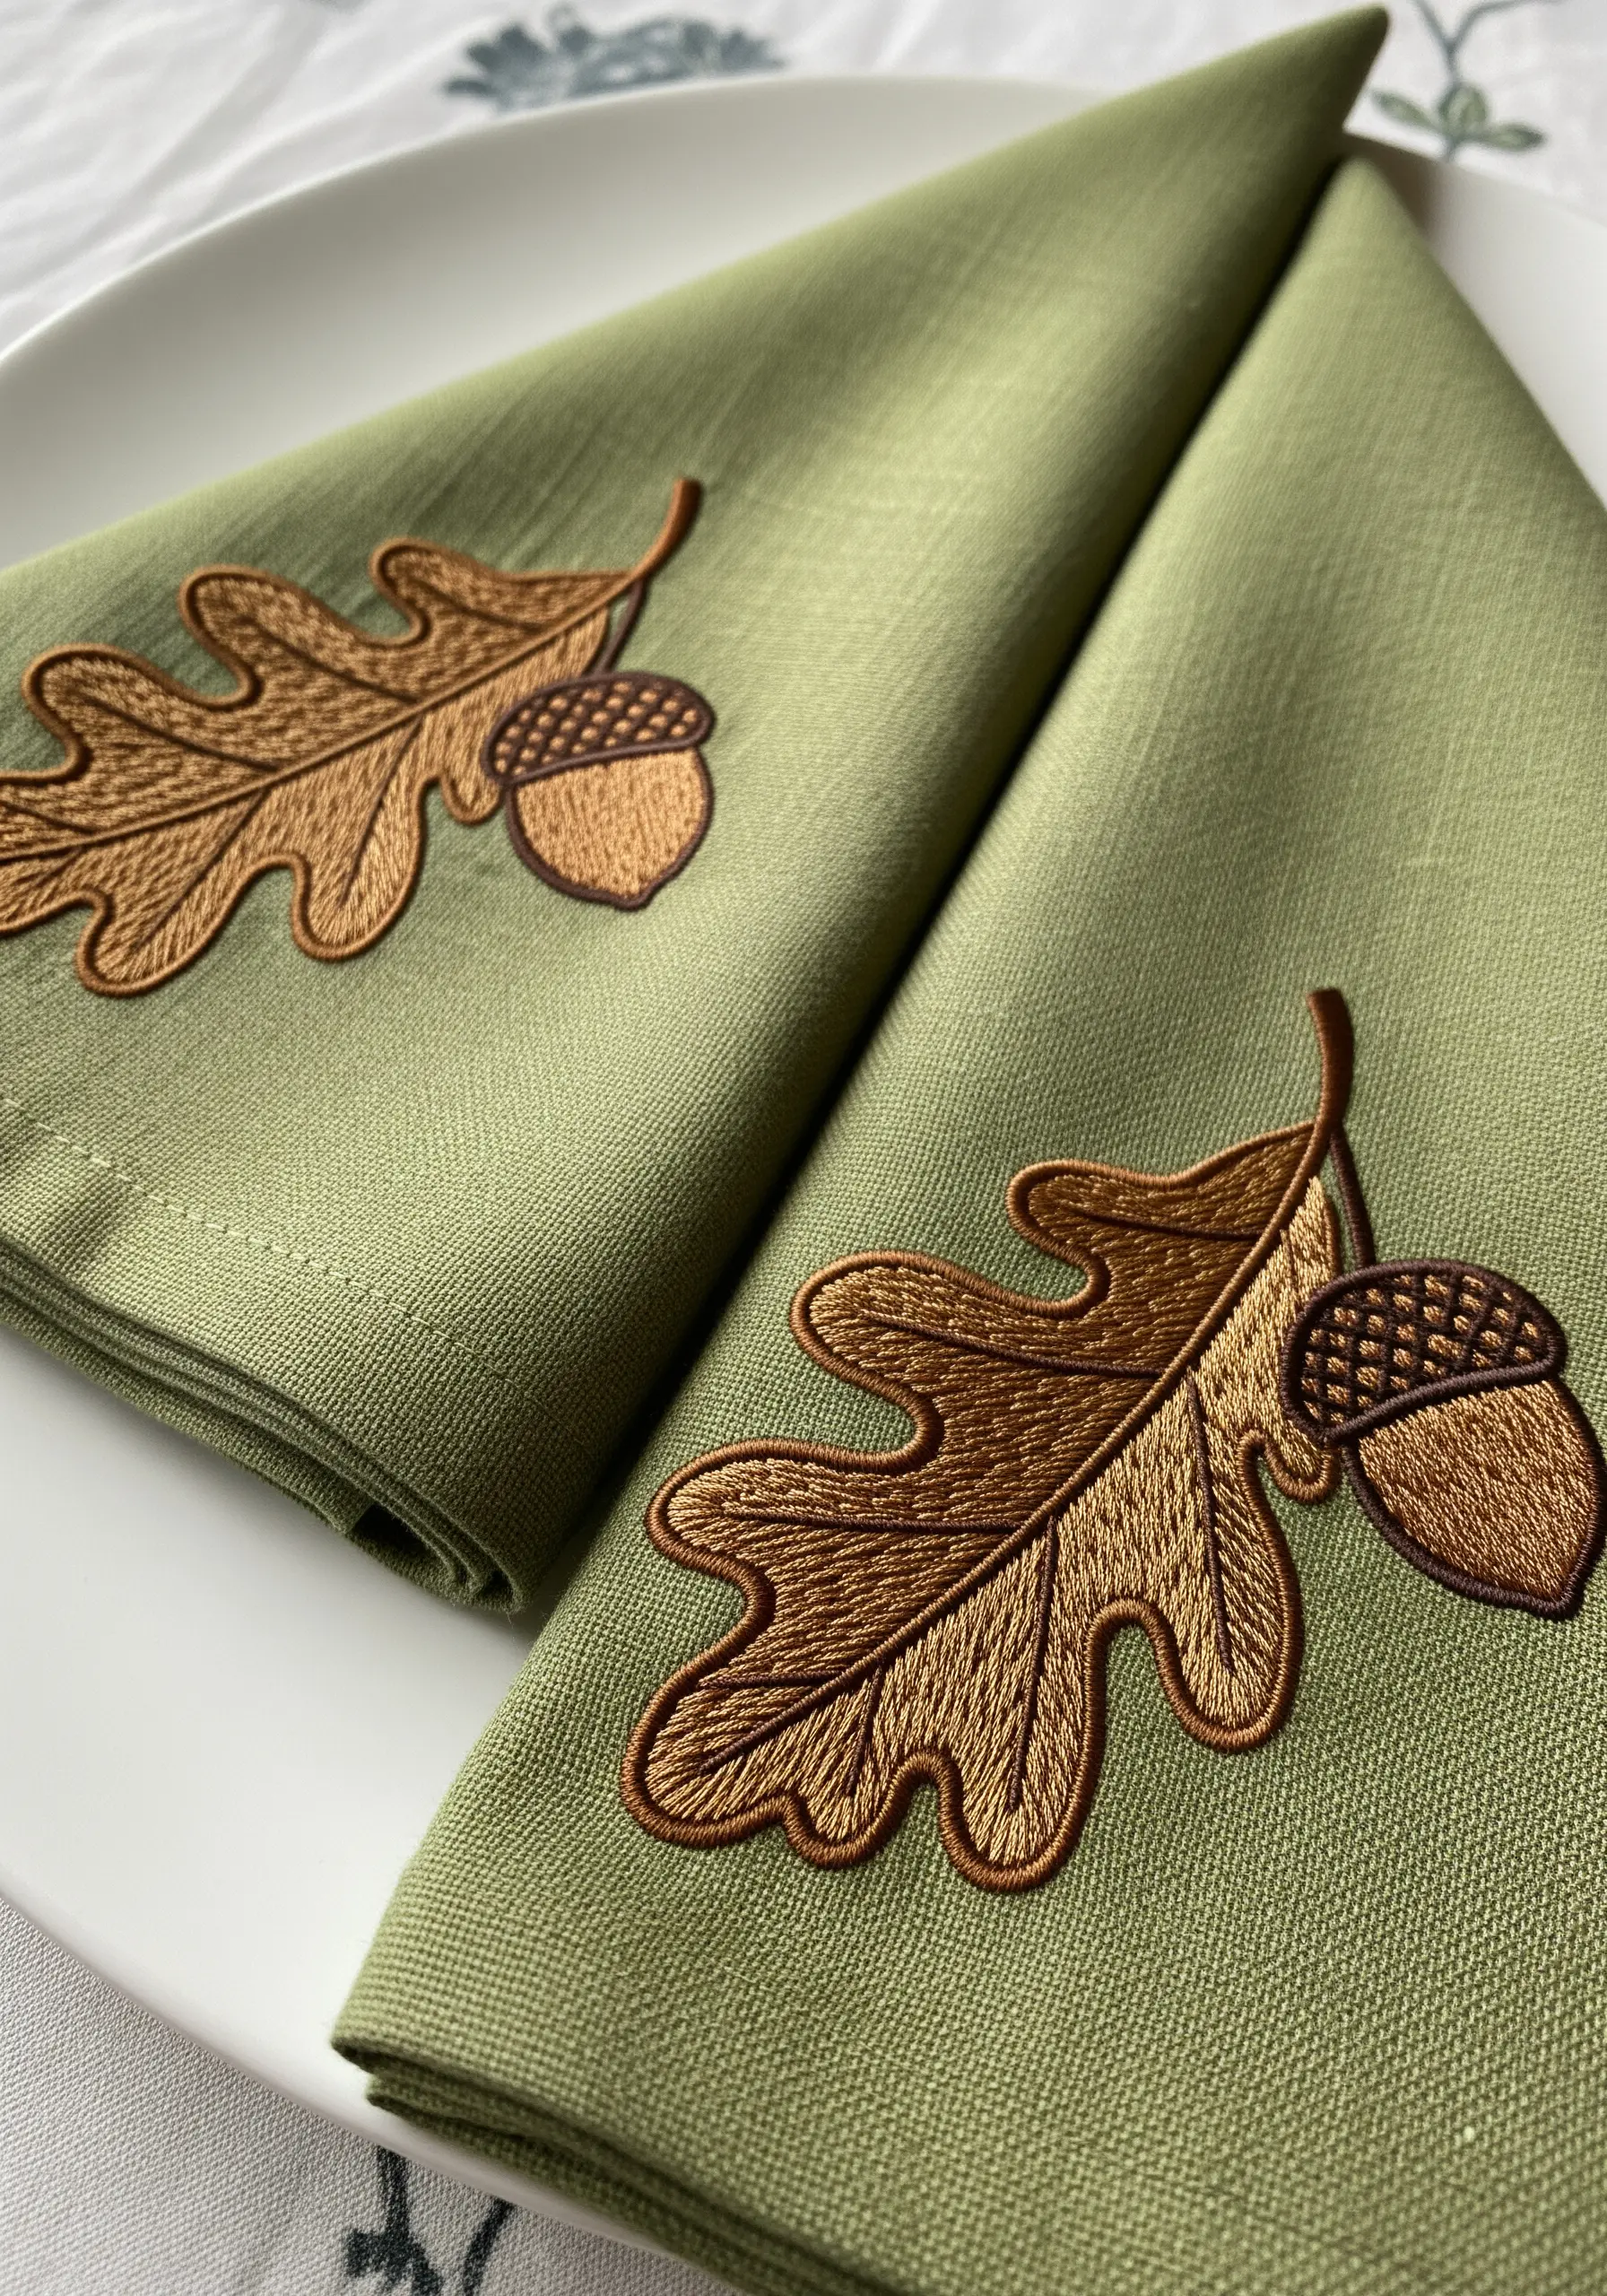
For a beautifully shaded effect without the complexity of thread painting, let variegated thread do the work for you.
This type of thread has multiple tones of a single color dyed along its length.
As you fill the oak leaf with a simple satin stitch, the color will shift naturally, creating subtle highlights and shadows.
Stitching the acorn cap in a solid brown provides a grounding contrast to the dynamic color of the leaf.
35. Personal Storytelling with Meandering Script

Transform your tablecloth into a deeply personal heirloom by stitching a favorite love poem, quote, or personal message directly onto it.
Use a simple backstitch or stem stitch to trace the words.
For the ultimate personal touch, transfer your own handwriting onto the fabric before you begin.
The wandering path of the text becomes a unique design element, creating an intimate and engaging tablescape for you and your partner.
36. Building Intricate Coral Texture with French Knots

Mimic the complex, organic structure of sea coral by dedicating yourself to the French knot.
First, outline the branching shape of your design.
Then, methodically fill the entire shape with hundreds of tightly packed knots, leaving no gaps.
Using a thread with a slight variegation or two very similar shades will add subtle depth and dimension, resulting in a wonderfully tactile and visually stunning piece of organic texture.