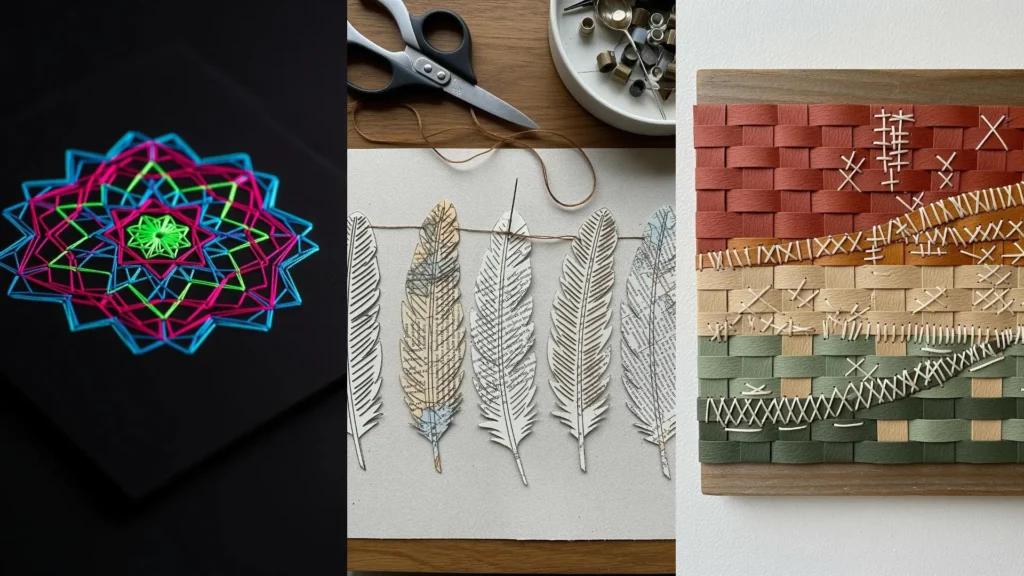
Before you pick up a needle, look at a piece of paper. See how it can be cut, layered, and folded to create texture and form? That same tactile logic is the secret to elevating your embroidery from simple stitches to expressive art.
Think of paper collage not as a different craft, but as a blueprint for your thread work. A torn edge can inspire a frayed stitch, a sharp cut can guide a perfect satin stitch outline, and layered colors can teach you the art of blending floss.
In these examples, you’ll learn to translate the techniques of paper art directly onto your fabric. You’ll see how to build depth, create unexpected textures, and compose your pieces with the confidence of a seasoned artist. It’s time to stop just stitching and start sculpting with thread.
1. Translate Paper Layering into Thread Painting
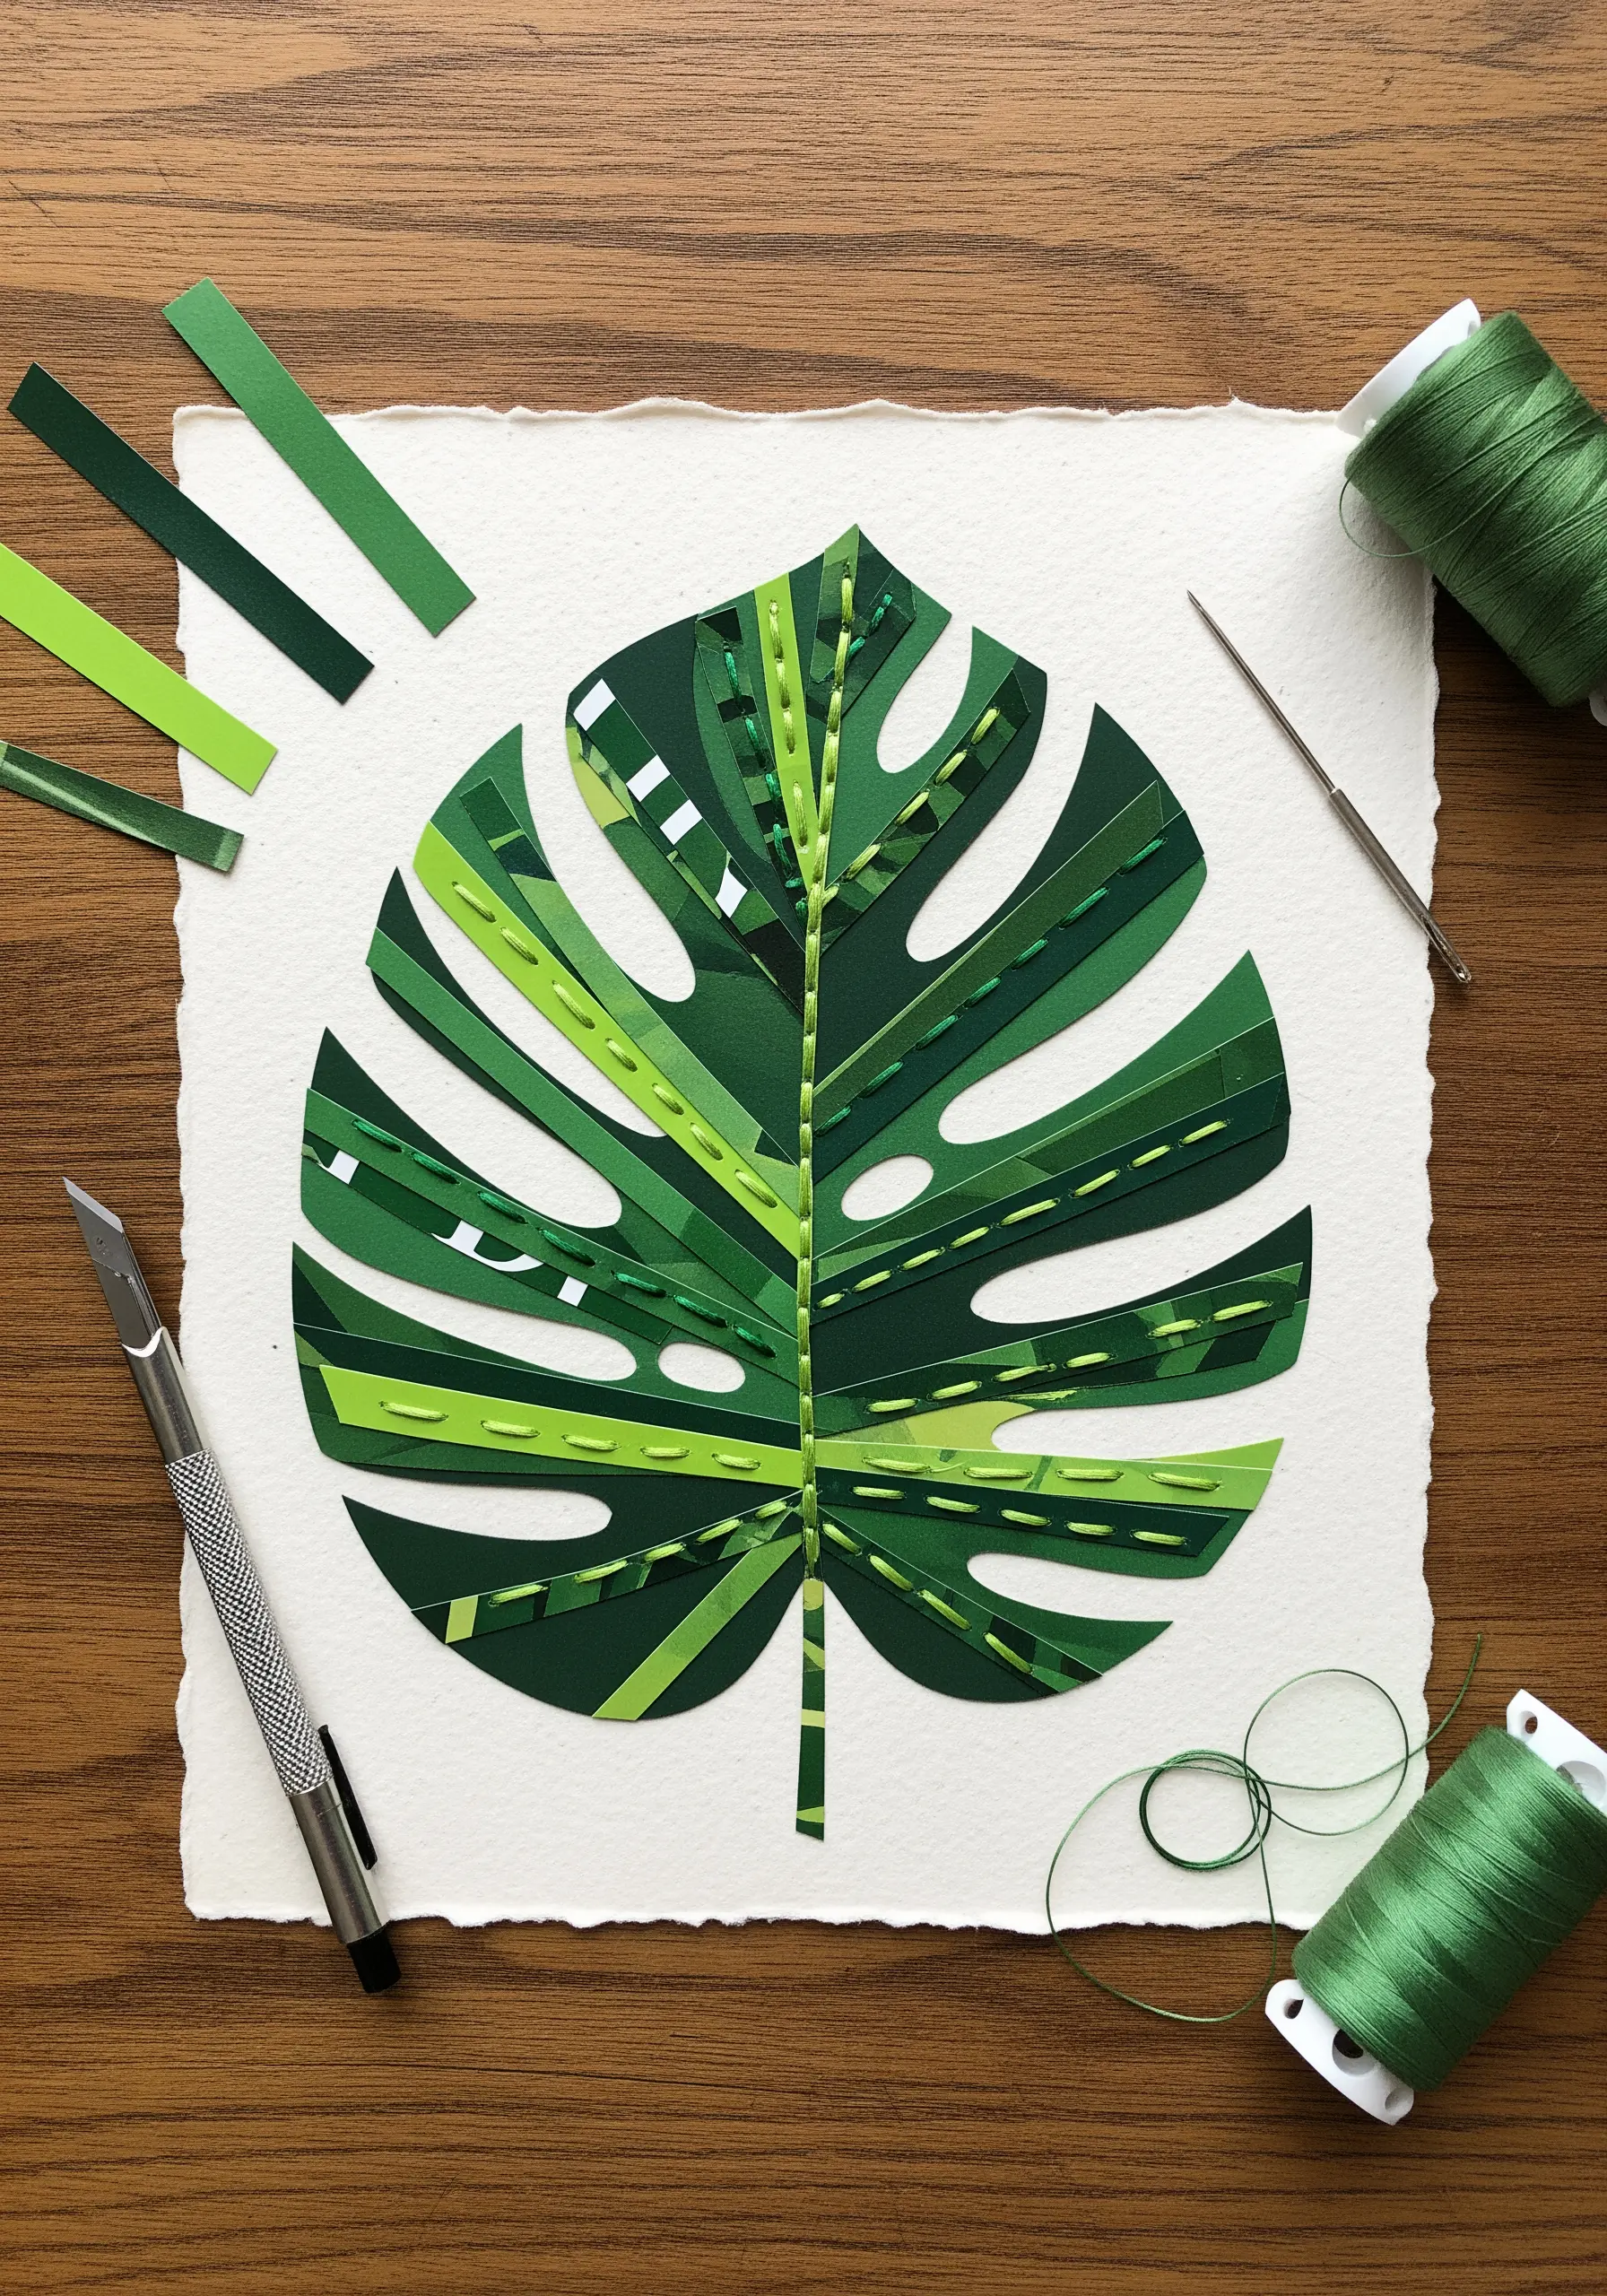
Observe how stacked paper strips create a gradient on the monstera leaf.
You can achieve this same effect with thread using the long-and-short stitch, blending shades of green to create a smooth, painterly transition.
Use a single strand of floss for the most delicate blending, allowing each stitch to act like a brushstroke.
The simple running stitches shown here can be translated into a final detail, using a contrasting color to define the leaf’s central vein and add a graphic touch.
This method transforms flat botanicals into three-dimensional botanical texture that pops.
2. Block In Color with Appliqué and Bold Outlines
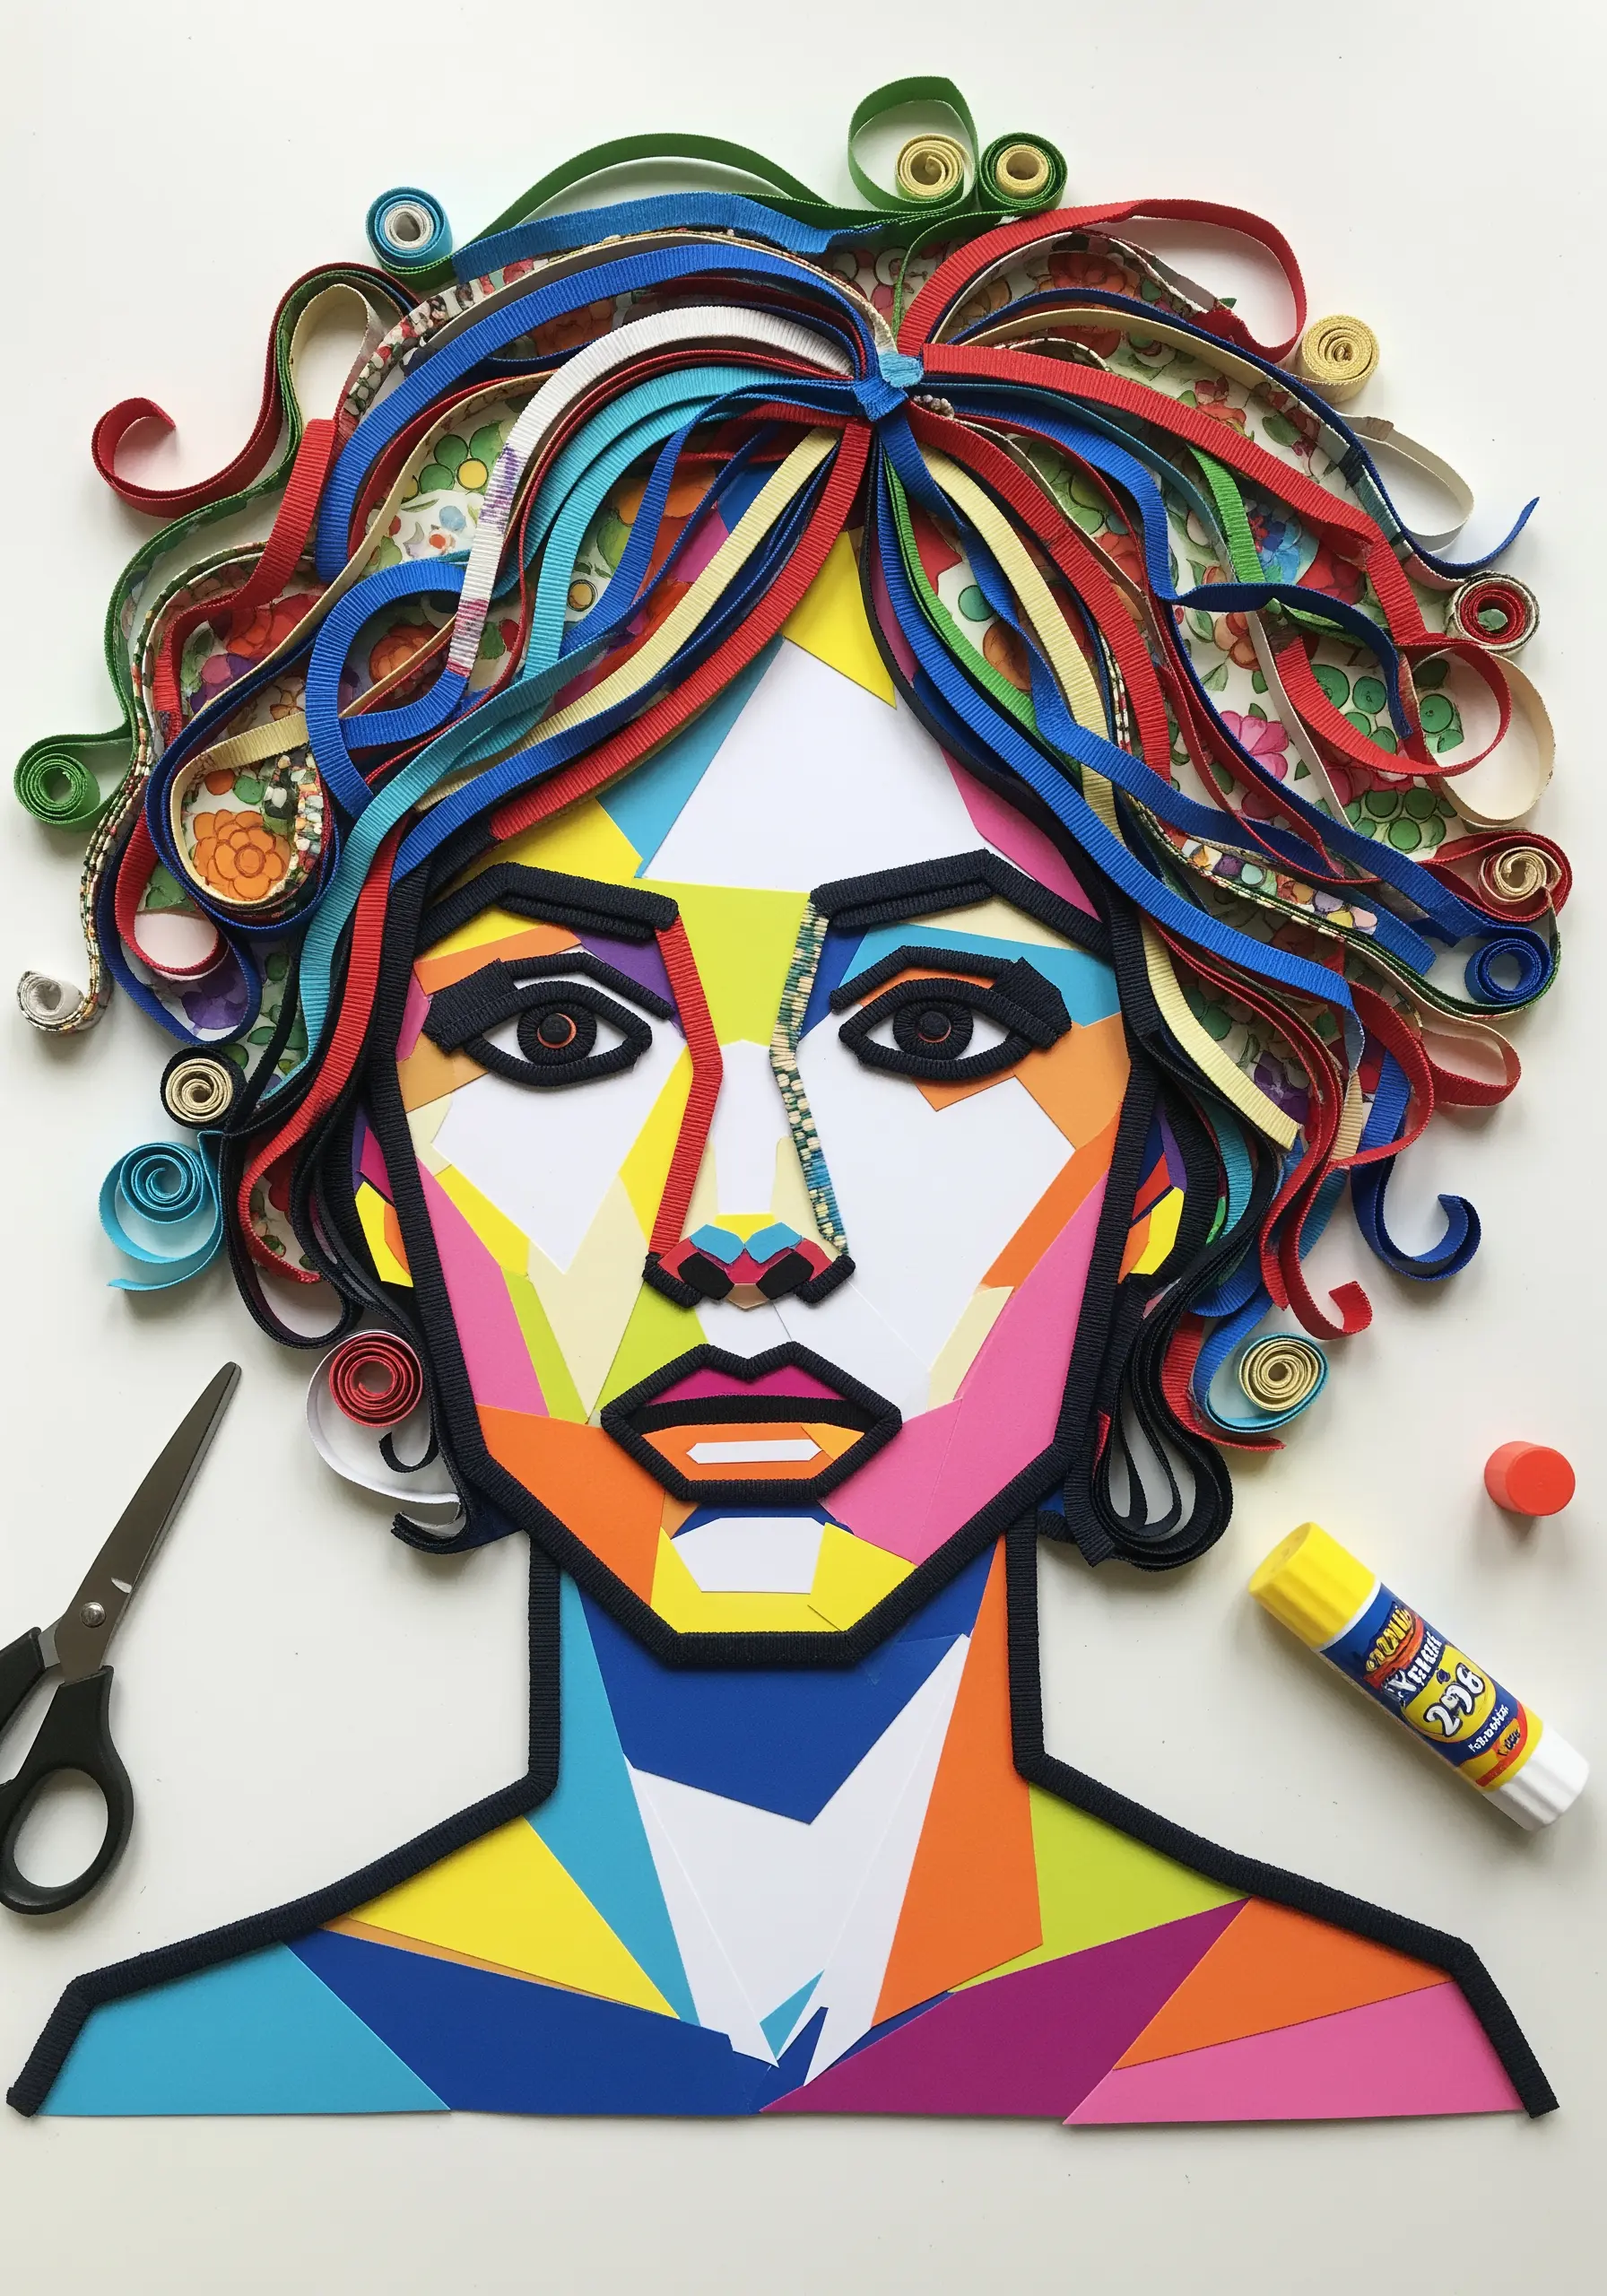
The sharp, graphic shapes in this paper portrait translate beautifully into fabric appliqué.
Cut small pieces of colored felt or cotton and arrange them to form the facial features, tacking them down with a few hidden stitches.
Then, use a heavy whipped backstitch or chain stitch in black thread to create those bold, defining outlines, which contain the color and give your piece a strong graphic structure.
For the coiled hair, instead of paper strips, use couched yarn or ribbon to achieve that same sculptural, looping texture.
3. Imply Dimension with Metallics and Negative Space
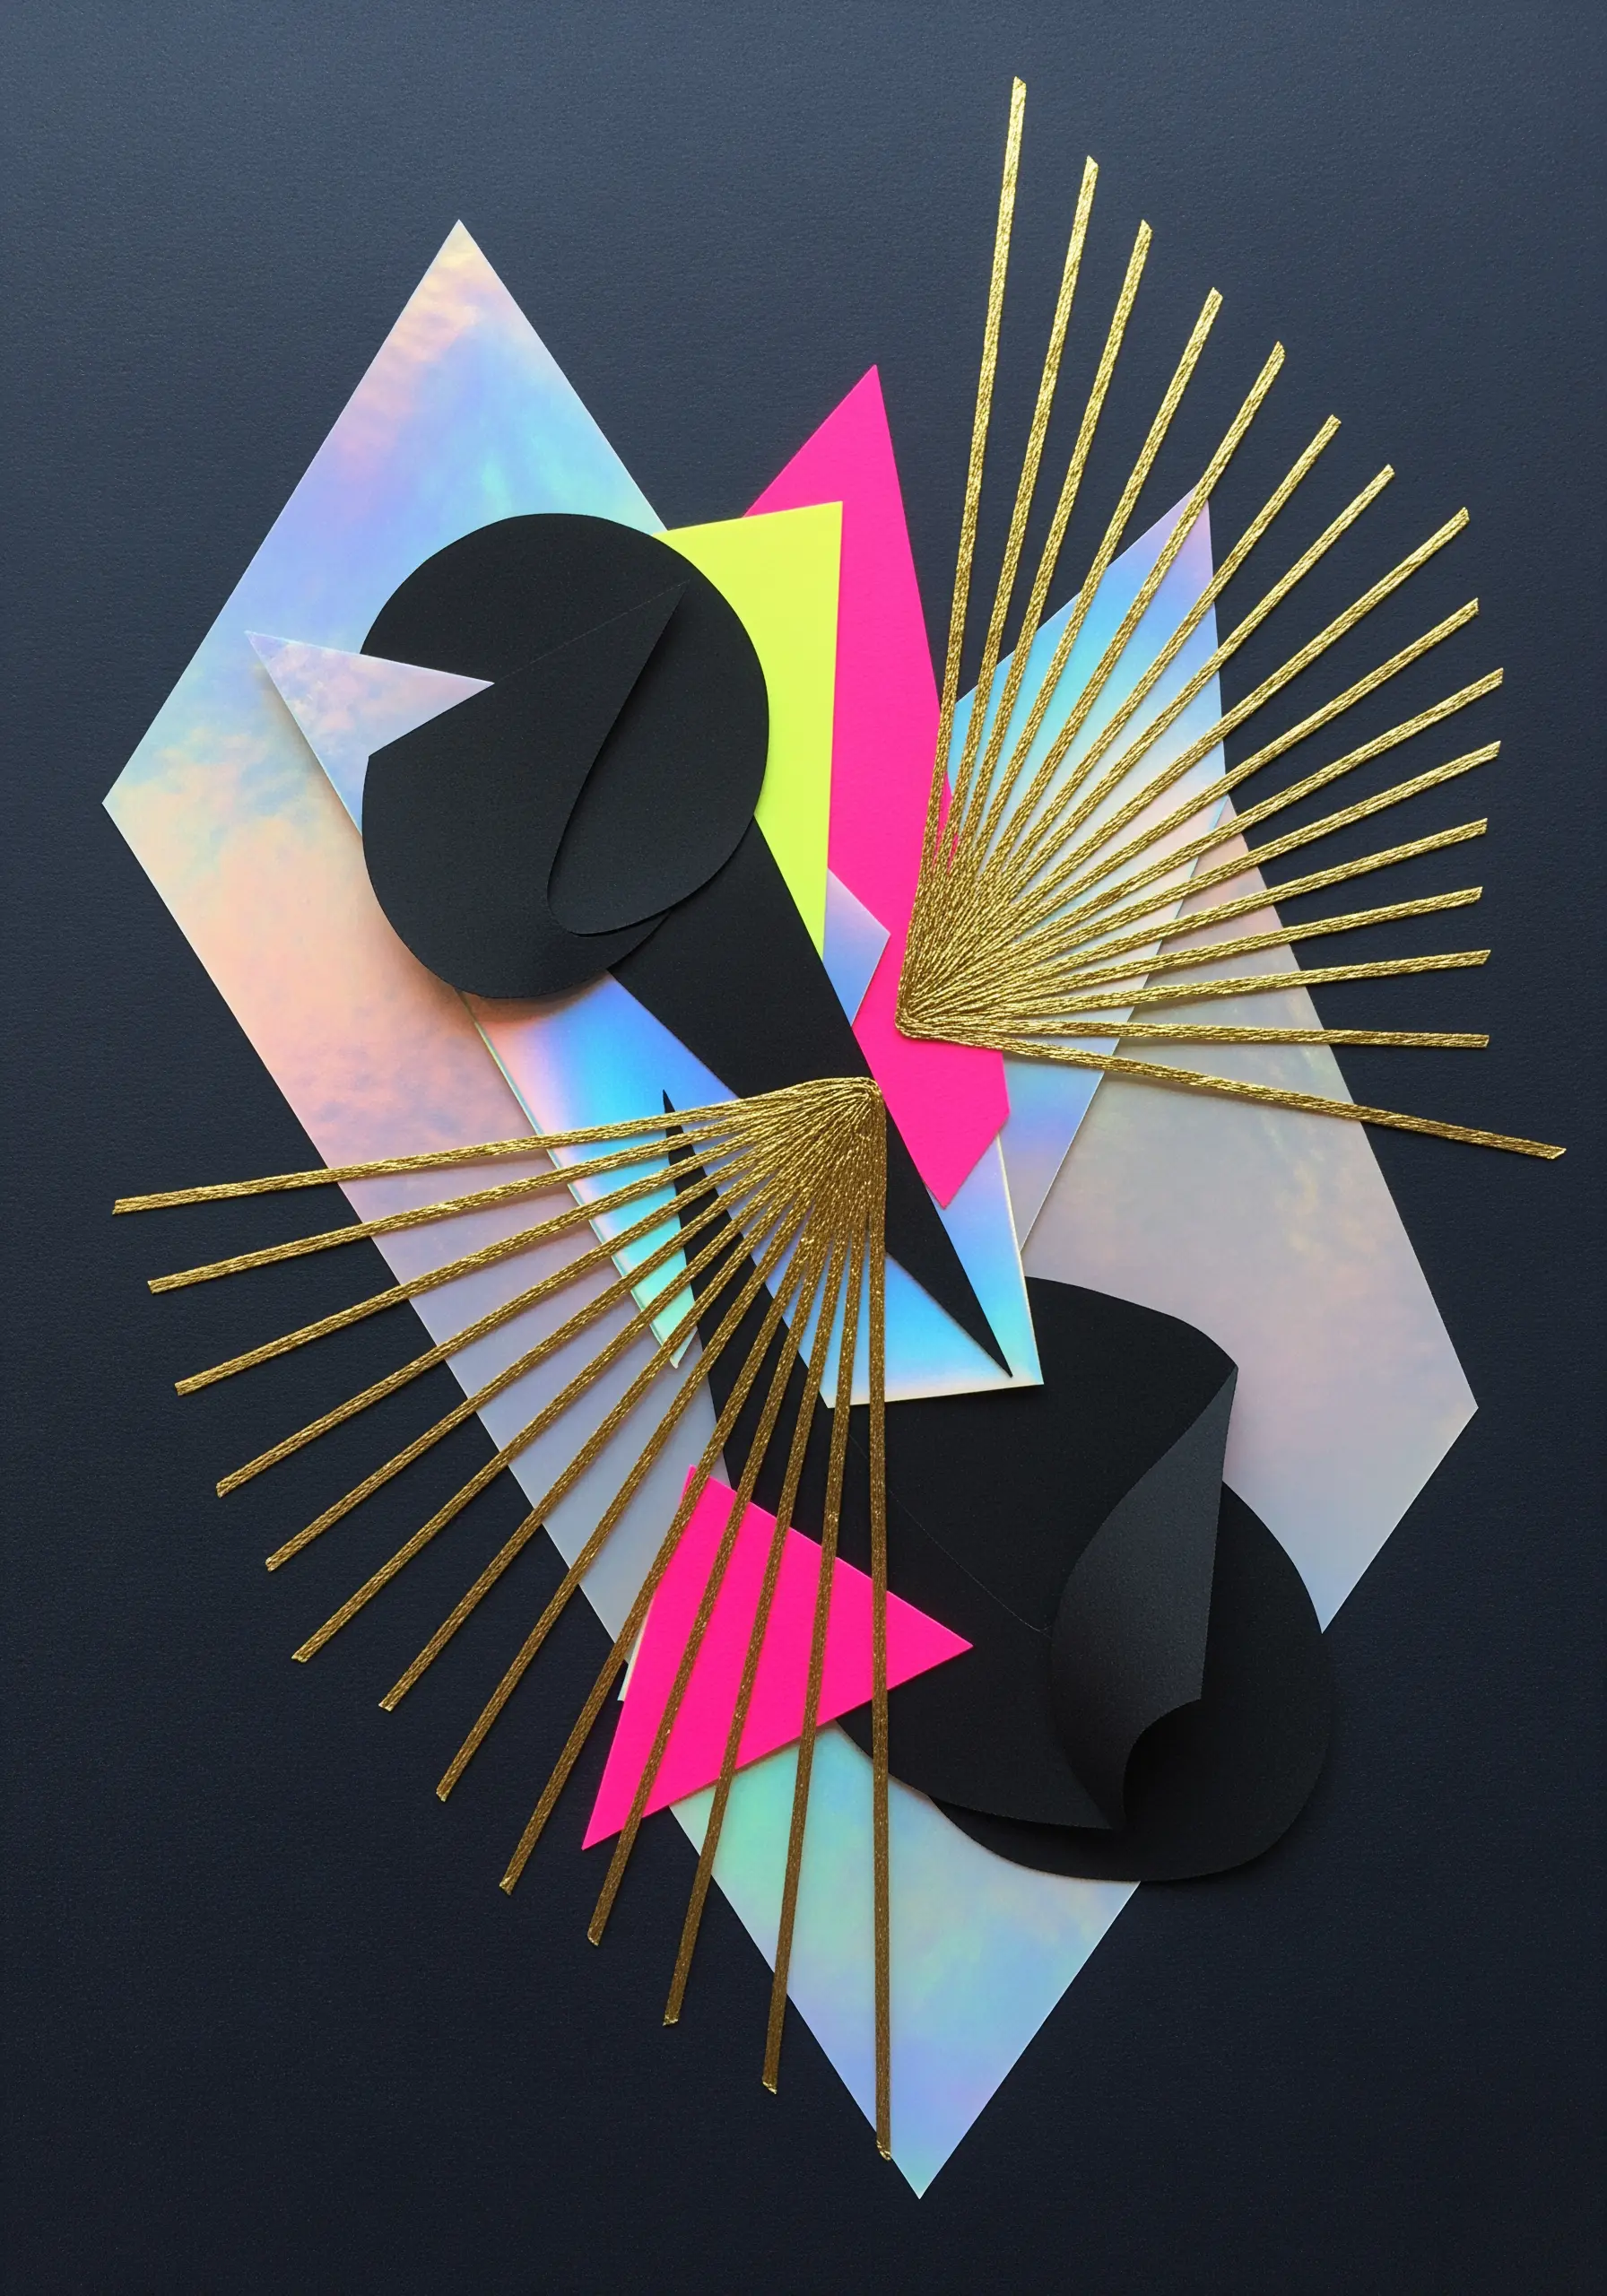
This composition uses holographic paper and gold strips to create energy and depth.
In your embroidery, swap the paper for iridescent fabric scraps or use specialty threads like metallic floss or silk to catch the light.
Recreate the radiating gold lines with long, disciplined straight stitches, using a single strand of metallic thread for a sharp, modern feel.
Notice how the black shapes are folded; you can mimic this with stumpwork by creating wired shapes that lift off the fabric, adding genuine three-dimensional form.
This is one of the abstract thread illusion techniques that create depth without complex stitches.
4. Build Rich Texture with Stitch Stippling
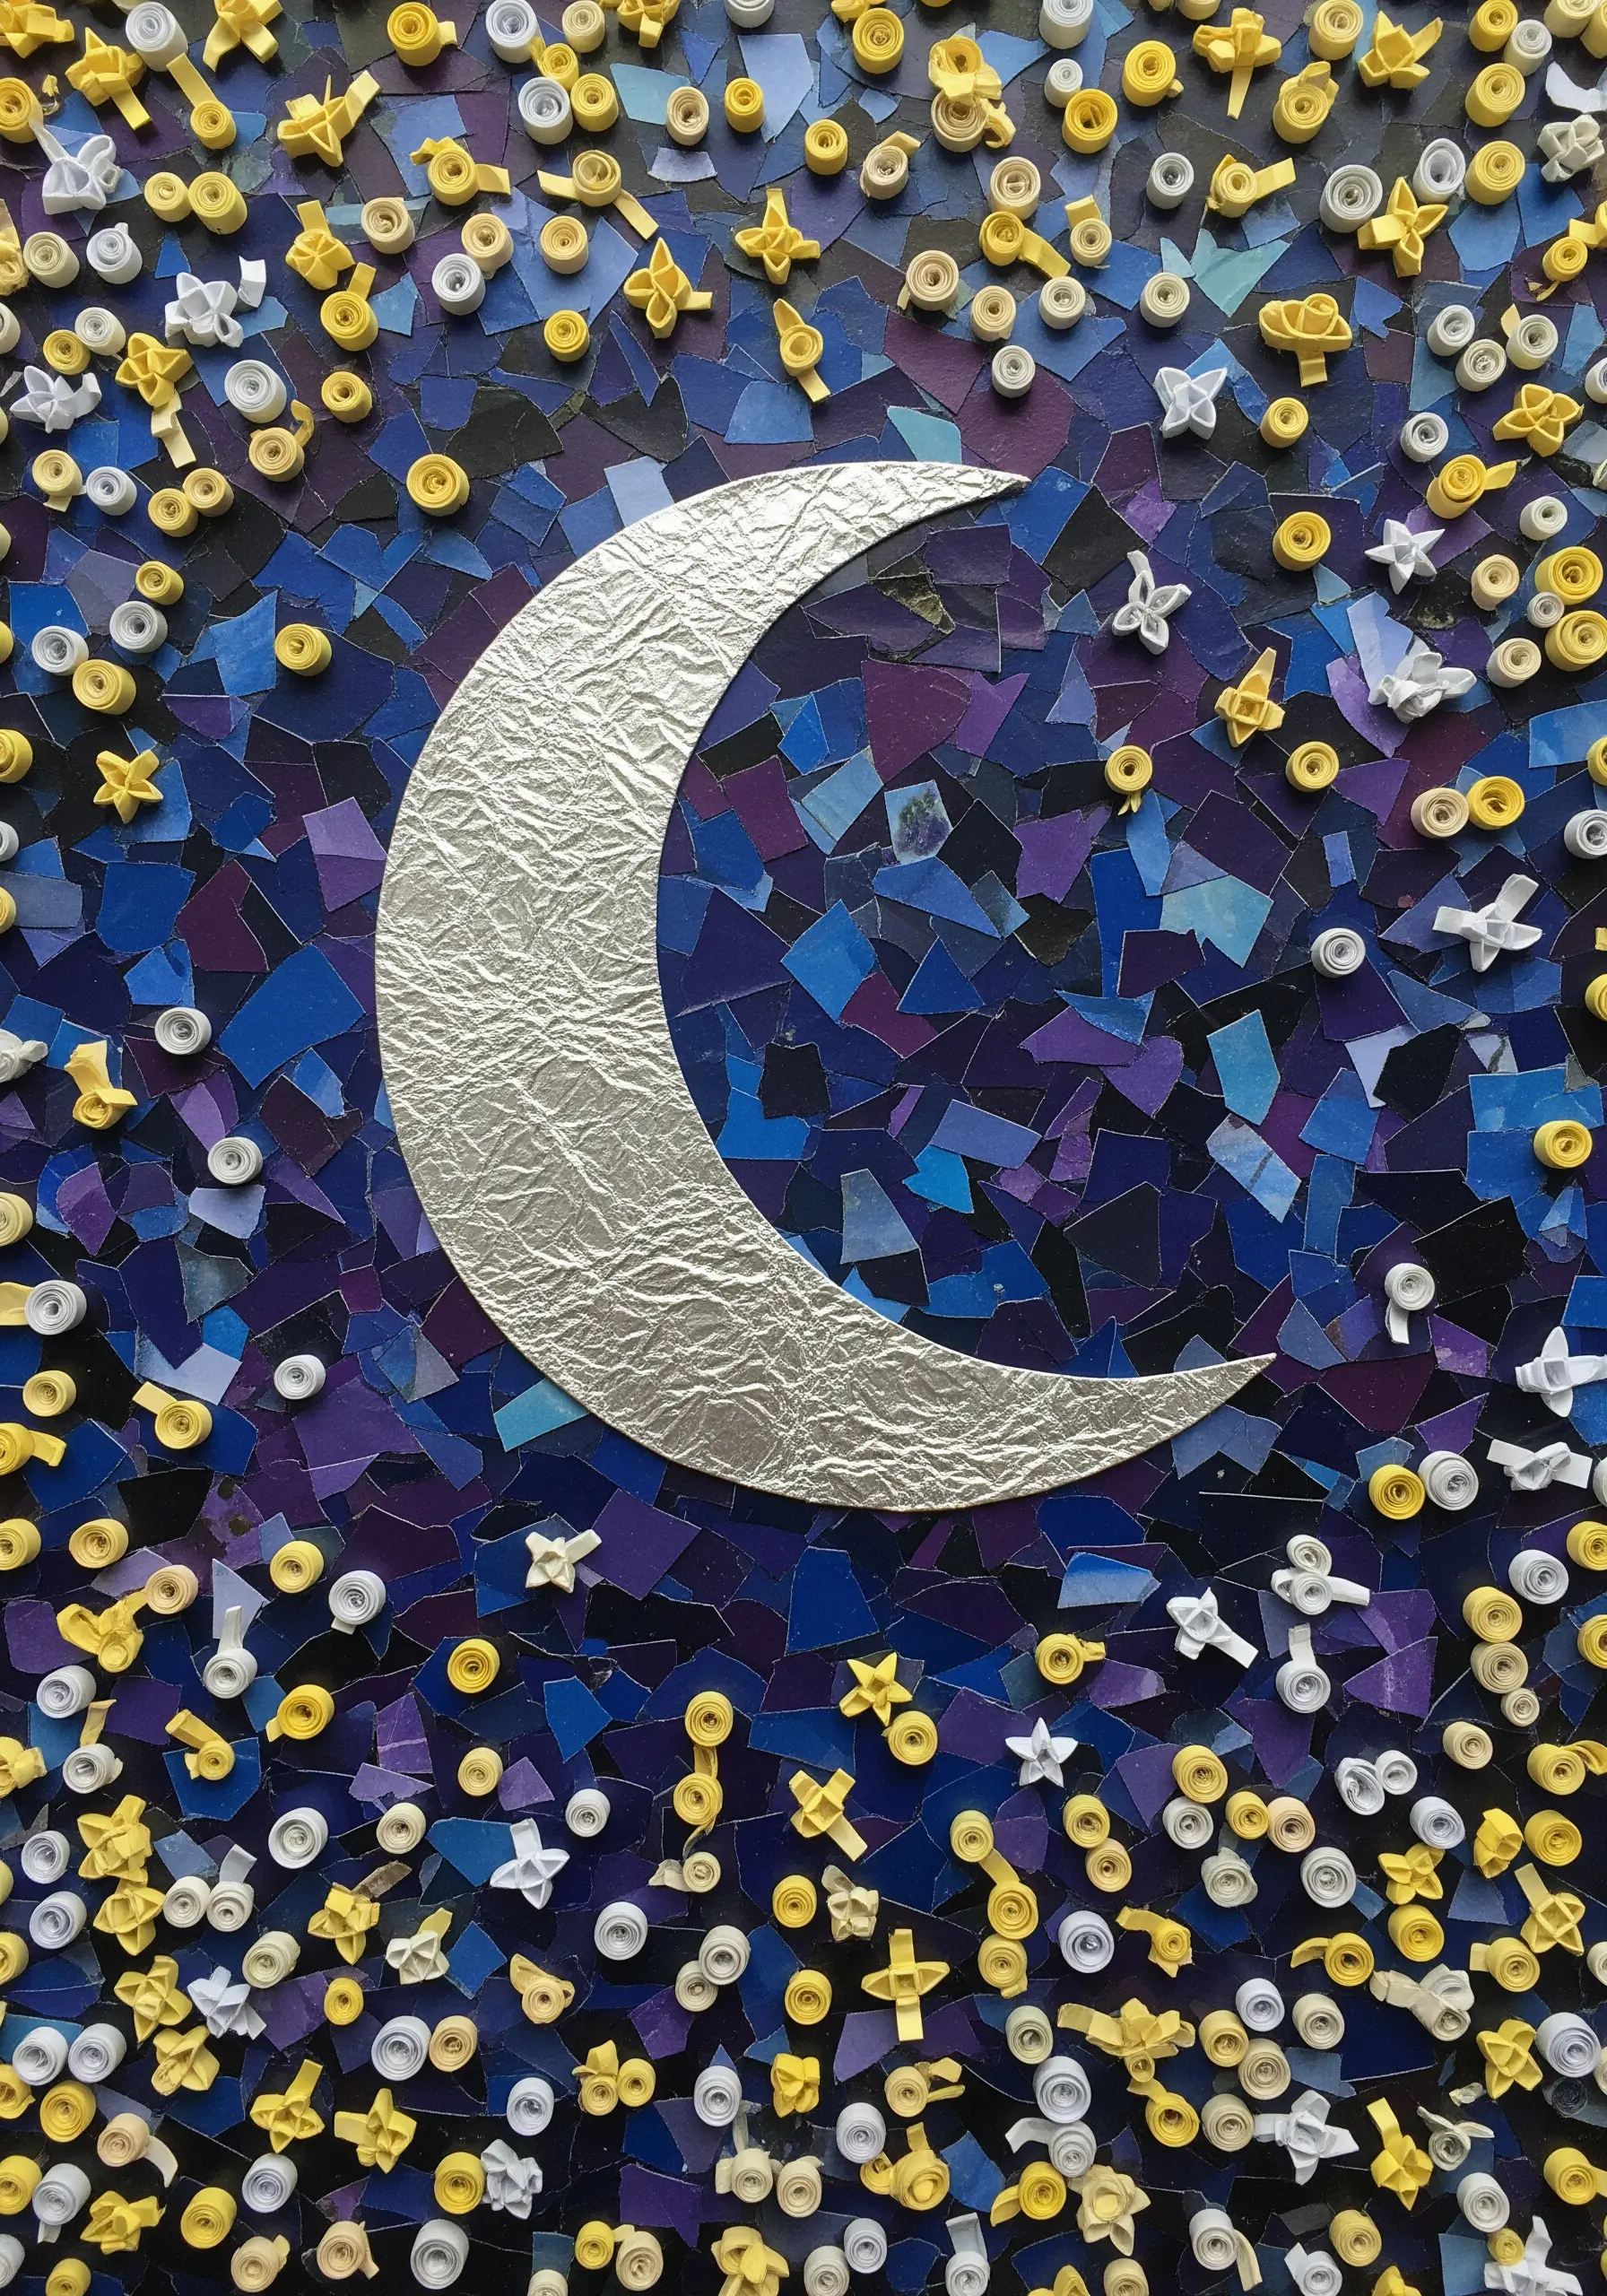
The background of this piece is a mosaic of tiny paper scraps, creating a deep, complex texture.
Translate this effect into your embroidery by using a dense field of French knots or seed stitches in varied shades of blue and purple.
This technique, known as stitch stippling, fills large areas with rich texture and subtle color variation.
For the coiled stars, use bullion knots or drizzle stitches to mimic the rolled paper, adding small, raised details that contrast with the flatter mosaic background.
These cosmic embroidery art pieces feel both tactile and vast.
5. Layer Stitches to Recreate Feathered Details
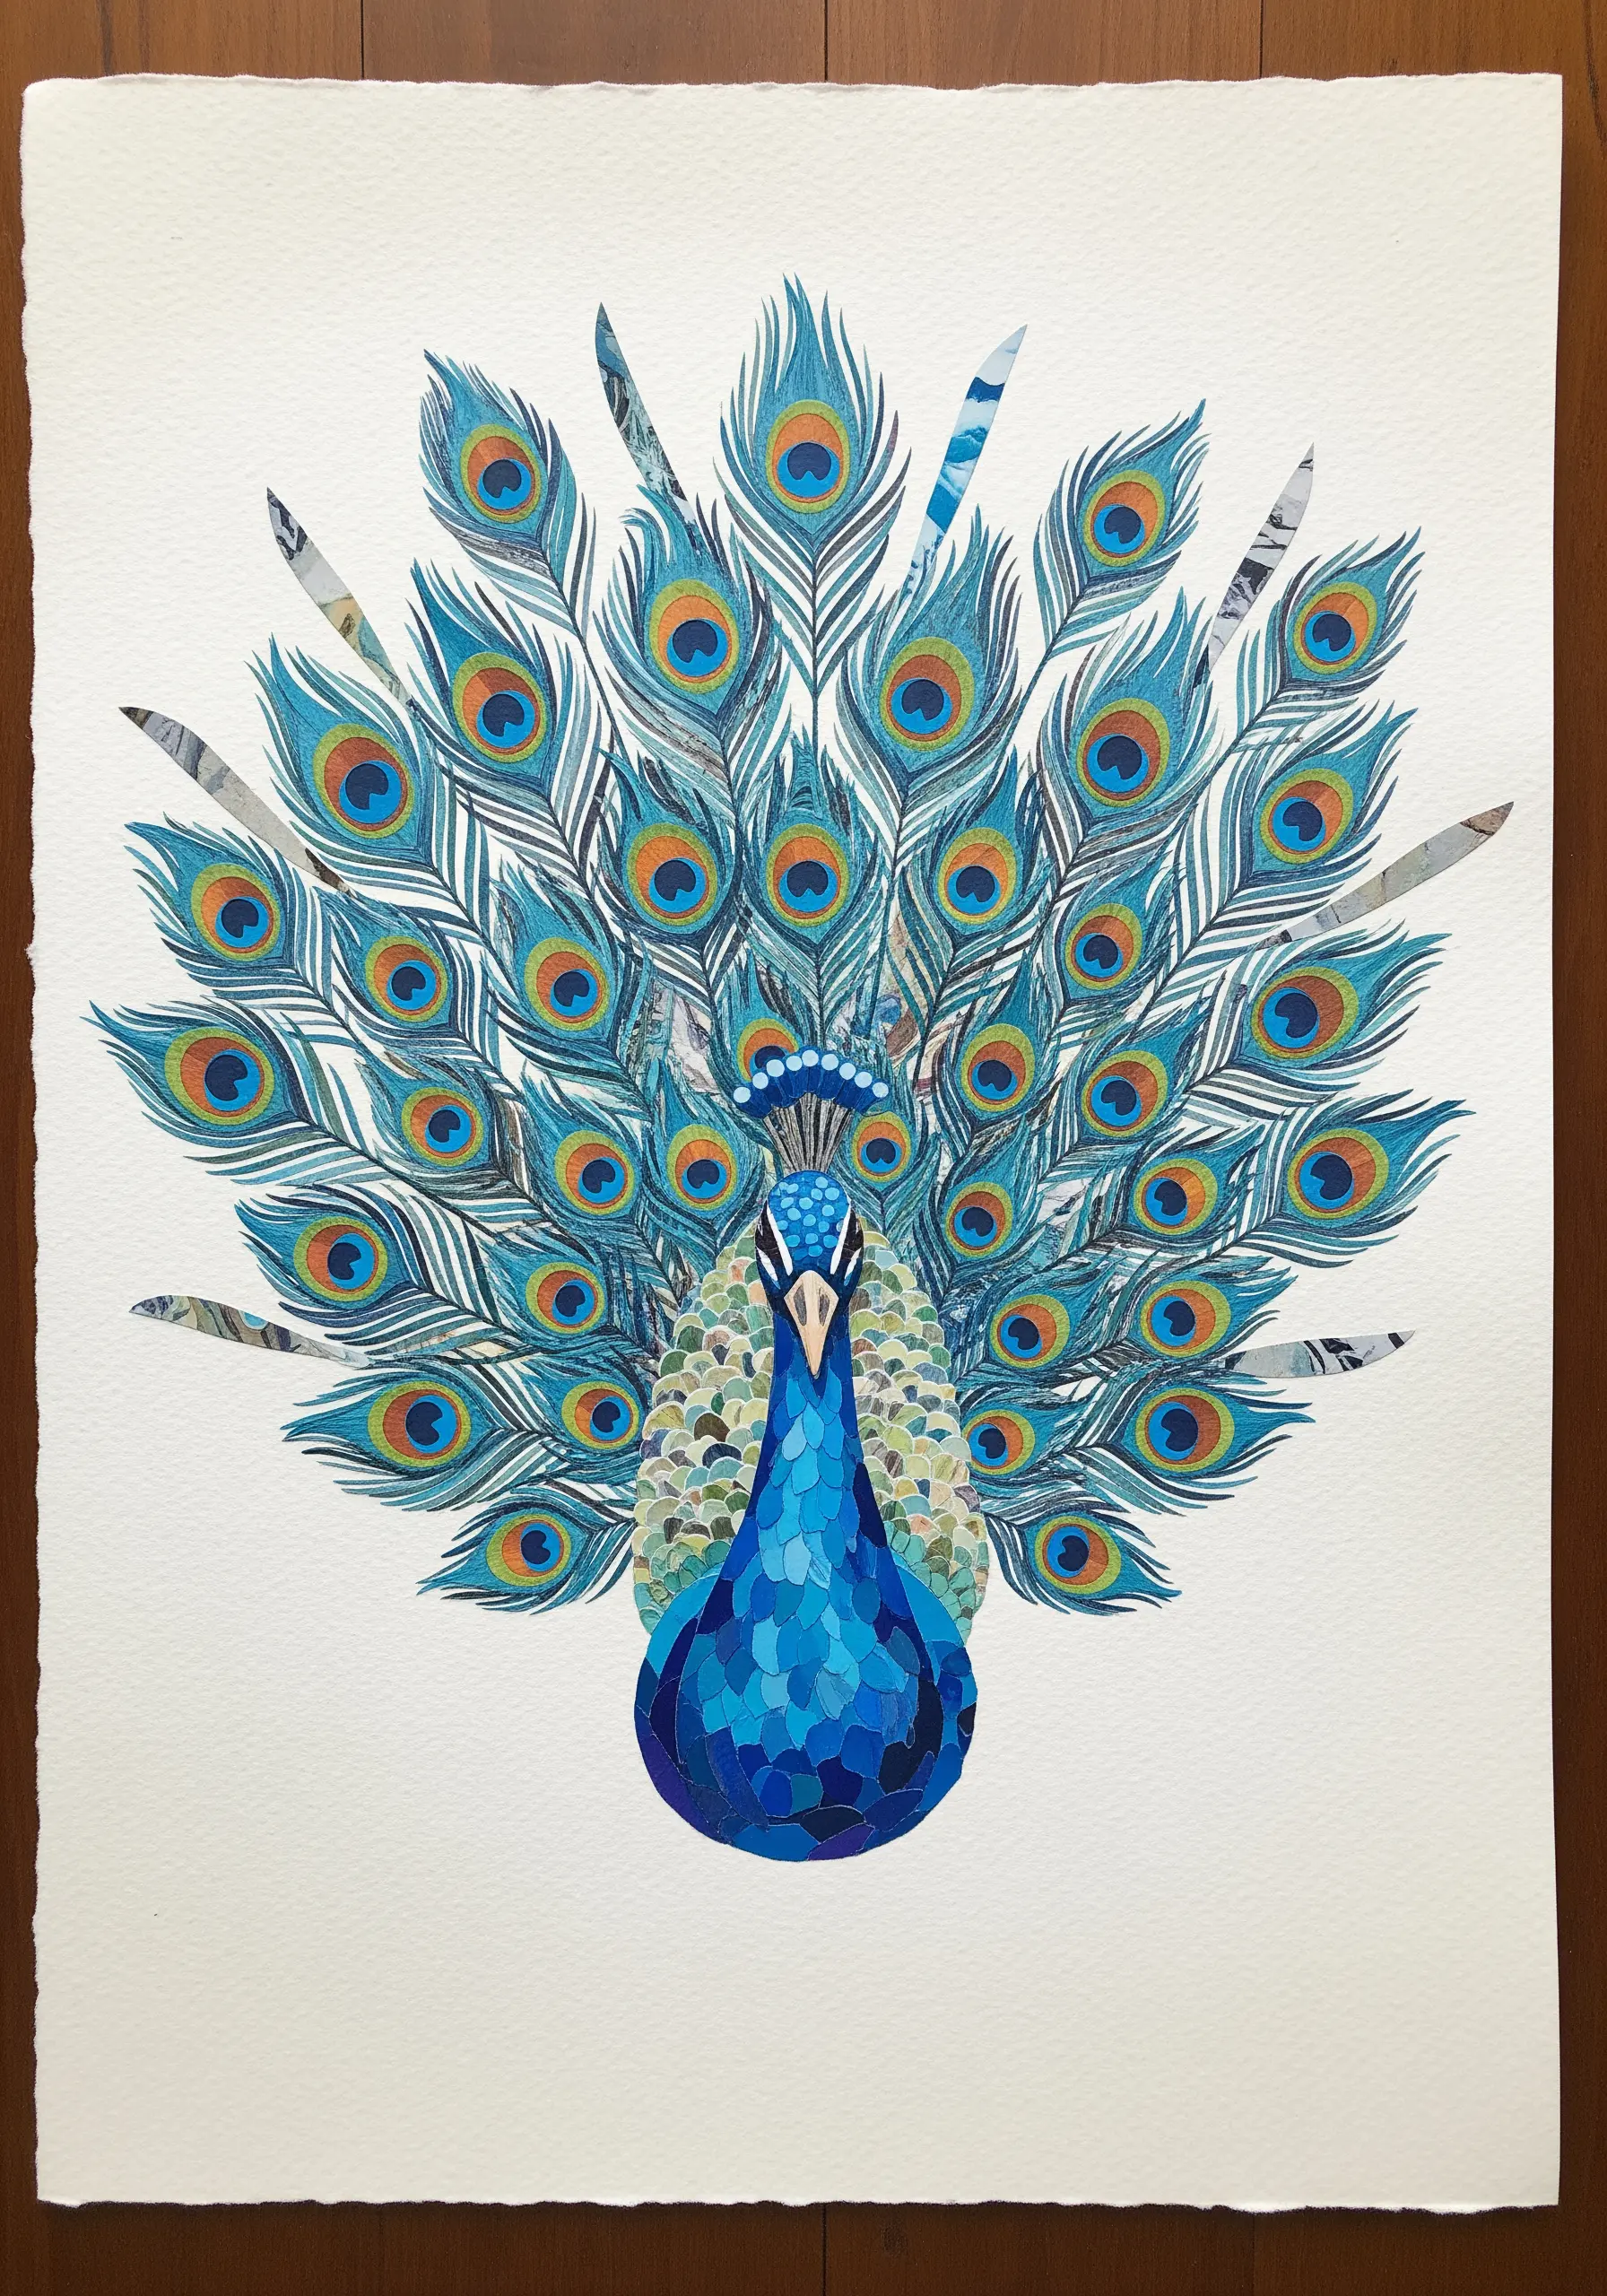
The intricate layering of a peacock’s feathers can be beautifully replicated with strategic stitching.
Instead of individual paper cutouts, use long-and-short stitch to build up color and create a soft, blended look.
For each ‘eye’ of the feather, start with a satin-stitched center in gold and orange, then radiate outwards with blues and greens.
Overlap your stitches slightly, just as the paper is layered, to give the impression of dense, shimmering plumage.
This method allows you to capture the iridescent quality of feathers far more realistically than block coloring ever could.
6. Create Landscapes with Fabric Collage
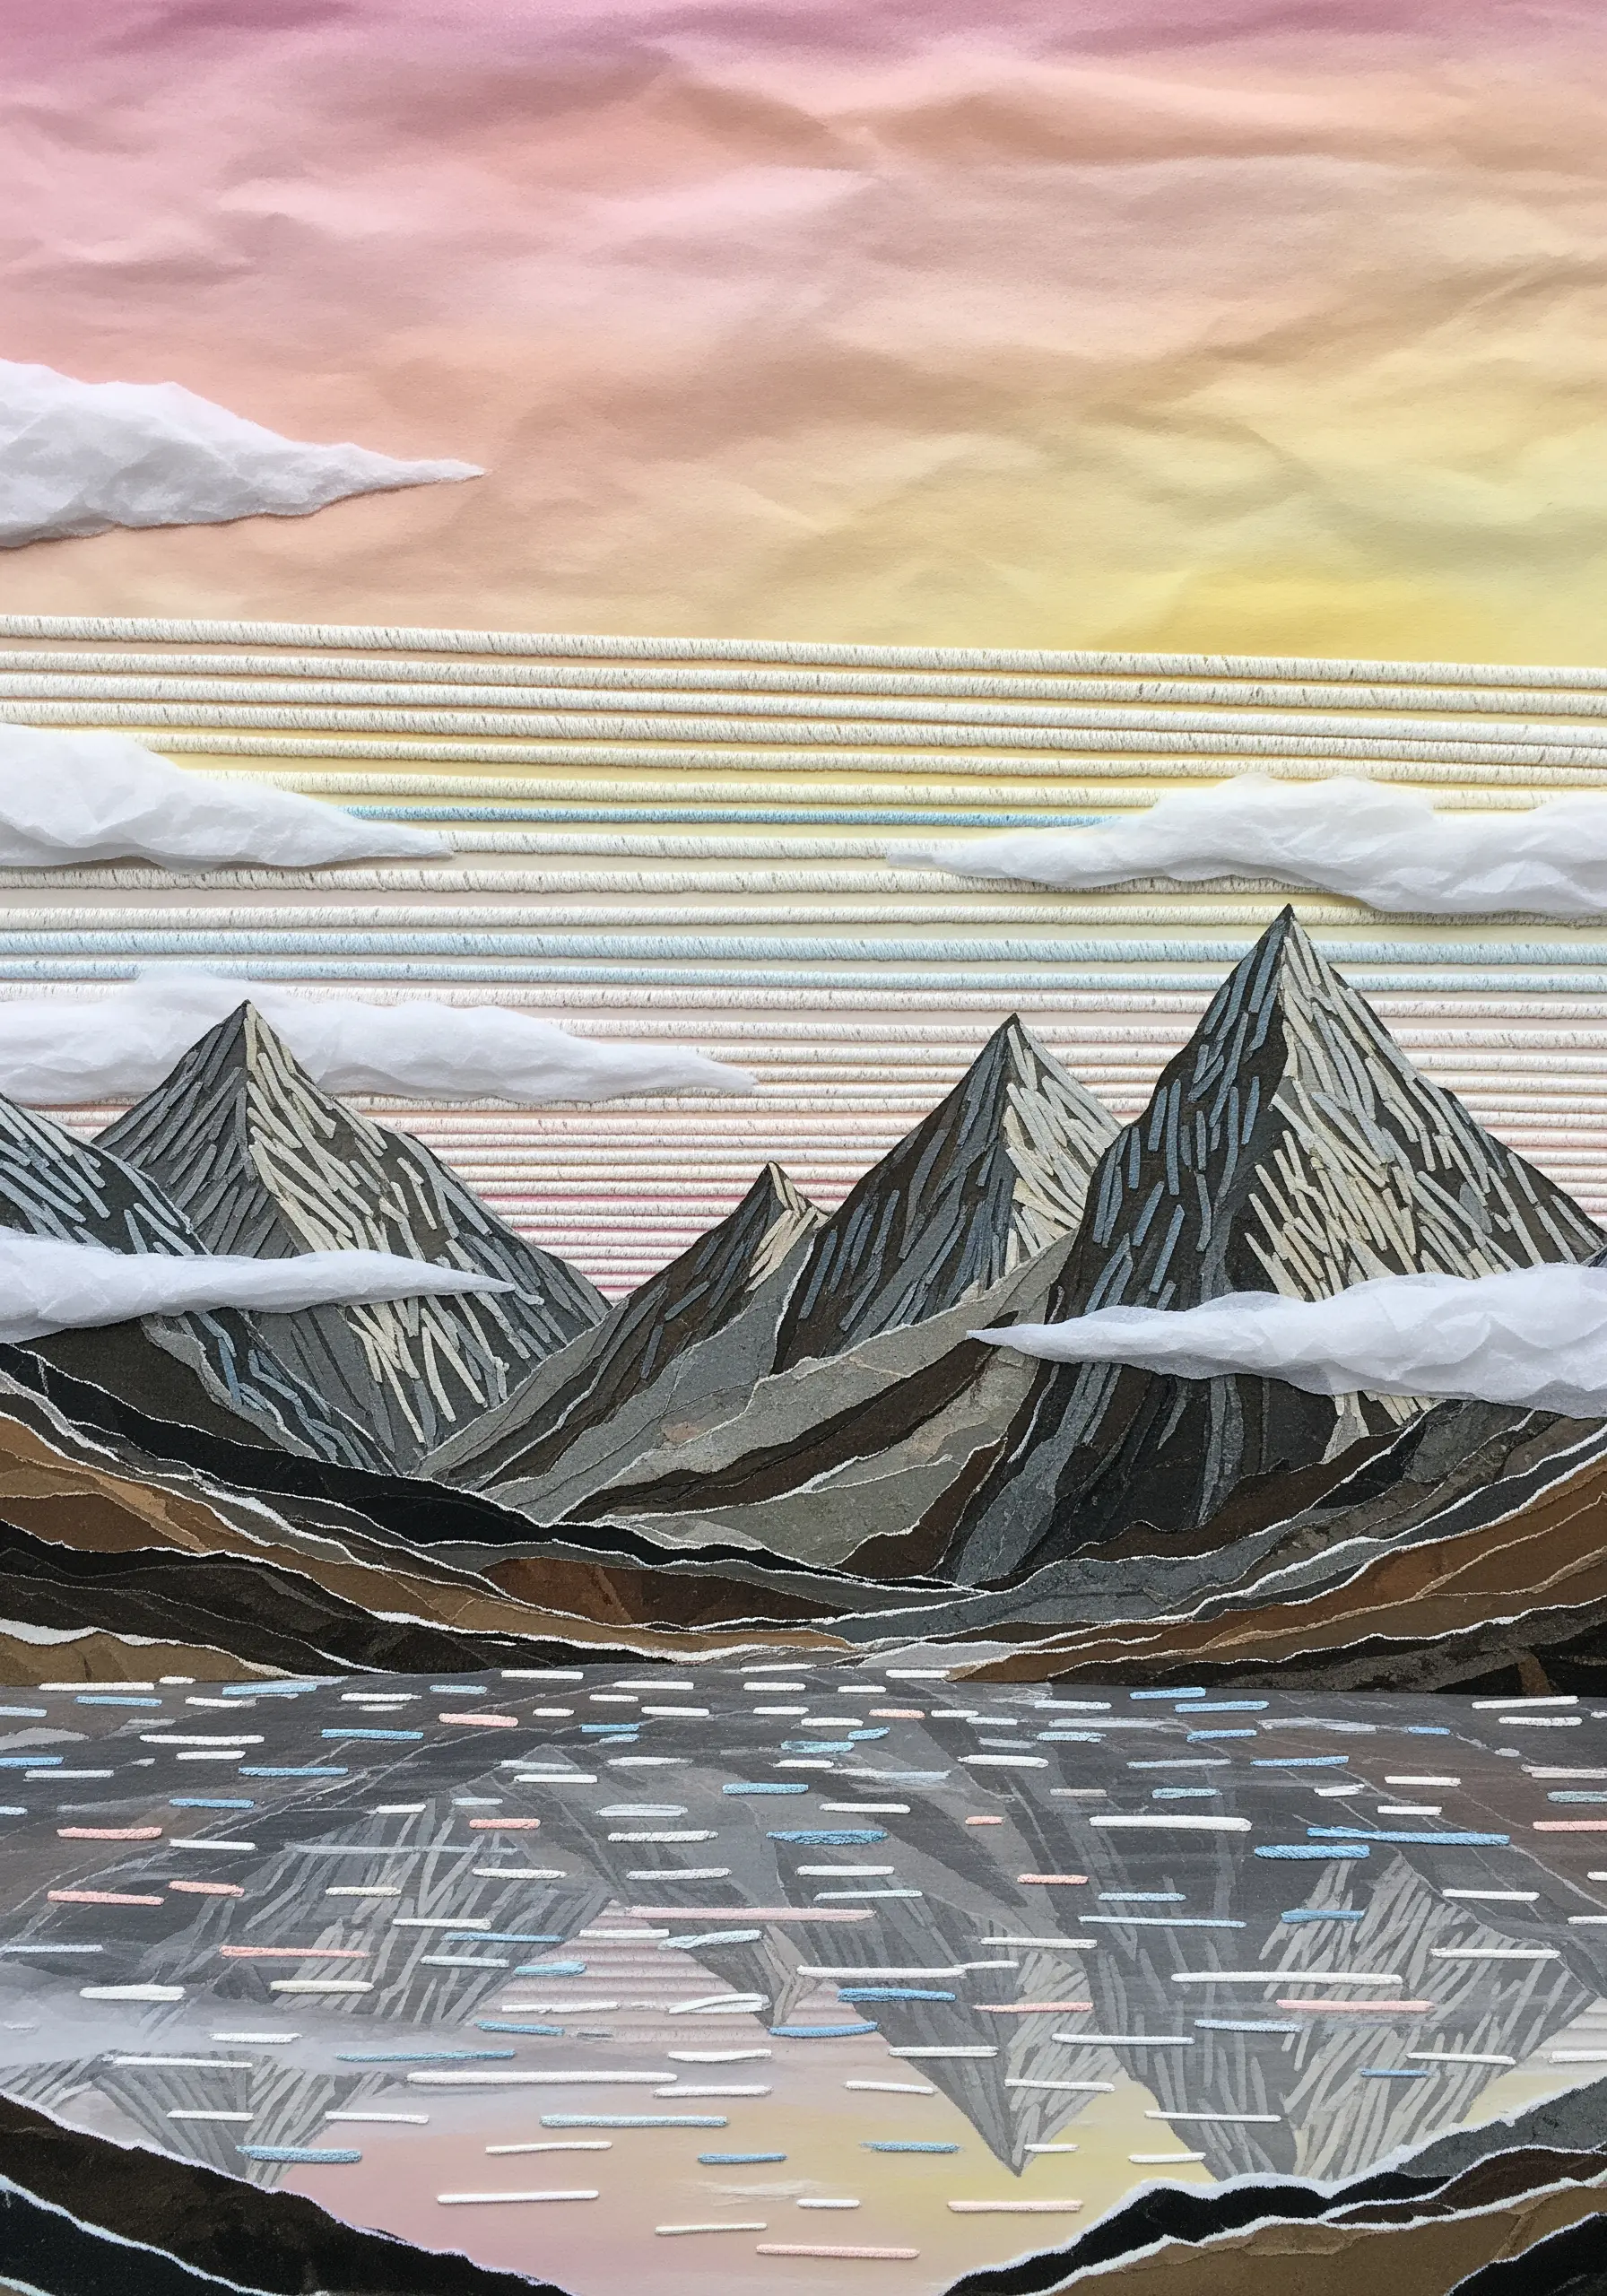
This landscape uses torn paper to suggest rugged mountains and shimmering water.
You can adopt this exact approach by using fabric scraps as your base. Choose textured fabrics like linen or tweed for the mountains and a smooth silk or satin for the water.
Arrange your fabric pieces and secure them with a simple running stitch, then embroider fine details on top—like straight stitches for snow lines or metallic threads for water reflections.
This mixed-media approach allows you to cover large areas quickly while creating incredible depth, much like these simple small hoop landscape designs.
7. Define Geometric Forms with Couching
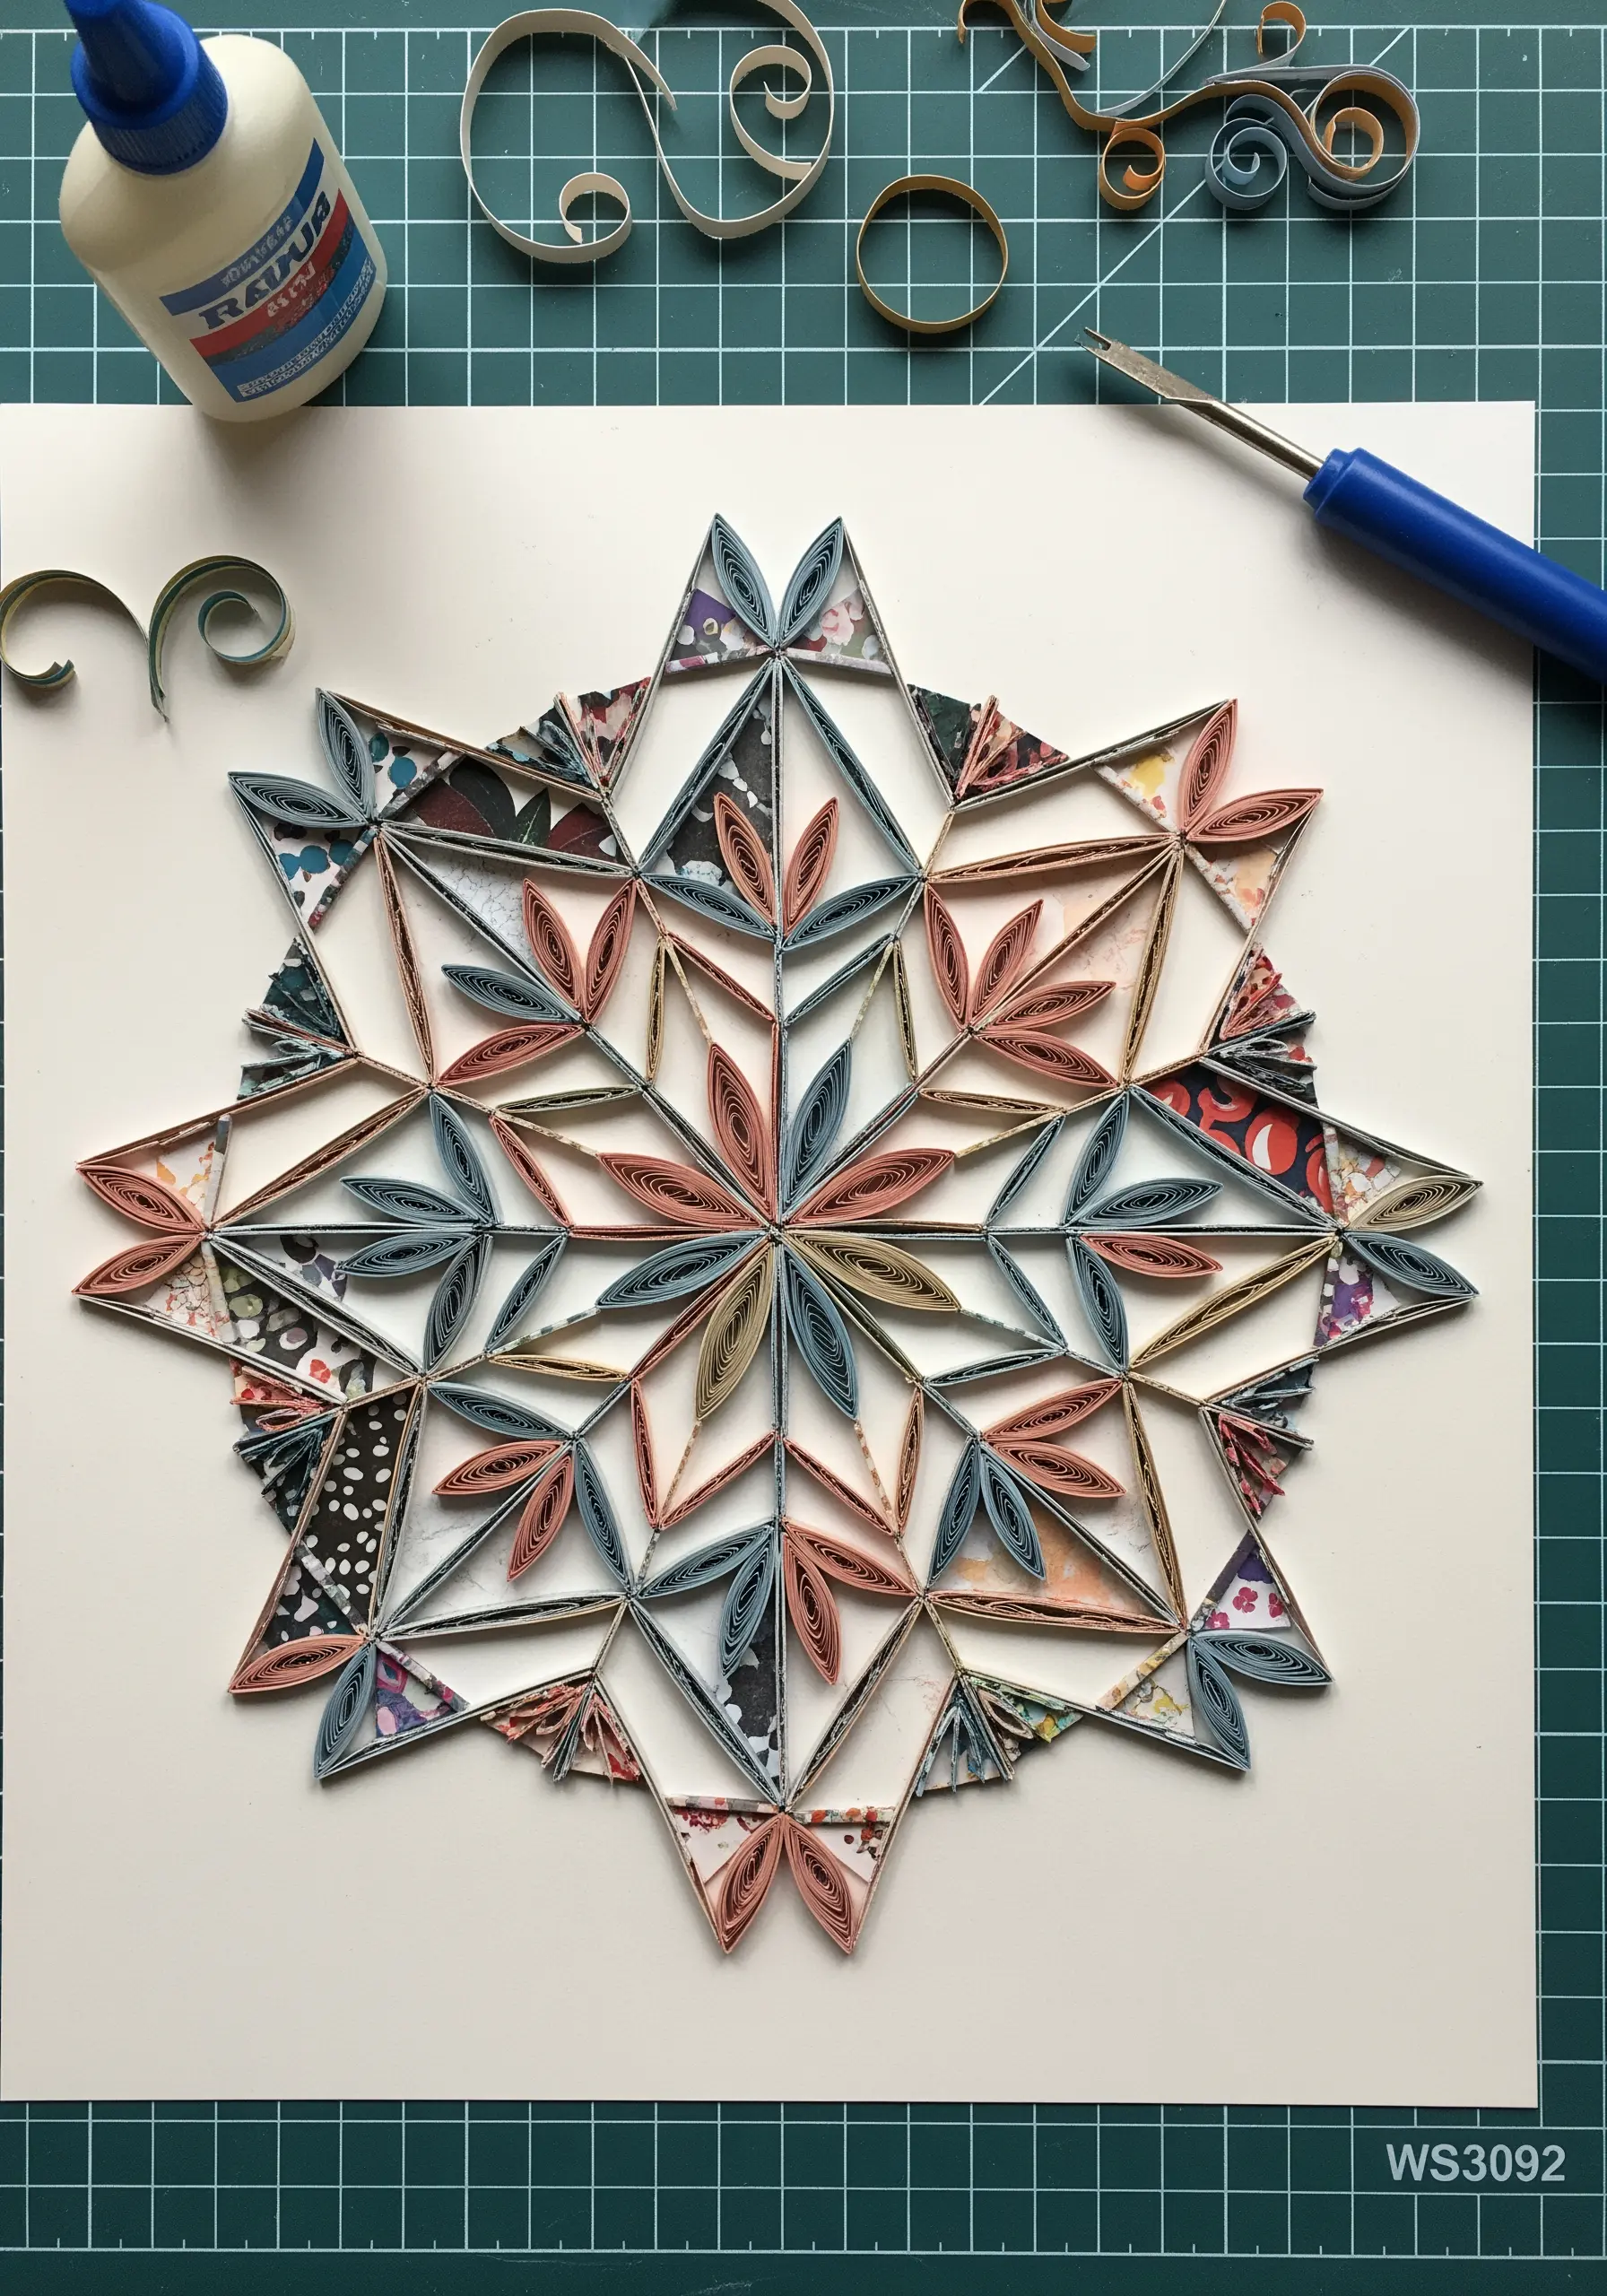
The beauty of this quilled mandala lies in its clean, raised lines and precise geometry.
To achieve this dimensional effect with thread, use couching—a technique where you lay down a thick thread or yarn on the surface and tack it in place with a thinner, contrasting thread.
This allows you to create sharp angles and smooth curves that stand off the fabric, mimicking the edge of the rolled paper.
It’s an ideal way to translate linear, graphic designs into embroidery without relying on dense fill stitches, perfect for modern mandala stitch patterns.
8. Sculpt Marine Textures with 3D Stitches
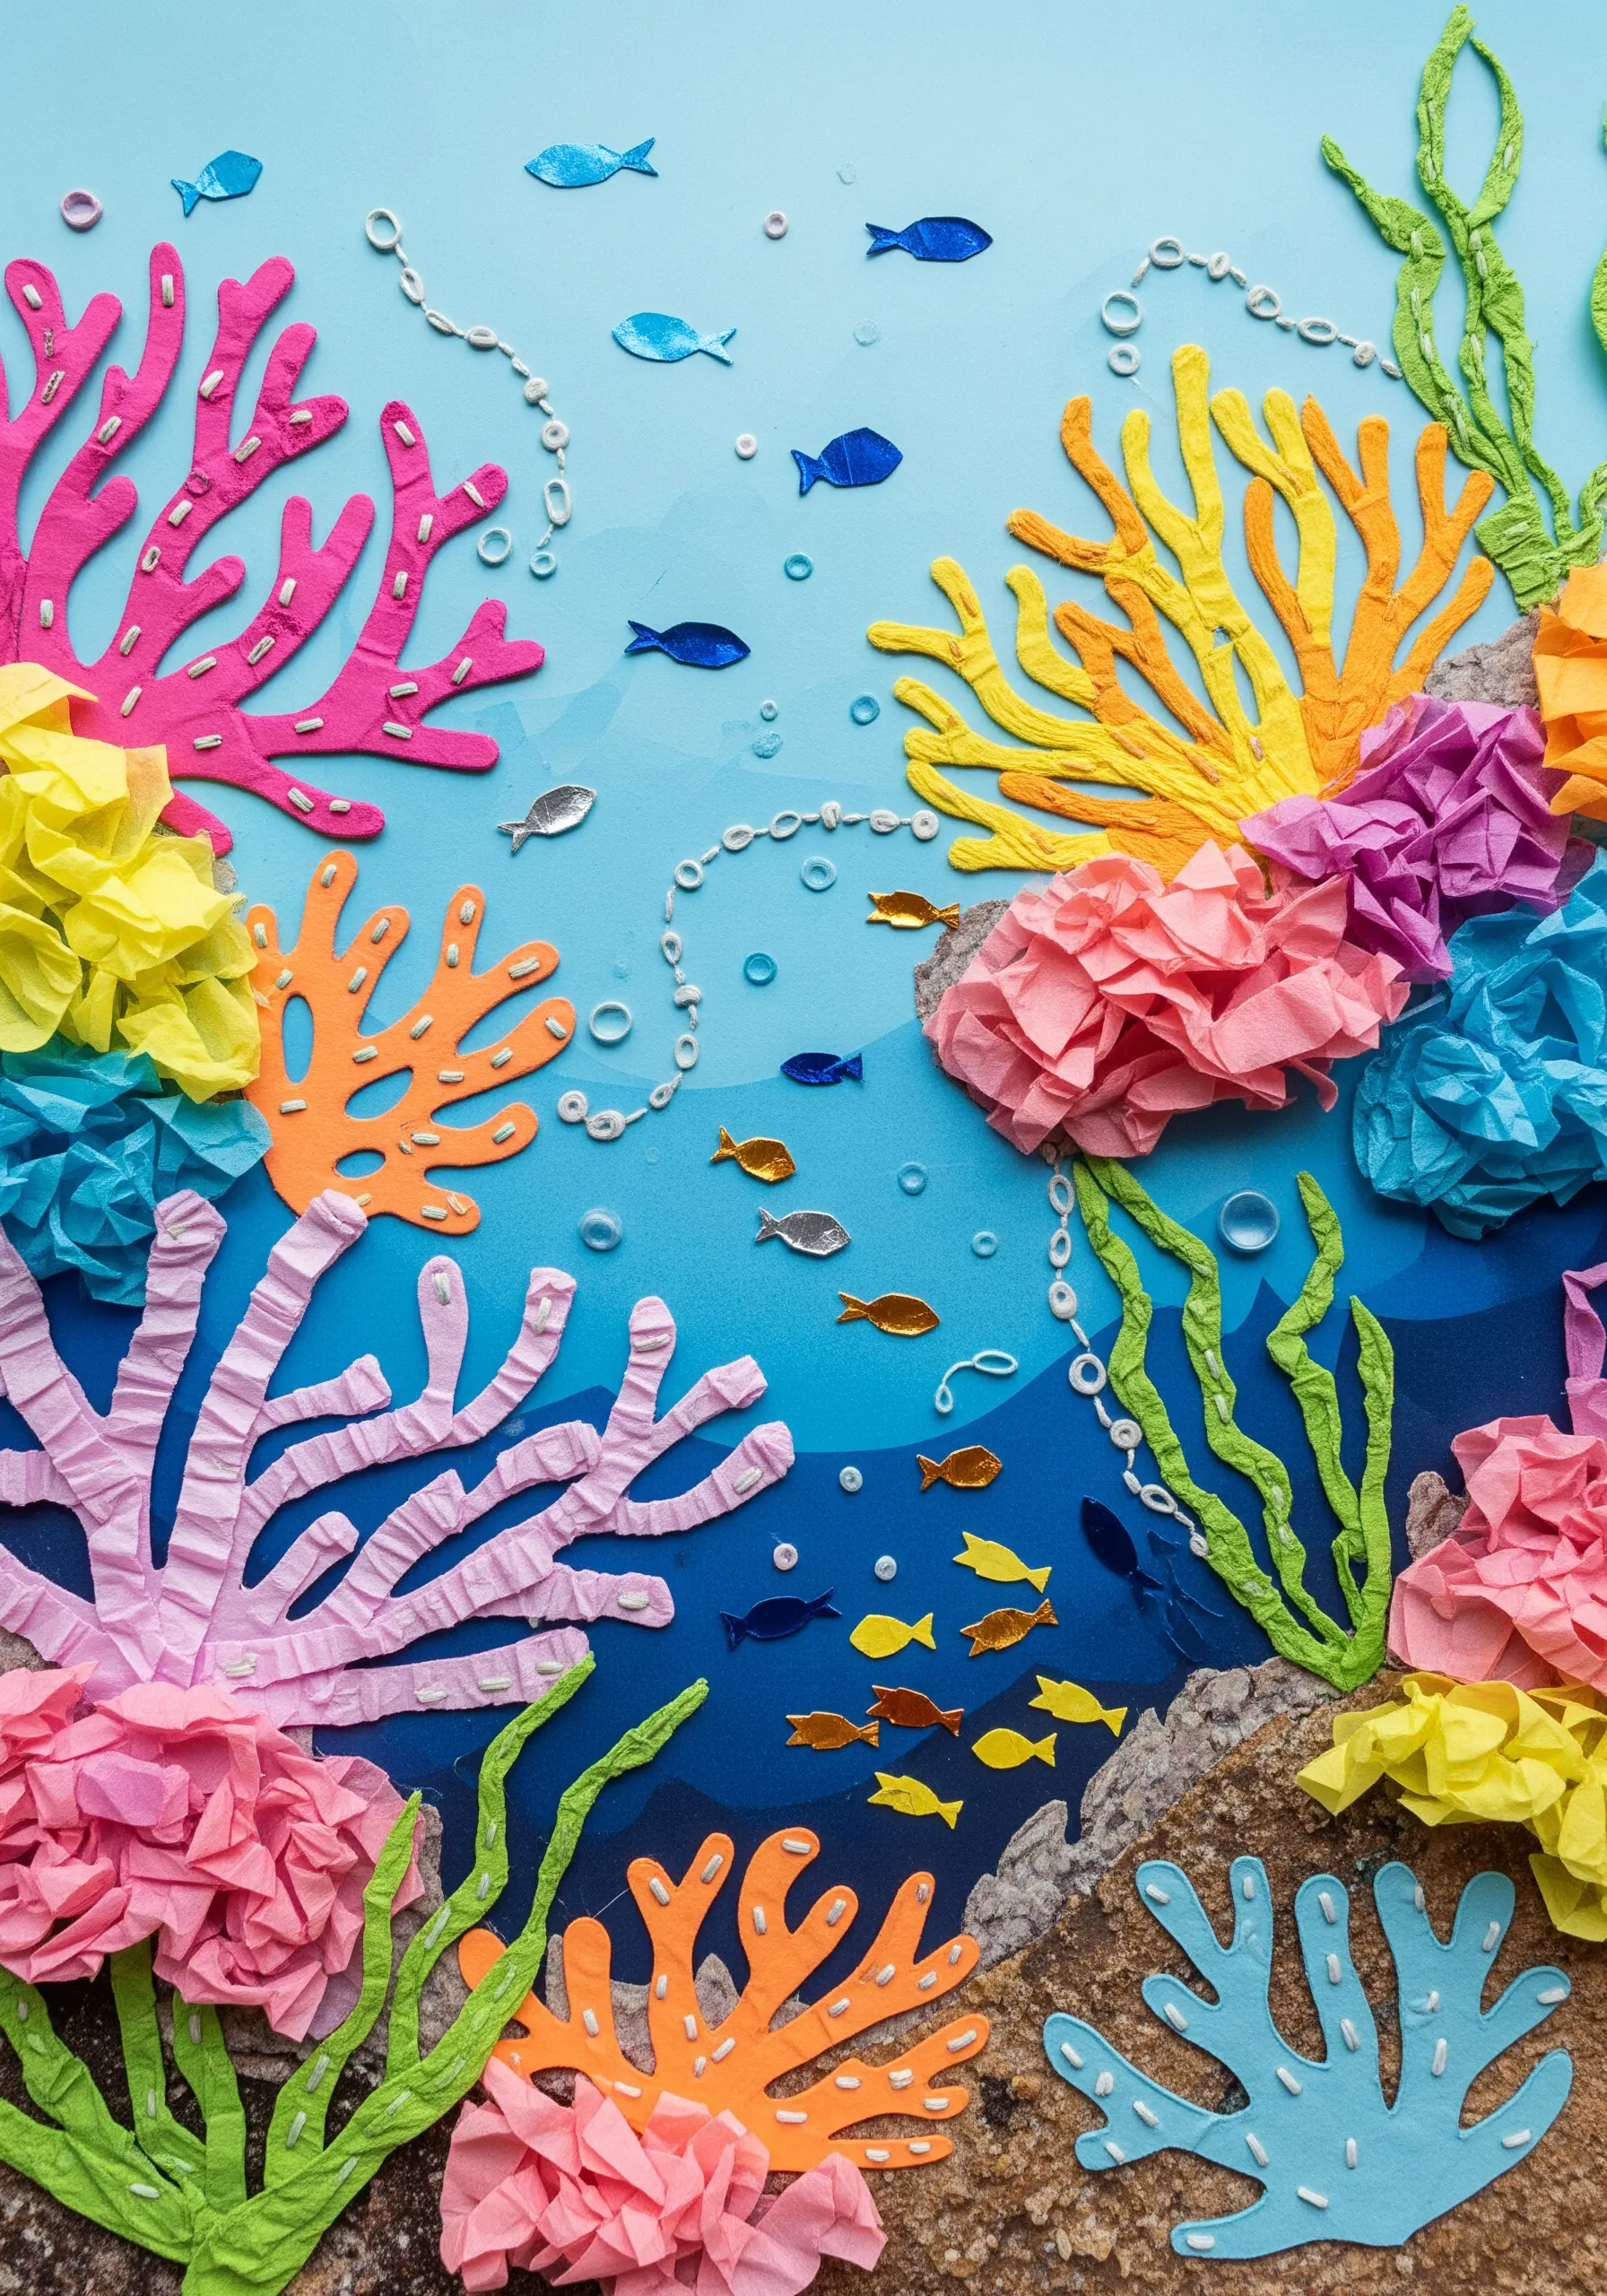
The ruffled tissue paper in this coral reef scene is all about organic volume and texture.
You can create similar underwater shapes using highly textural, three-dimensional stitches.
Try the woven picot stitch to build coral branches that stand away from the fabric, or use clusters of French knots and drizzle stitches to form soft, anemone-like structures.
For the delicate seaweed, a cast-on stitch or bullion knot creates elegant, raised tendrils, perfect for ocean-inspired hoop embroidery ideas.
9. Capture Architectural Lines with a Split Stitch Base
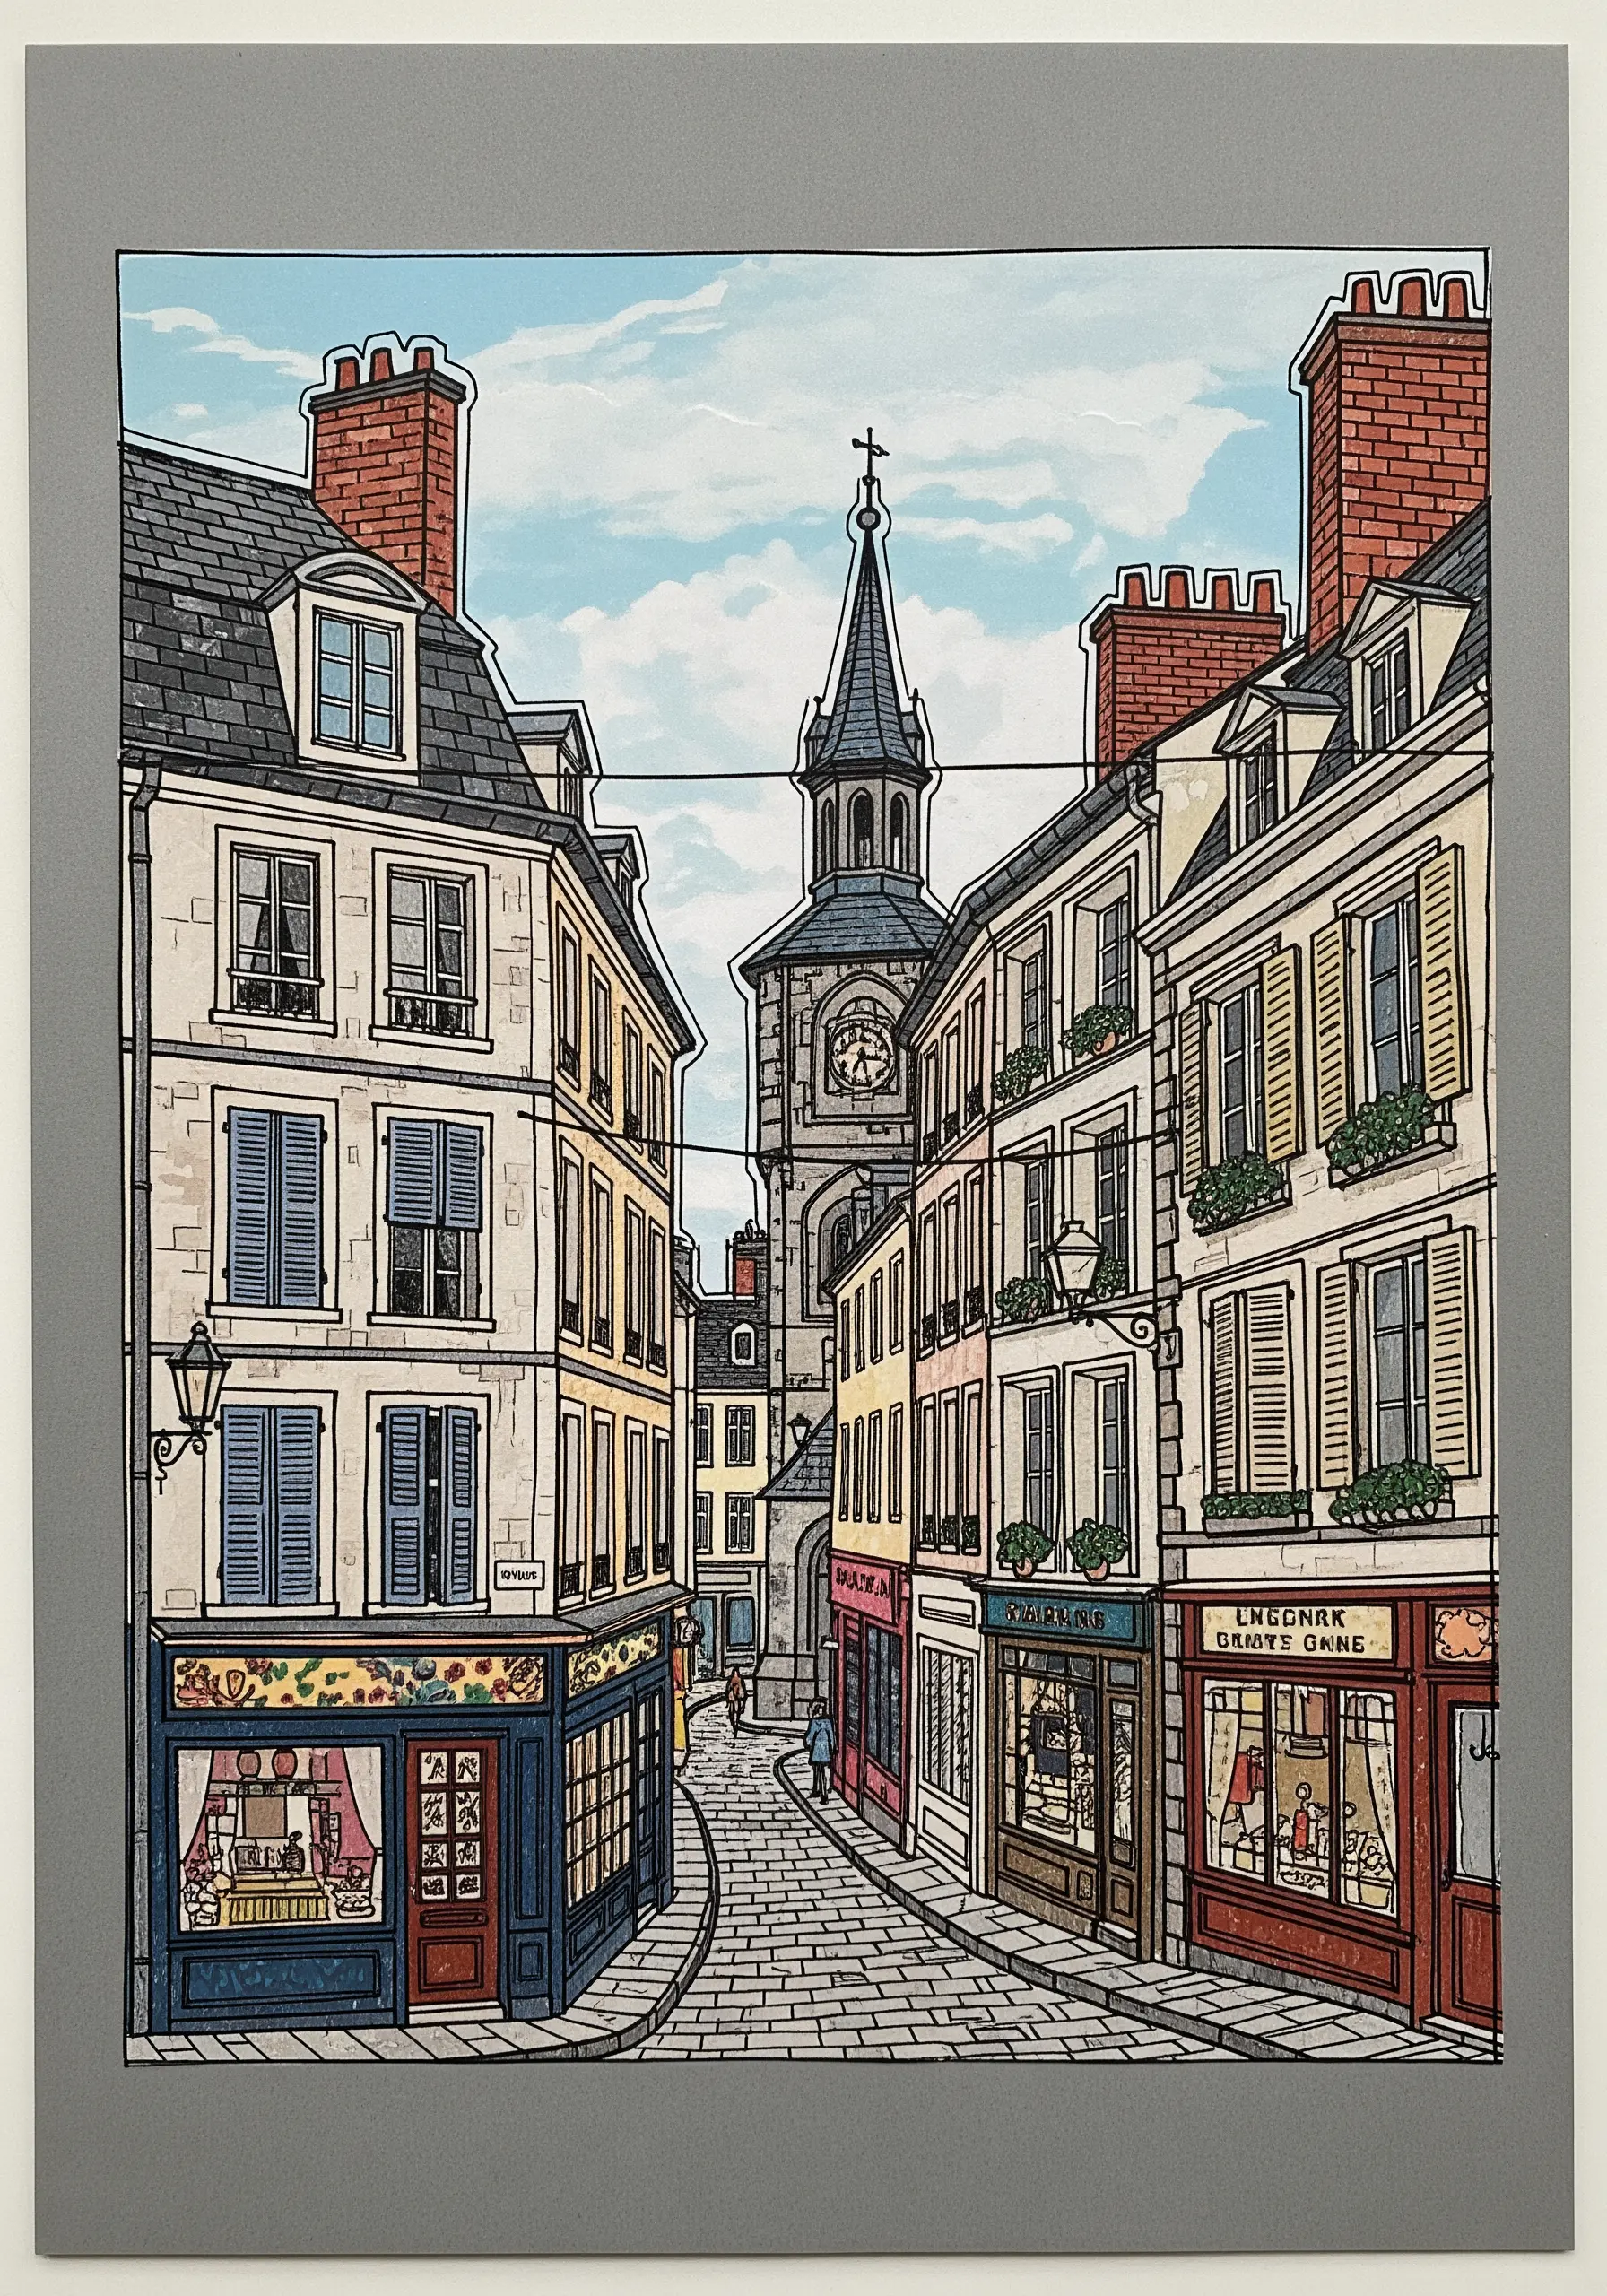
The crisp, ink-like lines of this street scene give it structure and a distinct illustrative quality.
If your outlines look uneven, reinforce them with a split-stitch base before covering them with a final satin stitch or whipped backstitch.
This foundational layer stabilizes the thread and creates a slightly raised, perfectly sharp edge.
Use a single strand of black floss for the finest details, like window panes, and a heavier 4- or 6-strand floss for the main building outlines to create visual hierarchy.
10. Use Cross-Hatching to Create Form and Shadow
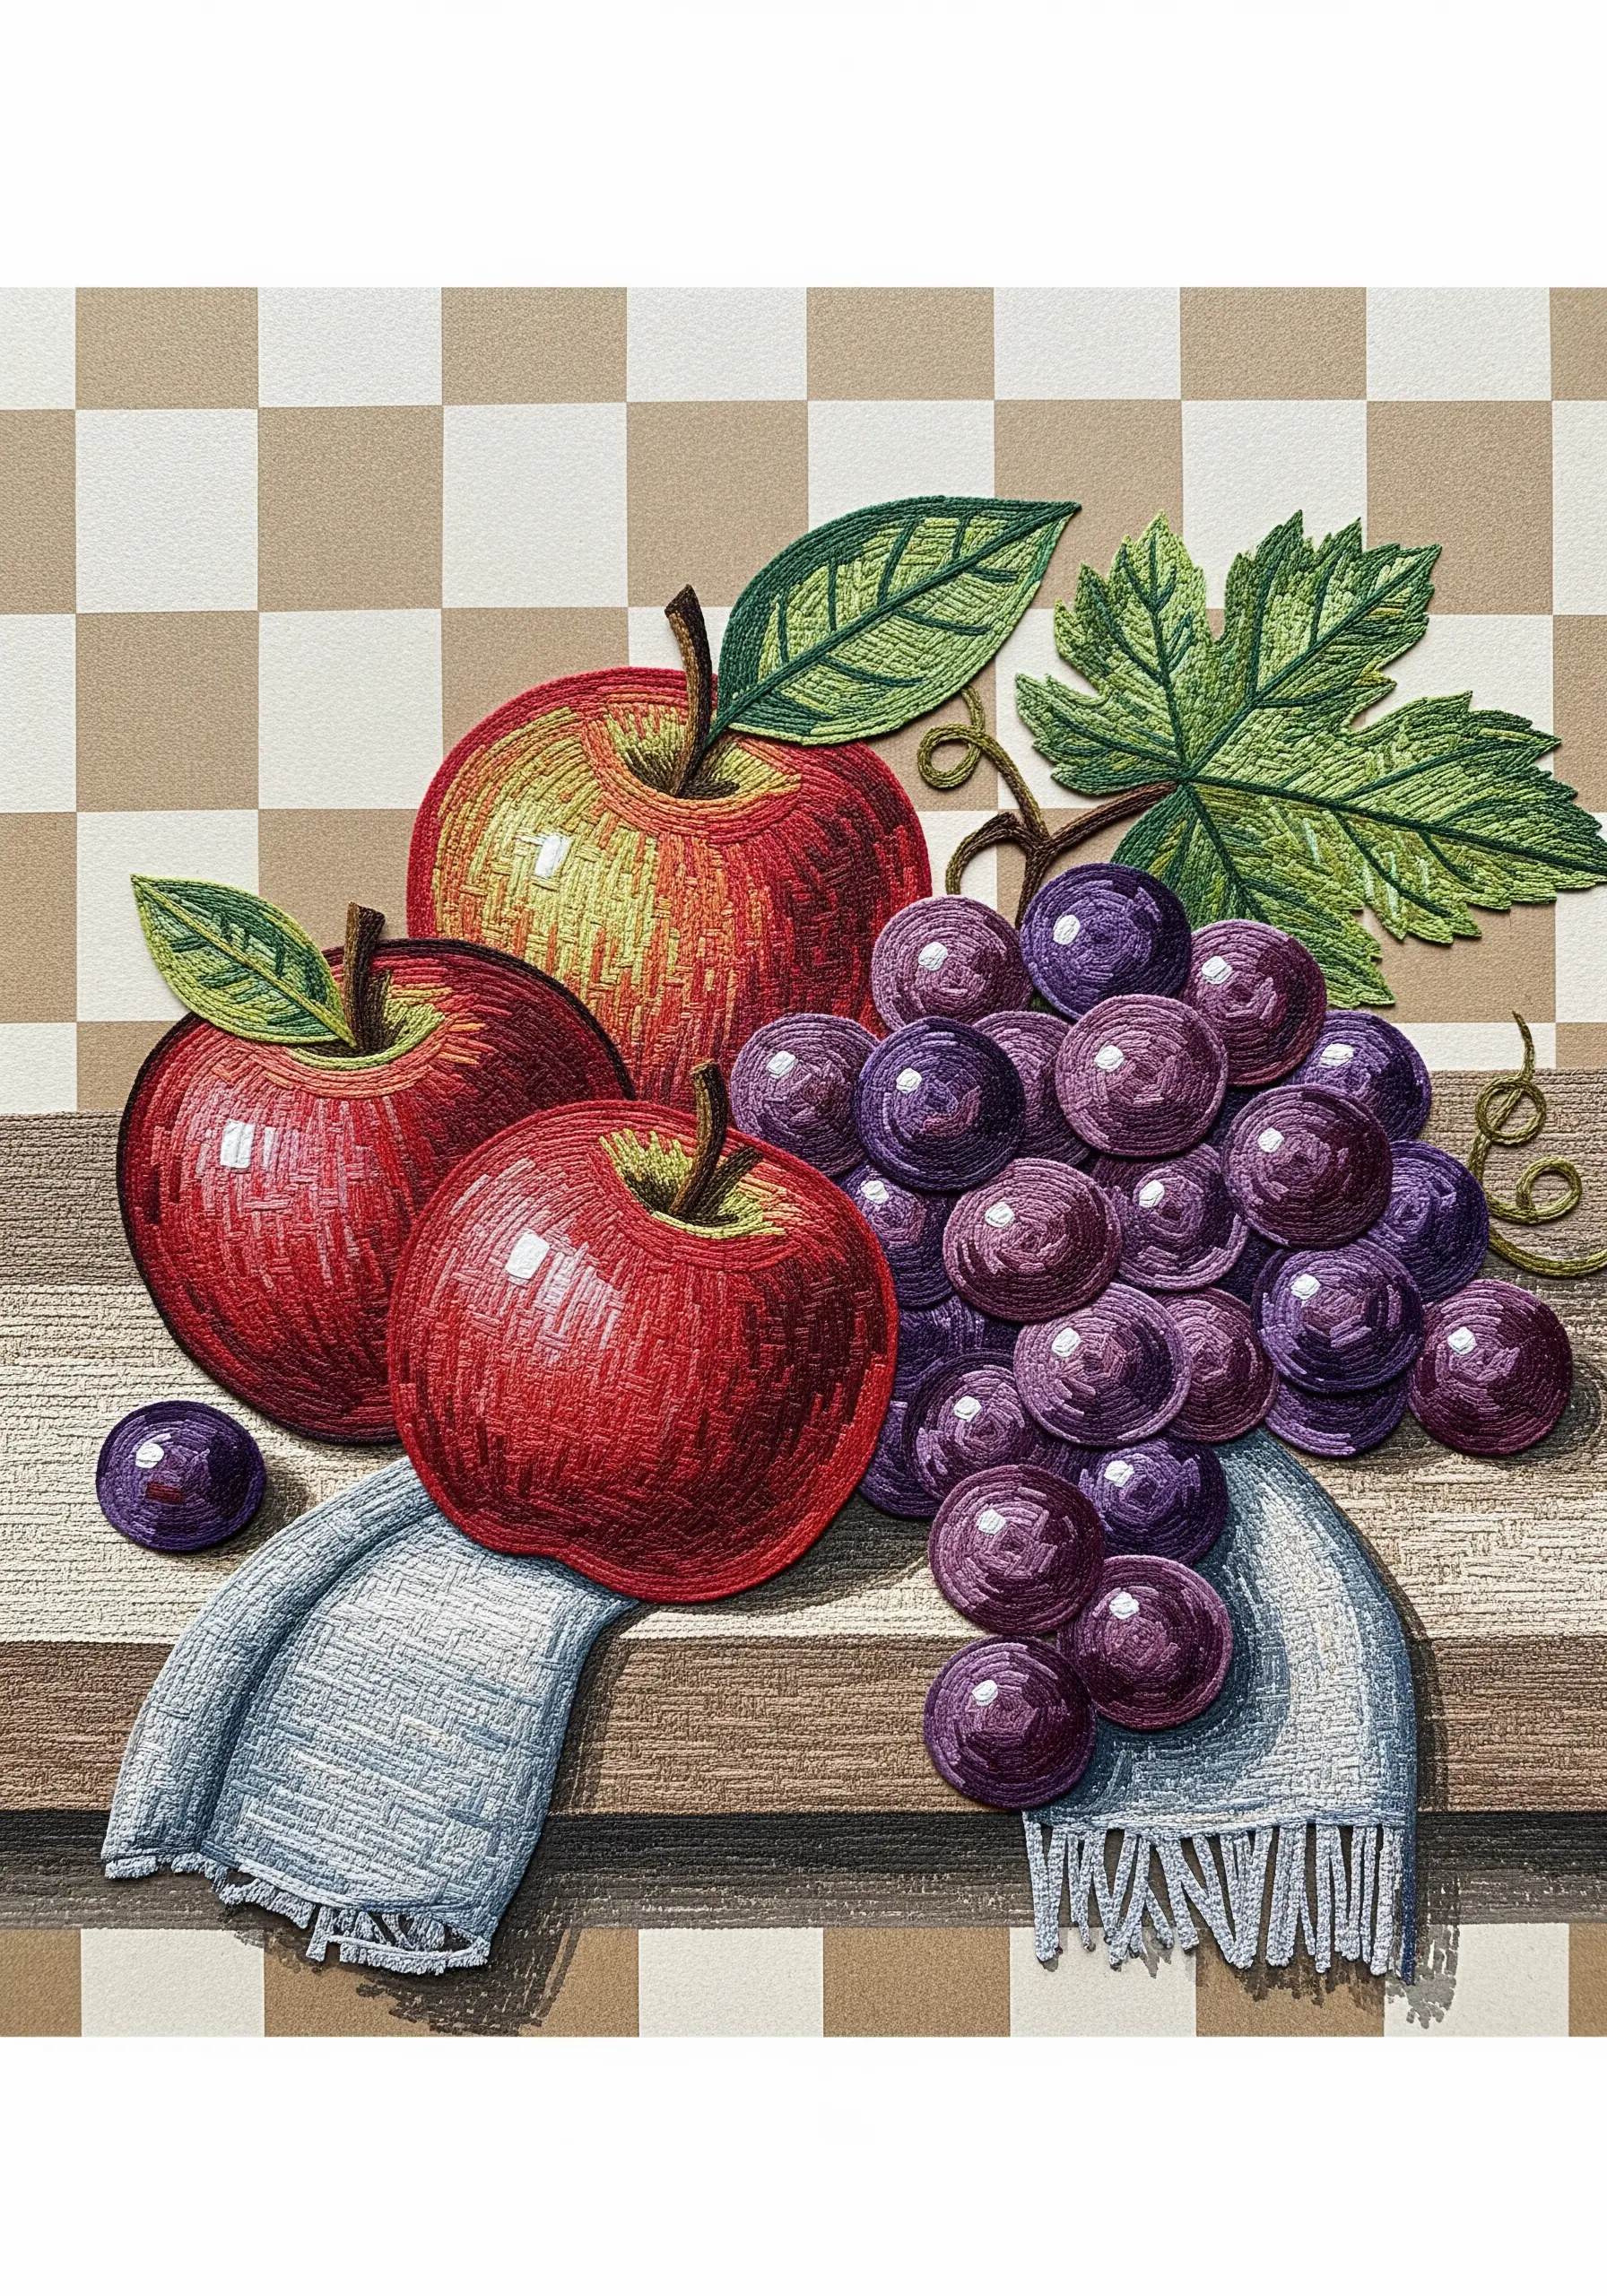
This still life cleverly uses a cross-hatching texture to suggest the roundness of the fruit and the folds of the cloth.
You can translate this directly to embroidery with seed stitches or simple straight stitches.
Work your stitches in one direction to create an initial layer of shading, then add a second layer of stitches at an opposing angle.
By varying the density and length of your stitches, you can create nuanced gradients and shadows, giving your work a sophisticated, hand-drawn aesthetic.
11. Integrate Patterned Fabric with Appliqué
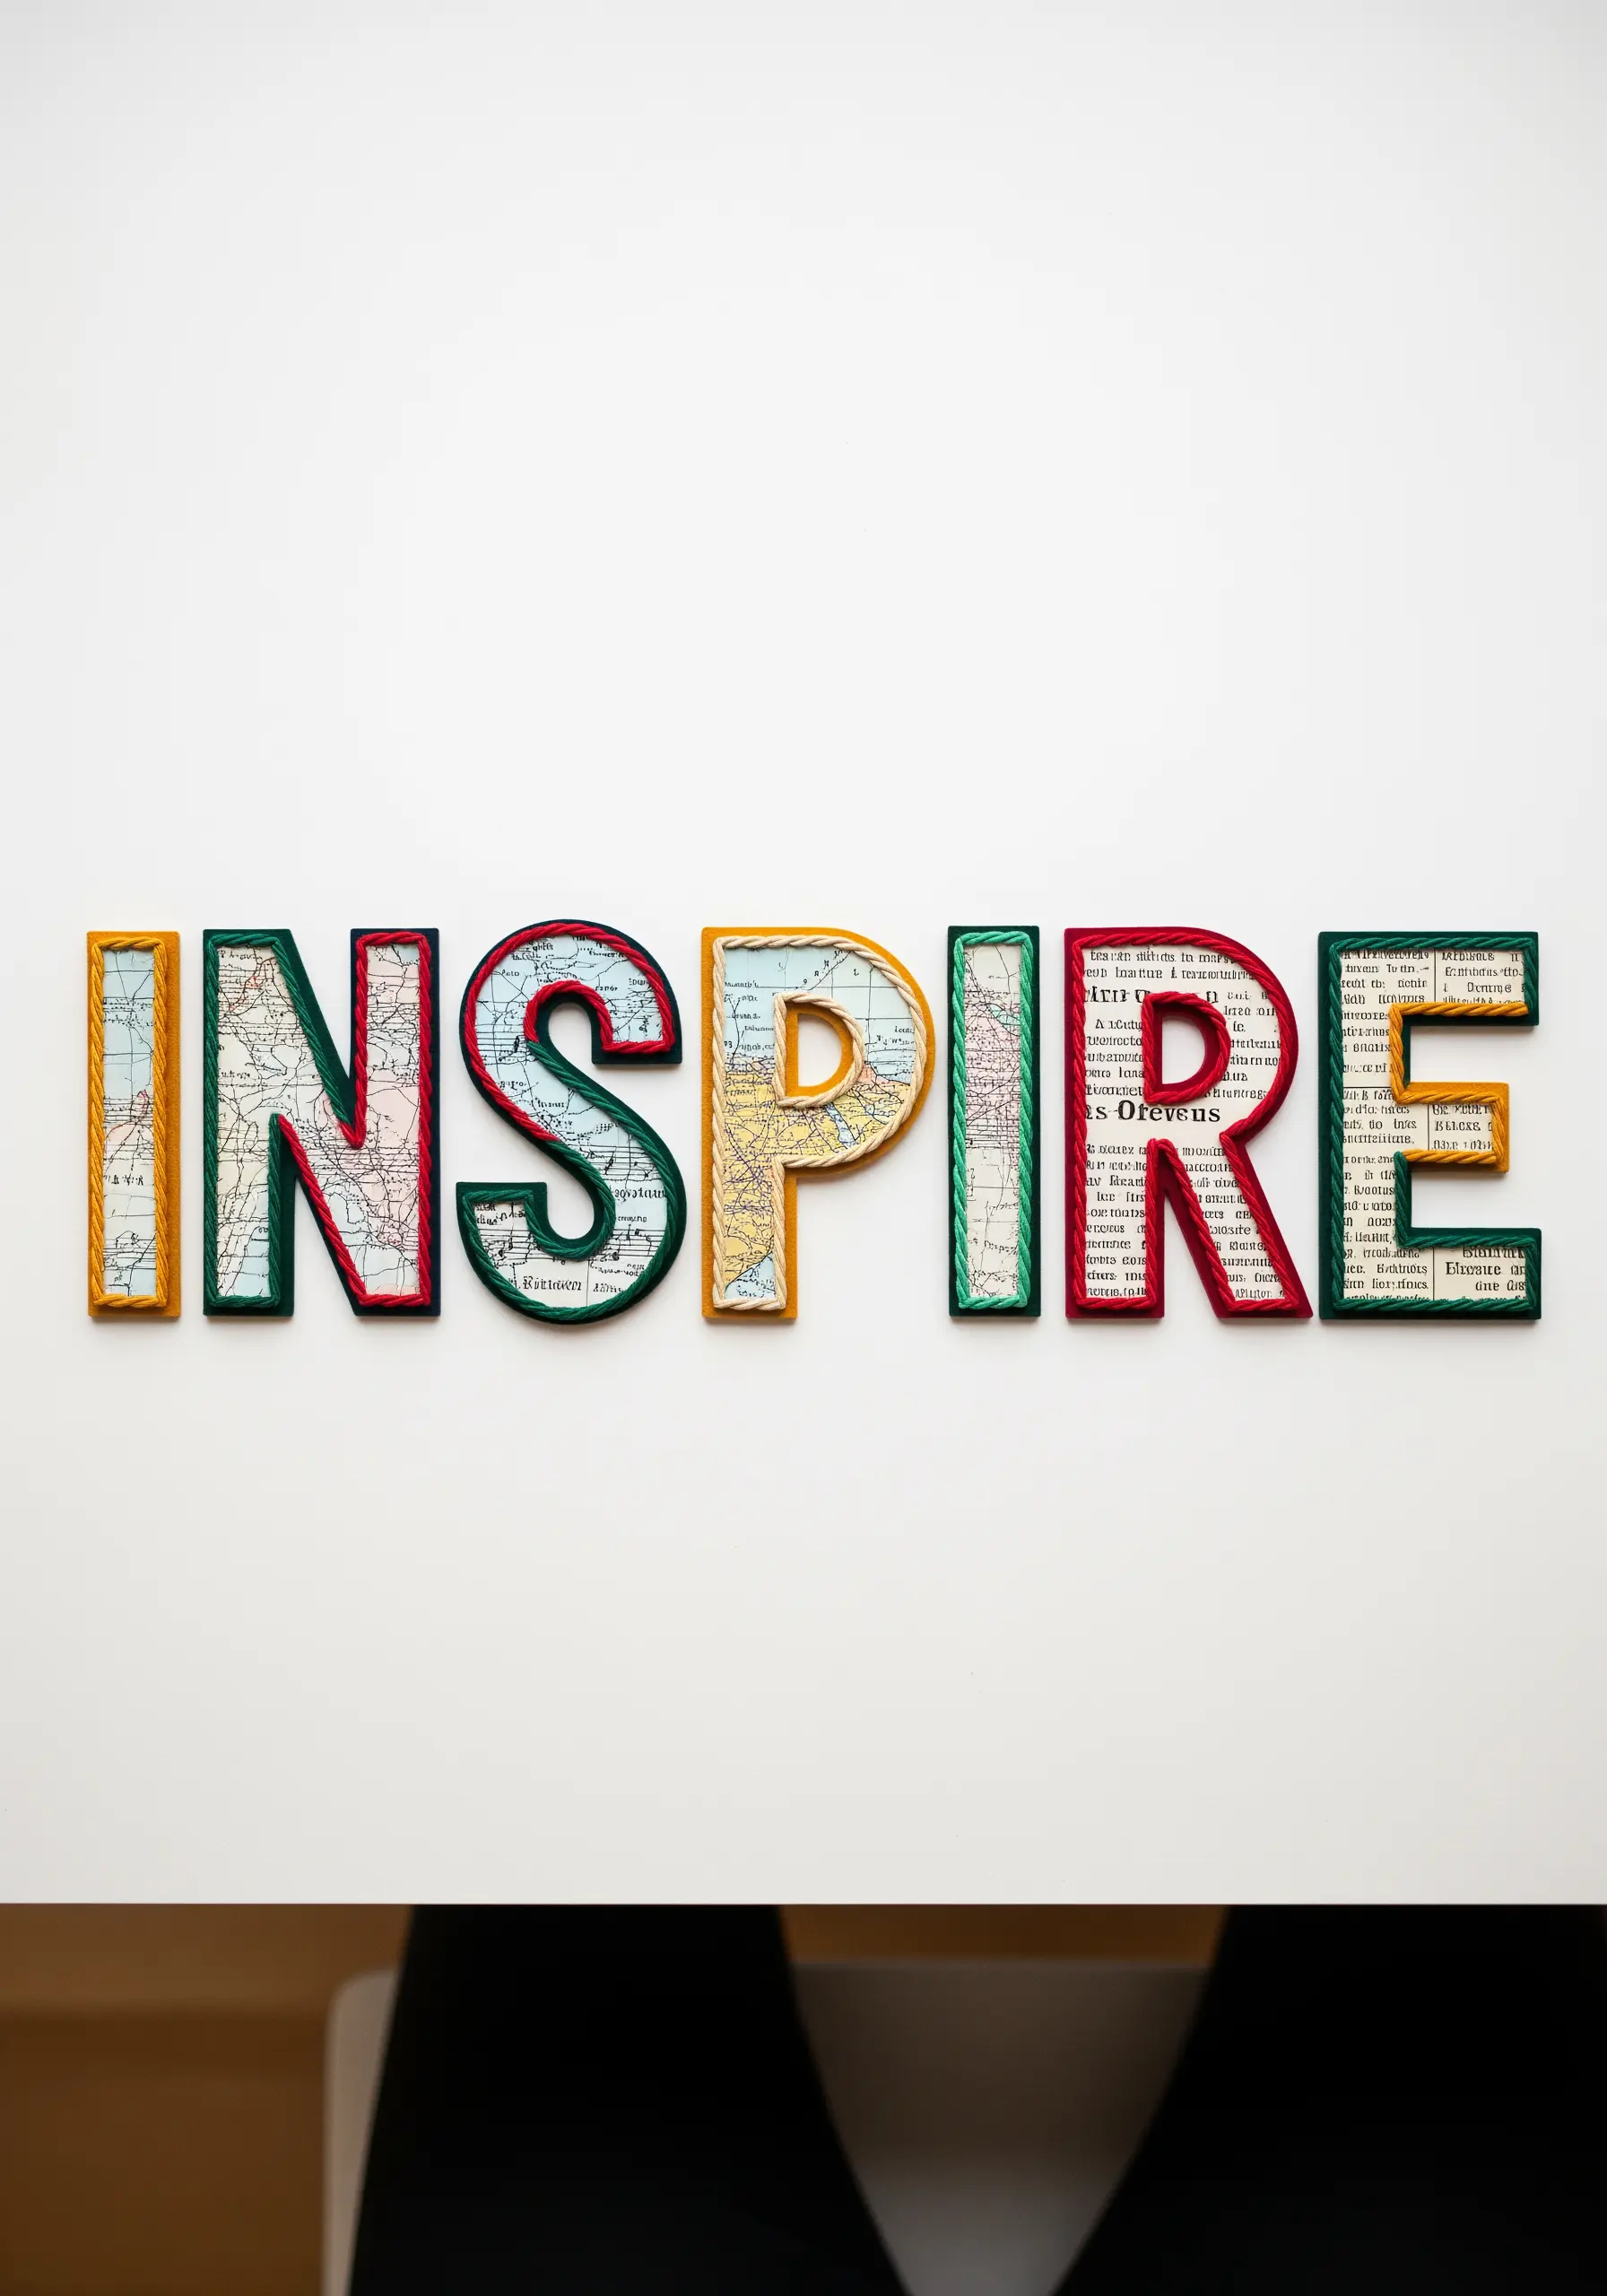
The map paper used within these letters adds a layer of narrative and visual interest.
In your own work, you can achieve this by using patterned fabric as an appliqué base.
Simply cut your letters or shapes from a favorite printed cotton, fuse them to your background fabric, and then secure the edges with a neat blanket stitch or a simple running stitch.
The wrapped thread on the edges is a perfect finishing touch—recreate it by couching a contrasting yarn around your appliqué shape.
This technique elevates simple DIY embroidery projects into meaningful art.
12. Mimic Iridescence with Precise Seed Stitches
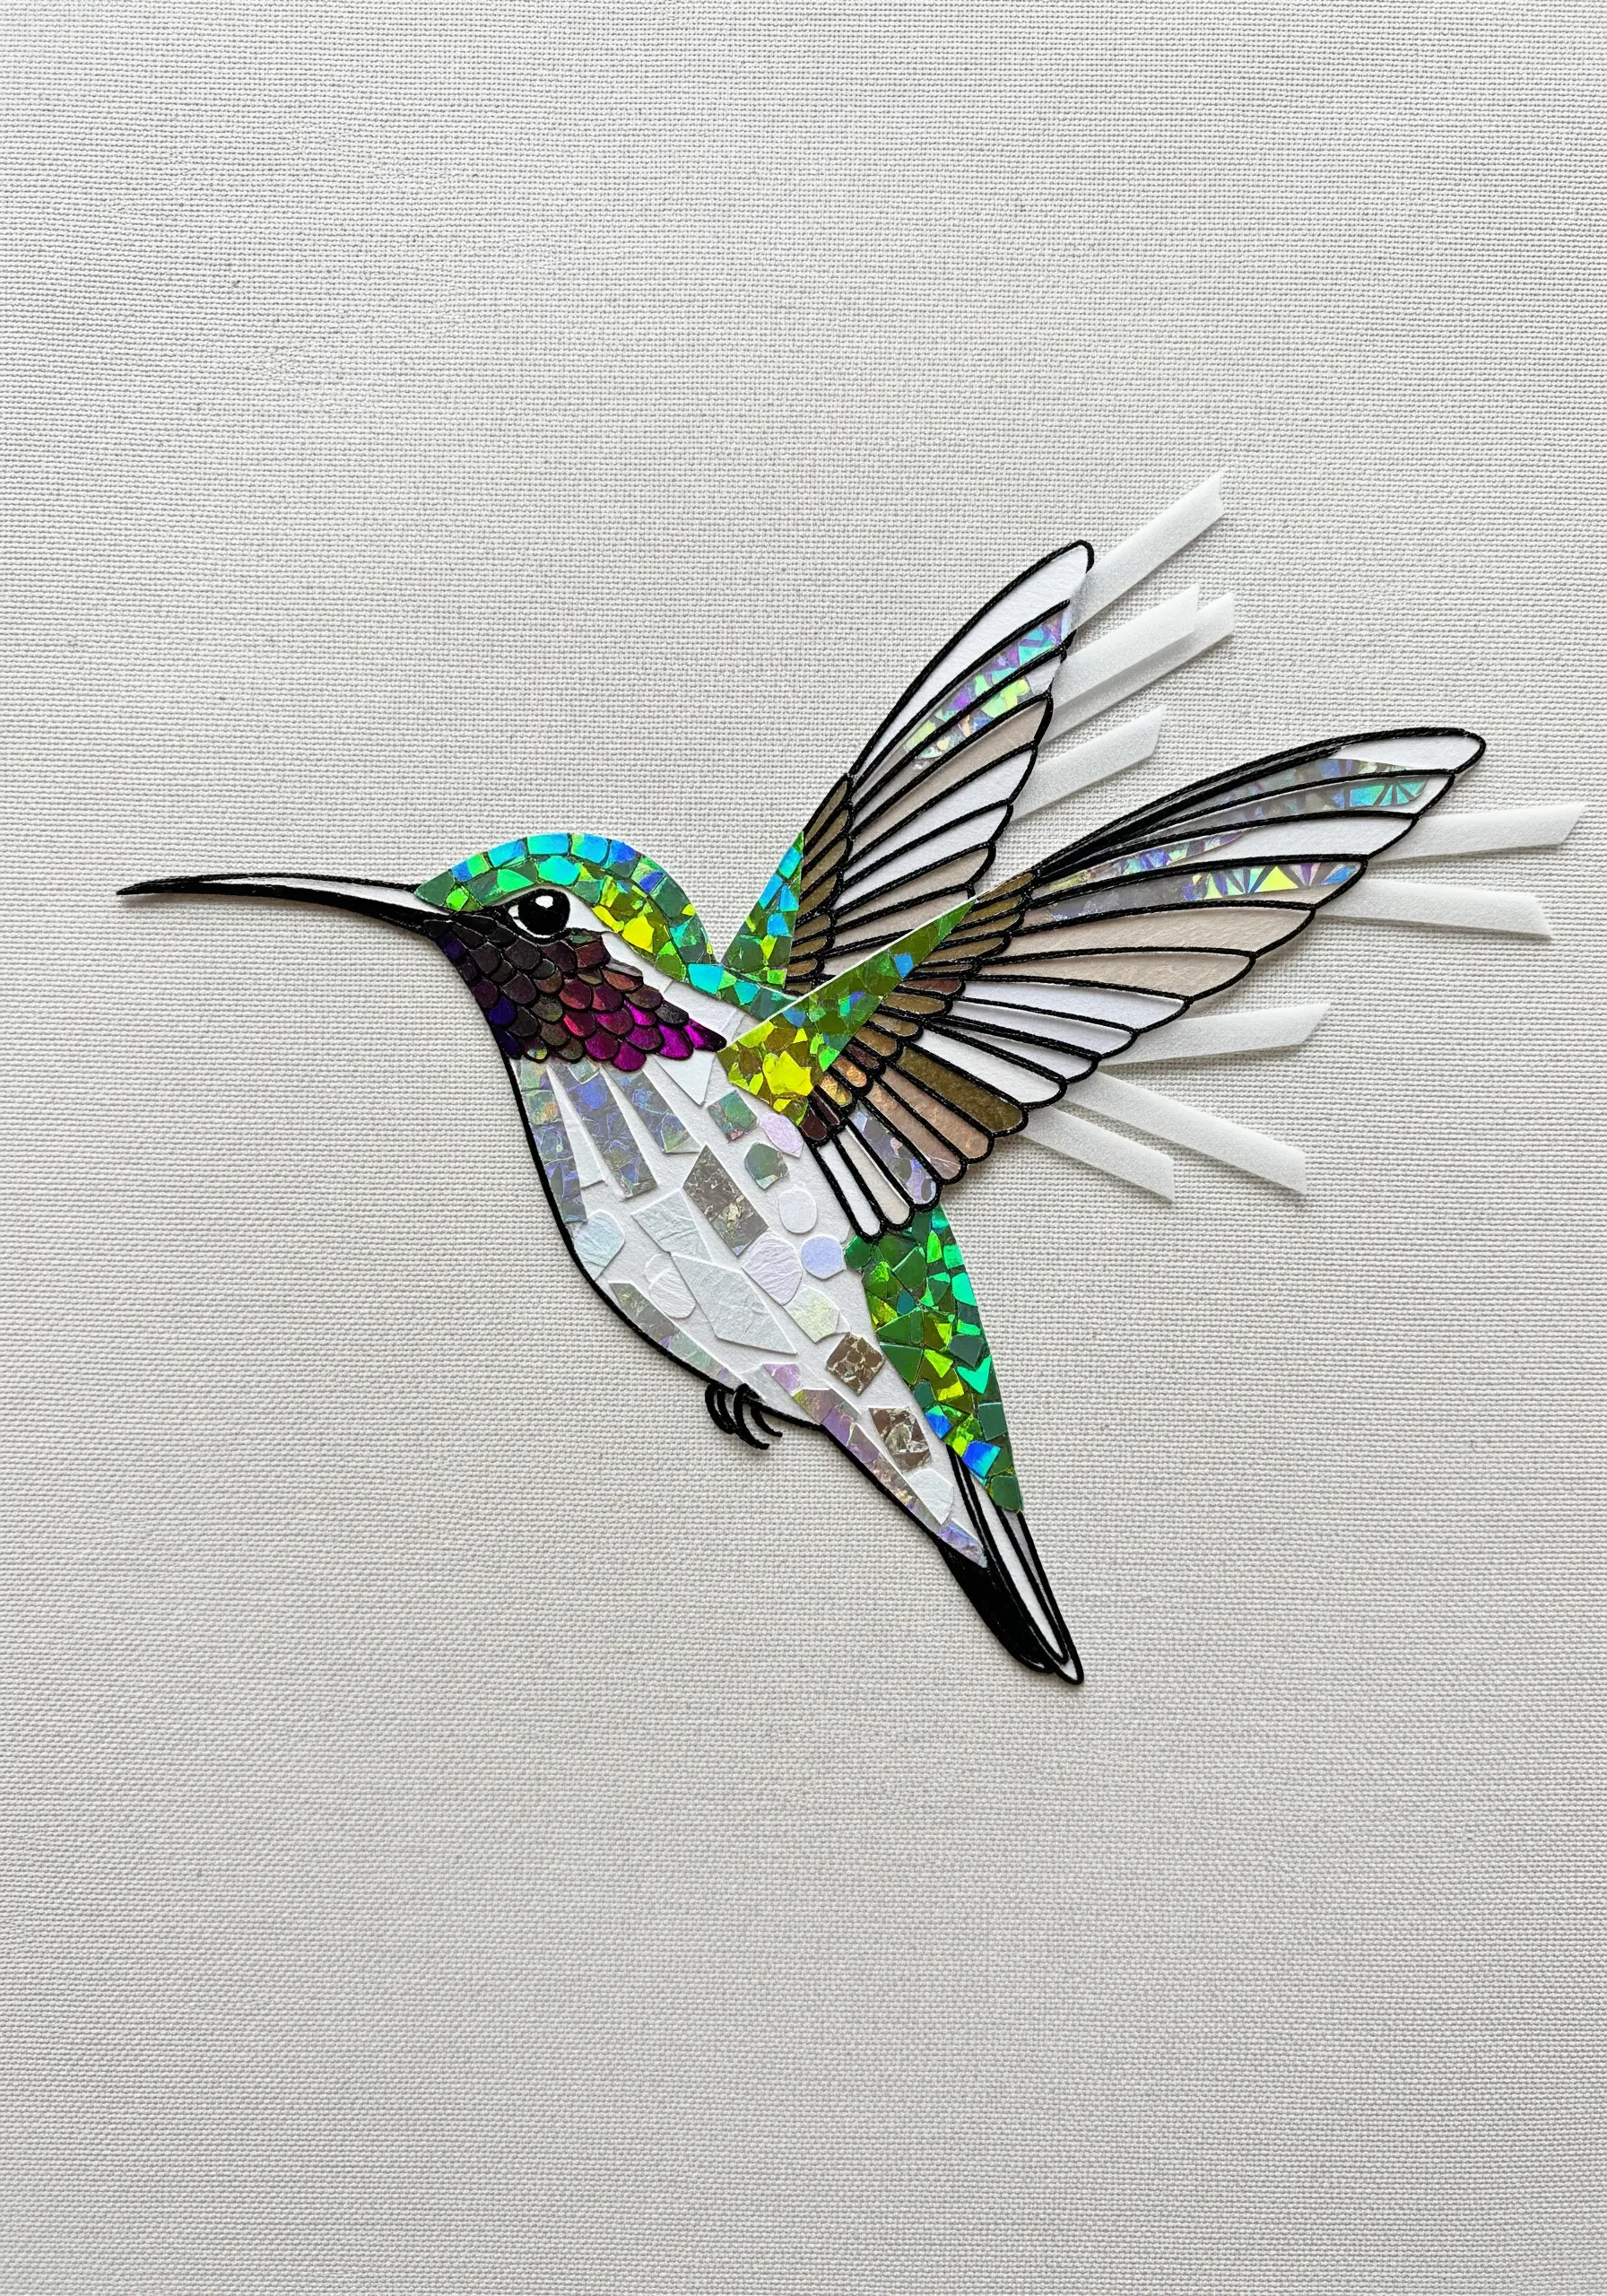
The hummingbird’s shimmering feathers are depicted with tiny, holographic mosaic pieces.
To create this iridescent effect with thread, use single strands of metallic, silk, or variegated floss.
Fill each small color section with tiny, carefully placed seed stitches, changing the angle of your stitches slightly to catch the light in different ways.
This meticulous process builds a surface that glitters and shifts in color as the viewer moves, perfectly capturing the magic of a hummingbird’s plumage.
13. Create Scaly Textures with Overlapping Stitches
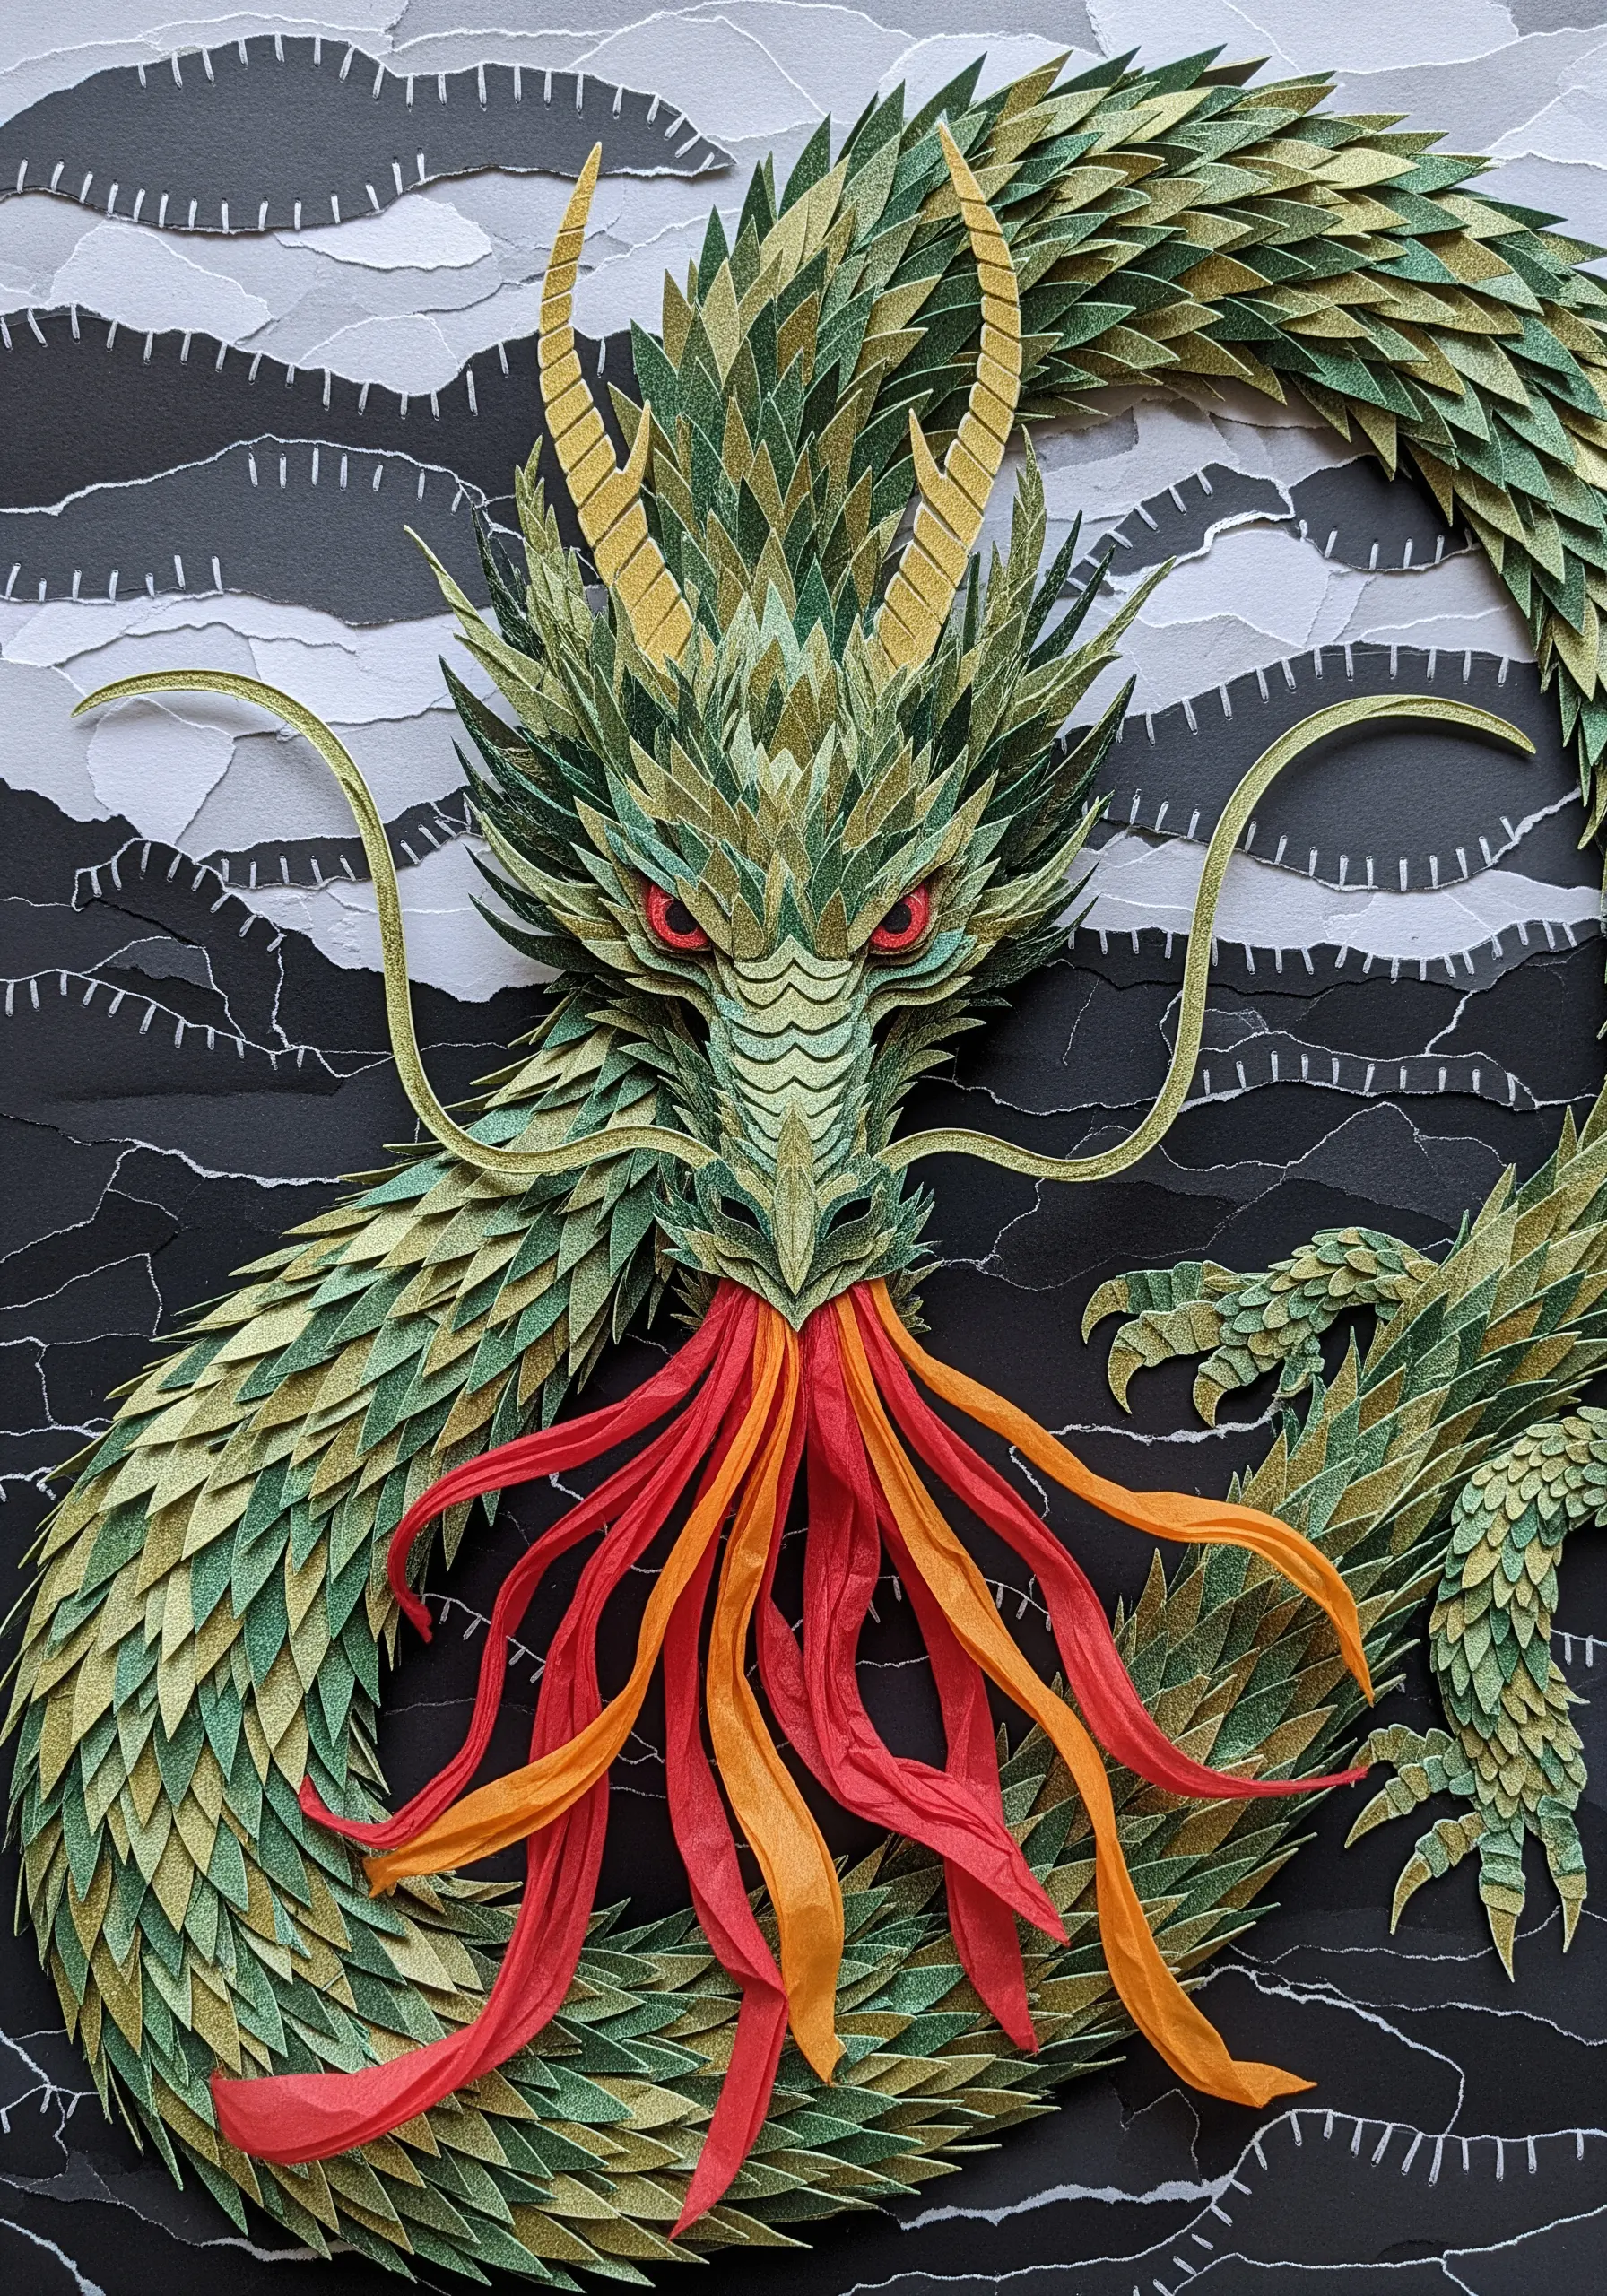
The dragon’s body is a masterpiece of layered, scale-like paper cutouts, creating incredible dimension.
You can build a similar surface using the fishbone stitch or overlapping fly stitches.
Work in rows, allowing the base of each new stitch to slightly cover the tip of the one below it. This creates a natural, layered texture that mimics scales, feathers, or even dense fur.
Using a variegated green thread will add subtle color shifts, enhancing the three-dimensional illusion without extra effort.
14. Combine Appliqué Lace with 3D Floral Stitches
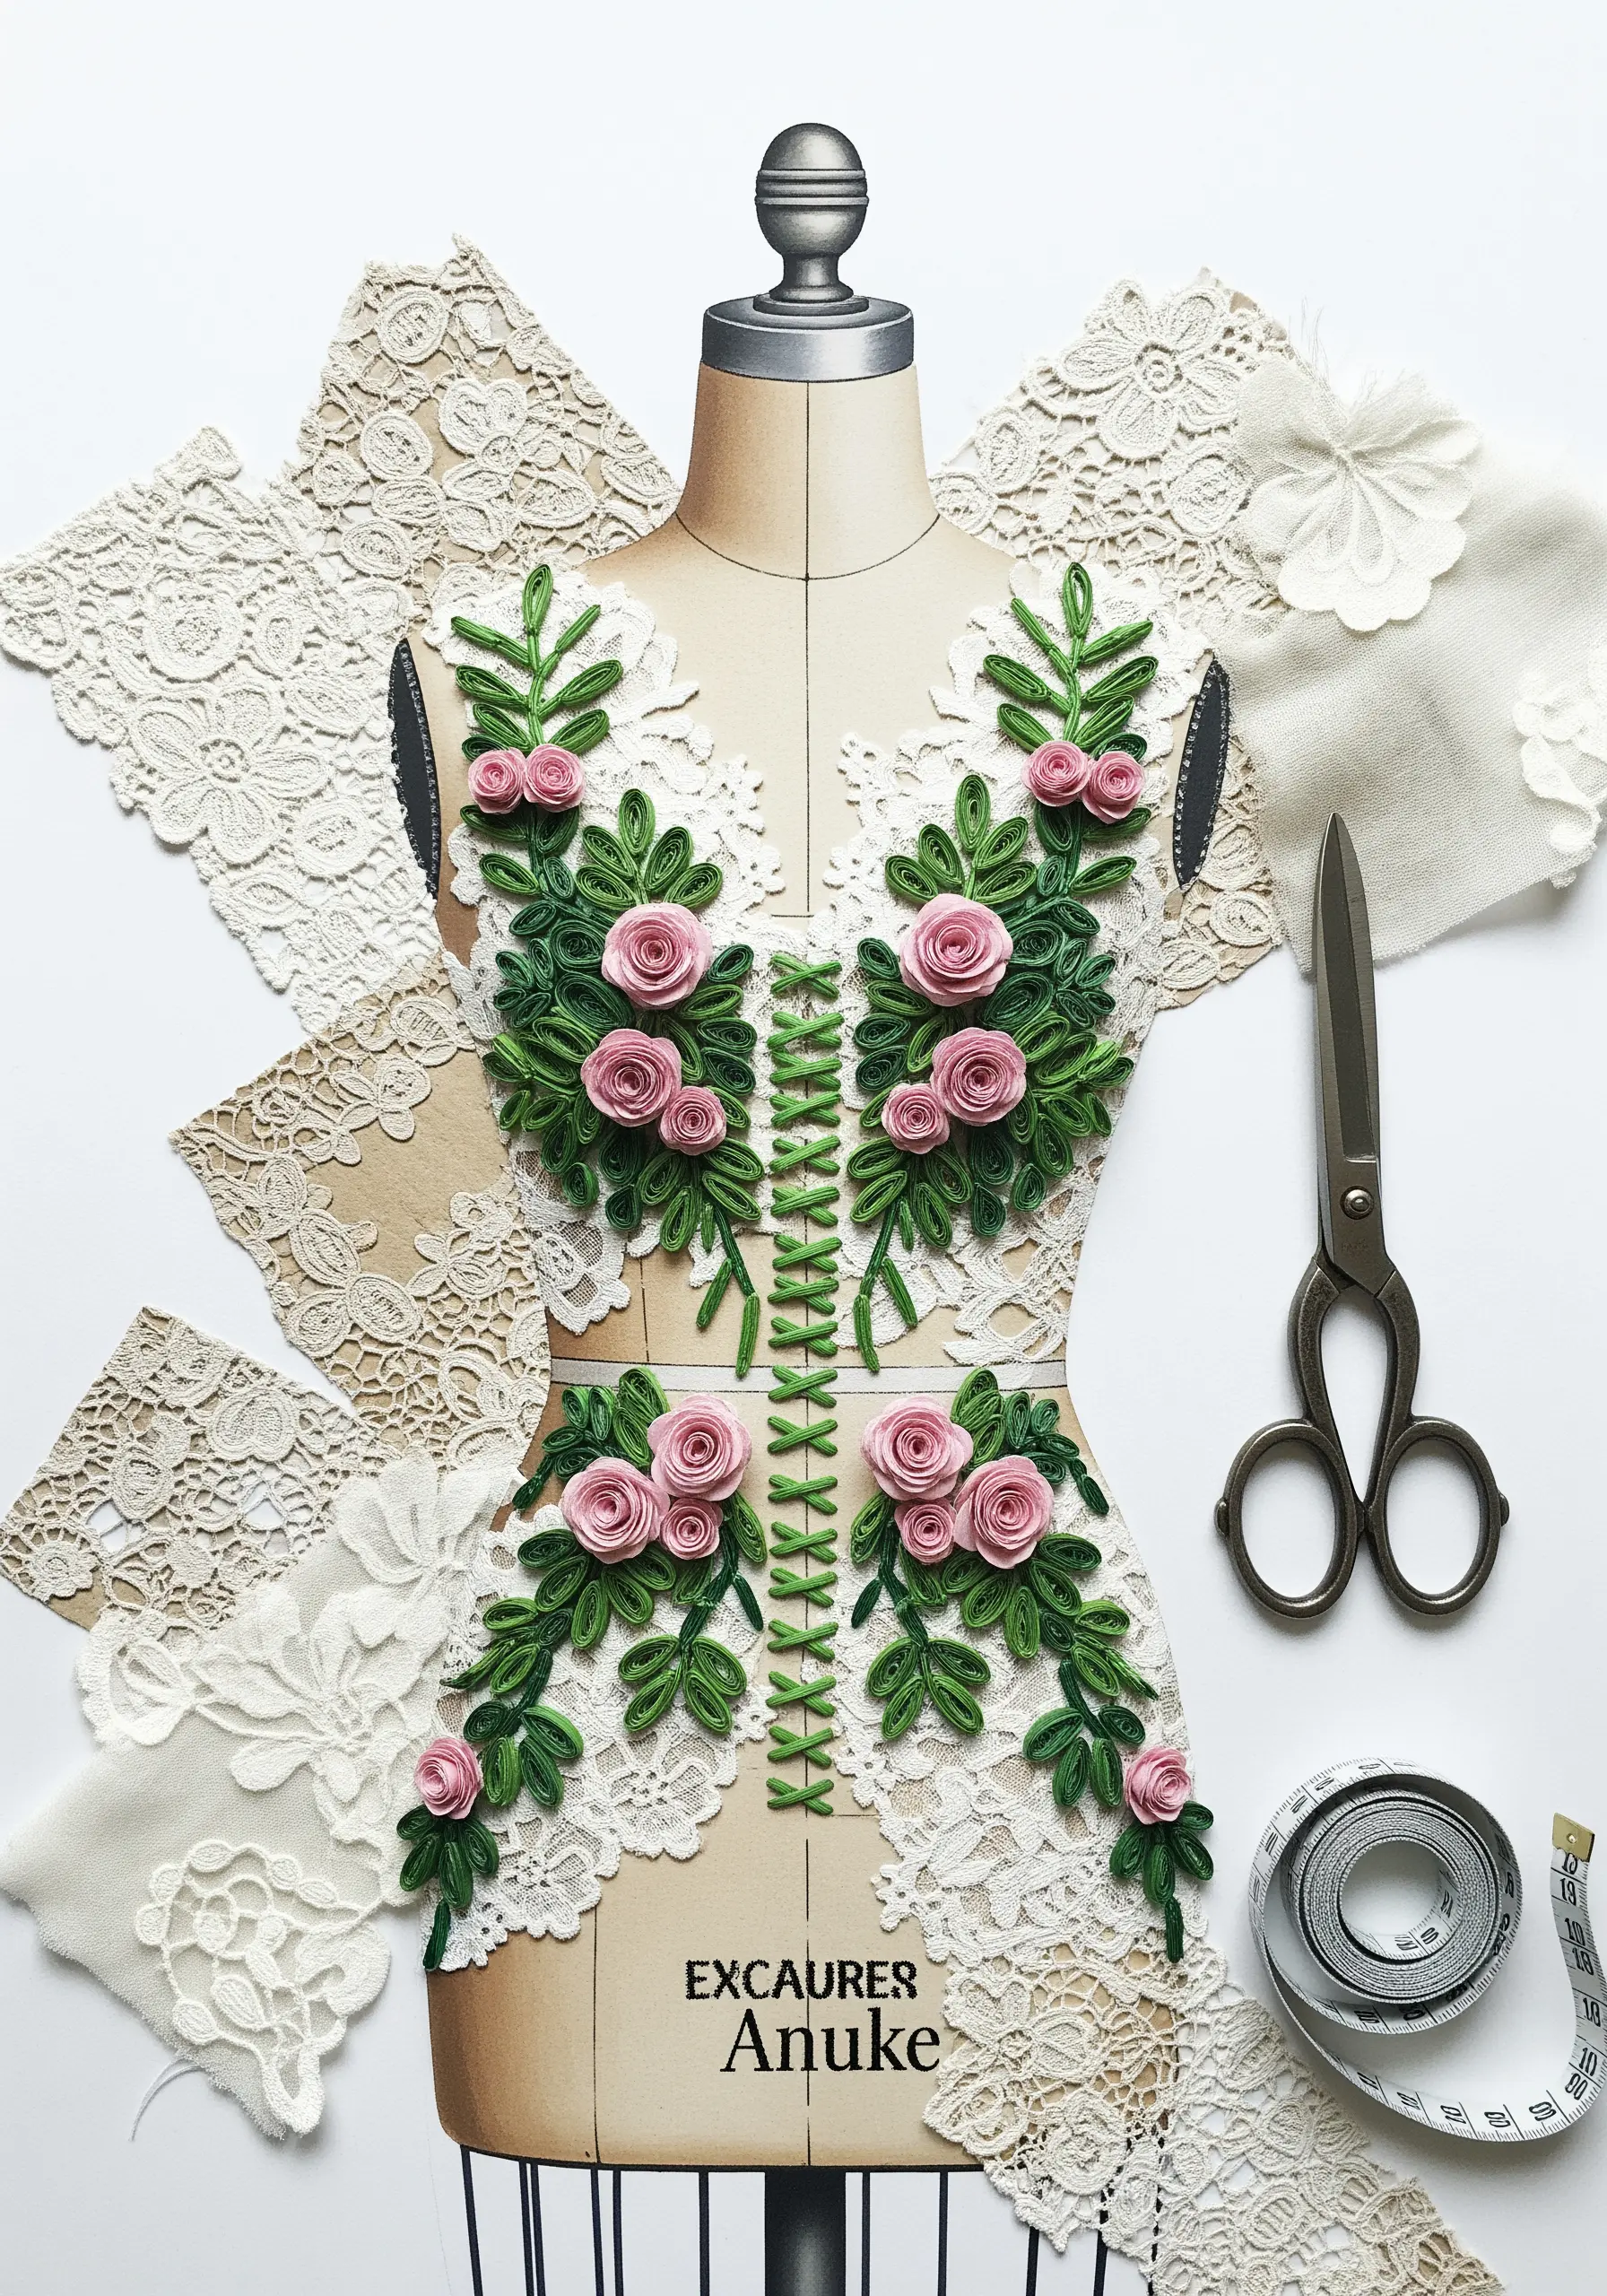
This design beautifully merges a lace base with sculpted paper florals, suggesting a couture garment.
Start by appliquéing a piece of vintage lace onto your fabric to create an elegant foundation.
Then, build your floral stitch wall art directly onto the lace using dimensional techniques.
Woven wheel stitches create lush, raised roses, while detached chain stitches (lazy daisies) are perfect for leaves. This combination of flat appliqué and raised stitches results in a rich, tactile piece.
15. Define Botanical Shapes with Linear Stitches
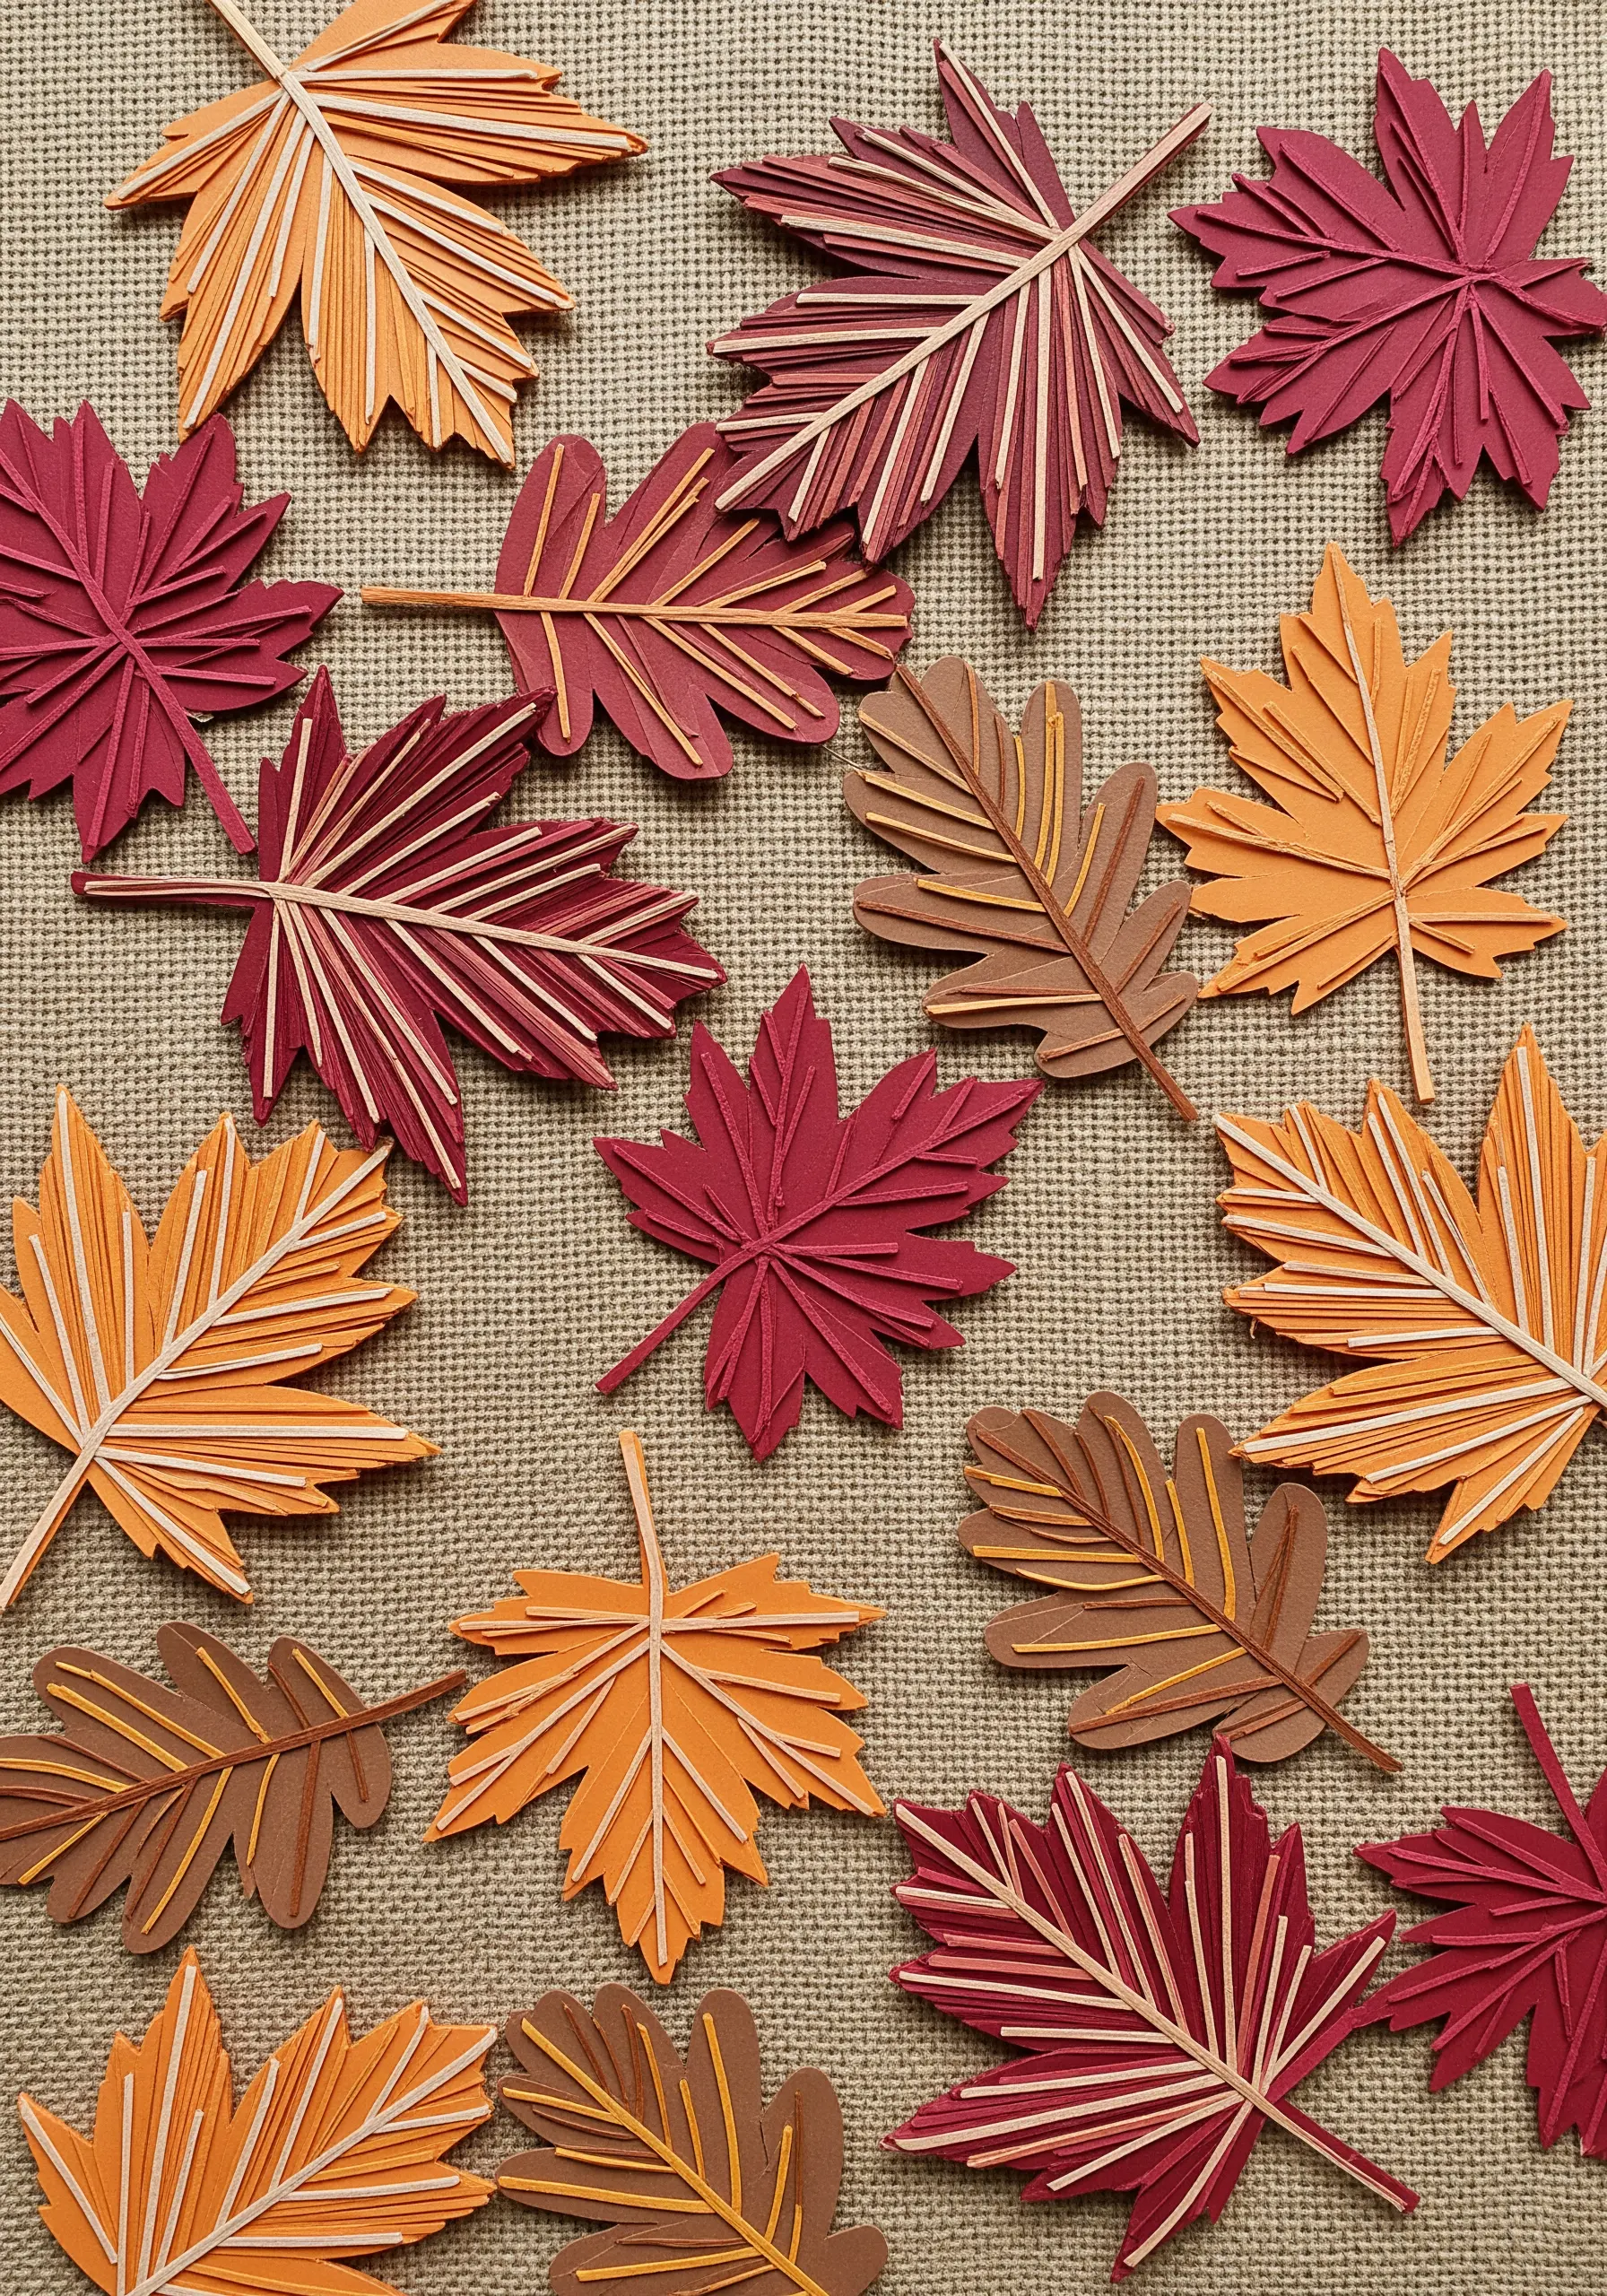
The contrasting lines on these paper leaves suggest veins and create a strong graphic quality.
This is a powerful reminder that sometimes the simplest stitches have the most impact.
After cutting leaf shapes from felt or cotton, use a contrasting color of thread to add veins with simple straight stitches or a central split stitch.
This single detail adds direction, structure, and a touch of refinement, turning a simple shape into a recognizable botanical element. This is one of the easiest leaf vein details you can stitch.
16. Frame Your Motifs with Decorative Borders
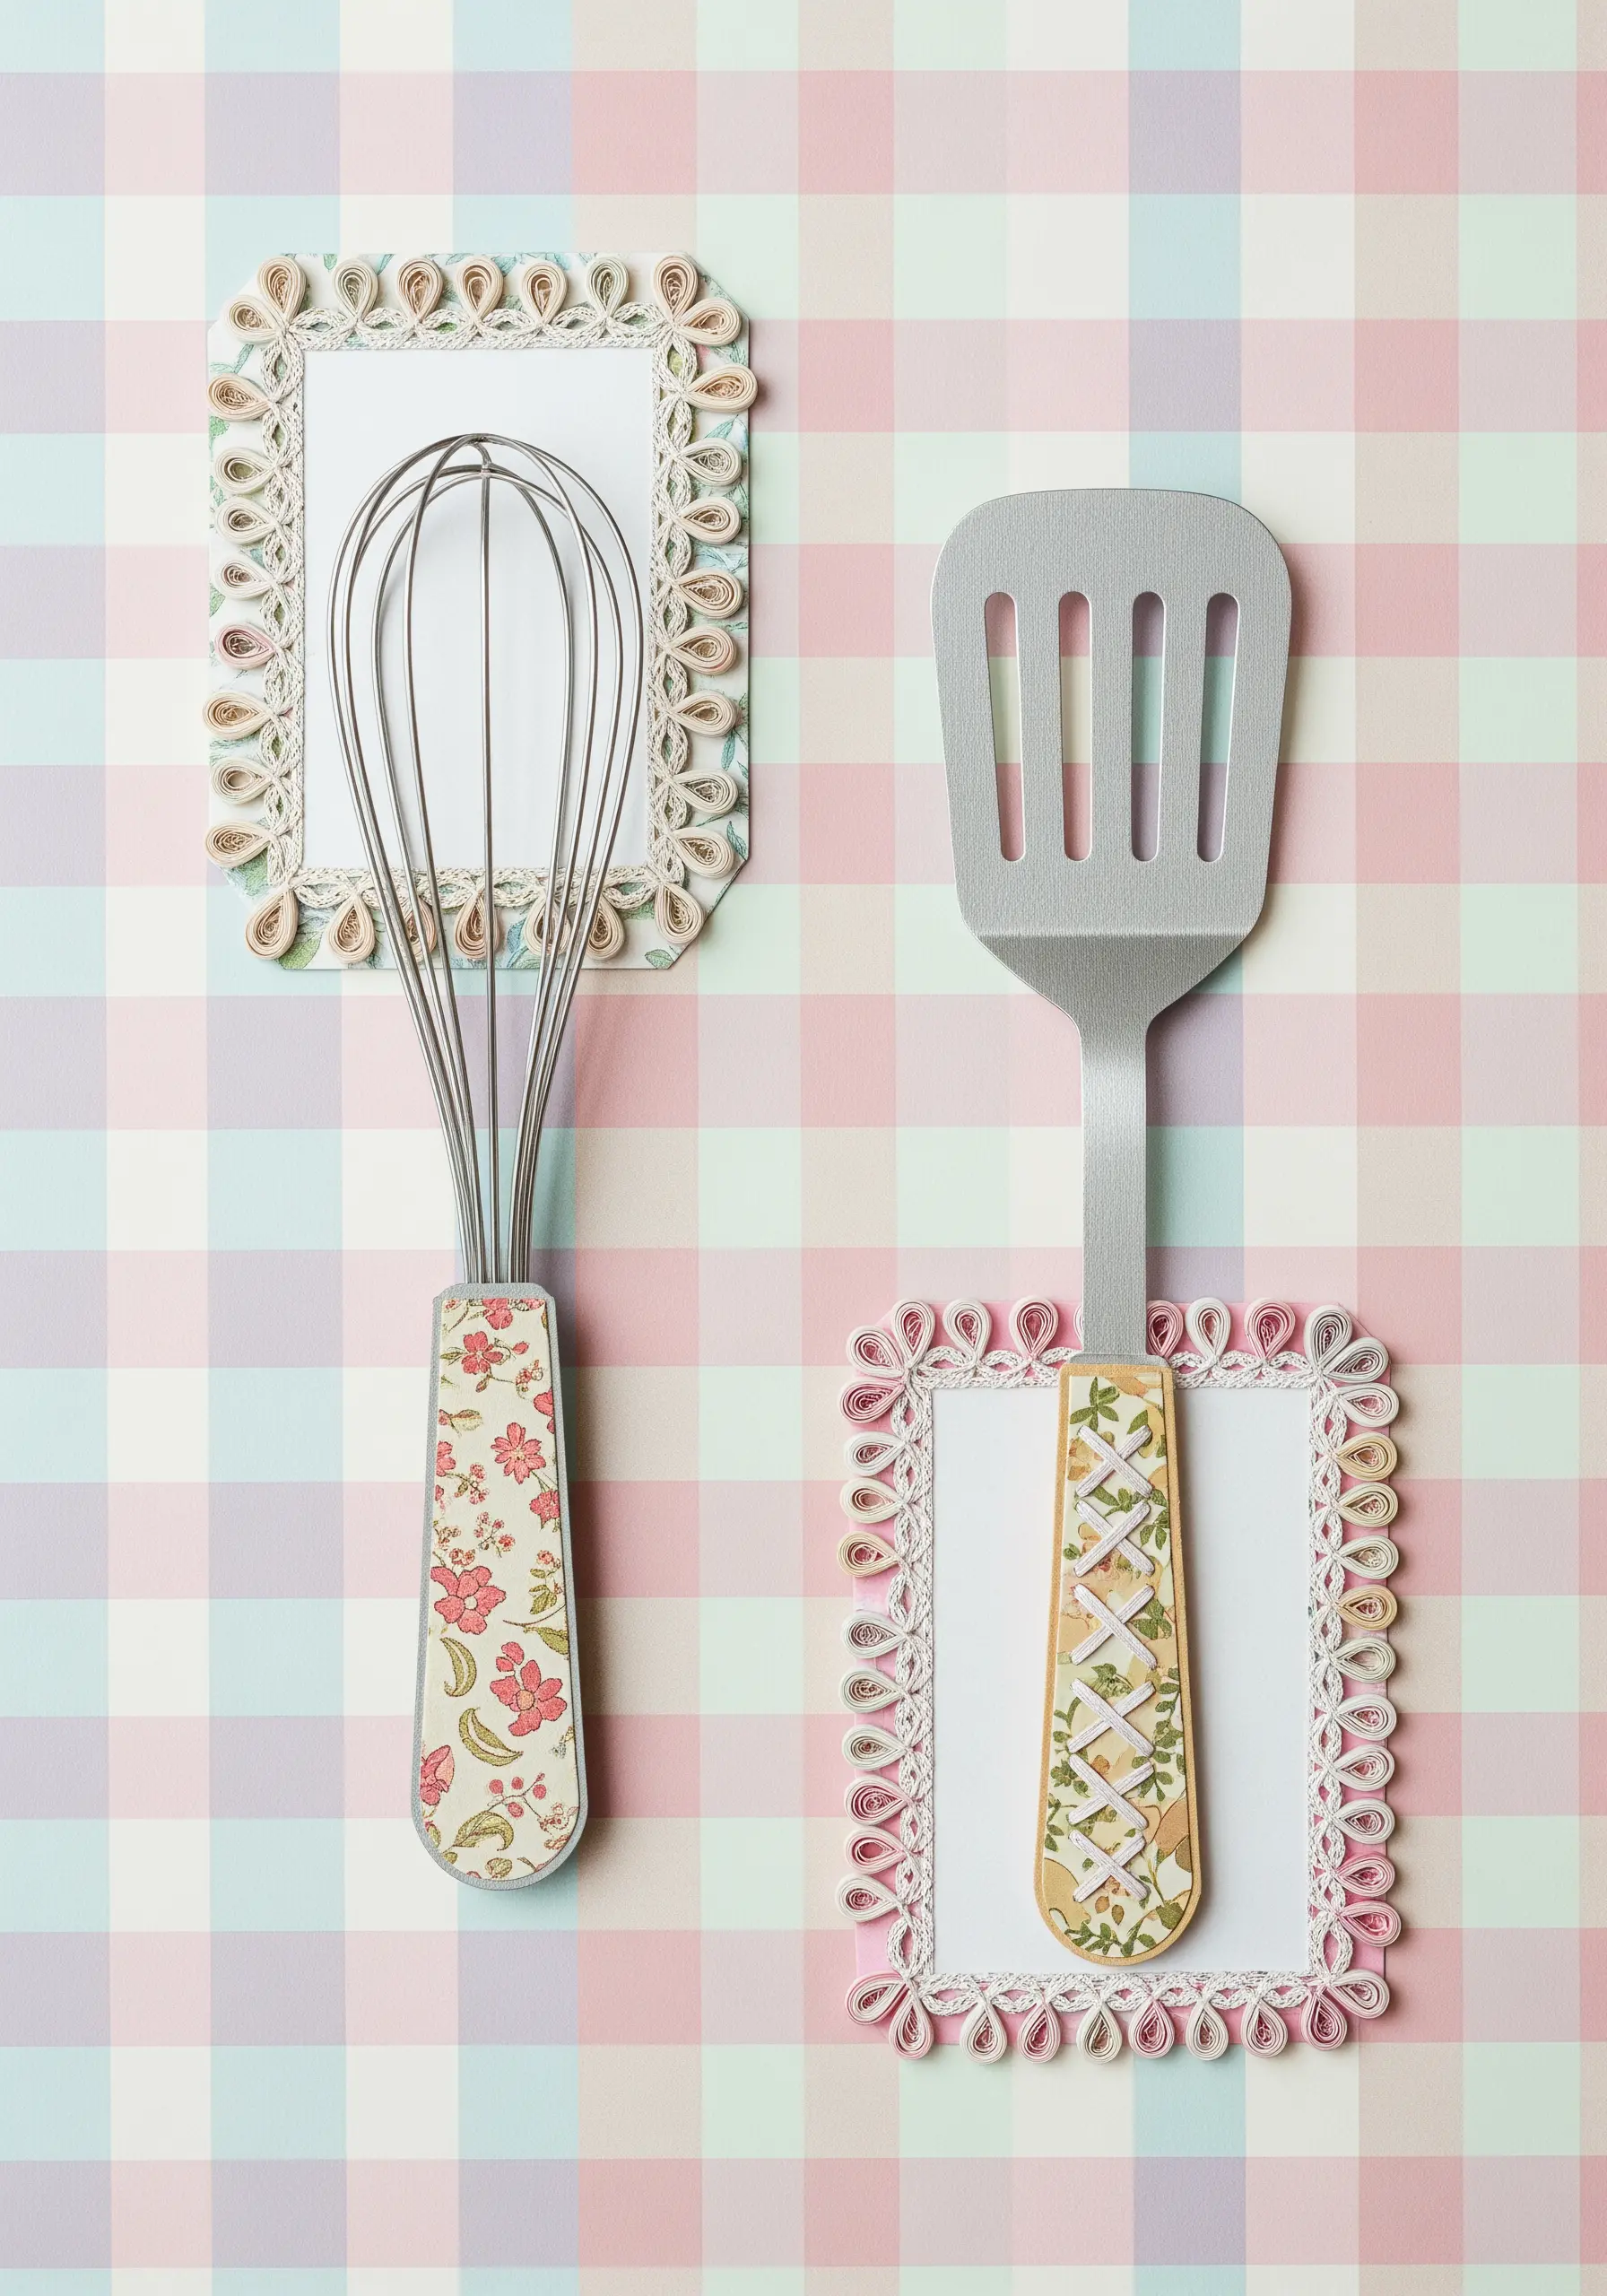
Here, simple kitchen utensils are elevated by ornate, quilled paper frames.
Apply this concept to your embroidery by containing your central motif within a decorative stitched border.
Instead of a plain running stitch, try a more elaborate feather stitch, Cretan stitch, or a scrolled chain stitch border.
This technique draws the eye inward, adds a sense of completeness, and turns a simple design into a finished, intentional piece of art. It’s a wonderful way to create kitchen wall decor that looks boutique-made.
17. Juxtapose Textures for Visual Contrast
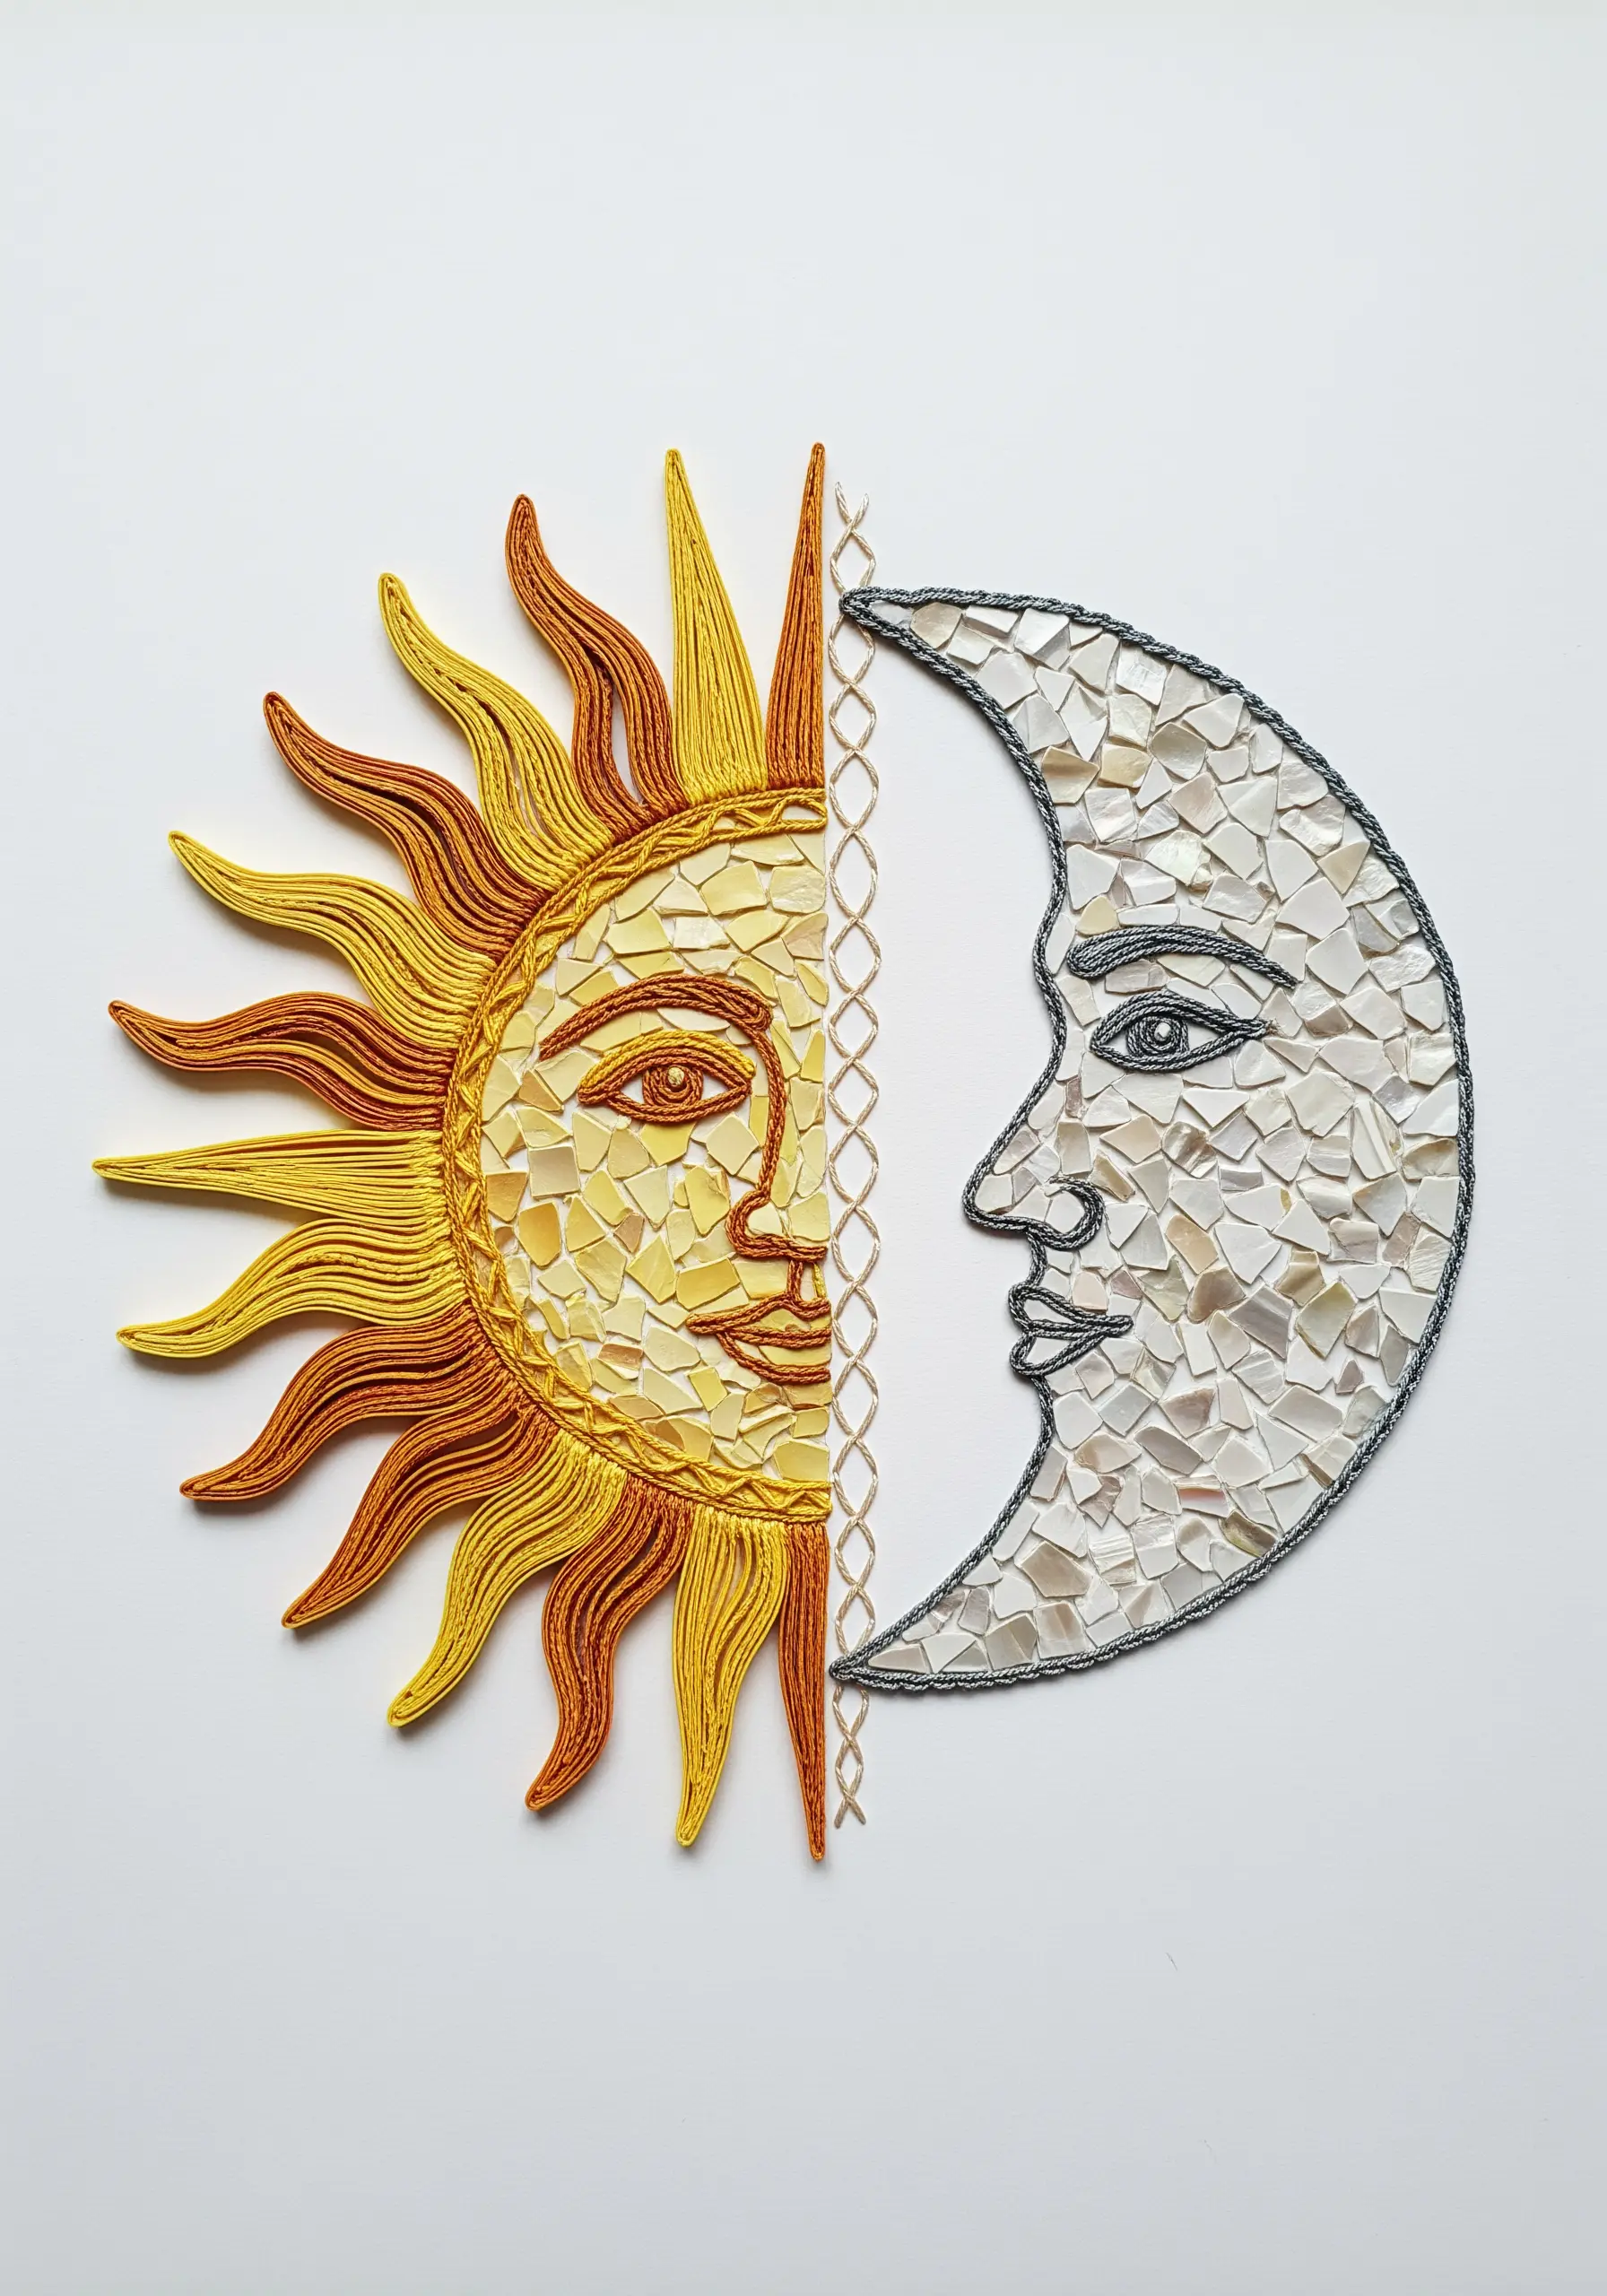
This sun and moon design is powerful because it contrasts two distinct textures: the smooth, linear rays of the sun and the fragmented, mosaic-like surface of the moon.
In your embroidery, create this same dynamic tension by pairing different techniques.
For the sun, use disciplined satin stitches or whipped backstitch for a smooth, radiant effect. For the moon, switch to a chaotic mix of seed stitches, French knots, or even tiny beads to create a rugged, light-catching surface.
This contrast makes both halves of the design more compelling.
18. Layer Felt Shapes for Bold Floral Compositions
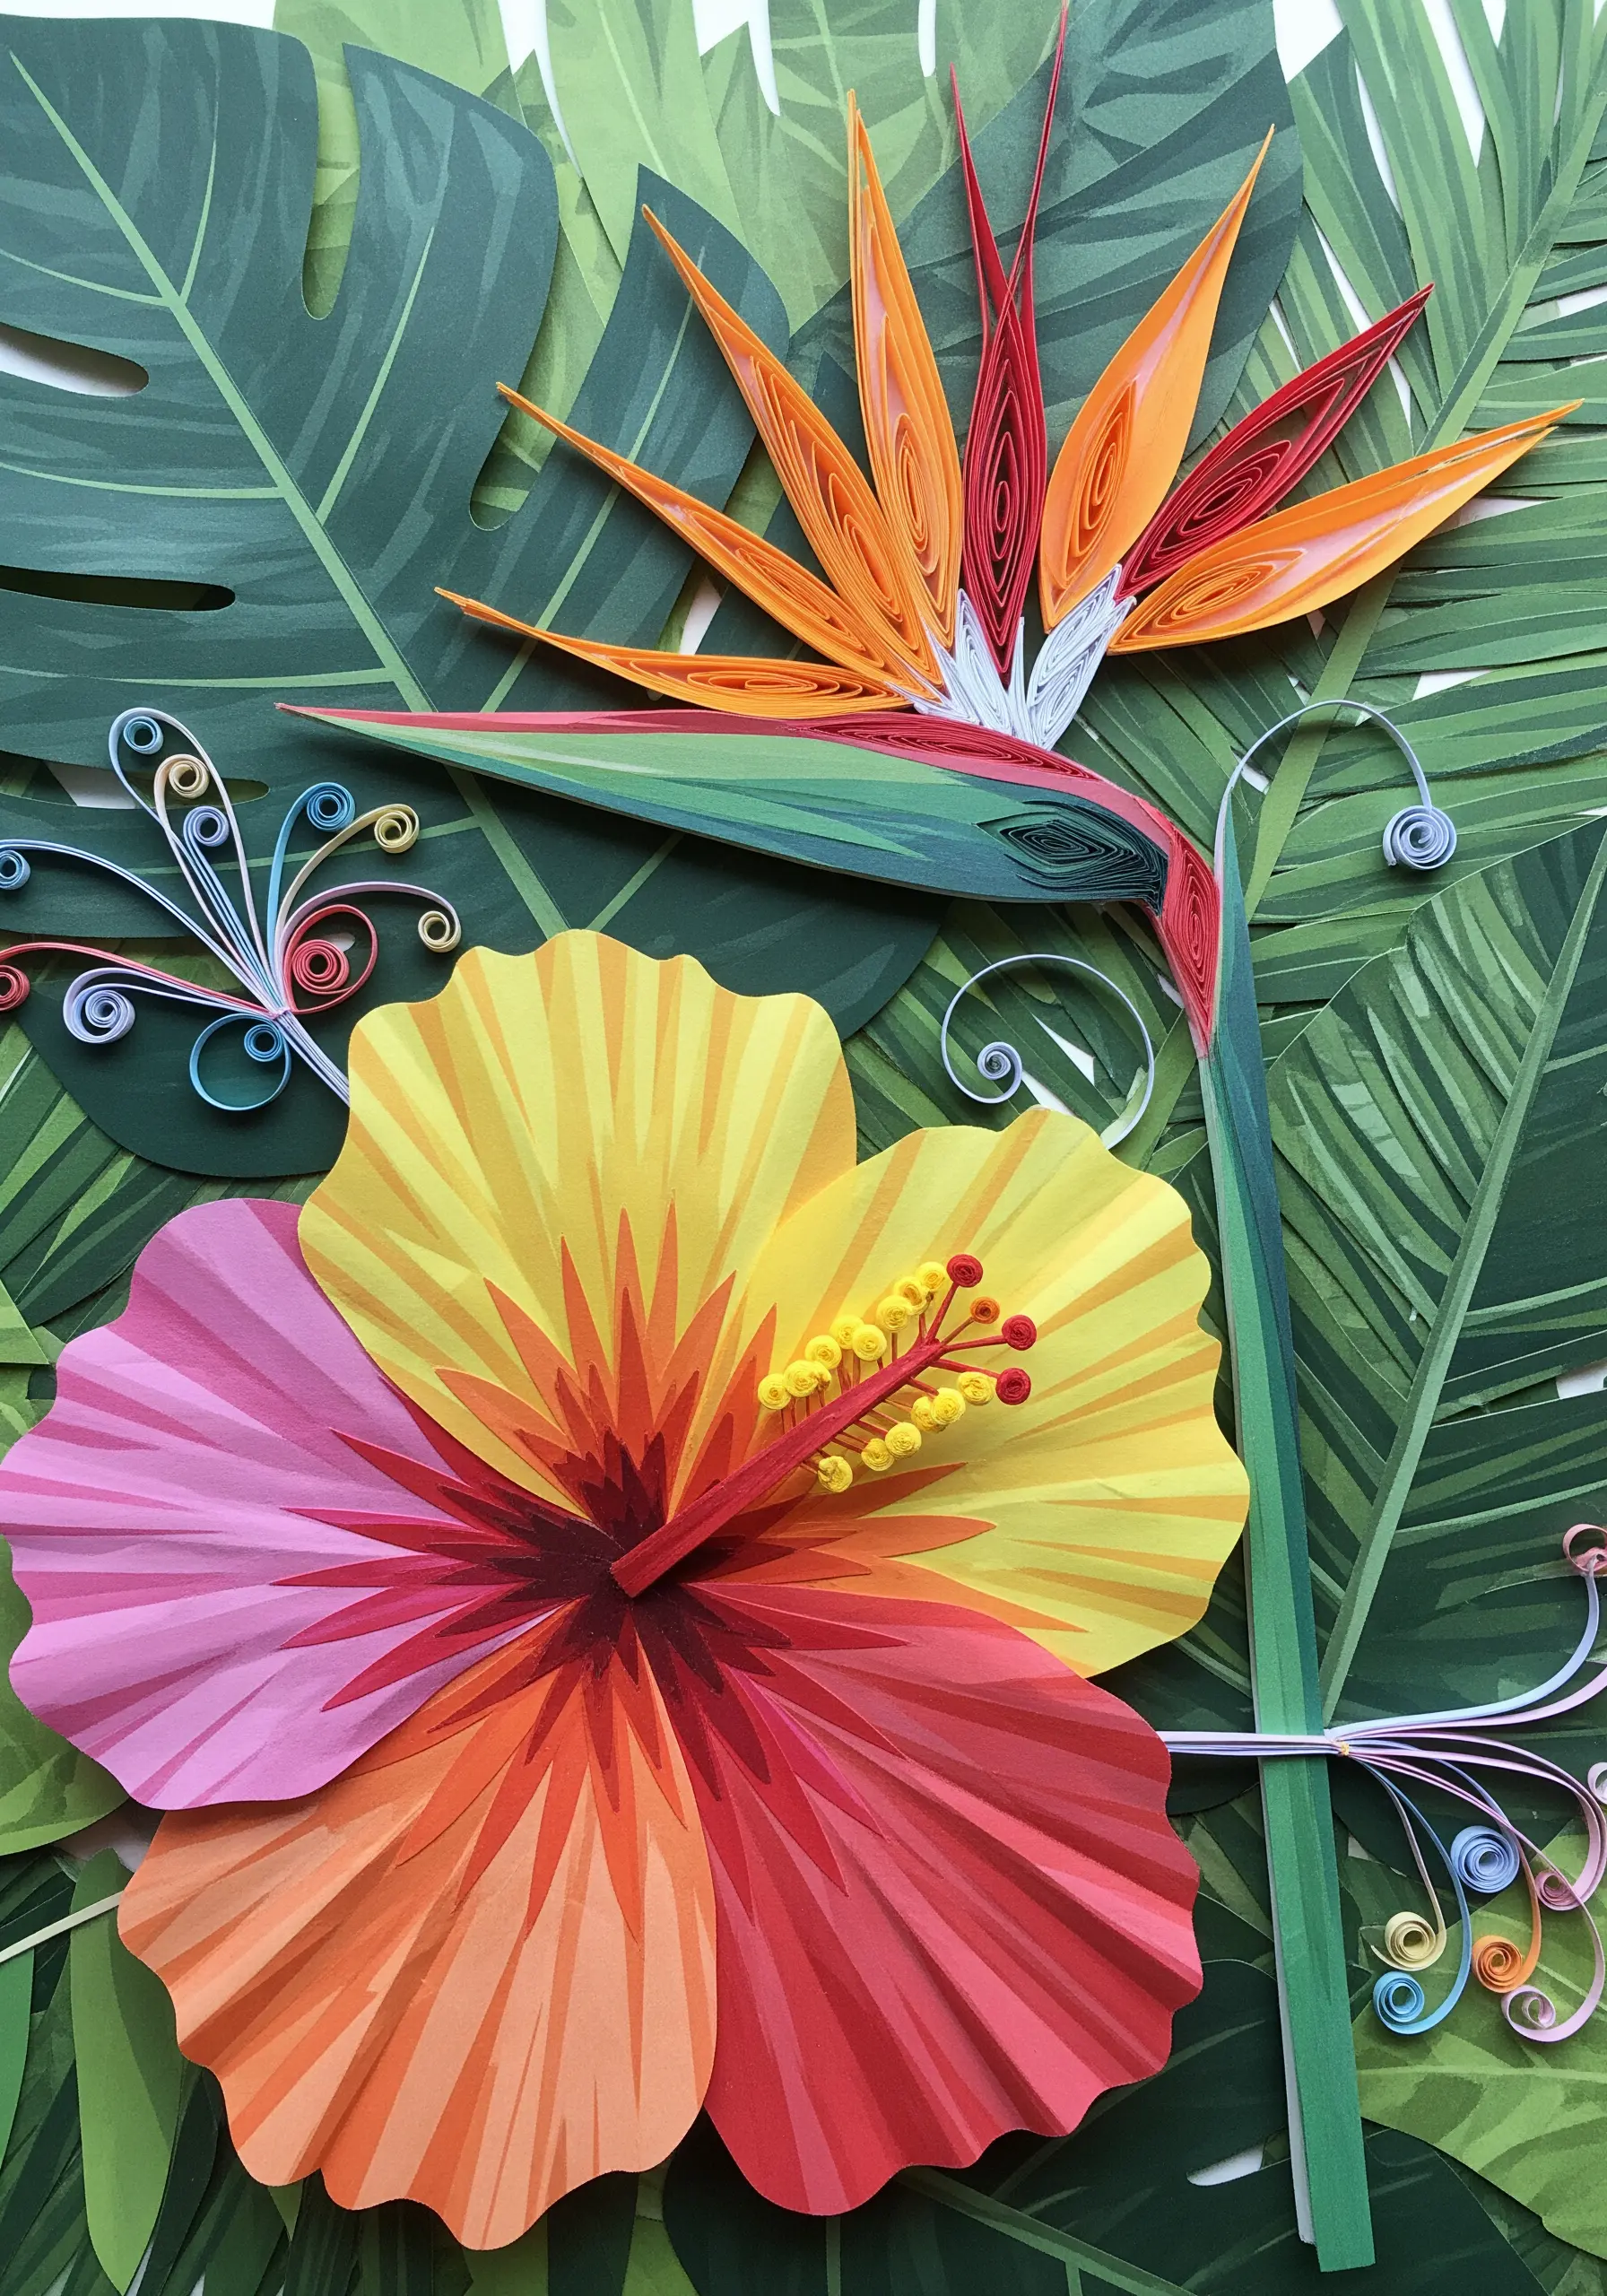
The vibrant, layered petals of these tropical flowers give them a bold, sculptural presence.
You can easily recreate this by cutting petal shapes from different colors of felt.
Layer the felt pieces to build your flower, securing them with a few central stitches. Then, add fine embroidered details on top, like French knot stamens or delicate backstitched veins.
This method is faster than filling large areas with satin stitch and results in a clean, graphic, and wonderfully dimensional floral design.
19. Create Movement with Free-Flowing Stitches

The swirls of sheet music create a sense of sound and movement flowing around the static piano.
Translate this concept by using a free-motion embroidery setting on your machine or by hand-stitching with loose, expressive couched threads.
Let your stitches loop and curve organically around a more structured, densely stitched central subject.
This contrast between disciplined detail and free-form line work adds energy and a narrative quality to your composition, turning it into one of the abstract thread embroidery projects based on music.
20. Use a Simple Running Stitch for Graphic Definition
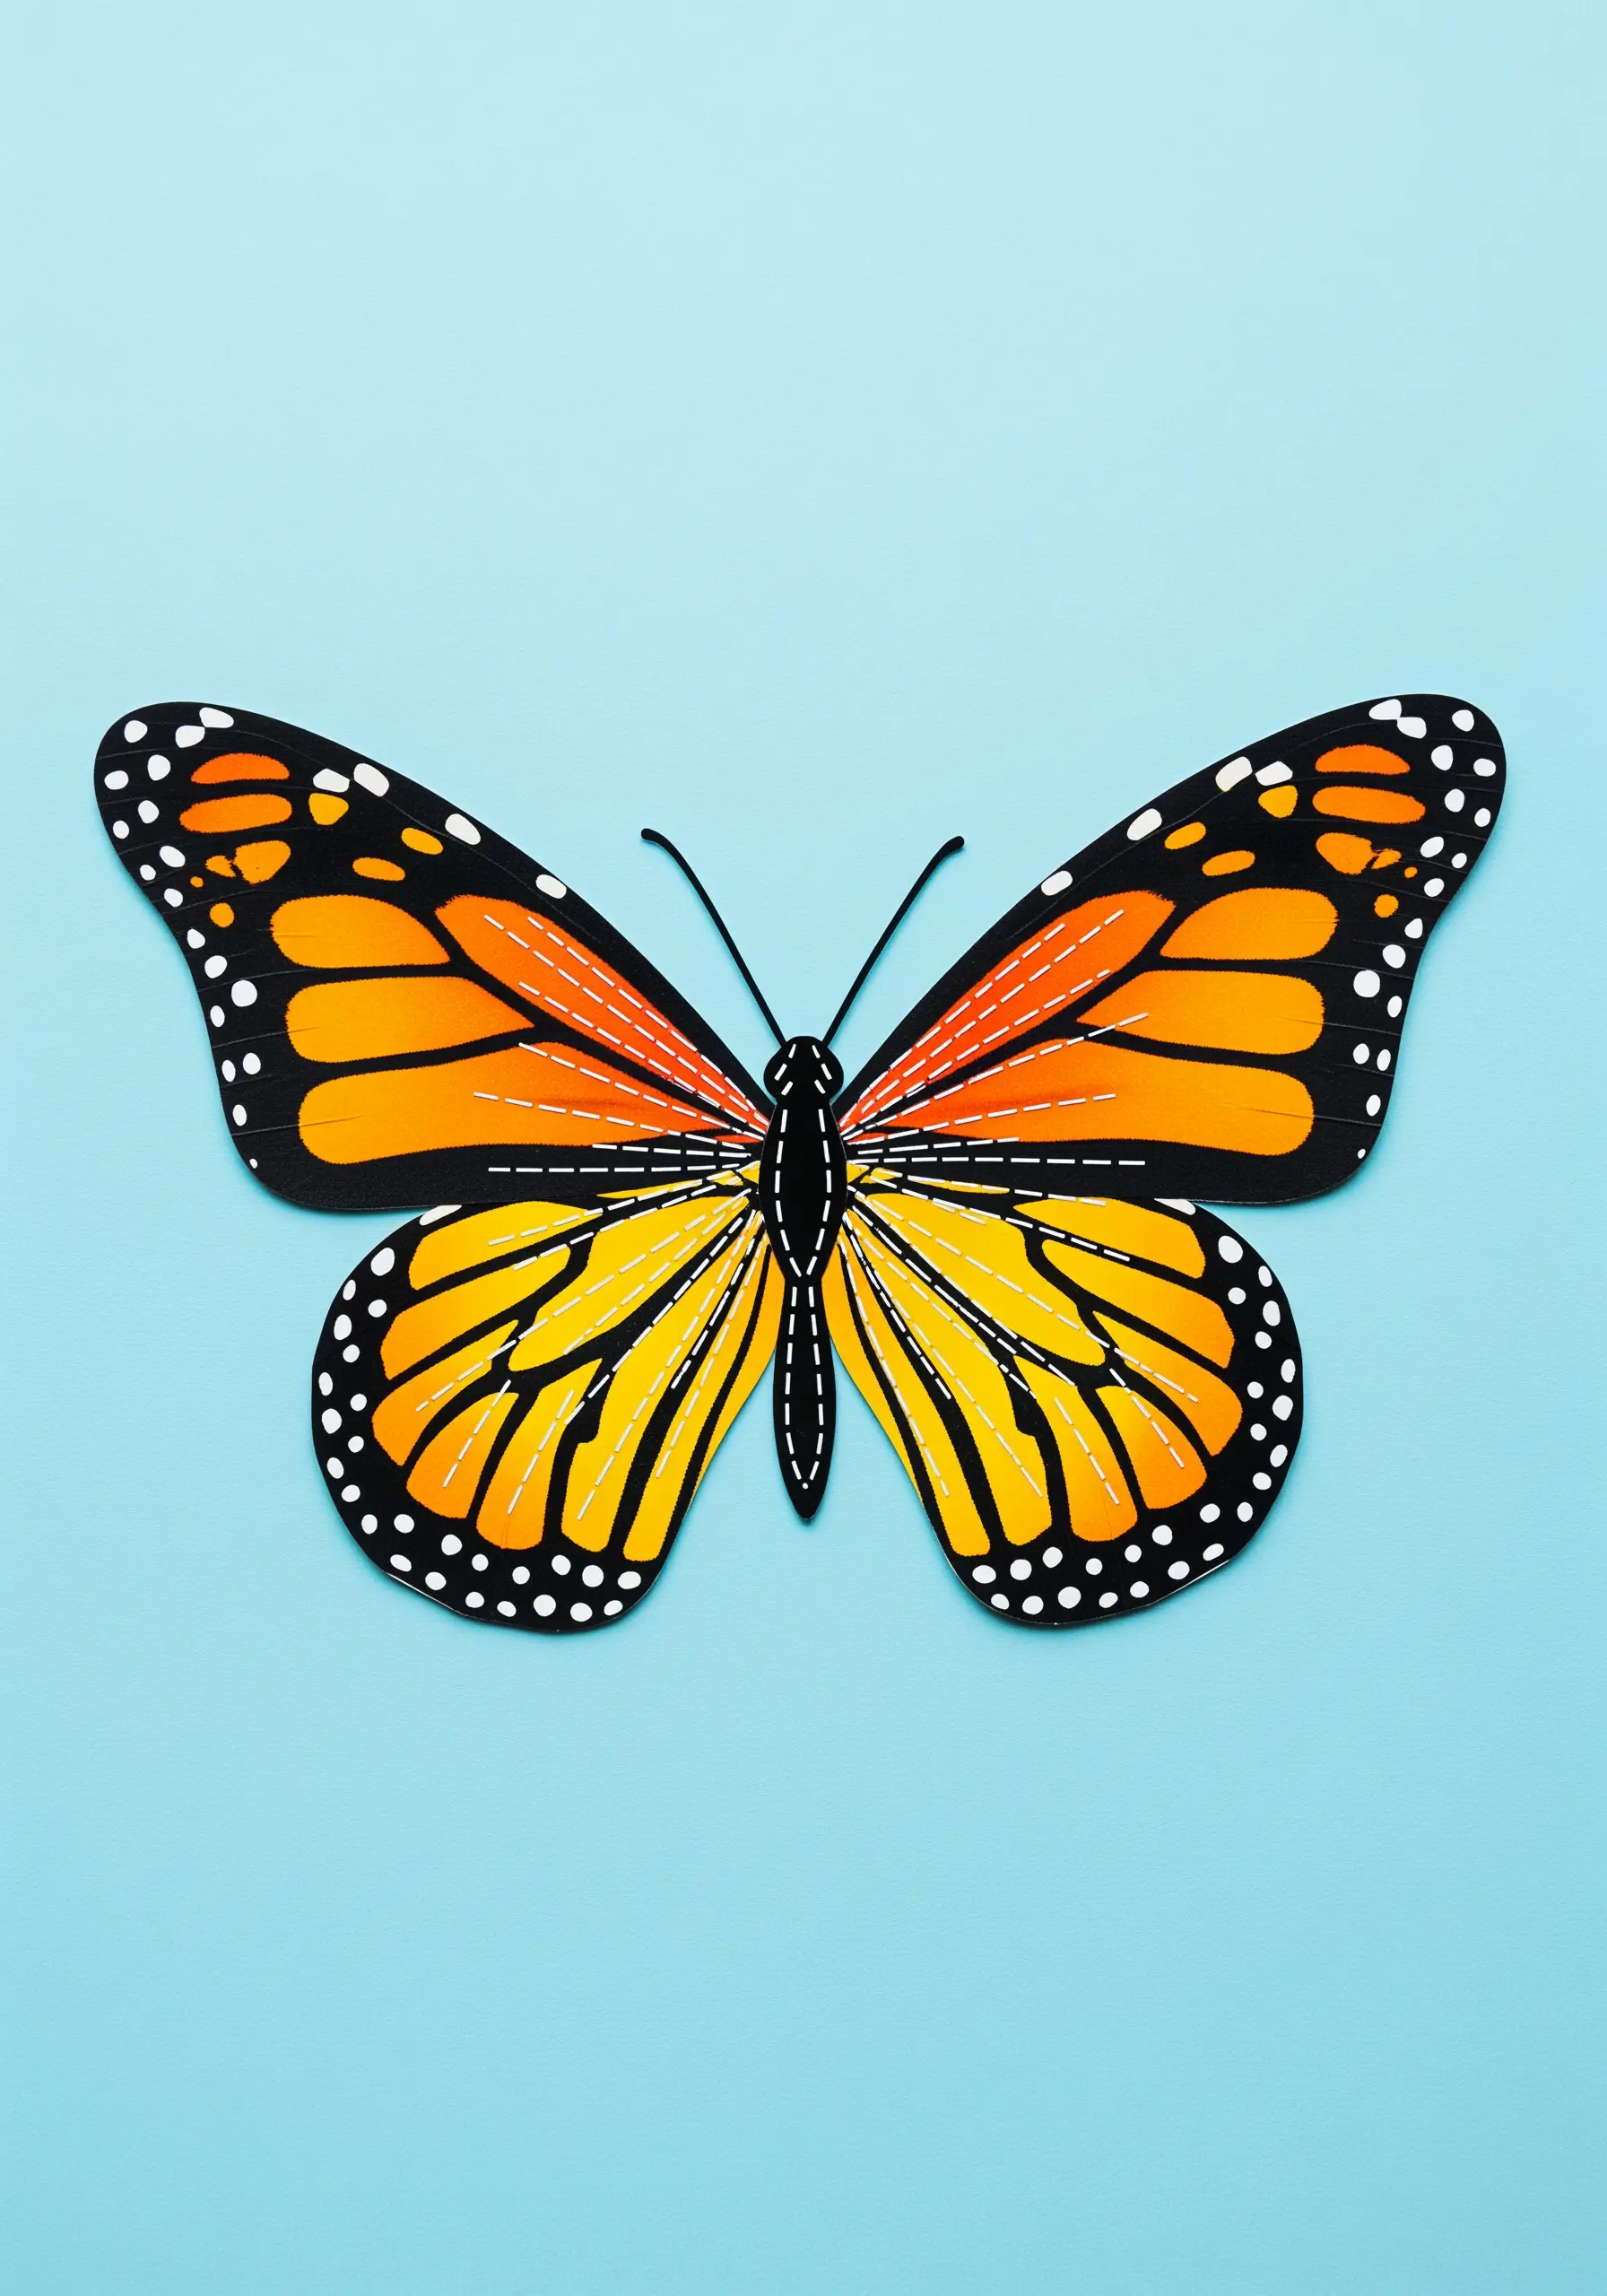
The white running stitch on this butterfly’s wings is a perfect example of minimalist detailing.
It doesn’t try to be realistic; instead, it provides a clean, graphic accent that defines the wing segments and adds a touch of handmade charm.
In your own work, consider where a simple, well-placed running stitch can replace a heavy satin stitch outline.
It’s an elegant way to add detail without adding visual weight, keeping your design light and modern.
21. Weave Linear Stitches for Dynamic Cityscapes

The intersecting colored lines in this piece give the cityscape a futuristic, energetic feel, like light trails or data streams.
You can achieve this by using single strands of floss in bright colors to create a web of long, taut straight stitches that crisscross your composition.
Stitch some lines over your main elements and some behind them to create a sense of depth and complexity.
This technique is a powerful way to add movement and a modern, abstract layer to an otherwise structured design.
22. Build Fur Texture with Appliqué Collage
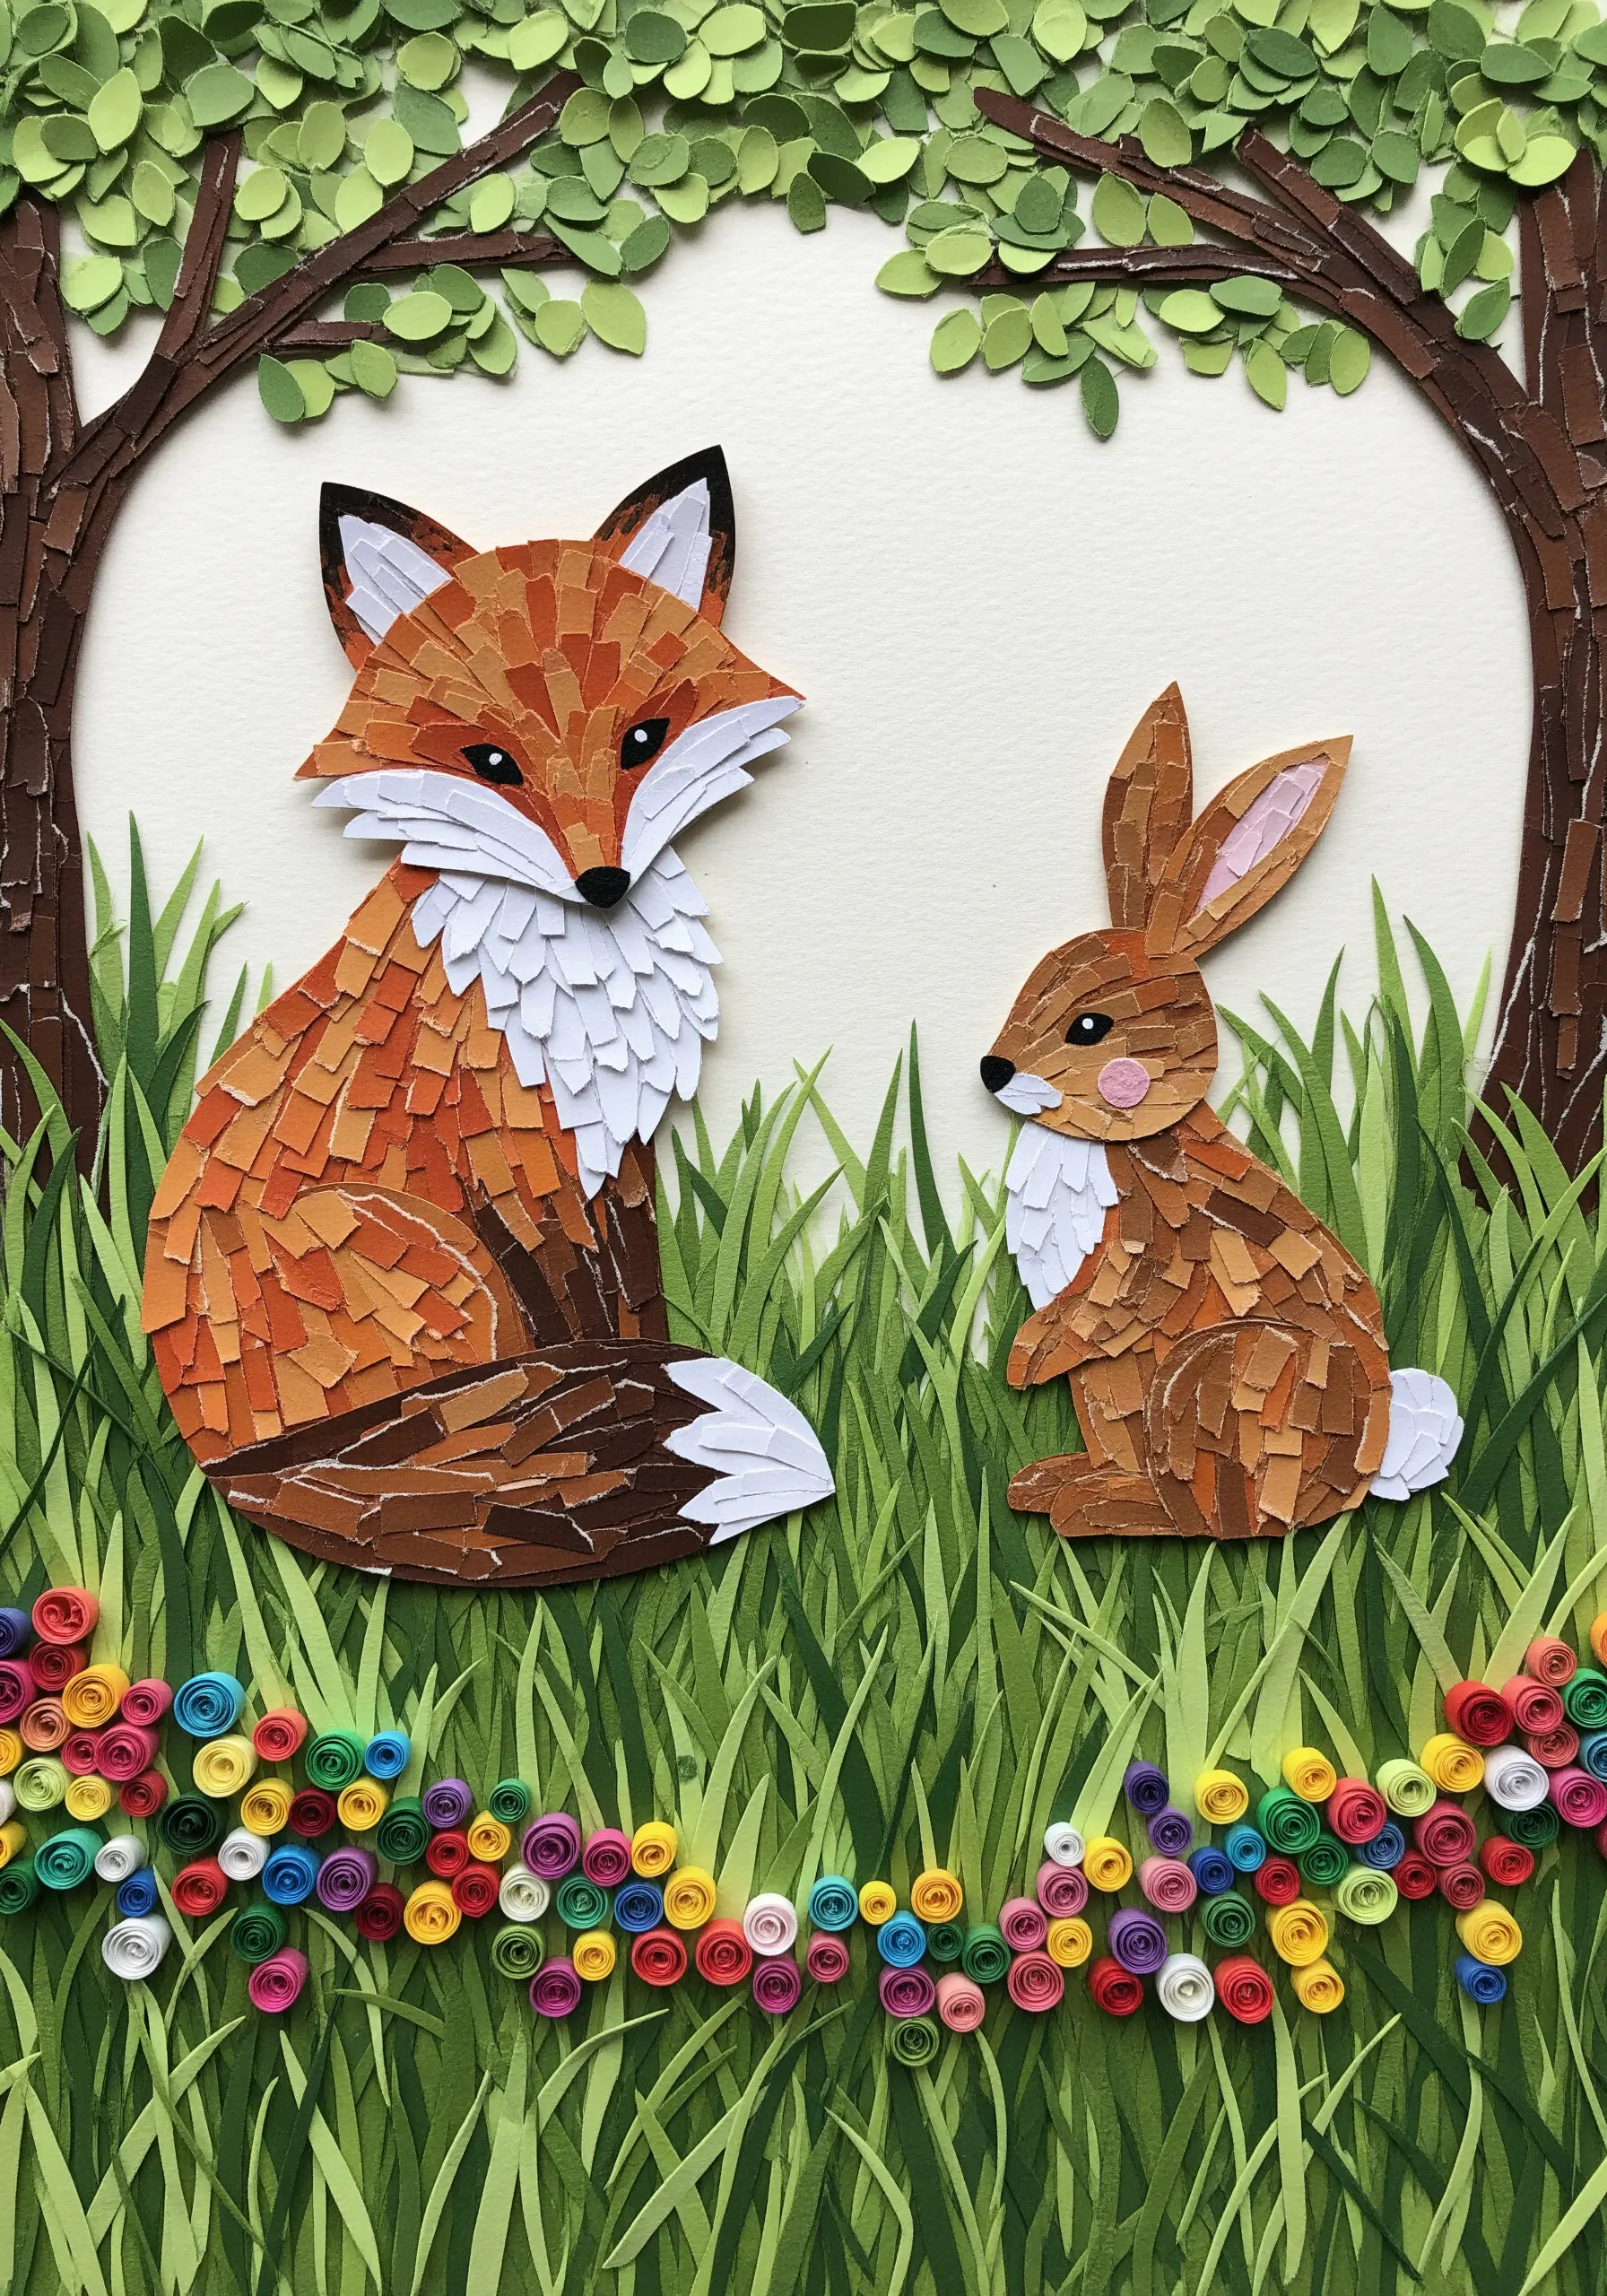
The fox and rabbit are rendered with tiny, overlapping paper pieces, creating a rich, fur-like texture.
This is a direct inspiration for fabric collage embroidery animals.
Cut tiny, irregular scraps of cotton or felt in shades of brown and orange. Arrange them in layers, following the direction of fur growth, and tack them down with small, hidden stitches.
This method builds a wonderfully tactile and visually complex surface that feels far more alive than flat fill stitches.
23. Incorporate Patterned Fabric Scraps for Whimsy
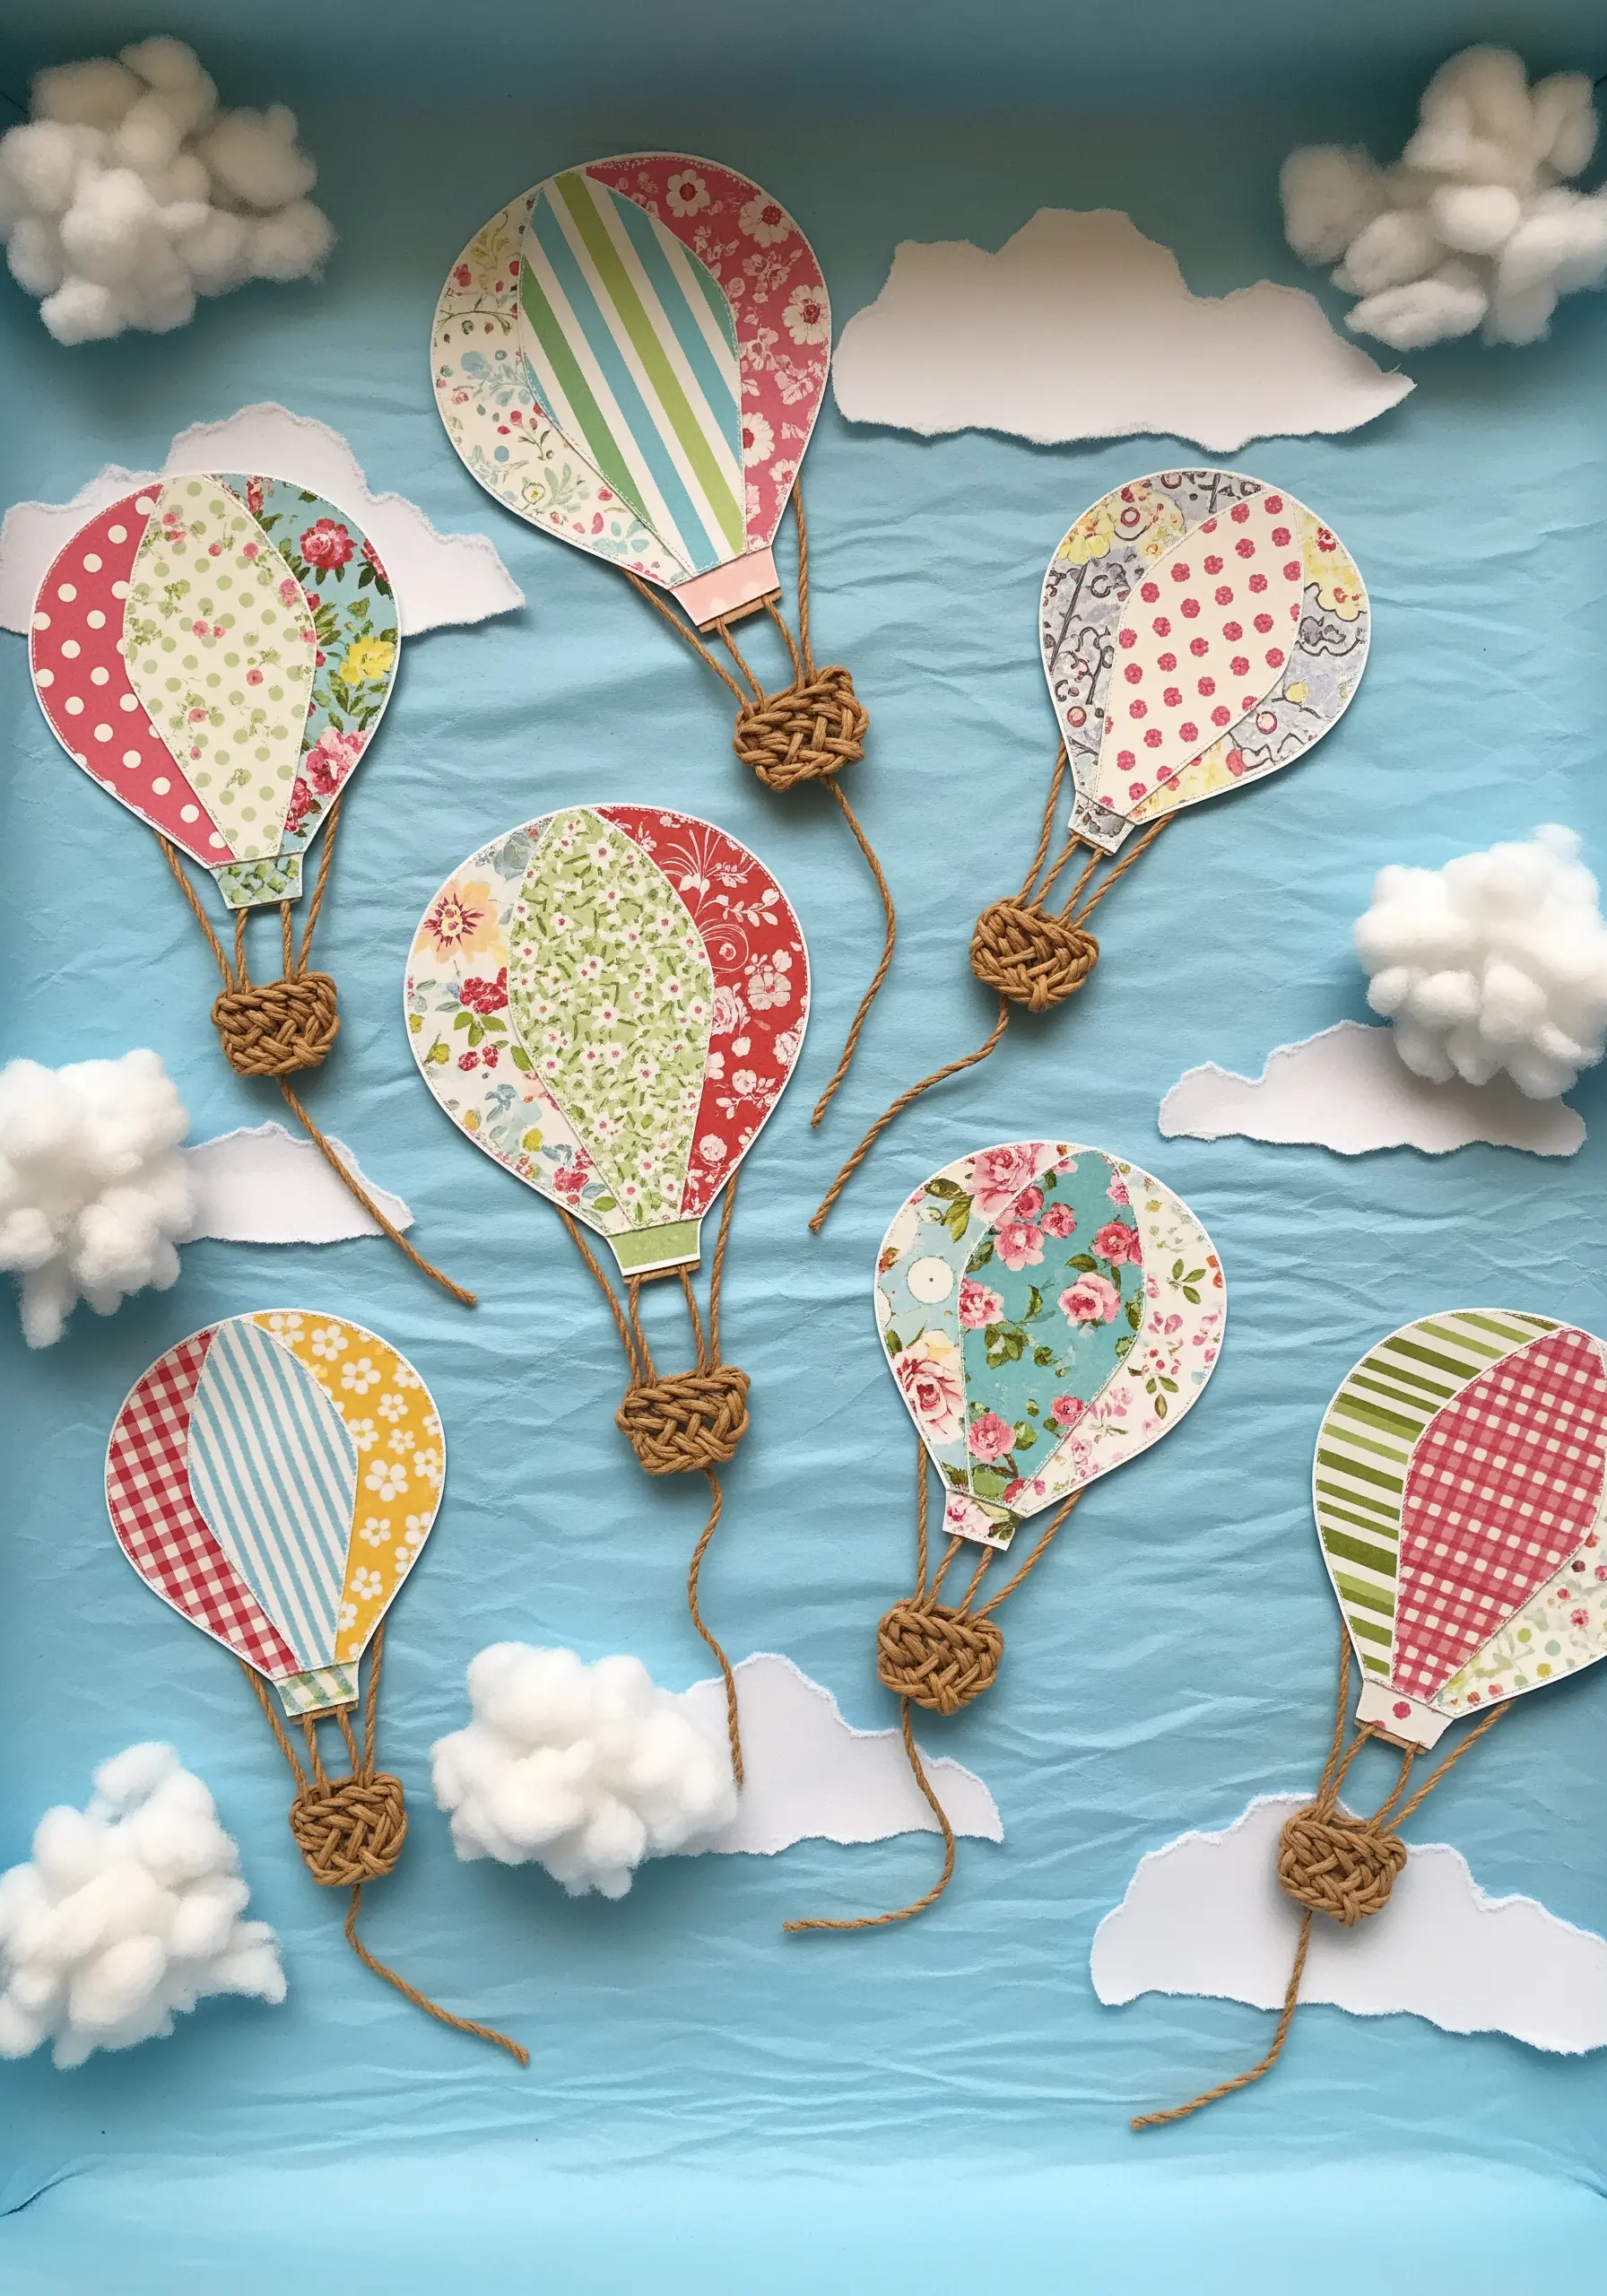
The charm of these hot air balloons comes from the use of varied, patterned scrapbook papers.
Raid your fabric stash for scraps of printed cotton with small-scale florals, dots, or stripes.
Use these fabrics to create appliqué shapes for your main design elements. Secure the edges with a simple blanket stitch to enhance the handmade feel.
This is a perfect way to use leftover materials and create whimsical fabric collage embroidery scenes with personality and charm.
24. Create Layered Mandalas with Concentric Stitches
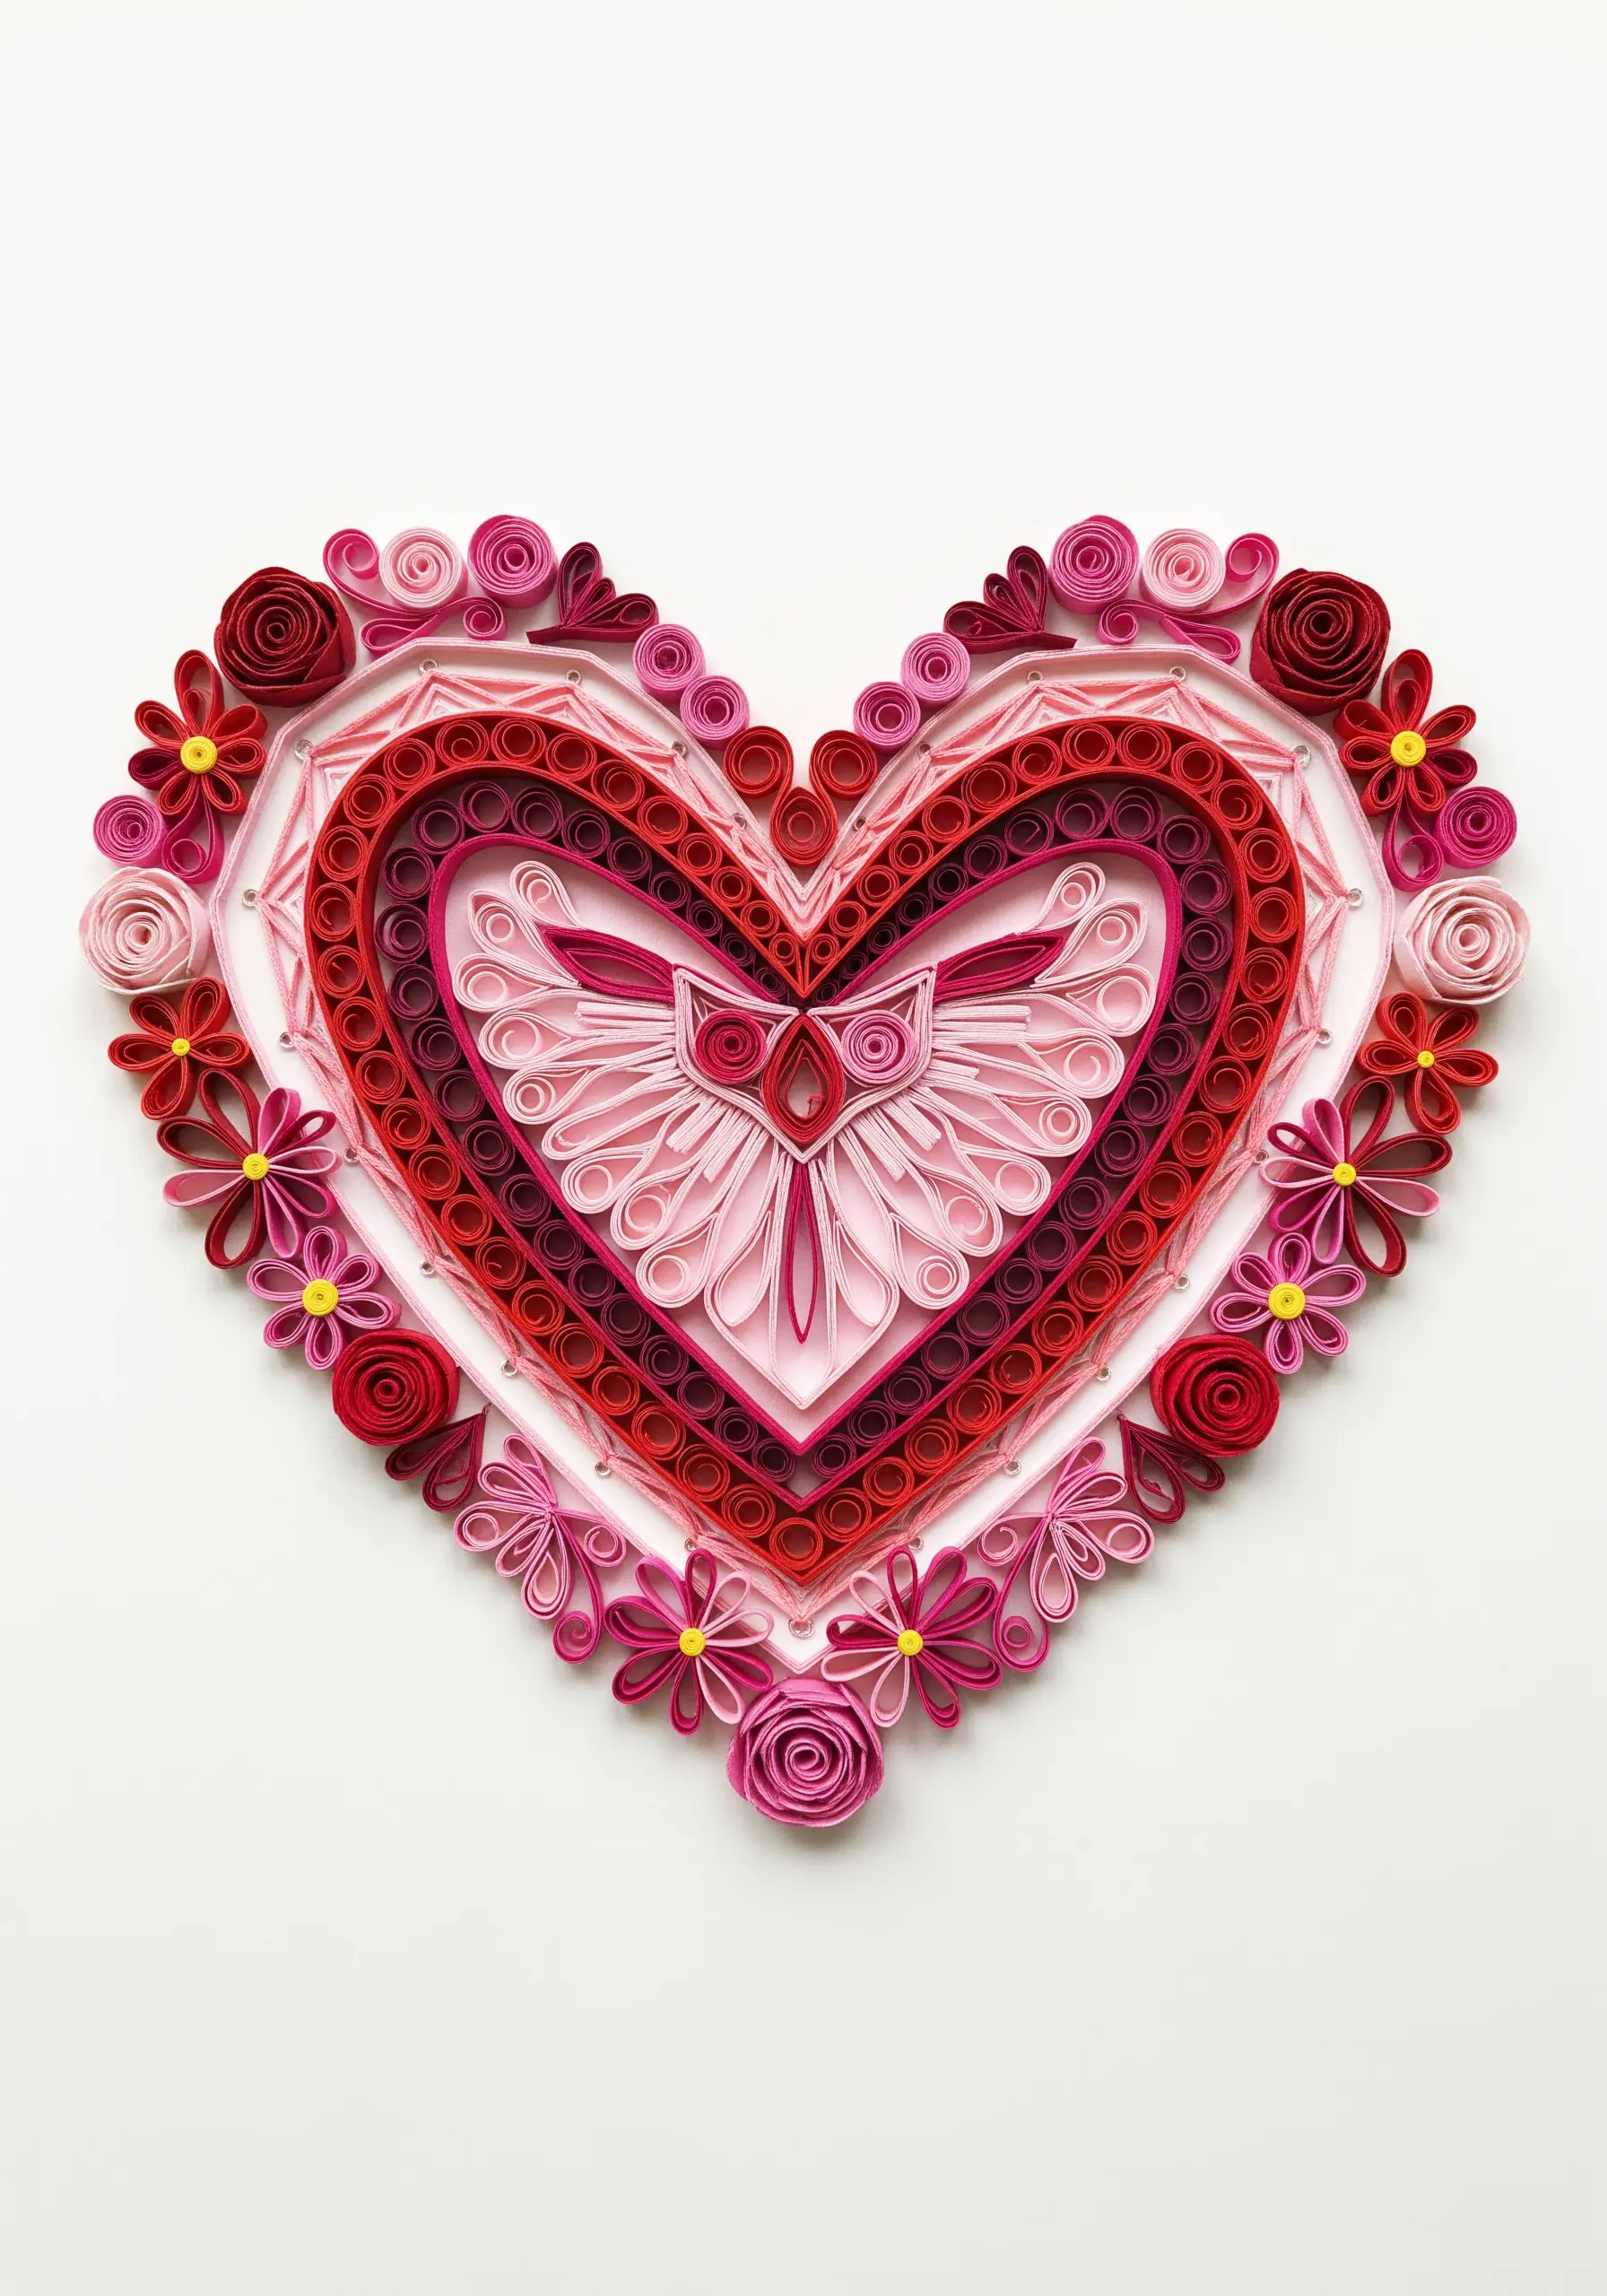
This intricate heart is built with concentric layers of rolled paper, creating rhythm and depth.
You can create a similar effect by building your design outwards from the center using rings of different stitches.
Start with a central satin-stitched shape, surround it with a ring of French knots, then a ring of chain stitch, followed by a border of lazy daisies.
By varying the stitch type, color, and texture in each concentric layer, you can create a visually stunning, mandala-like design that draws the eye inward.